Home Blog Page 3

How To Clean Fire Damaged Furniture: Quick Fix

0

Have you wondered if you can save your favorite furniture after a fire? It might seem impossible, but quick and careful steps can bring back its charm. We first check for burning marks, stubborn soot, and water stains to keep the damage from getting worse. Using gentle methods and the right tools, we remove both visible and hidden soot without harming your pieces. This guide shows you a simple, safe process to restore your furniture and help it look its best again.

Key Steps for Cleaning Fire Damaged Furniture

A fire is stressful, and quick, careful cleaning can stop more damage from happening. First, we check for charring, heavy soot, and water marks (from firefighting efforts). Taking these early steps helps prevent long-lasting stains and smells.

Start by examining each piece of furniture closely. Look for surface soot, burn marks, and any water damage that might make things worse. Understanding its condition lets us choose the best cleaning tools and techniques.

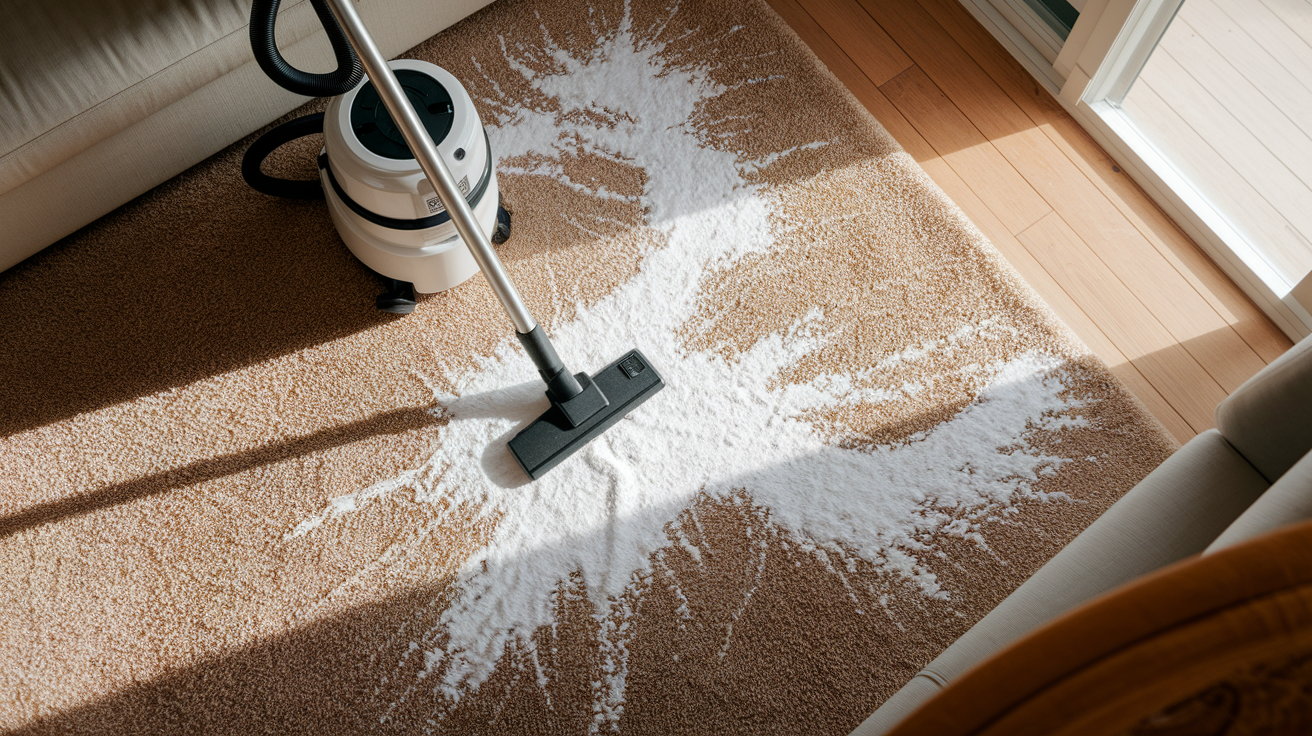
Using the right tools protects your furniture. We use a vacuum with a soft-bristle attachment, a soot sponge (a sponge designed to pick up soot), and cleaners safe for wood or fabric. This way, we remove both loose and hidden dirt without causing additional harm.

  1. Check each item for charring, soot buildup, smoke stains, and water marks.
  2. Gently remove loose soot using a vacuum hose or a soft-bristle brush.
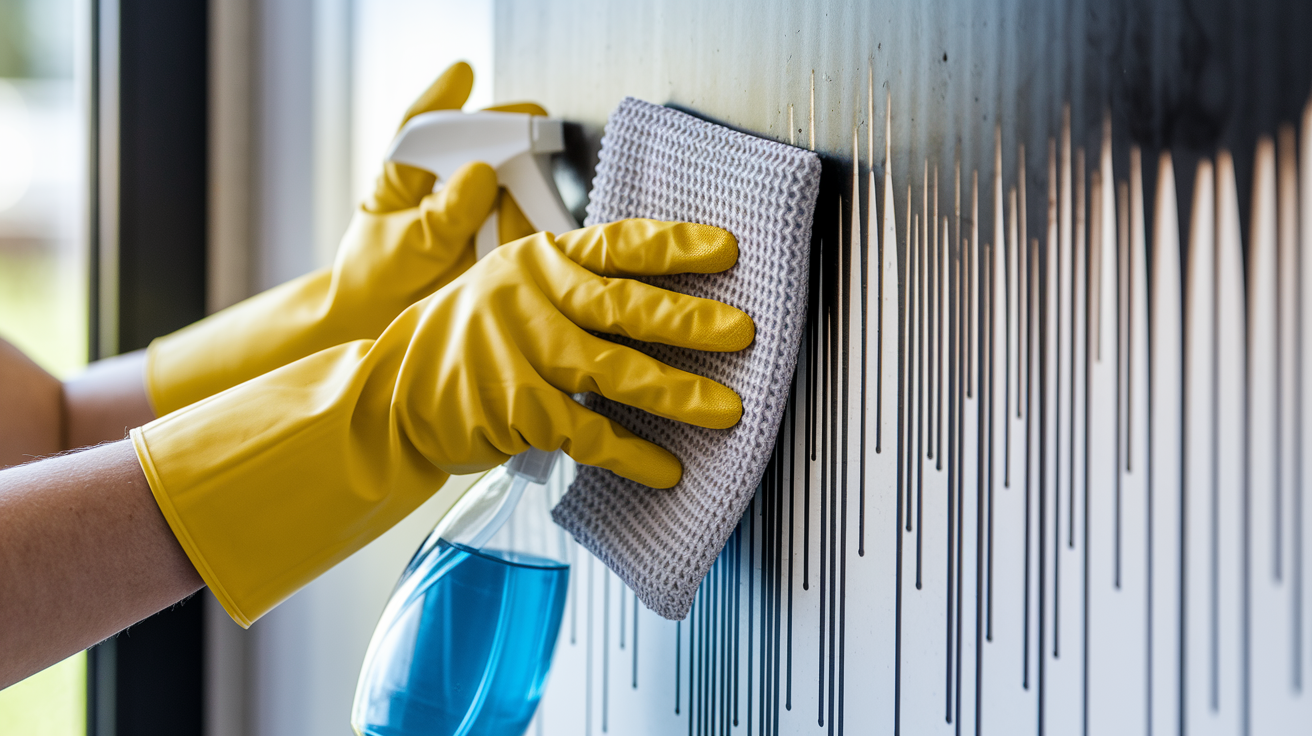
  3. Wipe surfaces with a soot sponge to lift away oils and residues.
  4. For wood pieces, clean with a mild soap-and-water solution or a wood-safe cleaner, then apply a polish or conditioner.
  5. For upholstered items, use a flat-brush vacuum, then clean with a mild detergent, and let it dry completely.
  6. Lightly dust with baking soda or use a vinegar solution to neutralize any lingering odors.

Following these steps in order helps you remove both visible soot and hidden residues while keeping your furniture’s finish intact. This methodical approach leads to a more effective and lasting restoration.

Essential Safety Precautions for Fire Damaged Furniture Cleanup

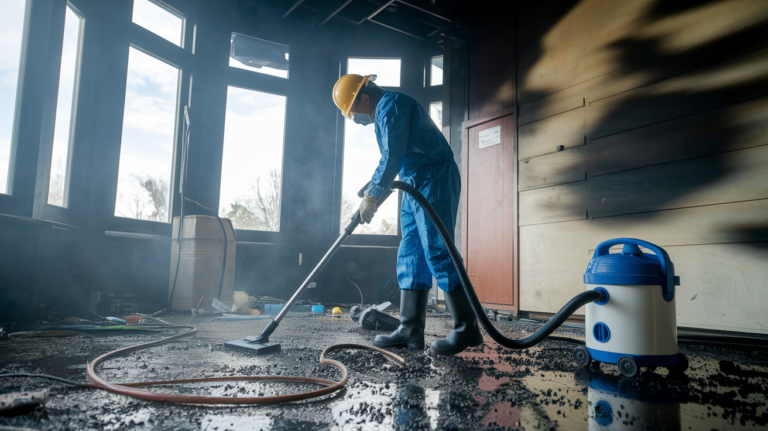
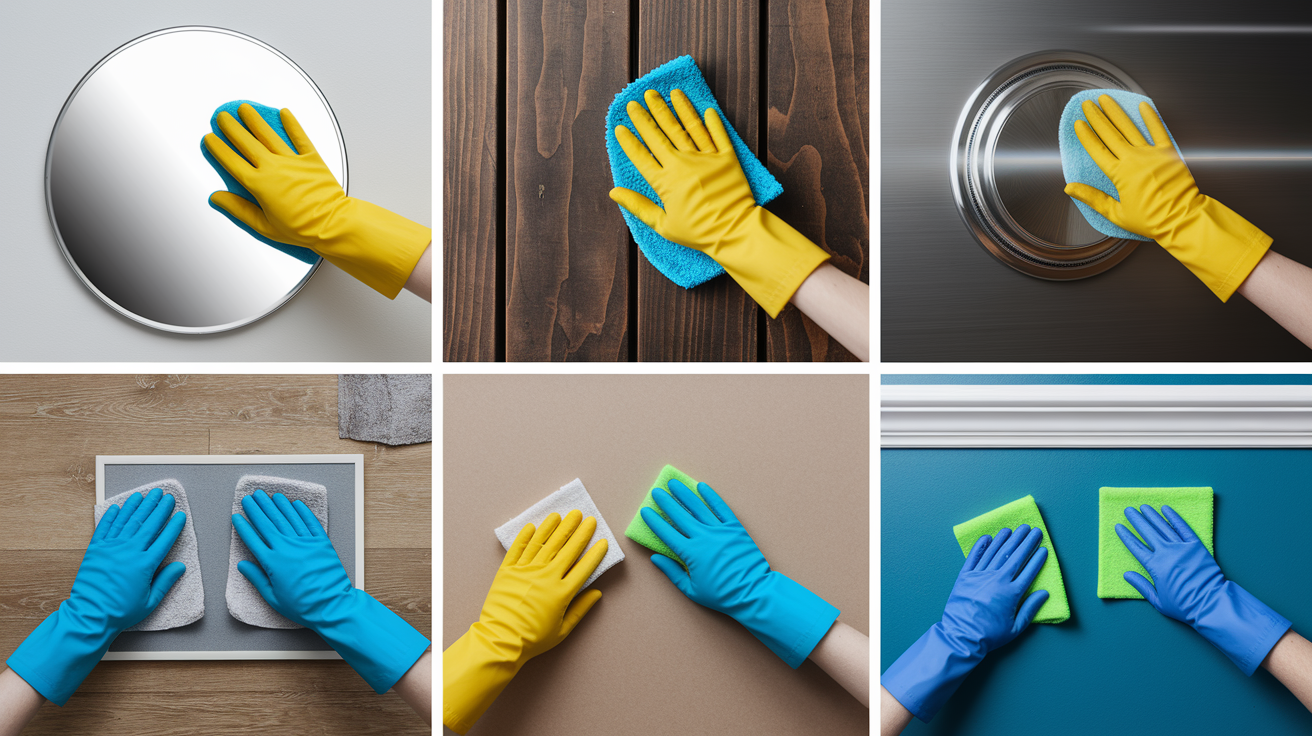
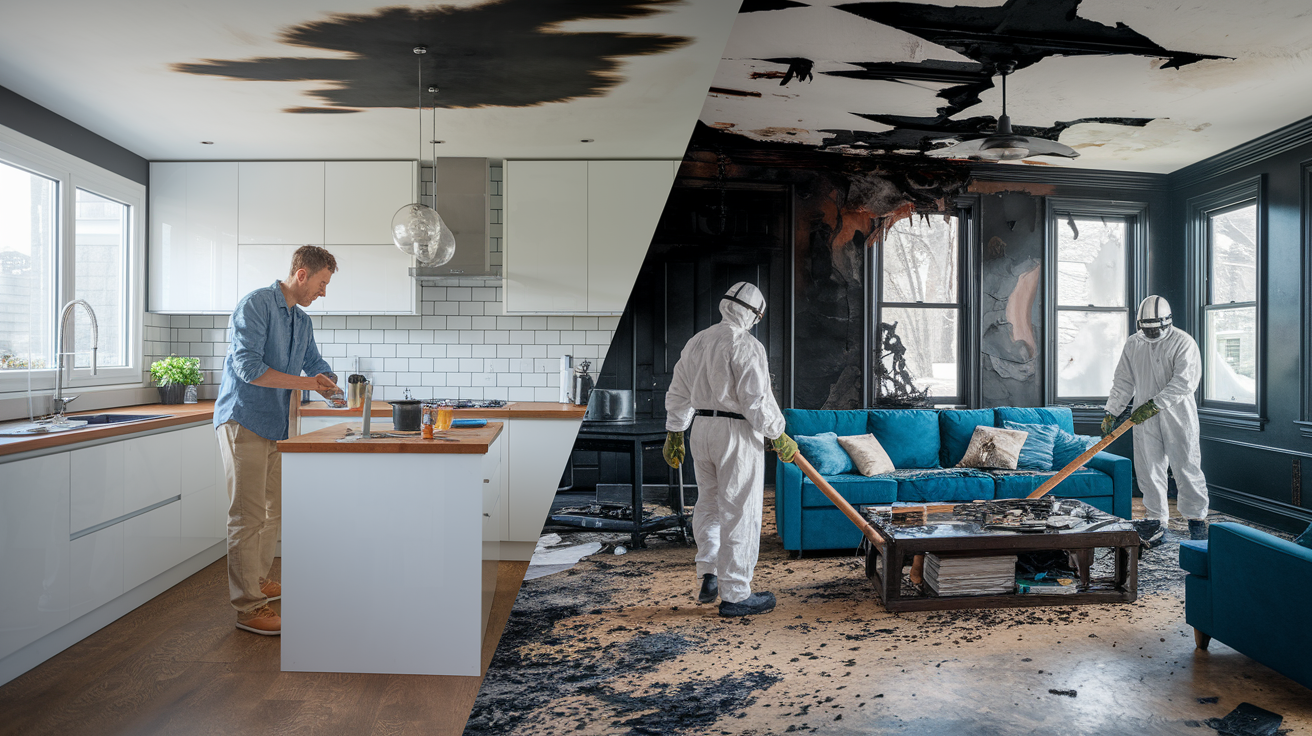
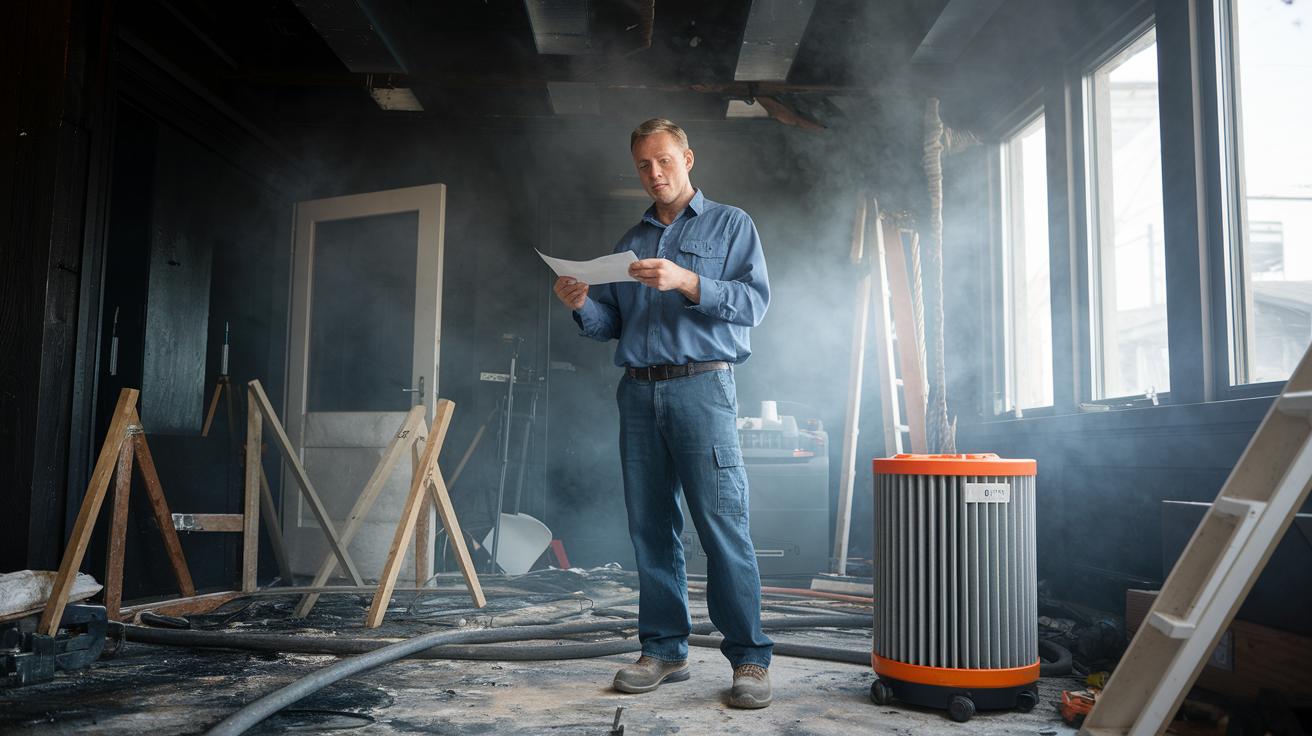
img-1.jpg

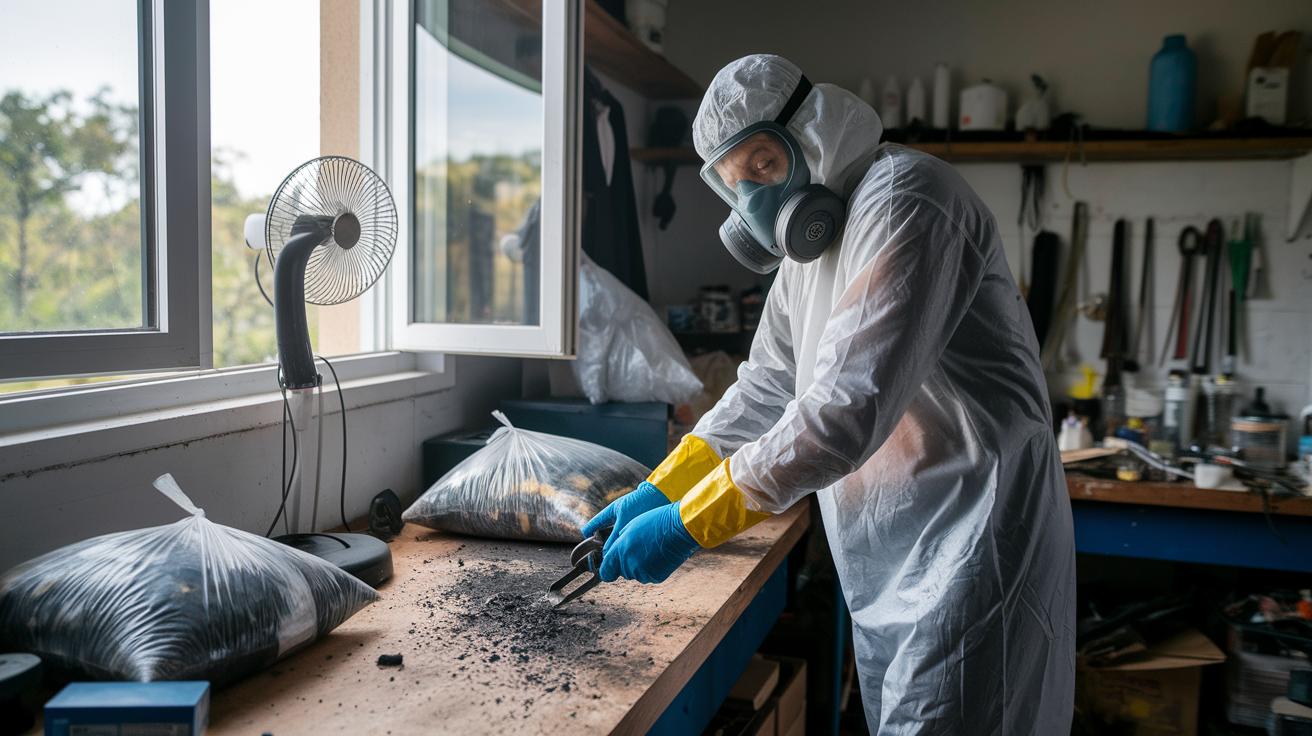
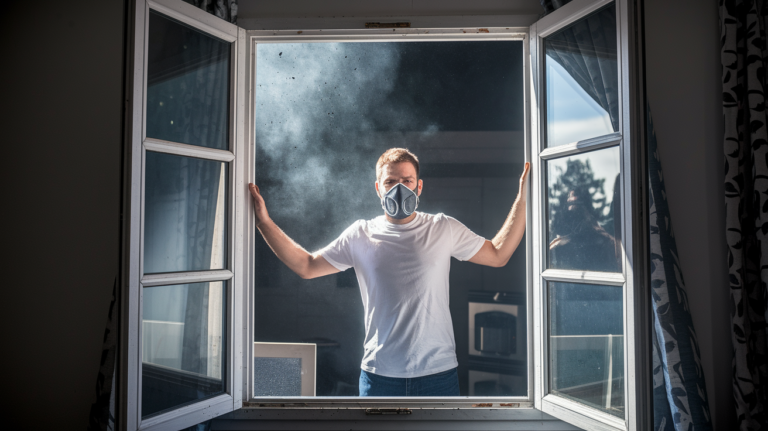
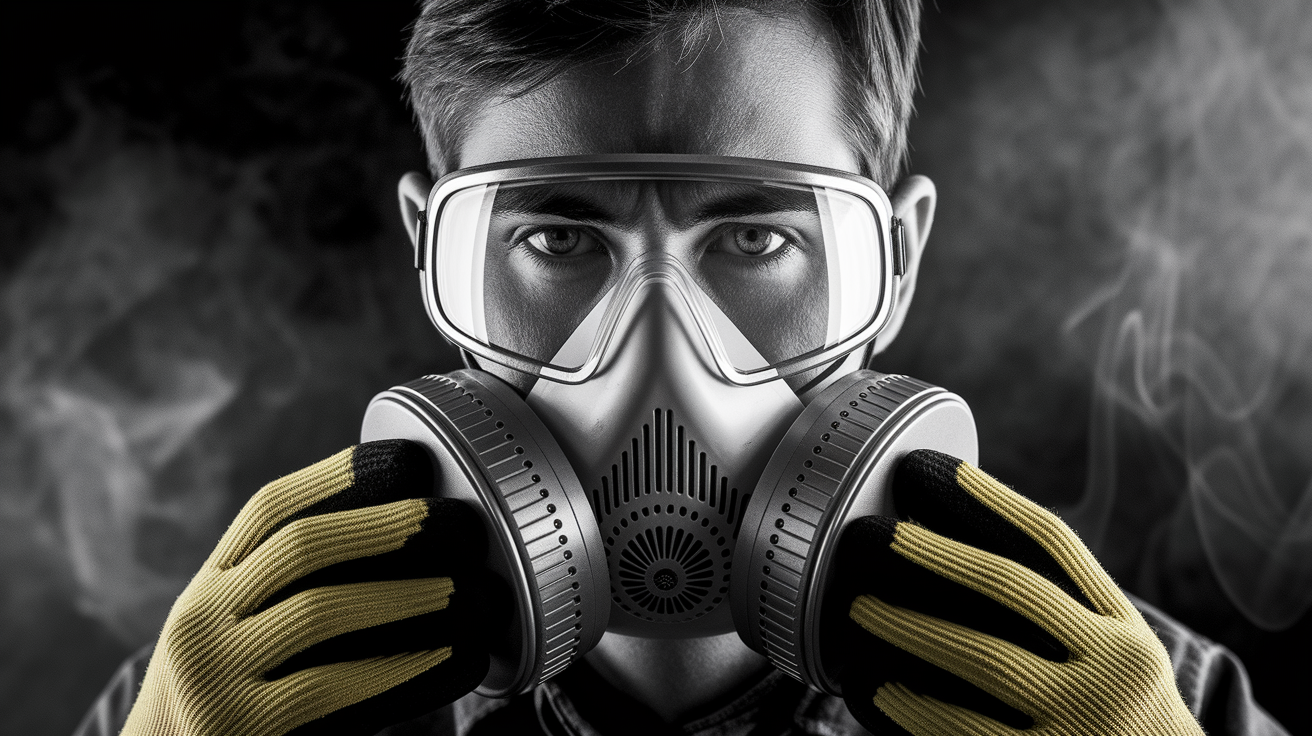
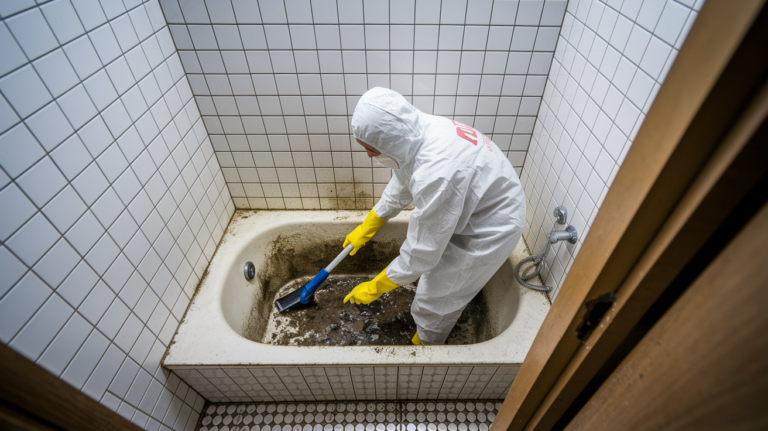
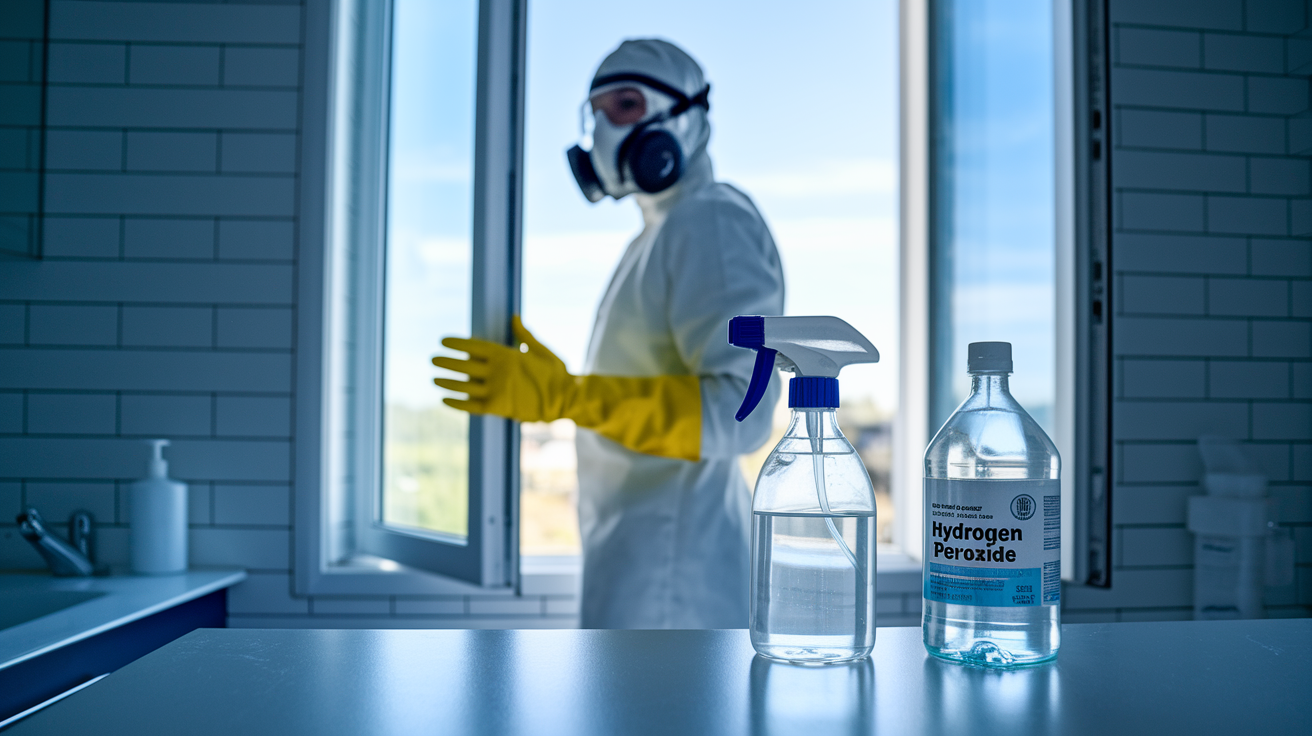
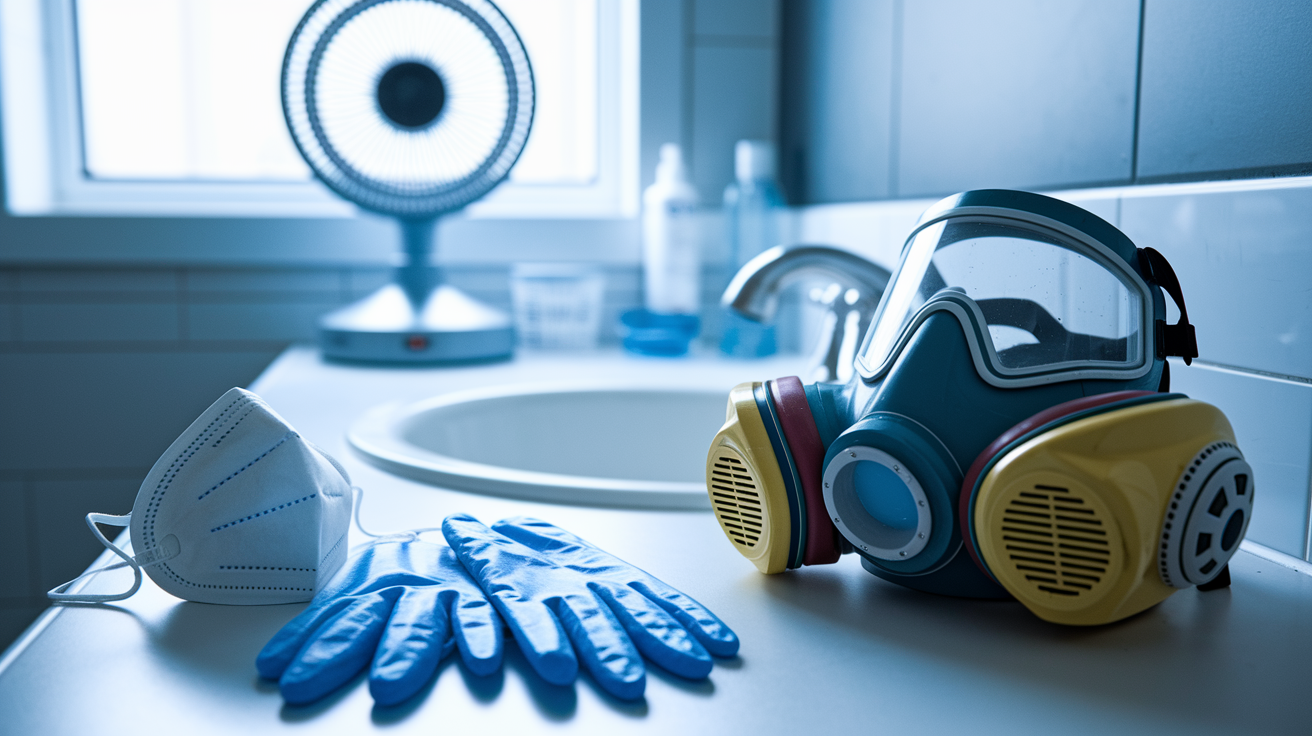
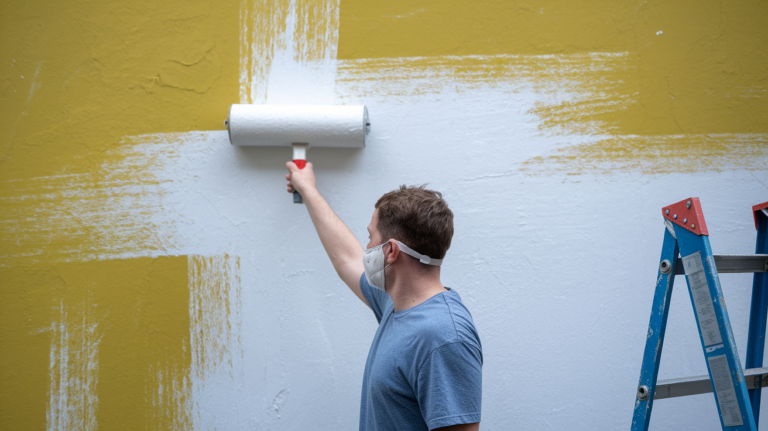
Wear protective gear like nitrile gloves, an N95 mask (or better), goggles, and long sleeves. This gear keeps harmful soot and chemicals away from your skin. Think of it like handling a sponge soaked in oil without wearing gloves, it’s risky.

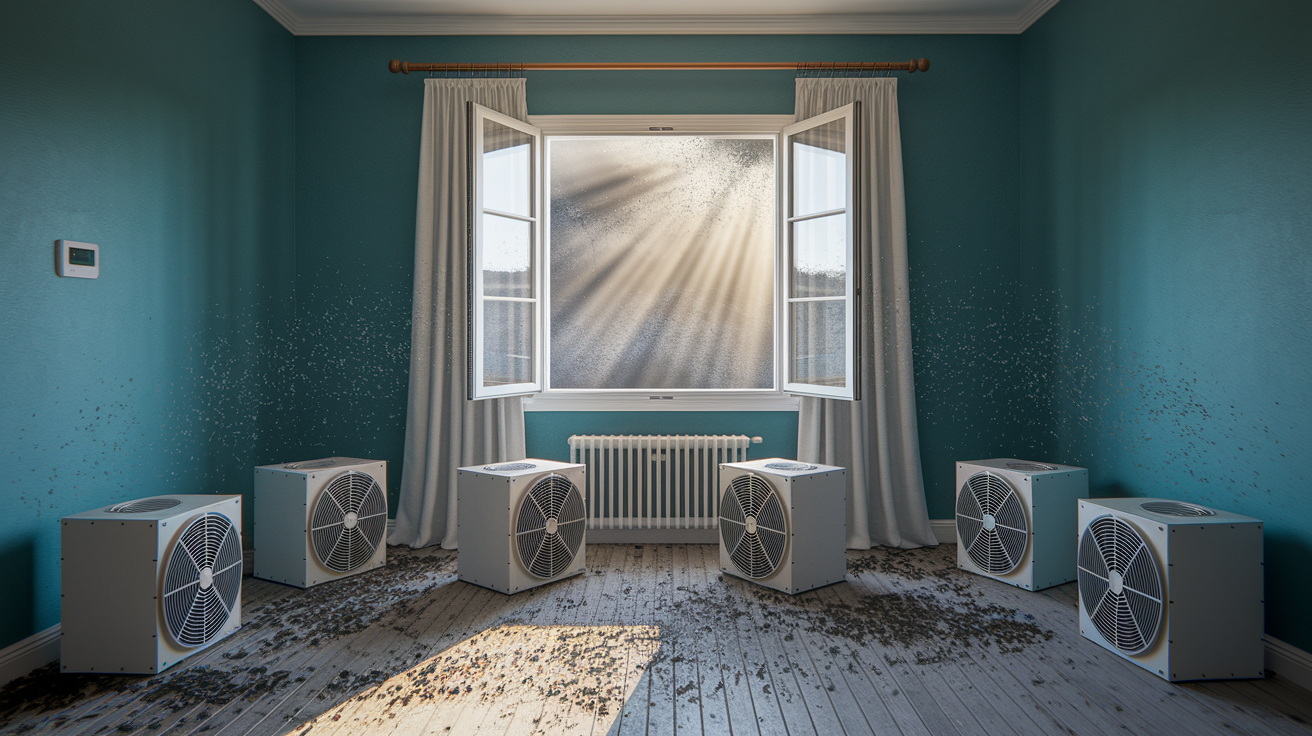
Open windows and run fans to keep your work area full of fresh air. Cover items that weren’t affected and seal off your work zone to stop soot from spreading. This helps clear toxic air quickly and shields clean surfaces.

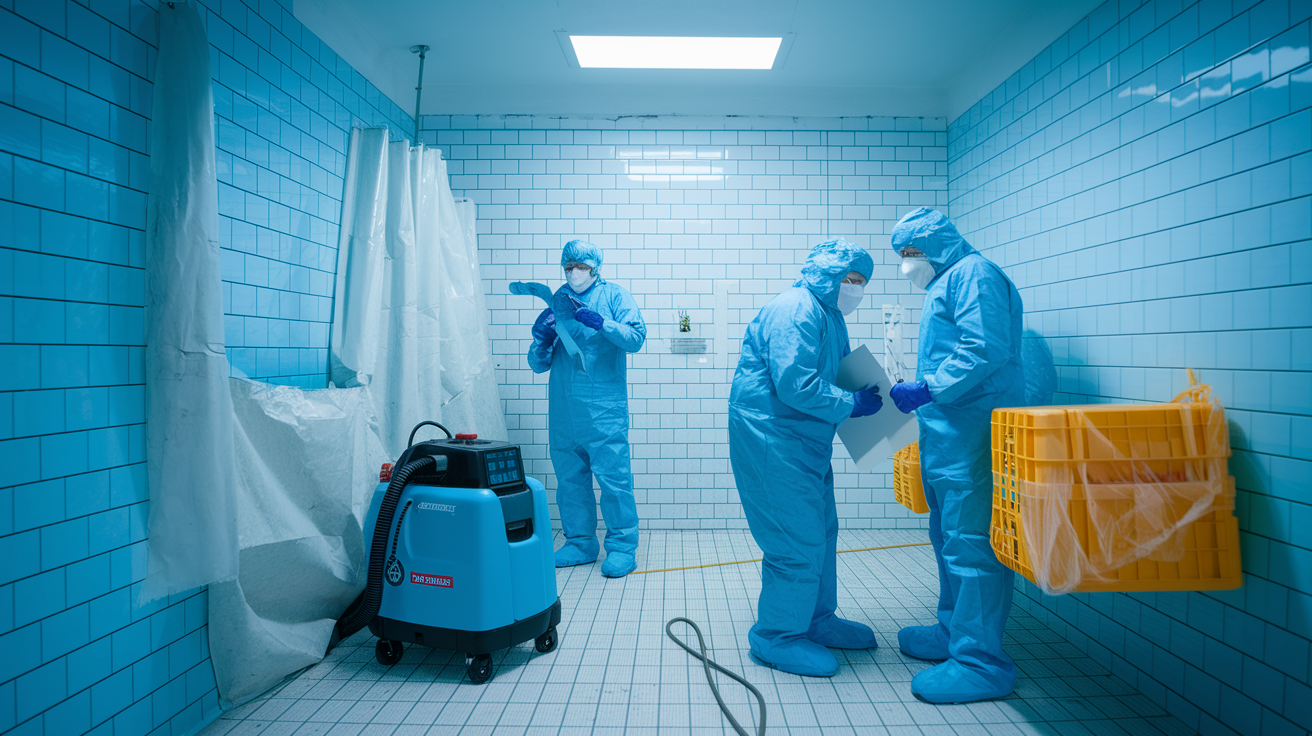
Dispose of used sponges, cloths, and filters in sealed bags. Doing so prevents toxins from moving around your home. Also, avoid using water or cleaning solutions on unknown surfaces until you test them for safety.

Assessing Damage Before Cleaning Fire Damaged Furniture

Start by closely checking each piece of furniture to see how the fire affected it. Look for signs like a layer of soot, scorched spots, or odd discoloration. This quick look helps you decide how serious the damage is before cleaning.

Next, inspect each item in more detail. For wood furniture, check for warping, cracks, or a peeling finish. With fabric items, look for burn holes, spots where the color has changed, or water stains from firefighting efforts. Use a small test sponge (a sponge that helps check if a cleaning solution will hurt the finish) on a hidden spot to see if the material might suffer more damage. This helps tell the difference between light surface damage and deeper harm that needs extra care.

After your survey, decide on what to do next. Sort each item as one that can be fully restored, one needing professional help, or one that should be retired. If you’re unsure about an item’s condition, it’s wise to call a cleanup professional. A careful evaluation now can help prevent more damage later.

Cleaning Techniques for Wood Furniture Affected by Fire

img-2.jpg

Finished Wood Cleaning
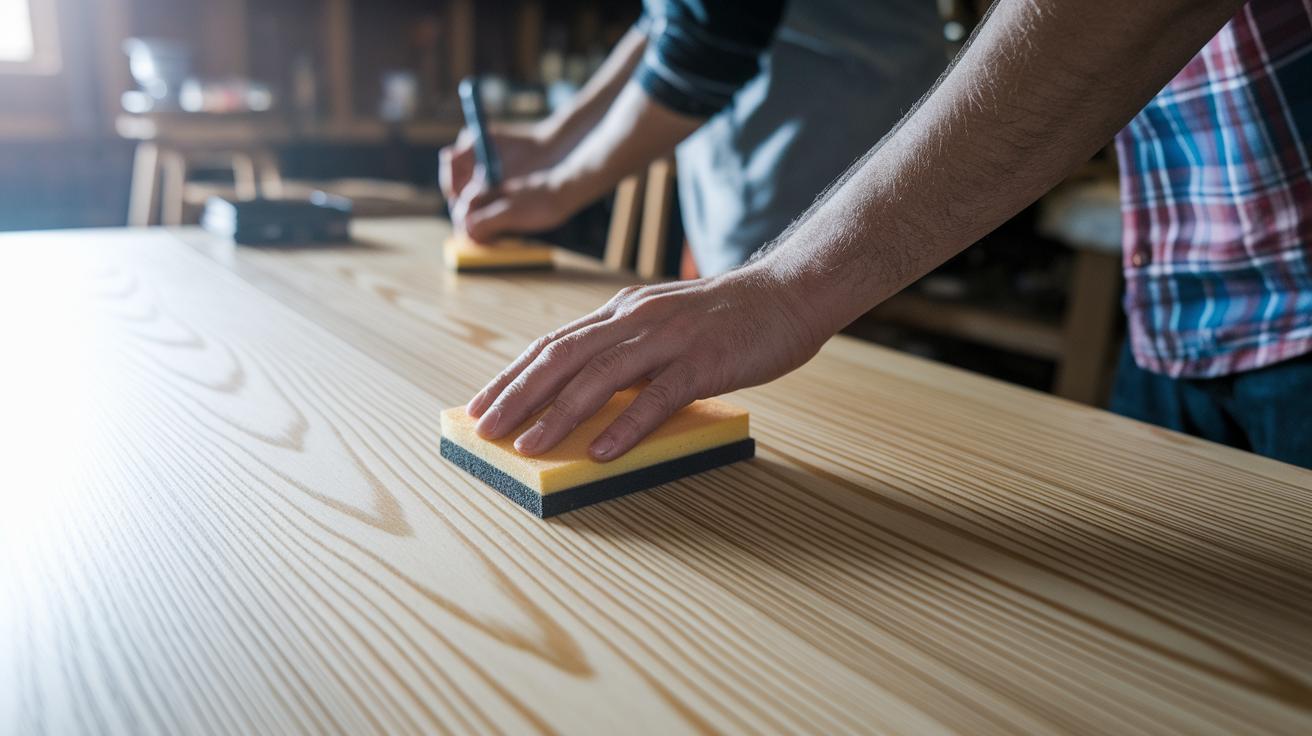
For finished wood, start by using a vacuum with a soft brush tip to lift loose soot without harming the surface. Next, grab a soot sponge (a sponge designed to remove soot gently) and wipe lightly following the wood grain. Then, wash the area with a solution of warm water mixed with a bit of mild dish soap or a pH-balanced wood cleaner (one that keeps the wood’s natural acidity in check). Work carefully and evenly to clear away both surface dirt and the oily residue left by soot. Once the wood is clean and dry, apply a wood polish or conditioner to restore its shine and add protection. Even a small amount of soot left behind can permanently damage the finish.

Unfinished Wood Cleaning
For unfinished wood, begin by vacuuming with a soft-bristle brush attachment to remove loose soot without driving particles into the porous surface. Avoid harsh scrubbing which could push the soot deeper. If stubborn stains remain, use a microfiber cloth lightly dampened with mineral spirits (a gentle cleaning liquid for tough stains). Wipe gently over the affected areas and allow the wood to air dry naturally. This method helps prevent over-wetting the wood and stops residue from setting in. It’s a good idea to test on a hidden spot first to be sure there is no damage.

Furniture Type Cleaning Method
Finished Wood Vacuum → Soot Sponge → Mild Soap → Polish
Unfinished Wood Brush Vacuum → Mineral Spirits Wipe → Air Dry

Restoring Upholstery and Fabric Furniture After Fire

Fire can leave behind stubborn soot, smells, and stains on both fabric and leather. Quick cleanup helps stop these problems from becoming permanent. Start by using a vacuum with a flat-brush attachment held just above the surface. This lifts dry soot without pushing it further into the fibers. Always test your cleaning solution in a hidden spot first to make sure it won’t harm the material.

Fabric Upholstery Cleaning

First, gently vacuum the fabric with a flat-brush attachment held a short distance away. This step helps avoid pushing soot deeper into the upholstery. Next, try a small spot using a mild upholstery detergent or a mix of vinegar and water (a natural cleaner made by diluting vinegar in water). This test checks that the cleaner does not cause any discoloration or damage. When you’re sure it is safe, evenly apply the cleaner over the affected area. Then, carefully blot the fabric with a white microfiber cloth to lift off the soot and residue. Avoid rubbing hard, as this could drive the dirt deeper into the fibers. Finally, let the fabric air-dry completely in a room with good airflow. Proper ventilation is key to drying the fabric and preventing mold from forming.

Leather Furniture Cleaning

For leather, start by holding the flat-brush attachment about one inch away from the surface. This helps protect the leather from scratches or wear. Use a cleaner made specifically for leather on a soft cloth and gently treat the area. After cleaning, apply a leather conditioner (a product that replenishes oils) to keep the leather soft and prevent it from drying out. Like fabric, let the leather air-dry in a well-ventilated room so that no cleaning residue or moisture remains. Following these steps can help restore the look and feel of your leather furniture after fire damage.

Effective Odor Elimination Methods for Smoke and Soot

img-3.jpg

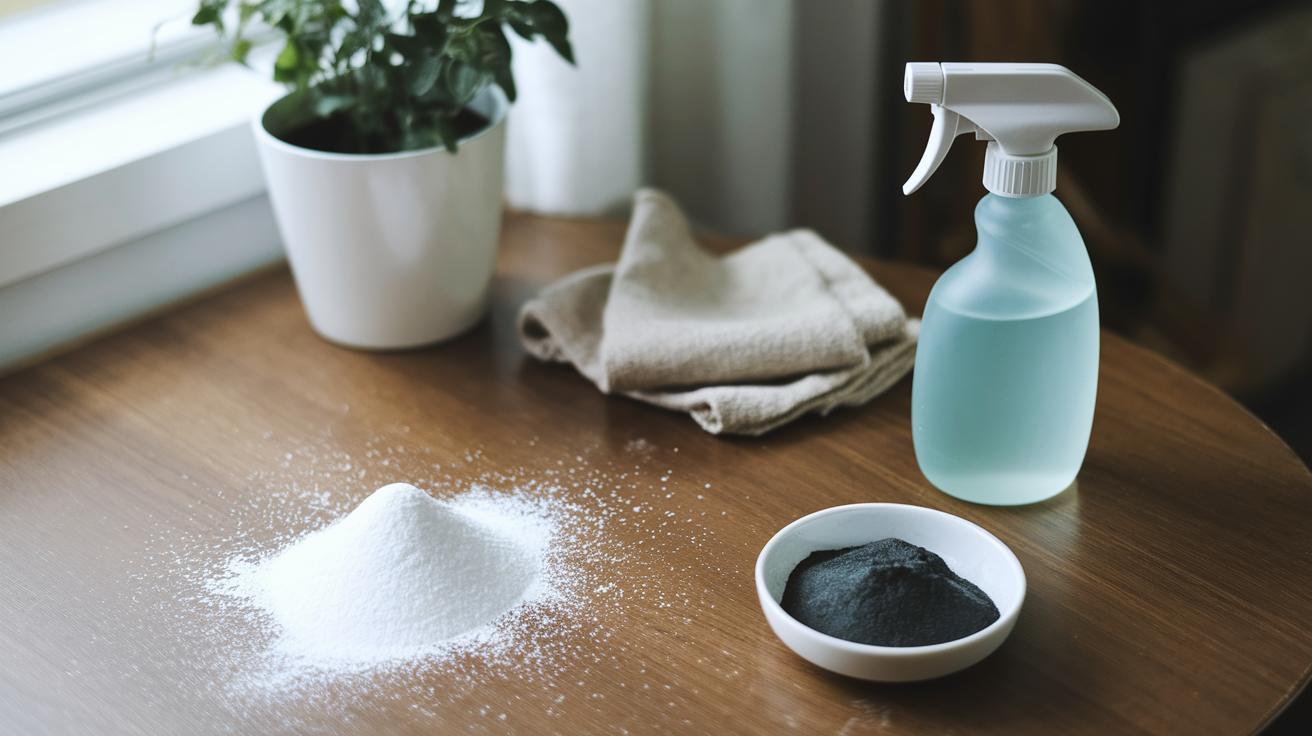
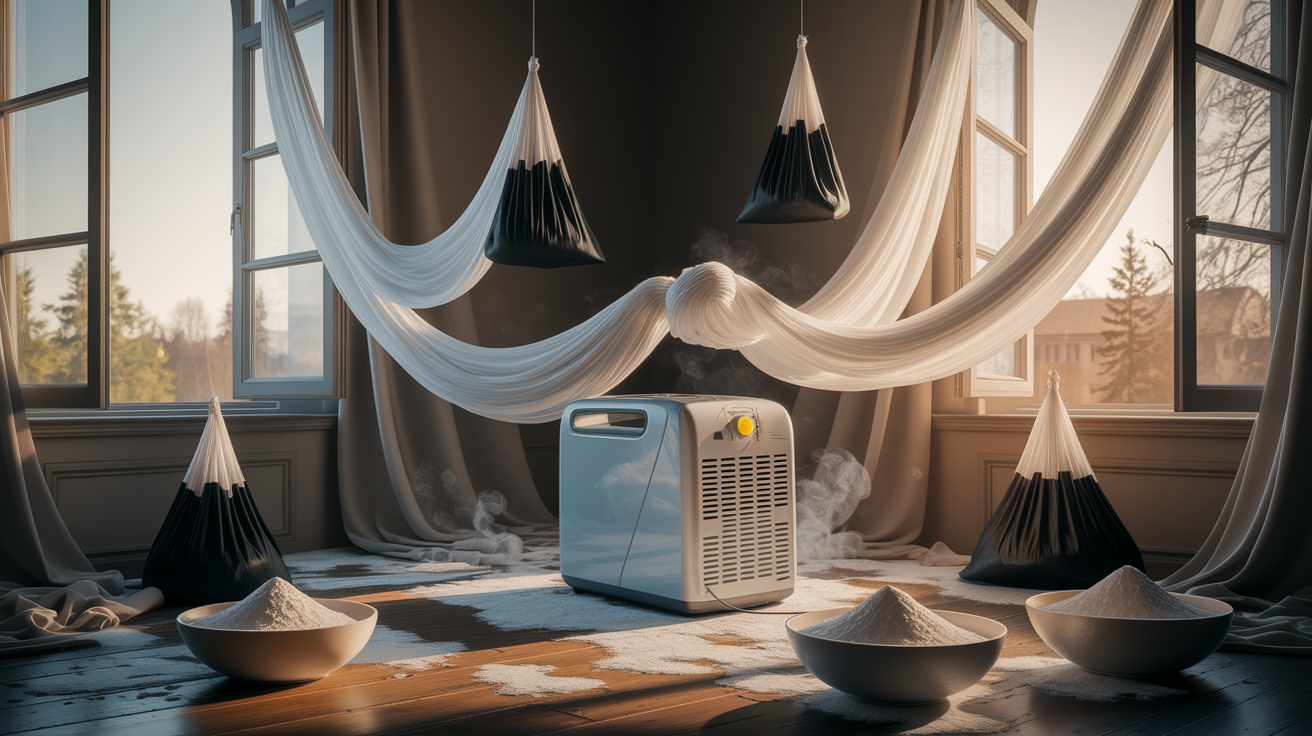
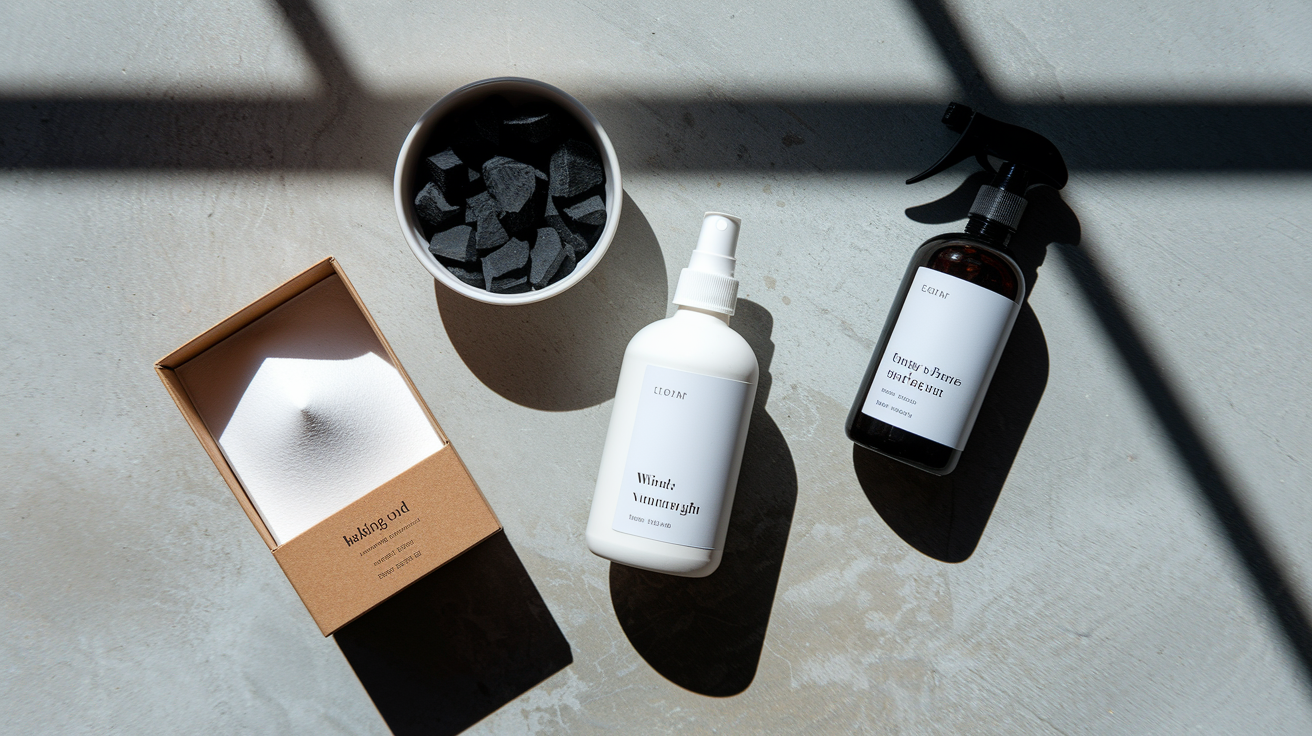
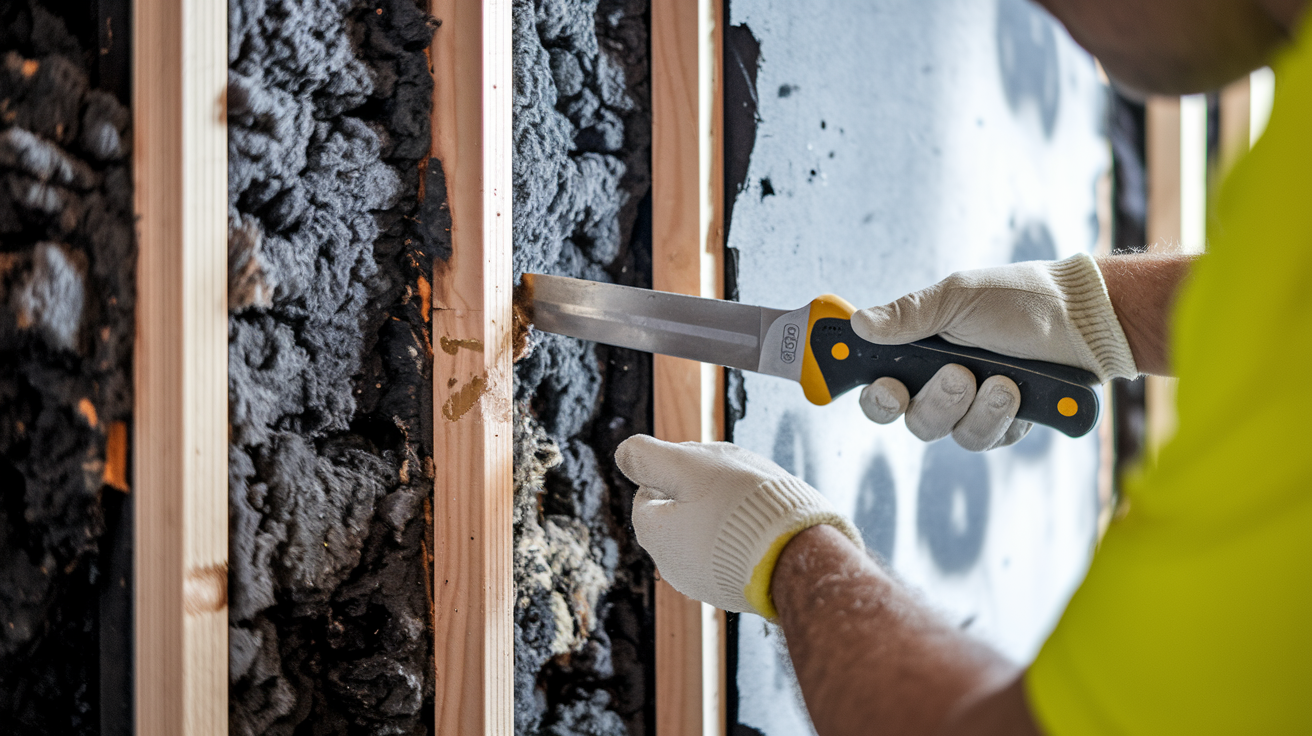
For a simple home fix, you can dust a light layer of baking soda on fabrics. Let it sit for 30 minutes to absorb the smoke smell, then vacuum it up. Baking soda helps lift burnt odors from soft surfaces without using harsh chemicals. For wood furniture, mix equal parts white vinegar and water (vinegar is a natural cleaner that cuts smoke smells) and wipe down the surfaces. This clean mix stops the odor from soaking into the wood. You can also place bowls of activated charcoal (a material that traps odors) or extra baking soda inside furniture for added help. Running box fans in a closed room for 24 to 48 hours helps push out trapped particles and refresh the air.

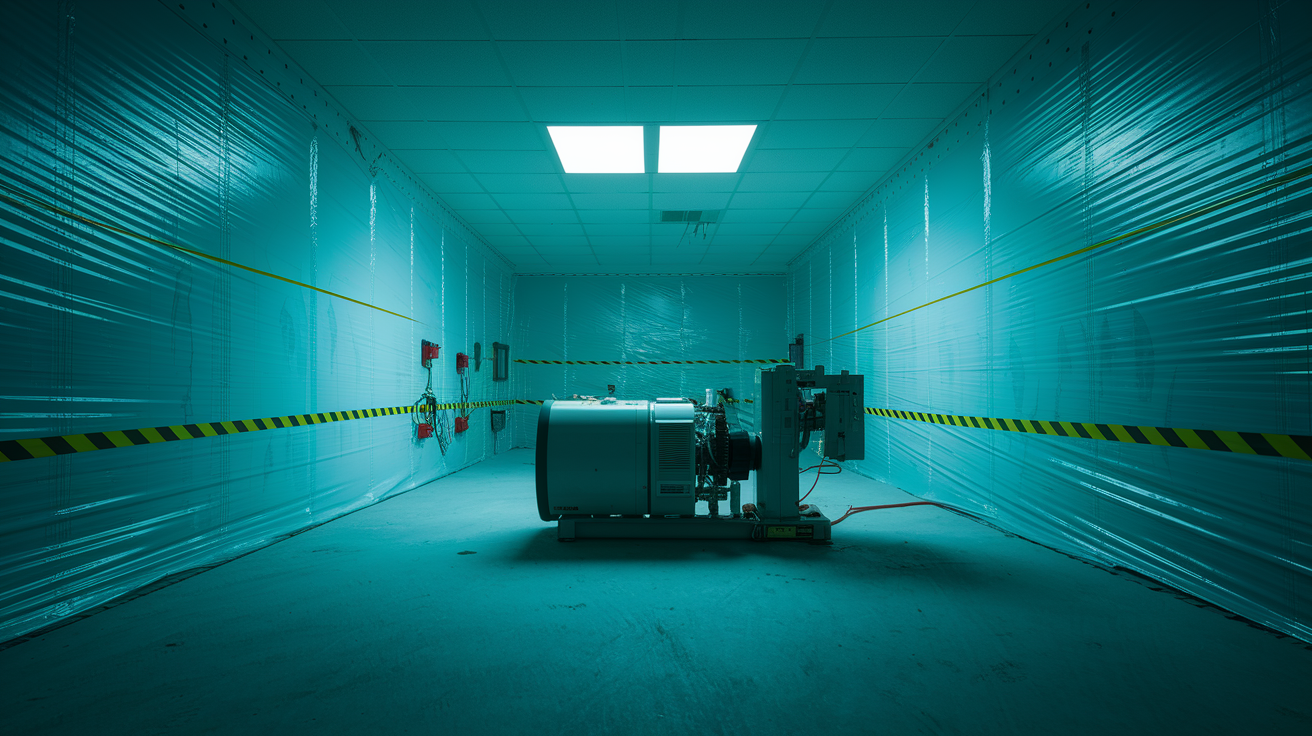
If these do-it-yourself steps do not remove all the odor, you might need advanced equipment. Sometimes smoke and soot settle deep into materials. In these cases, professionals use tools like hydroxyl generators (machines that break down odor molecules), ozone machines (devices that change the air quality), or ClOâ‚‚ treatments (using chlorine dioxide gas in controlled amounts) to neutralize stubborn smells. These methods clear the hidden residues and restore a cleaner, fresher environment. Always test a small area first and allow enough drying time to keep your fire-damaged furniture safe.

When to Seek Professional Fire Damage Cleanup Services

If you see deep burn marks on your furniture, warped wood, thick layers of soot, or a strong, lingering smoke smell, the damage is too serious for a DIY cleanup. When fires leave marks that seep into surfaces or ruin the finish on valuable items, trying to fix it yourself can make things worse.

Certified fire cleanup experts have the right training and tools to handle these problems. They use special machines like hydroxyl generators (devices that break down bad smells), thermal foggers, ozone machines (which clean odor-causing particles), or ClOâ‚‚ treatments (a chemical process that removes embedded smells) to clean up and restore surfaces. Their help is very important for antiques or sentimental pieces, as using the wrong method might permanently damage them.

When you notice that the damage goes beyond basic soot removal or if an item seems weakened, it is time to call in experts. For quick help with fire damage cleanup, search for "fire damage cleanup near me." They can check your home and use the right methods to restore it safely and effectively.

Case Studies of Successful Fire Damaged Furniture Restorations

img-4.jpg

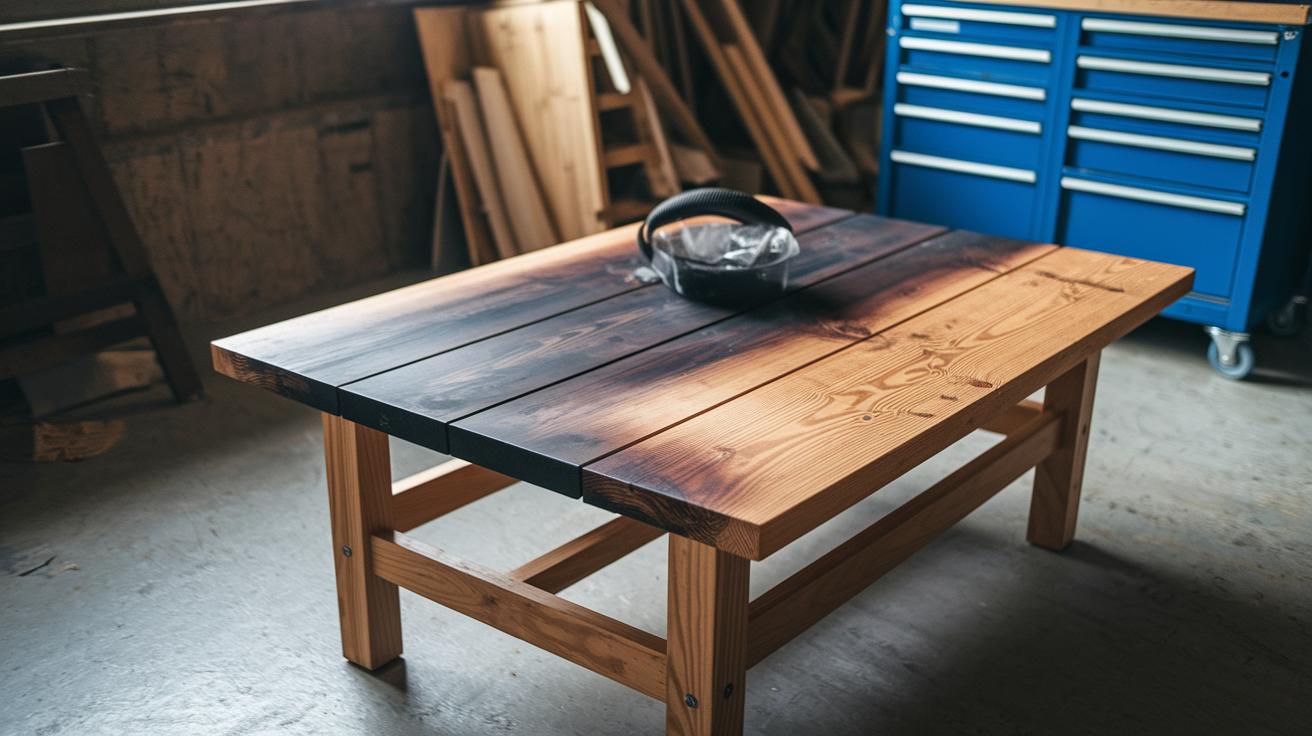
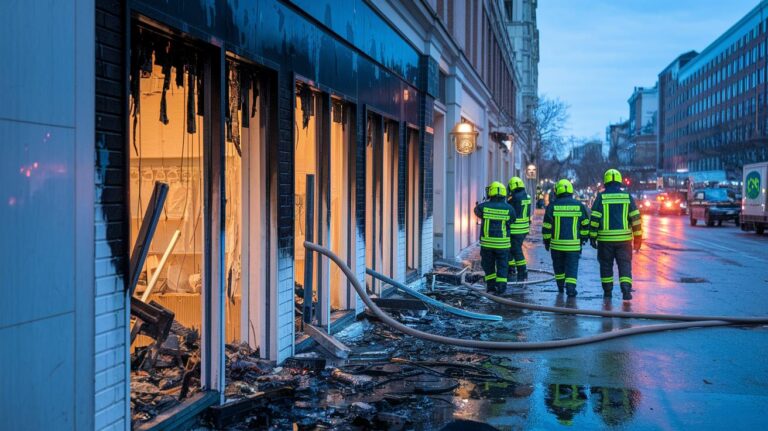
We restored a pine coffee table that had a thin layer of soot and light charring from a small fire. Although the damage affected its look, the table could still be saved. First, we gently vacuumed the table with a soft brush attachment to remove the loose soot. Then, we used a soot sponge (a tool designed to lift dirty particles safely) to lift the embedded soot without harming the wood. After a light wash with a mild wood cleaner, we polished the table to bring back its natural shine and enhance the wood grain. The table’s finish was fully restored, turning a difficult situation into a victory in furniture restoration.

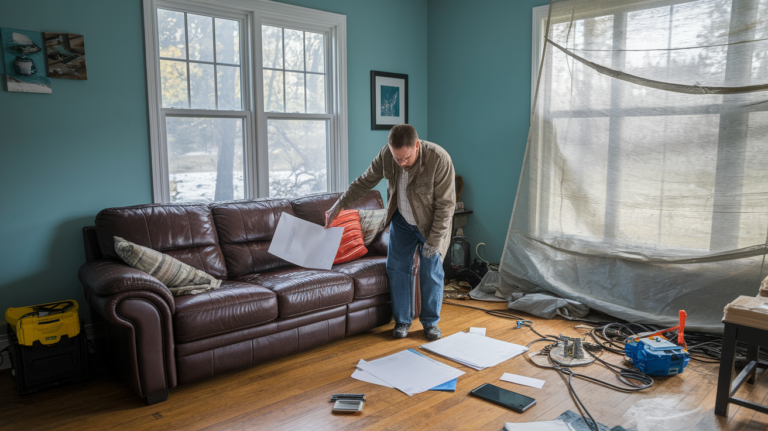
In another case, a leather sofa had absorbed smoke odor and some soot after a house fire. Cleaning leather requires care because the wrong method can cause more harm. We started with a flat-brush vacuum held at a safe distance to gently remove dry soot without scratching the leather. Next, a light application of vinegar mist was used to clean the affected areas while keeping the leather intact. After treating it with a leather conditioner to restore its softness, we completed the process with an ozone treatment (a method that neutralizes odors) to eliminate any lingering smell. The end result was a refreshed, supple leather sofa with no sign of previous smoke damage.

Final Words

In the action, we cover each step to clean fire damaged furniture safely, from assessing the damage and removing loose soot to using specialized cleaners and deodorizing solutions. We break down tasks for wood, upholstery, and odor elimination so you know exactly what to do. We also highlight when it's best to call pros for support. Following these clear steps can help restore your home quickly and keep you safe. Remember, knowing how to clean fire damaged furniture gives you control during a tough time. Stay positive and take action.

FAQ

How to clean fire damaged furniture couch?

Cleaning fire damaged furniture, such as a couch, means first removing loose soot using a vacuum or soft brush. Next, test a mild detergent solution on a hidden spot before cleaning the entire piece and allowing it to air dry.

What smoke damage cleaning products work best?

Smoke damage cleaning products include professional-grade soot sponges, mild detergents, and pH-balanced wood cleaners. These help lift embedded soot and odors while protecting delicate surfaces.

How to clean smoke damage on walls and ceiling?

Cleaning smoke damage on walls and ceilings involves gently wiping the surfaces with a cloth soaked in a mild soap and water solution or specialized cleaner, working in small sections to avoid spreading soot.

What steps are involved in cleaning after fire smoke damage?

Cleaning after fire smoke damage starts by assessing the area, removing loose soot carefully, and then using proper cleaning solutions. Thorough drying and deodorizing help eliminate lingering odors safely.

What is the smoke damage cleaning cost?

Smoke damage cleaning cost varies based on damage extent, the area affected, and cleaning methods used. A detailed estimate from professionals will clarify the expense for labor, supplies, and any specialized equipment.

How to clean smoke damaged wood furniture?

Cleaning smoke damaged wood furniture means vacuuming loose soot with a soft brush, using a professional-grade soot sponge, and then gently cleaning with a mild soap solution or mineral spirits before applying polish or conditioner.

What does professional cleaning after a fire involve?

Professional cleaning after a fire uses specialized equipment like hydroxyl or ozone machines. Experts assess deep-seated damage and use advanced methods to remove soot and odors with safety in mind.

What is the fire clean up cost?

Fire clean up cost depends on the damage’s severity and materials involved. Factors include labor, cleaning supplies, and special equipment. Requesting a detailed estimate from a certified service can help you plan accordingly.

Can smoke damaged furniture be saved?

Smoke damaged furniture can often be restored if cleaned promptly and correctly. Professional restoration methods may revive wood, fabric, or leather items, although severely damaged pieces might require replacement.

What should you spray on fire damaged wood?

For fire damaged wood, use a mild, pH-balanced wood cleaner spray that safely lifts soot without harming the finish. Always test on a small, hidden area first before full application.

What absorbs fire smoke smell effectively?

Effective odor absorbers for fire smoke include baking soda, activated charcoal, and vinegar solutions. These materials neutralize lingering smells when used with proper ventilation and cleaning techniques.

Cleaning Soot Residue: Simple Methods That Work

0

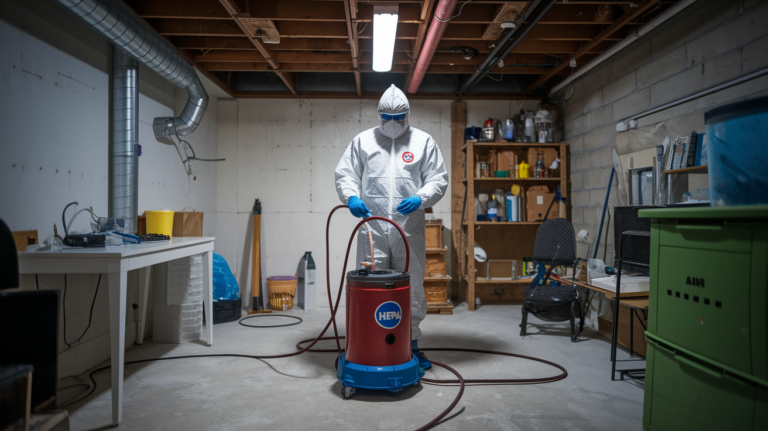
Think you can just wipe soot away? Think again. Soot isn’t like dust; it smears, digs into fibers, and can harm your lungs. Before you touch anything, stop soot from spreading, protect yourself, and check whether this is light surface dust or heavy smoke damage. This post walks you through simple, practical steps that work: what to do first, why you start dry using a HEPA vacuum (a filter that traps tiny particles) and dry-cleaning sponges, when to add water or solvents, and when to call in pros so the stain and the risk don’t come back.

Immediate Steps for Cleaning Soot Residue Effectively

gnQa_W8kRae0E2YOl0oyoA

Your first job is stopping soot from spreading while you figure out what you’re actually dealing with. Don’t grab a sponge or spray anything yet. Check the safety section below first, because soot particles can mess with your lungs and skin in ways you don’t want to ignore. Take five minutes to assess whether you’re looking at light surface dust or heavy smoke damage. That difference tells you if this is a weekend DIY project or if you need to call in restoration pros.

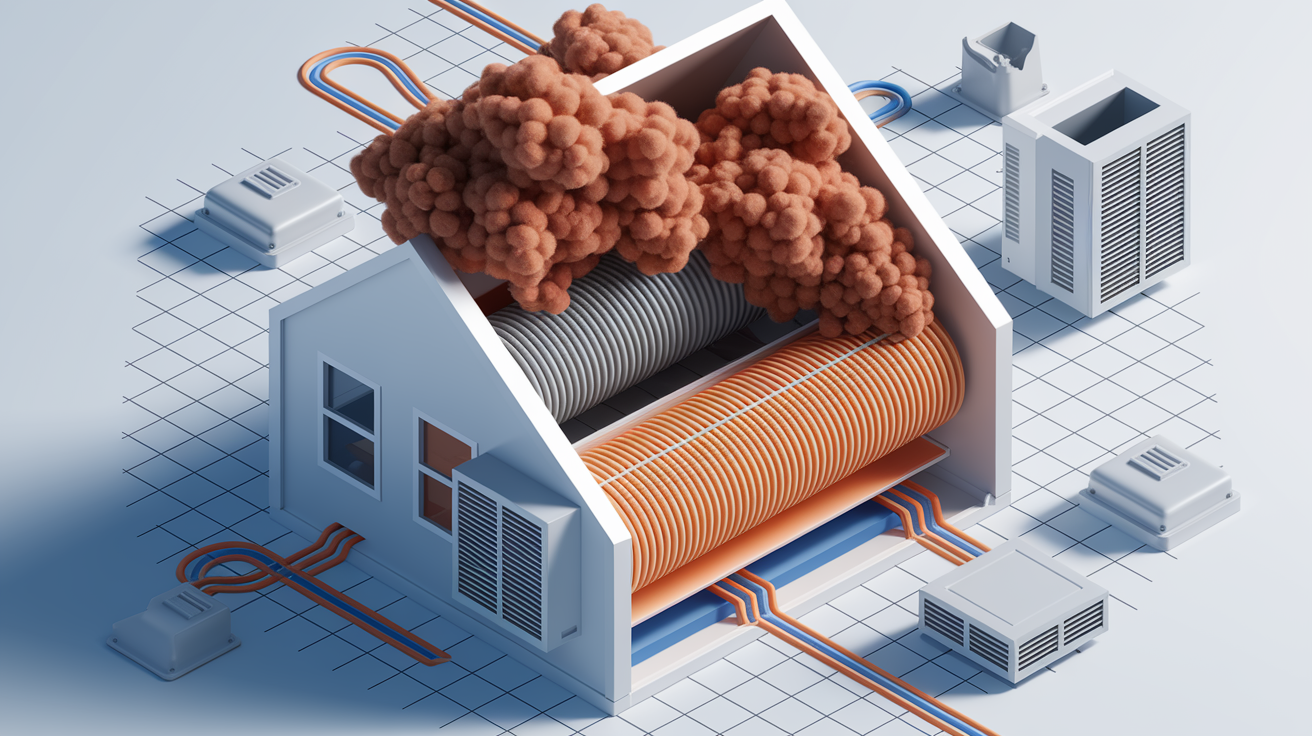
Shut off your HVAC right now. If air keeps running through the ducts, you’re pulling soot into every room and caking it onto filters, registers, and ductwork you can’t even see. Seal doorways to clean rooms with plastic sheeting or jam damp towels along the threshold. Open windows in the damaged space for ventilation and throw drop cloths over anything you can’t move out. Protect your floors with newspapers or old sheets, and plan to toss those covers when you’re done so you don’t scatter soot back across the house.

The sequence that works is dry first, wet second. Soot looks dry, but the moment you add water or cleaner it smears into a greasy black film. Start with HEPA vacuuming to pull up loose particles, then use a dry cleaning sponge to absorb what’s left, and only after that move to detergent or solvent for stubborn marks. Skip the dry steps or scrub hard and you’ll push carbon deeper into porous stuff, turning a surface issue into permanent discoloration.

Turn off the HVAC to stop soot from riding through ducts into rooms that are still clean.

Isolate the area with plastic or closed doors and get airflow going with open windows.

HEPA vacuum loose soot by holding the nozzle about half an inch off surfaces. Don’t press in or you’ll smear.

Use a dry cleaning sponge with gentle downward strokes. Don’t wet it. Once it’s wet, it’s useless.

Don’t add moisture until all dry soot is gone. Water locks carbon into fibers and pores.

Never scrub or rub soot stains during the first pass. Blot, lift, or wipe gently so you don’t embed it deeper.

Essential Safety Precautions for Cleaning Soot Residue

nVLE-OF4Tg2EAOcvPCWpAg

Soot isn’t normal dirt. These tiny carbon particles get into your body through your lungs, skin, and eyes, and long term exposure links to respiratory issues, bronchitis, heart disease, and cancer. Treat every soot cleanup like a health hazard, not just a messy chore. That black dust on your walls and carpet is combustion byproduct from wood, plastics, synthetic fibers, and household materials that didn’t burn completely. The particles are small enough to settle deep in lung tissue.

Put on your protective gear before you touch anything. Keep the room ventilated with windows open and fans running, but remember the HVAC stays off until you finish vacuuming and wiping. If you start feeling lightheaded, step outside for fresh air. Change gloves and respirator filters when they look dirty, and wash your hands plus any exposed skin right after each work session.

NIOSH rated N95 or P100 respirator mask to filter airborne soot particles. A pack of 10 runs about $10 to $30.

Nitrile gloves to protect your hands from carbon residue and cleaning chemicals. A box of 100 costs around $15 to $30.

Safety goggles to shield your eyes from soot dust kicked up during vacuuming and wiping.

Disposable coveralls or long sleeves and pants to keep soot off your skin. Coveralls cost about $8 to $20 each.

Final Words

Shut off the HVAC, seal the room, and put on your respirator and gloves. Those first moves stop soot from spreading and protect your lungs.

Start dry: HEPA vacuum about 0.5 inch from surfaces, then use a dry-cleaning sponge. Don’t wet or scrub at first — that just smears soot. Light jobs can finish in hours with basic supplies; heavy smoke often needs a pro.

Take photos and moisture readings for your claim, then complete repairs so the space is truly restored. Cleaning soot residue is manageable, and you’ll be back to normal soon.

FAQ

Q: Will Dawn dish soap remove soot?

A: Dawn dish soap can remove light greasy soot on nonporous surfaces when used after dry cleaning, but it will smear dry soot if used first; start with HEPA vacuuming and a dry‑cleaning sponge.

Q: How do professionals clean soot?

A: Professionals clean soot by starting dry: HEPA vacuuming close to surfaces, then using dry‑cleaning (chemical) sponges, followed by targeted wet cleaning, odor control, repairs, and clear documentation for insurance.

Q: Does soot stain permanently?

A: Soot stains can be permanent on porous materials; quick dry‑first cleaning, testing, and professional restoration may save many surfaces, but severely charred or deeply soaked materials often need replacement.

Q: Does white vinegar remove soot?

A: White vinegar won’t reliably remove dry soot; it can help lift smoke odor or light residue after HEPA vacuuming and dry‑cleaning, but avoid wetting soot before dry methods to prevent smearing.

Home Safety Checklist After A Flood: Stay Safe

0

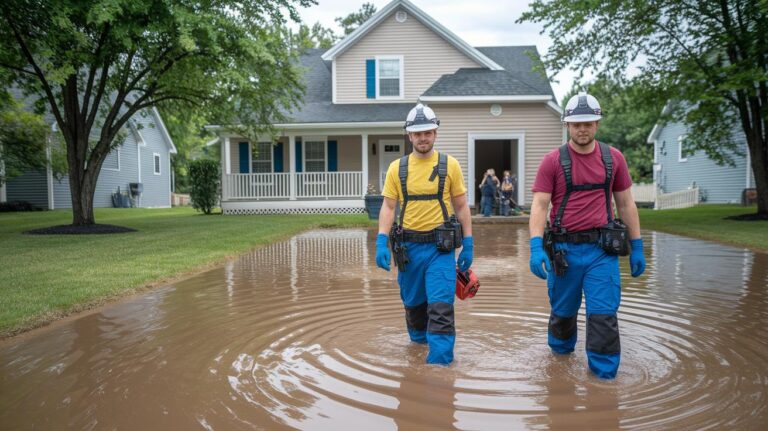
Have you taken a close look at your home since the flood? Floodwaters can bring more than just water. They can carry sewage, chemicals, and debris that may harm your health. It’s not enough to just dry your home, you need to make sure every room is safe. In this guide, we offer a simple safety checklist to help you spot hidden dangers like structural damage and the first signs of mold (a type of fungus that grows in moist areas). Follow these steps to protect your home and feel confident about its safety again.

Critical Items in Your Home Safety Checklist After a Flood

Floodwaters not only harm your belongings but can also bring sewage, chemicals, and debris into your home. These contaminants can pose serious health risks if you are exposed to them. Acting quickly helps stop further damage, prevents mold from growing (mold is fungus that can start within 24 to 48 hours), and supports your home’s structure from weakening.

Each step in this list is meant to protect you and keep your home safe. When you follow these steps, you reduce hidden damage and prepare for a careful inspection later.

  1. Check that your home’s outer structure is stable before coming inside.
  2. Turn off the electricity and gas using the main switches or valves. (For more details on safe shutdown, see our guide on electrical safety after water damage.)
  3. Wear protective gear like gloves, boots, and a respirator (a mask that stops harmful particles) to avoid contaminants.
  4. Take clear photos and videos of every wet and damaged area to help with your insurance claim.
  5. Remove any standing water or call professionals who know how to do it safely.
  6. Use dehumidifiers (machines that dry the air) and air movers to help dry out your space.
  7. Look for signs of mold near the baseboards and in corners.
  8. Check for cracks, warped flooring, or exposed wiring that could indicate deeper problems.

Following these simple steps not only protects your health but also prepares your home for thorough repairs when it is safe to re-enter.

Damage Assessment in Your Home Safety Checklist After a Flood

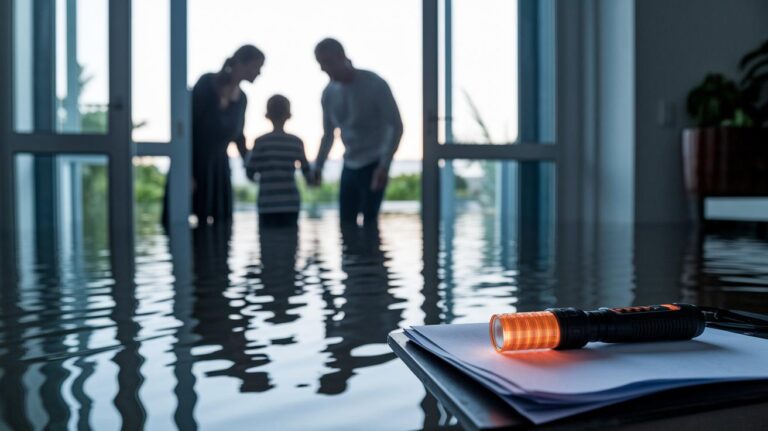
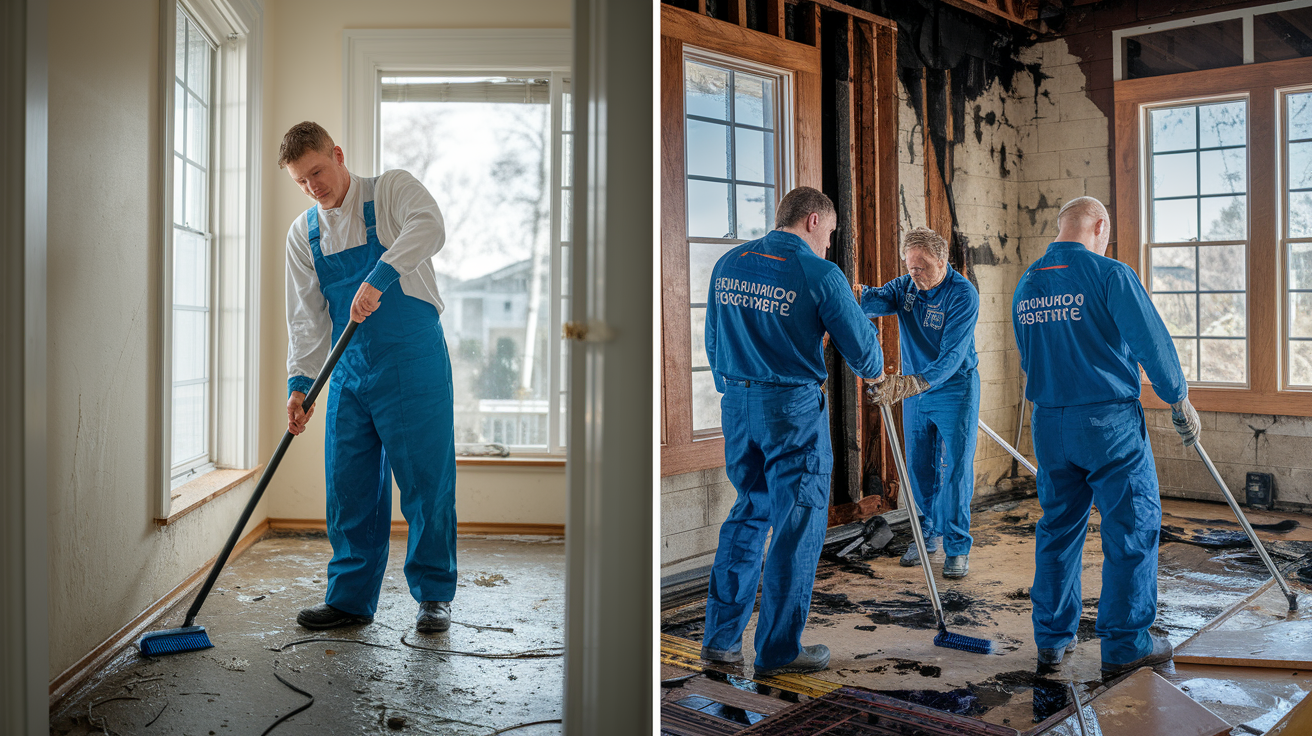
img-1.jpg

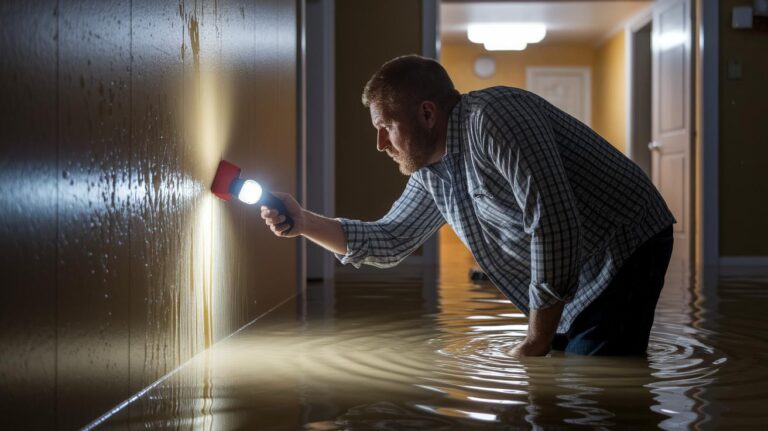
When you start your check, focus on high-risk spots like the basement and outside walls. These areas face the worst of the water and are likely to show hidden damage. Look there first so you know if you need professional help.

Inspect Structural Elements

Begin by checking your home's key supports. Look at the foundation, support beams, and joists. Watch for any sagging or spaces forming between walls and beams. Cracks in the foundation could mean water pressure has caused a problem. Then, check floors and ceilings. Uneven floors or ceilings that dip or bulge can signal that water has seeped in and damaged the materials.

Detect Hidden Moisture

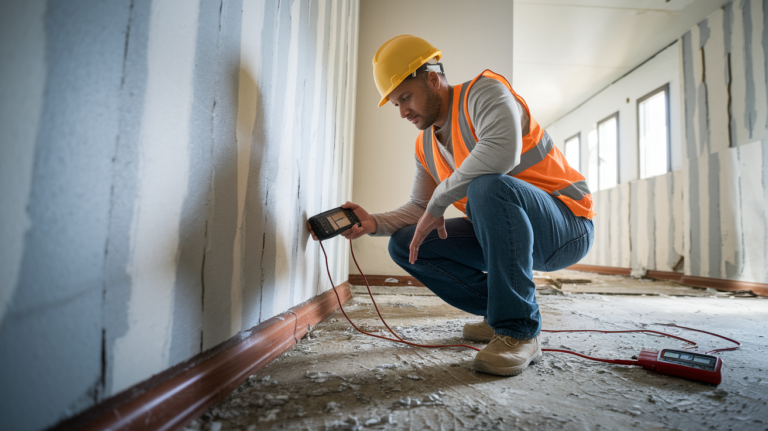
Use a moisture meter (a tool that measures water levels) or a thermal imaging device (a camera that shows temperature differences) to find water hidden behind drywall, under floors, or near plumbing. These tools help you spot damp areas that you can’t see. If you notice sagging, cracks, or high moisture readings, call a professional right away to stop further damage and keep your home safe.

Utility Safety Checks in Your Home Safety Checklist After a Flood

Before you step back into your home, make sure the water is completely gone. If you are unsure, call a professional. The floors and walls should look dry, and any wet patches could hide hidden water. This pause helps you stay safe from electrical and structural risks.

Turn off your main breakers and gas valves to lower the risk of shock or fire. Later, when you restore power, use a non-contact voltage tester (a tool that checks for live wires without touching them) to check each outlet for moisture. This careful step keeps you away from live electrical hazards.

Look over your gas lines for any signs of movement or loose fittings. You can use a gas detector or mix soap with water to check for leaks. Detecting even a small leak is important, as trapped gas pockets can be dangerous.

Examine your plumbing for any backflow, leaks, or broken seals. Check for rust or damaged pipes that might need quick repairs. Even a tiny leak can become a bigger problem if it goes unchecked.

Finally, test your carbon monoxide alarms to make sure they work well. If you use a portable generator, keep it at least 20 feet away from windows and doors to stop carbon monoxide from building up inside your home.

Water Extraction and Structural Drying in Your Home Safety Checklist After a Flood

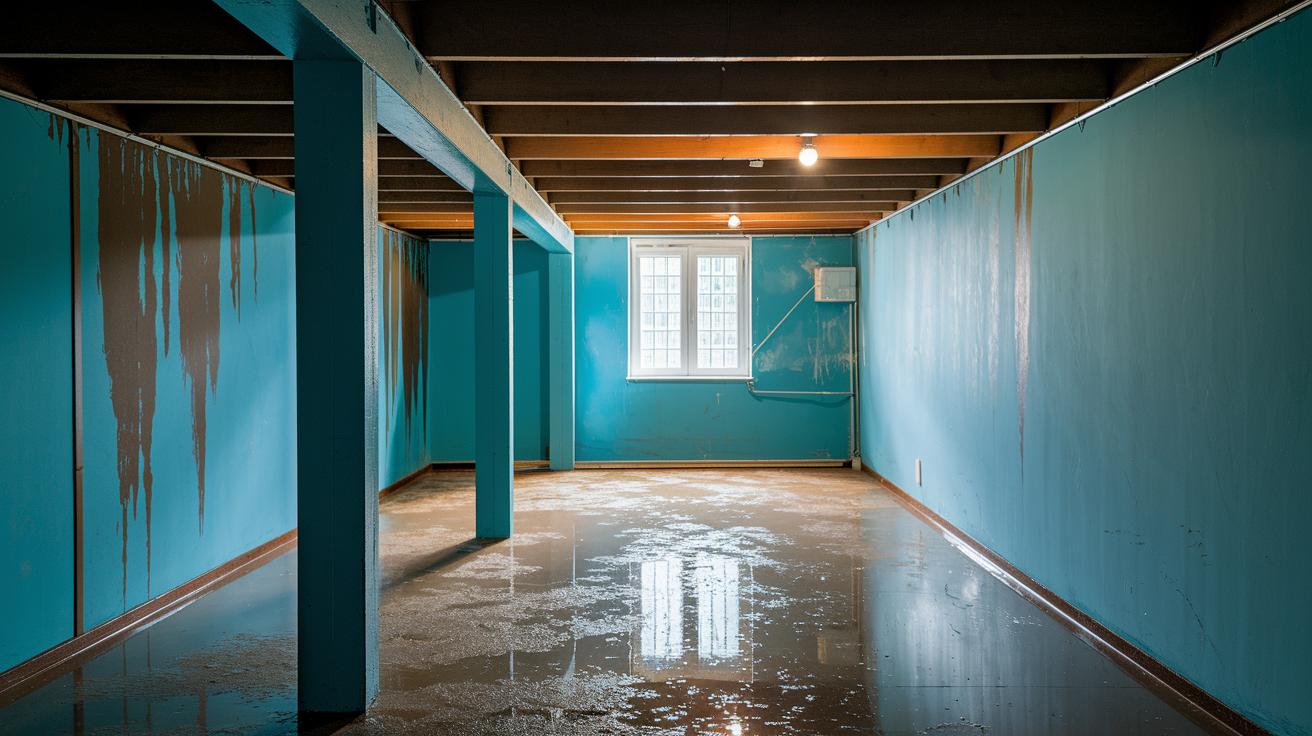
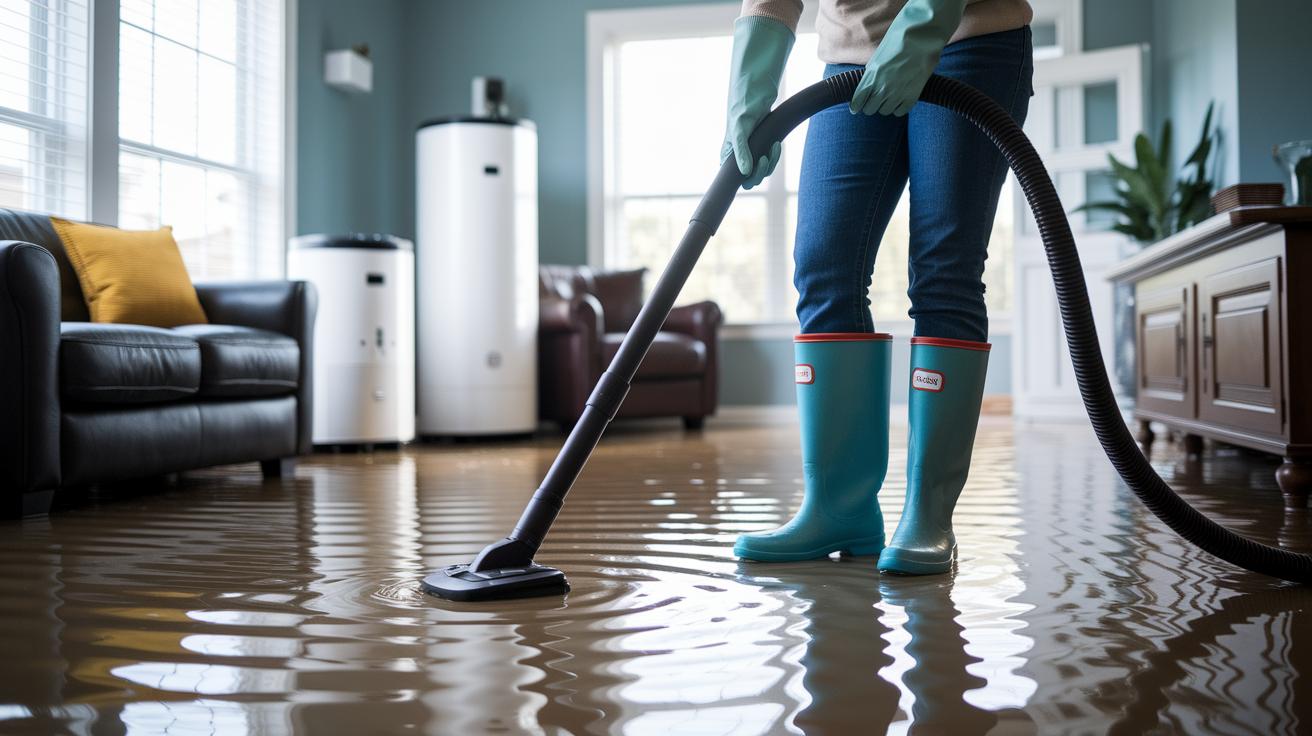
img-2.jpg

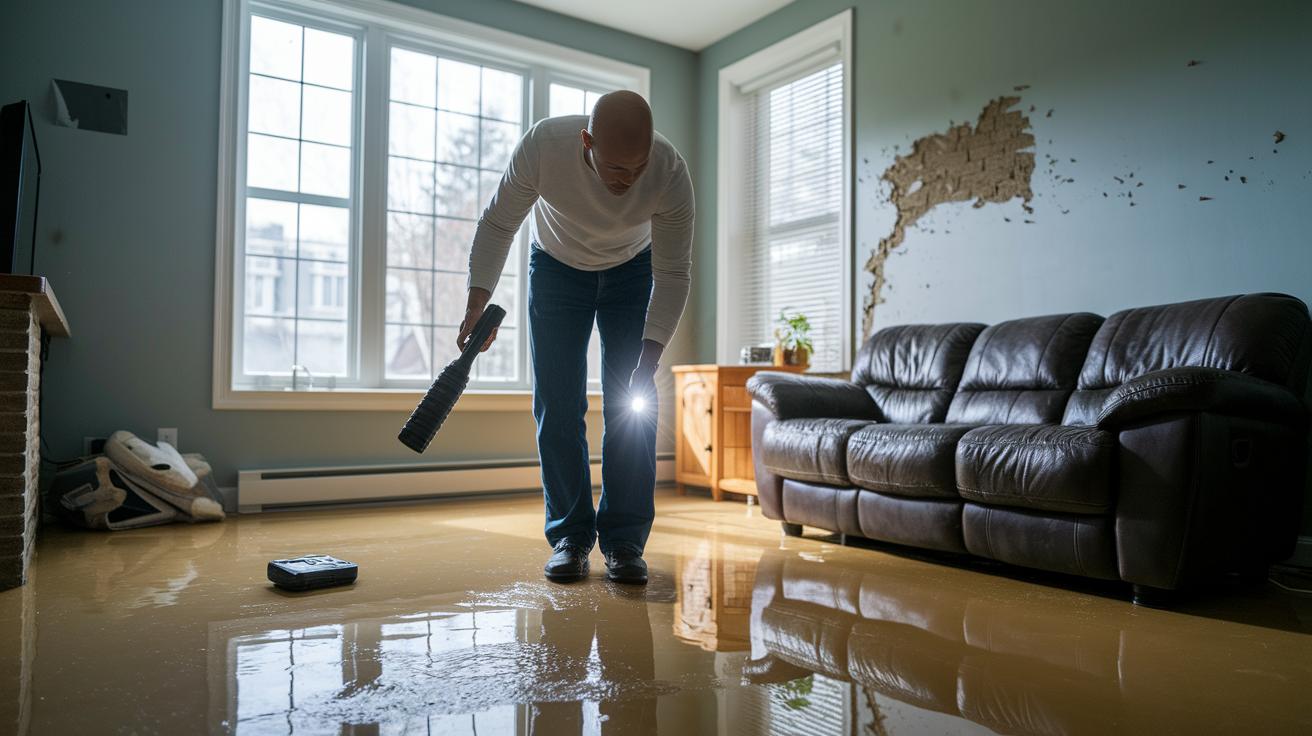
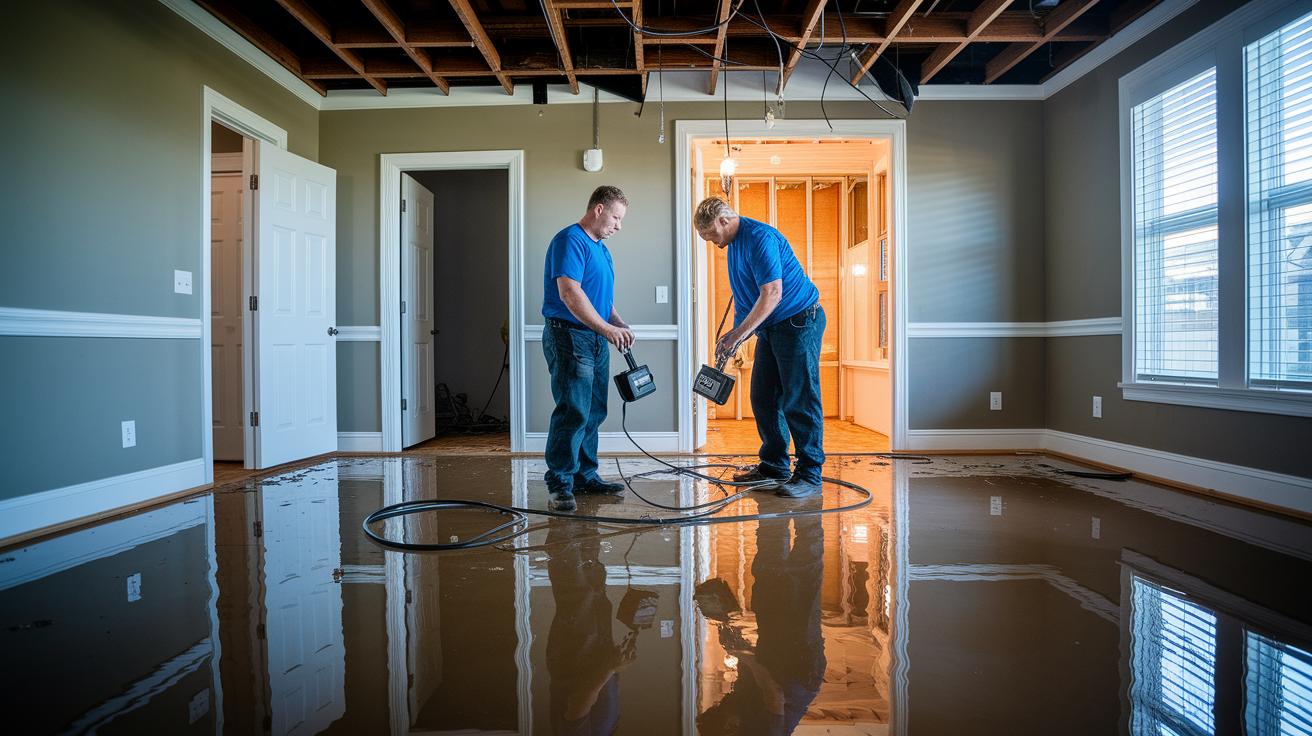
Removing all standing water within 48 hours is very important. Standing water can lead to mold growth and weaken wooden parts of your house. Removing it quickly helps stop hidden moisture and prevents further damage.

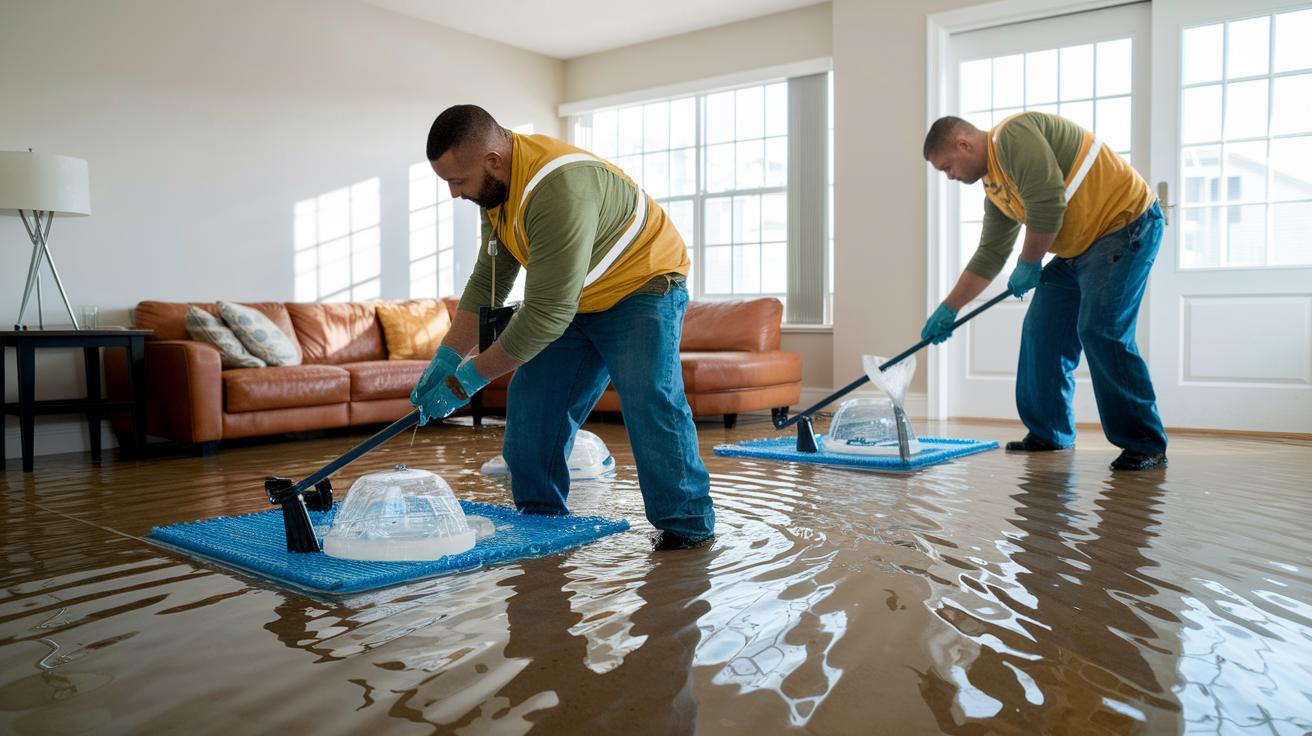
When you use pumps or wet-dry vacuums to remove the water, always wear rubber boots and gloves. Be sure to avoid contact between water and any electrical parts. If you are not comfortable using this equipment, call a professional water extraction service near you. This small step protects you from electrical shock and stops extra damage to your home.

For the drying process, set up dehumidifiers (machines that remove moisture from the air) and air movers (devices that help move air around) in a way that spreads the airflow through every room. Placing these machines properly makes sure moisture is drawn from behind walls and under floors. This method can cut drying time to just three to seven days and lower the risk of further structural issues.

Check moisture levels daily with a moisture meter (a tool that measures water content). Keeping track of the moisture helps you know when it is safe to start repairs without risking mold growth or weakened structures.

Mold Prevention and Sanitation in Your Home Safety Checklist After a Flood

Mold can start growing on wet surfaces within 24 to 48 hours after a flood. First, look for items that cannot be saved, like carpet, insulation, or ceiling tiles soaked by floodwater. If you find these, throw them away within 72 hours. Removing wet items fast keeps your home safer.

Next, clean hard surfaces such as wood, tile, or concrete with a stiff brush and an EPA-approved biocide (a cleaning chemical approved by the Environmental Protection Agency). This scrub will remove mold spores, bacteria, and fungi that may be left behind. Cleaning well helps stop further mold growth.

After cleaning, use drying agents to tackle any extra moisture. Open windows or set up fans to create cross-ventilation, which moves moist air out and brings dry air in. This airflow makes it harder for mold to grow again.

Finally, consider using portable HEPA air scrubbers (devices with High Efficiency Particulate Air filters that capture small mold spores and pollutants) to clear the air. Run them until the indoor humidity is below 50 percent. Keeping the air clean and dry reduces the chance of mold returning. Regular cleaning and checking keep your home safe in the long run.

Recovery Planning and Damage Documentation in Your Home Safety Checklist After a Flood

img-3.jpg

I know this situation is stressful, and we are here to help you take clear, practical steps.

  1. First, make a list of emergency contacts. Write down your insurer, local utilities, and restoration professionals. This list gives you quick access to help when you need it most.

  2. Next, walk through your home room by room. Take clear photos and videos that show any damage like broken flooring, cracked walls, or warped doors. These visuals support your insurance claim and guide repair experts.

  3. Then, create an inventory of damaged items. Write down each item, note its purchase date, and estimate its value. Keep any receipts or repair papers you have. This organized list helps verify losses and eases the insurance process.

  4. Finally, draft a step-by-step plan for repairs and upgrades to protect your home from future floods. List both immediate fixes and longer-term improvements. This plan, along with your documented evidence, gives you a clear path to recovery and strengthens your home's safety.

Final Words

In the action, we broke down key safety steps after a flood. You learned how to assess damage, handle utilities safely, extract water, and prevent mold. We also shared guidance on how to document damage for recovery and insurance claims. This guide serves as your home safety checklist after a flood, helping you keep hazards in check and set a clear path for repairs. With these steps, you can move forward confidently and work toward a safer, restored home.

FAQ

Q: What does a home safety checklist after a flood provide?

A: The home safety checklist provides step-by-step instructions to secure your home and protect your family. It covers turning off utilities, using protective gear, and documenting damage—useful tips found in recent pdf guides from 2022.

Q: What should be included in a flood emergency or survival kit?

A: A flood emergency kit contains water, nonperishable food, flashlights, batteries, first-aid supplies, and personal protective equipment. This kit helps you manage immediate needs during a flood and stay safe.

Q: What are the immediate steps to take when your house floods from rain or a burst pipe?

A: The initial steps include shutting off electricity and gas, leaving unsafe areas, and wearing protective gear. These actions prevent hazards and set the stage for professional help to remove water and check for hidden damage.

Ceiling Leak Repair Cost: What You’ll Really Pay

0

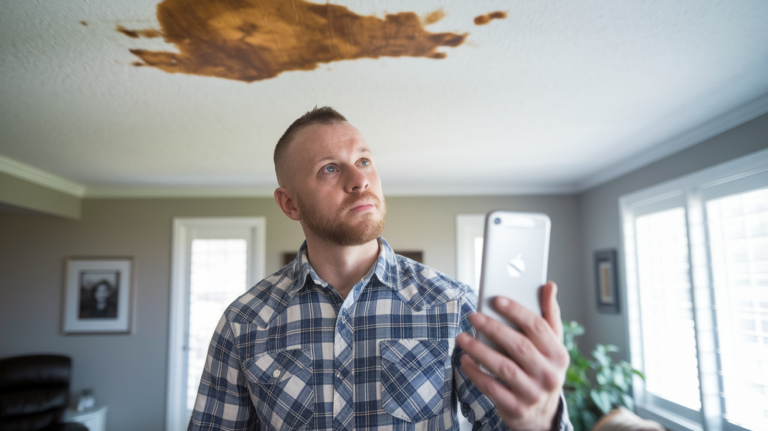
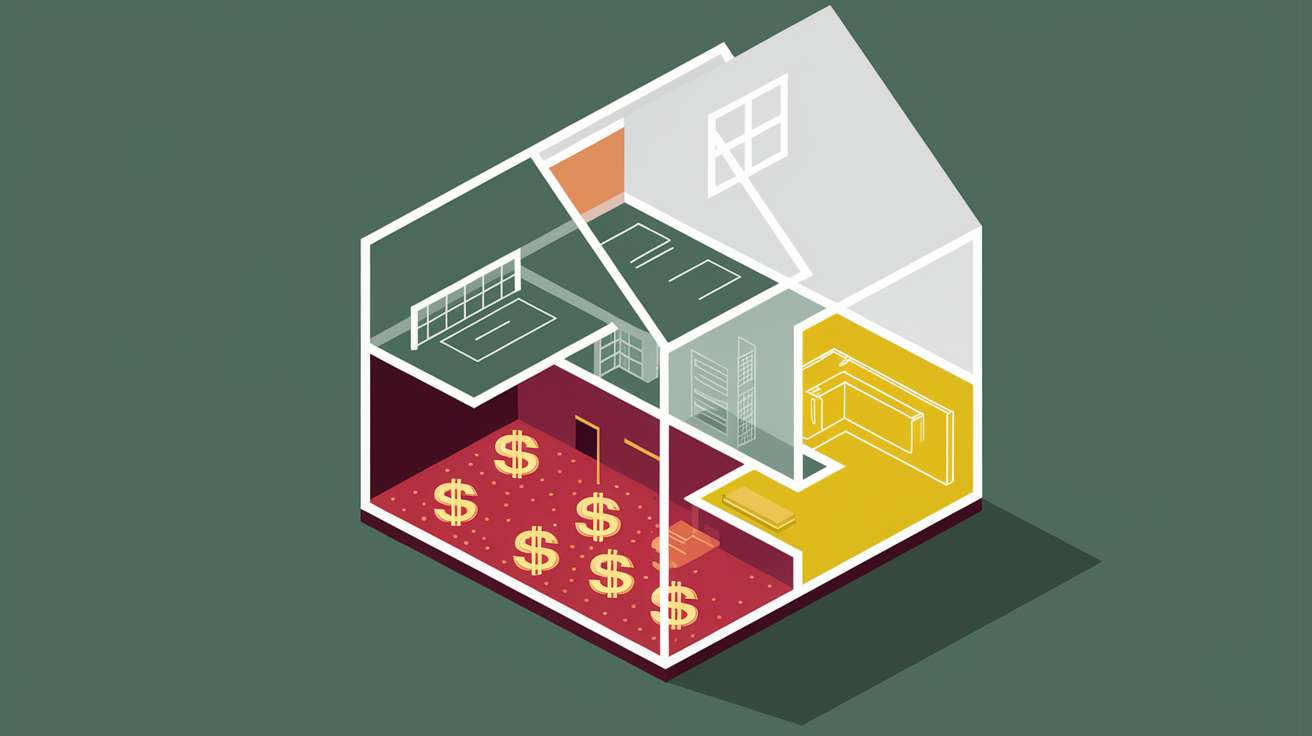
Most ceiling leak repairs cost between $300 and $2,500, but here’s the tricky part: the water stain you see is rarely the full story. That small brown circle on your ceiling might mean wet insulation, soaked framing, or water that’s been running sideways for days before gravity finally pulled it through. The real cost depends on what’s happening behind the drywall, not just what you can see. This guide breaks down actual pricing by damage severity, leak source, and what drives repair costs up or down so you know what you’re really paying for.

What You’ll Pay to Fix a Leaking Ceiling: Price Ranges and Estimates

Ruw3Kc5uTIayZnpqyH9EbQ

Damage Severity Price Range What’s Included
Minor $300 to $800 Drying, small patch repairs, repainting, no structural work
Moderate $800 to $2,500 Drywall replacement, water source repair, mold treatment, refinishing
Severe $2,500 to $10,000+ Structural repairs, ceiling joist replacement, insulation removal, large-area reconstruction

Most homeowners pay somewhere between $300 and $1,200 to fix a ceiling leak, with the national average landing around $700. If you caught the problem early and the stain’s still small, you’re looking at the lower end. But if the ceiling’s sagging or the leak ran for days, expect to climb toward those higher numbers fast.

You’re looking at $50 to $100 per square foot for repairs, and that includes labor, materials, and the finish work that makes it look like nothing happened. Labor alone runs $50 to $100 per hour. The final bill depends mostly on how bad the damage got, what your ceiling’s made of (drywall costs less than plaster), and whether you need actual structural fixes to ceiling joists or framing.

Cost Factors That Drive Up Ceiling Leak Repair Expenses

s6aOzUGAQ22Iv2PWyZLw-g

The size of the damaged area matters more than anything. A two-foot water stain needs less drywall, less labor, and less paint than a ten-foot section that’s buckled and soft to the touch. Bigger repairs mean more materials and more time. It adds up quick.

Labor pricing splits two ways. General repair work (drywall, finishing, painting) runs $50 to $100 per hour. Specialized plumbing work ranges from $45 to $200 per hour depending on what’s leaking and how hard it is to reach. If your plumber needs to open walls or squeeze into tight crawl spaces, you’re hitting the higher end.

Ceiling material type changes everything. Standard drywall is your most economical choice at $50 to $100 per square foot for replacement and finishing. Plaster costs 30% to 50% more because fewer contractors know how to work with it properly, and the material itself takes different skills and more time to match existing textures.

Here’s what actually goes into fixing a ceiling leak:

  1. Finding and fixing whatever’s causing the water (plumbing, roof, HVAC)
  2. Water extraction with pumps or wet vacs
  3. Drying the area using industrial fans and dehumidifiers
  4. Removing damaged stuff (drywall, insulation, compromised framing)
  5. Installing new materials, matching texture, priming, and painting so it blends with what’s already there

Hard-to-reach spots add time and equipment costs. Vaulted ceilings, cathedral spaces, or spots above staircases need scaffolding or specialized lifts. Tight attic crawl spaces slow everything down. Accessibility challenges can add 20% to 40% to labor costs compared to a standard eight-foot flat ceiling in an open room.

And finishing isn’t just slapping on paint. Painting and texturing add $150 to $600 depending on ceiling size, how complex the texture pattern is, and whether you need a precise match to the rest of the room. Popcorn texture, knockdown patterns, or hand-troweled finishes take more time than smooth drywall. Getting the new section to blend invisibly with 20-year-old paint requires skill and the right materials.

Water contamination level and structural damage drive costs up fast. If the leak soaked ceiling joists or roof framing for weeks, those components might need reinforcing or total replacement. Structural work pushes projects past $2,500 quickly. Clean water from a supply line is one thing. Water that sat stagnant or came through a roof with organic debris needs more cautious handling and disposal.

Identifying the Leak Source: Detection and Plumbing Repair Costs

Yw3vBC1GQ7yvBZ1kFOgH5A

You’ve got to find and fix the water source before any ceiling repair begins. If water’s still coming in, patching the ceiling is pointless. The new drywall will just get soaked again, and you’ll pay twice for the same work.

Plumbing repairs range from straightforward $100 fixes to complex $4,000 replacements. The average plumbing repair runs about $275. Simple problems like a loose connection under a sink or a worn wax ring under the toilet sit at the lower end. Major pipe failures inside walls or under concrete slabs climb toward the upper range.

Common plumbing leak repairs and what they cost:

P-trap issues: $100 to $150. Loose connections, worn gaskets, easy access under sinks.

Toilet wax ring replacement: $100 to $200. Straightforward fix, toilet removal and reinstallation.

Dripping faucets or shower valves: $150 to $300. Valve replacement, may need to open walls.

Cracked caulk or grout: $100 to $200. Resealing tub surrounds, shower pans.

Pipe bursts or major leaks: $500 to $4,000. Depends on location, accessibility, and how much pipe needs replacing.

Shower pan failures: $2,000 to $3,500 or more. Requires full shower rebuild in most cases.

Roof-Related Ceiling Leak Repair Costs

ynPyi9KARq2qQkaY9MQpHw

Roof leaks create dual expenses because you’re paying both a roofing contractor to fix the exterior problem and a repair team to handle the interior ceiling damage. This combination often costs more than plumbing-related leaks since roof work involves accessing elevated areas with safety equipment and specialized materials.

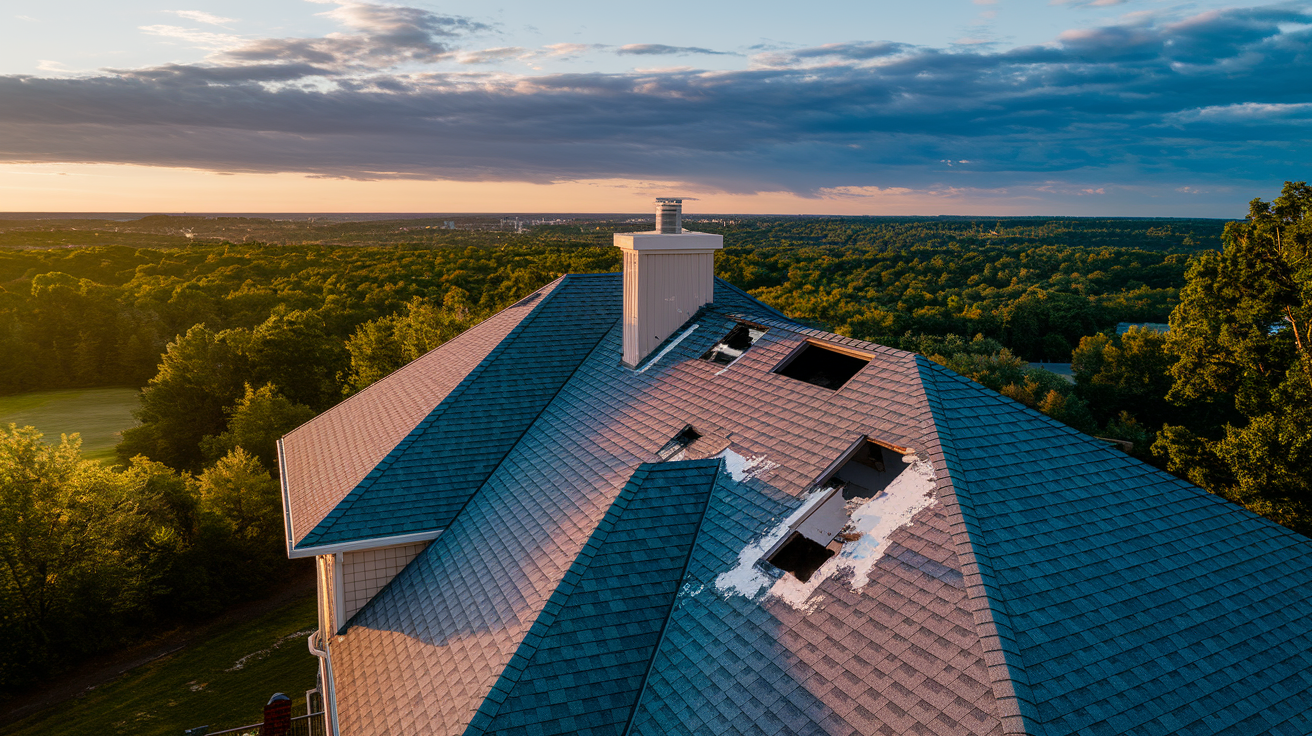
Common roof problems that cause ceiling leaks include damaged or missing shingles, failed flashing around chimneys or vents, ice dam damage in cold climates, and membrane failures on flat roofs. Each of these breaks down the water barrier that keeps weather outside. Once water finds a path through the roof deck, it follows rafters and insulation until gravity pulls it through your ceiling. For guidance on addressing roof-related water intrusion, see our detailed roof leak repair resource.

Roof repairs typically cost significantly more than simple plumbing fixes, and most roofing materials need replacement every 20 to 30 years depending on the type installed. Age becomes a major factor in repair versus replacement decisions. If your roof is 18 years old and failing in multiple spots, patching one leak might not make financial sense when the whole system’s near the end of its lifespan.

Additional Expenses: Mold Remediation and Water Extraction

rlVXAMSvTr6aiMSOBmsisQ

Water extraction and drying services cost $4 to $7 per square foot and must happen before any reconstruction begins. This isn’t optional. Professionals use industrial pumps, wet vacuums, air movers, and commercial dehumidifiers to pull moisture out of materials that can be saved and prepare the area for safe repairs.

The EPA recommends thorough drying within 24 to 48 hours of water exposure to prevent mold growth. That’s a tight window. Mold can start forming within that same timeframe if conditions are right (dark, damp, organic material present). Speed matters here. Drying takes a few days to a week for most situations, with equipment running continuously until moisture meters confirm the area’s dry enough to close back up.

Service Cost Range Timeframe
Water Extraction $4 to $7 per square foot Same day, usually 2 to 4 hours
Dehumidification and Drying Included in extraction cost 3 to 7 days with equipment running
Mold Remediation $500 to $6,000 1 to 5 days depending on extent

Mold remediation is a separate line item from basic water damage repairs, running $500 to $6,000 depending on how much contamination spread and where it grew. Small surface mold on drywall sits at the lower end. Extensive growth inside wall cavities, on framing, or in HVAC systems pushes costs higher and requires containment barriers, air scrubbing, and disposal of contaminated materials.

Emergency Response and After-Hours Ceiling Leak Repair Pricing

DymA6TbZSqySv8bNmkjp3g

Emergency calls outside regular business hours cost an extra $100 to $200 on top of standard service rates. That premium covers nights, weekends, and holidays when most contractors would rather be home. If you’re calling at 2 a.m. because water’s pouring through the ceiling, expect to pay for the urgency.

Emergency response makes sense when you’re dealing with active dripping, visible sagging or bulging in the ceiling, water pooling on the floor, or dark brown or black staining that indicates serious structural damage. These situations get worse by the hour. Water doesn’t stop on its own, and gravity keeps pulling it into places it shouldn’t go.

Preventing additional damage often justifies the emergency premium versus waiting until Monday morning. If waiting another 12 hours means the ceiling collapses or water spreads into three more rooms, that $150 emergency fee might save you $1,500 in extra repairs. The math makes sense when you’re facing active water intrusion that’s spreading.

DIY Ceiling Leak Repairs Versus Professional Service Costs

3C-zYGHsRveEKCxSfwI50A

DIY ceiling leak repair only works for very minor damage that you caught immediately. We’re talking areas smaller than two feet across, no sagging, no musty smell, and the leak source already fixed and confirmed dry. If you’re looking at anything beyond a surface water stain on otherwise solid drywall, professionals should handle it.

You’ll save on labor costs by doing it yourself, maybe $200 to $400 depending on the scope. But the risks of improper repair include hidden moisture that grows mold, missed structural damage that gets worse over time, and cosmetic work that doesn’t match or starts failing in six months. Those mistakes can double or triple your costs when you eventually call someone to fix both the original problem and your attempted repair.

When DIY ceiling leak repair is appropriate:

Leak source is already repaired and confirmed stopped. Affected area is under 2 square feet. No sagging, soft spots, or visible mold. Caught within hours of the leak starting. You have the right tools and materials to match texture and paint.

Professional ceiling leak repair services justify the $200 to $500 minimum through:

  1. Leak source identification and repair (finding what caused it, not just patching symptoms)
  2. Water extraction using commercial equipment
  3. Drying and dehumidification to prevent mold (moisture meters confirm when it’s actually dry)
  4. Damaged material removal including drywall, insulation, and compromised framing
  5. New material installation with proper fastening and sealing
  6. Finishing work including texture matching, priming, and paint blending

Professional service ensures proper drying, prevents mold growth through verified moisture levels, includes structural assessment for hidden damage, and typically comes with warranty protection. For comprehensive information on the full scope of professional water damage services beyond simple ceiling patching, review our water damage repair guide. That warranty matters. If the repair fails or mold shows up two months later, you’re covered. With DIY work, you’re paying again out of pocket.

Insurance Coverage Impact on Ceiling Leak Repair Costs

Q7yI1h2qT7qXBGWgSHTn6w

Homeowners insurance typically covers sudden and accidental damage like burst pipes, appliance hose failures, or storm damage that punches through the roof. These are events you couldn’t predict or prevent through normal maintenance. The policy treats them as covered perils, meaning they’ll pay for both the water source repair and the resulting ceiling damage.

Gradual leaks from poor maintenance, aging materials, or ignored problems don’t get covered. If a pipe’s been dripping for months and you didn’t fix it, or the roof’s been missing shingles for two years and you didn’t address it, insurance will likely deny the claim. They expect homeowners to maintain their property and address problems before they cause major damage.

Deductibles matter when deciding whether to file a claim for ceiling leak repairs under $1,000. If your deductible is $1,000 and the repair costs $900, filing doesn’t help you financially. Plus, claims can increase future premiums even if the payout is small. Sometimes paying out of pocket for minor repairs keeps your insurance costs lower over time.

Documentation becomes critical if you’re filing a claim. Take timestamped photos of the damage as soon as you discover it. Get a professional assessment that identifies the cause and documents the extent of damage. Insurance adjusters need clear evidence showing when the damage occurred, what caused it, and why it qualifies as sudden and accidental. Most policies cover water damage cleanup and drying, but many have limitations on mold remediation coverage, sometimes capping it at $5,000 or $10,000 regardless of actual costs. Verify your specific policy details before assuming full coverage.

Regional and Geographic Pricing Variations for Ceiling Repairs

Ocgw6nL_RQCRAhO_dUmRhQ

Urban areas consistently have higher labor rates than rural locations. A ceiling leak repair that costs $600 in a small town might run $900 to $1,100 in a major city. The difference comes from higher overhead costs, increased demand for contractors, and the general cost of doing business in metropolitan areas where everything from parking to permits costs more.

Regional cost of living, contractor availability, and local building code requirements all affect pricing. Coastal cities and high-cost areas like San Francisco, New York, or Seattle show labor rates 30% to 50% higher than the national average. States with strict licensing requirements or areas prone to natural disasters often have more expensive insurance requirements for contractors, which gets passed to customers.

While the national average sits at $700 for ceiling leak repairs, homeowners in high-cost metropolitan areas may see prices 20% to 40% higher, pushing typical repairs to $850 to $1,000. Rural locations often see costs 15% to 25% lower than the national average, with comparable repairs running $525 to $600. The work’s the same. The location determines how much you pay for it.

Hidden and Unexpected Costs in Ceiling Leak Repairs

CQ0g-rIESB2gNY_RWRJL8A

Opening up a damaged ceiling often reveals problems that weren’t visible during the initial inspection. What looks like a small water stain from below might hide soaked insulation, compromised wiring, or structural damage to ceiling joists that only becomes obvious once you cut into the drywall.

Structural issues like compromised ceiling joists or roof framing require reinforcement or replacement and push costs beyond $2,500 fast for extensive damage. If joists have been wet for weeks or months, wood rot weakens their load-bearing capacity. Engineers sometimes need to assess whether reinforcement is enough or if full replacement is required for safety. That engineering consultation adds $300 to $600 before repair work even starts.

Older homes built before the 1980s may contain asbestos in ceiling materials, requiring specialized removal at $400 to $500 for small areas or $3 to $7 per square foot for larger sections. This isn’t optional. Federal law requires certified asbestos abatement contractors to handle removal, and you can’t proceed with repairs until hazardous materials are properly removed and disposed of.

Common hidden costs discovered during ceiling leak repairs:

Electrical work and rewiring if water damaged junction boxes or fixtures ($200 to $800). Insulation replacement throughout the affected area ($1.50 to $3 per square foot). Structural reinforcement of ceiling joists or rafters ($500 to $2,000). Permit fees for extensive work requiring inspections ($50 to $300). Demolition and disposal fees for water-damaged materials ($100 to $400). Asbestos testing and removal in older homes ($400 to $7 per square foot).

Getting Accurate Contractor Quotes and Repair Estimates

Get at least three detailed written estimates that break down all cost components separately. A single lump-sum number that says “$1,200 for ceiling repair” tells you nothing about what you’re paying for. You need to see line items for water removal, demolition, materials by type and quantity, labor hours and rates, and finishing work.

Every ceiling leak repair estimate should itemize:

Water extraction costs (equipment, labor, disposal). Demolition and removal costs (cutting out damaged materials, protecting surrounding areas). Materials by type and quantity (drywall sheets, insulation, paint, primer, texture compound). Labor hours and rates (separate plumbing from general repair if both are needed). Finishing work including texture matching and paint (this is often 30% of the project cost). Permit fees if required (jurisdictions vary on what triggers permit requirements). Disposal and cleanup fees (dumpster rental, hauling damaged materials, final cleanup).

IICRC certification indicates contractors have specific water damage restoration training and follow industry standards for drying, moisture testing, and mold prevention. This matters more for ceiling leaks than for general handyman work because improper drying creates problems that show up months later. Ask if the company or specific technicians hold IICRC Water Damage Restoration Technician certification.

Avoid contractors who demand large upfront deposits exceeding 50% of the total project cost, use high-pressure sales tactics like “this price is only good today,” refuse to provide written contracts with specific scope details, or can’t produce current proof of licensing and liability insurance. These are red flags that often lead to incomplete work, cost overruns, or contractors who disappear mid-project.

Preventing Future Ceiling Leaks and Maintenance Costs

Prevention costs a fraction of emergency ceiling repairs. Spending $200 to $400 annually on routine maintenance can prevent $2,000 to $5,000 in leak damage and emergency repairs. The math strongly favors staying ahead of problems rather than reacting after water’s already coming through your ceiling.

Preventive maintenance tasks with recommended frequencies:

Clean gutters twice yearly minimum, more often if you have nearby trees that drop leaves ($150 to $300 per cleaning). Annual attic inspection for moisture signs, roof leaks, or condensation problems ($100 to $200 for professional inspection). Roof inspection every 3 to 5 years to catch damaged shingles, failed flashing, or membrane issues before they leak ($150 to $300). Plumbing system checks for corrosion, loose connections, and aging supply lines ($100 to $200 annually). HVAC drain line maintenance quarterly to prevent condensation backups (DIY or included in HVAC service contracts). Pipe insulation in cold climates to prevent freeze-related bursts ($2 to $4 per linear foot, one-time cost). Annual caulk and flashing inspection around tubs, showers, and roof penetrations (DIY or $100 to $150 professional check). Proper attic ventilation maintenance to prevent condensation that mimics roof leaks (verify during annual inspection).

Routine maintenance catches small problems before they become expensive emergencies. A $150 roof inspection finds damaged flashing that costs $200 to repair. Skip that inspection and the flashing fails completely, letting water run into your attic for months until you’re facing a $3,000 ceiling repair plus mold remediation. The inspection and preventive repair together cost less than 15% of the emergency repair.

Long-term costs favor prevention dramatically. Roof systems need replacement every 20 to 30 years depending on material type. Plumbing systems typically need updates every 50 to 70 years. Staying on top of maintenance extends those lifespans and prevents surprise failures that cause ceiling damage while you’re figuring out what went wrong.

Final Words

Ceiling leak repair cost depends mainly on how fast you catch the problem and how much damage already happened.

Minor stains might cost $300 to $800. Severe structural damage can push past $10,000.

The key is acting quickly. Water doesn’t wait, and every day adds cost.

Get at least three detailed written estimates. Make sure they cover leak source repair, water extraction, drying, material replacement, and finish work that matches your existing ceiling.

Most homeowners spend around $700 to get their ceiling dry, safe, and looking right again.

FAQ

How expensive is it to fix a leaking ceiling?

Fixing a leaking ceiling costs $300 to $800 for minor damage, $800 to $2,500 for moderate repairs, and $2,500 to $10,000 or more for severe structural damage. The national average sits at approximately $700, with most jobs running $300 to $1,200 depending on damage severity and ceiling material type.

Will insurance cover a ceiling leak?

Insurance typically covers ceiling leaks from sudden and accidental damage like burst pipes or storm damage, but not gradual leaks from poor maintenance or aging materials. Coverage depends on your specific policy, the damage cause, and your deductible amount. Filing claims for repairs under $1,000 may not make financial sense since claims can increase future premiums.

What to do if water leaks through your ceiling?

If water leaks through your ceiling, shut off the water source if possible, move valuables away from the affected area, and place buckets under active drips. Contact a professional immediately for leaks causing sagging, dark staining, or active water accumulation. Document damage with photos for insurance purposes and avoid touching electrical fixtures near wet areas.

How much does Home Depot charge for water damage ceiling repair?

Home Depot contractors typically charge $50 to $100 per square foot for ceiling water damage repair through their referral network, with total jobs ranging from $300 to $1,200. Final costs depend on damage severity, ceiling material type, and whether structural repairs are needed beyond basic drywall replacement and finishing work.

When should I call a professional for a ceiling leak instead of doing DIY repairs?

You should call a professional for ceiling leaks involving areas larger than two square feet, any sagging or bulging, visible mold growth, or unknown water sources. Professional help is required when structural damage to joists appears, electrical wiring runs through affected areas, or moisture has spread beyond the visible stain. DIY only works for very minor surface staining caught immediately with the leak source already fixed.

How long does it take to repair a leaking ceiling?

Repairing a leaking ceiling takes 3 to 7 days for most jobs, with drying time being the longest component requiring several days before repairs can proceed. Minor repairs may finish in 1 to 2 days after drying, while severe damage requiring structural work can take 2 to 3 weeks including proper moisture removal and finish work.

What increases the cost of ceiling leak repairs the most?

Mold remediation adding $500 to $6,000, structural damage requiring joist replacement beyond $2,500, and hard-to-reach locations like vaulted ceilings increase costs most significantly. Plaster ceilings cost 30% to 50% more than drywall repairs, and complex plumbing fixes ranging from $500 to $4,000 for pipe bursts dramatically affect total expenses.

Does mold always develop after a ceiling leak?

Mold can appear within 24 to 48 hours of water exposure if moisture isn’t properly removed. The EPA recommends thorough drying within 24 to 48 hours to prevent mold growth. Professional water extraction and dehumidification costing $4 to $7 per square foot helps prevent mold when applied quickly after leak discovery.

How do I know if my ceiling leak damaged the structure?

Ceiling leak structural damage shows as sagging or bulging areas, visible warping of ceiling joists in attic spaces, and soft spots when gently pressing the ceiling surface. Dark brown or black staining, musty odors, and cracks spreading from the wet area indicate serious damage requiring immediate professional assessment beyond cosmetic repairs.

What’s the difference between emergency and regular ceiling leak repair pricing?

Emergency ceiling leak repair adds $100 to $200 to standard service rates for after-hours, weekend, or holiday calls. Emergency response is justified when active dripping occurs, ceilings sag or bulge, or dark staining indicates structural compromise requiring immediate attention to prevent further damage that could double repair costs.

Smoke Damage Cleaning Walls: Restore Your Home After Fire

0

Think a quick wipe will make smoke-stained walls disappear? Not usually.
Soot and oily smoke can bond to paint and leave a musty smell if you clean the wrong way.
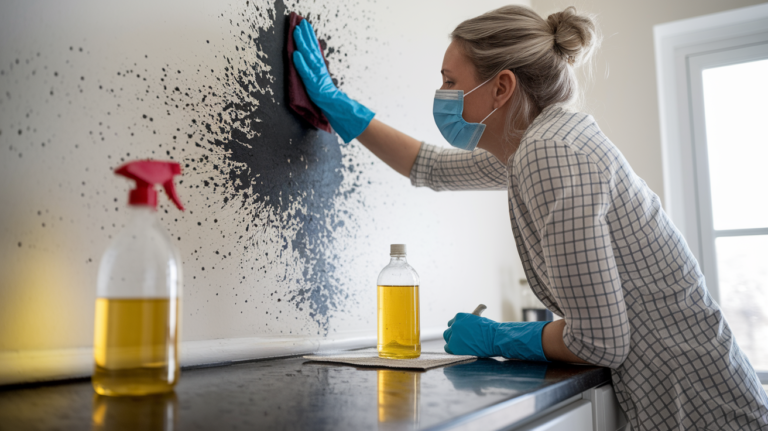
This post gives a clear, step-by-step method for cleaning walls safely—what to do first, which supplies work, and how different wall types change the approach.
You’ll also learn how to stop more damage, when to seal or replace drywall, and what to document for insurance.
Practical, fast, and focused on real repairs.

Immediate Method for Cleaning Smoke Residue from Walls

DX1uQIuRTfG0gox6eNKDvQ

Start by protecting your floor with drop cloths or old newspapers. Put on nitrile gloves and an N95 respirator before you touch anything. Open windows and turn off the HVAC to stop soot from spreading through vents.

Before you add water, you need to remove loose soot. Use a dry chemical sponge and wipe downward in long, straight strokes. Don’t scrub. Don’t wet the sponge. If the sponge gets clogged with soot, fold it to a clean side or grab a new one. Once you’ve lifted the dry soot, you’re ready for wet cleaning.

Mix your cleaner and work from the bottom up to prevent streaking. Here’s the fastest method using common supplies:

  1. Fill a bucket with one gallon of hot water and add a quarter cup of TSP or TSP substitute. Wear gloves and goggles.
  2. Dip a soft sponge into the solution and wring it until damp, not dripping.
  3. Start at the baseboard and wipe upward in small sections, about three feet wide.
  4. Rinse the sponge in clean water after each pass and wring it again.
  5. Once the section is clean, wipe it down with a second sponge soaked in plain water to remove cleaner residue.
  6. Dry the wall immediately with a microfiber cloth or clean towel.

For lighter soot, you can substitute one cup of white vinegar per gallon of warm water instead of TSP. For greasy cooking smoke, add two tablespoons of liquid dish soap or a commercial degreaser to the vinegar mix.

Most walls will look noticeably cleaner after one pass. If you still see staining or a yellow tint, let the wall dry for at least two hours and repeat the cleaning. Stubborn discoloration usually means soot has soaked into the paint or drywall and will require a stain blocking primer before repainting.

Essential Supplies for Removing Smoke and Soot from Walls

GJu4PBv7THSPFwL-VSVtlw

You need the right tools to lift soot without smearing it deeper into the wall. Chemical dry cleaning sponges are designed to grab soot particles without water. They look like dense foam blocks and they work better than regular sponges because they don’t smear. Once a side is saturated with soot, you fold or cut to a clean surface.

Microfiber cloths help with the final rinse and drying steps because they don’t leave lint. TSP and degreasers break down the oily, sticky residue left by smoke, especially from cooking or low oxygen fires. Protective gear keeps you safe from skin irritation and breathing in fine soot particles that can reach deep into your lungs.

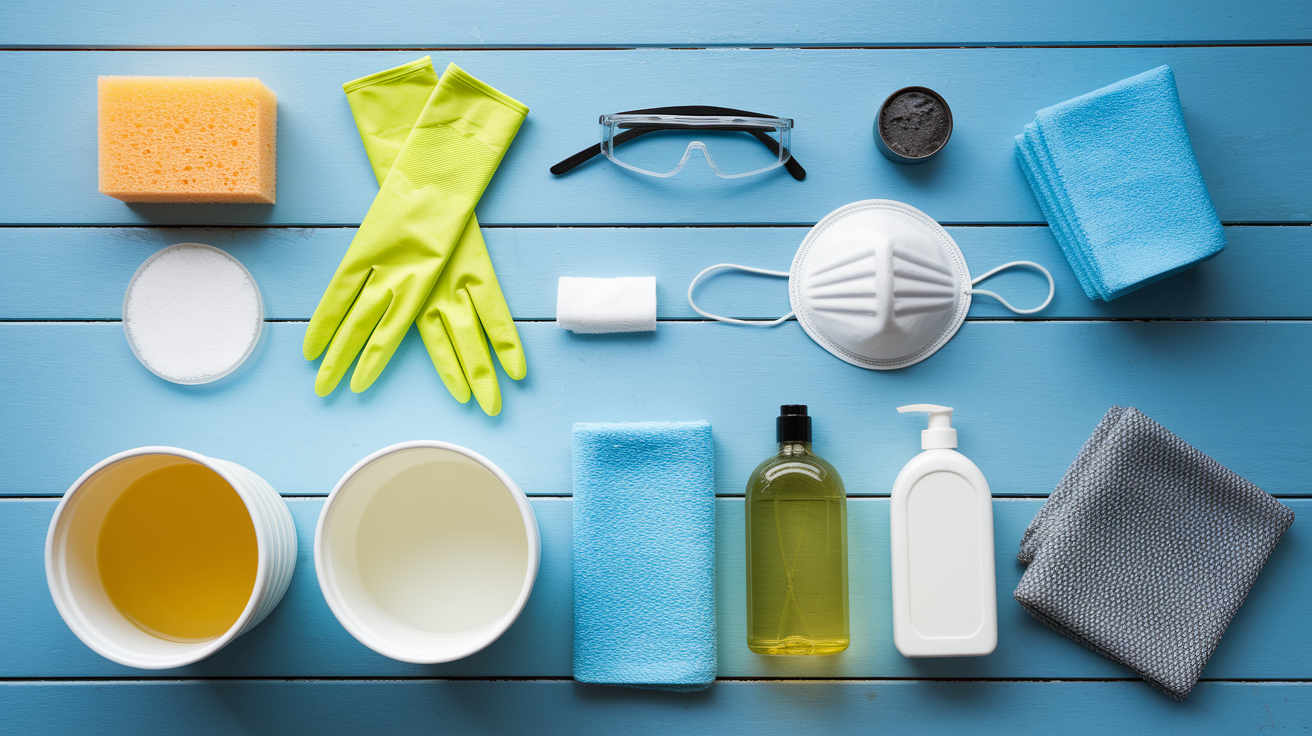
Here’s what you need before you start:

  • N95 or P100 respirator
  • Nitrile gloves
  • Safety goggles
  • Chemical dry cleaning sponge (also called a soot sponge)
  • TSP or TSP substitute
  • White distilled vinegar
  • Liquid dish soap or degreaser
  • Two buckets (one for cleaner, one for rinse water)
  • Microfiber cloths or lint free towels
  • Drop cloths or old newspapers
  • Step ladder (if cleaning above shoulder height)

How Wall Materials Affect Smoke Cleaning Methods

W-Q8aXcWTweGiTKLL6Hx9w

The type of wall surface changes how much soot sticks and what you can use to remove it. Flat paint and bare drywall are porous, so soot soaks in fast. Semi gloss and gloss finishes resist staining better because the surface is sealed. Wallpaper and brick both need gentler handling to avoid permanent damage.

Drywall and Flat Paint Walls

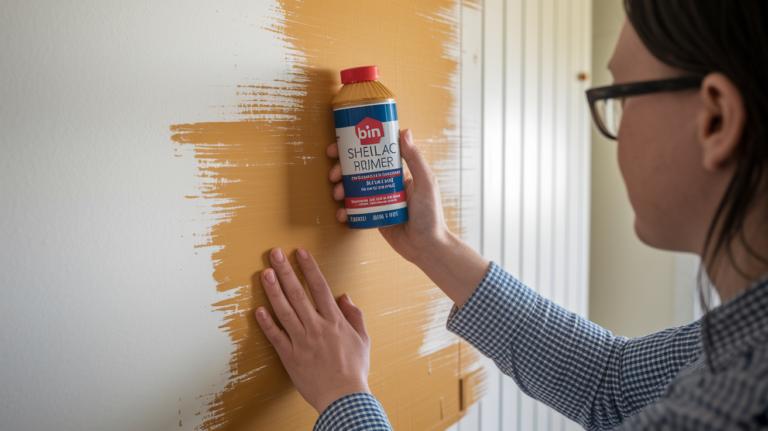
Flat or matte paint absorbs smoke residue like a sponge. If the soot has been sitting for more than a few days, it may have bonded to the paint. Start with the dry sponge, then test a small patch with TSP solution. Scrub lightly with a soft sponge and rinse immediately. If staining remains after two cleaning passes, the drywall paper or paint is too saturated. You’ll need to seal it with a shellac based primer and repaint. Expect one coat of primer and one to two coats of finish paint to cover smoke stains on flat finish walls.

Painted Walls with Semi Gloss or Gloss Finish

Semi gloss and gloss paints clean easier because the surface is harder and less porous. Use the same dry sponge first, then clean with a vinegar solution or TSP mix. You can apply slightly more pressure with the sponge on gloss finishes, but avoid scrubbing in circles because it can dull the sheen. Rinse thoroughly and dry with a microfiber cloth. Most gloss and semi gloss walls will return to their original appearance after one cleaning if the smoke exposure was light to moderate.

Wallpaper

Don’t soak wallpaper. Water will loosen the adhesive or cause the paper to bubble and peel. Use a dry chemical sponge and wipe gently in the direction of the seams. For light nicotine or cooking smoke, mist the surface lightly with a vinegar water spray (one part vinegar to three parts water) and blot immediately with a dry cloth. Don’t let moisture sit. If the wallpaper smells like smoke after dry cleaning and light misting, the soot has soaked through the paper and into the adhesive. You’ll need to remove and replace the wallpaper to eliminate the odor.

Brick and Masonry Walls

Brick is porous and rough, so soot embeds into the surface texture. Start with a stiff bristle brush or a dry sponge to loosen surface residue, then vacuum with a brush attachment. Mix a stronger degreaser solution or use TSP at half a cup per gallon of hot water. Scrub in small sections with a stiff nylon brush, rinse with clean water, and blot dry. Heavy soot on brick often requires two or three cleaning passes. If odor remains after cleaning, seal the brick with a masonry sealer or odor blocking primer designed for porous surfaces.

Safety Measures When Dealing with Smoke Damage

ayyYmOL6RsuBsK0J5LbAWQ

Wear an N95 or P100 respirator every time you clean smoke residue. Soot particles are small enough to enter your lungs and can cause breathing problems, bronchitis, and long term respiratory damage. Nitrile gloves protect your skin from TSP, degreasers, and the oils in soot that can irritate or burn. Safety goggles keep soot and cleaning solution out of your eyes, especially when you’re working on ceilings or above your head.

Open all windows and use box fans to create cross ventilation before you start. Point one fan out the window to push contaminated air outside. Turn off your HVAC system so soot doesn’t get pulled into ducts and spread to other rooms. If you’re using TSP or strong degreasers, never mix them with bleach or ammonia because the combination creates toxic fumes. Work in small sections and take breaks outside every thirty to forty minutes to give your lungs a rest.

Deep Cleaning Methods for Heavy Smoke Residue

0Da5ZS1nRVqAtqMXsEtuUA

Heavy smoke from a structural fire or prolonged exposure leaves thick, oily soot that standard cleaning won’t remove. You’ll see a greasy film that smears when wiped, and the smell stays even after washing the walls. This type of damage usually comes from low oxygen fires or burning synthetic materials like foam, plastics, or treated wood. The residue penetrates paint and drywall, so surface cleaning alone won’t fix it.

For deep set soot, you need stronger products and repeated applications. Start with TSP at half a cup per gallon of hot water. Clean one three foot section at a time, let it sit for two minutes, scrub gently with a soft brush, then rinse and dry. If staining persists, apply a commercial degreaser designed for fire restoration (available at hardware or janitorial supply stores). After cleaning, you’ll likely need to seal the wall with an odor blocking shellac or oil based primer before repainting. Some walls will require complete paint removal or drywall replacement if the soot has soaked through to the gypsum core.

Here are the most effective deep cleaning techniques for stubborn smoke damage:

  • Apply TSP solution twice, allowing five minutes of dwell time between passes, then rinse thoroughly with clean water.
  • Use a steam cleaner with a microfiber pad attachment to lift embedded soot from textured or porous surfaces without excessive scrubbing.
  • Spray a commercial smoke residue remover (citrus based or enzyme formulas work well) and let it penetrate for ten minutes before wiping.
  • Seal cleaned walls with one coat of shellac based primer to lock in remaining odor and stains before applying finish paint.
  • Replace drywall sections if soot has soaked through the paint and paper facing or if the gypsum core is discolored, charred, or crumbling.

Eliminating Smoke Odor After Wall Cleaning

tv_krxk3QmuDKrAp_0uj7w

Smoke odor sticks around because soot particles are trapped inside porous materials like drywall, wood trim, and unpainted surfaces. Even after you clean the visible residue, microscopic soot remains in the wall texture, grout lines, and anywhere moisture or heat caused the smoke to penetrate deeper. If the room still smells like smoke forty eight hours after cleaning, the odor is embedded and surface cleaning won’t remove it.

Ventilation helps but it’s not enough on its own. You need to neutralize the odor molecules or seal them inside the wall. Activated charcoal and baking soda absorb airborne odor particles but they won’t pull smoke residue out of paint or drywall. For that, you need chemical neutralizers or a blocking primer that seals the smell inside the surface.

Here are five methods to remove smoke odor after cleaning the walls:

  1. Run a HEPA air purifier continuously for seventy two hours to filter airborne soot and odor particles. Place the unit in the center of the room and keep windows closed during operation.
  2. Set bowls of activated charcoal or baking soda in the room and replace them every twenty four hours for three to five days. Use at least two cups per average sized bedroom.
  3. Spray walls lightly with an enzyme based odor neutralizer designed for smoke (not a masking spray). Let it dry completely and repeat if the smell persists.
  4. Apply one coat of shellac based or oil based odor blocking primer to all cleaned walls and ceilings before repainting. This seals residual soot and stops odor from bleeding through new paint.
  5. For severe odor, hire a professional to perform thermal fogging or ozone treatment. Ozone generators are effective but produce hazardous gas and must be used only by trained technicians with the home fully evacuated.

When to Call Professional Smoke Damage Restoration

miCIjs-7QLmnRXcjftm-nA

You should call a professional if the smoke came from a structural fire, if soot is inside your HVAC ducts, or if odor remains after seventy two hours of cleaning and ventilation. Professionals use industrial HEPA vacuums, commercial grade air scrubbers, and stronger degreasing agents than you can buy at a hardware store. They also have moisture meters and thermal imaging cameras to find hidden soot behind walls, inside ducts, and under flooring.

Heavy smoke damage often includes water damage from firefighting, which creates a separate restoration problem. If drywall is wet, charred, or crumbling, or if electrical outlets or fixtures were exposed to heat or water, DIY cleaning isn’t safe. Professional crews will document the damage with photos and moisture readings, remove unsalvageable materials, clean and deodorize what can be saved, and rebuild or repaint the affected areas. They’ll also coordinate with your insurance adjuster and provide detailed scopes and invoices for your claim. Expect full restoration work to take several days to weeks depending on the size of the affected area and the extent of structural repairs needed.

Cost Comparison: DIY Smoke Cleaning vs Professional Restoration

W2FWxcuvTuyBiaD7jwTHhg

DIY cleaning saves money up front but it only works if the smoke damage is light and limited to a small area. If you already own a vacuum and basic tools, you’ll spend between twenty and sixty dollars on cleaning supplies for one average sized room. That includes TSP or degreaser, sponges, gloves, a respirator, and a couple of chemical dry cleaning sponges. If you need to buy a HEPA vacuum, add one hundred to four hundred dollars.

Professional smoke damage restoration costs more but includes labor, industrial equipment, and guaranteed odor removal. Pricing depends on the size of the affected area, the type of smoke, and whether reconstruction or repainting is required. A single room with light surface soot might cost three hundred to six hundred dollars for cleaning and deodorizing. Whole home restoration after a structural fire can run several thousand dollars or more, especially if drywall replacement, HVAC cleaning, and odor blocking primers are needed.

Method Cost Range Notes
DIY supplies (one room) $20–$60 Includes TSP, sponges, gloves, respirator, drop cloths. Does not include vacuum or primer.
DIY with HEPA vacuum purchase $120–$460 Add cost of HEPA vacuum if you don’t already own one. Vacuum is reusable for future projects.
Professional surface cleaning (per room) $300–$600 Light to moderate soot. Includes cleaning, deodorizing, and air scrubbing. Does not include repainting.
Professional full restoration (whole home or heavy damage) $2,000–$20,000+ Includes drywall replacement, HVAC cleaning, odor blocking, reconstruction, and repainting. Price varies by square footage and severity.

Final Words

You’re in the action: vent the room, stop any smoke source, and dry-wipe loose soot before wet cleaning.

Mix a TSP or vinegar solution, clean from bottom to top, and pick tools that match the wall, whether drywall, painted, wallpaper, or brick.

Use gloves and a mask, expect to repeat for heavy residue, and call a pro if soot, smell, or damage won’t quit.

For smoke damage cleaning walls, these steps clear most residue and odors and get you back to normal fast.

FAQ

Q: What can I use to clean smoke-damaged or smoker’s walls?

A: You can clean smoke-damaged walls with a dry-cleaning sponge, HEPA vacuum, then a degreasing solution like TSP or diluted white vinegar. Dry-wipe first, then wet-clean from bottom to top to avoid streaks.

Q: Will Kilz cover smoke damage?

A: Kilz will cover smoke damage on many surfaces by sealing stains and reducing odor when applied after thorough cleaning. Porous walls, heavy soot, or deep nicotine may need extra cleaning or professional treatment.

Q: How do you clean a house that has been smoked in for years?

A: Cleaning a house smoked in for years requires ventilating, HEPA vacuuming, dry sponges, repeated degreasing (TSP), washing walls, sealing with an odor-blocking primer, and replacing porous items like carpets or drapes.

Soot Damage Cleaning: Simple Steps to Restore Your Home

0

Think soot wipes off like regular dust? Try that and you’ll smear black powder deep into your walls, turning surface soot into permanent staining. Soot contains acidic compounds that etch into paint and drywall within hours, and touching it with water before removing the dry layer creates an oily mess that spreads instead of lifts. The good news: cleaning soot follows a clear order that works. Dry cleaning first using chemical sponges, then wet cleaning only where needed, then odor control, then a final check to make sure it’s actually gone. Skip steps or reverse the order and you’ll make it worse.

Complete Soot Cleaning Process: From Safety Setup to Final Restoration

VXTCzS0LQQ2B-TYrG7g8wA

The complete soot cleaning process comes down to six steps that build on each other: shut off your HVAC and get air moving, gear up with proper protection including respirator and gloves, lift away loose soot using dry chemical sponges working top to bottom, switch to wet cleaning only after dry work is done, tackle odors through ventilation and absorption, then inspect everything to make sure it’s actually clean. This order isn’t arbitrary. Each step protects the next one from creating worse problems. Jump straight to wet cleaning without removing dry soot first and you’ll smear that powder deep into surfaces, turning a fixable mess into permanent staining.

Soot breaks down into two types based on how the fire burned. High oxygen fire soot looks dry and powdery, almost like fine dust that brushes off until it touches water, then it smears everywhere. This type needs dry cleaning sponges and zero water contact until every loose particle is gone. Low oxygen fire soot feels greasy and sticky, leaving an oily film that grabs onto more dirt. This residue needs wet cleaning with high alkaline degreasers, but only after you’ve dealt with the dry layer first. Figuring out which type you’re dealing with determines your entire approach.

Speed matters. Within hours, acidic compounds in soot start etching into surfaces, discoloring paint, tarnishing metal, working their way into porous stuff like drywall and wood. Small jobs in one room with light surface soot work for DIY if you follow the right methods. Large scale damage hitting multiple rooms, heavy buildup, or contamination in your HVAC system needs professional fire damage restoration to prevent permanent damage and health risks from doing it wrong.

Essential Safety Equipment and Protective Measures for Soot Cleaning

BKex8iljRkmSe_vWeZicYQ

Soot particles contain toxic combustion byproducts. Carbon, acids, chemicals from burned synthetics. These particles get into your body through breathing contaminated air, touching your face with dirty gloves, or direct contact with skin and eyes. Extended exposure causes respiratory irritation, chronic bronchitis, aggravated asthma. In severe cases it contributes to coronary heart disease or cancer from accumulated toxin exposure.

N95 respirator minimum for light soot, P100 respirator for heavy contamination or tight spaces. Nitrile gloves extending past your wrists, doubled up for long sessions. Safety glasses or goggles with side shields keeping particles away from eyes. Long sleeve shirt and long pants made from tightly woven fabric, not loose knits that trap particles. Closed toe work boots or shoes you can clean or toss after the job. Disposable coveralls for heavy soot environments so you don’t contaminate your regular clothing and the rest of your home. Head covering like a disposable cap to keep soot out of your hair.

Open every window and door in the affected area before you start. Turn off your HVAC at the thermostat and the breaker to stop circulating soot particles through ductwork into clean areas. Set up fans blowing outward to create negative pressure that pulls contaminated air outside instead of pushing it deeper into your house. This ventilation setup needs to run continuously during all cleaning work.

Don’t touch surfaces with bare hands during your initial walkthrough. Soot transfers instantly to skin, then spreads to every surface you touch afterward. Doorknobs, light switches, your phone. Keep contaminated gloves in the work area and remove them before leaving, or you’ll track soot throughout your home.

Understanding Different Types of Soot and Smoke Residue Patterns

Ak3ZAvA4SgOYSh8ykjV3Tg

Soot forms when materials burn without enough oxygen to achieve complete combustion. Instead of turning entirely to ash and gas, carbon particles cluster together with partially burned material, creating the black residue that coats everything cooler than the fire itself. Different materials produce different soot types. Wood creates dry, powdery residue while plastics and synthetics leave greasy, sticky films. The oxygen available during burning determines whether soot stays dry or turns oily.

High Oxygen Fire Residue (Dry Soot)

High oxygen fires burn hot and fast, producing fine, powdery soot that looks like black dust. This residue comes from burning wood, paper, natural fabrics, other cellulose materials with plenty of air feeding the flames. Dry soot sits on surfaces without bonding deeply at first, making it easier to remove if you use the right method. It brushes off like powder when touched but smears instantly when exposed to moisture, spreading the stain and pushing particles into porous surfaces where they become nearly impossible to extract. Dry chemical sponges lift this residue without water, keeping it from becoming a permanent stain.

Low Oxygen Fire Residue (Oily Soot)

Low oxygen fires smolder slowly, producing thick, greasy soot that feels sticky and coats surfaces with an oily film. Smoldering synthetic materials like plastics, foams, rubber, polyester create this residue when they don’t get enough air to burn cleanly. The soot contains unburned oils and tars that bond to surfaces immediately and attract more dirt over time. Dry cleaning sponges can’t remove this greasy film. You need wet cleaning with high alkaline degreasers that break down the oil bonds. The challenge is removing the dry surface layer first before introducing moisture, or you’ll create a smeared mess that spreads across walls.

Protein Residue from Synthetic Materials

Protein residue forms when synthetic materials vaporize during fires, leaving nearly invisible deposits that discolor paint and release persistent odors. You often can’t see this residue until weeks later when yellow or brown stains appear on walls and ceilings. It requires specialized sealers that lock in the discoloration and odors before repainting, otherwise the stains bleed through new paint within days.

Most real world fires produce mixed residue requiring multiple cleaning methods applied in sequence. You’ll find dry soot on surfaces near natural materials and oily residue near plastics or foam, sometimes in the same room. Start with dry cleaning methods everywhere, then assess which areas need wet cleaning for remaining greasy films.

Required Cleaning Materials and Specialized Equipment for Soot Removal

nOUf_nKIReOyaeJ61oIFnw

Gather all materials before starting work so you don’t contaminate clean areas by walking back and forth. The cardinal rule: dry cleaning happens first, wet cleaning happens only after all loose soot is removed. Introducing moisture too early turns removable powder into permanent stains.

Material Type Specific Products Purpose
Dry cleaning tools Chemical sponges (dry cleaning sponges), utility knife Lifts dry soot without moisture; slice off soiled sides to expose clean sponge
Vacuum equipment Shop vacuum with HEPA filter, upholstery brush attachment Removes loose particles before wiping; HEPA filter prevents recirculating fine soot
Alkaline cleaners TSP (trisodium phosphate), dish soap, commercial degreaser Cuts through oily residue; mix few tablespoons per gallon hot water
Solvent cleaners Rubbing alcohol, white vinegar, paint thinner Dissolves sticky residue on non-porous surfaces like glass and metal
Absorption materials Baking soda, cornstarch, commercial absorbent powder Draws oils from carpets and fabrics before vacuuming
Application tools White cotton rags, microfiber cloths, cellulose sponges Applies cleaners without scratching; white cloths show when they’re saturated
Rinse and dry supplies Clean water buckets, terry cloth towels Removes cleaning product residue; pat dry method prevents smearing
Containment materials Plastic sheeting, painter’s tape, newspapers Protects floors from falling soot during ceiling and wall cleaning

Chemical sponges work through a vulcanized rubber compound that attracts and holds soot particles without moisture. These sponges last through extensive cleaning when maintained properly. Wipe until the surface gets loaded with soot, then slice off the dirty layer with a utility knife to expose fresh sponge underneath. Once a chemical sponge gets wet, it loses effectiveness permanently. Buy extras because you’ll need several for whole house cleaning.

HEPA vacuums matter because standard vacuum filters let fine soot particles pass through, blowing them back into the air you’re breathing. The upholstery brush attachment prevents grinding particles into surfaces. Hold the nozzle about one half inch away from walls and ceilings, letting suction pull particles off without direct scrubbing contact.

Tile, glass, sealed stone, and glazed surfaces tolerate water based cleaning. Wood, drywall, unsealed grout, electronics, and porous materials need dry only methods or minimal moisture application. When you must use liquid cleaners on these sensitive surfaces, apply product to your cloth rather than spraying directly, use minimal moisture, and dry immediately with clean towels.

Step by Step Cleaning Process for Walls and Ceilings with Soot Damage

oAbEzLS0RSq9riBGbYx_gQ

Clean ceilings first, then walls, then floors. Gravity pulls loose soot downward, so working top to bottom prevents contaminating surfaces you’ve already cleaned. Trying to clean walls first means ceiling soot falls onto your finished work, forcing you to clean the same wall twice.

Cover floors directly below your work area with newspapers or plastic sheeting weighted down at edges to catch falling soot without creating trip hazards. Remove or cover furniture to prevent transferring soot from your clothing.

Vacuum ceiling surfaces with your shop vacuum held one half inch away from the surface, using slow, overlapping passes. Never let the nozzle drag across soot or you’ll smear it. Work in sections small enough to complete without arm fatigue causing sloppy technique.

Wipe ceilings with a dry chemical sponge using light pressure and straight wiping motions, never circular scrubbing. Turn the sponge to a clean side after every few strokes. When all sides show soot buildup, slice off the contaminated layer with your utility knife. The sponge removes what vacuuming missed without spreading residue.

Repeat the vacuum and dry sponge process on walls, working from ceiling line downward in vertical strokes. Stop periodically to inspect your sponge. If it’s smearing rather than lifting, you’ve hit oily residue that needs wet cleaning later. Mark these spots mentally and move on with dry cleaning for now.

Test your wet cleaning solution in an inconspicuous spot like inside a closet or behind furniture. Wait five minutes to confirm it doesn’t damage paint or cause discoloration before applying to visible areas.

Mix high alkaline cleaner according to package directions, typically a few tablespoons of TSP or dish soap per gallon of hot water. Apply with a slightly damp sponge or cloth, working in small sections. Wipe in straight, downward motions, never circular scrubbing that spreads residue.

Rinse each cleaned section immediately with a cloth dampened in plain water to remove cleaning product residue. Cleaners left on surfaces attract dirt and create sticky films.

Pat surfaces dry with clean terry cloth towels immediately after rinsing. Standing moisture on drywall causes swelling and paint damage.

Scrubbing drives soot particles deeper into porous surfaces like drywall and textured paint. What looks like aggressive cleaning actually creates permanent staining by forcing carbon into microscopic pores. Light wiping pressure and proper product selection do more than hard scrubbing.

Test every cleaning solution before widespread use. Paint formulations vary. What works safely on one wall might strip paint or cause discoloration on another. Testing takes two minutes and prevents ruining entire rooms.

Remove light fixtures, ceiling fan blades, and register covers before cleaning surrounding surfaces. Soot hides on top of these items and falls off during cleaning, contaminating your finished work. Clean these items separately in sinks or outdoors, let them dry completely, then reinstall after all other cleaning is done.

Carpet and Upholstery Restoration Methods for Smoke Residue

cHIJnmDYQnSd3xNK-tJrw

Carpets and upholstery trap soot deep in fibers where standard cleaning can’t reach. The porous, textured nature of fabric makes it impossible to wipe clean like hard surfaces. You need absorption and extraction methods that pull contamination out rather than pushing it deeper.

Start by removing large soot pieces using a spoon edge or dull butter knife held at a shallow angle. Lift particles off without applying downward pressure that grinds them into carpet backing. Work slowly. This tedious step prevents turning surface soot into embedded staining.

Sprinkle baking soda or commercial absorbent powder liberally across the entire affected carpet area, creating a layer thick enough to coat fibers without seeing through to the carpet color underneath.

Let the powder sit for at least one hour, longer for heavy soot. The powder absorbs oils and moisture from soot particles, making them easier to vacuum out.

Vacuum slowly with your upholstery attachment using overlapping passes, emptying the vacuum canister frequently to maintain suction power.

Blot remaining spots with a white cloth dampened in rubbing alcohol or hydrogen peroxide diluted with three tablespoons warm water per cup of peroxide. Never rub. Press the cloth down, lift straight up, move to a clean cloth section, and repeat.

For light colored carpets only, hydrogen peroxide works as both cleaner and mild bleach. On dark carpets, it causes unwanted lightening. Test in a hidden area first, always.

Upholstered furniture requires the same gentle approach. Vacuum first with the upholstery brush, apply absorbent powder, wait, vacuum again, then blot spots with appropriate cleaning solution. Avoid soaking fabric. Light moisture application and immediate blotting prevents watermarks and mildew in cushion foam.

Professional steam cleaning becomes necessary when soot penetrates deep into carpet padding or upholstery foam. Home methods can’t reach backing materials where odor causing residue hides. If you still smell smoke after surface cleaning, the contamination goes deeper than DIY extraction can address.

Cleaning Soot from Specialized Surfaces and Hard to Reach Areas

Cl30jimUSvqiRSI8Dwqxxw

Surface material determines cleaning method safety. Water safe surfaces tolerate aggressive wet cleaning, while porous and moisture sensitive materials need dry methods or minimal liquid application with immediate drying.

Surface Type Recommended Method Products to Avoid
Glass, mirrors, tile Dry sponge first, then glass cleaner or vinegar solution Abrasive scrubbers that scratch
Sealed wood, laminate Dry sponge only, minimal damp cloth if needed, immediate drying Water based cleaners, excessive moisture
Metal fixtures, hardware Dry sponge, then rubbing alcohol or metal polish Harsh acids that cause corrosion
Electronics, screens Compressed air for vents, barely damp microfiber for cases Any liquid near components, spray cleaners
Unsealed wood, raw drywall Dry sponge only, may require sealing and repainting if stained Water based cleaners that cause swelling
Baseboards, painted trim Full wet cleaning after dry sponge, since these are typically sealed Excessive scrubbing that removes paint

Electronics need special caution because moisture and cleaning chemicals damage internal components. Unplug everything before cleaning. Use compressed air to blow soot out of vents, USB ports, and button gaps. Wipe exterior cases with a barely damp microfiber cloth. Damp means you squeezed out every drop of water you could. Never spray cleaning solutions directly on electronics or use wet wipes that leave moisture behind.

Remove light fixtures, ceiling fans, and vent covers completely before cleaning the mounting surfaces behind them. Trying to clean around installed fixtures leaves shadow lines where soot remains. Take fixtures outdoors or to a utility sink where you can wash them thoroughly without worrying about drips. Clean light bulbs individually with rubbing alcohol on a cloth. Soot on bulbs reduces light output and creates odor when heated.

HVAC System Contamination and Air Duct Cleaning After Smoke Events

m0Jnni1mQfWZVfr8Rlig0Q

Soot travels through forced air systems, spreading from the fire area throughout your entire home via supply ducts. Your HVAC system acts like a distribution network, pulling contaminated air from the affected area, pushing it through ductwork, and delivering soot particles to every room with a register. Within hours, rooms untouched by direct smoke show soot deposits around vents and on walls near airflow paths.

Turn off your HVAC system at both the thermostat and the breaker before starting any soot cleanup. Leaving it running spreads contamination faster than you can clean and forces you to re-clean already finished areas.

Inspect all return and supply registers throughout your home for soot accumulation. Remove register covers and look into ducts with a flashlight. If you see black residue coating interior duct surfaces more than six inches deep, your ductwork is contaminated.

Replace your HVAC filter immediately even if it looks clean on the outside. Soot particles too fine to see have loaded the filter media, reducing airflow and recirculating smoke odor. Mark your calendar to replace the filter again after one week of operation, since residual dust gets stirred up when you restart the system.

Decide between DIY register cleaning and professional duct cleaning based on contamination depth. Surface soot around registers responds to dry sponge cleaning followed by wet cleaning with degreaser. Contamination deeper than arm’s reach into ductwork requires professional negative pressure cleaning with specialized equipment.

Clean all visible ductwork and register boots using the same dry then wet method you used on walls, working carefully to avoid dislodging insulation or damaging flexible duct sections.

After completing all other home cleaning, restart your HVAC system and monitor for smoke odor. Persistent smell indicates contamination remains in ductwork or the air handler unit itself.

Professional duct cleaning uses truck mounted vacuums creating negative air pressure while rotating brushes scrub duct interiors. This process costs more than DIY register cleaning but becomes necessary when contamination extends throughout your duct system. Trying to operate your HVAC with contaminated ducts means breathing soot particles continuously and re-soiling cleaned surfaces.

Odor Elimination Techniques and Deodorization Strategies for Smoke Smell

ucI-VnzoRuqiuM9rxJR-GA

Smoke odor persists after visible soot removal because microscopic carbon particles embed in porous surfaces, releasing smell continuously. Cleaning removes surface contamination, but odor molecules remain trapped in drywall, wood framing, insulation, and concrete. Materials you can’t wipe down.

Maximum ventilation through open windows and doors, running for several days to weeks, carries odor molecules outside as they off-gas from porous materials. Stagnant air lets smell concentrate.

Absorbent materials like bowls of baking soda, activated charcoal bags, or commercial odor absorbers placed throughout affected areas capture airborne odor molecules. Replace absorption materials every few days as they become saturated.

Wash all fabrics including curtains, bedding, clothing, and removable cushion covers using hot water and detergent. Smoke odor clings to textiles even when they don’t show visible soot.

Professional ozone treatment floods affected areas with ozone gas that oxidizes odor molecules, chemically breaking them down rather than masking smell. This method requires complete evacuation of people, pets, and plants during treatment since ozone irritates lungs at effective concentrations.

Thermal fogging uses heated deodorizing solution that vaporizes into microscopic droplets penetrating the same porous materials where smoke particles hide, neutralizing odors at the source.

Seal and repaint surfaces that remain odorous after cleaning and deodorization. Shellac based or specialty odor blocking primers trap remaining smell before topcoat paint, preventing bleed through.

Ozone generators work extremely well but come with important safety restrictions. During operation, ozone levels reach concentrations that damage lungs and aggravate respiratory conditions. All living things must leave the treatment area, and the space needs thorough ventilation for several hours after treatment ends before reoccupancy. You can rent portable ozone generators from equipment rental stores or hire professionals who handle setup, monitoring, and ventilation.

Avoid masking products like air fresheners, scented candles, or fragrance sprays. These products coat surfaces with oils that trap odor molecules underneath rather than eliminating them. When the fragrance fades, smoke smell returns stronger than before because you’ve added another layer that prevents off-gassing.

Smoke odor dissipation takes anywhere from a few days for minor surface contamination to several weeks for deeper penetration into building materials. Multiple cleaning treatments, aggressive ventilation, and patience work better than expecting instant results. The smell fades gradually as trapped particles off-gas and ventilation carries them away.

DIY Cleaning Techniques Versus Professional Fire Damage Restoration Services

rqKNrBgQT7OGtfOdfJRJzA

Deciding between DIY and professional restoration depends on damage extent, affected materials, your available time, and health considerations. The wrong choice leads to incomplete cleaning, permanent damage, or health risks from toxin exposure.

Damage Severity DIY Appropriate Professional Recommended
Light surface soot in one room Yes, if you have proper safety equipment and follow dry first cleaning protocols Optional for faster completion and guaranteed results
Multiple rooms with moderate soot Possible but time intensive, requires several days of dedicated work Yes, for thorough cleaning and to prevent cross contamination
Heavy soot coating all surfaces No, volume exceeds DIY capacity and increases health risks Essential for proper cleaning, sealing, and odor elimination
HVAC system contamination Register cleaning only, not internal ductwork Yes, for complete duct cleaning and air handler decontamination
Structural materials affected No, requires assessment of hidden damage and specialized treatment Essential for safety evaluation and comprehensive restoration

Professional fire damage restoration teams bring equipment homeowners can’t access: truck mounted negative air machines that prevent contamination spread, commercial grade HEPA air scrubbers, hydroxyl generators for odor elimination, and thermal imaging cameras that identify hidden moisture and heat damage. They complete in days what takes homeowners weeks, with results backed by industry certification and often required by insurance companies for claim approval.

Fire Damage Restoration services include complete assessment of visible and hidden damage, documentation for insurance claims, content pack out to clean belongings off site in controlled facilities, structural cleaning using professional methods, odor elimination through multiple treatment types, and final restoration that returns your home to pre-loss condition. Pack out matters for items that can’t be cleaned on site. Upholstered furniture, electronics, clothing, and documents get transported to specialized facilities with equipment designed for each material type.

Professional restoration becomes essential when soot affects areas you can’t easily access, when odor persists after DIY cleaning attempts, when HVAC contamination spreads damage throughout your home, or when insurance claim documentation requires certified work. Trying to save money with DIY on large scale damage often costs more in the end through incomplete cleaning, permanent staining, and claim complications.

Cost benefit analysis favors DIY for truly minor surface soot in small areas where you can see every affected surface and complete cleaning in a weekend. The moment damage extends beyond one room or penetrates into porous materials, professional services deliver better outcomes for comparable or lower total cost when you factor in your time, equipment purchases, and risk of inadequate cleaning.

Cost Estimates and Insurance Claim Considerations for Soot Removal Projects

Soot cleaning costs vary wildly based on damage extent, affected materials, accessibility, and whether you’re handling cleanup yourself or hiring professionals. Understanding cost factors helps you budget appropriately and make informed decisions about DIY versus professional services.

Material costs for DIY single room cleaning run approximately $150 to $300 including chemical sponges ($8 to $15 each, need multiples), HEPA shop vacuum rental ($40 to $60 per day), cleaning solutions and solvents ($30 to $60), disposable protective equipment ($20 to $40), and containment supplies ($20 to $40). Time investment ranges from 8 to 16 hours for a typical bedroom, longer for rooms with heavy buildup or difficult surfaces.

Single room DIY cleaning: $150 to $300 in materials plus 8 to 16 hours of labor over multiple days. Whole house DIY cleaning (1,500 to 2,000 square feet): $500 to $1,200 in materials plus 40 to 80 hours of work spread across two to three weeks. Single room professional cleaning: $800 to $2,500 depending on room size, damage severity, and included services. Whole house professional restoration (1,500 to 2,000 square feet): $5,000 to $15,000 for complete cleaning, deodorization, and minor repairs. Contents cleaning and pack out: $2,000 to $8,000 depending on inventory volume and item types requiring specialized treatment. HVAC duct cleaning: $400 to $1,000 for standard residential system, more for extensive contamination requiring multiple treatments. Advanced odor elimination (ozone or hydroxyl treatment): $500 to $2,000 for whole house treatment with professional monitoring.

Insurance claims for fire and smoke damage typically cover reasonable and necessary restoration costs including professional cleaning, odor elimination, and repairs to return your home to pre-loss condition. Your policy deductible applies, and you’ll need to demonstrate the damage and restoration scope through documentation.

Document everything before starting any cleaning. Take photographs and video of all affected areas from multiple angles showing damage extent and soot coverage. Photograph inside cabinets, closets, and ductwork if accessible. Make a detailed inventory of damaged contents with descriptions and estimated values. Keep receipts for all cleaning supplies, equipment rentals, and professional services. This documentation supports your claim and helps adjusters understand the full scope.

Insurance adjusters expect reasonable cleaning attempts on salvageable items before replacement claims. They may require professional cleaning estimates even if you plan to DIY the work. Many policies specify that restoration must use professional services for certain damage types or claim amounts above specified thresholds. Check your policy language and talk to your adjuster before making decisions that could affect claim approval.

Prevent claim denials by following proper notification procedures immediately after discovering damage, getting adjuster approval before starting extensive work, hiring licensed and insured contractors when using professionals, keeping detailed records of all communications and expenses, and completing cleaning promptly to prevent additional damage from delayed treatment. Waiting too long to start cleanup can result in partial claim denial for damage that spread after the initial loss.

Sealing, Priming, and Repainting Requirements After Soot Cleaning

Cleaning removes surface soot, but staining and odor often remain in paint and drywall, requiring sealing before repainting. Skip this step and you’ll see yellow or brown stains bleeding through new paint within days or weeks, forcing you to repaint correctly the second time.

Test cleaned surfaces by wiping with a white cloth dampened in rubbing alcohol. If black or brown residue transfers to the cloth, the surface needs additional cleaning before priming. If the cloth stays clean but you smell smoke odor, the surface needs odor blocking primer.

Apply stain blocking primer to all affected surfaces even if they look clean. Oil based primers work best, but low VOC water based alternatives exist for health sensitive situations. Shellac based primers like BIN provide the strongest odor blocking when smell persists after cleaning.

Use two coats of primer on heavily affected areas where soot penetrated deeply. One coat seals light contamination, but deep staining requires additional barrier layers.

Sand lightly between primer coats with fine grit sandpaper to smooth raised grain and create better adhesion for the next coat. Wipe away sanding dust with a tack cloth before applying additional coats.

Match your final paint to existing wall color using paint samples you bring to the store. Paint fades over time from UV exposure and age, so “matching” the original color from five years ago means matching the current faded shade, not what the can says it should be.

Apply paint in thin, even coats rather than thick coverage attempting to hide everything in one pass. Multiple thin coats prevent drips, level better, and create more durable finish than single heavy coats.

Specialty odor blocking primers contain additives that chemically neutralize smell rather than just creating a physical barrier. These products cost more than standard primers but eliminate persistent smoke odor that survives cleaning and deodorization. The most effective formulations use shellac or oil bases that penetrate and seal porous surfaces completely.

Some staining won’t respond to any amount of cleaning because acids in soot etched into paint, chemically changing the surface. These areas need primer to block the stain from showing through topcoat paint. Testing a small section with primer and paint before committing to entire walls confirms the primer blocks staining adequately.

Professional color matching uses spectrophotometers that analyze existing paint color and create custom mixed paint matching the current shade exactly. This technology prevents the common problem of “close enough” color matching that looks acceptable in the store but shows obvious differences on the wall. Your local paint store offers this service, usually for free when you purchase the paint.

Achieving a finish that blends into the rest of your home means extending new paint slightly beyond the repair area, thinning it at the boundary. On textured walls, match the texture pattern before painting to prevent smooth spots that show despite color matching.

Professional Certification Standards and What to Look for in Restoration Companies

IICRC certification represents the industry standard for fire and water damage restoration, demonstrating that technicians completed training in proper restoration protocols, safety procedures, and current best practices. The Institute of Inspection, Cleaning and Restoration Certification develops standards based on scientific research and field experience, then tests professionals to verify they can perform restoration work correctly. Not all restoration companies hold IICRC certification, but those that do follow standardized procedures proven to deliver complete restoration while protecting occupant health.

Credential/Feature Why It Matters Questions to Ask
IICRC certification Verifies training in proper restoration methods and current industry standards Which technicians hold certification? Can you provide certificate numbers for verification?
24/7 emergency response Fast response prevents damage from spreading and reduces total restoration costs What’s your actual response time? Do you charge extra for after hours or weekend calls?
Insurance claim experience Proper documentation and adjuster communication streamline claim approval and payment Do you handle insurance billing directly? Can you provide references from recent insurance paid jobs?
Professional equipment Commercial grade HEPA air scrubbers, negative air machines, and hydroxyl generators deliver results impossible with consumer equipment What specific equipment do you use? Can I see your equipment before you start?
Clear communication protocol Regular updates and transparent processes reduce homeowner stress and prevent surprises Who’s my point of contact? How often will I receive progress updates?

Professional restoration equipment separates qualified companies from general contractors attempting fire cleanup with consumer grade tools. Truck mounted negative air machines maintain controlled air pressure that prevents contamination from spreading during cleaning, while commercial HEPA air scrubbers filter entire rooms continuously. Thermal imaging cameras identify heat damage and hidden moisture problems invisible to visual inspection. Hydroxyl generators eliminate odors through advanced oxidation that’s safe for occupied spaces, unlike ozone treatment requiring evacuation.

Response time expectations matter because soot damage worsens with every passing hour. Legitimate restoration companies offer genuine 24/7 emergency response, not answering services that schedule callbacks the next business day. When you call at 2 AM Saturday, you should speak with someone who can dispatch a technician immediately, not leave a message for Monday morning.

Communication protocols should include a dedicated project manager serving as your single point of contact, daily or every other day progress updates depending on project length, clear explanations of what work is happening and why, transparent pricing with detailed estimates before work begins, and availability to answer questions throughout the process. Companies that go quiet after signing contracts create unnecessary stress during an already difficult time.

Final Words

Soot damage cleaning starts with fast action and the right approach. Stop your HVAC system, protect yourself with proper safety equipment, and use dry methods before introducing any moisture.

Match your cleaning technique to the soot type. High-oxygen fires leave dry residue that needs chemical sponges, while low-oxygen fires create oily deposits requiring wet cleaning with degreasers.

If the damage covers multiple rooms or includes HVAC contamination, professional restoration brings commercial equipment and certified techniques that homeowners can’t match. We handle the whole sequence from stabilization through finish work so you’re not coordinating different contractors.

The key is moving quickly before soot spreads, using the correct methods for each surface, and knowing when to call for help.

FAQ

Does soot stain permanently?

Soot does not stain permanently if you clean it promptly with the right methods. Fresh soot comes off with dry-cleaning sponges and proper detergents, but delays let it settle deeper into surfaces, making removal much harder and sometimes requiring sealing and repainting to prevent bleed-through.

Does Dawn dish soap remove soot?

Dawn dish soap removes soot effectively when used as a wet-cleaning step after dry sponge cleaning. Mix a few tablespoons with hot water for a high-alkali solution that breaks down oily soot residue on hard surfaces like tile and glass, but always dry-clean first to prevent smearing.

What to throw away after a house fire?

Throw away porous items heavily saturated with soot like food, cosmetics, medicines, burned clothing, charred fabrics, and anything with structural damage or deep smoke penetration. Non-porous items like glass, metal, and sealed hard surfaces can usually be cleaned and saved if you address them quickly.

How much does soot cleaning cost?

Soot cleaning costs range from minimal for single-room DIY projects using basic supplies to several thousand dollars for whole-house professional restoration involving contents cleaning, HVAC decontamination, and finish work. Extent of damage, square footage, and required equipment drive the final price.

Can I clean soot myself or do I need a professional?

You can clean soot yourself for small, contained incidents like a single candle mishap or minor cooking smoke, but professional help becomes necessary when multiple rooms are affected, HVAC systems spread contamination, or oily residue covers large areas requiring specialized equipment and techniques.

How long does it take to remove smoke smell after cleaning soot?

Smoke smell takes a few days to a few weeks to dissipate after cleaning soot, depending on damage severity and ventilation. Surface cleaning removes visible residue, but embedded carbon particles in porous materials require odor elimination techniques like ozone treatment or thermal fogging for complete removal.

What’s the difference between dry soot and oily soot?

Dry soot from high-oxygen fires appears powdery and requires dry-cleaning sponges, while oily soot from low-oxygen fires feels greasy and needs wet cleaning with degreasers. Using the wrong method spreads contamination, so identifying soot type before starting determines which cleaning approach will work.

Why can’t I use water on all surfaces with soot?

Water damages wood, electronics, drywall, and porous materials by causing warping, short circuits, and microbial growth when used on soot. Reserve wet cleaning methods for tile, glass, and waterproof surfaces only, and always use dry-cleaning sponges first to prevent spreading soot deeper into materials.

How to Encapsulate Smoke Odor from Walls and Ceilings

0

Think you can hide smoke smell by painting over it?
You can’t. Smoke particles live deep in drywall and trim, and the smell keeps coming back.

Here’s the short version: clean and dry the surfaces, then seal with two coats of a shellac-based primer to lock odor inside so it stops off-gassing.

This post walks you through the fast, step-by-step method, what to do first, which primers work best, safety tips, and how to test for breakthrough so the job stays done.

Fast Method to Seal In Persistent Smoke Odor

J9GIh0LoQP21r-4JobrNVA

The quickest way to stop smoke odor from continuing to spread is to clean the surface, let it dry completely, then apply two coats of a shellac based primer. This traps odor molecules inside the material and prevents them from off gassing into the air. Most jobs can be completed in one or two days if you work in stages and allow proper drying time between coats.

Here’s the rapid action sequence:

  1. Remove loose soot with a HEPA vacuum. Don’t wipe it first or you’ll smear greasy residue deeper into the surface.
  2. Wash walls and ceilings with TSP or a degreaser. Rinse thoroughly and let dry overnight or longer if humidity is high.
  3. Apply the first coat of shellac based primer. Work ceiling to walls to trim, using a roller for large areas and a brush for edges.
  4. Wait 45 to 60 minutes, then apply the second coat. Shellac dries fast enough that you can finish an entire room in one day.
  5. Verify the smell is gone after 24 hours. If odor breaks through in spots, touch up those areas with a third coat before painting.

Sealing works because smoke particles are incredibly small, often under 2.5 microns, and they penetrate deep into drywall, wood, and concrete. Cleaning removes surface soot, but embedded particles stay inside the material and continue releasing odor for months or years. A high bond primer creates a continuous barrier film that surrounds those particles and locks them in place. The polymers in shellac based products form an especially tight seal, which is why they outperform latex or standard water based primers on smoke damage.

Immediate Actions to Stop Smoke Odor From Spreading

aXTu-AoDR0GypQLkzWGjPg

Before you start cleaning or sealing, control airflow to prevent smoke particles from moving into unaffected rooms. Open windows in the damaged area and use box fans or exhaust fans to push air outside. Don’t rely on cross ventilation that pulls air into hallways or other living spaces. The goal is to create negative pressure in the contaminated zone so odor molecules move out, not deeper into the house.

Turn off your HVAC system right away. Forced air will circulate smoke particles through ductwork and deposit them in every room the system serves. If the furnace or AC has been running since the fire, assume the ducts and filter are contaminated. Leave the system off until ducts are cleaned or sealed and the filter is replaced. Running the system during cleanup recontaminates surfaces you’ve already washed.

Early containment reduces the total square footage you’ll need to seal later. Close doors to unaffected rooms, seal gaps with painter’s tape if needed, and keep tarps or plastic sheeting over doorways in high traffic areas. The less smoke migrates during the first few days, the less primer you’ll use and the fewer coats you’ll need. Containment also protects furniture, bedding, and clothing in other parts of the home from absorbing additional odor.

Cleaning and Surface Preparation Before Applying Sealer

25dIHwsZS2eiiECbRzHkQg

You can’t seal over soot, grease, or sticky residue and expect the primer to stick. If the surface is dirty, the primer will peel or the odor will bleed through within weeks. Cleaning is not optional, and it’s not fast. Plan to spend as much time washing and prepping as you will applying primer.

Essential prep tasks include:

HEPA vacuum all surfaces first. Ceilings, walls, baseboards, window frames, and door casings to remove loose ash and soot without smearing.

Wash with TSP solution or a heavy duty degreaser. Use a sponge or microfiber cloth, working from the bottom up to avoid streaks, then rinse with clean water.

Lightly sand glossy or sealed surfaces. This gives the primer something to grip. Use 120 grit sandpaper and wipe dust away with a damp cloth.

Patch any holes or cracks in drywall. Smoke can hide in voids behind the surface, and gaps let odor seep out even after sealing.

Remove outlet covers and switch plates. Soot often collects inside electrical boxes, and you’ll need to vacuum and seal those areas too.

Let everything dry completely. Damp drywall or wood won’t accept primer properly, and moisture can reactivate smoke residue and make the smell worse.

Drying times depend on humidity and airflow. In most homes, 24 hours is enough if you run fans. In basements or during humid weather, wait 48 hours or longer. Test by running your hand across the wall. If it feels cool or tacky, it’s still damp. You can also use a moisture meter on wood trim or drywall to confirm readings below 12 percent before you start priming.

Choosing the Correct Odor Blocking Primer

P_2t5qEVS5iJ1Ai-1b65uw

Selecting the right primer determines whether the odor stays sealed or breaks through after you paint. Not all primers block smoke smell, and using the wrong type is the most common reason DIY sealing jobs fail. Match the product to the severity of the damage and the material you’re sealing.

Shellac Based Primers

Shellac based primers are the gold standard for smoke odor encapsulation. They dry in 45 minutes, create a very tight molecular barrier, and block nicotine, soot, grease, and protein fire residues better than any other category. Shellac works on drywall, wood, plaster, and even concrete. The downside is strong fumes and the need for denatured alcohol for cleanup, but the performance justifies the hassle. Use shellac for anything worse than light surface smoke.

Oil Based Primers

Oil based primers offer good odor blocking and strong adhesion, especially on wood trim, cabinets, and doors. They penetrate deeper than shellac and are slightly more forgiving on surfaces that weren’t perfectly cleaned. The tradeoff is a longer dry time, typically 24 hours between coats, and lingering solvent smell during application. Oil based products work well for moderate smoke damage when you have extra time and want a durable base for paint.

Specialized Odor Seal Products

Commercial encapsulators marketed specifically for fire and smoke restoration are designed for the heaviest contamination. Many are water based with advanced polymer chemistry that traps odor molecules in a single thick coat. These products are used by professional restoration crews and cost more per gallon than standard shellac or oil primers, but they can save labor when damage is severe or timelines are tight.

Primer Type Best Use Case Dry Time
Shellac Based Heavy smoke, nicotine, protein fires, fast turnaround 45–60 minutes per coat
Oil Based Moderate smoke, wood surfaces, durable finish needed 24 hours per coat
Commercial Encapsulator Severe contamination, large areas, professional restoration 1–4 hours per coat

Applying Primer to Walls, Ceilings, and Trim

s1wPvH4gRoKjI5JDmfYo6g

Even coverage and correct application prevent odor from bleeding through later. Thin spots, skipped edges, and rushed work create gaps in the barrier, and smoke molecules will find those gaps within days. Take your time and follow a consistent order so you don’t miss anything.

Start with the ceiling. Smoke rises and ceilings hold the highest concentration of odor particles. Use a roller with a 3/8 inch nap for smooth drywall or 1/2 inch for textured surfaces.

Cut in edges and corners with a brush first. Then roll the field, overlapping each pass by a few inches to avoid lines or thin spots.

Move to the walls next. Work top to bottom in small sections, keeping a wet edge to prevent lap marks. Reload the roller frequently so the coat stays thick and even.

Prime all trim, baseboards, and door frames last. Use a brush for detail work and make sure to coat both the face and edges where smoke can penetrate.

Let the first coat dry fully before inspecting. Shellac is usually ready in 45 minutes. Oil based needs 24 hours. Check the can for exact recoat windows.

Apply a second coat to all surfaces. Even if the first coat looks good, two coats provide the barrier thickness needed to stop long term off gassing.

Check for bleed through after 24 hours. If you smell smoke in isolated spots, apply a third coat to those areas before you paint.

Common mistakes include rolling too fast, which leaves thin coverage and air bubbles. Skipping edges where walls meet ceilings or corners. And recoating before the primer is fully dry, which can cause the layers to lift or wrinkle. Shellac primers have a narrow recoat window. If you wait too long, the surface can become too hard and the second coat won’t bond well. Follow the timing on the label. Another error is using a roller with the wrong nap thickness. Too short and you won’t get enough primer onto textured drywall. Too thick and you’ll waste product and create an uneven surface for paint.

Ventilation, Equipment, and Safety During Sealing

anugu0_4R06NFl7Bn9Mzfw

Shellac based primers release strong fumes that can cause headaches, dizziness, and respiratory irritation if you work in a closed space. Open all windows in the room you’re sealing and set up fans to exhaust air outside. Cross ventilation helps, but make sure air is moving out, not just circulating inside. If you’re working in a basement or interior room with no windows, use a portable exhaust fan in the nearest doorway and keep other doors closed to create airflow.

Wear a respirator with organic vapor cartridges, not a dust mask. Dust masks do not filter solvent vapors. You’ll also need nitrile gloves because shellac and oil based primers can irritate skin, and safety glasses to protect against splashes when cutting in around ceilings or rolling overhead. Long sleeves and pants are a good idea. Primer overspray sticks to skin and is hard to remove.

Keep denatured alcohol or the manufacturer’s recommended solvent on hand for cleanup. Shellac won’t come off with soap and water. Pour solvent into a separate container, dip brushes and roller covers immediately after use, and work the solvent through the bristles or nap until the primer is gone. Dispose of solvent soaked rags in a sealed metal container outside. They can spontaneously combust if left in a pile.

Post Sealing Odor Control and Verification

4R9koofMQHGZpLuOPCKbsQ

Sealing traps embedded odor in walls and ceilings, but it doesn’t remove smoke particles from carpets, drapes, upholstery, or ductwork. After the primer dries, walk through the space and smell for any remaining odor. If you detect smoke, the source is likely soft goods or HVAC components, not the sealed surfaces. In some cases, a second coat of primer is necessary if the fire was severe or the material is especially porous, like old plaster or unsealed wood. Wait 24 hours, then do a final sniff test. If specific spots still smell, touch them up with a third coat before you paint.

Replace the HVAC filter and consider having ducts professionally cleaned if the system was running during or after the fire. Smoke particles circulate through return vents, settle in ductwork, and redeposit every time the blower runs. A new filter alone won’t solve that problem.

Check furniture, area rugs, and window treatments. Even after walls are sealed, fabrics can continue to release odor. Washable items should go through a hot water cycle with odor neutralizing detergent. Non washable upholstery may need professional cleaning or ozone treatment. If the smell persists in soft goods after cleaning, replacement is often the only permanent solution.

Costs, Product Options, and Expected Results

sZTozk2bQLmZqwbtN-lsmg

Shellac based primer typically costs $40 to $60 per gallon, and one gallon covers about 300 to 400 square feet per coat. A medium sized bedroom with 10 foot ceilings and standard trim will need roughly two gallons for two coats, putting material cost around $80 to $120. Add brushes, rollers, painter’s tape, TSP, and safety gear, and a DIY project usually runs $150 to $200 for a single room. Larger homes or whole house sealing after a fire can require 10 or more gallons and several days of labor.

Common primers and typical price ranges include:

Zinsser BIN Shellac Based Primer. $45–$55 per gallon. Industry standard for smoke and odor blocking.

Kilz Original Oil Based Primer. $35–$50 per gallon. Good for moderate odor, longer dry time.

KILZ Restoration Interior Primer. $50–$65 per gallon. Water based formula for heavy stains and odors, less fume than shellac.

Zinsser Odor Killing Primer. $40–$50 per gallon. Water based, designed for pet and smoke odors, easier cleanup than shellac.

Professional sealing typically costs $1.50 to $3.50 per square foot, depending on severity, access, and geographic location. That price includes surface prep, two coats of commercial grade encapsulator, and verification testing. Pros use airless sprayers for large wall runs, which speeds application and ensures even coverage, but DIY spray equipment rental adds cost and requires practice to avoid overspray and drips.

Properly applied shellac or oil based primer creates a permanent odor barrier. The seal only fails if the surface is physically damaged. Water leaks, impact holes, or future renovations that tear into sealed drywall can release trapped smoke particles. Resealing is rarely needed unless you sand through the primer during repainting or a new water event compromises the barrier. If you maintain the sealed surfaces and avoid moisture intrusion, the results should last as long as the wall or ceiling itself.

Final Words

Start by stopping the spread: ventilate, isolate the room, and shut off HVAC so particles don’t travel. Clean soot and let surfaces fully dry before you touch primer.

Choose a shellac or heavy‑duty odor blocker, wear proper masks, and apply 1–2 coats where needed. Test after drying and address fabrics or ducts separately.

If you’re figuring out how to encapsulate smoke odor, this plan gets it done fast and right. You’ll remove the smell and move toward a clean, repaired home.

FAQ

Q: What neutralizes the smell of smoke?

A: The smell of smoke is neutralized by removing the source, cleaning surfaces and fabrics, and using odor eliminators like activated charcoal, HEPA air scrubbers, and hydroxyl or ozone treatments (ozone only in unoccupied spaces).

Q: What fabrics absorb the most smoke?

A: Fabrics that absorb the most smoke are porous natural fibers such as curtains, upholstered furniture, carpets, bedding, and wool or cotton textiles; they trap odor particles deep in fibers and padding.

Q: What does Servpro use to remove smoke smell?

A: Servpro uses professional cleaning, thermal fogging, hydroxyl generators, HEPA air scrubbers, specialized detergents, and when needed sealing or reconstructive work to remove smoke odor and restore affected materials.

Q: Can you cover up cigarette smoke smell?

A: You can cover up cigarette smoke smell, but covering only masks odor; permanent removal needs cleaning, laundering, HVAC filter replacement, and sealing porous surfaces with a shellac-based primer.

Smoke Smell Removal After Fire: Effective Methods and Costs

0

You can’t paint over smoke smell or cover it with air freshener. That smoky odor you’re dealing with isn’t just floating in the air, it’s bonded into your walls, carpets, and furniture at a molecular level. The particles physically embed themselves into porous materials, which is why opening windows and lighting candles won’t fix it. This guide walks you through what actually works to eliminate smoke odor after a fire, from immediate ventilation steps to deep cleaning methods, plus what professional restoration costs when DIY isn’t enough.

Effective Strategies for Post-Fire Smoke Odor Elimination

yKIbktpRkCkcziDaOI_qw

Smoke odor doesn’t just float around and disappear. Smoke particles bond at a molecular level with every porous surface they touch: drywall, carpeting, furniture fabric, clothing, drapes, books, raw wood, even the padding under your floors. The smell sticks because particles physically penetrate these materials, not just settle on top.

Quick action stops smoke from embedding deeper into your home’s structure. The longer contaminated air sits, the farther particles migrate into walls, insulation, and ductwork. Starting odor removal within the first 24 hours makes a measurable difference in how much material you can save versus replace.

Here’s what to do first, in order of priority:

  1. Confirm the structure is safe to enter and the fire is completely out. Don’t assume. Check with fire personnel before going inside.
  2. Create cross ventilation by opening all windows and doors on opposite sides of affected areas to push contaminated air outside, not just move it around.
  3. Position fans in doorways and windows to force smoky air out of the house rather than circulating it between rooms.
  4. Wear an N95 respirator and protective gear before entering any fire affected space. Smoke particles irritate lungs even days after the fire.
  5. Deploy air purifiers with HEPA filters immediately in every affected room to capture airborne soot while you work.
  6. Assess whether the damage requires professional restoration or if DIY methods will actually work based on how far smoke traveled and what materials are affected.

For light smoke confined to one room with mostly hard surfaces, DIY cleaning often handles it. Heavy smoke that reached multiple rooms, soaked into carpets and upholstery, or contaminated your HVAC system needs professional equipment and techniques. Don’t guess. Walk through and look at what’s visibly stained, what smells strongest, and whether structural materials like drywall show discoloration.

Contact your insurance company after you’ve stabilized ventilation and documented the damage with photos. Most policies require prompt notification, but your first priority is stopping smoke from spreading deeper while the air is still contaminated. Take pictures of every affected surface, even minor staining, before you start cleaning.

Deep Cleaning Methods for Fire Smoke Residue and Soot Removal

LDLIqAhVTO6aOT8HIdd4Sg

Two types of soot exist, and they clean differently. Dry soot wipes away with a sponge and low alkaline detergent. Oily soot, which comes from burning plastics or synthetic materials, requires stronger techniques and can clog your washing machine if you’re not careful. Both types are acidic and will corrode metal surfaces, discolor wood, and eat into paint if you don’t remove them quickly.

For most cleaning, mix one tablespoon of dish soap or mild detergent with one quart of clear warm water. Add a small amount of white vinegar to the solution for stubborn residues and odor neutralization. Always rinse surfaces with clear water immediately after cleaning to prevent streaking and residue buildup.

Cleaning Walls, Ceilings, and Hard Surfaces

Start at the top and work down. Wipe ceilings first, then walls, then baseboards and doors. Use your mild detergent and vinegar solution with a clean sponge or microfiber cloth. Rinse each section with clear water right away.

Acidic soot corrodes metal and discolors wood within hours, so don’t wait. Clean door frames, window frames, cabinet exteriors, and all metal fixtures as soon as it’s safe to enter. Work in small sections so you can rinse before the cleaning solution dries.

Change your rinse water frequently. Dirty rinse water just spreads soot around. If the cloth or sponge turns black, switch to a clean one. You’re trying to remove particles, not push them deeper into porous surfaces.

Treating Woodwork and Painted Surfaces

Painted walls and finished woodwork need a lighter touch. Avoid oversaturating painted surfaces. Too much water can lift paint or seep behind it, creating bubbling or peeling later. Wring out your sponge until it’s just damp, not dripping.

Clean all cabinet interiors, drawer spaces, and closet surfaces even if they don’t look dirty. Smoke travels through gaps and settles on hidden surfaces. Empty drawers completely before wiping the inside, bottom, and sides. Don’t skip this. Smoke odor lingers in enclosed spaces.

Baseboards and door frames collect heavy soot because smoke rises and then cools along edges. These areas often need two passes: one to remove visible soot, a second with the vinegar solution to neutralize the odor bonded to the paint or finish.

Addressing Hidden Areas and Overlooked Spaces

Pull out appliances and clean behind them. Check inside light fixtures after turning off power. Wipe down closet interiors, including the shelf surfaces and walls. Move furniture and clean underneath.

Window screens trap smoke particles. Remove them, wash with mild soap and warm water, rinse with clear water, and let them dry completely before reinstalling. Clean the glass with a mixture of white vinegar and water for streak free results.

Don’t forget the spaces you don’t see daily. Top of door frames, ceiling fan blades, air vents, the back side of cabinet doors. Smoke settles everywhere air moves. If you skip these spots, they’ll keep releasing odor into cleaned spaces.

Fabric, Carpet, and Upholstery Smoke Odor Treatment

RV4SP_kqQYmRnmiT80QIzA

Wash all affected clothing, linens, curtains, and removable fabric items with high quality detergent plus one cup of baking soda added to the wash cycle. The baking soda absorbs odors while the detergent lifts soot particles. Use warm or hot water unless the fabric care label says otherwise. Delicate items that can’t handle machine washing need professional dry cleaning. Regular washing won’t remove smoke from silk, wool, or structured garments without damaging them.

Line dry fabrics outdoors when possible. Fresh air and sunlight help remove smoke smell in ways a dryer can’t match. If you must use a dryer, add a couple of clean tennis balls to keep fabrics moving and prevent them from trapping residual odor in folds.

Carpets and area rugs need a HEPA filtered vacuum first. Avoid upright vacuums with beater bars. Those push soot deeper into carpet fibers instead of pulling it out. Vacuum slowly, making multiple passes over each section. Then sprinkle baking soda generously across the entire carpet, let it sit for several hours or overnight, and vacuum again. The baking soda pulls odor molecules out of the fibers as it sits.

Upholstered furniture presents a bigger challenge. You can’t toss a couch in the washing machine. Vacuum thoroughly with a HEPA filtered unit, including under cushions and along seams. Sprinkle baking soda on all fabric surfaces, let it sit, then vacuum it up. If odor persists after this treatment, the smoke has likely penetrated the internal padding and foam, which means professional cleaning or replacement. Also, place a plastic barrier or towel under furniture legs before cleaning. Cleaning solutions can seep from wood furniture into carpet, carrying soot with them and creating additional stains you didn’t have before.

Air Purification and Ventilation Systems for Smoke Particle Elimination

GJYBwdbpSsORsVM47eq-tg

Your HVAC system is a smoke distribution network after a fire. Every time the system cycles on, it pulls contaminated air through ducts, across the blower, over the coil, and pushes it back out through vents in every room. Running the system before cleaning it spreads smoke particles into spaces that weren’t originally affected. Don’t turn it on until you’ve addressed the contamination.

Replace every HVAC filter in your home immediately. This includes furnace filters, return air filters, and any standalone air handler filters. Don’t try to clean and reuse them. Smoke saturated filters can’t be cleaned effectively, and they’ll keep releasing particles and odor back into your air.

HVAC ductwork requires professional cleaning after fire smoke exposure. Particles coat the inside of ducts and stick to register grilles. Even with new filters, contaminated ductwork will keep cycling smoke residue through your home. A qualified duct cleaning company uses specialized equipment to dislodge particles and extract them from the system. Have the system inspected before operating it to confirm the blower assembly, coils, and all mechanical components are clean.

Portable air purification helps while you clean:

  • Use HEPA filtered portable air purifiers continuously in all affected rooms, running them 24 hours a day for the first several weeks.
  • Place activated charcoal bowls throughout affected areas for natural absorption. Change the charcoal every few days as it becomes saturated.
  • Position ventilation fans in windows to maintain airflow that pushes contaminated air outside rather than recirculating it indoors.
  • Run dehumidifiers to control moisture that traps odors in fabrics and porous materials. Keep indoor humidity below 50%.
  • Create cross ventilation patterns with strategic fan placement. One fan pulling fresh air in, another pushing contaminated air out, creates continuous flow.

Air purifiers aren’t a replacement for cleaning, but they capture airborne particles that resettle on surfaces you’ve already cleaned. Run them continuously, even after the visible smoke haze clears. Microscopic particles stay airborne for days. Activated charcoal absorbs odor molecules naturally without adding chemicals or fragrances to the air. Place bowls in corners, closets, and other low airflow areas where mechanical filtration doesn’t reach as effectively.

Natural and Chemical Odor Neutralizers for Smoke Smell Removal

1N19gVtFQBa7Nngrdk4XKg

Masking an odor and neutralizing it are completely different. Spray deodorizers and scented candles cover smoke smell temporarily by adding a stronger fragrance, but the smoke odor is still there underneath. Once the spray scent fades, you’re back where you started. Neutralizers work by chemically binding to odor molecules or absorbing them, which actually reduces the source rather than hiding it.

Neutralizers work best after you’ve removed the bulk of soot and smoke residue through cleaning. In heavily fire damaged areas, neutralizers alone won’t solve the problem. Thick soot deposits and deeply penetrated smoke require physical cleaning first. Neutralizers handle the residual odor that remains after surfaces are clean.

Neutralizer Type Application Method Best Use Case Effectiveness Level
Baking Soda Sprinkle on carpets and fabrics, place open bowls in rooms Soft surfaces and enclosed spaces like closets Moderate for light to medium smoke exposure
Activated Charcoal Place bags or bowls throughout affected areas, replace every 3 to 5 days Continuous odor absorption in cleaned spaces High for residual odors after cleaning
White Vinegar Add to cleaning solutions, simmer on stovetop, place bowls in rooms Hard surface cleaning and air neutralization Moderate, works best as cleaning additive
Enzyme Cleaners Spray on fabrics and porous surfaces, allow to dry naturally Organic smoke odors on upholstery and carpets Moderate to high for protein based smoke residues
Commercial Deodorizers Follow product instructions for spray or fogger application Whole room treatment after physical cleaning Variable depending on product chemistry
Chemical Sponges Wipe dry across surfaces without water to lift soot Dry soot removal from walls, ceilings, lampshades High for dry soot on non washable surfaces

Professional Smoke Odor Removal: Ozone Treatment and Thermal Fogging

OX5TFX41SfSQUPXcGWXhTg

Professional restoration reaches the spaces DIY cleaning can’t touch: inside wall cavities, under flooring, deep in upholstery padding, throughout ductwork, and into areas you can’t access without removing structural components. Specialized equipment neutralizes odor at the molecular level instead of just cleaning surface residue.

Ozone treatment uses ozone generators to flood affected spaces with O3 gas, which oxidizes smoke molecules and neutralizes them chemically. The space must be completely evacuated during treatment. Ozone is harmful to breathe, and you can’t occupy the home while the generator runs or for several hours afterward while the ozone dissipates. It’s effective, but it’s not a casual process. Professionals seal the area, run the equipment for a specific duration based on contamination level, then ventilate thoroughly before anyone re-enters.

Thermal fogging involves heating a deodorizing solution until it vaporizes into a fine mist that penetrates the same pathways smoke traveled during the fire. The fog particles are roughly the same size as smoke particles, so they reach cracks, crevices, porous materials, and hidden spaces that can’t be wiped or sprayed. Once the fog settles and dries, it neutralizes bonded odor molecules. This method works well in combination with other treatments when smoke has penetrated deeply into materials.

Hydroxyl generators offer a safer alternative that can run while the space is occupied. These machines produce hydroxyl radicals that break down odor molecules without creating harmful byproducts. They work more slowly than ozone but don’t require evacuation, making them practical for extended treatment periods. HEPA air scrubbers work alongside these methods to capture airborne particles loosened during cleaning and treatment, continuously filtering the air to prevent recontamination of cleaned surfaces.

DIY Smoke Smell Removal: When Home Methods Work and Their Limitations

7Tey9X_rQEKTU0H64mDSSw

Light smoke confined to a single room often clears within a few days using proper ventilation, surface cleaning, and basic odor absorbers. If you had a small kitchen fire that didn’t spread beyond one space, didn’t heavily stain walls or ceilings, and didn’t run through your HVAC system, DIY methods can handle it. Hard surfaces wipe clean, washable fabrics come out of the laundry without odor, and continuous ventilation clears the air.

Heavy smoke that traveled through multiple rooms, soaked into carpets and upholstery, penetrated insulation, or contaminated ductwork is a different situation. Smoke doesn’t just sit on surfaces in these cases. It migrates into wall cavities, under flooring, into furniture padding, and throughout your ventilation system. Ventilation alone won’t remove it because the particles are physically bonded to materials, not floating in the air anymore. You can clean visible surfaces for weeks and still smell smoke because the source is hidden inside structural materials you can’t reach.

Here’s when DIY stops working and professional help becomes necessary:

  • Smoke odor persists after you’ve thoroughly cleaned all accessible surfaces multiple times
  • Odors return within hours or days after treatment, indicating a hidden source you haven’t addressed
  • Structural materials like drywall, insulation, or subflooring are visibly saturated with smoke staining
  • Walls and ceilings show smoke damage that won’t wipe clean or keeps bleeding through paint
  • Your HVAC system ran during or after the fire and now spreads smoke smell when it operates
  • You or your family experience persistent respiratory irritation, headaches, or other health symptoms from poor air quality even after cleaning

Material replacement becomes necessary when cleaning can’t remove odor from porous structural components. Carpet padding holds smoke odor even after the visible carpet is cleaned. Drywall absorbs smoke deep into its gypsum core. Insulation traps smoke particles throughout its fibers. If these materials still smell after surface cleaning and odor treatment, they need removal and replacement. You can’t clean your way through materials that are saturated at depth.

Cost Estimates and Timeline for Fire Smoke Odor Removal

d-fil5iQ3iHlOVoX6gERg

Cost depends on how much area the smoke affected, what materials absorbed it, which cleaning methods are required, and whether structural components need replacement. A single room kitchen fire costs far less to remediate than whole house smoke contamination from a living room fire that burned for an extended period.

Home size matters, but damage severity matters more. A 2,000 square foot house with light smoke in half the rooms costs less to clean than a 1,000 square foot house with heavy smoke throughout. Professional companies assess based on what actually needs treatment, not just square footage.

Damage Level DIY Cost Range Professional Cost Range Expected Timeline
Light smoke, single room $50 to $200 (cleaning supplies, air purifiers, filters) $500 to $1,500 2 to 5 days DIY, 1 to 2 days professional
Moderate smoke, multiple rooms $200 to $600 (equipment rental, supplies, filters) $2,000 to $5,000 1 to 2 weeks DIY, 3 to 7 days professional
Heavy smoke, whole house $500 to $1,200 (limited effectiveness, often insufficient) $5,000 to $15,000 3 to 6 weeks DIY (rarely successful), 1 to 3 weeks professional
Severe with structural damage Not feasible for DIY $15,000 to $50,000+ (includes material replacement and rebuilding) 4 to 12 weeks depending on scope

Timeline varies based on how quickly you start, how thoroughly smoke penetrated materials, and whether you’re waiting on insurance approval or material replacements. Light damage handled immediately clears faster than moderate damage that sat for a week before treatment started. The longer contaminated air circulates, the deeper smoke embeds.

Professional services move faster because they deploy multiple technicians with industrial equipment. What takes a homeowner two weeks of evening and weekend work, a restoration crew completes in three days with proper tools. Insurance often covers professional restoration costs when fire damage is involved, but you’ll need documentation: photos of damage, detailed scope of affected areas, and professional estimates. Keep receipts for everything, even DIY supplies, in case your policy provides partial reimbursement.

Health Hazards and Safety Precautions During Smoke Odor Removal

R9MtJz_nR5iF3_nk5a7uOA

Smoke particles and volatile organic compounds remain airborne for days after a fire. Breathing this contaminated air irritates your lungs, throat, and sinuses. Fine particulate matter penetrates deep into lung tissue, and the chemical compounds released during combustion include known carcinogens and toxins. This isn’t just an odor problem. It’s an air quality problem with real health consequences.

Soot is acidic and corrosive. Direct skin contact can cause irritation, especially during extended cleaning sessions when you’re handling contaminated materials repeatedly. The acidic nature also means it eats into metal, wood, and painted surfaces over time, which is why prompt removal matters for your home’s structure, not just your health.

Follow these safety precautions during all smoke cleaning work:

  • Wear an N95 or better respirator mask that seals properly around your nose and mouth. Cloth masks and surgical masks don’t filter fine smoke particles.
  • Use rubber gloves for all cleaning to prevent skin contact with soot and acidic residue.
  • Wear eye protection, especially when cleaning overhead surfaces where particles and cleaning solution can drip down.
  • Ensure adequate ventilation in every space you’re working. Open windows and run fans continuously.
  • Take frequent breaks in fresh air away from the work area. Don’t try to power through hours of cleaning without stepping outside.
  • Discard all food that was exposed to smoke, including unopened packages, canned goods, and pet food. Harmful chemicals and soot particles penetrate packaging.
  • Use protective clothing that can be washed separately from your regular laundry, or dispose of heavily contaminated work clothes.

Food safety is non negotiable after fire smoke exposure. Even if containers look sealed, smoke infiltrates packaging and contaminates contents with toxic residue. Throw it out. This includes dry goods in boxes, canned items, packaged snacks, and anything stored in affected areas. Pet food gets contaminated the same way. The cost of replacing food is minor compared to the health risk of consuming smoke contaminated items.

Structural Material Treatment: Drywall, Paint, and Wood Surfaces

TG8y9dSXQmWikMwTkn0zNA

Smoke particles don’t just sit on drywall and wood. They penetrate the porous structure at a molecular level, bonding with the material itself. Surface cleaning removes visible soot, but odor molecules remain embedded inside. That’s why cleaned walls sometimes still smell, especially in humid conditions when moisture draws odor back to the surface.

After cleaning soot from walls and ceilings, you need a smoke sealing primer before repainting. Regular paint won’t encapsulate the odor. Smoke sealing primers contain chemical binders that lock odor molecules in place, preventing them from migrating through the new paint layer. Apply it to all surfaces affected by smoke, even if they don’t look heavily stained. Two thin coats work better than one thick coat. Let the primer dry completely between coats and before applying finish paint.

Wood surfaces require careful assessment. Finished wood with intact sealant can often be cleaned and treated. Raw or unsealed wood absorbs smoke deeply and rarely cleans completely. Wood trim, baseboards, and door frames that were painted or finished before the fire usually respond well to cleaning followed by sealing primer. Unfinished wood studs inside walls, raw wood furniture, or porous wood paneling may need replacement if odor persists after cleaning and sealing attempts. Don’t try to seal heavily contaminated wood without addressing the source first. The odor will eventually bleed through no matter how many coats of sealer you apply.

Drywall replacement becomes necessary when smoke has saturated it beyond surface penetration. If the paper facing is heavily stained, discolored brown or black, or if odor persists after cleaning and priming, that section needs removal. Smoke travels behind drywall too, contaminating insulation and wall cavities. Cut out affected sections, remove any contaminated insulation, clean the framing, and install new drywall. For guidance on drywall repair after water damage, the same professional repair techniques restore smoke damaged wall surfaces with proper sealing, texture matching, and finish work that blends into existing walls. Half measures don’t work with saturated drywall. You either remove it or the smell stays.

Fire Restoration Process: What to Expect From Professional Services

Professional fire damage restoration starts with emergency response and damage assessment, often available 24/7 because smoke damage worsens the longer it sits. A qualified restoration company sends a team to evaluate affected areas, identify safety hazards, and develop a complete scope of work. They’ll assess structural damage, test air quality, identify contaminated materials, and explain what can be cleaned versus what requires replacement.

Containment comes next. Crews seal off affected areas with plastic sheeting and negative air pressure to prevent cross contamination while they work. This keeps smoke particles and cleaning chemicals from spreading into unaffected rooms. They’ll cover or remove unaffected contents, protect flooring in work areas, and establish safe pathways for moving equipment and materials.

Contents cleaning and pack out services handle your belongings separately from structural restoration. Salvageable furniture, clothing, electronics, and personal items get inventoried, cleaned using specialized methods, deodorized, and stored off site if necessary. Items that can’t be saved get documented for insurance claims. Professional contents cleaning uses techniques homeowners can’t replicate: ultrasonic cleaning for electronics, ozone chambers for fabrics, specialized solutions for different material types.

Structural repair follows a clear sequence. First, contaminated materials that can’t be cleaned get removed: saturated drywall, carpet padding, insulation, heavily damaged wood. Then deep cleaning of all remaining surfaces using professional grade equipment and solutions. After cleaning comes odor neutralization using methods like thermal fogging or ozone treatment. Finally, rebuilding: new drywall, texture and paint matching, trim replacement, flooring installation, and finish work that blends repairs seamlessly into your existing home.

Final verification includes air quality testing to confirm particulate levels are safe, visual inspection of all work areas, and a walkthrough with the homeowner to ensure everything meets expectations. Professional companies guarantee their work and address any concerns before closing the project. For comprehensive emergency home repair services that coordinate all aspects of fire damage repair, experienced restoration teams handle everything from initial emergency response through final cleanup as one connected process, so you’re not juggling multiple contractors trying to coordinate who does what when.

Preventing Smoke Odor Return and Long Term Air Quality Maintenance

Odor sometimes seems to return after you thought the problem was solved. Usually, this happens because you’ve adapted to the smell while living with it daily, then step outside for a few hours and notice it again when you come back. Another common cause: residual contamination in areas you haven’t addressed yet slowly releasing particles into cleaned spaces.

Continuous air filtration prevents recontamination after initial cleaning. Even when visible smoke is gone, microscopic particles remain airborne or settle slowly from ceiling areas and high surfaces. Running HEPA air purifiers continuously for the first several months captures these particles before they resettle on cleaned surfaces or get breathed in.

Long term prevention strategies keep your air clean:

  1. Maintain a regular HVAC filter replacement schedule, changing filters every 30 to 60 days for the first six months, then returning to normal intervals based on your system’s requirements.
  2. Run air purifiers continuously in affected areas for at least six months after restoration, gradually reducing runtime as air quality stabilizes.
  3. Control indoor humidity levels below 50% using dehumidifiers or your HVAC system to prevent moisture from trapping and reactivating odor molecules in materials.
  4. Conduct regular deep cleaning of soft surfaces like carpets, upholstery, and drapes every few months to remove any particles that settle despite filtration.
  5. Address any moisture issues immediately, because damp conditions reactivate smoke odor in materials and create conditions for mold growth that adds additional odor problems.

Monitor for warning signs that odor is returning or wasn’t fully eliminated. If you notice smell intensifying during humid weather, that indicates moisture is pulling embedded odor from materials. If certain rooms smell worse than others despite equal cleaning effort, check for hidden sources like contaminated ductwork or wall cavities. If fabrics smell when they get damp, they weren’t fully deodorized and may need re-treatment.

Regular monitoring means walking through your home after being away for several hours, when your nose is fresh. Check closets, cabinets, and low airflow areas where odor concentrates. If you detect smoke smell returning, address it immediately with targeted cleaning and additional air purification rather than waiting for it to spread.

Insurance Coverage and Documentation for Fire Smoke Damage Claims

Contact your insurance company immediately after the fire is out and you’ve confirmed the structure is safe, even before you start detailed cleaning. Most policies require prompt notification of loss, and delays can complicate claims. Give them basic information: date and time of fire, affected areas, preliminary assessment of damage. Don’t wait until you have perfect documentation. Initial notification starts the claim process.

Document everything with photos and video before touching anything. Photograph all visible smoke damage: stained walls, discolored ceilings, damaged belongings, affected areas. Take wide shots showing full rooms and close ups of specific damage. Video walkthroughs capture details you might miss in still photos. This documentation establishes the extent of loss before any cleaning or repairs begin.

Most homeowners insurance policies cover smoke damage under the fire damage provision, which typically includes cleaning, restoration, and rebuilding costs. Coverage usually extends to contents cleaning, temporary living expenses if the home is uninhabitable, and sometimes upgrades required by current building codes when replacing damaged structural elements. Review your policy to understand your deductible, coverage limits, and any specific exclusions.

Working with restoration companies that handle insurance coordination simplifies the claims process. Experienced companies know what documentation insurance adjusters need, how to format estimates to match policy requirements, and how to communicate directly with adjusters throughout the project. Many offer direct billing, where they work with your insurance company on payment while you handle only the deductible. This removes the burden of paying upfront and seeking reimbursement.

Required documentation throughout the restoration process includes detailed scope of work, itemized estimates, progress photos, receipts for all services and materials, and change orders if additional damage is discovered during work. Keep copies of everything: correspondence with your insurance company, contractor agreements, inspection reports, air quality test results. The more thorough your documentation, the smoother the claim settlement process. Professional restoration companies generate most of this paperwork as standard practice, but verify you’re receiving copies and storing them in a safe location outside the damaged property.

Final Words

Smoke smell removal after fire isn’t something you tackle once and walk away from.

Start with immediate ventilation and safety checks. Clean systematically from hard surfaces to fabrics. Seal walls and ceilings with proper primer. Replace filters and sanitize ductwork.

If odors persist after thorough cleaning, that’s your signal professional equipment is needed.

The good news? Most smoke damage responds well when you address it quickly and follow the right sequence. We’ll stabilize the damage, coordinate the repairs, and finish it so your home feels normal again.

FAQ

How do you get smoke smell out of a house after a fire?

To get smoke smell out of a house after a fire, start by confirming the structure is safe to enter, then create cross-ventilation by opening all windows and doors while positioning fans to push contaminated air outside. Next, wipe down all hard surfaces with mild detergent and water, sprinkle baking soda on carpets and fabrics, replace HVAC filters, and run HEPA air purifiers continuously in affected areas.

How long does it take for smoke smell to go away after a fire?

Smoke smell takes anywhere from a few days to several months to go away after a fire, depending on the severity of damage. Light smoke in a single room may clear within days with proper ventilation and cleaning, while heavy smoke embedded in walls, carpets, and HVAC systems can persist for weeks or months without professional intervention.

What do professional restoration companies use to remove smoke smell?

Professional restoration companies use ozone generators, thermal fogging equipment, hydroxyl generators, HEPA air scrubbers, and specialized smoke-sealing primers to remove smoke smell. These industrial-strength methods reach deep into porous materials where DIY cleaning cannot, neutralizing odor molecules at their source rather than simply masking them.

What neutralizes the smell of smoke?

White vinegar mixed with warm water, baking soda, activated charcoal, and enzyme cleaners neutralize the smell of smoke by chemically breaking down or absorbing odor molecules. For hard surfaces, use one tablespoon dish soap with one quart warm water plus a small amount of white vinegar, always rinsing immediately with clear water to prevent streaking.

When should you contact a professional restoration company after a fire?

You should contact a professional restoration company after a fire when smoke odors persist after thorough DIY cleaning, damage extends beyond surface areas, HVAC systems are contaminated, or structural materials like drywall and insulation are saturated with smoke. Professional equipment and techniques become necessary when home methods fail to eliminate embedded odors.

Can you run your HVAC system immediately after a fire?

You cannot run your HVAC system immediately after a fire because smoke particles contaminate the ductwork and filters, which will circulate soot and odors throughout your home when operated. Replace all HVAC filters first and have ductwork professionally cleaned and inspected before resuming system operation to prevent cross-contamination.

What safety equipment do you need for smoke odor removal?

For smoke odor removal, you need an N95 or better respirator mask, rubber gloves, eye protection, and protective clothing that can be washed separately. Take frequent breaks in fresh air, ensure adequate ventilation while working, and never attempt cleaning in areas with structural damage or air quality concerns.

Should damaged drywall be replaced or can it be cleaned?

Damaged drywall should be replaced if it still holds smoke odor after cleaning or shows visible smoke penetration, discoloration, or acidic soot damage. Clean surface soot first, then apply smoke-sealing primer. If odors persist from deep penetration into the drywall core, removal and replacement becomes necessary for permanent odor elimination.

Does homeowner’s insurance cover smoke damage restoration?

Homeowner’s insurance typically covers smoke damage restoration including professional cleaning, structural repairs, and rebuilding when fire damage occurs. Contact your insurance company immediately after the fire, document all damage with photos and video, and work with restoration companies that provide claim support and direct billing coordination.

Why do smoke odors sometimes return after cleaning?

Smoke odors sometimes return after cleaning because particles remain trapped deep inside porous materials like carpet padding, insulation, or within wall cavities where surface cleaning cannot reach. Temperature and humidity changes can release these embedded molecules back into the air, making thorough treatment or material replacement necessary for permanent removal.

3 Fire Damage Cleanup Near Me: Swift Relief

If a fire leaves your home covered in ash and smoke, we know it can feel overwhelming. We’re here to help you recover quickly and safely. Our local team removes soot, gets rid of stubborn odors, and dries your home (using machines that pull moisture from the air) to prevent mold from setting in. Neighbors have shared how relieved they felt when our team arrived fast and got to work. With our trusted, prompt help, you can get your home back to being a safe, livable place.

Finding Nearby Fire Damage Cleanup Services

When you need help fast, confirming your location is the first step. If a fire strikes, you need fire damage cleanup right away. We list the best local restoration experts based on what neighbors say about their skill, experience, and clear communication. One neighbor said, "After the fire, the team arrived in 90 minutes and started removing ash and debris immediately."

We choose these experts because they respond quickly and work right in your area. We favor companies that offer 24/7 on-site help so you get support when every minute counts. By using your location, we show you the top 10 trusted providers known for quick service and effective cleanup.

To find a reliable local fire restoration service:

  • Confirm your address to see nearby providers.
  • Check homeowner ratings and reviews.
  • Make sure the company follows industry standards and uses advanced equipment (like machines that pull moisture from the air).

This list is built from regular feedback and strict service checks. If you need extra assurance, search for "emergency restoration services near me" for more local support.

When every minute matters, fast cleanup is your first step to making your home safe again. Call one of these experts right away to start the recovery process.

3 fire damage cleanup near me: Swift Relief

img-1.jpg

Our local fire damage cleanup teams handle everything from soot removal to full smoke cleanup. After a fire, we act fast. First, we clear away burnt materials, neutralize smoky odors, and dry your home to stop mold growth (mold is a fungus that grows in damp areas). Our experts take care of urgent fixes and complete property salvage.

We send licensed technicians with IICRC certification (which means they meet industry cleanup standards) to assess your damage. They plan a strategy that may include these services:

  • Soot removal: We clear away black, powdery ash left by the fire.
  • Structural drying: We use machines (devices that remove moisture from the air) to dry your home completely.
  • Odor control: We apply treatments to stop the strong smoky smell.
  • Debris removal: We remove damaged materials that block repair work.
  • Smoke remediation: We clean surfaces stained by smoke.

Service times vary. We can board up your property (secure it) in 24 hours. A full clean might need 3 to 7 days based on the damage. For more details on our services, visit our page on fire damage cleanup: fire damage cleanup.

We document each step with photos and reports. This helps you understand the work and supports your insurance claim. Our process brings swift relief, getting you back into a safe home fast.

Step-by-Step Fire Damage Cleanup Process Near Me

When a fire hits your home, we act fast with our six-step plan to restore safety and comfort. First, we come to your property to check every room and structure. We look for clear damage and hidden problems, taking photos and notes so you know exactly what repairs are needed.

Next, we secure your home by boarding up broken windows and closing off dangerous areas. This action stops extra damage and keeps intruders away. One of our technicians explained that quick property security is key to preventing further loss.

If water is involved because sprinklers have been activated, we immediately start removing it. We use strong pumps and vacuums (machines that suck up water) to pull water from hard-to-reach corners. This helps prevent more damage and stops mold (a type of fungus that grows on wet surfaces) from developing.

Then, our team cleans off smoke and soot. We carefully wipe away the dark, powdery residue left by the fire. It is much like cleaning off a picnic table after a campfire, each clean sweep brings your home a little closer to normal.

After that, we target stubborn smoky odors with deodorization and ozone treatment. Using special machines that produce ozone (a gas that neutralizes smells), we freshen up your space. This step is like opening a window after cooking, letting in a breath of fresh air.

Finally, we finish by cleaning every surface and restoring your home to its best state. We repair or replace damaged materials and help bring back your cherished belongings. We document every phase so you have clear information for insurance claims.

Each step is carried out by our dedicated team who works hard to bring safety, comfort, and a fresh start back to your home.

Cost Estimates and Affordable Fire Damage Cleanup Options Near Me

img-2.jpg

Fire cleanup prices can vary a lot. On average, costs run from $2,500 to $10,000. This depends on how bad the damage is, the size of the area, and the work needed. Items like smoke damage, structural repairs, labor, and special equipment such as HEPA filters (air filters that trap tiny particles) all affect the price.

Local teams try hard to give you a cost estimate that fits your needs. They look at every detail so you know what to expect. One homeowner shared, "I felt relieved when the technician explained every cost, from cleaning to rebuilding damaged spots."

We understand that emergencies need fast, affordable solutions. Some companies offer financing or work directly with your insurance to make the process easier for you. If the damage is not severe, they might offer temporary repairs or adjust the work scope until full repairs are approved.

When you need emergency cleanup, clear and honest estimates matter. Ask your provider for a detailed breakdown of costs. Key cost factors include the amount of smoke residue and how much structural damage there is. This way, you can compare your options with confidence.

It is a good idea to get several estimates. This helps ensure you choose a team that meets your quality needs without stretching your budget too far.

Credentials and Customer Reviews for Fire Damage Cleanup Near Me

When you need fire damage cleanup, checking the crew's credentials is a smart first step. Trusted teams have licensed damage technicians with IICRC certification (a standard that shows they follow safe cleanup practices), state contractor licenses, and EPA lead-safe certifications (proof they can safely handle lead hazards). These marks of quality mean the team meets strict safety and work standards.

Look for cleanup professionals with strong ratings. Many homeowners share their experiences on review sites like Google and Yelp and aim for at least a 4.0-star rating. One homeowner said, "The certified incident specialists arrived on time, explained every step, and eliminated the smoke odor completely." Feedback like this tells you the crew is reliable and precise when handling fire damage.

When researching, check for these key credentials:

  • IICRC certification
  • State contractor licenses
  • EPA lead-safe certifications

By reading reviews and verifying credentials, you can feel confident that you are hiring an experienced team that will tackle the cleanup safely and effectively.

Insurance Claims and Documentation for Fire Damage Cleanup Near Me

img-3.jpg

After a fire, it is crucial to gather clear evidence of the damage. We suggest taking photos of every affected spot. Capture close-up images of blackened walls, burnt belongings, and weakened areas in your structure. You can also record a video walkthrough (a filmed tour of the damage) to show the full details of the loss.

Keep all your paperwork safe. Save estimates from contractors, receipts, and any written messages from the cleanup team. Detailed bills along with before-and-after photos help your insurance adjuster see what repairs were needed. Remember to file your claim within 30 days for smooth assistance with your loss.

Here are the steps to document your fire damage:

  • Take photos from different angles of all affected areas.
  • Record videos of key sections to capture the complete context.
  • Keep all contractor estimates and receipts.
  • Request a detailed report of the work needed from the professionals.
  • File your claim quickly to meet the 30-day deadline.

Good documentation helps speed up your claim and shows that you acted fast to stop further damage. One technician said, "Having every detail on record makes it easier for adjusters to approve the claim." For more help, visit our guide on how to document fire damage for an insurance claim.

How to Contact Fire Damage Cleanup Near Me: Emergency Response and Scheduling

When fire damage hits your home, quick action is vital. Our emergency team is available 24/7, and when you call, help will be on its way within 1 to 2 hours. We come to your property, assess the damage, and secure your home to prevent further harm.

We serve homes within a 100-mile radius. To get help swiftly, you can:

  • Call our direct phone line so we can dispatch a team immediately.
  • Complete our online scheduling form to set up a prompt on-site visit.
  • Send us an email for additional details and confirmation.

We may also send you a text message with your expected arrival time so you know when to expect us. Every call you make sets off an emergency response to stabilize your property and kick off the cleanup process quickly.

Final Words

In the action, we covered local solutions for tackling fire damage. We explained the step-by-step cleanup process, discussed cost estimates and credentials, and provided guidance on handling insurance claims. Each section is meant to help you understand your options and take fast, clear measures. For immediate help from trusted experts, search for fire damage cleanup near me. With prompt support and clear steps, you can restore your home to a safe, livable space quickly.

FAQ

Frequently Asked Questions

Q: What local fire damage cleanup services are available, such as in California, Texas, or for residential properties?

A: Local fire damage cleanup services cover areas like California, Texas, and nearby residential zones. Providers include trusted local specialists and well-known chains like SERVPRO, all ready to respond quickly.

Q: What is fire damage cleanup near me cost and how much can it cost to clean up after a fire?

A: Fire damage cleanup cost near you typically ranges from $2,500 to $10,000. The cost depends on damage severity, affected square footage, and services like soot removal and structural repairs.

Q: What defines the best fire damage cleanup and smoke damage cleaning services near me?

A: The best services offer rapid response, certified technicians, and clear communication. They handle soot removal, odor control, and structural drying to restore your property safely and efficiently.

Q: What is fire damage restoration and what is cleanup after a fire called?

A: Fire damage restoration, also known as post-fire cleanup, involves removing soot and smoke, drying the structure, and eliminating odors to return your home to a safe, livable state.

Q: How do you clean up fire damage?

A: Cleaning up fire damage starts with an on-site evaluation, emergency board-up, and water extraction if needed. The process continues with thorough soot removal, odor control, and final cleaning to secure your home.

Q: Are fire restoration companies worth it?

A: Fire restoration companies are worth it because they provide expert cleaning, reduce further damage risks, and streamline insurance claims, ensuring your home is safely restored and you can move forward quickly.

Property Damage Claim vs Home Repair: Which Saves Money?

0

What if calling your insurer costs more than fixing it yourself?
When water, wind, or fire damages your home, you have a choice: file a property damage claim or pay for the repair yourself.
Filing can cover most of a big bill but may raise your premium for years.
Paying out of pocket is faster and keeps your record clean, but you pay everything now.
This post walks you through the math (deductible, premium risk, hidden damage, and timing) so you can pick the option that truly saves money.

Key Differences Between a Property Damage Claim vs Home Repair Decisions

4YwhwDS4T4WYzHf0-LJY6A

When property damage hits, you’ve got a choice to make right away: file with your insurance or pay for the repairs yourself. A property damage claim means calling your insurer, letting an adjuster come inspect, documenting everything you can, and then waiting for approval and payment. Paying for a home repair on your own means you hire someone (or do it yourself) and skip the insurer completely. The first option can save you serious money when damage is extensive, but there’s paperwork, waiting, and the chance your rates go up later. The second gives you speed and control but puts the full cost on you upfront.

Your deductible drives a lot of this. Let’s say the damage costs $2,500 to fix and your deductible sits at $2,000. Filing gets you $500, which often isn’t worth the premium hike or the mark on your claim history. Premium risk adds up over time. Even one claim can bump your rates for three to five years, and multiple claims make it harder (and pricier) to find coverage down the road. You need to weigh what repairs actually cost against your deductible and what it’ll do to your premiums before you decide whether to file or pay.

Documentation and timing separate what’s okay from what creates problems. Temporary repairs are fine. Tarping a roof, boarding up a broken window, drying out wet drywall—insurers expect you to stop further damage, and they’ll usually cover mitigation costs if you save receipts. But permanent repairs done before the insurer inspects? That can trigger disputes or denial because the adjuster can’t verify what was damaged, what caused it, or how much work was really needed. There’s legal backing for this too. In Stokley v. Allstate Texas Lloyds, a federal court ruled that repairing part of a property (a fence in that case) didn’t block appraisal of the rest of the damage, showing courts get the difference between limited fixes and full replacements that wipe out evidence.

Option Pros Cons
File a Claim Insurer covers most repair cost; professional inspection and documentation; access to approved contractor networks; mitigation costs reimbursed Deductible applies; potential premium increase; insurer must inspect before permanent repairs; claim filing timelines and paperwork; possible denial if evidence not preserved
Pay Out-of-Pocket No deductible; no premium increase; faster repair start; full control over contractor choice and timeline; no claim on insurance history Full repair cost on you; no financial safety net if damage is worse than estimated; no reimbursement for temporary mitigation; risk of missed hidden damage

Understanding Property Damage Claims and When They Make Sense

7C0cRj3lRgKmc-ze5lcH1w

A homeowners insurance claim starts the second you contact your insurer to report damage. They assign an adjuster who inspects your property, documents what’s wrong, reviews your policy coverage, and determines the approved payout. This process protects you financially when damage goes beyond your deductible and fits policy terms, but it also creates responsibilities on your end. You’ve got to preserve evidence, give inspection access, and avoid permanent repairs that erase what the adjuster needs to see. Water damage claims, storm damage claims, smoke and fire damage all follow the same basic workflow, though timelines and how deep they inspect vary by what caused it and how bad it is.

The insurer’s adjuster inspection is everything. The adjuster measures, photographs, and estimates repair costs based on what the damage looked like originally. If you replace a damaged roof before they show up, they can’t confirm whether storm winds caused it or if it was just wear and tear, and your claim might get reduced or denied. Temporary mitigation (removing standing water, tarping holes, running dehumidifiers) isn’t just allowed, it’s expected. Insurers know you have to stop further damage, and they typically reimburse your mitigation receipts.

Documenting damage from the moment it happens builds your entire case. Essential steps:

  • Take multiple photos and videos of every affected area. Get close-ups of the damage and wide shots that show context.
  • Keep damaged items until the adjuster inspects. Don’t toss water-soaked drywall, burned furniture, or broken fixtures without approval.
  • Capture timestamps using your phone’s default camera or add handwritten notes with dates visible in the photos.
  • Save all receipts for temporary repairs, mitigation services, emergency housing, and materials you bought.
  • Contact your insurer within 24 to 72 hours of finding the damage so you meet policy filing deadlines.
  • Understand your coverage categories: dwelling coverage (structure), personal property (belongings), additional living expenses (ALE for temporary housing), and liability (if damage involves others).

Home Repair Considerations When Not Filing a Property Damage Claim

CJhULpHXQuSbZyT8T-oIJw

When damage is small, costs are low, or the repair sits below or near your deductible, handling the home repair yourself or through a contractor without filing makes financial sense. Small damage out of pocket (patching a fist-sized hole in drywall, replacing a broken door handle, resealing a small roof flashing gap) avoids claim paperwork, keeps your premium where it is, and leaves your insurance history clean. Emergency repairs to restore safety or make your home livable, like boarding a shattered window at night or shutting off a leaking water line, are immediate priorities whether you’re planning to file or not. Mitigation requirements apply even when you’re paying yourself: stop the damage, document what you did, and save receipts in case you change your mind and file later.

Cosmetic repairs and interior structural repair can blur the line. Repainting smoke-stained walls, replacing warped baseboards, or fixing a cracked tile are often manageable jobs to pay for yourself. But if the cosmetic damage points to hidden issues (smoke odor in HVAC ducts, water inside wall cavities, or structural settling), self-repair without professional assessment can leave problems unfixed and make a future claim harder to prove. Deciding factors include how urgent the repair is (is the home unlivable or unsafe?), whether it’s habitable (can you stay there while repairs wait?), and cost certainty (do you know the full scope, or might hidden damage show up?). If any answer is uncertain, get a professional estimate before you decide whether to file.

Cost Analysis: Deductibles, Premium Impact, and Long-Term Financial Effects

3EHReaF8SgGKrqriiN8Wpg

Your deductible anchors the whole cost vs benefit analysis. If your deductible is $1,500 and estimated repairs are $1,800, you’re netting $300 from the claim. Filing might still make sense if hidden damage could push the total higher, but if the damage is simple and visible (like a single broken window), you’re better off paying the $1,800 yourself. The claim stays off your record, your premium stays flat, and you avoid the insurer looking closely at future claims. Filing claims near your deductible value gives you little benefit and real risk.

Insurance premium impact is the hidden cost of every claim. A single filed claim can raise your annual premium by 10% to 25%, compounding for three to five years. Two claims in three years may double your rate or get you non-renewed. Over time, even a $5,000 payout can cost you $8,000 in higher premiums. Policy limits and coverage exclusions make the math even more complicated. If your dwelling coverage is $250,000 and your damage is $180,000, the claim makes sense. If your policy excludes the cause (flood, earthquake, wear and tear) or limits payout to actual cash value instead of replacement cost, you may get far less than repair estimates and still face a rate hike.

Your long-term claim history follows you around. Insurers share claims data through industry databases. Multiple claims, even with different carriers, mark you as higher risk, raising future premiums or making coverage unavailable. Financial factors to weigh before filing:

  • Deductible amount and how much of the repair cost you’re paying regardless
  • How often you’ve filed in the past and how this new claim affects your risk profile
  • Expected premium increase percentage and how many years it stacks up
  • Total estimated repair cost and whether it significantly beats your deductible
  • Long-term property value impact if damage is left unrepaired or poorly repaired

Claim Timing Factors and How They Affect Approval

OfK1Mwc8QYWGZJWme-26Wg

Timing starts when damage occurs. Most policies require you to report a claim within a set window (commonly 30 to 90 days) or risk denial for late notice. Inspection scheduling happens after you file, and you need to make the property accessible. Delaying inspection while you start permanent repairs creates problems. The adjuster arrives to find new drywall, fresh paint, and a replaced roof, with no way to verify what was damaged, how it happened, or whether your estimate is accurate. That scenario frequently leads to reduced payout or full denial because the insurer can’t fulfill its right to inspect and appraise before repair.

Record keeping best practices center on time-stamped documentation. Take photos right after discovering damage, then again after temporary mitigation, and once more when the adjuster inspects. Mitigation receipts should include dates, vendor names, and descriptions of work performed. If you tarp your roof on Monday and the adjuster inspects on Friday, those receipts and dated photos prove you mitigated responsibly without hiding evidence.

Three timing factors that directly affect claim approval:

  • Scheduling the adjuster inspection quickly after filing and before any permanent repairs, so original damage is visible and verifiable
  • Meeting policy deadlines for initial claim notification, typically 30 to 90 days from the date of loss or discovery
  • Understanding that delayed reporting (waiting weeks or months) gives insurers grounds to question whether damage got worse due to neglect, not the original cause

Claim Denial Risks and How Repairs Influence Insurer Decisions

E-MRRX0HSaisNxB2x10C_g

Claim denial reasons range from paperwork errors to policy exclusions, but how and when you repair directly influences several common denial triggers. Permanent repairs completed before the insurer inspects eliminate the adjuster’s ability to verify cause, scope, and cost. Insufficient documentation (missing photos, no receipts, vague damage descriptions) makes it worse. Together, premature repairs and poor records create a scenario where the insurer doubts your claim’s validity and denies it outright.

Excluded perils show up a lot in denials. Flood damage requires separate flood insurance. Earthquake damage needs an earthquake endorsement. Wear and tear exclusion applies when damage results from deferred maintenance rather than a sudden event. If you repair before inspection, the adjuster can’t tell the difference between storm damage (covered) and long-term roof deterioration (excluded). The insurer defaults to denial. False statements or inflated estimates discovered during investigation also trigger denial, and repairs that erase evidence make it easier for insurers to claim you misrepresented things.

Third-party negligence shifts liability. If a neighbor’s tree falls on your roof, your insurer may pay your claim then go after the neighbor’s liability policy. But if you repair immediately and toss all evidence, your insurer loses the ability to prove the neighbor’s fault, weakening both your claim and any subrogation recovery. Tips to avoid claim denial center on preserving the insurer’s inspection rights, keeping complete records, and performing only temporary mitigation until the adjuster has documented original conditions.

Denial Reason How Repairs Influence It
Failure to file on time Rushing to repair without notifying insurer can cause you to miss filing deadlines entirely
Insufficient documentation Permanent repairs erase physical evidence; without before-photos and receipts, insurer cannot verify claim
Excluded perils or wear and tear Adjuster cannot distinguish covered cause from excluded cause if damage is already repaired or replaced
False or misleading statements Replacing damaged materials before inspection makes it impossible to confirm your damage description, raising fraud suspicion
Third-party negligence Discarding evidence or repairing before adjuster documents can prevent insurer from recovering costs from responsible party

Role of Contractors, Adjusters, and Professional Support in Property Damage Claims vs Home Repair

yDlF7UT1S4SznkT3niWg0A

When you’re filing an insurance claim, hiring a contractor with experience in insurance restoration work helps a lot. These contractors know how to document damage, write detailed scopes of work, and communicate with adjusters. Licensed contractors are required for major repairs in many policies, and insurers may dispute or deny claims if unlicensed or DIY work fails to meet code or quality standards. The contractor provides an independent estimate that you can compare against the adjuster’s approved scope, and if the two differ significantly, the contractor’s detailed line items support your case for a supplement or appeal.

Public adjusters and independent adjusters play different roles. A public adjuster works for you, not the insurer, and helps document damage, prepare estimates, and negotiate the claim for a percentage of the payout (typically 5% to 15%). An independent adjuster works for the insurer and inspects your property on their behalf. Both provide professional assessments, but their loyalties differ. If your claim is large, complex, or disputed, a public adjuster may recover enough additional payout to justify the fee. For straightforward claims, you may not need one.

When you’re paying for repairs out-of-pocket without filing a claim, the contractor’s role simplifies. You get estimates, choose a contractor, and manage the job directly. Key considerations:

  • Contractor estimate accuracy. Detailed line-item scopes prevent surprise costs and change orders.
  • Scope of work definition. Clear contracts specify materials, timelines, permits, and final deliverables.
  • Change orders management. If hidden damage appears mid-job, document it and get a written change order before proceeding.
  • Licensing, insurance, and references. Verify credentials to avoid liability if the contractor causes further damage or injury.

Final Decision Framework: Choosing Between a Property Damage Claim vs Home Repair

F7BRQxV8SaKcs9sAb8xqiQ

Deciding whether to file a property damage claim or handle a home repair yourself requires evaluating multiple factors at once. Start by assessing repair urgency and habitability. If the damage makes your home unsafe or unlivable (no water, no heat, structural collapse, toxic smoke residue), you likely need professional restoration whether you file a claim or not. If the home stays habitable and the damage is contained, you’ve got time to weigh costs, gather estimates, and decide.

Next, compare realistic repair timelines against your deductible and premium risk. If the total repair cost is less than your deductible, filing makes no financial sense. If the cost significantly exceeds the deductible (say $15,000 in damage with a $2,500 deductible), the $12,500 potential payout may justify a claim despite possible premium increases. Factor in how many claims you’ve filed in the past three years and whether this new claim will push you into a higher-risk category.

Seven decision factors that guide the choice between filing a claim and paying for repairs out-of-pocket:

  • Total estimated repair cost versus your deductible amount
  • Potential premium increase over the next three to five years
  • Your recent claim history and how this new claim affects insurability
  • Urgency of repairs (safety, habitability, preventing further damage)
  • Whether damage cause and scope are clear or if hidden damage may exist
  • Your ability to document damage thoroughly before any permanent repairs
  • Policy coverage limits, exclusions, and whether your damage qualifies under policy terms
Scenario Best Option Why
Low-cost damage (repair estimate below or near deductible) Pay out-of-pocket Filing nets little or no money, risks premium increase, and adds a claim to your history; paying yourself keeps insurance clean
Major damage (repair estimate significantly exceeds deductible) File a claim after documenting and before permanent repairs Insurance payout can cover most costs; temporary mitigation allowed; professional inspection ensures hidden damage is found and covered
Uncertain cause or scope (visible damage but unknown extent or covered cause) Get professional inspection, document thoroughly, file if damage meets threshold Hidden damage may turn a small problem into a major one; early documentation preserves your claim rights if scope grows; contractor or public adjuster can help assess

Final Words

You’ve stopped the leak, taken photos, and started to weigh the cost versus the claim.
This post ran through how claims work, why insurers need to inspect, when temporary fixes are okay, and how deductibles and premiums change the math.

Think through safety, habitability, documentation, and contractor estimates before you decide. Use the decision checklist for a clear path on a property damage claim vs home repair.
You’ll make the right call and move your home back toward normal.

FAQ

Q: Can I keep my homeowners insurance claim check and make the repairs myself?

A: You can sometimes keep your homeowners insurance claim check and make repairs yourself, but only if your insurer and any mortgage lender allow it; avoid permanent repairs until the adjuster inspects and keep receipts, photos.

Q: What should you not say to a claims adjuster?

A: You should not tell a claims adjuster you caused the damage, guess fault, admit previous issues, downplay losses, promise fixes before inspection, or give recorded statements without checking coverage.

Q: What are common examples of property damage?

A: Common examples of property damage include water from burst pipes or leaks, storm and roof damage, fire and smoke, vandalism, fallen trees, and mold growth after moisture.

Q: How long does a property damage claim take?

A: A property damage claim timeline varies: initial response or inspection often within 24–72 hours, but full resolution and repairs can take weeks to months depending on complexity, documentation, and approvals.

Bathtub Black Mold Removal: Safe Methods That Actually Work

0

Think scrubbing will solve bathtub black mold? Think again.
Small patches can be handled safely at home if you act right. Gear up with an N95 respirator (filters tiny particles), gloves, and goggles, ventilate the room, and use vinegar or 3% hydrogen peroxide to kill surface growth before you scrub.
This guide gives clear, step-by-step methods that actually work, what to try first, how to treat different tub surfaces, when to remove caulk or open a wall, and when to call a pro.

Immediate Steps for Effective Bathtub Black Mold Removal

3qBPEqrwTNWbmeEioIY_JA

When you spot black mold in your bathtub, the first move is to protect yourself and stop it from spreading while you work. You don’t need an entire remediation plan before you start. You need to gear up, open a window, and get the mold off the surface before it gets worse.

Put on an N95 respirator, rubber gloves, and safety goggles before you touch anything. Open the bathroom window or turn on the exhaust fan and leave it running. If you don’t have a window, point a small fan toward the door to push air out of the room. Grab a spray bottle of undiluted white vinegar or 3% hydrogen peroxide. Both work on light surface mold without harsh fumes.

Here’s the sequence:

  1. Gear up with N95 mask, gloves, and goggles.
  2. Ventilate by opening a window or running the exhaust fan.
  3. Spray the moldy area completely with vinegar or hydrogen peroxide.
  4. Let it sit for at least a few minutes so the cleaner can penetrate the mold.
  5. Scrub with a stiff brush, working the cleaner into grout lines and corners.
  6. Rinse thoroughly with hot water and dry everything with a towel or squeegee.

That’s the core loop for bathtub black mold removal when the contamination is small and surface level. The goal is to kill the mold, lift it off, and dry the surface so it doesn’t grow back overnight.

Identifying Black Mold in the Bathtub and Understanding Its Root Causes

PFsKIbjUSjuDPxq84T-Q-Q

Black mold shows up as irregular dark spots, often black or dark green, with a raised texture that can feel slimy when wet or fuzzy when dry. If you run your hand near it, you’ll usually notice a musty, earthy smell that doesn’t go away after a normal cleaning. That odor is a reliable sign that mold has taken hold.

The most common bathroom molds are Penicillium and Aspergillus, which together account for about 59% of what we find in tested bathrooms. Chaetomium appears in roughly 17% of cases, and Stachybotrys (the species people call “black mold”) shows up in about 16% of bathrooms. All of them love the same conditions. Humidity above 60% and temperatures between 20 and 30°C. When water sits on caulk, grout, or tile for hours after a shower, mold moves in.

Early warning signs include:

  • Irregular black, dark green, or gray spots on grout, caulk, or tile
  • Slimy or fuzzy texture when you touch the area
  • Persistent musty or earthy odor even after cleaning
  • Soft, crumbling, or discolored grout lines
  • Loose tiles or caulk that peels away easily

Mold doesn’t just sit on top of surfaces. It sends roots into porous materials like grout and caulk, and it can grow behind tiles if water has been leaking through cracks. Soft grout or tiles that move when you press on them are signs that water has been sitting where you can’t see it.

Step-by-Step Bathtub Mold Removal Methods for Different Severity Levels

B-dEPRxTHCkorcDlx8SGw

Light surface mold responds well to one cleaner, one scrub session, and thorough drying. Stubborn or hidden mold requires stronger agents, longer dwell times, and sometimes removal of caulk or tile to reach contamination underneath. The severity of the problem determines which path you take.

For light mold on surfaces like tile or porcelain, spray undiluted white vinegar and let it sit for at least one hour. Then scrub with a stiff brush, rinse with hot water, and dry completely. If vinegar doesn’t lift the stain, switch to 3% hydrogen peroxide. Spray it on, let it bubble for 10 to 15 minutes, scrub, rinse, and dry. For moderate contamination with visible staining in grout, make a paste from baking soda and a small amount of water, apply it to the moldy area, let it sit, scrub with a grout brush, then rinse and dry.

When mold keeps coming back or you see black growth deep in grout lines, use a bleach solution (1 cup of bleach per 1 gallon of water). Apply it only to hard surfaces, let it sit for 15 minutes, scrub, rinse thoroughly, and dry. Never mix bleach with ammonia or other cleaners. Open a window and keep the fan running because bleach fumes are harsh.

Treating Stubborn or Hidden Bathtub Mold

Mold under caulk or behind loose tiles won’t come off with surface cleaning. You have to remove the old caulk with a utility knife or caulk removal tool, scrape out the mold underneath, clean the joint with hydrogen peroxide or diluted bleach, and let it dry completely. Use a fan or dehumidifier if the bathroom stays damp. Once the surface is dry and clean, apply mold resistant caulk and smooth it into place. If tiles are loose or grout is soft and crumbling, water has likely been sitting behind the wall. That contamination often requires opening the wall, which is professional territory.

Cleaner options from natural to commercial:

  • Undiluted white vinegar – Safe, effective on light mold; dwell time 1 hour.
  • Baking soda paste – Gentle; good for scrubbing and deodorizing.
  • 3% hydrogen peroxide – Kills mold without residue; dwell time 10 to 15 minutes.
  • Bleach solution (1 cup per gallon) – Strong but harsh; use sparingly on hard surfaces; dwell 15 minutes.
  • Commercial mold removers – Pre-mixed sprays designed for bathroom mold; follow label instructions.
  • Enzymatic mold cleaners – Break down organic material; good for recurring contamination.
  • Mold resistant bathroom cleaners – Prevent regrowth when used weekly after initial removal.

Bathtub Grout and Caulk Black Mold Treatment Strategies

eLJq-p21S9GKQtRZdQkOZw

Grout and caulk trap moisture and give mold a foothold that surface cleaning can’t always reach. When black mold is visible in grout lines, scrub it with a grout brush and hydrogen peroxide or a baking soda paste. Let the cleaner sit for at least 10 minutes, scrub hard, rinse, and dry. If the grout feels soft or crumbles when you touch it, water has soaked in and mold may be deeper than you can reach with a brush.

Caulk is different. Mold growing on caulk often means mold is growing under it, too. The only reliable fix is to remove the old caulk completely, clean the joint beneath, dry it thoroughly, and reseal with mold resistant caulk. Leaving moldy caulk in place just hides the problem.

Step by step caulk and grout treatment:

  1. Remove old caulk with a utility knife or caulk removal tool, scraping carefully to avoid damaging the tub or tile.
  2. Clean the exposed joint with 3% hydrogen peroxide or diluted bleach; scrub any remaining mold.
  3. Dry the area completely using a towel, fan, or dehumidifier; wait at least a few hours if the bathroom stays humid.
  4. Apply mold resistant caulk in a smooth bead, tool it into place, and let it cure fully before using the tub.

Bathtub Surface Types: Mold Removal Techniques for Porcelain, Acrylic, and Fiberglass

FYUU086lQXyYYP5aqcQMKQ

Different tub materials handle scrubbing and chemicals differently. Porcelain and ceramic tile are hard, so you can scrub them with stiff brushes and use stronger cleaners like diluted bleach without worrying about scratches. Acrylic and fiberglass tubs scratch easily, so you need soft bristled brushes or sponges and gentler cleaners like vinegar or hydrogen peroxide.

Tile surrounds with grout are porous and absorb moisture, making them more prone to deep mold growth. Grout can also break down if you use too much bleach too often, so stick with peroxide or vinegar for routine cleaning and save bleach for stubborn cases.

Regardless of material, the dwell times stay the same. Vinegar for at least one hour, hydrogen peroxide for 10 to 15 minutes, bleach solution for 15 minutes. The difference is in how hard you scrub and what tools you use.

Surface Type Recommended Cleaner Scrubbing Tools Cautions
Porcelain or ceramic tile Vinegar, hydrogen peroxide, or diluted bleach Stiff bristled brush, grout brush Avoid excessive bleach on grout; rinse thoroughly
Acrylic bathtub Vinegar, hydrogen peroxide, baking soda paste Soft bristled brush, sponge, microfiber cloth No abrasive scrubbers; avoid scratching surface
Fiberglass bathtub Vinegar, hydrogen peroxide, mild commercial cleaner Soft brush, scratch safe sponge Do not use bleach or abrasive pads; scratches trap mold
Tile surround with grout Hydrogen peroxide, vinegar, grout safe mold cleaner Grout brush, old toothbrush for corners Limit bleach use; seal grout after cleaning to reduce porosity

Safety Guidelines for Bathroom Mold Removal

m7cZpm9LRiyIeY9mj8z3Yg

Mold releases spores when you disturb it, and those spores can irritate your lungs, eyes, and skin. The right safety gear keeps you from breathing them in or getting cleaner chemicals on your hands and face. An N95 respirator filters out mold spores. A half face respirator with P100 filters offers even better protection if the contamination is heavy. Wear rubber gloves (nitrile, latex, or vinyl) and safety goggles to protect your eyes from spray and splashes.

Ventilation controls where the spores go. Open a window or run the exhaust fan before you start cleaning, and keep it running the entire time. If you use a portable fan, point it toward an open window so it pushes air out, not into other rooms. Never mix bleach with ammonia or other cleaners. The reaction releases toxic chloramine gas. Use bleach sparingly, rinse surfaces completely after cleaning, and dispose of contaminated rags and sponges in sealed plastic bags immediately after the job.

Key safety practices:

  • Wear an N95 or P100 respirator to filter mold spores.
  • Use disposable gloves and goggles to protect skin and eyes.
  • Ventilate with a window or exhaust fan running continuously.
  • Never mix bleach with ammonia or any other cleaning product.
  • Direct airflow out of the room, not into hallways or living areas.
  • Dispose of used cleaning materials in sealed bags to prevent spore spread.

If you start coughing, wheezing, or feeling short of breath while you’re cleaning, stop immediately, leave the bathroom, and get fresh air. Recurring symptoms or worsening respiratory issues mean it’s time to call a professional and let them handle the removal with containment and air scrubbers.

Preventing Future Bathtub Black Mold Growth

qz51jbnTSEurB5mqmD_okg

Mold grows when moisture sits on surfaces long enough for spores to take root. The most effective prevention is controlling humidity and drying the tub after every use. Keep bathroom humidity below 50%. Use a dehumidifier if your bathroom stays damp, especially in basements or homes without windows.

Run the exhaust fan during your shower and for 20 to 30 minutes after you finish. If you don’t have a fan, open the bathroom door or window to let humid air escape. After each shower, squeegee the walls and glass, then dry the tub corners and caulk lines with a towel. Those small steps remove the standing water that mold needs.

Clean the bathtub at least once a week with warm water and a mold inhibiting cleaner or a quick vinegar spray. Do a deep clean with hydrogen peroxide or a commercial mold cleaner once a month, scrubbing grout lines and inspecting caulk for cracks or discoloration. Fix leaks as soon as you notice them. Dripping faucets, loose showerheads, and cracked caulk all feed mold growth. Replace cracked or failing caulk immediately, and use mold resistant caulk when you reseal joints.

Daily, weekly, and monthly prevention routine:

  • After every shower: Squeegee walls and glass; dry tub corners and caulk with a towel.
  • Daily: Run exhaust fan or open a window to reduce humidity.
  • Weekly: Light clean with warm water and dish soap or quick vinegar spray.
  • Monthly: Deep clean grout and caulk with hydrogen peroxide or commercial mold cleaner.
  • As needed: Fix leaks, reseal cracked caulk with mold resistant product, wash or replace shower curtains.
  • Ongoing: Keep bathroom humidity below 50% using a dehumidifier or air conditioner.
  • Storage: Store bath items (sponges, loofahs, bottles) where they can dry between uses.
  • Inspection: Check grout and caulk every few months for soft spots, cracks, or early mold growth.

When Professional Bathtub Mold Remediation Is Necessary

PHBk96faSamw5bHParGASA

Most surface mold on tubs, tile, and grout is a DIY job. But when contamination covers more than one square foot, keeps coming back after you clean it, or shows up in places you can’t reach without opening walls, it’s time to call a professional. Hidden mold under the tub, behind tiles, or inside walls requires access you don’t have, tools you probably don’t own, and containment procedures that keep spores from spreading through your home.

If you smell a persistent musty odor but can’t find visible mold, that’s another sign of hidden contamination. Professionals use moisture meters, thermal cameras, and inspection scopes to locate water intrusion and mold growth behind surfaces. They also seal off the work area, use HEPA air scrubbers to filter spores, and remove contaminated materials safely.

When to hire certified mold remediation professionals:

  • Mold contamination covering more than 1 square foot
  • Mold behind tiles, under the tub, or inside walls
  • Persistent musty odor with no visible mold source
  • Mold that returns within days or weeks after cleaning
  • Soft, crumbling, or water damaged walls near the tub
  • Health symptoms (coughing, wheezing, headaches) that worsen during or after cleaning

Professional remediation typically involves containment, removal of damaged materials, HEPA filtration, antimicrobial treatment, and verification after the work is done. Costs vary based on the size and location of contamination, but addressing hidden mold early prevents more expensive structural repairs and ongoing health risks.

Final Words

Get your N95 on, open a window, and act fast: ventilate, apply vinegar or 3% hydrogen peroxide, scrub, rinse, and fully dry. No guesswork.

We covered how to spot real black mold, when to remove caulk or repair grout, and how porcelain, acrylic, and fiberglass need different care. We walked through safety—gloves, goggles, and never mixing cleaners—and simple prevention like squeegeeing and running the fan.

For most jobs this plan nails bathtub black mold removal. If it hides behind tiles or keeps coming back, call a pro. You’ll get the bathroom back to normal.

FAQ

Q: How to get rid of black mold in a bathtub?

A: To get rid of black mold in a bathtub, wear N95, gloves, and goggles, open windows or run the fan, apply undiluted vinegar or 3% hydrogen peroxide, let it sit, scrub, rinse, and fully dry the area.

Q: Is bleach or vinegar better to kill mold? What kills black mold permanently?

A: Bleach can clean nonporous surfaces but won’t penetrate porous spots; vinegar or 3% hydrogen peroxide is usually better for tub mold. Nothing guarantees permanent kill—fix moisture, dry, and reseal to stop return.

Q: Is it safe to shower in a bathroom with black mold?

A: Showering in a bathroom with black mold can irritate sensitive people; avoid it if you have asthma, allergies, or open wounds. Better to ventilate and clean visible mold before regular use.

Diy Mold Remediation: Quick & Safe Cleanup

0

Have you ever wondered if you can handle a mold cleanup yourself? If you’ve only got a small area affected, less than 10 square feet, you might be in luck. In this guide, we show you how to spot the leak, seal off the area, and safely remove the mold using everyday supplies and proper safety gear (protective items like gloves and a mask).

We keep the steps easy to follow, so you can act quickly and keep your home safe before the problem grows. Read on and learn how you can protect your space and your health.

Step-by-Step DIY Mold Removal Process

This guide is for small mold patches under 10 square feet. If you suspect toxic mold such as black mold or the area is larger, please call a professional. Your safety comes first, so wear an N95 mask, gloves, and goggles (eye protectors) before you start.

Before you clean up, find the moisture source that led to the mold. Fix any leaks to stop more water damage. Then, set up a sealed work area with plastic sheeting and tape to keep mold spores contained.

  1. Find and repair the leak or moisture source.
  2. Seal the work area with plastic sheeting and tape.
  3. Apply a cleaning solution (a mix of bleach and water or white vinegar, which helps kill mold) to the moldy spot.
  4. Scrub the surface with a stiff-bristle brush to remove the mold.
  5. Rinse the area well with clean water.
  6. Dry the area completely with fans or a dehumidifier (a machine that removes moisture from the air).
  7. Dispose of any contaminated materials carefully to avoid spreading mold spores.

If the mold covers more than 10 square feet or if you see toxic mold signs, call a professional immediately. For expert help with bigger jobs, check out our mold remediation process.

Mold Detection and Assessment in Your Home

img-1.jpg

Start by looking around your home for signs of mold. Check walls, ceilings, and corners where moisture collects. Mold often looks fuzzy or slimy and can show up in colors such as black, green, or blue. Mildew is different, it feels powdery and has a gray hue. Look for water stains, condensation, or any musty smells that aren’t normal.

Next, figure out which type of mold you have. Common types include Cladosporium, Penicillium, Aspergillus, Alternaria, and Stachybotrys, also known as black mold. Black mold can harm your health and damage your home’s structure. Knowing the type helps you decide if a simple cleaning is enough or if you should call a professional.

Finally, measure the moldy area. If it covers less than 10 square feet, you might clean it yourself. Be sure to check behind walls and under floors as mold can hide there. Use this checklist: note visual changes, watch for musty smells, measure the area, and mark spots that need a closer look.

Essential DIY Safety Gear and Supplies for Mold Cleanup

Wear the proper safety gear before you start cleaning mold. Use an N95 mask or half-mask (a device that filters harmful spores) along with goggles and nitrile gloves. This gear protects your lungs, eyes, and skin and helps lower your chance of irritation or infection. Wear long sleeves and pants, and if you have them, disposable coveralls.

Set up a work area that limits mold spores from spreading. Cover nearby areas with plastic sheeting and secure it with painter’s tape. If possible, use a negative-pressure fan (a machine that controls airflow) to pull contaminated air outside. This helps keep spores from drifting to other parts of your home.

Gather your tools before cleaning. Have spray bottles ready with your cleaning solution and use a stiff-bristle brush to scrub mold off surfaces. A HEPA-filter vacuum (a vacuum that traps tiny particles) can capture fine spores, and 100-grit sandpaper is useful for smoothing surfaces after mold removal.

Natural vs. Chemical Solutions for DIY Mold Remediation

img-2.jpg

When cleaning up mold on your own, you need a cleaner that works well, keeps you safe, and matches the surface you are treating. You want a product that fights mold effectively without causing extra damage. Consider how long the product needs to sit on the mold, whether it gives off strong fumes, and if it might harm porous materials. This guide shows you a side-by-side look at some common products so you can decide which one best fits your needs.

Solution Ingredients Effectiveness Safety Notes
White Vinegar White distilled vinegar Fights about 82% of mold species (needs 10–15 minutes contact) May etch some surfaces if used too long
Hydrogen Peroxide 3% hydrogen peroxide Good for killing mold spores Non-toxic but can bleach some materials
Tea Tree Oil Spray Tea tree oil mixed with water Works as a natural antifungal Strong oils can hurt finishes if overused
Bleach Solution 1 part bleach, 3 parts water Works fast to kill mold Strong fumes; may damage surfaces
Baking Soda Solution Baking soda dissolved in water Helps to keep surfaces fresh and stop mold from coming back Very gentle; great for regular upkeep

Before you use any product, work in a well-ventilated space by opening windows or turning on a fan to clear out fumes. Always test a small spot first to make sure the cleaner does not harm the surface. Adjust how long you let the product sit based on the material for a safe and effective cleanup.

DIY Mold Remediation: Quick & Safe Cleanup

Mold can be a real hassle, but you can clean it safely yourself. Different materials like concrete, wood, and bathroom ceilings need special care. Here’s how you can clean them quickly and keep your home safe.

Concrete Walls

Start by wetting the wall to loosen the mold. Then, apply a cleaning solution and scrub hard with a stiff brush to work the solution into the rough surface. Rinse well with clean water, making sure no residue stays that could attract more mold. Use fans or a dehumidifier (a machine that pulls moisture from the air) to dry the wall completely. Once dry, put on a mold inhibitor to help stop future growth. Check it often because concrete can soak up moisture quickly.

Wood Surfaces

Wood is extra delicate since it can absorb moisture. First, use a HEPA vacuum (a cleaner that traps tiny particles) to remove loose mold spores. Mix warm water with a bit of dish soap, and gently wipe the wood with a soft cloth or sponge. For stubborn mold, lightly sand with 100-grit sandpaper to remove it, then vacuum up the dust. Ensure the wood fully dries to prevent more mold. Regular cleaning helps keep wood looking good and lasting longer.

Bathroom Ceilings

Bathrooms are humid, which helps mold thrive. Spray a bleach or vinegar solution evenly over the ceiling and let it sit for 10-15 minutes so it can break down the mold. After that, scrub well with a brush to get rid of all the mold and grime. Rinse with water and then dry the ceiling completely using fans or a dehumidifier. Finish up by applying a mold-resistant treatment to guard against future mold growth.

DIY Strategies to Prevent Mold Regrowth

img-3.jpg

Mold keeps coming back if your home stays wet. Leaky roofs, broken pipes, or windows that aren’t sealed properly let in water that feeds mold. Even after cleaning, if you don’t fix these leaks, moisture will allow mold to return. Checking the inside and outside of your home often can help you spot these issues early.

Keeping air flowing and humidity low is your best defense. Use a dehumidifier (a machine that pulls moisture from the air) to keep indoor humidity below 50%. Turn on exhaust fans in kitchens and bathrooms while cooking or bathing to help lower moisture. Make sure water drains away from your home’s foundation. Taking these steps together makes your space drier and less inviting for mold.

Regular maintenance is essential to keep mold at bay. Check areas prone to dampness, like basements, attics, and crawl spaces, for signs of water damage or condensation on walls and windows. When you spot even a small leak or persistent damp spot, fix it immediately. Regular checks not only stop mold from growing back but also help keep your home safe and sound.

DIY Mold Testing Methods and When to Seek Professional Help

Mold test kits you can use at home help you get a simple idea of mold in your space. These kits let you swab surfaces or collect air samples, which are then sent to a lab (a place that checks for mold types and amounts). Keep in mind that these kits vary in how well they work. They work best when mold is limited to a small area, usually less than 10 square feet. While they can show you a rough idea of the mold level, they might not find hidden mold behind walls or under floors.

It is important to measure the area affected by mold before you decide to clean it yourself. If mold covers more than 10 square feet or you spot stains and smells that suggest there is more mold, the test kit might not reveal the full picture. Also, ongoing moisture or visibly damaged building materials can mean mold has spread unseen.

If you think the mold might be harmful or you see signs of mold where it could weaken your home’s structure, it’s best to call in experts. Our professionals use special tools to contain harmful substances (mycotoxins are the toxins some molds produce) and find mold in hidden spots, ensuring a safer and more complete cleanup.

Post-Remediation Maintenance and Mold-Resistant Home Improvements

img-4.jpg

After mold cleanup, you can boost your home to keep mold from coming back. Start by sealing cracks and applying moisture barriers (materials that stop extra water) in basements and crawl spaces. These steps stop water from seeping into surfaces and lower mold risk. Upgrading your insulation helps too by reducing condensation on walls and ceilings. Adding mold-resistant paint or primer on cleaned surfaces builds a barrier against future mold. Plus, installing or upgrading exhaust fans in kitchens and bathrooms cuts down indoor humidity, making your home less inviting to mold.

Keep up with long-term care by doing periodic treatments yourself. For example, you can use a DIY mold spray made from baking soda or mix a few drops of tea tree oil in water to treat problem spots. Regularly check your home’s humidity and fix small leaks right away. These improvements and simple steps help maintain a safe, healthy home after mold remediation. Routine maintenance not only secures your upgrades but also catches moisture issues early before they grow into bigger problems.

Final Words

In the action, we covered every key step to tackle mold, from spotting the problem and assembling safety gear to choosing the right cleaning solution. We walked through surface-specific methods and shared ways to stop mold from coming back through simple home improvements. We also looked at when to test and when to call an expert. These clear, affordable steps help you stay safe and in control with diy mold remediation that gets your home back to a secure, livable space.

FAQ

How do you approach DIY mold remediation for walls and drywall?

DIY mold removal on walls and drywall involves sealing off the area, cleaning with a safe solution (like vinegar or a baking soda mix), scrubbing, rinsing, and drying the surface while wearing proper protective gear.

What do Reddit discussions say about DIY mold remediation?

Reddit users share mixed experiences, noting that small mold issues can be tackled safely by homeowners. They stress caution with larger infestations and recommend professional help when toxic or widespread mold is present.

What kills mold permanently in a house?

Effective mold killers include white vinegar, hydrogen peroxide, and specialized cleaning agents. However, completely eliminating mold involves fixing moisture problems to prevent regrowth over time.

How does baking soda work for DIY mold remediation?

Baking soda mixed with water (and sometimes vinegar) creates a safe cleaning solution. It helps scrub mold, neutralizes odors, and can be used as part of a broader cleaning process to reduce mold buildup.

How should you perform DIY mold remediation in a basement?

Basement mold cleanup begins with drying out the area and identifying moisture sources. Clean affected surfaces with a safe solution, contain the spread, and ensure good ventilation to prevent mold from returning.

When is mold remediation required and can you remediate mold by yourself?

Remediation is needed when mold covers over 10 square feet or if toxic varieties are present. Homeowners can handle small patches, but larger or toxic infestations should be addressed by professionals for safety.

What do EPA mold remediation guidelines recommend?

The EPA guidelines advise controlling moisture, using proper cleaning agents, wearing protective equipment, and ensuring thorough drying. They also stress safe disposal of contaminated materials and professional help for severe cases.

What is considered the cheapest way to remediate mold?

The most cost-effective method is a DIY approach using household items like vinegar, baking soda, or hydrogen peroxide. Remember to address moisture issues to stop the mold from returning.

Is bleach or vinegar better for removing mold?

Vinegar is often preferred because it is gentler and still effective against many mold types, while bleach may remove stains but can damage surfaces and create harmful fumes. Always test a small area first and ventilate the space.

Smoke Odor Sealing Primer That Actually Works

0

You can’t just paint over smoke smell and hope it goes away. Paint’s porous at the molecular level, which means smoke molecules pass right through and keep releasing odor into your room. That’s why you need an actual sealing primer, not regular paint. The right primer traps smoke molecules permanently by creating a barrier they can’t penetrate. We’ll show you which formulas work, how to match them to your contamination level, and what application steps actually seal the odor for good.

Top Smoke Odor Sealing Primers: Product Effectiveness and Selection

atof2ZLuSauks1ACeS3vrw

Product Name Base Type Effectiveness Rating Price Range Best For
KILZ Original Oil-based Heavy-duty/Severe $25-$35/gallon Tobacco residue, nicotine stains
KILZ Restoration Water-based Heavy-duty/Severe $30-$40/gallon Fire restoration, pet odors
Zinsser Odor Killing Primer Water-based Medium to Heavy $28-$38/gallon Cigarette smell, smoke damage
KILZ Original Low Odor Oil-based Heavy-duty/Severe $28-$38/gallon Sensitive spaces needing ventilation control
Shellac-based options Shellac Maximum/Severe $35-$50/gallon Extreme contamination, soot coverage

Regular paint doesn’t work because smoke molecules pass right through. Paint’s porous at the molecular level, which means odor keeps moving through the finish and releasing into your room. Odor blocking primers trap those molecules permanently by creating a sealed barrier they can’t penetrate.

Oil-based KILZ Original’s been the professional standard for over 40 years when you’re dealing with tobacco residue and heavy nicotine stains. Real estate investors choose it for rental turnovers because it handles cigarette smoke that’s soaked deep into drywall and plaster. The formula physically seals the surface and traps odor molecules before they reach your topcoat.

For severe contamination from fire damage or years of chain smoking, you need maximum blocking power. KILZ Restoration and Zinsser Odor Killing Primer both offer water-based formulas that match traditional oil performance while being easier to work with. Shellac-based options work when you’re dealing with extreme cases, like fire damage with heavy soot or rooms that have been smoked in for decades. Check product labels at your local store or kilz.com for detailed guidance on matching primer strength to your contamination level.

Choosing the Right Primer Formula: Base Types and Topcoat Compatibility

uCVk9_y7T9Guo3TUKaPBEQ

Shellac Base Primers

Shellac-based primers deliver maximum odor blocking chemistry for severe contamination. The shellac formula creates the tightest seal against smoke molecules, making it the go-to choice when nothing else has worked. You’ll need serious ventilation because shellac primers release strong fumes during application and drying, but that aggressive formula is exactly what traps stubborn odor molecules permanently.

VOC levels in shellac primers run higher than water-based options, so plan for open windows and fans. Shellac dries fast though, usually within 45 minutes, which means you can topcoat quickly. Both latex paint and acrylic finishes stick well to shellac primers once they’re fully cured. The chemistry creates a hard surface that grips topcoats securely, whether you’re using flat wall paint or semi-gloss trim enamel.

Oil-Based Coating Primers

Oil-based primers work best at sealing porous materials where smoke’s penetrated deep into wood paneling, unsealed drywall, or bare plaster walls. The oil chemistry soaks into the surface slightly before hardening, which means it seals from within the material, not just on top. This makes oil-based coating the right choice for old houses where tobacco smoke’s been absorbed into the structure over years.

Low-odor oil formulas like KILZ Original Low Odor give you the sealing power of traditional oil while producing fewer fumes. This matters when you’re working in occupied homes or spaces where ventilation is limited. VOC levels in modern low-odor oils are significantly lower than old-school formulas, though still higher than water-based options. Plan for moderate ventilation and don’t trap yourself in small rooms during application. Latex paint, acrylic finish, and oil-based topcoats all work over oil primers after the recommended dry time.

Water-Based Formula Primers

Water-based primers have improved dramatically. KILZ Restoration and Zinsser Odor Killing Primer both seal smoke odor as effectively as oil and shellac formulas, but clean up with soap and water. You can work in spaces without major ventilation concerns, and you won’t leave the house smelling like solvent for days.

The modern chemistry in water-based formulas creates a flexible seal that handles temperature changes better than rigid oil primers. This matters on surfaces that expand and contract, like ceilings and exterior-facing walls. Water-based primers work with any topcoat, from latex paint to oil enamel to clear polyurethane. They’re the universal choice when you need compatibility across different rooms or don’t know what finish you’ll use yet.

Base Type Odor Blocking Power VOC Level Compatible Topcoats Best Surface Types
Shellac Maximum High All paints and clear finishes Extreme contamination, all surfaces
Oil-based Heavy-duty Moderate to High All paints and finishes Porous materials, wood, plaster
Water-based Heavy-duty Low All paints and finishes Drywall, concrete, most surfaces

Topcoat adhesion depends partly on surface texture. Smooth finishes like painted drywall take any primer formula well. Textured surfaces like popcorn ceilings or heavily textured walls may need extra attention with oil-based primers to make sure you get complete coverage in the valleys. Modern water-based primers have excellent adhesion to glossy surfaces including enamel paints, varnished wood paneling, and even ceramic tile without sanding first.

You can tint most primers with up to one fluid ounce of universal colorant per gallon. This helps when you’re topcoating with a color that doesn’t hide well, like yellow or red. When working with concrete under flooring or on basement walls, water-based primers handle the slightly alkaline surface better than oil. For plaster walls, any formula works, but oil-based primers help stabilize old, chalky plaster. Always pre-test in an inconspicuous area when using specialty finishes like lacquer or catalyzed polyurethane, particularly over exotic woods or glossy paneling.

Surface Preparation Before Applying Smoke Sealing Primer

n7IYhbfgQIe4fEh3OAxl8w

Preparation determines whether your primer actually works. Smoke residue, nicotine film, and soot sit on the surface and block primer adhesion. If you prime over contamination without cleaning first, you’re sealing dirt to the wall, and the primer won’t bond properly.

Here’s the preparation sequence:

  1. Remove loose debris and wipe down all surfaces to get rid of soot and ash deposits
  2. Wash walls, ceilings, and trim with TSP solution (trisodium phosphate) mixed according to package directions, scrubbing in circular motions
  3. Pay extra attention to nicotine stains, which show up as yellow-brown discoloration and feel slightly sticky or greasy
  4. Use a degreasing cleaner on areas with heavy residue, particularly around light switches and door frames where hands have touched
  5. Rinse all surfaces with clean water to remove TSP residue, then let everything dry completely (24 hours minimum)
  6. Inspect porous materials like unsealed wood or bare drywall to confirm they’re dry to the touch and no moisture remains

Heavy contamination needs more aggressive cleaning than light residue. If you’re dealing with years of chain smoking, you may need to wash surfaces twice. Wood paneling often holds more contamination than drywall because the grain absorbs smoke oils. Plaster walls, especially old lime plaster, can be fragile when wet, so use less water and more careful scrubbing. Concrete for subfloors requires the same TSP wash because smoke odor soaks into concrete just like it does into drywall. Textured surfaces need extra scrubbing time to reach into the valleys where residue hides.

Step-by-Step Application Methods and Professional Techniques

TrXAM1TuQKiULNjhpjDdIw

Choose your application method based on how much area you’re covering and what surfaces you’re treating. Spray works fastest for whole rooms. Roller handles large flat areas efficiently. Brush gives you control for detail work and smaller spaces.

Spray Application for Large Areas

Set your airless sprayer to a 0.017 inch tip and 2000 to 2500 psi pressure. These settings atomize the primer properly without creating too much overspray. Hold the spray gun 10 to 12 inches from the surface and keep consistent distance as you move. Overlap each pass by about 30 percent to avoid thin spots.

For aerosol cans, shake for two full minutes and test spray on cardboard first. Keep the can 10 to 12 inches away and use smooth, even strokes. Aerosol works well for small projects, closets, or touching up areas you missed with roller or brush.

Professional contractors always pre-test spray patterns in an inconspicuous area first, usually behind a door or in a closet. They use overlapping spray patterns on high ceilings and work in sections to keep wet edges. In enclosed spaces, they spray in one direction first, then cross-spray perpendicular for complete coverage.

Roller Technique for Walls and Ceilings

Use a 3/8 inch nap roller for smooth drywall, a 1/2 inch nap for lightly textured surfaces, and a 3/4 inch nap for heavy texture. Pour primer into a roller tray, load the roller evenly, and roll off excess so you don’t drip.

For wall priming, start in a corner and work across in three foot sections. Apply primer in overlapping vertical strokes, then smooth horizontally without reloading. This spreads primer evenly and avoids roller marks.

Ceiling treatment requires more care. Work in three foot squares, rolling away from yourself first, then toward yourself, then perpendicular to blend. Keep the roller loaded but not dripping.

Professionals apply primer in “W” patterns on porous materials and textured surfaces. Roll a W shape about three feet wide, then fill it in with parallel strokes. This technique makes sure you get better coverage because it works primer into the surface texture before smoothing.

Brush Coverage for Detail Work

Use a 2 inch angled brush for trim, corners, and cutting in around ceilings and baseboards. A 3 inch flat brush handles larger areas like door frames and wood paneling. Load the brush about one third up the bristles, tap off excess, and apply with smooth strokes following the grain on wood.

Brush application gives you direct control for spot treatment areas where smoke damage is concentrated, like walls near ashtrays or above radiators.

Professional contractors use brush application to inspect the surface while they work. They treat all visible surfaces systematically, checking for missed spots, staining, or areas needing extra attention. Brushing lets you feel the surface condition and adjust coverage as you go.

Temperature and humidity affect how primer performs. Apply when it’s between 40°F and 90°F with relative humidity below 85 percent. Cold primer doesn’t flow well and dries too slowly. High humidity extends dry time and can cause adhesion problems.

Plan your recoat window based on the product label. Most primers are ready for a second coat within 45 minutes to an hour. For heavy contamination, that second coat matters. Don’t skip it just because the first coat looks good.

Success factors include addressing concrete under flooring before installing new carpet or laminate, and treating entire rooms, not just walls. Professionals prime ceilings, walls, trim, closets, and inside cabinets in one session so nothing gets missed.

Dry Time, Recoat Windows, and Coverage Rates

XYNdy7ZDRNejvejnzLeiQA

Timing affects whether your fire restoration or renovation stays on schedule. Rush the dry time and you’ll trap solvent under your topcoat, which causes adhesion failure and peeling later.

Application Method Touch Dry Recoat Time Full Cure
Brush 25 minutes 45 minutes 7 days
Roller 25-30 minutes 45 minutes to 1 hour 7 days
Spray 30 minutes 1 hour 7 days

Most primers dry to touch quickly, but that doesn’t mean they’re ready for topcoat. Touch dry means you won’t leave fingerprints. Recoat time means the primer’s hardened enough to accept another coat without lifting or wrinkling. Full cure takes a full week for maximum adhesion and hardness.

Coverage rate runs about 300 to 400 square feet per gallon on sealed surfaces like painted drywall. Porous materials like bare wood, unsealed concrete, or textured plaster may cut that to 200 to 250 square feet per gallon because they absorb more primer. Calculate your square footage by multiplying wall length times height, then adding all walls together. Don’t forget the ceiling if you’re priming it.

For areas with smoke penetration deep into the material, plan on two coats minimum. Your first coat seals the surface. The second coat makes sure you get complete coverage and blocks any remaining odor molecules. Temperature conditions and humidity factors change dry time significantly. In cold rooms near 40°F, double your dry time expectations. High humidity slows drying even more, so run a dehumidifier if you’re working in damp conditions.

Safety, Cleanup, and Storage Guide

BfoSnE7HSRWvld_HAI4QKA

Safety during application protects your lungs and skin. Proper cleanup and storage extend primer shelf life and prevent environmental problems.

Safety Precautions During Application

Wear a respirator mask rated for organic vapors (not just a dust mask) when using oil-based coating or shellac primers. Put on nitrile gloves, safety goggles, and long sleeves to keep primer off your skin. Open windows and run fans to create cross ventilation in enclosed spaces, especially basements and small rooms.

Check VOC levels on the product label. Oil primers and shellac require more ventilation than water-based formulas. Control fumes by sealing off rooms you’re not working in and pointing fans outward to push contaminated air outside. Take breaks outside when working on high ceilings or in musty basement areas where air circulation is poor.

Product safety differences matter. Water-based formulas produce minimal fumes and won’t make you dizzy if you’re working in a bathroom or closet with limited airflow. Oil-based coatings require real ventilation, not just cracking a window. Professional contractors doing application in their own rentals still suit up with respirators for oil primers because the solvent exposure adds up over hours. Environmental impact is lower with water-based primers. Less VOC release means less air pollution and easier disposal.

Cleanup Procedures and Storage Guidelines

Water-based formulas clean up with warm water and liquid detergent. Rinse brushes and rollers under running water until the water runs clear, work detergent into the bristles or nap, rinse again, then shake out excess water and let them dry. Clean spray equipment immediately by running warm water through until it comes out clear.

Oil-based coating requires mineral spirits or xylene for cleanup. Pour solvent into a container, work the brush or roller through it, wipe on newspaper, then repeat with fresh solvent. Once tools are clean, wash with soap and water to remove solvent residue. Disposal guidelines for contaminated solvent vary by location. Never pour it down the drain. Many areas have household hazardous waste collection for paint solvents.

Proper disposal and storage steps:

Wrap used rags and brushes from oil primers in water, then seal in a metal can to prevent spontaneous combustion. Store opened containers with the lid hammered tight, turned upside down to create a seal, at temperatures between 40°F and 90°F. Keep unopened containers in a climate controlled space, not in an unheated garage where freezing and thawing breaks down the formula.

Check expiration dates or manufacture dates. Most primers last two to three years unopened, one year after opening. Environmental impact includes proper disposal of empty cans through municipal recycling programs that accept paint containers.

Product limitations for humid interior areas include not using primers in bathrooms with constant moisture or on surfaces that get regular water contact like shower walls. Primers seal odor but aren’t waterproof membranes. In areas with high humidity, run a dehumidifier before priming and maintain good ventilation afterward to prevent moisture from getting trapped under the primer layer.

Common Problems: Odor Breakthrough and Stain Bleedthrough

PxQOPgUCQCKyCtMX-UKr_Q

Problems happen when shortcuts get taken or contamination is worse than it looked. Knowing what goes wrong helps you prevent it.

Common mistakes that cause failure include inadequate surface preparation. Skipping the TSP wash or not scrubbing hard enough leaves a film that blocks primer adhesion. Skipping concrete under flooring means smoke soaks into concrete slabs and subfloors, then releases odor up through new carpet or laminate. Single coat on heavy contamination might look good but won’t seal severe nicotine stains or years of tobacco residue.

Missing enclosed spaces like closets, cabinets, or the areas behind radiators where smoke concentrates is another problem. Insufficient dry time before topcoating rushes the recoat window, traps solvents and prevents proper adhesion.

Odor breakthrough happens when you don’t seal every surface. Smoke penetrates walls, ceilings, and even into wall cavities through electrical outlets. Take a full room coverage approach: prime walls, ceiling, trim, inside closets, and cabinet interiors. If you’re smelling smoke after priming, you missed something. Check behind outlet covers, inside HVAC vents, and under baseboards where the previous owner might have had furniture blocking the wall.

Stain bleedthrough from nicotine stains occurs when the primer coat’s too thin or the contamination’s too heavy for one coat. Yellow-brown stains appearing through your topcoat mean the primer didn’t fully seal. The fix is to apply a second primer coat over the stained area, let it cure fully, then topcoat again. For severe staining, switch to a stronger primer formula. If you used water-based and it’s bleeding through, go to oil-based or shellac.

Poor adhesion and peeling prevention start with proper prep. If primer’s peeling, it means the surface wasn’t clean or the primer dried too fast in hot conditions. Scrape off the peeling sections, clean again, and reprime with better ventilation to slow the dry time. For property flipping and tenant damage scenarios, don’t try to save money by skipping steps. Repainting over failed primer costs more than doing it right the first time.

Specific Odor Types: Cigarette Smell, Pet Odors, and Kitchen Grease

hW8sdL2gQi-WiR9VXK4Rfg

Different odors need different approaches because they come from different sources and penetrate surfaces differently.

Cigarette Smell and Tobacco Residue

Cigarette smoke creates sticky nicotine stains that bond to surfaces. The tar in tobacco smoke forms a film that holds odor molecules against walls and ceilings. Prime everything. Ceiling treatment matters as much as walls because smoke rises and concentrates on ceilings. The residue in textured ceilings hides deep in the texture valleys.

Use oil-based primer or KILZ Restoration for wall priming when you’re dealing with years of chain smoking. The tobacco residue layer needs aggressive sealing. If the walls feel slightly greasy after cleaning, that’s nicotine film, and it requires a primer that physically encapsulates it.

Pet Odors and Mildew Smell

Pet urine soaks into porous materials like wood subfloors and baseboards. The odor’s from uric acid crystals that stay active until sealed. Prime the subfloor before installing new flooring, and prime baseboards even if they look clean.

Musty basement smells come from mildew and dampness. Treat the moisture source first. Fix leaks, run a dehumidifier, improve ventilation, then prime. Water-based primers like KILZ Restoration handle pet odors well, but remember to skip ammonia cleaners during surface prep because ammonia can react with uric acid and make the smell worse.

Kitchen Grease and Food Odors

Kitchen walls near stoves accumulate grease film from cooking. The grease holds food odors and blocks primer adhesion. Degreasing walls with a strong cleaner (TSP or a commercial degreaser) is critical before priming. If you don’t cut the grease, primer won’t stick and odors will come back.

Oil-based primers work better on greasy surfaces because they have solvents that penetrate and encapsulate oily residue. Water-based primers may bead up on heavy grease even after cleaning.

Match your primer selection to odor severity. Light cigarette smell from a tenant who smoked occasionally? Water-based primer in one coat works. Heavy smoke damage from a house fire? You need oil-based or shellac with two coats minimum. Medium contamination from a chain smoker who lived there for years? Start with KILZ Original or Restoration and plan for two coats, checking after the first whether odor’s still detectable.

Final Words

Blocking smoke and other stubborn odors comes down to choosing the right smoke odor sealing primer and preparing the surface completely before you start.

Skip the TSP wash or miss the concrete under your flooring, and you’ll smell it later through fresh paint.

Apply two coats in problem areas. Seal everything, walls, ceilings, trim, and subfloors. Give it proper dry time before topcoating.

Done right, your home won’t smell like the damage ever happened. You’ll paint over a solid barrier, not over active odors waiting to come back.

FAQ

What is the best primer to seal smoke smell?

The best primer to seal smoke smell is KILZ Original, an oil-based primer trusted by professionals for over 40 years to block heavy-duty odors and nicotine stains. For severe contamination, shellac-based primers offer maximum sealing power, while water-based KILZ Restoration matches traditional oil performance with easier cleanup.

What is the best primer for a smoker’s house?

The best primer for a smoker’s house is oil-based KILZ Original, recommended by real estate professionals specifically for blocking cigarette smoke odor and sealing tobacco residue. This primer creates a permanent barrier that prevents nicotine stains and odors from bleeding through fresh paint on walls and ceilings.

Does odor blocking primer work against smoked in house?

Odor blocking primer works against smoked in house by creating a chemical barrier that seals existing odors into the surface. Regular paint alone fails because smoke penetrates fresh coatings without a primer barrier, but proper primer application permanently locks odors and prevents breakthrough on walls, ceilings, and subfloors.

Which KILZ is best for smoke smell?

KILZ Original is best for smoke smell because it provides maximum odor-blocking power for severe cigarette and fire damage using oil-based chemistry. KILZ Restoration offers comparable performance in a water-based formula with lower fumes, while KILZ Original Low Odor works well in solvent-sensitive spaces requiring oil-based sealing.

How long does smoke odor sealing primer take to dry?

Smoke odor sealing primer takes 25 to 30 minutes to dry to touch and allows recoating in 45 minutes to 1 hour depending on application method. Full adhesion and hardness develop over 7 days, though topcoat application can proceed after the recoat window in proper temperature conditions.

Can you use water-based primer to seal smoke odors?

You can use water-based primer to seal smoke odors because modern formulas like KILZ Restoration and Zinsser Odor Killing Primer match oil and shellac performance. Water-based formulas offer lower fumes, easier cleanup with soap and water, and universal topcoat compatibility while permanently sealing cigarette smoke and fire damage odors.

Do you need to clean walls before applying smoke sealing primer?

You need to clean walls before applying smoke sealing primer because contamination, nicotine stains, and soot coverage prevent proper adhesion. Scrub all surfaces with TSP solution or low-suds cleaner, allow complete drying, and remove loose debris to ensure the primer creates an effective odor-blocking barrier.

How many coats of primer for smoke damage?

How many coats of primer for smoke damage depends on contamination severity, with one coat handling light residue and two coats required for severe problem odor areas. Apply the second coat after the 45-minute to 1-hour recoat window, covering all surfaces including walls, ceilings, and concrete subfloors for comprehensive sealing.

What surfaces need smoke odor primer?

Surfaces that need smoke odor primer include all walls, ceilings, wood paneling, plaster walls, textured surfaces, and concrete subfloors where smoke penetration occurred. Comprehensive treatment requires covering everything beyond just carpet replacement, as odors saturate porous materials throughout enclosed spaces and require full room coverage.

Can you spray smoke odor sealing primer?

You can spray smoke odor sealing primer using airless equipment with a 0.017 inch tip at 2000 to 2500 psi or aerosol cans held 10 to 12 inches from surfaces. Spray application covers large square footage efficiently on high ceilings and provides better penetration into textured surfaces and porous materials.

Basement Window Well Drainage Solutions That Actually Work

0

Think a window well can’t flood your basement? Think again.
Water that sits in a well pushes on the window frame, finds tiny gaps, and brings damp, mold, and ruined floors.
Basement window well drainage matters because it keeps that water moving away before it soaks drywall, warps trim, or freezes and cracks the foundation.
In it, we show simple, proven fixes like gravel and filter fabric, a sloped perforated drain, plus covers or a sump when the site requires, so you stop the leak and get the repair done right.

Understanding the Core Problem: How Basement Window Well Drainage Prevents Flooding

hKHjzc1BTZe_2ktkE-MxnQ

Basement window well drainage captures and routes water away from window wells before it can get into your basement. Most systems use a 6 to 12 inch layer of 3/4″ washed gravel, a 4″ perforated drain pipe with a filter sock, and a rigid cover that keeps rain and debris out. The drain pipe connects to a footing drain, storm sewer, drywell, or sump basin. You need a slope of 1% to 2%, about 1/8″ to 1/4″ fall per foot, to move water safely away from the foundation.

Without a working drain, window wells turn into concrete bathtubs. Water pools against the basement window, finds gaps in the frame or caulking, and seeps inside. Standing water creates hydrostatic pressure against the foundation, forcing moisture through cracks you can’t even see. Once inside, that water spreads across floors, soaks into drywall, and creates the damp conditions mold needs.

The system works when all parts are intact. When gravel clogs, pipes crush, or covers go missing, water has nowhere to go. The result? Leaks around the window frame, damp smells, warped trim, and sometimes visible mold on walls or ceilings below grade.

The biggest risks from failed drainage:

  • Water leaks through window frames and foundation cracks
  • Mold growth on walls, floors, and organic materials stored near windows
  • Structural stress from continuous hydrostatic pressure
  • Damage to carpets, drywall, and baseboards in finished basements
  • Ice expansion damage during freeze/thaw cycles in winter

How to Identify and Troubleshoot Window Well Drainage Problems

kuTo5ZD0SOawUdfJCUNNCg

Early Warning Signs and Minor Issues

Early symptoms show up as small changes you might not connect to the drainage system right away. You notice a damp smell near the basement window after heavy rain, or a faint musty odor that wasn’t there before. Small puddles form inside the well and vanish within a few hours, which points to a drain that’s working slowly, not freely. You may also see a buildup of leaves, grass clippings, or silty sediment sitting on top of the gravel, blocking water from reaching the drain below.

Symptom Likely Cause Severity Action Needed
Faint damp smell near window after rain Minor seepage or surface moisture Low Check for debris; inspect cover and grading
Thin layer of silt or leaves on gravel Missing or damaged cover Low Clear debris; install or repair cover
Water drains within 2–6 hours after storm Slow percolation through compacted gravel Moderate Remove and rinse gravel; check pipe slope
Visible moisture on window frame or sill Standing water pressing against seal Moderate Clear drain; reseal window with hydraulic cement

When debris builds up to more than 1/2 inch thick, it creates a mat that blocks water from filtering down through the gravel. Rain sits on the surface instead of draining. If you catch it here, clearing the debris by hand and hosing off the gravel usually restores flow.

Major Failures and How to Fix Them

Standing water that remains for days, or reappears even when it hasn’t rained, signals a deeper problem. The drain pipe may be crushed, clogged below the surface, or sloped incorrectly so water can’t move. Corrugated plastic pipe is especially prone to collapsing under soil weight or root pressure. If the pipe has flattened, water backs up and has nowhere to go. Insufficient slope, anything less than 1/8″ per foot, means gravity can’t pull the water along, so it sits in the pipe or trickles out slowly.

High groundwater can also overwhelm a properly built system if the water table rises above the bottom of the well. In that case, water seeps up through the gravel from below, not down from the surface. You’ll see standing water even in dry weather, and the gravel will feel wet several inches down.

Here’s how to address major drainage failures:

  1. Excavate around the drain pipe to inspect for crushing, kinks, or disconnected joints. Replace collapsed corrugated pipe with rigid 4″ Schedule 40 PVC.
  2. Check the slope with a 4 foot level. Reset the pipe to achieve at least 1/8″ drop per foot toward the outlet.
  3. Snake or jet the pipe from the well outlet to clear roots, silt, or debris lodged inside. Repeat from the outlet end if accessible.
  4. If groundwater is the source, add a sump pump and basin at the low point of the drainage run so rising water triggers automatic discharge.

When the problem is below the surface and you can’t see the pipe or the outlet, hiring a waterproofing contractor with an inspection camera saves time. They can locate the blockage, confirm slope, and verify the connection to the footing drain or storm line without guessing.

Components That Make a Basement Window Well Drainage System Work

Zvu35TLlRsufBbckIoj8fA

A functional window well drainage system relies on layers that filter, capture, and move water in sequence. Each layer has a specific job. Skip any one of them and you’ll usually have clogs, slow drainage, or complete failure within a year or two.

The bottom layer is non-woven geotextile fabric, typically rated at 6 oz per square yard or similar. This fabric separates the native soil from the gravel above it, preventing fine particles from washing into the gravel and clogging the pore spaces where water flows. Lay the fabric so it lines the excavated pit and extends up the sides, then fold the edges over the top of the gravel once the drain is in place. Without fabric, silt migrates into the gravel during every rain. Within a season the gravel turns into dense mud.

On top of the fabric goes the gravel bed and drain pipe. These two components work together to collect and route water to the outlet. Both need to be sized and installed correctly to handle the flow from heavy storms.

Gravel Layer and Fabric

The gravel layer provides the pore space where water collects before entering the drain pipe. Use 3/4″ washed gravel, sometimes called drainage stone or clear stone, placed in a layer 6 to 12 inches deep at the bottom of the window well. Washed gravel is free of fines (dust and small particles) that would clog the voids. The 3/4″ size creates enough open space for water to move freely while remaining stable underfoot.

Spread the gravel evenly across the geotextile fabric, then set the drain pipe on top of the gravel bed before adding more gravel around and over the pipe. The pipe should sit roughly in the middle of the gravel depth so water can reach it from all sides. Don’t pack gravel tightly. Loose placement preserves the voids. After the pipe is in place, fold the fabric edges over the top layer of gravel to complete the filter envelope.

Perforated Drain Pipe Options

The drain pipe is almost always 4 inches in diameter to provide enough capacity for sudden heavy rain. You have two main choices: rigid perforated PVC (Schedule 40 or SDR 35) and flexible corrugated polyethylene pipe (commonly sold as ADS). Rigid PVC lasts decades, resists crushing, and maintains a consistent inside diameter for better flow. Corrugated pipe is lighter, easier to bend around obstacles, and cheaper. But it can collapse under soil pressure and the corrugations create friction that slows flow.

Both types come with perforations (small holes or slots) to let water enter from the gravel. Always use pipe that comes with a filter sock (a fabric sleeve) already installed, or add one yourself. The sock keeps gravel and soil particles from entering the pipe and forming clogs inside. Run the pipe at a slope of 1% to 2%, about 1/8″ to 1/4″ drop per foot, from the well toward the outlet. Check slope with a 4 foot level as you lay the pipe. Shim or adjust the gravel bed to maintain the grade.

Window Well Covers and Load Ratings

A cover keeps rain, snow, and debris out of the well in the first place, which reduces the load on the drainage system and prevents organic material from decomposing into sludge on top of the gravel. Rigid polycarbonate covers are the most common choice for residential wells. These clear or translucent panels let light through to the basement window, resist UV degradation, and are rated to support 250 to 400 pounds. Enough for a person to step on safely.

Steel grates and mesh covers offer higher load ratings and better ventilation, but they don’t keep out rain or small debris like seeds and mulch. Avoid thin plastic “bubble” covers sold at hardware stores. They turn brittle in sunlight, crack under snow load, and create a humid space that encourages weed growth against the window. Secure any cover with brackets or pins so wind can’t lift it. Size it to overlap the well edges by at least 2 inches on all sides for full protection.

Planning a Basement Window Well Drainage System for Your Property

54CEF0fCSzuT9aw4vxHtbA

Before you dig or buy materials, walk the property and confirm where the water can go. Gravity drainage requires a continuous downhill slope from the bottom of the window well to a safe outlet. Ideally a perimeter footing drain, storm sewer, or a drywell at least 10 feet from the foundation. If your lot is flat or the basement sits below the grade of any available outlet, you’ll need a sump pump to lift the water and discharge it.

Check the soil type by digging a small test hole near the window well. Sandy or gravelly soil drains quickly and rarely holds standing water. Clay soil, common on Long Island’s north shore and similar regions, drains slowly and can hold water against the foundation for days after a storm. Clay means you’ll need a more robust system. Thicker gravel, confirmed pipe slope, and possibly a sump pump to handle water that can’t soak into the ground. Measure the distance from the window sill down to the existing grade. The bottom of the window well excavation must sit at least 6 inches below the sill to leave room for the gravel and drain pipe. Most prefabricated window wells are 36 to 48 inches wide, so plan to excavate at least that width plus an extra 6 to 12 inches beyond each wall to accommodate the drain pipe and gravel envelope.

Key planning steps:

  • Locate existing footing drains, storm lines, or sump pits on your property and confirm the depth and direction of each
  • Measure slope from the window well to the nearest outlet using a long level or string line. Calculate whether 1/8″ per foot is achievable
  • Identify any underground utilities (call 811 for locates) before digging trenches for drain pipe
  • Confirm local code requirements for storm sewer tie ins or drywell setbacks
  • Decide whether you will connect to an existing system or install a new outlet such as a drywell or sump basin
  • Sketch a simple plan showing well location, trench route, pipe slope, and outlet point so you can estimate material quantities

Step by Step Basement Window Well Drainage Installation

wkCwRkVWTXuERY1Ssw-8GQ

Installing a window well drainage system takes most DIY homeowners between 3 and 8 hours if materials are on hand and the trench is straightforward. Professional crews often finish in 1 to 4 hours, but you can do it yourself if you’re comfortable digging, handling pipe, and working to a grade.

Excavation and Base Preparation

Start by removing the existing window well if one is installed, or mark the perimeter of the new well location. Dig down to at least 6 inches below the window sill and extend the excavation 6 to 12 inches beyond the well walls on all sides. The bottom of the hole should be level or sloped gently toward the planned drain outlet. Remove roots, rocks, and debris. Tamp the soil lightly with a hand tamper to create a firm base, but don’t compact it so hard that water can’t percolate.

Dig a trench from the low corner of the well excavation toward the outlet. The trench needs to be wide enough to hold 4″ pipe plus a few inches of gravel on each side, typically 10 to 12 inches wide. Dig the trench with a consistent downhill slope of 1/8″ to 1/4″ per foot. Use a long level or a string line with a line level to check grade as you go.

Installing Fabric and Gravel Layers

Unroll non-woven geotextile fabric across the bottom and up the sides of the excavation. Overlap seams by at least 6 inches and let the fabric drape over the edge of the hole. Press the fabric into corners and smooth out wrinkles.

Pour 3/4″ washed gravel onto the fabric to a depth of 3 to 4 inches. Spread it evenly with a rake. This first layer creates the bed for the drain pipe. Don’t pour all the gravel at once. You need to set the pipe on the first layer, then add more gravel around it.

Laying and Connecting the Perforated Drain Pipe

Place the 4″ perforated pipe on top of the gravel bed. If the pipe has a filter sock, confirm it’s in place and not torn. Orient the perforations downward or to the sides (not straight up), so water enters from the gravel, not from above. Run the pipe from the well toward the outlet, maintaining the 1/8″ to 1/4″ per foot slope. Check with a level every few feet and adjust the gravel bed underneath to hold the grade.

At the outlet end, connect the pipe to the footing drain, storm line, or sump basin using a mechanical coupler, wye fitting, or watertight connector appropriate for your pipe type. If tying into an existing perforated drain, cut a section out and insert a tee or wye so the new pipe feeds into the main line. Seal joints with PVC primer and cement if using rigid PVC, or use stainless hose clamps and rubber couplers for corrugated pipe.

Backfilling and Achieving Proper Grade

Cover the pipe with another 3 to 6 inches of 3/4″ washed gravel so the total gravel depth in the well is 6 to 12 inches. Fold the edges of the geotextile fabric over the top of the gravel to complete the filter envelope. This keeps soil from washing down into the gravel when you backfill.

Backfill around the well with the excavated soil in 6 inch layers, tamping each layer lightly. Slope the final grade away from the well at a minimum of 1/4″ per foot for the first 6 feet. Install the window well unit (metal or plastic), seal the joint where it meets the foundation with hydraulic cement or a waterproof membrane, and attach the cover securely.

Here’s the complete installation sequence:

  1. Excavate well area to 6 inches below window sill and trench to outlet.
  2. Tamp the bottom lightly and check that trench slopes 1/8″ to 1/4″ per foot.
  3. Line excavation and trench with geotextile fabric, overlapping seams by 6 inches.
  4. Spread first 3 to 4 inches of 3/4″ washed gravel on fabric.
  5. Lay 4″ perforated pipe with filter sock on gravel bed, maintaining slope.
  6. Connect pipe to outlet using appropriate fittings. Seal joints.
  7. Cover pipe with 3 to 6 more inches of gravel. Fold fabric edges over top.
  8. Backfill in layers, tamping lightly. Slope final grade away from well.

Connecting Window Well Drainage to Footing Drains, Drywells, or Sump Pumps

UZrv0zG4SCqOp55GIRYSOA

The drain pipe must discharge somewhere that moves water safely away from the foundation. The most common and reliable outlet is the perimeter footing drain (also called foundation drain tile), which already collects groundwater from around the basement and routes it to a sump pump or to daylight. If your home has a footing drain, you can usually tie into it with a tee or wye fitting. Cut the existing drain pipe, insert the fitting, and connect your 4″ window well drain. This integrates the window well into the whole house drainage system so water collected in the well flows to the same outlet as water collected around the footings.

Where no footing drain exists, or where code and slope permit, you can run the drain pipe to a drywell. A drywell is a gravel filled pit dug at least 10 feet from the foundation. Line the pit with fabric, fill it with clean stone, and terminate the drain pipe in the center. Water disperses into the surrounding soil. Drywells work well in sandy or gravelly soils but can fail in clay, where water has nowhere to go and the pit fills and stays full.

If gravity drainage isn’t possible (your lot is flat, the basement is below grade, or the water table is high), install a sump pump and basin. Dig a separate pit near the low point of the drainage run, install a sump liner (typically 18 to 24 inches in diameter), and route the drain pipe into the top of the liner. Install a 1/3 HP or 1/2 HP submersible sump pump with a float switch. The pump activates when water fills the basin and discharges through a dedicated line that runs to daylight or a storm sewer. Sump pump installations, including basin, pump, check valve, and electrical work with GFCI protection, typically cost $600 to $2,000 installed.

Common outlet types and their uses:

  • Footing drain/perimeter drain: best choice if already present. Integrates with whole house system. Requires tee or wye connection.
  • Storm sewer: permitted in many areas. Requires permit and inspection. Ensures water leaves property. May need backflow preventer.
  • Drywell (10+ feet from home): works in sandy/gravelly soil. Not suitable for clay. Must be sized to handle peak flow.
  • Sump pump basin: necessary when gravity discharge is not possible. Adds mechanical component requiring power and maintenance. Reliable when properly sized.

Maintaining Basement Window Well Drainage Systems Year Round

14X0OoWkT4qWiT2deml97A

Drainage systems work quietly most of the time, which makes it easy to forget they’re there. But neglect leads to clogs, and clogs lead to flooding. A simple inspection and cleaning routine prevents most problems and catches small issues before they become expensive repairs.

Check the window well cover and the gravel surface every 3 to 6 months. Pull off any leaves, sticks, or mulch that have blown in. If you see a layer of organic debris thicker than 1/2 inch sitting on the gravel, scoop it out by hand and hose off the gravel. That mat of leaves and grass clippings blocks water from soaking through, even when the drain below is clear. After heavy storms or high winds, do a quick visual check. Standing water that drains within an hour or two is normal. Water that sits for six hours or more means something is slowing the flow, and you should clear debris and test the drain.

Once a year, flush the drain pipe. Remove the cover and pour a bucket of water into the well while watching the outlet (if accessible). Water should flow steadily and exit within a few seconds to a minute, depending on pipe length. If water backs up or drains very slowly, use a plumber’s snake or a garden hose with a jet nozzle to clear the pipe from the well end. In winter, ice can block the drain or build up inside the well. Insulated or vented covers reduce ice formation by allowing some air circulation, and a thin layer of coarse gravel on top of the main gravel bed helps prevent surface freezing.

Simple year round maintenance checklist:

  • Inspect cover and gravel surface every 3 to 6 months. Remove visible debris
  • Clear any organic mat greater than 1/2 inch thick. Rinse gravel if silty
  • Flush drain pipe with water once per year to confirm flow
  • Check that cover is secure and undamaged after winter. Replace cracked or brittle covers
  • Inspect around window frame for cracks or gaps in sealant. Apply hydraulic cement as needed

Cost, Materials, and Comparing DIY vs Professional Window Well Drainage Installation

mY90sUQ-SXy43z-Gc2PTyg

A single window well drainage system installed by a homeowner typically costs $100 to $400 in materials. That includes geotextile fabric, 3/4″ washed gravel (usually 1/2 to 1 cubic yard per well), 10 to 20 feet of 4″ perforated pipe with filter sock, fittings to connect to the outlet, and a rigid polycarbonate cover. Costs rise if you need to add a sump pump and basin, rent a trenching tool, or buy a new window well unit.

Professional installation runs $300 to $1,200 for a straightforward drain connection to an existing footing drain or drywell. Complex jobs (deep excavation, long trench runs, tie ins to municipal storm sewers, or installations on properties with high groundwater) commonly cost $800 to $3,000 or more. Professionals complete the work faster (usually 1 to 4 hours on site) and bring tools, experience, and liability insurance. They also confirm pipe slope with a laser level, inspect existing drains with cameras, and pull permits when required.

Factor DIY Professional
Cost $100–$400 materials only $300–$3,000+ installed
Time 3–8 hours per well 1–4 hours on site
Difficulty Moderate; requires trenching, grade setting, and physical labor Low for homeowner; contractor handles all excavation and connections
Risk Incorrect slope or poor connections can cause system failure and water damage Lower risk; contractor provides warranty and ensures code compliance

Hiring a contractor makes sense when you’re dealing with clay soil, high water tables, multiple wells, or when the outlet requires a long trench or a tie in to a municipal storm line. Mistakes in slope or connection can result in standing water, repeat flooding, and damage claims that exceed the cost of professional installation. If you’re confident in your ability to dig, grade, and seal, and the job is a simple gravity drain to an accessible footing drain or drywell, DIY saves money and gives you control over materials and timing.

Choosing Materials and Products for a Durable Window Well Drainage System

9zcsPMzdR5SKf-RdX3TT0A

Cheap materials fail early. A window well drain built with the right components can last 20 to 30 years with minimal maintenance. A system built with the wrong gravel, flimsy pipe, or no fabric can clog within a single season.

For gravel, always specify 3/4″ washed stone. Avoid pea gravel (too small, clogs easily), river rock (rounded, unstable and slow draining), or crushed stone with fines (dust migrates and blocks pores). Washed stone has angular edges that lock together while leaving large voids for water flow. For pipe, Schedule 40 PVC is the longest lasting choice. It won’t crush, rot, or collapse, and the smooth interior walls move water faster than corrugated surfaces. If you use corrugated pipe for cost or flexibility, inspect it annually and replace sections that show flattening or kinks.

Geotextile fabric must be non-woven and rated for drainage applications. A 6 oz per square yard fabric is common and effective. Woven fabrics and landscape cloth sold for weed suppression do not filter soil particles as well and can clog quickly. Window well covers should be UV stabilized polycarbonate rated for at least 250 pounds, or galvanized steel grates if you need higher load capacity and don’t mind debris entry. Avoid hardware store plastic bubble covers. They crack in cold weather and turn opaque after a year in the sun.

Recommended material specifications:

  • 3/4″ washed angular gravel, 6 to 12 inches deep at well bottom
  • Non-woven geotextile fabric, 6 oz/yd² or equivalent, for soil separation
  • 4″ perforated Schedule 40 PVC pipe for maximum durability and flow
  • Filter sock on all perforated pipe to prevent internal clogging
  • Polycarbonate window well cover, UV stabilized, rated 250 to 400 lbs
  • Hydraulic cement or polyurethane sealant for foundation to well joints

Final Words

Stop standing water, clear gravel, and check the slope—those moves keep a window well from turning into a leak. This post showed why drainage matters, how to spot clogs and seepage, and what parts make a system work.

We walked through planning, a step-by-step install, outlet options like sump or drywell, and routine care so problems don’t return.

Take small steps now—inspect covers every 3–6 months, flush the drain, and document what you find. With basic care and the right parts, basement window well drainage will keep water out and give you one less thing to worry about.

FAQ

Q: Does a basement window well need a drain?

A: A basement window well generally needs a drain to move water away, stop standing water, leaks, mold, and hydrostatic pressure. Tie it to perimeter tile, storm line, drywell, or a sump basin.

Q: Why is my basement window well filling with water?

A: A basement window well fills with water when gravel or the drain is clogged or missing, slope is insufficient, heavy rain or high groundwater overwhelms it, or a damaged cover lets runoff and debris in.

Q: How to drain a basement window well?

A: To drain a basement window well, clear debris, add 6–12 inches of 3/4″ washed gravel over geotextile, then install or clear a 4″ perforated pipe sloped 1%–2% to an outlet or to a sump.

Q: What is the best drainage for a window well?

A: The best drainage for a window well is a 4″ perforated pipe with a filter sock, 6–12 inches of 3/4″ washed gravel wrapped in geotextile, and a 1%–2% slope to a drain, drywell, or sump.

Storm Damage Cleanup Near Me: Immediate Help

0

Have you ever felt lost after a storm leaves your home in ruins? We know it can be overwhelming. That’s why we offer fast and reliable storm damage cleanup. Our local team quickly clears away debris and secures your property to stop more damage. We work fast so you can begin the recovery process and feel safe again. With our skilled experts available around the clock, help is just a phone call away.

Immediate Local Storm Damage Cleanup Services

When a storm hits, every moment counts. We know how stressful it can be, and we're here to help quickly. Our team is available 24/7 to reduce further damage, and one call to our emergency hotline gets you fast support. We start working within 24 hours on both homes and businesses to clear debris and secure compromised structures.

We have over 400 skilled restoration specialists ready to remove fallen tree debris and fix structural problems. Our team comes straight to your property to secure it and begin recovery right away. Many homeowners tell us, "I couldn’t believe how quickly help arrived after the storm."

If you need help immediately, give our hotline a call or visit our emergency support link emergency restoration services near me. We are committed to quick responses and thorough cleanup, even in the most challenging situations.

Our process includes:

  1. Rapid water removal (quick extraction to stop further damage).
  2. Safe debris cleanup.
  3. Securing your house from additional hazards.

We take every step to restore your safety and give you peace of mind. With our strong local commitment, we stand ready to help whenever storm damage strikes.

Comprehensive Post-Storm Cleanup and Restoration Processes

img-1.jpg

After a storm, we act fast to clean your property and stop further damage. First, we remove water quickly using advanced drying mats, dehumidifiers (machines that pull moisture from the air), and high-powered vacuums to clear standing water. One homeowner said, "Seeing all the water removed fast boosted my hope during a tough time."

Next, we handle the cleanup of storm debris. Our team clears away fallen trees, broken branches, and other storm mess to prevent more damage and prepare your property for the next steps. We also repair wind damage by securing injured structures and keeping dangerous conditions away from you.

We check your home for hail damage too. We inspect roofs, windows, and siding for cracks or dents and repair any visible issues to protect your home over the long term.

Finally, we dry your property thoroughly to stop hidden moisture from causing mold. We check every room to make sure all surfaces and materials are dry, ensuring your home or business stays safe and comfortable.

Our comprehensive process includes:

  • Rapid water removal after the storm.
  • Full debris cleanup and damage elimination.
  • Wind damage repair and hail damage restoration.
  • Structural drying and moisture monitoring.

We work quickly to help you get back to safety and comfort after a storm.

Certified Storm Damage Cleanup Professionals

We are a team of certified restoration experts with IICRC credentials (proof of our skills in cleaning and restoring after disasters). As a family-owned business since 1978, our technicians follow strict industry guidelines so you can rely on our licensed cleanup team to handle your storm damage safely and efficiently.

We are fully licensed for both home and business rebuilds, ensuring our work meets high safety and quality standards. Our experts use proven methods for debris removal and to stop mold growth before it starts. One homeowner said, "Seeing professionals with clear credentials made me feel safe during a very tough time."

When we work on your property, we:

  • Inspect affected areas carefully to find hidden damage
  • Remove debris safely to secure your home
  • Use clear mold prevention steps to avoid further issues

We always follow local regulations and guidance from regional authorities. By choosing us, you are getting experienced, dependable help from a team that cares about restoring your home with professionalism and care.

Transparent Pricing and Free Quotes for Storm Damage Cleanup Services

img-2.jpg

We give free damage quotes with an on-site assessment that shows you exactly what needs to be done. Our team will visit your property, check out the damage, and provide a written quote that breaks down each cost, whether it’s removing debris, fixing structural issues, or other necessary work. This way, you’ll know what you’re paying for with no hidden fees.

Our cleanup estimates are clear and easy to understand. We walk you through each step, from clearing debris to completing the final repairs. You’ll see every cost explained in simple terms, so you can choose the repair options that work best for your budget.

We also offer service bundles that provide a discount, making quality repairs more affordable for you. One customer said, "Seeing every cost laid out clearly gave me peace of mind during a stressful time." We focus on clear communication and honest pricing to help you feel confident during your recovery.

Customer Reviews of Local Storm Damage Cleanup Near Me

Homeowners tell us that almost everyone is happy with our storm cleanup work. They explain that we show up fast to secure your home and remove debris so that more damage doesn't occur. One local said, "I couldn’t believe how quickly help arrived. The cleanup was professional, and my home felt safe again in just hours."

Many customers notice how carefully we clear every bit of storm-damaged material. We remove fallen tree parts and other debris to prepare your home for repairs. Our team explains every step of the process clearly, which helps ease the stress during such tough times.

People also appreciate that we handle insurance claims without any hassle. We work directly with insurers to make the process simple for you. From securing your house to performing final inspections, we take care of every detail so you can recover and get back to normal life quickly.

How to Schedule Storm Damage Cleanup Near Me

img-3.jpg

When a storm causes damage, act fast. We’re here 24/7 to help you. Call our emergency hotline and a local cleanup crew will be on the way right away. Our skilled team will check the damage and arrange cleanup quickly so you can get back to normal sooner.

If you’d rather book online, our simple portal makes it easy to request help. You can reach us by phone or the website, and we even work with your insurance agent to speed up claim approvals. Every step is designed to take the stress off you during this tough time.

We’re ready to respond as soon as you call. We move fast and coordinate each step carefully to restore your home. Along the way, our support team will keep you updated until the cleanup is finished.

  • Call our emergency support number right away.
  • Use our online portal for quick scheduling.
  • Share details of the damage to speed up your booking process.

For scheduling, use this link: storm damage cleanup.

Service Area Coverage Map for Local Storm Damage Cleanup

Our coverage map shows we are ready to help when a storm hits. We bring mobile restoration tools (equipment for quick repairs) and local emergency teams so help is always close by. We serve key spots like the Portland Metro and Central Oregon cities such as Bend, Eugene, and Salem. Our team acts fast to protect your home.

We also work with trusted partners in the Midwest and Northeast. This network means we can get someone on site within 24 hours, no matter where you are.

We serve:

  • Portland Metro for city-wide issues.
  • Central Oregon with teams in Bend, Eugene, and Salem.
  • The Midwest and Northeast through our reliable local partners.

Our map makes it easy to see that help is never far away when you face storm damage. We are here to bring fast, professional restoration so you can begin your recovery without delay.

img-4.jpg

We work with all major insurance companies to make your claim easier. Our team takes clear photos, writes easy-to-read notes, and keeps a full record of every damaged area. This proof helps support your claim and gets approval for repairs faster. We guide you through each step, so you face less stress during this time.

We also talk directly with your insurance agent to answer questions, clear up details, and check that repairs are done right. Our years of experience make us a trusted helper for an insurance-approved fix. We prepare written reports and take accurate measurements to make filing your claim simple. By handling the paperwork and communication, our experts let you focus on making your home safe again.

Trust our team to manage your insurance claims efficiently. With our clear, straightforward support, approval comes faster and delays are kept to a minimum. Let us take care of the claim process so you can concentrate on getting your home back to normal. We are here to support you every step of the way.

Final Words

In the action, we tackled every step from the call to cleanup, moving fast to stop damage and reduce disruption. We covered debris removal, water extraction, and helping with insurance paperwork. Our process is clear and simple so you always know what to expect next. Local reviews show our team delivers quality work and prompt support. With our quick scheduling tools and 24/7 hotline, your home can be back to safe living sooner. Turn to FireFloodRescue.com for storm damage cleanup near me that makes a difference.

FAQ

What does storm damage cleanup near California involve?

Storm damage cleanup near California involves rapid local response. Crews assess damage, remove debris, extract water, and begin restoration quickly to safeguard your property following severe weather.

What does storm damage cleanup near Texas cover?

Storm damage cleanup near Texas delivers prompt local assistance. Experts remove debris, extract water, and stabilize your home to restore safety and prevent further damage.

What does residential storm damage cleanup near me provide?

Residential storm damage cleanup near you offers immediate support for home emergencies. Services include water extraction, debris clearance, and structural drying to protect your property from further harm.

What does mobile storm damage cleanup near me mean?

Mobile storm damage cleanup near you means skilled teams come directly to your location. They bring advanced equipment to swiftly remove debris and start restoration efforts right where you need them.

What defines the best storm damage cleanup near me?

The best storm damage cleanup near you means hiring trusted local professionals. They combine quick response, advanced techniques, and thorough inspections to ensure your property is safe and secure post-storm.

What does SERVPRO near me do?

SERVPRO near you offers rapid response for water and storm damage. They provide expert cleaning, debris removal, and restoration, working efficiently to return your home to a safe condition.

What do residential restoration companies near me offer?

Residential restoration companies near you provide full repair services. They handle water extraction, debris removal, and rebuild efforts, giving you a trusted local partner to restore your home after damage.

What does Servpro restoration near me include?

Servpro restoration near you includes comprehensive cleanup and restoration. Their certified teams manage water extraction, structural drying, and debris removal to safely restore your property after storm events.

How much does storm cleanup cost?

Storm cleanup cost varies by damage severity and required services. A free on-site assessment gives you a clear, written quote with an itemized breakdown to help you understand the costs.

Who is responsible for cleaning up after a tornado?

After a tornado, cleanup responsibility lies with property owners and their insurers. Professional restoration teams help manage debris removal and guide you through the insurance claim process.

What does SERVPRO actually do?

SERVPRO provides thorough water extraction, debris removal, and structural drying services. Their certified teams work quickly to restore safety and begin rebuilding after storm damage.

What is the average cost of storm damage repair?

The average cost of storm damage repair depends on damage extent and services needed. A professional assessment gives you a detailed estimate, covering debris removal, water extraction, and necessary structural repairs.

How to File a Property Damage Claim Successfully

0

You just discovered water damage in your living room, and now you’re staring at a mess wondering if you should call your insurance company or start cleaning up first. That split-second decision matters more than you think. Filing a property damage claim the right way means following specific steps in the right order, and getting even one thing wrong can delay your payout or shrink your settlement by thousands of dollars. This guide walks you through exactly what to do first, what documentation you need, and how to avoid the common mistakes that turn a straightforward claim into a months-long headache.

Essential Steps to File Your Property Damage Claim

iB8tuD6WQselrL9TduJEfA

Filing a property damage claim means following specific steps if you want to maximize your approval odds and settlement amount.

  1. Ensure safety and secure the property from further damage. Before anything else, make sure everyone’s safe and take immediate action to prevent more damage. Cover broken windows with plywood or throw tarps over exposed roof areas.

  2. Contact your insurance company immediately with basic incident details using their toll-free claim hotline. Most insurers have claim lines available 24/7. Call within 24 to 48 hours of discovering the damage and provide the date, time, location, and a quick description of what happened.

  3. Document all damage with photos and videos from multiple angles before any cleanup. Get wide shots showing the full extent, then take close-ups of specific problem areas. Record everything before you touch anything.

  4. Create a detailed inventory of damaged items with descriptions and values. List each damaged item separately with as much detail as possible: brand names, model numbers, purchase dates, and estimated replacement costs.

  5. Schedule the insurance adjuster’s inspection and prepare for their visit. The adjuster assesses the damage and determines payout amounts. Have all your documentation organized and ready to present.

  6. Complete the insurance claim form with accurate, detailed information. Fill out every section carefully. Incomplete or inaccurate forms delay processing and can lead to denials.

  7. Submit all required documentation and supporting evidence to your insurer. Include your photos, videos, damage inventory, receipts for emergency repairs, and any contractor estimates you’ve obtained.

  8. Review settlement offer and negotiate if necessary before accepting. Don’t feel pressured to accept the first offer. Compare it against your documentation and independent repair estimates.

Following these steps systematically helps ensure nothing gets overlooked and positions the claim for the best possible outcome. Prompt action on initial notification and documentation is critical. Waiting even a few days can raise questions about when damage actually occurred. Specific requirements may vary by insurer and policy type, so ask your claims representative about any additional forms or procedures. You should take temporary protective measures immediately to prevent further damage, but hold off on permanent repairs until the adjuster approves them. The insurance company needs to see the full extent of damage first.

Required Documentation and Evidence for Your Property Damage Claim

r_pMBKEkTbepB_yNRXMakA

Thorough documentation is the foundation of a successful property damage claim and directly impacts the settlement amount. Insurance companies require specific types of evidence to verify losses, and the quality of your documentation often determines whether disputed items get covered. The difference between a well documented claim and a poorly documented one can be thousands of dollars in settlement value.

Document the damage immediately before any cleanup or repairs begin. Premature action can eliminate critical evidence. Once you start moving things around or making repairs, you can’t recreate the scene for the adjuster.

Photographs and videos of all damaged areas from multiple angles and distances. Start with wide shots showing context, then move in for detailed views. Close-up images showing specific damage details and extent. Capture cracks, water stains, warped materials, smoke damage, and any structural issues. Written damage description including date, time, and circumstances of loss. Note what you saw, heard, or smelled when the damage occurred.

Complete inventory of damaged personal property with item descriptions. Include make, model, size, color, and condition before the damage. Proof of ownership documents including receipts, warranties, and purchase records. Bank statements, credit card statements, or photos showing items in your home before damage can substitute if original receipts aren’t available.

Contractor repair estimates and professional assessment reports. Get at least two independent estimates from licensed contractors for comparison. Police or fire department incident reports when applicable. Official reports add credibility and establish the date and circumstances of damage. Witness contact information and statements if relevant. Neighbors who saw storm damage occur or heard the incident can strengthen your claim. Receipts for emergency repairs and temporary protective measures. Keep every receipt for tarps, plywood, water extraction, or other immediate mitigation efforts.

Keep all damaged items and debris until the insurance adjuster approves disposal. Even if it looks like trash, that broken furniture or water damaged drywall is evidence supporting your claim. Maintain organized records of all communications with your insurance company. Log phone calls with dates, times, and names of representatives you spoke with. Make copies of everything you submit to the insurance company and keep them in a separate file for your personal records.

Understanding Your Policy Coverage and Claim Eligibility

2M0zOtCVSwiIoAIYw2sOXA

Review your specific policy before filing to understand what’s covered, what limits apply, and what your deductible amount is. Not all property damage is automatically covered under standard homeowners insurance. Filing a claim for damage that’s excluded can waste time and create a claim history notation without any payout. Your policy declarations page shows your coverage limits and deductible. This is the document you should review first.

The main coverage types include dwelling coverage, which protects the home structure and attached structures like attached garages or decks. Contents coverage protects personal belongings inside the home like furniture, clothing, and electronics. Other structures coverage applies to detached structures like standalone garages, sheds, fences, and driveways. Loss of use coverage pays for additional living expenses if the home becomes uninhabitable during repairs. Each coverage type has separate limits stated in your policy, and the deductible typically applies to the total claim, not to each coverage type separately.

Replacement cost policies pay to replace damaged property with new items of similar kind and quality. Actual cash value policies subtract depreciation based on the age and condition of damaged items. For example, a ten year old roof with a 20 year lifespan might receive only 50% of replacement cost under an actual cash value policy. Coverage limits represent the maximum the insurance company will pay regardless of actual damage costs. If your dwelling coverage is $250,000 but repairs cost $300,000, you’re responsible for the $50,000 difference.

Water backup, earthquake, and flood damage often require separate policies or add on coverage beyond standard homeowners insurance. Standard policies typically exclude damage from floods (rising water from outside the home), earthquakes, and even sewer backup unless you purchased the specific endorsement. Review your specific policy documents or contact your insurance agent for clarification on coverage questions before assuming damage is covered.

Critical Timelines and Deadlines for Filing Property Damage Claims

zY9C5g4ZTya59calXdAw5Q

Property damage claims are subject to multiple time sensitive requirements including immediate notification obligations, claim filing deadlines, and statutes of limitations that vary by state and insurance policy. Missing any of these deadlines can result in partial or complete claim denial, regardless of how legitimate the damage is. Insurance policies are contracts, and the insurer can enforce the timing requirements spelled out in the policy language.

Notify your insurance company immediately after damage occurs. Ideally within 24 to 48 hours using their toll-free claim hotline available any time. Delayed notification can be grounds for claim denial, especially if the delay allowed additional damage to occur that could have been prevented with prompt mitigation.

Timeline Requirement Typical Timeframe Consequence of Missing
Initial notification to insurer Within 24 to 48 hours of damage Possible claim denial or reduced payout for preventable additional damage
Formal claim filing deadline 30 to 60 days from date of loss (policy specific) Claim denial if policy deadline is missed
Documentation submission Within timeframe requested by adjuster (often 7 to 14 days) Processing delays, possible claim denial for non cooperation
Adjuster inspection coordination Typically scheduled within 3 to 10 days of claim filing Delayed settlement, potential issues if damage changes before inspection
Statute of limitations (state dependent) 1 to 6 years depending on state law Complete loss of legal right to pursue claim through lawsuit

Specific deadlines vary significantly by state law, insurance carrier, and individual policy terms. Some policies require written notice within a certain number of days, while others accept phone notification as sufficient. The statute of limitations for filing a lawsuit against your insurance company for claim disputes also varies by state. Some states allow six years, others just one year from the date of denial or underpayment. Review your policy documents or contact your insurance agent immediately to confirm exact deadlines applicable to your situation. Consider consulting an attorney if you’re approaching statutory limits or if the insurance company has delayed processing beyond reasonable timeframes.

Working with Insurance Adjusters During the Claim Process

mGd_DPLRLiKCtHG-KQj4A

The insurance adjuster is assigned by your insurance company to inspect the damage, assess repair costs, and determine the claim payout amount based on their findings and your policy coverage. Understanding their role helps you prepare for the inspection and advocate effectively for fair compensation.

You should have all documentation, photographs, and evidence organized and ready to present when the adjuster arrives. Walk the adjuster through all damaged areas and point out damage that may not be immediately visible, such as water damage inside walls, smoke residue in hidden areas, or secondary damage in adjacent rooms. The adjuster may spend only an hour or two at your property, so having everything prepared helps ensure nothing gets overlooked during their assessment.

Be present during the inspection to answer questions, provide context about the damage, and ensure all affected areas are documented in the adjuster’s report. Their assessment directly determines your settlement amount, so this is your opportunity to make sure they see everything. If you can’t be present, have a trusted family member or friend there who understands the full extent of the damage. Leaving an adjuster to inspect alone increases the risk that damage gets missed or underestimated in their report.

Company adjusters are employed directly by your insurance company. Independent adjusters are contracted by the insurer to handle claims on their behalf. Public adjusters are hired by policyholders to advocate on their behalf during the claims process. Public adjusters work for you, not the insurance company, but they charge a percentage of the settlement (typically 5% to 20%). They can be valuable for complex or high value claims where getting maximum settlement justifies their fee.

Take your own notes and photos during the inspection, request a copy of the adjuster’s report, and obtain multiple independent contractor quotes to compare with the adjuster’s estimate. This provides documentation if you need to negotiate the settlement amount. Adjusters sometimes use pricing databases that don’t reflect actual local contractor costs, or they may miss items that contractors include in their estimates. Having independent quotes from licensed professionals gives you leverage to challenge undervalued assessments.

Evaluating Settlement Offers and Negotiating Fair Compensation

NdhleYHMTt672-mhyhFp9Q

Obtain multiple professional repair estimates from licensed contractors for two critical reasons: to understand the true cost of repairs and to have documentation supporting your claim amount when negotiating with the insurance company. Independent contractor quotes provide an objective baseline for comparing against the insurance company’s assessment. Getting at least two estimates helps ensure you’re not relying on a single opinion. Choosing contractors experienced with insurance restoration work often results in more detailed and accurate repair scopes.

Evaluate settlement offers by comparing the insurance company’s estimate with independent contractor quotes, checking that all damaged items and necessary repairs are included, and verifying whether the offer is based on replacement cost or actual cash value. Line item differences between the adjuster’s estimate and contractor quotes are common. The adjuster might have missed items, used lower material grades, or applied different labor rates. Check that hidden damage like water damage inside walls or structural reinforcement needs are addressed, not just visible surface damage.

Insurance companies commonly make lowball initial settlement offers to reduce their financial liability. Accepting the first offer isn’t required. Policyholders have the right to negotiate for fair compensation that covers all documented damages. The first offer often tests whether you’ll accept less without questioning it.

Document all discrepancies between the adjuster’s assessment and contractor estimates. Submit supplemental documentation to support higher repair costs. Request detailed explanations for any disputed items. Consider consultation with a public adjuster or attorney if the settlement offer appears inadequate or the insurance company is unresponsive. Present your case in writing with specific line item comparisons showing where the adjuster’s estimate falls short. Attach contractor quotes, material cost documentation, and photos highlighting damage the adjuster may have undervalued. Remain factual and professional in all communications. Emotional appeals don’t work as well as documented evidence.

Handling Claim Denials and Disputes with Insurance Companies

RyhK2kvJQ5WK67Oi89_OdQ

Claim denials occur for various reasons including policy exclusions, insufficient documentation, missed deadlines, or insurance company determination that damage isn’t covered under the policy terms. Receiving a denial doesn’t mean the claim is over. Policyholders have options to challenge the decision. Understanding why the claim was denied is the first step toward potentially overturning it or pursuing other remedies.

The formal appeal process includes requesting a written explanation of the denial with specific policy language cited, reviewing your policy to verify the denial is legitimate, gathering additional documentation or expert opinions that counter the denial reasoning, and submitting a formal appeal letter within the timeframe specified in the denial notice. Most policies outline an internal appeals process with specific deadlines for requesting reconsideration. Your appeal letter should address each reason cited in the denial, provide additional evidence or documentation, and reference specific policy language supporting your position.

Bad faith insurance practices include unreasonable claim delays, failure to conduct proper investigation, denying valid claims without justification, or offering settlements far below documented damage costs. These situations may provide grounds for legal action beyond the claim itself. Insurance companies have a legal duty to handle claims fairly and in good faith. Violating this duty can result in penalties beyond just paying the original claim amount.

Consider legal representation for complex claims with significant value, repeated denials or unreasonable delays, suspected bad faith practices, or situations where settlement offers are substantially lower than documented repair costs. Attorneys experienced in insurance claims can negotiate directly with insurers, file formal complaints with state insurance regulators, and pursue litigation if necessary. Legal consultation is particularly important if you’re approaching statute of limitations deadlines or if the insurance company has stopped responding to your communications. The cost of attorney representation is often worth it when dealing with claims valued over $50,000 or when facing complete claim denials on legitimate covered damage.

Preventing Common Property Damage Claim Mistakes

14aK7FttS4Sf5IdO4nC-sw

Even well intentioned actions can negatively impact property damage claims. Understanding common mistakes before filing helps protect your claim and maximize your settlement. Small errors in the early stages of the process can create problems that are difficult or impossible to fix later.

Delaying notification to the insurance company beyond 24 to 48 hours raises questions about when damage actually occurred and whether additional preventable damage happened during the delay. Beginning permanent repairs before the adjuster inspects the damage means once repairs are complete, the adjuster can’t verify the extent of damage, making it easier for the insurance company to dispute your claim.

Discarding damaged items or debris before receiving approval from the insurer eliminates the adjuster’s ability to verify your losses. Failing to document damage thoroughly with photos and videos makes it harder to prove the extent of damage, especially for items that deteriorate further over time. Not taking reasonable steps to prevent further damage is a mitigation duty. Your policy requires you to prevent additional damage where possible, and failing to do so can reduce your claim payout.

Missing claim filing deadlines or documentation submission timeframes allows insurance companies to deny claims even when the underlying damage is legitimate and covered. Accepting the first settlement offer without reviewing or negotiating means initial offers are often lower than what you can obtain through negotiation with proper documentation.

Providing incomplete or inaccurate information on claim forms can delay processing or provide grounds for denial if the insurance company views them as material misrepresentations. Failing to keep receipts for emergency repairs and temporary protective measures means without receipts, you can’t seek reimbursement for immediate mitigation expenses. Not maintaining written records of all communications with the insurance company allows verbal conversations to be disputed later, while written documentation provides a clear record of what was said and when.

While policyholders must take emergency action to prevent further damage (such as covering broken windows, tarping damaged roofs, stopping water leaks, or shutting off compromised utilities), these temporary mitigation efforts should be documented with photos and receipts. Permanent repairs should wait for adjuster approval except in situations where immediate action is necessary to prevent health hazards or additional significant damage. For example, if a burst pipe is flooding your home, you need to shut off the water and extract standing water immediately rather than waiting for adjuster approval. But you should photograph everything before and during the emergency response.

Special Property Damage Claim Situations and Considerations

Q9yeHCggQdab7TWrh0SPsw

Additional living expenses coverage (loss of use) pays for temporary housing, increased food costs, and other necessary expenses when your home becomes uninhabitable due to covered damage. This coverage typically starts the day you move out and continues until repairs are complete or until you reach the policy limit, whichever comes first. What qualifies includes hotel or rental housing costs, restaurant meals if you don’t have kitchen access, storage fees for furniture and belongings, and even pet boarding if necessary. Keep all receipts and submit them regularly for reimbursement rather than waiting until repairs are complete. Coverage limits vary. Some policies cap loss of use at a percentage of dwelling coverage (often 20% to 30%), while others set specific dollar or time limits.

Rental property claims involve both landlord and tenant considerations. Landlords typically file claims for structural damage, attached fixtures, and loss of rental income while the property is uninhabitable, using their landlord or investment property insurance policy. Tenants with renters insurance file separate claims for personal property damage to their belongings inside the rental unit. Each party has responsibilities. Landlords must maintain the structure and notify their insurer of damage, while tenants must report damage promptly to both the landlord and their own insurer if they have renters coverage. Neither party should begin repairs without proper authorization. The landlord controls structural repairs after their insurer approves the work.

Commercial property damage claims often involve higher complexity, business interruption coverage, inventory losses, and different documentation requirements compared to residential claims. Processing times may be longer because commercial policies often require detailed financial records showing business income loss, inventory valuations, and operational impact assessments. Business interruption coverage requires proving not just that the property was damaged, but that the damage directly caused lost revenue or increased operating expenses. Documentation needs include profit and loss statements, tax returns, inventory records, sales data, and sometimes expert business valuation reports.

Third party liability situations occur when property damage was caused by someone else’s negligence. A neighbor’s tree falling on your property, contractor damage during work, or vehicle impact into your structure. When to file with your own insurance versus pursuing the liable party’s insurance depends on the circumstances and your coverage. Filing with your own insurer is usually faster but may require paying your deductible and could affect your rates. Pursuing the liable party’s insurance avoids your deductible but often takes longer and requires proving fault. Fault based claims require additional evidence such as police reports, incident reports, witness statements, or expert assessments establishing that the other party’s negligence caused the damage. In some cases, you file with your own insurer first, then your insurance company pursues the liable party through subrogation to recover what they paid out.

Final Words

Filing a property damage claim involves specific steps, solid documentation, and clear communication with your insurance company.

Start with immediate notification. Secure your property. Document everything before cleanup begins.

Understanding your policy coverage, meeting deadlines, and working effectively with adjusters all affect your settlement outcome.

If you receive a lowball offer or denial, you have options. Negotiate with evidence. Appeal if needed. Get professional repair estimates from qualified contractors who know how to file a property damage claim properly.

Take temporary protective measures right away, but wait for adjuster approval before permanent repairs. Keep receipts. Stay organized. Follow through.

Most claims move forward when you document thoroughly and communicate clearly from the start.

FAQ

What is the average settlement for property damage?

The average settlement for property damage varies widely depending on the extent of damage, policy coverage limits, deductible amounts, and whether the settlement is based on replacement cost or actual cash value with depreciation factored in.

What not to say when filing a claim?

When filing a claim, avoid making absolute statements about fault, speculating about causes you’re unsure of, downplaying damage extent, or saying you’ve already started permanent repairs before the adjuster inspects and approves.

What are common examples of property damage?

Common examples of property damage include water damage from burst pipes or roof leaks, fire and smoke damage, wind or hail damage to roofing and siding, fallen trees on structures, and vandalism or break-in damage.

What’s the biggest mistake people often make when dealing with an insurance claim?

The biggest mistake people make when dealing with an insurance claim is starting permanent repairs before the insurance adjuster inspects the full damage extent, which eliminates critical evidence and can result in claim denial or reduced settlement.

How soon should I contact my insurance company after property damage occurs?

You should contact your insurance company immediately after property damage occurs, ideally within 24 to 48 hours, using their toll-free claim hotline since delayed notification can be grounds for claim denial under most policies.

What should I do with damaged items before the adjuster arrives?

You should keep all damaged items and debris in place until the insurance adjuster inspects and approves disposal, as premature cleanup eliminates evidence the adjuster needs to verify losses and determine settlement amounts.

Do I need multiple repair estimates for my property damage claim?

You should obtain multiple professional repair estimates from licensed contractors to understand true repair costs and provide documentation supporting your claim amount when comparing with or negotiating the insurance company’s settlement offer.

What documentation do I need to support my property damage claim?

You need photographs and videos of all damage from multiple angles, a detailed inventory of damaged items, proof of ownership documents like receipts, contractor repair estimates, and receipts for any emergency repairs or temporary protective measures.

Can I make emergency repairs before the insurance adjuster inspects?

You can and should make temporary emergency repairs to prevent further damage, such as covering broken windows or stopping water leaks, but keep all receipts and document the temporary measures with photos while waiting for permanent repair approval.

What is the difference between replacement cost and actual cash value coverage?

Replacement cost coverage pays the full cost to replace damaged items with new equivalents without depreciation, while actual cash value coverage factors in depreciation based on age and condition, resulting in lower settlement amounts.

How long does the property damage claim process typically take?

The property damage claim process timeline varies significantly based on damage complexity, documentation completeness, and insurance company workload, ranging from a few weeks for straightforward claims to several months for complex situations requiring extensive repairs.

What if I disagree with the insurance adjuster’s damage assessment?

If you disagree with the insurance adjuster’s damage assessment, submit independent contractor quotes showing higher repair costs, provide supplemental documentation supporting your position, and request detailed explanations for disputed items before considering formal appeals or legal consultation.

Emergency Restoration Services Near Me Delivers Quick Relief

Have you ever wondered how quickly help can arrive when disaster strikes? In an emergency, every second counts. We understand this can be overwhelming, and our local experts are ready to jump in. We act fast to stop further damage and bring things back to normal. We tackle water damage, fire cleanup, mold removal, and more.

By choosing trusted restoration services near you, you can get quick relief and peace of mind. Read on to learn how taking immediate action can make all the difference when you need help most.

Emergency Restoration Services Near Me: Locate Local Experts in Under 60 Minutes

When disaster hits, every second counts. We have expert restoration specialists ready to help you 24/7 with water damage (repair work after water damage), fire cleanup, mold removal, and sewage backup. Our team covers both homes and businesses and usually arrives within one hour to stop further harm.

To get fast help, choose one of these options:

  • Phone: Call us now for immediate assistance.
  • Live chat: Use our website chat to speak with a specialist.
  • Online form: Fill out the online form and we’ll call you back quickly.

We’re here to bring calm to chaos. As soon as you reach out, our local team starts stopping extra damage right at your door. We guide you through every step, keeping safety in mind. If you need urgent recovery help, we’re just a phone call, chat, or form submission away.

Emergency Restoration Services Near Me: Core Service Offerings

img-1.jpg

When a disaster hits, we move quickly to protect your home and keep you safe. We follow clear, simple steps to get things under control. Here are the six main services we offer:

  • Flood and Storm Damage Cleanup
    We swiftly remove standing water and debris to stop further harm to your structure and prevent mold (a type of fungus that grows in damp areas).

  • Fire and Smoke Damage Restoration
    We clean up soot and remove smoke smells. We also secure any affected area with emergency board-up (covering openings to keep intruders and weather out).

  • Mold Inspection and Remediation
    We check for mold and safely eliminate it. Our methods help stop mold from coming back.

  • Sewage Backup and Contaminated Water Removal
    We handle dangerous water by removing sewage and contaminated water. This reduces health risks and stops extra damage.

  • Structural Drying
    We use dehumidifiers (machines that pull moisture from the air) and air movers to dry your home completely. This helps keep mold and decay from starting.

  • Content Pack-Out and Duct Smoke Removal
    We carefully move and protect your belongings. We also clean ductwork to remove any smoke residue.

Every service is aimed at minimizing damage and speeding up recovery. Our certified technicians use top equipment to safely restore homes and businesses. We work fast to stop damage early and get your space back to a safe, livable condition.

Emergency Restoration Services Near Me: 24/7 Rapid Response & Immediate Property Recovery

When damage hits your home in Bergen, Passaic, Essex, Hudson, Morris, Middlesex counties, or Hampton Roads, we’re here to help 24/7. We get to your property in less than an hour with a clear plan that tackles both local needs and essential recovery steps.

Our quick-response plan includes:

  • A safety check and securing your property to stop unwanted entry.
  • Fast removal of water to prevent more damage and lower the risk of mold.
  • Immediate boarding up of windows and doors to protect soft spots.
  • A prompt look at any structural damage so we can plan needed repairs.

Emergency Restoration Services Near Me: Certified Professionals & Coverage Area

img-2.jpg

We are a team of certified recovery professionals who respond quickly to urgent property damage. Each technician has IICRC certification (a credential from the Institute of Inspection, Cleaning, and Restoration Certification that shows they are trained to restore water damage), and our team is fully licensed and insured. You can count on us to handle your repairs with care and skill.

We serve many areas, including Bergen, Passaic, Essex, Hudson, Morris, and Middlesex counties in New Jersey, as well as Virginia Beach and Hampton Roads. Our broad service area means we are nearby when you need us most. We work closely with major insurance carriers to document your claim accurately, ensuring a smoother process for you. Our local experts are here to restore your property fast while easing your stress during difficult times.

Emergency Restoration Services Near Me: Transparent Pricing & Insurance Documentation

We know this is a stressful time. That’s why we make pricing easy to understand. First, we do a full check of the damage. Then, we give you a clear repair cost estimate so you know what each step will cost. We show you local pricing compared to industry standards right from the start.

We work with all major insurance companies. While repairing, we take clear photos, moisture readings (using tools that measure water in the air), and notes of each step. One of our technicians documents everything in detail so your claim is easier to process.

  • Flat repair estimates with no hidden fees.
  • Pricing that lets you compare local service costs easily.
  • Detailed records made during emergency repairs for your claim.
  • A free claim consultation to help you with your insurance carrier.

Each record is made to help speed up claim approval. Our complete documentation shows every stage of the restoration. This clear evidence helps prove the extent of the damage and supports the repair costs. We offer transparency that gives you peace of mind and helps you get a faster claim resolution with your insurer.

Emergency Restoration Services Near Me: Customer Reviews & Success Stories

img-3.jpg

Our customers share real stories of how we quickly restore homes and businesses when disaster strikes. One client explained that our fast help during a bad flood saved their belongings and stopped further damage. Another customer praised our fire cleanup team for removing soot and smoke smell, making their home safe again. Many clients rate us five stars for our prompt response, clear updates, and detailed records throughout the process.

Recent case studies include photo galleries and before-and-after pictures that show the transformation. Here are some highlights our customers have noted:

  • Immediate response within one hour that helped prevent extra damage.
  • A full restoration that left properties in even better condition.
  • Clear records, with photos and moisture readings, that made insurance claims smoother.
  • Caring technicians explaining every step, which eased homeowner worries.

These testimonials show our strong commitment to quality and trust. Homeowners and property managers value our skill in handling water, fire, and mold emergencies and our smooth work with insurance teams. Our careful cleanup and complete documentation make us a trusted choice when repair is needed.

Emergency Restoration Services Near Me: Advanced Techniques & Equipment

When disaster strikes, we know how overwhelming it can be. That’s why we jump into action using the latest technology to get your home back in shape fast and safely. We use infrared thermal imaging (a tool that finds hidden moisture) to spot damage you might not see. This helps us target problem areas quickly and stop further damage.

We also use powerful industrial dehumidifiers (machines that pull excess moisture from the air) and HEPA air scrubbers (devices that capture tiny particles) to lower the chance of mold and help keep your air clean. Our eco-friendly mold removal products clean effectively without harming your home. We make sure to pack out your belongings safely before starting heavy repairs. Then, our structural drying systems take care of hidden dampness in materials for a full restoration.

  • Infrared thermal imaging finds hidden moisture and damage.
  • Industrial dehumidifiers and HEPA air scrubbers speed up recovery.
  • Eco-friendly mold removal and structural drying systems offer complete restoration.

Final Words

In the action, we explored every step to restore your home quickly and safely. We covered immediate damage control, transparent pricing, and trusted, certified professionals. We broke down core offerings like water extraction, fire cleanup, mold remediation, and advanced repair techniques. Our guide shows how clear documentation and fast response limit further damage and save time.

Stay reassured knowing a rapid team is ready to respond. When you search for emergency restoration services near me, you'll find expert help around the clock.

FAQ

What do emergency restoration services near California provide?

The emergency restoration services near California deliver fast water, fire, and mold cleanup. They provide 24/7 help with immediate response and work with insurers to get your home back to safe, livable condition.

What do emergency restoration services near Texas offer?

The emergency restoration services near Texas offer quick recovery from water, fire, and mold damage. Their teams respond 24/7, providing rapid mitigation and restoration to secure your home.

What makes the best emergency restoration services near me stand out?

The best emergency restoration services near you provide quick response, certified technicians, and clear pricing. They offer comprehensive help for water, fire, and mold incidents to restore safety and comfort.

How does SERVPRO near me compare as a restoration option?

SERVPRO near you offers reliable, fast emergency help for water, fire, and mold damage. Their certified teams use advanced techniques to minimize damage and streamline the insurance process.

How do residential restoration companies near me assist with home repairs?

Residential restoration companies near you focus on repairing water, fire, and mold damage. They provide personalized services, quick response, and help with insurance documentation to ease your recovery.

What qualifies companies as some of the top restoration companies?

The top restoration companies are known for rapid response, certified expertise, and transparent pricing. They use modern equipment and proven techniques to restore properties efficiently and safely.

What services do fire and water damage restoration companies near me provide?

Fire and water damage restoration companies near you handle emergency cleanup by removing soot, smoke, and water. They use advanced equipment to limit damage and restore your property quickly.

What’s the difference between remediation and restoration?

Remediation involves removing harmful substances like mold (cleaning and treating them), while restoration repairs and returns your property to its original condition. Both work together to keep your home safe.

How much does it cost to clean up a burned house?

The cost to clean up a burned house depends on the damage extent and cleanup needs. Estimates consider labor, materials, and overall scope, so it’s best to request a detailed quote and check with your insurer.

What should I do immediately after water damage?

Immediately after water damage, turn off utilities if safe, document the damage, and call a 24/7 emergency restoration service. Quick action helps prevent further loss and initiates water extraction.

Are fire restoration companies worth hiring?

Fire restoration companies are worth hiring as they provide fast cleanup, expert repairs, and assistance with insurance claims. Their certified teams work to secure your home and reduce overall repair costs.

Black Mold Removal Services: Fast Certified Remediation

0

You just found black mold growing behind your bathroom vanity or spreading across basement walls. That dark, slimy growth isn’t something you can wipe away and forget. Black mold releases spores that spread fast, contaminate building materials, and require certified remediation to actually fix the problem. This guide walks you through what professional black mold removal looks like, from containment setup through final clearance testing, so you know what happens when certified crews show up to make your home safe again.

What to Expect from Professional Black Mold Removal Services

xpNY8OzCSTCHyJnNHCHtMg

Professional black mold removal goes way beyond wiping down surfaces. Certified technicians coordinate every step, from first inspection through final testing, using specialized gear and containment systems to protect your home. The work addresses what you can see and what’s hiding behind walls, in crawl spaces, or inside building materials you didn’t even know were compromised.

Here’s how the full remediation process breaks down:

Inspection and Testing
Technicians walk through visible problem areas and collect air and surface samples. They’re identifying mold species, figuring out how far contamination has spread, and tracking down moisture sources. Thermal cameras help spot hidden water behind walls and in ceilings that’s feeding the growth.

Containment Setup
Crews seal affected zones with heavy plastic sheeting and create negative air pressure using HEPA scrubbers. This stops spores from drifting into clean rooms while removal work happens.

Physical Mold Removal
Contaminated materials get stripped out. Affected surfaces get cleaned with antimicrobial solutions. HEPA vacuums run constantly to catch airborne spores.

Antimicrobial Treatment
After physical removal wraps up, crews apply antimicrobial agents to treated surfaces. This kills remaining spores and blocks regrowth.

Affected Material Removal and Restoration
Porous stuff that can’t be fully cleaned (drywall, insulation, carpeting) gets removed and replaced. Non-porous surfaces get cleaned and sealed.

Final Clearance Verification
Post-remediation testing confirms spore counts are back to normal and the problem’s actually gone when containment comes down.

Small jobs typically wrap in one to two days. Extensive cases hitting multiple rooms, attics, or basements can run several days to weeks depending on damage scope. Clearance testing gives you documented proof your home’s safe and the work actually fixed the problem.

Black Mold Removal Cost Factors and Pricing Estimates

Vym7wlYdSiGk2Wg1lNRLjw

Remediation costs swing wildly based on project scope. You might pay a few hundred for small bathroom patches or several thousand for widespread basement or attic infestations. Multiple factors drive final pricing, which is why free professional estimates matter before work starts.

Cost Factor Impact on Price
Affected Area Size Larger floor areas need more labor, protective equipment, specialized tools, and extended timelines, which significantly bumps costs
Material Types (Porous vs. Non-Porous) Porous materials like drywall, wood, and carpet require intensive cleaning or full replacement, raising costs compared to non-porous surfaces such as glass, metal, and tiles
Location Accessibility Hard to reach spots like crawl spaces, attics, and behind walls increase labor complexity and time requirements
Extent of Contamination Heavy infestations requiring extensive containment, air filtration systems, and thorough decontamination run more than surface level growth
Necessary Repairs Post-remediation reconstruction including drywall replacement, ceiling repairs, painting, and new flooring increases total project costs beyond initial removal

Basement and attic jobs typically cost more than small bathroom areas. These spaces often have widespread contamination hitting structural materials, limited access requiring specialized equipment, and extensive moisture problems that must be corrected to prevent it from coming back. Below-ground moisture seeping through foundation cracks and poor ventilation create conditions where mold spreads across large areas before anyone notices.

Additional repair costs stack on top of base remediation price. Drywall often must be cut away and replaced to get all spores embedded in the porous material and restore structural integrity. Carpet replacement is typically necessary because mold hides deep in the fibers, making thorough cleaning nearly impossible. Repainting treated areas and replacing trim work further drives up project expenses.

Most certified providers offer free estimates that include visual inspection, contamination assessment, and detailed scope of work with transparent pricing. Request estimates from multiple licensed companies to compare proposed approaches and understand what each quote actually includes.

Emergency Response and 24/7 Availability

HukqITuETNSrpXRMyr2j4g

Rapid response matters because mold can start growing within 24 to 48 hours after water exposure. Black mold contamination gets worse quickly once it’s established. Immediate professional action stops the spread and limits damage to building materials and personal belongings.

Same day emergency services include immediate on-site assessment to determine contamination extent, quick containment setup to prevent spores from spreading to unaffected areas, and moisture extraction to eliminate the water source feeding growth. Technicians start drying wet materials within the first 48 hours to prevent mold from establishing in porous surfaces like drywall, insulation, and subflooring. This fast action often means the difference between minor surface cleaning and extensive material replacement.

Local certified companies provide 24/7 availability with rapid response commitments. Many arrive at your home within one hour of your emergency call, equipped with containment materials, moisture meters, and air filtration equipment. You can reach these companies by phone any time, day or night, or submit emergency service requests through online contact forms that dispatch technicians immediately. The sooner you call, the less damage occurs and the lower your total costs.

When you discover black mold, take action immediately rather than waiting to see if the problem gets worse. Contact certified remediation services for free consultations and emergency assessments. Most companies provide phone estimates and can schedule same day inspections to evaluate your situation and begin containment if needed.

Customer Reviews and Success Stories

0OiIBjp0RbubGClkTP04iw

Verified customer reviews give you insight into service quality, technician professionalism, and project outcomes when selecting black mold remediation services. Past customer experiences reveal how companies handle emergency situations, communicate throughout the process, and deliver on their promises.

Industry research demonstrates service quality across remediation companies. Independent studies polling commercial and homeowner decision makers consistently rank top remediation companies as the number one choice for cleanup and restoration work based on customer satisfaction with response times, work quality, and project outcomes.

Customer testimonials commonly highlight rapid response times with technicians arriving within hours of initial contact, even for late night emergencies. Homeowners frequently mention the professionalism of certified technicians who explain each process step, answer questions clearly, and maintain clean work areas throughout remediation projects. Successful outcomes include thorough remediation that passes clearance testing, coordination with insurance providers to reduce claim stress, and complete restoration that returns homes to pre-damage condition. Many customers specifically note relief that one company handled both remediation and reconstruction work, eliminating the need to coordinate multiple contractors.

When evaluating companies, review multiple customer testimonials to identify consistent service patterns. Ask prospective providers for references from recent projects similar to your situation. Verify that positive reviews come from actual customers rather than promotional content, and pay attention to how companies respond to negative feedback when problems occur.

Service Areas and Local Coverage

ME-6fr9bQvioIDz72SMgnw

Selecting local certified providers matters because they understand regional moisture patterns, climate related mold risks, and building construction common to your area. Local companies respond faster to emergencies and maintain familiarity with municipal permitting requirements and regional licensing standards.

National franchise networks and independently owned remediation companies combine consistent quality standards with local availability. Franchise locations follow standardized remediation protocols, use approved equipment and products, and maintain certification requirements while providing the quick response times and regional knowledge of local businesses. This structure means you get proven remediation methods from technicians who live and work in your community.

Regional licensing requirements vary by state, with some areas requiring specific certifications for mold remediation work beyond general contractor licenses. California, Nevada, and other states mandate separate licensing categories for hazardous material handling and mold remediation work. Proper licensing demonstrates that companies meet state mandated training requirements, maintain adequate insurance coverage, and follow regulated safety protocols. Always verify that providers hold current licenses for your specific state or region.

Before contacting a company, confirm they serve your specific location and can respond quickly to emergency situations. Ask about typical response times for your area and whether they maintain local crews or dispatch technicians from distant locations. Companies with nearby offices and equipment storage generally provide faster service when you need immediate help.

Request Your Free Mold Inspection and Estimate

lRCn1W1iQ-u-GdOSiiEdwg

If you suspect black mold in your home, request a professional inspection immediately rather than waiting for the problem to worsen. Early detection and fast action limit damage, reduce health risks, and lower total remediation costs.

Free inspections from certified providers include comprehensive visual assessments of all affected areas, thermal imaging to detect hidden moisture and mold growth behind walls and in ceiling cavities, moisture readings to measure water content in building materials, evaluation of contamination extent to determine which materials can be cleaned versus replaced, and detailed written estimates with clear scope of work outlining each remediation step and associated costs. These thorough inspections give you complete information about your mold problem and what’s required to fix it properly.

Comparing multiple estimates from licensed providers helps you understand different remediation approaches and pricing structures. Request at least three quotes to evaluate proposed methods, project timelines, and total costs including both removal and necessary repairs. Verify that each estimate comes from properly licensed and insured contractors who maintain current certifications for mold remediation work.

Contact companies by phone for immediate emergency response or submit online request forms for scheduled inspection appointments. Most respond to phone calls within minutes and can dispatch technicians for same day assessments when needed. For scheduled inspections, expect response within 24 to 48 hours to book your appointment. Before the inspection, clear access to areas where you’ve noticed mold growth or moisture problems, document any recent water damage or leaks, and prepare questions about the remediation process, timeline, and what to expect during the work.

Certified Technicians and Industry Standards for Mold Remediation

27T7BJAS-yeFxxFXe_6MA

IICRC certification represents the industry gold standard for mold remediation professionals. This certification requires technicians to complete rigorous training in contamination assessment, proper containment procedures, safe removal methods, and moisture control strategies that prevent recurrence.

EPA guidelines, licensing requirements, and insurance verification protect homeowners during remediation projects. Certified companies follow EPA protocols for safe handling and disposal of contaminated materials, maintain state required licenses that demonstrate technical competency and regulatory compliance, carry adequate liability insurance and workers’ compensation coverage, and use eco-friendly antimicrobial solutions that effectively eliminate mold without creating indoor air quality concerns or chemical residues that affect occupants. Proper safety protocols include specialized protective equipment for technicians working in contaminated areas, especially when households include vulnerable individuals like young children, elderly residents, or those with compromised immune systems.

Certification matters because effective remediation requires technical knowledge that goes beyond basic cleaning. Certified technicians understand how mold spreads, which building materials can be salvaged versus replaced, proper containment methods that prevent cross contamination, and moisture control techniques that keep mold from returning after remediation is complete. Attempting DIY black mold removal without this expertise creates serious health risks from mycotoxin exposure and often spreads contamination to previously clean areas.

Always verify that contractors hold current IICRC certification, maintain proper state licensing, and carry adequate insurance before hiring them for remediation work. Licensed, insured, and certified contractors provide the expertise and accountability necessary for safe, effective mold removal that protects both your property and your health.

Understanding Toxic Black Mold and Health Risks

woCKddW8TE-cUvNjQ4cbiA

Stachybotrys chartarum, commonly called black mold, is considered the most dangerous household mold type because it produces harmful mycotoxins that trigger serious health problems when inhaled or touched. These toxic compounds cause reactions even in people without existing mold allergies or sensitivities.

Common health symptoms from black mold exposure include weakened immune system making you more susceptible to infections and illnesses, respiratory problems including difficulty breathing, chest tightness, and chronic respiratory infections, chronic coughing that persists even after leaving the affected area, throat irritation causing soreness, scratchiness, and difficulty swallowing, sinus congestion and persistent stuffiness that doesn’t respond to typical treatments, headaches ranging from mild to severe (often worsening in contaminated areas), allergic reactions including sneezing, runny nose, and itchy eyes, and skin and eye irritation causing redness, itching, and burning sensations.

Airborne mold spores spread through microscopic reproduction, with a single colony releasing millions of spores that float through air currents and settle on surfaces throughout your home. These spores survive harsh environmental conditions including dry weather and temperature extremes, remaining dormant until they find moisture and begin growing again. This survival ability makes black mold particularly dangerous because contamination spreads quickly once spores become airborne during disturbance or attempted DIY removal.

Black mold requires specialized safety equipment and respiratory protection during removal. Professional technicians wear full protective suits, respirators with HEPA filters, and protective eyewear to prevent mycotoxin exposure. Without this equipment, removal attempts expose you to dangerous toxin levels that cause immediate symptoms and potential long term health effects.

Vulnerable populations including young children, elderly individuals, pregnant women, and those with compromised immune systems or existing respiratory conditions face increased risks from black mold exposure. These groups should never enter contaminated areas and may need to temporarily relocate during remediation work to avoid health complications.

Moisture Control and Prevention After Mold Removal

BjtE9vNlRcmiKUmnDbyzWQ

Addressing moisture sources is as important as removing the mold itself. Without fixing the underlying water problem, new mold growth will appear within 24 to 48 hours after remediation work is complete, wasting your investment and continuing health risks.

The 24 to 48 hour timeline for mold growth means quick action on water problems is critical. Maintaining indoor humidity between 30 and 50 percent relative humidity prevents conditions that allow mold spores to germinate and begin forming new colonies. Use humidity meters to monitor levels throughout your home, especially in moisture prone areas like basements and bathrooms.

Effective prevention strategies include leak detection and repair addressing plumbing issues, roof leaks, foundation cracks, and appliance malfunctions that introduce moisture. Proper ventilation installation in bathrooms, kitchens, and laundry areas where steam and humidity naturally occur. Dehumidifier use in basements, crawl spaces, and other areas with persistent moisture problems. Humidity monitoring with meters that alert you when levels exceed safe ranges. Condensation management by immediately drying surfaces when you notice water droplets on walls, pipes, or windows. Regular inspections of attics, basements, and crawl spaces to detect moisture problems and early mold growth before significant damage occurs.

Professional remediation services include identifying and addressing underlying moisture problems to prevent mold recurrence. Technicians locate water sources using moisture meters and thermal imaging, recommend specific repairs for leaks and drainage issues, suggest ventilation improvements based on your home’s layout, and verify that moisture levels are within safe ranges before completing final remediation work. This comprehensive approach fixes both the mold problem and its cause, protecting your home long term.

Common Areas Requiring Black Mold Removal in Homes

WBeLHIs0RRqXjV2nhoB9Uw

Certain areas of homes are more vulnerable to black mold development because they combine the moisture, warmth, and organic materials that support rapid growth. Understanding these high risk locations helps you focus inspection efforts and take preventive action.

Basement and Crawl Space Mold Issues

Basements face constant mold challenges from below ground moisture seepage through foundation cracks and porous concrete, poor ventilation that traps humid air with no circulation path, and organic materials like wood beams, cardboard boxes, and stored belongings that provide food for mold growth. Water enters through floor cracks, wall penetrations, and basement windows during heavy rain or snow melt. Once moisture establishes in these areas, the cool temperatures and limited airflow create ideal conditions for black mold colonies to spread across walls, ceiling joists, and stored items.

Attic Contamination and Roof Leaks

Attics are susceptible due to limited ventilation in spaces designed for infrequent access, condensation that forms when warm moist air from living spaces meets cool roof surfaces, and roof leaks from damaged shingles, flashing failures, or ice dams that allow water to penetrate. Attic mold often goes undetected for months because homeowners rarely inspect these spaces until visible ceiling stains or odors alert them to problems. By then, contamination has typically spread across rafters, roof decking, and insulation.

Bathrooms and Kitchens

Bathrooms and kitchens develop mold from multiple water sources including sinks, showers, dishwashers, and refrigerators that can leak without immediate detection. High humidity from daily showers and cooking adds moisture to the air, and inadequate ventilation traps this humid air against walls and ceilings. Food particles, grease, and soap residue provide additional organic material that feeds mold growth. These rooms often have hidden moisture problems behind tile, under sinks, and within wall cavities where small leaks cause extensive damage before visible mold appears.

Regular inspection and maintenance of basements, attics, and moisture prone rooms help detect problems early when remediation is simpler and less expensive. Check these areas monthly for signs of water damage, condensation, or musty odors that indicate developing mold problems.

Insurance Coverage for Professional Mold Remediation

Insurance coverage for mold remediation depends on what caused the contamination. Sudden water damage from burst pipes, storm flooding, or appliance failures is typically covered under standard homeowners policies, while mold from long term neglect, chronic leaks, or poor maintenance usually isn’t.

Documentation requirements support insurance claims and determine coverage eligibility. Take photos and videos of all affected areas showing visible mold, water damage, and contaminated materials before remediation begins. Obtain professional inspection reports with moisture readings, contamination extent assessments, and identification of the water source that caused mold growth. Keep records of when you discovered the problem and how quickly you took action to mitigate damage. This documentation demonstrates that you acted responsibly to prevent worsening and shows the claim stems from a covered event rather than neglected maintenance.

Professional remediation services assist with insurance coordination and claims documentation throughout the process. Experienced companies understand what information insurance adjusters require, communicate directly with claims representatives to explain remediation scope and costs, provide detailed estimates that break down labor and materials, and document work progress with photos that verify proper remediation procedures. This coordination reduces stress during an already difficult situation and helps ensure your claim is processed smoothly.

Review your homeowners policy now to understand coverage limitations before damage occurs. Many policies include specific mold damage caps or exclude certain types of fungal growth. Consider purchasing additional mold coverage riders if you live in high humidity areas or have moisture prone spaces like basements or crawl spaces that face elevated risk.

DIY Black Mold Removal vs. Hiring Professional Services

Small surface mold on non-porous surfaces like glass, metal, or ceramic tiles may be cleaned by homeowners using appropriate protective equipment and cleaning products. Black mold, however, requires professional handling because of serious health risks from mycotoxin exposure and the likelihood of hidden growth that homeowners can’t detect or safely remove.

DIY Approach Professional Service
Limited to small surface areas less than 10 square feet on non-porous materials Handles contamination of any size including widespread growth affecting structural materials, multiple rooms, and hidden areas
Requires purchasing or renting protective equipment including respirators, protective suits, and eye protection Technicians arrive with full safety equipment, specialized tools, containment materials, and professional grade antimicrobial products
Can’t effectively clean porous materials like drywall, wood, insulation, or carpet where spores penetrate deep into material Properly removes and replaces contaminated porous materials that can’t be cleaned, preventing hidden mold from regrowing
Exposes household occupants to mycotoxins without proper containment and air filtration Establishes containment barriers and negative air pressure to prevent cross contamination during removal work

Specific dangers of DIY black mold removal include direct mycotoxin exposure without adequate respiratory protection causing immediate health symptoms and potential long term effects, improper containment that spreads spores to clean areas of your home through air currents and foot traffic, and inability to detect hidden growth behind walls, under flooring, or in ceiling cavities where moisture supports extensive colonies. Attempting to remove visible mold without addressing hidden contamination leaves the problem active, and disturbing established growth releases massive spore quantities that settle throughout your home.

Call professionals immediately rather than attempting DIY removal if you see black mold growth larger than a dinner plate, detect musty odors without visible mold suggesting hidden growth, have known moisture problems in walls or ceilings, notice health symptoms that worsen at home, or discover contamination in heating and cooling systems that could spread spores throughout your house. Professional services protect your health and ensure complete remediation that prevents recurrence.

Restoring Property After Black Mold Removal

Black mold often requires removing and replacing building materials rather than just surface cleaning because spores penetrate deep into porous materials where they can’t be fully eliminated. Attempting to clean heavily contaminated drywall, insulation, or carpeting leaves active mold that regrows once conditions become favorable.

Common restoration work includes drywall replacement where contaminated sections are cut away, removed, and replaced with new drywall that’s taped, textured, and painted to match surrounding surfaces. Subfloor repairs address moisture damaged wood decking under flooring where mold has compromised structural integrity. Ceiling reconstruction replaces water stained or moldy ceiling materials, repairs damaged roof decking in attic spaces, and restores insulation removed during remediation. Trim restoration replaces baseboards, door casings, and window trim affected by moisture and mold growth.

Porous materials like carpets, carpet padding, and insulation typically can’t be salvaged after black mold contamination. Carpet harbors spores deep within fibers and backing materials where cleaning solutions can’t penetrate effectively. Insulation loses its thermal properties when wet and provides ideal conditions for continued mold growth. These materials must be completely removed and replaced to eliminate contamination and restore your home to safe, functional condition.

Restoration steps following mold removal include damaged material removal disposing of all contaminated porous materials that can’t be cleaned, structural integrity assessment evaluating whether moisture has compromised framing, joists, or support members, replacement material installation using new drywall, insulation, flooring, and trim, finish matching ensuring repairs blend with existing textures, colors, and materials, and final painting and sealing applying primers and paints that match your home’s existing finishes.

Choose water damage restoration services that coordinate both remediation and restoration for seamless project completion. Working with one company that handles the complete process eliminates coordination headaches between multiple contractors, ensures consistent quality standards throughout the project, reduces timeline by avoiding gaps between remediation and reconstruction, and provides single point accountability for both mold removal and finish work quality.

Final Words

Professional black mold removal services follow structured protocols from initial inspection through final clearance testing.

Certified technicians use HEPA filtration, containment systems, and antimicrobial treatments to safely eliminate contamination and restore your home.

Costs vary based on affected area size, material types, and necessary repairs, but free estimates provide transparent pricing before work begins.

When you discover black mold, rapid response matters. Local companies with 24/7 availability can assess the situation, contain the spread, and start remediation within hours.

The right team handles everything from moisture control to final restoration, giving you back a safe, healthy home.

FAQ

How much does professional black mold removal typically cost?

Professional black mold removal costs vary significantly based on the affected area size, contamination extent, material types, and location accessibility. Small bathroom patches may cost a few hundred dollars, while extensive basement or attic infestations can reach several thousand dollars including necessary repairs.

Should black mold always be professionally removed?

Black mold should be professionally removed because it produces harmful mycotoxins requiring specialized containment, safety equipment, and certified expertise. DIY attempts risk spreading airborne spores, incomplete removal behind walls, and dangerous exposure without proper respiratory protection and HEPA filtration systems.

What methods kill black mold completely?

Professional antimicrobial treatments combined with complete removal of contaminated porous materials kill black mold completely. HEPA filtration, negative air pressure containment, and proper moisture control prevent recurrence. Simple surface cleaning rarely eliminates black mold from porous materials like drywall and wood.

How long does professional mold remediation take?

Professional mold remediation takes one to two days for small contained areas and several days to weeks for extensive contamination. Timeline depends on affected area size, necessary material removal, drying requirements, and restoration work including drywall replacement and finish matching.

What does a professional mold inspection include?

A professional mold inspection includes visual assessment, thermal imaging, moisture readings, air and surface sampling, and lab testing to identify mold species and contamination levels. Certified inspectors provide detailed written reports with remediation recommendations and cost estimates.

Why is moisture control necessary after mold removal?

Moisture control is necessary after mold removal because mold can regrow within 24 to 48 hours if humidity exceeds 50 percent or water sources remain unaddressed. Professional services identify and repair leaks, improve ventilation, and address underlying moisture problems preventing recurrence.

Does homeowners insurance cover black mold remediation?

Homeowners insurance typically covers black mold remediation when caused by sudden covered events like burst pipes, but excludes mold from long-term neglect or maintenance issues. Professional services provide documentation including photos, moisture readings, and inspection reports supporting insurance claims.

What areas of homes commonly develop black mold?

Basements, attics, bathrooms, and kitchens commonly develop black mold due to moisture sources, poor ventilation, and temperature differences. Below-ground spaces face foundation seepage, attics experience condensation from warm air meeting cool surfaces, and bathrooms have constant humidity from showers.

Can contaminated drywall and carpet be cleaned or must they be replaced?

Contaminated drywall and carpet must typically be replaced because black mold penetrates deep into porous materials where spores and mycotoxins cannot be completely removed. Professional remediation includes cutting away affected drywall and removing carpeting to eradicate all contamination and restore structural integrity.

What certifications should mold remediation companies have?

Mold remediation companies should have IICRC certification, state-specific licensing, liability insurance, and follow EPA guidelines. Certified technicians demonstrate proper training in containment procedures, safety protocols, HEPA filtration systems, and industry-standard remediation practices protecting homeowner health and property.

How quickly should you respond to black mold discovery?

You should respond to black mold discovery immediately by contacting certified professionals within 24 hours. Rapid response prevents spread to additional areas, limits health exposure, and allows moisture extraction before mold establishes deeper growth requiring more extensive material removal.

What happens during the black mold containment process?

During black mold containment, technicians seal affected areas with plastic barriers, establish negative air pressure using HEPA air scrubbers, and shut down HVAC systems preventing spore spread. Containment protects unaffected areas while allowing safe removal of contaminated materials.

Interior Finish Work After Fire Damage: Restoration Steps That Work

0

Think a fresh coat of paint will fix smoke-damaged rooms? Think again.
Paint hides stains. It doesn’t stop odor, soot, or wet walls.
After a fire, drywall, floors, trim, and cabinets often hold soot, heat damage, and water.
If you paint or install new finishes too soon, the problem comes back.
This post walks you through the Interior Finish Work After Fire Damage steps that actually work:
inspect for hidden moisture, clean and deodorize properly, confirm dryness with meters, then rebuild so the repairs last and your claim is documented.

Core Interior Finish Restoration Steps After a Fire

K6-6GiX-QfezIeZJJXhP9A

Interior finish work covers drywall, flooring, trim, paint, cabinetry, and ceilings. Everything that makes a room look and feel complete. After fire damage, those surfaces are usually covered in soot stains, smoke odor, heat damage, and water from firefighting hoses. You can’t start finishing until every contaminant is gone and every hidden problem is found and fixed.

The sequence matters because soot is acidic and corrodes surfaces within hours. Moisture left in wall cavities will grow mold in 24 to 48 hours. If you paint over smoke residue or install new flooring on damp subfloors, you’re locking in the problem. Restoration pros follow a strict order to prevent failure, recurring odors, and denied insurance claims.

Homeowners worry most about lingering smoke smells, hidden moisture they can’t see, and whether their home will ever feel normal again. The answer depends entirely on whether the restoration follows the proven steps, doesn’t skip deodorization, and verifies dryness with tools instead of guesses.

The six major finish restoration steps:

  1. Emergency stabilization and board up to stop weather intrusion and unauthorized entry.
  2. Water extraction within 24 to 48 hours using industrial pumps, air movers, and dehumidifiers.
  3. Soot and smoke residue removal with HEPA vacuums, chemical sponges, and air scrubbers.
  4. Odor neutralization using thermal fogging, ozone, or hydroxyl generators as conditions require.
  5. Cleaning and sanitizing all salvageable surfaces and contents before reconstruction begins.
  6. Structural repairs and interior finish restoration including drywall, paint, flooring, trim, and cabinetry.

HVAC duct cleaning happens between steps 4 and 5 to prevent odor recirculation once finishes are installed.

Interior Finish Damage Assessment and Planning After a Fire

1nfwQRFZRvymi2l2Ju-2tg

Inspectors evaluate structural safety, moisture levels, smoke penetration depth, and finish material salvageability before any work begins. Moisture meters check wall cavities and subfloors for hidden water. Thermal imaging can reveal where smoke traveled through gaps in framing. Soot on surfaces may look like dust, but it’s chemically active and continues damaging paint, wood, and metal until it’s removed.

Photographic documentation comes first. Before you touch anything. Wide shots show room conditions. Close ups capture stains, warping, and corrosion. These photos become the foundation of your insurance claim and the project scope. Hard surfaces like tile, glass, and metal can often be cleaned and saved. Porous materials like drywall, insulation, carpet, and upholstered furniture absorb smoke and water deeply, and most need replacement.

Assessment checkpoints before finish work begins:

  • Moisture readings inside walls, under flooring, and in ceilings to confirm full dryness.
  • Smoke penetration depth in drywall, trim, cabinetry, and flooring materials.
  • Structural safety of framing, load bearing walls, and ceiling joists after heat exposure.
  • Finish material salvageability based on contamination level, cost to clean, and insurance coverage.
  • Odor retention testing to determine whether surfaces still release smoke molecules after cleaning.

A formal scope of work lists every damaged finish, the repair method, and the estimated cost. This scope is used by the insurance adjuster, the project manager, and the trades doing the work. It keeps everyone aligned and prevents surprises when it’s time to close walls or order materials.

Cleaning, Soot Removal, and Odor Control Before Interior Finish Work

Rxs2yWNASpaTqxVemobncQ

Soot must be removed before finish work starts because it’s acidic, sticky, and will bleed through paint if left behind. HEPA vacuums capture the fine particles without redistributing them into the air. Dry chemical sponges lift soot from painted walls and ceilings without smearing. Wet cleaning with specialized agents follows on washable surfaces. Standard household vacuums and cleaning products make the problem worse, spreading soot or locking odor into the finish.

Deodorization targets smoke molecules embedded in surfaces and floating in the air. Hydroxyl generators are safe to run while people are present and work slowly to break down odor compounds. Ozone machines oxidize odors faster but require full evacuation of the home, including pets, because ozone irritates lungs. Thermal fogging uses a heated deodorizer mist that penetrates porous pathways the same way smoke did, neutralizing odor at the source.

HVAC ducts must be cleaned before finish work or the system will recirculate smoke particles and odor every time the fan runs. Air scrubbers with HEPA filters capture airborne contaminants during the cleaning phase and continue running until air quality is verified. Encapsulation primers seal any remaining odor molecules into the substrate so they can’t off gas through new paint.

Essential safety considerations for odor removal procedures:

  • Ozone treatment mandates complete evacuation including all occupants and pets for the duration of the process and airing out period.
  • Hydroxyl generators may run while occupied, but prolonged direct exposure to the UV light source should be avoided.
  • Thermal fogging requires temporary vacating due to visible fog and strong deodorizer concentration.
  • Verify air quality and complete ventilation before returning to the home after any deodorization method.

Drywall, Plaster, and Ceiling Restoration After Fire Damage

yzdBGgZmRwSVzkndRlWmhg

Drywall absorbs water and smoke quickly. If firefighting hoses soaked a wall or ceiling, the gypsum core stays wet long after the surface feels dry. Moisture meters confirm when the material has returned to normal levels, typically 12 to 15 percent or lower depending on climate. If readings stay high, the drywall must be removed. Smoke stained drywall can sometimes be cleaned and sealed if it wasn’t exposed to heat or water, but full replacement is common in fire affected rooms.

Preparation includes removing damaged sections, clearing debris, and verifying that framing and insulation behind the wall are dry and structurally sound. Any charred wood gets cut back to solid material. Insulation that absorbed water or smoke is pulled and replaced. New drywall is hung, taped, and mudded in multiple coats. Dust control matters. Drywall dust spreads everywhere and can recontaminate cleaned surfaces if the work area isn’t contained.

Finishing steps include sanding joints smooth, priming all new drywall, and sealing smoke stained areas with a shellac or oil based primer before the final paint goes on. Plaster repairs follow a similar sequence but may require bonding agents and longer cure times between coats. Ceilings often show the most smoke damage because heat and smoke rise. Many ceilings need full replacement rather than patching.

Material Repair Type When Recommended
Drywall Full replacement Water saturation, heavy smoke penetration, or heat damage present
Plaster Patch and refinish Structurally sound with minor smoke staining or isolated cracks
Ceilings Full replacement or resurfacing Heavy soot accumulation, sagging from water weight, or heat exposure
Insulation behind walls Remove and replace Any water contact, smoke saturation, or compression from heat

Paint, Primers, and Surface Restoration After Smoke Damage

9LrBpcfmSO2TZ8X_-yBqtA

Smoke stains bleed through regular latex paint. You can apply three coats and the yellow or brown discoloration will still show up within days. Shellac based primers and oil based stain blocking primers create a barrier that locks in smoke residue and prevents odor molecules from migrating through the finish. These specialty primers are required on any surface that was exposed to smoke, even if the stain was cleaned off.

Homeowners make two common mistakes. The first is skipping the primer and going straight to paint because the wall looks clean. The second is using a standard primer instead of a smoke blocking formula. Both lead to recurring stains and smells. After the stain blocking primer is applied and fully cured, surfaces can be painted with any finish paint in the color of your choice.

Primer types for smoke and fire damage:

  • Shellac based primer blocks heavy smoke stains and odors, dries fast, and requires denatured alcohol for cleanup.
  • Oil based stain blocker is effective on soot and moderate smoke, has a longer dry time, and requires mineral spirits for cleanup.
  • Specialty odor encapsulating coating seals porous substrates and traps odor causing molecules. It’s used on subfloors, framing, and heavily affected surfaces before drywall installation.
  • Latex stain blocker may work on very light smoke exposure but isn’t recommended for structural fire damage.

Once sealed and painted, the surface should release no odor and show no discoloration. If staining reappears, it means the substrate wasn’t fully cleaned or the wrong primer was used.

Flooring, Trim, and Cabinet Restoration After Fire Damage

p41LzfLHTfCFrPXHvfzSqA

Firefighting water often damages flooring in layers you can’t see. Hardwood planks can cup, warp, or stain black from moisture. If the wood is solid and the subfloor dried properly, sanding and refinishing may restore the floor. Engineered wood and laminate absorb water in the core and typically can’t be saved. Vinyl flooring can look fine on top but trap moisture and mold underneath the sheet or planks.

Tile and grout can usually be cleaned unless the heat cracked the tiles or the adhesive failed. Grout is porous and holds smoke odor, so it may need sealing or replacement even if it looks intact. Carpet almost always needs replacement after fire and water exposure because the pad underneath holds moisture and smoke contamination that cleaning can’t fully remove.

Trim and baseboards get checked for smoke penetration and water damage. Painted trim can often be cleaned, sealed, and repainted. Stained wood trim may show permanent discoloration and require replacement. Baseboards near the floor usually absorbed the most water and are removed during the drying process. New baseboards go in after the flooring is finished.

Cabinetry depends on construction and contamination level. Solid wood cabinets with a hard finish can be cleaned and deodorized. Particle board or MDF cabinets that absorbed water or heavy smoke usually can’t be saved because they swell, off gas odor indefinitely, and lose structural integrity. Cabinet interiors, especially in kitchens near the fire, often need sealing or lining even if the exteriors look fine. Moisture in floor assemblies is the silent problem. Subfloors, floor joists, and underlayment all need verified dryness before new flooring is installed or you’ll deal with mold, squeaks, and finish failure within months.

HVAC, Air Quality, and Interior Environmental Safety After Fire Damage

cqtbarwgShaNQGqHGBzLPg

HVAC ducts collect soot during a fire and distribute it through the house every time the system runs. Duct cleaning after fire damage isn’t optional. Professionals use negative pressure systems and HEPA filtered vacuums to remove debris without contaminating other areas. Supply and return vents are removed, cleaned, and often replaced if heavily stained. The blower assembly and evaporator coils are cleaned because smoke residue on those components reduces efficiency and releases odor.

Air scrubbers with HEPA filtration run during and after the cleaning phase to capture airborne particles. These machines pull air through multi stage filters that trap smoke particulates and some odor molecules. Deodorization methods target what the filters can’t catch, volatile organic compounds and odor molecules bonded to surfaces. Air quality testing measures particulate counts and sometimes VOC levels to verify the space is safe before final finishes and move in.

Post cleaning clearance checks before interior finish work is finalized:

  • Particulate count readings to confirm air quality meets safe indoor standards.
  • Visual inspection of HVAC system components including ducts, vents, and blower assembly for remaining soot or debris.
  • Odor presence test by walking through the property after deodorization to identify any areas still releasing smoke smell.

Vents and grills are sometimes sealed with plastic during the cleaning and deodorization phases to prevent cross contamination between treated and untreated areas. Once air quality is verified and HVAC cleaning is complete, new filters are installed and the system is safe to run continuously.

Insurance, Documentation, and Cost Planning for Interior Finish Restoration

TLfEhU_ZQA6KV3g-0wd86Q

Insurance adjusters need proof of damage and a detailed scope of work to approve costs for interior finish restoration. Documentation starts the moment the fire is out. Before you touch anything. Take wide shots of every room and close ups of stains, warping, and damaged finishes. Video walk throughs capture details still images might miss. A written room by room inventory with estimated replacement values gives the adjuster a baseline for contents and finishes.

Adjusters determine coverage by comparing the scope of work to the policy limits and exclusions. Replacement cost policies pay the full cost to replace damaged finishes with new materials of similar quality. Actual cash value policies deduct depreciation, which can cut the payout significantly on older flooring, trim, and cabinets. Code upgrade coverage pays the difference when current building standards require more expensive materials or methods than what was originally installed.

Cost driven decisions happen when an item can be cleaned for less than replacement, but replacement makes more sense for long term durability and odor control. For example, cleaning and sealing smoke damaged cabinets might cost sixty percent of replacement, but new cabinets come with a warranty and no odor risk. Adjusters usually approve the more cost effective option if documentation supports it.

Four documentation steps that improve claim approval:

  1. Notify your insurer within 24 hours and get a claim number and adjuster contact before cleanup begins.
  2. Photograph all damaged finishes and contents from multiple angles, including close ups showing soot, staining, water lines, and warping.
  3. Create a written inventory listing each damaged item, the room it was in, and an estimated replacement cost or original purchase information.
  4. Request and save all invoices for emergency mitigation work such as board up, tarping, water extraction, and temporary power because these are typically reimbursable as mitigation expenses.

Pack out services that move contents to a secure, climate controlled location for cleaning and storage are usually covered when documented properly. The same applies to emergency board up and tarping. Those are mitigation costs, not repairs, and insurers expect to pay them when you act quickly to prevent further damage.

Timeline, Sequencing, and Contractor Coordination for Finish Work

M5LmIuYQhyE7DrLdSNGYw

Typical timelines break into three phases. Emergency mitigation, board up, water extraction, and initial stabilization happen within 24 to 72 hours. Active restoration, including cleaning, deodorization, and contents handling, runs one to four weeks for moderate damage. Structural repairs and finish work take four to twelve weeks depending on the size of the rebuild, permit requirements, and material lead times.

Material lead times vary. Standard drywall, paint, and trim are usually available within days. Custom cabinetry, specialty flooring, or tile can take weeks or months to order and deliver. Contractor coordination matters because drywall crews can’t start until framing is repaired, painters can’t work until drywall is finished, and flooring installers need clean, dry subfloors. One delay in the sequence pushes everything back.

Frequent communication prevents most delays. A project manager should provide a schedule with milestones and update it when conditions change. Homeowners need to know when selections are due. Paint colors, flooring samples, cabinet hardware. Waiting on a decision stops progress. Subcontractors rely on clear hand offs. The electrician needs walls open, the drywall crew needs wiring complete and inspected, the painter needs sanding finished and dust cleaned.

Five sequencing essentials to keep finish work moving:

  • Complete all demolition and confirm full dryness before ordering finish materials or scheduling installation trades.
  • Obtain required permits and schedule inspections early so walls can be closed on time without waiting for the building department.
  • Coordinate material delivery dates with installer availability so flooring, cabinets, and trim arrive just before they’re needed, not weeks early.
  • Finalize finish selections (paint, stain, hardware, fixtures) at least two weeks before installation to avoid delays waiting on homeowner decisions.
  • Schedule a pre drywall walkthrough with the project manager to confirm all in wall work (plumbing, electrical, insulation) is complete and inspected before closing the walls.

Lead times for inspections, especially in jurisdictions that require permits for structural or electrical work, can add days or weeks. Plan for that buffer when setting expectations. The finish work moves quickly once the foundation is right, but rushing the sequence creates failures that cost more time and money to fix later.

Final Words

We pull out water, remove soot, and probe walls for hidden moisture before a single nail or paintbrush goes near your house.

This post walked through assessment, cleaning and deodorization, drywall and ceiling repair, priming and painting, flooring and trim work, HVAC cleaning, insurance documentation, and the typical timeline.

We measure dryness, seal smoke stains, document everything for claims, and coordinate trades so repairs aren’t guesswork.

When it’s time for interior finish work after fire damage, we rebuild carefully so your home feels safe and complete again.

FAQ

Q: How long do toxic fumes last after a fire?

A: Toxic fumes after a fire can linger for hours to weeks depending on fire size, materials burned, ventilation, and cleanup speed. Odors and hazardous gases often persist until ducts and surfaces are cleaned and ventilated.

Q: Can you paint over fire-damaged walls?

A: You can paint over fire-damaged walls only after soot removal, drying, and sealing with a shellac- or oil-based primer to block stains and odor; otherwise paint won’t hide stains or stop smells.

Q: Is anything salvageable after a fire?

A: Some items are salvageable after a fire: hard surfaces, metal fixtures, tile, and many contents can be cleaned and restored. Porous materials like carpets, soft furniture, and insulation often need replacement.

Q: How do professionals clean up after a fire?

A: Professionals clean up after a fire by stabilizing the site, documenting damage, extracting water, removing soot with HEPA vacuums and chemical sponges, deodorizing with hydroxyl/thermal or ozone when needed, and prepping for repairs.

How to Seal Basement Walls from Water That Actually Works

0

You can’t just slap sealant on wet basement walls and call it fixed. If you don’t figure out where the water’s coming from and why it’s getting in, you’ll waste money covering up problems that keep getting worse behind your fresh coating. Real waterproofing means identifying the actual source, preparing surfaces the right way, and using products that match your specific moisture situation. Here’s how to seal basement walls so water actually stays out.

Diagnosing Water Problems and Preparing for Basement Wall Sealing

YRQVsxBXQfW_WQIKVDgGVg

You can’t fix what you haven’t diagnosed correctly. Figuring out where water’s coming in and why it’s getting in tells you what sealing approach will actually work. Seal your walls when the real problem is bad drainage outside or water pressure from below, and you’re just delaying damage without fixing anything.

Look for water stains running down walls, efflorescence (the white powdery stuff on concrete), mold in corners, peeling paint. Less obvious signs include musty smells even when walls look dry, warped or buckled sections, rusting metal supports or rotting beams, chipped or cracked concrete. Water doesn’t always show up where it’s actually entering. It runs downhill inside foundation walls before you see it on the interior surface.

How to inspect systematically:

  1. Check for active leaks when it rains. Walk your basement during heavy rain or right after to see where water shows up first and whether it’s dripping, seeping through, or pooling.

  2. Look at wall floor joints for seepage. The cove joint where walls meet floors is a common entry point, especially in block foundations where water travels through those hollow cores.

  3. Inspect cracks and gaps. Note the size, location, and direction of each one. Vertical cracks usually mean settling, horizontal cracks suggest pressure problems, and stair step cracks in block walls point to foundation movement.

  4. Look for efflorescence patterns. That white powder marks where water evaporates and leaves mineral deposits behind, showing you the water’s path through the concrete.

  5. Do the aluminum foil test. Tape a 1 foot square of foil to the wall for 24 hours. If the wall facing side is damp when you pull it off, water’s penetrating from outside. If the room facing side is damp, you’ve got a condensation problem.

  6. Test moisture levels in multiple spots. Check different heights on the wall and several locations across the basement to map out the moisture pattern.

What you discover during inspection determines what you actually need to fix. Hydrostatic pressure from groundwater pushes against foundation walls, especially after heavy rain or in areas with high water tables. This pressure forces water through any opening it can find. Exterior drainage failures are common culprits. Clogged gutters overflow and pour water directly against the house, bad grading directs water toward the foundation instead of away from it, and missing downspout extensions dump roof water right at the foundation. Structural issues create pathways: settlement cracks from soil movement, foundation cracks from aging concrete, gaps at wall floor joints. Condensation from high humidity is a separate interior moisture source that won’t respond to exterior waterproofing at all.

What to do immediately based on what you find:

Clear gutters completely and extend downspouts 4 to 6 feet from the house so roof water drains away from the foundation. Check that your yard slopes away from the foundation. Water should flow away, not toward the house. Note crack sizes and locations to figure out the right repair methods (hairline cracks need different treatment than structural cracks). Determine if water is active pressure requiring drainage systems or moisture vapor that sealing can handle. Identify whether DIY sealing will be enough for your situation or if you need professional drainage systems, foundation repair, or exterior waterproofing. Document the moisture pattern with photos showing where water appears, when it appears, and how much accumulates.

Complete Step by Step Guide to Sealing Basement Walls

25s74FbXT4inX0GdLNLOrQ

This process assumes no active water intrusion requiring drainage systems. It’s appropriate for preventative sealing or addressing minor to moderate moisture issues on interior basement walls.

Phase 1: Workspace Preparation

  1. Clear the workspace and protect floors. Move furniture, storage boxes, and anything within 4 feet of the walls. Lay plastic sheeting on floors to catch drips and debris during cleaning and repair.

  2. Get proper ventilation going. Open doors and windows or set up fans to create airflow. Chemical products release fumes, and proper ventilation prevents buildup while helping surfaces dry faster.

  3. Gather all your tools and materials. You’ll need a wire brush or sandblaster for removing old coatings, muriatic acid (mix 1 part acid to 4 parts water), protective equipment including chemical resistant gloves, safety goggles, and respirator mask, mixing bucket, hydraulic cement, masonry caulk designed for concrete, putty knife, trowel, 3/4 inch nap roller, high quality nylon bristle brush, and your chosen waterproof sealer or coating.

Phase 2: Surface Preparation

  1. Remove all old paint, coatings, and loose material. Use a wire brush or sandblaster until bare concrete is exposed. Waterproofing products won’t bond to painted or coated surfaces. Scrub hard until you’re down to clean concrete.

  2. Clean walls thoroughly and treat efflorescence. Scrub the entire surface with a wire brush to remove dirt, dust, and mineral deposits. Mix your muriatic acid solution (1 part acid to 4 parts water, and always add acid to water, never water to acid). Apply the solution to efflorescence covered areas, let it sit for a few minutes, then rinse thoroughly with clean water. The acid dissolves mineral deposits that would prevent sealer adhesion.

  3. Allow complete drying for 24 to 48 hours. Damp concrete won’t accept most sealers properly. Run fans and dehumidifiers if needed to speed drying, especially in humid conditions.

Phase 3: Crack and Gap Repair

  1. Fill hairline cracks (less than 1/4 inch). Use masonry caulk designed for concrete. Cut the tube tip to create a 1/16 inch opening, then run a steady bead along each crack, pressing firmly to make sure the caulk fills the entire gap.

  2. Repair larger cracks (1/4 inch to 1/2 inch) with hydraulic cement. First, chisel the crack into a V shape to widen it slightly. This gives the cement something to grip. Dampen the crack surface with water (wet the concrete but don’t leave standing water). Mix small batches of hydraulic cement according to manufacturer instructions. It sets in 3 to 5 minutes, so work fast.

  3. Apply hydraulic cement quickly and firmly. Press the mixed cement into the crack with a putty knife, starting from the bottom and working upward. Push hard to get rid of air pockets. Smooth the surface with a trowel before it sets. If you’re dealing with an active leak, the fast setting hydraulic cement will harden even under water pressure.

  4. Seal windows and doors, then allow crack repairs to cure. Apply polyurethane caulking around window frames and door frames to seal any gaps. Let all crack repairs cure completely, typically 24 hours, but check the manufacturer instructions for your specific products.

Phase 4: Sealer Application

  1. Choose your waterproofing product. Penetrating silicate based sealers soak into concrete and form a chemical moisture barrier below the surface, allowing the concrete to breathe. Acrylic waterproof coatings create a surface film that blocks water but can trap moisture if applied over damp concrete. Match the product to your moisture situation.

  2. Mix waterproofing product thoroughly. Follow manufacturer instructions exactly. Stir from the bottom of the container to make sure pigments and solids are evenly distributed. Pour into a roller tray if using a roller.

  3. Apply first coat. Use a 3/4 inch nap roller for large wall areas or a high quality nylon bristle brush for detail work around obstacles. Work in 4 foot sections, maintaining a wet edge to avoid lap marks. Make sure you get even coverage without puddles or missed spots. You should see consistent color and texture across the entire surface.

  4. Wait for first coat to dry, then apply second coat. Wait 2 to 4 hours between coats (check manufacturer specifications, some products need longer). Apply the second coat in the opposite direction from the first coat. If you rolled vertically for coat one, roll horizontally for coat two. This makes sure you get complete coverage. Minimum two coats are required for proper waterproofing and hydrostatic pressure protection.

  5. Apply optional third coat for maximum protection. In high moisture areas or where groundwater pressure is a concern, a third coat adds extra protection. Again, apply in the opposite direction from the previous coat.

  6. Allow final curing period. Typically 24 to 48 hours before the sealer reaches full strength. Don’t return belongings to the basement until curing is complete. Walk the sealed area and inspect for uniform coverage, missed spots, or thin areas that need touch up.

Interior Drainage Solutions for Basement Waterproofing

7LRgTBfpRLW1ou7aGZLHlQ

Sealing walls alone won’t solve problems caused by hydrostatic pressure. When groundwater pushes against foundation walls, it’ll find any weak point: a crack, a cold joint, a porous section of concrete. Drainage systems relieve that pressure before water reaches the walls.

Interior French drain systems get installed at the wall floor joint, also called the cove joint. A contractor cuts a channel in the concrete floor along the perimeter, installs perforated pipe, and covers it with drainage stone. Water that seeps through the wall or up through the floor flows into this channel instead of spreading across your basement. The system directs collected water to a sump basket.

Sump pumps collect water from drainage systems and pump it away from the foundation through discharge pipes that empty at least 10 feet from the house. The pump sits in a sump basket (a hole dug below the basement floor level), and when water reaches a certain level, a float switch activates the pump. Battery backup systems keep the pump running during power outages, which often happen during the storms that cause flooding. For homeowners budgeting drainage solutions, understanding sump pump repair costs helps with long term maintenance planning.

Drainage becomes necessary when you’ve got high water tables that keep the soil around your foundation constantly saturated, seasonal flooding that overwhelms your foundation’s ability to resist water, consistent groundwater seepage that reappears no matter how many times you seal walls, or situations where exterior excavation isn’t doable because of landscaping, driveways, or adjacent structures. Professional drainage system installation typically goes along with interior waterproofing for complete protection rather than treating just the symptoms.

Installing Vapor Barriers on Basement Walls

QwqFO2nDQAuWZoVOFKXwjw

Vapor barriers are polyethylene sheets or specialized membranes that prevent moisture vapor transmission through walls. They’re often confused with waterproofing, but they serve a different purpose. Think of it this way: waterproofing stops liquid water from coming through your foundation. Vapor barriers stop water vapor (moisture in the air) from passing through walls and condensing inside wall cavities or on cold surfaces.

The installation process involves attaching the barrier material to clean, dry walls using mechanical fasteners or adhesive, depending on the product. Seams between sheets must overlap by at least 6 inches and get sealed with specialized tape. The bottom edge needs special attention. You either run it down to the floor and seal it, or you create a small channel that directs any condensation to your drainage system. The top edge gets sealed against the rim joist. Any penetrations (pipes, electrical boxes, windows) require careful sealing to maintain the vapor barrier’s effectiveness.

Vapor barriers work best in specific situations: unfinished basements where you’re not planning immediate finishing work, before you frame walls and add insulation (trapping moisture inside a finished wall cavity causes mold and rot), and combined with dehumidifiers to control overall basement humidity. They’re appropriate for condensation issues, when moisture in humid air contacts cold concrete and forms water droplets. But vapor barriers won’t stop hydrostatic pressure from groundwater, won’t prevent active leaks through foundation cracks, and can actually trap water if installed over damp walls without addressing the moisture source. If your foil test showed moisture coming from outside, a vapor barrier alone won’t fix it.

Exterior Waterproofing Methods for Foundation Walls

1jerj-oaQGyqnjobkv7toA

Exterior waterproofing stops water at the source, outside the foundation, rather than managing it after it penetrates. It’s the most permanent solution because it prevents water from ever contacting the interior foundation surface. Instead of waiting for water to seep through and then trying to manage it, you block it before it enters.

The excavation process requires digging down to the footer level around the entire foundation perimeter. Heavy equipment removes soil 4 to 6 feet away from the foundation wall, exposing it completely from top to bottom. This is major work that tears up landscaping, may require temporary removal of decks or patios, and takes 1 to 2 weeks depending on house size and site access.

Once walls are exposed, contractors pressure wash them clean, inspect for structural damage, and repair any cracks or deterioration. Then they apply a rubberized membrane or polymer modified coating that bonds directly to the concrete and creates a waterproof barrier. A drainage board (a dimpled plastic sheet) installs over the membrane to create an air gap and provide a path for water to flow downward. At the bottom, contractors install or repair footer drains, perforated pipes that collect water and direct it away to daylight or a collection system. Finally, they backfill with drainage stone near the foundation and topsoil toward the surface, restoring grade to slope away from the house.

When exterior waterproofing is necessary:

New construction or major renovation when the foundation is already exposed. Recurring interior waterproofing failures where sealed walls continue to leak. Structural damage to the foundation requiring exterior access for repair. Consistently wet basement despite interior drainage systems and wall sealing. Bowing or cracked walls from exterior soil pressure that needs addressing at the source. Finishing your basement for living space and wanting the best long term protection before investing in the interior.

Choosing the Right Waterproofing Products for Your Basement

xkHC5WxcQsu-ljN_5NEKKQ

Several factors determine the right product for your situation. The severity of moisture matters. Mild condensation needs different treatment than active seepage. Wall type makes a difference: poured concrete walls are solid and accept penetrating sealers well, while concrete block walls have hollow cores and mortar joints that may need surface forming products. Whether walls are painted or bare affects product selection, since some sealers require direct contact with concrete. Budget constraints matter too, as products range from $30 per gallon acrylic paints to $80 per gallon epoxy systems.

Product compatibility determines success or failure. Some products require completely bare concrete and won’t bond over any existing coating. Others work over previously painted surfaces if the paint is sound. Some products are breathable, allowing water vapor to pass through while blocking liquid water. Others create vapor barriers that trap moisture. Using a breathable sealer over a non breathable base coat traps water between layers, causing peeling and failure.

Product Type Best For Application Surface Lifespan
Silicate based sealer Penetrating protection, breathable barrier, mild to moderate moisture Bare concrete only 10 to 15 years
Acrylic waterproof paint Surface coating, minor moisture, easy DIY application Bare or painted concrete 5 to 10 years
Epoxy coating High moisture areas, strong durable barrier, finished look Bare concrete, requires thorough prep 10 to 20 years
Hydraulic cement Active leaks, crack repair, emergency patches Damp or dry concrete Permanent (for crack repair)
Polyurethane sealant Crack filling, joint sealing, flexible applications Concrete, masonry, around windows 10 to 20 years
Crystalline waterproofing Extreme moisture, chemical reaction with concrete, professional application Bare concrete only Lifetime of structure

DIY Basement Wall Sealing vs. Professional Waterproofing

GU_lLqYoSJqWOTpWjKwZJg

Making the right choice between DIY and professional help prevents wasted time and money on solutions that won’t work. DIY makes sense for straightforward preventative work. Professional help becomes necessary when the problem exceeds simple moisture control.

When DIY Basement Wall Sealing Works

DIY basement wall sealing works when moisture issues are minor and localized. A small damp spot that appears after heavy rain, light efflorescence in one area, or preventative sealing before moisture becomes a problem. An unfinished basement with easy wall access makes DIY practical. You can move around freely, you’re not tearing out finished materials, and mistakes don’t damage living space. Visible small cracks (less than 1/4 inch wide) that aren’t structural respond well to DIY repair with masonry caulk or hydraulic cement. If you see no signs of structural damage, no bowing walls, no horizontal cracks, no separation at wall floor joints, DIY sealing is reasonable.

You need time to do the work properly. Surface preparation alone takes a full day for a typical basement. Add crack repair time and multiple coats with drying time between, and you’re looking at 3 to 4 days total. Basic skills matter: comfort using power tools, ability to follow product instructions precisely, and willingness to work safely with chemical products. You’ll be using muriatic acid solutions, working in tight spaces with limited ventilation, and applying products that release strong fumes.

When to Call a Professional Waterproofing Contractor

Call a professional when water problems keep coming back despite your DIY attempts. If you’ve sealed walls twice and water still appears in the same spot, the problem is beyond surface sealing. Structural cracks or bowing walls indicate foundation problems that need engineering assessment and repair, not just cosmetic sealing. Active leaks during rain, water actually flowing or dripping, mean you have hydrostatic pressure that sealing alone won’t fix.

Mold covering more than 10 square feet suggests a serious moisture problem and potential health hazard requiring professional remediation. High water table conditions in your area mean groundwater constantly pushes against your foundation, and you need drainage systems to relieve that pressure. A finished basement requiring tearout to access walls changes the cost calculation. You’re not just sealing walls, you’re removing and replacing drywall, insulation, trim, and flooring. Installation of interior drainage systems, sump pumps, or exterior waterproofing requires equipment and expertise beyond typical DIY capabilities. Understanding the water damage restoration process helps you recognize when you’re dealing with serious water damage situations that need professional intervention. Foundation repair requirements like crack injection, wall stabilization, or underpinning are structural issues that only licensed contractors should handle.

Maintaining Sealed Basement Walls and Preventing Future Problems

j8iZaGoYTsGT3CUOUATWNg

Sealed basement walls aren’t “set and forget.” Regular inspection and maintenance prevent small issues from becoming major problems. Catching a hairline crack when it first appears takes 5 minutes and $10 of caulk. Ignoring it until it’s a structural crack costs thousands in foundation repair.

Interior basement waterproofing treatments typically last about 10 years, though actual longevity depends on exterior drainage conditions and soil type. Sandy, well draining soil puts less pressure on foundations than heavy clay that stays saturated. Homes with proper gutters, downspouts, and yard grading see longer sealer life than homes where water constantly pools against the foundation.

A twice yearly inspection routine catches problems early. Spring inspections (after snow melt and spring rain) and fall inspections (before winter freeze thaw cycles) work well. Check the entire foundation for new cracks, especially at wall floor joints and around windows. Look for water intrusion signs: dampness, staining, or efflorescence that wasn’t there before. Examine sealed surfaces for peeling, bubbling, or areas where the coating is wearing thin. Run your hand along walls to feel for temperature changes or dampness that’s not visible.

Preventative maintenance tasks:

Keep gutters and downspouts clear of leaves, debris, and winter ice dams that cause overflow directly against the foundation. Maintain proper yard grading with soil sloped away from the foundation at least 6 inches over 10 feet. Extend downspouts 4 to 6 feet from the house, or connect them to underground drain lines that empty away from the foundation. Run a dehumidifier during humid summer months to control condensation, keeping basement humidity below 50%. Make sure basement ventilation through windows, vents, or mechanical systems exchanges stale air. Address plumbing leaks right away before water accumulates in walls or floors. Monitor for efflorescence return, which signals that water is still finding a way through despite sealing.

Common Basement Wall Sealing Mistakes to Avoid

hWKroVWRSjCIxBUKgp5qSw

Waterproofing failures usually result from preparation shortcuts or applying the wrong solution to the problem. The sealer itself might be fine, but poor execution or misdiagnosis guarantees failure.

Common mistakes that cause waterproofing failure:

Sealing over painted or dirty surfaces without proper preparation. Waterproofing products bond to concrete, not to paint or dirt. If you seal over existing coatings, the new sealer bonds to the old paint, which then peels away from the concrete, taking your new waterproofing with it. Complete removal of old coatings is non negotiable.

Skipping efflorescence treatment. Those white mineral deposits create a barrier between concrete and sealer. Products won’t bond properly over efflorescence. The minerals need removal with acid washing and wire brushing before sealer application.

Not allowing adequate drying time between steps. Concrete needs 24 to 48 hours to dry after cleaning and acid treatment. Between sealer coats, you need 2 to 4 hours minimum. Rushing means the next layer doesn’t bond properly and traps moisture between coats.

Using surface sealers to stop active water pressure. If water is actively pushing through your foundation from groundwater pressure, a coating on the interior surface is like putting a band aid on a puncture wound. The pressure will find weak spots and force water through. Active pressure requires drainage systems to relieve it, not just surface sealing.

Rushing hydraulic cement application. Hydraulic cement sets in 3 to 5 minutes. If you mix a large batch, it’ll harden in your mixing bucket before you can apply it. Mix small batches, work quickly, and don’t try to speed the process by adding water to cement that’s starting to set.

Applying only one coat when two minimum are required. A single coat leaves thin spots, pinholes, and incomplete coverage. Two coats applied in opposite directions (vertical then horizontal) make sure every spot gets covered properly. Trying to save money by skipping the second coat guarantees early failure.

Ignoring exterior drainage problems. Sealing interior walls while clogged gutters dump water against your foundation, or while your yard slopes toward the house, means you’re treating symptoms while the cause continues. Fix drainage first, then seal walls.

Treating symptoms without identifying the water source. Seeing dampness on walls and immediately grabbing sealer without testing whether it’s condensation, groundwater seepage, or a leaking pipe means you might be sealing for the wrong problem. The foil test and systematic inspection identify the actual source.

Attempting DIY fixes for structural foundation problems. Horizontal cracks, bowing walls, or major foundation movement require engineering evaluation and proper structural repair. Surface sealing over structural damage is dangerous and won’t work.

Cost and Time Estimates for Sealing Basement Walls

pkIB8a5CSSWmBLdMZDQ7WQ

DIY costs are primarily materials: sealers, hydraulic cement, brushes, rollers, safety equipment. Professional costs include labor, equipment, warranty coverage, and often drainage system installation. Understanding the investment helps you budget appropriately and compare DIY versus professional options.

A DIY sealing project for an average basement (800 to 1000 square feet of wall surface) requires roughly $200 to $400 in materials: waterproof sealer ($100 to $200), hydraulic cement ($30 to $50), masonry caulk ($20 to $30), wire brushes and cleaning supplies ($20 to $30), safety equipment if you don’t own it ($30 to $50), and rental of pressure washer or sandblaster if needed ($50 to $100). Your time investment typically spans 2 to 4 days including surface preparation (8 to 10 hours), crack repair (2 to 4 hours), and sealer application with drying time between coats (6 to 8 hours of actual work spread over 2 days).

Professional projects cost more but include expertise, equipment, labor, and warranties. Interior sealing by professionals costs $3 to $9 per square foot depending on wall condition and products used. More complex solutions increase costs significantly: interior drainage systems with sump pump installation run $3,000 to $8,000 depending on basement perimeter length and system complexity, exterior waterproofing with membrane application costs $8,000 to $15,000 for an average home, and full exterior waterproofing with excavation, membrane, drainage board, and footer drain replacement reaches $15,000 to $30,000 for extensive work.

Project Type Cost Range Time Required Lifespan
DIY interior sealing (materials only) $200 to $400 2 to 4 days 5 to 10 years
Professional interior waterproofing $2,500 to $7,000 1 to 3 days 10 years (typical warranty)
Interior drainage system with sump pump $3,000 to $8,000 2 to 4 days 20+ years (system), pump replacement every 7 to 10 years
Exterior waterproofing with membrane $8,000 to $15,000 1 week 10 to 15 years
Exterior waterproofing with full drainage system $15,000 to $30,000 1 to 2 weeks 25+ years

Understanding Different Types of Basement Foundation Walls

Different foundation wall types affect waterproofing approach and product selection. What works perfectly on poured concrete might fail on concrete block walls, and older stone foundations present unique challenges.

Poured concrete walls are solid from outside to inside with no hollow spaces. They develop fewer entry points for water, typically only through cracks or cold joints where different concrete pours meet. They’re generally easier to seal because the surface is relatively smooth and uniform. Penetrating sealers work well on poured concrete because they can soak into the surface and react chemically with the concrete to form moisture barriers. The solid construction means that if you seal a crack properly, water can’t travel through hollow cores to appear somewhere else.

Concrete block walls have hollow cores that create pathways for water to travel inside the wall. Water that enters through one crack or mortar joint can run down inside the hollow blocks and appear at the floor level several feet away from the actual entry point. Mortar joints between blocks are vulnerable. They’re a different material than the blocks themselves, they can crack and shrink, and they’re often the path of least resistance for water. Block walls may require filling the cores with grout or foam before sealing to get rid of internal water pathways. Surface forming sealers (acrylics, epoxies) work better than penetrating sealers on block walls because you need to create a surface barrier that water can’t penetrate, rather than relying on chemical reactions within the concrete.

Older stone foundations present the biggest challenges. The stones are irregular shapes and sizes, creating an uneven surface that’s difficult to seal uniformly. Mortar joints are often wider than in block walls, and the lime based mortar used in old foundations deteriorates over time. These foundations often require professional assessment because the stone construction may be structurally compromised. Repointing (replacing deteriorated mortar) usually comes before sealing. Product compatibility is limited. Many modern sealers don’t bond well to old lime mortar or certain types of stone. Breathable products are essential because trapping moisture in old stone foundations speeds up deterioration.

When Basement Wall Sealing Requires Building Permits

Simple interior sealing and coating work typically doesn’t require permits. You’re applying a paint like product to your own basement walls for maintenance purposes, which falls under normal homeowner maintenance that building departments don’t regulate.

Permits become necessary when work affects structural elements or building systems. Structural foundation repairs, epoxy injection for cracks, carbon fiber reinforcement for bowing walls, underpinning to stabilize settling foundations, require permits and engineering approval in most jurisdictions. Adding sump pump systems requires permits if you’re installing new electrical circuits, cutting through foundation floors, or connecting discharge lines to municipal storm sewers. Modifying drainage that affects property boundaries needs permits: if your solution directs water onto a neighbor’s property or into municipal drainage systems, you need approval. Installing exterior drainage systems that alter lot grading may require permits to make sure water management complies with local stormwater management regulations.

The importance of hiring bonded and insured contractors applies even for work that doesn’t require permits. Bonding protects you if the contractor doesn’t complete work or damages your property. Insurance covers accidents or damage during the work. Check local building codes before starting major waterproofing projects, even if you believe permits aren’t required. Requirements vary significantly by jurisdiction, and assuming you don’t need permits can create problems when you sell the house if the buyer’s home inspector identifies unpermitted work.

Final Words

Sealing basement walls from water starts with accurate diagnosis and choosing the right approach for your situation.

Simple surface sealing handles minor moisture and prevents future issues. Active water pressure and structural problems need drainage systems or exterior waterproofing.

The work itself is straightforward when you prep properly, fill cracks completely, and apply coatings in multiple layers with full drying time between steps.

Keep gutters clear, inspect twice a year, and catch small problems before they spread. When you’re not sure or the water keeps coming back, bring in a professional to assess the foundation and drainage.

A dry basement protects your home and makes the space usable again.

FAQ

How do you stop water from seeping through basement walls?

You stop water from seeping through basement walls by first identifying the source: fixing exterior drainage issues like gutters and grading, repairing foundation cracks with hydraulic cement, sealing walls with waterproof coating, and installing interior drainage systems with sump pumps for persistent groundwater pressure.

Can you waterproof basement walls yourself?

You can waterproof basement walls yourself if moisture issues are minor and localized, walls are accessible, and you’re comfortable with basic prep work like cleaning surfaces, filling cracks, and applying multiple coats of sealer following manufacturer instructions for proper drying times.

Should concrete basement walls be sealed?

Concrete basement walls should be sealed to prevent moisture penetration, protect against efflorescence and mold growth, extend foundation lifespan, and create a dry living space, especially before finishing the basement or if you notice water stains or musty odors.

Can you waterproof basement walls from the inside?

You can waterproof basement walls from the inside using penetrating sealers or surface coatings for minor to moderate moisture issues, but interior sealing won’t solve problems caused by severe hydrostatic pressure, which requires exterior waterproofing or drainage systems.

What are the first signs that basement walls need sealing?

The first signs that basement walls need sealing include white powdery efflorescence on concrete, water stains or streaks, musty odors, peeling paint, visible mold growth, damp or warped drywall, and excessive condensation, with water often appearing away from actual entry points.

How long does basement wall sealing last?

Basement wall sealing typically lasts about 10 years for interior treatments, though lifespan varies based on exterior drainage quality, soil type, water table levels, and product quality, with professional exterior waterproofing systems often carrying 25-year warranties.

What’s the difference between waterproofing and damp proofing basement walls?

The difference between waterproofing and damp proofing is that waterproofing creates a complete barrier against liquid water and hydrostatic pressure using thick membranes or multi-coat systems, while damp proofing only resists moisture vapor with thinner coatings insufficient for active water intrusion.

When should you call a professional instead of DIY sealing?

You should call a professional instead of DIY sealing when you see recurring water problems despite previous attempts, structural cracks or bowing walls, active leaks during rain, mold exceeding 10 square feet, or need drainage system installation beyond simple surface sealing.

Do you need to remove old paint before sealing basement walls?

You need to remove old paint before sealing basement walls because waterproofing products require direct contact with bare concrete to bond properly and form effective moisture barriers, with wire brushes or sandblasters used to strip existing coatings completely.

What causes efflorescence on basement walls?

Efflorescence on basement walls is caused by water moving through concrete, dissolving mineral salts, and depositing them on the surface as white powdery residue when moisture evaporates, indicating active water penetration requiring treatment before sealing.

How many coats of waterproof sealer do basement walls need?

Basement walls need a minimum of two coats of waterproof sealer applied in opposite directions with 2-4 hours drying time between coats, with optional third coats providing maximum protection in high-moisture areas or below-grade walls facing hydrostatic pressure.

Can you seal basement walls with active leaks?

You can seal basement walls with active leaks using fast-setting hydraulic cement to stop immediate water flow under pressure, but permanent solutions require identifying and fixing the water source through improved drainage, foundation repair, or professional waterproofing systems.

Rebuilding After Water Damage: Step-by-step To Swift Fix

0

Ever notice how a small delay can turn water damage into a much bigger headache? We know this stress is real. That’s why we’ve put together a simple guide to help you act fast.

Here’s what to do:

  1. Make sure it’s safe.
  2. Call your homeowners association.
  3. File your claim.
  4. Remove any damaged items.

We walk you through each step in clear, everyday language so you can quickly protect your home. Let’s work together to get your home safe again.

Rebuilding after Water Damage: Step-by-Step to Swift Fix

Right after the incident, we check with your homeowners' association to make sure it’s safe to enter the home. We also confirm if any community rules might change how we repair the damage. Next, you call your insurance company. Most standard policies don’t cover flood damage, so starting your claim early and filing a proof of loss statement is essential. If your insurer confirms flood coverage, you’re already on the right path to recovery.

Once safety and documentation are set, our team moves in to remove the water. We extract water-soaked materials to stop problems like swelling and mold. We then remove damaged flooring, subfloor, and any affected wall parts to prevent hidden moisture from causing more damage. Costs can range between $1,500 and $6,500, depending on how bad the damage is.

After we take out the damaged areas, we start drying the structure. We leave wall cavities open for several weeks and use moisture meters (tools that measure water in materials) to check for dryness. We follow up with air quality tests using portable monitors to ensure no harmful particles remain in the air.

When we confirm that moisture and harmful particles are under control, rebuilding begins. We replace damaged structural parts, flooring, and walls with moisture-resistant materials. We use licensed contractors to make sure the work meets local building standards.

Every step must be done quickly. Delays can let mold grow because water can seep along hidden surfaces. We work fast and carefully to get your home safe and livable again.

Rapid Water Damage Assessment and Safety Measures

img-1.jpg

Before you step back into your home, call your homeowners association to make sure the area is safe. Then, turn off the electricity and gas to cut the risk of shock or fire. We do this to secure the scene before any repair work begins.

Once you get the all-clear, walk through your home and check for signs of trouble. Look for drooping ceilings, warped walls, or water near electrical outlets. Use a moisture meter (a tool that shows moisture in materials) to find hidden wet spots behind floors or inside walls. You might notice dark, damp patches that you can’t see with your eyes, signals that water has seeped into the structure.

Take clear photos and videos of every affected area. This documentation helps with your insurance claim and lets you track the progress of repairs.

Follow these steps:

  • Check with your homeowners association to confirm safety.
  • Turn off the electricity and gas.
  • Inspect for structural issues like drooping ceilings and warped walls.
  • Use a moisture meter to find hidden water.
  • Photograph and video all damage.

These steps help ensure that cleanup starts only after you fully understand where water has intruded and have removed any immediate risks.

I'm sorry you're dealing with water damage. First, call your insurance company to check if flood damage is covered (flood damage means damage caused by water). Let them know what happened and any safety steps you took.

Before meeting your adjuster, gather your policy documents. Take clear photos and videos of every area that was affected. This evidence shows the full damage and helps support your claim. Write a detailed proof of loss statement (a list of damaged items and structures) and put together a complete list of repair costs.

Here’s a simple checklist to follow:

  • Call your insurer to confirm flood coverage.
  • Organize your policy documents so they’re easy to find.
  • Take clear photos and videos of all damaged areas.
  • File your proof of loss statement quickly.
  • Compile a detailed list of damages and repair costs.

Following these steps helps you communicate effectively with your adjuster and secures the funds needed for safe rebuilding.

Water Extraction and Structural Drying Techniques for Rebuilding

img-2.jpg

When water damage strikes, safe rebuilding begins by taking out all wet flooring and subflooring. Wet materials like hardwood, laminate, carpet, or tile can swell, warp, or break down. Removing these items stops hidden moisture from weakening your structure later.

Advanced Drying Techniques

We cut open wall spaces about 12 inches above the waterline. This extra room lets air flow inside the wall. We leave these openings for 2 to 3 weeks so any trapped water can evaporate from the wood framing and insulation. During this time, we check moisture levels with handheld meters (devices that measure water content).

We also use special equipment to speed up drying. Air movers push air over damp surfaces, helping water evaporate faster. Low-grain refrigerant dehumidifiers (machines that pull moisture directly from the air) remove extra humidity. Structural drying mats are placed over wet areas to soak up water immediately. These steps work together to lower moisture and stop mold growth.

Steps to follow:

  • Remove all wet flooring and subfloor materials.
  • Open wall cavities by cutting 12 inches above the waterline.
  • Use air movers, low-grain refrigerant dehumidifiers, and drying mats.
  • Keep wall openings and equipment running for 2 to 3 weeks.
  • Regularly check moisture levels with a moisture meter.

Mold Prevention Steps in Rebuilding After Water Damage

When water damage strikes, preventing mold is our first priority. We start by taking out wet batt insulation because it can quickly become a home for mold. Removing it stops mold from getting started.

Next, we treat the exposed framing with antimicrobial treatment (chemicals that stop fungi). Think of it like putting a raincoat on your walls to block unwanted invaders.

Then, we check the air using a portable monitor that detects mold spores and VOCs (volatile organic compounds, which are chemicals that can harm indoor air). This helps us spot any lingering problems.

Finally, we keep indoor humidity below 50% by using air conditioners, dehumidifiers (machines that remove moisture from the air), and good ventilation. This step cuts off the moisture mold needs to grow.

Follow these steps:

  • Remove wet batt insulation.
  • Apply antimicrobial treatment on exposed framing.
  • Use an air monitor to check for mold spores.
  • Control humidity and improve ventilation.

Structural Repairs and Material Replacement in Water Damage Rebuilding

img-3.jpg

After water damage, rebuilding your home means swapping out ruined parts with strong, long-lasting materials. First, we remove damaged drywall and install new, mold-resistant gypsum panels (a type of wallboard that resists mold). This helps keep your home safe from future mold problems.

Next, we replace wet or crumbled insulation (material used to keep your home warm and energy-efficient) with fresh insulation. We then rebuild the subfloor using pressure-treated lumber (wood treated to fight water damage) to ensure a sturdy and dry base.

For the flooring, we choose water-resistant options like vinyl plank or tile. After the flooring goes in, we seal all edges and seams using advanced sealants (liquids that block water seepage) for added protection against water.

Our work is done by licensed contractors who follow building codes and high quality standards. This assures you that every step, from framing to finishing, is done right for a safe and lasting repair.

Steps to follow:

  • Remove damaged drywall and install mold-resistant gypsum panels.
  • Replace wet insulation with new insulation.
  • Rebuild the subfloor using pressure-treated lumber.
  • Choose water-resistant flooring, like vinyl or tile.
  • Seal all edges and seams with advanced sealants.

Restoring Utilities and Final Inspection for Rebuilding After Water Damage

When most of the rebuilding is finished, getting your utilities back on is very important. We bring in a licensed electrician to check your home's wiring, fix any problems, examine the electrical panels, and install GFCI outlets (special outlets that help prevent electric shocks).

Next, we call an HVAC specialist to clean and service your air ducts. They make sure any dust or contaminants are removed. We also replace any water-damaged pipes and fixtures so everything is safe and up to code. Think of it like taking your car to a mechanic before a long drive.

We then run indoor air quality tests to check for dust, carbon monoxide, or other harmful particles in the air. Our team uses a checklist to make sure every electrical outlet works properly and all wiring is secure. Lastly, we walk through the property with building inspectors who review the repairs and give the final sign-off for you to move back in.

  • Check wiring and install GFCI outlets
  • Replace damaged pipes and fixtures
  • Clean HVAC ducts and test indoor air quality

Final Words

In the action, we walked through the key phases of restoration after water damage, from initial safety checks and detailed insurance documentation to professional water extraction and precise structural drying.
We covered mold prevention, effective repairs, and final system inspections to bring your property back to life.
This rebuilding after water damage: step-by-step guide is meant to make a challenging situation more manageable.
Each step builds toward a safe, livable home.
Keep moving forward with confidence and hope.

FAQ

FAQ

What are the steps of water damage restoration?

The steps of water damage restoration involve assessing safety by turning off utilities, extracting water, drying structures with air movers and dehumidifiers, preventing mold by removing wet materials, and finishing with repairs and utility restoration.

What should I do immediately after water damage occurs?

The action to take immediately after water damage is to turn off the electricity and gas, make sure everyone is safe, check for hazards, document the damage with photos, and call professional help for water extraction.

How can I use a water damage restoration checklist?

The water damage restoration checklist is used to guide you through each phase, from filing insurance claims and water removal to drying, mold prevention, and final repairs, helping ensure no step is missed.

What are typical water damage house repair costs?

The typical water damage house repair costs range between $1,500 and $6,500, depending on the extent of damage, materials affected, and the specific repairs required for safe living conditions.

How can I find water damage cleanup near me?

The way to find water damage cleanup near you is to search local directories or online listings, which connect you with professionals ready to provide rapid response and effective water extraction services.

What is the average insurance payout for water damage?

The average insurance payout for water damage depends on the policy limits and damage extent, often covering repair costs but varying widely; contacting your insurer early helps clarify potential compensation.

How long can drywall be wet before mold develops?

The time drywall can remain wet before mold sets in is typically 24 to 48 hours, so prompt drying is essential to prevent mold growth and ensure structural integrity.

Home Loss Prevention Tips For Avoiding Repair Costs!

0

Ever thought a small repair today might save you thousands tomorrow? Tiny cracks in your roof or a slow leak from a pipe can quickly turn into a huge bill. With a few simple home care tips, you can avoid these pricey surprises. Regular checks like inspecting your roof, cleaning your gutters, and sealing your windows protect both your home and your wallet. Taking care of these little tasks now means big savings later and a safer home for your family.

Core Home Loss Prevention Strategies to Avoid Repair Costs

Delaying repairs can cost you thousands of dollars over time. A small crack in your roof can let water in, a broken HVAC (heating and cooling system) might need to be completely replaced, and leaks left unchecked can lead to mold (a fungus that can affect your health). Quick action matters.

Doing simple home maintenance every now and then keeps big repair bills away. When you check and fix small problems early, you protect your home and your wallet.

  • Inspect your roof in the spring and fall.
  • Clean your gutters twice a year.
  • Change HVAC filters and clean ducts.
  • Seal windows, doors, and vents.
  • Look for plumbing leaks.
  • Drain your water heater and check the anode rod (a metal part that helps prevent rust).
  • Test your smoke and carbon monoxide detectors every month.

Regular maintenance means fewer surprises and lower repair costs. Spend a little time now, and you will save a lot later.

Roof Preservation and Gutter Maintenance for Home Loss Prevention

img-1.jpg

A strong roof is your first defense against water damage and structural problems. When you inspect your roof twice a year, in the spring and fall, you can spot missing shingles, cracks, or debris before they cause leaks. Fixing these small issues early helps you avoid expensive repairs later.

Maintaining your gutters is just as important in protecting your home. Gutters channel rainwater away from your roof and walls, reducing the risk of moisture seeping into your structure. When your gutters are clean, water flows away smoothly, keeping your foundation safe from damage.

Here’s what you can do:

  1. Remove leaves and blockages.
  2. Check hangers and fasteners.
  3. Flush downspouts with a hose.
  4. Extend downspouts away from your foundation.
  5. Inspect for leaks and patch them with sealant.
  6. Test water flow during rainfall.

Setting a regular schedule for inspections and cleaning minimizes the risk of water damage and helps you avoid extra repair costs. Regular roof and gutter upkeep keeps your home safe and saves you money over time.

HVAC and Utility System Audits to Minimize Repair Expenses

Change or clean your HVAC filters every 1 to 3 months. This keeps your system running smoothly and saves energy. Have a technician inspect your system once a year so they can catch small issues early. Listen for strange sounds or dripping water that might indicate a leak needing quick attention.

Regular check-ups of your utility system can help uncover hidden problems in pipes and connections. For example, if you notice a steady drip, look at nearby ducts and plumbing lines. Fixing these issues early can prevent further damage and save money.

Water Heater Care for Repair Expense Minimization

Drain and flush your water heater once a year. This simple task removes sediment (the chalky buildup) that can harm the unit and lower its efficiency, reducing energy costs. Also, check the anode rod (a metal part that slows rust) during your maintenance. Replacing a worn rod is much cheaper than buying a new water heater, keeping your hot water reliable.

Seal Windows, Doors, and Insulate for Loss Prevention and Energy Efficiency

img-2.jpg

Check your windows and doors every year to spot worn or broken seals and cracked caulk. When these seals fail, water can sneak in and cause mold to grow. A simple fix, like reapplying weather stripping (protective strip that blocks air and moisture), helps keep out drafts and moisture. This small step can prevent costly repairs from water damage and wasted energy.

Add insulation with a high R-value (a rating that shows how well insulation stops heat transfer) to your attic and exterior walls. This extra insulation blocks drafts and stops moisture from entering your home. It stabilizes indoor temperatures and reduces the need for extra heating or cooling, which can lead to unexpected repairs over time. Proper insulation also helps prevent condensation and structural issues caused by dampness.

Choose products that are built to last. ENERGY STAR-rated windows and doors, combined with durable caulk and high-quality insulation, secure your home against the elements. Investing in this trusted equipment now means fewer repairs later and a more energy-efficient, safe home.

Foundation Stability Checks and Basement Care to Prevent Home Loss

Regularly check your foundation to catch early signs of damage. Look at your walls and floors for tiny cracks and uneven settling that might mean your home is shifting. Also, examine your basement walls and floors for damp stains; these could be early signals of hidden leaks or moisture seeping in, which may lead to expensive repairs if not fixed.

Test your sump pump (a device that removes water from your basement) before heavy rains. This simple step can help prevent flooding. Make sure the soil around your home slopes away from the foundation so water doesn’t pool near your house. Regular checks like these go a long way in avoiding unexpected repairs and keeping your home safe.

Seasonal Upkeep Calendar and Maintenance Scheduling for Cost Savings

img-3.jpg

A seasonal maintenance schedule can help keep your home in top shape and prevent costly repairs. Mark key tasks like roof checks in the spring and fall, cleaning your gutters twice a year, testing smoke and carbon monoxide detectors every month (with battery changes once a year), and an annual HVAC service (heating, ventilation, and air conditioning system check). You should also check your yard grading in the spring and test your sump pump (a pump that helps prevent flooding) in the fall. This simple plan keeps you organized and stops small issues from becoming expensive problems.

Sticking to a routine not only protects your home, it also saves you time and money. When you follow a set schedule, you can catch leaks and wear early before they damage your home's structure or hurt its energy efficiency. Planned checkups mean fewer emergencies and lower repair costs over time.

Digital Tools for Maintenance Scheduling

Smartphone apps and simple spreadsheets make scheduling easier. Automated reminders help you keep track of tasks like roof inspections and safety device battery changes. You can also use photo logs and digital records to confirm work is finished and see changes over time. These tools help you stay on track and keep clear records that can prevent property damage and reduce repair costs.

Final Words

In the action, we outlined how regular roof checks, gutter cleaning, HVAC maintenance, and sealing windows and doors can stop damage before it escalates. Simple steps like plumbing leak checks, water heater draining, and foundation inspections help avoid costly repairs.

Keeping a seasonal upkeep calendar easy to follow puts you ahead of issues. Use home loss prevention tips for avoiding repair costs to build a safer, worry-free home.

FAQ

Q: What is the 1 rule for home maintenance?

A: The one rule for home maintenance means staying proactive with regular inspections and repairs. Keeping up with routine checks helps catch small problems before they become costly.

Q: What is the most expensive thing to repair in a house?

A: The most expensive repairs often involve fixing the roof, foundation, or HVAC system. Damage in these areas can lead to wider issues, making repairs expensive.

Q: Can you think of a home maintenance task that could prevent costly repairs?

A: Regular gutter cleaning and inspections prevent water damage by keeping debris out. This simple task helps protect the roof and foundation from leaks and other costly issues.

Q: How much should you save each year for maintenance on your home?

A: Saving around 1% to 3% of your home’s value each year can cover routine upkeep. This budgeting helps you avoid unexpected expenses and keeps your home in good shape.

Interior Reconstruction After Water Damage: Complete Recovery Steps

0

Most homeowners think interior reconstruction just means patching drywall and repainting. It doesn’t. After water damage, reconstruction rebuilds your home from framing to finish, replacing compromised materials and making structural repairs before anything gets covered back up. This process determines whether your home is truly dry, structurally sound, and safe, or whether moisture and damage stay hidden behind fresh paint. Here’s what complete recovery actually involves, step by step.

What Interior Reconstruction Involves and Why Professional Help Matters
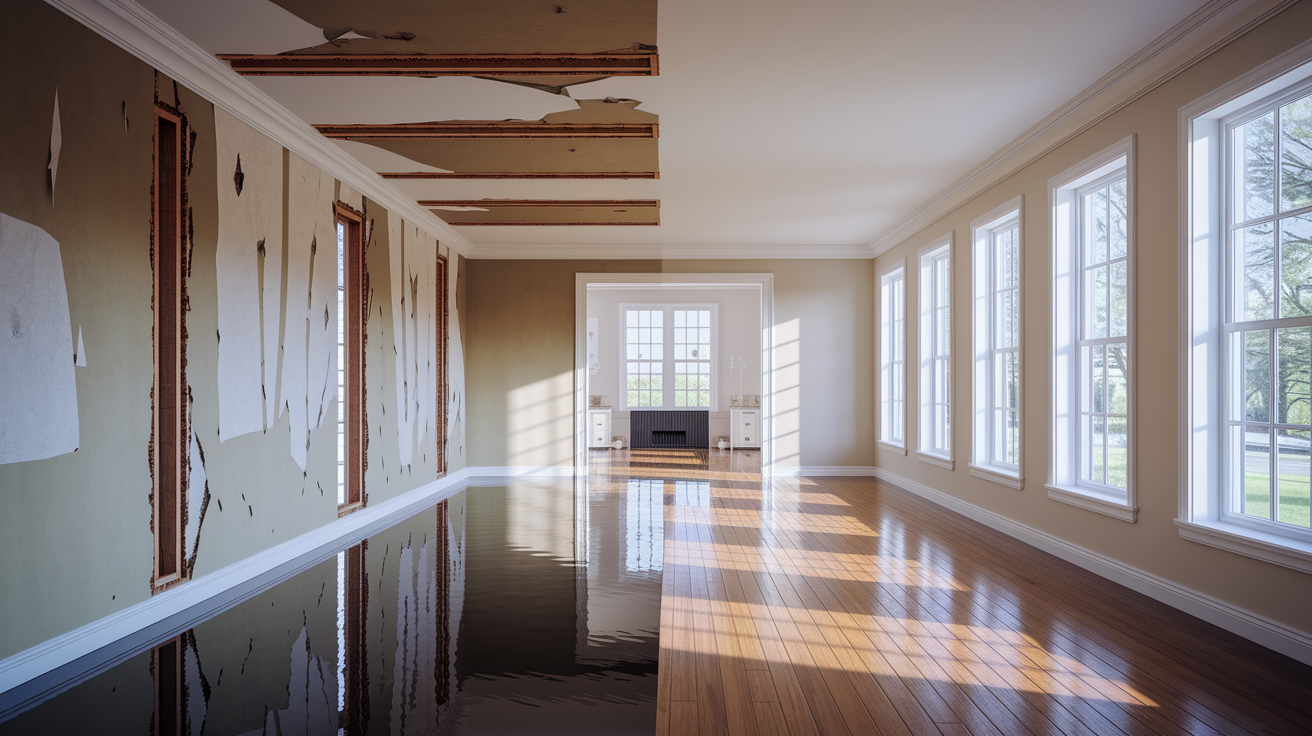
hN5nRHoaRW-pkrVBwOt8uw

Interior reconstruction after water damage is the final recovery phase. It rebuilds damaged areas to restore structure, function, and appearance after water mitigation and drying are done. This phase transforms stripped down, damaged spaces back into livable rooms by replacing building materials, repairing structural components, reinstalling utilities, and finishing surfaces. The work ranges from replacing a section of water damaged drywall to completely rebuilding multiple rooms from studs to paint.

You need professional contractors because they know how to assess hidden damage in walls and subfloors, figure out whether areas need repair or complete rebuild, make sure all work meets building codes, and manage the complex multi-phase process from emergency response through final completion. They coordinate inspections, handle permits, and deliver quality that protects your home long term.

Emergency Response and Professional Assessment After Water Damage

xCj78OD5S0CsmDEkrij6Vg

Contact a restoration specialist right after you notify your insurance company. Water damage hides extensive rot in places that are hard to detect, unlike fire or storm damage. Professional assessment is critical before any reconstruction decisions get made.

Professional contractors conduct thorough inspections using moisture meters and thermal imaging to find hidden damage in walls, subfloors, ceiling cavities, and structural components. They measure moisture levels throughout affected areas, identify materials that can be saved versus those needing replacement, and locate damage you can’t see behind finished surfaces. A moisture meter reading above 15 to 20% in wood framing or above manufacturer specifications in other materials typically means replacement is needed.

The assessment documentation process creates detailed records for insurance purposes. Contractors photograph all damage from multiple angles, document moisture readings in affected areas, create itemized lists of damaged materials, and prepare detailed scope of work estimates that break down each phase of reconstruction. This documentation supports your insurance claim and establishes clear expectations for timeline and cost before work begins.

Based on assessment findings, professionals determine whether restoration or complete reconstruction makes sense. Safety and structural integrity drive this decision. When framing members are compromised, when mold growth is extensive, or when repairs would cost nearly as much as rebuilding, reconstruction becomes the better path.

Structural Drying and Dehumidification in Water Damaged Interiors

pSMI1nRMRIOG4x_PqjEEYQ

Complete structural drying is non-negotiable before rebuilding begins. Moisture trapped behind new drywall, under new flooring, or within wall cavities causes mold growth within 24 to 48 hours and leads to structural failure, rot, and recurring problems that cost far more to fix later. You can’t seal moisture inside walls and expect good results.

Commercial dehumidifiers, air movers, fans, and monitoring devices track moisture levels in walls, floors, and ceilings throughout the drying process. Large capacity dehumidifiers remove moisture from the air while air movers circulate air across wet surfaces and into wall cavities through small holes drilled near the floor. Contractors place moisture meters at multiple locations and check readings daily, making sure materials reach acceptable moisture levels before reconstruction starts. The equipment runs continuously, sometimes 24 hours per day, until readings stabilize.

Typical drying timeframes for common building materials:

Drywall takes 3 to 5 days with proper airflow and dehumidification. Hardwood floors need 7 to 14 days depending on wood species and moisture penetration depth. Concrete slabs require 4 to 6 weeks for complete drying, longer for thick pours. Wall insulation varies by type. Fiberglass dries in 3 to 5 days, closed cell foam retains moisture longer. Carpet and padding are rarely salvageable and typically get removed immediately.

Antimicrobial treatments are applied during the drying phase to affected surfaces. These treatments inhibit microbial growth on wood framing, concrete, and other materials while drying continues, providing protection during the vulnerable period when materials are damp but not yet dry enough for reconstruction to begin.

Mold Remediation Requirements for Interior Reconstruction

EVTkax4qQH-YqRfJaeZOsA

Mold remediation becomes necessary when water has been present for 24 to 48 hours or longer, or when visible mold growth appears during demolition. Category 3 water (sewage, flooding) requires antimicrobial treatment regardless of timeline because contamination creates immediate health risks.

The containment process seals off affected areas with plastic barriers and creates negative air pressure using specialized equipment to prevent mold spore spread to unaffected rooms. Contractors seal HVAC vents, doorways, and any openings between remediation zones and clean areas. Negative air machines with HEPA filters pull air from the containment area and exhaust it outside, making sure spores don’t migrate through your home during removal work.

Removal procedures include HEPA vacuuming all surfaces before material removal, careful extraction of mold affected materials to minimize spore release, disposal in sealed bags, antimicrobial application to remaining structural components, and post remediation air quality testing to verify the space is safe for reconstruction. All workers wear protective equipment including respirators during remediation work. Any porous materials with mold growth (drywall, insulation, carpet, ceiling tiles) get removed and replaced rather than cleaned.

Timeline impacts vary based on extent. Minor mold confined to a small area adds 3 to 5 days to your reconstruction schedule, while extensive mold covering large portions of walls or multiple rooms can add 2 to 3 weeks or more when professional remediation, testing, and clearance protocols are required.

Demolition and Removal of Water Damaged Building Materials

9iuVAuERQI2k-u1gvfp2ng

Selective demolition removes only what’s damaged beyond repair while preserving structural elements and salvageable materials. Contractors don’t strip everything to studs unless moisture readings, visible damage, or mold growth requires it. This approach saves money and time by keeping undamaged materials in place.

Common materials needing removal include water wicked drywall, typically cut out 12 to 24 inches above the visible water line because wicking continues upward through the paper facing and gypsum core. Soaked insulation loses R-value and holds moisture against framing, so it gets pulled from wall and ceiling cavities. Damaged flooring (whether carpet, hardwood, laminate, or tile that’s lifted from compromised adhesive) comes up to expose and dry the subfloor. Baseboards and trim that absorbed water get removed because they warp, harbor mold, and won’t sit flush after drying. Cabinetry made from particle board or MDF swells and delaminates when wet and needs replacement, though solid wood cabinets can sometimes be saved.

Content removal and storage happens before demolition work begins. Professionals identify salvageable belongings, move them to unaffected areas or off-site storage, and coordinate professional content cleaning services for items affected by water, smoke, or debris. Modern restoration technology can clean and restore electronics, documents, furniture, and personal items at a fraction of replacement cost. Your restoration company can store cleaned contents and deliver them when reconstruction is complete, timed to your move in date.

Proper debris disposal follows local regulations and environmental requirements for water damaged materials. Some jurisdictions classify water damaged debris as special waste, particularly if mold is present or if the water source was contaminated. Contractors arrange appropriate dumpsters, obtain disposal permits if required, and make sure materials reach approved facilities.

Structural Repairs in Water Damage Reconstruction Projects
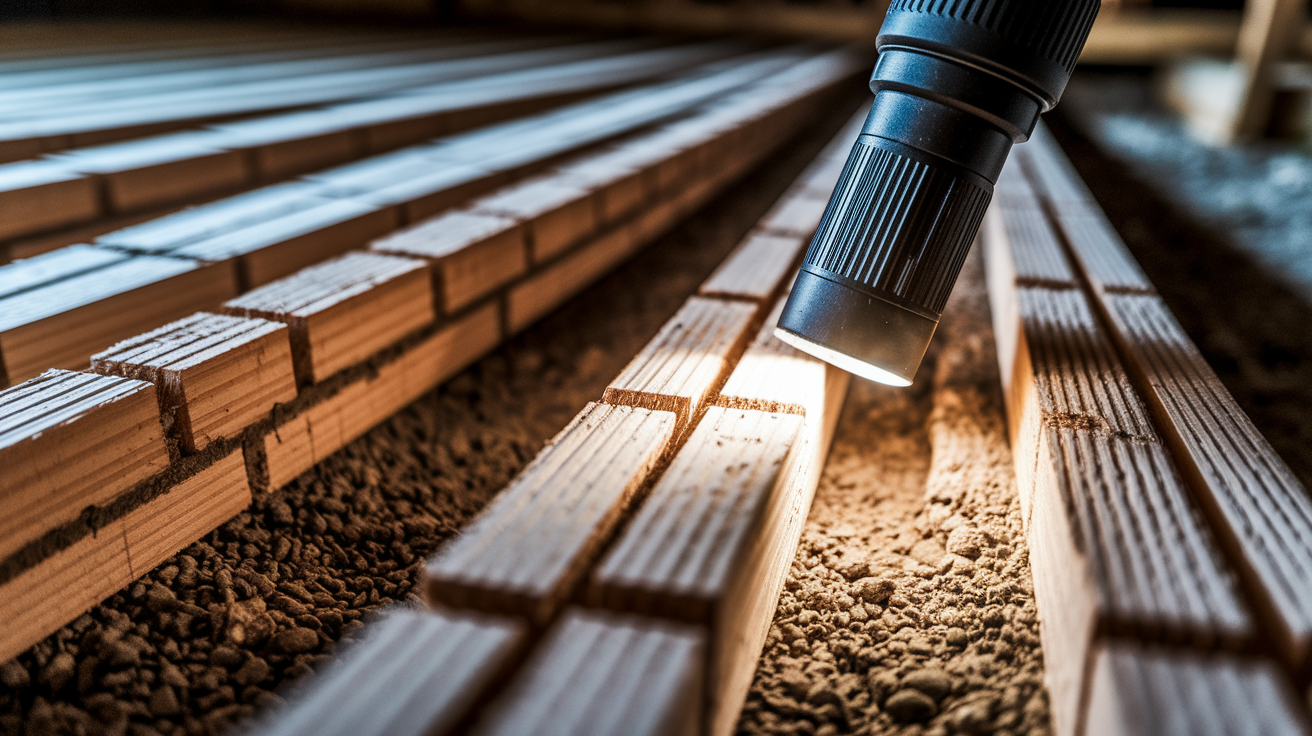
KGF2ePUQTxOyWPVI14Y_kw

Structural damage assessment determines when structural engineers are needed versus when general contractors can handle repairs. Bring in engineers for load bearing wall damage, foundation moisture intrusion or cracking, extensive floor joist damage affecting multiple bays, or any time you’re uncertain about structural integrity. General contractors handle most other repairs (non-structural wall studs, isolated joist damage, and subfloor replacement).

Common structural repairs include replacing damaged floor joists weakened by prolonged moisture exposure, sistering (reinforcing) compromised studs by attaching new lumber alongside damaged members, repairing or replacing subflooring sections that have delaminated or lost strength, addressing foundation moisture intrusion with waterproofing or drainage improvements, and reinforcing weakened framing members that can be salvaged rather than fully replaced. Sistering works when the damage is localized. A new board fastened tight against the old one restores strength without complete replacement.

Building code compliance for structural work determines material specifications, fastener schedules, and connection requirements. Current codes often exceed standards from when your home was built, so repairs must meet today’s requirements even when matching existing construction. Required inspections happen at the rough framing stage before any structural work gets covered. Inspectors verify lumber sizes, proper fastening, adequate support, and code compliant repairs.

Structural repairs must be completed and approved before moving to finish work. You can’t install drywall, run final electrical, or lay flooring until structural components are solid, dry, properly fastened, and inspected. This sequencing protects your investment in finish materials and makes sure nothing gets damaged when structural issues are discovered late.

Plumbing and Electrical Safety After Interior Water Damage

wwxEWZ-nQ4SbhsJ1oDch4g

Plumbing and electrical work happens before interior finishing because these systems run through walls and must be inspected before concealment behind drywall. Sequencing is critical. You can’t close walls until utilities are installed, tested, and approved by inspectors.

Plumbing repairs start with identifying pipe damage from freezing, corrosion, or physical stress during the water event. Contractors replace corroded sections rather than patching them because corrosion continues. They address the original leak source (whether a burst supply line, failed appliance connection, or drain backup) and test for proper drainage throughout affected areas. Pressure testing makes sure no hidden leaks remain in supply lines before walls close. Any repairs to drain, waste, and vent systems get tested to verify proper flow and venting.

Electrical safety inspection identifies water exposed wiring, outlets, switches, and fixtures. Water compromises wire insulation, corrodes connections, and creates shock and fire hazards. Contractors replace damaged circuits rather than trying to dry and reuse them. If your electrical panel was submerged or heavily water exposed, it likely needs replacement. Water inside panel boxes corrodes bus bars and breakers. Upgrading panels happens when existing capacity is insufficient or when code requires arc-fault or ground-fault protection that wasn’t present in older systems. Testing all circuits makes sure there’s proper grounding, correct voltage, and functioning ground-fault protection in bathrooms, kitchens, and outdoor circuits. All electrical work must meet current National Electrical Code requirements.

Reputable contractors coordinate all required inspections before proceeding to drywall installation. Rough plumbing inspection verifies drain slopes, proper venting, and supply line pressure testing. Rough electrical inspection confirms wire sizing, circuit protection, box placement, and grounding. Only after inspection approval can you move forward with closing walls.

Drywall Replacement and Interior Wall Reconstruction

w7bE7-NQ7yQ5qSGaGyGRA

Drywall installation begins after structural repairs are complete, utilities are installed and inspected, and all rough work receives approval. Starting drywall before inspections pass means tearing it back out if problems are found. Expensive and time consuming.

The installation process involves measuring and cutting panels to minimize seams and waste, securing sheets to studs with screws spaced per manufacturer specifications, taping seams with paper or fiberglass mesh tape, applying joint compound in multiple coats with drying time between applications, sanding smooth without over sanding and damaging paper, and texture matching when reconstruction adjoins existing walls.

Drywall Phase Timeframe Description
Measurement and cutting 1 day Measure openings, cut panels, plan layout to minimize seams and waste
Installation 1 to 2 days Hang sheets, secure to framing, cut out for electrical boxes and fixtures
Taping 1 day Apply tape over seams, first coat of joint compound, corner bead installation
Finishing coats 3 to 4 days Second and third coats with drying between, feathering edges, sanding smooth
Texture and prime 1 to 2 days Match existing texture, apply primer to seal new drywall before paint

Matching existing textures in partial reconstruction projects requires skill and testing. Contractors create sample patches to match knockdown, orange peel, or other textures before texturing large areas. Texture applied too heavy or too light stands out noticeably. Priming new drywall seals the paper facing and joint compound, creating a uniform surface that accepts paint evenly and prevents the joint compound from absorbing paint differently than the drywall paper.

Flooring Repair and Replacement in Water Damaged Interiors

dNNPNI8-SoC3rqYza6YYFA

Flooring damage assessment varies by material type. Hardwood can sometimes be dried and refinished if water exposure was brief and the wood didn’t cup or buckle, but prolonged moisture causes permanent warping. Engineered wood with a plywood or MDF core typically needs replacement because the core swells and separates. Tile may need removal if the adhesive or mortar failed, or if the underlying substrate is damaged. Carpet and padding almost always need replacement after water damage. Pad remains damp for weeks and grows mold, while carpet develops odors even after professional cleaning. Vinyl and laminate need replacement if water damaged because moisture causes bubbling, lifting, and permanent staining.

Subfloor preparation makes sure there’s complete dryness, typically 12% moisture content or lower in wood subfloors. Contractors replace damaged sections that have delaminated, softened, or lost structural integrity. They level uneven areas with floor leveling compound where height differences exceed acceptable tolerances for your chosen flooring. Installing moisture barriers becomes important in basements or anywhere ground moisture could wick upward, particularly before installing wood or laminate products sensitive to moisture.

Material selection considerations include matching existing floors in partial replacements, which often requires ordering the same product if still available or finding close matches in wood species, plank width, and finish. Upgrading to more water resistant options makes sense in areas prone to moisture (luxury vinyl plank in basements, tile in bathrooms and laundries). Balance cost with durability. Cheap materials might save money now but may need earlier replacement.

Flooring installation typically happens as one of the final steps after walls are painted, trim is installed, and all other trades have finished to avoid damage from foot traffic, dropped tools, and rolling equipment across new floors. The exception is floors sometimes go in before kitchen cabinets to create a continuous surface, though this uses more material and risks damage during cabinet installation.

Baseboards, Trim, and Interior Finish Carpentry Work
897dchBjS-CnChaIuvkOpA

Baseboards and trim are typically replaced rather than saved in water damage scenarios because they absorb moisture through end grain and edges, harbor mold in the space behind them against walls, and warp when wet, making them impossible to reinstall flat and tight. Even dried out trim often won’t sit flush after moisture exposure.

Trim installation includes baseboard replacement along all walls in affected rooms, door and window casing around openings, crown molding if your home originally had it and if budget allows replacement, tight joints at corners with proper coping or mitering techniques, and caulking gaps between trim and walls for a finished appearance. Proper reveals (the slight space between door jambs and casing edges) give professional results rather than trim sitting tight against jambs.

Finish carpentry details separate adequate work from quality results. Matching existing profiles and styles maintains consistency. You want new baseboards to match the style throughout your home unless you’re updating everything. Using quality materials that resist future moisture, like primed MDF or finger-jointed pine with good paint coverage, provides better long term performance than cheap pine that splits and warps. Proper priming and painting with attention to all surfaces, including the back of baseboards, seals the wood. Making sure there are seamless transitions between repaired and existing areas means careful measurement, clean cuts, and attention to joint placement so they’re not immediately noticeable.

Final touches return the space to pre-loss condition or better. This includes installing outlet and switch covers, door stops, closet rods, towel bars, and any other details that make rooms fully functional and finished.

Paint and Final Finishing for Water Damage Reconstruction

Paint preparation makes sure you get professional results. Contractors prime new drywall with a quality primer sealer that seals the paper facing and joint compound, creating a uniform surface. They caulk trim to wall joints with paintable caulk to eliminate gaps. Filling nail holes in trim with wood filler or spackle and sanding smooth gets rid of imperfections. All surfaces must be clean, dry, and smooth before paint application begins.

Paint application involves using odor sealing primers on surfaces affected by water or smoke to prevent odors from bleeding through new paint, applying multiple finish coats (typically two coats minimum) for even coverage and durability, color matching existing walls in partial reconstruction by bringing paint chips to match or having the paint store scan existing paint for color formulas, using quality paint that resists moisture and mildew particularly in bathrooms and kitchens, and making sure there’s even coverage and consistent sheen throughout with proper rolling technique and adequate material.

Final finishing details complete the work. Touch-ups address any drips, missed spots, or areas where paint coverage is thin. Removing painter’s tape carefully when paint is dry to the touch but not fully cured creates clean lines without pulling paint. Cleaning surfaces removes dust and debris from cutting in and rolling. Hardware reinstallation includes outlet covers, switch plates, door handles, cabinet pulls, and anything else removed for painting. The final walk-through inspection with the homeowner identifies any issues before the contractor leaves.

Painting is typically the final major step before homeowners can move belongings back into reconstructed spaces. Furniture, boxes, and normal use should wait until paint fully cures, usually 2 to 3 days, to avoid marking fresh paint or damaging the finish.

Cabinet and Kitchen Restoration in Water Damage Projects

Cabinet salvageability depends on construction materials. Solid wood cabinets may be salvageable if dried quickly, though water staining often remains visible on unfinished interior surfaces. Particle board and MDF cabinets typically need replacement when water damaged because these materials swell irreversibly when wet, losing structural integrity and creating wavy, bubbled surfaces that won’t accept new finish.

Cabinet restoration for salvageable units includes removing doors and drawers to allow air circulation and thorough drying of cabinet boxes, addressing water stains with appropriate cleaners or light sanding if stains are surface level, refinishing or repainting to refresh appearance and seal wood against future moisture, and replacing damaged components like drawer boxes, shelves, or sections of face frames that didn’t survive water exposure. Hinges and drawer slides exposed to water often need replacement due to rust and binding.

Cabinet replacement involves custom ordering matching styles, colors, and configurations, which extends timelines significantly. Installation timing typically happens after flooring but before countertops so cabinets sit on finished floors and countertops can be templated to exact cabinet positions. Coordinating with plumbers makes sure sink base cabinets allow proper access for supply lines, drain connections, and shut-off valves. Proper fit and function means level installation, doors and drawers that operate smoothly, and secure mounting to wall studs.

Countertop considerations include material selection, template timing after cabinets are installed and level, and typical lead times of 1 to 3 weeks for custom fabrication of stone or quartz counters. Custom cabinet orders often take 4 to 8 weeks depending on manufacturer and finish complexity.

Bathroom Reconstruction Specifics After Water Damage

Bathrooms require special attention because they’re high moisture environments with concentrated plumbing and strict building code requirements for waterproofing, ventilation, and fixture installation. Cutting corners in bathroom reconstruction leads to recurring water damage, mold problems, and costly repairs.

Waterproofing requirements include cement board or waterproof drywall installation instead of standard drywall in wet areas, shower pan or liner systems that create watertight enclosures beneath tile with proper slope to the drain, proper tile backer installation that extends to appropriate heights above tubs and showers, waterproof membranes applied over joints and seams in wet areas before tile installation, and sealed penetrations around pipes, fixtures, and valve bodies to prevent water intrusion into wall cavities.

Bathroom-specific work includes toilet reinstallation with new wax rings and supply lines, fixture installation including tubs, showers, sinks, and faucets with proper mounting and connections, tile work on floors and walls with attention to layout, cuts around fixtures, and consistent grout lines, grout and caulk application with proper curing time and mildew resistant products, vanity installation with level mounting and secure attachment, and making sure there’s proper ventilation with code compliant exhaust fans that vent to exterior, not into attics or crawl spaces.

Bathroom work requires specialized expertise and coordination of multiple trades. Plumbers for rough in and fixture connections, tile setters for waterproofing and tile installation, electricians for GFCI outlets, lighting, and fan installation, and finish carpenters for vanities and trim. Each trade must complete work in sequence without disrupting previous work.

Insurance Claims and Documentation for Interior Reconstruction

Notify your insurance company immediately after discovering water damage. Document all damage with photos and videos before any emergency work begins, capturing the water source, standing water, visible damage to walls and floors, damaged belongings, and overall scope. This initial documentation supports your claim and establishes damage extent before mitigation.

Working with insurance adjusters involves scheduling inspections within days of initial notification, providing access to all damaged areas including attics, crawl spaces, and behind walls when needed, understanding your coverage limits and exclusions for different water sources, reviewing estimates from your contractor and the adjuster’s estimate for discrepancies in scope or pricing, and negotiating scope of work discrepancies when the adjuster’s estimate doesn’t match your contractor’s assessment.

Essential documentation to maintain throughout reconstruction:

Initial damage photos and videos from multiple angles and locations. Daily moisture readings during the drying phase showing progress toward acceptable levels. Scope of work documents detailing every phase and material specification. Itemized estimates showing costs for labor, materials, permits, and other expenses. Change orders for any additional work discovered during demolition or reconstruction. Receipts for all completed work, material purchases, and permit fees.

Common coverage issues affect final claim amounts. Flood damage typically requires separate flood insurance policies. Standard homeowner policies exclude flood damage from rising water. Gradual damage limitations mean insurance may not cover water damage that accumulated over weeks or months from unnoticed leaks. Depreciation versus replacement cost coverage determines whether you receive actual cash value (depreciated) or full replacement cost. Replacement cost policies pay more but often require you to complete repairs before receiving full reimbursement. Coverage caps on certain materials or repairs may limit claim amounts below actual reconstruction costs.

Maintain separate documentation files organized chronologically, with physical copies and digital backups. Communicate regularly with both contractors and adjusters, getting everything in writing. Follow up on pending approvals rather than assuming silence means agreement.

Cost Estimates and Budget Planning for Interior Reconstruction

Costs vary significantly based on damage extent, your geographic location, material choices, and whether reconstruction includes upgrades beyond basic restoration. Square footage affected, severity of structural damage, and finish selections all impact final costs substantially.

Damage Level Cost Range Typical Scope
Minor Repairs $3,000 to $8,000 Limited drywall replacement, minor flooring repairs, repainting specific areas, minimal structural work
Moderate Repairs $10,000 to $30,000 Multiple room drywall replacement, flooring restoration, bathroom or kitchen work, some structural repairs
Major Reconstruction $35,000 to $100,000+ Complete structural repairs, whole-house drywall, complete flooring replacement, multiple bathrooms, kitchen, extensive mold remediation

Cost factors include square footage affected (larger areas cost more for materials and labor), material quality selections from basic builder grade to premium finishes, structural repair extent when framing, subfloors, or foundations need work, permit and inspection fees required by your municipality, labor rates in your area which vary significantly by region and local demand, and timeline acceleration needs if you’re paying premium rates for expedited work.

Budget planning strategies help manage costs. Get multiple estimates from licensed contractors to understand pricing ranges and what different contractors include. Understand what’s included versus excluded in estimates. Does the price cover permits, dumpster rental, clean-up, and final inspection fees, or are those additional charges. Plan for contingencies by setting aside 10 to 20% of the estimated cost as a buffer for unexpected discoveries during demolition. Prioritize essential repairs versus upgrades. Complete all structural, waterproofing, and safety work first, then make decisions about upgraded finishes based on remaining budget.

Financing options exist if insurance doesn’t cover full costs. Home equity lines of credit, personal loans, or contractor financing programs may help bridge gaps between insurance payments and actual costs.

Timeline Expectations for Water Damage Interior Reconstruction

Timelines vary based on damage extent, material availability, permit processing times, contractor scheduling, and whether work proceeds without complications. Understanding realistic timeframes helps with planning temporary living arrangements and managing expectations.

Minor repairs take 1 to 2 weeks for limited drywall replacement in one or two rooms, small flooring repairs covering under 200 square feet, and repainting specific areas. Minimal structural work, quick drying materials, and straightforward scope keep these projects short.

Moderate repairs require 2 to 4 weeks for partial structural repairs like subfloor replacement or joist sistering, drywall replacement in multiple rooms throughout the house, and flooring restoration when damage affects several rooms or includes bathrooms requiring tile work.

Major reconstruction takes 1 to 3 months for severe flooding requiring complete structural repairs to framing and foundations, complete drywall installation throughout the home, complete flooring replacement in all living areas, kitchen and bathroom reconstruction, and mold remediation when growth is extensive and requires containment protocols.

Factors extending timelines include specialty material lead times when you order custom cabinets, unique tile, or specific hardwood species, mold remediation requirements adding days or weeks for containment, treatment, and clearance testing, structural engineering assessments that require analysis and stamped drawings before work proceeds, permit delays when building departments are backlogged or require plan revisions, insurance approval wait times for scope or payment authorization, and discovery of additional hidden damage during demolition that wasn’t visible during initial assessment.

Factors accelerating timelines include quick emergency response that minimizes secondary damage and shortens drying time, overlapping work phases when multiple trades work simultaneously in different areas, readily available materials that don’t require special orders or long lead times, pre-approved contractor relationships with building inspectors who can schedule inspections quickly, and clear insurance authorization upfront that eliminates waiting for approval at each phase.

Realistic expectations prioritize quality over speed. Rushing reconstruction leads to moisture problems, poor finish quality, and code violations. The goal is efficient progress with attention to proper sequencing and thorough work at each phase.

Choosing Licensed Contractors for Interior Reconstruction Work

Hiring licensed, insured, and experienced contractors specializing in water damage reconstruction protects your investment and makes sure you get quality results. General contractors without water damage experience may miss hidden moisture, skip critical waterproofing steps, or fail to recognize when mold remediation is necessary.

Contractor qualifications to verify include proper licensing for your state (requirements vary, but most states require general contractor licenses for projects over certain dollar amounts), general liability insurance that covers property damage and accidents during work, workers compensation insurance protecting you from liability if workers are injured on your property, IICRC certification for water damage restoration showing training in proper mitigation and reconstruction techniques, references from recent similar projects you can contact to verify quality and professionalism, and established local presence with a physical business address rather than just a cell phone number.

Essential questions to ask potential contractors:

How many years of experience do you have specifically with water damage reconstruction projects? Can you provide a detailed timeline estimate with specific phases and completion dates? Do you use subcontractors, and if so, who handles coordination and quality control? What are your communication protocols, how often will I receive progress updates? What warranty do you offer on workmanship, and what does it cover? What is your payment schedule, how much upfront and how are milestone payments structured? How do you handle change orders when additional work is discovered during demolition?

Red flags to avoid include requests for large upfront payments exceeding 10 to 15% of total cost, no physical business address or only a P.O. box, lack of insurance documentation or expired policies, pressure tactics demanding immediate decisions or claiming limited time pricing, prices significantly below other estimates suggesting cut corners or incomplete scope, and reluctance to provide references or permit previous clients to discuss their experience.

The value of choosing contractors who handle project management, coordinate all trades, and maintain clear communication throughout reconstruction can’t be overstated. You need one point of contact who manages plumbers, electricians, drywall installers, painters, and flooring contractors rather than juggling multiple separate contractors yourself. For comprehensive water damage restoration services, experienced contractors streamline the entire process from emergency mitigation through final reconstruction.

Permits and Inspections During Interior Reconstruction

Permits are required for structural work affecting load bearing components, electrical system changes including new circuits or panel upgrades, plumbing modifications to supply or drain lines, and extensive reconstruction beyond simple cosmetic repairs like painting or carpet replacement. Requirements vary by jurisdiction. Some municipalities require permits for any work over certain dollar amounts.

The permit process involves application submission with detailed plans showing scope of work, materials specifications, and sometimes engineer stamped drawings for structural work, fee payment based on project value or specific flat rates for different work types, approval wait times often ranging 1 to 2 weeks though complex projects or busy building departments may take longer, and posted permits displayed at the job site showing approval and inspection requirements.

Required inspections happen at various stages throughout reconstruction. Rough framing inspection verifies structural repairs, lumber sizing, proper fastening, and load bearing support before anything gets covered. Rough plumbing and electrical inspection confirms proper installation, code compliance, and safety before drywall installation. Insulation inspection in some jurisdictions verifies proper R-values and installation techniques. Final inspection before occupancy approval checks all completed work, verifies everything meets code, and issues an occupancy certificate or final approval allowing you to move back in.

Reputable contractors handle all permit applications and schedule inspections, with costs included in project estimates. All work must pass inspection before proceeding to the next phase. You can’t install drywall before rough inspections pass, and you can’t occupy the home before final inspection approval. Failed inspections require corrections and re-inspection, potentially delaying completion.

Living Arrangements and Habitability During Reconstruction

Living arrangements depend on damage extent, which areas are affected, and safety considerations. You may be able to remain in your home during some reconstruction projects, while others require temporary relocation for your safety and to allow contractors efficient access.

Staying is possible when damage is confined to specific rooms that can be isolated from living areas, working HVAC keeps unaffected areas comfortable, you have at least one functioning bathroom and kitchen, electrical systems in occupied areas are safe and code compliant, dust and debris can be contained to work zones through plastic barriers and negative air pressure, and you have reasonable tolerance for construction disruption including noise, foot traffic, and restricted access to affected areas.

Temporary relocation becomes necessary when extensive damage affects multiple rooms throughout the home making isolation impossible, no functioning kitchen or bathroom exists during major reconstruction, structural safety is compromised requiring shoring or temporary supports, major mold remediation with containment protocols affects living areas and creates air quality concerns, and toxic material abatement like asbestos or lead paint requires complete home evacuation.

Plan for relocation costs including temporary housing, storage for belongings removed from the home, meals out when you don’t have kitchen access, and transportation between temporary housing and your normal work or school locations. Review insurance coverage for additional living expenses, which many policies include to cover reasonable costs during necessary displacement. Coordinate move out and move in timing with contractors so you’re not vacating unnecessarily early or waiting in temporary housing after work completes.

Preventing Future Water Damage After Interior Reconstruction

Reconstruction creates opportunities to address root causes and add protective measures that prevent future water damage incidents. Installing prevention features during reconstruction costs less than adding them later and provides long term protection for your investment.

Waterproofing upgrades include improved bathroom waterproofing systems with full-coverage membranes behind tile and upgraded shower pans, basement waterproofing if applicable with interior or exterior drainage systems and vapor barriers, water resistant materials in high moisture areas like mold resistant drywall and cement board, proper vapor barriers on exterior walls preventing moisture intrusion from outside, and upgraded flashing around windows and doors eliminating common leak points.

System improvements provide active protection and early warning. Better ventilation in bathrooms and kitchens with properly sized exhaust fans vented to exterior reduces moisture buildup. Leak detection systems or water alarms near water heaters, washing machines, and under sinks provide early warning before small leaks become major damage. Automatic shut-off valves triggered by sensors or timers prevent catastrophic flooding from burst pipes or forgotten running water. Improved drainage around your foundation with proper grading and downspout extensions keeps water away from basement walls. Regular maintenance access points for plumbing inspection allow you to check for hidden leaks in walls or under floors.

Ongoing maintenance practices to prevent water damage include inspecting your roof twice yearly for damaged shingles, failed flashing, and clogged valleys, cleaning gutters and downspouts every spring and fall to maintain proper drainage, replacing appliance hoses every 5 years even if they look fine (burst washing machine hoses cause frequent flooding), scheduling annual HVAC maintenance including condensate drain cleaning and drip pan inspection, and monitoring moisture prone areas like basements, crawl spaces, and areas under sinks for signs of dampness or musty odors.

Long term value of prevention investments becomes clear when you avoid recurring water damage problems, maintain property value with proper systems and materials, reduce insurance claims that can increase premiums, and protect your family’s health by preventing mold growth. For comprehensive guidance on preventing water damage, review proven home water damage prevention tips that protect your home year round.

Final Walkthrough and Project Completion for Interior Reconstruction

The final walkthrough verifies all work is complete, identifies any punch list items requiring attention, and makes sure quality standards are met before final payment and project closeout. Schedule the walkthrough when contractors indicate substantial completion, allowing daylight inspection of all work areas.

Check during walkthrough: all surfaces properly finished with no visible defects, paint coverage and quality including even color, consistent sheen, and no drips or thin spots, flooring transitions and installation with properly seated planks, secure tile, and flush transitions between rooms, trim and caulking completed with tight joints and smooth caulk lines, fixtures and hardware installed and functioning including faucets, lights, outlets, and appliances, doors and windows operating properly with smooth action and proper latching, and cleanliness of work areas with dust removed and debris cleared.

Completion documentation includes final

Final Words

Interior reconstruction after water damage brings your home from crisis back to comfortable. The process connects emergency response through structural repairs to the finished surfaces you see every day.

Working with experienced contractors means one team handles assessment, drying, demolition, rebuilding, and final finishing without gaps or handoff confusion.

Your home can look right, feel safe, and function reliably again. The right reconstruction approach fixes what’s damaged, prevents what’s next, and gives you a space worth coming home to.

FAQ

How to repair water damaged interior walls?

To repair water damaged interior walls, you first complete structural drying using dehumidifiers and air movers, then remove damaged drywall and insulation, repair any structural framing issues, install new drywall with proper taping and finishing, and finally paint to match existing surfaces.

Is interior water damage covered by insurance?

Interior water damage coverage depends on your individual policy terms and the cause of damage. Sudden events like burst pipes are typically covered, while gradual damage accumulated over time and flood damage often require separate policies or may not be covered at all.

What does a restoration company do after a flood?

A restoration company after a flood conducts professional damage assessment using moisture meters and thermal imaging, performs water extraction and structural drying, removes damaged materials, coordinates mold remediation if needed, completes structural repairs, rebuilds interior finishes, and manages the entire reconstruction process from emergency response through final completion.

What not to do after water damage?

After water damage, do not delay calling restoration professionals, avoid using electrical outlets near moisture, don’t paint over water stains without proper drying and sealing, never close up walls before complete moisture removal, and don’t attempt structural repairs without proper assessment of hidden damage and code compliance requirements.

How long does interior reconstruction take after water damage?

Interior reconstruction timelines vary by damage extent. Minor repairs with limited drywall replacement take 1 to 2 weeks, moderate repairs affecting several rooms require 2 to 4 weeks, and major reconstruction involving complete structural repairs and full interior rebuilding takes 1 to 3 months depending on complexity.

When should you replace drywall after water damage?

You should replace drywall after water damage when moisture has wicked up the wall, typically removing sections 12 to 24 inches above the water line, when mold is present, when structural integrity is compromised, or when drywall has been saturated for more than 48 hours even after drying.

Can hardwood floors be saved after water damage?

Hardwood floors can sometimes be saved after water damage if dried quickly using professional equipment, the water was clean (not contaminated), and the wood hasn’t warped or cupped significantly. Engineered wood and floors exposed to water for extended periods typically require replacement rather than restoration.

What comes first during reconstruction, plumbing or drywall?

Plumbing comes first during reconstruction, along with electrical work, because utilities must be installed and inspected before drywall installation. All systems that run through walls need completion and approval before closing walls with new drywall to ensure code compliance and prevent costly rework.

Do I need permits for water damage reconstruction?

You need permits for water damage reconstruction when work involves structural repairs, electrical system changes, plumbing modifications, or extensive rebuilding beyond cosmetic repairs. Reputable restoration contractors handle all permit applications, schedule required inspections, and include permit costs in project estimates.

How much does interior reconstruction cost after water damage?

Interior reconstruction costs vary significantly based on damage extent. Minor repairs typically range $3,000 to $8,000, moderate repairs affecting multiple rooms cost $10,000 to $30,000, and major reconstruction requiring complete structural work ranges $35,000 to $100,000 or more depending on square footage and material selections.

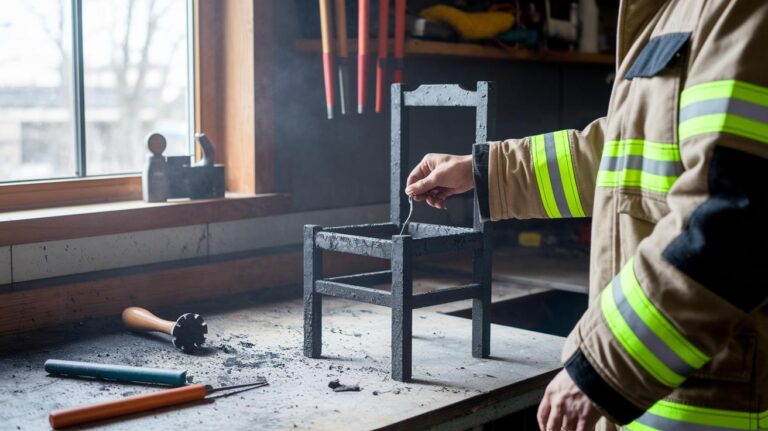
How to Identify Electrical Hazards in Your Space

0

Would you notice an electrical hazard before it causes a shock or a fire?
Most hazards give visible, audible, or physical warnings—warm outlets, buzzing breakers, burning plastic smells, damp spots near panels.
About half of workplace electrical deaths involve contact with overhead power lines, and roughly 30 percent tie back to improper grounding.
We’ll show simple, fast checks you can do right now, what each warning likely means, and the immediate steps to stop further damage and get repairs started.
No fluff—just clear signs, the why behind them, and what to do next.

Key Ways to Identify Electrical Hazards Immediately

OxMqhY21QzuVSx3q5Ama9g

Most electrical hazards give you visible, audible, or physical warnings before they cause serious injury or fire. These signs appear in homes, commercial buildings, and construction sites. About half of workplace electrical fatalities happen when someone makes contact with overhead power lines. Another 30 percent are caused by improper grounding.

Start with a quick visual sweep of any space where electrical equipment operates. Look for damaged cords, outlets that feel warm to the touch, and signs of moisture near electrical boxes or panels. Listen for buzzing, sizzling, or crackling sounds coming from outlets, switches, or breakers. Smell for burning plastic, which means insulation is overheating somewhere. These are the immediate red flags that tell you something is wrong and damage is happening right now.

Arc flash events release sudden bursts of energy that reach temperatures up to 35,000°F. Hot enough to vaporize metal and cause catastrophic burns. You can identify arc flash risk by looking for scorched breaker panels, visible arcing light at connection points, or equipment that hums loudly under load. Wet conditions multiply shock risk because water conducts electricity straight through you if insulation fails.

Electrical Hazard Identification Checklist:

Check all visible cords and plugs for frayed insulation, exposed metal conductors, cuts, abrasions, or cracked housings. Verify grounding prongs are intact. Missing or bent ground pins mean no fault current protection. Look for warm, hot, or discolored outlets and switch covers, which signal resistive heating from loose connections or overloads. Note any burning smells, buzzing sounds, sparking, or visible smoke around outlets, panels, or equipment.

Confirm breakers aren’t tripping repeatedly. Frequent trips indicate overcurrent, short circuits, or ground faults. Inspect for water, condensation, or puddles near electrical equipment, outlets, or extension cords. Maintain a minimum 10 foot clearance from overhead power lines for people, equipment, ladders, and materials. Test GFCI outlets monthly by pressing the “Test” button. The outlet should cut power immediately.

What Electrical Warning Signs Mean Physically and Electrically

v4I7Xa9KS8ujGvvRF5mAcw

Flickering or dimming lights usually signal loose wire connections or voltage drop caused by undersized wiring that can’t carry the load. When a high draw appliance like an air conditioner starts, it pulls current through the circuit. If connections are loose or wire is too small, resistance increases and lights downstream dim. That resistance creates heat at the weak point.

Warm or discolored outlets mean resistive heating is happening inside the receptacle or at wire terminations. Electricity flowing through a poor connection generates heat, which chars plastic and metal over time. Burning or melting plastic smells come from insulation breaking down under heat. The wire jacket is literally cooking. Buzzing or sizzling sounds are caused by arcing, which is electricity jumping a gap at a loose terminal or damaged conductor. Smoke or melted plastic around an outlet means the circuit is overloaded or a short circuit is dumping current faster than the breaker can trip.

What These Signs Indicate:

Flickering lights point to loose connections, undersized wire, or failing breaker contacts creating intermittent resistance. Warm outlets or switches mean resistive heating from loose terminals, oxidized contacts, or current exceeding receptacle rating. Burning smell indicates insulation breakdown from prolonged overheating or arcing at wire junctions.

Buzzing or sizzling reveals arcing caused by loose screws, damaged conductors, or moisture bridging contacts. Frequent breaker trips suggest overcurrent from too many devices, short circuit to ground, or internal breaker wear. Discolored or scorched outlets show sustained heat from poor contact, aluminum to copper mismatch, or backstab connection failure.

Electrical Hazards Caused by Damaged or Overloaded Wiring

6rXdZcjSQHycpVSegNV4mw

Overloaded circuits show up as outlets that feel warm to the touch, a faint burning odor near the breaker panel, and breakers that trip when you plug in one more device. The circuit is carrying more current than the wire and breaker are rated for, which heats the wire inside the wall. That heat degrades insulation and raises fire risk.

Damaged cords are easier to spot. Look for cracks, cuts, or abrasions in the outer jacket. If you see exposed copper conductors, the cord is unsafe. Cords running under rugs or pinched by furniture wear through faster because foot traffic and pressure break down insulation. Pet chew marks compromise the insulation layer and expose live metal. Never use electrical tape as a permanent repair. It’s an insulator, but it doesn’t restore mechanical strength or meet code. Remove damaged cords from service and replace them.

Older homes and buildings may still have outdated wiring systems that were never designed for modern electrical loads. Upgrading these systems requires a licensed electrician, but you can identify them during a visual inspection.

Indicators of Outdated or Inadequate Wiring:

Two prong outlets instead of three prong grounded receptacles. Aluminum wiring, which appears silvery where visible and expands/contracts more than copper, leading to loose connections. Knob and tube wiring, an old cloth insulated system with porcelain insulators, commonly found in homes built before 1950.

Fuse boxes instead of modern circuit breaker panels. Fuses work, but panels are often undersized for current loads. Frequent electrical problems like tripped breakers, dimming lights, or the inability to run multiple appliances simultaneously.

Identifying Grounding and Bonding Problems

QkDAI7diRYKqCfaCwaszgw

Improper grounding is responsible for about 30 percent of workplace electrical fatalities, according to the National Safety Council. Grounding provides a safe path for fault current to return to the source and trip the breaker before you become the path. Without it, a damaged tool or appliance can energize its metal housing and shock you when you touch it.

The fastest way to spot grounding problems is to look at outlet faces and equipment cords. Three prong outlets should have the round grounding hole at the bottom. If you see only two slots, the outlet is ungrounded. Check power tool and appliance cords for three prong plugs. If the grounding prong is missing, bent, or broken off, the equipment has no ground fault protection.

Some tools are double insulated and safe with two prong plugs, but they must be labeled with a “double insulated” symbol (a square inside a square). Portable equipment used on construction sites or in commercial settings should always be grounded or clearly marked double insulated. If you open an electrical box and notice wires with no visible grounding conductor (bare copper or green insulated wire), bonding may be incomplete or missing.

Electrical Hazards in Wet or Damp Environments

4-dhsKl-QoqqZHoIixGKeQ

Water is an excellent conductor, and wet skin has much lower resistance than dry skin. That combination makes even low voltage shocks dangerous when moisture is present. If electrical equipment gets wet, don’t touch it. Shut off the circuit at the breaker and contact a qualified electrician to inspect and dry the equipment before re-energizing.

Outdoor outlets, basement receptacles, bathrooms, kitchens, laundry areas, and any location within six feet of a water source should have GFCI protection. GFCIs detect tiny imbalances in current and shut off power in milliseconds, before a shock can cause injury. Inspect outdoor outlets for weatherproof covers. The spring loaded or screw down lids that keep rain out. If covers are cracked, missing, or won’t close, replace them.

Wet Area Inspection and GFCI Testing:

Check for standing water, condensation, or damp conditions near outlets, panels, extension cords, or portable equipment. Verify outdoor and wet location outlets have intact weatherproof covers. Confirm GFCI outlets are installed in bathrooms, kitchens, garages, basements, and outdoor locations.
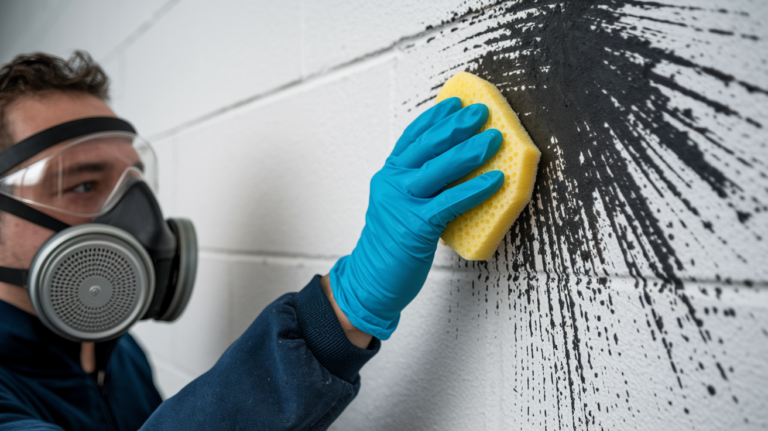
Test GFCI outlets monthly. Plug in a small lamp, turn it on, press the “Test” button on the GFCI. Lamp should turn off, then press “Reset” to restore power. Never operate electrical equipment with wet hands, and dry hands thoroughly before plugging or unplugging cords.

Recognizing Overhead and Underground Electrical Line Hazards

bhzcnUekT4WphBlGcm_5TQ

Contact with overhead power lines causes roughly 50 percent of workplace electrical fatalities. These lines carry extremely high voltages, often hundreds of thousands of volts on transmission lines, and you don’t have to touch the wire directly. Electricity can arc across air gaps if you get too close with conductive materials like ladders, scaffolding, cranes, or metal pipes.

Before you start work outdoors or move tall equipment, scan the area for overhead lines. Look up. Identify the closest power line and measure or estimate the distance between your highest working point and the wire. OSHA and electrical safety standards require a minimum 10 foot clearance for people and uninsulated equipment. If you can’t maintain that distance, contact the utility company to de-energize or insulate the line, or plan the work differently.

Underground electrical cables are marked by warning signs, colored tape, or utility company markers, but the markings fade and shift over time. Before digging, trenching, or driving ground stakes, call your local utility location service (811 in the United States) and have all buried lines marked. A shovel or post hole digger can cut through an underground cable and cause electrocution or an arc flash explosion.

Overhead Line Inspection Steps:

Survey the work area and locate all overhead power lines before lifting equipment, extending ladders, or positioning scaffolding. Measure or estimate clearance and confirm it exceeds the minimum 10 foot distance for people and non insulated tools. Install physical barriers, warning signs, or high visibility flagging to mark exclusion zones around overhead lines. Inspect the site daily. Lines can sag in hot weather or after storms, reducing clearance.

Identifying Arc Flash and High Energy Electrical Hazards

OjR_vL9WQGel58gheP8hKQ

Arc flash is a sudden release of energy caused by a fault or short circuit in energized equipment. Temperatures inside the arc reach up to 35,000°F, vaporizing metal and creating a pressure wave that can throw you backward, damage hearing, and cause severe burns to skin and eyes. Arc flash hazards exist wherever high energy electrical systems are operated, maintained, or opened while energized.

You can recognize arc flash risk by inspecting electrical panels and switchgear for warning labels. Equipment rated above certain voltage and available fault current thresholds must carry arc flash hazard labels that specify the boundary distance, required PPE, and incident energy level. Listen for unusual sounds. Loud humming, buzzing, or sizzling from a panel indicates arcing or loose connections under load. Panels that feel warm to the touch or emit a burning smell show signs of internal overheating. Visible scorch marks, melted plastic, or discolored breaker handles mean arcing has already occurred.

Arc Flash Warning Sign What It Indicates
Loud buzzing, humming, or sizzling from panel Arcing at bus bars, breaker contacts, or loose lugs; high fault current or poor connection
Warm or hot panel enclosure, breaker handles Resistive heating from overload, undersized breaker, or failing internal components
Visible scorch marks, melted plastic, discolored breakers Previous arcing event; insulation failure; breaker or bus bar damage requiring immediate professional inspection

Checklist Based Electrical Hazard Identification (Home + Workplace)

5tXmhCIYS-C_VfE0xrrIdA

A simple monthly walkthrough catches most electrical hazards before they cause injury or fire. In homes, walk every room and check outlets, switches, and appliance cords. In commercial or construction settings, inspect portable equipment, temporary wiring, panels, and job site conditions before starting work each day. Professional inspections should happen every 3 to 5 years for newer buildings and annually for structures older than 40 years or high demand electrical environments.

Inspection Checklist for Homes and Workplaces:

Inspect all visible power cords, extension cords, and equipment cables for frayed insulation, exposed conductors, cuts, cracks, abrasions, or missing outer jackets. Verify grounding prongs are intact on three prong plugs. Bent, broken, or missing ground pins eliminate fault protection.

Check outlets and switch covers for warmth, discoloration, burning odor, melted plastic, or loose mounting. Test GFCI outlets monthly using the built in “Test” and “Reset” buttons. Confirm power cuts off and restores properly.

Look for water, condensation, damp conditions, or puddles near electrical equipment, outlets, panels, or outdoor boxes. Inspect equipment housings, junction boxes, and panel covers for cracks, missing screws, gaps, or damaged enclosures.

Confirm the presence of safety barriers, warning signs, and labeled arc flash boundaries around high voltage equipment and panels. Measure or visually confirm minimum 10 foot clearance from overhead power lines for people, equipment, ladders, scaffolding, and stored materials.

Note repeated breaker trips, flickering lights, buzzing sounds, or burning smells and document the circuit and time of occurrence. Schedule a licensed electrician for a comprehensive inspection if your building is over 40 years old, experiences frequent electrical issues, or if you’re planning major renovations or load increases.

Tools and Devices That Help Identify Electrical Hazards

UYYoKjODT-QrhbOObilDg

Non contact voltage testers let you detect live wires without touching them. These battery powered pens or wands light up and beep when brought near energized conductors. Use them to confirm a circuit is de-energized before working on outlets, switches, or junction boxes. They’re fast and safe for general checks, but they won’t tell you exact voltage or current.

Multimeters measure voltage, current, and resistance with probe contact. They’re more precise than non contact testers, but you must follow safety protocols. Verify the meter is rated for the voltage you’re testing, use insulated test leads, wear appropriate PPE, and never measure energized circuits unless you’re trained and authorized. Always start on the highest voltage range and step down.

Thermal imaging cameras detect hot spots by measuring infrared radiation. Overloaded circuits, loose connections, and failing components generate heat before they fail completely. A thermal scan of a breaker panel or electrical enclosure reveals temperature differences that point to problem areas. Inspectors and electricians use thermal imaging to find hidden faults in walls, panels, and equipment under load.

Tool Type Primary Use
Non contact voltage tester Quick detection of live wires and confirmation of de-energized circuits without physical contact
Digital multimeter Accurate measurement of voltage, current, resistance, and continuity; requires direct probe contact and safety training
Thermal imaging camera Identification of hot spots, overloaded circuits, loose connections, and failing components by measuring surface temperature
GFCI outlet tester Plug in device that verifies proper GFCI operation, correct wiring, and ground fault trip response

When Electrical Hazards Require Immediate Professional Assistance

az947mOLQYyolrBdS-zOhA

If you see sparks, smoke, or smell burning plastic and can’t locate the source, shut off the main breaker and evacuate the building. Call emergency services if there’s visible fire. Once the space is safe, contact a licensed electrician for an emergency inspection. Don’t attempt to troubleshoot or repair energized equipment yourself.

Repeated breaker trips, warm or hot outlets, buzzing panels, visible arcing, wet electrical equipment, missing or damaged grounding, and any work involving overhead power lines all require professional assessment and repair. Electrical systems carry enough energy to cause fatal shocks, arc flash explosions, and structure fires. Trained electricians have the tools, PPE, and knowledge to work safely on live and de-energized systems. If you’re unsure whether a situation is dangerous, assume it is and call for help. For urgent situations involving fire, water intrusion, or electrical damage that threatens safety or property, reach out to professionals who can coordinate emergency response for fire, water, and electrical damage.

Situations Requiring Licensed Electrician or Emergency Response:

Any outlet, switch, breaker, or panel that sparks, smokes, sizzles, or emits burning odors. Outlets or switches that feel warm or hot to the touch, or show discoloration and melted plastic. Breakers that trip repeatedly after being reset, indicating overcurrent, short circuit, or ground fault.

Wet or water damaged electrical equipment, submerged outlets, flooded panels, or moisture inside enclosures. Missing, damaged, or improperly installed grounding. Ungrounded outlets in wet locations or on portable equipment.

Final Words

If you see buzzing, burning smells, warm or discolored outlets, sparking, or wet equipment, act fast. Stop using the circuit and keep people away.

This post walked you through immediate signs, wiring and grounding checks, wet-area steps, overhead and buried line risks, arc‑flash indicators, practical checklists, and the tools to confirm trouble. Do the monthly inspection and the GFCI test we described.

If you’re unsure, call a licensed electrician. Use this guide on how to identify electrical hazards to spot risks early and protect your home. You’re on the right track.

FAQ

Q: How do you identify electrical hazards?

A: You identify electrical hazards by spotting frayed insulation, exposed wires, warm or discolored outlets, smelling burning odors, hearing buzzing or sizzling, noting frequent breaker trips or wet conditions, and testing with a non-contact tester.

Q: What are the 7 types of electrical hazards?

A: The seven types of electrical hazards are overhead line contact, energized-contact, arc flash, improper grounding, overloaded circuits, damaged insulation/exposed conductors, and wet environments—overhead lines cause about 50% of workplace electrical deaths.

Q: What are the main electrical hazards and examples?

A: The main electrical hazards are overhead line contact (crane or ladder strikes), grounding failures (missing prong, ungrounded outlets), arc flash (panel arcing; temps up to 35,000°F), overloaded circuits (warm outlets, trips), and frayed cords (exposed wire).

How Long Does Flood Damage Restoration Take? Timeline & Phases

0

You’re staring at water damage right now and need to know when your home gets back to normal. Here’s the truth: flood restoration takes anywhere from 3 days to 3 months depending on how bad the damage is, how fast you call for help, and what kind of water you’re dealing with. Most homeowners underestimate the drying phase. That’s where timelines stretch or collapse based on how quickly professionals start equipment, because every hour water sits, it soaks deeper into materials you can’t see.

Flood Damage Restoration Timeline: What to Expect

GuZ2Kk9QT72sCAiS_6pJZA

Flood damage restoration takes anywhere from 3 days to several weeks. It depends on how bad things are, what kind of water you’re dealing with, and which materials got hit. The drying part alone needs 3 to 7 days of equipment running nonstop before anyone can start rebuilding. After your structure hits acceptable moisture levels, you’re looking at another 1 to 2 weeks for material replacement in simple cases. Complex jobs can stretch past 90 days.

Your timeline moves through clear phases:

  1. Minor damage in one room (small bathroom overflow, single supply line leak): 3 to 5 days drying, then 1 to 2 weeks for replacing materials and finishing

  2. Moderate damage across multiple rooms (appliance failure, washing machine overflow spreading to nearby spaces): 5 to 10 days drying, plus 2 to 4 weeks rebuilding

  3. Significant flooding across an entire floor (water heater failure, major pipe burst): 1 to 2 weeks drying and cleanup, plus 4 to 8 weeks removing materials and rebuilding

  4. Severe contamination or structural problems (basement flooding with sewage, water intrusion across multiple floors): 2 to 3 weeks drying and disinfection, plus 8 to 12 weeks for complete reconstruction

How fast you respond changes everything. Professional teams that show up in the first few hours can start pulling water immediately. That cuts drying time and stops secondary problems before they start. Where you live matters too. Teams usually hit properties within city limits in about an hour. Rural spots might wait longer.

The gap between a 5 day project and a 5 week project? That’s usually about how fast you acted. Call professionals within hours of finding flood damage and you’ll cut drying time significantly because moisture hasn’t soaked deep into materials yet. Wait even 24 hours and water migrates into wall cavities, subfloors, insulation. The affected area expands, and so does your timeline.

Taking Immediate Action to Minimize Your Timeline

k9ZAjBMCQs2_36cUpscnlQ

Contact an IICRC certified restoration company within 24 to 48 hours. It prevents mold damage and keeps your timeline shorter. Before mold spores settle into damp drywall and start colonizing your walls, quick action stops them. Shut off your water supply if the source is internal. Document what you can see with photos and videos for insurance. Don’t use electrical outlets or appliances near standing water.

Keep your HVAC running to maintain air circulation and stable temperature. This controls humidity before professionals arrive with industrial equipment. Move portable items and furniture out of affected areas to prevent more absorption and make space for restoration gear. Contact your insurance provider to start claims, but don’t wait for adjuster approval before calling restoration pros. Emergency work typically gets covered even when started before the adjuster shows up.

Emergency Response and Water Extraction Phase of Flood Restoration

L-O5tHrMT3evdhjFuF7u3Q

Water extraction happens fast once professionals arrive. Industrial pumps and truck mounted extraction units clear standing water in 1 to 8 hours depending on volume and access.

Initial assessment runs at the same time as water removal. Technicians measure moisture throughout your property with handheld meters, find the water source, determine contamination category, and map how far water traveled including hidden moisture in wall cavities and under flooring. This assessment guides equipment placement and helps estimate your overall timeline.

Response timing changes by location. Properties within city limits typically see emergency teams within an hour of your call. Rural areas or communities outside the immediate service area might experience 2 to 4 hour windows.

Geographic challenges don’t just slow arrival time. They also impact equipment availability and technician scheduling for monitoring visits throughout your drying phase. Remote properties sometimes need longer restoration timelines simply because daily moisture checks take more coordination, though actual drying duration stays the same once equipment is running.

Structural Drying Time After Flood Damage

iJo24yzXR_OCEMA5cNx1AA

Structural drying needs 3 to 7 days of continuous equipment operation. This is the most time intensive phase. Industrial dehumidifiers pull moisture from the air while air movers create constant circulation across wet surfaces, forcing water vapor out of building materials. Equipment runs 24 hours each day. Extending this phase beyond minimum timeframe is common when working with thick materials, large square footage, or unfavorable conditions.

Dehumidifiers and air movers work as a system. Dehumidifiers extract moisture from air but can’t pull water out of materials on their own. They need air movers to create evaporation at material surfaces. Air movers without dehumidification just circulate humid air without removing moisture from your property. Professional teams position this equipment based on airflow patterns, material density, and moisture meter readings.

Technicians visit every 24 hours to measure moisture in affected materials using digital moisture meters and thermal imaging cameras. Visual dryness means nothing. Drywall can feel dry while holding significant moisture deep in its core. Moisture readings must match levels in unaffected areas before the drying phase is complete. This verification prevents hidden moisture from causing mold growth or material deterioration after equipment gets removed.

Environmental conditions add days when temperature and humidity work against the equipment. Hot and humid summer conditions in regions with high outdoor humidity force dehumidifiers to work harder and longer. Cold temperatures slow evaporation rates. High indoor humidity from cooking, showering, or laundry extends the drying phase. Restoration teams adjust equipment counts and monitor more frequently when conditions aren’t ideal.

Drying Phase Activity Typical Duration Equipment Used
Initial drying setup and equipment placement 2 to 4 hours Industrial dehumidifiers, air movers, moisture meters
Continuous dehumidification operation 3 to 7 days Dehumidifiers running 24 hours, air movers repositioned as needed
Daily monitoring and moisture measurement 15 to 30 minutes per visit over 3 to 7 days Moisture meters, thermal imaging cameras, humidity sensors
Final moisture verification before equipment removal 1 to 2 hours Comprehensive moisture meter readings throughout affected areas

Mold Prevention During the Drying Phase

nAcIGp0tQXmj55-D9aKWKQ

Antimicrobial treatments get applied to affected surfaces during drying to prevent mold spores from establishing growth. The EPA recommends addressing water damage within 24 to 48 hours specifically because mold can begin growing within this window once moisture creates favorable conditions. Quick professional response keeps you within this timeframe and allows preventive treatment before mold appears.

Finding active mold growth adds weeks to your restoration timeline. Remediation requires containment protocols, specialized air filtration, material removal procedures, and post remediation verification testing. Containment barriers prevent mold spores from spreading to unaffected areas, but they also slow down drying in the contained space and add complexity to equipment placement. Material removal extends beyond flood damaged components to include any porous surfaces with visible mold, which increases reconstruction scope and duration.

How Water Contamination Level Affects Restoration Duration

EzrYiQTWR5K35zwEEbkD7w

Water contamination category determines cleaning requirements, protective equipment needs, material disposal protocols, and antimicrobial treatment intensity. All of which directly impact how long your restoration takes.

Category 1: Clean Water Incidents

xWobkHNiQFaA9e8pMHBKbg

Category 1 water comes from sanitary sources like broken supply lines, sink overflows, or failed appliance hoses carrying fresh water. This classification allows the fastest restoration timeline because it doesn’t require extensive disinfection protocols or automatic material disposal. Affected materials can often be dried and salvaged rather than removed, which eliminates the reconstruction phase for many Category 1 incidents. Cleanup focuses on water extraction and structural drying without the antimicrobial treatments and protective barriers needed for contaminated water.

Category 2: Gray Water Contamination

f5JjDh5cRaagyaAibtlhww

Category 2 water contains some contamination from sources like washing machine overflows, dishwasher backups, or toilet overflows without feces. Gray water is the most common contamination level in residential flood restoration. This category requires more thorough cleaning than Category 1 because the water carries detergents, food particles, or mild chemical contamination. Affected materials need antimicrobial treatment during drying, and porous materials with significant gray water exposure often require removal rather than drying. Cleanup and disinfection typically completes within 1 day once drying is finished.

Category 3: Black Water and Sewage

WNnsOfarR0SammbSyscV_g

Category 3 water involves sewage backups, floodwater from rivers or storm surge, or any water that contacted soil or raw sewage. Black water demands the most extensive restoration protocols because it contains harmful bacteria, viruses, and potential chemical or biological hazards. Restoration teams wear protective equipment during all work phases, and contaminated porous materials face immediate removal regardless of drying potential. All affected surfaces require antimicrobial treatment and disinfection, which takes about 1 day for actual cleaning but extends overall timeline because of increased material removal scope. Category 3 incidents consistently push restoration toward the longer end of the timeline range, especially when contamination affects multiple rooms or floor levels.

Building Materials That Extend Flood Damage Restoration Time

rouURgiiSKe14uvLpsFSZQ

Building materials respond to flood damage based on their porosity and density. Porous materials absorb water deeply and need extended drying time compared to non-porous surfaces like ceramic tile or sealed concrete. Square footage multiplies these material challenges. A 500 square foot basement requires different equipment counts than a 200 square foot bathroom, even when the same materials are involved.

Different materials create distinct timeline expectations:

Drywall absorbs moisture extensively through its gypsum core and paper facing, typically requiring removal and replacement rather than drying when water exposure is significant. Removal and replacement adds 5 to 10 days beyond the drying phase.

Carpet and padding hold water against the subfloor and face removal in most flood scenarios because padding rarely dries adequately before mold risk becomes unacceptable. Carpet removal happens quickly (same day) but replacement scheduling depends on material selection and installation availability.

Hardwood flooring can sometimes be dried and saved if water extraction happens within hours, but cupping, warping, or moisture penetration into the subfloor usually requires board replacement. Hardwood restoration decisions take 3 to 5 days after drying completes as boards stabilize and reveal whether they’ll return to acceptable flatness.

Laminate flooring swells when moisture reaches the fiberboard core and faces replacement in nearly all flood situations. Laminate removal and replacement typically takes 3 to 7 days depending on square footage.

Ceramic tile resists water damage but allows moisture to reach the grout, thinset, and subfloor beneath. Tile can often stay in place while the subfloor dries through grout joints, extending drying time but eliminating tile replacement from the timeline.

Concrete and sealed surfaces dry relatively quickly because water doesn’t penetrate deeply, though moisture can still collect in cracks or beneath surface coatings. Concrete drying takes 5 to 7 days in most residential scenarios.
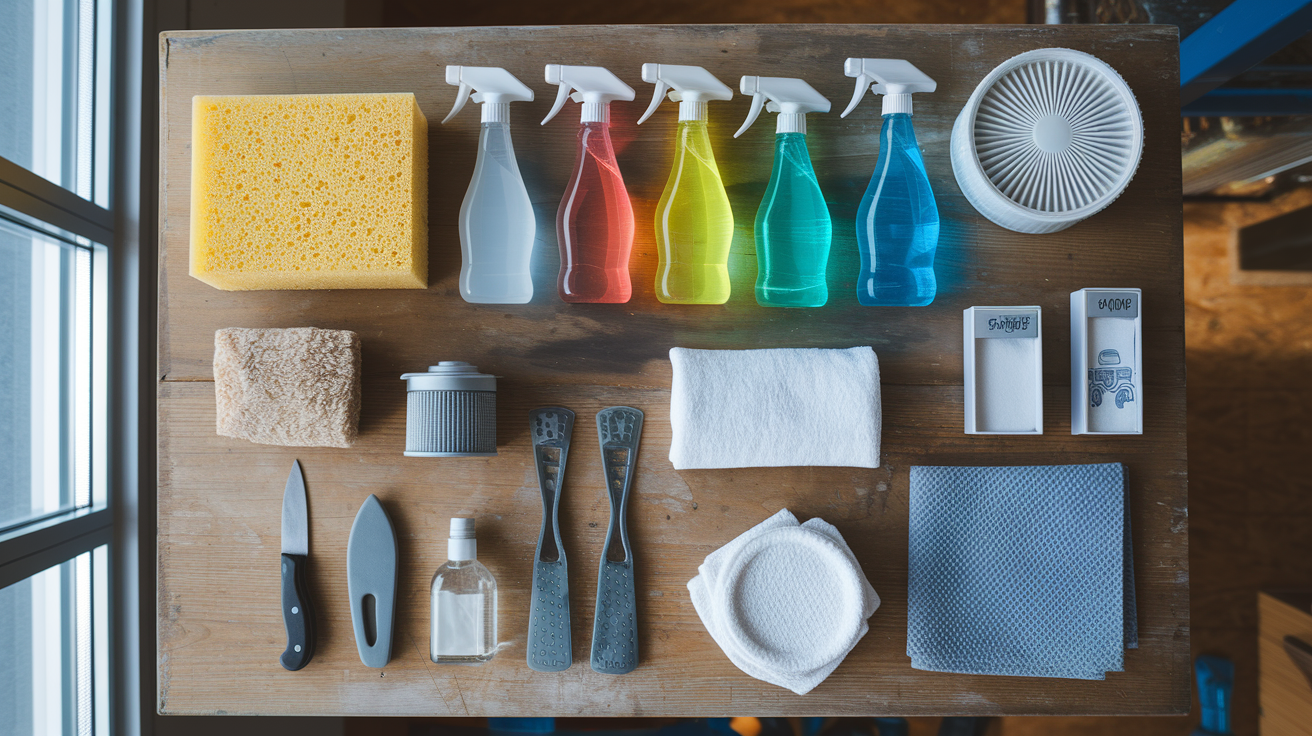
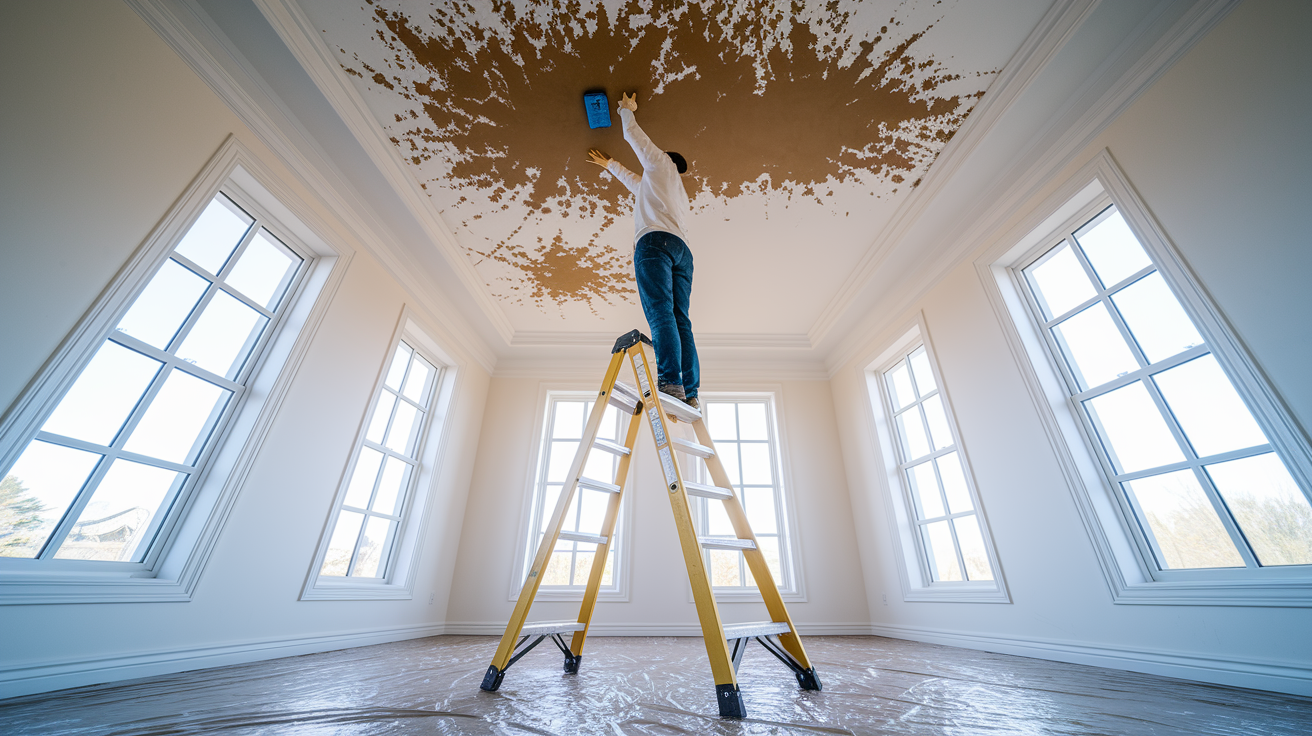
Material removal happens once the drying phase confirms which components can’t be salvaged. This removal work takes 1 to 5 days depending on damage extent, with single room projects on the shorter end and whole floor material removal reaching the upper end. Insulation removal adds time when wall cavities were affected, and subfloor replacement extends the timeline because it’s foundational work that must finish before flooring installation can begin.

Insurance Claims and Their Effect on Restoration Duration

Insurance adjuster availability creates unpredictable delays. Some adjusters schedule site visits within 24 to 48 hours, while others appear near the end of restoration work. This can stall reconstruction phases if the adjuster needs to approve scope or additional work.

Most homeowners insurance policies cover water damage from sudden events like burst pipes, failed appliances, or roof leaks during storms. Flood damage from external sources like river overflow, storm surge, or ground saturation requires separate flood insurance through the National Flood Insurance Program or private flood carriers. Understanding which policy applies prevents delays. Filing a claim with the wrong policy type adds days or weeks while paperwork gets redirected. For detailed guidance on navigating different coverage types and the claims filing process, review Understanding Water Damage Insurance Claims.

Documentation requirements protect your timeline by providing clear evidence of damage extent and restoration necessity. Take photos and videos immediately after discovering flood damage, before any water removal begins. Continue documenting throughout the restoration process, capturing moisture readings, equipment placement, material removal, and reconstruction progress. Complete documentation prevents adjuster disputes that delay payment authorization and slow down contractor work.

Restoration companies that work directly with insurance providers streamline the claims process by submitting estimates, progress reports, and completion documentation in the formats adjusters expect. This coordination reduces back and forth communication delays and keeps projects moving forward while claims processing continues in the background.

Cleanup and Repair Phase Duration in Flood Restoration

Sanitization and odor removal procedures complete within 1 day for both Category 2 and Category 3 contamination once structural drying finishes. Technicians apply antimicrobial solutions to all affected surfaces, treat any remaining odor sources, and verify that disinfection protocols met safety standards.

Reconstruction timelines range from 30 to 90 days based on damage extent and complexity. Simple projects like drywall replacement in a single room or carpet installation take at least 30 days when you account for material ordering, contractor scheduling, and finishing work like painting and trim installation. Complex reconstruction involving multiple rooms, structural repairs, or custom finishes extends toward the 90 day mark. Inspection duration varies from 1 hour for small properties with limited damage to 4 hours for larger spaces requiring extensive documentation and moisture verification in multiple areas.

Repair scenarios create different timeline expectations:

Carpet replacement in one or two rooms: 30 to 35 days including material selection, ordering, delivery, and installation with baseboards reinstalled

Drywall repair and repainting for a single wall or room: 35 to 45 days accounting for drywall installation, taping, mudding, sanding, priming, and finish painting with proper dry time between coats

Flooring replacement in multiple rooms: 45 to 60 days depending on material type, with hardwood requiring longer timelines than laminate or vinyl plank due to acclimation requirements

Multiple room reconstruction including walls, flooring, and trim: 60 to 75 days for coordinated work sequences where drywall must finish before flooring installation, and flooring must complete before trim and painting

Full basement restoration with structural repairs: 75 to 90 days when foundation sealing, subfloor replacement, wall reconstruction, and mechanical system work all need coordination

Final inspection and walkthrough take 1 day. The restoration team reviews completed work with you, confirms that all moisture levels remain acceptable, verifies that materials match adjacent unaffected areas, and documents project completion for insurance submission.

When You Can Return Home During Flood Restoration

Minor to moderate damage affecting one or two rooms typically allows families to stay home throughout restoration. Equipment noise and activity create some disruption, but when flooding is contained to a bathroom, laundry room, or kitchen, the rest of your home remains livable. Technicians set up containment barriers to separate work areas from occupied spaces, and you can continue daily routines in unaffected rooms.

Extensive flooding or sewage backups may require temporary relocation for safety. Category 3 water contamination creates health hazards that make occupancy unsafe until disinfection completes.

Restoration equipment operates continuously throughout the drying phase, running 24 hours each day to maintain consistent dehumidification. Technicians visit daily to monitor progress, check moisture readings, and reposition air movers as needed, but these visits typically last 15 to 30 minutes unless equipment needs adjustment or additional units. You won’t have crews working in your home around the clock. Just equipment running and brief daily check ins.

Certified restoration professionals assess habitability at the start of each project and provide clear recommendations about whether you should stay or relocate temporarily. IICRC standards guide these safety determinations based on contamination level, structural stability, and affected square footage. Trust the assessment. Staying in an unsafe environment creates health risks that aren’t worth the convenience of remaining home.

Final Words

Most flood restoration projects take 3 days to several weeks depending on damage severity and building materials affected. The drying phase alone requires 3 to 7 days of continuous equipment operation before repairs can begin.

Your timeline depends on how fast you act. Professional response within 24 to 48 hours prevents mold growth and shortens the overall duration significantly.

Once structural drying completes, reconstruction adds another 30 to 90 days for material replacement and finish work. But here’s the good news: knowing how long does flood damage restoration take helps you plan for temporary housing, coordinate with insurance, and understand what’s happening at each stage.

We’ll keep you informed every step of the way so you’re never guessing what comes next.

FAQ

How long does water damage restoration take?

Water damage restoration takes 3 days to several weeks depending on damage severity, with drying alone requiring 3-7 days before repairs begin. Small incidents like bathroom overflows may complete in 48 hours, while flooded basements with contaminated water could take weeks to fully restore.

Is water damage restoration worth it?

Water damage restoration is worth it because quick professional response prevents secondary mold damage, protects your home’s structural integrity, and reduces overall repair costs. Addressing water damage within 24-48 hours stops minor problems from becoming extensive reconstruction projects that cost significantly more.

How to tell if water damage is permanent?

Water damage becomes permanent when materials remain saturated beyond safe drying timeframes, creating mold growth, structural deterioration, or warping that requires replacement. Professional moisture meters and thermal imaging confirm whether materials have dried completely or need removal, as visual dryness alone doesn’t guarantee safe moisture levels.

How long does it take to recover from flood damage?

Recovery from flood damage takes 3 days to several weeks, starting with 1-8 hours for water extraction, followed by 3-7 days of continuous drying, and then 30-90 days for reconstruction if materials need replacement. Category 3 black water and porous materials like drywall extend timelines compared to clean water incidents affecting non-porous surfaces.

What happens during the emergency response phase?

The emergency response phase happens within 1-4 hours of contact and includes initial damage assessment and water extraction using industrial pumps. Standing water removal takes 1-8 hours depending on volume, with response times faster within city limits than rural areas.

How long does structural drying take after flooding?

Structural drying takes 3-7 days of continuous dehumidifier and air mover operation, with technicians monitoring moisture levels daily using meters and thermal imaging. Drying is complete only when moisture readings match unaffected areas, not when surfaces appear visually dry, as hidden moisture causes secondary damage.

Does water contamination category affect restoration time?

Water contamination category directly affects restoration time, with Category 1 clean water restoring fastest, Category 2 gray water requiring more thorough cleaning, and Category 3 black water demanding the most extensive protocols. Black water from sewage or floodwater requires antimicrobial treatment and often material removal, significantly extending timelines.

Which building materials take longest to dry?

Porous building materials like drywall, carpet, and hardwood floors take longest to dry because they absorb more water than non-porous surfaces like tile or concrete. Material removal takes 1-5 days when drying proves insufficient, with larger square footage requiring more equipment and extended drying duration.

How do insurance claims delay flood restoration?

Insurance claims delay flood restoration when adjusters take time to schedule inspections or when documentation requirements slow approval processes. Working with restoration companies that coordinate directly with insurance providers and maintaining clear damage documentation prevents unnecessary timeline extensions and claim complications.

Can I stay home during flood restoration?

You can stay home during flood restoration if damage affects only one or two rooms with minor to moderate severity. Extensive flooding, sewage backups, or structural safety concerns require temporary relocation, with certified technicians assessing habitability and providing clear recommendations about safe occupancy.

How long does the cleanup phase take?

The cleanup phase takes 1 day for sanitization and disinfection regardless of contamination category, followed by 30-90 days for reconstruction depending on repair complexity. Simple projects like carpet replacement complete in 30 days, while extensive multi-room reconstruction extends to 90 days.
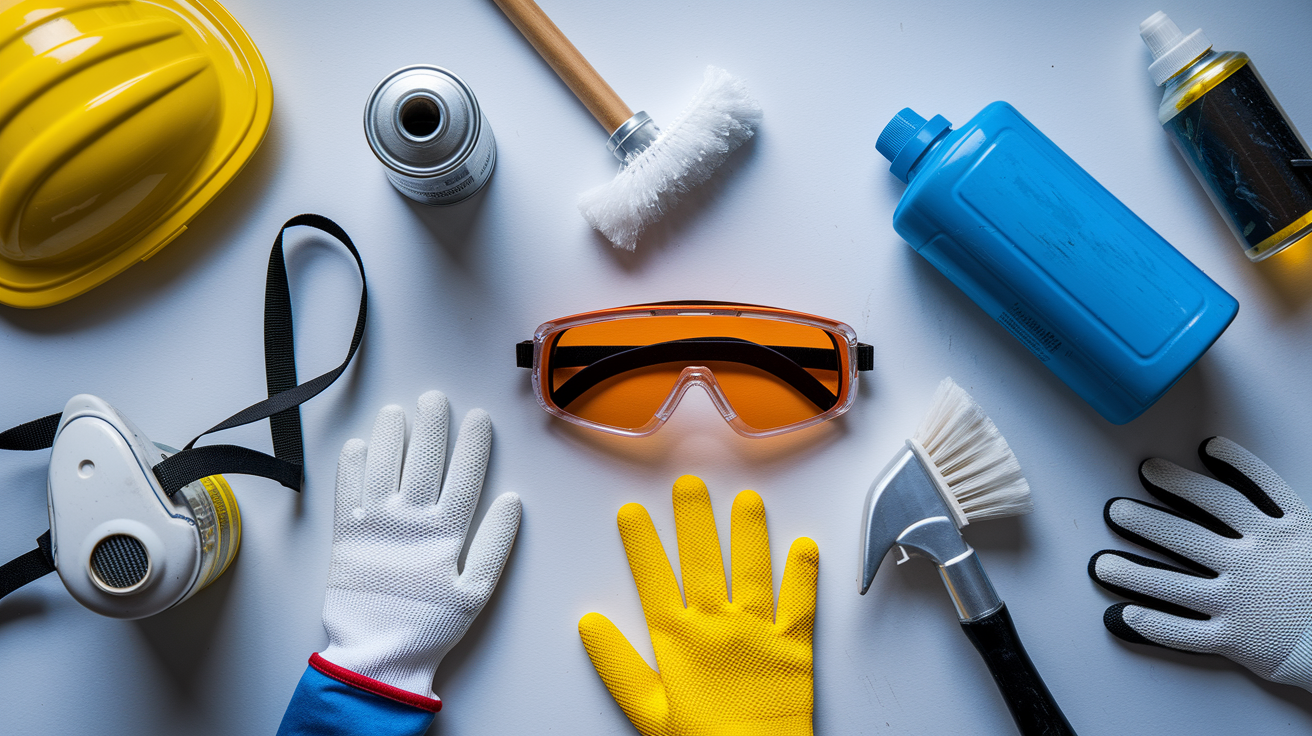
What determines if restoration takes days or weeks?

Restoration duration depends on water contamination level, affected square footage, building material types, and response time after initial damage. Quick professional contact within 24-48 hours, clean water sources, and non-porous materials push timelines toward the shorter 3-day range, while delayed response, black water, and porous materials extend restoration to several weeks.