Home Blog Page 2

Water Extraction: Quick Recovery From Flood Damage

0

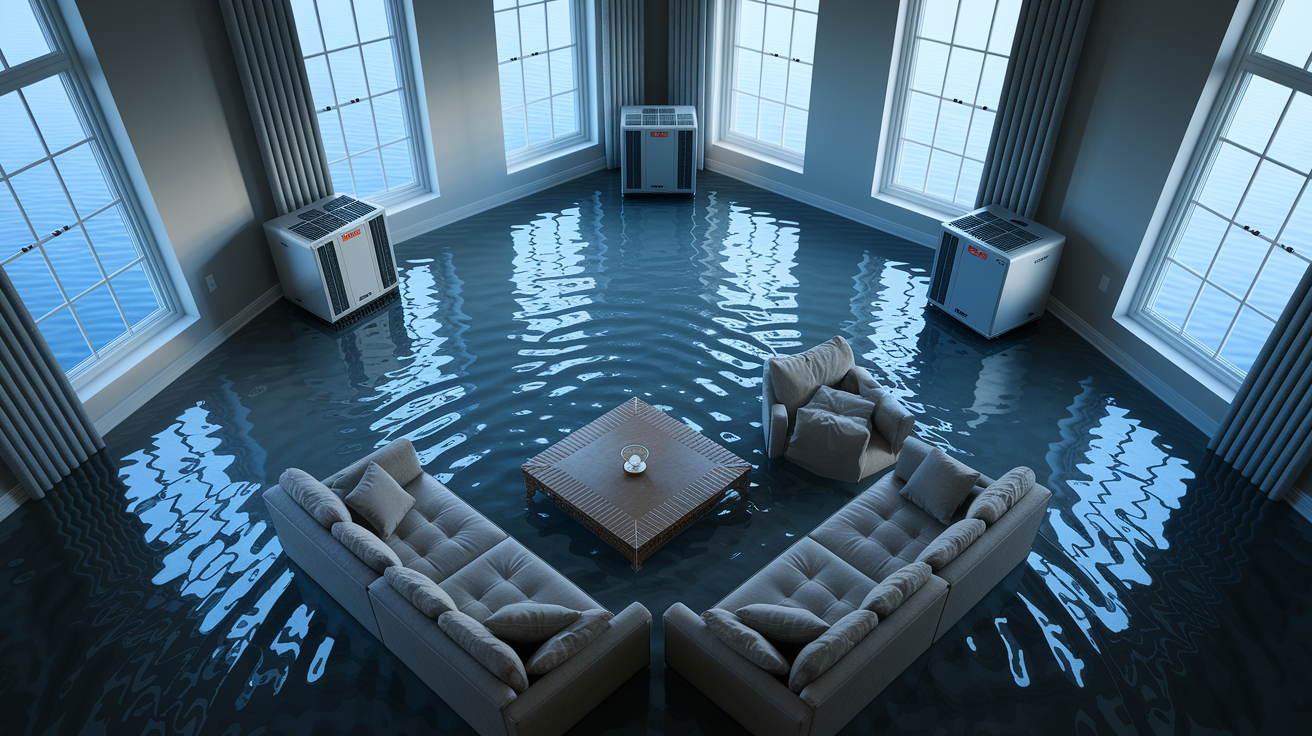
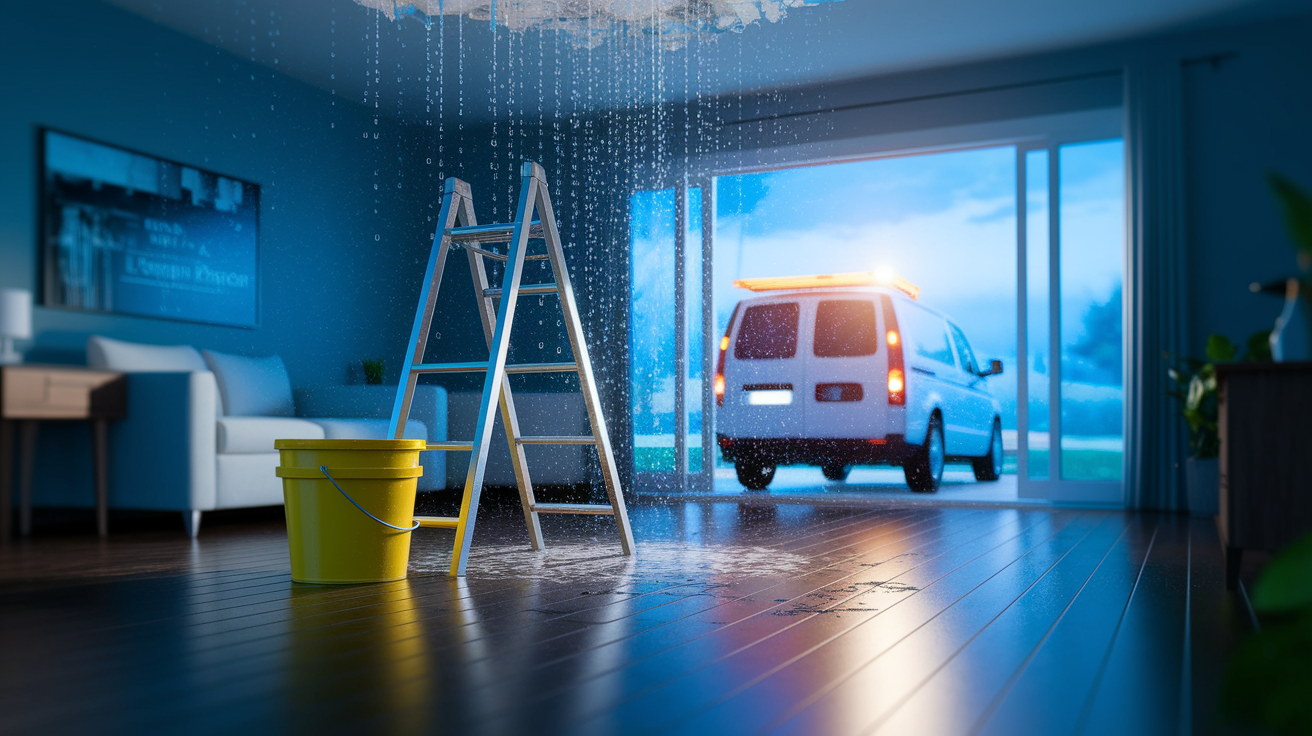
Flood damage can quickly put your home and family at risk. We act fast to remove standing water (this is called water extraction) so that mold does not start growing hidden damage. Imagine a giant vacuum that soaks up spills before they seep into your walls and floors.

We use strong pumps (machines that quickly move water) and heavy-duty vacuums (tools built to clean hard-to-reach areas) to restore your home fast. Taking action early protects your family and helps secure your home again.

Core Water Extraction Techniques Explained

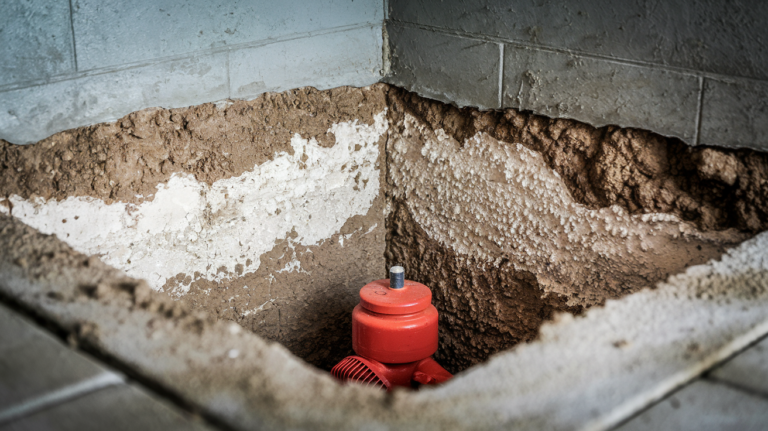
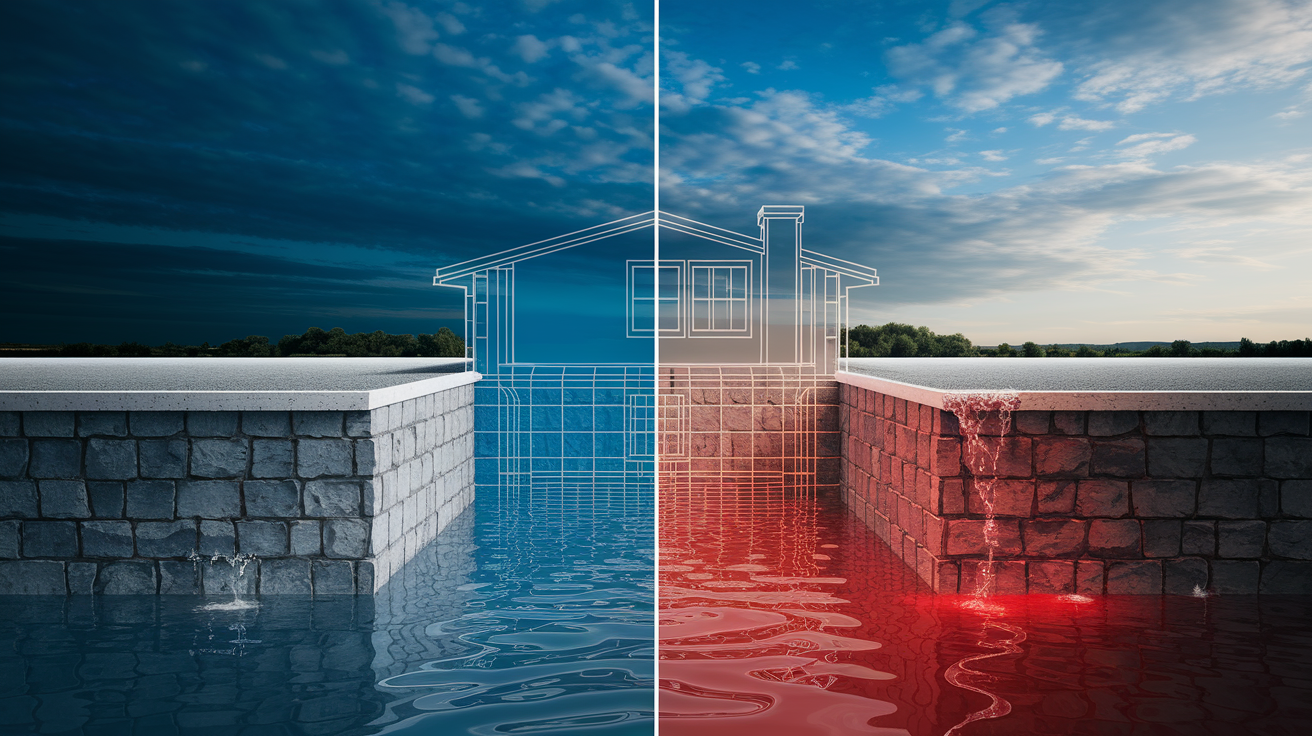
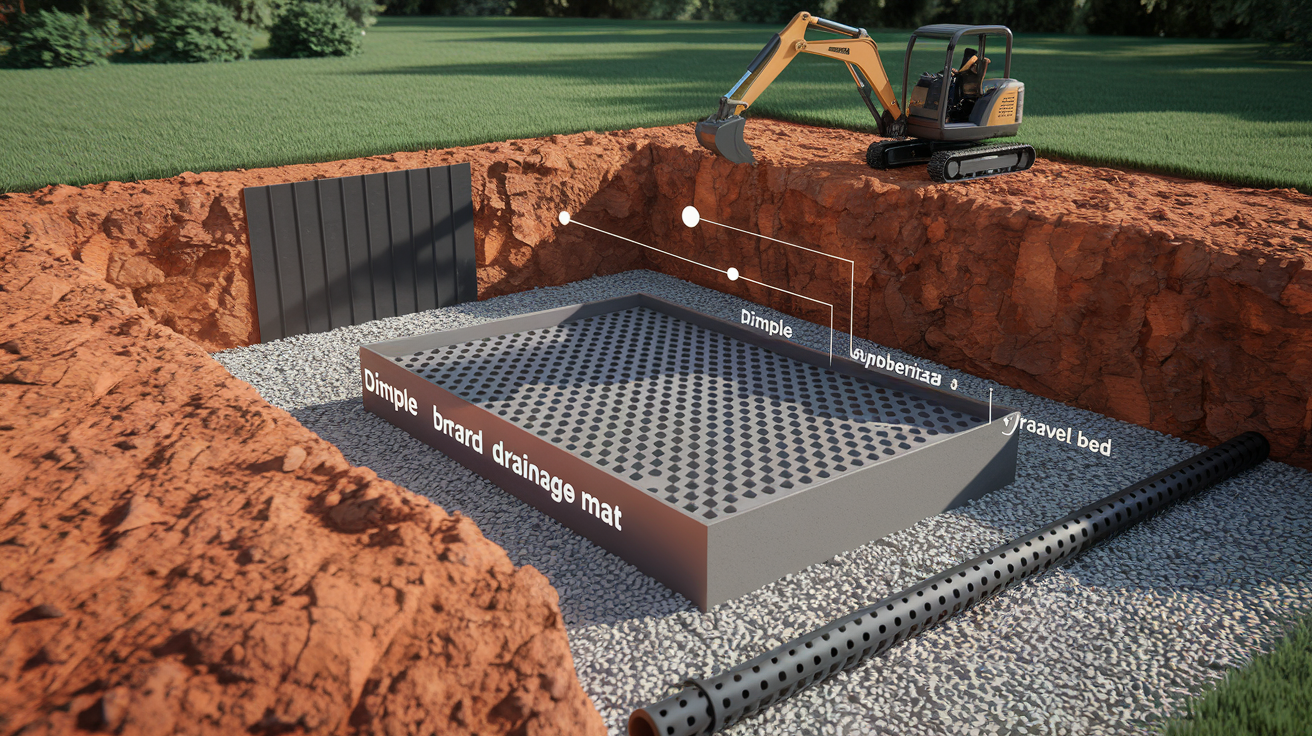
Water extraction means taking out standing water from your home with powerful tools like submersible pumps (machines that push or pull water) and industrial vacuums (big, heavy-duty vacuums). We do this to stop water from seeping into your house’s foundation and causing hidden damage that might weaken its support.

When a flood leaves water on floors and surfaces, it can hurt your home’s strength. We clear water fast, just like using a giant vacuum to clean up spills before they damage important parts of your house.

Quick water removal is key because mold can start growing in just 24 to 48 hours. Mold (a fungus that can cause allergies and asthma attacks) can put your family’s health at risk. That’s why we act fast to reduce hazards and keep your air safe. If there’s a risk of mold, we follow a proper cleanup process to make sure your indoor environment stays healthy.

By taking quick action, we help prevent further complications and work to get your home back to normal sooner.

Water Extraction Equipment and Methods

img-1.jpg

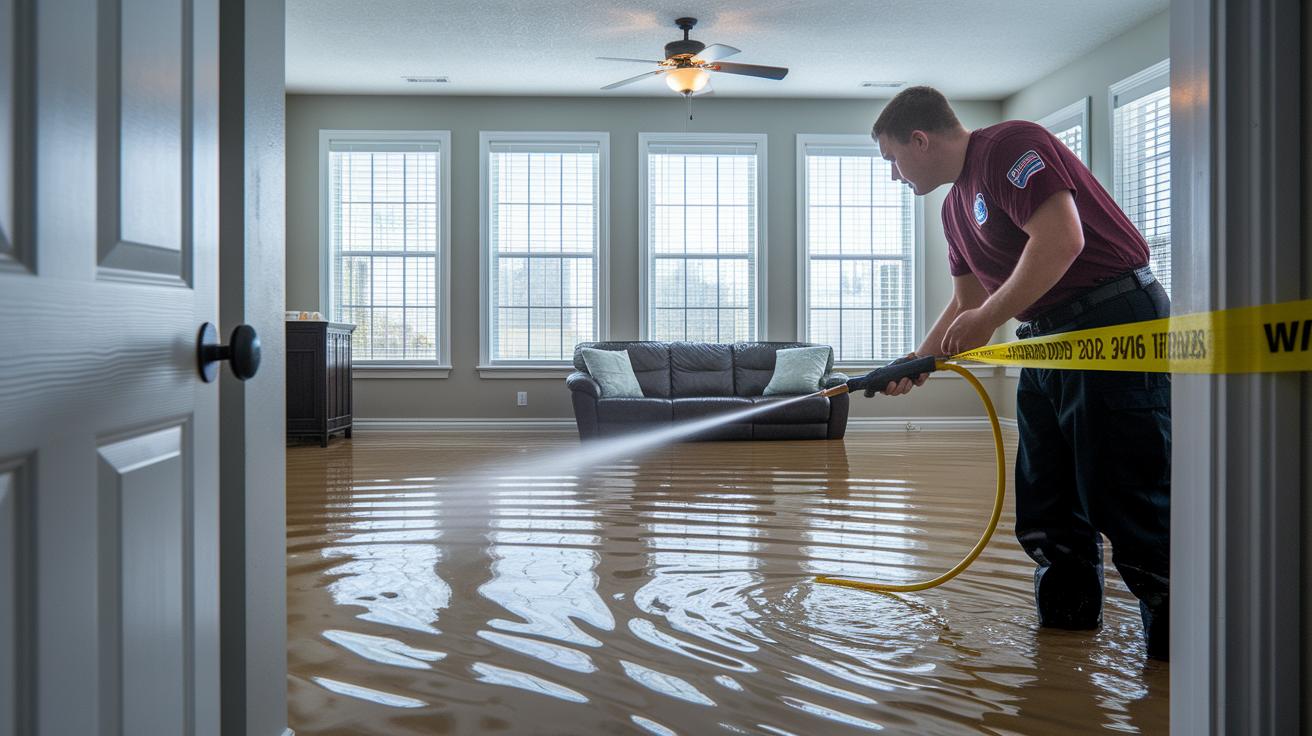
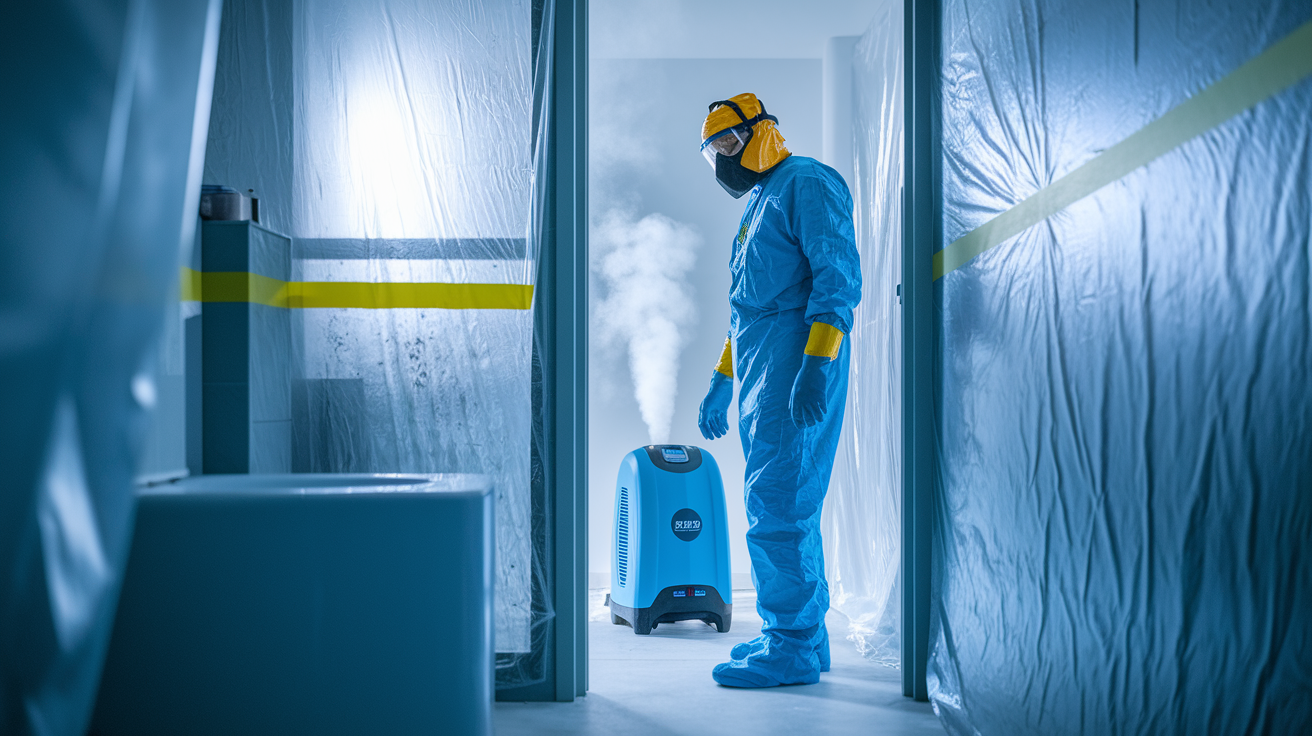
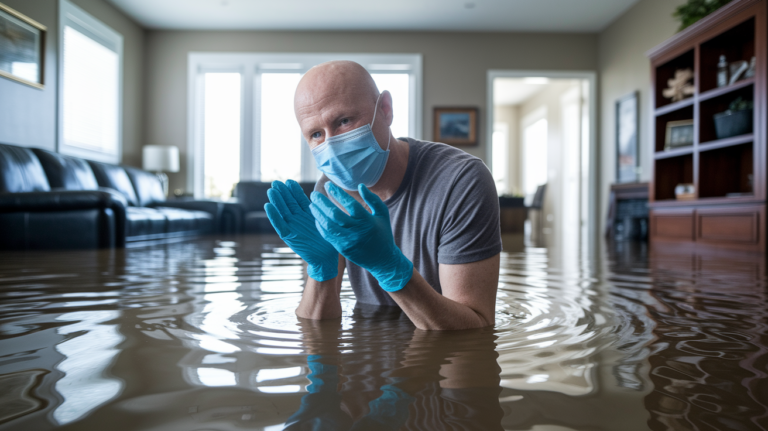
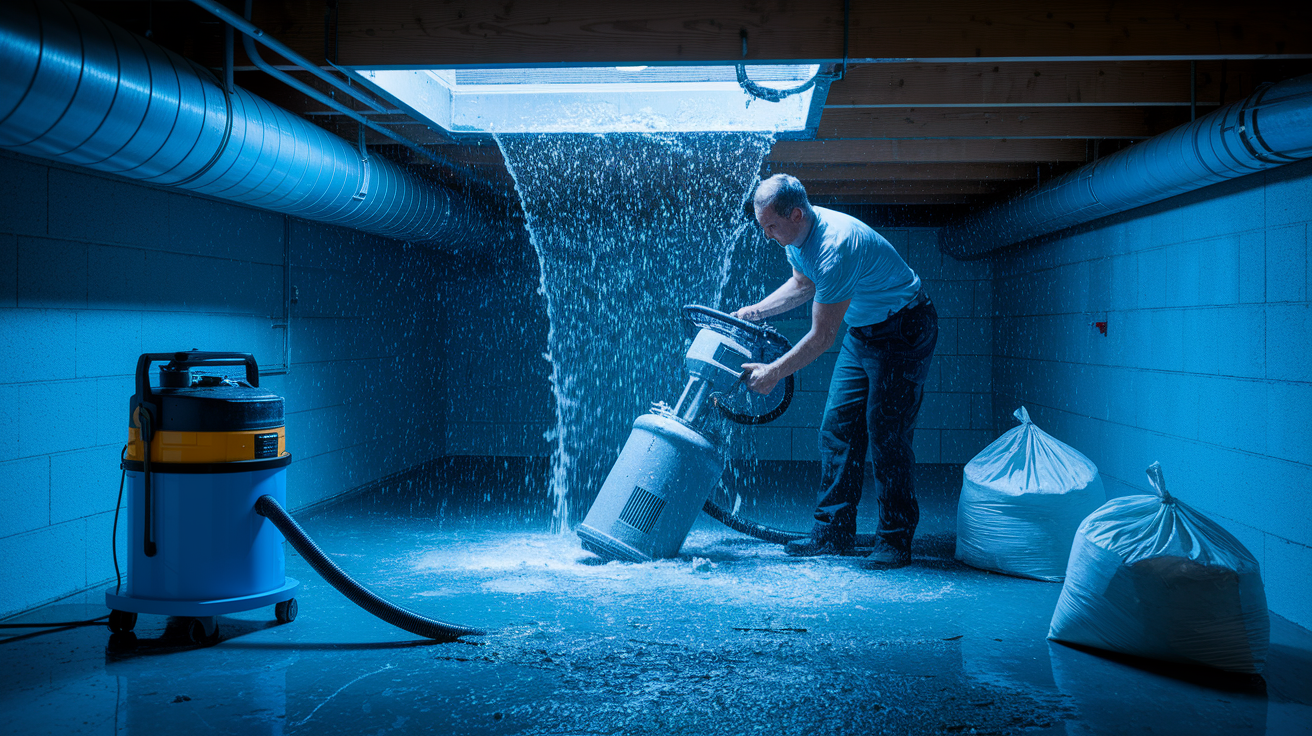
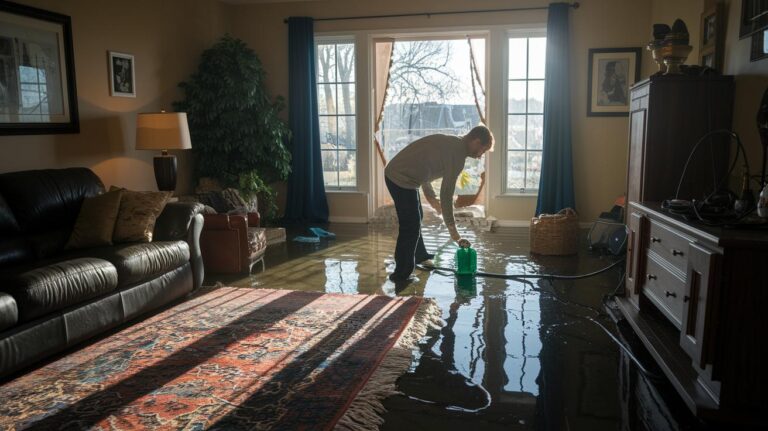
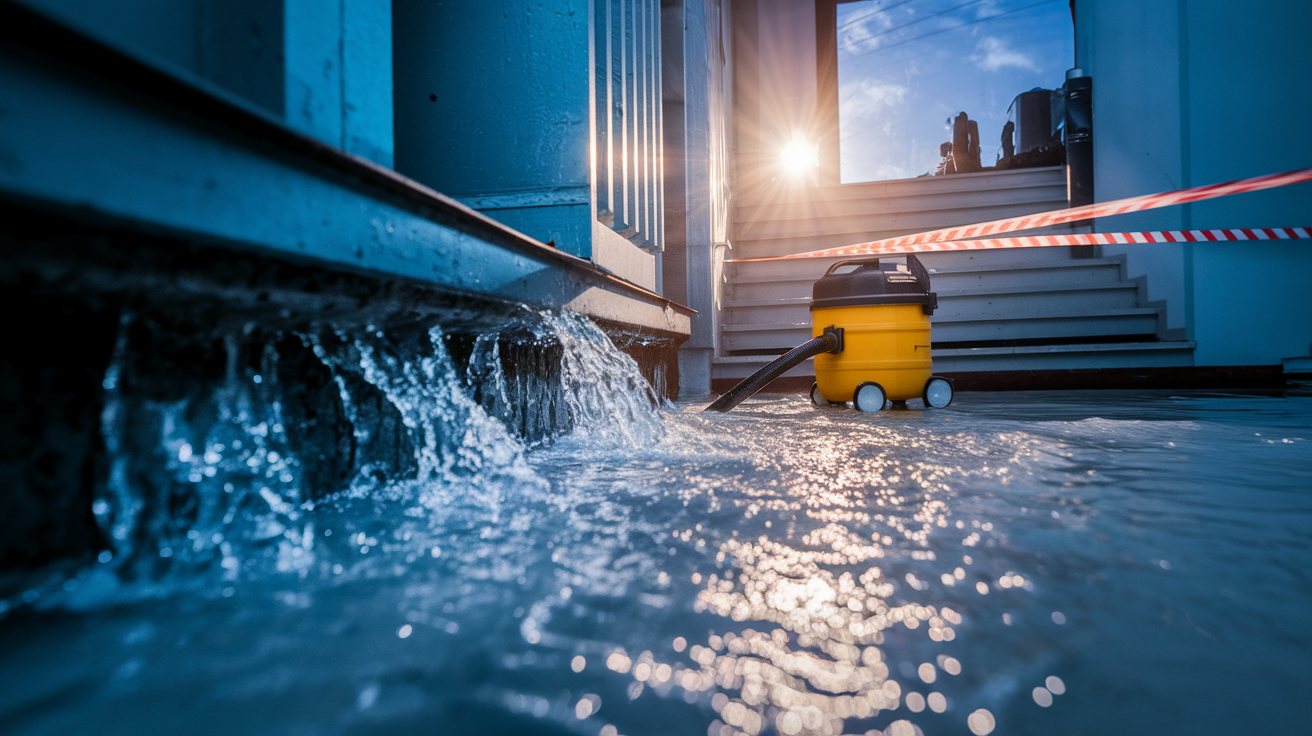
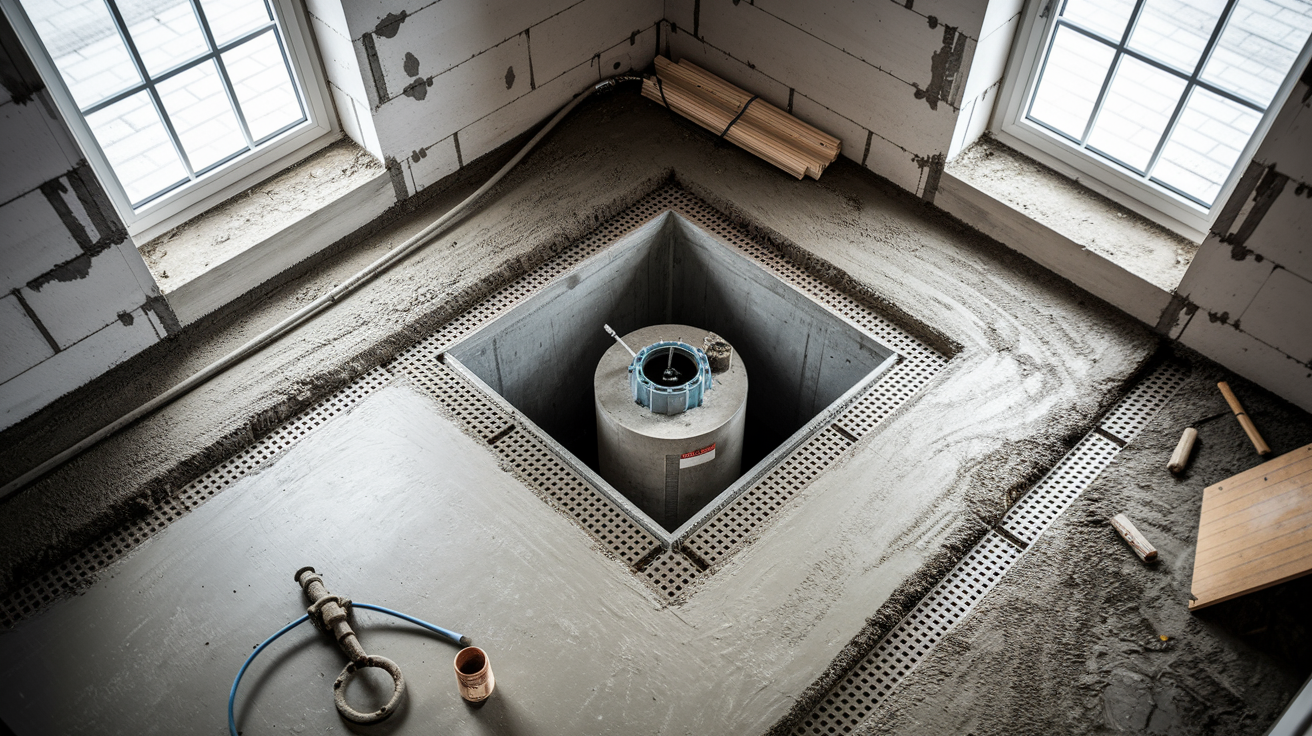
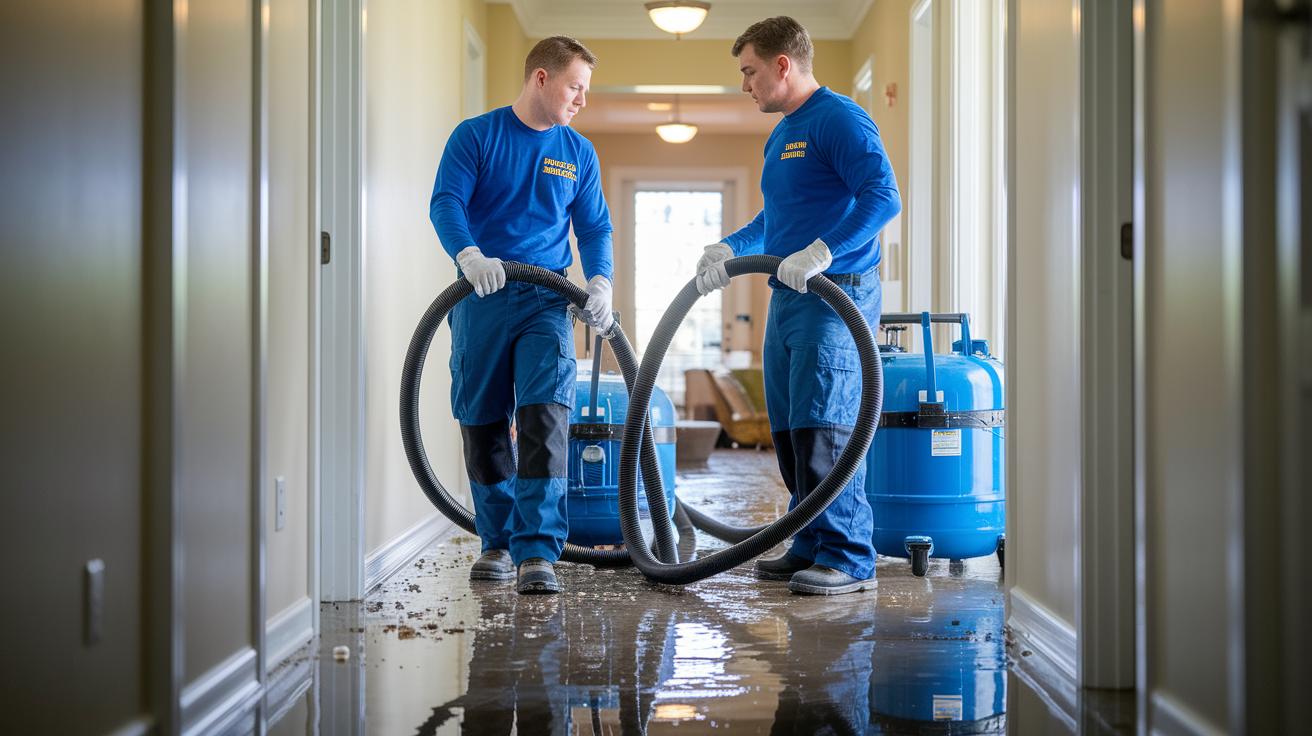
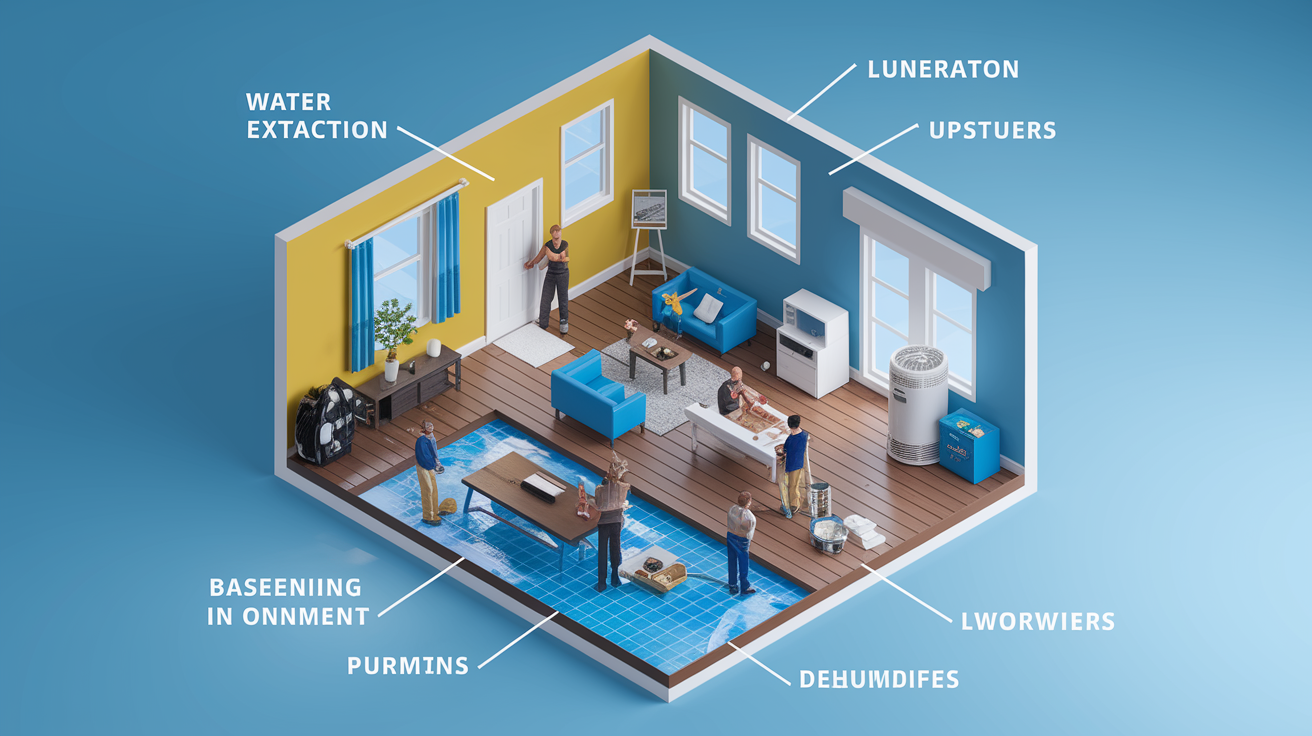
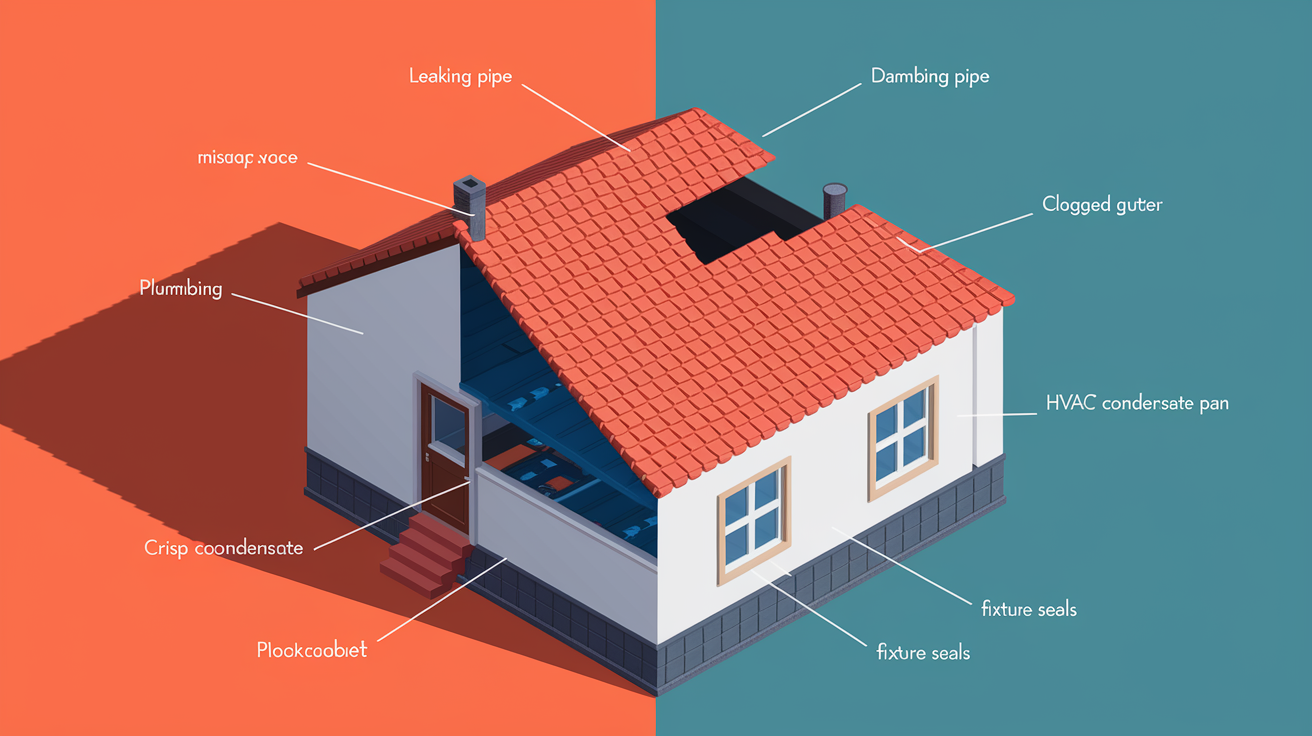
When water enters your home, we act fast to remove it using the right tools. Our equipment pulls water and moisture out so your home can dry quickly.

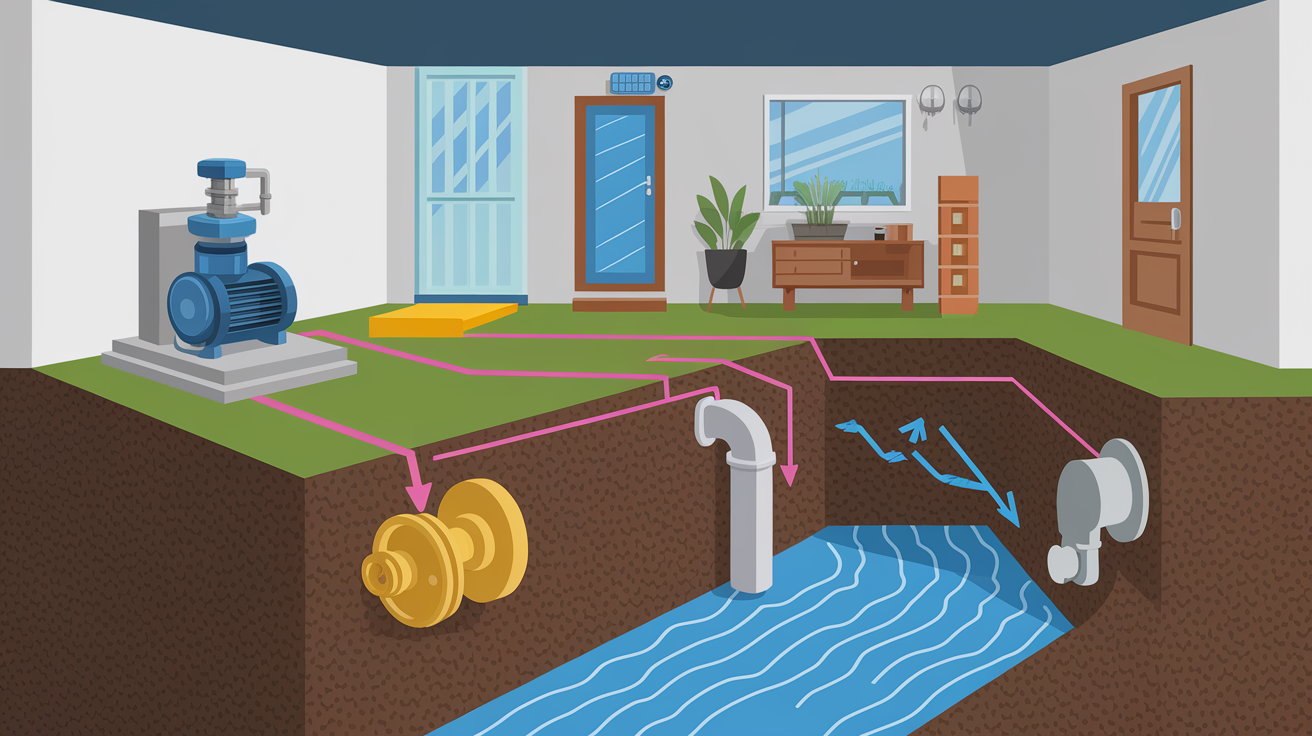
Submersible pumps work like a fast pump to clear large amounts of water. They can pump between 500 and 1,000 gallons per hour. We place them directly in the water so they start working right away. This helps prevent water from seeping into your home’s foundation.

Our industrial wet/dry vacuums are built for tough jobs. They have strong motors (5–10 horsepower, which is a measure of engine power) that let them suck up water from floors and tight spots. They also use filters to catch tiny particles, leaving the space cleaner.

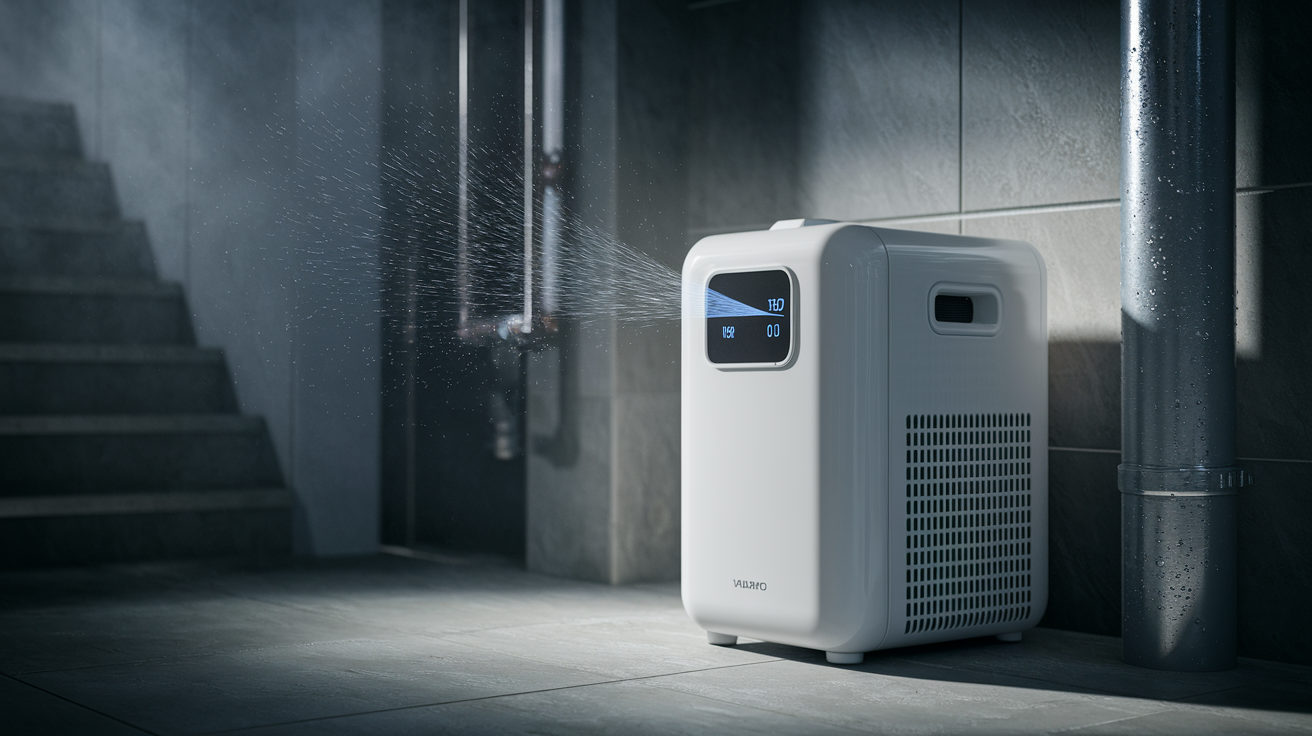
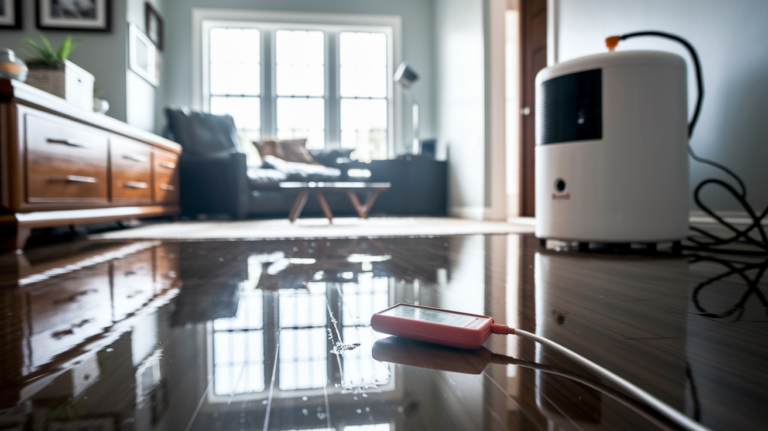
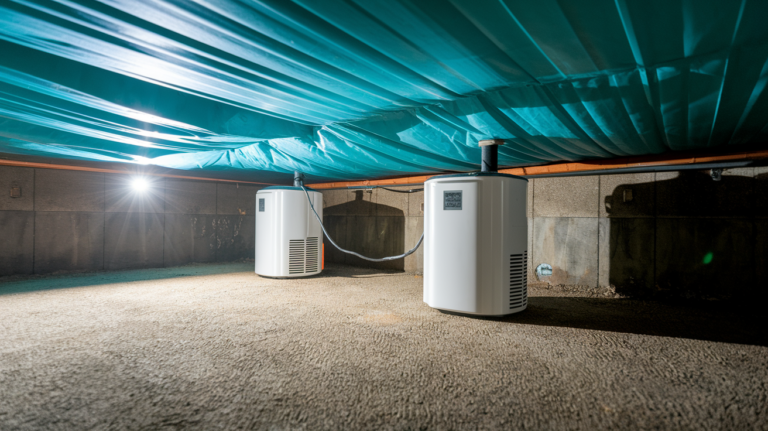
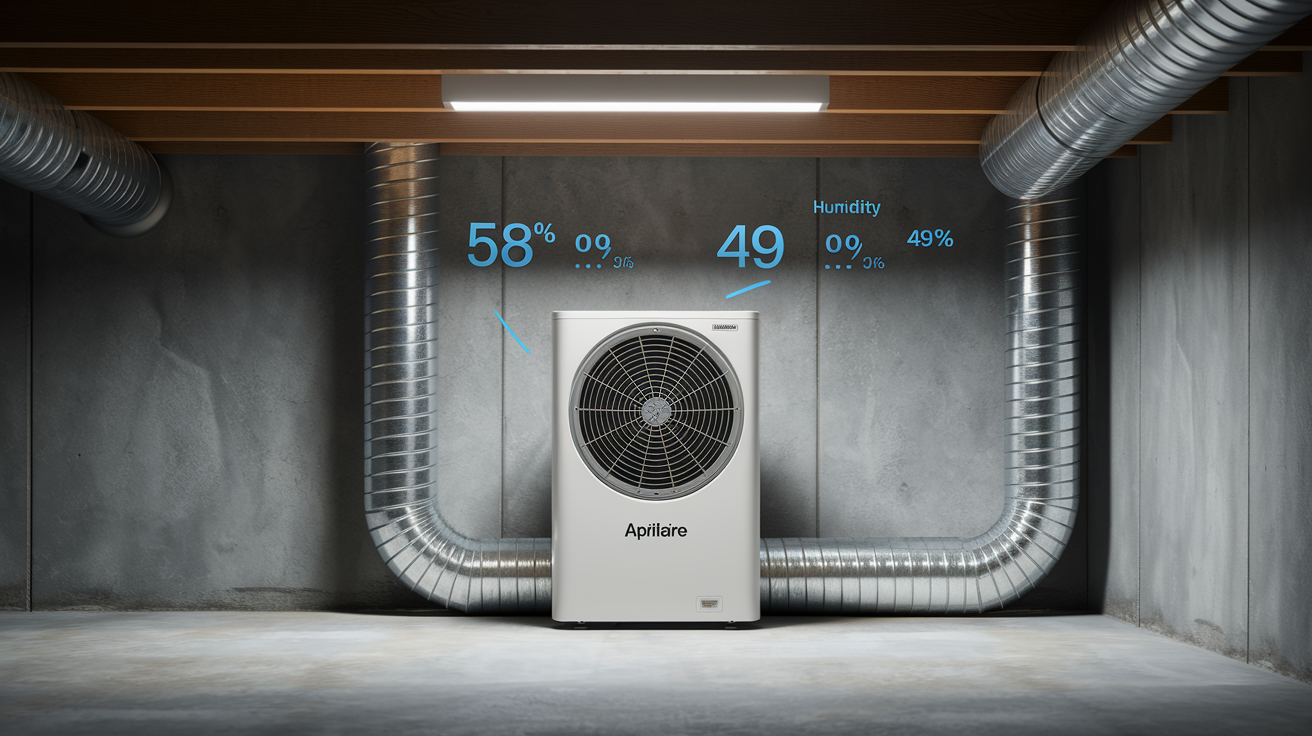
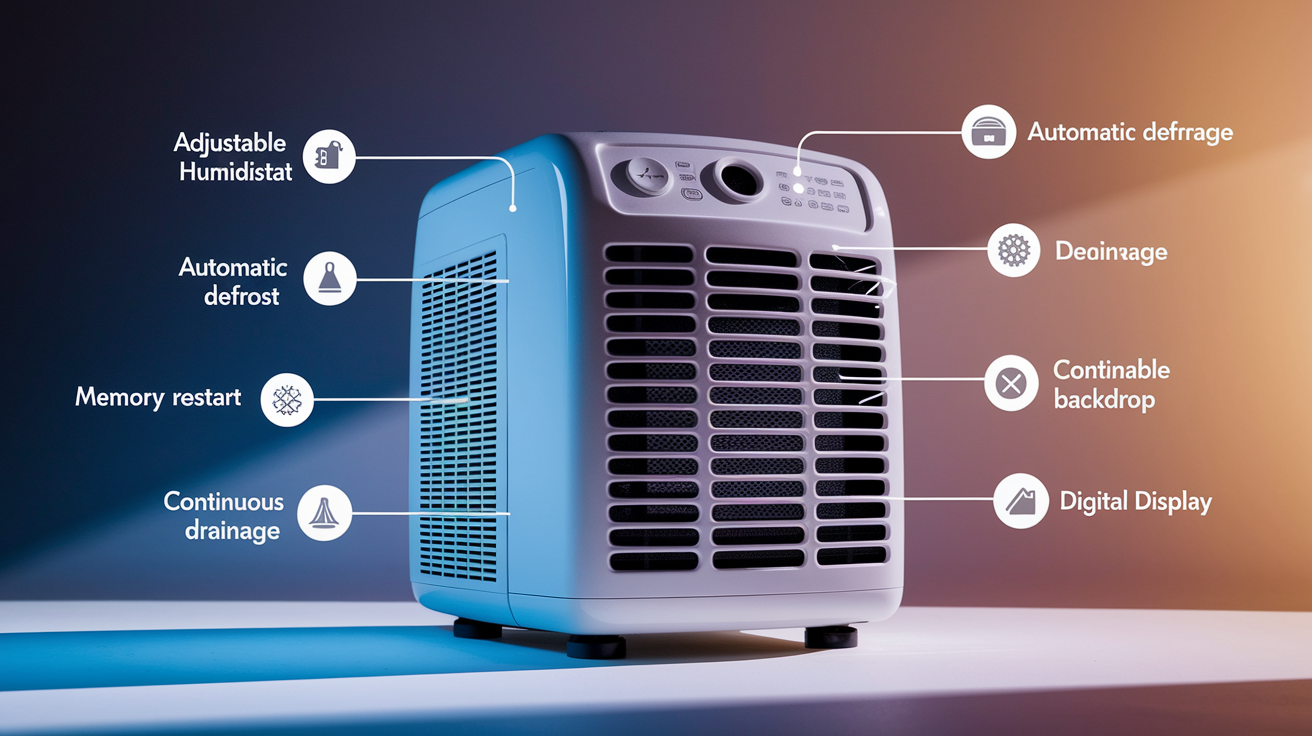
Portable dehumidifiers help dry the air. They remove about 50 to 70 pints of moisture each day. Placing them where water damage occurred helps lower humidity and stops mold from growing.

Equipment Primary Use Capacity
Submersible Pump Fast water removal 500–1,000 GPH
Industrial Wet/Dry Vacuum Suction from floors and hidden spots 5–10 HP
Portable Dehumidifier Lowering air moisture 50–70 pints/day

Comparing DIY vs. Professional Water Extraction

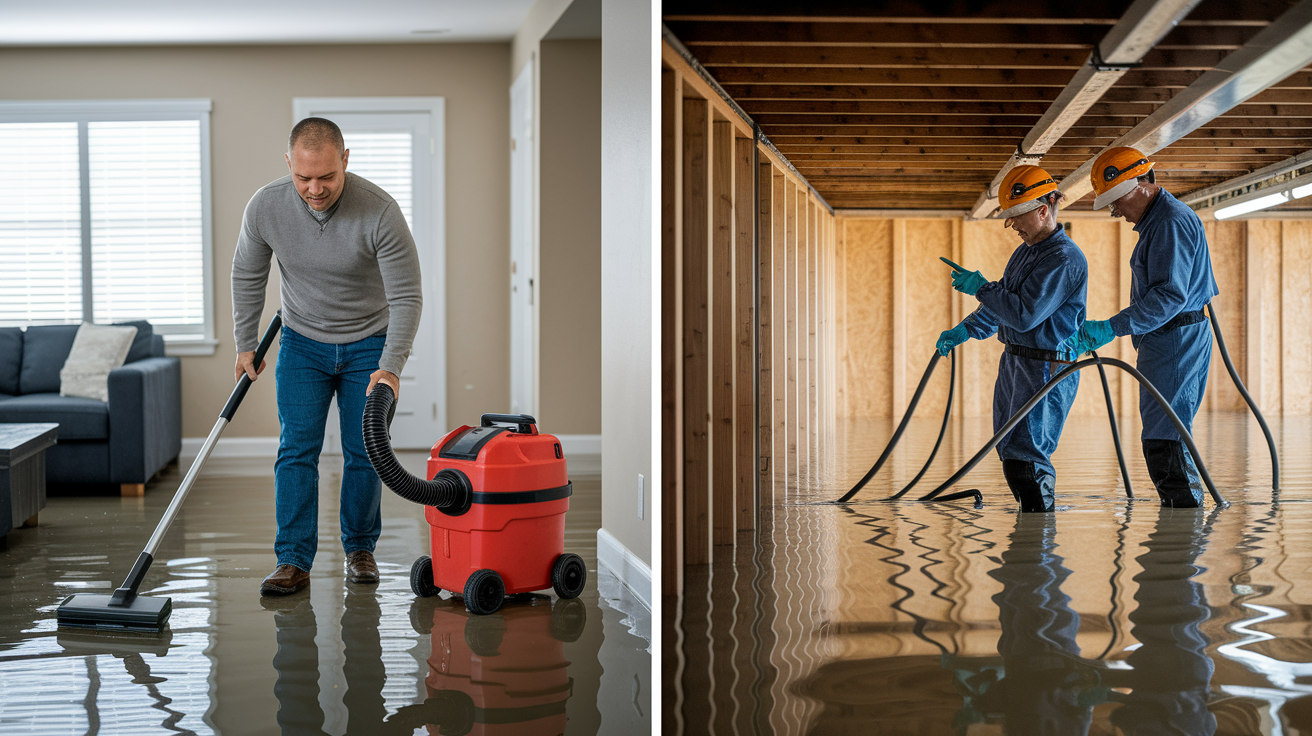
When water damage occurs, you might think about using a wet vacuum and towels to clean it up yourself. These DIY methods work for small spills but can miss hidden moisture that builds up mold and causes more damage. We use powerful machines that pull out water fast and completely. This approach helps prevent long-term issues and protects your home or business.

  • More powerful equipment
  • Faster water removal and drying
  • Less chance of hidden moisture and mold
  • Cost differences: renting equipment vs. full service
  • Fixed outcomes with warranties

If the water damage is large or moisture hides behind walls or under floors, professional help is needed. Our experienced technicians are available 24/7 to handle these situations quickly and efficiently. We not only remove the water but also take steps to secure your property, lower health risks, and prevent future issues. This complete service gives you peace of mind during a stressful time.

Specialized Water Extraction and Mitigation Services

img-2.jpg

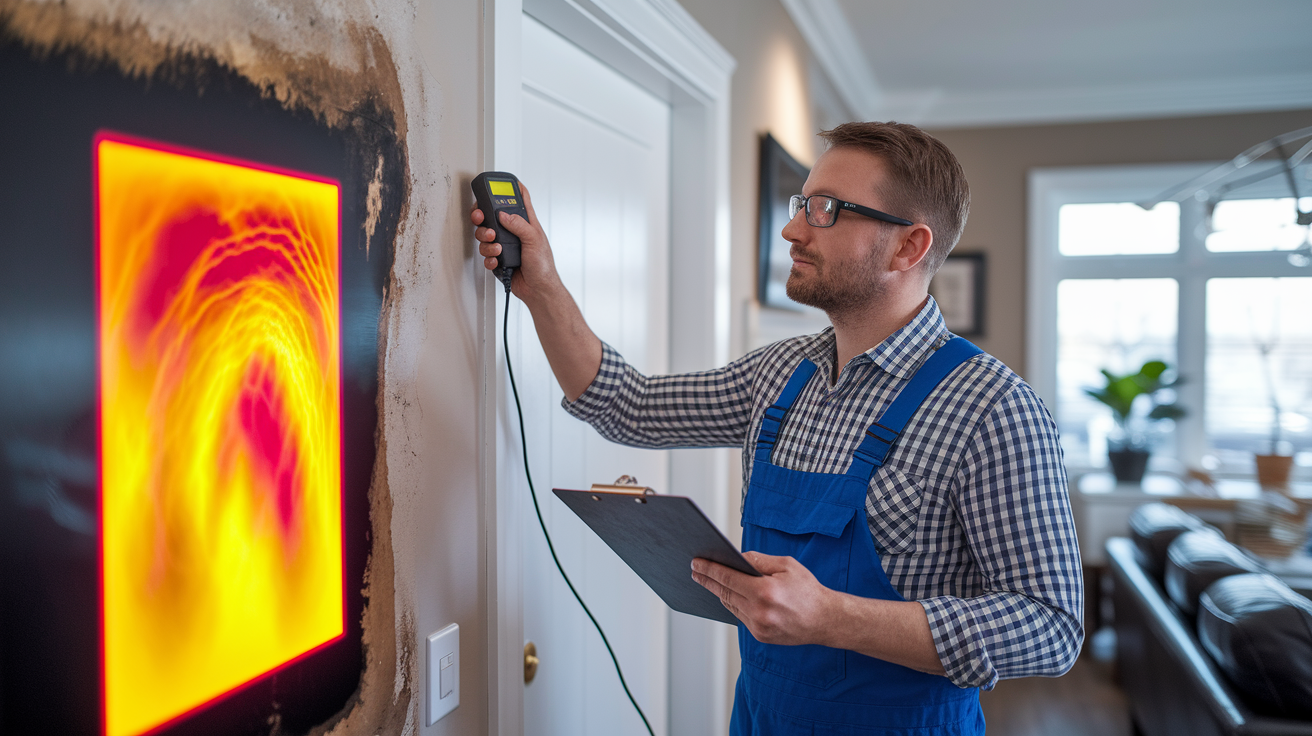
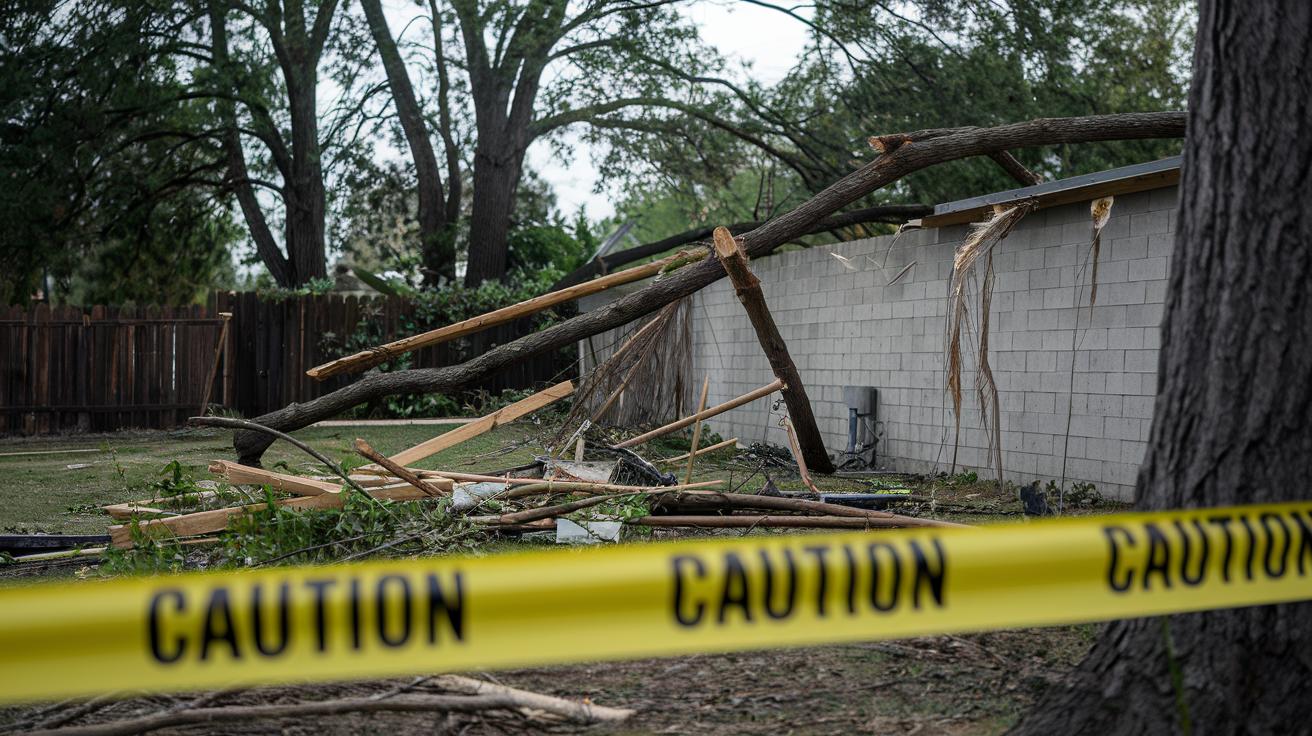
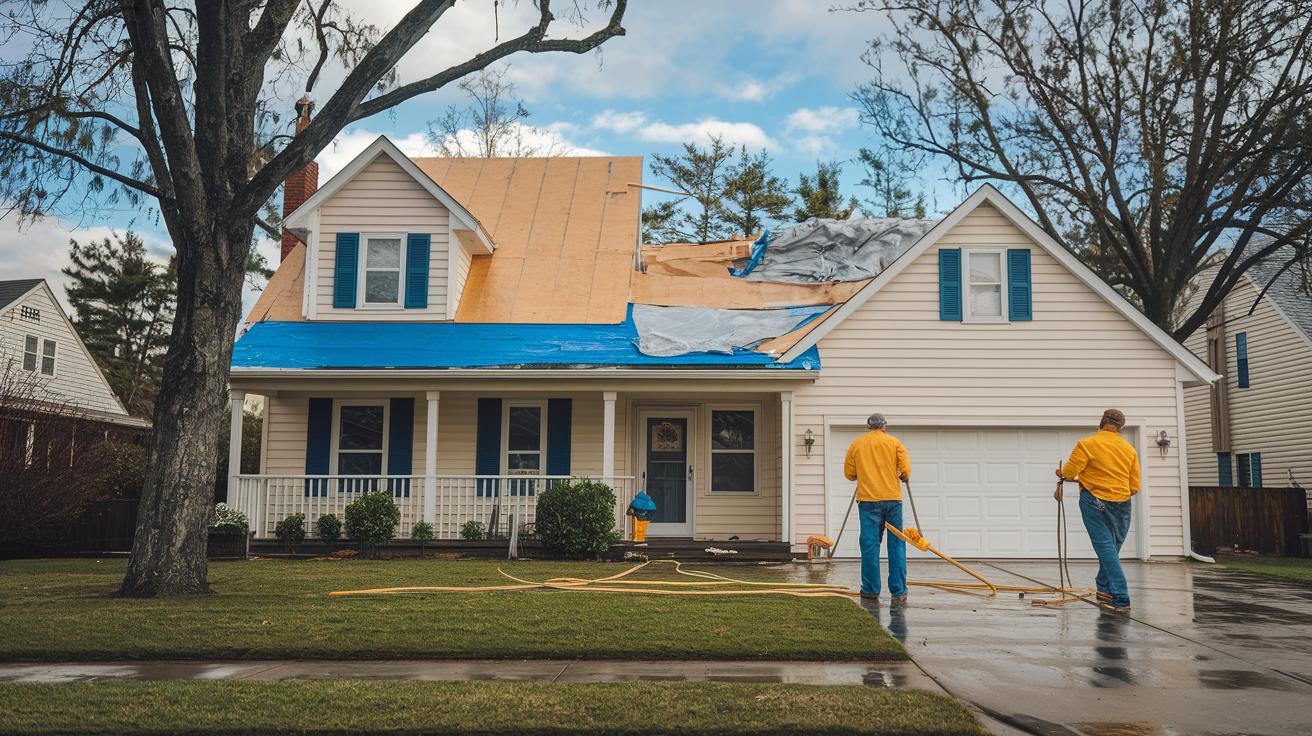
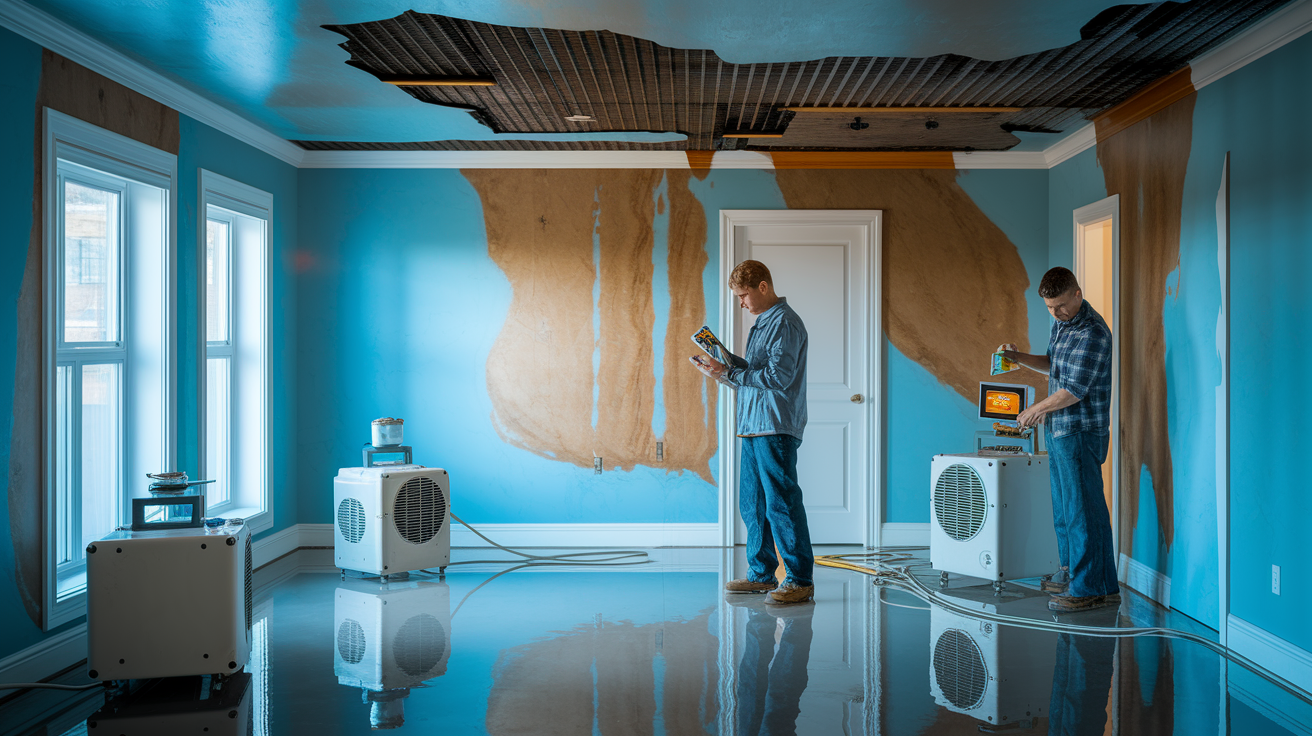
When flood damage hits, we act fast. We don't just pull out the water, we protect your home or business right away. We handle residential, commercial, and large loss cases with care. Our services include fast water removal, leak repair, and more. We follow proven industry guidelines to dry, secure, and restore your space. For more details, please check our Emergency Restoration Services.

Water Mitigation

After we remove the water, we move quickly to stop any more damage. We seal off affected areas and bolster weak spots to keep water from seeping in further. This step helps reduce the need for extra repairs later.

Drying & Dehumidification

We use powerful dehumidifiers (machines that remove moisture from the air) to dry out your property. We place these machines strategically to boost airflow and pull moisture from surfaces. This helps lower the risk of mold and further damage.

Controlled Demolition

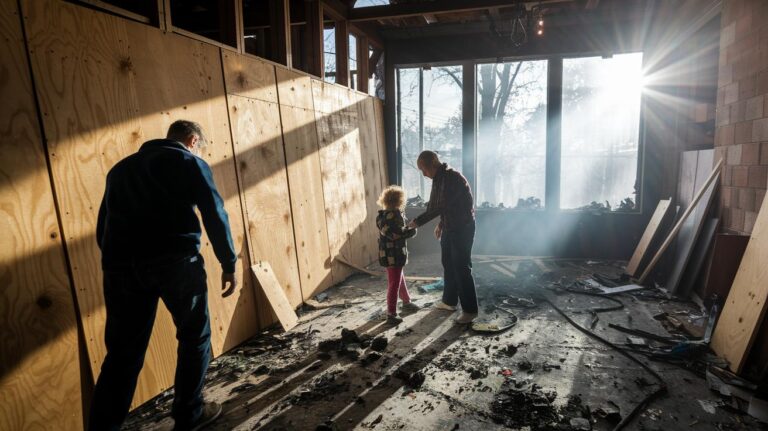
Sometimes, parts of your building are too damaged to save. We safely remove these materials to stop hidden moisture from causing more trouble. This controlled demolition clears the way for proper repairs.

Emergency Board-Up

We also secure your home quickly with emergency board-up services. We cover windows, doors, and other open areas to protect your property until full repairs can begin.

Safety Guidelines and Industry Standards for Water Extraction

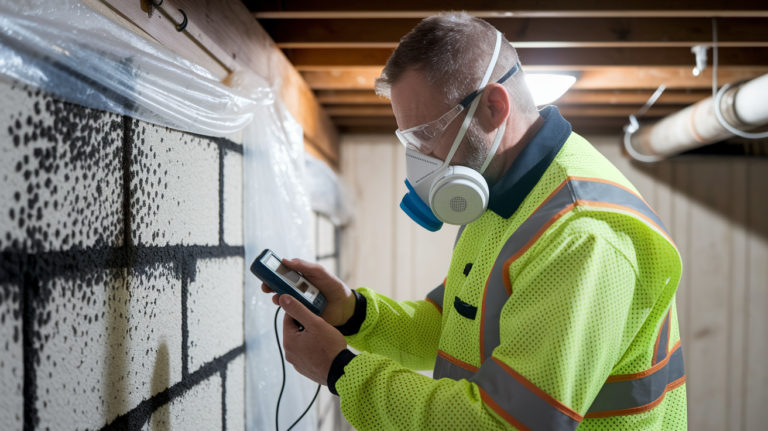
We take safety very seriously during water extraction. Our crew wears hard hats, gloves, safety glasses, and protective coveralls. We also inspect the site thoroughly before work begins. This helps us spot hazards like wet floors or unstable areas so we can protect both our team and your property.

We follow the standards set by IICRC (a group that sets cleaning and restoration rules) and OSHA (the organization that makes sure workplaces are safe). Our technicians use moisture meters (tools that measure dampness) and check electrical systems to reduce risks. Our team holds current certifications and receives regular training. This means our work meets the required cleanup and dehumidification steps after a flood.

We know acting fast is important. Through our Priority Disaster Response program, we record every step we take. This careful documentation helps us meet flood hazard guidelines and keeps everyone safe while work is being done.

Cost Considerations for Water Extraction Services

img-3.jpg

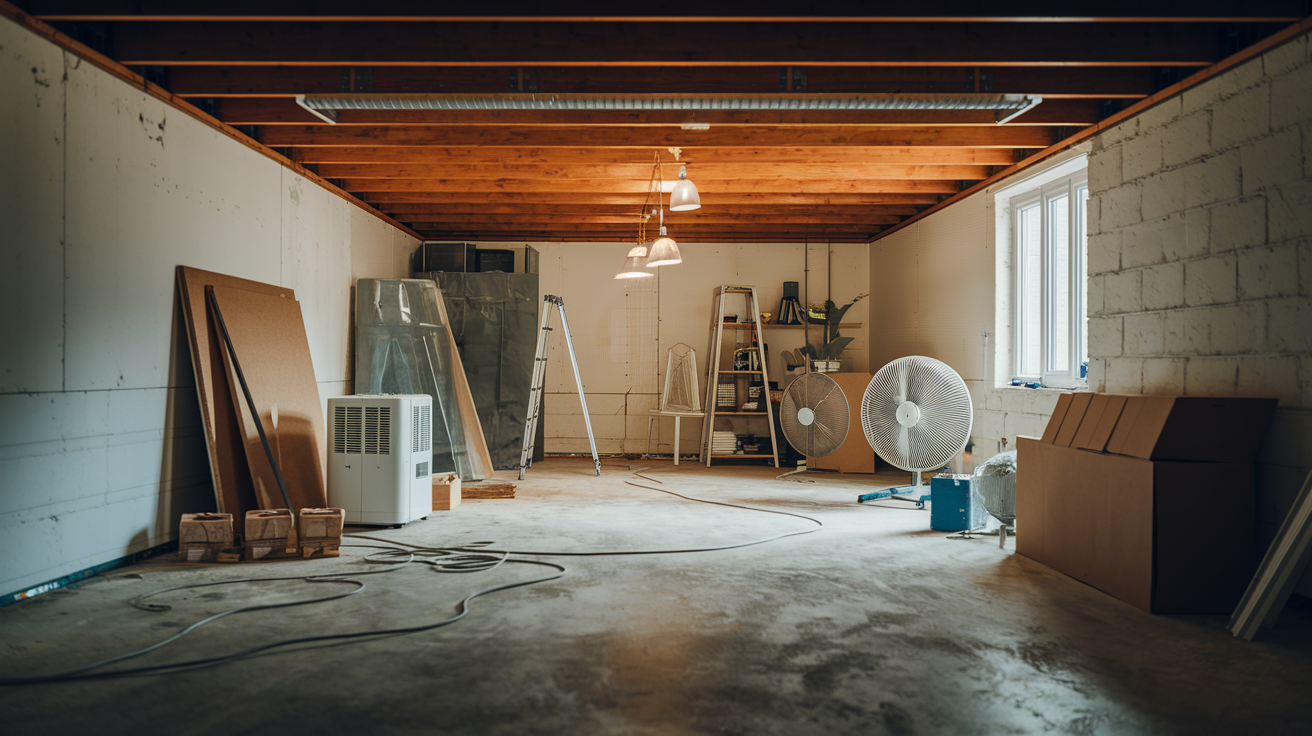
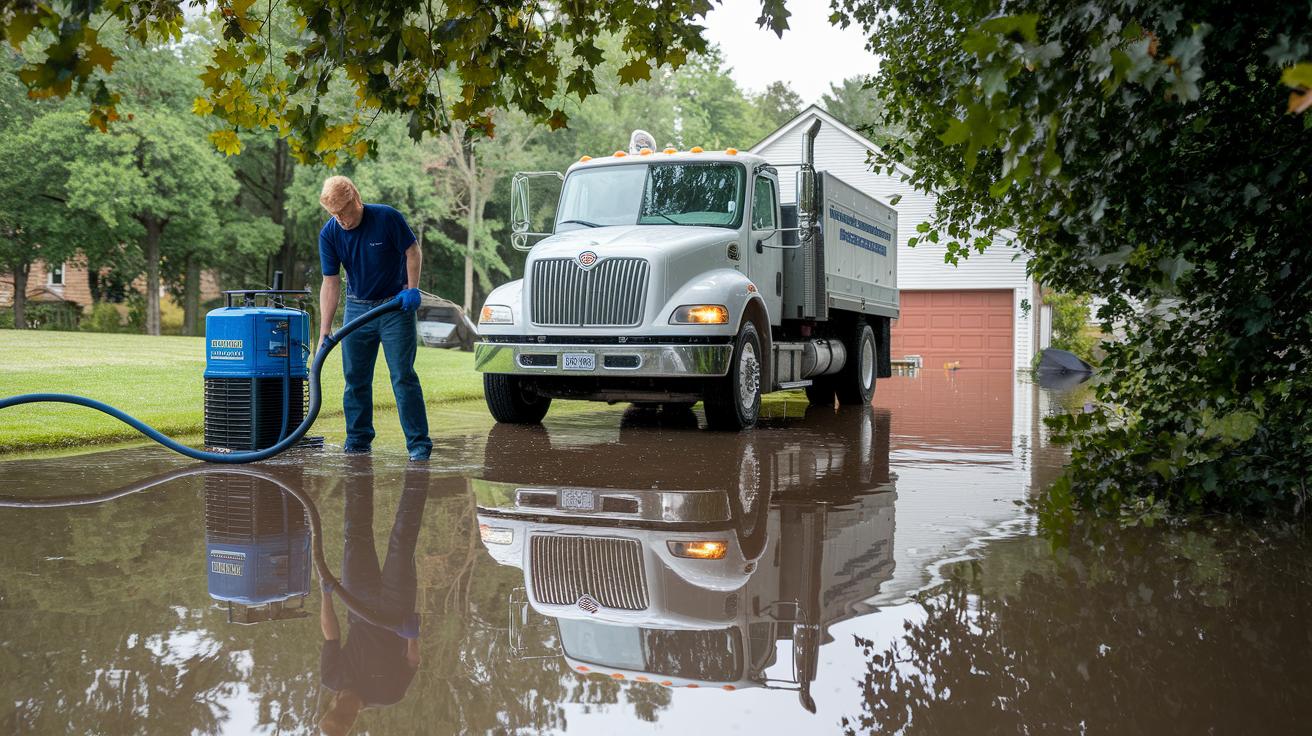
When you need water extraction, many things can affect the price. The size of the area, how bad the damage is, and the tools needed all play a part. Large areas may need stronger machines and extra hands. The type of water, not dirty, slightly dirty, or very dirty, changes the cost too. Extra work like drying walls or preventing mold can also add up.

Here are some common cost details:

  • Equipment rental can cost between $100 and $200 per day.
  • Labor may run from $50 to $100 per hour.
  • If you call us during an emergency or after regular hours, you might pay about 1.5 times the normal rates.

To help keep your bill low, try to schedule the service during normal business hours. Getting several quotes from licensed water cleanup experts can help you compare both prices and quality of work. This way, you get the right help and a fair price.

Final Words

In the action, we explored water extraction techniques that safeguard your home. We explained how rapid removal prevents foundation problems and mold risks, detailed the essential tools, and compared DIY methods with expert services.

By reviewing safety protocols and cost considerations, you now have a clear guide for quick recovery. Fast water extraction minimizes damage and paves the way for safe restoration. We’re here to help you move forward with confidence.

FAQ

What is the process of water extraction?

The water extraction process means removing standing water using pumps and vacuums. It prevents foundation damage and mold growth by clearing water quickly and efficiently.

How does a water extraction machine or water extractor work?

The water extraction machine works by using submersible pumps and industrial vacuums to remove water fast. This method stops water from seeping into structures and causing further damage.

How much does water extraction cost?

The cost of water extraction depends on factors like area size, water type (clean, gray, or black), and equipment needs. Prices vary, so it’s wise to request multiple quotes for the best value.

How long does water extraction take?

The water extraction process usually takes a few hours to a full day, depending on water volume and damage extent. Quick extraction is essential to prevent mold, which can start within 24 to 48 hours.

What is carpet water extraction?

Carpet water extraction involves removing water from carpets with powerful vacuums and drying machines. It restores the carpet and helps prevent mold and odor issues from lingering moisture.

How do I find water extraction services near me?

Searching for water extraction near you can be done online by checking local listings and reviews. This approach helps you connect with dependable service providers in your area.

How do I extract water from a phone?

Water extraction from a phone means drying out the device and using moisture removal tools. Professional help is recommended to avoid further damage and ensure all moisture is cleared.

What is water extraction from air?

Water extraction from air refers to removing moisture from the surrounding environment using dehumidifiers. This process helps reduce ambient moisture and prevents conditions that encourage mold growth.

What is a water extraction method for plants?

Water extraction for plants involves techniques to obtain moisture from plant tissues or condense ambient water. This method is typically used in research or controlled resource recovery settings.

Fire Damage Cleanup: Bright Recovery Ahead

0

Ever wonder if your home can bounce back after a fire? I know this is scary, but we have a step-by-step plan to help you recover. First, we inspect your home for fire, soot (the black residue from burning), and water damage to see what can be saved. Next, we quickly remove debris and clean harmful odors so you can feel safe. With simple tools and expert care, we work together to bring your home, and your peace of mind, back to normal.

Complete Guide to Fire Damage Cleanup Procedures

When a fire occurs, we know it can feel overwhelming. We start with an inspection by our specialists who check for fire, soot, and water damage. They also look for items that can be saved, check the building’s structure, and give you estimates for cost and time so you know what to expect.

Next, we clear out unsalvageable debris quickly. Removing damaged materials stops further harm and preps the surfaces for a deep clean. We use simple tools like dry sponges and special cleaning chemicals (chemicals made to dissolve stubborn soot) to lift away soot and smoke deposits from walls and ceilings.

Once debris is gone, we work on removing smoke odors. Lingering smells can affect your well-being. Our team uses techniques such as thermal fogging (a method that sprays a fine mist to neutralize odors) and air scrubbers (machines that filter the air) to ensure your indoor air feels fresh and safe.

After odors are under control, we begin final repairs. Damaged drywall is replaced, surfaces are repainted, and any broken fixtures from the fire are fixed or replaced. This step helps restore both the look and the function of your home.

Finally, reconstruction starts. Contractors rebuild any damaged structural parts of your home, always following building standards. Our complete approach covers everything from emergency salvage to full repairs, helping you move toward a safe and comfortable recovery.

Initial Damage Assessment and Safety Measures for Fire Damage Cleanup

img-1.jpg

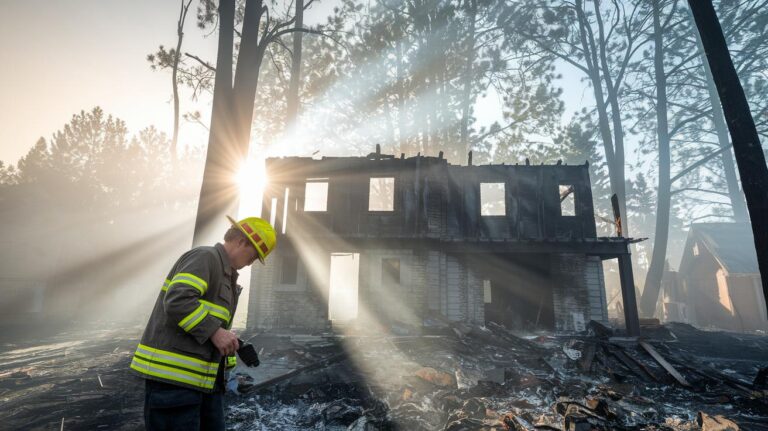
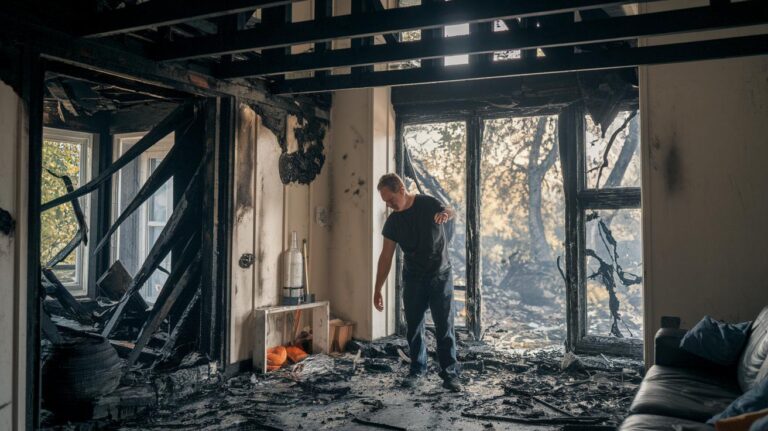
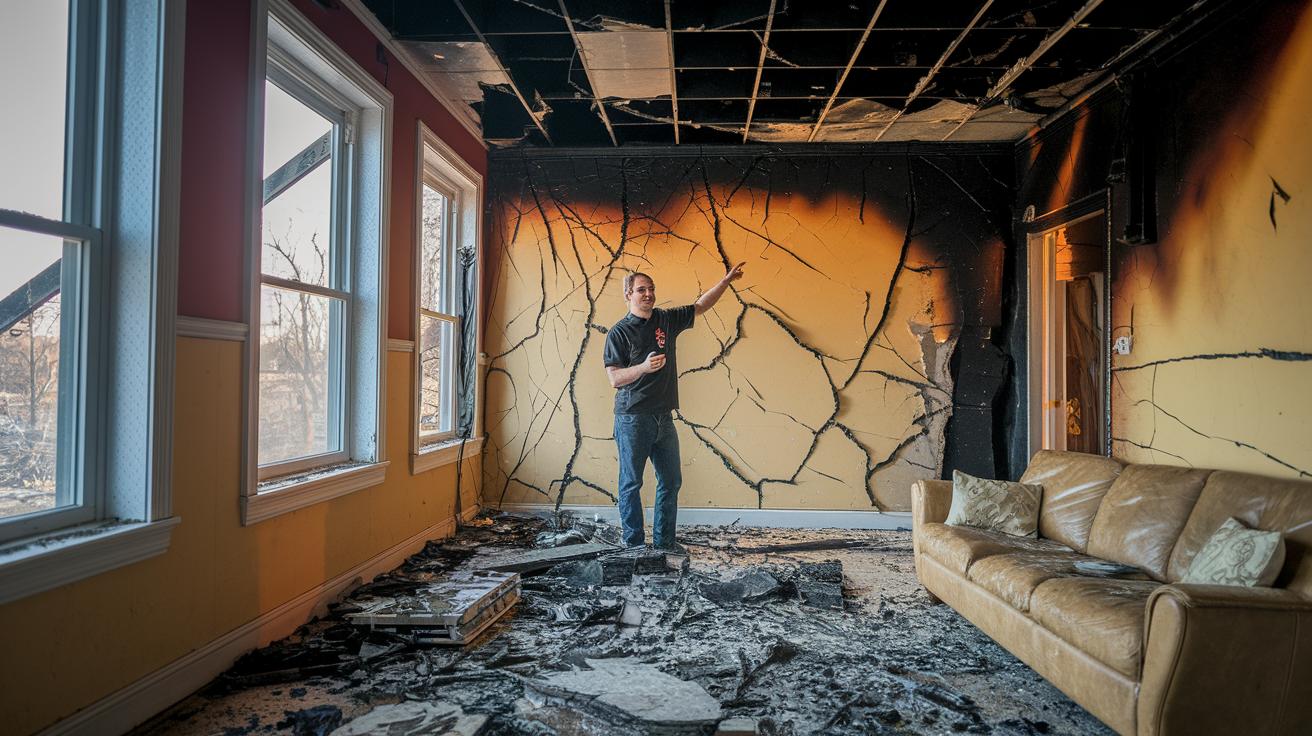
We start by carefully walking through your home to check for signs of fire, soot (the dark residue after burning), and water damage. We treat this like a quick health check for your property, looking at every wall and beam to see how the fire has affected things. We quickly note what can be saved and which parts may need extra support.

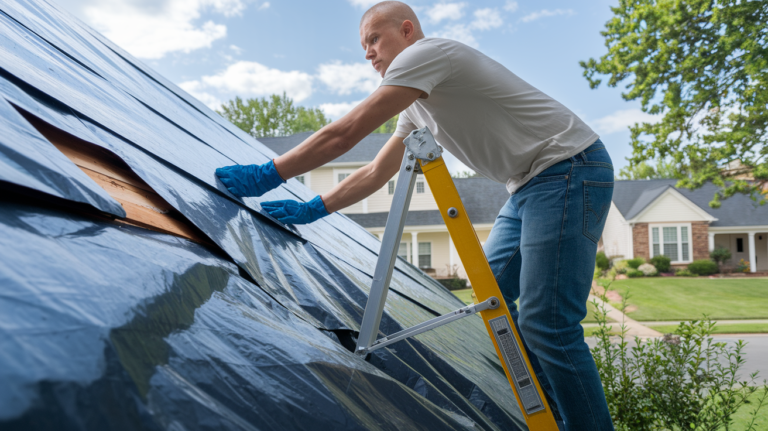
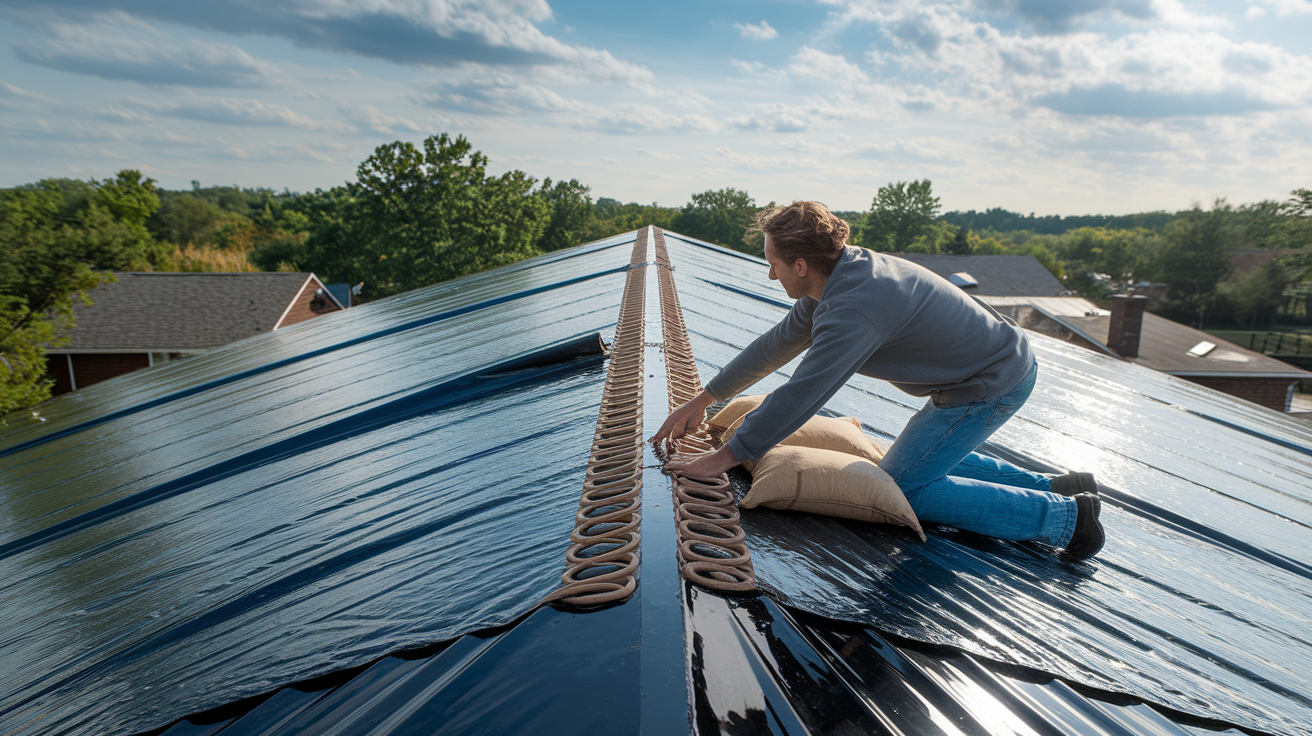
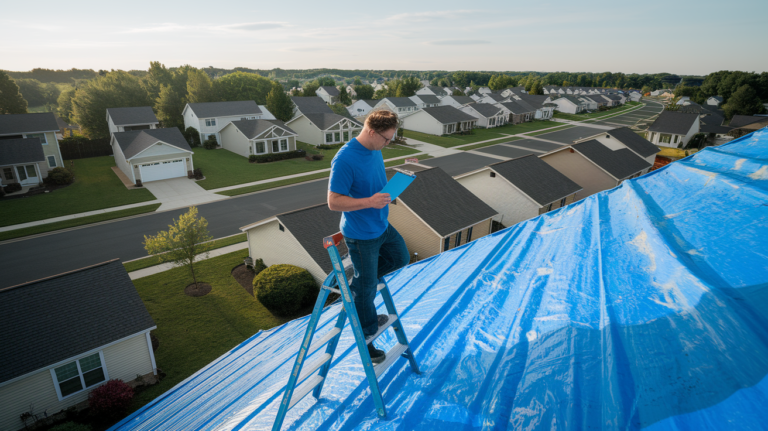
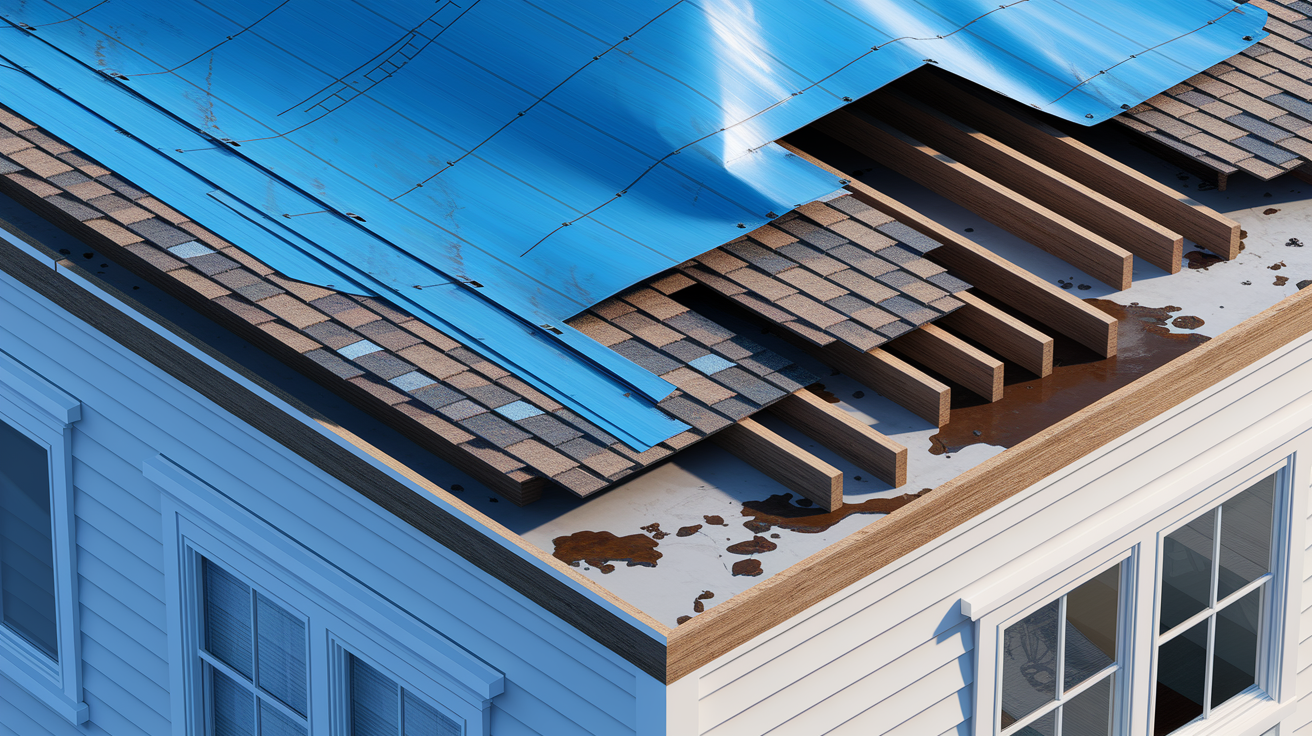
Next, we make your home safe before starting cleanup. We might board up broken windows or cover damaged roofs with tarps (large, waterproof sheets) to stop further issues. This step helps prevent extra damage as we get ready to clean.

Your safety is our top priority. Our team wears protective gear to guard against harmful particles and strong odors. We carefully check for hazards such as weakened supports or contaminated surfaces. We mark off dangerous zones and isolate areas needing special chemical treatments so that cleanup only starts when it is safe.

These measures protect both you and our team from further injury or damage while we work to restore your home.

Debris Removal and Soot Elimination Techniques in Fire Damage Cleanup

When we clean up fire damage, we first clear away loose debris and use dry sponging to remove surface soot. Now, we also use special chemicals to tackle deeper layers of soot. We pick the right chemical cleaner for each surface and the level of soot. For light soot, we use a gentle alkaline solution (a basic cleaning agent that protects surfaces). When soot is heavier, we use stronger solvents like petroleum distillates and glycol ethers (solvents that break down thick soot) to get the job done.

Your safety matters to us. Our technicians wear gloves, goggles, and respirators when they work with these chemicals. We also ensure proper ventilation and follow strict rules for handling chemicals to keep risks low.

One technician shared, "Using glycol ethers helped remove soot from rough surfaces while protecting the paint underneath."

Our updated process includes these key steps:

  • Choosing the right chemical based on the surface and soot damage.
  • Using a gentle solution for light soot and stronger blends for deeper layers.
  • Following safety protocols with proper protective gear and good ventilation.
  • Recording our results to keep improving our cleaning methods.

We pay careful attention to both chemical selection and safety, which makes our cleanup process as effective as our proven debris removal techniques.

Smoke Odor Neutralization and Indoor Air Quality Renewal After Fire Cleanup

img-2.jpg

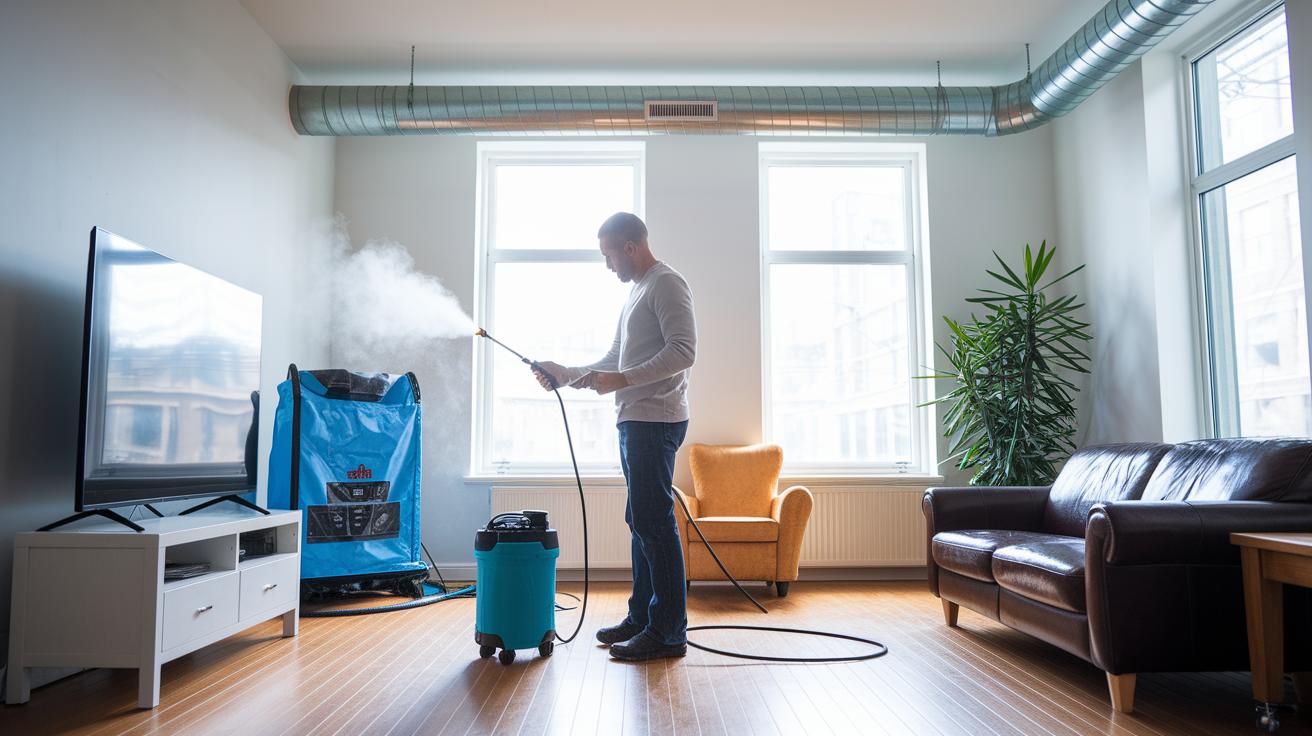
Smoke odors can cause headaches and breathing problems. They can also lower your home's value. Once we clear out all the debris and soot, we focus on freshening the air you breathe. First, we use thermal fogging (a process that sprays a fine mist to break down odor molecules). We also apply ozone treatments to target smoke smells that regular cleaning might miss. Then, HEPA air scrubbers (machines that catch tiny particles) help clear the air.

We don’t stop at just removing the smell. We clean or replace HVAC ducts and filters to make sure no lingering smoke residue keeps circulating. Advanced air purification systems then restore the air to a clean, safe state. We keep a close watch on the air quality throughout the process to ensure every odor and particle is controlled.

Key steps include:

  • Using thermal fogging and ozone treatments to break down stubborn odors.
  • Employing HEPA air scrubbers to capture tiny airborne particles.
  • Cleaning or replacing HVAC ducts and filters to stop hidden smoke residue.

This careful process gives your home a fresh start so it looks clean and feels safe to breathe.

Water Damage Extraction and Structural Drying in Fire Cleanup Operations

After a fire, water used by firefighters can stick around and cause extra problems. We start by getting the water out fast with strong pumps and water extraction units (machines that remove water). Removing standing water quickly helps stop mold growth and keeps your home strong.

Next, we use industrial dehumidifiers (machines that pull moisture from the air) and drying equipment to take out any extra wetness. We check with moisture meters (tools that measure dampness) to be sure everything is dry and safe. This careful process helps stop more damage and prepares your home for repairs.

Our steps are simple:

  • Remove water using high-powered pumps and extraction units.
  • Use dehumidifiers and drying machines to get rid of extra moisture.
  • Check dampness with moisture meters to ensure safety.

By acting fast, we help prevent hidden issues like mold and protect your home’s structure. We turn a tough situation into a step toward a safe and secure home.

Mold Inspection and Prevention Strategies Following Fire Cleanup

img-3.jpg

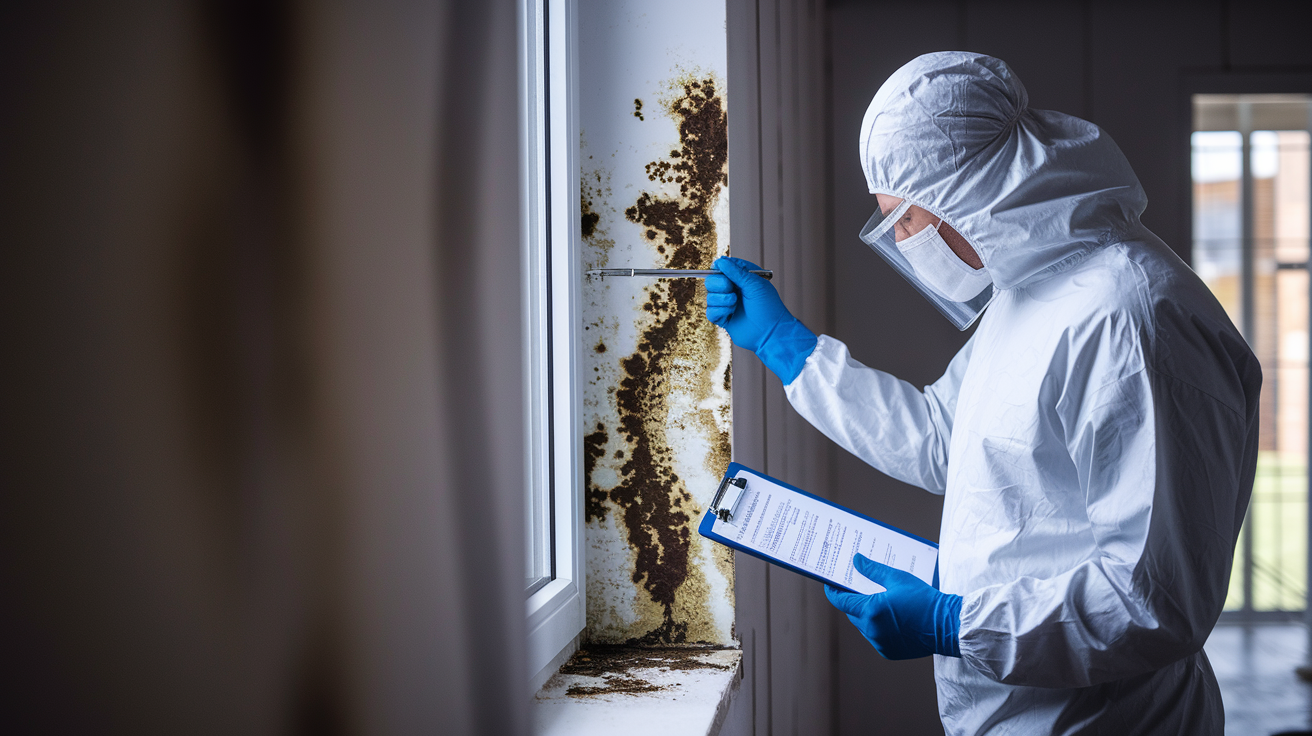
After a fire, leftover moisture and debris can give mold the space it needs to grow. This mold can harm your health and damage your home. Our certified team uses tools like moisture mapping (a way to find damp spots) and thermal imaging (a tool that detects temperature differences) to locate hidden areas where mold may form. Next, we treat these areas with EPA-approved fungicides (chemicals that stop mold) and remove any contaminated materials so that mold stays away from areas that are still safe.

We don’t stop at clean-up. We take extra steps to protect your home from future mold issues. Our crew sanitizes all surfaces to remove any lingering mold particles. We also use HEPA vacuuming (vacuums that capture tiny particles) to clean up any remaining debris. Good air circulation is key, so we ensure your home is well-ventilated to discourage moisture from settling.

These measures keep your home safer by reducing the risk of mold, improving indoor air quality, and preventing further damage after fire and water cleanup.

Cleanup Cost Assessment and Insurance Considerations for Fire Damage Cleanup

Our first inspection gives you a clear cost estimate for all the cleanup work needed. We break down each expense so you know exactly what to expect. Our estimate includes debris removal (clearing away broken pieces), specialized cleaning to remove stubborn soot and smoke residue, odor control treatments to get rid of lingering smells, and reconstruction (repairing damaged areas) of your home. We base these costs on your home's size, how bad the damage is, and the services required.

Estimating Cleanup Costs

We calculate cleanup costs in simple steps. First, we assess the damage and list the repairs needed. Then, we create a detailed estimate that covers:

  • Material removal and disposal
  • Chemical and equipment use for cleaning
  • Air purification (cleaning the air from dust and odors) and odor neutralization
  • Reconstruction services for rebuilding damaged areas

One technician explained, "We list each cost item clearly so homeowners are not surprised later." This approach helps you budget accurately for the work ahead.

Dealing with insurance claims can feel confusing, but we work to make the process easier for you. We document every step with photos and detailed estimates, which insurance companies require as proof of damage and costs. We help by:

  • Collecting photos and written reports
  • Preparing clear, itemized estimates
  • Answering any questions from insurance adjusters

Many homeowners feel relieved to know that our restoration services cover both the repair work and the help needed with insurance claims. We also discuss options like payment plans and restoration loans to manage any out-of-pocket expenses. This way, you have a clear picture of the cleanup costs and the steps needed for insurance recovery, making the process smoother during a stressful time.

Reconstruction Following Blaze: Full-Service Property Repair After Fire Cleanup

img-4.jpg

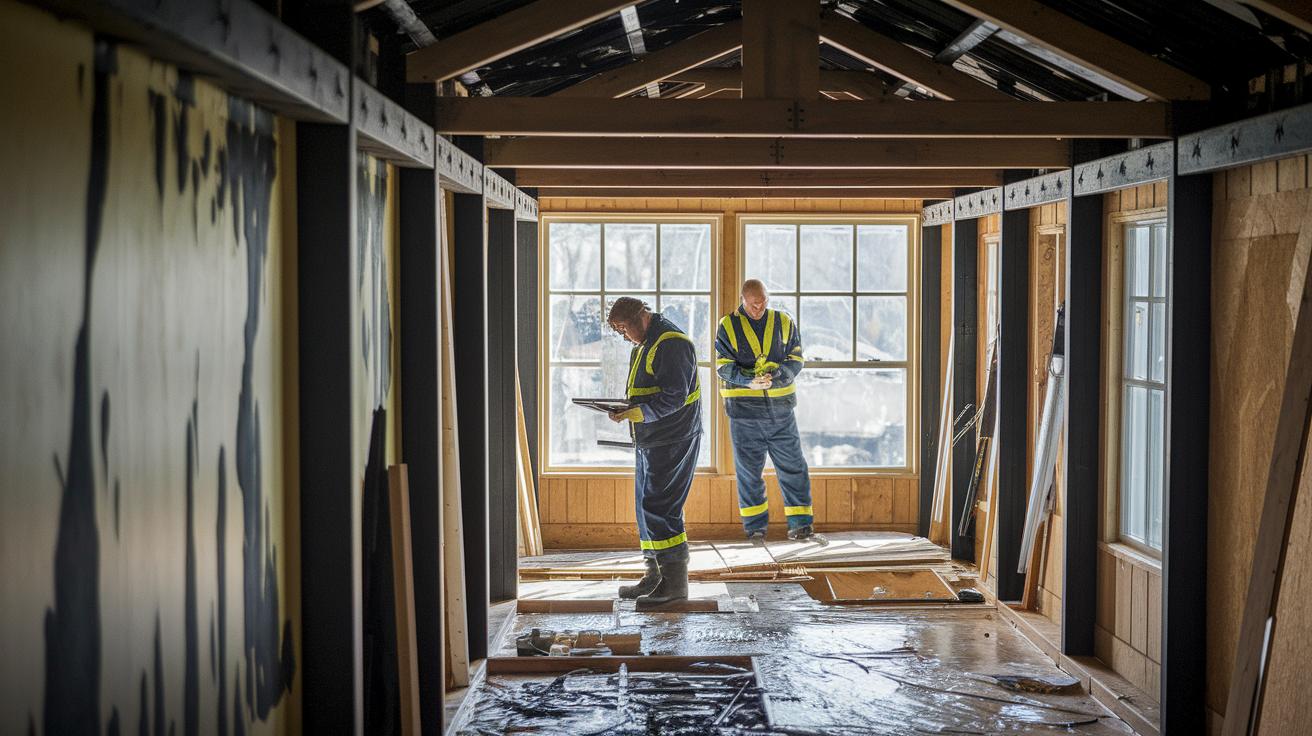
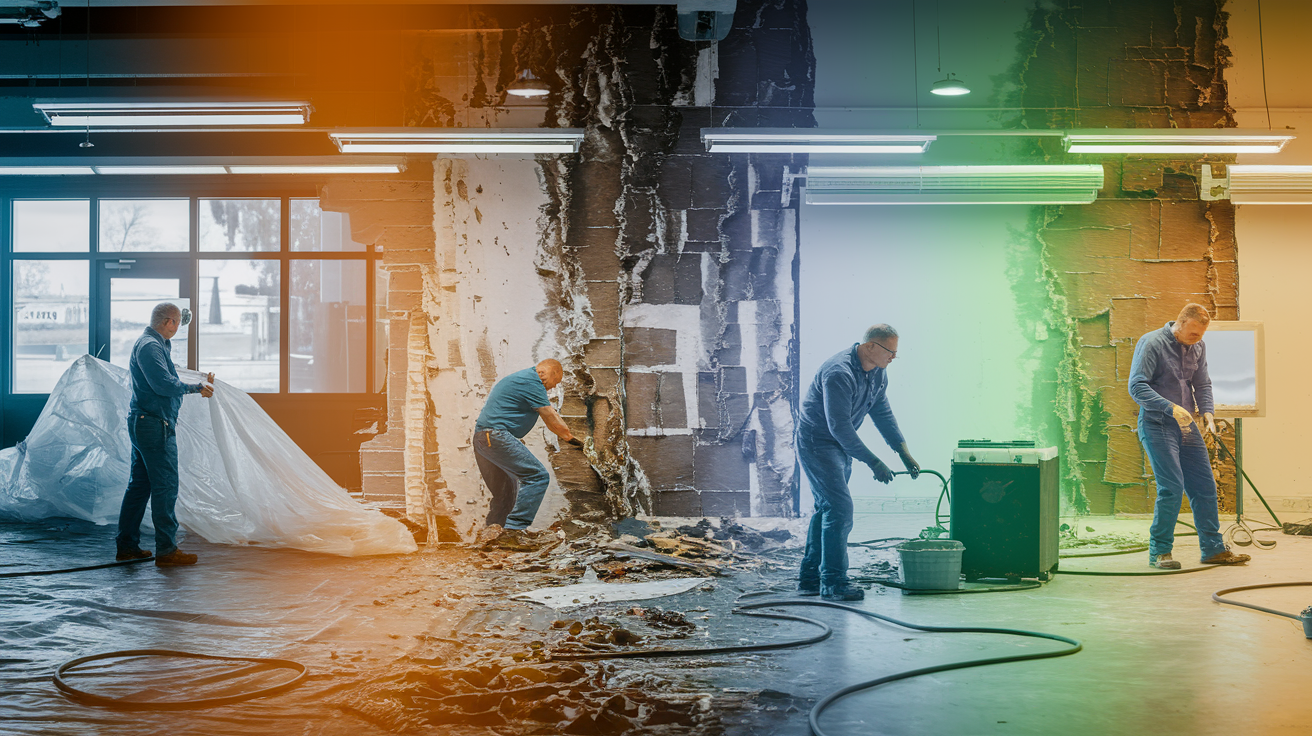
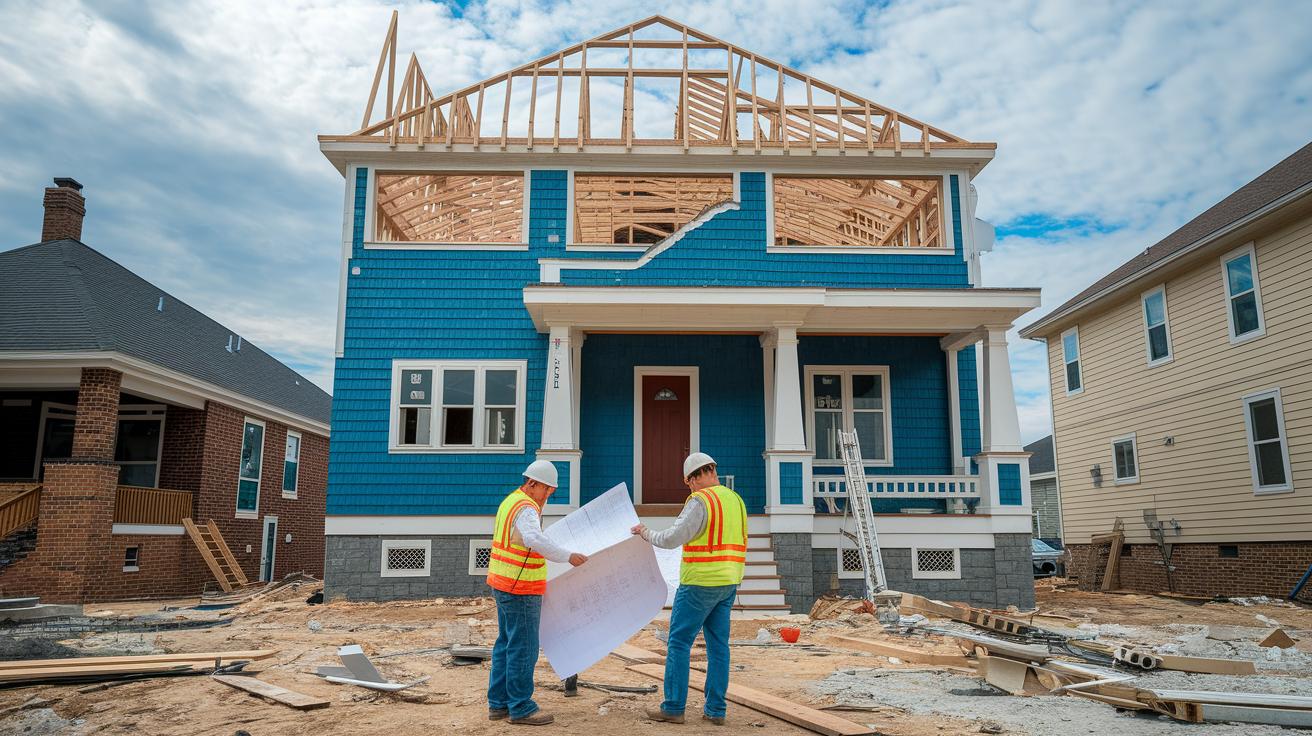
After cleaning is complete, our licensed restoration team comes in to rebuild your home. They start by checking the fire and water damage to your house’s frame and structure (the bones of your home). This helps ensure that every repair connects smoothly with parts that were not affected. We handle everything from fixing the framing to putting up new drywall so each wall and ceiling is strong and secure.

We work carefully on every repair. One technician said that replacing damaged framing and putting up quality drywall is like giving your home a fresh start. We also do painting, flooring, and installing fixtures so your home not only returns to normal but might even look better than before. The materials and methods we use help restore your property to its original state.

Our licensed contractors manage the whole project. They take care of permits, inspections, and follow local building codes (rules that keep homes safe). This means every repair is checked and approved, giving you peace of mind and a safe home. We finish the recovery work quickly and with care. For major reconstruction jobs, we use a clear plan that mixes repair and remodeling. This step-by-step process is part of our overall approach to restoring homes after a fire.

Final Words

In the action, we outlined each step of the process, from the initial inspection and safety checks to debris removal, soot elimination, odor neutralization, water extraction, and mold prevention. We also touched on cost estimates, insurance claims, and reconstructions. Every step is designed to stop additional damage while restoring your property quickly and safely.

We stand ready to help you rebuild and move forward, making fire damage cleanup effective and stress-free.

FAQ

Frequently Asked Questions

Fire damage cleanup services near me

Fire damage cleanup services near you provide rapid, expert help by assessing, removing debris, and cleaning soot and smoke, so you can feel safe and get back on track quickly.

Residential fire damage cleanup

Residential fire damage cleanup addresses home fire issues by removing debris, cleaning soot, neutralizing odors, and drying structures to restore a safe and livable environment.

Fire damage cleanup cost

Fire damage cleanup cost varies based on damage extent, materials involved, and service scope. Professionals offer detailed quotes that cover debris removal, cleaning, drying, and repair services.

Fire damage cleanup near me

Fire damage cleanup near you means local professionals are ready to assess, remove debris, and safely restore your property using proper equipment, so you can recover quickly after a fire.

Smoke damage cleaning products

Smoke damage cleaning products include specialized chemical agents and solvents designed to lift soot and neutralize odors, helping restore surfaces and improve indoor air quality.

Cleaning after fire smoke damage

Cleaning after fire smoke damage involves removing soot buildup, treating surfaces with chemical agents, and using air scrubbers to clear lingering odors and improve indoor air quality.

Fire restoration checklist

A fire restoration checklist outlines steps such as damage assessment, debris removal, soot and odor cleaning, water extraction, and final repairs, ensuring all aspects of restoration are covered.

Smoke damage cleaning cost

Smoke damage cleaning cost depends on the severity of contamination and the methods used for soot and odor removal. Detailed estimates typically include labor, materials, and equipment usage.

How to clean up after fire damage?

Cleaning up after fire damage involves a step-by-step process of damage assessment, debris removal, soot cleaning with dry sponging and chemical agents, and odor neutralization to restore safety.

How much can it cost to clean up after a fire?

The cost to clean up after a fire depends on the extent of damage and required services, with professionals providing itemized estimates covering debris removal, cleaning, drying, and necessary repairs.

What is the best product to clean fire damage?

The best product to clean fire damage is a specialized chemical agent designed to dissolve soot and neutralize odors effectively, often used alongside proper tools and safety gear for optimal results.

What is cleanup after a fire called?

Cleanup after a fire is called fire restoration, which includes assessing the damage, removing debris, cleaning soot, neutralizing odors, drying the structure, and repairing the property.

How to Seal Smoke Odor in Walls: Clean, Prime & Eliminate for Good

0

You can’t paint over smoke smell and hope it disappears. The odor molecules are embedded deep in your drywall, and regular paint lets them bleed right back through within weeks. Real elimination requires specialized odor blocking primers that trap those compounds at the surface, stopping them from escaping into your home. We’ll walk you through the complete sealing process: deep cleaning to remove surface residue, applying the right primer for your contamination level, and finishing with durable topcoat protection that actually lasts.

Essential Steps and Products for Sealing Smoke Odor

SRTOCz6vSYG5eBhlks22vw

Smoke particles don’t just sit on surfaces. They burrow deep into porous drywall, embedding over 4,000 chemical compounds into the material itself. Regular paint won’t stop the smell from bleeding back through, and air fresheners are basically Band-Aids. Real odor elimination requires specialized encapsulation primers that trap smoke molecules at the surface, keeping them from escaping back into your home.

The complete sealing process has three distinct phases: deep cleaning to remove surface soot and oils, application of odor blocking primer to encapsulate embedded particles, and protective topcoat finishing for durability and appearance. Light to moderate contamination from occasional smoke exposure or a single fire incident works well as a DIY project. Heavy fire damage or homes with decade long smoking history need professional assessment before you start, as the contamination may have penetrated insulation and wall cavities beyond what surface primers can reach.

Contamination Level Recommended Primer Specific Products Cost Per Gallon Timeline
Light: occasional smoke exposure Shellac or water-based BIN Shellac-Based Primer, Zinsser Odor Killing Primer $45-80 3-5 days
Moderate: years of smoking or recent fire Shellac or oil-based BIN Shellac-Based Primer, Kilz Original Oil-Based $40-80 5-7 days
Heavy: structural fire or decade+ smoking Shellac-based only BIN Shellac-Based Primer $50-80 Professional service recommended

Here’s the complete five step process for sealing smoke odor in walls:

  1. Assess damage severity, establish ventilation, and remove furniture. Open all windows and position box fans to create cross ventilation throughout the space. Move furniture to another room or center of the space under protective covering. Inspect walls under bright light to identify heavy staining, especially near ceiling lines where smoke accumulates most. Determine contamination level to select appropriate primer type.

  2. Deep clean all surfaces with TSP solution using bottom up technique and allow 24 to 48 hours drying. Mix TSP cleaner at 1/4 to 1/2 cup per gallon of warm water. Start at the bottom of each wall and work upward to prevent permanent streaking on contaminated surfaces. Use a sponge or soft cloth, rinsing frequently in clean water. For heavy soot, use dry chemical sponges first to lift surface particles before wet cleaning. Set up fans and dehumidifiers to accelerate drying.

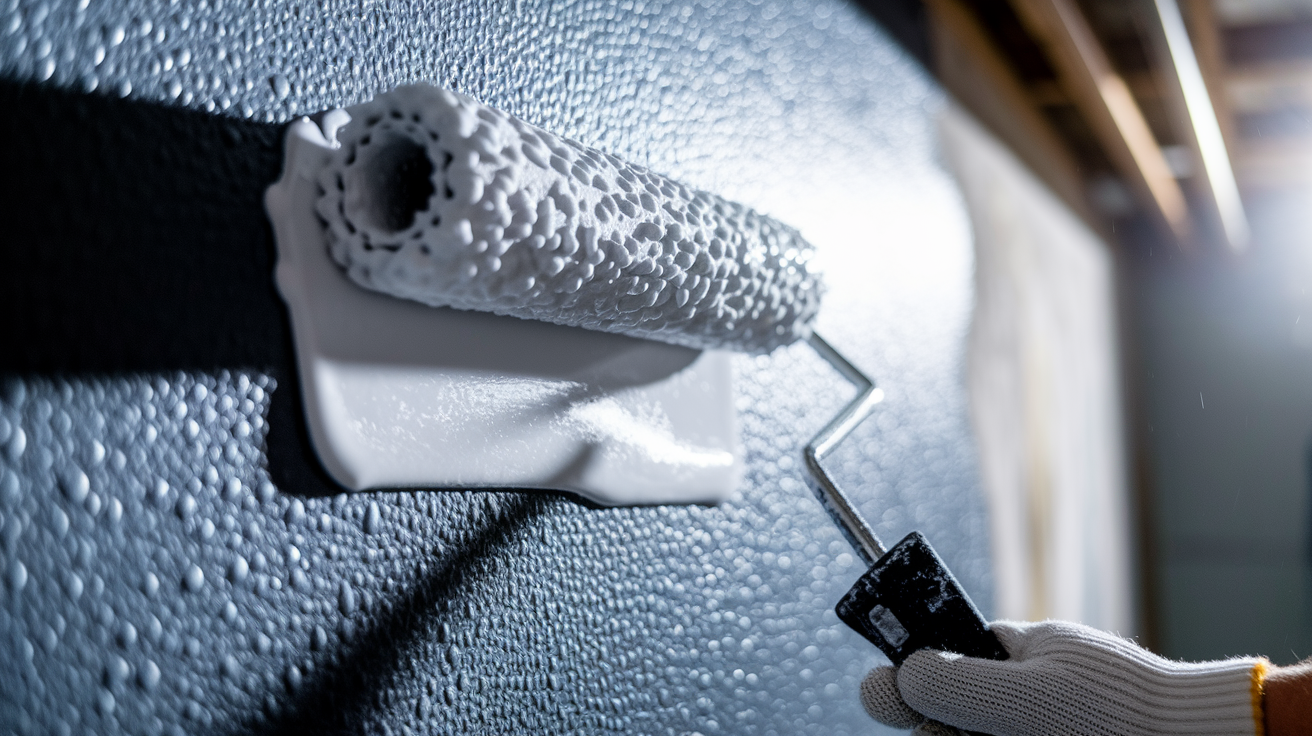
  3. Apply 2 to 3 coats of odor blocking primer (shellac for heavy, oil based for moderate). Cut in all edges, corners, and trim using a 2 inch angled brush. Roll primer in overlapping W pattern using 3/8″ to 1/2″ nap roller. Allow proper drying time between coats: 45 minutes for shellac based, 2 to 4 hours for oil based, 1 to 2 hours for water based products. Each gallon covers 300 to 400 square feet.

  4. Inspect coverage and apply additional coats to problem areas. After second coat dries, seal the room for 4 hours then check for lingering odor. Inspect under bright light for thin spots, especially in corners and along ceiling lines where coverage often misses. Yellow nicotine stains bleeding through indicate need for additional coats in those areas.

  5. Finish with quality latex topcoat in 2 coats. Once primer fully blocks odor and stains, apply two coats of 100% acrylic latex paint in your chosen color. Use satin or semi-gloss sheen for better cleanability. Allow each coat to dry per manufacturer specifications.

Light damage in a single 12×12 room typically takes 3 to 5 days DIY with $200 to $400 in materials including primer, cleaner, paint, and supplies. Moderate contamination across multiple rooms extends to 5 to 7 days with $400 to $800 invested. Heavy contamination from structural fires or extensive long term smoking usually requires professional service at $1,500 to $5,000+ because it demands specialized equipment like thermal foggers and ozone generators, plus potential drywall and insulation replacement in severely affected areas.

Wall Cleaning Before Sealing Smoke Odor

KamTfMNGTuCIL2uoEN4PgQ

Sealing over uncleaned smoke residue traps odors beneath the primer, which then break down the paint bond and cause failure within months. The soot, tar, and nicotine create an oily barrier that prevents primer from adhering properly to the drywall surface. What looks like a sealed wall becomes a ticking clock, with yellowing bleed through appearing first, followed by bubbling paint and the full return of smoke smell.

Test your cleaning approach on a small 2×2 foot section first, preferably in a closet or behind where furniture will sit. This lets you verify the cleaning solution removes soot without damaging the underlying paint or drywall paper. If the test area shows good results after drying 24 hours, proceed with the full room.

Contamination Level Cleaning Method Solution Type
Light Dry chemical sponge followed by mild TSP 1/4 cup TSP per gallon warm water
Moderate Dry sponge then concentrated TSP scrub 1/2 cup TSP per gallon warm water
Heavy Multiple passes with concentrated TSP 1/2 cup TSP per gallon, multiple bucket changes

TSP application requires the bottom up washing technique to prevent permanent streaking. Start at the baseboard and work your way up in 3 to 4 foot horizontal sections. Dip your sponge in the TSP solution, wring it until just damp, then scrub in circular motions with moderate pressure. Rinse the same section immediately with a clean water sponge, then dry with cloth rags. The bottom up approach prevents dirty water from running down over uncleaned areas, which creates streaks that become permanent once primer seals them in. Change your rinse water frequently as it turns gray from soot.

Walls must dry completely before primer application, which takes 24 to 48 hours depending on humidity levels and ventilation. Position box fans 6 to 8 feet from walls to keep air moving across surfaces. Run a dehumidifier if indoor humidity exceeds 60%, as moisture trapped under primer creates adhesion problems and potential mold growth. Touch the wall surface in several spots, checking that it feels dry and cool to the touch, not damp or clammy. Wet drywall feels cooler than dry drywall. Skip this drying time and your primer won’t bond properly, leading to peeling within weeks.

Ventilation and Safety Equipment for Smoke Odor Sealing

0KvtyCDQTa2DvvHQuXqWUg

Smoke residue contains formaldehyde, benzene, and carbon monoxide alongside thousands of other compounds, some linked to cancer and respiratory illness. These toxins remain active even in dried soot that’s been sitting on walls for months or years. Cleaning and sealing stirs up microscopic particles that become airborne, putting them directly into your breathing zone at concentrated levels far higher than the original smoke exposure.

Proper protective equipment starts with respiratory protection. Use an N95 respirator as minimum protection for light cleaning work, but upgrade to a P100 half mask respirator for primer application and heavy contamination cleaning. The P100 filters capture 99.97% of particles and provide better face seal than disposable masks. Wear nitrile gloves instead of latex or vinyl types, as nitrile resists chemical breakdown from TSP cleaners and primer solvents. Add safety goggles or a full face shield to protect against TSP splashes and primer drips, especially when working overhead on ceilings.

Cross ventilation setup requires planning before work begins. Open windows on opposite sides of the room or home to create air flow paths. Position one box fan in a window blowing outward to exhaust contaminated air, then place another fan in a doorway or opposite window pulling fresh air inward. This creates positive air movement that carries particles out instead of letting them settle back onto surfaces. Keep this ventilation running continuously during cleaning, all primer application stages, and for 24 hours after final coat. Shellac based primers release strong solvent vapors that cause headaches and dizziness in poorly ventilated spaces, making this ventilation setup non-negotiable for safe work conditions.

Complete Application Guide: Primer Selection, Technique, and Coverage

lj1VBog9SOyRnJOmUZ9xhQ

Odor blocking primers work through encapsulation technology, which means they trap smoke molecules at the surface rather than allowing them to penetrate through to the finished paint layer. The primer creates a chemical and physical barrier that binds with the contaminated surface, sealing odor compounds in place so they can’t evaporate back into your living space. This differs completely from regular paint, which has large enough pores to allow smoke odors to pass through within weeks.

Shellac Based Primers for Maximum Odor Blocking

BIN and similar shellac based products deliver the most effective odor blocking for heavy contamination, including severe nicotine staining and fire damage. Shellac’s unique chemistry creates an impermeable seal that blocks persistent odors regular primers can’t handle. These primers dry in just 45 minutes between coats, letting you complete multiple applications in a single day. The tradeoff comes in a strong solvent odor during application that requires excellent cross ventilation with windows open and fans running. Shellac primers work on all contamination levels, making them the safe choice when you’re uncertain about damage severity. They clean up with denatured alcohol or ammonia based cleaners.

Oil Based Primers for Stain Prevention

Kilz Original and similar oil based alternatives provide a solid middle ground option for moderate contamination levels, particularly years of smoking without heavy tar buildup or recent fires with limited soot. These primers excel at blocking the yellow nicotine stains that bleed through water based products. Expect longer dry times of 2 to 4 hours between coats, which extends project timelines. Oil based primers require mineral spirits for brush and roller cleanup, and they maintain a noticeable odor for several days after application. They work best for moderate nicotine staining where water based products fail but shellac’s intensity isn’t required.

Water Based Specialty Primers

Zinsser Odor Killing and similar water based alternatives suit only light smoke exposure, such as a single small fire quickly extinguished or a property where smoking occurred occasionally but not extensively. The main advantages come from lower VOC formulations that meet strict air quality regulations, easier cleanup with just soap and water, and faster 1 to 2 hour dry times. However, these primers show significant limitations compared to shellac and oil based options when facing heavy contamination. Smoke odors typically bleed through water based primers within months when contamination exceeds light exposure levels.

Proper application technique matters as much as primer selection. Thin, multiple coats outperform single thick applications because they allow better adhesion, faster drying, and more complete coverage without runs or sags.

Here’s the detailed six step application process:

  1. Protect floors with drop cloths and tape off trim, baseboards, and ceiling edges. Lay canvas drop cloths across the entire floor, overlapping edges by 6 inches. Canvas absorbs drips better than plastic, which becomes slippery and dangerous. Apply 2 inch painter’s tape along all baseboards, door frames, window trim, and the ceiling line. Press tape edges firmly to prevent primer from bleeding underneath.

  2. Cut in all edges, corners, and trim using 2 inch angled brush with steady hand. Load the brush with primer about halfway up the bristles. Start in corners and work outward, creating a 3 to 4 inch band along all edges where the roller can’t reach. Use long, smooth strokes rather than stabbing motions. Cutting in properly prevents roller marks at transition points and ensures complete edge coverage where smoke concentrates.

  3. Apply first coat using roller with 3/8″ to 1/2″ nap for smooth drywall in overlapping W pattern to avoid roller marks. Pour primer into roller tray, filling the deep end about halfway. Load the roller by rolling back and forth in the primer, then rolling excess off on the tray’s ribbed slope. Start in a corner and roll a W pattern about 3 feet wide, then fill in the W without lifting the roller. This technique distributes primer evenly without creating lines or thin spots.

  4. Inspect coverage under bright light checking for thin spots especially in corners. After completing a wall, shine a work light at an angle across the surface. Thin areas appear as lighter patches or show the original wall color bleeding through. Corners and edges near the ceiling often receive inadequate coverage due to roller angle limitations. Mark any thin spots with light pencil marks to address in the next coat.

  5. Allow proper drying time (45 min shellac, 2 to 4 hours oil based, 1 to 2 hours water based). Set a timer based on the primer type. Don’t touch or inspect surfaces during drying as this leaves fingerprints in partially cured primer. Keep ventilation fans running throughout the drying period. Temperature affects drying time, with cool rooms under 60°F extending the wait by an hour or more.

  6. Apply second coat using same technique ensuring complete coverage. Repeat the cutting in and rolling process in the same order as the first coat. The second coat typically requires less primer since you’re covering sealed surface rather than raw drywall. Pay special attention to areas that showed thin coverage after the first coat.

Coating requirements scale with damage severity. Light exposure from occasional smoke requires 1 to 2 coats in most cases. Moderate staining from several years of regular smoking needs 2 to 3 coats, particularly on ceilings where nicotine accumulates most heavily. Heavy nicotine from decade plus smoking demands 3 to 4 coats since the yellow tar creates persistent bleed through that penetrates even shellac based primers if applied too thinly. Fire damage requires 3 or more coats plus spot treatment of the worst areas where soot saturated the drywall. Heavy nicotine creates yellow bleed through that emerges during the first coat’s drying phase. Each gallon of primer covers 300 to 400 square feet depending on surface texture and application method, with rougher surfaces consuming more product. Between coats, conduct a smell test by sealing the room for 4 hours with windows and doors closed, then entering with fresh perspective to check for lingering odor before proceeding.

Common mistakes undermine even the best primers. Applying primer too thin to save money causes odor bleed through within months, wasting all the labor invested. Inadequate coverage in corners and edges leaves gaps where smoke concentrates most heavily. Not allowing proper dry time between coats causes poor adhesion as wet primer bonds to tacky primer instead of fully cured surface. Using wrong roller nap creates problems: nap too thick causes unwanted texture, while nap too thin gives poor coverage and requires extra coats. Skipping the edge cutting step leaves unsealed gaps along trim and corners where roller can’t reach, creating odor escape routes that contaminate the sealed areas.

Sealing Ceilings and Trim from Smoke Odor

XH7bqrOORwqOJhMinz-gRw

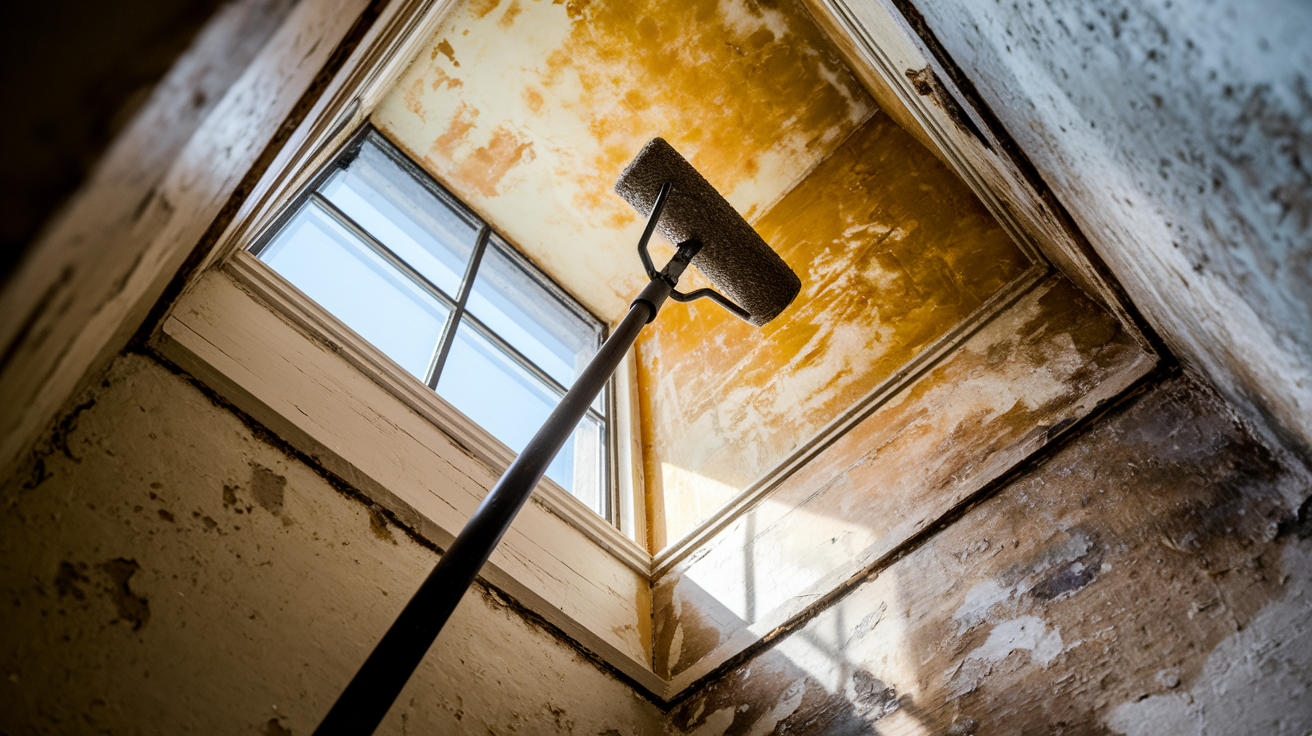
Ceilings require special attention because they show the worst nicotine staining as smoke rises and accumulates on overhead surfaces. The yellow brown tar buildup concentrates more heavily on ceilings than walls, sometimes requiring an extra coat of primer compared to vertical surfaces in the same room. Overhead application creates its own challenges. Use a proper roller extension pole 4 to 8 feet long to reach the ceiling without a ladder, which prevents fatigue and ensures even coverage. Standing on a ladder and reaching forces awkward angles that create thin spots and uneven application. The extension pole lets you maintain consistent pressure and technique while keeping both feet safely on the floor.

Remove or carefully tape off baseboards and trim before sealing adjacent walls. Small gaps between the wall and trim create spaces where smoke residue hides, and sloppy taping leaves primer on wood surfaces. If the trim itself shows nicotine staining or absorbed smoke odor, it needs primer too. Remove the trim completely for separate priming, or tape off walls and prime the trim in place. Quarter round and shoe molding at floor level often show heavy staining on the top edge where it meets the wall, requiring careful brush work to seal properly.

Bare wood surfaces or wood paneling may need light sanding with 220 grit sandpaper before primer application for proper adhesion. Glossy factory finishes or old varnish create slick surfaces that prevent primer from bonding correctly, leading to peeling within weeks. Sanding removes the glossy finish and creates microscopic grooves that give primer something to grip. Sand just enough to dull the shine, then wipe surfaces with a tack cloth to remove dust before priming.

Remove all outlet covers and switch plates before sealing walls, then prime inside the electrical boxes to prevent odor from escaping through wall cavities into sealed rooms. Smoke particles penetrate through small gaps around outlets and fill the wall cavity behind the drywall. If you seal the wall surface but leave boxes exposed, odor will bleed out through these openings and make the room smell like sealing failed. With power shut off at the breaker, remove cover plates and apply primer to the visible drywall inside the box using a small brush. Reinstall covers after topcoat paint dries.

Topcoat Paint Selection After Sealing Smoke Odor

eCzHmUD6SZKtxNXtKiP0Ag

Topcoat paint provides appearance, color, and cleanability while the primer underneath provides the actual odor blocking. Never skip primer thinking topcoat alone will work. Regular paint has relatively large pores that allow smoke odors to pass through within weeks, regardless of how many coats you apply or how expensive the paint. The primer does the heavy lifting for odor control, while topcoat protects the primer and gives you the finished look you want.

One hundred percent acrylic latex paints deliver best durability and easier application with lower VOCs than oil based topcoats. Modern acrylic formulations provide solid adhesion over shellac and oil based primers after proper drying time. They clean up with soap and water, dry in 1 to 2 hours for recoating, and produce minimal odor during application compared to solvent based alternatives. Most importantly, acrylic latex paints resist yellowing over time, which matters after investing significant effort in removing nicotine stains.

Satin or semi-gloss finishes work better than flat paint for previously smoke affected areas. Flat paint absorbs dirt and can’t be scrubbed without damaging the finish, which creates problems if any smoke residue remains on furniture or fabrics and transfers back to walls. Satin provides light sheen that allows gentle cleaning with damp cloth without removing paint. Semi-gloss offers even better washability for areas like kitchens or heavily used rooms, though it shows surface imperfections more readily than satin. Skip flat paint entirely in rooms that had smoke damage.

Quality topcoat requires two coats for uniform appearance over primer, especially when covering stain blocking primers that may have slight tint or amber color from shellac base. The first topcoat often looks blotchy as it adjusts to the primer underneath. The second coat evens out color and provides full hide, giving you the true finished shade you selected. Allow first topcoat to dry fully, usually 2 to 4 hours depending on humidity, before applying the second coat.

Advanced Techniques: Encapsulation Method for Heavy Smoke Odor

HfHZ8lYLSMCEf5pgziWmTQ

Encapsulation means molecular level neutralization versus surface covering. Standard primers seal smoke odor by creating a physical barrier, but encapsulation technologies penetrate to the same depth as the original smoke infiltration and chemically bond with odor molecules. This approach becomes necessary when contamination has soaked deep into drywall, reaching the paper backing and potentially the studs behind, making surface only treatments ineffective.

Thermal fogging uses heated deodorizing solution dispersed as fine mist to penetrate the same depth as original smoke. The process involves heating a specialized deodorizing compound to 130 to 140°F, then forcing it through a fogging machine that creates microscopic droplets smaller than smoke particles themselves. These tiny droplets follow the same paths smoke took during the original fire or exposure, reaching deep into porous materials where they bond with odor molecules and neutralize them chemically. The treatment takes 2 to 4 hours depending on square footage, and the property must remain vacant during application and for 4 to 6 hours afterward while fog settles.

Ozone treatment breaks down odor molecules through chemical oxidation, but requires completely vacant property for 24 to 48 hours due to health hazards. Ozone generators produce O3 gas that reacts with organic compounds including smoke molecules, breaking their chemical bonds and eliminating odor at the source. The gas penetrates everywhere air can reach, including wall cavities, ductwork, and porous materials. However, ozone at treatment concentrations damages lungs and irritates respiratory systems, making occupancy during treatment dangerous. All people, pets, and plants must vacate. After treatment, the space needs thorough ventilation for several hours before reoccupancy. Ozone also degrades rubber, plastics, and some fabrics with prolonged exposure.

Hydroxyl generators provide safer occupied space alternative to ozone that can run while residents remain, though the process works slower and with less power than ozone. Hydroxyl radicals occur naturally in the atmosphere when sunlight breaks down water vapor, and they safely break down odors and other organic compounds without health risks to occupants. The generators can run continuously for several days or weeks while people live in the space normally. The tradeoff comes in longer treatment time, typically 5 to 10 days for moderate contamination compared to ozone’s 1 to 2 day treatment. Hydroxyl works well for maintenance odor control after initial heavy remediation, preventing residual smells from reasserting.

Professional equipment becomes necessary in specific scenarios: structural fires with soot distributed throughout the house, years of heavy smoking in multiple rooms creating deep drywall penetration, or failed DIY sealing attempts that show odor return within weeks. When surface primers can’t reach the contamination depth, or when contamination has spread to insulation and wall cavities, these advanced methods provide solutions standard products can’t match. For severe fire damage or decade plus smoking exposure, consider professional Fire Damage Restoration Services that include thermal fogging and ozone treatment as part of comprehensive remediation.

When Insulation and Drywall Replacement Beat Sealing Smoke Odor

rMEiQIysRMOVUZ-n-xaf9g

Some contamination levels exceed what even shellac based primers can effectively encapsulate, making removal more practical than repeated sealing attempts. When smoke has saturated drywall to the point that tar has penetrated the paper backing and reached the gypsum core, or when insulation behind the drywall has absorbed years of accumulation, surface treatments can’t solve the problem no matter how many coats you apply.

Five indicators signal when replacement makes more sense than sealing:

Visible tar saturation bleeding through multiple primer coats and cleaning attempts, showing as persistent yellow brown staining that reappears within days of each application. Structural fire damage with charred drywall or exposed paper backing, indicating the material itself is compromised beyond surface contamination. Decade plus heavy smoking exposure throughout the home, particularly in homes where smoking occurred indoors daily for 15 to 20+ years. Persistent odor after proper two coat shellac primer application following thorough TSP cleaning, suggesting contamination has penetrated beyond primer’s reach. Visible mold growth combined with smoke damage, indicating moisture problems that require drywall removal anyway for proper remediation.

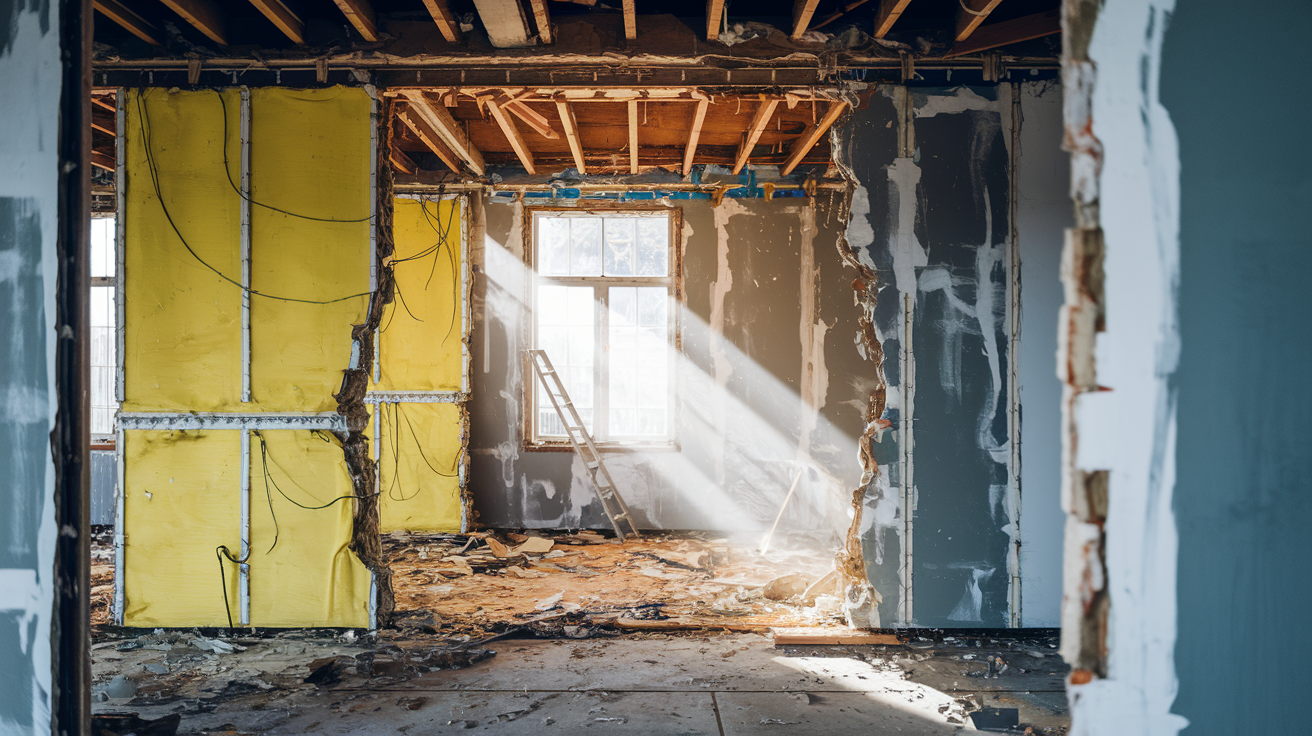
Insulation behind drywall absorbs and permanently holds smoke odor that surface applied primer cannot reach. Fiberglass batting and cellulose insulation act like sponges for smoke particles, trapping them deep in the material where they continue releasing odor for years. When you seal the drywall surface but leave contaminated insulation in the wall cavity, the room continues smelling because odor bleeds out through tiny gaps around outlets, baseboards, and penetrations. Opening a wall in a heavily smoke damaged home often reveals insulation stained brown from tar accumulation, making it an invisible odor source that undermines all surface sealing efforts.

Compare cumulative costs when making replacement decisions. Three failed sealing attempts at $600 each in materials and labor total $1,800 with no successful outcome, while one time drywall and insulation replacement in the worst affected rooms like the master bedroom or living room costs $1,200 to $2,000 and solves the problem permanently. Replacement also provides opportunity to upgrade insulation R value and inspect for other hidden issues like old wiring or plumbing problems. For comprehensive restoration that addresses underlying structural issues, consider Water and Fire Damage Repair services that coordinate removal, disposal, and reconstruction in one project.

Addressing HVAC Systems to Prevent Smoke Odor Return

h6IpPfuFSR2TZvUarwD2jQ

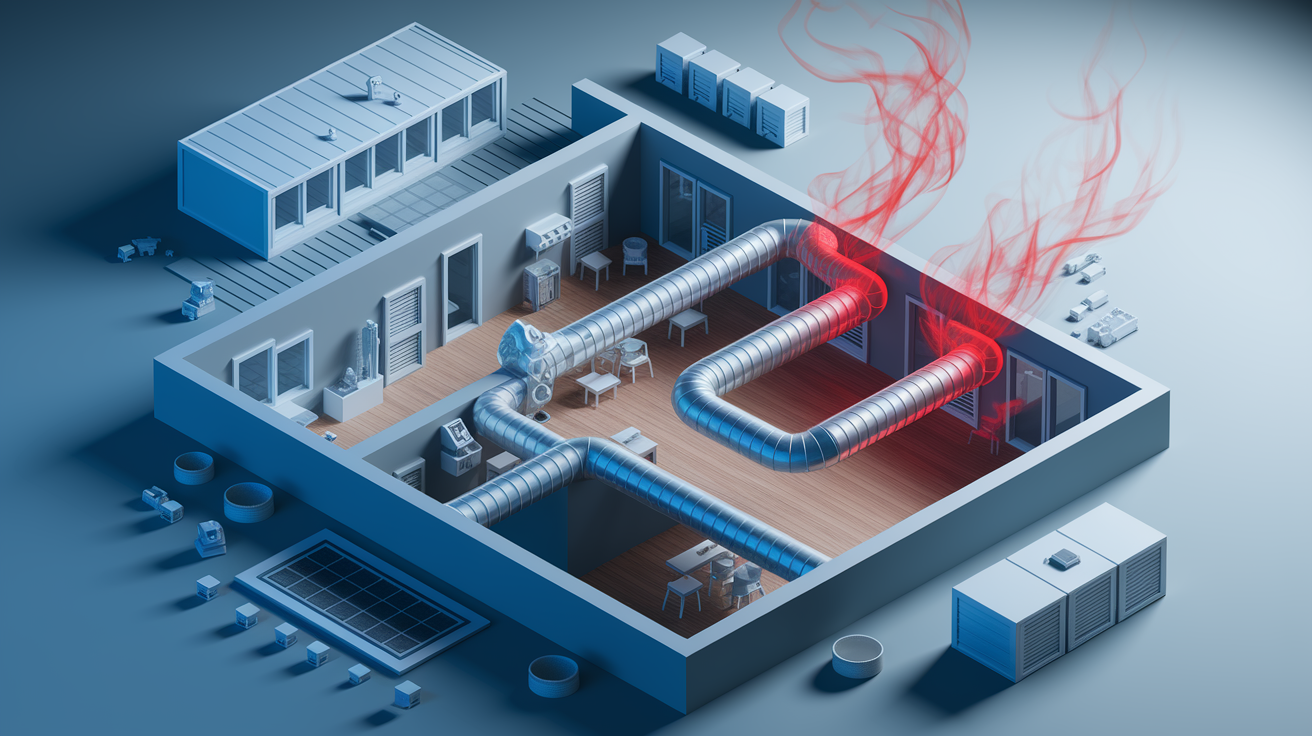
HVAC systems perpetuate smoke odor problems by cycling contaminated air through sealed rooms. Smoke particles lodge in ductwork, stick to the air handler coil, and accumulate in the evaporator unit, then get blown back into freshly sealed rooms every time the system runs. This undermines sealing efforts by reintroducing odor sources faster than primers can trap them. You might seal walls perfectly, but the HVAC system becomes an odor distribution network that makes the whole project seem like it failed.

Professional duct cleaning with rotary brush and HEPA vacuum should occur before final topcoat application or immediately after project completion. The process involves accessing ductwork through registers and return vents, then running specialized rotating brushes through the ducts while HEPA filtered vacuum extracts loosened particles. Technicians also clean the air handler coil, blower compartment, and return plenum where smoke residue concentrates. This service costs $300 to $500 for typical residential systems but proves essential for lasting results. Without it, contaminated dust redistributes through sealed rooms within days.

Upgrade standard fiberglass filters to MERV 11 to 13 pleated filters or add standalone HEPA air purifiers with activated carbon for continued odor molecule capture. Standard 1 inch fiberglass filters catch only large particles like dust and pet hair, allowing microscopic smoke particles to pass through and recirculate. MERV 11 to 13 filters trap particles down to 1 micron including most smoke components, though they cost $20 to $30 each versus $3 to $5 for fiberglass. Make sure your HVAC system can handle the increased airflow restriction before upgrading, as some older systems can’t pull air through dense filters without straining the blower motor. Standalone HEPA purifiers work in rooms where HVAC upgrades aren’t possible, continuously filtering air and reducing particle counts.

Replace HVAC filters monthly instead of the standard 3 month interval during the three months following smoke remediation to capture loosened particles. Cleaning and sealing work stirs up contamination that settles throughout the house, including into ductwork and on filter surfaces. More frequent replacement during this period prevents particle buildup that would otherwise recirculate. After three months, return to manufacturer recommended replacement intervals unless odor returns, which signals incomplete remediation requiring additional steps.

Verification and Problem Solving After Sealing

8HpmqDSARwmil-xuxES4TQ

Wait at least 72 hours after final topcoat application before accurate smell testing. Paint continues curing and releasing VOCs during this period, creating chemical odors that mask or confuse smoke odor detection. Fresh paint smell from acrylic latex usually fades within 48 to 72 hours in well ventilated spaces, leaving clean air that reveals whether smoke odor remains. Testing too early gives false results because you’re smelling paint, not evaluating odor elimination.

The closed room test provides reliable verification. Seal the room for 24 hours with windows and doors closed and HVAC register closed or blocked. This prevents fresh air from masking lingering odor and allows any remaining smoke smell to concentrate in the space. After 24 hours, leave the house for 30 minutes to clear your nose, then return and immediately enter the sealed room. Fresh perspective catches odors your nose would miss if you’d been working in the space. A properly sealed room smells like new paint or completely neutral, not smoky or stale.

Heat and humidity stress testing raises the stakes by increasing thermostat to 78 to 80°F for several hours. Warmth activates smoke compounds that remain dormant in cool conditions, so heating the space reveals weak spots in sealing coverage. If odor emerges during heating, it indicates missed areas or insufficient primer coats in certain spots. Run this test on a warm day or use heating system to raise temperature, then perform the smell test after heat has held for 4 to 6 hours.

Persistent odor after proper sealing points to specific missed areas or contamination sources beyond wall surfaces. It means the work wasn’t complete, not that sealing doesn’t work.

Systematic troubleshooting identifies the remaining problems:

  1. Verify all primer coats dried fully (shellac 45 min, oil 4 hours) before topcoat application. Rushing between coats causes poor bonding and allows odor to bleed through weak spots in the seal. Check your project timeline against manufacturer specifications to confirm proper drying occurred.

  2. Inspect corners, ceiling line, and baseboard edges under bright light for thin coverage spots. Use a work light or bright LED flashlight held at an angle to the wall surface. Thin areas appear lighter or show underlying staining. Mark them with light pencil for spot treatment.

  3. Remove outlet covers and smell inside wall cavities for odor escaping from unsealed areas. If the wall cavity smells worse than the room, contamination behind the drywall needs addressing through insulation replacement or in cavity treatment with thermal fogging.

  4. Confirm HVAC ducts received professional cleaning if system was running during smoke exposure. Schedule duct cleaning if you haven’t already completed it, as contaminated ducts undermine all surface sealing work.

  5. Check adjacent rooms, closets, and attic spaces that may be feeding odor through shared wall cavities. Smoke travels through wall cavities between rooms. Sealing one room while leaving adjacent spaces untreated allows odor to migrate through shared stud bays.

  6. Apply heat test to walls with hairdryer to identify weak spots where odor emerges. Hold a hairdryer 6 inches from the wall on high heat for 30 to 60 seconds, then smell that spot immediately. Odor emergence pinpoints exact locations needing additional primer coats.

Commonly missed locations include wall areas behind radiators or large furniture that were inaccessible during application and received no primer at all. Closets often get treated as low priority and receive only one coat when the main room got three. Upper wall sections near the ceiling frequently receive thin roller coverage because of awkward overhead angles. Window and door frames that were taped off but not sealed themselves continue releasing odor into sealed rooms.

Accept that smoke contamination has penetrated beyond what surface primers can encapsulate when specific signs appear. Odor persisting after proper 3 coat shellac application following thorough cleaning indicates deep penetration into insulation or wall cavities. Odor stronger inside wall cavities than on the surface confirms contamination behind the drywall that primers can’t reach. Failed second sealing attempt using a different primer type and technique suggests the problem exists beyond the surface level. At this point, drywall and insulation removal and replacement becomes the necessary solution rather than continuing to add primer coats to surfaces that can’t solve the underlying problem.

DIY Versus Professional Smoke Odor Sealing Services

The decision between DIY and professional service depends on contamination severity, affected square footage, homeowner skill level with painting and surface preparation, and available time for a multi day project requiring proper drying periods between steps.

Factor DIY Approach Professional Service
Best for Single rooms with light to moderate damage, homeowners comfortable with painting Whole-house contamination, heavy fire damage, failed DIY attempts
Timeline 3-7 days with proper drying between coats, working evenings and weekends 2-4 days with full crew working continuously
Cost $200-800 in materials depending on room size and damage severity $1,500-5,000+ including labor, materials, equipment, disposal
Equipment Rental fans, standard painting supplies, respirator, adequate for surface work Commercial air scrubbers, thermal foggers, ozone generators, airless sprayers included
Results Good results with proper technique, material selection, and sufficient coats Guaranteed results with warranty, IICRC-certified techniques, molecular-level treatment

IICRC certification stands for Institute of Inspection, Cleaning and Restoration Certification, the industry standard showing technician training in proper fire and smoke restoration protocols. Certified technicians have completed coursework in smoke behavior, contamination assessment, appropriate cleaning methods, primer selection, and verification testing. This training matters for quality outcomes because smoke damage involves chemistry and building science beyond standard painting knowledge. IICRC certification also carries weight with insurance companies during claims processing, as adjusters recognize certified work as meeting industry standards for proper remediation.

DIY materials cost $200 to $400 for light damage in a single 12×12 bedroom, including TSP cleaner, dry sponges, 2 gallons of shellac or oil primer, 2 gallons of topcoat paint, roller supplies, brushes, tape, and drop cloths. Moderate damage across

Final Words

Sealing smoke odor in walls takes the right sequence: deep TSP cleaning, shellac or oil-based primer in multiple coats, and quality topcoat to finish.

Light damage in one room runs $200-400 and takes 3-5 days. Moderate contamination across multiple rooms costs $400-800 and needs 5-7 days. Heavy fire damage or decade-long smoking usually requires professional service with specialized equipment.

Skip steps and the smell comes back. Follow the process and you get lasting results that make rooms livable again.

FAQ

What gets rid of smoke smell on walls?

Getting rid of smoke smell on walls requires deep cleaning with TSP (trisodium phosphate) solution followed by application of shellac-based or oil-based odor-blocking primer. Surface cleaning alone won’t work because smoke particles embed deep into porous drywall and require encapsulation, not just masking.

Will Kilz cover cigarette smoke?

Kilz Original oil-based primer will cover cigarette smoke effectively for moderate contamination levels when applied in 2-3 coats over properly cleaned surfaces. For heavy nicotine staining or decade-long smoking exposure, shellac-based primers like BIN provide superior odor blocking and stain coverage compared to Kilz.

How long does smoke smell stay in walls?

Smoke smell stays in walls permanently until properly removed because smoke particles embed deep into porous drywall and insulation. Without professional cleaning and odor-blocking primer application, the smell will persist indefinitely and bleed through regular paint within weeks or months of application.

Will painting walls cover smoke smell?

Painting walls will not cover smoke smell because regular paint cannot encapsulate the smoke particles embedded in porous drywall. You must first deep clean with TSP solution, then apply 2-3 coats of shellac-based or oil-based odor-blocking primer before any topcoat paint application.

How many coats of primer do I need for smoke odor?

The number of primer coats needed for smoke odor depends on contamination severity: light exposure requires 1-2 coats, moderate nicotine staining needs 2-3 coats, and heavy fire damage or decade-long smoking demands 3-4 coats. Test between coats by sealing the room for 4 hours and checking for lingering smell.

Can I use water-based primer for smoke odor?

Water-based primer works only for very light smoke exposure and offers significant limitations compared to shellac or oil-based products for moderate to heavy contamination. Shellac-based primers provide maximum odor blocking for serious smoke damage, while oil-based primers offer excellent middle-ground performance for moderate staining.

Do I need to seal ceilings for smoke odor?

Yes, you need to seal ceilings for smoke odor because smoke rises and accumulates on ceiling surfaces, creating the worst nicotine staining in most rooms. Ceilings require the same cleaning and primer treatment as walls, using a 4-8 foot extension pole for proper overhead application.

Should I remove insulation after smoke damage?

You should remove insulation after smoke damage when contamination has penetrated beyond what surface primers can encapsulate, typically after structural fires or decade-plus heavy smoking throughout the home. Insulation behind drywall permanently holds smoke odor that surface-applied primer cannot reach, creating an invisible odor source.

How long does primer need to dry before topcoat?

Primer drying time before topcoat depends on product type: shellac-based primers need 45 minutes between coats, oil-based primers require 2-4 hours, and water-based primers need 1-2 hours. Allow proper drying between all coats to prevent poor adhesion and paint failure.

Do HVAC ducts need cleaning after smoke damage?

HVAC ducts need professional cleaning after smoke damage because smoke particles lodge in ductwork and get blown into freshly sealed rooms every time the system runs. Duct cleaning with rotary brush and HEPA vacuum should occur before final topcoat application to prevent re-contamination.

When should I hire professionals for smoke odor?

You should hire professionals for smoke odor when dealing with structural fires affecting multiple rooms, decade-long heavy smoking throughout the home, or failed DIY sealing attempts showing odor return. Professional services include IICRC-certified techniques, commercial equipment, and guaranteed results with warranty coverage.

How much does professional smoke odor sealing cost?

Professional smoke odor sealing costs range from $1,500-3,000 for whole-home light to moderate damage and $3,000-7,000+ for heavy fire damage with contents cleaning. This pricing includes labor, materials, commercial equipment, and disposal, compared to DIY material costs of $200-800 for single rooms.

Black Mold Drywall Removal: Safe Steps for Your Home

0

Think you can just spray and paint over black mold on drywall? Think again.
When mold gets into the paper layer of drywall, surface cleaning usually won’t stop it.
Left alone it spreads, damages framing, and can irritate lungs.
This post walks you through safe, step‑by‑step actions for small jobs: stopping spores from spreading, the protective gear to use, how to cut and bag contaminated drywall, and when to call a professional.
Acting fast limits damage and makes repairs easier.

Immediate Steps for Safe Black Mold Drywall Removal

D2OIt7tMQfOqQ0CJE_3RZw

Black mold on drywall (Stachybotrys chartarum) needs fast action. You can’t clean or save porous materials like drywall and paper facing once mold gets in. Removal is the only fix that works. Water damaged drywall should be dried or torn out within 24 to 48 hours after exposure to stop mold before it starts. If you’re already seeing dark, slimy patches, the damage is active and you need to deal with it now.

Before you cut anything, measure the contaminated area. Small patches under 10 square feet (think a 3 foot by 3 foot section) can be handled by a prepared homeowner. Anything larger, hidden mold inside wall cavities, ceiling contamination, or mold in your HVAC system means you need a professional remediation contractor.

Here’s what to do for a small DIY job:

  1. Turn off your HVAC system. Shut down heating, cooling, and ventilation so spores don’t spread through ducts.
  2. Seal off the room. Use 6 mil plastic sheeting and duct tape to cover doorways, air vents, and any openings. You’re creating a containment zone.
  3. Set up negative air pressure. Run a HEPA air scrubber or exhaust fan to pull air out of the work area and vent it outdoors. This keeps spores from drifting into clean spaces.
  4. Put on full PPE. Wear an N95 respirator (or P100 for heavier contamination), sealed goggles, nitrile gloves, and a disposable Tyvek suit with hood and shoe covers.
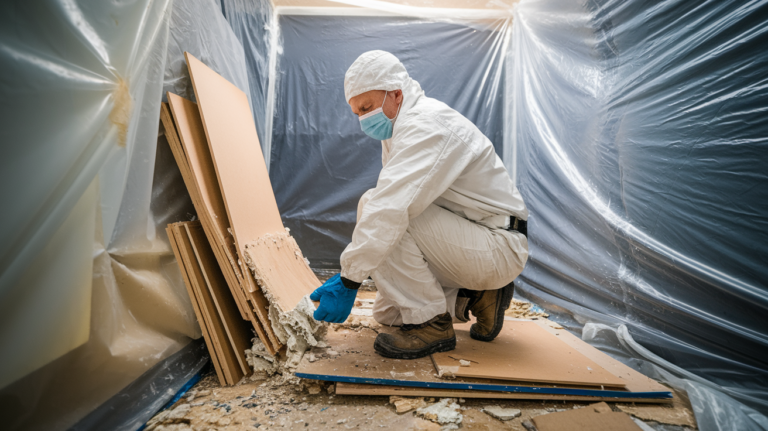
  5. Cut and remove moldy drywall. Score and cut at least 12 inches beyond visible mold. For heavy or uncertain growth, extend the cut to 18 inches. Remove all affected insulation too.
  6. Double bag debris. Seal removed materials in heavy duty 6 mil contractor bags. HEPA vacuum exposed framing, then clean with detergent or 3% hydrogen peroxide. Dry the structure to below 15–20% moisture content before closing it back up.

Later sections will expand on PPE options, containment techniques, tools, pricing, and when to stop and call a pro.

Identifying Black Mold on Drywall and Assessing Severity

4y5SGCP8RL6Hrv2XdRS-fA

Black mold typically shows up as dark green or black patches with a slimy or wet texture. It grows in areas with chronic moisture behind leaking pipes, around roof intrusions, in damp basements, or after flooding. The scientific name is Stachybotrys chartarum, and it loves cellulose materials like drywall paper and wood when relative humidity stays above 60% for extended periods.

Use these signs to confirm black mold and figure out how bad it is:

  • Color and texture: Dark greenish black, often glossy or wet looking. Dry black mold can appear powdery.
  • Smell: Strong musty or earthy odor, even if you don’t see visible growth yet.
  • Water history: Recent or ongoing leaks, flooding, roof damage, or condensation problems in the area.
  • Moisture readings: Use a moisture meter on studs and drywall. Readings above 20% for wood framing indicate active moisture that will support mold growth.

If the contaminated area measures more than 10 square feet, if you find mold inside wall cavities when you open a small inspection cut, or if people in the home are experiencing symptoms like coughing, nasal congestion, wheezing, eye irritation, or skin rash, don’t attempt DIY removal. Vulnerable groups (infants, elderly individuals, pregnant people, and anyone with asthma, allergies, or weakened immune systems) face higher risk from exposure and should leave the home during remediation.

Safety Gear and PPE for High Risk Mold Removal Conditions

XXCMJJrWSIKTU_Io9lXi0A

Personal protective equipment isn’t optional for black mold removal. Cutting into moldy drywall releases a cloud of spores, mycotoxins, and dust. You need a barrier between your lungs, eyes, skin, and that contamination.

For small, contained jobs under 10 square feet with no structural damage, an N95 respirator provides baseline protection. These disposable masks cost around $10 to $30 each and filter at least 95% of airborne particles. Replace the mask if it becomes damp or hard to breathe through.

For moderate to heavy contamination (larger areas, visible mold inside walls, or wet insulation), upgrade to an elastomeric half mask or full face respirator with P100 cartridges. These reusable respirators cost $50 to $150, with replacement P100 filters running $20 to $40 per pair. P100 filters capture 99.97% of particles, including mold spores and fine dust. Full face models also protect your eyes.

Additional PPE you need for every job:

  • Sealed goggles (non vented): $10–$25. Vented goggles allow spores in. Use tight fitting, sealed eye protection.
  • Nitrile gloves: 4–7 mil thickness, disposable. A box of 50 costs $10–$20. For heavy contamination or sharp edges, double glove or use thicker chemical resistant gloves.
  • Disposable coverall suit: Tyvek or similar material with hood and elastic cuffs, $15–$30 each. Tape the cuffs to your gloves and boots to seal gaps.
  • Shoe covers or dedicated work boots: Disposable covers cost $5–$10 per pack. If you use work boots, clean them thoroughly before leaving the containment area.
  • Hair covers (optional for severe jobs): Prevent spores from settling in your hair.

Wear all PPE from the moment you enter the containment zone until you finish bagging the last piece of debris. Remove PPE carefully in reverse order (gloves last) and dispose of it in the same contractor bags you use for moldy drywall.

Advanced Containment Setup for Mold Contaminated Drywall

VAtsRrLcTAmX0U6FSCZweg

Containment stops mold spores from spreading to clean areas of your home. Even a small drywall removal job requires full isolation of the work zone. Cutting and handling moldy materials releases spores into the air, and without containment those spores settle on furniture, carpets, and HVAC ducts throughout the house.

Start by turning off your central heating and cooling system. Seal all HVAC vents in the work area with 6 mil plastic sheeting and duct tape. If the system runs during demolition, it’ll pull contaminated air into the ductwork and distribute spores to every room.

Use 6 mil polyethylene sheeting to seal doorways, windows, and any openings. A single roll (typically 10 feet by 25 feet) costs $20 to $60. Overlap sheets by at least 12 inches and secure all edges with heavy duty duct tape or filament tape, which runs $6 to $15 per roll. If the doorway must remain passable, create a zippered entry or a double flap system using two overlapping sheets of plastic.

Negative air pressure is the key to stopping cross contamination. Set up a HEPA air scrubber or exhaust fan inside the containment zone and vent it directly outdoors through a window or exterior wall. The scrubber pulls air out of the work area faster than it leaks back in, creating a pressure difference that keeps spores from drifting into adjacent rooms. HEPA air scrubbers rent for $100 to $300 per week. Make sure the unit exhausts outside. Recirculating air defeats the purpose.

Here’s the containment sequence:

  1. Seal all HVAC vents and registers with plastic and tape.
  2. Cover the floor with plastic sheeting to catch debris and protect flooring.
  3. Hang 6 mil plastic over doorways, windows, and openings. Tape all seams.
  4. Position the HEPA air scrubber near a window or exterior opening and run ductwork outside.
  5. Turn on the scrubber before you start cutting drywall and leave it running until final cleanup is complete.

If you open a door or plastic barrier and feel air being pulled into the room, your negative pressure is working.

Tools and Materials Needed for Removing Moldy Drywall

XW_Db37ORtq0-pgVXsNp_w

You need cutting tools, cleaning equipment, moisture control devices, and disposal supplies. Buy or rent HEPA rated vacuums and dehumidifiers. Standard shop vacs and box fans will spread spores instead of capturing them.

Cutting and demolition tools: Utility knife with extra blades, drywall saw or jab saw, pry bar, hammer. For larger jobs a reciprocating saw speeds up cutting but increases dust. Total cost for hand tools: $20 to $100.

HEPA vacuum: A true HEPA vacuum filters 99.97% of particles at 0.3 microns, trapping mold spores and fine dust. Consumer models cost $200 to $800. Commercial units rent for $40 to $150 per day. Confirm the vacuum meets HEPA standards. Many shop vacs labeled “HEPA style” don’t meet the full specification.

Dehumidifier: After removing wet drywall, you’ve got to dry the framing before closing walls. Dehumidifiers cost $150 to $400 to purchase, or $40 to $80 per week to rent. Plan to run the unit 24 to 72 hours, depending on moisture levels and airflow.

Moisture meter: Pin type or pinless meters measure moisture content in wood and drywall. Readings should drop below 15–20% for studs before you install new drywall. Meters cost $30 to $150.

Disposal and cleaning supplies: Heavy duty 6 mil contractor bags (30–55 gallon), $10 to $20 per box. Buckets, scrub brushes, spray bottles, detergent, and 3% hydrogen peroxide for cleaning non porous surfaces. Don’t use bleach on porous materials like wood framing. It doesn’t penetrate and can leave moisture that encourages regrowth.

Containment materials: 6 mil plastic sheeting, duct tape, HEPA air scrubber (rental $100–$300/week).

Rent equipment locally or through tool rental chains to save on upfront costs for single use jobs.

Step by Step Black Mold Drywall Removal Procedure

qpLnJRQgRlqBnVMHIXoyEg

This procedure applies to small, contained jobs under 10 square feet with no HVAC or structural complications. If you encounter extensive hidden mold, stop and call a professional.

  1. Document the area. Photograph visible mold, water stains, and the overall room condition. Measure the square footage of contamination. Save this documentation for insurance or contractor estimates.

  2. Turn off HVAC and power. Shut down heating, cooling, and ventilation. Turn off electrical circuits to the work area at the breaker panel to avoid cutting into live wires.

  3. Set up containment. Seal doorways, windows, and vents with 6 mil plastic sheeting and tape. Position a HEPA air scrubber to exhaust outdoors and create negative air pressure.

  4. Put on full PPE. Respirator, sealed goggles, Tyvek suit, nitrile gloves, shoe covers. Tape glove cuffs to suit sleeves.

  5. Score and cut drywall. Use a utility knife to score cut lines at least 12 inches beyond visible mold. For heavy contamination or uncertain boundaries, extend the cut to 18 inches. Lightly mist the moldy surface with water from a spray bottle to reduce airborne spores when cutting. Cut slowly and carefully. Drywall dust mixed with mold spores creates a respiratory hazard even with a respirator.

  6. Remove contaminated drywall and insulation. Pry off moldy drywall sections. Remove all wet, discolored, or crumbling insulation. Don’t try to salvage porous materials. If you find additional mold behind the first layer, extend your cuts and keep removing material until you reach clean, dry framing.

  7. Double bag all debris. Place moldy drywall, insulation, and trim into heavy duty 6 mil contractor bags. Seal each bag, then place it inside a second bag and seal again. This prevents tears and leaks during transport.

  8. HEPA vacuum all exposed framing. Vacuum studs, sill plates, and any remaining structure. Work slowly and thoroughly. Spores cling to wood grain and crevices.

  9. Clean non porous surfaces. Scrub framing with a stiff brush, detergent, and water, or spray with 3% hydrogen peroxide and let sit 10 to 15 minutes before wiping. Don’t use bleach on wood. It evaporates quickly, leaves moisture, and doesn’t penetrate porous surfaces. For concrete or masonry, use TSP (trisodium phosphate) or a heavy duty cleaner.

  10. Dry the structure. Run a dehumidifier and air movers (fans) for 24 to 72 hours. Use a moisture meter to confirm wood framing reads below 15–20% moisture content and relative humidity in the cavity stays under 50%. Don’t close the wall until drying is complete and verified. Trapped moisture will bring the mold back.

After drying, reinspect for any remaining discoloration, odor, or soft spots. If the area passes visual and moisture checks, you can proceed to repairs.

Disposal Rules for Mold Contaminated Drywall

5_1PQjxURTqldZ3nEZfzKw

Moldy drywall is construction debris, not household trash. Most municipalities allow disposal in regular construction and demolition landfills, but rules vary by location. Call your local waste management authority or landfill before hauling bags to confirm acceptance and labeling requirements.

Double bag all contaminated materials in 6 mil contractor bags. Tie and tape each bag shut to prevent tearing during transport. Don’t overfill bags. A half full bag is easier to carry and less likely to split. Transport bags directly from the containment area to your vehicle without setting them down in clean spaces. If possible, keep bagged debris outside in a sealed container until disposal.

Don’t put moldy drywall in compost bins, and don’t burn it. If your home was built or renovated before 1980 (especially before 1978), suspect asbestos in drywall joint compound, textured ceilings, and plaster. Cutting or sanding asbestos containing materials requires licensed abatement and special disposal. Test suspect materials before you start cutting. Asbestos testing costs $200 to $600 and can be completed in a few days by a certified lab.

When to Hire Professional Mold Remediation Services

nSSP7fUJTzqTFwK6S5wLZQ

Professional remediation becomes necessary when contamination exceeds your ability to safely contain, remove, and verify cleanup. The 10 square foot threshold is a common guideline, but other factors matter just as much.

Hire a professional if you encounter any of these conditions:

  • Contaminated area larger than 10 square feet. Larger jobs require industrial containment, commercial grade HEPA filtration, and experience managing airflow and disposal at scale.
  • Hidden mold inside wall cavities, ceilings, or under floors. If you open one section and find mold spreading along studs or sheathing beyond what you can see, the infestation is bigger than the visible patch. Professionals use thermal imaging and moisture mapping to locate hidden growth.
  • HVAC or ductwork contamination. Mold inside ducts or air handlers spreads spores throughout the home every time the system runs. Duct cleaning and HVAC remediation require specialized tools and access.
  • Recurrent mold despite prior removal. If mold keeps coming back in the same location, the moisture source hasn’t been fixed or the initial cleanup was incomplete. A professional can identify hidden leaks and perform clearance testing to confirm elimination.
  • Occupants with serious health conditions. If anyone in the home has asthma, immune disorders, chronic respiratory conditions, or is pregnant, don’t attempt DIY mold removal. The risk of exposure outweighs the cost of hiring a contractor.

Professional costs vary by job size and complexity. Small jobs under 50 square feet typically run $500 to $3,000. Moderate remediation covering 50 to 500 square feet costs $1,500 to $10,000. Large or complex projects (whole rooms, structural repairs, HVAC contamination) can reach $5,000 to $30,000 or more. Professionals carry liability insurance, use industrial equipment, and provide documentation that satisfies insurance adjusters and health inspectors.

Costs of Black Mold Drywall Removal and Restoration

WR9AxCbAR3adIXIDKaW0-g

Black mold remediation costs break down into containment, removal, disposal, cleaning, drying, testing, and rebuilding. DIY jobs save labor but require equipment rentals and material purchases. Professional jobs include all labor, equipment, and insurance documentation.

Job Size Typical Cost Range
Small (under 50 sq ft, DIY or pro) $500–$3,000
Moderate (50–500 sq ft, professional) $1,500–$10,000
Large or complex (whole rooms, HVAC, structural) $5,000–$30,000+

Per square foot estimates commonly range from $10 to $30 or more, depending on access, contamination severity, and local labor rates. Hidden mold, asbestos abatement, and post remediation repairs push costs higher.

DIY equipment and material costs include HEPA air scrubber rental at $100 to $300 per week, dehumidifier rental at $40 to $80 per week, 6 mil plastic sheeting and tape for $30 to $80, contractor bags for $10 to $20, PPE (respirator, Tyvek suit, gloves, goggles) for $50 to $100, and a moisture meter for $30 to $150. Add drywall, joint compound, primer, and paint for finishing, which varies by square footage.

Professional remediation includes containment setup, negative air pressure, removal, HEPA cleaning, disposal, moisture control, and documentation. Many contractors offer post remediation clearance testing for an additional $300 to $800 to verify the space is safe for reoccupation.

Insurance coverage for mold is inconsistent. Most homeowner policies exclude mold damage unless it results from a covered peril like a sudden pipe burst. Gradual leaks, long term humidity, and maintenance issues are typically not covered. Document everything (photos, moisture readings, contractor estimates, receipts) and submit claims promptly.

Preventing Mold from Returning After Drywall Removal

zHHtHHBcSpmB3a1t4tExqw

Removing moldy drywall solves the immediate problem, but mold will return if moisture conditions persist. Prevention is about controlling water, airflow, and humidity at the source.

Maintain indoor relative humidity between 30% and 50%. Use a hygrometer to monitor levels in bathrooms, basements, and other high risk areas. Humidity above 60% for extended periods creates ideal conditions for mold growth. Run dehumidifiers in damp spaces and empty collection tanks daily.

Fix leaks immediately. Plumbing leaks, roof damage, gutter overflow, and foundation cracks all introduce water into wall cavities and insulation. Repair the source within 24 to 48 hours and dry affected materials completely. Small leaks ignored for weeks cause more damage than sudden floods because mold has time to colonize porous materials.

Here are six prevention practices to follow after remediation:

  1. Improve ventilation. Install exhaust fans in bathrooms and kitchens that vent to the outside, not into attics or crawl spaces. Run fans during showers and cooking and leave them on for 15 minutes after.
  2. Use mold resistant materials. Install mold resistant drywall (paperless or fiberglass faced) or cement board in high moisture areas like bathrooms, laundry rooms, and basements.
  3. Keep gutters and downspouts clear. Water should drain at least 6 feet away from the foundation. Clean gutters twice a year and check that downspout extensions are in place.
  4. Slope grade away from the foundation. Soil should slope away from the house at a minimum 6 inch drop over 10 feet to prevent water pooling against basement walls.
  5. Monitor with a moisture meter. After repairs, check framing moisture levels periodically, especially after heavy rain or plumbing work. Catch problems early before mold appears.
  6. Dry materials within 24–48 hours. If a pipe leaks, a roof drips, or flooding occurs, extract water and start drying immediately. The faster you dry, the less chance mold has to establish.

Inspect basements, attics, and crawl spaces twice a year for signs of water intrusion, condensation, or musty odors. Early detection stops small problems before they require full remediation.

Final Words

Stop the leak, put on the right PPE, and set containment now — fast action limits spread and health risks.

This post walked you through spotting black, slimy patches, reading moisture meters, using HEPA air scrubbing and negative pressure, cutting 12–18 inches beyond visible growth, safe disposal, and when to call a pro.

For small jobs you’re likely able to follow these steps. For larger or HVAC-linked problems, get help. With careful drying and clear documentation, black mold drywall removal finishes with a healthy, fixed home.

FAQ

Q: Can black mold be removed from drywall?

A: The black mold can sometimes be removed, but drywall soaked or heavily contaminated usually must be cut out. Remove at least 12–18 inches beyond visible growth. Small areas (<10 sq ft) may be DIY; larger jobs need pros.

Q: Is drywall mold toxic?

A: Drywall mold can be toxic depending on the species; Stachybotrys (black mold) may produce harmful spores and mycotoxins. People with asthma, infants, or the elderly can react. Get removal and medical advice if symptoms appear.

Q: What kills mold and mildew on sheetrock?

A: Mold and mildew on sheetrock can be removed with detergent and water or 3% hydrogen peroxide, plus HEPA vacuuming. Porous drywall often can’t be saved—do not use bleach on soaked drywall; cut and replace if deeply contaminated.

Q: Is mold behind drywall a problem?

A: Mold behind drywall is a problem because it hides, spreads, and damages framing while creating health risks. You need moisture readings and likely removal; call pros if over 10 sq ft, HVAC involved, or occupants are vulnerable.

How to Fix a Leaking Basement Floor That Actually Works

0

Think a quick coat of sealer will fix your leaking basement floor? Think again.
A wet floor is a symptom, not the source.
If you only mop and paint, the water comes back and mold, warped trim, and ruined things follow.
This post shows how to find where water enters, stop it fast, and use repairs that actually hold, including crack patching, proper primers, and when to install a drain.
Read on and you’ll get step-by-step actions you can do today, and know when to call a pro.

Immediate Steps to Stop a Leaking Basement Floor

scBP3yvPS3eScTCcd3-AJA

The first thing you need to do when water shows up on your basement floor is figure out where it’s coming from. Walk the entire floor and look at the perimeter where the slab meets the wall. Check for visible cracks, damp patches that stay wet longer than the rest of the floor, and white powdery deposits. That powder is called efflorescence, and it means water is pushing through the concrete. Mark every spot you find with chalk or tape so you can come back to it.

Next, classify the leak. Is it a slow seep that leaves a damp circle, or is water actively flowing? If you see standing water, remove it immediately using a wet vacuum or a submersible pump. The faster you pull water out, the less it soaks into walls, wood, and stored belongings. If you have an active leak where water is literally streaming through a crack, you can buy yourself time with hydraulic cement. Mix a small batch, press it into the crack while water is still flowing, and hold it for a few minutes. It sets in about three to five minutes and will slow or stop the flow long enough for you to plan a real repair.

Once the floor is clear and you’ve controlled active water, do a second walk through. Sometimes drying the surface reveals additional damp spots or hairline cracks you missed the first time. Take photos of every leak point and write down rough measurements. How big the crack is, how much area stays wet, whether the problem is along one wall or spread across the whole slab.

Your immediate action list:

Turn off the source if it’s a plumbing leak. If it’s groundwater, you can’t stop it but you can control how much enters. Extract all standing water with a wet vacuum or pump as fast as possible. Apply hydraulic cement to active cracks to buy time for a permanent fix. Mark and photograph every seepage point so you know what to repair next.

Common Basement Floor Leak Causes and How They Develop

Ldsp2SRXTCizZjbIz-vKYg

Most basement floor leaks fall into a few predictable categories. The most common is hydrostatic pressure. When the water table rises or soil around your foundation gets saturated, groundwater pushes up through the slab. Concrete is porous, and any crack or weak spot becomes an entry point. You’ll usually see this type of leak get worse after heavy rain or spring thaw.

Cracks and cold joints are the second big cause. Concrete shrinks as it cures, and floors poured in sections create seams where those sections meet. Over time, settlement, freeze thaw cycles, or just age can open those joints or widen hairline cracks. Water follows the path of least resistance, so even a crack you can barely see can channel a surprising amount of moisture. If your gutters are clogged or your downspouts dump water right next to the foundation, that water soaks into the soil and eventually works its way under the slab.

Other leak sources include foundation wall cracks that let water run down to the floor wall joint and pool at the perimeter. Failed or missing perimeter drain tiles that no longer carry groundwater away from the footing. Plumbing leaks from supply lines or drain pipes buried in or beneath the slab. Condensation on cold concrete during humid weather, which can look like seepage but is actually moisture from the air. Seasonal groundwater spikes when the water table temporarily rises above your basement floor elevation. Window well leaks that allow surface runoff to pour through basement window openings and run across the floor.

Preparing the Basement for Leak Repair

lL-T2CQaQT-BEhCXFIHq3Q

Before you can seal or patch anything, the floor has to be completely dry and clear of obstacles. Move furniture, boxes, and anything stored on the floor out of the work area. If the leak is near a wall, pull items away from that wall too. You need access and you don’t want belongings sitting in damp air while the repair cures.

Scrub the floor with a stiff brush to remove dirt, oils, old sealers, and loose concrete. Vacuum up all debris with a shop vacuum. If there’s grease or oil, use a concrete degreaser and rinse thoroughly. Any contamination left on the surface will prevent primers and sealants from bonding. Once the floor is clean, it has to dry. If the slab is damp from the leak itself or from cleaning, set up fans and a dehumidifier. Depending on humidity and airflow, drying can take anywhere from a few hours to a full day. You can test dryness by taping a piece of plastic sheeting to the floor. If moisture beads up under it after a few hours, keep drying.

Wear gloves and safety glasses during prep work, especially if you’re using acid based cleaners or concrete etching solutions. Ventilate the basement by opening windows or running exhaust fans. Fumes from sealers and epoxies can build up fast in an enclosed space. Re-inspect the floor after it dries. Sometimes additional cracks, damp zones, or efflorescence become visible once surface moisture evaporates. Mark those spots and add them to your repair list.

Choosing Materials to Fix a Leaking Basement Floor

IS5FkZoWR3yT3wI2WN9ZHg

The materials you need depend on whether you’re patching a crack, sealing the entire floor, or both. For small cracks and control joints, use a flexible polyurethane sealant. Polyurethane stays elastic as the concrete expands and contracts, so it won’t crack out after a few months. It comes in caulk tubes or larger cartridges for a caulk gun. If the crack is structural, wider than a quarter inch or if the concrete has shifted, you’ll need an epoxy injection kit or a polyurethane foam kit designed for crack repair.

Before you apply any topcoat or crack filler, use a primer compatible with your chosen waterproofing product. Primers improve adhesion and help sealers penetrate the concrete surface. Read the manufacturer’s instructions. Some sealers include primer in the first coat, others require a separate product.

For full floor waterproofing, you have two main options. A penetrating concrete sealer or a membrane coating. Penetrating sealers soak into the concrete and block moisture from within. Membrane coatings sit on top of the slab and form a rubber like barrier. Membranes are more common for basements with active moisture problems because they can bridge small cracks and handle higher moisture loads.

If you’re dealing with persistent seepage or you want extra protection, consider a waterproofing membrane made from heavy duty polyethylene or rubberized material. These roll out over the floor and sometimes extend partway up the walls. They’re especially useful if you plan to finish the basement later. Install the membrane first, then build your floor system on top.

You’ll also need a paint roller with an extension handle for applying sealers evenly across large areas. A caulk gun for polyurethane sealants and crack fillers. A wire brush and shop vacuum for crack prep. A mixing paddle and drill if you’re using two part epoxy. Plastic sheeting to protect walls and anything you can’t move. A dehumidifier to control humidity during and after application. Gloves, safety glasses, and a respirator if working with solvent based products.

Step by Step Basement Floor Sealing and Crack Repair

h38K9L7QSIOyNQo6uytPCg

Cleaning and Priming the Slab

Start with a completely clean, dry surface. Sweep and vacuum the entire floor, then scrub any stains or residue with a concrete cleaner. If the manufacturer recommends acid etching, common with epoxy and some sealers, mix the etching solution according to the label, apply it evenly, scrub with a stiff brush, and rinse thoroughly. Let the floor dry completely before moving to the next step.

Once dry, apply primer. Pour a small amount onto the floor and spread it with a roller, working in overlapping passes to cover the entire surface. Primers typically dry within a few hours, but check the product instructions. The slab should feel slightly tacky or have a uniform sheen when the primer is ready for the next coat.

Repairing Cracks and Joints

For hairline cracks, use a grinder or chisel to widen the crack to about half an inch in a V shape. This gives the filler something to grip. Vacuum out all dust and debris. If the crack is dry, you can fill it with a polyurethane or epoxy crack filler from a caulk tube. Inject the filler slowly, starting at one end and working to the other, overfilling slightly so it mounds above the surface. Smooth it with a putty knife and let it cure per the product’s instructions, usually 24 to 72 hours.

For wider cracks or cracks that show movement, use an epoxy injection system. Drill holes along the crack every 8 to 12 inches, insert injection ports, and seal the crack surface with epoxy paste. Once the paste cures, inject liquid epoxy through each port starting at the lowest point. The epoxy flows through the crack and bonds the concrete back together. This method is more involved but handles structural repairs that surface fillers can’t.

Applying Waterproofing Sealer

After cracks are sealed and the primer is dry, roll on your first coat of waterproofing sealer. Pour the sealer into a paint tray, load your roller, and apply it in even, overlapping strokes. Cover the entire floor, paying extra attention to corners, the perimeter, and any remaining small cracks or crevices. Don’t leave puddles, but don’t skimp either. Most sealers need a heavy, uniform coat to work.

Let the first coat dry according to the product label, typically 12 to 24 hours. Then apply a second coat the same way. Two coats create a more durable barrier and improve moisture resistance. Some high performance sealers call for a third coat in areas with known water problems. Allow the final coat to cure fully, usually 48 to 72 hours, before moving anything back onto the floor or exposing it to water.

When Interior Drains Are Needed

If you seal the floor and water still appears, or if seepage is widespread rather than isolated to a few cracks, sealing alone won’t solve the problem. You’re dealing with hydrostatic pressure or a high water table, and the water will find a way in no matter what you put on the surface. In these cases, you need an interior perimeter drain system. This involves cutting a trench around the inside edge of the basement floor, installing perforated pipe in gravel, and routing the water to a sump pump. The system intercepts groundwater before it can push up through the slab. Interior drains are a bigger project, often a mix of DIY and professional work, but they’re the only permanent solution when sealing fails.

Interior Drain Systems and Sump Pump Solutions for Persistent Floor Leaks

VSeTjqOEQg-xTV-GvrpiwQ

When sealing and crack repair don’t stop water from coming up through your basement floor, the problem is usually hydrostatic pressure. Groundwater sitting higher than your slab and forcing its way up. The fix is an interior perimeter drain, sometimes called a French drain or channel drain. You cut a trench around the inside edge of the floor where it meets the wall, install perforated pipe surrounded by gravel, and let the system collect groundwater before it surfaces. The pipe slopes toward a sump pit, and a sump pump sends the water outside.

Interior drains work because they relieve pressure. Instead of water pushing up through the weakest point in the slab, it flows into the drain pipe and gets pumped out in a controlled way. The trench is typically 4 to 6 inches wide and dug 3 to 6 inches below the floor elevation. You lay down landscape fabric, add a base layer of 3/4 inch crushed stone, set 4 inch perforated PVC or corrugated pipe on top, cover it with more stone, and then pour new concrete or leave it as a gravel channel if the basement won’t be finished.

Sump pump selection matters. A 1/3 to 1/2 horsepower submersible pump handles most residential basements. Pedestal pumps sit above the pit and are cheaper but noisier. Submersible pumps sit in the water and last longer. Add a battery backup system or a water powered backup if power outages are common in your area. Your drain system is useless if the pump doesn’t run. Discharge piping should run at least 10 feet away from the foundation and drain onto a slope or into a dry well, never back toward the house.

Component Typical Specs Cost Range
Interior perforated drain pipe 4″ diameter PVC or corrugated, 10–20 ft lengths $1–$3 per linear foot
Crushed stone (3/4″) ~0.5–1 cubic foot per linear foot of trench $30–$50 per cubic yard
Sump pump (submersible) 1/3–1/2 HP, 3,000–5,000 GPH capacity $100–$700
Battery backup system 12V marine battery + controller $200–$1,500
Discharge piping and fittings 1.5″ PVC, check valve, exterior termination $50–$150

Exterior Waterproofing, Drainage, and Soil Grading Fixes

H5ivEQ5ASmKPKnAnVUuHpw

If water keeps coming through your basement floor despite interior repairs, the real problem is outside. Exterior waterproofing means excavating down to the footing, cleaning the foundation wall, applying a waterproof membrane or coating, and installing exterior drain tile at the footing level. The drain tile, usually 4 inch perforated pipe in gravel, collects groundwater and carries it away before it can build pressure against the foundation or seep under the slab. This is the most permanent fix, but it’s also the most invasive and expensive. Expect to pay between $5,000 and $20,000 depending on the size of your house, how deep the footing is, soil conditions, and site access.

Exterior work also gives you a chance to fix grading problems. Your yard should slope away from the foundation at least 6 inches over the first 10 feet. If the ground is flat or slopes toward the house, water pools next to the foundation and finds its way into the basement. Regrade with clean fill, tamp it down, and restore landscaping so surface runoff moves away. Downspouts are just as important. Extend them at least 5 to 10 feet from the house using rigid PVC extensions or flexible corrugated pipe buried in a shallow trench. If your downspouts dump water right next to the foundation, you’re feeding the problem.

Exterior membranes come in different forms. Rubberized asphalt, bentonite clay panels, and spray applied polymer coatings all work, but they have to be installed on a clean, dry foundation wall. Some contractors prefer a dimpled drainage board over the membrane. It creates an air gap and gives water a path to drain down to the footing tile instead of sitting against the wall. Backfill carefully with gravel near the wall and clean fill farther out. Avoid heavy clay soil right against the foundation because it holds water. Once backfilled, restore topsoil and slope everything away from the house.

Cost Breakdown for Fixing a Leaking Basement Floor

0C4ToQdNQViua6GAEbycdw

Basement floor leak repairs vary widely in cost depending on the severity and the fix you choose. A simple crack seal with polyurethane caulk and a couple coats of waterproofing sealer can cost under $200 if you do it yourself, while a full perimeter excavation with exterior waterproofing can run $15,000 or more. Most repairs fall somewhere in between. Understanding the cost drivers, materials, labor, equipment, and whether you’re addressing symptoms or the root cause, helps you plan the work and set a realistic budget.

Insurance sometimes covers water damage repairs, especially if the leak is sudden and accidental, like a plumbing failure. Chronic seepage from groundwater is usually excluded unless you have specific coverage for water backup or seepage. If you’re filing a claim, document everything. Take photos, keep receipts, get moisture readings if possible, and write a clear scope of what was damaged and what needs repair. Adjusters want proof that the damage happened and that the repair is necessary, not optional.

Repair Type DIY Cost Professional Cost
Crack sealing (polyurethane or epoxy injection) $50–$300 $400–$1,500
Waterproofing sealant (full floor, 2 coats) $150–$500 $800–$2,500
Interior perimeter drain + sump pump $800–$3,000 $3,000–$8,000
Exterior excavation and waterproofing Not recommended DIY $5,000–$20,000+

Preventative Measures to Keep Basement Floors Dry Long Term

s0OxhBu4SqmLFgzprPdxIw

Once you’ve stopped the leak and completed repairs, the next step is making sure it doesn’t come back. Prevention is cheaper and less disruptive than repeated fixes. Start with your gutters and downspouts. Clean them at least twice a year, more if you have trees nearby. Clogged gutters overflow and dump water right next to the foundation, which is exactly what you don’t want. Check that every downspout has an extension that carries water at least 10 feet away from the house, and make sure those extensions aren’t clogged or disconnected.

Control interior humidity with a dehumidifier rated for your basement’s square footage. Aim to keep relative humidity below 50 percent. High humidity doesn’t cause floor leaks, but it does promote mold, mildew, and condensation that can look like seepage and damage finishes. If your basement doesn’t have good airflow, add a fan or improve ventilation. Check basement windows for cracks or failed seals. Window leaks can run down the wall and pool on the floor, mimicking a slab leak.

Routine maintenance checklist:

Clean gutters and inspect downspout extensions every spring and fall. Test your sump pump monthly by pouring water into the pit and confirming it cycles on and drains. Inspect the basement perimeter for new cracks, damp spots, or efflorescence every few months. Check grading annually and add fill if soil has settled near the foundation. Replace sump pump batteries or backup systems every 3 to 5 years. Service or replace dehumidifier filters as recommended by the manufacturer.

When to Call a Basement Waterproofing Professional

Ttiy-objRvqpC60EFqUssQ

Some leaks are straightforward DIY projects. Small cracks, surface dampness, or situations where a coat of sealer and better drainage solve the problem. Other leaks signal bigger issues that need professional assessment and repair. If you seal a crack and water reappears in the same spot, the crack is probably still moving or there’s a deeper structural problem. If you see multiple leaks along the same wall or across the whole floor, you’re dealing with widespread hydrostatic pressure or a failed drainage system, not a simple patch job.

Call a professional when you notice cracks wider than a quarter inch, especially if the edges are offset or the floor has heaved. Those are signs of foundation movement or soil pressure that sealing alone won’t fix. Persistent seepage, more than a gallon of water per day or continuous dampness even after repairs, means the water source is too strong for surface fixes. Professionals can install interior perimeter drains, sump systems, or exterior waterproofing and give you a warranty on the work, often 5 to 10 years or longer depending on the contractor and the system installed. If your insurance is involved or you’re selling the house soon, having a licensed contractor complete the work and provide documentation makes the process smoother.

Final Words

Water’s pooling on the basement floor. First stop the flow, extract standing water, and mark the leaks.

We covered quick fixes and how to find where water comes in, plus prepping the slab, picking the right materials, step-by-step crack and sealer work, when interior drains or a sump pump are needed, exterior fixes, costs, and simple upkeep.

Use this guide as your playbook for how to fix a leaking basement floor—stop more damage, document everything, and get the space dry and rebuilt. You’ll be back to normal.

FAQ

Q: How do I fix water coming through my basement floor?

A: Fixing water coming through your basement floor starts with locating entry points, stopping the source, extracting standing water, and plugging active leaks with hydraulic cement (fast-setting). Then dry, document, and plan permanent repairs like crack sealing or drains.

Q: Will homeowners insurance cover a leaky basement?

A: Homeowners insurance may cover a leaky basement if the damage comes from a sudden, accidental event like a burst pipe. Gradual seepage or groundwater runoff is usually excluded. Document photos, moisture readings, and call your insurer promptly.

Q: Can water seep through my concrete basement floor when it rains a lot?

A: Water can seep through a concrete basement floor during heavy rain when hydrostatic pressure or poor drainage pushes groundwater up through cracks and joints. Fix grading, downspouts, or install interior drains to stop recurring seepage.

Q: What is the cheapest way to seal a concrete basement floor?

A: The cheapest way to seal a concrete basement floor is a roll-on cementitious sealer or concrete masonry paint applied after thorough cleaning and drying. It’s a low-cost, temporary fix; persistent leaks often need injections or drains.

Property Damage Claim Process: Filing to Settlement Success

0

Ever notice how your neighbor’s insurance claim sailed through in three weeks while yours got stuck in month five? That gap usually comes down to what happens in the first forty-eight hours after damage hits your property. The property damage claim process follows specific steps, from initial documentation through final settlement, and skipping even one requirement can cost you thousands or kill your claim completely. This guide walks you through exactly what to do at each stage so your claim moves forward instead of stalling out.

Complete Guide to Filing and Managing Your Property Damage Claim

efd8SG5Q5aFZwnc0JFmwQ

A property damage claim is your formal request to your insurance company for money to cover repairs or replacements up to what your policy allows. The whole thing plays out in stages, from first spotting the damage through getting your final check. Each step needs specific paperwork and actions, and what you do directly affects whether your claim goes through and how much you actually get.

Following the right steps matters because insurance companies work under tight rules about what they’ll pay for and when. Some policies put time limits on reporting damage. Miss that window and you’re covering repair costs yourself. Skip documentation, ignore emergency repair rules, or fix things without coordinating with your insurer first? You’re looking at a smaller settlement or parts of your claim getting tossed out completely.

The Complete Property Damage Claim Process:

  1. Assess safety and secure the property. Before you document anything, look for structural problems, broken glass, exposed wires, or other immediate dangers. Building looks unsafe? Get out and call professionals. If it’s safe to enter, lock down the property by blocking damaged areas so nobody gets hurt and nothing gets stolen.

  2. Document all damage immediately. Take photos and videos from different angles. Wide shots and close-ups of every damaged area, structure, item, piece of equipment. Write detailed descriptions with exact date, time, location, what happened, who was there. Capture everything before you clean up or fix anything.

  3. Contact your insurance company and get a claim number. Report damage as soon as you can with basic details: date, time, what caused it. Ask for a claim number. Find out about filing procedures, required forms, documentation deadlines. Write down who you talked to and how to reach them.

  4. Do emergency repairs while documenting everything. After you’ve notified your insurer, take reasonable steps to stop more damage. Tarp roof holes, board up broken windows, pump out standing water, move undamaged stuff out of harm’s way. Photograph all emergency work as you do it and keep every receipt. These expenses usually get reimbursed.

  5. Pull together comprehensive documentation. Build your complete claim package. All photos and videos. Written descriptions of damage. Detailed lists of damaged items with values. Receipts for emergency repairs. Contractor estimates. Police reports if there was theft or vandalism. Copies of policy documents and all correspondence with your insurer.

  6. Meet with the claim adjuster. Bring organized evidence: photos, repair estimates, receipts for temporary fixes. Walk them through damaged areas, answer questions honestly, and ask about their assessment process, timelines, coverage details. Take notes and request written confirmation of what they observed.

  7. Review the settlement offer and negotiate if you need to. Compare what they’re offering against your documented losses and contractor estimates. Offer doesn’t cover everything? Provide more evidence. Professional estimates or new photos showing things the adjuster missed. If disputes keep going after you’ve tried negotiating, talk to an attorney.

Timeline requirements and procedures vary a lot by state and insurance company. Verify reporting deadlines, required forms, approval processes with your specific insurer right after damage happens. That’s how you make sure you hit all policy requirements.

Critical Documentation Requirements From Day One

Good documentation determines if your claim gets approved and how much you collect. Insurance companies base their decisions and calculations on evidence you give them. Comprehensive records from the moment damage occurs? That’s your most important claim tool.

Your documentation package needs a written damage description with exact date, time, location. Comprehensive photos from all angles showing context plus close-ups of specific damage. Video walkthroughs capturing full scope. Detailed inventory of damaged items with values or replacement costs. Receipts for emergency repairs or mitigation work. Professional contractor estimates for permanent fixes. Police reports if vandalism, theft, or accidents happened. Copies of your policy, coverage declarations, all correspondence with your insurer.

For photos, shoot before any cleanup, from multiple positions in each room, with objects for scale, in good lighting that shows damage clearly. Keep organized files with dates and descriptions for each photo. Back up digital documentation in multiple places in case devices fail.

Emergency Repair Protocols That Protect Your Claim

Most policies require you to notify your insurer before making emergency repairs. Unauthorized work could mess up your claim. Some insurance companies have specific rules about what you can fix independently versus what needs advance approval. Contact them first with basic damage details and ask what emergency steps you’re allowed to take right away.

Acceptable emergency repairs usually include tarping damaged roofs or covering holes to keep rain and weather out, boarding up broken windows, doors, structural openings to secure against weather or break-ins, water extraction and drying to prevent mold and more water damage, securing damaged areas with temporary barriers to prevent injuries or theft, relocating undamaged inventory or belongings away from affected areas, and hiring emergency response contractors for stabilization like water extraction, structural support, or debris removal when immediate professional help prevents more loss.

Save every receipt for materials, equipment rentals, contractor services tied to emergency repairs. Photograph all temporary work as you complete it. Show what was damaged, what you did to secure it, materials you used. These emergency expenses get reimbursed under most policies, but only if you provide complete documentation proving the work was necessary.

What to Expect: Timeline and Stages of Property Damage Claims

fUqojKPLQjGHhqXhx0HyvA

Processing times vary a lot based on how complex the damage is, how many catastrophic events are happening, and how busy your insurer is. Average claims cycles hit nearly 24 days in 2024, over six days longer than the year before. That reflects increased strain from more catastrophic events.

Typical Claim Stages and Timeframes:

  1. Initial report to adjuster assignment (1-3 days). After you file, the insurance company reviews basic info and assigns an adjuster, usually within a couple days for standard claims.

  2. Inspection scheduling (3-7 days). The adjuster contacts you to schedule an onsite inspection. Timing depends on their workload and whether catastrophic events created backlogs in your area.

  3. Damage assessment completion (7-14 days). The adjuster inspects your property, reviews documentation, determines coverage, prepares an initial damage estimate and settlement calculation.

  4. Settlement offer (14-21 days). The insurance company reviews the adjuster’s assessment and issues an offer outlining covered damages, payment amounts, any exclusions or limitations.

  5. Final payment (varies by repair completion). After you accept the settlement and complete repairs, the insurer issues final payment. May come in installments with initial funds for starting work and remaining amounts when contractors finish.

Several things push these timelines way beyond average. Catastrophic events affected 46 percent of personal lines property claims in 2023, highest percentage in seven years. Creates huge backlogs when multiple policyholders file at once after hurricanes, wildfires, severe storms. In 2024, twenty-eight catastrophic weather events caused over ninety-two billion dollars in damage nationwide. Overwhelmed adjusters, stretched processing times.

Complex damage needing engineering reports, structural evaluations, specialized inspections adds weeks. Disputes over coverage or settlement amounts require more documentation, independent appraisals, negotiation rounds that can stretch the process by months.

Track your claim status using your insurer’s online portal if they have one. Often gives real-time updates on assessment progress and payment processing. Stay in regular contact with your assigned rep, checking in weekly if you haven’t heard anything. Document all communications with dates, times, rep names. Understand your cooperation clause requirements, which obligate you to provide requested info and access promptly to avoid delays. Keep organized records of every interaction, submitted document, timeline milestone to spot unnecessary delays and hold your insurer accountable.

Understanding the Claim Adjuster’s Role in Your Property Damage Case

6ujpO_MeS_6RrlBC82CsDA

Insurance companies usually assign an adjuster within a couple days after you file. The adjuster’s job? Investigate damage, determine what your policy covers, calculate compensation based on their assessment and your coverage limits. This person becomes your main contact throughout the process and has serious influence over your settlement.

During the onsite inspection, adjusters evaluate structural damage, photograph affected areas, measure damaged spaces, inventory destroyed items, assess what repairs are necessary. They review your documentation (photos, receipts, contractor estimates) against what they see during inspection. Adjusters calculate damage estimates using software that factors in material costs, labor rates for your area, coverage provisions specific to your policy. They also spot policy exclusions, determine applicable deductibles, verify damage resulted from a covered peril rather than excluded causes like wear and tear or maintenance neglect.

Before the adjuster shows up, review your policy carefully. Understand your deductibles, coverage limits, exclusions so you can ask informed questions during inspection. Get professional repair estimates from licensed contractors to verify the adjuster’s assessment accuracy and catch any damage they might overlook or undervalue. Walk through the property with the adjuster, pointing out all damaged areas. Make sure nothing gets missed.

If you disagree with the adjuster’s initial assessment, request a written explanation for how they calculated the estimate and what damage or repairs they excluded. You can request a second inspection, hire an independent adjuster at your own expense for an alternative assessment, or engage a public adjuster who works for you rather than the insurance company.

Claim Valuation Methods: Actual Cash Value vs. Replacement Cost

kUZKspzFSLa-MQ-urFt3fg

Your policy’s valuation method affects how much money you get. This distinction matters before you document damage and start negotiating. Actual cash value coverage pays current market value of damaged items minus depreciation for age, wear, condition. Replacement cost coverage pays the full amount needed to replace damaged items with new equivalents of similar quality without deducting for depreciation.

Depreciation calculations slash payouts significantly for older items even when they worked fine before damage. Insurance companies calculate depreciation based on the item’s age, expected lifespan, condition prior to loss. Often use standardized depreciation schedules that assign percentage reductions for each year of use.

Deductibles reduce your final payout by the amount specified in your policy, which you pay out of pocket before insurance coverage starts. If your deductible is fifteen hundred dollars and your covered damages total ten thousand, you get eighty-five hundred in settlement. Some policies include separate deductibles for specific perils like hurricanes or floods. Single event could trigger multiple deductibles that all apply before you get any payment.

Betterment charges happen when repairs improve your property beyond its pre-loss condition. Insurance companies may reduce your settlement to account for this added value. Your twenty-year-old roof gets damaged and must be replaced with a new roof that’ll last thirty years? The insurer might apply a betterment charge requiring you to pay part of the replacement cost reflecting the improved condition and extended lifespan.

Effective Settlement Negotiation and Dispute Resolution Strategies

f6HDi-PgSyOF1IEf6GAndA

Settlement offers get calculated based on the adjuster’s damage assessment, your policy’s coverage limits and deductibles, whether your policy provides actual cash value or replacement cost coverage. Review offers carefully because they may not fully cover repair costs, especially after catastrophic events when material prices spike and contractor availability gets limited.

Offers frequently fall short when adjusters miss damage during inspections, underestimate repair costs compared to actual contractor quotes, apply excessive depreciation to items that still have significant value, exclude covered damage by misinterpreting policy language, or fail to account for code upgrade requirements that force you to bring repairs up to current building standards.

Effective negotiation tactics and common denial reasons:

Obtain multiple contractor estimates from licensed professionals to show actual repair costs exceed the adjuster’s calculations. Document all communications in writing. Send follow-up emails confirming verbal conversations, create a paper trail of your negotiation efforts. Provide additional photos when the adjuster’s assessment missed damage or didn’t capture full extent of loss. Reference specific policy language that supports coverage for disputed items. Quote exact sections that define what your policy covers. Present comparable repair costs from similar claims or publicly available construction cost data for your region. Request written explanations for any denied items. Force the insurer to justify exclusions with specific policy provisions.

Understand that late filing beyond policy deadlines is a common denial reason. Makes immediate reporting critical. Recognize that insufficient documentation, damage from excluded perils like floods, pre-existing damage, policy lapses are frequent denial causes.

Payment structures usually involve installments rather than lump sums. Insurance company issues an initial amount for starting repairs and releases final payment when you submit proof that contractors finished. Typical processing timelines for payments range from seven to fourteen days after settlement acceptance for the initial installment. Final payments processed within similar timeframes once you provide completion documentation and final invoices.

Retain all documentation after settlement acceptance. Correspondence, photos, receipts, relevant claim info for tax purposes and potential future disputes if more damage appears or disagreements arise about completed work.

The appeals process follows a structured path when you disagree with settlement amounts or coverage denials. Submit a formal written appeal to your insurance company within the timeframe specified in your policy or denial letter, usually thirty to sixty days. Include all supporting evidence. Professional estimates, additional photos, policy language supporting your position, documentation of damage the initial assessment missed. The insurer reviews your appeal and issues a written response, typically within thirty days. Either adjusting the settlement, maintaining the original decision, or requesting more information.

Hire public adjusters when you face complex claims involving extensive damage, disputes over settlement amounts where independent professional assessment adds credibility, or situations where you need someone working solely for you rather than the insurance company. Engage attorneys when insurers show bad faith practices like unreasonable delays or improper denials, significant underpayment compared to obvious damage and clear policy coverage, or policy interpretation disputes requiring legal expertise.

Common Property Damage Claim Types and Coverage Categories

bkuMw_b-TnKirQ-CTc4oUw

Standard homeowners insurance policies include dwelling coverage that pays for damage to your home and attached structures like porches and garages. Specialized coverage requires policy addons or separate policies for certain perils. Understanding which coverage applies to different damage types helps you know what to expect during the claims process and whether you need additional protection.

Specialized coverage fills gaps in standard policies for perils that cause catastrophic losses but fall outside typical protections. Earthquake coverage requires policy addons in most states and covers structural damage, foundation cracks, property loss from seismic events. Flood coverage operates through separate National Flood Insurance Program policies rather than standard homeowners insurance. Covers water damage from rising water, storm surge, overland flooding that standard policies exclude.

Damage Type Coverage Category Special Considerations
Water damage from leaks or burst pipes Dwelling coverage, contents coverage Covered for sudden events. Gradual leaks from maintenance neglect typically excluded. Quick response prevents mold and additional damage.
Fire damage and smoke Dwelling coverage, contents coverage, additional living expenses Usually fully covered including structural repairs, smoke cleanup, temporary housing during repairs
Wind and hail damage Dwelling coverage, other structures coverage May have separate higher deductibles. Catastrophic events like Hurricane Ian in 2022 caused widespread roof damage and water intrusion claims
Structural damage Dwelling coverage Covers foundation, walls, roof systems. May require engineering reports for assessment
Personal property and contents Contents coverage Covers furniture, electronics, clothing, inventory. Typically limited to percentage of dwelling coverage amount
Flood and earthquake Specialized separate policies or addons Standard policies exclude these perils. Flood requires National Flood Insurance Program coverage, earthquake requires policy rider

Common policy exclusions create coverage gaps that catch homeowners by surprise when damage happens. Flood damage from rising water, overland flooding, storm surge requires separate National Flood Insurance Program policies because standard homeowners insurance specifically excludes these perils. Earthquake coverage requires policy addons in most regions and won’t be included automatically even in high-risk areas.

Review coverage limits before damage occurs to ensure adequate protection across all categories. Dwelling coverage should reflect your home’s full replacement cost. Contents coverage typically provides fifty to seventy percent of dwelling coverage but may need increases for high-value items. Other structures coverage protects detached garages and sheds. Loss of use coverage pays additional living expenses if you must temporarily relocate during repairs.

Deductibles apply differently to various claim types. Catastrophic events like hurricanes often trigger separate percentage-based deductibles that significantly exceed standard fixed-dollar deductibles. Hurricane Ian in 2022 showed how catastrophic events generate multiple claim types at once. Policyholders filed for roof damage from wind, water damage from rain intrusion, structural damage from storm forces. Each potentially subject to different coverage limits and deductibles.

Working with Restoration Companies During the Claims Process

3E2BxfIBQeuJELwBWWphBw

Selecting qualified restoration contractors who understand insurance claims processes helps ensure repairs get done properly while maximizing your settlement recovery. Pick licensed and reputable contractors and keep detailed records of all repair work and expenses to satisfy insurance company documentation requirements. Protects you if disputes arise about repair quality or costs.

Verify that restoration companies hold current licenses for your state and the specific work they’ll perform. Make sure they carry adequate liability insurance and workers comp coverage to protect you from liability if injuries occur. Look for demonstrated experience working directly with insurance adjusters and understanding claim documentation requirements. Check their reputations for quality work through references, online reviews, professional organization memberships.

Professional restoration companies provide detailed written estimates breaking down materials, labor, equipment, timeline for each phase of work. They coordinate directly with insurance adjusters, participating in onsite assessments, explaining technical repair requirements the adjuster may not fully understand, providing documentation that supports your claim for adequate settlement amounts. Getting professional repair estimates before the adjuster completes their assessment gives you independent verification of actual costs. Helps identify when adjuster estimates undervalue the work required.

Some insurance policies require you to use approved contractors from the insurer’s preferred vendor list. Others let you select any licensed contractor you choose. Understand whether your policy includes approved contractor requirements and how using non-approved contractors might affect your claim settlement or payment terms.

Professional restoration contractors who regularly work within insurance claims processes know how to document work properly, coordinate with adjusters efficiently, help homeowners navigate claim requirements while completing quality repairs.

Documentation requirements stay critical throughout the repair process. Keep detailed records of all repair work completed including dates, materials used, labor hours, any changes from original estimates. Save all receipts and invoices in organized files with project phases clearly identified. Photograph repairs in progress and after completion to document proper installation and quality workmanship. Submit all receipts and invoices to your insurance company according to their specific requirements and timelines to receive full reimbursement for covered work.

Policyholder Rights and Insurance Company Obligations

AtCMnrtiSeuG4USSd6wXiw

Insurance regulations establish protections that ensure fair treatment during the claims process, though specific rights vary by state. Core policyholder rights include the right to a prompt, thorough investigation with adjusters conducting reasonable assessments within appropriate timeframes. Written explanations for any denied claims or excluded coverage that cite specific policy language justifying the decision. Access to your complete claim file including adjuster notes, photos, assessment documentation upon request. Fair settlement practices that calculate payouts based on actual damage and policy terms rather than arbitrary reductions.

Cooperation requirements obligate you to fulfill certain responsibilities that let your insurance company investigate and process your claim properly. You must provide reasonable access for inspections, allowing adjusters, engineers, or other professionals hired by the insurer to examine damaged property at scheduled times. Policyholders must submit requested documentation including proof of ownership, damage descriptions, repair estimates, receipts within reasonable timeframes specified by the insurer.

Insurance companies can require recorded statements where you answer questions about the damage, its cause, circumstances surrounding the loss. Responses used to verify claim accuracy and detect potential fraud. Examination under oath represents a more formal process where you answer detailed questions under sworn testimony. Usually reserved for complex or disputed claims where insurers need comprehensive information about the incident and resulting damage.

State insurance regulations differ significantly in how they protect policyholders and define insurer obligations. Critical to understand your specific state’s requirements. Some states mandate faster claim processing timelines, impose penalties for unreasonable delays, require more detailed written explanations for denials, or provide stronger protections against bad faith insurance practices.

Insurance regulations vary significantly by state. Requires personalized knowledge of local laws when you face disputed claims, unreasonable settlement offers, or processing delays that seem excessive. Policy interpretation disputes, payout disagreements, claim denials may require specialized legal consultation from attorneys familiar with your state’s insurance regulations and how courts in your jurisdiction interpret policy language and insurer obligations.

Critical Mistakes That Jeopardize Property Damage Claims

eByl-oraTpGXRBkaNw6PzQ

Avoidable mistakes reduce claim payouts or result in complete denials more often than genuine coverage disputes. Careful attention to procedures throughout the claims process is essential for protecting your settlement.

Critical mistakes that commonly damage claims:

Delaying claim notification beyond policy time limits can result in complete denial even for legitimate covered damage. Some policies require reporting within days of loss discovery. Making major repairs before documenting damage thoroughly eliminates evidence the adjuster needs to verify your claim and calculate appropriate settlement amounts. Discarding damaged items too soon before the adjuster inspects them removes physical evidence that supports your inventory lists and valuation claims.

Failing to stop further damage by leaving property exposed to weather, ongoing water intrusion, security risks causes additional losses your policy won’t cover. Inadequate photo documentation that misses damage in less obvious locations, fails to show damage extent with wide-angle shots, lacks close-ups showing specific destruction details. Missing filing deadlines established by state statutes of limitations or policy terms voids your right to claim compensation even when damage is clearly covered. Not reviewing settlement offers carefully against your documented losses and contractor estimates leads to accepting insufficient amounts that don’t cover actual repair costs.

Creating a methodical claim checklist prevents these errors by ensuring you complete each required step in proper sequence. Document damage comprehensively before any cleanup or repairs. Photograph from multiple angles with context and detail shots. Notify your insurance company immediately following policy reporting requirements. Do only emergency repairs necessary to prevent additional damage. Save every receipt for materials and services. Coordinate all major repairs with your adjuster before starting work. Review settlement offers against independent contractor estimates before acceptance. Retain all documentation including correspondence, photos, receipts, claim-related info after settlement.

This documentation serves purposes beyond initial claim processing. Provides records for tax deductions related to casualty losses. Preserves evidence for potential future disputes if additional damage appears or disagreements arise about repair quality or coverage interpretation.

Final Words

The property damage claim process moves quickly once damage happens, so knowing each step before you need it makes everything smoother.

Document everything thoroughly from the first moment, contact your insurer right away, and keep organized records through final settlement.

Work with qualified restoration contractors who understand insurance requirements, and don’t hesitate to ask questions or negotiate if a settlement offer doesn’t cover legitimate repair costs.

Most claims close faster when you provide complete documentation, respond promptly to your adjuster’s requests, and understand your policy coverage before damage occurs.

FAQ

What should you not say to a claims adjuster?

You should not tell a claims adjuster anything that speculates about fault, exaggerates damage, or provides inconsistent information without documentation. Stick to factual statements about what happened, when it occurred, and what got damaged. Avoid guessing repair costs or accepting blame before understanding the full situation.

What is the average settlement for property damage?

The average settlement for property damage varies widely based on damage extent, coverage type, and policy limits, with no universal amount. Settlement amounts depend on actual repair costs, replacement values, deductibles, and whether your policy pays actual cash value or replacement cost. Complex claims often exceed simple estimates.

What are the 4 stages of the insurance claim cycle?

The 4 stages of the insurance claim cycle include initial reporting and adjuster assignment, onsite inspection and damage assessment, settlement calculation and offer presentation, and final payment after repair completion. Each stage has specific timelines and documentation requirements that affect how quickly your claim gets resolved.

What’s the biggest mistake people often make when dealing with an insurance claim?

The biggest mistake people often make when dealing with an insurance claim is delaying damage notification beyond policy time limits or making repairs before proper documentation. Both errors can reduce settlement amounts or result in claim denials, leaving homeowners paying out of pocket for covered damage.

Mold Remediation Process: Proven Safety Steps

0

If you notice a musty smell, it might hide a bigger issue. Mold is more than an odor, it can affect your family's health.

We understand how stressful this can be. That is why we follow clear, proven steps to handle mold safely. First, we locate where the mold began. Then, we stop it from growing. Finally, we remove it so you can breathe clean air.

This guide shows you simple steps to keep the mold levels low and your home safe. We are here to help you take back your space.

Comprehensive Mold Remediation Process Overview

When you find mold at home, it can feel overwhelming. We’re here to help with a clear, step-by-step process that makes your home safe again. Mold remediation means finding the mold, stopping it from spreading, and removing it so your air quality stays healthy. We aim to keep mold levels below 500 spores per cubic meter.

  1. Inspection & Assessment
    We begin by checking the problem area. Using tools like moisture meters (devices that measure wetness) and infrared cameras (tools that show heat differences), we pinpoint where the mold is growing. This helps us see how far the mold has spread.

  2. Containment
    Next, we set up barriers with plastic sheeting and create simple airlocks with taped seams. These steps stop mold spores from getting into other parts of your home.

  3. Air Filtration
    We use air scrubbers with HEPA filters (air filters that catch tiny particles) to clean the air. This makes the space safer before we start removing the mold.

  4. Removal
    We carefully remove any moldy materials. Items like drywall or insulation that are badly affected might get thrown away, while things that can be saved are cleaned properly.

  5. Cleaning & Disinfection
    We then wipe down all exposed surfaces with EPA-approved antimicrobial cleaners (products that kill germs). This step helps make sure no mold spores are left behind.

  6. Restoration
    Finally, we fix or replace the damaged parts of your home. This restores the strength of your walls and stops mold from coming back later.

Every step is important. By following this simple process, we make sure your home is safe and comfortable for the long run.

Mold Assessment and Air Testing in the Mold Remediation Process

img-1.jpg

We start by checking areas where mold might hide. We look for water stains, changes in color, and musty smells. We use moisture meters (tools that measure dampness) and infrared cameras (devices that show hidden moisture) to find wet spots that mold loves. We follow EPA mold control guidelines (steps to safely handle mold) and IICRC S520 standards (industry rules) to make sure our work meets high standards.

After our look around, we take air samples. We use air pump spore traps (machines that grab mold particles from the air) to collect spores. These samples are sent to a lab for analysis. We then compare the mold count to a safe limit of 500 spores per cubic meter. If the number is too high, we know more cleaning is needed.

Moisture Detection Tools

We use moisture meters to check how wet areas are and infrared cameras to spot hidden damp spots. These tools help us create a clear map of where mold can grow.

Spore Sampling Procedures

We use air pump spore traps to collect mold spores from the air. The samples get tested in a lab and are compared to a limit of 500 spores per cubic meter. This test shows if we need to do more cleanup.

Containment and Air Filtration in the Mold Remediation Process

We start by sealing off the mold-affected area with a strong 6 mil polyethylene sheeting. We secure the sheeting with heavy-duty tape to form tight seams that block mold spores from reaching clean areas. We also set up airlocks (controlled entry points) to create a pressure difference that stops spores from spreading outside the sealed zone.

Once the area is contained, we bring in portable air scrubbers with HEPA filters (air filters that trap tiny mold and soot particles) to continuously clean the air. These machines capture 99.97% of spores as small as 0.3 microns. We also use negative air machines that pull air inward from surrounding areas to keep the contaminated air confined. We monitor airflow and pressure throughout the process to ensure our barriers hold strong. This coordinated approach helps control mold spread and keeps your home safer while we work.

Removal and Cleaning Techniques in the Mold Remediation Process

img-2.jpg

We remove mold safely and restore your living space. First, we inspect the area to see which materials are affected. We then decide on the best method based on the type and size of the mold spread. For surfaces that do not absorb moisture, we use EPA-registered antimicrobial agents (germs-killing cleaners). For soft items like drywall or insulation covering more than 30 square feet, we remove them to stop hidden spores from causing more trouble. When we find black mold (Stachybotrys, a type that can be dangerous), we take extra care by double-bagging the items and disposing of them off-site. We also treat salvageable items with natural antifungal solutions like vinegar, hydrogen peroxide, or quaternary ammonium compounds (mold-fighting but gentle cleaners).

Surface Treatments

We treat moldy areas by spraying disinfectants directly on them. The disinfectant is left on the surface for a few minutes to kill the mold completely. After waiting, we rinse the area to wash away any leftover chemicals and mold pieces. This method not only removes the seen mold but also helps stop it from coming back. We make sure that every part of the surface, even in small crevices, gets treated.

Proper Disposal of Contaminated Materials

Items that cannot be cleaned well, especially soft or porous materials, are taken out of your home. We place these items in heavy-duty plastic bags, sealing and labeling each bag as hazardous waste. These are then taken to a designated landfill that safely handles such waste. This careful disposal helps prevent the mold from spreading and keeps both our crew and your family safe.

Restoration and Prevention Measures in the Mold Remediation Process

After cleaning the affected area, we begin restoring your home. We remove damaged drywall and fix surfaces to rebuild your home's structure. We take out damaged materials carefully and replace them with new, safe ones. We also repaint the walls with mold-resistant paint (a special coating that stops mold) to add extra protection against moisture and mold.

When the restoration is done, our technicians test the air using approved methods (IICRC standards, which guide safe cleaning). This test makes sure that mold spore levels are safe. We work closely with you throughout the process to ensure we follow proper residential and commercial mold cleaning techniques.

Preventing future mold growth is just as important. Once repairs are complete, we work on reducing moisture and controlling humidity, key steps to stop mold from returning. By fixing the causes of mold growth, you help keep your home healthy.

Here are some simple steps to prevent mold:

  • Install dehumidifiers and monitor relative humidity (RH) to keep indoor levels below 50%.
  • Upgrade HVAC filters to those rated MERV 13 or higher for cleaner air.
  • Seal leaks and improve drainage around your home to reduce water intrusion.
  • Use mold-resistant paints and coatings when repainting.
  • Schedule annual visual inspections and air-quality checks to catch any moisture early.

These steps work together to restore and protect your home, helping keep it safe and mold-free.

Cost Analysis and Timeline for the Mold Remediation Process

img-3.jpg

Our mold removal pricing is set per square foot. We typically charge between $15 and $30 per square foot. For a small area under 100 square feet, you can expect to pay between $500 and $1,500. This gives you an upfront idea, though the final cost may change based on your home's unique conditions and materials.

How long the work takes depends on the size of the affected area. For small spaces under 100 square feet, the job usually takes 1 to 2 days. Areas between 100 and 500 square feet often need 3 to 5 days. Larger jobs, over 500 square feet, may require 1 to 2 weeks before your home is safe and restored. These timelines help set clear expectations for when your space can be used again.

It’s important to plan your budget in advance. Many homeowner policies cover water-damage–related mold issues, which might help pay for the work through an insurance claim. We recommend discussing these options with your contractor and insurance provider so you know your financial options during the remediation process.

Certification, Safety Protocols, and Regulatory Compliance in the Mold Remediation Process

Our team wears N95 respirators (special masks that filter out harmful particles), gloves, and Tyvek® suits to keep both you and us safe during cleanup. We follow OSHA’s Hazard Communication Standard and EPA mold guidelines (rules for safe mold cleanup) to lower your exposure to mold spores and chemicals.

We take safety very seriously. We use the proper gear and follow strict procedures to meet all required rules. This means our cleanup is done right and without risk.

Our licensed contractors carry state certifications and IICRC S520 credentials, which show they have special training in mold remediation. They also follow local rules to dispose of contaminated materials safely, ensuring all waste is handled correctly.

This dedication to safety and compliance protects your home and makes our work both responsible and legal.

Final Words

In the action, we broke down the mold remediation process from inspection to full restoration. We explained air testing, containment, safe removal, cleaning, and final restoration steps to keep your home safe. Every phase plays its part, reducing damage and cutting ongoing risk.

Following this simple guide helps you act quickly and confidently. With clear, documented steps, you can move toward a safer, healthier space and a positive new start.

FAQ

Q: What are the steps in the mold remediation process?

A: The mold remediation process involves six steps: inspection and assessment, containment, air filtration, mold removal, cleaning and disinfection, and restoration. Each step builds on the previous one for safe cleanup.

Q: When is mold remediation required?

A: Mold remediation is required when water damage causes visible mold growth or health concerns. Professionals use EPA guidelines alongside inspections to decide when remediation is needed.

Q: How long does the mold remediation process take?

A: The process timeline depends on the job size. Small areas can take 1–2 days, mid-size areas 3–5 days, while large jobs may need 1–2 weeks to complete.

Q: How long should you stay out of the house after mold remediation?

A: You should stay out until professionals complete clearance testing and confirm air quality is safe for reentry. This ensures all mold spores and contaminants are removed.

Q: Who pays for mold remediation?

A: Payment usually hinges on your insurance policy. Homeowners may bear the cost unless water-damage incidents trigger coverage for mold remediation expenses.

Q: Can I remediate mold myself?

A: Homeowners can tackle very small mold spots, but professional remediation is safer. Experts follow strict guidelines to effectively remove mold and protect your health.

How to Rebuild Interior After Flood: Safe Recovery Steps

0

Think rebuilding after a flood is just drying and painting? Think again.
Floodwater brings contamination and hidden moisture that ruins walls, floors, and wiring fast.
What you do in the first hours decides if you stop mold, avoid bigger repairs, and get the right insurance claim.
This post walks you step by step through safe recovery: when to go in, how to document and remove water, how to remove soaked materials, how to dry and check moisture, and when to rebuild and call pros.
No guesswork. Just clear, practical steps you can use now.

Start Here: Immediate Steps After a Flood

KqVuiDf8S5Se-oUXZvyHg

Don’t walk into your home until the building department or fire marshal says it’s safe. Floodwater carries sewage, chemicals, and bacteria. The structure may have shifted or weakened. Electricity and gas lines may be damaged and dangerous.

If officials clear entry, shut off the main electrical panel before stepping into water. If you can’t safely reach the panel without entering water, call a licensed electrician or your utility company. Wear rubber boots, waterproof gloves, a respirator mask, and eye protection. Open windows and doors to start cross ventilation if outdoor humidity is lower than inside. This slows mold growth and helps moisture escape.

Your first hour sets the tone for the entire recovery:

  1. Shut off electricity and gas at the main source.
  2. Document the scene with photos and video before touching anything.
  3. Remove standing water as quickly as possible using pumps, wet vacs, or buckets.
  4. Elevate furniture on blocks if floors are still wet.
  5. Remove soaked carpets, pads, and any items holding water.

Speed reduces mold risk. Mold can start growing within 24 to 48 hours after exposure.

Assessing Damage and Documenting for Insurance

Fomxbrs7TqipYEHgX65uEA

Walk through each room and photograph everything. Capture wide shots and close ups. Record water lines on walls, warped floors, stained ceilings, and damaged belongings. Video works well for showing the full scope and layout. These records prove what happened and how high the water reached.

Make a written inventory of damaged items. Include the item name, approximate age, and what you paid or what it would cost to replace. Keep receipts for any emergency expenses like tarps, pumps, hotel stays, temporary repairs. Don’t throw away damaged materials until your insurance adjuster has seen them. Some carriers require inspection before disposal. Standard homeowner policies often exclude external flooding, so confirm whether you have separate flood coverage through FEMA’s National Flood Insurance Program or a private flood policy.

Your insurer will need:

  • Photos and video of every affected room
  • Close ups of structural damage (walls, floors, ceilings)
  • Water level marks on walls
  • Written inventory with estimated values
  • Receipts for emergency purchases
  • Before and after photos if available

Removing Water and Debris

yY3-GlpHRtuOPQPrUFnDnQ

Start with the deepest standing water. Use a submersible pump for basements or large volumes. A wet/dry vacuum works for shallower areas and corners. Mops and towels handle the last layer, but they’re slow and labor intensive. The faster you remove water, the less it soaks into studs, subfloors, and insulation.

Separate contaminated debris from salvageable items. Anything touched by sewage or black water should be bagged and removed immediately. Soaked drywall, insulation, and carpet padding usually can’t be saved. Stack salvageable furniture and belongings in a dry area with airflow. Wipe them down and let them dry completely before bringing them back inside.

Work from the top floor down if multiple levels flooded. This prevents dirty water from dripping onto cleaned areas.

Common water removal tools:

  • Submersible pump for deep standing water
  • Wet/dry vacuum for medium depths and corners
  • Buckets and mops for final cleanup
  • Squeegees to push water toward drains

Safe Interior Demolition

9PvWGL7cRcSHPemHPwTTcQ

Flood soaked drywall must be cut and removed at least 12 inches above the visible waterline. Water wicks upward inside the paper and gypsum core, and hidden moisture leads to mold and rot. Use a utility knife to score the drywall, then snap and pull sections free. Wear gloves and a mask. Drywall dust is irritating, and mold spores may be present.

Wet insulation loses its R value and traps moisture against framing. Pull it out completely. Fiberglass and cellulose insulation can’t be dried and reused after contamination. Spray foam may survive if it dries fully, but inspect it closely for trapped water pockets or odor.

Check subfloors for warping, delamination, or soft spots. Plywood and OSB swell when saturated and rarely return to their original shape. If the subfloor feels spongy or has separated layers, it must be replaced before new flooring goes down. Laminate flooring almost always needs replacement. Hardwood may be saved with rapid professional drying. Tile can often stay if the subfloor underneath dries properly and remains stable.

Materials Commonly Removed After Flooding

Drywall is cut 12 to 18 inches above the water line to make sure no hidden moisture remains in the cavity. Baseboards and trim are pulled to expose wall bottoms and allow airflow. Carpet and padding are removed immediately. Padding holds water like a sponge and fuels mold. Insulation is stripped from walls and ceilings wherever water reached. Cabinets made of particleboard or MDF typically swell and fall apart. Solid wood cabinets may be saved if dried quickly. Always inspect structural framing for rot, warping, or mold before closing walls back up.

Drying and Dehumidifying the Interior

k6bqcMvuRii9388AcxP9jw

Set up industrial air movers to push moisture out of walls, floors, and cavities. Position them at angles to create airflow across wet surfaces. Pair them with a commercial dehumidifier that pulls moisture from the air. Consumer grade dehumidifiers remove 5 to 10 gallons per day. Professional units extract up to 30 gallons per day and cover larger areas.

Keep indoor temperature between 70 and 80 degrees Fahrenheit if possible. Warmer air holds more moisture and speeds evaporation without encouraging mold growth. Expect active drying to take 3 to 5 days depending on the amount of water, materials affected, ventilation, and weather. Use a moisture meter to confirm dryness in wood framing and subfloors before rebuilding. Readings should drop below 15 percent moisture content.

Recommended drying equipment:

  • Industrial air movers (move 3 to 4 times more air than household fans)
  • Commercial dehumidifiers rated for the square footage
  • Moisture meter to test framing and subfloors
  • Thermometer and hygrometer to monitor conditions
  • Fans to assist cross ventilation through windows and doors

Mold Prevention and Remediation

q5uF7V6SQo6A-9o5MbB6Tw

Mold needs moisture, organic material, and time. Drywall, wood, insulation, and carpet provide food. If those materials stay wet for 24 to 48 hours, mold begins. You can’t always see it at first. It grows inside walls, under flooring, and behind baseboards.

Stop mold by removing water fast and drying materials completely. Antimicrobial washes reduce surface contamination on framing and concrete after demolition, but they don’t replace proper drying. Porous materials like drywall and insulation that were soaked and then sat wet can’t be reliably cleaned. They must be removed. Hard surfaces such as metal studs, concrete, and tile can be disinfected with a bleach solution. One cup of household bleach per 5 gallons of water, left on the surface for at least 10 minutes.

If you see or smell mold, or if materials were wet for more than two days before drying started, hire a certified mold remediation specialist. Professionals use containment barriers, HEPA air scrubbers, and disposal protocols that prevent spores from spreading during removal. Moisture meters and thermal imaging cameras find hidden moisture you can’t see. Don’t seal up walls or install new flooring until you confirm the structure is dry and mold free.

Rebuilding Walls, Floors, and Interior Structures

my3Mcp_MR_KL4cWg5VZp1Q

Reconstruction begins only after moisture levels in framing and subfloors fall below 15 percent. Installing new materials over wet structure traps moisture and leads to rot, mold, and buckling. Confirm dryness with a moisture meter, not by touch or appearance.

Replace damaged subfloor sections first. Screw down new plywood or OSB and make sure it sits flat and level. Install vapor barriers if your original assembly included them, or if your building code requires them in below grade or flood prone areas. Then hang drywall. Use moisture resistant or mold resistant drywall in areas that flooded. Tape, mud, and sand the seams. Prime and paint after the final sanding. Install flooring last. Tile, hardwood, laminate, or vinyl, once walls are finished and painted.

Blueboard ceilings require a specialist to apply the skim coat plaster finish. Standard drywall crews often don’t have that skill set. If your home originally had blueboard, budget extra time and cost to find a qualified plasterer.

Sequence of Interior Rebuild Tasks

Start with structural repairs. Fix or replace floor joists, studs, or sill plates that rotted or shifted. Install new subfloor sections and fasten them securely. Add insulation to wall and ceiling cavities. Hang drywall on walls and ceilings. Tape and mud seams, then sand smooth. Prime and paint all surfaces. Install finish flooring after walls are complete. Reinstall baseboards, door casings, and trim. Finally, reconnect electrical fixtures, outlets, and HVAC registers. Each step depends on the previous one being dry and solid.

Electrical, HVAC, and Plumbing Considerations

zrawS8dFQjifhwPHo92yMg

Any electrical component that was submerged or splashed must be inspected by a licensed electrician before you restore power. Outlets, switches, breaker panels, and wiring can corrode or short even after drying. The electrician will test circuits, replace damaged devices, and confirm grounding is intact.

HVAC ducts that were underwater or exposed to contaminated air need cleaning or replacement. Mold and bacteria can colonize ductwork and spread spores every time the system runs. A professional duct cleaning service uses brushes, vacuums, and antimicrobial treatments to sanitize the interior. If ducts are crushed or filled with mud, replacement is often faster and cleaner than attempting restoration. Check the furnace, air handler, and any mechanical components for water damage and rust.

Critical systems requiring professional inspection after a flood:

  • Electrical panel, outlets, switches, and visible wiring
  • HVAC ducts, air handler, and heating/cooling units
  • Plumbing supply lines, drain lines, and fixtures
  • Water heater, sump pump, and backflow prevention devices

Final Interior Restoration and Prevention for the Future

46ovNh87TLqWBtX5gK0REg

Once walls, floors, and systems are rebuilt and tested, schedule a final walkthrough. Confirm that all materials are dry, mold free, and installed correctly. Test outlets, check for leaks at fixtures, and run the HVAC system. Keep documentation like photos, invoices, permits, inspection reports in a safe place. These records help with insurance, resale, and any future claims.

Reduce the risk of the next flood by upgrading materials and systems. Closed cell spray foam insulation doesn’t absorb water. Tile and luxury vinyl plank flooring resist moisture better than carpet or laminate. Elevate electrical outlets at least 12 inches above expected flood levels. Install a sump pump with battery backup if you have a basement. Add backflow valves to prevent sewage from backing up through drains during heavy rain or municipal overflows.

Preventative improvements to consider:

  • Flood resistant insulation (closed cell foam or foam board)
  • Tile or luxury vinyl flooring instead of carpet
  • Elevated outlets and switches
  • Sump pump with battery backup and backflow valves

Final Words

First, stop the water, make the scene safe, and document damage for insurance. Take photos, shut off utilities if it’s safe, and remove standing water right away.

Next, clear out ruined materials, dry with air movers and dehumidifiers, and watch for mold. Get pros to inspect electrical, HVAC, and plumbing before you rebuild.

Follow these steps and you’ll know how to rebuild interior after flood. You’ll get your home back safe, dry, and ready to live in again.

FAQ

Q: How to fix water damage inside walls?

A: Fixing water damage inside walls involves stopping the leak, opening and drying the cavity, removing wet insulation and damaged drywall, treating for mold, confirming dryness with moisture readings, then repairing and documenting for insurance.

Q: How long does it take for walls to dry out after a flood?

A: Walls typically take 48–72 hours to dry with proper equipment, but thicker or heavily soaked assemblies can take several days to weeks; we confirm dryness with moisture meters before rebuilding.

Q: Can a house be repaired after a flood?

A: A house can be repaired after a flood in most cases; we stop further damage, dry and demo affected areas, remediate mold, then rebuild, with structural and system inspections guiding the scope and cost.

Q: Is furniture salvageable after a flood?

A: Furniture is salvageable depending on material and contamination; solid wood and metal often can be cleaned and dried, but soaked upholstered or particle-board items usually need to be discarded and replaced.

Black Mold Removal Cost: What You’ll Actually Pay

0

You’ve heard black mold removal costs “a few thousand dollars,” but what does that actually mean when you’re staring at dark patches spreading across your bathroom wall? The gap between national averages and your real invoice comes down to variables most homeowners don’t discover until the work starts. Here’s what drives the price, what your location changes, and where hidden damage turns a $1,500 estimate into something closer to $5,000.

What You’ll Pay for Black Mold Removal in 2026

X1PV-spiQLWCQjm4XTyv0Q

Professional black mold remediation typically costs between $1,200 and $3,750 nationally. Most homeowners end up paying around $2,300 for a complete job. Per square foot, you’re looking at $10 to $25 for removal, though where you live changes that number. The Northern Virginia and DC metro area runs $15 to $30 per square foot because of higher labor costs and stricter containment requirements.

Project Size/Location Square Footage Typical Cost Range Key Variables
Small surface areas Under 10 sq ft $500–$1,500 Surface type, accessibility, testing needs
Medium infestations 10–100 sq ft $1,200–$3,000 Containment requirements, material disposal
Large projects 100–300 sq ft $3,000–$7,000 Structural damage, HVAC involvement
Whole-house remediation 300+ sq ft $10,000–$30,000+ Flood damage, multiple systems affected
Attic Varies $1,000–$4,000 Insulation replacement, ventilation issues
Basement Varies $800–$4,000 Contamination level, moisture source complexity
Crawl space Varies $500–$2,000 Accessibility, vapor barrier needs
Bathroom Varies $500–$3,000+ Hidden plumbing leaks, fixture removal
HVAC system Varies $1,500–$10,000 System type, ductwork extent, airflow contamination
Emergency catastrophic damage Whole property $10,000–$30,000+ Flood category, structural compromise, timeline urgency

Project size and location interact in ways that can dramatically shift your final bill. A small bathroom mold problem, maybe 8 square feet around a tub, might cost $500 to $800 because it’s easy to access and contains the work area. That same 8 square feet in an attic crawl space could run $1,200 to $1,800. Why? Technicians need specialized equipment to reach tight spaces, insulation has to come out and get replaced, and contaminated materials are harder to haul out.

These numbers represent starting points. What you’ll actually pay depends on how deep the contamination goes, what materials got damaged, and how complex the moisture source turns out to be.

Comprehensive Cost Factors and Location-Specific Pricing

WrXoj-NUS66WRNgIO1GE7Q

Labor typically represents half or more of your total remediation cost. This isn’t a paint and patch job. It’s a controlled demolition and sanitization process that protects your family from exposure while preventing spore spread throughout the house. The work requires strict containment protocols, protective measures for workers, specialized cleaning procedures, and careful disposal of contaminated materials.

What affects the price:

  • Extent and severity of contamination. Surface mold costs less than growth penetrating structural materials.
  • Square footage affected. More area means more containment barriers, longer work hours, and higher material disposal costs.
  • Location within the home and accessibility challenges. Attics, crawl spaces, and HVAC systems require specialized access equipment and confined space safety measures.
  • Type of materials involved. Porous materials require removal and disposal. Non-porous surfaces can be treated and saved.
  • Structural damage requiring repairs. Rotted framing, compromised subfloors, and damaged joists add thousands in carpentry costs.
  • Moisture source complexity and repair needs. Simple pipe leaks cost less to fix than foundation seepage or roof penetrations.
  • Contamination of HVAC or ventilation systems. Spore infiltration in ductwork can require whole system cleaning or replacement.
  • Specialized equipment requirements. Negative air machines, industrial dehumidifiers, and HEPA filtration systems add daily rental costs.
  • Testing and verification needs. Lab analysis of spore types and post-remediation clearance testing.
  • Removal method intensity. Dry ice blasting and abrading cost more than antimicrobial wiping.

The distinction between porous and non-porous materials determines whether you’re looking at a $1,500 cleaning job or a $5,000 demolition and reconstruction project. Porous materials like drywall, carpeting, ceiling tiles, insulation, fabric, cardboard, and unsealed wood absorb moisture and provide a growth medium that penetrates deep into the material structure. These can’t be saved. They must be cut out, bagged in sealed containers, and disposed of properly. Non-porous surfaces like metal ductwork, glass, plastic, sealed wood, and ceramic tile can be treated with antifungal and antimicrobial cleaners, HEPA vacuumed, and returned to service. If your bathroom has mold on tile grout and painted drywall, you’ll pay to clean the tile and replace the drywall. That difference adds hundreds to thousands in material and labor costs.

Specific locations command different pricing because of access challenges and contamination risks. Attics and HVAC systems run $2,000 to $6,000 for attics and $1,500 to $10,000 for HVAC systems. Technicians need specialized scaffolding or lifts, insulation removal creates massive disposal volumes, and spores in ductwork can recirculate throughout your entire home every time the system runs. You’ve turned a contained problem into whole house contamination. Basements and crawl spaces vary widely from $500 to $3,000 based on whether the moisture source is a simple pipe drip or complex groundwater seepage requiring French drain installation, sump pump repairs, or foundation waterproofing. Bathrooms start lower at $500 or more for visible surface mold on tile and caulk, but costs escalate fast when testing reveals hidden plumbing leaks behind walls. Suddenly you’re removing tile, cutting into walls, replacing valve assemblies, and reconstructing the entire shower enclosure.

Discovering hidden damage during remediation changes the scope and the bill. Contractors remove a section of moldy drywall and find rotted floor joists underneath. They pull up contaminated carpet and discover the subfloor has turned spongy from months of slow moisture infiltration. The initial $2,000 quote becomes $4,500 because structural repairs can’t wait. Compromised framing is a safety issue. This isn’t a bait and switch. The full scope only becomes visible once contaminated materials come out and inspectors can see what’s been growing in the dark.

Professional Mold Removal vs DIY Cost Comparison

npOeG8D1Q3C4RIExFkyicA

The EPA recommends DIY removal only for areas smaller than 10 square feet on non-porous surfaces, and only if you don’t have asthma or respiratory sensitivities. That 10 square foot threshold, roughly a 3 foot by 3 foot area, represents the point where disturbing mold without proper containment creates serious health risks and cross contamination problems throughout your home.

DIY Black Mold Removal Costs and Limitations

You’ll spend $50 to $200 on protective gear and supplies. N95 respirator masks, not the cloth kind. Waterproof gloves, safety goggles, cleaning agents like diluted bleach at 1 cup per gallon of water, plastic sheeting, and heavy duty disposal bags. Add your time, which for a small project might be 3 to 6 hours of careful work.

The limitations matter more than the cost savings. DIY lacks proper containment, which means every time you scrub or wipe, you’re launching microscopic spores into the air where they travel through your HVAC system, settle in other rooms, and start new colonies. You can’t address mold in porous materials like drywall or insulation because those require removal, not cleaning. You can’t tackle hidden mold behind walls, under flooring, or in ductwork. You’re limited to visible surface growth on hard materials like tile, glass, or sealed wood.

What Professional Remediation Investment Includes

Professional pricing covers plastic sheeting containment barriers that create sealed work zones with taped seams and zippered entry points. Negative air pressure systems, $500 to $1,500 per room, use specialized fans to pull air from the contaminated space, filter it through HEPA systems, and exhaust it outside. This prevents spores from escaping the work area even when contractors open walls or disturb materials.

HEPA filtration equipment captures particles down to 0.3 microns, small enough to trap individual mold spores that are invisible to the naked eye. Antimicrobial fogging treatments penetrate porous surfaces and kill residual growth. Proper disposal protocols mean contaminated materials go into sealed bags, get transported in enclosed containers, and end up at facilities equipped to handle biological waste. Not your neighborhood dumpster where spores can spread.

Specialized removal methods match the situation. Hard surfaces get antimicrobial cleaning with commercial grade products stronger than household bleach. Abrading uses mechanical friction to remove embedded growth from concrete or wood framing. Dry ice blasting uses compressed CO2 pellets to clean without moisture, ideal for areas where adding water would worsen the problem.

Proper containment is non-negotiable for projects over 10 square feet because it prevents the most expensive scenario. Spore circulation through your HVAC system. Once mold spores enter your ductwork, every room serviced by that system becomes a potential growth site. You’ve turned a $1,500 bathroom problem into a $10,000 whole house remediation because spores settled in bedrooms, living areas, and other bathrooms. Professional containment with negative air pressure keeps this from happening.

Homeowners can typically stay in the house during professional work because proper containment isolates affected areas. Contractors seal doorways with plastic barriers, route exhaust hoses to exterior windows, and maintain negative pressure so air flows into the work zone but not out. You hear the equipment running. You see the sealed off area. But spores stay contained.

The value proposition breaks down like this. Spend $100 to $200 on DIY supplies and risk incomplete removal, cross contamination, and recurrence within months. Or invest $500 to $1,500 for professional small area remediation that includes containment, prevents HVAC infiltration, ensures complete removal to outdoor ambient spore levels, and provides documentation and warranties. For anything beyond a small patch of surface mold on tile, professional work isn’t optional. It’s the only approach that actually solves the problem instead of spreading it around.

Inspection, Testing, and Additional Service Costs

EMcw61oETqq7WAKfJpCTUw

Quoted removal prices usually cover labor and materials for the actual removal work, but testing, inspection, and verification services often appear as separate line items. Understanding what’s included versus what costs extra helps you budget accurately and avoid surprise charges.

What might cost extra:

  • Initial mold inspection ($300 to $600). Visual assessment, moisture mapping, and sample collection to identify mold types and contamination extent.
  • Laboratory testing and spore count analysis ($250 to $700). Lab identification of specific mold species and airborne spore concentration levels.
  • Post-remediation clearance testing ($250 to $350). Air quality verification that spore levels match or fall below outdoor ambient levels.
  • Permit and inspection fees (varies by municipality). Local building department requirements for structural work or containment procedures.
  • Moisture meter testing and thermal imaging ($150 to $400). Electronic detection of hidden moisture in walls, ceilings, and subfloors.
  • Air quality verification ($200 to $500). Third party testing to confirm work meets industry standards and your home is safe for occupancy.

Post-remediation clearance testing is critical because it verifies that spore levels are at or below outdoor ambient concentrations, the industry standard for “clean.” Without this verification, you’re trusting that the work was done right rather than having independent proof. This testing also provides documentation for insurance claims, real estate transactions, or future buyers who want confirmation the problem was handled properly.

Some contractors include basic visual inspection in their quotes but charge separately for lab testing. Others bundle everything into a comprehensive package. Ask upfront. “Is testing included in your quote or charged separately?” Get it in writing so there’s no confusion when the final invoice arrives.

Insurance Coverage for Mold Remediation Costs

Vjmx0-f2TCmTy6V9lz3wkQ

Insurance typically covers mold removal when it results from a sudden, covered event. A burst pipe, a storm that tears off shingles and allows rain penetration, or a washing machine supply line that ruptures and floods the laundry room. The key word is “sudden.” If water damage happens fast and you report it quickly, coverage is likely.

Scenarios usually covered: sudden pipe bursts, storm damage to roof or siding, appliance malfunctions that cause immediate water release, and firefighting water damage.

Scenarios typically excluded: long term leaks from poor maintenance, gradual seepage from neglected gutters, flooding without separate flood insurance, and mold from humidity or condensation issues.

Typical deductibles run $500 to $2,000, with mold coverage often capped at $5,000 to $10,000 unless you purchased additional coverage. Documentation requirements for claims include photos of damage, remediation estimates, moisture readings, and timeline documentation showing you responded quickly after discovering the problem. Filing promptly matters. Delays between water damage and remediation can be used to deny claims based on “failure to mitigate.”

Most policies cap mold coverage at $5,000 to $10,000 even when the underlying water damage is covered. If your whole house remediation after a pipe burst costs $18,000, insurance might cover $10,000 and leave you responsible for the remaining $8,000. Read your policy’s mold endorsement carefully. Some insurers offer higher limits or full coverage for an additional premium, worth considering if you live in a humid climate or have an older home with aging plumbing.

Working with adjusters goes smoother when you document everything and get pre-approval before starting work. Take photos of the water source, the affected areas, and moisture readings. Get written estimates from licensed contractors. Submit everything to your adjuster and ask for written approval to proceed. Starting work before approval can lead to coverage disputes, though emergency water extraction and initial drying to prevent further damage are usually acceptable.

Getting Accurate Quotes from Mold Removal Specialists

BZaOonL4QmiwvO3J68o08Q

Getting three or more written estimates helps ensure you’re paying competitive rates and comparing apples to apples rather than different scopes of work. A $1,800 quote that includes post-remediation testing is a better value than a $1,400 quote that excludes it and charges an additional $400 later.

What to verify:

  • Specialty mold remediation certification. Verify certifications from organizations like the IICRC (Institute of Inspection, Cleaning and Restoration Certification) or NORMI (National Organization of Remediators and Mold Inspectors).
  • Proof of liability and mold-specific insurance. General liability doesn’t cover mold remediation work. Contractors need pollution liability or environmental coverage.
  • Licensed contractor status. Check state contractor licensing boards for active licenses, complaint history, and disciplinary actions.
  • References and customer reviews. Ask for recent references from similar projects and check online reviews across multiple platforms.
  • Detailed written scope of work. Quotes should specify square footage, containment methods, disposal procedures, materials to be removed, and cleanup protocols.
  • Inclusion of post-remediation testing. Verify whether air quality testing is included or quoted separately.
  • Warranty or guarantee terms. Understand what’s covered if mold returns (usually excludes new moisture sources but should cover incomplete removal).

Red flags include quotes significantly lower than competitors, often a sign that essential containment steps will be skipped or cheaper materials substituted. Contractors who refuse to provide proof of insurance or certification, who can’t produce references, or who pressure you for immediate payment before work starts should be avoided. Vague scope descriptions like “remove mold in basement” without specifying containment procedures, square footage, or materials to be addressed leave too much room for disputes and change orders later. Learn more about contractor vetting at How to Vet Home Repair Contractors.

Questions to ask during consultations: “Is testing included in this quote or charged separately?” “What’s your containment protocol, negative air machines, plastic barriers, and sealed work zones?” “How do you handle unexpected damage discovered during removal?” “What’s the estimated timeline from start to final clearance testing?” “What warranties or guarantees do you provide?” “Can I see proof of your mold-specific insurance and certifications?”

Ways to Reduce Your Mold Removal Expenses

u-pRefKTQrusqSQ22LMHrQ

Cutting corners on containment or removal creates health risks and often costs more in the long run when incomplete work allows mold to return or spread. But legitimate savings exist without compromising safety or effectiveness.

Smart ways to save:

  • Catching mold early before it spreads. Small surface patches cost $500 to $1,500. Waiting until it penetrates walls costs $3,000 to $7,000.
  • Handling cosmetic repairs yourself after professional removal. Paint, replace trim, retile, or install new baseboards once remediation is complete.
  • Getting multiple competitive quotes. Three estimates from licensed contractors reveal fair market pricing and prevent overpaying.
  • Scheduling during off-peak seasons. Late fall and winter may offer lower rates when contractors have more availability.
  • Addressing moisture sources yourself if safe and simple. Fix dripping faucets, repair loose roof shingles, or clean clogged gutters before they cause bigger problems.
  • Bundling remediation with other needed repairs. Coordinate mold removal with planned bathroom renovations or basement finishing to reduce total costs.
  • Asking about payment plans or financing. Many restoration companies offer 12 to 24 month financing with approved credit.
  • Filing insurance claims when applicable. Don’t leave coverage on the table when mold results from a covered event.

The biggest money saver is prevention. Maintaining 30 to 50 percent humidity with dehumidifiers, responding to leaks within 24 to 48 hours before mold establishes colonies, ensuring proper ventilation in bathrooms and kitchens, and conducting seasonal inspections of moisture prone areas. A $200 dehumidifier and $100 in gutter cleaning prevents a $3,000 remediation project.

Realistic DIY contributions after professional removal save hundreds. Once contractors finish containment, removal, and antimicrobial treatment, you’re left with bare walls, exposed framing, and removed flooring. You can handle the cosmetic restoration. Painting treated surfaces, installing new baseboards and trim, replacing tiles, or laying new flooring. That might represent $800 to $1,500 in labor costs you keep in your pocket. What you can’t DIY safely: containment, removal of contaminated materials, structural repairs to framing or subfloors, HVAC system cleaning, or any work that disturbs mold. Those tasks require professional equipment, training, and safety protocols.

Health Risks and Why Proper Removal Matters

PJc4O6BSTOyhA39vAeZGEw

Black mold exposure causes respiratory issues ranging from chronic coughing and wheezing to serious infections in vulnerable individuals. Allergic reactions include sneezing, skin rashes, eye irritation, and sinus congestion. Chronic exposure can lead to persistent fatigue, difficulty concentrating, and in severe cases, neurological problems. Particularly dangerous for children, elderly residents, and anyone with compromised immune systems.

Common types and their risks:

  • Stachybotrys chartarum. The classic “black mold,” causes respiratory distress, chronic coughing, nosebleeds, and produces mycotoxins that can trigger severe reactions in sensitive individuals.
  • Aspergillus fumigatus. Can cause pneumonia and aspergillosis in immunocompromised people, leading to serious lung infections requiring hospitalization.
  • Chaetomium atrobrunneum. Attacks the central nervous system in people with compromised immune systems, causing cognitive issues and coordination problems.
  • Penicillium. Spreads rapidly even in lower humidity conditions, triggers allergic reactions and respiratory inflammation.
  • General mycotoxin exposure. Prolonged contact with mold toxins can cause headaches, memory issues, mood changes, and immune system suppression.

Improper removal, scrubbing or wiping mold without containment, releases millions of microscopic spores into your home’s air. Those spores travel through doorways, settle on furniture and bedding, infiltrate your HVAC system, and establish new colonies anywhere conditions are favorable. You’ve actually worsened your family’s exposure rather than solving the problem. A well intentioned DIY effort can turn a contained bathroom issue into a whole house contamination event that costs five times more to remediate properly.

Professional containment and HEPA filtration protect your family during and after remediation by creating sealed work zones that prevent spore escape, filtering air before it leaves the work area, and maintaining negative pressure so spores can’t travel to occupied spaces. It’s the difference between spreading the problem throughout your home and actually solving it.

Timeline and What Happens During Professional Mold Removal

t4_eU_KCTn2XGznceLSAGw

Small projects affecting a single room under 100 square feet typically take 1 to 3 days from initial containment setup through final clearance testing. Medium projects covering 100 to 300 square feet might require 3 to 5 days. Whole house remediation after flooding or extensive water damage can take 5 to 10 days or longer depending on the extent of structural repairs needed.

Here’s what happens:

  1. Initial inspection and testing to map contamination. Technicians use moisture meters and thermal imaging to identify all affected areas, including hidden growth behind walls or under flooring. Air samples and surface swabs go to labs for species identification and spore count analysis. This step takes 2 to 4 hours and determines the full scope of work.

  2. Containment setup with plastic barriers and negative air pressure. Crews seal doorways, vents, and openings with 6 mil plastic sheeting secured with tape. Negative air machines create lower pressure inside the work zone so air flows in from surrounding spaces but doesn’t flow out. HEPA filtration systems process contaminated air before exhausting it outside.

  3. Removal of contaminated porous materials. Workers wearing respirators, protective suits, and gloves remove drywall, insulation, carpeting, ceiling tiles, and any other porous materials showing contamination. Materials go into sealed plastic bags for proper disposal. This demolition phase generates the most debris and noise.

  4. HEPA vacuuming and antimicrobial treatment of salvageable surfaces. Non-porous materials like framing lumber, concrete, metal ductwork, and sealed wood get HEPA vacuumed to remove surface spores, then treated with commercial antimicrobial solutions that kill remaining growth and prevent recurrence. Surfaces must remain wet with treatment solution for specified contact time, usually 10 to 20 minutes.

  5. Drying and dehumidification of affected areas. Industrial dehumidifiers and air movers run continuously for 24 to 72 hours to bring moisture levels below 15 percent, the threshold where mold can’t grow. Technicians monitor moisture readings with meters until all materials reach acceptable levels.

  6. Post-remediation testing and clearance verification. Independent testing confirms airborne spore levels match or fall below outdoor ambient levels and the space is safe for occupancy. This typically happens 24 to 48 hours after final cleaning to allow any disturbed spores to settle.

Homeowners can usually remain in the house during work because proper containment isolates affected areas. You’ll hear equipment running. Negative air machines and dehumidifiers generate steady noise similar to a window air conditioner. You’ll see the plastic barriers sealing off work zones. But spores stay contained, and you can use unaffected areas of your home normally. Severe cases involving multiple rooms or HVAC contamination may require temporary relocation for 2 to 7 days while the most intensive work happens.

After removal, the space must dry completely, moisture sources need permanent fixes, and removed materials require replacement before the area is ready for normal use. That reconstruction phase, hanging new drywall, installing insulation, painting, replacing flooring, and restoring trim, adds another 3 to 7 days depending on complexity. Understanding the full timeline helps you plan around the disruption and set realistic expectations for when your space will be fully functional again. To better understand how water damage categories affect the remediation approach, see Understanding Water Damage Categories.

Preventing Mold Growth After Remediation

P3c53CSiQNOFXpNqyFq7Yw

Remediation without moisture control is a temporary fix. Mold will return in weeks or months if the conditions that allowed it to grow in the first place, excess moisture, poor ventilation, ongoing leaks, remain unaddressed. You’ve spent thousands removing the symptom without treating the cause.

Prevention steps that actually work:

  • Maintain 30 to 50 percent humidity with dehumidifiers. Install basement dehumidifiers set to 40 percent, empty collection buckets daily or run continuous drain lines.
  • Fix leaks immediately. Repair plumbing leaks, roof penetrations, and foundation cracks within 24 to 48 hours before moisture saturates materials.
  • Improve ventilation in bathrooms and kitchens. Run exhaust fans during and for 20 minutes after showers, install fans vented to exterior if none exist.
  • Remove carpet from basements and moisture prone areas. Replace with tile, vinyl, or sealed concrete that doesn’t absorb moisture and provide growth medium.
  • Clean gutters and ensure proper drainage away from foundation. Keep gutters clear, extend downspouts 6 feet from foundation, grade soil to slope away from the house.
  • Insulate pipes to prevent condensation. Wrap cold water pipes in unheated spaces with foam insulation to prevent condensation drips.
  • Address HVAC condensation issues. Ensure drain pans empty properly, drain lines stay clear, and evaporator coils don’t develop standing water.
  • Conduct regular inspections of moisture prone areas. Check under sinks, behind toilets, around water heaters, in attic corners, and basement perimeters quarterly.

The moisture source identification performed during professional remediation should guide your prevention efforts. If mold grew because a roof leak allowed rain penetration, that roof repair must be permanent, not a temporary patch that fails next storm season. If bathroom mold resulted from poor ventilation and no exhaust fan, installing a properly vented fan prevents recurrence. If basement contamination came from foundation seepage, exterior waterproofing or interior drainage systems address the root cause.

Monitor humidity with an inexpensive hygrometer. Digital models cost $10 to $30 and provide accurate readings in real time. If humidity creeps above 50 percent regularly, increase dehumidifier capacity or improve ventilation. Watch for early warning signs that moisture problems are developing: musty odors that appear suddenly, condensation on windows during cold weather, water stains on ceilings or walls, or peeling paint and wallpaper. Catching these issues early, before visible mold growth appears, prevents the need for another expensive remediation project.

Final Words

Black mold removal cost depends on how far the contamination has spread, where it’s growing, and what materials are involved.

Small surface areas might run $500 to $1,500, while whole-house remediation after flooding can reach $10,000 to $30,000.

The key is catching it early, getting clear written quotes from certified specialists, and making sure the moisture source gets fixed so it doesn’t come back.

Professional removal with proper containment protects your family and prevents spores from spreading through your HVAC system.

Once the work is done and verified with post-remediation testing, you’ll have a safe, clean space again.

FAQ

How expensive is it to fix black mold?

Professional black mold removal typically costs between $1,200 and $3,750, with most homeowners paying around $2,300 for remediation. Small areas under 10 square feet may cost $500 to $1,500, while whole-house projects can reach $10,000 to $30,000 depending on contamination extent and structural damage.

Can you ever fully get rid of black mold?

Yes, professional remediation can fully eliminate black mold by removing contaminated materials and treating salvageable surfaces to bring spore levels at or below outdoor ambient levels. Complete removal requires proper containment, HEPA filtration, antimicrobial treatment, and fixing the moisture source to prevent regrowth.

Can a house recover from mold?

A house can fully recover from mold through professional remediation that removes contaminated porous materials, treats salvageable surfaces, and addresses underlying moisture problems. After proper removal and moisture control, the home returns to safe, livable condition with spore levels matching outdoor air quality.

Is professional mold removal worth it?

Professional mold removal is worth the investment because it includes containment barriers, negative air pressure systems, and HEPA filtration that prevent spore spread throughout your home. Proper removal protects your family’s health, prevents costly HVAC contamination, and ensures complete elimination verified through post-remediation testing.

What’s included in professional mold remediation costs?

Professional mold remediation costs include plastic sheeting containment, negative air pressure equipment, HEPA filtration systems, antimicrobial treatment, contaminated material disposal, and specialized removal methods. Labor represents over half the total cost, covering containment protocols, protective measures, surface cleaning, and verification that spore levels return to safe levels.

How much does mold testing cost separately from removal?

Mold testing costs range from $250 to $700 for laboratory analysis and spore count testing, with post-remediation clearance testing costing $250 to $350 additional. Initial mold inspections typically run $300 to $600, and these testing fees are often separate from the base remediation quote.

When does homeowners insurance cover mold removal?

Homeowners insurance typically covers mold removal resulting from sudden, covered events like burst pipes or storm damage, but excludes mold from long-term leaks or maintenance neglect. Coverage limits often cap at $5,000 to $10,000, requiring prompt filing and proper documentation after water events.

What makes attic mold removal more expensive?

Attic mold removal costs $2,000 to $6,000 due to specialized access requirements, contaminated insulation removal, and spore distribution risks. Limited workspace, extreme temperatures, and the need to protect HVAC systems from contamination add complexity and labor costs compared to accessible locations.

How long does professional mold removal take?

Professional mold removal for small projects under 100 square feet typically takes 1 to 3 days, while whole-house remediation may require 5 to 10 days or longer. Timeline depends on contamination extent, structural repairs needed, drying time, and post-remediation testing verification.

What prevents mold from returning after professional removal?

Preventing mold recurrence requires maintaining 30 to 50 percent humidity with dehumidifiers, fixing all moisture sources immediately, and improving ventilation in bathrooms and kitchens. Regular monitoring with hygrometers and addressing early warning signs like musty odors or condensation prevents new growth.

Storm Damage Cleanup: Revive Your Home

0

Have you ever wondered if your home can truly recover after a storm? Storms bring more than water and wind. They leave behind hazards and a sense of loss that can feel overwhelming.

Restoring your home is about more than just clearing away the debris. It means bringing back safety and comfort. Think of it like mending a favorite sweater, every repair is important.

In this guide, we explain the simple steps to secure your home right away. We act quickly to stop further damage and help you feel safe again. If you have any questions, we’re here to help every step of the way.

Storm Damage Cleanup Steps to Restore Your Property After a Storm

After a storm, your property can be unsafe. Strong winds and rain may leave dangerous power lines, fallen tree limbs, and even flooding. It is important to act fast. Clearing paths like roads, driveways, and walkways helps keep everyone safe and stops further damage when materials and help are in short supply.

  • Turn off your utilities if it is safe to do so to avoid risk of shock.
  • Look for and mark unsafe areas such as unstable structures or piles of debris.
  • Remove debris that blocks evacuation routes.
  • Protect vulnerable areas by covering them with temporary boards or tarps.
  • Call local emergency services and use restoration hotline numbers.
  • Take clear photos of damage like broken pavement, downed trees, or displaced objects for your records.

Working with certified restoration companies can speed up the cleanup and help meet safety standards. They offer free on-site estimates and clear evaluations of what needs repair. Fast-response teams are available 24/7, so you can count on professional help to secure your home quickly.

It is also important to document all the damage. Snap pictures of every affected area and write down what happened. Keeping a record and saving receipts for repairs can make your insurance claim go more smoothly.

Storm Damage Cleanup Assessment and Hazard Prioritization

img-1.jpg

After a storm, safe cleanup starts with a careful look around your property. First, check for dangers like fallen power lines, gas leaks, or walls that might fall. Take clear photos of each unsafe spot. Picture broken tree limbs leaning against a wall or exposed electrical wires next to debris. These images help us see how much damage there is and guide safe debris removal.

Next, list the dangers in order of urgency and secure the risk areas. Focus on spots with immediate hazards like exposed utilities or shifting debris, and mark these areas to keep people away. You can use tape, cones, or temporary barriers to create clear boundaries. This step-by-step method helps keep everyone safe until professionals arrive to handle the repairs.

Storm Damage Cleanup Equipment and Machinery Options

When a storm hits, the right machines can help turn chaos into order quickly. We use a variety of equipment to clear fallen trees and open blocked pathways. For example, our heavy-duty excavators can lift and move large pieces of debris and trees. When safety is a concern, we rely on remote-controlled machines that work in risky spots. Telescopic boom attachments (extendable arms that reach high areas) let us handle obstacles up to 55 feet high. We also use mulchers to grind debris into mulch and stump grinders to remove tree stumps fast.

Equipment Type Primary Use
Heavy-Duty Excavator Moving large debris and fallen trees
Remote-Controlled Machine Working in high-risk areas safely
Telescopic Boom Attachment Reaching obstacles up to 55 ft high
Mulcher Turning organic debris into mulch
Stump Grinder Clearing tree stumps for a clear area

When choosing rental options, look for equipment that fits your cleanup needs. Local rental companies have a range of restoration tools available. Compare rental costs and check that you follow operator guidelines to stay safe. Using the right machines not only speeds up debris removal but also helps reduce the risk of injury and more property damage. Being prepared with the proper equipment makes storm cleanup safer and more efficient.

Storm Damage Cleanup Water Extraction and Drying Techniques

img-2.jpg

After a storm, we know quick water removal is key to preventing more damage. Our team uses truck-mounted vacuums and submersible pumps (tools that remove standing water) to clear water from your home fast. These machines reach even the tight spots where water hides, reducing the chance of further harm and cutting down on repairs.

Once the water is out, drying equipment gets to work. Air movers blow dry air across wet surfaces, and dehumidifiers (machines that pull moisture from the air) lower the moisture levels. This steady airflow speeds up nature’s drying process and helps stop hidden water pockets that may cause later issues. Our careful methods ensure every area of your home dries evenly.

After drying, we focus on stopping mold from growing. Mold can appear in just a few days if any moisture remains. Even with proper drying, our team checks for spots that might still hold moisture. We also treat these areas and keep humidity low to protect your home. These steps help keep mold away and your space safe and livable.

Storm Damage Cleanup Debris Handling and Disposal Practices

After a storm, the first step in a safe cleanup is sorting the debris correctly. We go through the mess and sort items into three groups: recyclable, hazardous (waste that can harm you or the environment), and bulky. We check the site carefully and set aside each type in a designated area. Getting this right helps protect your home and nature.

After sorting, we follow proper paths for disposal and recycling. Recyclable items go to special centers where they are processed. Hazardous waste is taken by approved services that follow local rules. Bulky items, like large tree branches or broken pieces of a structure, are removed by expert debris hauling teams. This helps keep your neighborhood safe without extra risks.

To keep our work site safe, everyone wears the right protective gear. This means hard hats, gloves, and steel-toed boots to protect against falling or sharp objects. We also watch the weather closely during cleanup. By choosing safe weather windows, we reduce hazards and make sure the process goes smoothly.

Storm Damage Cleanup Insurance Claims and Documentation Tips

img-3.jpg

After a storm, detailed records can really help with your insurance claim. Take clear photos and videos of each damaged spot. Write down the date for every picture and save all receipts from repairs or cleanup work. For example, a photo of a broken window with the date shown helps prove when the damage happened. These clear records make it easier for you and your insurer.

Next, review your policy to match your documentation to its terms. Check your coverage limits and ask if you need pre-cleanup approval. Organize your photos and receipts in order and confirm they follow your policy guidelines before you start the cleanup. This careful method speeds up your claim process and supports your recovery efforts.

Storm Damage Cleanup Contractor Selection and Rapid Response Teams

After a storm, your home needs fast help. Choose certified restoration professionals with a local storm response team ready to work 24/7. They offer free consultations and use experts like certified arborists (tree specialists) to check for tree damage. Their teams start cleanup quickly and follow strict safety rules to protect your home and keep access routes clear.

When getting quotes, ask for easy-to-understand cost breakdowns and a clear timeline for the work. Request examples of past storm cleanup jobs to check their quality. Quick service can stop further damage. Skilled contractors work closely with you and adjust their plans to meet your specific needs.

Final Words

In the action, we broke down how to tackle storm damage cleanup fast. We covered safety checks, debris removal, water extraction with drying techniques, and even the proper steps to document damage for insurance. We also discussed how to choose certified restoration contractors, so every step works together to restore your home quickly.

Our guide shows that with fast, clear action and trusted help, storm damage cleanup can turn a tough situation into a manageable recovery. Stay positive and move forward safely.

FAQ

What does storm damage cleanup near me mean?

The phrase storm damage cleanup near me describes local companies that clear debris and repair damage after a storm. You can find fast, local help to restore your property.

What does tornado storm damage cleanup involve and who handles it?

Tornado storm damage cleanup involves assessing hazards and removing debris safely. Typically, property owners hire certified contractors, and insurance policies may offer financial support for the cleanup.

What defines the best storm damage cleanup and which restoration companies can help?

The best storm damage cleanup is provided by certified teams who remove debris, repair damage, and restore safety quickly. Top restoration companies offer free estimates and rapid response.

What do storm cleanup jobs entail, including opportunities like Florida paying $3000 a week?

Storm cleanup jobs involve removing debris, assessing damage, and aiding repairs. Some positions, like promoted Florida roles, offer high earnings due to the fast-paced, essential nature of the work.

What does storm damage reports today refer to?

Storm damage reports today provide current information on damage levels. They help homeowners, contractors, and insurers determine the repairs needed after a storm.

What does storm damage Monster Truck mean?

The term storm damage Monster Truck may refer to robust, heavy-duty vehicles used for clearing massive debris and damaged structures during extreme cleanup jobs.

How much should you charge for storm cleanup services?

Charging for storm cleanup depends on the extent of damage, labor, equipment, and debris work required. Contractors typically offer free assessments to provide an accurate cost estimate.

How do you clean up after a storm?

Cleaning up after a storm starts with safety checks, followed by debris removal and water extraction. Professionals use specialized equipment to secure your property and prevent further damage.

Does homeowners insurance cover tree cleanup after a storm?

Homeowners insurance often covers tree cleanup when damage is caused by a storm. However, coverage varies, so reviewing your policy or contacting your insurer is recommended.

Basement Waterproofing Methods That Actually Stop Leaks

0

Most basement waterproofing fails because homeowners pick solutions based on price instead of what’s actually causing water to show up. Surface sealants won’t stop hydrostatic pressure. A sump pump can’t fix foundation cracks. And if you’re layering fixes on top of the wrong diagnosis, you’re just spending money while your basement stays wet. The methods that actually work start outside, intercept water early, and match the specific way moisture is reaching your space.

Core Waterproofing Methods: Comparison and Selection Guide

GqGsQv57SzaX0Fr5cnCWxg

Choosing the right basement waterproofing method starts with understanding what you’re actually dealing with. Minor dampness that shows up as musty smells. Moderate seepage leaving water marks on walls. Or active flooding that pools on your floor during rainstorms. Your budget matters too, and you’ll need to figure out whether water pressure builds from groundwater outside pushing in or condensation forming inside from temperature swings and poor ventilation.

Waterproofing solutions range from $50 surface sealants you can brush on yourself to $15,000 professional excavation jobs that expose your entire foundation. The most effective methods stop water early in its path toward your basement, before hydrostatic pressure builds and forces moisture through concrete pores, cracks, and joints.

Method Best For Effectiveness Rating Cost Range DIY Feasible Installation Time Lifespan
Exterior membrane + excavation Severe flooding, high water table, permanent solution 9/10 $8,000-$15,000 No 5-7 days 25-30 years
Interior drainage + sump pump Regular water intrusion, finished basements, limited exterior access 8/10 $2,000-$6,000 No 2-3 days 7-10 years pump, 25+ drain
Exterior French drain Surface water management, soggy yard, foundation perimeter drainage 7/10 $2,000-$10,000 Difficult 2-4 days 20-30 years
Surface coatings/sealants Minor dampness, humidity control, porous walls 4/10 $50-$200 DIY, $1-3/sq ft pro Yes 1-2 days 5-10 years
Crack injection Active leaks through foundation cracks, localized seepage 7/10 $300-$800 per crack Limited 2-4 hours 10-15 years
Grading improvements Surface water pooling near foundation, negative slope 6/10 $500-$3,000 Yes 1-3 days 5-10 years
Vapor barriers Humidity control, condensation issues, finished wall protection 5/10 $0.50-$2/sq ft Yes 1 day 20+ years
Dehumidifiers Ambient moisture, musty odors, preventing mold in dry basements 4/10 $200-$1,500 Yes 1 hour 5-10 years
Downspout extensions Roof drainage directing water toward foundation 6/10 $50-$200 Yes 1-2 hours 3-5 years
Emergency hydraulic cement Active leaks requiring immediate temporary repair 3/10 $10-$30 Yes 15-30 minutes 1-3 years temporary

The most reliable protection combines multiple approaches working together. Exterior French drains that reduce groundwater pressure around your foundation paired with interior backup drainage and a sump pump that catches breakthrough water. Or surface coatings combined with a dehumidifier when you’re managing minor moisture rather than actual flooding. Single method solutions work for specific problems, but layered systems handle the unpredictable nature of water finding its way into basements.

Emergency Response: Stopping Active Leaks and Flooding

qbiUCROIT8KilauZKsU7xg

If water’s actively coming in right now, safety comes first. Standing water near electrical outlets, appliances, or your breaker panel creates shock hazards serious enough to require shutting off power to affected areas and staying out until conditions are safe.

Immediate Response Steps:

  1. Shut off electricity to basement circuits at the main panel if water reaches outlets, appliances, or wiring, and avoid walking through standing water until power is confirmed off

  2. Identify the water source. Foundation crack, window well overflow, sewer backup, sump pump failure, or surface water coming through doorways. Response tactics differ for each.

  3. Stop inflow if possible by clearing blocked window wells, redirecting downspouts away from foundation, or covering exposed cracks with plastic sheeting secured with duct tape

  4. Begin water removal immediately using wet dry vacuums for minor flooding (under 1 inch), submersible pumps for deeper water, starting from the lowest point and working outward

  5. Document damage with photos and video showing water levels, affected materials, and visible damage for insurance claims before cleanup removes evidence

For active leaks through cracks or joints, hydraulic cement provides quick patches that set in 3 to 5 minutes even while water’s flowing. Mix it to a thick putty consistency, undercut the crack edges slightly to create a key, pack the cement in firmly, and hold it in place for several minutes until it hardens. This buys you time to plan proper crack injection repairs. Plastic sheeting secured over seeping walls with construction adhesive or furring strips creates temporary barriers while you arrange professional repairs. Window wells filling with water during storms need immediate clearing of debris from drain grates plus sandbags stacked around the well perimeter to redirect surface flow.

Water removal speed matters because mold colonization starts within 24 to 48 hours on wet organic materials like drywall, wood framing, insulation, and stored items. Wet dry vacuums handle minor seepage and small puddles. Submersible pumps rented from equipment suppliers ($40 to $80 per day) move hundreds of gallons per hour for significant flooding, with discharge hoses running to storm drains or street drainage at least 20 feet from your foundation. Severe flooding with contaminated water or more than 6 inches depth across large areas warrants professional water extraction services that bring truck mounted equipment and industrial drying systems.

Emergency Supplies to Keep Ready:

  • Hydraulic cement (fast setting waterplug type)
  • Heavy 6 mil plastic sheeting in 10×25 foot rolls
  • Wet dry vacuum with 6+ gallon capacity
  • Portable submersible pump with 50 feet discharge hose
  • Sandbags (or heavy duty garbage bags filled with soil as substitute)
  • Battery powered or backup outlet dehumidifier for immediate drying

Exterior Waterproofing: Excavation and Membrane Systems

I8Fx7PWoRiOkEM4blzoH7Q

Exterior waterproofing tackles water at the foundation perimeter before hydrostatic pressure builds enough to force moisture through concrete. It’s the most complete long term approach that fixes root causes instead of just managing symptoms after water’s already reached your basement walls.

Excavation and Foundation Preparation

The process starts with excavating a trench around your foundation perimeter, typically 6 to 8 feet deep down to the footer level where the foundation widens at its base. Heavy equipment, mini excavators for tight residential access or full size machines for open properties, removes soil in sections while protecting landscaping, utilities, and hardscaping where possible. The exposed foundation wall gets thoroughly cleaned with pressure washers or wire brushes, removing all soil, old tar coatings, efflorescence, and loose concrete. Any visible cracks, honeycomb areas (porous sections), or damage get repaired with hydraulic cement or epoxy injection before waterproofing application begins. The working trench needs enough width (3 to 4 feet) for installers to apply membranes properly and install drainage systems alongside the footer.

Waterproof Membrane Application

The most common membrane is rubberized asphalt applied in two coats from footer to grade level, creating a thick barrier that remains flexible as foundations shift slightly over time. Liquid applied membranes get rolled or sprayed onto prepared surfaces, while peel and stick sheet membranes come in rolls that overlap at seams by 4 to 6 inches. All membrane types create impermeable barriers blocking liquid water penetration. Over the waterproof membrane, installers attach dimple boards (plastic sheets with raised bumps) or drainage mats that create an air gap between membrane and backfill soil. This relieves hydrostatic pressure by giving water a path to flow downward toward footer drains rather than pressing directly against the waterproof coating.

Exterior French Drain and Footer Drainage

Alongside the footer, installers lay perforated drain pipe (typically 4 inch diameter) in a gravel bed that extends 6 to 8 inches below and around the pipe. The perforations face downward, allowing water that collects at the footer level to enter the pipe. Filter fabric wraps the gravel and pipe assembly to prevent soil particles from clogging perforations over time. The pipe slopes at minimum 1 inch per 8 feet, directing collected water away from the foundation to a daylight outlet (where pipe emerges at ground surface downhill from the house) or to a dry well 10 to 20 feet away. This drainage system intercepts groundwater before it reaches foundation walls, working with the membrane to stop water at multiple intervention points.

Backfilling and Grading Establishment

After membrane and drainage installation, backfilling uses proper drainage soil (sandy loam or engineered fill) rather than heavy clay that holds water. Installers compact fill in 6 inch layers using plate compactors to prevent future settling that creates low spots near the foundation. The final grade establishes positive drainage. Ground slopes away from the foundation with minimum 6 inches drop over the first 10 feet. This surface slope directs rain and snowmelt away before it soaks down to footer level. Landscape restoration includes replacing topsoil, reseeding grass, and rebuilding garden beds, though expect disruption to plantings, walkways, and anything within the excavation zone.

Exterior waterproofing delivers permanent protection with 25 to 30 year lifespan and stops water before pressure builds. But the investment runs $8,000 to $15,000 for typical homes, tears up landscaping temporarily, requires property access for excavators and dump trucks, and works best scheduled during dry weather when soil conditions allow clean excavation and membrane curing.

Interior Drainage Systems: Sump Pumps and Perimeter Drains

lubFdl_-Swi0M2VA9iMEJg

Interior waterproofing systems don’t stop water from entering your basement envelope but manage it effectively once inside. This makes them less disruptive than excavation, more affordable for finished basements where interior access is easier, and reliable for controlling water that’s already found its way to your foundation.

Interior Perimeter Drain Installation

Installers start by cutting a channel through your concrete floor along the basement perimeter, typically 12 to 18 inches from the wall. Concrete saws with dust control attachments cut through the slab, then crews remove concrete sections and excavate a trench down to footer level, usually 12 to 18 inches below floor surface. Perforated drain pipe sits in this trench on a gravel bed, positioned to capture water at the cove joint where floor meets wall, the most common leak location since this construction joint often allows water seepage. Gravity directs captured water through the pipe system to the lowest basement point where the sump pit waits. After pipe installation, crews pour new concrete over the trench, leaving a narrow gap at the wall edge or installing drain grates flush with the floor to allow water entry. Typical installation takes 2 to 3 days including concrete cutting, excavation, pipe placement, and patching.

Sump Pump System Components

The system centers on three connected parts working together. The basin, an 18 to 24 inch diameter pit dug 24 to 30 inches below floor level at the lowest basement point, collects water from the perimeter drain system and provides surge capacity during heavy water events. The pump unit sits in the basin on bricks or a pump stand that keeps the inlet screen above sediment. Residential sump pumps typically run 1/3 to 1/2 horsepower, with cast iron pumps lasting longer than plastic but costing more ($150 to $400 for cast iron versus $80 to $200 plastic). A float switch activates the pump automatically when water reaches a set level, usually 8 to 12 inches deep in the pit. The discharge line runs from pump outlet through basement wall to exterior, routing water 10 to 20 feet from the foundation with a check valve installed near the pump preventing backflow when the pump shuts off.

Backup Systems and Redundancy

Battery backup systems ($300 to $800) matter because power outages often coincide with severe storms that cause flooding, exactly when your primary pump needs to work. These systems use deep cycle marine batteries charged by a small trickle charger, automatically engaging when they detect primary pump failure or power loss. Water powered backup pumps offer another option, using municipal water pressure to create suction that moves basin water without electricity, though they discharge slower than electric pumps and add to water bills. Alarm systems ($50 to $150) alert you to pump failure, high water, or power loss through loud sirens or smartphone notifications. High risk areas prone to extended power outages or severe water intrusion sometimes warrant dual primary pump installations with pumps on separate circuits.

Installation Costs and Maintenance Requirements

Professional installation of a complete system, interior perimeter drain, pump basin, primary pump, and exterior discharge line, typically runs $2,000 to $6,000 depending on basement size, soil conditions, and access difficulty. Experienced homeowners with concrete cutting saws, sledgehammers, and excavation equipment can tackle DIY installation, cutting materials cost to $600 to $1,200 but requiring serious physical work and 3 to 5 full days. Ongoing maintenance includes quarterly pump testing by pouring buckets of water into the basin to verify activation and discharge, annual pit cleaning to remove accumulated sediment, checking discharge lines for clogs or freeze damage in cold climates, and testing battery backup systems monthly. Primary pumps last 7 to 10 years with proper maintenance, drain tile systems function 25+ years, and discharge lines need occasional clearing but rarely fail.

System Component Function Typical Cost Maintenance Frequency Expected Lifespan
Interior drain tile Collects water at cove joint and directs to sump basin $1,200-$3,500 Check grates monthly 25+ years
Sump pump Removes collected water from basin and discharges outside $150-$400 Test quarterly, clean annually 7-10 years
Discharge line Routes pumped water away from foundation $200-$600 Check seasonally for clogs 15-20 years
Battery backup Operates pump during power outages $300-$800 Test monthly, replace battery 3-5 years Battery 3-5 years, system 10+ years
Check valve Prevents discharge water from flowing back into basin $15-$40 Inspect annually 5-7 years

Surface Treatments: Coatings, Sealants, and Penetrating Products

IEyZUmnvTW2iKh9G0Nsphg

Surface coatings work for minor dampness issues, humidity control, and minimal water seepage through porous concrete. Not for active leaks, visible water running down walls, or situations where hydrostatic pressure forces water through cracks and joints with enough volume to puddle on floors.

Waterproof paints like Drylok provide the most common DIY surface treatment, using latex based formulations that create a barrier blocking liquid water while allowing vapor transmission so trapped moisture can escape rather than building up behind the coating. One gallon covers 75 to 100 square feet depending on concrete porosity, with manufacturer specifications calling for two coats applied 4 to 6 hours apart. The breathable characteristic matters because if you seal moisture inside concrete with a completely impermeable coating, it can cause paint failure, efflorescence behind the coating, and continued dampness issues. These masonry paints work best on walls experiencing condensation, minor seepage, or dampness during humid weather rather than steady water intrusion. You’ll typically spend $30 to $45 per gallon, covering an average basement with $120 to $180 in materials.

Crystalline waterproofing products and silicate based penetrating sealers offer more permanent protection by working inside the concrete rather than just coating the surface. Crystalline treatments penetrate concrete pores up to 1/8 inch deep and react with moisture and minerals in the concrete to form crystals that fill tiny capillaries and micro fractures. This becomes part of the concrete structure, providing permanent waterproofing that self seals future hairline cracks up to 0.4mm as moisture reactivates the crystalline reaction. Silicate sealers chemically bond with calcium compounds in concrete, creating a denser surface layer that repels water while remaining breathable. These penetrating products cost more ($60 to $120 per gallon) but last longer, typically 10 to 15 years compared to 5 to 10 years for topical paints.

Surface Treatment Application Process:

  1. Clean walls thoroughly by removing all efflorescence (white mineral deposits), loose concrete, old paint, and dirt using wire brushes or pressure washers, allowing walls to dry completely before coating

  2. Repair cracks larger than hairline width with hydraulic cement, undercutting crack edges slightly to create a mechanical key, and filling completely before applying surface treatments that can’t bridge gaps

  3. Etch very smooth concrete surfaces with diluted muriatic acid (10:1 water to acid ratio) to create surface texture for better coating adhesion, rinsing thoroughly and allowing complete drying

  4. Apply masonry primer if required by your chosen product, particularly on surfaces with old coatings or very porous concrete that would absorb too much topcoat

  5. Apply first coat using masonry brush or thick nap roller in horizontal strokes, working product into surface pores, maintaining wet edges to avoid lap marks, and allowing manufacturer specified cure time (typically 4 to 8 hours)

  6. Apply second coat perpendicular to the first using vertical strokes for complete coverage and maximum thickness, ensuring no pinholes or thin spots remain

Surface treatments handle symptoms rather than causes, meaning they work best when groundwater pressure stays minimal and water problems stem from condensation or minor concrete porosity rather than structural issues. They’re appropriate for situations where you can’t access the exterior foundation and water intrusion rates stay low. Expect to invest $50 to $200 for DIY materials covering typical 400 to 500 square foot basement sections. Professional application adds $1 to $3 per square foot labor but ensures proper surface preparation and even coating thickness. Plan on recoating every 5 to 10 years as the waterproof barrier degrades from moisture exposure, temperature cycles, and concrete movement.

Foundation Crack Repair and Structural Sealing

vDhnkB3AR9GgUU0EO5ux-A

Hairline settling cracks under 1/8 inch wide commonly appear during a home’s first 6 years as the foundation settles into surrounding soil. These typically don’t indicate structural problems and mainly need waterproofing to prevent moisture intrusion. Wider cracks exceeding 1/4 inch, horizontal cracks running along mortar joints or through concrete, stair step patterns in block walls, or cracks with one side offset from the other require structural engineering assessment before any waterproofing work begins, since improper repairs might hide serious foundation movement.

Epoxy injection provides structural repairs by bonding crack faces back together with adhesive strength exceeding the surrounding concrete. The process involves drilling injection ports along the crack path every 6 to 12 inches, then using specialized pumps to inject two part epoxy resin under pressure starting from the lowest port and working upward. The epoxy fills the crack completely, cures hard, and restores structural integrity to the wall. This method works best for dry, inactive cracks where wall movement has stopped and structural stability needs restoration along with waterproofing. The downside is that epoxy’s rigidity can’t accommodate future foundation movement. If settling continues, new cracks form adjacent to the repair. Cost runs $300 to $800 per crack for professional work covering typical 8 to 20 foot crack lengths.

Polyurethane foam injection handles active leaking cracks better than epoxy because it expands 20 to 30 times original volume on contact with water, filling the entire crack depth and remaining flexible enough to accommodate minor wall movement without cracking. Installers drill angled injection ports that penetrate through the wall thickness, then pump expanding polyurethane that chases water through the crack path, pushing into voids and filling irregularities that straight liquid sealants might miss. The foam cures flexible, maintains waterproofing effectiveness even when walls shift slightly with seasonal temperature changes or soil movement, and works while cracks actively leak under hydrostatic pressure. This method is ideal for basement walls showing seepage during rainstorms or spring snowmelt.

Hydraulic cement offers quick surface patching for small leaks and weeping areas, mixing to putty consistency and setting in 3 to 5 minutes even underwater. You undercut the leak area into a shallow cone shape, pack cement firmly into the depression, and hold it in place until initial set begins. This provides temporary repairs that stop immediate water intrusion but isn’t a permanent solution. Hydraulic cement can crack out or allow water to route around the patch over time. Use it for emergency situations, then follow up with proper crack injection within a few months.

Block foundation walls built from cinderblock or concrete masonry units often leak through deteriorated mortar joints rather than through the blocks themselves. Repair involves tuckpointing, removing damaged mortar to 1/2 inch depth, cleaning joints thoroughly, and repacking with fresh mortar matched to original strength and color. Tie rod holes left from concrete form construction create potential water entry points through the full wall thickness. These get sealed by drilling the hole slightly larger, cleaning thoroughly, and filling with hydraulic cement or installing injection ports for polyurethane foam that penetrates the entire hole depth.

Professional crack injection runs $300 to $800 per crack, with most basements having 2 to 4 significant cracks requiring repair. DIY injection kits cost $50 to $150 and include epoxy or polyurethane, injection ports, and mixing equipment, but proper installation requires understanding crack behavior, selecting appropriate materials, and using correct injection pressures. Mistakes can waste materials without achieving waterproofing or, worse, cause additional cracking from excessive pressure. Structural crack assessment by licensed engineers costs $300 to $500 and provides critical information before committing to repairs, since waterproofing a crack that’s still actively widening from foundation failure just means you’ll be repairing it again in 6 to 12 months as movement continues.

Moisture Control: Vapor Barriers and Dehumidification

5yuyo49HSNmgqcw7WvbEhg

Water intrusion from groundwater or rain requires drainage systems, excavation, and membranes to stop the physical flow of liquid into your basement. Vapor and humidity problems caused by temperature differentials, poor ventilation, and condensation need different solutions focused on controlling ambient moisture in the air. Finished basements often face both, liquid water managed by perimeter drains and backup from groundwater, plus humid air from laundry, bathrooms, or natural concrete moisture transmission that requires active dehumidification.

Vapor barrier materials create a semi permeable or impermeable layer that blocks moisture transmission while installed on basement walls or floors. The most common option is 6 mil polyethylene sheeting attached directly over exposed foundation walls before finishing, overlapped at seams by 12 inches and sealed with construction tape. More specialized crawl space membranes (10 to 20 mil thickness) offer higher tear resistance and longer lifespan when you’re encapsulating unfinished spaces. Installation on walls involves attaching sheeting with construction adhesive or mechanical fasteners, running from floor to ceiling, carefully sealing around all penetrations for pipes, wires, and ducts. Floor vapor barriers go under new concrete slabs during construction or over existing slabs before installing floating floors, preventing moisture from wicking up through concrete and damaging flooring materials. Sealing seams and penetrations matters as much as the barrier itself. Any gaps allow moisture transmission that defeats the system’s purpose.

Dehumidifiers actively remove moisture from basement air, preventing condensation on cold surfaces and maintaining humidity levels that discourage mold growth. Size the unit based on basement square footage and moisture severity. 30 pint capacity handles spaces under 1,500 square feet with mild dampness, while 50 to 70 pint models suit larger basements or areas with persistent moisture problems. Energy Star rated units use less electricity while removing the same moisture, typically costing $30 to $50 monthly to operate during humid summer months but less in drier seasons. Built in condensate pumps eliminate need for manual emptying by automatically pumping collected water to floor drains or discharge lines, while gravity drain connections work if your unit sits above a floor drain. Place dehumidifiers in central basement locations with adequate airflow on all sides, away from walls and furniture that block air circulation. Target humidity of 30 to 50% creates comfortable conditions without promoting mold colonization or condensation issues. Modern units include humidistats that automatically cycle on and off to maintain set humidity levels.

Signs You Need Moisture Control Rather Than Drainage:

  • Persistent musty or earthy odors even when walls appear dry to touch
  • White powdery efflorescence appearing on walls without visible water staining
  • Condensation forming on cold water pipes, concrete walls, or windows during humid weather
  • Visible mold spots growing on cardboard, wood, fabric, or other organic materials stored in basement
  • Rust forming on metal items, tools, or appliances despite no direct water contact
  • Wood trim, doors, or furniture warping from moisture absorption and peeling paint without obvious leaks

Dehumidifiers work on symptoms rather than causes, meaning they remove moisture from air but don’t stop water from entering through foundation walls, cracks, or poor drainage. They work best combined with air sealing, proper ventilation, and addressing moisture sources like unvented dryers, bathroom exhaust, or groundwater infiltration. A dehumidifier running constantly at maximum capacity suggests underlying water intrusion problems exceeding the unit’s removal capacity. Time to investigate foundation waterproofing rather than buying a bigger dehumidifier.

Vapor barriers cost $0.50 to $2 per square foot installed depending on material thickness and installation complexity, with typical basement applications running $400 to $1,200 for materials and labor. Quality dehumidifiers range from $200 to $1,500 based on capacity, features like built in pumps and humidistats, and energy efficiency ratings. Operating costs depend on runtime and humidity load but average $30 to $50 monthly during peak humid seasons, less during drier periods when units cycle less frequently.

Water Source Management: Grading, Gutters, and Drainage

uqeZfI39QLmakkrwJWK4kw

Managing rain and snowmelt before it saturates soil around your foundation prevents most basement water problems and costs less than any other waterproofing approach. Proper surface drainage eliminates the source rather than dealing with water after it’s already causing problems.

Proper grading establishes slopes running away from your foundation so gravity directs water away from basement walls rather than pooling against them. Ground should drop minimum 6 inches over the first 10 feet from the foundation, that works out to 1/2 inch per foot of slope. Regrading involves stripping existing soil and landscaping back from the foundation 10 to 15 feet, establishing the proper slope using laser levels or string lines, compacting fill soil in layers to prevent future settling, and finishing with 4 to 6 inches of topsoil that supports grass or plantings. Problem areas include sunken spots where settling created low points that collect water, flat or negative grades where ground slopes toward the house instead of away, and locations where sidewalks, patios, or driveways direct water back toward foundations. Professional regrading costs $500 to $3,000 depending on property size, soil conditions, extent of work needed, and whether you’re also addressing drainage structures. The work creates temporary mess as equipment moves soil, strips landscaping, and rebuilds grade, but results last 10 to 15 years before settling requires touchup.

Gutter systems collect roof drainage, often thousands of gallons during storms, and control where that water goes instead of letting it sheet off roof edges directly onto soil beside the foundation. Properly sized gutters for residential applications run 5 to 6 inches wide with capacity to handle roof drainage from typical 1,500 to 2,500 square foot roof areas. Size calculations account for roof square footage, local rainfall intensity, and roof pitch (steeper roofs shed water faster, requiring larger gutters). Gutters need proper pitch of 1/4 inch per 10 feet toward downspouts to prevent standing water and debris buildup. Common problems include gutters sagging from excess weight (ice, water, debris), separating at seams and end caps, or overflowing during heavy rain because they’re undersized or clogged. Clean gutters twice yearly minimum, spring after tree pollen and fall after leaf drop, removing all debris, flushing downspouts, checking for leaks, and tightening loose hangers. Gutter guards reduce maintenance frequency but don’t eliminate it.

Downspout management matters because even perfect gutters fail at waterproofing if they dump water right beside your foundation. Extensions direct water minimum 4 to 6 feet from foundation walls, with 10 feet ideal for problem properties or heavy clay soils that drain slowly. Solid extensions (rigid plastic, aluminum, or corrugated flex pipe) work better than splash blocks that just spread water. Buried discharge lines offer cleaner appearance and more reliable water routing. Installers run solid pipe underground from downspout outlets to daylight outlets at property edges or to dry wells. Pitch buried lines 1/4 inch per foot to prevent standing water and freezing issues in cold climates. Make sure discharge points don’t create problems on neighboring properties or route water back toward your foundation through surface swales or poor grading.

Window well covers made from clear polycarbonate or metal prevent rain from filling window wells while still allowing natural light and emergency egress through basement windows. Uncovered window wells collect rain, snowmelt, and debris, commonly flooding during storms when well drains can’t handle volume or become clogged. Window wells need gravel bases 6 to 12 inches deep for drainage plus drain connections to perimeter systems or independent drain lines running to daylight outlets. Clean window wells twice yearly, clearing leaves and debris, checking drain function, and ensuring covers fit securely without gaps.

Dry well installations handle downspout discharge and other drainage in areas without natural surface outlets. These consist of 3 to 4 foot diameter excavations, 3 to 6 feet deep, filled with gravel surrounding a perforated collection barrel or geotextile fabric chamber. Water from discharge lines fills the gravel void, then gradually percolates into surrounding soil over hours to days. Position dry wells 10 to 20 feet minimum from foundations to prevent drainage from seeping back toward basements. They work in soils with decent permeability but fail in heavy clay that doesn’t absorb water, requiring either deeper installation to reach better soil or alternative drainage solutions like routing to storm sewers or swales.

Final Words

Every basement is different, but the right combination of basement waterproofing methods protects your home from water damage while fitting your budget and timeline.

Start with what stops the water first. Surface management buys you time. Interior systems catch what gets through. Exterior work stops it at the source.

Most homeowners layer methods over time, beginning with emergency fixes and building toward permanent protection.

The key is starting now, before minor seepage turns into major damage.

FAQ

What is the best waterproofing method for a basement?

The best waterproofing method for a basement depends on your specific water problem, with exterior membrane systems offering the most comprehensive protection by stopping water before it reaches foundation walls, while interior drainage with sump pumps provides reliable flood prevention for less cost and disruption.

What are the three methods of waterproofing a basement?

The three main methods of waterproofing a basement are exterior waterproofing (excavation and membrane application that stops water at the foundation perimeter), interior drainage systems (perimeter drains and sump pumps that collect and remove water), and surface treatments (coatings and sealants applied to walls and floors for minor moisture control).

How much does it cost to waterproof a 1200 sq ft basement?

Waterproofing a 1200 square foot basement typically costs between $2,000 and $6,000 for interior drainage systems with sump pump installation, $8,000 to $15,000 for comprehensive exterior excavation and membrane systems, or $300 to $800 for DIY surface coating treatments addressing minor dampness.

Can you waterproof a basement from the inside?

You can waterproof a basement from the inside using interior perimeter drainage systems that collect water at the cove joint and direct it to a sump pump, surface sealants and coatings for minor moisture control, crack injection repairs, and dehumidification systems, though these methods manage water rather than prevent entry.

How do I stop an active basement leak immediately?

To stop an active basement leak immediately, first shut off electricity to affected areas for safety, identify the water source, apply hydraulic cement to active cracks (it sets in 3 to 5 minutes even underwater), secure plastic sheeting over seeping walls, and begin water removal with a wet-dry vacuum or submersible pump.

What maintenance does a sump pump system need?

A sump pump system needs quarterly testing by pouring water into the pit to verify operation, annual pit cleaning to remove debris and sediment, check valve inspection to prevent backflow, discharge line checks for clogs or freezing, and battery backup testing if installed to ensure reliability during power outages.

When should I choose exterior waterproofing over interior systems?

You should choose exterior waterproofing over interior systems when addressing severe groundwater pressure, protecting valuable finished basement spaces, during new construction or major renovations when excavation access exists, or when interior systems previously failed, recognizing exterior methods prevent water contact rather than managing intrusion.

How long do basement waterproofing systems last?

Basement waterproofing systems last 25 to 30 years for exterior membranes and drain tile, 7 to 10 years for sump pumps (with drain tile lasting 25 years or more), 5 to 10 years for surface coatings before reapplication, and 10 to 25 years for professional interior drainage systems with proper maintenance.

Can I install basement waterproofing myself?

You can install basement waterproofing yourself for surface coatings ($50 to $200), minor crack patching with hydraulic cement, downspout extensions, basic grading touchups, and dehumidifier setup, but excavation work, interior drain tile with concrete cutting, structural crack injection, and complex French drains require professional equipment and expertise.

What causes basement walls to leak?

Basement walls leak due to hydrostatic pressure from saturated soil pushing groundwater through porous concrete and cracks, poor exterior grading directing surface water toward foundations, clogged or missing gutters overflowing near the house, settling cracks from the first 6 years after construction, and deteriorated mortar joints in block foundations.

Do vapor barriers stop basement water leaks?

Vapor barriers do not stop basement water leaks from groundwater or rain intrusion but control ambient humidity and condensation by blocking moisture vapor while allowing walls to breathe, making them effective for managing dampness when combined with dehumidification rather than addressing active water entry requiring drainage systems.

How do I know if I need professional waterproofing help?

You need professional waterproofing help when facing visible structural cracks (horizontal or stair-step patterns), regular flooding that DIY methods haven’t resolved, water tables above basement floor level, previous waterproofing system failures, or when planning finished basement spaces requiring reliable long-term protection and transferable warranties.

Flood Damage Mold Remediation: Health Risks and Professional Removal

0

Mold after a flood is more dangerous than most people realize.
In 24 to 48 hours, spores start colonizing wet drywall, insulation, and carpet.
That creates breathing problems, allergy attacks, and hidden structural damage, especially for kids, older adults, and anyone with lung issues.
This post lays out the health risks of flood-related mold and shows why professional remediation, including containment, moisture mapping, HEPA air control, and proper documentation, stops further harm, protects your household, and makes rebuilding possible.

Immediate Actions for Mold After Flooding

GamcizU6QKSCFIzepq-d1A

Mold doesn’t wait. Within 24 to 48 hours of flooding, spores already hanging out in every home start colonizing wet drywall, insulation, and carpet. The longer stuff stays wet, the deeper the growth digs in. What starts as a moisture problem turns into a health hazard and a structural mess pretty fast.

Exposure to flood-related mold irritates your respiratory system, sets off allergic reactions, and makes asthma worse in anyone already dealing with it. Kids, elderly folks, and anyone with chronic lung issues face bigger risks. When you mix contaminated floodwater with mold spores, you’re looking at conditions that need fast, smart action.

Before pros show up, here’s what you can do to limit damage and keep your household safer:

  • Turn off electricity to flooded areas at the breaker panel if you can reach it safely.
  • Stop water from coming in by shutting off the main supply if a pipe burst, or seal obvious entry points with tarps.
  • Open windows and doors only if the air outside is less humid than what’s inside. Ventilation helps, but bringing in sticky outdoor air just makes things worse.
  • Get standing water out using pumps or wet vacs. The faster water’s gone, the less mold can set up shop.
  • Move furniture, electronics, and personal items you can save to a dry spot so contamination doesn’t spread.

Don’t touch visible mold with bare hands. And don’t hang out in heavily contaminated rooms without a mask. These first moves buy you time and cut down exposure until trained remediators can figure out the full picture.

How Fast Mold Grows After Flooding

xnoiTc8LR3aAcmatHrB2Cw

Mold spores sit dormant until moisture wakes them up. In a flooded home, that happens quick. Wet drywall, soaked insulation, damp carpet… all perfect conditions. Organic material, darkness, moisture levels above 60 percent. Growth often starts where you can’t see it, behind walls and inside ceiling cavities, before discoloration or that musty smell shows up on surfaces.

Speed depends on what got wet. Porous surfaces that trap water speed things up, while non-porous items like metal and sealed concrete hold out longer. Knowing these timelines helps you realize how tight the response window really is.

Drainage Solution Purpose Typical Cost Maintenance Frequency DIY Feasible
Foundation grading Direct surface water away from foundation perimeter $500-$3,000 Inspect annually, touchup every 5-10 years Yes with equipment
Gutter installation/repair Collect roof drainage and control discharge points $600-$2,000 Clean twice yearly, inspect annually
Material Type Likely Mold Growth Window
Drywall and wood framing 24–48 hours
Carpet and padding 24–72 hours
Insulation (fiberglass, cellulose) 24–48 hours
Tile, sealed concrete, metal 72+ hours (surface only)

Health Risks of Flood-Related Mold Exposure

BvmYL9XASmihlW7ru7hOfA

Flood conditions bring in bacteria, sewage contaminants, and organic debris that mix with mold. That creates a more dangerous setup than your typical household moisture problem. Exposure can cause coughing, nasal congestion, throat irritation, wheezing, skin rashes. For people with asthma, mold sets off acute attacks. In immunocompromised folks, prolonged contact can lead to fungal infections that need medical treatment.

Kids and older adults face higher risk because their respiratory systems are more sensitive. Even short exposure during cleanup can kick off symptoms that stick around for days. And it’s not just about “black mold.” Many species common after flooding produce allergens and irritants that mess with your health, especially when you disturb them during amateur cleanup.

The health impact scales with how bad the contamination is and how long you’re exposed. Spending hours in a heavily molded room without respiratory protection increases the dose of spores you’re breathing in. Symptoms might seem mild at first… scratchy throat, watery eyes. But repeated exposure makes the response worse. People with chronic conditions should stay out of affected areas completely until pros finish remediation and clearance testing confirms the air quality is safe.

First 24–48 Hours: Homeowner Actions Before Professionals Arrive

q3uYQCYgQXGIogP07CKO9A

The first two days after flooding decide how much damage mold can do. Safe drying steps include getting standing water out with pumps or wet vacs, opening windows when outdoor humidity is lower than indoors, and isolating rooms with visible mold by closing doors and sealing gaps with towels. These moves slow colonization and cut down airborne spore counts in clean areas.

Here’s the sequence to stabilize things before remediation pros arrive:

  1. Make sure it’s electrically safe. Turn off power to flooded zones at the breaker if you can reach the panel without stepping in water.
  2. Document all damage with photos and video, including water lines on walls, soaked materials, visible mold growth. Insurance claims need this evidence.
  3. Remove standing water as fast as you can using submersible pumps, wet vacuums, or buckets if mechanical options aren’t available.
  4. Pull up soaked carpet and padding within 24 hours if flooding was clean water only. Carpet exposed to sewage or sitting submerged for a long time has to go.
  5. Run fans and dehumidifiers in affected areas, but don’t blow air directly at moldy surfaces. That just spreads spores.
  6. Toss porous items that stayed wet for more than 48 hours. Drywall, insulation, particleboard, upholstered furniture… they typically can’t be saved.
  7. Don’t try cleaning visible mold yourself if the area’s bigger than 10 square feet, if water came from sewage, or if you’ve got respiratory conditions.

Skip the bleach on porous materials. It doesn’t penetrate deep enough to kill embedded mold, and the moisture it adds can make growth worse. Leave antimicrobial treatments to pros who use products designed for flood contamination.

When DIY Mold Cleanup Is Unsafe

d2IS2uctR-uO95oazhTiQQ

Small patches of surface mold on hard, non-porous stuff like metal shelving or sealed tile can sometimes be cleaned by homeowners wearing gloves and an N95 mask. Anything beyond that gets risky. When mold covers more than 10 square feet, roughly a 3-foot by 3-foot section, you need professional remediation to make sure it’s completely removed and health complications don’t follow.

DIY cleanup also becomes unsafe when the water source was sewage or contaminated floodwater. Category 2 and Category 3 water carry bacteria and pathogens that require specialized disinfection and disposal protocols. Handling these materials without proper containment spreads contamination and exposes you to infection risk.

Other situations that need professional help:

  • Mold growth inside HVAC ducts or air handlers, which spreads spores throughout your home every time the system runs.
  • Structural contamination affecting wall cavities, floor joists, or ceiling insulation, where hidden growth keeps going behind surfaces you can see.
  • Vulnerable people in the household. Infants, elderly residents, pregnant people, or anyone with asthma or immune disorders face higher health consequences from exposure.
  • Uncertainty about how bad the damage really is, especially when musty odors stick around but visible mold is limited. That often signals hidden reservoirs that need moisture mapping and thermal imaging to locate.

Trying remediation without containment, negative air pressure, and HEPA filtration risks spreading spores to clean areas and embedding contamination deeper into porous materials.

Professional Mold Remediation Process Explained

HU_wEzt4TeuiB3Ld26DxCQ

Licensed remediation contractors follow industry protocols designed to remove mold, prevent cross-contamination, and verify safe conditions before reconstruction starts. The process involves containment, controlled removal, antimicrobial treatment, and clearance testing. These steps require specialized equipment and training beyond typical homeowner resources.

Inspection and Moisture Mapping

Pros start with a detailed inspection using moisture meters, infrared cameras, and hygrometers to locate all wet materials, including those hiding behind walls and under flooring. Moisture mapping creates a baseline that guides the scope of work and identifies areas where mold’s likely growing even if you can’t see it yet. Some contractors do air and surface sampling during this phase to document contamination levels and identify mold species, though sampling isn’t always necessary for straightforward flood jobs. The inspection typically takes one to three hours and produces a written scope that outlines which materials have to be removed, what can be cleaned, and the expected timeline.

Containment and Air Control

Before demolition begins, the team builds containment barriers using 6-mil polyethylene sheeting to seal affected areas from the rest of your home. HEPA-rated air scrubbers create negative pressure inside the containment zone. Air flows in but doesn’t escape, preventing spores from spreading to clean rooms. Negative pressure is measured and maintained at a differential of 0.02 to 0.05 inches of water column. The team sets up airlocks and decontamination chambers for workers and materials entering and exiting. This controlled environment matters when removing contaminated drywall, insulation, or flooring, which releases high concentrations of spores during handling.

Removal of Contaminated Materials

Porous materials that absorbed floodwater and supported mold growth get removed and double-bagged for disposal. Drywall below the waterline, soaked insulation, wet carpet and padding. Non-porous items like metal studs, PVC pipes, and sealed concrete are cleaned in place using HEPA vacuuming and antimicrobial agents. Demolition is methodical. Workers wet-mist surfaces to reduce airborne spores, cut materials into manageable sections, and pass debris through the containment airlock into sealed bags. The goal is complete removal of contaminated substrate, not cosmetic cleaning. For typical residential jobs, material removal takes one to three days depending on how big the affected area is.

Treatment and Final Clearance Testing

After removal, all remaining surfaces get HEPA-vacuumed and scrubbed with antimicrobial solutions to kill residual spores and prevent regrowth. The team verifies that moisture levels have returned to baseline. Wood framing typically dried to below 15 to 16 percent moisture content, confirmed using calibrated meters. Air movers and dehumidifiers run continuously during this phase, often for two to seven days, until readings stabilize. Once drying’s complete, a third-party inspector or the remediation firm performs clearance testing. Visual inspection, moisture verification, and optional air or surface sampling to confirm contamination’s been eliminated and the space is safe for reconstruction. Clearance testing typically happens 24 to 72 hours after the final cleaning and costs $200 to $600 depending on how many samples are collected.

Costs and Insurance Coverage for Mold Remediation

FqxK3IWfTi-KUoGEEhw9dg

Remediation costs scale with the size of the contaminated area, the materials affected, and how complicated access is. Small jobs, a single room with limited surface mold on non-porous materials, often range from $500 to $3,000. Moderate contamination involving drywall removal, insulation replacement, and multi-day drying in several rooms typically costs $3,000 to $10,000. Major structural remediation, including HVAC cleaning and reconstruction of flooded lower floors, can hit $10,000 to $50,000 or more.

Insurance coverage depends on what caused the water damage and the terms of your policy. Standard homeowners policies often cover mold remediation if it resulted from a sudden, accidental event like a burst pipe, but they exclude mold caused by neglect or long-term moisture problems. Flood insurance, purchased separately through the National Flood Program or private insurers, may cover cleanup costs when rising water is the source. Many policies cap mold coverage or require that remediation starts promptly to limit damage. Documenting every step, keeping receipts, and notifying your insurer within 24 to 72 hours strengthens your claim.

Contamination Severity Typical Cost Range Notes
Small (under 100 sq ft, surface only) $500–$3,000 Often includes inspection, cleaning, antimicrobial treatment
Moderate (100–500 sq ft, drywall removal) $3,000–$10,000 Containment, material removal, drying, clearance testing
Large (500+ sq ft, structural work) $10,000–$50,000+ HVAC cleaning, multi-room demolition, reconstruction
Additional testing (pre/post air sampling) $200–$700 Lab analysis of spore counts and species identification

Choosing a Certified Mold Remediation Contractor

neJe70RITtOMH4_9jeAajg

Credentials matter when you’re hiring for mold remediation. Look for contractors with IICRC S520 certification, which confirms training in mold-specific removal protocols, and IICRC WRT certification for water damage restoration. State contractor licenses, general liability insurance, and pollution or environmental liability coverage protect you if something goes wrong during the job. Request a certificate of insurance and verify coverage amounts directly with the insurer before work starts.

A qualified contractor provides a written scope of work that details containment procedures, materials to be removed, equipment deployment, drying targets, and clearance testing plans. They explain timelines, cost breakdowns, and disposal methods without pressuring you to commit before you review the estimate. Post-remediation verification, either through the contractor’s own clearance protocol or a third-party inspector, should be included or clearly stated as an additional line item.

When you’re evaluating contractors, confirm these things:

  • IICRC or equivalent mold-remediation certification for lead technicians, not just the company.
  • Proof of insurance including general liability and pollution coverage, with limits appropriate to the job size.
  • At least three recent references from local jobs involving flood-related mold, with contact information you can verify.
  • A detailed written estimate with line-item pricing for inspection, containment, removal, drying, treatment, and testing. Avoid vague lump-sum bids.
  • Willingness to coordinate with your insurance adjuster and provide documentation, photos, and moisture logs needed for claims.

Red flags include contractors who promise immediate “mold-killing” treatments without removing contaminated materials, refuse to provide insurance proof, or pressure you to authorize work before you get a written scope. Remediation requires methodical containment and removal, not shortcuts.

Final Words

Start by stopping the water and removing standing moisture. Those first moves limit mold and make the rest of the recovery easier.

We covered immediate steps, how fast mold grows, health risks, what to do in the first 24–48 hours, when DIY is unsafe, the professional remediation process, and how costs and insurance work.

For reliable flood damage mold remediation, act fast, document what you see, and bring in a certified team when needed. You’ll get your home back safe and livable.

FAQ

Q: How to deal with mold after a flood?

A: Dealing with mold after a flood means stopping water, removing wet materials, starting controlled drying with air movers and dehumidifiers, isolating contaminated areas, and calling professionals for large or sewage-contaminated jobs.

Q: What are the 10 warning signs of mold toxicity?

A: The 10 warning signs of mold toxicity are persistent coughing, wheezing, chronic sinus congestion, frequent headaches, fatigue, brain fog, skin rashes, eye irritation, nausea, and worsened asthma or breathing issues.

Q: Is mold covered by flood insurance?

A: Mold coverage on flood insurance is often limited or excluded; some policies or endorsements cover remediation if tied to a covered flood event, so document damage, file promptly, and check your policy or agent.

Q: How long does it take for mold to set in after a flood?

A: Mold can start growing within 24 to 48 hours after a flood; porous materials like drywall, insulation, and carpet often show growth faster, so begin drying and removal immediately.

Emergency Restoration Services: Swift, Trusted Recovery

0

Have you seen a home go from safe to damaged in just minutes? When every second counts, we act fast to stop further damage. We’re like a neighbor who comes when you need help most. We arrive within 60 minutes for water, fire, storm, and mold issues. Our caring team works day and night to secure your home and protect your belongings. With years of trusted service, we get you back on track quickly and give you peace of mind.

Round-the-Clock Emergency Restoration Services and Rapid Response

When disaster strikes, we’re here to help 24/7 with fast, caring service for water, fire, storm, and mold emergencies. Our team is ready to act quickly, just like when a burst pipe put a home at risk, we arrived fast and stopped further damage.

Every call gets our full attention, and we promise to be on site within 60 minutes. Whether it’s a home or business, our trained crew checks the damage and starts making things safe right away.

  • Guaranteed on-site response within 60 minutes.
  • Support across the nation, day or night.
  • Quick damage checks and immediate safety measures.
  • Skilled technicians who work fast to restore your space.

Since 1966, we have built our reputation on prompt and reliable restoration. With over 1,900 locations, expert help is never far away when you need it most.

Emergency Restoration Services for Water Damage: Extraction, Drying, and Repair

img-1.jpg

Water damage spreads quickly, and every second matters. When water starts to overwhelm your space, we jump in to remove it fast, stopping further harm to your home and belongings.

Our crew uses powerful pumps and advanced vacuums (machines that suck up water) to pull water out quickly. We use equipment built specifically to clear water fast. Check out our water extraction process for details. We take every job seriously because a prompt response helps prevent swollen walls and warped floors.

Once we remove the water, our next step is to dry out your home. We use air movers (machines that circulate air) and dehumidifiers (devices that remove moisture from the air) to dry the area. Our technicians also use moisture meters (tools that measure water levels) to check that the drying is working well. This careful process stops mold growth and avoids further damage, whether it’s your living room or your basement.

Repair work can cost between $2,000 and $5,000, depending on the damage. We work closely with your insurance provider to make the claim process easier and lower your stress, ensuring essential repairs and drying work fit the approved budget.

Emergency Restoration Services for Fire, Smoke, and Soot Cleanup

Fire and smoke can leave hidden risks behind. Soot can coat surfaces, odors may linger, and unstable structures can put you in danger. Fast, calm action is key.

Our team works quickly to remove soot and fix smoke damage. We board up weak spots and cover damaged areas with tarps to shield your home from weather and debris. These steps help secure your structure and stop further harm.

Removing the burnt smell is a vital part of our work. Using special cleaning agents and modern equipment, we clear the odor from walls, floors, and furniture. When damage is widespread, we offer complete repairs to restore your home to its prefire condition. Check out our clear post-fire home reconstruction process for details.

Our repair experts not only restore safety but also bring comfort back to your home. We know how stressful fire damage can be, and we are committed to helping you return to a secure, livable space.

Emergency Restoration Services for Storm Damage and Biohazard Cleanup

img-2.jpg

When storms hit, heavy wind, hail, and rain can expose your home to more damage. Fallen trees, broken windows, and water seeping in all need fast action.

We respond quickly to secure your home. We board up windows, tarp roofs, and remove broken branches and debris. Our goal is to stop further harm and stabilize your home after severe weather.

We also handle biohazard cleanup with care. We follow strict steps for cleaning crime scenes, hoarding situations, or other biohazard areas (places with dangerous materials). Our team uses special equipment to remove harmful substances, disinfect the space, and make it safe again. This process helps stop more damage and lowers health risks.

We offer fast toxic spill containment too. Our experts neutralize dangerous spills to protect your family and prepare your property for full restoration.

Streamlined Emergency Restoration Services Process: Four-Step Approach

When an emergency strikes, following a simple plan is key. We quickly check the damage, secure your home, and begin repairs so you can feel safe again.

  1. First, we inspect your home to spot all damage and risks.
  2. Next, we stabilize the area to stop extra harm from happening.
  3. We then dry and clean the space using tools like air movers (machines that blow air to dry surfaces) and dehumidifiers (machines that remove moisture).
  4. Finally, we fully restore your home so it is safe and ready for you to live in.

Time is critical in water emergencies. Water can spread fast, walls can start to break down in just hours, and mold may grow in under a week. Quick action helps keep repair costs down and prevents further damage. We follow this step-by-step process to secure your space and restore it safely.

Certifications, Insurance Coordination, and Quality Assurance in Emergency Restoration Services

img-3.jpg

Our team meets high standards using professionals who are certified (official proof of expertise) and insured (protection if something goes wrong). Each technician is trained to fix damage fast, safely, and correctly.

Our certified technicians are the heart of our process. Their credentials prove their skill, so we can handle even tough emergencies with care. We record each step in a way that helps with your insurance claim, making the process smoother for you. We also offer affordable recovery options with a price match promise, free inspections, and a quick 60-second pre-check that doesn’t affect your credit.

We work directly with your insurance company to manage your claim, cutting down on paperwork and saving you time. Our insured restoration services meet high industry standards while keeping costs low. We offer flexible monthly payment plans to make repairs as stress-free as possible.

Our customers rate our work highly, with a 4.7 score from word-of-mouth and online reviews. This trust comes from our clear guarantees and proven quality. When you need fast, reliable restoration, we’re the team you can count on.

Customer Testimonials and Case Studies of Emergency Restoration Services

Our clients share real stories that show how fast and reliable our emergency restoration team can be. We know you need quick help during stressful times, and our work speaks for itself.

  • Rapid flood cleanup in a Denver home: We arrived within 60 minutes. Our team quickly removed all standing water and set up drying equipment (machines that pull moisture from surfaces). In just 48 hours, we made sure the home was safe and dry, stopping further damage.
  • Post-fire recovery: One homeowner told us how our fast response and careful repair work brought safety back to their property and cleared out the smoky smell.

Our customer ratings average 4.7 out of 5 on multiple review sites. This high score shows that we take pride in our work and truly care about getting you back to a safe home.

Emergency Restoration Services: Swift, Trusted Recovery

img-4.jpg

If a disaster hits in Denver or nearby, we’re ready to help right away. We answer your call quickly with a 24/7 hotline and repair advice available any day, even on holidays. Our team will guide you through every step of the restoration so you can feel safe fast.

You can reach us at:

Address Contact Inspection Payment Options
2301 S Jason St, Denver, CO 80223 (303) 975-4000, (719) 445-0200 Free inspection (no effect on your credit) Monthly payment plans

Call our hotline now to speak with a seasoned restoration professional. When every minute counts, we work fast and with care to help restore your property safely.

Final Words

In the action, our process brings fast, effective help to your home after any disaster. We detailed rapid water extraction, fire and soot cleanup, and storm damage management. Our four-step approach and certified team work quickly to limit damage while coordinating with your insurance. Customer experiences affirm that our clear, reliable services help restore safety and comfort. Rely on our emergency restoration services to guide you from crisis to comfort and keep your home secure and livable.

FAQ

Emergency restoration services near me

When searching for emergency restoration services near you, look for companies that offer 24/7 response, quick on-site help, and positive customer reviews for fast property recovery during disasters.

Free emergency restoration services

Free emergency restoration services refer to initial inspections and estimates offered at no charge, so you can understand the damage without an upfront cost.

Emergency restoration services reviews

Emergency restoration services reviews reflect customer experiences regarding response time, pricing, work quality, and overall satisfaction with the repair and restoration process.

24 hour emergency restoration services

24-hour emergency restoration services mean help is available day or night; companies offering round-the-clock support provide rapid response during any emergency.

Best emergency restoration services

The best emergency restoration services combine fast response times, certified technicians, quality work, and favorable client feedback to quickly restore your property.

Emergency Services Restoration, Inc

Emergency Services Restoration, Inc is a restoration company known for quick response and comprehensive damage repair services during emergency situations.

Emergency Restoration Services Virginia Beach

Emergency Restoration Services Virginia Beach represents local teams that offer fast, professional recovery services in the Virginia Beach area for water, fire, or storm incidents.

Emergency Restoration Services LLC by owner

Emergency Restoration Services LLC by owner indicates a company managed directly by its owner, with hands-on oversight and strict quality control during the repair process.

What is an emergency restoration system?

An emergency restoration system is a setup of trained professionals, specialized equipment, and clear procedures designed to quickly repair and restore your property after a disaster.

What is the meaning of emergency restoration?

The meaning of emergency restoration is the rapid process of cleaning up and repairing damage from incidents like water leaks, fires, or storms to make your home safe again.

Are fire restoration companies worth it?

Fire restoration companies are worth it because they specialize in cleaning and fixing damage from fires and smoke, so your property gets restored to a safe condition.

What is the difference between restoration and remediation?

The difference between restoration and remediation is that restoration repairs and rebuilds your property to its original state, while remediation removes hazardous materials to stop further damage.

Interior Rebuild After Fire: Steps, Costs & Contractor Tips

0

After a fire, most homeowners assume the flames caused all the damage. They didn’t. Firefighting water, toxic smoke residue, and hidden structural compromise often create more rebuilding challenges than the burn itself. A proper interior fire rebuild involves coordinated phases, strict safety protocols, and decisions that directly affect your family’s health and your home’s resale value. Here’s what actually happens from day one through move-in, what it costs, and how to choose contractors who finish the job right.

Essential First Actions and Three-Phase Overview for Fire Recovery
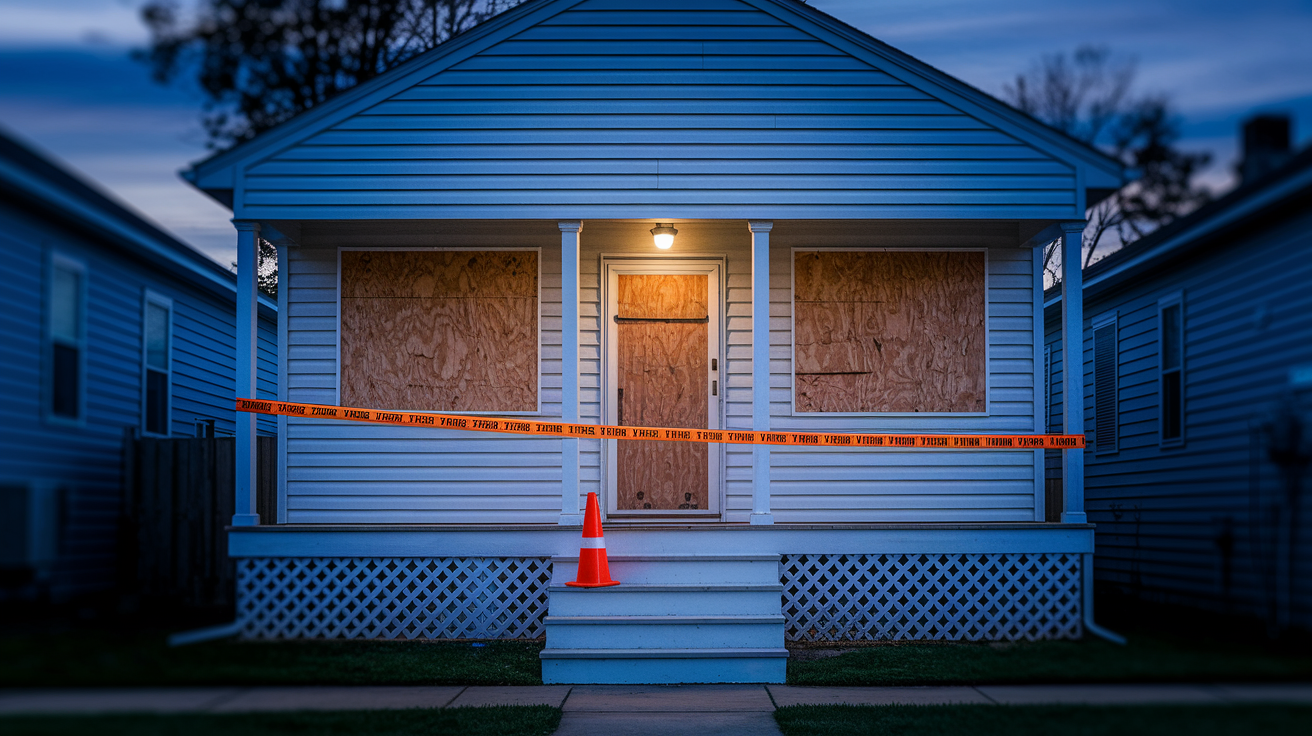
l7IqdIjPQEmCFiQG8H6T2w

Don’t enter your fire-damaged property without professional safety clearance. Contact your insurance company right away to start the claims process. Secure the property against weather and unauthorized entry with board-up services.

Fire recovery follows three distinct phases. Assessment & Planning involves safety inspection, structural evaluation, and insurance documentation. Remediation & Demo includes hazard removal, water extraction, demolition, and deep cleaning. Rebuild & Finishing covers structural repairs, utility restoration, and cosmetic finishes that return your home to safe, livable condition. Each phase has specific goals detailed below.

Safety Assessment and Structural Evaluation Before Fire Rebuild Begins
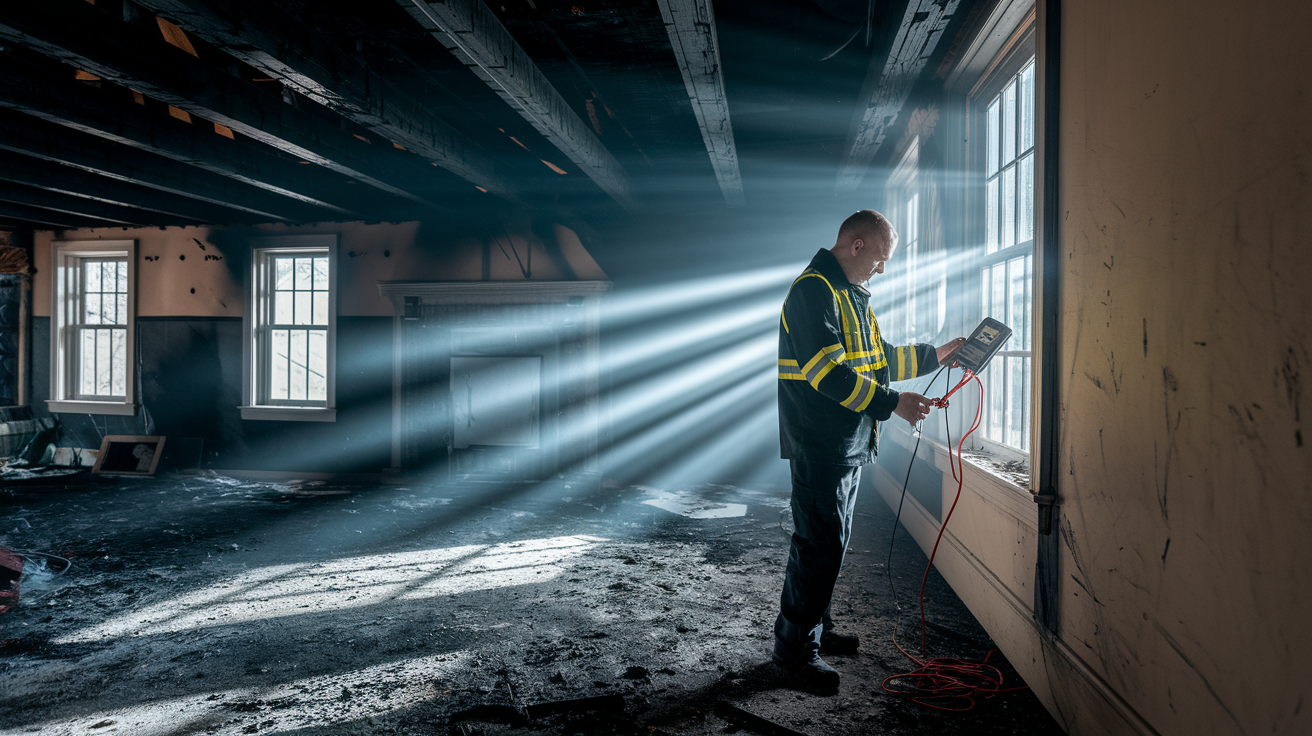
kbBEn1g4TdejNk8t5364Pg

Walking into a fire-damaged home without professional clearance puts you at serious risk.

Post-fire hazards include unstable structures, falling debris, exposed nails embedded in charred wood, carcinogenic chemicals hanging in the air, electrical shock from damaged wiring, and hidden water damage that weakened floors and ceilings. Professionals trained to navigate these conditions enter with protective equipment and structural knowledge you don’t have.

Qualified inspectors holding IICRC FSRT (Fire and Smoke Restoration Technician) and WRT (Water Restoration Technician) certifications evaluate every critical system. They examine foundation integrity for heat-caused shifts or cracks. They check load-bearing elements including walls, beams, joists, and columns to determine what’s salvageable versus what requires replacement. Inspectors test air quality, identify hazardous materials like asbestos or lead that become friable when burned, assess utility damage to electrical panels and gas lines, inspect roofing for structural soundness, and flag areas susceptible to mold from firefighting water. They also check plumbing for heat-damaged pipes, HVAC systems for smoke contamination, siding for compromised weatherproofing, and interior walls for hidden damage behind surface burns.

Verify that inspectors carry proper credentials and state licensing before allowing property access. Their assessment determines which building materials can be cleaned and reused versus what must be completely removed, directly affecting your rebuild budget and timeline.

Health Hazards and Toxic Material Remediation in Fire-Damaged Interiors

xIMdNpIZRX66M5-CUlkj-A

Fire damage isn’t limited to what you can see. Burned building materials release toxic chemicals that penetrate and contaminate surrounding materials that look untouched.

When wood products, plastics, synthetic materials, and asbestos-containing materials burn, they release hydrogen chloride, dioxin chloromethane, nitrogen oxide, and carbon monoxide. These chemicals don’t disappear when flames go out. They settle into porous surfaces like drywall, insulation, fabrics, and ductwork. Short-term exposure causes respiratory issues, persistent coughing, bronchitis, asthma attacks, skin irritation, and eye problems. Long-term exposure carries risks including cancer, stroke, heart attack, and serious developmental consequences for infants and young children.

Professional remediation with proper protective equipment is required, not DIY cleaning. Firefighting foam used to suppress flames contains PFAS (per and polyfluoroalkyl substances) known as “forever chemicals” that require specialized handling protocols. When asbestos-containing materials burn, they release microscopic fibers that become airborne and lodge in lung tissue. Attempting to clean these materials yourself without respiratory protection, containment barriers, and proper disposal methods creates exposure that can affect your health for years.

Six common toxic contaminants requiring professional remediation:

Hydrogen chloride from burned PVC pipes, vinyl siding, and plastic materials

Dioxin chloromethane from combusted synthetic fabrics, carpets, and upholstery

Nitrogen oxide from high-temperature combustion of wood framing and natural materials

Carbon monoxide absorbed into porous surfaces during active burning

Asbestos fibers released when older insulation, floor tiles, or popcorn ceilings burn

PFAS chemicals from firefighting foam that penetrate flooring, drywall, and concrete

Water Damage and Moisture Control During Fire Interior Restoration

p8ZpzRBIQiCbt_Q78puOkw

Firefighting efforts introduce hundreds or thousands of gallons of water that create secondary damage requiring immediate attention alongside fire repairs.

Mold growth begins within 24 to 48 hours after fire crews extinguish flames. This narrow window makes immediate moisture removal absolutely critical. Water from fire hoses soaks into wall cavities, saturates insulation, pools under flooring, and seeps into structural framing where you can’t see it. If not extracted quickly, mold colonizes these damp areas while you’re still processing the fire damage itself.

Professional crews use industrial-strength dehumidifiers that pull moisture from the air at rates household units can’t match. High-powered fans create airflow patterns that accelerate drying in wall cavities and under flooring. Wet vacuums extract standing water from carpets and padding. Moisture meters measure water content in framing lumber, drywall, and subfloors to track drying progress. Infrared cameras detect hidden moisture trapped behind walls or under flooring that visual inspection misses, preventing mold growth in concealed spaces.

Water-damaged drywall, insulation, and carpeting can’t be dried and saved. These materials are mold breeding grounds that must be removed entirely and replaced. Antimicrobial cleaners or diluted bleach sanitize surfaces touched by suppression water, killing bacteria and mold spores before they establish colonies.

Insurance Claims and Documentation for Fire Rebuild Projects

DBgXNiVnR8iYgqz7oXBgiA

Most home insurance policies cover fire damage to the building structure, contents, and property, though coverage amounts vary significantly by policy.

Insurance adjusters inspect damage to determine covered repairs and calculate payout amounts. Restoration contractors experienced in insurance work can assist by documenting damage with detailed photos, providing itemized repair estimates that match insurance company formats, and communicating directly with adjusters to explain technical repair requirements. This support helps homeowners navigate claims without becoming overwhelmed by unfamiliar processes while dealing with displacement and stress.

Cost ranges for fire restoration vary dramatically based on damage extent. Smaller fires confined to one room cost approximately 3,000 to 5,000 dollars to repair. The national average for full fire restoration sits at 13,404 dollars. Fires causing structural damage to roofs or kitchens can exceed 50,000 dollars due to complex framing repairs, utility system replacement, and expensive finish materials. Understanding these ranges helps set realistic budget expectations and prepares homeowners for potential out-of-pocket expenses beyond insurance coverage.

Thorough documentation from day one protects your claim and maximizes reimbursement. Maintain these five critical documentation items:

Timestamped photos of all damaged areas, structural components, and destroyed contents before any cleanup begins

Itemized invoices from every contractor and vendor with detailed scope descriptions and material specifications

Professional communications including inspection reports, testing results, and contractor recommendations saved as PDFs

Daily progress photos showing work completed at each phase for insurance verification and dispute resolution

Digital backup of all documentation stored in cloud services or emailed to yourself for access if devices are damaged

Building Permits and Code Compliance for Fire Reconstruction

mR9Z1f6jQ0yXC33bZK5yFQ

Building permits are legally required for fire restoration work to ensure structures meet minimum safety standards for occupants and neighbors.

Building departments inspect structural repairs, electrical installations, plumbing modifications, and HVAC work at multiple stages throughout reconstruction. Inspectors verify that load-bearing repairs use properly sized lumber, electrical circuits are correctly grounded and protected, plumbing installations meet pressure and drainage codes, and gas line repairs prevent leak hazards. These inspections protect homeowners by catching construction errors before they’re hidden behind drywall, preventing future failures that compromise safety or resale value.

Rebuilding existing fire-damaged structures costs significantly less than complete demolition and new construction due to code grandfathering. Existing structures can maintain compliance with older building codes under which they were originally permitted. Complete replacement requires bringing everything to current code including property line setbacks that may have changed since original construction, deeper footings meeting updated frost-line requirements, modern foundation drainage systems, water service line sizing, and sewer connection standards. These current-code requirements can add tens of thousands of dollars to reconstruction costs.

Final occupancy permits are required before homeowners can legally move back into fire-damaged properties. Building departments issue occupancy clearance only after verifying all permitted work passed final inspections, utility companies restored services, and structures meet minimum habitability standards. Moving in before occupancy permit approval can void insurance coverage and create liability if safety issues cause future injuries.

Demolition and Debris Removal in Fire-Damaged Home Interiors
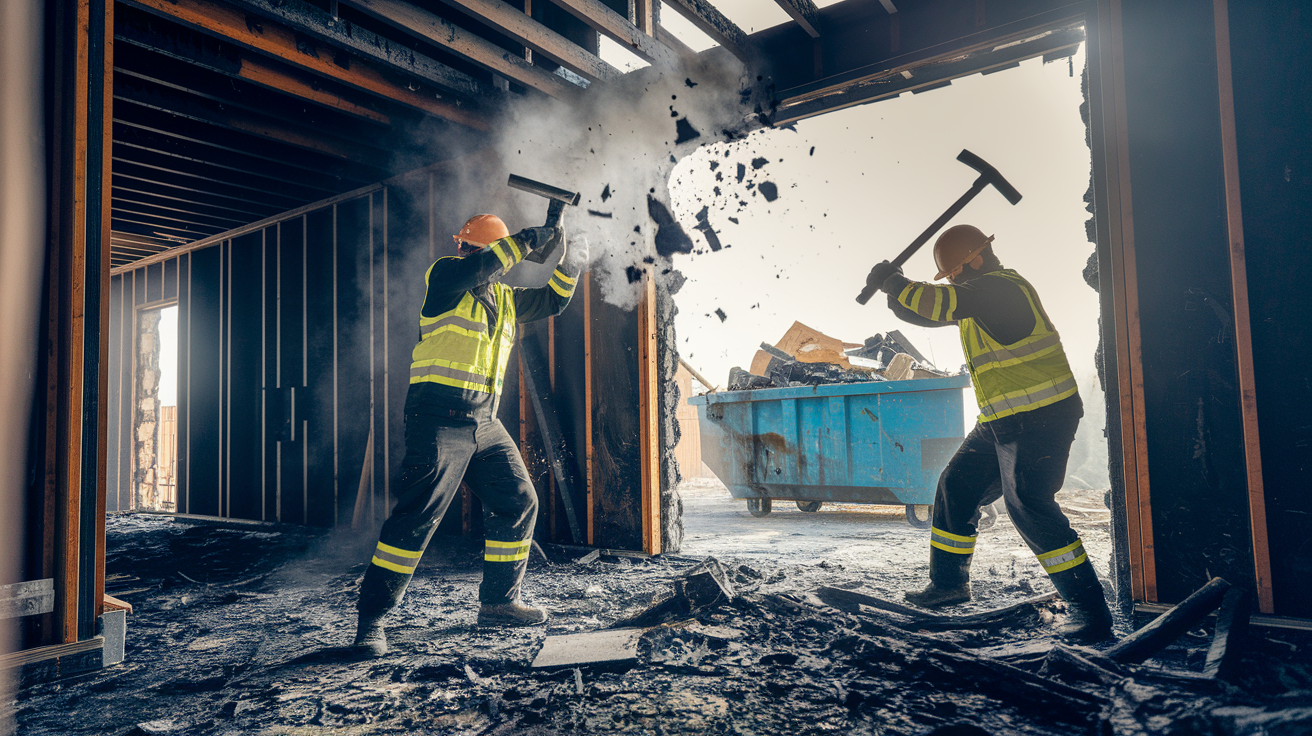
Sq44X9CDTMmYMuKkwcv4Eg

Demolition, called clear-out or muck-out in restoration terms, is the necessary first step after safety clearance.

This phase involves structural stabilization using temporary supports where fire weakened load-bearing components, then systematically removing all fire-damaged materials. Crews remove charred framing that lost structural capacity from prolonged heat exposure. Soaked insulation that absorbed firefighting water comes out entirely because it can’t be dried. Smoke-saturated drywall gets torn out because soot particles penetrate the gypsum core beyond surface cleaning. Compromised flooring including burned hardwood, melted vinyl, and smoke-saturated carpeting is pulled up along with damaged subflooring. Contents including furniture with smoke damage that penetrated upholstery, clothing that absorbed carcinogenic particulates, appliances with melted components or electrical damage, electronics with heat-damaged circuits, and all perishable food exposed to smoke or heat are removed and disposed of properly.

Emergency board-up services secure and protect the structure during restoration. Plywood sheets cover window openings where glass shattered from heat. Tarps protect roof sections where shingles burned through. Temporary doors replace fire-damaged entry points. Board-up prevents weather from causing additional damage to exposed framing, stops animals from entering the structure, and discourages unauthorized entry or theft of remaining contents and building materials.

Professionals can identify which structural components are salvageable versus compromised materials where repair costs exceed replacement value. A floor joist with surface charring but intact structural fibers can be cleaned and sealed. A joist burned halfway through its depth must be replaced because it lost load capacity.

Smoke and Soot Cleaning Before Interior Fire Rebuild
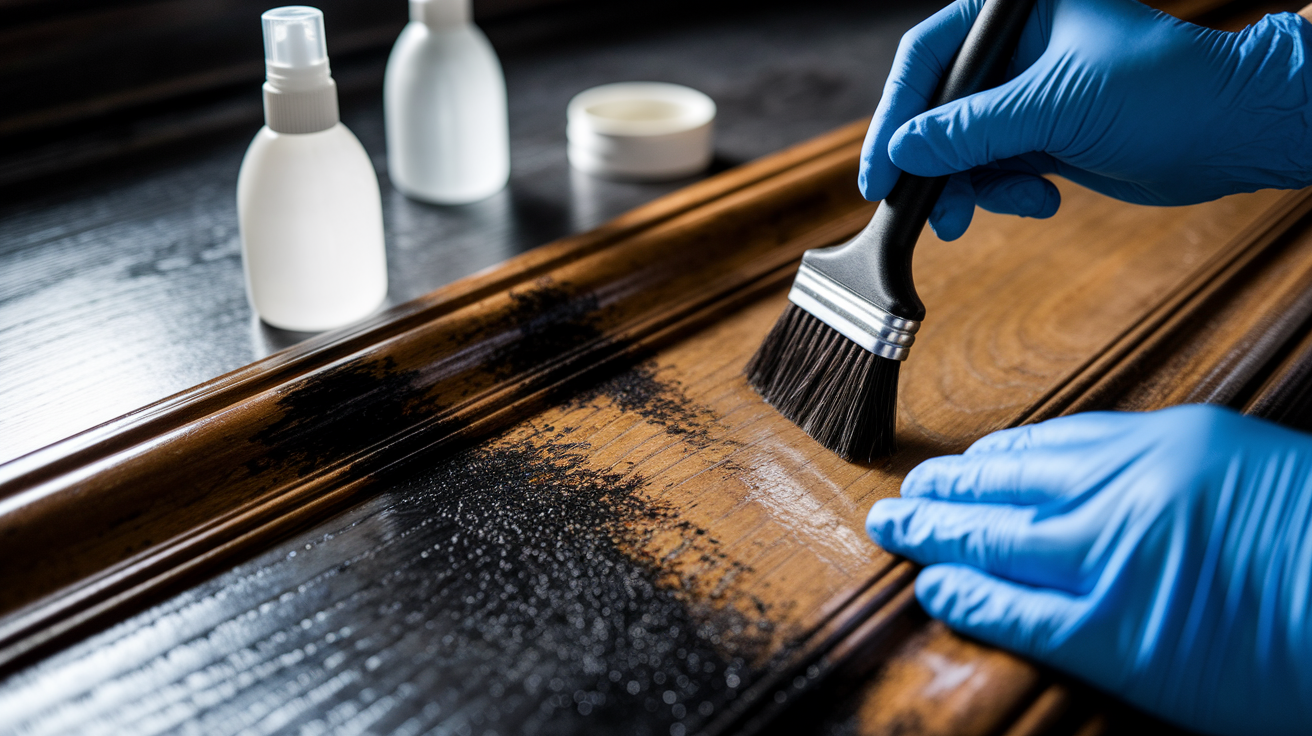
5InyJA__RxezaGzdecTwZg

Smoke and soot penetrate porous surfaces creating both visible stains and invisible contamination that require professional-grade cleaning before rebuilding begins.

Soot particles measure microscopic in size, allowing them to infiltrate drywall pores, wood grain, concrete surfaces, and any material with texture. Surface wiping only smears these particles deeper without removing them. Chemical cleaners break down soot composition at molecular level, releasing the bond between particles and building materials. Trisodium phosphate (TSP) is highly effective for cleaning soot and charred stains from framing lumber, concrete foundations, and other structural elements, but requires proper safety equipment including chemical-resistant gloves, eye protection, and respiratory protection because TSP is a strong alkaline compound that causes skin burns and respiratory irritation on contact.

Advanced odor elimination techniques address smoke smell that persists after visible soot removal. Thermal fogging uses heated petroleum-based or water-based solutions that vaporize into microscopic particles matching smoke’s molecular size, allowing deodorizing agents to penetrate the same spaces smoke reached, neutralizing odor at its source. Ozone treatment generates ozone molecules that chemically react with and break down odor-causing compounds embedded in porous materials, though ozone is toxic to humans and requires complete evacuation during treatment. Air purifiers with activated carbon filters and HEPA filtration run continuously during cleaning to capture airborne particulates released during soot disturbance.

Air duct cleaning and HVAC system restoration prevent smoke odor recirculation throughout the home. Smoke particles settle inside ductwork and on HVAC components during the fire. When systems restart, they blow these particles and odors into every room. Professional duct cleaning removes accumulated soot. HVAC equipment including coils, blowers, and air handlers get chemically cleaned or replaced if damage is severe.

Complete odor elimination including toxins, odor traces, and discoloration must be achieved before new building materials are installed or smells become permanently trapped in rebuilt spaces. Drywall acts like a sponge. If you hang new drywall over framing that still carries smoke odor, the drywall absorbs that smell and continues releasing it for years.

Electrical and Plumbing System Restoration After Fire

nw47wLUiSu6Yl16GVH_TKQ

Utility companies shut off power, gas, and sometimes water immediately after fires for safety. Licensed professionals must restore and inspect these systems before reconnection is authorized.

Electrical system damage from fire includes melted wire insulation that creates short-circuit and shock hazards, burned connections in outlets and switches, heat-damaged circuit breaker panels with compromised safety mechanisms, and wiring inside walls exposed to flame or extreme heat. A licensed electrician must inspect the entire electrical system, test circuits for proper grounding and load capacity, replace damaged wiring and components, install new circuit breakers and panels if heat compromised safety features, and verify all work meets current electrical code. The electrician then notifies the utility company (like SDG&E in San Diego or Edison in Los Angeles) that electrical restoration is complete and safe for reconnection. The utility performs their own verification before restoring power.

Plumbing systems require inspection for heat damage that may not be immediately visible. Plastic supply lines (PEX or CPVC) soften and deform at temperatures well below what causes visible fire damage. Copper pipes can develop pinhole leaks where prolonged heat weakened pipe walls. Drain lines made of PVC or ABS plastic melt at relatively low temperatures. Pressure testing involves sealing the system and pumping it to normal operating pressure (typically 60 PSI for residential water supply) to identify compromised sections that leak under load. Damaged pipes get replaced in sections or entirely depending on fire extent. Gas lines undergo similar pressure testing with specialized equipment that detects even tiny leaks that could cause explosions.

HVAC system restoration begins with ductwork inspection and cleaning to remove smoke residue that settled throughout the system. Sheet metal ducts withstand fire heat better than flexible duct, which often melts or collapses. Equipment inspection checks furnace heat exchangers for cracks that leak carbon monoxide, air conditioning coils for heat damage that affects refrigerant containment, blower motors for electrical damage, and control boards for melted components. Systems with significant heat exposure typically require complete replacement because repair costs approach or exceed replacement cost, and compromised systems pose ongoing safety and efficiency problems.

Structural Repairs and Framing Work in Fire Rebuild

zuHsxr-4R9KB_-HEaOgkuQ

Structural framing must be repaired or replaced before finish work begins because it forms the foundation upon which all cosmetic work depends.

Common structural repairs include floor joists that support subflooring and everything above, wall studs forming the skeleton that holds drywall and siding (with special attention to load-bearing walls that carry roof and upper-floor weight), ceiling joists that prevent walls from spreading outward under roof load, beams that span long distances to transfer loads to vertical supports, columns that carry concentrated loads from beams to foundations, stairways where stringers (the angled boards supporting treads) may have burned or weakened, and subfloor plywood or OSB that lost strength from heat exposure or water saturation. Structural engineers specify repair methods for severely damaged areas, calculating required lumber sizes, connection hardware, and temporary support systems during repair.

Insulation replacement is mandatory because fire-damaged insulation must be completely removed. Fiberglass insulation exposed to flame melts and loses R-value. Cellulose insulation burns. Spray foam insulation releases toxic fumes when heated and must be cut out entirely. This phase offers opportunities to upgrade to fire-resistant or higher R-value options that improve energy efficiency. Fire-resistant insulation products include mineral wool (rock wool or slag wool) that withstands temperatures above 1,000 degrees Fahrenheit, providing both thermal performance and fire barriers between rooms.

This phase is ideal for installing fire-resistant building materials that provide both safety durability and contemporary aesthetic appeal. Treated lumber infused with fire retardants slows flame spread through framing. Metal framing studs don’t burn and maintain structural integrity during fires better than wood. Stone veneer on exterior walls or interior accent walls adds non-combustible surfaces. These upgrades cost more upfront but reduce future fire risk and often lower insurance premiums.

Drywall, Flooring, and Interior Finishes During Fire Rebuild

Finish work is where the home begins to look like a home again, transforming bare structure into livable space through room-by-room systematic restoration.

The sequence matters for efficiency and quality. Drywall installation and finishing come first, covering framing and creating smooth walls and ceilings. Drywall finishers tape joints, apply multiple coats of joint compound, and sand to create seamless surfaces. Primer application is essential for sealing residual odors that cleaning couldn’t completely remove. Primer acts as a barrier preventing smoke smell from bleeding through paint. Paint application follows, typically two coats for durability and even color, where lighter colors enhance room brightness and create an uplifting atmosphere in spaces being restored from darkness and damage. Flooring installation comes after wall painting to avoid paint splatter damage, including hardwood installation or refinishing, tile setting with grout sealing, carpeting with quality padding, or luxury vinyl plank that’s gained popularity for its durability and water resistance. Trim and molding installation finishes the visual transition between surfaces, with baseboards covering gaps between walls and floors, crown molding adding detail at ceiling lines, door casings framing openings, and window trim completing the polished look.

Finish Component Material Options Typical Timeline
Drywall Standard gypsum, fire-resistant Type X (5/8-inch for fire barriers), moisture-resistant green board or purple board for bathrooms 3-7 days per 1,000 square feet including taping and finishing
Painting Primer (odor-sealing formulas for fire restoration) plus two coats finish paint, color selection for brightness and mood 2-4 days per room including drying time between coats
Flooring Hardwood (3/4-inch solid or engineered), ceramic or porcelain tile, carpet with padding, luxury vinyl plank 1-3 days per room depending on material and square footage
Trim Baseboards (typically 3-5 inches), crown molding (2-6 inches), door casings, window trim in wood, MDF, or PVC 1-2 days per room for installation, plus painting time
Fixtures Lighting (recessed cans, flush mounts, chandeliers), outlet and switch covers, door hardware (handles, hinges, locks) 1-2 days total for typical home

Cosmetic restoration including whitewashing where applicable, multiple paint coats, and refinishing removes all traces that a fire occurred including any remaining discoloration that survived cleaning processes.

Kitchen and Bathroom Reconstruction After Fire

Kitchens and bathrooms often sustain the most severe fire damage and require specialized reconstruction, with kitchen structural damage potentially exceeding 50,000 dollars.

Kitchen rebuild components include complete cabinet replacement because smoke and heat penetrate cabinet boxes and doors beyond cleaning capability, countertop installation in materials ranging from laminate to granite or quartz depending on budget and insurance coverage, backsplash tile work that protects walls from cooking splatter while providing cleanable surfaces, appliance connections for ranges that require proper gas line installation or electrical circuits sized for load, dishwashers needing both plumbing and electrical hookups, and proper ventilation systems to prevent future fire hazards. Range hoods vented to exterior remove cooking smoke and grease-laden air that causes buildup over time. Many kitchen fires start from grease accumulation in hoods or ducts, making proper ventilation a fire-prevention upgrade during rebuild.

Bathroom reconstruction requires moisture-resistant materials to prevent mold in these high-humidity spaces. Cement board or similar water-resistant backing replaces standard drywall behind tub and shower enclosures. Tile work for walls extends at least 6 inches above shower heads to protect from water spray, and floor tile should be slip-resistant when wet. Plumbing fixture installation includes toilets, vanity sinks with proper drain venting, tub or shower valves with anti-scald protection required by current codes, and faucets. Ventilation fans vented to exterior remove humid air during showers, preventing moisture accumulation that leads to mold growth, peeling paint, and wood rot around windows.

This phase offers opportunities to upgrade to fire-resistant materials that provide contemporary aesthetic appeal when integrated into kitchen and bathroom designs. Quartz countertops don’t burn and withstand heat better than laminate. Porcelain tile floors are non-combustible and easier to clean than vinyl. Metal or glass tile backsplashes add modern style while providing fire-resistant surfaces behind cooktops. The room-by-room systematic restoration approach allows focusing budget and attention where it matters most in these high-use, high-value spaces.

Timeline and Project Phases for Interior Fire Rebuild

Rebuild timelines vary dramatically based on damage extent, from weeks for minor fires to 6 to 12 months for severe damage requiring comprehensive step-by-step process.

Some phases can overlap to accelerate overall timeline. Ordering materials during demolition means they arrive when needed rather than waiting weeks after demolition completes. Scheduling inspections in advance prevents delays waiting for inspector availability. However, other phases must be completed sequentially because later work depends on earlier completion. Structural repairs must finish before drywall installation. Electrical and plumbing rough-in must pass inspection before walls are closed. Painting must dry before flooring installation to avoid damage.

Five major timeline phases with typical duration ranges:

  1. Assessment and permits (1 to 3 weeks) includes initial safety inspection, structural engineering evaluation if needed, insurance adjuster walkthrough, permit application submission, and permit approval waiting period that varies by jurisdiction workload

  2. Demolition and remediation (1 to 2 weeks) covers the clear-out phase including structural stabilization, removal of unsalvageable materials, water extraction and drying, smoke and soot cleaning, and hazardous material remediation

  3. Structural repairs and utility restoration (2 to 8 weeks) includes foundation repairs if necessary, framing replacement or reinforcement, electrical system restoration and inspection, plumbing system replacement and pressure testing, HVAC cleaning or replacement, and insulation installation

  4. Finish work (3 to 8 weeks) encompasses room-by-room systematic restoration including drywall installation and finishing, primer and paint application, flooring installation, trim and molding, cabinet installation in kitchens and bathrooms, countertop installation, and fixture mounting

  5. Final inspection and occupancy clearance (1 to 2 weeks) covers contractor punch-list completion, building department final inspection scheduling and completion, utility final connections, and occupancy permit issuance

Temporary housing considerations become critical for longer rebuilds. Check your insurance policy for Additional Living Expense (ALE) coverage that pays for hotels or rental homes while your property is uninhabitable. Factors that delay timelines include permit processing delays in busy jurisdictions, material availability issues for specialized items like custom cabinets or specific tile selections, insurance claim processing speed affecting contractor payment and work authorization, inspection scheduling during peak construction seasons when building departments are backed up, and weather conditions affecting exterior work like roofing or siding that must complete before interior finishing progresses.

Cost Estimation and Budget Planning for Fire Interior Rebuild

Homeowners typically pay between 2,968 and 28,042 dollars for full fire restoration, with a national average of 13,404 dollars. Smaller fires confined to one room cost approximately 3,000 to 5,000 dollars to repair, while fires causing structural damage to roofs or kitchens can exceed 50,000 dollars.

Factors affecting costs include damage extent measured in square footage of affected areas, material selections ranging from basic builder-grade to premium finishes, local labor rates that vary significantly between rural and urban markets, permit fees charged by building departments (typically 1 to 3 percent of project cost), and whether hazardous material remediation is required for asbestos or lead, which adds 2,000 to 10,000 dollars depending on quantity. Geographic location significantly impacts labor costs, with metropolitan areas like Los Angeles, San Francisco, or San Diego charging 30 to 50 percent more than smaller cities for the same work.

Rebuild Component Low Range High Range
Demolition and cleaning $2,000 $8,000
Structural repairs (framing, subfloor) $5,000 $25,000
Electrical and plumbing systems $3,000 $15,000
Drywall and painting $2,500 $10,000
Flooring installation $3,000 $12,000
Kitchen and bathroom reconstruction $8,000 $50,000+

Insurance coverage handles most structural repairs and restoration to pre-fire condition, but out-of-pocket costs arise from upgrades beyond basic restoration. If your kitchen had laminate countertops and you want granite, you pay the difference. If code requires upgrading electrical panels from 100-amp to 200-amp service, insurance typically covers that mandatory upgrade. If you choose to add recessed lighting that wasn’t there before, that’s out-of-pocket. Fire restoration costs vary widely and homeowners should budget for both insurance-covered work and out-of-pocket modifications or upgrades, with all expenses carefully documented for insurance reimbursement claims and potential tax deductions for casualty losses.

Selecting and Vetting Fire Restoration Contractors

Fire damage restoration companies handle remediation, meaning cleanup and hazard removal, while full-service fire restoration companies provide complete reconstruction services from demolition through occupancy clearance. Many homeowners need both capabilities, making it simpler to hire one company with comprehensive skills rather than coordinating separate remediation and construction contractors.

IICRC certifications are the gold standard for fire restoration professionals, setting industry benchmarks through the American National Standards Institute (ANSI). Specific credentials to verify include FSRT (Fire & Smoke Restoration Technician) demonstrating knowledge of soot types, cleaning methods, and odor control techniques, WRT (Water Damage Restoration Technician) covering moisture detection, extraction, structural drying, and mold prevention, and OCT (Odor Control Technician) specializing in advanced deodorization including thermal fogging and ozone treatment. Project managers overseeing your rebuild should carry OSHA safety training certifications proving they understand job site hazard management and worker protection requirements, plus certifications in lead and asbestos management if your home was built before 1980 when these materials were common. Companies with comprehensive restoration credentials and multi-hazard experience, like those handling water damage restoration, typically provide smoother project coordination because they understand how different damage types interact.

Eight essential contractor vetting criteria to verify before signing contracts:

Valid state and local licensing including general contractor license and specialized restoration licenses where required by state law, with license numbers verifiable through state contractor licensing boards

Adequate liability and workers compensation insurance with minimum coverage of 1 million dollars general liability and statutory workers compensation, verified by requesting certificates of insurance directly from the insurance company

IICRC certifications for key personnel including FSRT, WRT, and OCT credentials, with certification numbers verifiable through the IICRC online directory

Verifiable references from at least three recent fire restoration projects, contacted directly to ask about quality, communication, timeline adherence, and how problems were handled

Detailed written estimates with scope breakdown showing materials, labor, timeline, and payment schedule, not vague lump-sum numbers that hide cost details

Warranty offerings for workmanship (typically 1 to 2 years) and materials (varies by product), with clear terms explaining what’s covered and claim procedures

Clear project management approach with defined communication protocols including point of contact, update frequency, and how change orders are documented and approved

Decades of construction experience evidenced by years in business, portfolio of completed projects, and knowledge of building codes and material compatibility demonstrated during initial consultation

Design Opportunities and Modern Upgrades During Fire Rebuild

Rebuilds offer a unique opportunity for transformational redesign to improve layout, update outdated systems, and incorporate modern materials that weren’t possible with simple maintenance.

Popular design upgrades include removing non-load-bearing walls to create open floor plans that foster connectivity between kitchen, dining, and living areas while maintaining distinct zones through strategic furniture placement and flooring transitions. Open layouts improve sight lines for families with young children, enhance entertaining flow, and make smaller homes feel more spacious. Installing larger windows, skylights, or glass doors maximizes natural light to improve mood and reduce feelings of confinement. Natural light reduces dependence on artificial lighting during daytime hours, cutting electricity costs while creating brighter, more inviting spaces. Fire-resistant materials including metal roofing that doesn’t ignite from flying embers, stone accent walls providing non-combustible focal points, and treated wood framing infused with fire retardants provide both safety durability and contemporary aesthetic appeal that aligns with modern design trends.

Energy efficiency improvements accessible during rebuild include upgraded insulation beyond code minimum R-values, reducing heating and cooling costs by 20 to 40 percent annually compared to minimal code compliance. High-efficiency windows with Low-E coatings and argon gas fills block heat transfer in summer and retain warmth in winter. Modern HVAC systems with variable-speed compressors and smart thermostats reduce operating costs compared to older single-speed units while providing better temperature control and air quality. These improvements cost more initially but generate savings that accumulate over years of ownership.

Working with interior designers or renovation specialists experienced in post-restoration projects can provide innovative solutions tailored to homeowner needs. Designers understand building codes, material lead times, and budget allocation strategies that maximize value. They help select personal decor that celebrates resilience, incorporating salvaged items that survived the fire into the new design tells your story while honoring what you preserved. Designers familiar with trauma-informed design can create dedicated therapeutic spaces like meditation corners, reading nooks with comfortable seating and soft textiles, or zen gardens visible through new larger windows, promoting relaxation and recovery through calming colors, natural materials, plants, and soothing artwork that support emotional healing alongside physical rebuilding.

Final Inspection, Walkthrough, and Moving Back After Fire Rebuild

Final building department and fire marshal inspections are required before occupancy permits are legally issued, allowing homeowners to move back in safely.

The contractor walkthrough process happens before final inspections, giving homeowners opportunity to identify any incomplete or unsatisfactory items. Walk through slowly with a notepad, testing every light switch, outlet, faucet, door, and window. Check that doors close without binding and latches engage properly. Run water in every sink, tub, and shower to verify proper flow and drainage. Flush toilets to ensure complete refills. Test HVAC systems in both heating and cooling modes. Inspect finish quality including paint coverage, trim joints, flooring transitions, and caulking around tubs and sinks. Items noted during walkthrough go on a punch list for completion before final payment is released. This gives contractors incentive to return and address concerns promptly.

During final walkthrough, verify that comprehensive documentation was maintained throughout the process including all inspection certificates, warranty information for new appliances and materials, as-built drawings showing any layout changes, and operating instructions for new systems. Test all utilities to confirm proper operation. Check for any lingering fire evidence including visual discoloration, persistent odors, or air quality issues that could indicate incomplete cleaning.

The goal of fire restoration is complete removal of any evidence of fire including toxins, odor traces, and discoloration while ensuring structural soundness and utility functionality. When properly completed, your home should show no signs that a fire occurred. Walls are smooth and evenly painted, floors are level and finished, all utilities function reliably, and air smells clean without any smoke hints. Professional final quality checks through emergency restoration services and restoration completion standards ensure you’re moving back into a safe, comfortable home rather than an incomplete project with lingering problems.

Final Words

An interior rebuild after fire follows a clear path from safety assessment through structural repairs to finished living spaces.

Each phase builds on the last. Demolition can’t start without clearance. Finish work can’t begin until framing is solid and utilities are restored.

The timeline stretches weeks to months depending on damage extent, but working with certified professionals who understand the full sequence keeps the project moving forward.

Document everything, verify credentials, and remember that this rebuild is also a chance to improve your home’s safety, efficiency, and layout for the long term.

FAQ

What is the 30/30/30 rule for fire?

The 30/30/30 rule for fire refers to a safety guideline stating that if you see lightning and hear thunder within 30 seconds, seek shelter immediately and remain inside for 30 minutes after the last thunder. This rule helps prevent lightning-related fires and injuries during storms.

How much does it cost to rebuild after a house fire?

Rebuilding after a house fire typically costs between 2,968 and 28,042 dollars, with a national average of 13,404 dollars. Smaller fires cost approximately 3,000 to 5,000 dollars to repair, while fires causing structural damage to kitchens or roofs can exceed 50,000 dollars.

What are the 4 stages of interior structural fire?

The four stages of interior structural fire include incipient stage (initial ignition with minimal smoke), growth stage (rapid fire spread with increasing heat), fully developed stage (maximum heat release with full room involvement), and decay stage (fire diminishes as fuel is consumed).

Is anything salvageable after a fire?

Some items are salvageable after a fire, depending on damage extent and material type. Professional assessment determines which structural components can be repaired and which contents can be cleaned, while severely smoke-damaged materials, water-soaked insulation, charred framing, and perishable food must be disposed of entirely.

How long does it take to rebuild a house after a fire?

Rebuilding a house after fire typically takes weeks for minor damage to 6-12 months for severe structural damage. Timeline depends on damage extent, permit processing, material availability, insurance claim speed, and project phases including assessment, demolition, structural repairs, finish work, and final inspection.

Do I need permits to rebuild after a fire?

You need building permits to rebuild after a fire to ensure structures meet minimum safety standards for occupants and neighbors. Permits are legally required for fire restoration work, and final occupancy permits must be obtained before homeowners can legally move back into fire-damaged properties.

Can smoke damage be completely removed?

Smoke damage can be completely removed through professional cleaning methods including chemical cleaners, thermal fogging, ozone treatment, and air duct restoration. Complete odor elimination including toxins, odor traces, and discoloration must be achieved before new materials are installed or smells become permanently trapped.

What materials must be replaced after fire damage?

Materials that must be replaced after fire damage include water-soaked insulation, smoke-saturated drywall, charred framing, compromised flooring, and any structural components where repair costs exceed replacement value. All perishable food and severely damaged contents like furniture, clothing, and electronics also require disposal.

Should I hire a restoration company or general contractor after a fire?

You should hire fire restoration companies that provide both remediation (cleanup and hazard removal) and full reconstruction services. Look for IICRC-certified professionals with Fire & Smoke Restoration Technician (FSRT) credentials, decades of construction experience, and project managers trained in OSHA safety and hazardous material management.

What certifications should fire restoration contractors have?

Fire restoration contractors should have IICRC certifications including Fire & Smoke Restoration Technician (FSRT), Water Damage Restoration Technician (WRT), and Odor Control Technician (OCT). Project managers should possess OSHA safety training, valid state licensing, and certifications in lead and asbestos management for safe hazardous material handling.

How soon does mold grow after a fire?

Mold growth begins within 24-48 hours after fire crews extinguish flames, making immediate moisture removal absolutely critical. Water damage from firefighting efforts requires professional extraction using industrial-strength dehumidifiers, high-powered fans, moisture meters, and infrared cameras to prevent mold colonization.

What toxic chemicals are released during house fires?

Toxic chemicals released during house fires include hydrogen chloride, dioxin chloromethane, nitrogen oxide, carbon monoxide, asbestos fibers, and PFAS from firefighting foam. These contaminants cause short-term effects like respiratory issues and long-term risks including cancer, stroke, and heart attack, requiring professional remediation.

Can you live in a house during fire restoration?

You cannot live in a house during fire restoration until final occupancy permits are legally issued after building department and fire marshal inspections. Temporary housing is necessary during the restoration timeline, which includes hazardous material remediation, structural repairs, and utility restoration before safe occupancy.

Does insurance cover fire rebuild costs?

Insurance typically covers fire damage to the building, contents, and property, though coverage amounts vary by policy. Homeowners should document all expenses including photos, invoices, and professional communications digitalized for insurance evidence, and budget for both insurance-covered work and out-of-pocket modifications or upgrades.

What gets cleaned first after a fire?

Safety assessment and structural stabilization get completed first after fire, followed by water extraction and moisture control within the critical 24-48 hour window. Then ash, smoke, and soot removal occurs using professional methods before demolition of unsalvageable materials and reconstruction phases begin.


What Are Common Electrical Hazards in Homes and Prevention Tips

0

Think your home’s electrical system is safe because the lights come on?
A lot of real dangers hide behind walls, in outlets, and under rugs.
Old wiring, frayed cords, overloaded circuits, water near outlets, and DIY fixes are common triggers for shocks and fires.
This post walks through the most common hazards and gives simple prevention steps you can use right away.
We’ll show what to check, when to cut power, and when to call a licensed electrician.
No guesswork. Clear actions to stop problems before they spread.

Identifying the Most Common Electrical Hazards in Homes

Yt55hgmgQxiaq_ZbuVK35A

Electrical hazards show up in nearly every room, but most stay hidden until they spark, shock, or start a fire. Older homes with wiring installed over 30 years ago carry the highest risk. Frayed, brittle, or corroded conductors overheat behind walls where you can’t see them. Overloaded circuits push wires past their design limits, causing heat buildup that can ignite insulation or nearby materials. Water near outlets in kitchens, bathrooms, and basements multiplies shock danger, especially when ground fault protection is missing or failed.

Exposed electrical components create immediate contact hazards. Live wires, uncovered junction boxes, damaged appliance cords. DIY electrical repairs often introduce reversed polarity, loose connections, and non-code splices that look fine on the surface but quietly degrade over time. Faulty outlets and switches show their trouble through burn marks, sparks, or warm faceplates. Appliances that deliver shocks signal grounding failures or internal wiring faults.

Catching these hazards early prevents the damage that spreads when small problems go unnoticed. The most common electrical dangers in homes include:

  • Overloaded circuits that cause repeated breaker trips and dimming lights when appliances start
  • Frayed or damaged wiring hidden behind walls, in attics, or inside junction boxes
  • Water exposure near electrical equipment in kitchens, bathrooms, garages, and basements
  • Exposed live wires and uncovered junction boxes that allow direct contact with energized conductors
  • Damaged appliance cords with cracked insulation or visible copper strands
  • Improper DIY electrical work that violates code and hides loose or reversed connections
  • Faulty outlets and switches that spark, overheat, or lose contact intermittently
  • Shock prone appliances that tingle or deliver jolts when touched, indicating missing or broken grounding

Understanding Wiring Related Home Electrical Hazards

uk0kZl3eT5ybPqktio1BXw

Wiring breaks down over time through oxidation, heat cycling, moisture intrusion, and age. Frayed or brittle insulation exposes live conductors. Corroded connections increase resistance, generating heat that can ignite surrounding materials. Homes built in the 1960s and 1970s sometimes used aluminum branch wiring, which expands and contracts more than copper. That loosens connections at outlets and switches, creating arcing points that overheat. Knob and tube wiring, common in houses built before the 1950s, lacks grounding and protective sheathing. It leaves conductors vulnerable to damage from renovations, rodent chewing, or accidental contact.

Wiring hidden behind drywall, above ceilings, or beneath floors can fail without visible warning. Rodents chew through insulation. Renovation work sometimes drives screws or nails directly into cables. Inspections are recommended when wiring reaches 30 years of age or when a home has never been professionally evaluated. Invisible damage often comes before visible failure.

Major wiring red flags include:

  • Frequent breaker trips or fuses that blow repeatedly in the same circuit
  • Flickering lights or dimming when motors start, especially if the home is more than three decades old
  • Warm or discolored outlet covers and switch plates near suspected old wiring
  • Visible charring, scorching, or burn marks on walls near outlets or junction boxes
  • Any wiring that shows exposed copper, cracked insulation, or signs of rodent activity

Recognizing Outlet and Switch Electrical Hazards

bE_0uYoQR6iKU4p_4w_OyQ

Outlets and switches wear out through repeated use, environmental exposure, and poor initial installation. Loose outlets allow plugs to make intermittent contact, creating arcing that heats the receptacle and surrounding wiring. Cracked faceplates or broken internal components expose live terminals, raising the risk of shock when fingers or conductive objects contact the device. Burn marks on outlet covers signal that arcing or overheating has already happened. Warm or hot faceplates mean current is flowing through damaged connections instead of the intended load.

Sparking when inserting or removing a plug indicates internal arcing or a loose wire at the terminal screw. Outlets that feel hot to the touch should be shut off at the breaker immediately. The heat reflects resistance buildup that can ignite plastic housing or nearby combustibles. Exposed wiring behind damaged outlets or missing wall plates creates direct shock hazards. Any receptacle that delivers a tingle or shock when touched requires professional inspection and replacement before further use.

Electrical Hazards Caused by Overloading Circuits and Power Strips

7q2G9psWT6-XzG4ZZXa10w

Circuits are designed to carry a specific maximum load, typically 15 or 20 amperes for general residential branch circuits. When the combined draw of lights, appliances, and devices exceeds that limit, wires heat beyond safe operating temperatures and insulation begins to degrade. Older electrical panels often lack the capacity to support modern homes filled with computers, televisions, kitchen appliances, HVAC systems, and electric vehicle chargers. That makes overload a chronic rather than occasional condition.

Power strips and extension cords multiply the problem when homeowners use them as permanent wiring. Plugging high draw devices like space heaters, window air conditioners, or power tools into a multi outlet strip can push total circuit demand well past safe limits. That overheats both the strip and the upstream wiring. Breakers trip to interrupt the overload, but if a breaker is weak or oversized for the wire gauge, the circuit continues heating without protection.

Dimming or flickering lights when appliances cycle on, warm power strips, and frequent breaker trips all signal that circuits are carrying more current than intended. Early warning signs include:

  • Breakers that trip repeatedly, especially when multiple devices operate at the same time
  • Lights that dim noticeably when the refrigerator compressor, air conditioner, or washing machine starts
  • Warm or discolored power strips, extension cords, or outlet covers
  • Burning plastic smell near outlets, strips, or the electrical panel

Moisture Related Electrical Hazards in Homes

gLZtqgwYQ22D1wUPapvIlQ

Water and electricity create immediate shock hazards because moisture provides a conductive path that bypasses the intended circuit. Kitchens, bathrooms, garages, basements, and outdoor areas expose outlets and fixtures to splashes, humidity, condensation, and occasional flooding. Corroded outlet faces, rust on screws, and discolored covers all indicate that moisture has entered the device. That compromises insulation and increases the chance of short circuits or ground faults.

Ground fault circuit interrupters (GFCIs) are designed to shut off power within milliseconds when they detect current leaking through water or a person’s body. But older homes often lack GFCI protection in required locations. Outlets near sinks, tubs, washing machines, and outdoor faucets must be GFCI protected to meet current code. Any outlet that’s been exposed to standing water, leaks, or flooding should be inspected by a licensed electrician before being re-energized. Tripped GFCIs that won’t reset, visible moisture inside outlet boxes, and damp junction boxes all signal that water intrusion has compromised electrical safety. Immediate professional evaluation is necessary.

Panel and Breaker Electrical Hazards in Residential Settings

AFrNCey7SRmP2arcnoxxYg

The electrical panel distributes power throughout the home and protects circuits through circuit breakers designed to trip when current exceeds safe levels. Older panels, particularly those manufactured by Federal Pacific or Zinsco, are known for failing to trip during overloads. That allows wires to overheat without interruption. Panels that hum, buzz, or feel warm to the touch indicate loose connections, overloaded busbars, or internal arcing. Burning smells near the panel mean that insulation or plastic components are overheating. Visible scorch marks or melted breaker handles require immediate shutdown and professional replacement.

Double tapped breakers (two wires connected to a single breaker terminal not designed for that configuration) create loose connections that heat and arc. Missing panel covers expose live busbars. Outdated panels without arc fault circuit interrupter (AFCI) protection in bedrooms and living areas increase fire risk from arcing faults that standard breakers don’t detect. Frequent breaker trips, dimming lights throughout the house, and the inability to reset a tripped breaker all point to panel problems that need licensed electrician evaluation.

Panel warning signs that require action include:

  • Warm, hot, or vibrating panel enclosures when touched
  • Humming, buzzing, or crackling sounds coming from inside the panel
  • Burning plastic smell or visible smoke near breaker positions
  • Breakers that trip immediately when reset, or that won’t stay in the ON position
  • Rust, corrosion, or water stains inside the panel cabinet or on breaker faces

Appliance and Cord Electrical Hazards in Homes

ardd5whURoyqE6sxJP_lTA

Appliances rely on intact power cords and internal wiring to operate safely. Damaged insulation, cracked plugs, and exposed conductors turn everyday devices into shock and fire hazards. Frayed cords reveal bare copper strands that can contact metal surfaces or fingers, delivering shocks or creating short circuits. Space heaters draw high current, often 12 to 15 amperes. They overload circuits when plugged into power strips or extension cords not rated for that load. Placing heaters on rugs or under furniture traps heat, igniting surrounding materials.

Appliances that deliver a tingle or shock when touched indicate a grounding fault or internal insulation breakdown. Plugs that feel warm during use signal resistance at the connection, often from worn prongs or a loose outlet. Appliances that intermittently shut off, spark when plugged in, or cause breakers to trip require immediate inspection and repair by a qualified technician. Or replacement if internal wiring has failed.

Unsafe appliance scenarios include:

  • Running space heaters through extension cords or power strips instead of dedicated wall outlets
  • Using appliances with cracked, chewed, or visibly damaged power cords
  • Operating devices near sinks, tubs, or wet floors without GFCI protection
  • Ignoring tingling sensations or small shocks when touching metal appliance surfaces

Electrical Hazards From Improper DIY Electrical Work

QRb1RN0jTneebwg5Y6RLkQ

Homeowners attempting electrical repairs without training or permits often create hazards that remain hidden until they cause fires or shocks. Reversed polarity (swapping the hot and neutral wires) leaves devices energized even when switched off. Loose wire nuts or improperly secured terminal screws generate arcing points that overheat. Non-code splices, like twisting wires together without approved connectors or junction boxes, concentrate heat and can ignite insulation or nearby wood framing.

Unpermitted electrical work bypasses inspection, so code violations remain concealed behind walls and ceilings. Undersized wire for the circuit load, missing grounding conductors, and incorrect breaker ratings all reduce safety margins that professional installations preserve. DIY repairs that appear functional on the surface often fail under load. They produce intermittent problems that are difficult to diagnose and increase long term fire risk. Licensed electricians follow code requirements, use proper materials, and ensure connections are mechanically and electrically sound. That prevents the hidden failures that amateur work introduces.

Child Related and Safety Device Electrical Hazards in Homes

tVBzmGE1TFaKRuHqaCs0uQ

Children exploring outlets with keys, paperclips, or hairpins face shock and burn injuries when conductive objects contact live terminals. Standard outlets allow insertion of small objects into the slots. Tamper resistant outlets contain spring loaded shutters that block access unless equal pressure is applied to both sides simultaneously, the configuration of a plug’s prongs. Homes without tamper resistant receptacles in areas accessible to young children lack a basic layer of protection.

Safety devices like smoke alarms, carbon monoxide detectors, and ground fault circuit interrupters provide early warning and automatic shutoff. But only when they function correctly. Smoke alarms with dead batteries, expired sensors (older than ten years), or accumulated dust fail to detect fires. GFCIs that are never tested may fail to trip during a ground fault, leaving occupants unprotected. Monthly testing of GFCIs using the built in TEST button confirms the device will disconnect power when needed. Smoke alarms require battery replacement (or full unit replacement for sealed ten year models) and monthly test button checks.

Critical safety devices to inspect and maintain include:

  • Tamper resistant outlets in rooms where children play, sleep, or spend time
  • Smoke alarms on every level of the home and inside each sleeping area, tested monthly and replaced every ten years
  • Carbon monoxide detectors near sleeping areas, tested monthly and replaced per manufacturer recommendations
  • GFCI outlets in kitchens, bathrooms, garages, basements, and outdoor locations, tested monthly using the TEST button
  • Arc fault circuit interrupter (AFCI) breakers in bedrooms and living areas, verified during professional inspections

Knowing When Home Electrical Hazards Require a Licensed Electrician

0_tCcTYsRcSvQVwpHWYN_w

Some electrical problems present immediate danger and require professional response without delay. Sparks, visible smoke, or flames from outlets, switches, or the panel mean that arcing or short circuits are active. Power should be shut off at the main breaker if it’s safe to approach the panel. Burning smells (plastic, rubber, or electrical insulation) indicate overheating that can ignite surrounding materials. Any outlet, switch, or appliance delivering shocks needs immediate shutdown and inspection.

Persistent breaker trips that continue after unplugging devices signal overloaded circuits, failing breakers, or hidden wiring faults. Those require load evaluation, circuit additions, or panel upgrades. Exposed live wiring from damaged walls, open junction boxes, or pulled apart connections creates shock hazards that homeowners should never attempt to repair while energized. Aluminum wiring, suspected code violations from prior DIY work, and panels older than 25 to 30 years all warrant professional evaluation to assess safety and plan necessary upgrades.

Emergency steps when electrical hazards appear include shutting off power at the breaker for the affected circuit or the main disconnect if the specific circuit is unknown. Avoid contact with wet floors or standing water near energized equipment. Call a licensed electrician or emergency services if smoke, fire, or injury occurs. Licensed professionals carry tools to test circuits safely, verify grounding, measure loads, and diagnose problems hidden behind walls. They provide accurate solutions that restore safety and meet code requirements.

Hazard Immediate Action Needed
Sparks, smoke, or flames from outlet or panel Shut off main breaker if safe; evacuate and call emergency services if fire spreads
Burning smell near wiring, outlets, or panel Turn off power to affected circuit; call licensed electrician immediately
Shock or tingle from appliance or outlet Unplug device, shut off circuit breaker, schedule electrician inspection
Repeated breaker trips after removing devices Stop using circuit; call electrician to diagnose overload or wiring fault
Water contact with outlets or exposed wiring Shut off power at breaker; do not touch wet equipment; call electrician before re-energizing

Final Words

If you see sparking, smell burning, or notice a warm outlet, stop using it and act now.
This post walked through the usual hazards—overloaded circuits, frayed wiring, water near plugs, exposed live wires, damaged cords, DIY wiring mistakes, faulty outlets, and risky appliances—and showed what to watch for and why each is dangerous.

Check panels, test GFCIs, and call a licensed electrician for persistent problems.
Knowing what are common electrical hazards in homes helps you act fast and keep your family and property safe.

FAQ

Q: What are the five common electrical hazards at home?

A: The five common electrical hazards at home are overloaded circuits, frayed wiring, water near electrical equipment, exposed live wires, and damaged cords. Expanded top-ten adds faulty outlets, outdated panels, DIY wiring, power-strip misuse, and shock-prone appliances.

Q: What appliances should not be left plugged in?

A: Appliances that should not be left plugged in include space heaters, irons, toasters, portable ovens, and devices with damaged or frayed cords, since they can overheat, trip breakers, or start fires when unattended.

Q: How to tell if a house has electrical issues?

A: You can tell a house has electrical issues by frequent breaker trips, flickering or dimming lights, warm or buzzing panels, burning smells, hot outlets or faceplates, visible sparking, or shocks from appliances.

Post-fire Home Reconstruction Process Sparks Hope

Have you ever felt that a fire might be a new beginning rather than just an end? When disaster strikes, putting your home back together can seem like piecing together a broken puzzle. We start by checking every part of your home for safety, then we clear away the damage and rebuild everything from scratch. This isn’t just about fixing things, it’s about giving you a fresh start filled with hope and safety. Every careful check and each repair we make is our promise that your home can rise stronger than before.

Post-Fire Home Reconstruction Process Sparks Hope

We start by checking your home for safety. Within 24 to 48 hours, our team visits to look for risks like unstable walls or harmful chemicals left by smoke and water. We write down every detail so we can plan repairs and help with your insurance claim.

Next, we clear away the debris and remove any dangerous waste. This phase gets rid of burned materials and contaminants to stop further harm. It also prepares your home for rebuilding, easing some of the emotional stress you feel.

Finally, we begin repairs and rebuilding. We fix parts that can be saved and replace those that cannot. We follow modern safety rules to keep your home safe and sound. This step-by-step process is designed to rebuild a safe space and bring hope for a stronger future.

Conducting a Thorough Damage and Safety Assessment in Post-Fire Reconstruction

img-1.jpg

We understand that a fire leaves you stressed and uncertain about your home’s safety. Right away, we send a certified expert to inspect every part of your home. We check load-bearing walls, look for cracks in the foundation, and watch out for any signs that part of your house might collapse.

We start by reviewing burn damage to spot any weak areas affected by high heat and dangerous residue. Then, we examine the building’s key supports so you know your home stands strong. Next, we test for harmful chemicals from soot and toxins (bad substances that can harm you) to ensure no dangerous materials linger. We also take clear photos of every damaged spot. These photos help with insurance claims and guide our repair plan.

We check for issues like:

  • Structural collapse hazards (areas that could fall apart)
  • Exposed electrical wiring
  • Damaged support beams
  • Asbestos or lead-contaminated materials (unsafe building materials)
  • Toxic smoke residue
  • Early mold risks in damp areas

By documenting every detail, we create a focused plan that addresses both obvious and hidden dangers. This careful review sets the stage for safe repairs and a secure recovery for your home.

Navigating Insurance Claim Filing and Documentation for Post-Fire Reconstruction

After a fire, filing your insurance claim is key to getting your home back to a safe place. First, check your homeowner policy. Look for what fire damage is covered, any limits, and exclusions. This helps you know what to expect and prevents surprises later.

Collecting proof of the damage is very important. Take clear photos and make a video walkthrough of every affected area. These records show visible damage and hidden problems like weak structures or lingering smoke residue. You might also get help from a certified inspector (a professional who checks damage) to produce a detailed report that supports your claim.

Keep every repair estimate from trusted contractors. Their estimates explain the costs for demolition, materials, and labor. Write down each conversation with your insurance adjuster so you have a clear record of all details. This organized approach helps make the process smoother and eases your stress during recovery.

Below is a list of helpful items to include:

  • Detailed photos and video walkthrough (see link: Detailed photos and video walkthrough)
  • Inventory of damaged items with purchase dates
  • Professional damage assessment report
  • Repair estimates from licensed contractors
  • Log of all communication with adjusters

Planning, Permits, and Regulatory Compliance for Post-Fire Home Reconstruction

img-2.jpg

After fire damage, rebuilding is about more than fixing structures, it’s ensuring your home meets local safety rules. First, we review local building codes that cover everything from structural repairs and firewalls to safe exit routes (egress: the way out in an emergency). We carefully check ordinance details, zoning rules, and run legal compliance audits so your home will pass every municipal inspection.

Permit applications are a key step. Depending on your area, permits can take between 2 and 6 weeks, so we build that time into your project plan. We gather all needed documents, like detailed site plans and safety assessments, to support your permit application. When you submit plans for modifications, such as changes to egress routes or using fire-resistant materials, you’re taking a smart step to meet local standards.

Once permits are in hand, inspections start at important points like the foundation, framing, and electrical work. These checks ensure every part of the rebuild meets safe occupancy guidelines. We work closely with local inspectors through every stage, helping to keep the process smooth and on schedule. By following clear permit procedures and local rules, you can feel confident that your rebuilt home is safe and compliant.

Budgeting and Cost Estimation in the Post-Fire Home Reconstruction Process

When you rebuild your home after a fire, having a clear and realistic budget is essential. Contractors often give detailed estimates that break down costs like demolition, materials, labor, and overhead (general operating expenses). This way, you know exactly where each dollar is spent and avoid surprises later.

It is wise to set aside an extra 10 to 15 percent in your budget to handle unexpected issues, such as hidden water damage or structural surprises that may show up during the work. This cushion helps keep you prepared and reduces stress if extra costs come up.

Remember, budgeting is not just about numbers. It is also about planning for a safe future. You may be eligible for government or nonprofit disaster-relief grants that can help lower your out-of-pocket expenses, so you can focus on getting your home back to normal.

One homeowner shared that careful budgeting and exploring available grants made a big difference when reconstruction costs slightly exceeded the original estimates. This proactive planning not only eased the financial burden but also brought peace of mind during recovery.

Using accurate cost estimates, careful budget planning, and looking into different financing options all work together to create a smoother and more manageable rebuild.

Selecting Contractors and Establishing a Reconstruction Timeline

img-3.jpg

Choosing a restoration contractor takes careful thought. We work only with professionals who hold proper state licenses and fire-restoration certifications (proof they meet industry standards). We check that they have a valid contractor license and insurance, real fire-restoration experience, good client references with before/after photos, clear and detailed bids, and a written warranty on labor and materials.

Next, we set a clear timeline for your home's rebuild. We break the work into steps, from the start of demolition to framing, installing mechanical systems (like heating and plumbing), and finishing touches. This helps keep everything organized so you know what comes next.

We team up with licensed builders and your chosen contractor to create a realistic schedule that meets repair needs and gives you peace of mind. By planning each step, demolition, framing, mechanical updates, and interior finishes, along with quality checks, we track every part of the process. Regular reinspections and progress meetings help us catch any issues early.

This clear, step-by-step plan ensures your home is rebuilt safely and according to modern standards. We make sure you feel supported and informed from start to finish while respecting the unique setup of your home.

Structural Restoration and Fire-Resistant Upgrades in Post-Fire Reconstruction

After a fire, your home needs to be rebuilt to meet today’s safety codes. We start by checking the foundation, support walls, and key parts of your structure. We look at framing, footings (the base that holds up your home), and beams. Fixing these issues early keeps your home safe and ready for fire-resistant upgrades.

We add strength to critical areas using steel or engineered lumber (strong, man-made wood). This extra support helps your home handle future stress. We also repair brick and concrete elements using proper masonry repair steps. Our careful review finds hidden issues so we can fix them right.

Improving fire resistance is important to lower future risks. We install ignition-resistant sheathing (material that slows fire spread) and fire-retardant treated timber on exterior walls and eaves. These upgrades not only cut down the chance of a new fire but also give your home better protection. All materials meet today’s building codes.

Our step-by-step approach, from checking the foundation to reinforcing the wood frame and adding fire-resistant treatments, builds a strong base for safe rebuilding. We repair the current damage and reduce future hazards, helping you regain both your property and your peace of mind.

Interior Restoration, Finishes, and Modern Rehabilitative Techniques

img-4.jpg

After a fire, your home needs a fresh look and improved safety. We remove damaged drywall, insulation, and flooring and replace them with strong, new materials. We let everything dry and harden properly so it lasts. Imagine a room that was once charred now shining with smooth, clean surfaces, a space ready for a new beginning.

We install high-efficiency HVAC filters (air filters that trap smoke) and strong mechanical ventilation systems to clear away any smoke particles. These systems freshen your indoor air, making your home feel safer. It’s like opening a window after a storm to help you breathe easier. We also use mold-resistant drywall (a wall material designed to fight moisture) to prevent mold from growing in damp spots.

We monitor humidity closely during the restoration process. By checking the air moisture levels often, we keep your home within a comfortable range of 30 to 50 percent. This careful control protects your new finishes and helps create a healthier environment for everyone.

Key improvements:

  1. We replace damaged building materials with durable, new ones.
  2. We install advanced HVAC filters to remove residual smoke.
  3. We use moisture-resistant products to stop mold in its tracks.
  4. We regulate indoor humidity for clean and safe air.

We choose finishes that look modern and work well. By updating your interior with smart design and the latest systems, your home not only regains its beauty but also supports your family’s comfort and health during recovery.

Final Inspections, Quality Control, and Occupancy Approval in Post-Fire Reconstruction

After all the work is done, we make one final check to ensure your home is safe to live in. We walk through your home with local building inspectors to check that the foundation is stable, the walls and structure are strong, and the electrical and plumbing systems work correctly. We also look at fire safety features like alarms and sprinklers to be sure they function properly.

During this last review, inspectors test safety systems and mark any items that still need fixing. We then take care of these small corrections to make sure there are no hidden issues before you return.
Before we issue your certificate of occupancy, every repair is double-checked against all safety and structural standards. This certificate shows that your home is not only rebuilt but is secure and ready for you to move back in.

Sustainable and Resilient Rebuild Strategies After Fire Damage

img-5.jpg

After a fire, rebuilding your home is a chance to add safe, green features that prepare you for the future. We use up-to-date building techniques to install high-R-value insulation (material that slows heat flow) and Energy Star–rated windows (energy-saving windows) that help lower your utility bills. We also add programmable thermostats that adjust the temperature automatically, keeping you comfortable while saving energy.

Think of these improvements as smart investments in safety and strength. Adding solar panels or battery backups gives you power during emergencies and cuts your reliance on the grid. We use low-VOC paints (fewer harmful chemicals) and recycled or sustainably sourced materials to lower the impact on the environment and improve indoor air quality.

Here are some key eco-friendly upgrades:

Upgrade Benefit
High-R-value insulation and Energy Star–rated windows Saves energy and lowers bills
Programmable thermostats Efficient temperature control
Solar panels and battery storage Emergency power and reduced grid use
Low-VOC paints and recycled materials Healthier indoor air and eco-friendly rebuild

By combining modern building technology with eco-friendly design, you create a home that is both resilient and energy efficient, ready to face future challenges while keeping your energy costs low.

Final Words

In the action, the post-fire home reconstruction process covers every critical step, from swift emergency assessments and safety measures to planning, permits, and quality control. We walked through damage reviews, insurance claims, contractor selection, and even sustainable upgrades. Each phase is designed to restore safety and comfort quickly while minimizing hassle. We focus on turning chaos into a safe, livable home. A brighter, rebuilt home is just ahead.

FAQ

Post fire home reconstruction process step by step

The post fire home reconstruction process step by step starts with an emergency damage assessment, followed by debris and hazardous waste removal, then structural repairs and rebuild. This orderly approach ensures safety and code compliance.

Post fire home reconstruction process pdf

The post fire home reconstruction process PDF outlines every stage, from initial safety checks and debris removal to rebuilding steps, permitting, and final inspections. It serves as a clear guide for homeowners in recovery.

Post fire home reconstruction process cost

The post fire home reconstruction process cost varies based on damage extent, materials needed, labor, and required permits. Homeowners should plan for a contingency fund to cover unforeseen repairs and hidden damage.

Post fire home reconstruction process california

In California, the post fire home reconstruction process follows strict state and local building codes. It includes detailed damage assessments, permits, and inspections to ensure that repairs meet the necessary safety and compliance standards.

Flood Damage Restoration Cost: What to Expect and Pay

0

Most flood damage restoration costs between $1,300 and $6,000, but here’s the surprise: your homeowner’s policy probably won’t cover a penny if it’s actual flooding. Standard policies cover burst pipes and leaking appliances. They don’t cover water that comes through doors, windows, or foundation cracks from outside. That means your biggest risk might leave you paying the entire bill out of pocket unless you carry separate flood insurance. We’ll walk through what different policies cover, what you’ll pay directly, and how to navigate the insurance process when you’re dealing with water damage right now.

What You’ll Pay for Professional Flood Damage Restoration

j713yh_iTiq_R60vegHqQA

Most homeowners spend between $1,300 and $6,000 on flood damage restoration. But costs can range from $150 for minor surface water in a single room to over $100,000 for severe structural flooding. Your final bill depends on how much water got in, how long it sat there, what it touched, and whether you’re dealing with contamination. These numbers reflect the complete process, from when professionals arrive through final repairs.

Pricing depends on how extensive the damage is and which parts of your home got hit. A bedroom with surface water from a broken supply line costs way less than a flooded basement that soaked into subfloors, wall cavities, and insulation. Square footage pricing gives you a baseline estimate, but contamination level and damage severity determine what you actually pay.

Here’s how damage severity breaks down into typical cost ranges:

Damage Severity Typical Cost Range What’s Involved
Class 1 (Minor, Single Area) $150 to $500 Small area with minimal water absorption, mostly surface moisture
Class 2 (Moderate, Partial Room) $500 to $1,000 Water up to 12 inches, affecting carpets and baseboards
Class 3 (Significant, Multiple Areas) $1,000 to $3,000 Water in floors, subfloors, wall cavities, and ceilings
Class 4 (Severe Structural Damage) $20,000 to $100,000 Deep penetration from flooding or hurricanes, extensive reconstruction needed

Water Contamination Categories and Cost Impact

The source and cleanliness of the water directly affects restoration costs. Contamination determines which materials can be saved versus what must be removed and replaced. Category 1 clean water from broken supply lines costs $3 to $4 per square foot to remediate. This water hasn’t contacted contaminants, so carpets and materials can often be dried and salvaged. Quick response is everything with clean water.

Category 2 gray water comes from appliances like dishwashers, washing machines, or sump pumps. It costs $4 to $7 per square foot. It contains moderate contamination levels and potential bacteria, so affected materials require more aggressive cleaning and sanitization. Some materials can be saved, but anything porous that stays wet too long gets removed.

Category 3 black water costs at least $7 per square foot and often more. This comes from sewage backups, toilet overflows, or floodwater that’s been sitting. It carries serious health hazards, which means complete removal of all affected materials including drywall, flooring, furniture, and clothing. Nothing porous stays. The cleanup involves full protective equipment, aggressive antimicrobial treatment, and careful containment to prevent contamination spread.

Comprehensive Breakdown of Restoration Service and Repair Costs

i2XeLDn8TIevGb21BdgrZQ

Professional restoration follows a structured sequence that starts when technicians arrive and continues through final repairs. The process includes damage assessment to measure moisture levels and plan extraction strategy, water removal using industrial pumps, drying and dehumidifying with commercial equipment, sanitizing all affected surfaces, and rebuilding damaged components. Each phase carries separate costs. The timeline stretches from a few days for minor damage to several weeks for structural work.

Standard labor rates for certified restoration technicians range from $70 to $200 per hour depending on your location and the company’s experience level. Equipment deployment adds to hourly charges because industrial dehumidifiers, air movers, moisture meters, and thermal imaging cameras are expensive to purchase, maintain, and transport. Most companies bundle equipment and labor into daily rates during the drying phase.

Here’s what specific restoration services typically cost:

Damage assessment and moisture inspection runs $100 to $400. It includes thermal imaging and moisture mapping. Water extraction and pump out services cost $200 to $1,000 depending on volume and location. Drying equipment deployment costs $300 to $1,200 per day, covering dehumidifiers and air movers placed throughout affected areas. Antimicrobial treatment runs $150 to $500 to prevent growth on surfaces. Moisture detection and monitoring costs $50 to $150 per visit for follow up readings. Final inspection and testing runs $100 to $300 to verify complete drying before reconstruction begins.

Once water is removed and surfaces are dry, damaged materials must be replaced or repaired. This phase often exceeds extraction and drying costs because building materials, labor, and finish work add up quickly. The range runs from cosmetic repairs like repainting drywall to major structural work involving framing, subfloors, and insulation replacement.

Material/Component Typical Repair Cost
Drywall Replacement $1.50 to $3.00 per square foot, or $300 to $1,000 total for typical rooms
Carpet Restoration or Replacement $1 to $11 per square foot depending on carpet quality and contamination level
Hardwood Floor Repair $200 to $550 for small areas, more for extensive warping
Ceiling Repairs $350 to $1,600 depending on damage extent and ceiling type
Subfloor Replacement $500 to $3,000 depending on area size and access difficulty
Insulation Replacement $1 to $5 per square foot depending on insulation type
Trim and Baseboards $200 to $800 for typical rooms

Emergency rates are 2 to 3 times normal rates, reaching $120 to $600 per hour versus standard pricing. That sounds expensive until you understand why immediate action saves money overall. Quick response prevents issues within the 24 to 48 hour window after flooding. It stops structural damage from water sitting in wall cavities and reduces total material loss. A $300 emergency call that starts extraction tonight often prevents $3,000 in remediation and additional structural repairs next week. The premium hourly rate pays for itself by shrinking the total project scope.

Additional Expenses Beyond Water Removal

Eb28ICrET9OKOjIM-rNmiA

Flood damage creates cascading expenses beyond initial restoration work. Secondary costs develop when water creates conditions for issues, contaminates belongings, or requires specialized services to handle documents, electronics, and furniture.

Remediation adds $1,000 to $3,500 to your total restoration costs and becomes necessary when moisture sits for 24 to 48 hours. Once problems start developing, professionals must contain affected areas, remove contaminated materials, treat surfaces with antimicrobial solutions, and verify complete removal before reconstruction begins. The cost jumps higher when issues spread through HVAC systems or inside wall cavities that require extensive opening and treatment.

Other common additional expenses include pack out and storage of belongings while restoration work happens, typically $500 to $2,000 depending on home size. Contents cleaning and restoration for salvageable furniture, electronics, and personal items ranges from $200 to several thousand. Furniture repair or replacement when upholstered items absorb contaminated water. Document recovery services for important papers, photographs, and business records. Debris removal and disposal fees for unsalvageable materials, carpet, drywall, and damaged belongings.

These additional services can add thousands to your final bill, especially when flooding is severe or contaminated. Extensive damage combining structural repairs with remediation often reaches $7,000 to more than $16,000 total.

Location-Specific Factors in Flood Restoration Pricing

ftu1wHHpQNeOPBGp6ShWjQ

Geographic location affects restoration costs significantly. Coastal areas and high flood risk regions experience more demand for restoration services, which drives up pricing. Companies in flood prone zones often charge premium rates year round because they maintain larger equipment inventories and standby crews. The same Class 2 water damage that costs $800 in a low risk area might cost $1,200 in a coastal flood zone.

Urban areas typically charge more than rural locations due to higher labor costs, office overhead, and operational expenses in cities. Permit fees and inspection requirements in urban jurisdictions add administrative costs to every job. Rural properties sometimes face trip charges or minimum service fees when restoration companies must travel significant distances with equipment.

Basement flooding involves additional complexity and costs ranging from $700 for minor surface water to more than $75,000 for complete reconstruction after severe flooding. Basements are harder to dry because they sit below grade, have limited ventilation, and often contain finished living spaces with more materials to remove and replace. Multi story buildings add equipment hauling costs and access challenges that extend labor hours.

Local building codes and permit requirements create regional cost differences that affect final bills. Some jurisdictions require permits for drywall replacement or electrical work during restoration, adding fees and inspection delays. Areas with strict contractor licensing requirements and high insurance standards tend to have higher service rates but also more qualified professionals.

Understanding Insurance Coverage for Flood Damage Restoration

UO7vrFQ2-Ckg5syhWnNQ

Standard homeowners insurance policies cover sudden internal water damage but exclude flooding from external sources. That distinction matters because it determines whether your claim gets approved and how much you pay out of pocket.

Homeowners insurance typically covers burst pipes, failed water heaters, washing machine supply line breaks, and storm damage that lets rain through a compromised roof. These are sudden accidental events. Policies exclude gradual leaks from poor maintenance, seepage through foundation cracks over time, and rising floodwater from rivers, storm surge, or heavy rain overwhelming drainage. External flooding requires separate flood insurance through the National Flood Insurance Program or private insurers.

Typical deductibles range from $500 to $2,500 depending on your policy. Coverage limits affect how much the insurance company pays toward restoration and contents replacement. If your policy limit for water damage is $50,000 and repairs cost $60,000, you’re responsible for the $10,000 difference plus your deductible. Review your policy limits before you need them.

Insurance claims require detailed documentation. Photographs of damage before cleanup begins. Professional moisture assessments with readings. Itemized repair estimates. Receipts for all work performed. Take photos of everything, save damaged items until the adjuster inspects them, and keep detailed records of conversations with your insurance company.

Insurance adjusters evaluate damage extent and determine what’s covered under your policy terms. They might dispute whether damage resulted from a covered sudden event or excluded gradual leak. Having professional restoration documentation strengthens your claim because certified technicians provide objective assessments and industry standard moisture readings that support your case.

Professional Restoration Company Costs vs DIY Approaches

nfePHVHTRneGV0AVhOr0Eg

The decision between DIY cleanup and hiring professionals comes down to weighing immediate costs against long term risks and potential for incomplete work that requires professional correction later.

DIY Flood Cleanup Limitations and Hidden Costs

Equipment rental for wet vacuums, dehumidifiers, and air movers costs $50 to $150 per day. That adds up quickly over the 3 to 5 days required to dry a typical flooded room properly. You’ll spend significant time moving furniture, pulling up carpet, cutting out drywall, and monitoring moisture levels. The bigger problem is that homeowner equipment lacks the power and capacity to dry structural cavities. You can’t detect hidden moisture in wall cavities or subfloors without professional meters.

DIY methods often fail to address moisture trapped inside walls, under flooring, and in ceiling spaces where it causes hidden damage for months. Incomplete drying leads to problems that spread through your HVAC system and affect indoor air quality. When DIY attempts fail, you end up calling professionals anyway to fix both the original flood damage and new problems created by incomplete drying. Total costs often exceed what professional restoration would have cost from the start.

Professional Restoration Value and Certifications

Certified restoration technicians hold credentials from the Institute of Inspection, Cleaning and Restoration Certification (IICRC), which means they follow industry standards for water damage restoration. They use commercial grade extractors that remove more water faster. Industrial dehumidifiers that process hundreds of pints per day versus the 50 pints from homeowner models. Thermal imaging cameras that detect moisture inside building cavities without destructive investigation.

Professionals provide documentation for insurance claims. Moisture maps. Daily progress logs. Equipment placement photos. Final dry out verification readings. Most restoration companies guarantee their work and provide warranties covering the completed restoration. This matters because your insurance company wants proof that drying was thorough and complete before they close your claim.

Professional restoration costs more upfront but reduces long term risks. The investment buys peace of mind that the job is complete and your home is safe.

Cost Saving Strategies for Flood Damage Restoration

QcKUtcGjSkelnD_OxTBbLQ

Quick response is the single most effective way to reduce total restoration costs. The moment you discover flooding, immediate action minimizes damage spread and prevents secondary problems that multiply your final bill. Each hour of delay allows water to spread across floors, seep deeper into porous materials, travel through wall cavities, and create conditions for rapid development. The difference between calling for help within an hour versus waiting until tomorrow often means saving thousands in remediation and material replacement.

Here are specific strategies that reduce costs without compromising quality. Act immediately when flooding occurs and call a restoration company right away. Shut off the water source to prevent ongoing damage and additional water entering your home. Remove salvageable belongings quickly from standing water to prevent furniture damage. Work with your insurance company promptly to start the claim process and get adjuster approval for emergency services. Get multiple estimates from certified restoration companies and compare itemized pricing. Ask about preventative measures during restoration like adding waterproofing or upgrading sump pumps. Consider financing options or payment plans if your insurance doesn’t cover the full amount or you face high deductibles.

Comparing estimates from multiple restoration companies helps identify fair pricing and reveals which contractors provide detailed scopes versus vague proposals. Look for itemized breakdowns that separate water extraction, drying, demolition, and reconstruction costs. Ask about equipment deployment fees, daily monitoring charges, and what’s included versus what costs extra. Companies that explain their process clearly and answer questions directly tend to deliver better results than those pushing immediate commitments.

Preventing Future Flood Damage and Long Term Cost Considerations

OOaLL_g5TQe23UyMopm-Ww

Investing in prevention is more cost effective than paying for repeated restoration work. A homeowner who spends $2,000 on preventative upgrades once avoids potential $5,000 restoration bills every few years when the next heavy rain or plumbing failure happens.

Specific preventative measures and typical costs include sump pump installation at $500 to $1,500 depending on pump capacity and whether battery backup is included. Backwater valve installation runs $150 to $500 to prevent sewage backup through floor drains. Regular plumbing inspections cost $100 to $300 annually to catch small leaks before they become floods. Gutter and downspout maintenance runs $100 to $400 per year to ensure water diverts away from foundation. Basement waterproofing costs $2,000 to $10,000 for interior or exterior waterproofing systems. Water detection alarm systems run $50 to $300 for sensors that alert you to leaks immediately.

Regular maintenance tasks catch problems before they become floods. Check supply line connections to washing machines, dishwashers, and water heaters every six months for signs of wear or slow leaks. Test your sump pump quarterly by pouring water into the pit and verifying it activates. Clear gutters twice yearly and extend downspouts at least six feet from your foundation. These simple routines prevent most common flooding scenarios.

Flood damage history reduces property resale value and increases insurance premiums for years. Buyers request disclosure of past water damage, and inspection reports note evidence of previous flooding or repairs. Insurance companies raise rates after claims and may exclude flood coverage entirely if you have multiple losses. Some insurers won’t renew policies after repeated water damage claims. Preventing flooding protects both your immediate finances and long term property value.

Electrical, Plumbing, and HVAC Restoration Expenses

Tk9lq_2sRpa4L09B3U9cPg

Building systems require inspection and often repair after flood exposure. Water affects more than just visible surfaces and finishes.

Electrical systems exposed to flooding must be inspected before reconnection. Water damages wiring insulation, corrodes connections, and creates shock hazards. Flood damaged outlets, switches, and service panels often require replacement even if they appear dry. Licensed electricians charge $75 to $150 per hour for inspection and repairs. Panel replacement adds $500 to $2,000 depending on your home’s electrical service size. Safety codes prohibit reusing electrical components that contacted contaminated water.

Plumbing systems need inspection for compromised pipes, failed water heaters, and sewage system backups after flooding. Water heaters that flood must be replaced because contaminated water enters the tank and damages heating elements. The cost runs $800 to $2,500 for replacement including installation. Sewage backups require professional cleaning and sanitization of drain lines, which adds $350 to $1,500 to your restoration bill. Supply lines may need replacement if flooding caused movement or stress on connections.

HVAC systems suffer ductwork contamination when water enters air handling systems, and equipment damage when furnaces or air conditioners flood. Ductwork cleaning costs $300 to $1,000 depending on system size and contamination extent. Furnace or AC replacement runs $3,000 to $8,000 when flooding damages motors, controls, or refrigerant lines. Comprehensive systems sanitization prevents spreading contaminants through your home every time the system runs.

Restoration Process Overview and Timeline Impact on Costs

Qgh5Jck8SQmprpbhE6pTlQ

Longer restoration timelines mean more equipment rental days, additional labor hours, and increased risk of secondary damage that expands the scope. Quick completion reduces costs while protecting your home.

The restoration process follows this progression. Damage assessment takes a few hours and includes thermal imaging and moisture mapping to identify all affected areas. Water extraction happens immediately after assessment and takes several hours to a full day depending on volume. Drying takes 3 to 5 days typically, with equipment running continuously and technicians monitoring moisture levels daily. Sanitization follows complete dry out and takes several hours to treat all surfaces. Repairs and reconstruction range from a few days for minor drywall replacement to several weeks for extensive structural rebuilds.

Equipment rental charges daily, making fast drying completion financially important. Industrial dehumidifiers cost $50 to $100 per unit per day. Most jobs require multiple units plus several air movers. A typical setup running five days costs $1,500 to $2,500 just for equipment. Every delay extends these charges.

Damage Level Typical Timeline Key Cost Drivers
Minor (Class 1) 1 to 3 days Minimal equipment deployment, small affected area, quick dry out
Moderate (Class 2) 3 to 5 days Multiple rooms, carpet and pad removal, extended equipment runtime
Significant (Class 3) 5 to 10 days Wall cavity drying, subfloor moisture, extensive demolition and reconstruction
Severe (Class 4) 2 to 6 weeks Structural repairs, specialty drying, remediation, complete rebuilds

The 24 to 48 hour window matters. Problems begin developing rapidly once moisture and warm temperatures combine. Quick response and aggressive drying within this timeframe prevent issues from establishing, which eliminates the need for costly remediation work later. Every hour counts when water sits in your home.

Delays from insurance disputes or material sourcing extend costs through continued equipment rental, additional monitoring visits, and potential secondary damage development while work waits. Clear communication with insurance adjusters and ordering materials early minimize timeline extensions.

Getting Accurate Restoration Estimates and Choosing a Contractor

Accurate estimates require on site inspection. Water damage severity can’t be assessed over the phone. A restoration company needs to see the affected areas, measure moisture levels, identify contamination category, and evaluate structural access before providing reliable pricing. Phone quotes based on descriptions often underestimate actual costs and lead to surprise charges mid project.

Good estimates itemize water extraction, drying equipment deployment, daily monitoring, antimicrobial treatment, demolition, material costs, and reconstruction labor separately. This breakdown helps you understand where money goes and compare proposals from different companies accurately. Watch for vague line items like “complete restoration” without detail. They make cost comparison impossible and hide potential upcharges.

When choosing a restoration contractor, verify IICRC certifications proving technicians completed water damage restoration training. State contractor licensing and proper business registration. General liability insurance and workers compensation coverage protecting you from liability. References from recent similar projects you can contact. Written estimates detailing scope, timeline, payment terms, and what’s excluded. Warranties on workmanship and guarantees on complete drying.

Red flags include unusually low bids that are 30 percent or more below other estimates. Pressure tactics demanding immediate decisions or upfront payment. Contractors who discourage insurance involvement or offer to waive deductibles. Lack of physical business address or proper licensing. Refusal to provide references or proof of insurance.

Get at least three estimates from certified restoration companies before deciding. Compare their approaches, communication style, and whether they answer questions clearly. The right contractor explains their process, walks you through what’s needed, and provides documentation supporting their proposal.

For local restoration estimates and 24/7 emergency response, contact FireFloodRescue.com to schedule an inspection and receive a detailed scope and pricing for your specific situation.

Final Words

Most homeowners spend between $1,300 and $6,000 on flood damage restoration cost, but your actual expenses depend on water contamination level, affected square footage, and how fast you act.

The difference between a manageable repair and a costly rebuild often comes down to response time. Water spreads, materials absorb moisture, and mold starts growing within 48 hours.

Get detailed written estimates from certified restoration contractors who can assess your specific situation. Quick action, clear documentation, and choosing experienced professionals will protect both your home and your budget.

FAQ

Is water damage restoration worth it?

Water damage restoration is worth it because it prevents mold growth, protects structural integrity, and preserves your home’s value. Acting fast stops minor damage from becoming a major rebuild. Professional restoration catches hidden moisture that leads to bigger problems later.

How much does it usually cost to repair water damage?

Water damage repair usually costs between $1,300 and $6,000 for most homeowners. Minor single-area damage starts around $150 to $500, while severe structural damage can reach $20,000 to $100,000. Your final cost depends on damage severity and affected square footage.

Does insurance cover water damage restoration?

Insurance covers water damage restoration when the damage is sudden and accidental, like burst pipes or appliance failures. Standard homeowners policies typically exclude flooding from external sources, which requires separate flood insurance. Your deductible and coverage limits determine out-of-pocket costs.

How much does it cost to rebuild after a flood?

Rebuilding after a flood costs between $1,300 and $6,000 for typical damage, but severe structural cases reach $20,000 to $100,000 or more. Black water contamination from sewage adds $7 per square foot minimum. Basement reconstruction alone ranges from $700 to over $75,000 depending on extent.

What affects flood restoration pricing the most?

Flood restoration pricing is affected most by water contamination level, damage severity, and affected square footage. Category 3 black water costs over twice as much as clean water damage. Emergency after-hours service rates run two to three times normal hourly rates.

How long does professional flood restoration take?

Professional flood restoration takes three to five days for drying alone, with total project timelines ranging from one week to several weeks. Minor damage resolves in days, while severe structural repairs extend to weeks. Fast response matters because mold develops within 24 to 48 hours.

What’s included in water extraction costs?

Water extraction costs include pump-out services, industrial equipment deployment, moisture detection, and initial damage assessment. Professional labor runs $70 to $200 per hour for standard rates. Emergency response increases rates to $120 to $600 per hour but prevents secondary damage.

Do I need mold remediation after flooding?

You need mold remediation after flooding if water sat for more than 24 to 48 hours or if visible growth appears. Mold remediation adds $1,000 to $3,500 to restoration costs. Professional assessment identifies hidden growth behind walls and under flooring.

Can I do flood cleanup myself to save money?

You can do flood cleanup yourself for minor surface water, but DIY methods miss hidden moisture that professionals detect with thermal imaging and moisture meters. Incomplete drying leads to mold growth and structural damage, often requiring professional correction later at higher total cost.

How do I get an accurate restoration estimate?

You get an accurate restoration estimate through on-site inspection by certified technicians who assess damage extent, moisture levels, and contamination category. Request itemized written estimates covering extraction, drying, repairs, and materials separately. Compare estimates from multiple IICRC-certified restoration companies.

What are typical drywall replacement costs after flooding?

Typical drywall replacement costs run $1.50 to $3.00 per square foot, with total repairs averaging $300 to $1,000 for minor damage. Extensive ceiling and wall replacement reaches several thousand dollars. Costs include material removal, installation, finishing, texture matching, and paint.

Does emergency flood response cost more?

Emergency flood response costs two to three times normal rates, reaching $120 to $600 per hour versus standard $70 to $200 hourly rates. Despite premium pricing, immediate response reduces total project costs by preventing mold growth, structural damage, and material loss.

What’s the difference between clean water and black water damage costs?

Clean water damage costs $3 to $4 per square foot and often allows material salvage. Black water damage from sewage costs $7 per square foot or higher and requires complete removal of drywall, flooring, and contaminated belongings due to serious health hazards.

How much does basement flooding restoration cost?

Basement flooding restoration costs range from $700 to over $75,000 depending on damage extent and finished space involvement. Basement work involves additional complexity including foundation concerns, limited access, and below-grade moisture challenges that increase labor and material expenses.

What additional costs come with flood damage restoration?

Additional costs with flood damage restoration include pack-out and storage of belongings, contents cleaning, furniture repair or replacement, document recovery, and debris disposal. These secondary expenses can add thousands to your final bill beyond basic water extraction and drying.

How to Secure a Tarp on a Roof Safely and Effectively

0

Can a tarp really save your home after a storm?
Yes, if it’s secured quickly and correctly, it can stop water from soaking insulation, walls, and wiring.
This guide walks you through safe, effective tarping—what to do first, how to anchor a tarp without making things worse, when to stop and call a pro, and which tools and materials actually work.
Read on for simple, step-by-step actions that prevent more damage while you wait for permanent repairs.

Quick Emergency Steps to Cover a Roof With a Tarp (Do This First)

XZ6HKOiXTpSqm61ddXDsNA

A damaged roof lets water into walls, insulation, ceilings, and electrical systems. Every minute counts. The goal of emergency tarping is to stop further water intrusion until permanent repairs can be scheduled. This isn’t a final fix. It’s a way to protect your home from more damage while you wait.

Don’t attempt tarping if there are downed power lines near the roof, if you see visible sagging or collapse, or if weather conditions include high winds, lightning, or heavy rain. Wait for conditions to improve or call a professional emergency service immediately.

Step by step emergency roof tarping:

  1. Gather materials quickly. You need a heavy duty polyethylene tarp (6–10 mil minimum, sized to cover the damage plus 2–4 feet of margin), at least two 8 foot 2×4 boards, exterior screws or roofing nails, a cordless drill or hammer, work gloves, non slip boots, and a stable extension ladder.

  2. Set up the ladder safely. Position the ladder on firm, level ground at a 4:1 angle (one foot out for every four feet up), and extend it at least three feet above the roof edge.

  3. Work with a partner. One person on the roof, one person on the ground to hand up materials and call for help if something goes wrong.

  4. Clear large debris from the damaged area. Remove any loose branches, broken shingles, or standing water so the tarp can lie flat.

  5. Unfold and position the tarp. Spread the tarp over the damaged section so it extends at least 2–4 feet beyond all edges of the hole or leak, including up and over the roof ridge if the damage is near the peak.

  6. Anchor the top edge first. Lay a 2×4 board across the top edge of the tarp (the side closest to the ridge), and screw or nail the board into the roof decking or rafters below, not into shingles alone.

  7. Pull the tarp taut and secure the sides and bottom. Add 2×4 boards along each side and the bottom edge, spacing boards every 2–3 feet to prevent wind from getting underneath.

  8. Check for loose corners and flapping edges. Walk the perimeter and add extra fasteners or small weights if you see any gaps or movement.

  9. Inspect from the ground. Step back and confirm the tarp is smooth, covers all damage, and has no large wrinkles or pockets where water can pool.

  10. Document the installation with photos. Take clear pictures of the damage before and after tarping for your insurance claim.

If wind speeds are above 15–20 mph, if you feel unsteady on the roof, or if the roof pitch is steep, stop and call a professional tarping service. Falling from a roof causes severe injury. Temporary tarping is only worth it if you can do it safely.

Preparing the Roof Surface Before Securing the Tarp

BXqCgFRBQMqlvmm-S6Z6og

Before you lay down a tarp, you need to know what you’re working with. Walk the damaged area carefully and look for soft spots, cracked decking, or places where your weight might break through. If the roof feels spongy or you see visible sagging, stay off that section and mark it from a safe distance.

Use a roof rake, push broom, or your gloved hands to clear away leaves, broken shingles, small branches, and any standing water. Debris under the tarp creates lumps that let wind lift the edges. Moisture trapped between the tarp and roof can lead to mold or rot while you wait for repairs. If there’s a puncture or tear in the roof surface, note its location so you can center the tarp over it with enough overlap.

Before you start, check for:

  • Loose or missing shingles that could shift when you walk or anchor the tarp
  • Exposed nails or sharp edges that might puncture the tarp from below
  • Wet or icy patches that increase slip risk
  • Power lines, vents, or satellite equipment near the work area

Once the surface is clear and you’ve confirmed stable footing, you’re ready to position and secure the tarp.

Methods for Securing a Tarp Depending on Roof Damage Severity

kvj-BIRLTp-B88zVMYJ_mw

The way you anchor a tarp depends on how much roof area is damaged and how long the tarp will stay in place. Small punctures need different treatment than a tree branch that punched through half the roof.

Light Damage (Small Leak or Missing Shingles)

For a hole smaller than a basketball or a missing shingle cluster, use a single tarp sized 10×12 feet or 12×16 feet. Drape the tarp over the damage so it extends at least 2 feet past the problem area on all sides. Anchor the edges with sandbags (20–30 pounds each) placed every 3–4 feet, or use a single 2×4 board screwed lightly into solid decking along the uphill edge to hold the tarp in place. This method works when you expect permanent repairs within a few days and wind speeds stay below 20 mph.

Moderate Damage (Hole Up to 4×4 Feet or Ridge Leak)

Use a 12×20 foot or larger tarp. Lay the tarp so it covers the damage and extends 3–4 feet beyond all edges. If the damage is near the ridge, run the tarp over the peak and down both sides at least 3 feet. Secure with 2×4 boards placed perpendicular to the roof slope, spaced every 2–3 feet across the width of the tarp. Fasten each board into roof rafters (typically spaced 16 or 24 inches on center) using 3 inch exterior screws with washers, not into shingles alone. This “sandwich” method keeps the tarp from flapping and resists moderate wind.

Severe Damage (Large Hole, Fallen Tree, or Structural Concern)

If the damaged area exceeds 4×4 feet, if you see broken rafters, or if the roof deck is visibly sagging, don’t attempt full tarping alone. If you must stabilize the area before professional help arrives, lay plywood or OSB sheathing over the open hole first, then tarp over the plywood. Use at least four 2×4 boards in a grid pattern, fastened into solid framing members around the perimeter of the damage. Don’t walk on compromised sections. If the damage involves electrical wiring, gas lines, or if you can’t safely access the area, call a licensed contractor immediately.

Damage Level Recommended Method Notes
Light (small leak) Single tarp + sandbags or one anchor board Good for short term, low wind conditions
Moderate (4×4 ft or ridge leak) Tarp + 2×4 sandwich every 2–3 ft, fastened into rafters Handles moderate wind; suitable for 1–2 weeks
Severe (large hole, structural damage) Plywood sheathing + heavy tarp + perimeter anchoring Temporary only; call professionals for permanent repair

How Roof Type Affects Tarp Installation

9AIaZ2fsTEKXNmziGW4DvA

Asphalt shingle roofs are the easiest surface for emergency tarping. Shingles provide decent traction when dry, and the underlying wood decking accepts screws or nails without special tools. When you anchor 2×4 boards, aim to fasten into the roof deck or rafters, not just through the top layer of shingles. Shingles alone won’t hold under wind load. If the damaged area includes missing or loose shingles, clear them away so the tarp lies flat against solid decking. Asphalt roofs also allow you to use roofing cement or butyl tape along tarp edges to create a temporary waterproof seal.

Metal roofs require extra caution. The surface is slippery, especially when wet or covered with morning dew. Wear rubber soled boots with deep treads and consider using a safety harness anchored to a structurally sound point. Avoid driving screws or nails through metal panels if possible, because every new hole is a future leak point. Instead, use heavy duty ratchet straps looped under the ridge cap or around the eave edge, or anchor the tarp to fascia boards with screws and large washers. If you must fasten through metal, use neoprene washer screws designed for metal roofing and seal each penetration with roofing sealant immediately.

Tile roofs are fragile and crack under direct weight. Don’t walk on individual tiles. Lay plywood walkways over the tiles to distribute your weight, or work from a ladder positioned against the fascia. If tiles are already broken around the damage, remove the broken pieces carefully and set them aside. Position the tarp over the gap, then tuck the edges under adjacent intact tiles when possible, or use 2×4 boards placed across multiple tiles to spread the load. For larger damage, lay plywood sheeting under the tarp to bridge the gap, then anchor the plywood and tarp together to the roof structure. Tile roofs often require professional help because improper anchoring can crack more tiles and make permanent repairs more expensive.

Troubleshooting Common Problems When Securing a Tarp

6_riIFoaTRyFMBkD54uS5A

Even a well installed tarp can develop issues after the first rainstorm or gust of wind. Most problems come from insufficient tension, poor anchor placement, or water pooling in low spots.

If your tarp starts flapping, wind is getting underneath. Check that all edges extend past the damage and are held down with boards or weights. Add extra 2×4 anchors or sandbags along the sides where the tarp lifts. Flapping tears grommets and weakens the material quickly.

Common tarp problems and fixes:

  • Tarp flapping in wind. Increase anchor points, tighten straps, or add a center support pole under the tarp to reduce the surface area exposed to wind.
  • Water pooling on the tarp. Adjust the tarp position so it slopes toward the eaves, or add a small support under the center to create a peak that channels water off the sides.
  • Tarp shifting after rain. Re tighten anchor boards and check that screws or nails haven’t pulled out of wet decking; add washers to screws if needed.
  • Leaks at tarp edges. Seal the perimeter with roofing cement or waterproof butyl tape; make sure the tarp overlaps the damaged area by at least 2 feet on all sides.
  • Grommets tearing out. Distribute load by using tarp clips or by sandwiching the tarp edge between two boards before fastening; never tie knots directly through grommets.

Inspect your tarp after every storm and at least once a week. Loose anchors, new tears, or standing water mean the tarp isn’t doing its job anymore.

When You Should Call a Professional

y3vd6TX1RDOz53UnCqo3eQ

Some roof situations are too dangerous or too complex for temporary tarping. If the damaged area is larger than 10×10 feet, if you see rafters broken or the ceiling inside your home sagging, or if water is actively pouring into your attic, a professional emergency roof service can respond faster and safer than a DIY attempt. Licensed roofers carry commercial grade tarps, harnesses, and scaffolding that let them work on steep pitches and multi story homes without the fall risk you face on a ladder.

Call a professional immediately if you see:

  • Visible roof sagging, soft spots, or sections that feel unstable underfoot
  • Electrical wires near or touching the damaged area
  • A fallen tree or large branch still resting on the roof
  • Roof pitch steeper than 6:12 (6 inches of rise per 12 inches of run), which is difficult to walk safely without specialized equipment

Emergency tarp services typically cost between $150 and $800 depending on roof size, access difficulty, and materials required. That cost buys you safety, speed, and proper documentation for your insurance claim. Temporary tarping is a smart DIY project for small, accessible damage in calm weather. When conditions or damage exceed those limits, the right call is to step back and let trained crews handle it.

Final Words

Stop ongoing water and get a tarp over the damage right away. Fast action prevents more soaking, mold, and warped boards.

This post walked you through quick steps, how to clear debris, secure tarps with 2x4s, methods for light to severe damage, roof-specific tips, troubleshooting, and when to call a pro.

Follow these practical steps on how to secure a tarp on a roof to limit damage, collect photos and readings for insurance, and buy time for a proper repair. You’ll feel steadier once the roof is stabilized.

FAQ

Q: What’s the best way to hold a tarp down on a roof?

A: The best way to hold a tarp down on a roof is using 2×4 battens laid over the tarp and screwed into solid wood beyond the damage, plus weights or straps at edges to resist wind uplift.

Q: How to attach a tarp to a roof without nails?

A: Attaching a tarp to a roof without nails uses non‑penetrating options like sandbags, heavy 2×4 battens weighted and tied, tarp clips with straps, or ratchet straps anchored to chimneys or ground points.

Q: How to attach a tarp to a roof temporarily?

A: Attaching a tarp to a roof temporarily means securing it with 2x4s across edges, fastening to safe framing or fascia, adding corner weights, and rechecking after wind or rain until a permanent repair is done.

Q: What is the 25% rule in roofing?

A: The 25% rule in roofing is the guideline that if over 25% of the roofing material on one plane is damaged, contractors or insurers often require replacement of that plane or the entire roof.

How To Prevent Future Property Loss After Disaster!

0

Have you ever thought a simple plan could save you from big losses during a disaster? Extreme weather can cause huge damage, but a clear plan helps cut the harm and speed up repairs. First, look at your area’s risks and secure your most valuable items. This small step can keep big setbacks at bay. In this post, we share easy steps to build a solid plan so you can protect your home and belongings with confidence.

Develop a Risk Mitigation Framework to Prevent Property Loss After Disasters

Disasters can hit unexpectedly and leave serious damage behind. Data from NOAA shows that between 2020 and 2024, the US faced 115 major weather events that cost nearly $750 billion. A solid plan can help you prepare by outlining clear steps to reduce damage and speed up recovery. Our method breaks this plan into simple parts: checking local hazards (knowing the risks in your area), creating a response plan (what to do right away), assembling an emergency kit (the supplies you need during outages), securing important items (keeping key papers safe), and taking clear pictures of your belongings (for insurance claims).

Having a clear plan puts you in control when a crisis hits. Here are the key steps to build your framework:

  • Check local hazards using maps and past storm records.
  • Create a simple response plan with clear steps to follow when disaster strikes.
  • Prepare a 72-hour emergency kit with food, water, and essential medicines.
  • Protect valuable items by storing important documents and keepsakes in a waterproof safe.
  • Review your insurance policy every year to catch any coverage gaps.
  • If needed, call in professionals like emergency restoration services for extra help.

Taking these steps now can keep your home safer and make recovery smoother. A clear plan not only speeds up the recovery process but also simplifies your insurance claim. By preparing ahead, you build a strong system to reduce future property loss.

Conduct a Vulnerability Appraisal to Prevent Future Property Loss

img-1.jpg

When a disaster hits, it's important to know where your home might be at risk. We perform a careful check (vulnerability appraisal) to spot weak areas using local weather trends and your home's building features. This process shows dangers from past storms and helps you decide where to strengthen before a big event.

Regional Hazard Mapping

We use tools like FEMA flood maps (maps from the Federal Emergency Management Agency) and NOAA storm records (data from the National Oceanic and Atmospheric Administration) to spot risks. These tools highlight which areas near your home could experience heavy rain, floods, or strong winds. With this information, you can plan simple steps to protect your property.

Structural Integrity Inspections

We check your roof, foundation, walls, and where utilities are placed for signs of wear or damage. Finding issues like loose roofing or weakened joints early can help prevent bigger problems later. Fixing these spots now may lower risks during severe weather and keep your home safer.

Insurance Policy Gap Analysis

Review your insurance policies to see if there are any gaps in your coverage for floods, wind, or fire. Knowing exactly what is covered lets you fill in the gaps quickly. This makes it easier to get a smooth claim process if disaster strikes.

A detailed vulnerability appraisal gives you a clear idea of your home's risks. By checking local hazards, inspecting your structure, and reviewing your insurance, you can take proactive steps to protect your home and keep your family safe.

Implement Structural Hardening and Retrofit Measures to Prevent Property Loss

We design a plan that makes your home stronger, stopping small problems from turning into big ones. Using modern fixes, we reinforce key parts of your home and lower risks before storms or disasters hit. By taking these steps, you not only strengthen your home but also keep your family safer during severe weather.

  • Strengthen your roof using hurricane straps (metal fasteners that secure the roof to your home) and impact-resistant shingles to hold up against strong winds.
  • Upgrade your windows and doors with tempered glass (glass that is tougher and safer) or add storm shutters to prevent breakage.
  • Put up flood barrier solutions, like sandbags or modular barriers, along entry points and around your home. View our home safety checklist after a flood for more tips.
  • Trim dead limbs from trees within 10 feet of your home, and do this yearly to lower the risk of wind damage.
  • Bolt heavy appliances and secure furniture to wall studs (support beams) so they stay in place during a disaster.
  • Anchor outdoor items or store them inside to prevent them from turning into dangerous projectiles.
  • Before a major event, shut off the gas and main power to lower the risk of fires and explosions.

Taking these measures helps protect your home from wind, flooding, and fire. With clear steps in place, you can secure your property and make repairs easier if a disaster strikes.

Plan Emergency Fortifications and Community Safeguards to Minimize Property Loss

img-2.jpg

When disaster strikes, a solid emergency plan can make a big difference. Start by putting together a 72-hour kit with water, nonperishable food, and a first-aid kit (supplies to help with minor injuries). This simple step makes it easier for you to act quickly and safely when every minute counts.

Designing Evacuation Routes

Plan at least two clear evacuation routes for your family. Draw maps for a primary path and a backup so each family member knows where to go. Mark the best exits from your home and decide on safe meeting spots outside. Run a practice drill at least twice a year, choose a sunny afternoon so you can review any issues and tweak your plan as needed.

Setting Up Neighborhood Alert Systems

Good communication helps keep everyone safe. Sign up for community alert apps or set up sirens that issue real-time warnings. Make sure main shutoff points for gas and electricity are clearly marked so they can be quickly turned off if needed. Team up with your neighbors to implement similar measures, and hold regular community meetings to boost trust and preparedness.

By planning your emergency kit, mapping clear evacuation routes, and setting up a neighborhood alert system, you protect not just your home but the entire community from future losses.

Review Insurance Coverage to Enhance Property Loss Recovery Readiness

Review your homeowner or renter insurance each year to make sure it still fits your needs. If you live in an area with risks like floods, high winds, or fires, consider adding extra coverage (called endorsements) to protect more against these dangers. This simple check helps connect keeping risks low with bouncing back quickly after a loss.

Keep a list of your belongings by taking clear photos and videos of each room. These records, including any repair or replacement costs, can speed up your claim and help you get back on your feet sooner.

When you need to file a claim, act quickly and file within your policy's timeline. Hold onto all receipts from repairs or temporary moves. Acting fast helps settle your claim properly and leads to a smoother recovery.

Establish Maintenance Schedules and Quality Control for Ongoing Property Protection

img-3.jpg

Regular maintenance helps keep your home safe from small issues that can turn into big problems. We recommend inspecting your roof and gutters every spring and fall so you can catch leaks or debris buildup early. Check the health of nearby trees each year and trim or remove any branches that could fall in a storm. Test your smoke and CO alarms (devices that alert you to fire and dangerous gases) and shutoff valves every three months to make sure they are working. This schedule gives you a clear plan to keep your home in top shape.

Keep a detailed log of every maintenance task. Write down the date, your observations, and any repairs you made. Mark each seasonal check and note any follow-ups needed. Also, inspect flood barriers before and after rainy seasons to confirm they work as expected. This regular quality control not only spots issues early but also helps you rest easy knowing your property is always protected.

Integrate Sustainable and Climate-Resilient Design to Protect Property

Eco-friendly home upgrades make your property stronger and better prepared for disasters. We use simple, sustainable plans (methods that save energy and last long) to help your house stand up to extreme weather.

Consider these practical ideas:

  1. Use pavers that let water pass through and plant rain gardens to manage runoff and lessen stress on your foundation.
  2. Add green roofs or reflective coatings to keep your home cooler and reduce fire risks.
  3. Lift HVAC and electrical systems above the flood line to prevent water damage during storms.

Landscape with low-fuel, fire-resistant plants to protect your surroundings. Choose building materials based on local weather patterns to suit your area. Every upgrade adds another layer of defense, making your home safer and more efficient for years to come.

Utilize Government Incentives and Community Resources for Property Loss Prevention

img-4.jpg

Government programs can cut your costs when you update your home to handle future disasters. For example, the FEMA Hazard Mitigation Grant Program can cover up to 75% of the retrofit expenses. Many states also offer tax breaks for upgrades that make homes more energy efficient or storm-resistant. Your local planning office might even hold workshops to share useful materials and advice on hazard planning.

There are also grants for upgrades and low-interest disaster loans available to help with recovery. The SBA offers loans for repair work and mitigation (steps to stop further damage), which can lower the financial burden. Using these funding options can help you enhance your home's safety without hurting your budget.

Start early by gathering clear records of any past damage and detailed plans for improvements. Keep an eye on deadlines and make sure you have all the necessary paperwork. These community resources not only give you funds but also offer practical tips on managing emergency resources, helping you build a stronger defense against future property loss.

Final Words

In the action, we reviewed a step-by-step plan to protect your property after a disaster. We broke down how to assess hazards, retrofit your home, review insurance, and set up maintenance and community safeguards. Each step is designed for fast, clear action to reduce costs and rebuild safely. Following these measures helps prevent future property loss after disaster and sets you on the path to a quicker recovery. We stand ready to help you secure a safer, more prepared home.

FAQ

What are 10 ways to prevent natural disasters?

The approach includes hazard assessments, structural reinforcements, securing valuables, assembling emergency kits, practicing drills, regular maintenance, clear evacuation plans, updating insurance, timely repairs, and community coordination.

What are some hazard mitigation examples?

Hazard mitigation examples include conducting vulnerability appraisals, reinforcing structures, preparing emergency kits, scheduling regular maintenance, drafting clear evacuation plans, and reviewing insurance to reduce future damages.

What is the first step in hazard mitigation after identifying a hazard?

The first step is to evaluate the risk by assessing local hazards and property weaknesses. This assessment guides the planning of actions to reduce damage and protect lives.

How do you mitigate house mold issues?

House mold mitigation involves drying affected areas, cleaning surfaces with disinfectants, addressing water leaks, and improving ventilation. These steps help contain mold and prevent further damage.

What is a FEMA Hazard Mitigation Plan template?

A FEMA Hazard Mitigation Plan template provides a clear outline for evaluating risks, setting priorities, and planning actions. It helps communities prepare systematic steps to reduce disaster damage and protect people.

What does a mitigation plan example include?

A mitigation plan example includes hazard assessments, emergency response protocols, assembling kits, securing valuables, documenting damages, and scheduled maintenance—all aimed at reducing future risk and damage.

What are the top ways to prevent natural disasters?

The top methods include performing risk assessments, reinforcing structures, preparing emergency kits, setting up clear evacuation routes, practicing community drills, and maintaining properties to reduce disaster impact.

What happens to property values after a natural disaster?

Property values often fall after a disaster due to damage and market shifts. Timely repairs and improved mitigation measures can help restore and stabilize property values over time.

What is the disaster relief fund?

A disaster relief fund is a reserve of resources set aside to help rebuild and repair communities after a disaster. It supports immediate recovery and long-term restoration efforts.

What are two actions to avoid after a disaster?

Avoid ignoring hazards like gas leaks and postponing contact with professional restoration services. Not addressing safety risks promptly can increase damage and delay recovery.

Which step focuses on reducing loss of lives and property and preventing future emergencies?

Hazard mitigation is the step that focuses on reducing risks by assessing vulnerabilities, reinforcing structures, and preparing emergency plans to protect both lives and property.

Electrical Hazard Safety Boots That Meet ASTM Standards

0

You might think any work boot keeps you safe around electricity, but uncertified footwear can turn you into a conductor when you contact live circuits. EH-rated safety boots use non-conductive soles tested to block 600 volts in dry conditions, preventing current from flowing through your body to the ground. This protection only works when boots carry the ASTM F2413 certification label permanently attached inside, not just marketing claims on the box. We’ll show you which boots meet the standard, what the certification actually tests, and where to buy footwear that delivers real electrical protection instead of dangerous guesswork.

Top-Rated Boots, Key Certifications, and Where to Buy

6glBAouPQ-6FHR_LOXV-Tg

EH-rated safety boots protect workers from electrical currents up to 600 volts in dry conditions. They use thickly insulated, non-conductive soles that stop electricity from flowing through the footwear to the person wearing them. The ASTM F2413 certification validates this protection through testing conducted by the American Society for Testing and Materials, which checks how well boots hold up when workers encounter live wires, energized equipment, or secondary electrical sources. Only boots that pass these voltage exposure tests get the official EH designation. You’ll find it on labels permanently attached inside the footwear near the tongue or collar, where you can verify certification before buying.

Manufacturer Model Features Price Range Available At
Chippewa ASTM F2413 EH certified, leather construction, Vibram outsoles, composite toe options $150-$249 Manufacturer direct, specialty safety retailers, authorized online distributors
Kodiak ASTM tested EH protection, Ortholite Comfort Foam, waterproof models, metal-free options $100-$199 Specialty safety retailers, manufacturer website, authorized distributors
Timberland PRO EH-rated with anti-fatigue technology, composite toe, slip-resistant, alloy safety toe $150-$219 Specialty retailers, manufacturer direct, major online safety suppliers
Keen Utility ASTM F2413 EH certified, asymmetrical safety toe, waterproof membrane, wider fit options $150-$199 Manufacturer website, outdoor retailers, authorized safety footwear dealers
Wolverine EH protection with CarbonMAX safety toe, waterproof leather, slip-resistant Wolverine outsole $120-$189 Specialty safety stores, manufacturer site, authorized online retailers
Carhartt ASTM F2413 EH rated, Storm Defender waterproof, composite toe, oil-resistant outsole $130-$179 Specialty retailers, manufacturer direct, farm supply stores, authorized distributors

Legitimate ASTM certification appears as a permanently affixed label inside the boot. You’ll typically find it sewn or heat-stamped on the tongue or collar area where it won’t wear off during use. This label clearly states “ASTM F2413 EH” along with additional protection ratings the boot provides, such as compression resistance (C75 or C50), impact resistance (I75 or I50), and metatarsal protection if applicable. Don’t trust verbal claims or marketing materials alone. Physically inspect the label inside the boot before purchasing, because uncertified boots that look similar offer zero electrical protection and put you at serious risk around energized circuits and equipment.

The three main price tiers for EH-rated boots reflect construction quality, material selection, and extra safety features that affect both protection and comfort during long work shifts. Boots in the $100 to $149 range typically meet minimum ASTM F2413 standards with basic leather uppers, non-conductive rubber outsoles, and standard insulation. They may lack comfort technologies or waterproofing. The $150 to $199 tier adds premium features like Vibram high-performance outsoles, 3M Thinsulate insulation, cushioned footbeds with arch support systems, and often includes waterproof membranes that extend boot life in demanding conditions. Boots priced $200 to $249 incorporate specialized technologies like metal-free construction for airport and security work, odor control systems, puncture-resistant midsoles, and proprietary comfort platforms designed for workers who spend entire shifts on concrete or climbing ladders.

Purchase EH-rated boots from specialty safety footwear retailers where trained staff can properly measure your feet, assess your specific workplace hazards, and verify certification labels before you leave the store. Manufacturer websites offer complete product lines with detailed specifications and sizing guides, though you miss the fitting expertise that prevents buying the wrong size or width. Authorized online distributors like SafetyShoeDistributors.com or WorkBootWarehouse.com stock multiple brands with competitive pricing and return policies. But first-time buyers benefit from in-person fitting to establish correct size before ordering online for future replacements. Farm supply stores, industrial uniform shops, and dedicated safety equipment suppliers maintain stock specifically for electricians, utility workers, and construction crews who need immediate replacements rather than waiting for shipping.

Certification Standards and Construction Requirements

Rld-k0pjQpOFHAEWEnwrLg

The ASTM F2413 electrical hazard certification process tests boots by placing them on a conductive plate connected to an electrical power source, then applying 600 volts of alternating current for one minute while measuring any current leakage through the sole and heel to a simulated human foot inside the boot. Boots pass certification when leakage current stays below 1.0 milliampere under this sustained electrical exposure. This proves the non-conductive materials successfully block dangerous current flow that would otherwise travel through the wearer’s body to ground. Testing laboratories evaluate multiple sample boots from each production run, examining sole integrity, heel construction, and the complete barrier between conductive surfaces and the wearer’s foot. The certification label gets permanently attached inside passing boots, displaying the ASTM F2413 designation along with the specific year of the standard version used for testing.

Non-conductive rubber compounds formulated with synthetic materials and specific carbon black ratios create the insulating barrier that defines EH-rated protection. These rubber formulations exclude conductive additives while maintaining flexibility, durability, and traction properties workers need on job sites. Sole thickness typically measures between 10mm and 15mm, providing sufficient insulation depth to prevent electrical current penetration while supporting the worker’s weight during standing, walking, and climbing tasks. The heel construction uses similar non-conductive materials extending from the outsole through any midsole layers. This ensures complete electrical isolation from ground contact points where current would normally flow through conductive footwear during accidental contact with energized equipment or wiring.

Key certification requirements and testing criteria that boots must satisfy for ASTM F2413 EH rating:

Sole thickness meeting minimum insulation standards with non-conductive rubber compounds throughout the entire ground contact surface. Heel construction using identical non-conductive materials as the sole without any conductive fasteners or metal shanks that create electrical pathways. Non-conductive material requirements extending through all layers between the wearer’s foot and external conductive surfaces including midsoles, outsoles, and heel stacks. Voltage exposure testing at 600 volts for sustained periods with leakage current measurements staying below 1.0 milliampere throughout the test duration. Secondary electrical source protection validated through open circuit testing that confirms insulation integrity when electricity seeks paths to ground through footwear. Open circuit protection standards requiring complete electrical isolation even when wet contaminants like conductive fluids contact the sole exterior while remaining dry against the foot.

Leather upper construction in EH-rated boots serves structural and protective functions while the sole system handles electrical insulation. Full-grain leather provides abrasion resistance, ankle support, and protection from physical hazards like falling objects or sharp materials. The leather connects to the non-conductive sole through cement bonding or stitching methods that don’t compromise the electrical barrier. Manufacturers carefully select attachment points and adhesives that maintain insulation properties. Quality EH-rated boots integrate a moisture barrier between the leather upper and the interior lining, preventing sweat or external moisture from saturating the boot’s interior and compromising the dry conditions necessary for electrical protection. The complete boot functions as a system where durable leather protects against mechanical hazards while the carefully engineered sole assembly provides the tested electrical insulation that defines the EH rating.

Material Type Protective Property Boot Location
Non-conductive rubber compound Blocks electrical current flow, withstands 600-volt exposure with less than 1.0 milliampere leakage Outsole and heel contact surfaces
Synthetic insulation layers Creates additional electrical barrier while providing cushioning and temperature control Midsole between outsole and footbed
Full-grain leather Resists abrasion and punctures while supporting ankle structure and preventing mechanical injuries Upper construction from vamp through collar
Non-metallic shanks Provides arch support without creating conductive pathways through the sole assembly Embedded in midsole beneath arch area
Moisture-resistant membrane Prevents internal saturation that would compromise electrical insulation while allowing vapor transmission Between leather upper and interior lining

OSHA Compliance and Proper Use Conditions

beHgaD-mTrSLT1jl29qpeA

OSHA regulations under 29 CFR 1910.136 and 1910.137 require employers to assess workplace electrical hazards and provide appropriate protective footwear when employees face risks from electrical shock through ground contact points. The regulatory framework places responsibility on employers to conduct hazard evaluations that identify work areas, tasks, and conditions where energized equipment, exposed conductors, or potential ground faults create electrical dangers requiring certified protective footwear as part of comprehensive electrical safety programs. Compliance documentation must demonstrate that selected footwear meets ASTM F2413 standards appropriate to the identified hazards, with regular inspections confirming boots remain in serviceable condition throughout their use.

Specific occupations and job roles requiring EH-rated footwear:

Electricians working with building wiring, panel installations, circuit repairs, and electrical system maintenance where accidental contact with energized conductors can occur. Linesmen installing, maintaining, and repairing electrical power transmission and distribution lines carrying high-voltage current. Utility workers servicing electrical infrastructure, substations, transformers, and power distribution equipment in both above-ground and underground installations. Industrial engineers troubleshooting automated manufacturing systems, motor controls, and electrical components integrated into production equipment. Maintenance workers performing repairs on electrical machinery, lighting systems, HVAC equipment, and facility electrical infrastructure. Construction workers on job sites with temporary power systems, exposed wiring during building phases, and multiple trades working near energized circuits. Manufacturing technicians operating equipment with exposed electrical components, control panels, and machinery requiring routine electrical inspection or adjustment. Electrical installers working with commercial and industrial electrical systems during new construction, retrofits, and equipment commissioning.

EH-rated boots function as secondary protection that reduces injury severity if primary electrical safety measures fail. Not as standalone safeguards against electrical shock. The 600-volt protection limit applies only in completely dry conditions where both the boots and the work surface stay free from moisture. Wet floors, damp concrete, puddles, or even high humidity can severely compromise or eliminate the electrical insulation properties that define EH protection. Workers must never rely on EH-rated footwear as their main defense against electrical contact. Proper lockout/tagout procedures, insulated tools, voltage testing, de-energizing circuits before work, and maintaining safe distances from exposed conductors remain the essential safety practices that actually prevent electrical injuries.

Workplace hazard assessment requires employers to evaluate maximum voltage levels workers might encounter, environmental conditions including potential moisture exposure, the likelihood of primary electrical contact versus secondary ground fault scenarios, and whether specialized footwear beyond basic EH ratings becomes necessary for adequate protection. This assessment process identifies specific work zones, tasks, and conditions requiring EH-rated boots, documents the evaluation in writing, and establishes replacement schedules based on boot condition rather than arbitrary time periods. Employers must train workers on proper use limitations, dry condition requirements, voltage exposure thresholds, and the critical understanding that damaged or wet boots provide no electrical protection regardless of their original certification.

Situations where EH-rated boots don’t provide adequate protection and different footwear or additional safety measures become mandatory:

Wet or damp conditions including rain-soaked work areas, flooded spaces, standing water, moisture-saturated concrete, or high humidity environments that compromise insulation properties. Voltage exposure exceeding 600 volts requires dielectric footwear tested and certified for higher voltage ratings specific to the electrical hazard present. Primary electrical contact points where workers directly handle energized conductors need insulated gloves, tools, and procedures beyond footwear protection. Compromised or damaged boots with sole cracks, separation between sole and upper, worn-through areas, or punctures that create conductive pathways negating EH protection. Expired or worn footwear that no longer maintains the tested insulation properties due to material degradation, chemical exposure, or mechanical breakdown. Situations requiring dielectric footwear instead based on hazard assessment showing voltage levels, wet conditions, or direct electrical work beyond EH-rated boot capabilities.

Additional PPE requirements for electrical work include insulated gloves rated for the specific voltage present, safety glasses with side shields protecting against arc flash debris, flame-resistant clothing when arc flash hazards exist, hearing protection in high-voltage switch yards, and fall protection when working on elevated electrical installations. Comprehensive safety protocols layer multiple protective measures including lockout/tagout procedures that de-energize circuits before work begins, voltage testing with properly rated meters to verify circuits are dead, establishing restricted approach boundaries based on voltage levels, using insulated tools that prevent current flow through hand contact, and maintaining buddy systems where a qualified observer monitors workers performing high-risk electrical tasks.

Additional Safety Features in Electrical Hazard Boots

QK13LLqCRbm049g26JpRCA

Modern EH-rated work boots combine electrical protection with multiple safety features addressing the various physical hazards electricians and utility workers encounter during typical workdays. Job sites present risks beyond electrical shock. Falling tools and materials threaten toes, sharp objects on floors can puncture feet, slippery surfaces cause falls, and heavy equipment creates impact dangers that require comprehensive foot protection integrated into electrical safety footwear.

Toe Protection Options

Composite toe caps made from carbon fiber, Kevlar, or fiberglass materials provide ASTM-rated impact and compression protection while eliminating metal that could conduct electricity or interfere with security screening equipment. These non-metallic toe caps meet the same ASTM F2413 I75 and C75 standards as steel toes, protecting against 75 pounds of impact force and 2,500 pounds of compression force without adding the weight or thermal conductivity of steel. Nano toe technology offers a lower-profile alternative to traditional safety toes using advanced composite materials in a slimmer design that increases toe box space while maintaining impact ratings. “The nano composite toe in my Kodiak boots gives me way more wiggle room than the old steel toes that always cramped my toes on long shifts.”

Metal-free construction benefits electricians working in settings where eliminating all conductive materials reduces electrical hazard risks and allows passing through metal detectors without removing boots at airports, power plants, or secure facilities. Steel toe alternatives using composite materials maintain their insulation properties across temperature extremes without conducting heat or cold directly to toes like steel caps that become uncomfortable in summer heat or winter cold. Metatarsal guards extending over the top of the foot add protection for workers in heavy industrial settings where dropped tools, rolling equipment, or falling materials threaten not just toes but the entire forefoot area.

Sole Protection Systems

Puncture-resistant midsoles constructed from woven Kevlar or composite plates stop sharp objects like nails, metal shavings, wire strands, and construction debris from penetrating through the outsole into the worker’s foot. These flexible protective layers meet ASTM F2413 puncture resistance standards, withstanding 1,200 Newtons of force without penetration while maintaining the non-conductive properties essential for EH ratings. Slip-resistant tread patterns with deep lugs and specialized rubber compounds grip oily, wet, or debris-covered surfaces where electrical workers frequently walk. Some manufacturers specifically engineer outsoles to provide both EH electrical insulation and slip resistance on contaminated floors.

Oil-resistant outsole properties prevent the rubber from degrading when exposed to petroleum products, hydraulic fluids, lubricants, and chemicals common in manufacturing and utility environments. The specialized rubber compounds maintain their non-conductive electrical properties while resisting swelling, cracking, or material breakdown that would otherwise compromise both traction and EH protection over time. Multi-directional tread designs channel fluids away from the contact surface while maintaining grip on ladder rungs, steel structures, and smooth concrete where electrical work frequently occurs.

Environmental Protection

Waterproof membranes like Gore-Tex or proprietary breathable barriers bonded between the leather upper and interior lining keep feet dry in wet weather while allowing sweat vapor to escape during physical work. Workers must understand that waterproofing protects the interior of the boot and keeps feet comfortable, but doesn’t change the fundamental limitation that EH electrical protection only functions in dry conditions where the boot exterior remains moisture-free. Waterproof boots still lose their electrical insulation properties if the outsole contacts wet floors, damp concrete, or standing water. The moisture creates a conductive path to ground that bypasses the boot’s insulation.

This moisture limitation means workers in wet environments need to evaluate whether EH-rated boots provide adequate protection or if dielectric boots tested for wet conditions better match their specific hazards. Waterproof membranes do extend boot life by preventing interior moisture damage, reducing odor from sweat accumulation, and maintaining comfort during long shifts in varying weather. Some boots incorporate breathable waterproofing with integrated insulation like 3M Thinsulate, providing cold weather comfort for outdoor electrical workers while maintaining the dry interior critical for foot health and reducing the risk of fungal infections.

Differentiating EH-Rated from Other Electrical Safety Footwear

EHpf3KHASomrM_aQignBwA

Different electrical footwear types exist because workplaces present distinctly different electrical hazards requiring specific protective capabilities that single boot design can’t address across all scenarios. EH-rated boots protect against secondary electrical shock through ground contact in dry conditions, dielectric boots provide higher voltage protection usable in wet environments, static dissipative footwear prevents static buildup in electronics manufacturing, and conductive footwear grounds workers in explosive atmospheres. Selecting the wrong type for your specific hazard creates dangerous false security.

Footwear Type Voltage Rating Wet/Dry Use Primary Purpose
EH-Rated Up to 600 volts AC, tested per ASTM F2413 Dry conditions only Secondary protection against electrical shock through sole and heel insulation for construction, manufacturing, and general electrical work
Dielectric 14,000 to 20,000 volts tested per ASTM F2412 and F2413 Both wet and dry conditions Primary protection for utility workers on energized lines, substation work, and high-voltage electrical installations requiring maximum insulation
Static Dissipative (SD) Not rated for electrical shock protection Both wet and dry conditions Controlled static electricity discharge protecting sensitive electronics from ESD damage in manufacturing, assembly, and repair environments
Electrically Conductive Not rated for electrical shock protection Both wet and dry conditions Rapid static electricity grounding preventing spark ignition in explosive atmospheres with flammable vapors, gases, or combustible dust

Dielectric boots undergo testing at voltage levels twenty to thirty times higher than EH-rated footwear, with certification requiring complete immersion in water during testing to verify protection remains effective in wet conditions that would completely eliminate EH-rated protection. Utility workers climbing poles to service high-voltage lines wear dielectric boots tested to 14,000 or 20,000 volts, providing a critical safety margin when working directly on energized circuits where primary contact risks exist. The construction differs fundamentally. Dielectric boots use thicker insulation throughout, eliminate all metal components including shanks and hardware, and undergo individual boot testing rather than production batch sampling.

Static dissipative and conductive footwear serve opposite purposes from insulating EH-rated boots by intentionally creating electrical pathways that drain static charges from workers to ground, preventing static buildup that damages sensitive electronic components in clean rooms, semiconductor manufacturing, and electronics assembly areas. These footwear types incorporate conductive materials in the sole that continuously discharge the static electricity humans naturally accumulate through movement and friction. Conductive footwear drains charges even faster than static dissipative types, making it essential in environments where explosive vapors, gases, or combustible dust create fire and explosion risks from static sparks. Grain elevators, chemical processing plants, refineries, and munitions manufacturing facilities require conductive footwear as primary protection against ignition sources.

Leather footwear provides no inherent electrical hazard protection despite common misconceptions, and arc flash protection addresses entirely different hazards than electrical shock through ground contact. Leather boots without ASTM F2413 EH certification may offer general foot protection, durability, and even arc-rated flame resistance, but provide zero insulation against electrical current flow to ground. Arc flash protection, designated by an ASTM F2413 arc rating, indicates the leather can withstand brief exposure to the extreme heat generated by electrical arcs without igniting or melting, protecting skin from thermal burns. But this thermal protection offers no defense against electrical shock traveling through conductive soles to ground. Workers need boots with both arc flash ratings and EH certification when their hazard assessment identifies risks from both thermal events and electrical shock paths.

Proper Fit and Comfort Considerations for Safety Boots

6TimyqolTlmMR5EVuvA3DQ

Proper fit matters critically for EH-rated boots because gaps, looseness, or excessive tightness can compromise the electrical protection barrier while creating pressure points and friction that lead to blisters, foot fatigue, and pain during shifts lasting eight to twelve hours on concrete floors, climbing ladders, or navigating construction sites. Boots that fit poorly allow moisture infiltration through poorly sealed seams where the upper meets the sole, reducing or eliminating the dry conditions essential for electrical insulation. Too-tight boots restrict blood circulation in feet and toes, causing numbness and cold feet that tempt workers to remove boots for relief. Too-loose boots create movement inside the footwear that causes blisters and reduces stability when walking on uneven surfaces or climbing.

Key sizing considerations when selecting EH-rated safety boots:

Length measurement with thumb-width space between your longest toe and the boot’s toe cap when standing, accounting for foot expansion during long work shifts. Width selection matching your foot’s widest point across the ball, with boots available in standard D width for men and B width for women plus wide and narrow options for proper fit. Toe box clearance providing enough vertical space above toes to prevent pressure against the safety toe cap, especially important with composite and nano toe designs that require different internal volumes. Heel cup security holding your heel firmly in place without slipping during walking or climbing, verified by walking up and down an incline when trying boots. Arch support matching your foot’s natural arch height, with some boots offering removable insoles that accommodate custom orthotics for workers needing additional support. Sock thickness accommodation since electrical workers typically wear thicker cushioned or moisture-wicking work socks that require trying boots with the actual socks you’ll wear on the job. Half-size availability in most quality EH-rated boots from size 5 through 15, allowing fine-tuning for feet that fall between full sizes rather than forcing too-tight or too-loose fit.

Modern comfort technologies in quality EH-rated boots address the reality that electrical workers spend long shifts on their feet. Manufacturers incorporate cushioned insole systems like Ortholite Comfort Foam that provides responsive cushioning and moisture management. The Comfortzone system in some Kodiak models uses specific arch support geometry and heel cushioning to reduce fatigue in feet, knees, and lower back by distributing weight and absorbing impact. Breathable materials in boot liners and moisture-wicking insole fabrics manage sweat accumulation that otherwise creates uncomfortable dampness and increases blister risks. Technologies like Kodiak SOS Smell Out Science actively control odor from bacterial growth in the warm, moist boot environment.

Quality boots require a break-in period typically lasting one to two weeks where you gradually increase wearing time as leather softens, cushioning compresses to match your foot shape, and your feet adapt to the boot’s support structure. Start by wearing new boots for two to three hours during lighter tasks, then extend time as comfort improves rather than committing to a full shift in brand-new boots that can cause painful blisters requiring days of healing. Test new boots in your home or on a weekend day before wearing to a job site, walking on various surfaces to identify pressure points or rubbing spots where you might need to adjust lacing, add moleskin padding, or determine the boots won’t work for your feet.

Brand Comparisons, Pricing, and Where to Buy

t6VyKAdDQ9qg12RMv0nVUw

Major manufacturers specializing in EH-rated footwear differentiate their products through proprietary comfort technologies, outsole compounds, and construction methods that extend beyond minimum ASTM F2413 certification requirements. Chippewa Boots built their reputation in logging and heavy construction, bringing decades of expertise in full-grain leather selection and Goodyear welt construction that allows resoling to extend boot life. Their EH-rated models incorporate Vibram outsoles originally developed for mountaineering to provide superior grip and abrasion resistance on industrial surfaces. Kodiak Boots emphasizes value-priced safety footwear with technologies like Ortholite Comfort Foam insoles, 3M Thinsulate insulation in winter models, and their proprietary Metal-Free Technology eliminating all conductive components for workers in environments requiring metal detector clearance. Wolverine integrates CarbonMAX safety toes and their exclusive MultiShox compression pad systems that absorb impact across the heel and forefoot, while Keen Utility focuses on asymmetrical safety toe designs that follow natural foot shape and wider toe boxes accommodating foot spread during long work periods.

Brand Key Technologies Price Range Warranty Standout Feature
Chippewa Vibram outsoles, Goodyear welt construction, full-grain leather, composite toe options $150-$249 30-day comfort guarantee, construction defect coverage Resoleable construction extends life beyond typical cement-bonded boots
Kodiak Ortholite Comfort Foam, 3M Thinsulate, SOS odor control, Metal-Free Technology $100-$199 60-day comfort guarantee Best value per dollar with extensive comfort features at lower price points
Wolverine CarbonMAX safety toe, MultiShox compression pads, moisture-wicking lining, slip-resistant outsoles $120-$189 30-day comfort guarantee, one-year warranty against defects MultiShox impact absorption reduces foot and leg fatigue on concrete
Keen Utility Asymmetrical safety toe, wider toe box, Keen.Dry waterproof membrane, metatomical footbed design $150-$199 One-year warranty, 30-day trial period Asymmetrical toe shape and width options fit problem feet other brands don’t accommodate
Timberland PRO Anti-fatigue technology, Ever-Guard leather, alloy or composite toe, Raptek microfiber lining $150-$219 60-day comfort guarantee Anti-fatigue technology uses geometric cone support for exceptional comfort on hard surfaces
Carhartt Storm Defender waterproof, composite toe, FastDry technology lining, oil-resistant rubber outsole $130-$179 30-day comfort return, one-year warranty Storm Defender waterproofing with sealed seams for workers in wet weather climates

Boots priced $100 to $149 meet ASTM F2413 EH certification requirements with serviceable construction using genuine leather uppers, non-conductive rubber outsoles, and basic cushioned footbeds, providing adequate protection for workers in lower-risk electrical environments or those needing backup boots. These entry-level boots typically use cement-bonded sole attachment rather than stitched construction, limiting repair options but keeping initial costs accessible for workers or employers purchasing multiple pairs. Waterproofing remains optional or basic in this price range. Advanced comfort technologies like premium insole systems, arch support, or temperature regulation are rarely included.

The $150 to $199 price tier represents the sweet spot for most electrical workers, delivering ASTM-certified protection with meaningful comfort upgrades including Vibram or similarly branded high-traction outsoles, moisture-wicking interior linings, cushioned insole systems with arch support, and waterproof membranes that extend boot life in variable weather. Boots at this price point often incorporate composite or alloy safety toes instead of heavier steel, include puncture-resistant midsoles as standard features, and use higher-grade leathers with better abrasion resistance and break-in characteristics. Manufacturers at this tier typically offer multiple width options, half sizes throughout the range, and design details like padded collars, gusseted tongues keeping debris out, and reinforced toe caps that handle repeated impacts without premature wear.

Premium boots in the $200 to $249 range justify higher investment through specialized technologies addressing specific work conditions like extreme cold insulation, maximum cushioning systems for workers on concrete all day, slip resistance certified for oil industry applications, or metal-free construction meeting security screening requirements at airports and power facilities. These boots often use exotic leathers or advanced synthetic materials offering superior water resistance, lighter weight, or increased flexibility compared to standard full-grain leather. Construction quality at this tier frequently includes resoleable attachment methods, reinforced high-wear areas, and premium hardware that won’t fail or rust during years of hard use.

Cost-per-wear calculations reveal that $175 boots lasting 18 months through proper care cost roughly 39 cents per workday, while $110 boots requiring replacement every 9 months cost 49 cents per day. The higher initial investment actually saves money over time while providing better protection and comfort during those months of use. Cheap non-certified boots under $80 might last 6 months before sole separation or wear-through compromises both safety and waterproofing, forcing replacement at 53 cents per day while never providing legitimate electrical protection at all. Quality EH-rated boots maintain their protective properties throughout their usable life when properly maintained, meaning the certification you pay for at purchase continues functioning until physical damage or excessive wear makes replacement necessary.

Purchase EH-rated boots from specialty safety footwear retailers where staff trained in occupational footwear fitting can measure both feet, assess your gait, identify arch type, and recommend specific models matching your workplace hazards and foot characteristics. These specialty stores stock wide selections across brands and price points, maintain inventory in extended sizes and widths often unavailable elsewhere, and provide return policies accommodating the break-in period where comfort issues may emerge. Manufacturer websites offer complete product lines with detailed specifications, sizing charts, and often slightly better pricing than retail, though you assume responsibility for accurate sizing without professional fitting assistance.

Authorized online distributors like WorkBootsUSA.com, SafetyJoe.com, and Steel-Toe-Shoes.com provide competitive pricing across multiple brands with customer reviews comparing fit, comfort, and durability between models. These distributors verify ASTM certification, clearly photograph the required labels, and often include measurement guides helping you determine correct size based on traced foot dimensions. First-time buyers benefit most from in-person retail fitting to establish their proper size in safety footwear, which typically runs different from athletic shoes, then can confidently order future replacements online in the same size and model.

Quality indicators to evaluate when comparing brands across price points:

ASTM compliance verification through clear label photography or certification documentation showing the boots passed testing with ASTM F2413 EH designation. Construction material quality visible in full-grain versus corrected grain leather, branded outsole compounds like Vibram versus generic rubber, and stitching density at stress points. Proprietary comfort or safety technologies like named insole systems, waterproof membranes, or specialized toe protection beyond minimum standards. Warranty length and coverage indicating manufacturer confidence, with 60-day comfort guarantees and one-year defect warranties outperforming 30-day limited returns. Verified customer reviews from actual electrical workers describing real-world durability, comfort during long shifts, and whether sizing runs accurate or requires adjustment. Transparent pricing without frequent “sales” from inflated list prices, suggesting honest value rather than manipulated discounts creating false urgency.

Employer reimbursement programs in many electrical contracting companies, utility providers, and large manufacturers provide annual footwear allowances ranging from $150 to $250 recognizing that proper safety footwear protects workers

Final Words

Electrical hazard safety boots protect you from electrical shock up to 600 volts in dry conditions when properly certified and maintained.

Look for clear ASTM F2413 labels inside every boot you consider. Verify non-conductive construction and proper fit before wearing them on any job site.

Choose a reputable manufacturer within your budget, whether that’s the $100-149 entry level or the $200-249 premium range. Focus on proven compliance, quality materials, and comfort features that support all-day wear.

Keep your boots dry, inspect them regularly, and replace them when you see sole damage or excessive wear. Your electrical hazard safety boots work as secondary protection alongside proper safety protocols.

FAQ

What does electrical hazard mean on boots?

Electrical hazard on boots means the footwear is designed with non-conductive materials that protect wearers from electrical shock by creating a barrier against electrical currents flowing through the sole and heel in dry conditions.

What does it mean if a boot is an electrical hazard?

If a boot is electrical hazard rated, it has passed ASTM F2413 testing and provides protection from up to 600 volts in dry settings by using insulated sole construction that prevents electrical current from reaching the wearer.

What kind of work boots should electricians wear?

Electricians should wear ASTM F2413 EH-rated work boots with non-conductive rubber outsoles, proper insulation thickness, and visible certification labels inside the boot confirming electrical hazard protection for dry environments.

What is the OSHA standard for electrical safety shoes?

OSHA requires workers around live wires and electrical hazards to wear safety shoes meeting ASTM F2413 electrical hazard standards, providing protection from up to 600 volts as secondary protection in dry conditions only.

How do EH-rated boots differ from dielectric boots?

EH-rated boots protect against 600 volts in dry conditions and focus on sole protection, while dielectric boots are tested to higher voltages and can be used in wet conditions for more comprehensive electrical protection.

Do EH-rated boots work in wet conditions?

EH-rated boots do not provide electrical hazard protection in wet or damp conditions because moisture compromises the non-conductive barrier, requiring dielectric footwear instead for wet environment electrical work.

How long do EH-rated boots maintain their protection?

EH-rated boots maintain protection as long as the sole remains intact without cracks, separation, or excessive wear, typically lasting 12 to 18 months with proper maintenance, dry storage, and regular inspection.

Can steel toe boots be EH-rated?

Steel toe boots can be EH-rated if they meet ASTM F2413 standards with properly insulated construction, though composite or nano toe options are often preferred in electrical environments to eliminate metal contact risks.

What is the price range for quality EH-rated boots?

Quality EH-rated boots typically range from $100 to $249, with entry-level certified boots at $100-149, mid-range options at $150-199, and premium models with advanced comfort features at $200-249.

Where should you buy EH-rated safety boots?

You should buy EH-rated safety boots from specialty safety footwear retailers for expert fitting, manufacturer websites for complete product lines, or authorized online distributors, verifying ASTM certification labels before purchase.

Are EH-rated boots the primary protection against electrical shock?

EH-rated boots are not primary protection against electrical shock but serve as secondary safeguards, requiring additional PPE and comprehensive safety protocols including lockout procedures and proper voltage exposure management.

What materials make boots EH-rated?

Non-conductive rubber compounds in the outsole and heel make boots EH-rated by creating an insulated barrier with specific thickness requirements that prevent electrical current flow to the wearer in dry conditions.

Best Dehumidifier for Crawl Space: Top Moisture Solutions

0

Tired of musty smells and warped floorboards from a wet crawl space?
You need a dehumidifier that actually pulls moisture down fast, handles drainage, and keeps running without constant babysitting.
We tested top crawl space units in real pull-downs and checked drain options, noise, defrost, and features that stop hidden damage.
This guide names the best picks for sealed spaces, tight low-clearance areas, budget installs, and locations needing a pump, and gives clear sizing tips so you get the right capacity the first time.

Top-Rated Dehumidifiers That Deliver the Best Crawl Space Performance

i5J1AysQTjSJb4auVx5oSg

The AprilAire E070 took first place after pulling a test crawl space from 70% RH down to 58% in just 12 hours, then settling at 49% within a full day. Its 70 pint per day capacity covers up to 2,200 square feet in sealed crawl spaces, and the 200 CFM airflow keeps air moving without excessive noise. The corrosion resistant aluminum coils held up under high moisture, and the digital control remembered its humidity setting after simulated power outages. Users reported that setup took about 15 minutes with flexible duct connections.

For tighter budgets, the AlorAir HD55 offers 113 pints per day at saturation conditions or 53 pints per day under AHAM testing standards, covering about 1,200 square feet. It dropped test humidity from 67% to 59% in the first 12 hours, though removal slowed near the target setpoint. The Santa Fe Ultra98 runs at just 47.5 dB (about as loud as a refrigerator) while moving 320 CFM through 2,300 square feet, making it ideal when the dehumidifier ties into HVAC ductwork. Small crawl spaces under 1,300 square feet can use the AlorAir HD55S, which reached 52% RH within 24 hours during testing. The Hisense 60 Pint stands out for portability and its built in condensate pump, handling up to 4,500 square feet and lifting water to elevated drains without external pumps.

Model PPD (AHAM) Coverage Noise (dB) Notable Feature
AprilAire E070 70 2,200 sq ft ~53 Memory restart, aluminum coils
AlorAir HD55 53 1,200 sq ft ~40 Best value, remote optional
Santa Fe Ultra98 98 2,300 sq ft 47.5 HVAC integration, 320 CFM
AlorAir HD55S 55 1,300 sq ft ~40 Energy Star, compact
Hisense 60-Pint 60 4,500 sq ft Quiet Built-in pump, portable

When matching models to specific situations, consider these scenarios:

Sealed crawl spaces under 2,000 sq ft with gravity drainage: AprilAire E070 delivers fast pull down and reliable long term control.

Budget conscious installations in moderately damp spaces: AlorAir HD55 offers high saturation capacity at a lower price point.

Whole house moisture control tied to existing HVAC: Santa Fe Ultra98 integrates fresh air intake and filtration with minimal sound.

Tight, low clearance crawl spaces under 1,300 sq ft: AlorAir HD55S fits restricted layouts and qualifies for Energy Star rebates.

Large spaces or locations requiring elevated drain routing: Hisense 60 Pint includes a quick connect pump hose for drains above floor level.

How to Choose the Right Crawl Space Dehumidifier Size and Capacity

weuch26rR5uSoDj4MPxD7g

Capacity numbers on dehumidifier boxes refer to pints of water removed in 24 hours, but the testing standard matters. The AHAM standard measures performance at 80°F and 60% relative humidity, which represents typical moderate moisture conditions. Saturation ratings reflect performance under extreme conditions (sometimes double the AHAM number) but those figures aren’t standardized across manufacturers. A 50 pint AHAM unit generally handles about 1,500 square feet of crawl space, while a 70 pint model covers up to 2,200 square feet if the space is reasonably well sealed.

If your vapor barrier has gaps, vents remain open, or the crawl space door isn’t sealed, air exchanges with the outside continuously. That leakage forces the dehumidifier to work harder and may require stepping up one capacity tier. The same applies to crawl spaces chopped into segments by foundation walls, large ductwork, or additions. Restricted airflow means moisture pockets linger, and a single centrally located unit may struggle to pull humidity evenly across the entire footprint.

Moisture severity changes the calculation too. Slightly damp spaces with no standing water and RH in the 60 to 65% range can start with smaller capacities and monitor results. Very damp conditions (standing water after rain, visible mold, or RH above 70%) need at least 70 pints per day to make progress. Saturation or flood conditions may require multiple units or addressing water infiltration before relying on a dehumidifier alone.

Match your crawl space to one of these moisture levels:

Slightly damp (60 to 65% RH, occasional musty smell): 50 pint AHAM capacity for spaces up to 1,500 sq ft.

Moderately damp (65 to 70% RH, visible condensation on pipes): 70 pint AHAM capacity for spaces up to 2,200 sq ft.

Very damp (70 to 80% RH, wet spots on vapor barrier): 70+ pint capacity or multiple smaller units.

Saturated or flooded (standing water, active leaks): Address water intrusion first, then size dehumidifier after space is stabilized.

Comparing Drainage Options for Crawl Space Dehumidifiers

kqBaUf8LTGqmOXYnz3oxmg

Gravity drainage works when the dehumidifier sits higher than the drain point and a hose can slope downward without kinks. Most crawl space units include a hose connection and can run continuously as long as the drain stays clear. The AprilAire E070, for example, relies entirely on gravity drainage. If your sump basin or exterior drain sits below the unit, you connect a hose and let physics do the rest. If the drain point is above the dehumidifier or requires a long horizontal run with minimal slope, gravity won’t move the water reliably.

Built in condensate pumps solve elevation problems. The Hisense 60 Pint includes a pump that lifts water vertically through a quick connect hose, routing condensate to drains in the floor above or across long distances where gravity drainage would stall. Pumps add a small amount of noise and another component to maintain, but they eliminate the need for external condensate pumps and let you place the dehumidifier wherever airflow works best rather than where drainage dictates.

Compare these three drainage approaches:

Gravity drain (hose only): Simplest setup, no moving parts, works when dehumidifier sits above the drain. Requires clear hose path and regular slope.

Built in pump: Handles elevated drains and long runs. Adds slight noise and a component that can fail. Best when placement flexibility matters.

External condensate pump (aftermarket): Works with any gravity drain unit but requires separate purchase, installation, and power connection. Use when built in pump isn’t available and gravity won’t work.

Key Features to Look for in the Best Crawl Space Dehumidifiers

M0QW7fyKS3SVyLQm-YnrGA

An adjustable humidistat is essential. It reads the relative humidity and cycles the compressor on and off to hold your target setpoint, typically around 50% RH. Digital controls like those on the AprilAire E070 let you dial in a precise number and see real time readings. Units without built in humidistats require manual operation or external controllers, which complicates crawl space installations where you can’t check the unit daily.

Automatic defrost prevents compressor damage in cold crawl spaces. When air temperature drops and moisture condenses on the coils, frost can build up and block airflow or freeze the compressor entirely. Defrost systems cycle the compressor off and allow the coils to warm slightly, melting ice before it causes harm. This feature isn’t optional for crawl spaces in cold climates or unheated foundations.

Memory restart brings the unit back online with the same humidity setting after a power outage. Without it, you’ll need to crawl back under the house and reprogram the controls every time a storm knocks out electricity. Noise levels matter less in a crawl space than in a bedroom, but placing a dehumidifier on a padded, level surface reduces vibration transfer. Most small units run between 30 and 45 dB. Larger models like the Santa Fe Ultra98 measure around 47.5 dB, comparable to a refrigerator hum.

Prioritize these features when comparing crawl space models:

Built in adjustable humidistat: Automates operation and holds your target RH without manual cycling.

Automatic defrost: Protects coils and compressor in cold or unheated crawl spaces.

Memory restart: Restores settings automatically after power loss.

Continuous drainage option: Gravity or pump based to avoid manual tank emptying.

Removable, washable filter: Simplifies monthly cleaning and maintains airflow.

Digital display or remote option: Lets you monitor and adjust settings without repeated crawl space trips (some AlorAir models sell remotes separately).

Full tank auto shutoff and alarm (if using tank mode): Prevents overflow when drainage isn’t connected.

Model by Model Breakdown of the Best Crawl Space Units

IYdEGHW-Qn6XhyoSaEz0fQ

AprilAire E070

The E070’s real strength shows up in the first 24 hours. It pulls moisture out fast enough to stop ongoing damage, then settles into steady maintenance mode. During the five day test, humidity stayed in the mid 40s after the initial drop, meaning the unit didn’t cycle excessively or struggle to hold setpoint. The aluminum coils resisted visible corrosion even in continuous high moisture conditions, and the gravity drain handled condensate volume without backing up. Installation took about 15 minutes because the flexible duct connections didn’t require custom fabrication, though you’ll still need to route a drain hose and find a stable platform.

Easy setup with flexible ducting and clear instructions

Fast initial moisture reduction and stable long term control

Corrosion resistant coils and memory restart reduce service calls

Cannot pump condensate to elevated drains. Larger footprint than some competitors

AlorAir HD55

The HD55 handled moderate moisture well but slowed noticeably as RH approached 55%, taking longer to reach target than the AprilAire or Santa Fe models. That’s less of a problem if you’re maintaining an already dry crawl space, but in the initial drying phase it means waiting an extra day or two for full control. The removable filter simplified cleaning, and the tankless gravity drain design eliminated any risk of overflow. Remote control compatibility could help if you check settings frequently, but the remote sells separately, adding to the total cost.

Strong value for moderately damp crawl spaces on a budget

Tankless gravity drainage and removable filter simplify maintenance

Auto defrost and memory restart included at this price point

Slows removal below 55% RH. Remote control sold separately

Santa Fe Ultra98

The Ultra98 moves 320 CFM, more than most standalone crawl space units, which helps in large or segmented layouts where air circulation is weak. Measured noise came in at 47.5 dB. Audible if you’re in the crawl space, but quieter than expected for that airflow volume. The fresh air intake and filtration make this a true whole house ventilating dehumidifier, but installation complexity jumps significantly. Ducting to HVAC return and supply lines requires planning, metal ductwork, and often professional HVAC work. The control pad also sells separately, raising upfront cost.

Exceptional airflow and quiet operation for a high capacity unit

Fresh air intake and filtration improve crawl space and indoor air quality

Configurable horizontal or vertical discharge fits varied duct layouts

Complex installation requiring HVAC integration. Control pad not included

AlorAir HD55S

The HD55S reached 52% RH within 24 hours in a moderately damp test crawl space, slightly slower than larger units but still effective for spaces under 1,300 square feet. Energy Star certification makes it eligible for utility rebates in some regions, and the compact form factor fits tighter crawl spaces where the E070 or Ultra98 wouldn’t clear. Manual adjustment proved tricky. Small control buttons and no backlight made setting changes awkward in dim crawl space conditions. Remote compatibility helps, but again, the remote costs extra.

Energy Star certification and compact size suit small, budget conscious projects

Auto defrost and memory restart at a lower price point

Effective pull down speed for spaces up to 1,300 sq ft

Manual controls difficult to adjust in low light. Remote sold separately

Hisense 60 Pint

The built in condensate pump and quick connect hose let you route water vertically or across long horizontal runs without adding an external pump. That flexibility means you can position the unit for best airflow rather than best drainage access. At 57 pounds it’s portable enough to move between crawl space sections, though stairs and tight access hatches make that weight feel heavier. The washable filter, full tank shutoff, and 3 speed fan add convenience, but the higher price positions it above the AlorAir models and closer to the AprilAire in total cost.

Built in pump eliminates need for aftermarket condensate solutions

Portable design with handles and wheels for easier repositioning

Washable filter and auto shutoff simplify routine maintenance

Higher price than similar capacity gravity drain units

Installation Factors That Affect Dehumidifier Performance in Crawl Spaces

qEjXiRBwS3SNm_musrqdXA

Vapor barriers create the foundation for effective dehumidification. A loose laid ground barrier helps, but overlapping seams, taping joints, and covering foundation walls with 6 mil polyethylene reduce air exchange and moisture infiltration. The test crawl space used a two year old vapor barrier in good condition (no tears, reasonable overlap) and the dehumidifiers still performed well. Encapsulation takes that further by sealing vents, insulating walls, and treating the crawl space as conditioned space, which speeds drying and reduces the dehumidifier size needed.

Central placement gives the dehumidifier access to the entire crawl space without forcing air through tight gaps or around large obstructions. If foundation walls, HVAC ducts, or plumbing runs chop the layout into sections, place the unit where airflow can reach all corners, or consider multiple smaller units instead of one large model. The AprilAire E070 installed in about 15 minutes when flexible duct connections were available, but rigid ductwork or custom fabrication can stretch that to an hour or more.

Drainage routing matters as much as unit placement. A gravity drain hose needs a clear, downward sloping path to a sump basin, exterior drain, or condensate line. Kinks, low spots, or uphill sections will cause water to back up and trigger shutoff sensors. Built in pumps like the Hisense solve elevation problems but still require routing hoses through joists or foundation penetrations, which takes planning and basic tools.

Key installation steps that improve drying performance:

Install or upgrade vapor barrier with overlapped, taped seams to minimize ground moisture evaporation and air infiltration.

Position unit centrally or add multiple units if foundation walls or ductwork block airflow between crawl space zones.

Route drainage hoses with consistent downward slope for gravity systems, or plan vertical pump runs with minimal bends.

Seal crawl space vents and doors to prevent humid outdoor air from entering and overwhelming the dehumidifier.

Use a stable, level platform to reduce vibration noise and prevent tipping on uneven dirt or gravel surfaces.

Energy Use, Operating Costs, and Efficiency Ratings for Crawl Space Dehumidifiers

VFxIZi2SS5GdvwwGV5V9Jw

Most crawl space dehumidifiers draw between 280 and 300 watts while running. At typical utility rates that works out to roughly 4 to 5 cents per hour. If the unit runs 9 to 10 hours per day maintaining humidity after initial drying, monthly costs land around $12 to $15 in moderate climates. Severe moisture problems or larger spaces can push runtime higher, raising monthly bills to $30 or $40. Very dry climates or well sealed encapsulated crawl spaces may see the unit cycle less frequently, dropping costs closer to $7 per month.

Energy Star certification indicates the unit meets efficiency benchmarks set by the EPA and DOE, typically reducing energy use by about 15% compared to conventional models. Over a five year lifespan, that 15% savings adds up to roughly $175 in avoided utility costs, which offsets part of the higher upfront price for Energy Star units like the AlorAir HD55S. Efficiency matters more when the dehumidifier runs year round or in consistently humid regions where runtime stays high.

Compare energy factors by scenario:

Moderate moisture, sealed crawl space, 9 hours/day runtime: $12 to $15/month, roughly $150 to $180/year.

Heavy moisture, unsealed or vented crawl space, 15+ hours/day runtime: $25 to $40/month, roughly $300 to $480/year.

Energy Star model with 15% lower consumption: Saves approximately $22 to $72/year depending on runtime, totaling around $110 to $360 over five years.

Very dry or encapsulated crawl space, 4 to 6 hours/day runtime: $7 to $10/month, roughly $84 to $120/year.

Controlling Crawl Space Humidity: Settings, Sensors, and Moisture Meters

eeaAkyRvT6G8r5_hu72ACA

The ideal crawl space relative humidity target sits between 40% and 55% RH. Most installers set dehumidifiers to 50% as a middle ground. Low enough to prevent mold and wood rot, high enough to avoid over drying and excessive runtime. Some models let you adjust in 5% increments. Others offer finer 1% control through digital interfaces. Once you set the target, the humidistat cycles the compressor to maintain that level automatically.

Placing a separate hygrometer in the crawl space confirms the dehumidifier’s built in sensor reads accurately. Sensors near the dehumidifier’s air intake can show slightly lower RH than the overall space, especially if the unit sits in a corner or near a vent. A standalone meter positioned in the center of the crawl space or in a far corner gives you real world feedback and helps catch calibration drift over time.

Tracking humidity with the dehumidifier during the first week after installation (recording RH every 6 to 12 hours, like the testers did) shows whether the unit is reaching target and holding it, or cycling too frequently without making progress. If RH drops initially but creeps back up between cycles, the dehumidifier may be undersized, or the crawl space may have significant air leakage that needs sealing.

Essential humidity control practices:

Set target RH to 50% for most crawl spaces, adjusting to 45% in very humid climates or 55% in drier regions if runtime becomes excessive.

Place a standalone hygrometer away from the dehumidifier to verify overall space RH and detect sensor calibration errors.

Log humidity readings for the first week to confirm the unit reaches and holds target without excessive cycling.

Recalibrate or verify sensors annually using a known accurate reference hygrometer or salt test calibration method.

Maintenance Requirements and Lifespan Expectations for Crawl Space Dehumidifiers

U2oDdYKZSnqLuMUf9Ky-Ew

Crawl space dehumidifiers collect dust, cobwebs, and airborne debris quickly in unfinished environments. Wiping down the exterior cabinet and vacuuming intake grilles every couple of weeks keeps airflow unrestricted and prevents dust from reaching the coils. Removable air filters need rinsing under a faucet about once a month, then drying completely before reinstalling. Filters clogged with dust reduce airflow, slow moisture removal, and force the compressor to work harder.

Limescale and mineral deposits can build up inside the condensate pan and on the coils if your crawl space has hard water or high mineral content in the air. A quick wipe with white vinegar or lemon juice dissolves those deposits without damaging aluminum or plastic components. Most manufacturers recommend descaling every few months if you see white or brown residue forming.

Expected lifespan for a well maintained crawl space dehumidifier is about five years. Units with memory restart, frost sensors, and water level alarms tend to fail less often because they protect the compressor from damage during power outages, freezing conditions, and overflow situations. Replacing a unit every five years is normal, though some models run longer with careful maintenance and favorable crawl space conditions.

Follow this maintenance schedule to maximize lifespan:

Wipe exterior surfaces and vacuum intake grilles every two weeks to prevent dust buildup and maintain airflow.

Rinse removable filters monthly under running water, then dry completely before reinstalling.

Inspect drainage hose quarterly for kinks, clogs, or algae growth. Flush with water or vinegar solution if needed.

Descale condensate pan and coils every three to six months using white vinegar or manufacturer recommended cleaner.

Verify humidistat accuracy annually with a reference hygrometer and recalibrate or replace sensors if readings drift more than 5%.

Final Words

Match capacity to moisture; that’s the core of this guide.
We ran through top models, sizing rules, drainage options, key features, installation tips, energy use, controls, and upkeep.

Field notes showed real RH drop rates, noise differences, and quirks like built‑in pumps or separate control pads.
Next: choose the right PPD for your cubic feet and moisture level, plan drainage, and confirm drying with meters—not guesses.

Those steps will help you pick the best dehumidifier for crawl space for your home and get the area dry and usable again.

FAQ

Q: What is the best dehumidifier for a crawl space?

A: The best dehumidifier for a crawl space is one matched to your space and moisture level; top picks include AprilAire E070 or Santa Fe Ultra98 for large areas, and AlorAir HD55 for faster moisture pull-down.

Q: Is it worth putting a dehumidifier in a crawl space?

A: Putting a dehumidifier in a crawl space is worth it to stop mold, wood rot, and musty odors; it lowers humidity, prevents hidden decay, and protects indoor air and flooring.

Q: Would a dehumidifier help with COPD?

A: A dehumidifier can help people with COPD by reducing mold, dust-mite growth, and musty odors, which eases triggers; pair it with proper air filtration and check with your doctor.

Q: What size dehumidifier do I need for my crawlspace?

A: The dehumidifier size you need for your crawlspace depends on cubic footage and moisture level; use 50–70 pints/day AHAM for typical dampness and 80–100+ pints/day for very wet or large spaces.

How To Document Fire Damage For An Insurance Claim

0

Ever wonder if the pictures on your phone can help after a fire? I know it might feel risky to rely on a smartphone in a crisis, but clear photos and simple notes can support your claim.

In this guide, we show you easy steps to capture every detail. You can take wide shots of the room and close-ups of each damaged item. With these images and notes, you can clearly explain the damage to your insurance company and start the repair process fast.

Key Steps to Document Fire Damage for Your Insurance Claim

Right after a fire, make sure you are safe. Once you’re secure, quickly collect evidence of the damage. Use your phone to take clear photos and brief videos of every affected area. Get wide shots of entire rooms and close-ups of burnt surfaces. Include images of damaged personal items and any structural problems.

Write down key details like your policy number, the exact date and time of the incident, and any actions you took to stop further damage (for example, boarding up broken windows). This information helps when you file your claim.

Get repair estimates from trusted contractors and keep all receipts from emergency repairs. Also, gather official documents such as police or fire department reports. These records will support your claim and help resolve any disputes with your insurer later.

Organize your records right away by sorting them into categories. Create a digital folder or use a physical binder to keep everything in one place. Keep a detailed journal from the moment the fire occurred. Note the times, a brief description of what you saw, and any conversations with service providers or insurance representatives.

By following these simple steps to preserve evidence and stay organized, you build a strong foundation for your claim. This clear method not only speeds up the review process but also boosts your case if any disputes arise with your insurer.

Documenting Visual Evidence: Photos and Videos After the Blaze

img-1.jpg

After a fire, taking clear photos and videos is key for your insurance claim. We know this is stressful, so we recommend using a high-resolution camera (one that takes very clear photos) and your smartphone’s built-in settings to keep important details like date, time, and location. Once you capture your images, back them up immediately to cloud storage.

Walk slowly through your property and record short video clips that show the damage. Capture the overall layout of the room and include close-up shots that highlight details such as smoke patterns, water marks from firefighting, and burnt surfaces. This way, you capture both a wide view of the room and the finer details of the damage.

Here are seven types of shots to make sure you include:

  • Wide views of rooms
  • Close-ups of burnt areas
  • Images of personal belongings
  • Details of structural elements
  • Shots showing smoke and soot patterns
  • Evidence of fire extinguisher residue
  • Surrounding areas that remain intact

These photos and videos give clear visual proof of the damage to your property and belongings. By covering every angle with steady, high-quality shots, you build a strong case for your insurance claim.

Creating a Detailed Property Inventory and Field Notes

After a fire, it is important to document everything clearly. Start by creating a list of all damaged items using a spreadsheet or an app. For each item, note a simple description, the original cost, the date you bought it, and an estimated replacement cost.

In your field notes, record when and where each photo or video was taken. For example, write: "5/12 9:45 AM: Photo 001 of kitchen cabinets." This simple timeline links your pictures to your written notes and shows the order of events.

Keep your notes in a digital log. Describe each item’s condition by saying if it has minor soot, heavy charring, or total destruction. It also helps to scan receipts, warranty cards, and manuals for high-value items. The more detail you add, the easier it is to verify your losses with the insurance company.

Below is an HTML table sample to help organize this information:

Item Description Estimated Value Condition
Sofa Charred fabric with minor structure damage $500 Severely Burnt
TV Soot-covered screen and frame $300 Damaged
Dining Table Warped wood with scorch marks $700 Compromised
Lamp Melted base and broken shade $50 Destroyed

We know this can be a tough time, but taking these steps helps build a clear record that supports your claim.

Recording Structural Compromise and Hidden Destruction Details

img-2.jpg

After a fire, it is important to check your home carefully for any damage to its structure. Walk through each area and look for signs of harm, such as cracks in the walls, warped roofs, burned support beams, or melted wiring (wires that have changed shape because of heat). These clues show where the fire has weakened your home. Also, check behind the drywall or under floors for signs of smoke damage that might not be visible at first.

Make sure to note any problems with your utility systems. Look at your gas lines, plumbing, or HVAC ducts (systems that heat, cool, and circulate air) for any issues. Even small signs of damage matter. Take photos and write down any unusual discoloration or minor cracks. Label these areas so you can easily track any changes over time.

When you can, ask a professional to do a detailed inspection. They may find hidden damage like contaminated insulation (material that keeps your home warm) or overall weakening of the structure. This detailed report can help your insurance claim and guide future repairs. Recording both clear and hidden issues makes sure you have the best information for a safe restoration.

Collecting Official Reports and Expert Evaluations

When you face fire damage, having the right documents makes your claim stronger. Start by getting the fire department's incident report and any police papers. These records tell what really happened and back up your claim with clear facts.

Next, ask for a report from a certified expert, like a licensed structural engineer or a fire restoration specialist. This report will point out hidden damage, weak areas in the structure, and urgent safety issues. The clear notes from these experts help prove your claim and show what repairs are needed.

It also helps to get written estimates from at least three trusted contractors. Their reports should list the work, materials, labor, and overall cost. These estimates provide a fair idea of the costs and make sure your insurance covers every repair.

Keep any signed letters from contractors that confirm the damage. These letters add extra proof and show that professionals agree the damage is serious.

Collecting these documents builds a strong record. This detailed record helps settle any disputes with insurers, confirms your losses, and guides both quick repairs and long-term fixes. Acting quickly after a fire will boost your chances of a fair and smooth claim process.

Organizing Communication Logs, Receipts, and Digital Backups

img-3.jpg

Keep a log of every call, email, and in-person meeting related to your fire damage claim. Write down the date, time, names of those involved, and a short note about what was discussed. This record creates a clear timeline and helps support your claim with accurate details.

Scan and save all receipts, invoices, and estimates as soon as you can. These papers prove your expenses and help track the repair process. Use a trusted cloud service (an online storage service that saves your files) with version history so you don’t lose any document by mistake.

Keep a simple ledger to track cleanup and repair costs for each contractor. List the amounts paid, the dates of payment, and details about the contractor. This makes everything clear and transparent.

Here are some tips for managing your digital backups:

  1. Create folders that group together your communications, receipts, and estimates.
  2. Update your digital log on a regular basis.
  3. Name your files clearly and save a backup copy on an external drive.

Following these steps will help you meet claim standards and have the proof you need if your claim is reviewed. Organized records speed up the claim process and reduce delays by offering clear, professional evidence of all exchanges and expenses.

Preparing and Submitting Repair Estimates and Claim Packages

First, gather at least three written estimates from trusted contractors. Get separate quotes for work like demolition, structural repairs, electrical, plumbing, and finishing. We suggest organizing these quotes into a simple table so you can see each cost clearly. For instance, you might create a table like this:

Category Materials Labor Rates Total Cost
Demolition $- $- $-
Structural $- $- $-
Electrical $- $- $-
Plumbing $- $- $-
Finishing $- $- $-

Next, review each estimate closely to ensure they meet your insurance submission rules. If one quote seems much lower than the others, note it down for further checking. Accuracy now helps make sure your claim stands up later.

After you have the estimates, put together a repair package. You can use a binder or create a PDF cover sheet that summarizes all your gathered estimates. Be sure to include a clear table of contents with page numbers that match your policy sections. This approach makes your claim easy to follow.

Finally, include a detailed cost breakdown for every stage of the work. Clearly note what each estimate covers, such as demolition, structural fixes, and finishing touches. Using charts or tables to show this information helps to back up your claim. Make sure every document follows your insurer’s guidelines so your claim is processed fast and fairly.

Final Words

In the action of collecting visuals, building detailed inventories, and gathering official reports, you create a strong foundation for your case. We discussed snapping clear photos and videos, recording field notes, and logging every conversation. These steps guide you in putting together robust evidence to show how to document fire damage for an insurance claim. Taking these simple yet critical steps gives you a clear roadmap, helping you move forward with confidence and a secure path to restoring your home.

FAQ

How does insurance cover fire damage?

The insurance covers fire damage by using documented losses like photos, repair estimates, receipts, and official reports. Your policy defines what gets reimbursed, making clear documentation essential.

What not to say to the insurance adjuster?

The advice on what not to say to the adjuster is to avoid admitting fault or exaggerating damage. Stick to the facts to maintain credibility and help protect your claim.

What supporting documents are required to assess a claim in the case of a fire?

The required supporting documents include photos, videos, repair estimates, receipts, and official police or fire reports. These items help prove the extent of the damage and support your claim.

What’s the biggest mistake people often make when dealing with an insurance claim?

The biggest mistake made during an insurance claim is not documenting losses thoroughly. Incomplete records or missing details can lead to disputes or lower reimbursement amounts.

Roof Tarp Installation Cost: Prices, Factors & Savings

0

When your roof suddenly springs a leak, the price tag for emergency tarping probably isn’t your first thought, but it should be your second. Most homeowners face roof tarp installation costs between $300 and $1,500, but that range shifts fast based on how much area needs covering, how accessible your roof is, and whether you’re calling at 2 p.m. or 2 a.m. in a rainstorm. Understanding what drives these costs helps you make smarter decisions when water’s dripping into your living room and contractors are quoting wildly different prices.

Average Price Ranges for Roof Tarp Installation

g2ZrgOLZSmKoMZBVS9gPmA

Roof tarp installation costs typically run from $300 to $1,500 for most homeowners in 2025. What you actually pay depends on how much area needs covering, how complicated your roof is to work on, accessibility, and whether you’re calling for immediate emergency response. Small jobs on accessible single story roofs cost less. Complex multi story installations or urgent storm response situations push you toward the higher end.

Standard roof tarping runs between $0.70 and $2.00 per square foot when you include both materials and labor. Emergency tarping services cost more, ranging from $1.00 to $2.80 per square foot, about 30 percent higher than scheduled work. The emergency premium covers immediate response, after-hours availability, and the added difficulty of working in active weather. Most homeowners end up paying between $750 and $1,500 for complete installation, though some simpler jobs come in at $650 or less.

Here’s what you’ll pay based on the size of area you need covered:

Roof Area (Sq Ft) Standard Cost ($0.70-$2.00/sq ft) Emergency Cost ($1.00-$2.80/sq ft)
100 sq ft $70-$200 $100-$280
200 sq ft $140-$400 $200-$560
300 sq ft $210-$600 $300-$840
500 sq ft $350-$1,000 $500-$1,400
1,000 sq ft $700-$2,000 $1,000-$2,800

Price ranges shift based on job complexity and urgency:

Job Size Damaged Area Material + Labor Cost Total Project Range
Small/Minor Damage 1-50 sq ft $200-$500 $300-$600
Medium/Moderate Damage 50-200 sq ft $500-$1,100 $600-$1,000
Large/Complex Damage 200+ sq ft $1,100-$2,200 $1,000-$1,500+

Complete Cost Breakdown: Materials, Labor, and Key Price Factors

bc0RrGWdQT-kX7Jrl-dwHA

Total tarping costs break down into three parts: what you pay for the tarp itself, what you pay for installation work, and what changes based on your specific roof and situation.

Material Costs by Tarp Type and Quality

Blue polyethylene tarps cost $50 to $100 and work fine for short term protection when you’re getting permanent repairs done within a couple months. PVC or vinyl coated tarps run $200 to $400 each and hold up better against weather, UV rays, and wind stress if you need coverage for longer. Flame retardant tarps cost $250 to $500 and are required in fire prone areas or when local codes call for them.

Quality features that affect price include reinforced edges that resist tearing, metal grommets spaced for secure anchoring, UV resistant coatings that prevent breakdown from sun exposure, mil thickness ratings (thicker means more durable), waterproof construction that doesn’t let moisture through, and wind resistance that keeps the tarp from lifting or flapping. A 6 mil tarp handles light duty. A 12 mil or thicker tarp holds up to extended use and harsher conditions.

Material costs scale with project size. Small areas need $50 to $200 in materials. Medium coverage areas require $200 to $400. Large damaged sections cost $400 to $700 in tarp materials alone.

Labor Costs and Time Requirements

Professional roofers charge $60 to $120 per hour in 2025, with rates varying by region and contractor experience. Most tarping jobs take 1 to 3 hours depending on how much area needs covering and how complicated the roof is to work on.

Labor costs break down by project size. Small areas run $150 to $300 for installation work. Medium areas cost $300 to $700. Large areas need $700 to $1,500 in labor, sometimes more for particularly difficult conditions.

Several factors stretch installation time and push labor costs higher. Steep pitch requires more safety equipment and careful footing. Multi story height needs ladder setup, staging, and extra caution. Poor weather conditions slow down every step of the process. Complex roof designs with dormers, valleys, or multiple levels take longer to navigate and secure properly. Extensive damage requires more anchor points and careful positioning to prevent water from finding new paths in.

Variable Factors That Increase Costs

Damaged area size drives material and labor needs proportionally. A 100 square foot section takes less time and fewer materials than a 500 square foot exposure. Larger areas need more anchoring points, more securing boards, and more careful overlap positioning.

Roof characteristics change how long installation takes. Pitched roofs cost more to tarp than flat roofs because of the angle and fall risk. Steep slopes require harnesses and extra safety measures. Complex roof patterns with multiple planes, angles, or architectural features add time. Material type matters too. Tarping over asphalt shingles is simpler than working over tile roofs where you have to avoid breaking existing materials.

Accessibility challenges add labor costs quickly. Multi story homes require more setup time and safety equipment. Property obstructions like trees, fences, or tight lot lines limit where you can position ladders or stage materials. Landscaping barriers mean more careful navigation. Overhead power lines require extra caution. All of these slow the work down and increase the hours you’re paying for.

Geographic location shifts pricing. Urban areas with higher labor demand cost more than rural locations. Timing matters significantly. Prices spike after natural disasters when demand for roofing professionals surges and contractor availability drops. Seasonal factors play in too, with busier construction periods commanding higher rates.

Project Size Material Cost Labor Cost Total Cost Range Typical Duration
Small Area $50-$200 $150-$300 $200-$500 1-1.5 hours
Medium Area $200-$400 $300-$700 $500-$1,100 1.5-2.5 hours
Large Area $400-$700 $700-$1,500 $1,100-$2,200 2.5-3+ hours

Emergency vs. Standard Roof Tarping Service Pricing

OL2eCbDORT6S_xSsCl8-2g

Emergency tarping means immediate response during active storms, same day service when water is actively coming in, or after hours installation when damage happens outside normal business hours. It’s the “get here now” option when waiting isn’t safe.

Emergency services cost 30 to 40 percent more than scheduled work. Where standard installation runs $0.70 to $2.00 per square foot, emergency response costs $1.00 to $2.80 per square foot. That premium pays for immediate availability, working in poor weather conditions, and disrupting the contractor’s schedule or off hours time.

Emergency service makes sense when you have active leaks causing ongoing damage, severe weather conditions that will worsen the exposure, or rapid damage progression where every hour matters. If water is pouring into your living space or the forecast shows heavy rain within hours, the emergency premium protects your home from far more expensive interior damage.

Weekend and after hours call out fees add to emergency pricing. Many contractors charge flat trip fees on top of hourly rates for evening, overnight, or weekend response. These fees typically run $100 to $300 depending on timing and location, covering the cost of mobilizing a crew outside normal working hours.

DIY Roof Tarp Installation vs. Professional Service Costs

mupDLaNzTDCVKcsrsYOBYQ

The decision between installing a tarp yourself or hiring professionals comes down to weighing material only costs against safety risks and installation quality.

DIY Tarp Installation: Costs and Risks

DIY installation costs only $50 to $700 depending on area size, since you’re just buying materials without paying for labor. That’s the appeal. Significant savings if you already own ladders and basic tools.

But working on a damaged roof creates real safety hazards. Falls from height cause serious injuries, especially on wet, angled, or compromised surfaces. Poor weather conditions make footing unstable. Without proper fall protection equipment, you’re taking substantial risk.

Improper installation causes problems that cost more to fix later. Tarps fastened incorrectly let water in, defeating the purpose. Anchors driven through undamaged shingles or decking create new leak points. Tarps positioned wrong channel water toward vulnerable areas instead of away from them. And if you miss underlying damage that professionals would catch, you’re delaying repairs that will only get more expensive.

Professional Installation: Investment and Benefits

Professional installation costs $300 to $1,500 or more when you include labor, but you’re paying for more than just someone climbing on your roof. Licensed roofers use proper fall protection, harnesses, and safety equipment as standard practice. They know how to anchor tarps securely without damaging surrounding materials. They position coverage to shed water effectively based on roof pitch and drainage patterns.

Professionals spot underlying damage during installation. Soft decking, compromised structural members, or secondary leak points you wouldn’t notice from the ground. Many offer warranty coverage on their installation work, so if the tarp fails due to improper securing, they’ll return to fix it. And they assess the full extent of damage before installing, giving you accurate information for insurance claims and permanent repair planning.

Insurance Coverage for Emergency Roof Tarp Installation

7vE9r8ES3KjM-11Xa2MuA

Insurance typically covers emergency tarping when damage results from covered perils like storms, wind, hail, or falling trees. The key is that the damage must come from a sudden, unexpected event that your policy covers. If a storm rips shingles off your roof, tarping to prevent rain from getting inside falls under covered emergency protection.

Tarping is viewed as temporary emergency protection to prevent further damage, which insurance companies expect you to take. It’s part of your responsibility to mitigate losses after covered damage occurs. Most policies include language requiring policyholders to protect property from additional harm, and proper tarping does exactly that.

Insurance usually won’t cover tarping for wear and tear, poor maintenance, pre existing damage, or long term neglect. If your roof was already leaking before the storm because you ignored repairs for years, the tarping won’t be covered. If damage comes from gradual deterioration rather than a specific event, you’re paying out of pocket. The damage needs to be sudden and from a covered cause.

Documentation matters for successful claims. Take photos of the damage before tarping if conditions allow. Get written estimates from contractors that detail the damage and tarping scope. Keep receipts for all materials and labor. Record the timeline. When damage occurred, when you noticed it, when tarping happened. Your deductible applies to the total claim, not just the tarping, so factor that into your decision about filing. And don’t leave tarps in place indefinitely without pursuing permanent repairs. Letting damage worsen under a tarp because you delayed permanent work can affect claim validity and give insurers reason to deny coverage for subsequent problems.

How Long Tarps Last and When Permanent Repairs Are Needed

AbdoxGzZSRy8iosdPeY77A

Standard tarps last 60 to 90 days under normal conditions, while reinforced tarps with higher mil thickness and UV protection can last 6 to 12 months with proper installation. That’s the manufacturer rating, but real world performance depends on what the tarp faces.

UV exposure degrades tarp material over time, breaking down the waterproofing and weakening the fabric. Weather conditions matter. Constant wind stress, heavy snow loads, or repeated freeze thaw cycles shorten lifespan. Wind is particularly hard on tarps, causing flapping that loosens anchors and tears material at stress points. Installation quality affects durability too. Properly secured tarps with adequate anchoring and correct tension last longer than hastily installed coverage.

Tarps are temporary emergency protection, not permanent solutions. They stop water from getting in right now, but they don’t fix the underlying damage. The roof structure, damaged decking, missing shingles, and compromised flashing all still need actual repair work. Tarps just buy you time to schedule permanent fixes without additional damage happening in the meantime.

Schedule permanent repairs as soon as practical. Extended tarp periods create problems. Prolonged moisture exposure under tarps can lead to rot, mold growth, and structural deterioration even when the tarp keeps most water out. Insurance companies may question claims if you leave temporary protection in place for months without pursuing actual repairs. And the longer you wait, the more likely the tarp itself will fail, exposing your home to new damage. If you’re keeping a tarp up longer than 90 days, expect to pay re tarping or maintenance fees to inspect anchors, reposition material, and ensure continued protection.

Additional Repair Costs Beyond Tarp Installation

8gEPQ2n2RN6sD08W2SuDWw

Tarp installation is emergency stabilization that stops immediate water intrusion, but it doesn’t address the underlying structural issues, missing roofing materials, or damage that already occurred. It’s the first expense in a complete recovery process, not the total cost of getting back to normal.

Once the tarp is securing the opening, you’ll need to budget for permanent repairs that actually fix what’s broken. The scope depends on what caused the need for tarping in the first place and how much damage occurred before protection went up.

Repair Type Cost Range When Needed
Leak Repair $350-$2,000 For localized damage to shingles, flashing, or small roof sections
Roof Flashing Replacement $1,000-$1,800 When flashing around chimneys, vents, or valleys is damaged or missing
Debris/Tree Removal $200-$1,500 When fallen trees, branches, or storm debris caused the damage
Complete Roof Replacement $6,700-$85,000 For extensive damage affecting large roof sections or structural integrity

Tips to Reduce Roof Tarp Installation Expenses

k0yd4EQtTqy-DwKOP1RCbQ

Cost matters, but inadequate protection or unsafe installation leads to greater expenses down the line. The goal is reducing unnecessary costs while ensuring your home stays protected and the work is done safely.

Get multiple contractor quotes and compare estimates, making sure each includes the same scope of work so you’re comparing accurately.

Act before emergency rates apply when weather forecasts allow. If you have a day or two before the next storm hits, scheduling standard service saves 30 to 40 percent over emergency rates.

Avoid post disaster peak demand periods if your damage isn’t immediately threatening. Prices spike after major storms when every roofer in the area is booked solid.

Ask about material options and select appropriate quality level for expected tarp duration. If permanent repairs are happening within 30 days, a standard tarp works fine. If you’re looking at 3 to 6 months, invest in better materials.

Verify insurance coverage before paying out of pocket. Contact your insurer immediately after damage occurs to confirm coverage and get authorization for emergency protection.

Clear access paths before the contractor arrives to reduce labor time. Move vehicles, outdoor furniture, and obstacles that would slow down ladder placement or material staging.

Schedule permanent repairs promptly to avoid re tarping fees. The longer you delay, the more likely you’ll need to pay for tarp inspection, maintenance, or replacement before actual repairs happen. Quick action on roof leaks also prevents costly interior water damage repairs that compound your total expense.

Getting Accurate Quotes for Roof Tarp Installation

ny5K4n6WTyWmR7b5258CmQ

Accurate quotes require contractor assessment of damage extent, roof access, pitch, and materials needed. No reputable contractor will give you a firm price over the phone without seeing the actual conditions. Too many variables affect both time and materials for remote estimates to be reliable.

Contractors need specific information to provide accurate estimates. Damaged area size measured in square feet or described by visible extent. Roof characteristics including pitch angle, number of stories, and roofing material type. Access conditions such as property obstacles, lot lines, and staging area availability. Timing requirements for standard scheduling versus emergency response. Expected tarp duration to determine appropriate material quality and anchoring methods.

Complete estimates should include material specifications listing tarp type, dimensions, and quality level, labor hours or hourly rates with total labor cost clearly stated, itemized cost breakdown separating materials from installation work, project timeline with start date and expected completion, and any warranty or guarantee terms covering the installation work. Ask about what happens if the tarp fails due to installation issues versus weather conditions beyond normal expectations.

Watch for red flags. Unusually low bids often mean inadequate materials, rushed work, or contractors who aren’t properly licensed or insured. Lack of licensing information, insurance certificates, or references suggests you’re dealing with someone who may not be qualified or accountable. Pressure for immediate payment, especially full payment upfront, is a warning sign. Vague scope descriptions that don’t specify materials, methods, or timeline leave too much room for disputes later. Work with comprehensive repair providers who can assess both temporary and permanent repair needs, plan the complete recovery process, and coordinate the sequence from emergency response through finished restoration.

Final Words

Roof tarp installation cost depends on damage size, roof complexity, materials, and timing.

Most homeowners spend between $750 and $1,500 for complete emergency protection, with standard rates running $0.70 to $2.00 per square foot.

Emergency service adds 30 to 40 percent more, but it’s worth it when active damage is spreading.

Get multiple quotes, act before storms hit if possible, and schedule permanent repairs fast. Tarps buy you time, not a fix.

Work with licensed contractors who can stabilize your roof today and plan the real repairs tomorrow.

FAQ

How much do roofers charge to tarp a roof?

Roofers charge between $300 and $1,500 to tarp a roof depending on damaged area size, roof complexity, and service urgency. Standard tarping costs $0.70 to $2.00 per square foot, while emergency services range from $1.00 to $2.80 per square foot, about 30 percent higher than scheduled work.

What is the 25% rule in roofing?

The 25% rule in roofing states that if 25 percent or more of your roof section requires repair or replacement, most building codes require you to bring that entire section up to current standards rather than patching isolated areas.

How much does labor cost to install roof underlayment?

Labor costs for roof underlayment installation are not directly comparable to emergency tarping labor, which ranges from $150 to $1,500 depending on project size and complexity. Most tarping jobs take 1 to 3 hours at hourly rates of $60 to $120.

How much does insurance pay for tarping?

Insurance typically covers emergency roof tarping costs when damage results from covered perils like storms, wind, hail, or falling trees. Coverage applies to tarping performed as temporary protection to prevent further damage from valid claims, subject to your policy deductible and specific coverage terms.

How long does a roof tarp last before permanent repairs are needed?

A roof tarp lasts 60 to 90 days for standard materials, while reinforced tarps can last 6 to 12 months with proper installation. Tarps are temporary protection designed to prevent further damage until you schedule permanent repairs, not long-term solutions.

What factors increase roof tarping costs the most?

Roof tarping costs increase most from damage size, roof pitch and height, multi-story access challenges, emergency or after-hours service timing, and complex roof designs with dormers or valleys. Geographic location and post-disaster demand spikes also significantly affect pricing.

Can I install a roof tarp myself to save money?

You can install a roof tarp yourself using materials costing $50 to $700, but this approach carries serious fall risks, potential for improper installation causing additional damage, and missed underlying issues professionals would identify during assessment.

What types of roof damage does insurance cover for tarping?

Insurance covers roof tarping for damage from covered perils including storms, wind, hail, and falling trees. Coverage typically excludes tarping for wear and tear, poor maintenance, pre-existing damage, or long-term neglect unrelated to sudden covered events.

What additional repair costs should I expect after roof tarping?

After roof tarping, you should expect leak repair costs of $350 to $1,700, roof flashing replacement averaging $1,000, debris removal ranging $200 to $1,500, or complete roof replacement from $6,700 to $80,000 depending on damage severity.

How can I reduce emergency roof tarping expenses?

You can reduce roof tarping expenses by getting multiple contractor quotes, acting before emergency rates apply when weather allows, avoiding post-disaster peak demand periods, clearing property access paths, and verifying insurance coverage before paying out-of-pocket.

What should a roof tarping estimate include?

A roof tarping estimate should include material specifications and costs, labor hours and hourly rates, total cost breakdown, expected timeline, and warranty or guarantee terms. Complete estimates also detail damaged area size, roof characteristics, and any accessibility challenges.

How much does emergency tarping cost compared to standard service?

Emergency tarping costs 30 to 40 percent more than standard service, with emergency rates ranging $1.00 to $2.80 per square foot compared to standard rates of $0.70 to $2.00 per square foot for scheduled installation during regular business hours.

Ceiling Water Leak Repair Near Me: Fast Local Solutions

0

Think a ceiling drip is just a nuisance?
It can get serious in 48 hours, with mold, warped drywall, and soaked insulation.
If you’re searching “ceiling water leak repair near me,” you need a same-day local team that stops the leak, pulls moisture out of framing and insulation, and rebuilds the ceiling so the problem doesn’t return.
This post shows how to get fast local response, what pros check first, and the four simple steps you can take before help arrives.

Immediate Local Help for Fast Ceiling Water Leak Repair

4ybikxU5QzSqk1Be16RHcA

When water starts dripping from your ceiling, you don’t have time to waste. Mold can start showing up after about 48 hours of wetness, and every minute that water keeps flowing, it’s spreading deeper into framing, insulation, and electrical systems. If you’re searching for ceiling water leak repair near me, you need same day ceiling leak response near me or a 24 hour ceiling leak repair service that can stop the damage tonight. Not next week.

Before the truck pulls up, take four quick actions to keep water from spreading. Move electronics, furniture, and anything you care about away from the drip zone. Set buckets or pans under active leaks so you’re not dealing with floor damage too. If the ceiling is bulging with trapped water, carefully poke a small hole at the lowest point to relieve pressure. Otherwise you might end up with a sudden collapse. Shut off your main water supply if you think the leak is plumbing related, and photograph everything for your insurance claim.

When an emergency ceiling leak contractor shows up, the first job is triage. Not guesswork. Pros check whether the source is a broken pipe above, a roof intrusion from the last storm, or condensation from an HVAC unit. Many local services offer free ceiling leak inspection near me visits to confirm the cause, measure moisture inside walls and ceilings, and map out the repair plan. Service areas vary by ZIP code, so confirm your address falls within the contractor’s normal coverage zone before you commit.

Four critical steps while waiting for help:

  • Move valuables and electronics away from the leak
  • Place buckets to catch dripping water
  • Relieve bulging ceiling pressure with a small puncture
  • Shut off main water if plumbing is suspected

Common Causes Behind Ceiling Water Leaks in Homes

vv98ARMxQM6DGALcMB0R5w

Most ceiling leaks trace back to five common culprits: damaged plumbing pipes, leaking roofs, clogged gutters, HVAC condensation pans, or failed seals around fixtures. Water doesn’t always drip where it enters. A roof intrusion near a chimney can send water sideways along rafters, pooling at a ceiling junction ten feet away. Similarly, a slow pipe drip in an upstairs bathroom can soak insulation and travel to a light fixture below, making the ceiling appear to sweat before it finally gives out.

If the leak is on your top floor or in a room directly under the attic, climb into the attic with a flashlight and look for mildew smells, brown staining on framing lumber, or wet, matted insulation. Those are telltale attic to ceiling leak diagnosis clues pointing to roof or gutter problems. If the ceiling damage is on a lower level, especially under a kitchen or bathroom, the source is usually plumbing. Gutters overflow when leaves and debris clog downspouts, forcing water to back up under shingles or pour over the edge and seep into exterior walls. HVAC condensation causing ceiling leaks is less dramatic but just as real. When the drip pan cracks or the drain line clogs, condensate spills directly onto ceiling drywall.

Cause Typical Sign
Plumbing Pipe Leak Drips below bathrooms or kitchens; stains near fixtures
Roof Damage Leaks during or after rain; wet attic insulation; stains near chimneys or skylights
Clogged or Damaged Gutters Water intrusion at exterior wall/ceiling junctions; overflow stains
HVAC Condensation Slow, steady drips near air handler or ductwork; no correlation with rain

Professional Steps in Ceiling Water Leak Repair and Restoration

Jd7nrHTjQtO1WtB5K5irOA

Restoration pros don’t just patch the hole and leave. The workflow starts with stopping the source, moves to controlled drying, then advances to demolition, repair, and refinishing. First, the team confirms the leak is off, whether that means capping a pipe, tarping a roof section, or clearing a gutter. Next comes structural drying with industrial fans, air movers, and dehumidifiers to pull moisture out of framing, insulation, and drywall. Drying can take anywhere from a couple of days to a few weeks depending on how saturated the materials are and how humid the air is outside. Moisture meters and thermal cameras verify that hidden pockets are dry, not just the surface you can see.

Once readings confirm the space is dry, wet drywall and insulation come out. Saturated drywall almost always gets replaced, not patched, because it loses strength and becomes a mold risk. Insulation that stayed wet for more than 48 hours also gets pulled and discarded. After demo, the plumber or roofer repairs the underlying cause, then the restoration crew rebuilds the ceiling with new drywall, tape, mud, texture, and paint matched to the surrounding finish. If the damaged section is large, the entire ceiling may be refinished to avoid a visible patch.

Water weight is a real structural issue. A U.S. gallon of water weighs nearly 8.5 pounds, so even a small puddle trapped above drywall can stress joists and cause sagging or sudden collapse. Restoration teams check framing for warping or rot and reinforce or sister joists if needed. The goal is a ceiling that looks original and performs like new, with no hidden moisture waiting to grow mold or weaken the structure six months later.

Local Contractors Who Fix Ceiling Leaks: Plumber, Roofer, or Restoration Specialist?

LMpFvVbWRCKfUgHhtdk_Mw

Choosing the right pro depends on where the water is coming from. If the leak appears below an upstairs bathroom, under a kitchen sink, near a water heater, or along interior walls with visible pipes, call a licensed ceiling leak plumbers specialist. Plumbers locate hidden leaks with pressure tests and thermal imaging, repair or replace damaged pipe sections, and inspect connections behind walls and above ceilings. They stop the flow, but they typically don’t handle the drying, demolition, or reconstruction that follows.

When the leak happens during or right after rain, or when it shows up near shingles, flashing, chimneys, skylights, or roof valleys, the source is overhead and you need a roofer. Roof to ceiling leak detection service includes inspecting the exterior for damaged or missing shingles, checking metal flashing around penetrations, clearing debris from valleys, and looking for ice dam damage in cold climates. Roofers patch, reseal, or replace the compromised section and may install temporary tarps to stop weather intrusion until permanent repairs are complete.

For comprehensive residential ceiling leak repair companies or commercial property ceiling leak contractors, restoration specialists handle the full cycle. They dry the structure, remove damaged materials, coordinate with plumbers or roofers to fix the source, then rebuild and refinish the ceiling. Many restoration companies are IICRC certified, meaning their teams are trained and tested in water damage mitigation, mold remediation, and structural drying protocols. They also document moisture readings, take before and after photos, and prepare detailed scopes that insurance adjusters need to approve claims.

Five contractor types and their responsibilities:

  • Plumber: Locates and repairs pipe leaks, fixture failures, and water heater issues. Typically doesn’t perform drying or drywall work.
  • Roofer: Inspects and repairs roof damage, flashing, shingles, gutters, and skylights. Installs tarps for interim weather protection.
  • Restoration Specialist: Dries structure, removes wet materials, coordinates source repair, rebuilds ceiling, and documents for insurance.
  • Handyman or General Contractor: Handles smaller drywall patches and cosmetic refinishing after the leak source is already fixed.
  • Mold Remediation Pro: Removes visible mold growth, uses HEPA air scrubbers, and treats affected areas when growth exceeds safe levels.

Warning Signs Your Ceiling Leak Needs Immediate Professional Attention

Ie3oRgUpQrORoA647RGXYg

Some ceiling leaks drip slowly and stay small. Others signal urgent structural or health risks that demand same day professional response. Brown or yellow water stains that spread across drywall mean moisture is migrating through the material faster than it can dry. Sagging ceiling panels or drywall that feels soft when you press it gently indicate trapped water that’s exceeded the material’s weight capacity. If you see bubbling paint, peeling texture, or wallpaper pulling away at the seams, water has separated the finish coat from the substrate and mold may already be forming behind it.

Musty odors are a red flag for hidden mold growth. Mold can start forming after 48 hours of wetness, and it often colonizes the back side of drywall, inside wall cavities, or on top of insulation where you can’t see it. Visible mold appears in multiple colors: white, green, black, gray, yellow, orange, or pink. Textures range from slimy and wet to fuzzy, powdery, or wool like. If anyone in the home experiences new allergy symptoms, respiratory irritation, or asthma flare ups after the leak starts, mold spores are likely circulating in the air.

Six major symptoms that require immediate professional help:

  • Large or spreading brown, yellow, or rust colored ceiling stains
  • Sagging, soft, or bulging drywall panels
  • Bubbling paint, peeling texture, or separating wallpaper
  • Persistent musty or earthy odors in the affected room
  • Visible mold growth in any color or texture
  • Continuous dripping even when it’s not raining or no faucets are running

Costs of Ceiling Water Leak Repair and What Factors Affect Pricing

VhNKZh2QTJWEv033PhZwVQ

Ceiling water leak repair costs vary widely depending on the damage extent, the leak source, and how long water ran before discovery. The average water damage repair bill in the U.S. runs around $3,600, covering drying, demolition, source repair, and reconstruction. Ceiling specific work typically costs $45 to $55 per square foot when you include cutting out wet drywall, replacing insulation, hanging and finishing new drywall, texture matching, and repainting. Fixing the underlying cause adds another layer. Plumbing repairs range from $200 for a simple valve replacement to $1,550 for repiping a bathroom supply line, while roof repairs span $200 for minor flashing work to $1,550 or more for shingle replacement and valley sealing.

Drying time directly affects labor and equipment rental costs. A small leak caught within hours may dry in two to three days with a few air movers and a dehumidifier. A leak that soaked framing and insulation for a week can require ten days of continuous drying, multiple dehumidifiers, and antimicrobial treatment to prevent mold, pushing costs higher. Saturated drywall almost always requires full replacement rather than surface patching because the paper facing delaminates and the gypsum core loses structural integrity once waterlogged.

Additional cost drivers include the room location (top floor or attic access is harder to reach), ceiling height (cathedral ceilings need scaffolding), finish complexity (popcorn texture or coffered panels cost more to match), and whether flooring, trim, or electrical fixtures also sustained damage. Always request an itemized estimate that separates drying, demolition, source repair, materials, labor, and finishing so you can compare contractor estimates for ceiling reconstruction transparently.

Service Typical Price Range
Ceiling Drywall Replacement & Refinishing $45–$55 per square foot
Plumbing or Roof Source Repair $200–$1,550
Complete Water Damage Restoration (Average) ~$3,600

Insurance Claims for Ceiling Leak Damage and Documentation Tips

aG16iHfXTJK43GX5NxVexQ

Homeowners insurance typically covers ceiling water damage when the cause is sudden and accidental, such as a burst pipe, storm damaged roof, or overflow from a clogged condensate line. Policies exclude damage from long term neglect, lack of maintenance, or flood events, which require separate flood insurance. The distinction matters. A pipe that rusted over five years and finally cracked may be denied if the insurer decides routine maintenance would have prevented it, while a freeze and burst event during an unexpected cold snap is usually covered.

Strong documentation is the difference between a smooth claim and a drawn out dispute. As soon as you discover the leak, take photos and videos of the ceiling stain, any visible water pooling, the source if you can access it, and all affected belongings. Photograph the water shut off valve position, the attic or crawl space if accessible, and any mold or swelling. Restoration contractors supply additional evidence: moisture meter readings that map wet zones, thermal images showing hidden saturation, itemized scopes listing every material to be removed and replaced, and daily progress photos during drying. Adjusters use these reports to verify the damage extent and approve line items for drying equipment, demolition labor, materials, and finishing work.

Five essential documentation steps for a ceiling leak insurance claim:

  1. Photograph and video the ceiling damage, source area, and all affected rooms immediately after discovery.
  2. Document the leak source with close up images of the failed pipe, roof section, or fixture.
  3. Capture before and after images of furniture, flooring, and personal property that got wet or moved.
  4. Request written moisture readings, thermal scans, and a detailed scope of work from your restoration contractor.
  5. Keep all receipts for emergency mitigation (tarps, buckets, fans) and provide them to your adjuster with your claim.

Preventing Future Ceiling Leaks in Your Home

FE1-54_WQSKgnQAn6fbpFQ

Prevention starts with routine inspections and fast repairs when small issues appear. Schedule a professional roof inspection at least once a year and again after any major storm, hail event, or high wind. Roofers check shingles for cracks or missing granules, test flashing around chimneys and skylights, clear debris from valleys, and confirm that vents and boot seals are intact. Catching a worn shingle or loose flashing early costs a few hundred dollars. Waiting until water soaks the attic can cost thousands.

Keep gutters and downspouts clear of leaves, pine needles, and debris so water flows away from the house instead of backing up under roof edges or pooling against foundation walls. Insulate exposed pipes in attics, crawl spaces, and exterior walls to prevent freeze and burst failures during cold snaps. Inspect plumbing fixtures and supply lines under sinks, behind toilets, and near water heaters every six months for rust, corrosion, or slow drips. Install water leak detection devices with audible alarms near water heaters, washing machines, sump pumps, and basement floors so you catch leaks in minutes instead of days. Mold can begin forming after 48 hours, so the faster you know about moisture, the smaller the repair.

Six proven prevention tactics to protect your ceiling:

  • Schedule annual roof inspections and post storm checks by a licensed roofer
  • Clean gutters and downspouts at least twice a year (spring and fall)
  • Insulate pipes in unheated spaces to prevent freeze damage
  • Inspect plumbing fixtures and supply lines every six months for leaks or corrosion
  • Install water leak detection alarms near water heaters, washers, and basements
  • Address small roof or plumbing issues immediately before they turn into ceiling damage

Final Words

First, stop the water, move valuables, contain the drip, and document the damage. Fast action keeps mold and structural problems from getting worse.

You saw the likely causes, what pros do to dry and rebuild, who to call, red flags, cost expectations, and how to document for your insurer.

If you need help now, search ceiling water leak repair near me or call a local 24/7 team. Quick response gets repairs started and your home back to normal.

FAQ

Q: How much does it cost to repair a water leak in the ceiling?

A: The cost to repair a water leak in the ceiling typically runs about $45–$55 per square foot for ceiling repair, with full water-damage jobs averaging near $3,600; plumbing or roof fixes add $200–$1,550.

Q: Who fixes water leaks in the ceiling or who do you call for a damp patch on the ceiling?

A: Who fixes ceiling leaks or a damp patch depends on the source: plumbers handle pipes, roofers handle roof-origin leaks, and restoration contractors handle drying, demolition, and rebuilding—call based on where the water’s coming from.

Q: What to do if water leaks through the ceiling?

A: If water leaks through the ceiling, stop the source if safe (shut off the main for plumbing), move valuables, contain water, relieve bulging, photograph damage, and call a 24/7 repair team quickly. Mold can start in 48 hours.

Crawlspace Moisture Problems: Causes, Detection and Fixes That Work

0

You know that damp, musty smell when you open your crawlspace access? That’s not just unpleasant. It’s a warning. Crawlspace moisture feeds mold, rots floor joists, wrecks insulation, and pushes contaminated air into the rooms where you live. Most homeowners ignore it until floors start sagging or energy bills spike. But once you understand what causes moisture buildup, how to spot it early, and which fixes actually work, you can stop the damage before it spreads into expensive structural repairs.

Recognizing Moisture Warning Signs Early

wQNIrzKfTcqGB-OcZfJuLA

Crawlspace moisture doesn’t sneak up quietly. It announces itself through warning signs that get worse if you don’t act.

The smell hits you first. That musty, damp odor that won’t go away no matter how much you clean? It’s telling you excess humidity is feeding biological growth on wood and insulation below your floors. When you spot visible mold on baseboards or walls in rooms above the crawlspace, moisture’s already migrating into your living space. And if you or your family deal with allergy or breathing issues that feel worse at home but better when you’re out, contaminated air rising from below could be the culprit.

Physical signs you can see yourself:

  • Floors that warp, sag, or squeak because moisture’s weakening the joists underneath
  • Doors and windows sticking or refusing to close right from structural movement
  • Water stains on foundation walls pointing to where moisture’s getting in
  • Condensation dripping off pipes or ductwork
  • White powdery stuff (efflorescence) on concrete from moisture evaporating
  • Standing water or puddles showing up after storms
  • Insulation that’s wet or falling down from absorbing too much humidity
  • Paint peeling on interior walls near the floor

These signs often get worse after heavy rain, during humid summers, or they might stick around constantly depending on how bad things are. When you’re seeing multiple signs at once, you need an inspection now. Musty smell plus floor changes plus visible condensation means moisture’s moved past surface problems into structural territory.

Understanding What Causes Moisture Under Your Home

C3vvcLefTs6KUaBMWoNP4g

Crawlspaces sit in a vulnerable spot. They’re partially underground, they’re not heated, and they touch soil directly. Usually it’s not just one thing causing problems but several factors working together.

Bulk water issues need fixing immediately. Plumbing leaks under your home saturate insulation and subflooring gradually over months, bumping up crawlspace humidity without any obvious flooding. A slow drip from a supply line or drain fitting does more long term damage than most people expect. Whether it’s drainage problems or plumbing leaks, bulk water requires immediate repair to stop structural damage from spreading through wood members.

Ground moisture sneaks in through two ways most folks don’t expect. Moisture evaporates continuously from uncovered soil and porous foundation walls even when the dirt looks bone dry. This vapor transmission happens 24/7 no matter what the weather’s doing. The second surprise? Outdoor air ventilation. Warm humid air comes in through crawlspace vents, then cools when it hits the crawlspace’s lower temperature. That cooling raises relative humidity dramatically. Air that’s 60% RH at 90°F becomes 95% RH when it cools to 75°F inside the crawlspace, creating perfect conditions for biological growth despite “ventilating” the space.

Seasonal factors make these baseline problems worse. High water tables push groundwater up through hydrostatic pressure. Clay soil holds moisture way longer than sandy soil, keeping the ground under your home saturated weeks after the rain stops. Groundwater enters through foundation cracks, unsealed vents, or soil that’s graded wrong and slopes toward your foundation instead of away from it.

Health Risks From Crawl Space Humidity and Mold

bJM7LcjVTOmc9Hbd8nd0Kw

Up to 50% of the air you’re breathing inside your home comes from the crawlspace below. This “stack effect” pulls air upward through floor penetrations, making crawlspace moisture control critical for indoor air quality throughout your living spaces.

Mold and mildew love damp crawlspaces and release fungal spores continuously into your air supply. These spores cause persistent coughing, wheezing, allergy flare ups, sinus irritation, headaches, and fatigue that cleaning and air filters can’t eliminate because the source below keeps producing contamination. Long term mold exposure can contribute to chronic respiratory conditions that get worse gradually over years of living above an untreated moisture problem.

Kids, seniors, and anyone with asthma face particularly harmful effects from mold exposure. Their respiratory systems react more severely to the same contamination levels that cause mild symptoms in healthy adults.

Dust mites thrive above 60% relative humidity and colonize damp insulation and wood surfaces fast. These microscopic pests release allergens triggering sneezing, runny nose, and itchy eyes that stick around despite bedroom cleaning because the crawlspace keeps reintroducing allergens into your air supply. Pest infestations add another layer. Termites and rodents attracted to moist environments bring bacteria and allergens through droppings and nesting materials that become airborne and circulate through your HVAC system.

Structural Damage and Foundation Issues From Moisture

nog9jPSGSIe5GG853ZWyaQ

Wood rot attacks floor joists and subflooring when moisture content hits 25% or higher. This biological decay weakens structural members gradually, causing floors to sag, feel bouncy underfoot, or develop squeaks that show loose connections. Dark or warped wood visible during crawlspace inspection means long term moisture exposure needing immediate attention before failure occurs. The decay progresses invisibly inside wood members before surface damage becomes obvious.

Humidity damages insulation severely. Fiberglass batts absorb moisture, get heavy, and eventually fall away from floor joists entirely. Wet insulation loses its temperature regulation capability even before falling, forcing your HVAC system to work harder maintaining comfortable temperatures upstairs. This reduced efficiency shows up as increased energy bills that climb 10 to 20% compared to a dry, properly insulated crawlspace. The fallen insulation creates cold spots in winter and hot spots in summer as conditioned air escapes through unprotected floor sections.

Moisture attracts destructive pests that make structural damage worse. Termites consume damp structural wood actively, creating hollow galleries that weaken load bearing capacity. Rodents nest in moist crawlspaces year round, chewing through vapor barriers, electrical wiring, and ductwork while contaminating insulation with urine and droppings. Both pest types bring additional health hazards while speeding up the structural deterioration moisture started.

Measuring Moisture Levels and Conducting Inspections

hlgVFHnrTVCdXwjWOIKnjw

Accurate moisture assessment requires measuring both relative humidity using hygrometers and material moisture content using pin type or pinless moisture meters. 60% relative humidity is generally the upper limit for indoor comfort and effective mold prevention. Mold can begin growing at 60% RH but needs 70% or higher to sustain active growth across surfaces. These measurements tell different stories. Air humidity shows current conditions while material moisture content reveals accumulated exposure over time.

DIY monitoring makes tracking conditions practical. Digital thermo hygrometers with remote sensors let you track crawl space relative humidity from inside your home without entering the space every month. Place the remote sensor in the center of the crawlspace away from vents or obvious moisture sources for representative readings. Visible indicators during inspection include condensation on pipes or plastic sheeting, damp or darkened wood, and biological growth on organic materials.

Measurement Tool What It Measures Target Range
Hygrometer Relative humidity in air Below 60% RH (under 70% minimum)
Moisture Meter Wood moisture content Below 19% (under 25% requires intervention)
Visual Inspection Physical signs of moisture damage No condensation, staining, or growth
Thermal Imaging Camera Temperature variations indicating moisture Consistent temperatures without cold spots

Professional inspection becomes necessary when DIY monitoring shows persistent high humidity, when visible damage appears, or when you’re unsure about readings. Contractors use infrared cameras to detect hidden leaks or temperature variations you can’t see with visual inspection. They provide comprehensive moisture assessments identifying all contributing factors like bulk water sources, vapor transmission rates, ventilation impacts, and drainage deficiencies, then recommend prioritized solutions addressing root causes rather than symptoms.

Exterior Drainage and Grading Solutions

Wr1n8fLoQKmLf8H1ogih8g

Controlling moisture before it enters the crawlspace through proper drainage and grading is the most effective prevention strategy you’ve got. Bulk water from drainage problems requires immediate repair to prevent structural damage that spreads quickly once water gets into foundation materials.

Grading problems create chronic moisture issues. Soil sloping toward your foundation instead of away allows water to pool against foundation walls during every rain event. That pooled water eventually finds entry through porous concrete, foundation cracks, or gaps around penetrations. Groundwater enters through foundation cracks, unsealed vents, or poorly graded soil that stays saturated against foundation walls for days after storms end.

Exterior drainage solutions that stop water from reaching your foundation:

  1. Proper grading creating slope away from foundation with minimum 6 inches vertical drop over 10 feet horizontal distance
  2. Gutter systems collecting all roof runoff with regular cleaning twice yearly minimum
  3. Downspout extensions directing collected water at least 6 to 8 feet away from foundation perimeter
  4. French drains intercepting groundwater flow before it reaches the foundation, installed around foundation perimeter at footing depth
  5. Foundation waterproofing membranes blocking moisture penetration through porous concrete
  6. Exterior drainage systems preventing standing water near the foundation after heavy rainfall

Sump pump installation becomes necessary for properties with high water tables or seasonal flooding risk. These systems collect groundwater in a basin before it rises high enough to enter the crawlspace, then pump it away from the foundation through discharge lines. Water stains on foundation walls or visible puddles showing up after heavy rainfall mean drainage intervention is needed immediately. Waiting allows progressive damage as each storm adds to accumulated moisture in structural materials.

Vapor Barriers and Complete Encapsulation Systems

LAjoeJuzRWezvBXSF25lpw

Moisture continuously evaporates from exposed dirt floors and porous foundation walls even when soil looks completely dry during inspection. Vapor barriers block this vapor transmission from soil into the crawlspace air where it raises humidity and condenses on cooler surfaces.

Standalone vapor barrier installation provides basic ground moisture control. Proper barriers use heavy polyethylene sheeting with minimum 6 mil thickness, though 10 to 20 mil thickness lasts longer and resists punctures better during installation and maintenance access. Installation requires covering the entire floor surface, extending material up foundation walls 6 to 12 inches and securing it there, overlapping all seams by 12 inches or more and sealing with contractor grade tape, sealing carefully around piers and pipe penetrations, and securing edges to prevent wind displacement or pest damage.

Basic vapor barrier installation costs can run under $1.50 per square foot for existing homes. This intervention is recommended when wood moisture content reaches 25% or when relative humidity stays consistently above 70% despite adequate ventilation.

Complete encapsulation represents the comprehensive long term solution combining vapor barriers with additional moisture control elements. This system installs heavy duty vapor barriers across floors and extends them up walls to create a continuous moisture barrier, closes and seals all foundation vents permanently to eliminate outdoor air entry that paradoxically raises humidity, adds wall insulation (R10 to R11 typical) to moderate temperatures, and installs dedicated crawlspace dehumidifiers maintaining optimal humidity levels year round regardless of outdoor conditions.

Benefits of complete encapsulation systems:

  • Blocks ground vapor transmission completely rather than partially
  • Prevents mold and mildew growth by eliminating moisture sources and controlling humidity
  • Improves indoor air quality throughout your home by stopping contamination at its source
  • Protects structural wood and insulation from moisture damage indefinitely
  • Reduces energy costs by 10 to 20% through improved thermal boundary and reduced air leakage
  • Maintains steadier temperatures year round making homes feel less drafty and smell fresher

High quality encapsulation systems can last 20 years or more with proper installation and minimal maintenance. They increase home value measurably through improved air quality, comfort, and structural protection that buyers recognize during inspection. Closed crawl spaces with proper encapsulation maintain mid 60°F temperatures in Climate Zones 3 to 4 per IRC Section R409 requirements. Homes with encapsulation feel noticeably less drafty, smell fresher without musty odors, and maintain more comfortable conditions throughout the year. For comprehensive moisture solutions or if you’re dealing with existing water damage needing professional attention, Water Damage Restoration Services can assess the full scope and coordinate repairs.

Dehumidifiers and Understanding Ventilation

o8XPnOCRS7mj6fC9qkbVIw

Outdoor air entering through crawlspace vents creates a counterintuitive problem. Warm humid air cools as it enters the crawlspace’s lower temperature environment, and cooling air raises its relative humidity even though absolute moisture content stays the same. That 60% RH air at 90°F becomes 95% RH when it cools to 75°F inside your crawlspace. High enough to sustain active mold growth and condense on cool surfaces. Vented crawl spaces shouldn’t be built in hot humid climates like the Southeast where this ventilation paradox causes chronic moisture problems rather than solving them.

Modern building science favors closed, conditioned crawl spaces over vented ones in most climate zones.

Dehumidifiers work best when combined with vapor barriers and sealed vents rather than used alone. A dehumidifier can’t compensate for bulk water intrusion from plumbing leaks or drainage problems, and it can’t overcome continuous ground vapor transmission from exposed soil. These units control humidity after you eliminate active moisture sources. They maintain dry conditions rather than create them initially. Dehumidifiers alone don’t work without first removing moisture sources through proper drainage, vapor barriers, and vent sealing.

Properly installed closed crawlspaces with complete vapor barriers rarely need long term dehumidification except as extra insurance. Standalone dehumidifiers running in vented crawlspaces without addressing root causes waste energy while providing only temporary symptom relief that stops when the unit fails or fills its reservoir.

DIY Moisture Fixes Versus Professional Solutions

EdqUv5epQASuLQyMsUZw8A

You can handle certain crawlspace moisture tasks safely and effectively. Installing basic vapor barriers in accessible crawlspaces with adequate clearance makes sense for DIY work. Extending downspouts away from the foundation, improving soil grading near foundation walls, monitoring humidity levels with purchased hygrometers, cleaning gutters twice yearly, and sealing minor foundation cracks with hydraulic cement or polyurethane sealant represent appropriate DIY moisture control.

Professional contractors become necessary for specific situations. Standing water or active flooding requires immediate professional assessment and pumping equipment homeowners don’t own. Mold growth covering large areas presents health hazards requiring proper containment and protective equipment during removal. Dark or warped structural wood indicating long term moisture exposure needs professional evaluation for safety and load bearing capacity. Damaged insulation from condensation signals underlying problems requiring drainage improvements or coordinated dehumidification that professionals diagnose accurately. Complex drainage problems involving French drains or exterior excavation, full encapsulation systems with sealed vents and coordinated components, and foundation waterproofing installations all require professional expertise and specialized materials.

Situation DIY or Professional Reason
Simple vapor barrier installation DIY Straightforward installation in accessible space
Active mold growth over large area Professional Health hazard requiring proper containment and remediation protocol
Extending downspouts DIY Basic exterior work with readily available materials
Structural wood damage Professional Safety concern requiring expertise to assess load bearing capacity
Full encapsulation system Professional Complex coordinated system requiring specialized installation and sealing

Professionals use specialized tools including infrared cameras revealing hidden moisture patterns, commercial grade dehumidifiers sized appropriately for space volume, and professional waterproofing materials lasting decades longer than consumer products. They provide warranties on completed work, typically 1 to 5 years for encapsulation systems and longer for structural repairs. For contractors experienced in comprehensive home damage and restoration including structural repairs and coordinated moisture solutions, Fire and Smoke Damage Repair services handle complex restoration projects requiring multiple coordinated trades.

Cost Ranges for Moisture Remediation and Prevention

MMJhbEFNSQKokhS49SVnXw

Crawlspace moisture remediation costs vary widely based on problem severity, total crawlspace square footage, geographic location and local labor rates, and the complexity of solutions required to address all contributing factors.

Common solution cost ranges:

  • Basic vapor barrier installation running $1.50 to 3.00 per square foot for straightforward installations
  • Full encapsulation system costing $5,000 to 15,000 for average sized homes depending on access and complications
  • Crawlspace dehumidifier units costing $1,200 to 2,500 installed including electrical connections and condensate drainage
  • Sump pump installation ranging $800 to 3,000 depending on system complexity and discharge line routing
  • Exterior drainage and French drain systems costing $2,000 to 10,000 depending on linear footage required
  • Foundation waterproofing running $3,000 to 8,000 for exterior membrane application and drainage board
  • Grading improvements and downspout extensions costing $500 to 2,500 for typical residential properties
  • Professional mold remediation ranging $1,500 to 5,000 depending on contamination extent and required containment

Encapsulation costs under $1.50 per square foot are possible for the most basic vapor barrier installations in existing homes with good access and no complications. Comprehensive systems protecting your home long term typically cost more because they include vapor barriers, vent sealing, insulation, and dehumidification working together. Systems lasting 20 years or more and reducing energy costs by 10 to 20% provide measurable return on investment through lower utility bills and avoided structural repairs that cost significantly more than prevention.

Get multiple quotes from licensed contractors, verify each contractor’s credentials and current insurance coverage, ask specifically about warranties on materials and labor, and consider financing options for larger projects if paying the full amount upfront strains your budget.

Preventing Future Crawl Space Moisture Issues

Ongoing prevention and monitoring cost far less and take less time than reactive repairs after damage develops. Small problems caught early stay small problems rather than becoming structural emergencies.

Preventive maintenance practices that keep crawlspaces dry:

  1. Monitor crawlspace humidity with remote hygrometers monthly, checking readings and targeting levels below 60% RH consistently
  2. Inspect crawlspace seasonally for new warning signs including condensation, staining, odors, or biological growth, especially after heavy rain events
  3. Clean gutters and downspouts twice yearly minimum, more often if trees overhang your roof
  4. Maintain proper grading around foundation perimeter, adding soil where settling creates low spots against walls
  5. Check for plumbing leaks under your home regularly by looking for water stains, listening for dripping, and monitoring water bills for unexplained increases
  6. Inspect vapor barriers annually for tears, displacement, or damage from pest activity or maintenance access
  7. Schedule professional crawlspace inspections every 2 to 3 years to catch hidden issues before they become visible problems

Seasonal monitoring matters particularly during humid summer months when outdoor dew points stay high for weeks and during spring when heavy rainfall saturates soil around foundations. Small problems caught during routine inspection like a torn section of vapor barrier, a downspout that disconnected, or a new crack in foundation concrete prevent expensive structural damage when addressed immediately. Maintaining crawlspace moisture control systems extends their lifespan and effectiveness. Change dehumidifier filters quarterly, ensure sealed vents stay closed and gasketed properly, verify sump pumps activate when tested monthly, and check that drainage systems flow freely without debris blockages.

Climate and Regional Moisture Considerations

Hot humid climates like the Southeast face particularly severe crawlspace moisture problems year round. High outdoor humidity combined with warm temperatures means ventilating crawlspaces with outdoor air worsens the problem rather than improving it. Vented crawl spaces shouldn’t be built in these regions according to current building science research. The warm humid air cools inside the crawlspace, raising relative humidity to levels supporting continuous mold growth and wood decay that never dries out seasonally.

Climate zone considerations affect which moisture control strategies work best and what building codes require. Closed crawl spaces with R10 to R11 wall insulation maintain mid 60°F temperatures in Climate Zones 3 to 4, providing enough warmth to prevent condensation while avoiding frozen pipe risks. Floor insulation versus wall insulation decisions depend on climate zone. Floor insulation is potentially warranted in Climate Zone 4 and colder regions where keeping crawlspace temperatures closer to outdoor temperatures makes sense. IRC Section R409 addresses closed crawlspace construction requirements that vary by region based on freezing risk, humidity patterns, and local building practices.

Regional factors compound these climate patterns. High water tables in coastal and low lying areas require more aggressive drainage solutions and waterproofing because groundwater sits closer to crawlspace floor level year round. Seasonal flooding risks in some regions make sump pump systems necessary rather than optional. Building codes reflect these regional moisture challenges. The 1968 North Carolina residential code previously allowed closed insulated crawl spaces decades before other regions recognized their benefits, because humid southeastern conditions made vented crawlspaces problematic even then.

Final Words

Crawlspace moisture problems won’t fix themselves, and waiting just makes repairs more expensive.

Start by checking your crawlspace for warning signs. Measure humidity levels. Stop bulk water from getting in through better drainage and grading.

If you’re dealing with standing water, mold growth, or structural damage, bring in professionals who can assess everything and coordinate the fix from start to finish.

Once you’re dry, keep it that way. Monitor humidity. Maintain your systems. A closed, encapsulated crawlspace protects your home, your air quality, and your peace of mind for years.

FAQ

Q: Why is there so much moisture in my crawl space?

A: Crawl space moisture typically comes from multiple sources working together including groundwater seeping through foundation cracks, moisture evaporating continuously from bare dirt floors, plumbing leaks saturating materials over time, and humid outdoor air entering through vents and cooling down which raises relative humidity levels significantly.

Q: Will homeowners insurance cover water in a crawl space?

A: Homeowners insurance coverage for crawl space water depends on the cause. Sudden events like burst pipes typically qualify for coverage, while gradual moisture problems from poor drainage, condensation, or ground seepage are usually excluded as maintenance issues homeowners are expected to prevent.

Q: How much does it cost to fix moisture in a crawl space?

A: Crawl space moisture repair costs vary widely based on problem severity. Basic vapor barrier installation runs $1.50 to $3.00 per square foot, while comprehensive encapsulation systems average $5,000 to $15,000 for typical homes, plus additional costs for drainage improvements, dehumidifiers, or waterproofing.

Q: Will a crawl space dry out on its own?

A: A crawl space will not dry out on its own because moisture continuously evaporates from exposed soil and enters through foundation materials even when dirt appears dry. Without intervention like vapor barriers, proper drainage, sealed vents, or dehumidification, humidity levels remain elevated and problems worsen.

Q: What are the first warning signs of crawl space moisture problems?

A: The first warning signs of crawl space moisture include persistent musty or damp smells that cleaning cannot eliminate, visible mold spots on baseboards or walls in rooms above the crawl space, warped or sagging floors, doors and windows that stick, and recurring allergy symptoms that worsen at home.

Q: Can I install a crawl space vapor barrier myself?

A: You can install a basic crawl space vapor barrier yourself in accessible crawl spaces using heavy polyethylene sheeting. Cover the entire floor surface, extend material 6 to 12 inches up foundation walls, overlap seams by 12 inches and seal with tape, then secure edges to prevent shifting.

Q: How does crawl space moisture affect indoor air quality?

A: Crawl space moisture affects indoor air quality significantly because up to 50% of home air originates from the crawl space. Mold and mildew release fungal spores causing persistent coughing, wheezing, allergy flare-ups, sinus irritation, headaches, and fatigue, particularly affecting children, seniors, and asthma sufferers.

Q: What humidity level should I maintain in my crawl space?

A: You should maintain crawl space humidity below 60% relative humidity for comfort and mold prevention. Mold can begin growing at 60% humidity and sustains active growth at 70% or higher. Use digital hygrometers with remote sensors to track levels monthly.

Q: Does encapsulation really reduce energy costs?

A: Encapsulation reduces energy costs by 10 to 20% when properly installed by sealing air leaks, protecting insulation from moisture damage, and allowing HVAC systems to work more efficiently. Homes with encapsulation maintain steadier temperatures year-round and feel less drafty.

Q: Should crawl spaces be vented or closed in humid climates?

A: Crawl spaces should be closed rather than vented in hot-humid climates like the Southeast. Outdoor air entering through vents cools inside the crawl space, paradoxically raising relative humidity from 60% at 90°F to 95% when cooled to 75°F, worsening moisture problems instead of improving them.

Q: When do I need professional help for crawl space moisture?

A: You need professional help for crawl space moisture when dealing with standing water or active flooding, large areas of mold growth, dark or warped structural wood, damaged insulation from condensation, complex drainage problems, or when installing full encapsulation systems requiring specialized tools and expertise.

Q: How long does a crawl space encapsulation system last?

A: A crawl space encapsulation system lasts 20 years or more when using high-quality materials and proper installation. Longevity depends on material thickness, installation quality, ongoing maintenance like dehumidifier filter changes, and protecting the vapor barrier from tears or displacement during inspections.