Home Blog Page 4

Step-by-step Guide To Water Damage Claim Documentation Simplified

Have you ever worried that your water damage claim papers might not be strong enough? Many homeowners miss important details and lose money when filing claims. This simple checklist shows you exactly what to capture, from tips on safe photo taking to keeping repair receipts. We explain every step so you can back your claim with solid proof. Follow our guide to protect your home and your wallet.

Step-by-Step Documentation Checklist for Your Water Damage Claim

  1. Call your insurance company right away. Try to reach them within one or two days (some policies let you call within a month or two). If you see a burst pipe, use their emergency number immediately.
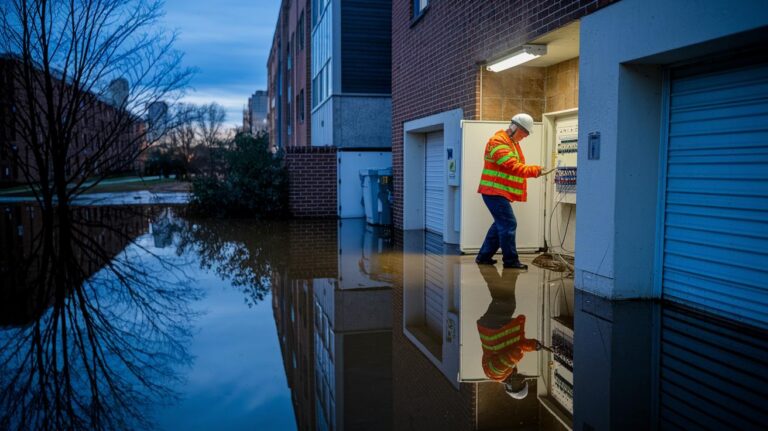
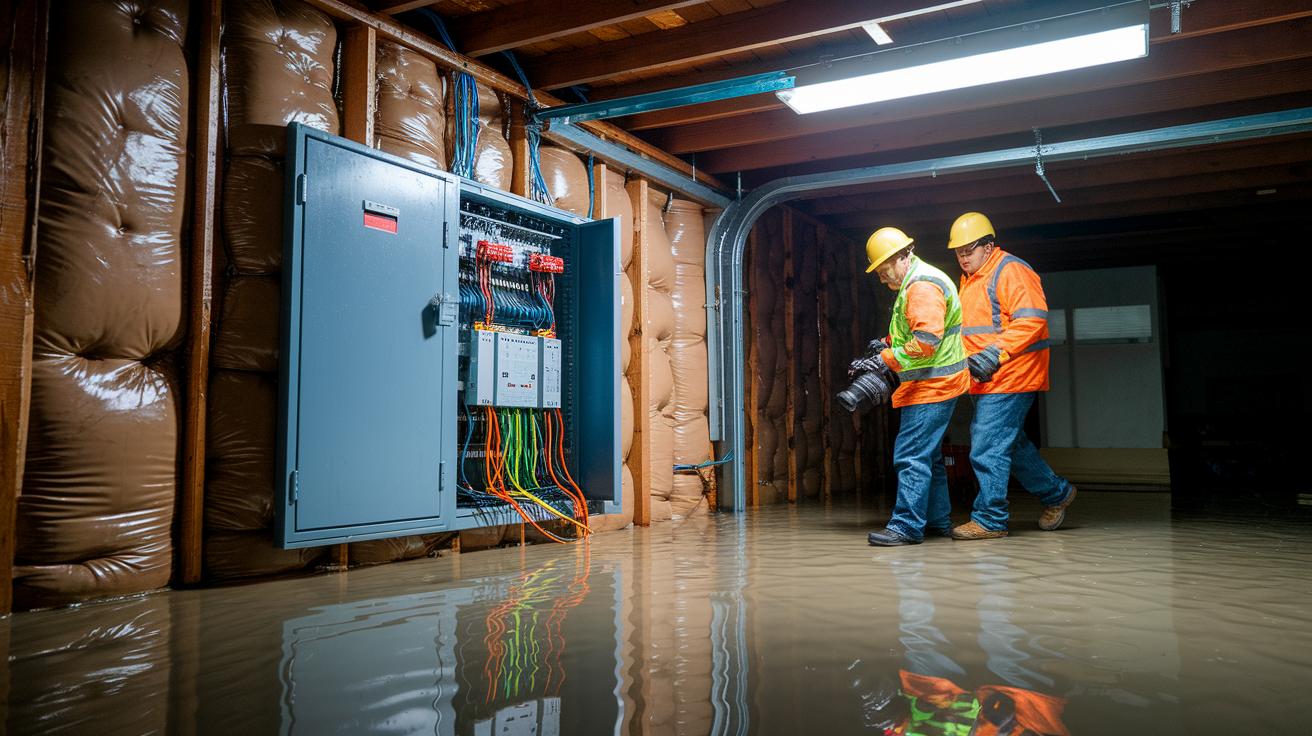
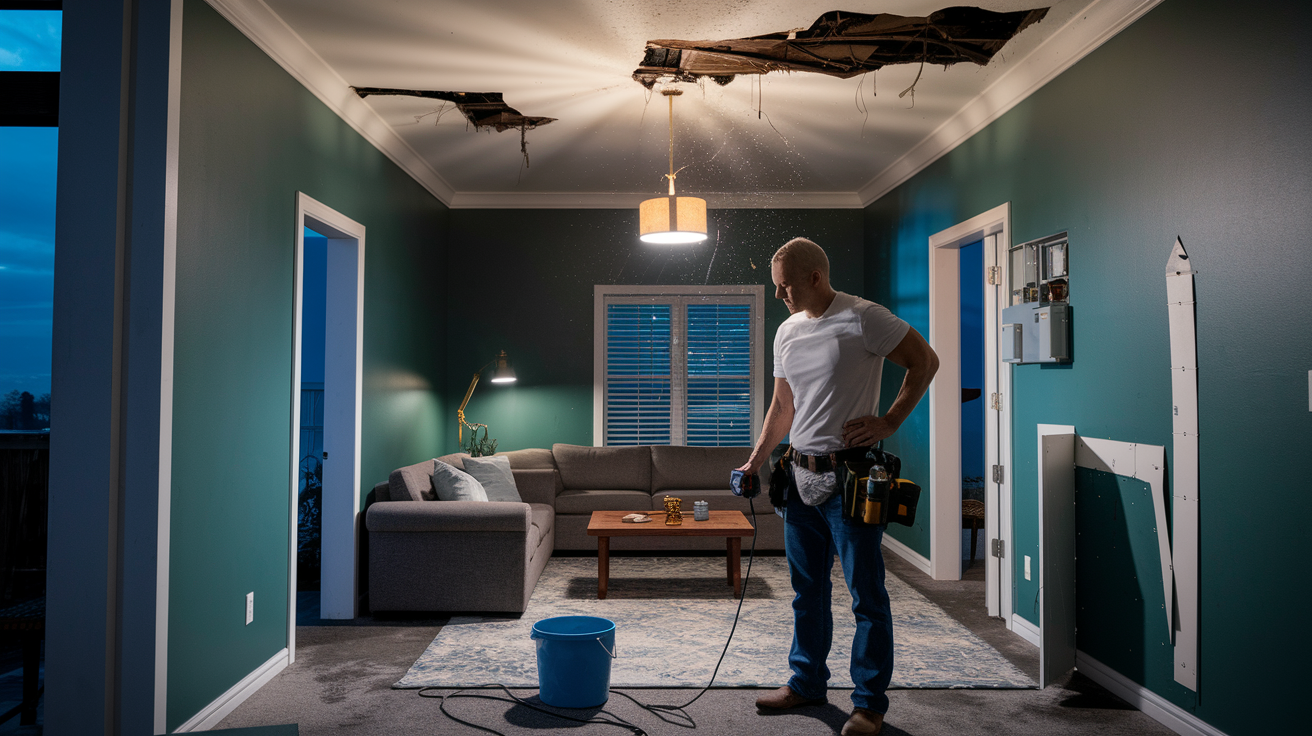
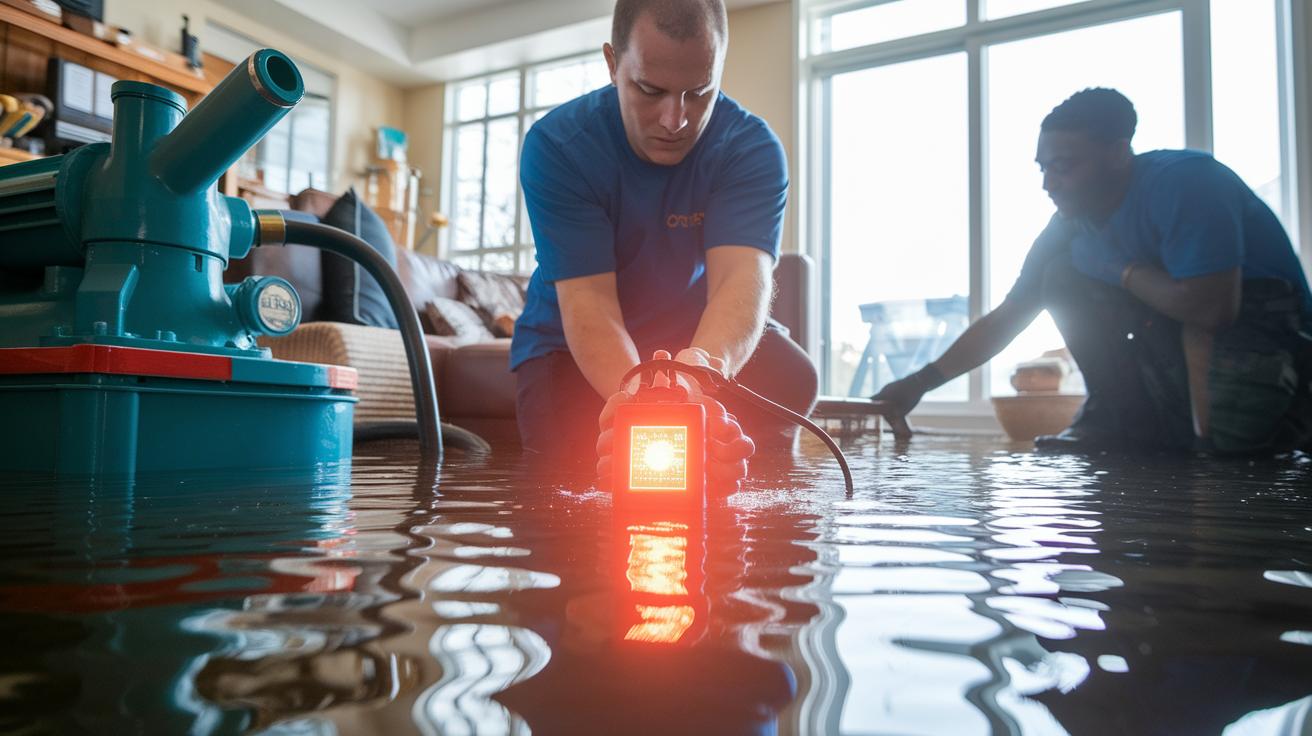
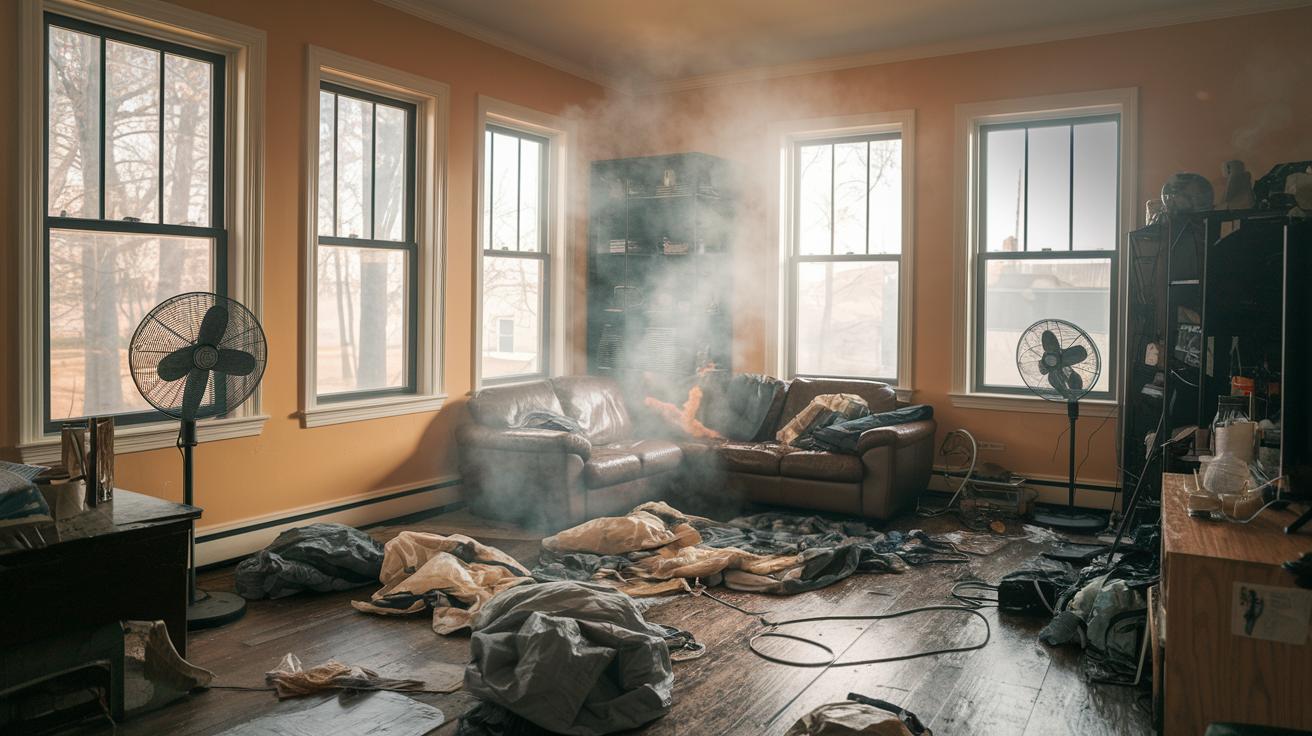
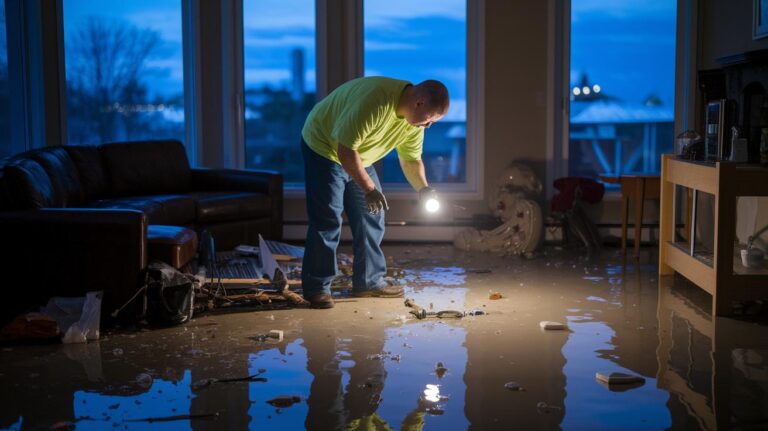
  2. Put safety first before snapping any photos. Stay away from areas with water near electrical outlets and unstable surfaces. If you see water by outlets, turn off the main power and consider calling professionals for water extraction.
  3. Focus on quick fixes to stop more damage. Move valuables away from wet areas but avoid deep cleaning, since cleaning can change the evidence needed for your claim.
  4. Document where the water came from before you start cleaning up. Take clear photos and videos that show the leak or burst pipe and how the water spread. This helps adjusters understand what happened.
  5. Record evidence room by room. Capture wide shots of the overall damage and take around 20 to 30 close-up photos to show details like water stains and warped surfaces.
  6. Make a detailed list of all damaged items. Write down electronics, furniture, and any personal belongings along with the approximate dates of purchase and values.
  7. Keep every invoice and receipt from repair work or emergency fixes. These records will support your claim.
  8. Stay in touch with your insurance adjuster by keeping a timeline of events and logging every conversation. This helps clarify your coverage and speeds up the review process.
  9. Submit all your evidence as soon as possible. Send in your complete package including photos, videos, the inventory list, receipts, and your incident timeline.

Reviewing Your Policy Coverage Before Documenting Water Damage Claims

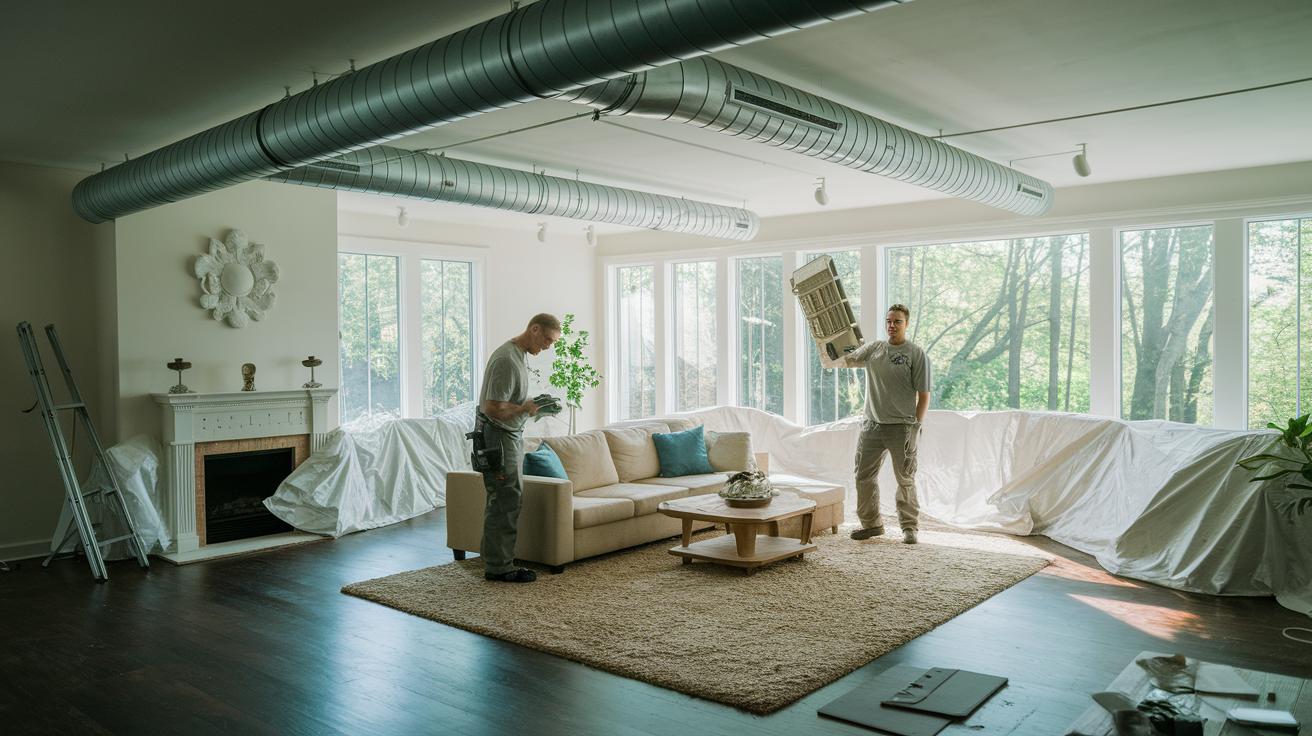
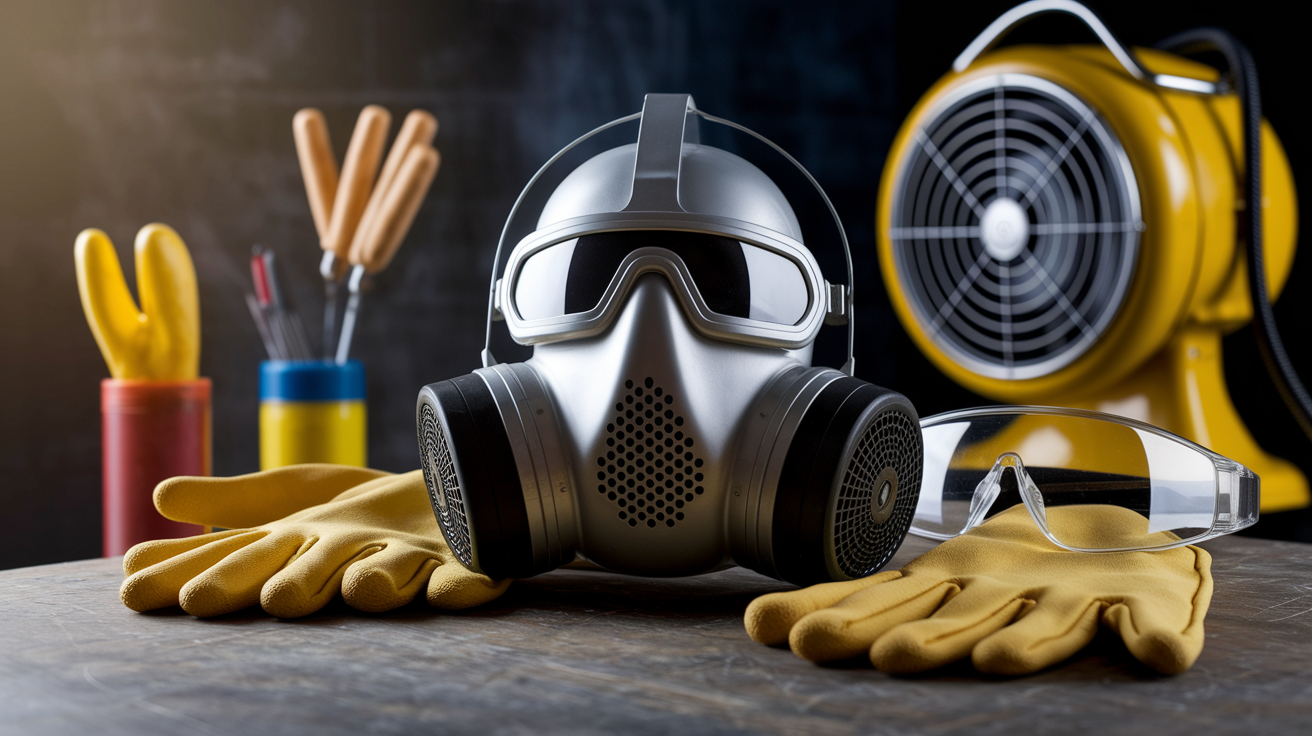
img-1.jpg

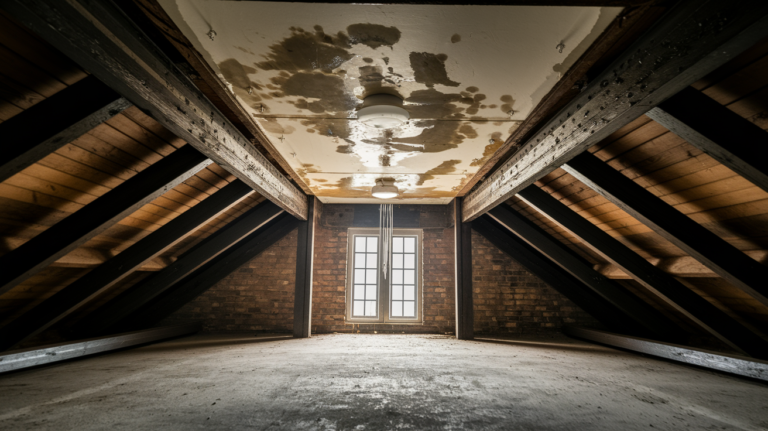
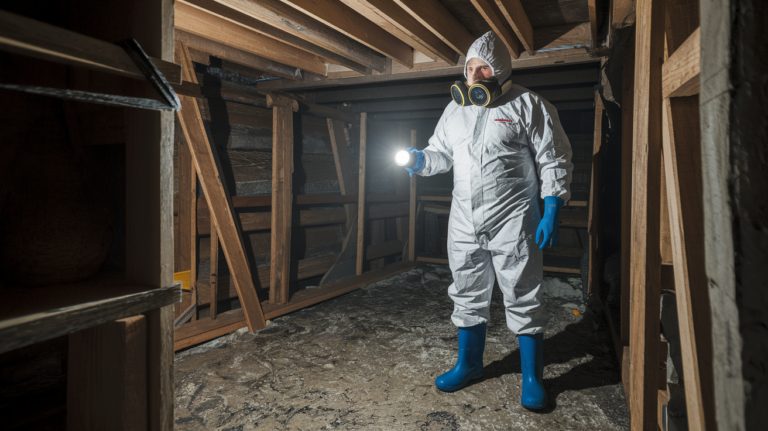
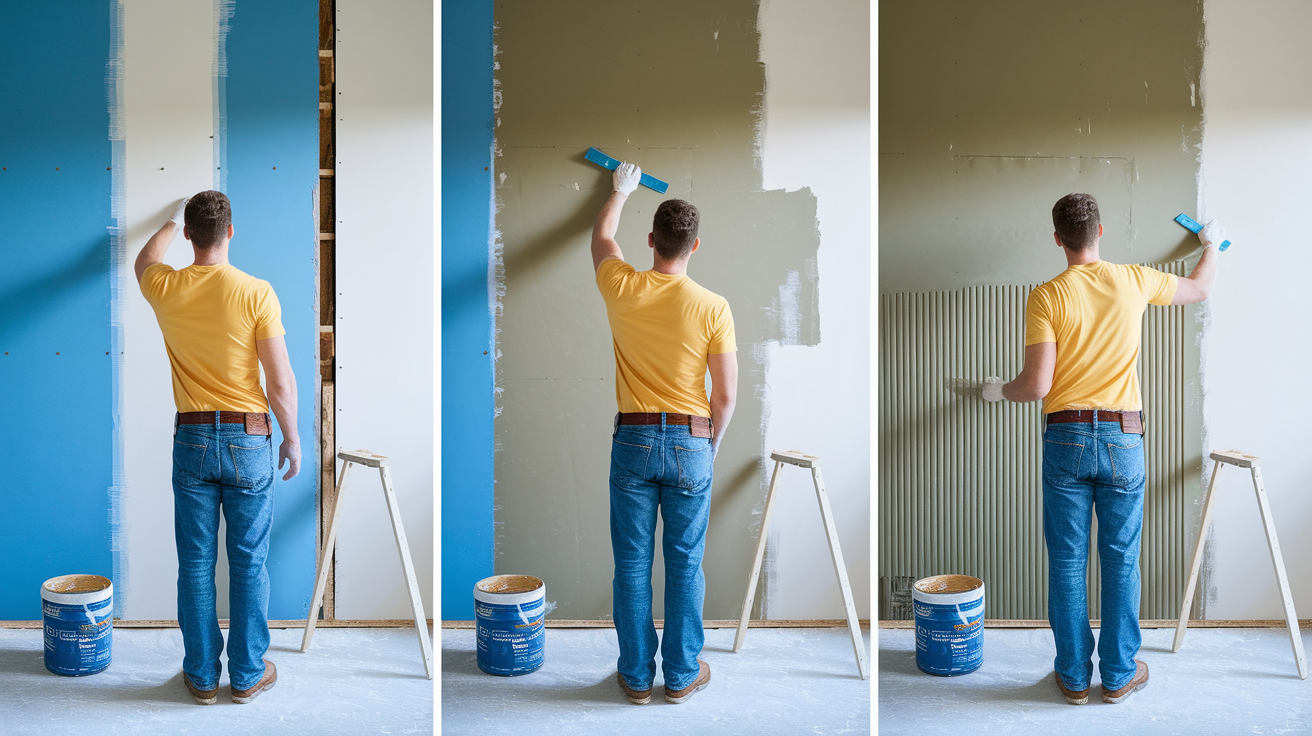
First, review your insurance declarations closely. Look at your policy limits, things it doesn’t cover, and any special add-ons (extra coverage details in your policy). This helps you know what damage might be covered. If damage comes from a sudden burst pipe or an accidental overflow, your policy could cover it fully. However, if damage happens because of long-term leaks, coverage might be limited or not available at all. Also, check for any flood or mold notes (mold is a type of fungus that grows on wet areas) so you know how issues like gradual leakage are handled.

Next, check your policy for any rules about how soon you must notify your insurer. Some policies say you need to call within 24 to 48 hours, while others give you more time. This will help you act fast and gather your documentation accordingly. It’s also a good idea to know if your policy offers replacement cost coverage (money to replace lost items with new ones) or reimburses based on actual cash value (the depreciated worth of an item). Understanding these details ensures the evidence you collect matches what your insurer needs. This careful review sets you up for a smoother claim process and helps you avoid any surprises later on.

Conducting a Detailed Water Damage Claim Assessment and Property Inspection

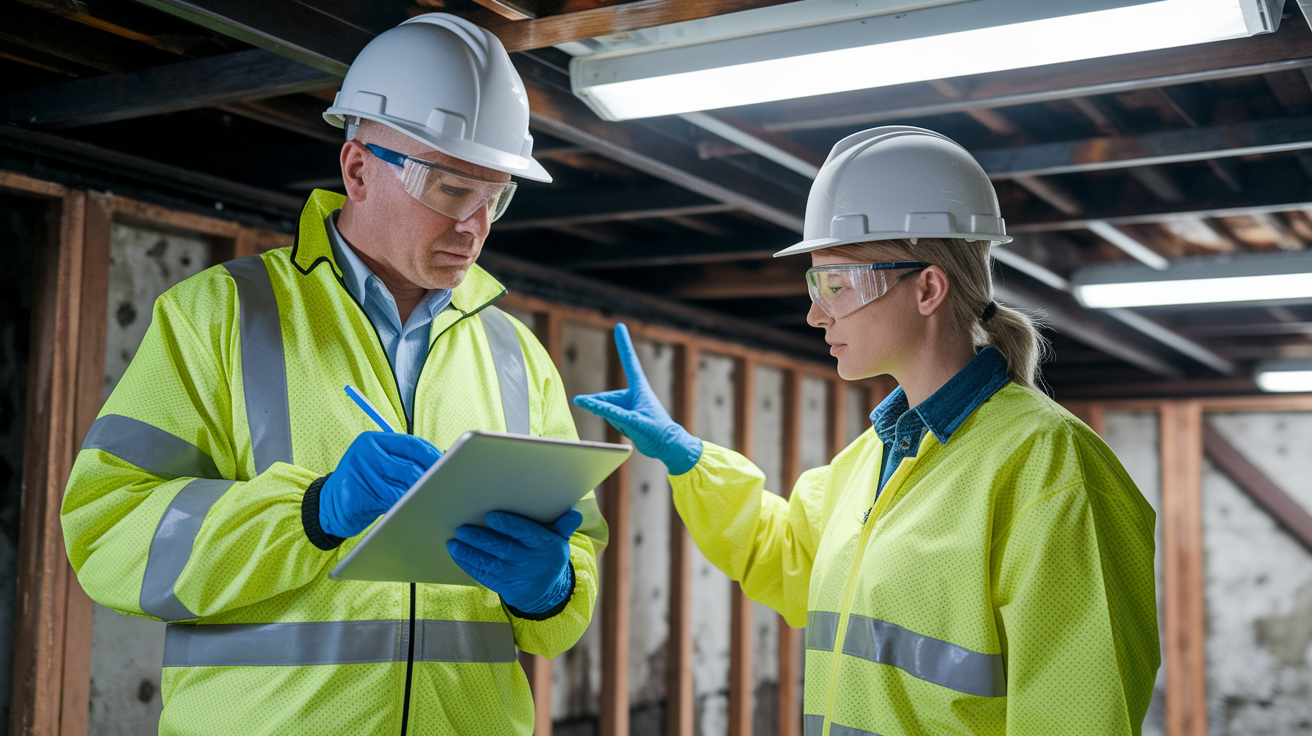
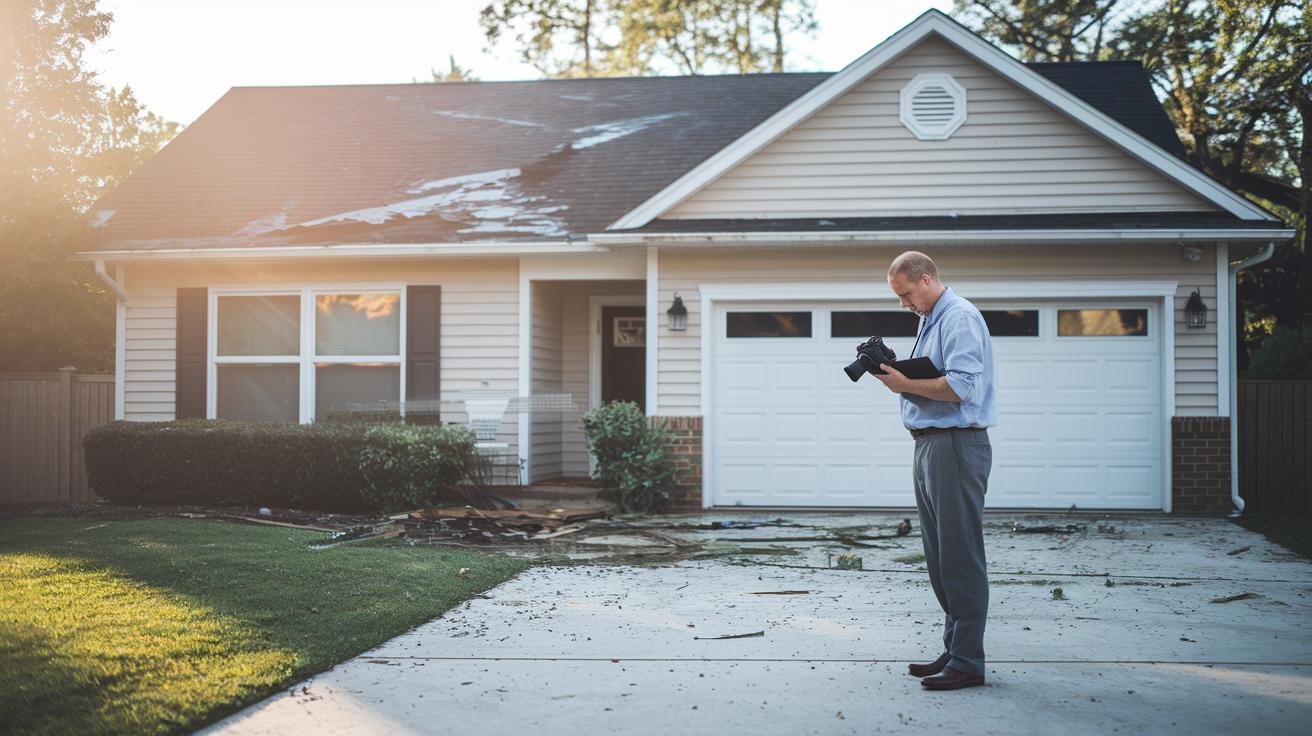
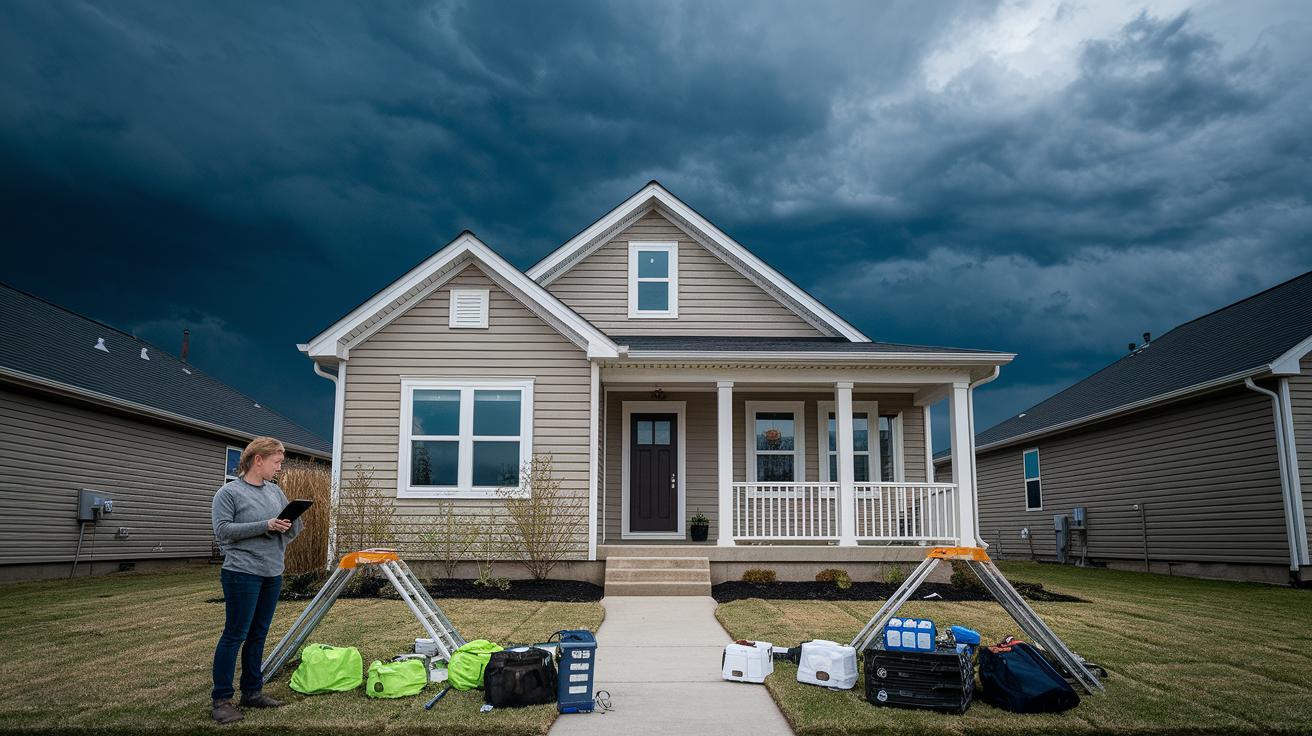
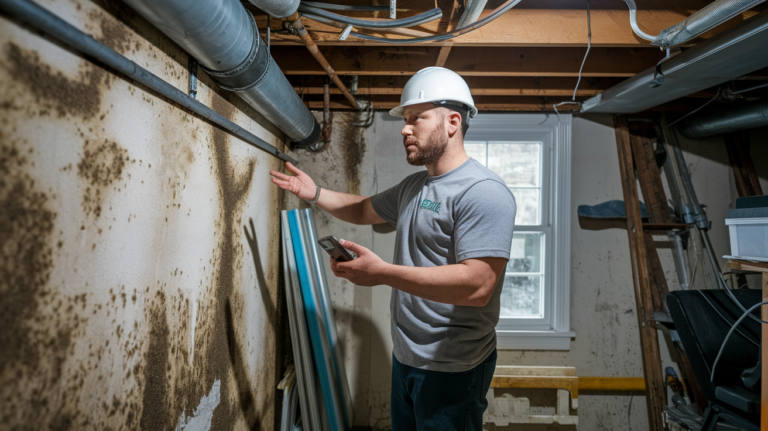
Begin your inspection as soon as you can, ideally within 24 to 48 hours, so you capture all the water damage. Take wide-angle photos that show the full room and 20 to 30 close-up shots of important details. Be sure to record waterline marks, stains, and warped materials. Also, document the exact spot where the leak or burst began before you start any repairs.

Interior vs. Exterior Damage Assessment

Check both the inside and outside of your home. For the interior, look at the walls, ceilings, and floors for any signs of damage. Notice if there’s discoloration on the walls, peeling paint, or blistered drywall. Watch for sagging ceilings or buckled floors as these can point to structural issues. On the exterior, inspect the siding, foundation, and landscaping. Look for cracked or shifting foundations, damp window frames, or water pooling around the house. Write down any water marks or stains to help your insurance adjuster see the full picture.

Moisture Detection Techniques

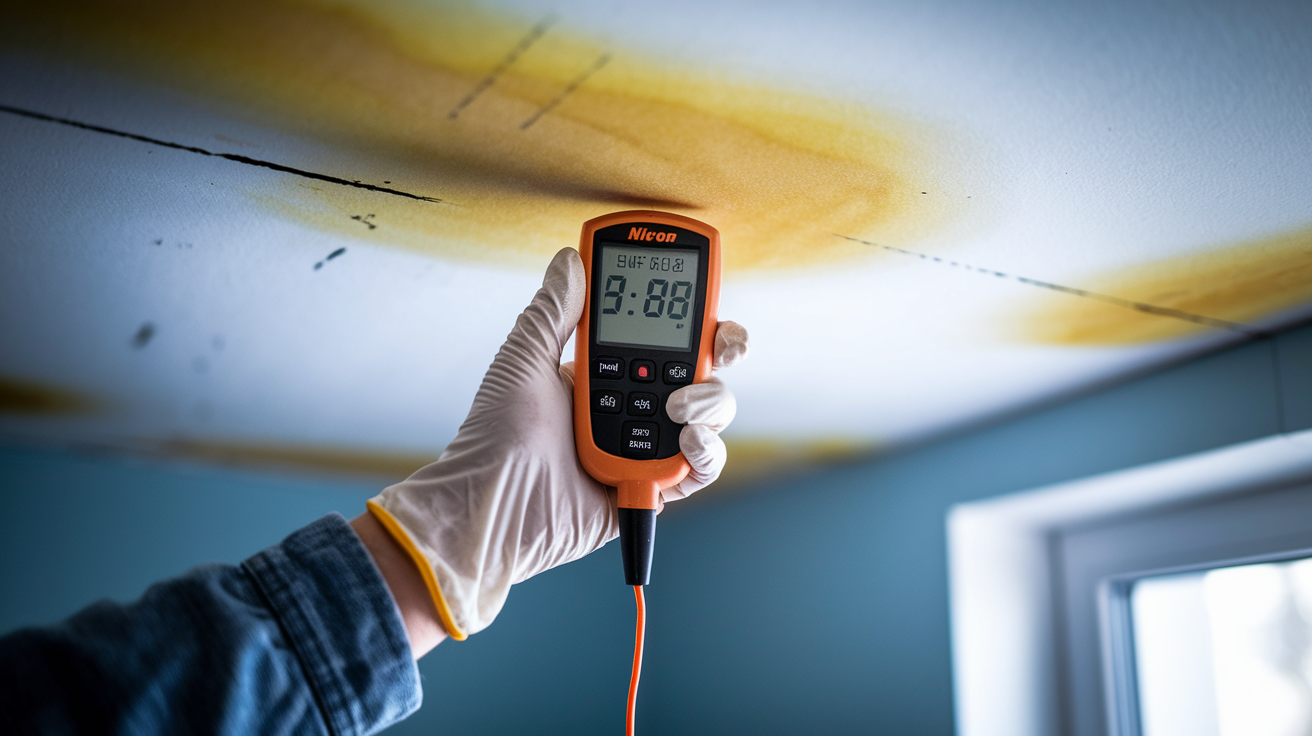
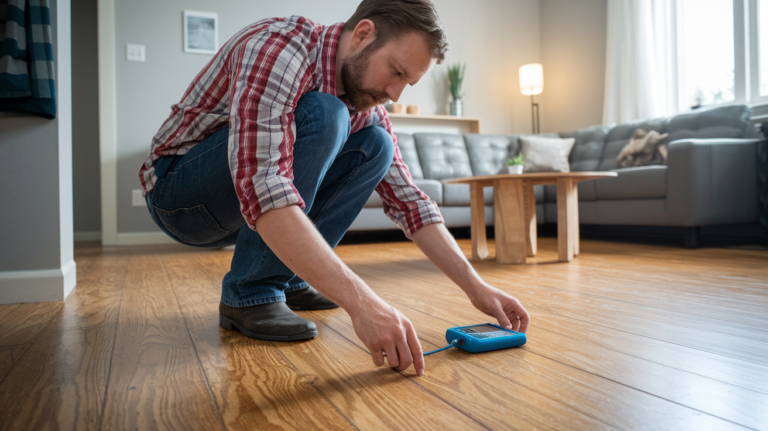
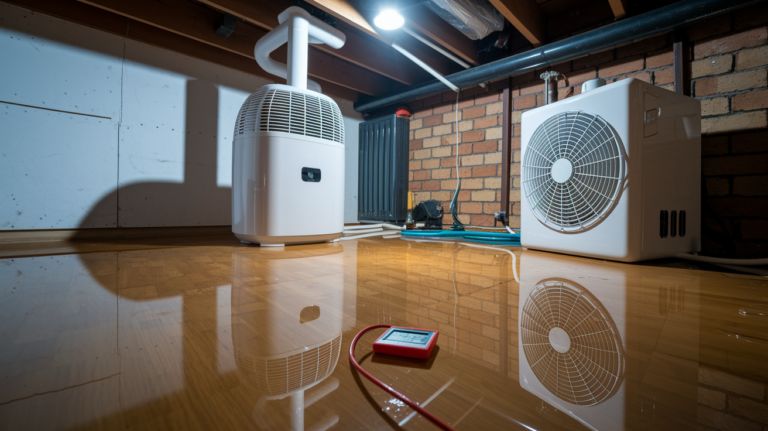
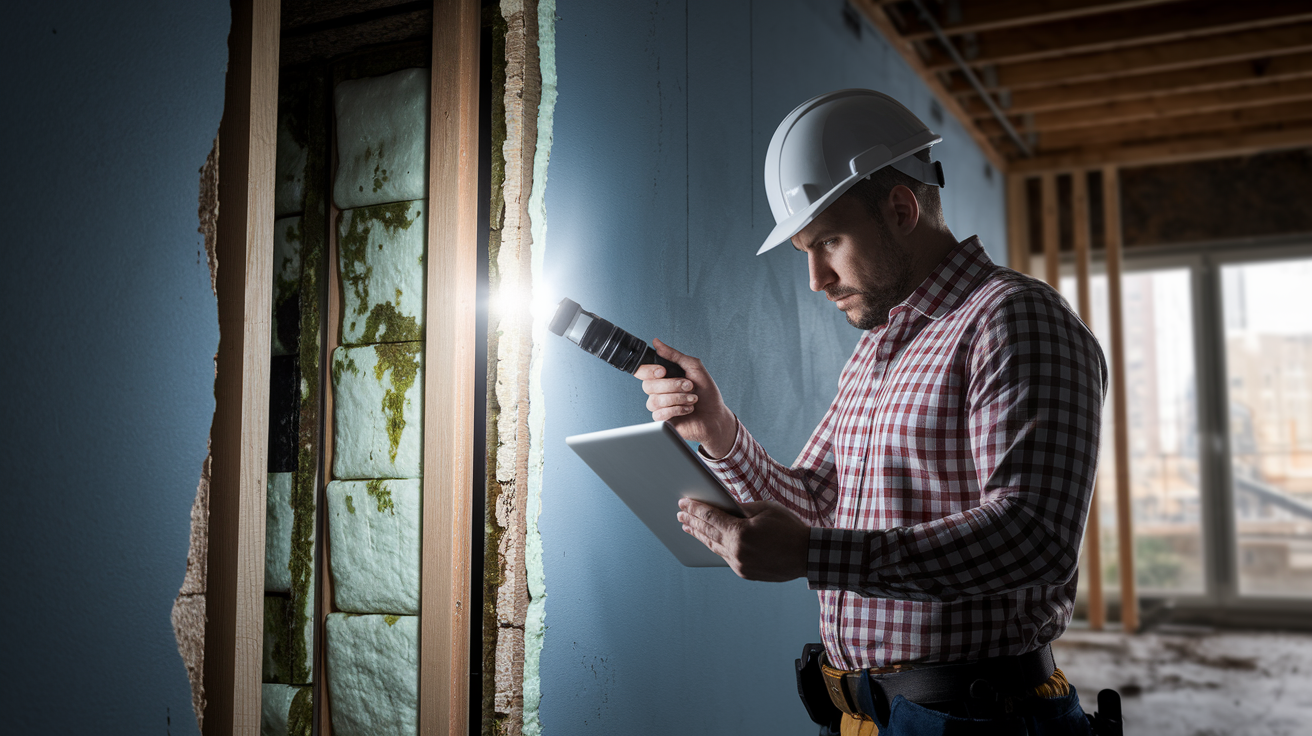
When you record the damage, use tools to get accurate details. A moisture meter (a tool that checks water levels in materials) can help you spot hidden dampness in walls and floors. Thermal imaging cameras show temperature changes that can reveal wet spots, and hygrometers (devices that measure humidity) give readings of moisture in the air. Make a note of each reading by area and highlight any unusual findings that might affect the structure. This mix of photos and tool readings builds a strong record to back up your claim.

Capturing and Organizing Photographic and Video Evidence for Your Water Damage Claim

img-2.jpg

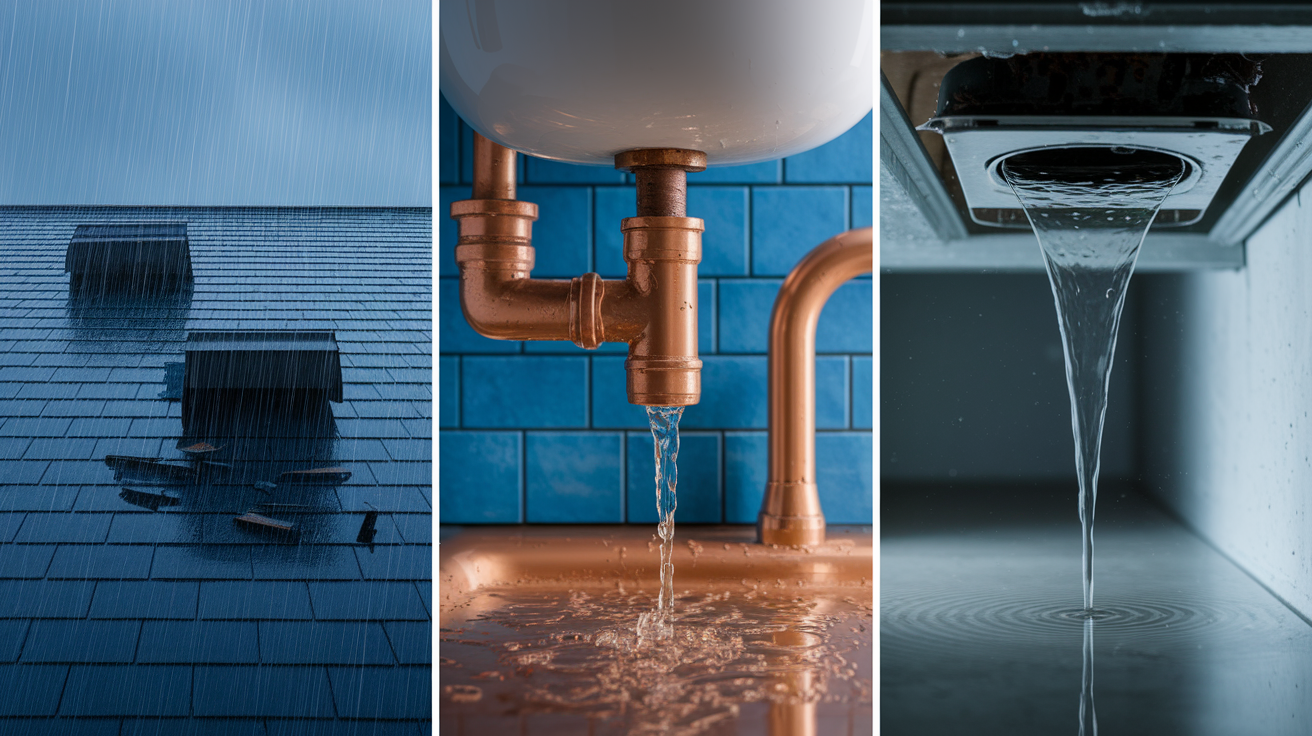
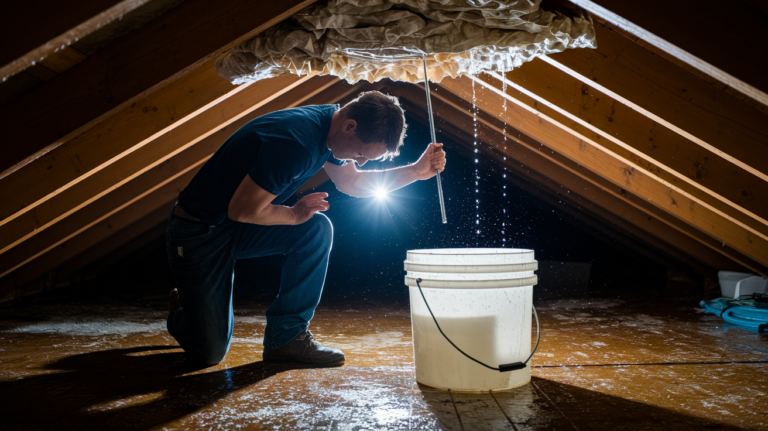
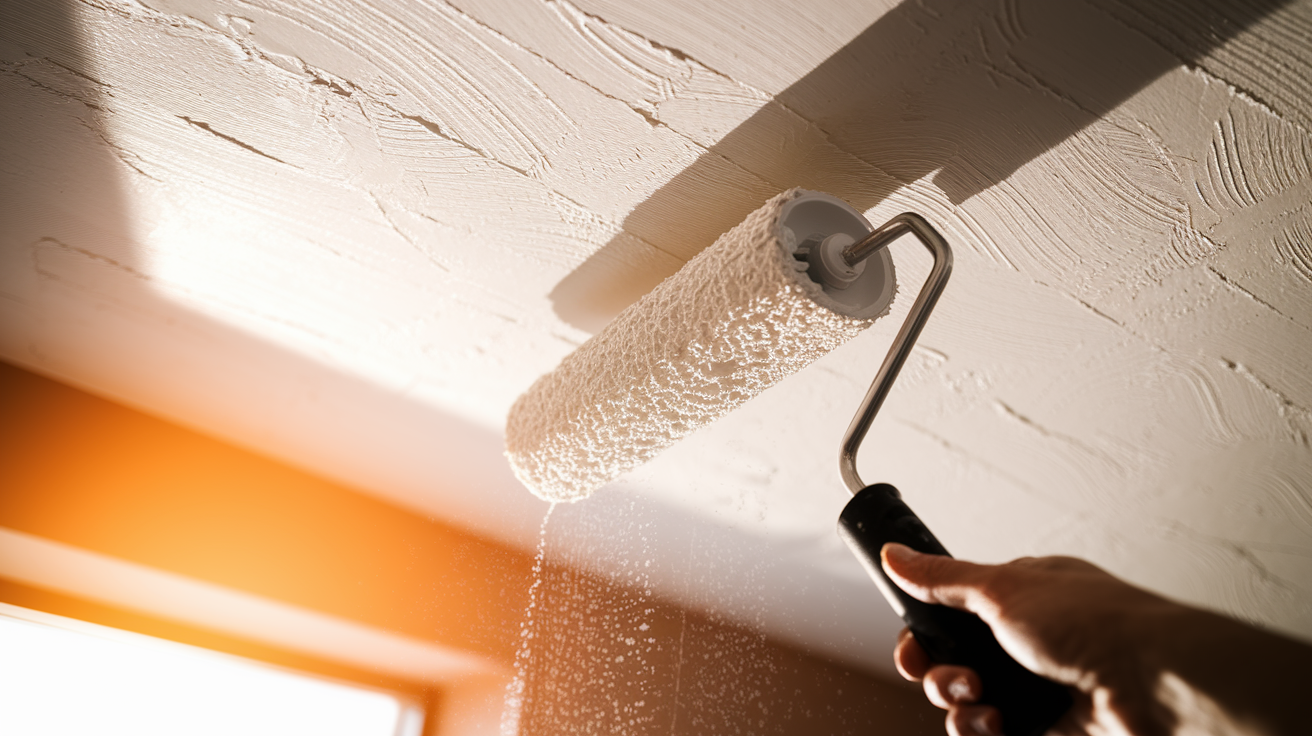
We know dealing with water damage is stressful. Clear photos and videos can really help support your claim. Here’s how you can capture trustworthy evidence:

  1. Take wide photos from both inside and outside the affected area. These images show the full context.
  2. Snap clear close-up photos of leaks, water stains, and warped surfaces. They capture important details.
  3. Use a camera or smartphone that adds the date and time to your photos (this helps show when the damage happened).
  4. Record a video walkthrough of your property. As you move through each room, mention the water source, note the affected spots, and explain how much damage there is.
  5. Label each file with the room name and recording date. This keeps everything organized.
  6. Include before-and-after photos that show the damage before and after any initial fixes.
  7. Keep the digital file details (metadata) to prove the authenticity of your images.
  8. Back up your photos and videos on a cloud service or external drive. Safe storage ensures your documentation is always ready when you need it.

Following these steps will help make your claim clear and organized.

Preparing Repair Estimates and Professional Reports for Your Water Damage Claim Documentation

When water damage strikes, getting clear written repair estimates is essential. We recommend you call licensed contractors, plumbers, or restoration experts to get at least two detailed repair estimates. Each estimate should show the work details, materials, labor costs, and any extra fees. Always check that each contractor is licensed before you move forward.

Obtaining Licensed Contractor Estimates

Follow these easy steps:

  1. Ask each contractor for a written breakdown where every cost is listed separately.
  2. Compare the estimates side-by-side to spot differences in material quality, labor time, and overall work scope.
  3. Hold on to every invoice and receipt. These papers show the work done and support your claim.
  4. If you need immediate help, consider calling emergency restoration services.

Commissioning Professional Inspection Reports

A certified inspector can spot hidden damage and mold risks you might not see. When you hire an inspector, ask that they:

  1. Check for hidden structural damage and water-related weaknesses.
  2. Record moisture levels and note areas that could develop mold.
  3. Give you a clear report that you can add to your repair estimates to strengthen your claim.

Using this approach gives you both detailed cost estimates and expert evaluations. We know this process can feel overwhelming, but these steps will help you document the damage and support your claim confidently.

Organizing and Submitting Your Water Damage Claim Documentation

img-3.jpg

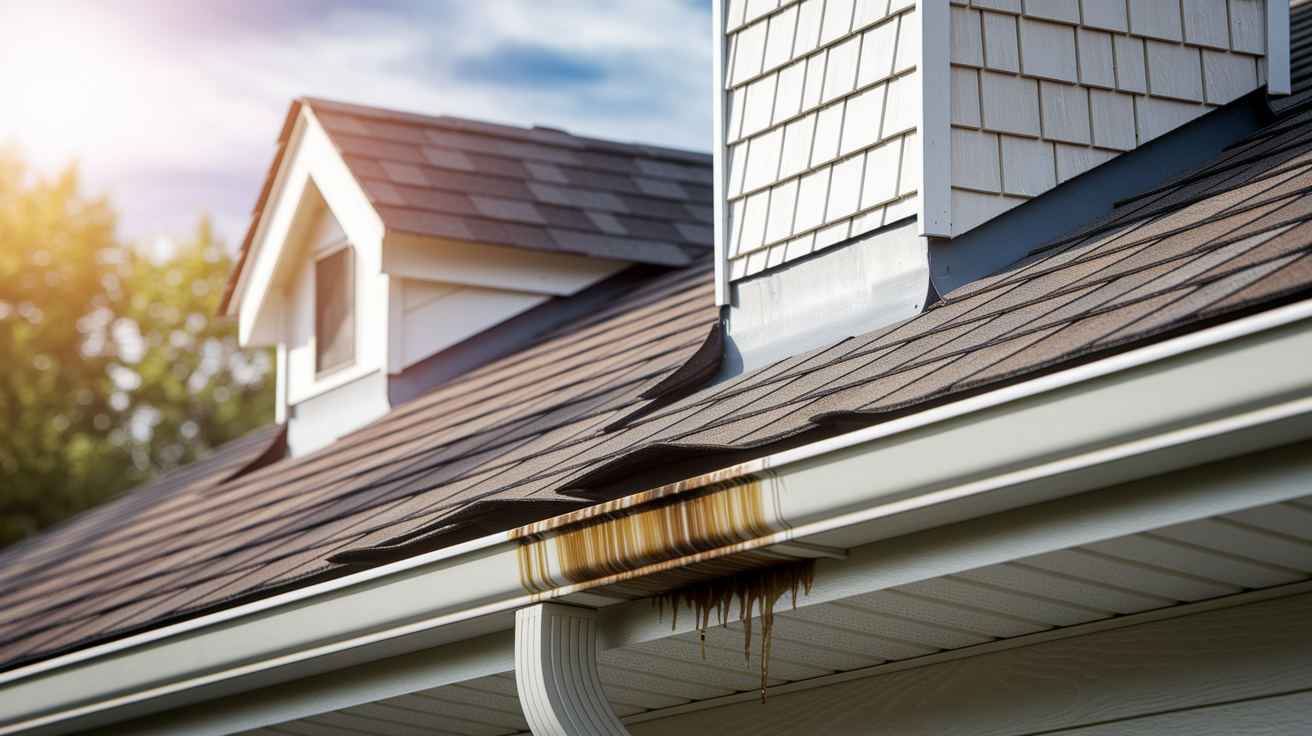
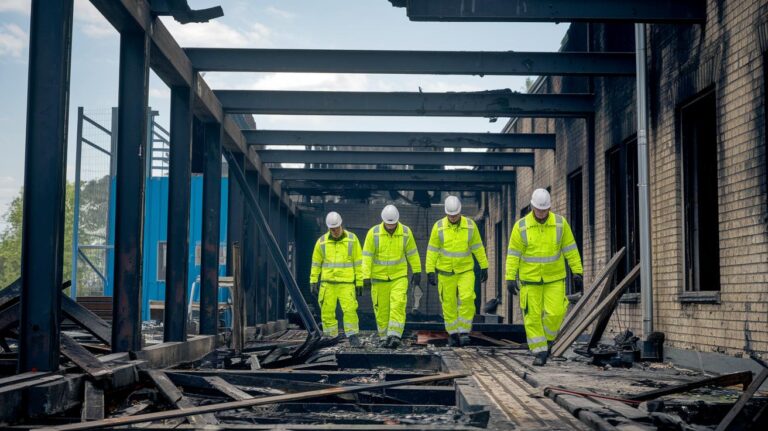
Start by gathering all your water damage documents in one place. This includes photos, videos, lists of belongings, repair estimates, reports, and receipts. Keeping both digital and paper copies makes it easier to keep track of everything.

  1. Make separate folders for each type of document. For example:

    • Photos and videos
    • Inventory lists
    • Written repair estimates and professional reports
    • Receipts and invoices
  2. Name your digital files clearly. Use simple labels that include the room name and the date. This helps you track events and details.

  3. Fill out your insurance claim forms carefully. Write each detail and date exactly as they appear.

  4. Send your completed claim package using certified mail or through your insurer’s online portal. Write down the date you send everything and note any deadlines for follow-up.

  5. Keep copies of all documents and maintain a simple log of all communications with your insurance company. This record will be useful throughout the claim process.

Collaborating with Insurance Adjusters and Avoiding Common Documentation Pitfalls in Water Damage Claims

When an adjuster arrives, we work with them step by step. We bring clear evidence bundles for each room, using sharp photos, videos, and receipts. This makes review faster and keeps everything easy to understand.

Follow these simple steps:

  • Record each call and email with the adjuster. A written log helps clear up any issues later.
  • Share your full timeline, including emergency steps and events.
  • Explain if damage happened suddenly (like a burst pipe) or over time (like slow leaks).
  • If any part of your claim is denied, ask for a written explanation. This helps you follow up if needed.
  • Check that every photo is in focus. Blurry photos or missing receipts can slow down your claim.
  • Submit all documents on time to avoid errors.

Sticking to these steps cuts down on mistakes and supports your claim. We build trust with the adjuster by keeping clear records and staying cooperative, which makes the process smoother and faster.

Final Words

In the action, we've broken down what to do right after water damage strikes. You learned to secure safety, capture useful evidence with clear photos and videos, and organize repair estimates. We also covered reviewing your policy and coordinating with your insurer step by step.

This step-by-step guide to water damage claim documentation gives you the tools to limit damage cost and reduce future risks. Keep your records clear and follow these simple steps, so your home can be safe and livable again.

FAQ

How to document water damage?

The process of documenting water damage starts with capturing clear photos, videos, and notes of affected areas. This includes recording dates, water sources, and inventory details to support your insurance claim.

What not to say to an insurance adjuster about water damage?

The approach when speaking to an adjuster is to stick to facts. Avoid emotional language, exaggerations, or placing blame. Instead, provide organized evidence and clear documentation of the damage.

How to write a water damage report?

The method for writing a water damage report involves detailing a timeline, describing room-by-room damage, including photos and videos, and listing estimates and repairs. This organized report helps adjusters understand the full scope of the incident.

How to get the most out of a water damage claim?

The strategy for maximizing a water damage claim starts with prompt notification, comprehensive documentation, and professional estimates. Staying organized and communicating clearly with adjusters helps ensure a fair and timely settlement.

Roof Tarp Damage Prevention: Protect Your Home from Further Harm

0

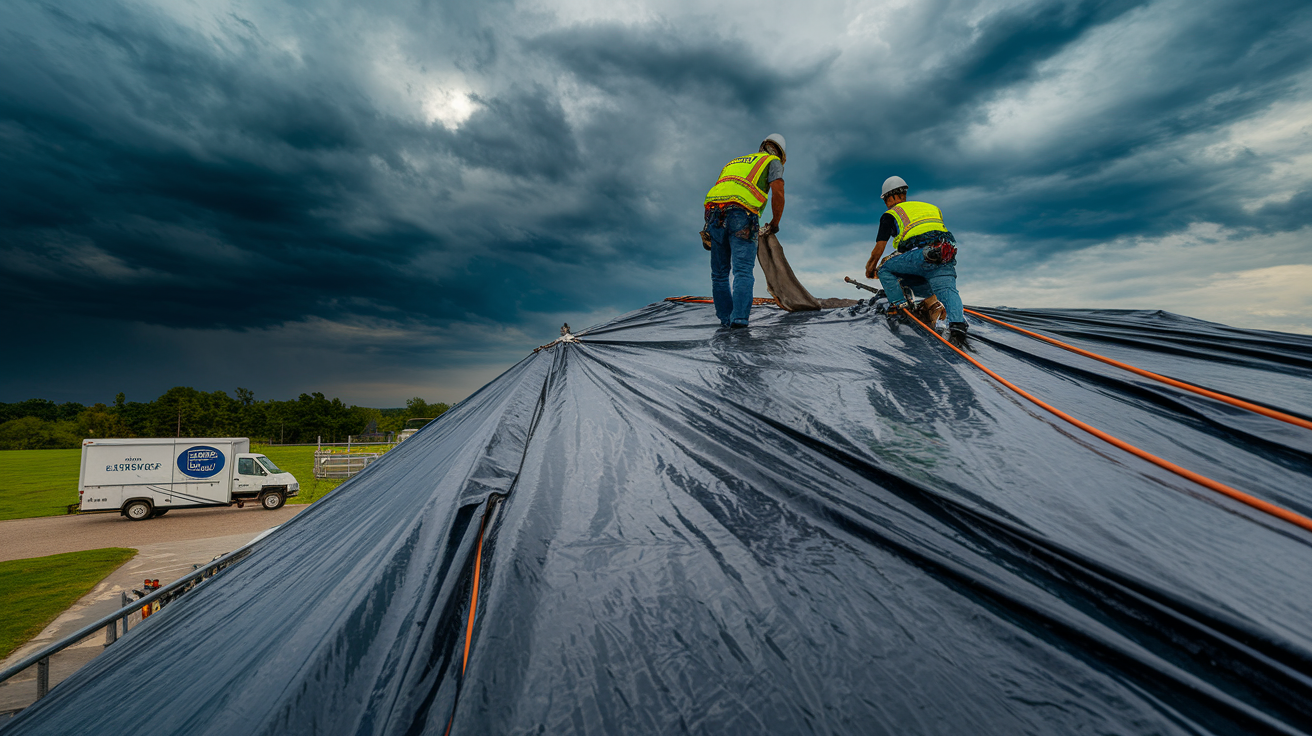
What if your temporary roof tarp fails the first night? That’s not dramatic, it’s how a small tear or a loose edge turns into soaked insulation, warped trim, and a big insurance headache. In the next few minutes you can stop more harm. This post walks you through the exact steps pros use: picking the right tarp, stretching it 2 to 3 feet past the damage, taping seams, capping nails with washers, anchoring against wind, and testing with a hose. Follow these steps and keep the water out while you plan real repairs.

Essential Roof Tarp Damage Prevention Techniques for Immediate Protection

OmXb_bstRPudetwRuvjzXw

The first hour after you find roof damage decides whether you stop the problem or watch it creep into ceilings, insulation, and walls. Water won’t wait around. A tarp done right stops water while you figure out real repairs.

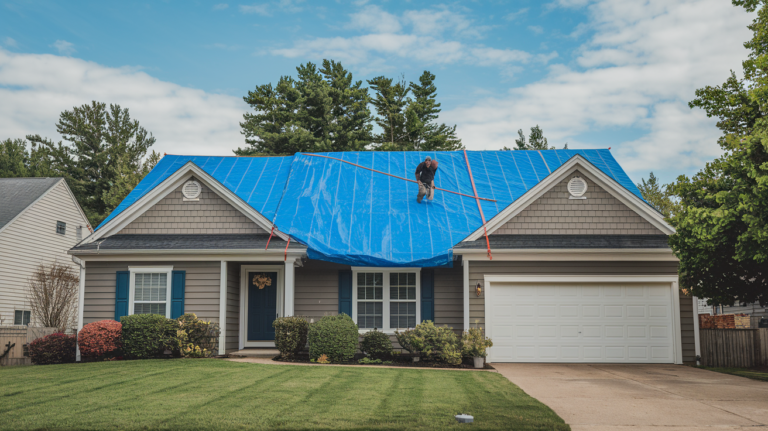
Most people mess up in three spots. They cut the tarp too small, forget the tape, or don’t fasten tight enough. Your tarp needs to stretch 2–3 feet past the damaged spot so water runs away from the breach. Taping every seam and capping each nail with a washer builds a weatherproof seal that actually holds when wind and rain hit.

Here’s what you need to do:

  1. Check and measure the damaged section from the ground or a stable ladder. Mark where shingles are missing, where holes are, or where decking shows through. Clear off debris and loose bits so the tarp sits flat.

  2. Grab a heavy duty UV resistant tarp that’s at least 6 mil thick. Cut it so it goes 2–3 feet beyond the damage on every side.

  3. Center the tarp over the roof peak if damage crosses the ridge. Drape it evenly so water flows down without forming puddles.

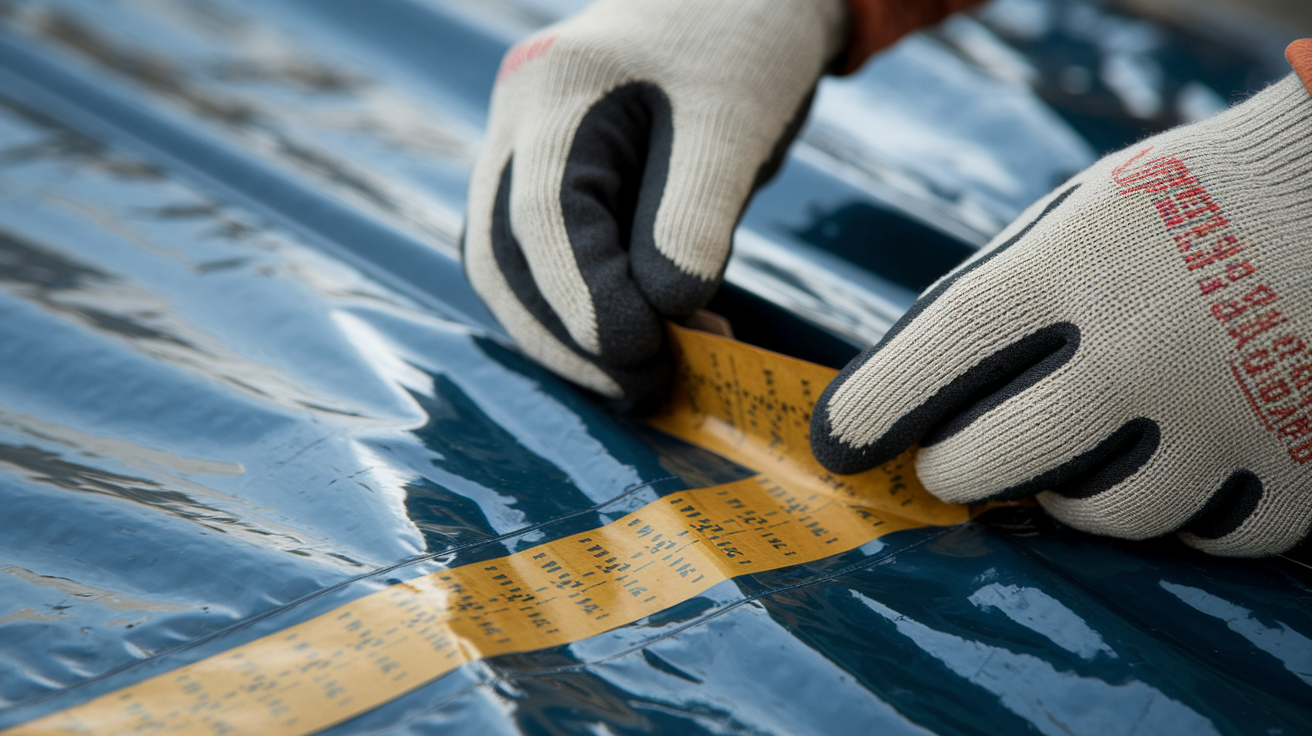
  4. Fold 6–8 inches of tarp over the ridge. Run a solid line of outdoor tarp tape along that fold, then nail through the fold every 12–16 inches. Cap every nail with a washer so it won’t tear and leak.

  5. Push tarp edges at least 12 inches past the eaves. Fold the edge under and lock it down with nails and washers, or tuck it beneath drip edges if you can reach them.

  6. Press the tarp tight into roof valleys. Tape the tarp to the decking along the valley shape and lock the edges with washers.

  7. For pipes or vents, cut an X shaped opening in the tarp. Fold the flaps over the pipe, tape the edges, and secure with washers to seal it up.

  8. Test what you did with a garden hose before walking away. Run water over seams, edges, and openings to find leaks. Fix anything that drips right away.

Skip the tape or use nails without washers and water just bypasses your tarp and flows straight into the house. Leave edges loose and wind pockets form that’ll rip the material in hours.

Choosing the Right Materials to Prevent Roof Tarp Failure

SVO3t4_3Sf6PcOux1c8QtA

A thin tarp looks the same as a heavy one when it’s folded on the shelf. You’ll see the difference three days later when the cheap one tears at the grommets or gets brittle from sun.

Heavy duty polyethylene tarps fight tearing and UV breakdown better than budget canvas or light poly. You need 6 mil minimum for short term coverage. Go with 10–16 mil contractor grade if you want something that lasts and handles wind without shredding. Canvas tarps breathe and resist scraping but they soak up water and get heavy, which stresses fasteners on steep slopes.

Grommets are where things fail. Reinforced corner grommets with doubled fabric or metal rings spread tension and resist pullout. Tarps with grommets spaced 18–24 inches along edges give you more anchor points and cut down on sagging between fasteners.

UV protection matters if your tarp stays up for weeks. UV stabilized tarps include stuff that slows sun breakdown. An untreated tarp can crack and tear within 30 days of full sun. A UV rated tarp keeps its strength for 60–90 days or more.

What you need:

  • Tarp thickness: 6 mil minimum. 10–16 mil for longer coverage or windy spots.
  • Grommet reinforcement: Find double layer fabric or metal rings at stress points.
  • UV rating: Make sure it says UV stabilized if the tarp stays up more than two weeks.
  • Fasteners: Use galvanized roofing nails or screws with neoprene or metal washers. Don’t use staples.
  • Reinforcement boards: Pressure treated 1×6 or 1×8 lumber placed across the slope every 6–8 feet stops wind uplift on big tarps.

Roof Tarp Positioning for Different Slopes and Structural Layouts

nJfN8Y-tT7mMkxwtTTsCXw

Flat and low slope roofs collect water if the tarp sags even a little. Steep roofs create wind uplift that can peel a loose tarp in minutes. How you position it has to match pitch, drainage direction, and where the structure carries load.

On flat or low slope roofs, create a slight angle by putting small blocks or folded lumber under the tarp to push water toward gutters or drains. Without slope, water pools in low areas, stresses the tarp, and eventually leaks through seams or nail holes. On moderate slopes (4/12 to 8/12), standard ridge to eave draping works if you tension it evenly and lock down edges to stop flapping. Steep roofs (9/12 and up) need tighter tension and more fasteners to fight wind lift along the slope.

Roof Type Primary Positioning Requirement
Flat or low slope (0/12 to 3/12) Add angled supports beneath tarp to create runoff channels. Inspect daily for ponding.
Moderate pitch (4/12 to 8/12) Drape from ridge to eave. Tension evenly. Secure edges to prevent flapping and uplift.
Steep pitch (9/12 and above) Increase fastener density (every 10–12 inches). Use reinforcement boards to resist wind peel.

Proper slope management stops sagging that traps water weight, stresses fasteners, and speeds up tarp failure. Water pooling adds hundreds of pounds of load, which can warp decking or yank fasteners loose. Keeping drainage going also cuts down on ice buildup in cold weather, which can tear the tarp or overload the roof structure.

Extreme Weather Reinforcement Methods Beyond Standard Anchoring

GF0KubBMTsWIy-FYxfVX9A

High winds create uplift forces that standard nails and washers can’t fight alone. A 30 mph gust can lift a poorly anchored tarp and rip it away in seconds, leaving your roof exposed during the storm.

Ballast placement adds weight at critical stress points without punching through the roof. Put sandbags or water filled containers every 6–8 feet along tarp edges, especially at corners and along the ridge. Only position ballast on solid areas. Don’t put heavy loads near damaged decking or compromised rafters. Ballast works best paired with mechanical fasteners, not instead of them.

Ratchet straps threaded through grommets and anchored to secure roof features (chimney bases, vent stacks, or the opposite roof edge) fight uplift on large tarps. Never anchor straps to gutters. The force will tear gutters loose and cause more damage. Route straps over the ridge or tie to anchor points installed in solid decking. Tighten straps until the tarp is taut but not stretched. Over tensioning tears grommets and stresses the fabric.

Uplift pressure goes up with roof slope and exposure. A ridge mounted tarp on a 10/12 pitch in an open field takes more wind load than a 4/12 roof sheltered by trees. Exposed ridgelines need reinforcement boards fastened through the tarp into decking every 6 feet to stop peeling.

Advanced reinforcement tactics:

  • Double layer tarp edges: Fold the tarp edge back on itself before fastening to double the material thickness at stress points.
  • Cross bracing with rope: Run paracord or heavy rope diagonally across the tarp surface, threading through grommets and tying to opposite anchors to cut down on flapping.
  • Wind deflectors: Position small boards or foam wedges along the windward edge to push airflow over the tarp rather than underneath it.
  • Redundant fastener rows: On high wind roofs, add a second row of fasteners 6–8 inches inside the primary edge fasteners to create a backup attachment line.
  • Storm inspection triggers: Check and retighten all fasteners, straps, and ballast within 12 hours before forecast high winds. After the storm, inspect right away for damage.
  • Temporary wind fences: If the tarp covers a large area, stack sandbags or anchor plywood panels upwind to reduce direct wind pressure on the tarp surface.

Protecting Roof Features, Skylights, and Penetrations

VFIONTUmTjuIiFjiTZIa0g

Vents, pipes, and chimneys create openings that standard tarp draping can’t seal. Water funnels into these gaps and flows straight into the attic or living space below.

The X cut method seals penetrations without leaving open edges. Measure the penetration diameter, then cut an X in the tarp slightly smaller than the penetration. The undersized cut creates tension when you stretch the tarp over the feature. Fold each flap of the X down over the penetration base, tape the edges with outdoor grade waterproof tape, and lock down each flap with a washer and nail. The tape bonds the tarp to the penetration surface and blocks water from slipping beneath the fold.

Skylights need a frame approach. Don’t drape the tarp directly over the skylight dome. It’ll trap water and stress the glass. Instead, build a small plywood frame around the skylight perimeter, drape the tarp over the frame to create a tent shape, and secure the tarp edges to the frame with battens and screws. This sheds water away from the skylight and keeps clearance.

X cut sealing procedure:

  1. Find the penetration and measure its diameter. Add 2 inches to account for the fold over.

  2. Cut an X in the tarp with each leg around 75% of the penetration diameter. The tight fit creates a seal when stretched.

  3. Position the tarp so the X opening lines up with the penetration. Pull the tarp taut and fold each flap down against the base of the pipe or vent.

  4. Apply waterproof tape along each folded edge. Press firmly to bond the tape to both the tarp and the penetration surface. Lock down each flap with a washer and nail driven into the roof deck next to the penetration base.

Safety Precautions for Tarping Without Causing Additional Damage

tVjP3Rz3TZiur5A-P2SK3w

Roof work mixes height, unstable footing, and weather exposure. A fall from a single story roof can cause serious injury. A fall during installation creates a bigger emergency than the original leak.

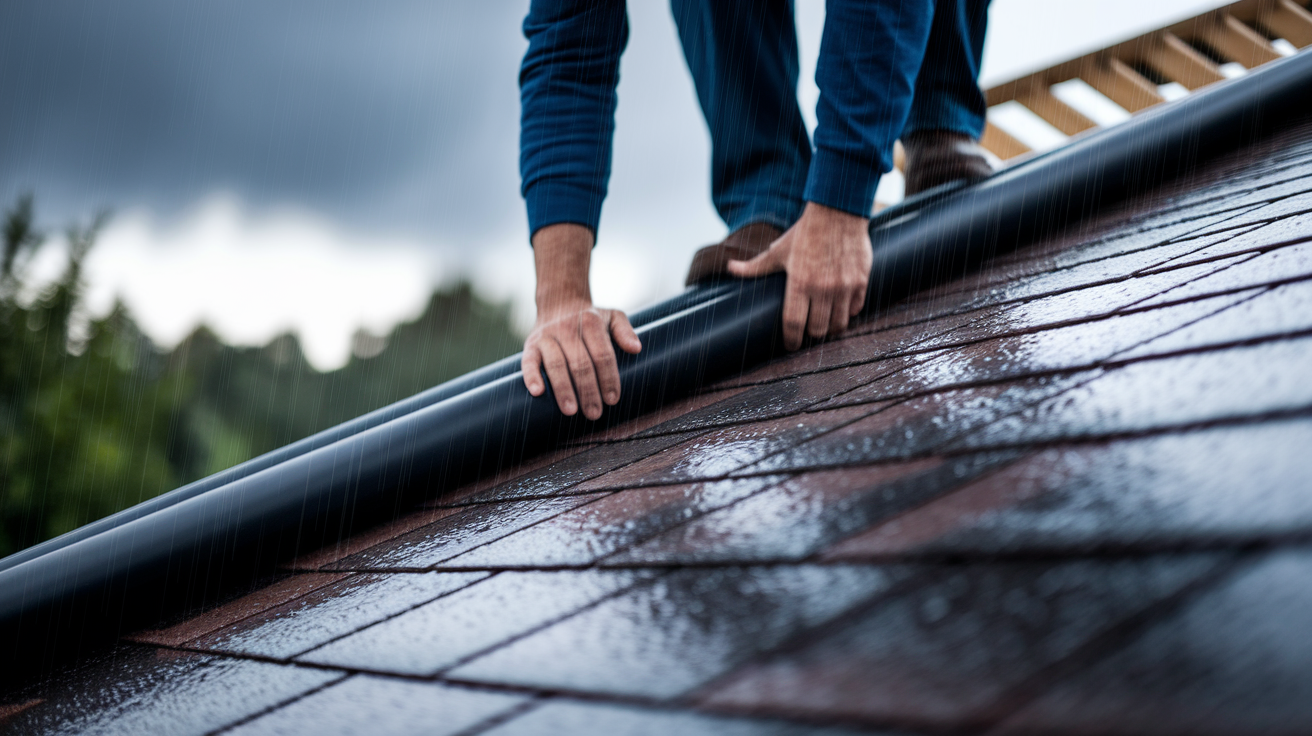
Use a ladder rated for your weight plus the weight of tools and materials. Position the ladder on level, stable ground at a 75 degree angle, about one foot of base distance for every four feet of ladder height. Extend the ladder at least three feet above the roof edge so you have a handhold when stepping on and off. Wear non slip rubber soled shoes with good tread. Wet shingles are slippery even when they look dry.

Work only in calm, dry conditions. Wind speeds above 20–25 mph make it hard to control the tarp and increase the risk of being blown off balance. Stop work right away if rain starts. Wet roofing materials become dangerously slippery within seconds. Lightning risk is another hard stop. Even distant storms can produce strikes without warning.

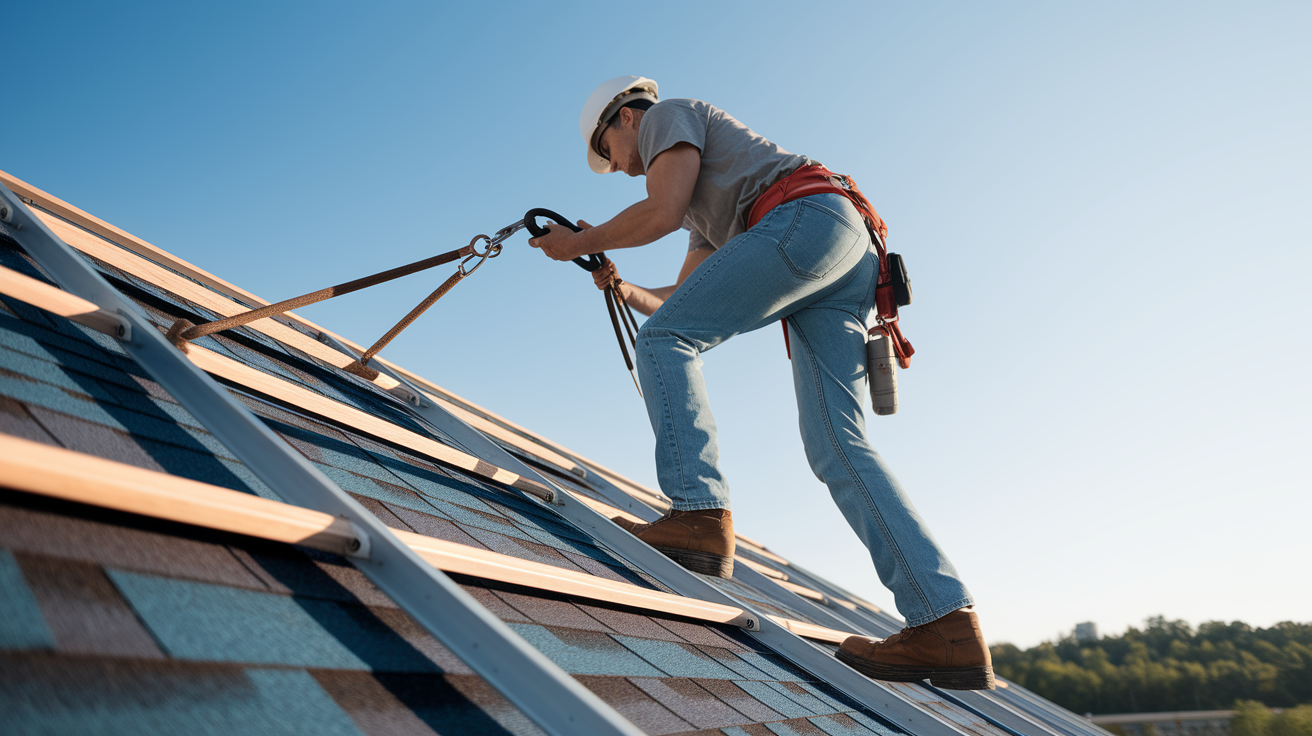
Never tarp alone. A second person on the ground can steady the ladder, hand up materials, and call for help if something goes wrong. If you have to climb onto the roof, use a safety harness anchored to a secure point on the opposite side of the roof peak or to a properly installed roof anchor. Harnesses are required by OSHA for any work on roofs above six feet, and they prevent fatal falls even if you slip.

Maintaining, Inspecting, and Repairing Roof Tarps for Long Term Protection

To_H7ivTSz2PkHC5XNON7w

A tarp done right still breaks down. UV exposure weakens the fabric, wind works fasteners loose, and temperature swings cause expansion and contraction that stresses seams.

Inspect the tarp at least once per week and right after any storm with wind or heavy rain. Walk the perimeter from the ground with binoculars if climbing is unsafe. Look for loose edges, torn fabric, pulled fasteners, sagging sections, or water stains on the underside. Check that washers stay snug and that tape along seams is still stuck down. Small problems caught early take minutes to fix. Ignored, they turn into full tarp failures that need complete reinstallation.

Maintenance checklist:

  • Tighten loose washers and refasten any nails or screws that have backed out.
  • Check seams and overlap zones for separation. Re tape with fresh waterproof tape if edges have lifted.
  • Remove leaves, branches, and debris that collect on the tarp surface. Organic material traps moisture and speeds up fabric breakdown.
  • Check for ponding or sagging. Add support blocks or adjust tensioning to get proper drainage back.
  • Patch small tears right away with heavy duty waterproof tape or tarp repair patches. Tears grow fast under wind stress.
  • Document tarp condition with dated photos after each inspection. Insurance adjusters use this record to verify the timeline of temporary protection and approve claim supplements.

Replace the entire tarp if you see widespread cracking, multiple large tears, or fastener pullout in more than three locations. A failing tarp gives false security. It looks intact from the ground but leaks during the next rain. Re tarping every 30–45 days is standard for extended coverage, and always re tarp right after a big storm even if the tarp looks undamaged.

When to Call Professionals and What to Expect from Emergency Services

zbus4n_USMWmmMOk0_1DYw

Some roof damage is beyond safe DIY scope. Structural instability, large damaged areas, steep pitches, and hazardous weather conditions need professional emergency tarping services.

Pros bring fall protection equipment, commercial grade tarps, and the experience to work safely on complex roof shapes. They also carry liability insurance, which protects you if someone gets injured during the tarping process. Emergency services typically respond within hours and can secure a roof in conditions that would be unsafe for you to attempt.

Situation Why Pros Are Needed Typical Cost Range
Steep roof pitch (9/12 or greater) or multi story height Requires specialized fall protection, roof jacks, and anchor systems. High injury risk for untrained climbers. $400–$1,200
Large damaged area (over 100 sq ft) or multiple roof planes Needs multiple tarps, extensive fastening, and coordination. Difficult to tension and seal properly without a crew. $600–$2,000+
Structural damage (sagging decking, compromised rafters, or tree penetration) Requires engineering assessment before tarping. Walking on unstable decking can cause collapse. $500–$1,500+ (may include shoring or debris removal)
Active severe weather or unsafe conditions (high winds, ice, lightning risk) Professionals have equipment and training to work in marginal conditions. Attempting DIY tarping in storms is extremely dangerous. $300–$1,000 (emergency surcharge common)

Insurance companies expect you to take reasonable steps to prevent more damage, and professional tarping qualifies as a covered emergency expense in most policies. Keep the invoice, take photos of the installed tarp, and document the date of installation. Submit these records with your claim to support reimbursement for the tarping cost and any follow up repairs that the tarp prevented from getting worse.

Final Words

Start by centering a heavy-duty tarp over the damaged area, extending it 2–3 feet, folding over the ridge, taping seams, and nailing with washers so water can’t sneak in.

Pick a thick, UV-resistant tarp and add boards, straps, or ballast for wind. Tuck around vents, press tarps into valleys, and follow safe ladder and harness practices.

Inspect, hose-test, patch small tears, and photograph everything for your claim. For steep roofs or big damage, call pros. roof tarp damage prevention is about stopping more harm now so repairs can move forward. You’ll be under a dry roof again soon.

FAQ

Q: What is the best way to cover a damaged roof with a tarp?

A: The best way to cover a damaged roof with a tarp is to use a heavy-duty UV-resistant tarp (6 mil+), extend it 2–3 ft past the damage, fold over the ridge, tape seams, and secure with boards and washered nails every 12–16 inches.

Q: What is the 25% rule in roofing?

A: The 25% rule in roofing says if damage affects 25% or more of the roof surface, insurers and roofers often require a full roof replacement rather than spot repairs.

Q: How long will a tarp last on a roof?

A: A tarp will last on a roof depending on material and weather; light 6-mil tarps often need replacement in 30–45 days, while 10–16 mil contractor tarps can last several months with regular inspections.

Q: What do roofers use to tarp a roof?

A: Roofers use heavy polyethylene tarps (6–16 mil), 1×6 or 1×8 lumber for wind resistance, roofing nails or screws with washers, continuous tarp tape, and sometimes straps or ballast for high winds.

Which of the Following Is Not an Electrical Safety Hazard: Quick Answer

0

Ever stare at a quiz question and think “wait, that’s a trick question”? Knowing which electrical situations are NOT hazards is as important as recognizing the dangerous ones, because it tells you when it’s actually safe to work. Here’s what matters: properly insulated tools on completely de-energized circuits, verified lockout/tagout systems, and correctly grounded equipment meeting current standards aren’t hazards. The difference between safe and deadly comes down to specific conditions you can check and verify before you touch anything.

Identifying What Is NOT an Electrical Safety Hazard

zi92yrpLSma6FD-ch3AXPA

Properly insulated tools working on de-energized circuits aren’t electrical hazards. When you’ve got equipment with intact double insulation, verified lockout/tagout procedures in place, and everything’s completely de-energized, the electrical hazard doesn’t exist anymore. Non-conductive work surfaces and correctly grounded equipment meeting current safety standards also fall into the safe category.

What makes something NOT a hazard comes down to a few specific things. Equipment with undamaged insulation stops current from reaching workers. De-energized systems following verified lockout procedures don’t have any active voltage. Non-conductive materials like rubber mats, fiberglass ladders, and plastic-handled tools won’t conduct electricity. Double-insulated power tools give you two layers of protection. When equipment’s got proper safety certifications and stays in good working condition with all guards and covers where they should be, you don’t have a hazard.

Damaged insulation creates immediate shock risks, though. Energized circuits can kill you. Conductive materials near live voltage let current flow right through workers. Missing ground pins take away your protective pathways. Wet conditions around electrical sources increase conductivity fast. Overloaded circuits generate heat that starts fires. These are the actual hazards killing and injuring workers.

OSHA regulations and NFPA 70E standards spell out this distinction pretty clearly. Equipment in an electrically safe work condition (fully de-energized, locked out, tested, and verified at zero voltage) isn’t hazardous. The standards require creating these non-hazardous conditions before you start working. Compliance with National Electrical Code installation requirements, proper equipment grounding per OSHA 1926.404, and following manufacturer specifications all turn potentially dangerous electrical systems into safe working conditions.

Common Electrical Hazards Overview

OGv4I2X0SzKx1yK1-JARCg

Understanding actual electrical hazards saves lives and property. The construction industry accounts for 52 percent of all electrical fatalities in US workplaces, with most incidents involving direct contact with overhead power lines or energized equipment.

Recognizing true hazards starts with knowing what creates danger. Electrical risks range from immediate threats like exposed wiring to gradual deterioration that eventually sparks fires.

You’ll see these electrical hazards most often:

Exposed wiring with visible copper conductors. Damaged electrical cords with cracked or missing insulation. Overloaded circuits carrying more current than they’re designed for. Improper grounding or missing ground connections. Wet conditions near electrical equipment and outlets. Overhead power lines within 10 feet of workers or equipment. Damaged insulation on cables, tools, and fixed wiring. Faulty equipment with internal electrical problems. Aging outlets and circuit wiring in systems over 30 years old. Extension cords and power strips being used for permanent installations.

Fire Hazard Source Risk Factor Prevention
Outlets Aging wiring, loose connections, wear from repeated use Replace every 15-25 years, especially in kitchens and bathrooms
Circuit Wiring Homes older than 30 years, improper installation, rodent damage Professional inspection, correct wire sizing for load, caution when drilling
Power Strips/Extension Cords Overloading, daisy-chaining, hidden placement, permanent use Temporary use only, avoid connecting to other strips, visible placement
Damaged Insulation Exposed conductors, cracking, rodent chewing, age deterioration Turn off power and replace, never cover with electrical tape

Aging electrical systems develop problems slowly. Homes and facilities built more than three decades ago have wiring that wasn’t designed for today’s electrical loads. Warning signs include burning smells near outlets or panels, discoloration around receptacles, flickering lights, dimming when appliances turn on, and circuit breakers that trip over and over. These indicators point to serious underlying issues demanding immediate attention before they cause fires or injuries.

Improper grounding stays the most frequently cited OSHA electrical violation. Without proper grounding, fault current has nowhere to go safely, which increases electrocution risk. Wet conditions make every electrical hazard worse because water conducts electricity, creating paths through materials that would normally insulate. Moisture on skin, damp concrete floors, wet work gloves, and standing water near outlets all dramatically increase shock severity and the likelihood that even low voltage becomes deadly.

Wet Conditions and Water Exposure

Water conducts electricity by letting current flow through dissolved minerals and ions. When moisture contacts energized electrical components, it creates conductive paths that can reach workers through floors, tools, and direct contact. This conductivity increases shock severity and lets even relatively low voltages deliver dangerous current levels.

Specific scenarios create wet condition hazards. Bathrooms with outlets near sinks and tubs create risks when you’re using hairdryers or other appliances with damp hands. Kitchens combine water sources with multiple appliances. Outdoor areas expose equipment to rain and ground moisture. Construction sites frequently involve both water and temporary electrical systems. Basements deal with humidity, condensation, and occasional flooding that affects panels and outlets.

Electrical equipment that’s gotten wet needs inspection by a qualified electrician before you energize it again. Internal moisture can stick around even after surfaces dry, creating hidden short circuit paths and corrosion. GFCI protection’s essential in moisture-exposed areas, interrupting power within milliseconds when ground faults occur and preventing most electrocutions in wet locations.

Electrical Shock, Electrocution, and Arc Flash Risks

kEoJ0p4gT6OXGFqRyO78mA

Electrical shock happens when current passes through your body. Electrocution is shock that kills you. Both depend on current level, voltage, path through the body, how long contact lasts, and individual factors like how wet your skin is. Even non-fatal shocks can cause severe burns, heart rhythm problems, and injuries from falls after involuntary muscle contractions.

Current thresholds create predictable responses in your body. At 1 to 3 milliamps, most people feel a slight tingling. Between 3 and 9 milliamps, it gets painful but you can still control your muscles voluntarily. From 9 to 25 milliamps, muscular contraction becomes severe enough that workers can’t let go of energized conductors. At 25 to 60 milliamps, ventricular fibrillation can occur, causing your heart to quiver ineffectively rather than pump blood, typically resulting in death without immediate defibrillation.

Voltage levels determine how easily current overcomes skin resistance. The 50-volt threshold marks where shock hazards become significant under most conditions. Common workplace voltages include 120 volts for standard outlets and lighting, 208 volts for some commercial equipment, 277 volts for commercial lighting circuits, and 480 volts for industrial machinery and large HVAC systems. Higher voltages force more current through your body’s resistance, making injuries worse.

Arc flash is an explosive electrical energy release during short circuits and faults. When electrical current jumps through air between conductors or from conductors to ground, it creates a superheated plasma arc reaching temperatures up to 35,000 degrees. The thermal energy causes severe burns at significant distances. The explosive blast produces pressure waves that rupture eardrums, collapse lungs, and throw workers across rooms. Vaporized metal from conductors creates shrapnel. The intense light damages your vision.

NFPA 70E establishes arc flash boundary classifications based on incident energy levels measured in calories per square centimeter. Level 1 requires basic arc-rated clothing for lower energy exposures. Level 2 demands increased protection with arc-rated shirts, pants, and face shields. Level 3 requires arc flash suits with higher ratings for severe exposures. Level 4 mandates maximum protection including specialized suits rated for extreme incident energy levels exceeding 40 calories per square centimeter.

Arc flash protection measures include conducting arc flash studies to calculate incident energy levels and establish boundaries, wearing arc-rated clothing appropriate for the calculated hazard level, maintaining flash protection boundaries and restricted approach distances, and using remote operation when possible to keep personnel away from potential arc sources.

Properly de-energized equipment following lockout/tagout procedures eliminates arc flash hazards entirely. When voltage is verified absent, energy sources are isolated, and stored energy is released, the arc flash hazard disappears. This makes the de-energized state a non-hazardous condition, which is why creating electrically safe work conditions is the primary injury prevention method.

Regulatory Compliance and Safety Practices

tmnceN_RSDicH1jZuWTFZw

OSHA establishes and enforces electrical safety requirements in workplaces. The regulations under 29 CFR 1910 Subpart S and 1926 Subpart K define minimum safety standards for electrical installations, equipment, and work practices that employers have to follow.

NFPA 70E provides the electrical safety standard that most employers use to comply with OSHA’s general duty requirements. This consensus standard addresses safe work practices, risk assessments, personal protective equipment selection, lockout/tagout procedures, and training requirements. NFPA 70E establishes the concept of electrically safe work conditions and defines approach boundaries for energized work. The standard requires arc flash hazard analysis, appropriate PPE based on calculated incident energy, and documented safety programs.

The National Electrical Code (NEC) governs how electrical systems must be installed. Also designated NFPA 70, this code prevents hazards through proper design requirements including conductor sizing, overcurrent protection, grounding methods, circuit configurations, and equipment installations. Following NEC standards during construction and modification creates electrical systems that won’t become hazards under normal operation. Proper wire gauge prevents overheating. Adequate circuit protection stops dangerous overloads. Correct grounding provides fault current paths.

Improper grounding stays the most frequently cited OSHA electrical violation year after year. Missing ground connections, removed ground pins, ungrounded equipment, and inadequate grounding conductors all show up regularly in violation reports. Compliance importance goes beyond avoiding citations because proper grounding directly prevents electrocutions by providing the low-resistance path that clears faults and trips protective devices.

Protective equipment and procedures create the barrier between workers and electrical hazards. Using the right gear properly transforms dangerous situations into manageable tasks.

Safety measures need systematic implementation. Workers need specific tools and techniques to interact safely with electrical systems.

You need these essential safety procedures:

Lockout/tagout procedures that de-energize equipment, prevent re-energization, and verify zero voltage before work begins. Insulated tools rated for the voltage level you’re working on that prevent current from reaching workers. Rubber gloves and safety boots that provide barriers against shock paths through hands and feet. Safety barriers and warning signs that keep unqualified personnel away from energized equipment and overhead lines. Proper guarding of electrical parts including covers for temporary lighting, panels, and exposed terminals. Voltage testing before work begins to verify de-energized state rather than assuming safety.

These measures transform potentially hazardous situations into safe working conditions. A properly locked out machine with verified zero energy isn’t a hazard. Insulated tools used correctly eliminate shock paths. Maintained barriers prevent contact. When implemented completely, safety procedures convert hazards into non-hazardous states.

Ground Fault and Circuit Breaker Protection

r3mDiDqpRVquLAOgPF73wQ

Ground fault circuit interrupters monitor current flow between hot and neutral conductors. When even 4 to 6 milliamps of difference appears, indicating current’s leaking through an unintended path like a person, the GFCI trips within milliseconds. This interruption happens faster than a heartbeat, preventing most electrocutions. GFCI outlets belong in bathrooms, kitchens, garages, outdoor receptacles, and anywhere moisture exposure occurs. They protect against shocks that would otherwise be fatal in wet locations.

Circuit breakers protect against overloads and short circuits by monitoring current flow through circuits. When current exceeds the breaker’s rating, thermal or magnetic mechanisms trip the breaker, opening the circuit and stopping current flow. This prevents wire overheating that starts fires. Circuit breakers respond to sustained overloads within seconds to minutes depending on how much the load exceeds capacity. They react almost instantly to short circuits where resistance drops nearly to zero and massive current flows. The protection interrupts power before conductors melt or insulation ignites.

Proper grounding practices create intentional low-resistance paths for fault current. The three-prong plug includes a ground pin that connects equipment frames and enclosures to the grounding system. If a hot wire contacts the metal case, fault current flows through the ground path rather than through a person who touches the equipment. The high current trips the circuit breaker, stopping the hazard. Never remove the ground pin because it returns unwanted voltage to the ground. You shouldn’t force three-prong plugs into two-prong outlets using adapters unless the outlet box is grounded and the adapter’s ground lug is properly connected.

Surge protectors defend against voltage spikes from lightning strikes and utility switching. They divert excess voltage to ground, protecting sensitive electronics from damage. While surge protectors serve an important protective function, they’re not electrical hazards themselves when properly rated for their connected load and in good condition. The hazard comes when surge protectors are overloaded, daisy-chained, or used beyond their service life. A quality surge protector with adequate joule rating, proper placement, and regular replacement represents protective equipment, not a threat.

Damaged Wiring and Insulation Problems

8dWWSeWvSK-wyl1-o5j7Hg

Wiring degradation happens progressively through age, environmental exposure, physical damage, and electrical stress. What starts as minor insulation cracking eventually exposes conductors that create shock and fire hazards.

You’ll see different types of insulation damage. Frayed cables show individual wire strands separating from repeated flexing. Cracked insulation develops from heat cycles and age, with protective coatings becoming brittle and flaking away. Exposed copper conductors result from complete insulation breakdown or physical abrasion. Rodent damage appears as chewed sections where mice and rats gnaw through wire coverings. Deterioration from age affects the plasticizers in insulation, causing it to harden and crack even without obvious stress.

You can’t temporarily fix damaged insulation with electrical tape. Proper repair is required. Tape doesn’t restore the insulation rating, doesn’t prevent moisture intrusion, and doesn’t address the underlying cause of failure. Heat from current flow eventually degrades the tape adhesive. Electrical work requires turning off power at the circuit breaker, verifying zero voltage with a tester, then either replacing damaged sections or installing new circuits. Splices must occur in approved junction boxes with proper connectors rated for the wire gauge and current load.

Properly maintained wiring with intact insulation isn’t a hazard when correctly sized for the load and installed per code. Conductors with undamaged coverings, secured properly in boxes and conduits, protected by appropriate overcurrent devices, and carrying loads within their ampacity ratings function safely for decades. The wiring itself becomes hazardous only when insulation fails, connections loosen, circuits overload, or installation doesn’t meet code requirements.

Electrical Safety Inspection and Testing

mwRediSwRISeTKfMdOAL1A

Regular inspections identify developing hazards before they cause injuries or fires. Systematic examination of electrical systems, equipment, and work practices finds problems that compromise safety.

Inspection Type Frequency Purpose
Daily Equipment Checks Before each use Verify cord condition, plug integrity, proper operation, no damage
Monthly System Reviews Every 30 days Examine outlets, switches, panels for signs of overheating or damage
Quarterly Detailed Inspections Every 3 months Test GFCI devices, verify grounding, check circuit loading, inspect boxes
Annual Comprehensive Assessments Yearly Full system evaluation, thermal imaging, testing, code compliance verification

Inspectors look for specific problems during examinations. Damage includes physical impact marks, cracked housings, broken covers, and bent prongs. Wear shows as discoloration from heat, loose connections that spark, and insulation that’s become brittle. Code violations appear when installations don’t match current NEC requirements for wire sizing, circuit protection, box fill calculations, and grounding methods. Improper installations reveal themselves through exposed splices, missing cover plates, overloaded circuits, and equipment used beyond its ratings.

Equipment passing inspection with no problems identified represents non-hazardous conditions. When testing confirms proper grounding, insulation resistance meets standards, no overheating occurs, connections remain tight, and installation matches code requirements, the electrical system is safe. Discovered defects are hazards requiring correction, but the properly maintained and verified equipment isn’t itself a threat. This distinction matters because it identifies what needs fixing versus what can remain in service safely. The inspection process transforms unknowns into verified safe conditions or identified repair priorities.

Overhead Power Lines and Clearance Requirements

z-AY7343QVyCvkotPDjfjQ

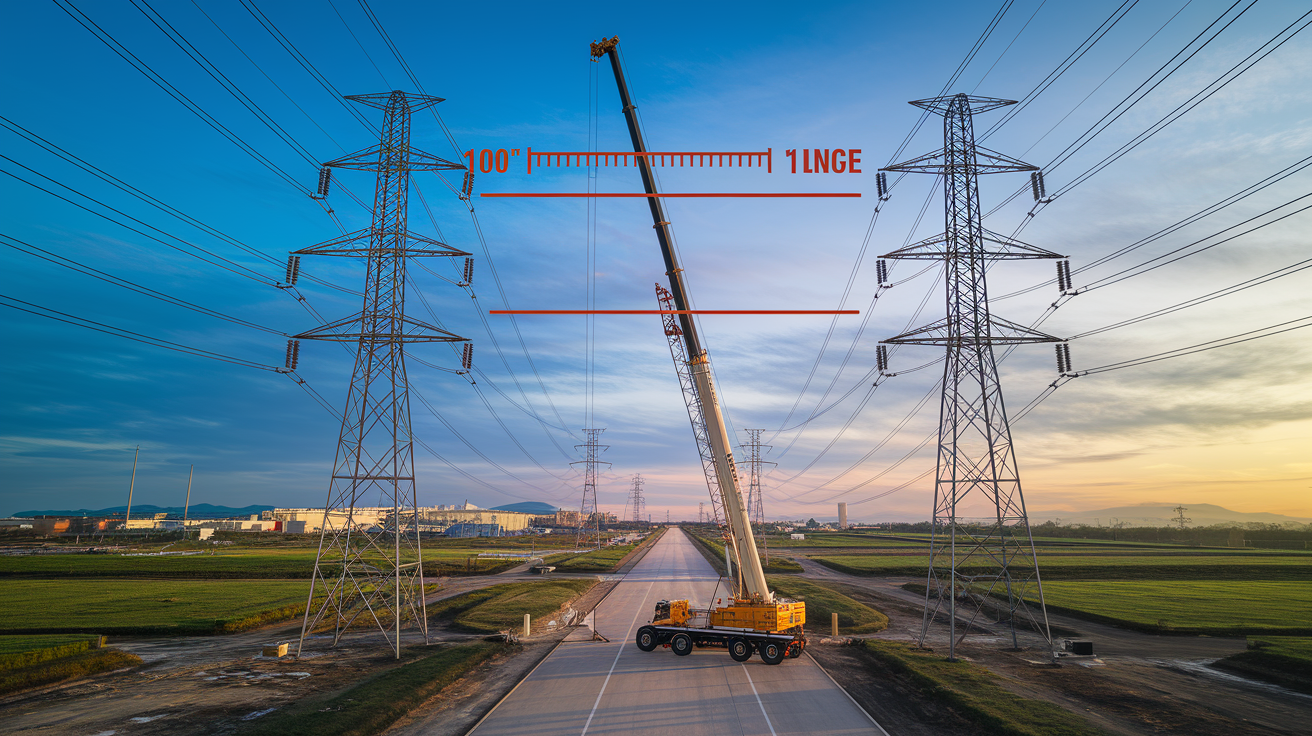
Overhead power lines represent a leading cause of construction industry electrical fatalities. Contact between cranes, ladders, scaffolding, or other equipment and energized lines kills workers instantly and causes devastating arc flash incidents.

The minimum 10-foot clearance rule establishes safe distance for most overhead power line work. This separation applies to workers, tools, equipment, and materials near lines carrying up to 50,000 volts. Higher voltage lines require greater distances, with clearances increasing to 14 feet for lines up to 200,000 volts, 16 feet for lines up to 350,000 volts, and 20 feet for lines up to 500,000 volts. The clearance includes allowances for equipment movement, boom sway, and materials being hoisted.

Proper procedures when work must occur near overhead lines start with requesting de-energization from the utility company whenever possible. When lines can’t be shut down, safety measures include installing physical barriers that prevent equipment from entering the minimum clearance zone, posting warning signs visible from all approach directions, assigning dedicated spotters to watch clearances continuously, and using only insulated equipment rated for working near energized lines. Cranes and similar equipment require boom guards that alarm when approaching minimum distances.

Maintaining proper distance and using non-conductive equipment in compliance with clearance requirements creates safe conditions. The hazard is proximity violation, not distance-compliant work. When workers and equipment remain outside the minimum clearance zone, use non-conductive tools and materials, and follow established safety procedures, the overhead lines don’t pose immediate danger anymore. The electrical hazard exists within the clearance boundary. Outside that zone, with proper controls, the condition is safe even with energized lines nearby.

Proper Use of Extension Cords and Power Strips

XdQbc2PGTsiLGiwGgyRJWA

Extension cords and power strips serve legitimate temporary purposes but create hazards when misused. Understanding the difference between proper short-term application and dangerous permanent installation prevents fires and overloads.

Practice Safe or Hazard Reason
Heavy-duty rated extension cord for temporary tool use Safe Correct gauge for load, inspected before use, temporary application
Daisy-chaining power strips Hazard Exceeds circuit capacity, creates overload, multiplies failure points
Power strip under furniture or rug Hazard Traps heat, prevents observation, accumulates dust and lint
Correct-gauge extension cord matched to tool rating Safe Voltage drop minimized, current capacity adequate, proper sizing
Permanent extension cord installation Hazard Not rated for continuous use, lacks proper protection, violates code

Overloading creates heat that melts insulation and starts fires. Power strips typically handle 15 amps total across all outlets. Plugging in a space heater (1,500 watts, 12.5 amps), plus a vacuum (8 amps), instantly exceeds capacity. The internal wiring overheats but may not trip the circuit breaker protecting the room’s wiring because the strip’s cord is the bottleneck. Heat buildup gets worse when strips are hidden under furniture or rugs where airflow can’t cool them and lint accumulates near connections. Space heaters, window AC units, dehumidifiers, and other high-draw appliances should never connect through power strips. They need direct outlet connections.

Properly rated extension cords used temporarily for their designed purpose aren’t inherently hazardous. A 12-gauge cord rated for 20 amps, in good condition with intact insulation and proper grounding, safely powers tools drawing 15 amps for a few hours during a repair job. That’s temporary use matching the cord’s specifications. The hazard comes from misuse: wrong gauge causing voltage drop and heat, overloading beyond rating, permanent installation instead of temporary application, daisy-chaining multiple cords, running cords through walls or ceilings, hiding them under carpets, or using damaged cords with exposed wires. Understanding this distinction helps identify when extension cords and power strips are tools being used correctly versus when they’ve become fire hazards. After water damage events that may have affected outlets and wiring behind walls, addressing electrical safety becomes even more critical since moisture can compromise systems that appeared fine before the incident. Repairs often require opening and repairing damaged drywall to access and evaluate hidden electrical components.

Residential Electrical Safety Considerations

HwNvw18tSkyHkQE7RxYykw

Residential electrical systems face unique challenges different from commercial and industrial facilities. Aging infrastructure installed decades ago supports dramatically increased loads from modern appliances and electronics. Homeowner DIY modifications often bypass code requirements. The combination creates hidden hazards.

Outlet safety begins with understanding age-related deterioration. Outlets ranked as the number one most common electrical fire hazard in 2025, with most rooms containing 4 to 6 outlets that degrade from repeated use. The spring-loaded contacts that grip plugs weaken over time, creating loose connections that arc and overheat. You should replace outlets every 15 to 25 years, especially in high-use areas like kitchens and home offices where plugs are frequently inserted and removed. Tamper-resistant outlets provide spring-loaded shutters that prevent children from inserting objects into slots, required by code in new construction and recommended for retrofit in homes with young children. Proper three-prong configurations with functioning ground connections protect against shock when appliance insulation fails. Two-prong outlets in older homes lack this protection and should be upgraded to grounded three-prong receptacles with verified ground paths, not adapters that create false security.

Modern electrical loads from EV chargers, heat pumps, induction cooktops, and whole-house smart systems exceed what older wiring can handle. Level 2 EV chargers draw 40 to 50 amps continuously for hours, requiring dedicated 240-volt circuits with appropriately sized wire. Smart home hubs, security cameras, WiFi routers, and charging stations create constant loads that didn’t exist when homes were built. Major new appliances or systems require verification that existing wiring, panel capacity, and service entrance can handle the additional load before installation. Overloading older circuits causes breakers to trip repeatedly or, worse, creates heat that smolders inside walls without tripping protection.

Up-to-code, properly maintained residential electrical systems with appropriate outlet types and adequate capacity aren’t hazards. When homes have sufficient circuit capacity, correctly sized wiring, functioning overcurrent protection, intact insulation, proper grounding, GFCI protection in wet locations, and outlet replacement on schedule, the electrical system functions safely. Age alone doesn’t create hazards when systems are maintained. Damage from DIY errors, overloading beyond design capacity, deteriorated connections, and improper modifications create the actual hazards. Repairing water damaged walls after flooding or leaks often reveals electrical issues that existed before the water event, making professional evaluation essential before closing walls back up.

Common Misconceptions About Electrical Safety

Misunderstandings about electrical safety lead workers and homeowners into dangerous situations they believe are safe. Correcting these misconceptions prevents injuries and property damage.

False beliefs stick around despite clear evidence of their danger. People trust quick fixes and workarounds that seem logical but actually increase risk.

You’ll hear these electrical safety myths often:

“Electrical tape can permanently fix damaged cords.” False. Tape doesn’t restore insulation ratings, allows moisture penetration, and degrades under heat. Damaged cords need replacement.

“Removing the ground pin is acceptable if the plug doesn’t fit.” False. The ground pin returns fault current safely to earth. Removing it takes away the only protection against electrocution when equipment insulation fails.

“Low voltage can’t harm you.” False. Current kills, not voltage. Even 12-volt car batteries deliver enough current to cause severe burns during short circuits. Low voltage with high current is still dangerous.

“Circuit breakers eliminate all shock risks.” False. Breakers protect against overloads and short circuits but won’t necessarily trip during electrocution because human body resistance limits current below breaker trip points.

“Rubber-soled shoes provide complete protection.” False. Rubber soles increase resistance to ground but don’t make you immune. Moisture, worn soles, and high voltage overcome this minimal protection.

“Wood ladders make you immune to shock.” False. Dry wood resists current flow but moisture in wood conducts electricity. Fiberglass ladders are safer but still require maintaining clearances from energized conductors.

“Properly insulated de-energized equipment is still hazardous.” False. This is the key misconception. When equipment’s verified de-energized through lockout/tagout, tested to confirm zero voltage, and properly insulated, the electrical hazard is gone. The de-energized state isn’t hazardous.

Understanding what truly creates a hazard versus what represents safe practice is essential for injury prevention. Many items labeled “electrical hazards” in training materials are only hazardous under specific conditions: when damaged, energized, improperly used, or inadequately maintained. That same equipment in proper condition, de-energized state, correct application, and well-maintained status isn’t a hazard. The distinction matters because blanket fear of all electrical equipment prevents necessary work, while false confidence from misconceptions causes injuries. Accurate knowledge identifies actual hazards requiring control measures and recognizes non-hazardous conditions where work can proceed safely. Understanding both what creates danger and what eliminates it leads to better safety outcomes than treating all electrical situations as equally threatening.

Final Words

Knowing which of the following is not an electrical safety hazard gives you the clarity to work confidently around electricity at home and on the job. Properly insulated tools, de-energized equipment following lockout procedures, non-conductive materials, and code-compliant installations aren’t hazards when they’re maintained correctly and used as intended.

The real risks come from damaged wiring, wet conditions, overloaded circuits, and ignoring safety distances.

When you understand the difference between safe conditions and actual threats, you protect yourself, your home, and everyone around you from preventable electrical accidents.

FAQ

What is not an electrical safety hazard?

Properly insulated tools and equipment used correctly are not electrical safety hazards. Items like de-energized systems following lockout/tagout procedures, non-conductive surfaces, and equipment with intact double insulation and proper grounding represent safe conditions rather than hazards.

What are the four electrical hazards?

The four primary electrical hazards are electric shock (current passing through the body), electrocution (fatal electric shock), arc flash (explosive energy release during faults), and electrical burns from contact with energized conductors or arc flash events.

Which of the following is not a safety hazard commonly associated with electrical systems?

De-energized electrical equipment following proper lockout/tagout procedures is not a safety hazard commonly associated with electrical systems. Once power is confirmed off and locked out, the equipment no longer presents shock, arc flash, or burn risks.

What are the 8 electrical hazards?

The eight electrical hazards are exposed wiring, damaged electrical cords, overloaded circuits, improper grounding, wet conditions near electrical equipment, overhead power lines, damaged insulation, and faulty equipment. These conditions create shock, fire, and electrocution risks in workplaces and homes.

Why doesn’t properly insulated equipment create an electrical hazard?

Properly insulated equipment doesn’t create an electrical hazard because intact insulation prevents current from reaching conductive surfaces. When insulation remains undamaged and equipment meets safety standards, the electrical conductors stay isolated from contact, eliminating shock and arc flash exposure.

How do GFCI outlets prevent electrical hazards?

GFCI outlets prevent electrical hazards by detecting ground faults and shutting off power within milliseconds. These outlets monitor current flow and immediately interrupt the circuit when they sense current leakage, protecting against electrocution in wet locations like bathrooms and kitchens.

When do extension cords become electrical hazards?

Extension cords become electrical hazards when daisy-chained together, overloaded beyond their rating, used permanently instead of temporarily, or when damaged. Properly rated extension cords used for short-term needs represent safe temporary wiring solutions rather than hazards.

What makes overhead power lines particularly dangerous?

Overhead power lines are particularly dangerous because they carry extremely high voltages and account for most construction electrical fatalities. Direct contact or even close proximity with conductive equipment can cause fatal electrocution, requiring minimum 10-foot clearance distances.

How often should electrical outlets be replaced?

Electrical outlets should be replaced every 15 to 25 years, especially in high-use areas where wear accelerates. Aging outlets represent the number one electrical fire hazard source, with deterioration creating loose connections that generate heat and potential ignition.

Why can’t electrical tape fix damaged insulation permanently?

Electrical tape can’t fix damaged insulation permanently because it doesn’t provide adequate protection against moisture, physical stress, or voltage levels. Damaged insulation requires turning off power and proper replacement to restore safe conditions and prevent shock or fire hazards.

What current level causes dangerous reactions in the human body?

Current levels above 25 milliamps cause dangerous reactions in the human body, potentially triggering ventricular fibrillation. Even 9-25 milliamps causes painful muscular contraction and loss of control, while 1-3 milliamps produces barely perceptible sensations.

How do circuit breakers protect against electrical hazards?

Circuit breakers protect against electrical hazards by automatically interrupting power when they detect overloads or short circuits. They prevent wires from overheating and causing fires, though they don’t eliminate all shock risks from properly functioning circuits.

What inspection frequency prevents electrical hazards?

Daily visual equipment checks, monthly system reviews, quarterly detailed inspections, and annual comprehensive assessments prevent electrical hazards. Regular inspection schedules detect damaged cords, faulty wiring, and code violations before they cause injuries or fires.

Why must the ground pin never be removed from three-prong plugs?

The ground pin must never be removed from three-prong plugs because it returns unwanted voltage safely to the ground. Removing this metallic pin eliminates critical protection against equipment faults that could energize metal casings and cause electrocution.

What makes wet conditions increase electrical hazards?

Wet conditions increase electrical hazards because water conducts electricity and dramatically lowers resistance between energized parts and ground. Moisture on skin, floors, or equipment creates direct paths for current flow, increasing shock severity and likelihood.

Crawlspace Vapor Barrier Installation Made Simple

0

Think the dirt under your house can’t hurt you? Think again.
Ground moisture rises into joists, insulation, and the air you breathe, causing mold, rot, and that musty smell upstairs.
A crawlspace vapor barrier stops that moisture before it damages wood and wrecks indoor air quality.
This post makes vapor barrier installation simple and practical: we’ll show what materials and tools to choose, a clear step-by-step install, common mistakes to avoid, cost expectations, and when you should call a pro.
Do it once, do it right.

Understanding Crawlspace Vapor Barriers

RhqcZEPSSWOUAyeh0WOXXQ

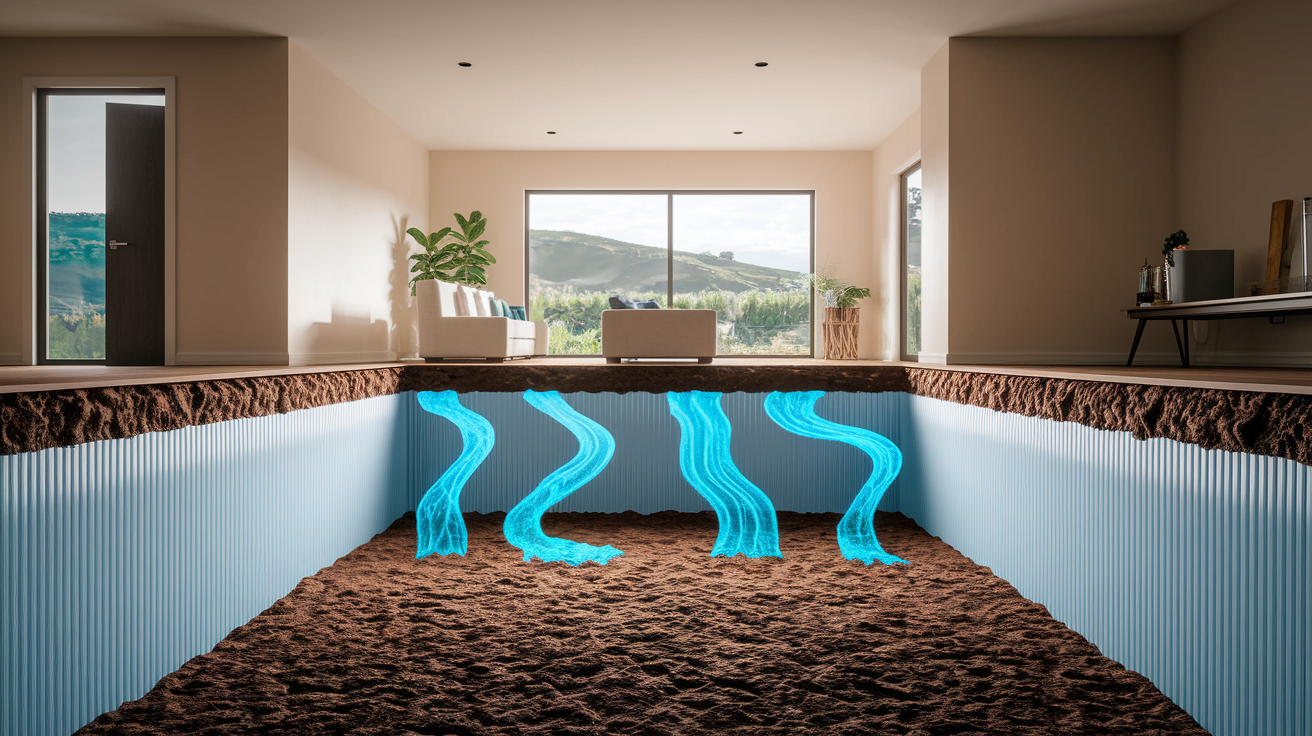
A crawlspace vapor barrier is a heavy-duty membrane, usually polyethylene sheeting, that gets installed across the dirt floor of a crawlspace and up the foundation walls. Its job? Stop ground moisture from rising into your home. When soil releases water vapor, that moisture travels upward through the dirt, into floor joists, insulation, and eventually your living space. A vapor barrier blocks that path before the moisture causes real damage.

Without a barrier, crawlspace moisture creates mold growth on wood framing, rotting floor joists, rusted electrical boxes, corroded plumbing, and soggy insulation that quits working. That same moisture also wrecks indoor air quality. Roughly 40 to 50 percent of the air you breathe on your first floor originally came from the crawlspace below, so what happens down there affects what you smell and breathe upstairs. Installing a vapor barrier breaks that cycle by sealing off the soil and keeping the space dry.

Installation typically involves clearing the crawlspace, laying sheets of polyethylene across the floor with overlapped seams, sealing those seams with tape, and securing the edges to the foundation walls with fasteners and adhesive. Materials range from 6 mil sheeting up to 20 mil or thicker composite membranes, depending on how much durability you need. Thicker barriers hold up better to foot traffic, sharp debris, and long term wear.

Key benefits include stopping ground moisture and vapor from entering the home, reducing mold and musty odors in living areas, protecting structural wood and metal systems from rot and corrosion, and improving insulation performance while lowering heating and cooling costs.

Tools and Materials Needed for Installation

Im35cgXSR265l64T3DcIiA

Before you start, gather everything you’ll need so you don’t have to climb out of the crawlspace halfway through. The main material is polyethylene sheeting, also called poly, sold in rolls. Thickness matters. Six mil poly tears easily and usually doesn’t hold up in real world crawlspaces. Ten to twelve mil is better for long term use, and fifteen to twenty mil works well in spaces where you might need to crawl around later for plumbing or electrical work.

You’ll also need seam tape to seal overlaps, masonry anchors or fasteners to attach the barrier to concrete walls, and construction adhesive or butyl tape for a waterproof seal along the top edge. A utility knife cuts the poly to size, a measuring tape and chalk line help keep things square, and a hammer drill with a masonry bit drives anchors into the foundation. Personal protective equipment like a respirator, work gloves, and knee pads keeps you safe in a dusty, tight space.

Essential tools and materials include polyethylene sheeting (10 to 20 mil thickness recommended), seam tape (3 to 6 inches wide, manufacturer approved), masonry anchors or mechanical fasteners, construction adhesive or butyl tape, utility knife, measuring tape, chalk line, hammer drill with masonry bit, respirator, work gloves, and knee pads.

Step by Step Crawlspace Vapor Barrier Installation

GDk_gN3QTvi7-YmFy_C4Jw

Installing a vapor barrier is methodical work. If you skip a step or rush the sealing, moisture finds the gaps. Take your time and do it once.

Clear and prepare the crawlspace. Remove stored items, debris, and any wet or moldy insulation. If there’s standing water, pump it out or wet vac it. Fix any plumbing leaks before you lay the barrier. Level out sharp rocks or high spots that could puncture the poly once it’s down.

Measure the space and plan your layout. Calculate total square footage, add 10 to 20 percent for wall turn ups and overlaps, then buy enough material. Sketch a rough layout showing where seams will land so you can stagger joints and avoid weak spots.

Cut and lay the first sheet. Unroll the poly across one section of the floor, leaving enough material to run six to twelve inches up the foundation wall. Don’t pull it tight. Leave a little slack so it can settle without tearing.

Overlap seams by six to twelve inches. When you add the next sheet, overlap the edge of the first sheet by at least six inches. Some codes require twelve. Stagger the seams like brickwork so you don’t create one long weak line across the floor.

Seal every seam with tape. Use the manufacturer approved seam tape and press it down firmly with a roller or your hand. Work out air bubbles. If the seam isn’t sealed, moisture will creep through and condense under the barrier.

Secure the barrier to foundation walls. Turn the poly up the wall six to twelve inches. Apply a bead of construction adhesive or a strip of butyl tape along the top edge where the poly meets the concrete, then install masonry anchors every twelve to eighteen inches to hold it in place. The barrier should be snug against the wall, not drooping or gapped.

Wrap piers and seal around penetrations. Cut the poly to fit tightly around support columns, pipes, and ducts. Wrap columns completely and seal the seam with tape. For pipes, cut a small slit, slide the poly around the pipe, and seal the edges with mastic or tape so there’s no open path for vapor.

Inspect and verify coverage. Walk the perimeter and check that no soil is visible, all seams are taped, the wall edges are attached and sealed, and penetrations are wrapped tight. Look for tears or gaps. Patch anything questionable now, while you’re still down there.

Cost Breakdown for Vapor Barrier Installation

N-SUbsDgRg-mkhnwLmmT8A

Material and labor costs depend mostly on crawlspace size, barrier thickness, and whether you do the work yourself or hire a crew. A basic six mil poly barrier runs cheapest, ten to thirty cents per square foot for the material alone, but it tears easily and rarely lasts more than a few years. Ten to twelve mil sheeting costs more, typically thirty cents to a dollar per square foot, and holds up better. Heavy duty composite membranes can run even higher but provide puncture resistance if you need to access the crawlspace later.

Professional installation usually costs between fifteen hundred and four thousand dollars for an average single family crawlspace, though larger or more complex jobs can go higher. That price includes labor, materials, sealing, and often a warranty. DIY jobs save on labor but take time. Plan on four to sixteen hours depending on space size, access, and how many obstacles you’re working around. You’ll still pay for materials, tape, fasteners, and tools you don’t already own.

Cost Type Typical Range
Materials (DIY, 10–12 mil poly) $0.30–$1.00 per sq ft
Professional labor $1.00–$3.00 per sq ft
Total professional project $1,500–$4,000 typical

Common Mistakes to Avoid

bw-0-x8GTuy0joc9OE8kqA

Most vapor barrier failures happen because someone skipped a sealing step or used material that wasn’t tough enough for the job. These mistakes let moisture sneak in and undo the whole point of the barrier.

Using six mil poly in a long term installation tears too easily and won’t hold up. Failing to overlap and tape seams creates direct paths for vapor to pass through. Not securing the barrier to foundation walls or around penetrations like pipes and columns leaves open routes for moisture. Leaving crawlspace vents open without addressing the moisture source pulls humid outdoor air into the space. And ignoring drainage or active water intrusion before laying the barrier means water pools on top of the poly instead of being blocked by it.

When seams aren’t taped or edges aren’t fastened, the barrier shifts and gaps appear. Moisture condenses under loose poly, mold starts growing on the wood above, and within a year or two the crawlspace smells damp again. If there’s a plumbing leak or runoff problem and you lay a barrier over wet soil, you’ve just trapped the water instead of stopping it. The barrier only works when the space is dry to start with and the installation is airtight.

DIY vs. Professional Installation

DTEoEMzJTJa33NA3sTIi9Q

DIY installation saves money and gives you control over timing, but it’s physically demanding work in a cramped, dirty space. You’ll spend hours on your knees or stomach, cutting poly, taping seams, and drilling into concrete. If your crawlspace is small, clean, and easy to access, and you’re comfortable working in tight quarters, DIY is a reasonable option. Buy good materials, follow the steps carefully, and plan for a full weekend or two evenings.

Professional crews finish faster and bring experience with sealing techniques, code requirements, and tricky details like pier wraps and wall attachments. They also carry insurance and often offer warranties on both materials and labor. If your crawlspace has standing water, mold, structural damage, or complex HVAC and plumbing runs, a professional can handle remediation and installation together without you needing to coordinate multiple contractors.

The decision usually comes down to space complexity and your comfort level. A small, dry crawlspace with easy access is manageable for a careful homeowner. A large space with drainage issues, low clearance, or contamination is better left to someone who does this regularly and knows how to troubleshoot problems that don’t show up in a how to guide.

Maintenance and Long Term Care

MrzxvYrXQsa-ErIBBaj4ug

A properly installed vapor barrier doesn’t need much attention, but it does need occasional checks. Plan to inspect the crawlspace at least once a year and again after heavy storms, plumbing work, or if you notice musty smells upstairs. Look for tears in the poly, loose or peeling seam tape, detached wall edges, and any new moisture or standing water. Small punctures can be patched with a piece of matching poly and fresh seam tape. Larger tears or widespread damage usually mean the barrier needs replacement.

If you added a dehumidifier or sump pump as part of the installation, check that equipment according to the manufacturer’s schedule, usually every few months. Empty collection buckets, clean filters, and confirm the unit is running when humidity rises. Outside the crawlspace, keep gutters clear and downspouts extended so roof runoff drains away from the foundation. Grading should slope away from the house so surface water doesn’t pool near the walls and seep in.

Regular maintenance includes inspecting the barrier and seams annually and after storms or plumbing changes, patching tears promptly with matching poly and fresh seam tape, monitoring dehumidifier operation and emptying or servicing as needed, and maintaining exterior grading, gutters, and downspouts to prevent water buildup around the foundation.

Final Words

In the action, we walked through what a vapor barrier does, the tools and materials to buy, a clear eight-step install plan, and what it might cost. We flagged common mistakes, compared DIY vs hiring a pro, and explained upkeep so the barrier lasts.

If you’re ready to protect the house, start with the right material thickness, proper seam sealing, and a tidy layout. For complex crawlspaces, get professional help. A good crawlspace vapor barrier installation keeps moisture out and cuts mold risk. You’ll feel more confident knowing the space is stable and dry.

FAQ

Q: How to properly install a vapor barrier in a crawl space?

A: Properly installing a vapor barrier in a crawl space involves covering the soil with 6–20 mil polyethylene, overlapping seams 6–12 inches, sealing and taping seams, and fastening the barrier to foundation walls to block ground moisture.

Q: When should I install a vapor barrier in my crawl space?

A: You should install a vapor barrier in your crawl space during new construction or when addressing moisture, mold, or insulation damage; install after grading and drainage fixes and before adding insulation or closing walls.

Q: What are common vapor barrier mistakes?

A: Common vapor barrier mistakes include leaving gaps, failing to seal seams, using thin plastic, not attaching the barrier to walls, ignoring crawlspace drainage, and skimping on overlap or repairs.

Q: What is the code for a crawl space vapor barrier?

A: The code for a crawl space vapor barrier varies by jurisdiction; many require at least 6 mil polyethylene, while some require thicker or fully sealed systems—check your local building code or inspector first.

5 Steps To Restore Water Damaged Belongings Fast

0

Have you ever wondered why some people save their favorite belongings after a flood, while others lose them forever? When water enters your home, every minute counts. Quick, safe steps can stop further damage and sometimes save valued items like hardwood floors, furniture, or electronics.

Today we share five clear actions to help restore water-damaged items fast. We explain when to turn off your power, how to sort your belongings, and more. Follow these steps to take control and protect your home during a water emergency.

Immediate Actions for Restoring Water-Damaged Belongings

When water hits your home, every second matters. The longer it lingers, the higher the risk of lasting damage, mold, and electrical dangers. Acting fast can help save items like hardwood floors, solid-wood furniture, and electronics (if they are turned off) while keeping you safe. For example, shutting off power or gas immediately can stop potential shocks or fires.

  1. Turn off the power and gas.
  2. Check the type of water and if it may be contaminated.
  3. Remove any standing water safely.
  4. Move and sort wet items into groups.

Each minute counts when dealing with water damage. First, decide if the water is clean, gray, or black. How long items have stayed wet matters too. Clean water on fabrics and hard surfaces can sometimes be restored. However, contaminated items like certain fabrics, mattresses, or particle-board products are often unsafe to salvage. Be careful when moving possessions to prevent spreading contaminants. Wearing gloves and boots can help protect you.

Even if you are eager to save everything, your safety comes first. A quick inspection can show which items might need professional cleaning or drying methods. This might mean using a dehumidifier (a machine that pulls moisture from the air) for wood or freeze-drying for important papers. By turning off utilities, assessing contamination risks, removing water safely, and sorting items, you pave the way for a complete and efficient restoration.

Efficient Water Extraction and Dehumidification for Wet Belongings

img-1.jpg

We start by quickly pulling water out of your home with heavy-duty machines. Using submersible pumps (equipment that pushes water out from flooded areas) and portable wet/dry vacuums, we clear away the excess water to reduce further damage and prepare your items for the next drying step.

  • Submersible pump
  • Portable extractor
  • High-velocity air mover

Next, we work to lower the humidity fast. We set up commercial dehumidifiers (machines that pull moisture from the air) and air movers to drop humidity below 50% within 24 to 48 hours. This step helps prevent mold and stops your belongings from deteriorating further. We keep a close eye on the process using hygrometers (instruments that measure air moisture) and moisture meters (devices that detect water in materials) to ensure everything dries properly.

Tailored Drying Techniques for Various Water-Damaged Belongings

Different materials need special drying methods after water damage to stop mold and further deterioration. For water-damaged fabrics, we use either freeze-drying (a process that removes water by turning it into vapor at low temperatures) or professional laundering when the water is clean. We also use fans to boost airflow, which helps remove moisture evenly so hidden dampness cannot cause more problems. These steps keep your fabrics soft and safe from long-term damage.

Other items call for unique care. Wood furniture is dried with low-heat air movers (blowers that use gentle warm air) along with dehumidifiers (machines that pull moisture from the air). This slow drying method helps prevent warping. Electronics need careful handling too. We use warm-air cabinets (enclosed units that warm and dry electronics safely) and controlled airflow to protect delicate parts before turning the power back on. Important papers and photos may benefit from freeze-drying or vacuum-thermal drying (a technique that uses low air pressure and heat to remove moisture) to keep fibers and ink intact.

Using these tailored drying methods not only speeds up the recovery process but also lessens the risk of permanent damage. Acting quickly is key to preventing hard-to-see structural issues.

Item Type Drying Method Estimated Dry Time
Fabrics/Textiles Freeze-dry or commercial laundry 12–24 hrs
Wood Furniture Low-heat air movers and dehumidifiers 48–72 hrs
Electronics Warm-air cabinet and airflow system 24–48 hrs
Documents/Photos Freeze-dry or vacuum thermal 48–72 hrs

Comprehensive Cleaning and Mold Prevention for Restored Items

img-2.jpg

When water damage hits, it can quickly create health risks. Contaminants start to spread fast, even from water that seems clean. We act immediately to dry and disinfect your items so mold does not take hold.

For hard surfaces like ceramic tiles, glass, and sealed stone, we use EPA-approved disinfectants (cleaning products tested for safety) within 24 hours after drying. Clothing and linens that got wet in clean water get washed on high-heat cycles to kill bacteria. Items exposed to gray or black water should be thrown away to stop the spread of contaminants.

We treat wood surfaces and upholstered furniture with an anti-microbial spray (a liquid that stops mold spores) to keep moisture from making mold grow. We apply the spray evenly over all affected areas to ensure porous materials, which can hide mold, stay safe.

If the damage is severe, extra help from certified mold remediation experts (professionals trained to remove mold safely) is needed. If mold signs continue or spread to hard-to-reach places, please get professional advice. We are here to help protect your health and keep your home safe.

5 steps to restore water damaged belongings fast

After drying your items, we check moisture levels with a meter 48 to 72 hours later. We also inspect hardwood floors for any cupping (a sign of water damage) and may apply a refinishing treatment if needed. This process helps us confirm that hidden moisture is gone and the structure is stable.

We then store your restored belongings in a climate-controlled room, keeping humidity between 30% and 50%. This controlled space helps stop extra damage and mold from forming.

For ongoing care, we schedule regular mold inspections and add silica gel packs around sensitive items like electronics or important documents. Using a moisture meter, we keep track of the environment. If readings start to rise, we quickly adjust ventilation or dehumidification settings. This proactive step protects your possessions over time.

For more tips on preventing future property loss after a disaster, please visit https://firefloodrescue.com?p=. Regular reviews keep your belongings safe and give you peace of mind.

Final Words

In the action, we showed how to assess water damage, extract water efficiently, and use targeted drying techniques. We laid out immediate tasks like shutting off power, categorizing belongings, and setting up dehumidification equipment. We also explained cleaning methods, mold prevention, and the final inspection to protect your home in the long run.

By following the steps to restore water damaged belongings, you can quickly regain a safe, livable space. Every step you take brings you closer to restoring comfort and confidence in your home.

FAQ

Q: What is included in a water damage restoration checklist (and checklist PDF)?

A: The water damage restoration checklist provides key steps to secure your home after water exposure. It lists shutting off utilities, extracting water, drying items, and documenting damage for repairs and claims.

Q: What are the steps and stages of water damage restoration?

A: The steps of water damage restoration start with a rapid response, followed by water removal, drying, cleaning, and final repairs. Each stage helps bring your home back to a safe condition.

Q: What are typical water damage house repair costs?

A: Water damage house repair costs vary based on the damage extent, water type, and affected areas. These expenses usually include water extraction, drying, cleaning, and repairing structural components.

Q: What is the water mitigation process?

A: The water mitigation process stops further damage by turning off utilities, removing water, drying surfaces, and cleaning affected areas. This quick action helps prevent the growth of mold and further deterioration.

Q: How does DIY water damage restoration work?

A: DIY water damage restoration involves handling simple cases by turning off power, removing water, drying belongings, and documenting damages. For severe exposure, calling professionals is best.

Q: How does a general contractor handle water damage repair?

A: A general contractor for water damage repair manages the entire restoration project. They coordinate repairs, handle permits, and work to fix damage following safety and building codes.

Q: How long does it take for water damage to turn into mold?

A: Water damage can lead to mold growth in as little as 24 to 48 hours if moisture remains. Quick drying and proper airing can help stop mold from forming.

Q: How do I fix water damage on my phone, like an iPhone?

A: Fixing water damage on a phone starts with turning it off immediately and drying it thoroughly. Avoid heating or shaking it, and contact a repair professional to check the internal components.

Q: How can I repair items affected by water damage?

A: Repairing water-damaged items involves drying them completely, cleaning thoroughly, and addressing any structural issues. In some cases, professional restoration is needed to bring items back to safe condition.

Temporary Roof Tarp Cost: What You’ll Actually Pay

0

Your roof just got damaged and someone quoted you $1,200 to nail a tarp over it. Seems high for what looks like basic blue plastic and a few boards, right? Here’s what most contractors won’t tell you upfront: materials only account for about 30% of tarping costs. The rest covers skilled labor, liability insurance, emergency response capability, and the expertise to secure tarps properly so they actually protect your home instead of ripping off in the next storm. Most residential tarping runs $650 to $1,500 depending on roof size, damage extent, and when you need crews to show up.

What You’ll Pay for Roof Tarp Installation

WQPIBNY4Qlm66rNtpM3UWg

Most homeowners spend between $750 and $1,500 for complete emergency roof tarping in 2025, with many residential jobs coming in at $650 or less. Your specific cost depends on how much roof you need covered, how quickly you need it done, and how easy it is for crews to reach the damaged area. A weekend emergency call after a major storm will cost more than scheduling standard service on a Tuesday afternoon, but both serve the same purpose: stop water from getting inside your home while you arrange permanent repairs.

Pricing breaks down to $0.70 to $2.00 per square foot for standard service during business hours. Emergency tarping runs $1.00 to $2.80 per square foot when you need crews immediately, typically about 30% higher than regular rates. That premium covers the cost of pulling crews from other jobs, working in dangerous conditions, or responding after hours when most contractors have gone home.

Here’s what you’ll actually pay based on roof size:

500 square feet: $350 to $1,000 standard, $500 to $1,400 emergency

1,000 square feet: $700 to $2,000 standard, $1,000 to $2,800 emergency

1,500 square feet: $1,050 to $3,000 standard, $1,500 to $4,200 emergency

2,000 square feet: $1,400 to $4,000 standard, $2,000 to $5,600 emergency

2,500 square feet: $1,750 to $5,000 standard, $2,500 to $7,000 emergency

Total costs include both materials (the tarp, battens, nails, waterproofing) and labor. Labor typically represents 60 to 70% of what you pay. Professional crews charge $60 to $120 per hour, with most tarping jobs taking one to three hours depending on roof size and complexity. A simple single story ranch with straightforward access takes less time than a two story home with steep pitch and limited workspace.

Emergency and After Hours Rate Premiums

Emergency rates exist because responding to urgent calls means disrupting normal schedules, working in active weather, and accepting higher risk. Standard weekday rates apply during normal business hours when conditions are stable. Evening and weekend calls typically run 1.5 times normal hourly rates. Holiday response costs even more. Severe weather emergency rates apply when contractors work during active storms or immediately after widespread damage when demand spikes.

Many companies charge $100 to $200 call out fees just for after hours emergency response before labor begins. These premiums feel expensive in the moment, but emergency tarping prevents exponentially higher repair costs from water damage progression. Interior ceilings, insulation, drywall, flooring, and belongings all stay dry when tarps go up fast.

Primary Cost Factors

Roof size directly impacts both material and labor costs. Larger damaged areas need bigger tarps, more fasteners, and more crew time to secure properly. Pitch steepness matters because steep roofs require additional safety equipment, slower work pace, and often extra crew members compared to flat or low slope roofs.

Accessibility affects pricing significantly. Single story homes with clear yard access cost less than multi story homes surrounded by landscaping, power lines, or tight spaces that limit equipment placement. Damage severity determines scope. Small punctures need targeted coverage while widespread wind damage may require tarping entire roof sections, and debris removal adds time before tarping can even begin. Architectural complexity increases costs when roofs feature multiple levels, valleys, dormers, or other features that complicate tarp positioning and securing.

Professional Installation Versus DIY Tarp Costs

B9h4FnSMGiQjuj5WvDNw

DIY tarping looks appealing when you price materials alone and skip labor costs entirely.

Basic materials for do it yourself installation include:

  1. Heavy duty tarp: $50 to $250 depending on size and quality
  2. Lumber for battens: $20 to $60 for 1×4 or 2×4 boards to secure edges
  3. Roofing nails: $10 to $20 for rust resistant fasteners
  4. Roofing cement: $15 to $30 for sealing edges
  5. Safety equipment: $40 to $100 for harness, rope, non slip shoes
  6. Ladder stabilizers: $25 to $50 for safe roof access

Typical DIY material costs total $150 to $400 for an average residential job. Professional installation for the same project runs $500 to $1,200 including labor and materials. That $350 to $800 difference tempts homeowners to handle it themselves, especially when storm damage hits and money feels tight.

Hidden costs of DIY work add up fast though. Personal injury risk tops the list. Roofing consistently ranks among the most dangerous home maintenance tasks, with falls causing serious injuries even on single story homes. Time investment matters when you factor lost work hours, multiple trips for forgotten materials, and learning curve mistakes.

Improper installation leads to bigger problems: tarps that blow off in the next storm, fasteners that create new leak points, trapped moisture that starts mold growth, or inadequate coverage that lets water intrude at edges. Insurance complications arise when DIY tarping fails and adjusters question whether homeowner negligence contributed to worsening damage.

DIY makes sense for very small accessible areas as temporary protection until professionals arrive within hours. It’s also reasonable when you have genuine roofing experience and proper safety equipment already. Professionals become necessary for damaged or structurally compromised roofs, multi story homes, steep pitch installations, complex roof patterns, large damaged areas, or any situation where working alone on an elevated damaged surface creates serious safety risk.

Tarp Material Types, Pricing, and Protection Duration

SHPrZHbhTX-JCxWUMxZiJg

Every tarp sold is temporary by design. You’re buying time to arrange permanent repairs, not a long term roofing solution.

Tarp Type Thickness (mil) Typical Cost Expected Lifespan Best For
Economy poly tarp 5-6 mil $25-$75 30-60 days Very short term emergency coverage
Standard blue poly tarp 10-12 mil $75-$150 60-90 days Typical residential tarping needs
Heavy duty reinforced tarp 16-20 mil $150-$250 3-6 months Extended protection, high wind areas
Professional grade vinyl tarp 18-24 mil $200-$400 6-12 months Long term coverage, severe weather exposure

Features that increase upfront cost deliver longer protection periods and better performance. UV resistance prevents sun degradation that makes cheaper tarps brittle and prone to tearing. Reinforced edges with heat sealed hems resist tearing at stress points where wind tries to rip tarps loose. Metal grommets every 18 to 24 inches provide secure anchor points without ripping through material. Higher tear strength withstands flapping in wind and impact from debris.

Standard blue poly tarps typically last 60 to 90 days under normal conditions. Heavy duty reinforced tarps extend protection to three to six months with proper installation. Professional grade vinyl tarps can protect for six to twelve months when secured correctly.

High winds shorten lifespan by creating constant stress on fasteners and material. Hail punctures even heavy duty tarps. Extreme heat accelerates UV degradation. Prolonged sun exposure weakens all tarp materials over time.

Cost per day calculations favor better tarps for extended coverage needs. A $75 economy tarp lasting 45 days costs $1.67 per day, while a $250 heavy duty tarp lasting 150 days costs $1.67 per day with better weather resistance and less chance of mid term failure.

Extended tarp periods create real risks though. Insurance companies expect reasonable timelines from emergency protection to permanent repairs. Leaving tarps for six months or longer can complicate claims if damage worsens from tarp degradation. Water intrusion increases as tarps age and develop small tears or loose fasteners. Structural deterioration continues underneath tarps when underlying damage isn’t addressed. Mold growth begins within 24 to 48 hours after water intrusion in humid climates, meaning tarps that fail mid coverage create new problems.

Transitioning from temporary tarping to permanent roof repair should begin immediately after tarps go up. Tarps buy you the necessary window to file insurance claims, wait for adjusters, select contractors, and schedule repair work. Typically 60 to 90 days for standard timelines. Permanent repairs for leaky roofs range from a few hundred dollars for minor shingle replacement to several thousand for extensive structural damage. Tarps extending four feet beyond damaged areas on all sides provide adequate coverage that prevents edge infiltration while permanent work gets arranged.

Regional Price Variations for Roof Tarping Services

nA7NqldQkq9PaTYyWPFrw

Where you live affects what you’ll pay for the same tarping service.

Region Type Typical Cost Range Factors
Major metro areas $800-$1,500 Higher labor rates, more competition, faster response
Suburban areas $600-$1,200 Moderate rates, good contractor availability
Rural locations $500-$1,000 Lower labor costs, longer travel time, fewer contractors
Disaster affected zones $900-$2,000+ Surge pricing, high demand, limited crew availability

Local labor rates vary significantly between markets. Contractors in high cost of living areas charge more per hour than those in lower cost regions. Contractor availability determines pricing when supply meets demand: areas with many roofing companies stay competitive, while regions with few contractors allow higher rates.

Material supply chains affect costs in remote areas where distributors add freight charges that get passed to homeowners. Competition levels keep prices reasonable in suburban markets with multiple service providers bidding for work. Regional weather patterns drive demand spikes. Hurricane prone coastal areas see price surges during storm season, while regions with occasional severe weather maintain more stable pricing year round.

Get two to three quotes from local contractors rather than relying on national averages. Your specific market, current demand levels, and individual roof factors determine actual pricing more accurately than generalized estimates. Most reputable contractors provide free estimates for emergency tarping, giving you real numbers before committing to service.

Insurance Coverage for Emergency Roof Tarping

WuoRtb3ERpqp8SUn23-JYQ

Emergency tarping qualifies as immediate damage mitigation under most homeowner insurance policies. Coverage often extends up to 1% of your home’s total insured value specifically for emergency protective measures, frequently without requiring you to pay your deductible first. That means the insurance company recognizes that spending money now to prevent additional damage costs far less than covering expanded claims from water intrusion.

Filing a tarping insurance claim follows these steps:

  1. Document damage immediately: Take photos and video of roof damage before anyone touches it, showing the full extent from multiple angles.
  2. Contact your insurance company: Call your carrier’s claims line as soon as you discover damage, before tarping if possible.
  3. Save all receipts and invoices: Keep every piece of paper related to tarping costs, including materials, labor, and emergency service fees.
  4. Photograph the tarped roof: Document the protective coverage once installed, showing how it secures the damaged area.
  5. Submit claim documentation promptly: Send all paperwork to your adjuster within the timeframe specified in your policy.

Most policies reimburse reasonable tarping expenses based on actual costs incurred. For a home insured at $300,000, your policy may cover up to $3,000 for emergency protective measures like tarping. That ceiling typically exceeds what most homeowners actually spend, providing adequate coverage for standard residential tarping jobs. Larger or more complex homes with higher insured values receive proportionally higher emergency mitigation allowances.

Homeowners usually pay contractors upfront and submit receipts for reimbursement later. Some insurance companies send emergency service providers directly and handle payment behind the scenes, but most residential claims require homeowners to arrange service and front costs initially.

Failure to tarp promptly creates claim complications. Adjusters may reduce coverage or deny additional damage if they determine homeowner negligence allowed water intrusion to worsen preventable damage. Delayed response demonstrates lack of reasonable mitigation effort, weakening your claim position. Leaving tarps beyond reasonable timeframes raises similar red flags. Insurance expects you to pursue permanent repairs within typical timelines, not leave temporary protection indefinitely while underlying damage progresses.

Typical progression from tarping to permanent repair follows this timeline:

  1. Immediate tarping: Day 0 to 1 after damage occurs
  2. Insurance claim filing: Day 1 to 3 to notify carrier and initiate claim
  3. Adjuster inspection: Day 3 to 14 for insurance representative to assess damage
  4. Approval and contractor selection: Week 2 to 4 to receive approval and choose repair contractor
  5. Permanent repair scheduling: Week 4 to 8 to get on contractor’s schedule
  6. Repair completion: Week 8 to 12, varying significantly by scope and complexity

Several factors extend these timelines: widespread storm damage that overwhelms local contractors, complex claims requiring multiple inspections, material availability for specialty roofing, seasonal weather that prevents safe roofing work, and scope changes when hidden damage appears during permanent repairs. For more information on how water damage progresses without proper mitigation, see our guide on Water Damage Restoration Process and Costs.

Begin permanent repair planning immediately after emergency tarping. Contact multiple roofing contractors for estimates while waiting for insurance approval. Research material options and upgrade possibilities. Schedule work as soon as approval comes through rather than waiting until the tarp shows wear.

Reducing Your Roof Tarp Installation Expenses

6H5qG3FmQTCoP-F1ygJR9Q

Emergency tarping shouldn’t be avoided to save money. The cost of delayed protection far exceeds tarping expenses. But strategic decisions reduce what you ultimately pay.

Identify contractors before emergencies strike. Research and vet local tarping services during calm weather, getting contact information and approximate pricing so you’re not scrambling during crisis. Act quickly when damage occurs. Immediate response often allows standard service rates rather than emergency premiums, and early protection prevents escalating repair costs from continued water intrusion.

Consider standard service timing when safe to wait. If damage occurs Thursday evening and no rain threatens until Saturday, scheduling Friday morning standard service costs less than Thursday night emergency rates. Provide clear roof access. Move vehicles, outdoor furniture, and obstacles before crews arrive to reduce setup time and labor hours. Have accurate roof measurements ready. Knowing square footage helps contractors provide precise quotes rather than padding estimates for uncertainty.

Ask about package pricing with future permanent repairs. Some contractors discount tarping costs if you commit to using them for permanent roof replacement or repairs. Verify insurance coverage limits before selecting service tier. Understanding what your policy covers helps you choose appropriate tarp quality without overspending or underprotecting.

Quality matters more than bargain hunting when roof damage threatens your home. Don’t compromise on certified installers who carry proper licensing and insurance. Unlicensed operators may charge less but leave you liable for accidents and defective work. Don’t skimp on appropriate tarp grade for your climate. Saving $100 on materials means nothing when a cheap tarp fails in two weeks and requires reinstallation.

Don’t accept improper installation that saves time but doesn’t extend coverage adequately beyond damage or secure fasteners properly. Don’t delay response to avoid after hours fees if weather threatens. Water damage from waiting costs far more than emergency service premiums.

Long term cost perspective shows that quality tarping plus prompt permanent repairs costs far less than addressing mold remediation, structural repairs, ceiling replacement, insulation damage, electrical issues, and destroyed belongings that result from delayed or inadequate protection. Spending $800 on proper tarping prevents $8,000 in additional damage. That’s not an expense. It’s damage control that saves money.

Understanding What’s Included in Tarp Service Quotes

bknwNakuSW2LeIxfFyMfhw

Detailed written estimates help you understand exactly what you’re paying for and identify contractors padding prices or hiding costs.

Service Component Typically Included Potential Extra Charge
Tarp materials Standard blue poly tarp, appropriate size Heavy duty or specialty tarps, oversized coverage
Fastening materials Wooden battens, roofing nails, basic straps Premium anchoring systems, sandbag weighting
Labor for installation Standard crew during business hours After hours premium, holiday rates, multi story surcharge
Damage assessment Visual inspection to determine coverage needs Detailed structural assessment if requested separately
Debris clearing Minor debris moved from work area Tree removal, major debris hauling ($400-$1,200)
Emergency service premium Not applicable for scheduled service 1.5x rate for after hours, weekends, immediate response

Ask contractors these questions before accepting quotes: Is this a flat rate or hourly pricing? What specific tarp grade is included in this estimate? Are all fastening materials (battens, nails, straps, roofing cement) included or extra? Is debris removal included or charged separately? What happens if additional damage is discovered during installation, do costs increase?

Is there a warranty or guarantee on the installation workmanship, and what does it cover? These questions reveal whether quotes provide complete service or baseline pricing that grows with inevitable add ons.

Red flags include quotes significantly below market rates without clear explanation. Legitimate contractors can’t provide professional service at prices far below competitors without cutting corners somewhere. Lack of itemization prevents you from comparing quotes accurately or understanding what drives costs. Reluctance to provide written estimates suggests contractors want flexibility to increase charges after work begins. Pressure to decide immediately without reviewing insurance implications or getting other bids indicates more concern with closing sales than serving clients properly.

Temporary Tarp Protection for Different Damage Types

ai7S3iSyThC44DnUlRhiDA

Damage type affects how much roof you need covered, what installation approach works best, and what you’ll ultimately pay.

Wind and Storm Damage

Wind typically creates scattered damage patterns: sections of missing shingles, lifted flashing, punctures from airborne debris. Standard tarping approach covers affected sections plus surrounding area, extending four feet beyond visible damage in all directions. Typical cost range for storm damage tarping runs $500 to $1,200 depending on how many separate areas need coverage. Multiple small damaged sections sometimes cost more than one large area because positioning and securing multiple tarps takes extra time.

Tree Impact and Debris Damage

Trees or large branches that penetrate roofs create obvious damage with hidden structural concerns underneath. Debris removal adds $400 to $1,200 before tarping can begin. Crews must clear broken branches, remove unstable material, and ensure safe working surface. Structural assessment becomes necessary when impact compromises roof framing, potentially requiring temporary interior supports before tarping.

Larger tarp coverage becomes essential because impact damage often extends beyond the visible hole, with surrounding shingles loosened and decking cracked in wider patterns than surface damage shows.

Leak Related Damage

Identified leak sources from deteriorated flashing, damaged valleys, or failed seals often need only targeted coverage rather than whole section tarping. Smaller tarp sizes keep costs lower, $300 to $600 for focused protection over specific problem areas. The challenge involves identifying leak source accurately before tarping, because water infiltrates at one spot and travels along roof structure before appearing inside. Professional assessment helps pinpoint actual damage location rather than just covering where water drips indoors.

Hail Damage

Widespread hail creates thousands of small impact points across entire roof sections rather than concentrated damage. Comprehensive coverage becomes necessary when damage is extensive, sometimes requiring tarping entire roof sections or even full roofs. Costs increase proportionally, $1,000 to $2,500 for major hail damage protection.

The good news: hail damage that requires full tarping typically also requires full roof replacement, meaning tarp costs represent small fraction of total insurance claim and temporary protection period runs shorter before permanent replacement begins. For roof damage caused by fire, similar comprehensive tarping needs arise. See our guide on Fire and Smoke Damage Repair Process for how emergency protection works after fire incidents.

Permits, Safety Standards, and Liability Considerations

Zt-84WIHSVWZAu0IAKyjJg

Emergency tarping rarely requires building permits, but contractor credentials and safety compliance significantly affect quality and legal protection.

Verify these credentials before hiring anyone:

Contractor licensing: Valid license in your state, appropriate classification for roofing or emergency services. Liability insurance: Coverage protecting you if installation causes additional damage or fails to prevent water intrusion. Workers’ compensation insurance: Protection ensuring you’re not liable if crew members get injured on your property. OSHA safety compliance: Following federal safety standards for elevated work, fall protection, and equipment use. Warranty or guarantee: Written commitment covering installation workmanship for specified period, typically 30 to 90 days.

These credentials increase costs slightly compared to unlicensed operators, but provide essential protections worth every dollar. You’re not personally liable if crew members fall or get injured during work. Workers’ comp insurance covers medical costs and lost wages. Work meets code requirements and follows industry standards, preventing installation failures that cause additional damage.

Insurance companies accept documentation from licensed contractors without question, smoothing claims processing. Recourse exists through licensing boards and insurance carriers if installation fails or contractors disappear before completing work properly.

Reputable contractors include these protections in standard pricing automatically. Their insurance, licensing fees, safety equipment costs, and ongoing training get built into hourly rates and project quotes. Quotes that seem unusually low, 30% or more below market rates, may reflect lack of proper insurance, expired licensing, or corner cutting on safety requirements. You’re not saving money. You’re accepting risk that costs far more when something goes wrong.

Final Words

Temporary roof tarp cost ranges from $750 to $1,500 for most jobs, with emergency service adding 30% to 50% to baseline rates.

But the real cost calculation includes what you prevent. Every hour of delay risks exponentially higher repair bills from water damage, structural deterioration, and mold growth.

Professional installation covers materials, labor, safety compliance, and documentation your insurance company needs. That upfront expense protects your home and simplifies your claim process.

Get your roof tarped fast, document everything, and start planning permanent repairs while the tarp holds the line.

FAQ

How much do roofers charge to tarp a roof?

Roofers typically charge $750 to $1,500 total to tarp a roof in 2025, with most homeowners spending $650 or less. Per-square-foot pricing ranges from $0.70 to $2.00 for standard service and $1.00 to $2.80 for emergency response. Labor represents 60-70% of total cost at $60 to $120 per hour.

Where can I get a free tarp for my roof?

Free roof tarps are generally not available from professional sources, but some local governments and disaster relief organizations provide free tarps after major storms. Most homeowner insurance policies cover tarping costs up to 1% of your home’s insured value as damage mitigation, effectively making professional tarping free after reimbursement.

What can I use instead of tarping my roof?

Instead of tarping your roof, you can apply roofing cement to small leaks, use plywood for localized coverage, or install emergency roof patches. However, these alternatives work only for minor damage on accessible areas and don’t provide the comprehensive weather protection tarps offer for significant damage. Permanent repair remains the only true alternative to temporary tarping.

How much do roof tarps cost?

Roof tarps cost $4 to $25 for small DIY tarps and $50 to $250 for full-size residential covers, depending on thickness and quality. Professional-grade vinyl tarps run higher but last 6-12 months versus 60-90 days for standard poly tarps. Material cost represents only 30-40% of total professional installation expense.

Electrical Safety After Water Damage (when To Shut Off Power): Stay Secure

0

Imagine a small leak putting your loved ones at risk. Water pooling near outlets or cords can lead to electrical shock because electricity and water don't mix. I know this is stressful, so we're here to help with clear, simple steps.

We explain when you should shut off power to keep your home safe. We break it down into easy steps so you know exactly what to do during water damage. Follow these quick instructions to protect your family and your home.

When to Shut Off Power After Water Damage

When water touches outlets, cords, or panels, assume the electricity is still on. If water is very close to electrical parts, shut off the main breaker right away. For your safety, wear dry, rubber-soled shoes and use one hand when adjusting the breakers. Approach the panel from the side so you don't step in water or touch wet surfaces. Even a small amount of water can hide more moisture that may put you and your home at risk.

If the main panel is underwater or hard to reach, do not try to get to it yourself. Instead, call your local utility company to disconnect the power at the meter. Also, be aware that battery backups, generators, or solar installations might keep some parts of your home powered even after the main breaker is off. Treat any sign of water near electrical parts as an emergency to avoid shock or fire from damaged wiring and insulation.

After you have cut the power safely, plan for a professional check before turning the electricity back on. Use extra caution with any temporary power options until an expert tells you it is safe. For a full guide on keeping your home secure after a flood, check the home safety checklist at home safety checklist after a flood. Waiting for a licensed electrician to inspect the area helps ensure that hidden moisture and corrosion do not cause future problems.

Recognizing Electrical Danger Signs After Water Damage

img-1.jpg

When water gets into your home, it can quickly create hidden electrical dangers. You might notice signs that your circuits are not working as they should. Sometimes, electrical parts remain powered even after a leak. We know this can be stressful, so it helps to know what to look for right away.

Here are some warning signs to watch for:

  • Flickering lights
  • Breakers that trip often (the breaker is a switch that cuts power when too much electricity flows)
  • Burning smells around outlets or switches
  • Buzzing noises coming from electrical boxes
  • Switch plates that feel warm or show discoloration
  • GFCI outlets (special outlets that help prevent electric shocks) that do not pass tests
  • Corrosion on outlet covers or inside electrical panels
  • Water stains by baseboards or at outlets

If you see any of these signs, it means water may have damaged your electrical system. Even if things still seem to work, the hidden moisture could later cause short circuits or even fires. The best next step is to call a licensed professional right away to inspect your wiring and electrical devices.

Safe Procedures for Shutting Off and Isolating Power After Water Damage

If you see water near wiring or electrical panels, be very careful. Make sure you have dry shoes and a clear path before you approach the main breaker. If you need to remove a cover, use a tool that is not made of metal to avoid the risk of a shock. Stand to the side of the panel and try to use one hand when switching circuits. This simple step lowers your risk of getting shocked.

If you can reach individual circuits easily, turn them off first. This extra step helps prevent power surges and keeps the wet areas separate. Once you have switched off the circuits, check with a non-contact voltage tester (a tool that detects electricity without touching wires) to be sure the power is off. Take your time here because hidden moisture might still make wires active even when you cannot see any power.

Remember, backup systems like generators, solar setups, or battery backups might still be live even after you turn off the main breaker. Stay cautious around these devices and do not reset any breakers until a licensed technician confirms it is safe. Avoid using any electrical device until a complete inspection has been performed.

For complete safety and proper power restoration, call professional emergency restoration services at emergency restoration services. They will inspect your system and guide you through the right steps for a safe repair after water damage.

Professional Inspection and Repair of Electrical Systems After Water Damage

img-2.jpg

If your home has water damage, a licensed electrician needs to check your electrical system right away. We look over panels (the boxes that control your power), bus bars (the metal strips that carry electricity), and wiring for any corrosion that might weaken these parts. We also run insulation resistance tests (simple checks to see how well wiring can fight off moisture) to find hidden water damage. This step is important because unseen moisture can eventually lead to dangerous electrical issues. Early checks help keep your home and family safe.

Our electricians also inspect breakers (safety switches), outlets, and light switches to catch any sparking or issues with how they work. In cases of serious internal corrosion or damaged insulation, we may need to replace the entire panel. This careful check makes sure every part meets today’s safety codes. We also test built-in devices like GFCI (Ground Fault Circuit Interrupter, which stops shocks) and AFCI (Arc Fault Circuit Interrupter, which stops dangerous sparks) to ensure they work properly in wet areas. These inspections help prevent later electrical failures and fires during flood recovery.

A professional inspection after a flood isn’t just about fixing immediate problems, it also protects your long-term safety. Certified electricians use special tools to spot hidden water damage, ensuring that repairs and replacements follow strict safety codes. This thorough work reduces the chance of future hazards and keeps your system running reliably. Trusting experts with your electric system check is the best way to restore safety and peace of mind in your home.

Preventive Measures for Electrical Safety After Water Damage

We know that water damage can create electrical risks. Taking action now helps keep you safe in the future. We recommend using GFCI outlets (safety plugs that reduce shocks) in areas where moisture is common. You can also move your main panels and disconnects to higher spots so water is less likely to reach them. Upgrading to weatherproof breakers and covers helps keep moisture out.

You can further improve your safety by adding whole-house surge protection and installing moisture alarms and auto shutoff valves (devices that turn off power when needed). These steps catch problems early. Scheduling annual inspections also helps spot hidden issues before they cause harm.

Preventive Measure Benefit
Install GFCI outlets Reduces risk of electric shock
Relocate main panels Less exposure to water
Upgrade breakers and covers Improves weather resistance
Add surge protection Guards against power spikes
Schedule annual inspections Finds hidden issues early

Final Words

In the action, we covered safe shutdown steps when water meets electricity. Our guide highlighted clear indicators of risk and precise methods to cut power safely.

We walked through important tips and precautions, including electrical safety after water damage (when to shut off power), to keep you and your home secure.

Taking these steps now means a safer recovery and a faster return to normal. Stay alert, follow proper procedures, and remember help is always on the way.

FAQ

How long does it take for electrical wiring to dry out?

The drying time for electrical wiring depends on moisture levels and environmental conditions. It typically takes several days for wiring to dry fully, so professional evaluation is advised before restoring power.

When to turn on the breaker after a flood?

The breaker should only be turned on after a professional inspection confirms the wiring is safe. This cautious approach prevents potential shocks or fires from lingering moisture.

What happens when electrical wiring gets wet?

Electrical wiring that gets wet may lead to short circuits, breaker trips, or even fires. Moisture can damage insulation and create risks, so addressing water exposure promptly is essential for safety.

Can electronics be fixed after water damage?

Electronics affected by water damage can sometimes be repaired if dried and cleaned quickly. However, lasting damage may occur, so having a professional assess and repair devices ensures safety and proper functionality.

What Causes Ceiling Leaks: Common Sources and Warning Signs

0

Think a small ceiling stain is no big deal?
More often it’s the first sign of a bigger problem: a failing roof, a leaking pipe, a clogged AC drain, or trapped condensation in the attic.
Roof leaks tend to show up during storms, plumbing leaks drip all the time, and HVAC issues make clear, steady water.
In this post you’ll learn the common sources, the warning signs to watch for, and the quick steps to stop more damage and get the right repair.

Why Your Ceiling Is Leaking: The Most Common Causes

kZLTD8dTSTOY9NOm1EBQGw

Roof failures cause most ceiling leaks. Missing shingles, cracked flashing around chimneys and vents, clogged gutters. All of these let rainwater and snowmelt penetrate the roof system and soak into insulation and drywall. Roof leaks usually show up only during or right after storms, and the water might travel along rafters or electrical lines before dripping through a ceiling that’s actually far from where it got in.

Plumbing failures come in second. Burst pipes, loose fittings, corroded supply lines, worn fixture connections. These can produce sudden or steady dripping from the ceiling below. The leaks often appear consistent or even get worse over time, and they don’t care about the weather. Toilets, showers, under-sink connections, and water heaters on upper floors? Frequent offenders.

HVAC systems create condensation that needs to drain properly. When drain lines clog or drip pans overflow, water backs up and leaks into attic spaces or ceiling cavities. HVAC leaks tend to be small and steady. The water’s typically clear, unlike the brown or dirty-gray stuff that comes from a roof leak carrying old insulation or debris.

Other causes that often go unnoticed:

  • Poor attic insulation or ventilation causing condensation buildup
  • Structural cracks in walls or ceilings letting rain intrude
  • Ice dams forming at roof edges during freeze-thaw cycles
  • Washing machines or dishwashers on upper floors overflowing
  • Skylight seals failing after years of sun exposure
  • Bathroom exhaust fans vented improperly into attic spaces
  • Foundation cracks allowing groundwater to wick upward through walls

Identifying Roof-Related Leak Sources

VyRiSCedTUuQqWsTDBwaiw

Roof systems fail when protective layers degrade or when water finds a path through gaps in shingles, membranes, or flashing. Wind can lift and remove shingles, hail can crack them. Decades of sun exposure make asphalt brittle and prone to splitting. Flashing (the metal or rubberized strips that seal roof penetrations like chimneys, vent pipes, and skylights) can corrode, separate, or crack. Gutters and downspouts that clog with leaves force water to back up under shingles at the roof edge, especially during heavy rain.

Water stains from roof leaks often appear as irregular brown or yellowish patches. They spread slowly over days or weeks and grow larger after each storm. The stain may be far from the actual roof damage because water can travel along rafters, wiring, or ductwork before finding a low point to drip through. Attic inspections during or after rain frequently reveal wet insulation, damp roof decking, or daylight visible through small holes in the sheathing.

Five indicators that your ceiling leak comes from the roof:

  1. Leaks appear only during or immediately after rain, snow, or ice melt.
  2. Water stains are brown, yellow, or dirty-gray, carrying roof debris or old insulation.
  3. You notice missing, curled, or cracked shingles when viewing the roof from the ground.
  4. Gutters overflow during storms or are visibly sagging or detached.
  5. Attic insulation is wet, compressed, or discolored near the area above the ceiling stain.

Identifying Plumbing-Related Leak Sources

VmTGegeS9WuuX36QvYXEA

Plumbing leaks develop when pipes corrode, fittings loosen, or seals degrade. Cold climates add the risk of ice expansion inside pipes, which can crack copper or PVC and cause sudden ruptures. Older homes often have galvanized steel pipes that rust from the inside out. Even modern PEX or copper lines can fail at crimped joints or soldered connections. Water heaters, especially units installed in attics or second-floor utility closets, store 30 to 80 gallons and produce large leaks if a tank cracks or a supply line separates.

Fixture-based leaks are common in upstairs bathrooms. Toilet wax rings can compress and allow sewer water to seep under the base and through the subfloor. Shower pans crack over time. Grout or caulk around tub surrounds fails, letting water migrate behind walls and down into the ceiling below. Under-sink shut-off valves and braided supply hoses can develop pinhole leaks or loosen at threaded connections, especially after years of vibration from daily use.

Water patterns and timing reveal plumbing as the source. Plumbing leaks typically drip continuously or worsen when specific fixtures run (like when the toilet flushes or the shower runs). The water’s usually clear unless the leak involves a drain line carrying dirty water. Stains may feel warm if a hot-water line’s involved, and you might notice reduced water pressure or hear hissing inside walls. Plumbing leaks don’t correlate with weather. They persist on sunny days and may even increase as fittings corrode further.

HVAC and Ventilation System Leak Causes

JtTS8ZEDRfSiW_DhR83WWw

Air conditioning systems pull humidity from indoor air and convert it to liquid condensation that must drain away through a condensate line. That line typically runs from the indoor air handler to a floor drain, exterior drain, or sometimes into a utility sink. When the line clogs with algae, dirt, or mineral deposits, water backs up into the drip pan under the air handler. If the pan’s cracked, rusted, or simply overflows, water spills into the attic or ceiling cavity and drips through drywall below.

Disconnected or improperly insulated ductwork also generates ceiling leaks. Warm, humid air passing through cold ducts can condense on the outside of the duct and drip onto insulation or ceiling material. Frozen evaporator coils caused by low refrigerant or dirty filters will eventually thaw and release a surge of water that overwhelms the drip pan. HVAC leaks are often seasonal, appearing mostly during cooling months. The water’s clear and odorless.

Common HVAC-related ceiling leak causes:

  • Clogged condensate drain lines forcing water to back up and overflow
  • Cracked, rusted, or missing drip pans under air handlers or furnace coils
  • Duct joints that have separated, allowing humid air to escape and condense
  • Frozen evaporator coils that melt suddenly and release large volumes of water

Other Hidden or Less Obvious Leak Sources

EPia8-pUQwuYrcKfiLflNg

Poor attic insulation or ventilation can cause moisture to condense on cold surfaces inside the attic, mimicking a roof leak. When warm, humid indoor air reaches a cold attic ceiling in winter, it condenses into droplets that soak insulation and drip onto drywall. This type of moisture doesn’t correlate with rain and often appears as widespread dampness rather than a single drip point. Bathrooms that vent exhaust fans directly into the attic instead of outside contribute large volumes of humid air that condense on rafters and sheathing.

Appliance overflows and second-floor plumbing fixtures can send water traveling through floor joists and appearing as ceiling leaks in rooms below. A washing machine supply hose that bursts, a dishwasher that overflows, or a bathtub left running can saturate flooring and subfloor quickly. Water then seeps through gaps around pipes, light fixtures, or along wall plates, eventually staining and dripping from the ceiling below.

Source How It Causes a Ceiling Leak
Condensation from poor insulation Warm indoor air meets cold attic surfaces, condenses into water, soaks insulation, and drips onto drywall
Ice dams at roof edges Melting snow refreezes at eaves, forcing meltwater under shingles and into attic or wall cavities
Washing machine overflow Supply hose bursts or drain backs up, flooding floor and leaking through subfloor into ceiling below
Structural cracks or settling Foundation or wall cracks allow rain or groundwater to enter and migrate upward or laterally into ceiling spaces

How to Diagnose the Source: A Quick Troubleshooting Flow

en26Sxu1SAqwUpmwK_dDag

Systematic inspection saves time and limits damage by narrowing down the leak source through location, timing, and visible patterns. Start by documenting when the leak appears and how the water behaves, then work backward to the most likely origin point.

Follow this diagnostic checklist:

  1. Note the timing. Does the leak appear only during or after rain, or does it drip constantly regardless of weather?
  2. Check if the water’s clear, warm, or discolored. Clear water suggests plumbing or HVAC. Brown or dirty water points to the roof.
  3. Inspect the ceiling stain shape. Round, spreading stains that grow after storms indicate roof leaks. Localized drips near fixtures suggest plumbing.
  4. Go into the attic during or shortly after the leak starts. Look for wet insulation, damp rafters, or active dripping.
  5. Turn off all plumbing fixtures and appliances on floors above the leak. If dripping stops, the source is plumbing.
  6. Run the HVAC system and listen for dripping near the air handler or along ductwork. Check the condensate drip pan for standing water.
  7. Feel the temperature of dripping water. Warm water often means a hot-water supply line. Cold water during AC operation suggests condensation.
  8. Trace the leak path by removing a small section of ceiling drywall if it’s safe to do so. Follow wet framing back toward the source.

If the leak appears only during rain and shows brown staining, schedule a roof inspection. If it drips constantly and the water’s clear, call a licensed plumber to check supply lines and fixtures. If it starts when the AC runs, inspect the condensate system or call an HVAC technician. Isolating the system that triggers the leak tells you which professional to contact and reduces unnecessary exploratory work.

Preventing Future Ceiling Leaks

eS051NWZTyiJodMA0VAZ4A

Regular roof inspections and gutter maintenance are the most effective prevention steps. Schedule a roof inspection twice per year (once in spring after winter freeze-thaw cycles and once in fall before heavy rain and snow). Replace missing or damaged shingles promptly, reseal flashing around chimneys and vents, and confirm that gutters drain freely. Clean gutters at least twice per year, more often if trees overhang the roof. Clogged gutters force water to back up under shingles at the roof edge, especially during heavy storms.

Attic ventilation and insulation reduce condensation risks and extend roof life. Aim for attic insulation levels of R-38 to R-49 in colder climates, and make sure soffit vents and ridge vents provide continuous airflow. Check that bathroom exhaust fans vent outside, not into the attic. Inspect plumbing fixtures annually for loose connections, worn washers, and cracked seals. Drain and inspect water heaters every year, and replace braided supply hoses every five to seven years before they fail.

Five high-impact prevention methods:

  • Inspect and clean gutters twice yearly. Repair sagging sections immediately.
  • Schedule roof and attic inspections in spring and fall to catch damage early.
  • Replace aging plumbing supply hoses and fixture seals before they leak.
  • Service HVAC systems annually, including condensate line flushing and drip-pan checks.
  • Insulate pipes in unheated areas and install heat cables on roof edges prone to ice dams.

When to Call a Professional

e24vXU4YSi21emkTN_u_QQ

Immediate professional help is necessary when electrical systems are at risk, ceilings show structural sagging, or active water flow exceeds what a bucket can contain. Water near electrical outlets, light fixtures, or ceiling fans creates shock and fire hazards. Turn off power to affected circuits at the breaker panel and call an emergency electrician or restoration company. Ceilings that sag, bulge, or feel soft to the touch may collapse suddenly, especially if drywall has absorbed water for hours or days. Don’t stand under a sagging ceiling. Call a licensed contractor immediately.

Attempting DIY repairs on concealed plumbing, roof penetrations, or structural leaks often worsens damage and increases costs. Licensed plumbers carry cameras and moisture meters to locate hidden leaks without unnecessary demolition. Roofers can identify weak flashing and membrane failures that homeowners miss from the ground. If the leak source is unclear after basic troubleshooting, if water volume is high, or if mold appears across more than a few square feet, hire a professional to diagnose, contain, and repair the damage safely and completely.

Final Words

If water is coming through the ceiling right now, stop the source if you can—turn off the water main for plumbing leaks, set a bucket under the drip, and take photos to document damage.

This post ran through the usual culprits: roof failures, plumbing breaks, HVAC condensation, and hidden sources, plus how to diagnose, prevent, and when to call a professional.

If you’re wondering what causes ceiling leaks, start with roof and plumbing checks, then move to HVAC and attic paths. Act fast, document everything, and repairs will follow. You’ll get your home back to normal.

FAQ

Q: How do you know if a ceiling leak is serious?

A: A ceiling leak is serious if water is actively flowing, the ceiling is sagging, electrical fixtures are wet, or the stain keeps growing quickly. Those signs need immediate shutoff and pro help.

Q: What should you do if your ceiling is leaking?

A: If your ceiling is leaking, stop the water source if safe, move valuables, put a bucket under the drip, turn off power near the wet area, document damage with photos, then call a pro.

Q: Does homeowners insurance cover ceiling leaks?

A: Homeowners insurance may cover ceiling leaks caused by sudden events like a burst pipe or storm, but not damage from long-term neglect. Document the loss, report it quickly, and check your policy details.

Q: Can a small ceiling leak become a big problem?

A: A small ceiling leak can become a big problem because hidden moisture leads to mold, rot, warped materials, and bigger repairs over time if you don’t stop and repair it promptly.

Soot Removal Service Cost: What to Expect in 2024

0

Think soot cleanup is cheap? Think again. In 2024 a light job can run $200, but a full fire-related cleanup often reaches $3,000 to $6,000 or more, depending on how thick the residue is, what materials got hit, and whether ducts or contents need packed out. This piece lays out typical price ranges, the main cost drivers, what a pro does versus a DIY try, and how to document the work for your insurer so you don’t get stuck with surprise bills or hidden damage.

Soot Removal Cost: Average Prices in 2024

93adeZ52Sy69snCBOkc8JA

Most homeowners pay between $200 and $6,000 for professional soot removal. It depends on how much soot there is, what caused it, and what needs cleaning. A light job, maybe a few candle smudges or minor fireplace soot on one wall, often lands near the lower end. A house fire or furnace puffback that coats ceilings, walls, ducts, and contents? That can push costs well past $6,000, especially when reconstruction gets involved.

Light contamination means a thin layer of dry soot on hard surfaces. Cleanable in an afternoon. Severe contamination includes thick, greasy residue from fuel oil, melted plastics, or protein fires that soaked into porous materials like drywall, insulation, and upholstery. The difference isn’t just the time required. Heavy soot often demands containment barriers, HEPA air scrubbers, chemical degreasing agents, duct cleaning, and sometimes wall or ceiling replacement.

Service fees typically include a base inspection or dispatch charge, often $100 to $300, then hourly labor, equipment rental, materials, and disposal. Emergency calls, after-hours response, or urgent mitigation to prevent further damage may add a surcharge of 25% to 50% on labor.

Common service tiers and typical cost ranges:

  • Light cleaning (single room, surface soot, minor odor): $200 to $800
  • Moderate cleaning (multiple rooms, HVAC filter replacement, odor treatment): $800 to $2,500
  • Heavy soot restoration (whole house contamination, duct cleaning, partial content pack out): $2,500 to $5,000
  • Fire damage soot removal (structural cleaning, full HVAC remediation, ozone treatment, reconstruction): $3,000 to $6,000+

Cost Breakdown by Soot Removal Type

lSRkX58kRPG3rZIwv7zAwg

Chimney soot removal is the most routine job. Annual chimney sweeps typically cost $150 to $400, depending on flue height, creosote thickness, and whether a camera inspection’s included. A standard sweep clears loose soot and creosote from the flue liner, smoke chamber, and damper. If heavy creosote has hardened into a glaze, chemical treatments or rotary brushing may push the price toward the upper range.

Fire related soot cleaning is a different category entirely. When a house fire, grease fire, or electrical fire deposits acidic soot and smoke residue across walls, ceilings, furniture, and ductwork, costs range from $1,500 to $6,000 or more. This work includes containment setup, HEPA vacuuming every surface, chemical cleaning or dry ice blasting, thermal fogging or ozone for odor, and often repainting or replacing trim, drywall, and insulation. Crew size, square footage, and reconstruction needs all drive the final number.

HVAC and duct soot removal runs $300 to $1,000 for most residential systems. When soot enters the return air stream (common after puffbacks or smoldering fires) it coats the blower, evaporator coil, and ductwork. Technicians seal off vents, vacuum ducts with HEPA equipment, wipe down the air handler, and replace filters. Larger homes, multiple zones, or commercial systems push costs higher.

Service Type Typical Price Range
Chimney soot removal $150–$400
Fire-related soot cleanup $1,500–$6,000+
HVAC system soot removal $300–$1,000
General interior surface cleaning $200–$1,500 per room

Factors That Influence Soot Removal Pricing

U3tyUTgnSxyXeP5vYFrWRA

Square footage and contamination thickness matter more than almost anything else. A 1,200 square foot ranch with light soot on painted drywall might be cleaned in a day for $800. The same square footage with quarter inch greasy soot from a basement oil burner malfunction can triple the price, because every surface needs chemical degreasing, rinsing, and sometimes sealing or priming before repainting.

Material type and structural access also change the math. Soot on sealed hardwood floors wipes away quickly. Soot embedded in popcorn ceilings, textured plaster, or porous brick requires specialty sponges, solvents, and often replacement. High ceilings, attics, and crawl spaces add scaffolding, extension tools, and extra labor hours. Multi-story homes or commercial buildings may need lifts or confined space safety protocols, all of which cost money.

Five major cost variables for soot removal:

  1. Square footage: Larger areas require more labor hours, equipment runtime, and cleaning solution. Expect per square foot pricing from $0.50 to $3.00 depending on severity.
  2. Contamination thickness and type: Dry soot is easier than oily, acidic soot from fuel oil or plastics, which may double or triple cleaning time.
  3. Access difficulty: Hard to reach zones, tight HVAC runs, or second story exteriors add equipment rental and technician risk premiums.
  4. Location and regional rates: Urban coastal markets often run 10% to 30% higher than rural areas. Emergency response in remote locations may add travel surcharges.
  5. Special equipment requirements: Dry ice blasting, negative air machines, thermal foggers, and ozone generators each carry rental or operating fees that appear as line items on invoices.

Insurance Coverage and When It Applies

XKYKRUwbSH6g4pE2T5AlSw

Insurance typically covers soot damage when it results from a sudden, accidental event. A house fire, chimney fire, furnace puffback, or electrical short that releases smoke and residue. Policies treat this as direct physical loss, so mitigation, cleaning, temporary housing, and reconstruction are reimbursable up to policy limits, minus the deductible. Coverage doesn’t extend to routine chimney soot from normal fireplace use or gradual buildup from candles and cooking.

You need documentation the moment damage occurs. Take dated photos of every affected room, appliance, and piece of furniture. Note the date, time, and cause if known. Call a licensed restoration contractor for an inspection and itemized estimate. Most insurers require you to mitigate further damage immediately. Seal off the area, turn off the HVAC to prevent soot spread, and document those steps with receipts and time stamps.

Deductibles for fire and smoke claims commonly range from $500 to $2,500. If your total soot cleaning bill is $1,800 and your deductible is $1,000, you pay the first $1,000 and the insurer covers the remaining $800. Always get insurer pre approval for large remediation projects. Submit the contractor’s scope of work, photos, and moisture or air quality readings if available. If hidden damage appears during cleaning (soot inside walls or ductwork) request a supplemental claim in writing, supported by photos and a revised estimate.

DIY vs. Professional Soot Removal Costs

iswAY8HtQFi8salYhk84vg

DIY soot removal costs between $30 and $150 for supplies: dry chemical sponges, TSP cleaner, microfiber rags, HEPA rated shop vacuum bags, and odor neutralizing spray. You save all labor expense, which is the largest part of a professional bill. For a single room with light, dry soot on painted drywall, this approach can work if you have time, patience, and proper respiratory protection.

Professional soot cleaning eliminates guesswork and health risk. Technicians use truck mounted HEPA vacuums that capture 99.97% of particles, not hardware store vacs that blow fine soot back into the air. They apply pH balanced chemical cleaners matched to the soot type and substrate, set up containment barriers to prevent cross contamination, and run negative air machines with activated carbon filters to remove odor. When the job involves HVAC systems, contents, or structural materials, professionals document readings and provide written clearance. That’s critical for insurance and resale.

When you should call a professional instead of attempting DIY:

  • Soot covers more than one room or has entered ductwork and forced air systems.
  • The soot is oily, greasy, or sticky. Signs of fuel oil, plastics, or protein combustion that require solvents and degreasing agents.
  • Odor persists after surface cleaning, indicating soot inside walls, insulation, or porous materials.
  • You’re filing an insurance claim, which almost always requires licensed contractors, itemized invoices, and documented methods.

Final Words

You open a room and see dark streaks on the walls. This guide gave clear price ranges—from about $200 up to $6,000+—and explained light versus severe soot, plus chimney, HVAC, and fire cleanup costs.

We walked through the main price factors, when insurance often helps, and when DIY might be enough versus hiring pros. Document the damage, take photos, and get written estimates.

Knowing the likely soot removal service cost helps you plan the next steps and move forward with confidence.

FAQ

Q: How much does soot removal cost?

A: The cost of soot removal ranges from $200 to $6,000+, depending on contamination severity, square footage, and whether fire damage is involved. Light surface cleaning is usually a few hundred dollars; major restoration costs much more.

Q: How do professionals clean soot?

A: Professionals clean soot by assessing damage, using HEPA vacuums (HEPA filters trap tiny particles), dry sponges, specialized detergents, and air scrubbers, then deodorize, repair affected materials, and document work for insurance.

Q: How long does it take to clean soot?

A: The time to clean soot ranges from a few hours for small surface jobs to several days for heavy contamination or fire damage, plus extra time for repairs, drying, and insurance documentation.

Q: Does dry cleaning remove soot?

A: Dry cleaning can remove light surface soot from walls and fabrics, but it often fails on baked-on residue, embedded particles, or smoke odor; professionals use stronger methods when dry cleaning isn’t enough.

Emergency Water Extraction: Efficient Flood Recovery

Have you ever thought that a few extra minutes might be the difference between a safe home and a big mess? When water floods in, every second matters. Standing water weakens your home and can start mold (a harmful fungus that grows in damp places) within days. We use emergency water extraction to pull water fast, protecting your walls, floors, and belongings from lasting damage. Our team works around the clock with powerful machines to clear the water and start drying right away. This quick action helps you avoid costly repairs and turns a flood into a manageable cleanup.

Emergency Water Extraction Solutions for Immediate Flood Damage Control

When water damage strikes, minutes matter. We work 24/7 to pull out standing water and prevent harm to your home. Water can weaken structures and start mold growth (toxic fungus that thrives in wet areas) in just 24 to 48 hours. Our focused water extraction helps save materials like drywall, wood, floors, carpets, and furniture before the damage becomes permanent.

Quick action is key. Our team usually arrives within an hour and uses strong machines to pull out water fast, then starts the drying process. Acting quickly helps protect your home and lowers the risk of long-term health issues. Look up "water extraction near me" to find a local team and get help fast.

  • Turn off the main water source right away.
  • Move valuable items and furniture to a dry area.
  • If it’s safe, shut off the power to avoid electrical hazards.
  • Take photos of any visible damage.
  • Contact an emergency water extraction team immediately.

Our work isn’t just about taking out the water. We use industrial-grade tools to check moisture levels (the water content in your home) and make sure no hidden damp spots stay behind. This careful approach helps keep your home safe and saves you from expensive repairs later.

Key Equipment and Techniques for Effective Emergency Water Extraction

img-1.jpg

When floods hit, choosing the right equipment fast can help save your home. We use powerful tools to remove water, dry out the area, and stop more damage. Every tool, whether a wet/dry vacuum, a submersible pump, or a portable water extractor, is picked for a specific job so we can work quickly and safely.

Wet/Dry Vacuums

Wet/dry vacuums are built to suck up water. They need to run in water mode to avoid damage. It is important to plug the machine into a safe power source (grounding) to reduce the risk of shock. Keep the inlet clear of debris to keep the suction strong. A simple tip: always clean out the filter and check that the vacuum is connected to a properly grounded outlet.

Submersible Pumps

For high water levels and large areas, we use submersible pumps. There are different types:

  1. Drainage pumps for clean water.
  2. Sewage pumps for dirty water with solids.
  3. Deep well pumps for very deep water.

These pumps come in power ratings from 1/4 to 5 horsepower (HP, a unit that measures power). The material, whether thermoplastic or cast iron, affects how they withstand harsh conditions. To get the most water out, set the pump at the lowest spot in the flooded area and keep electrical parts safe.

Portable Water Extractors

Portable water extractors are small but strong. They have powerful suction and a large tank to handle big volumes of water. Their light weight makes them perfect for tight spaces where larger machines can’t go. We can quickly move these extractors from room to room as needed.

Choosing the right tool for each flood situation is key. We look at the amount of water, its cleanliness, and the size of the area. This helps us work quickly to get your home safe again.

Safety Protocols and Health Considerations in Emergency Water Extraction

Before we begin removing water, we carefully check the area. We test all electrical devices, like wet/dry vacuums (machines that remove water) and pumps, to make sure they are grounded properly to avoid shocks. We also keep power sources away from any standing water. Our team watches the equipment closely and clears away debris that might block the machine inlets or cause damage. This detailed check helps keep everyone safe during the water extraction process.

Once the water is removed, we clean and disinfect all surfaces to stop mold from forming. Mold spores can grow in just 24 to 48 hours in damp conditions, so cleaning is key to protecting your home and health. Our team sanitizes floors, walls, and any affected furniture to limit the spread of mold. This helps reduce risks like breathing issues and allergies while getting your space ready for further repairs.

  • Wear waterproof gloves to protect your hands.
  • Use protective eyewear to keep your eyes safe from splashes.
  • Put on a face mask to prevent breathing in contaminant particles.

Professional Versus DIY Approaches in Emergency Water Extraction Services

img-2.jpg

Many homeowners try using household wet/dry vacuums, fans, dehumidifiers, and open windows to dry a flooded room. While these methods look quick and simple, they can leave hidden moisture in walls and carpets. This leftover water can lead to mold and long-term damage if not completely removed.

We use industrial-grade pumps that pull water fast and high-capacity dehumidifiers (machines that lower humidity) to dry every corner. Our team also uses infrared moisture meters (devices that find hidden water) and special air movers to keep air flowing. This complete method removes both standing water and damp spots that home techniques might miss.

When flood damage is severe, it’s best to call in certified restoration experts. We make sure every bit of moisture is taken care of so you can rest easy knowing your home is safe from future water damage.

Cost and Pricing Guide for Emergency Water Extraction Services

We calculate the cost for water extraction based on how much of your home is affected, how dirty the water is (clean water is basic while contaminated water needs extra care), and the number of machines needed. We look at the square footage to determine the pumps and dehumidifiers (machines that pull moisture from the air) needed to dry your space. The type of water plays a big role in pricing because cleaning methods and equipment vary. We also count the labor hours, as our teams work quickly to remove water and start drying. If you call us at odd hours, emergency fees might be added.

  • Area size
  • Water type and contamination level
  • Equipment rental (pumps, dehumidifiers, etc.)
  • Labor hours and emergency fees

Prices change based on these factors. Our skilled restoration teams will give you a clear, detailed estimate after checking the damage. This helps you plan your budget for affordable flood repair while stopping more damage from moisture.

img-3.jpg

We know this is a tough time for you. After we remove the water, gathering and organizing your paperwork is key to a smooth insurance claim. Clear records of the damage and repairs help your adjuster see the full picture, which can speed up the approval of your claim. Our team prepares detailed reports during cleanup. These include moisture readings (measurements that show how much water is still in your walls and floors), technician reports, and invoices. This information supports your claim and helps you get the costs for fixing your home covered.

Here are some steps to follow:

  1. Take clear photos of every damaged area. Include both close-ups and wider shots.
  2. Record moisture readings in different rooms using a digital moisture meter (a device that measures water content).
  3. Keep all invoices and receipts for repairs and any equipment used.
  4. Save the reports from our technicians and any assessments of the damage we did right after the water was removed.
  5. Write down the contact details and keep records of any emergency service calls.
  6. Build a timeline of events and repairs. List the dates and note any changes in the damage.

Working closely with your insurance adjuster is important. They need accurate records to understand your situation quickly. Following a detailed guide like our water damage claim documentation steps can ensure nothing gets missed. By staying organized and proactive, you can help move the process along and feel confident that your home will be restored as soon as possible.

Local 24/7 Emergency Water Extraction Response and Service Areas

When water damage strikes, we’re here to help 24/7. We quickly remove water and set up drying equipment to protect your home or business. Every minute counts to stop mold and prevent further damage. Our skilled team uses special equipment to restore your property fast.

We serve city centers, suburbs, and commercial areas. We handle water damage from storms, fire, and smoke, and we even check for mold (harmful fungi). Whether you’re a homeowner or a business owner, you can count on us to safely and efficiently manage your water emergency.

Frequently Asked Questions on Emergency Water Extraction Methods and Timing

img-4.jpg

  • What is emergency water extraction?
    Emergency water extraction means we quickly remove extra water from your home to stop further damage and prevent mold. Mold can start to grow in as little as 24 to 48 hours, so fast removal is very important.

  • How quickly does our team respond?
    We usually arrive within an hour. Our team comes fully prepared to remove water and start drying right away to protect your home.

  • What equipment is used during extraction?
    We use wet/dry vacuums, submersible pumps, dehumidifiers (machines that pull moisture from the air), and air movers. These tools work together to clear water and help dry your home more quickly.

  • DIY versus professional extraction, when should you call us?
    Small spills might be handled with your own efforts, but larger water damage needs professional equipment and experience. Calling us helps prevent safety issues and stops mold from growing.

  • How long does the drying process take after extraction?
    While we remove water quickly, drying your home can take several days. We work to make sure walls, floors, and hidden areas are fully dry to lower the chance of mold growth.

Success Stories and Testimonials for Emergency Water Extraction Projects

After a pipe burst flooded my living room, the emergency team arrived in minutes. They used powerful water pumps and industrial dehumidifiers (machines that pull moisture from the air) to remove every trace of water. I was relieved to see them check each area with real-time moisture sensors (devices that spot hidden damp spots) to ensure nothing was missed. Their 24/7 service stopped mold growth and prevented long-term damage, saving my home’s structure and my peace of mind.

During a heavy storm that left my basement underwater, I called for help and received a quick response. The team used modern water extraction tools and continuous moisture sensors to secure my home. They worked carefully to stop further damage and prevent mold from forming. I appreciated every step they took to restore my home to a safe condition. Their work was professional, clear, and compassionate.

Final Words

In the action, we explained how rapid responses and the right equipment keep your home safe. We broke down processes from water removal to safety checks while simplifying key insurance steps. Each section showed how immediate intervention stops further damage and minimizes costly repairs.

Emergency water extraction is crucial for controlling flood damage and preventing mold. Trust in professional help to restore your home quickly. We're here to support you every step of the way.

FAQ

What is water extraction?

Water extraction is the process of removing standing water from a flooded area. It uses pumps, vacuums, and other tools to quickly reduce damage and lower the risk of mold growth.

How do emergency water extraction companies near me operate?

Emergency water extraction companies respond fast, often within an hour, to remove water using industrial equipment so your property is dried effectively and potential damage is minimized.

What is the cost of emergency water extraction and water removal services?

The cost of emergency water extraction varies by property size, water type, and equipment used. Prices can be competitive and are sometimes covered by insurance once you receive a detailed estimate.

What water extraction machine is commonly used during flood cleanup?

Water extraction machines include wet/dry vacuums, submersible pumps, and portable extractors. Each tool is built for fast water removal to reduce structural damage and prevent long-term problems.

How can I quickly get water out of my house?

Quick water removal is achieved by using high-powered pumps and vacuums to extract water rapidly. Acting immediately with professional help can prevent extensive damage and lower the risk of mold.

How rapidly does mold grow after water damage?

Mold can begin to grow within 24 to 48 hours after water damage occurs. Removing water quickly is essential to deter mold growth and protect your home’s integrity.

What should I do immediately after water damage occurs?

Immediately after water damage, ensure your safety by turning off electricity in affected areas if possible. Then, stop the water source, document the damage, and call emergency water extraction professionals for assistance.

How to Dry Out a Crawl Space After Water Damage Fast

0

Most homeowners don’t realize a wet crawl space is drying from the top down while rotting from the bottom up. If you’re staring at standing water under your house right now, the clock’s already running on mold growth, structural damage, and trapped moisture that’ll keep working against you for months. The good news is you can stop the damage and dry it out completely if you follow the right sequence. We’ll show you exactly what to do first, which equipment actually works, when DIY makes sense, and when you need to call professionals before the problem spreads upward into your floors.

Critical Safety Precautions Before Entering a Flooded Crawl Space
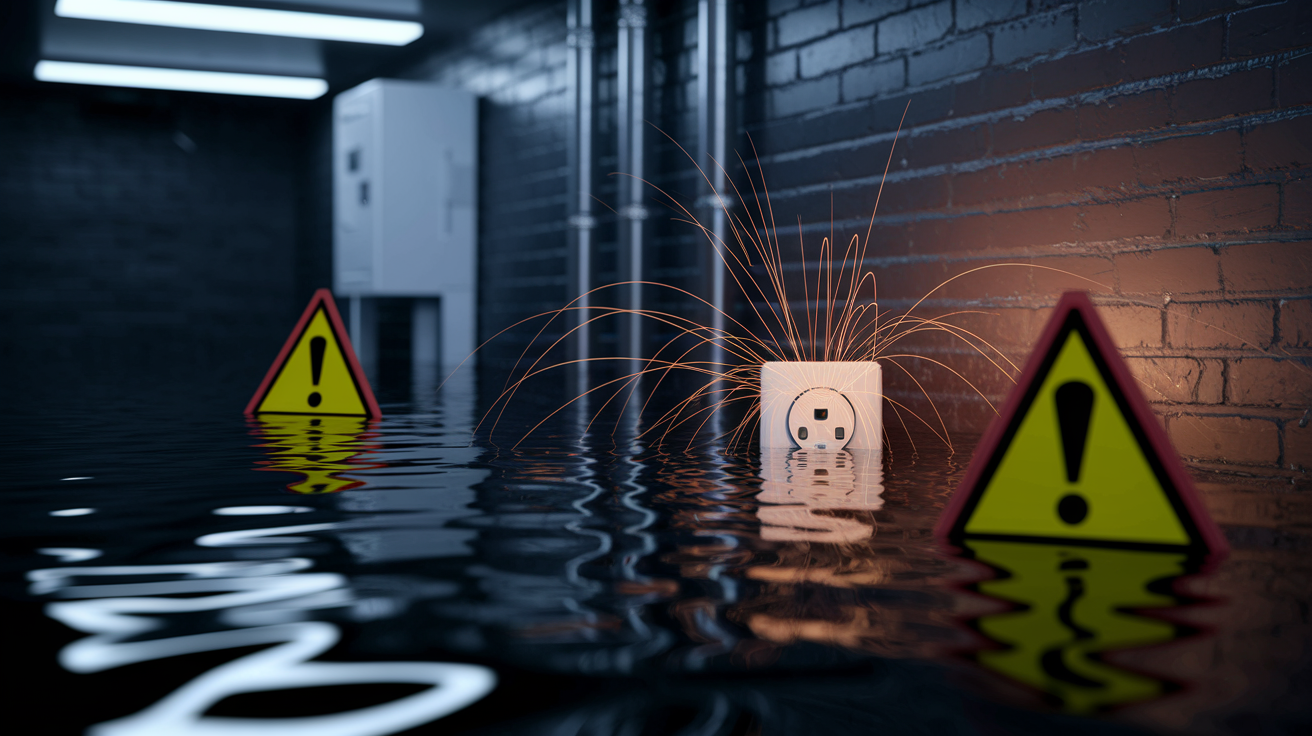
OVuMB7pMTcmQI2PrTt8T4A

Water and electricity don’t mix. Ever. Electric shock from water contacting outlets, appliances, or wiring causes severe burns, cardiac arrest, and death. You don’t enter a flooded crawl space until a qualified electrician confirms the power’s completely off. Not something you skip. Not something you handle yourself. The main breaker might be off, but individual circuits could still be energized through backfeed situations or generator connections. Standing water conducts electricity across distances. You don’t have to directly touch a wire or outlet to get shocked.

Before you go down there, complete these safety checks in order:

Electrical system verification. Have a licensed electrician confirm power is off to the entire crawl space. That includes outlets, HVAC equipment, water heaters, and any other electrical components.

Air quality testing. Test for carbon monoxide, sewer gases, or low oxygen levels. Especially important in enclosed crawl spaces with limited ventilation.

Structural stability assessment. Check for sagging floors above, cracked foundation walls, or compromised support posts that could collapse.

Contamination type identification. Determine if you’re dealing with clean water (supply line), gray water (appliance discharge), or black water (sewage backup).

Pest and wildlife presence. Look for snakes, rodents, or insects that may have entered through flood openings or been displaced by rising water.

Proper protective equipment isn’t optional. Wear waterproof boots rated for the depth you’ll encounter, chemical resistant gloves that cover your forearms, and head protection in low clearance areas. If you’re dealing with sewage contamination or visible mold, you need an N95 respirator at minimum. For extended work, use a half-face respirator. Use battery powered flashlights or LED work lights. Never candles or any open flame. Even small amounts of natural gas or propane create explosive conditions in enclosed spaces.

Stop and call professionals instead of proceeding if you find sewage or chemical contamination, structural damage like cracked foundation walls or sagging floor joists, mold covering more than 10 square feet, or electrical equipment that was submerged. Some situations are beyond DIY scope. They require specialized training, equipment, and safety protocols. Pushing forward when you shouldn’t can turn a property problem into a personal injury or death.

DIY Drying Versus Hiring Professional Restoration Services
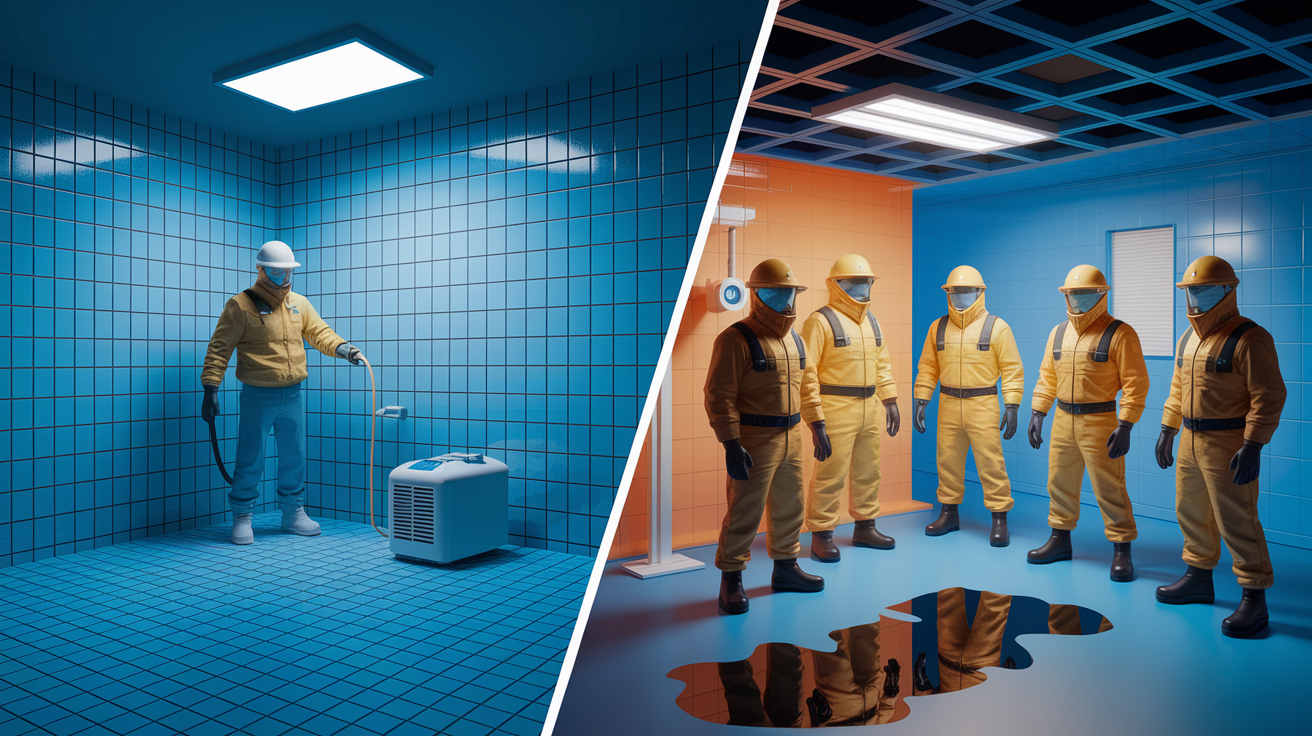
4JbTyAtRQ2yWJtKHjkl9yQ

DIY drying works for minor situations. You’re dealing with clean water from a supply line, the water depth stayed under a few inches, there’s no electrical system damage, and you’re comfortable working in tight spaces with the right equipment.

These situations require professional restoration help, not DIY attempts:

Sewage or contaminated water. Black water contains bacteria, viruses, and pathogens requiring specialized cleaning protocols and disposal methods.

Water deeper than 6 inches. Volume exceeds what homeowner equipment can handle efficiently. Structural damage risk increases significantly.

Electrical system damage. Any situation where outlets, wiring, or equipment was submerged needs professional electrical assessment and repair.

Extensive mold growth. Visible growth covering more than 10 square feet, especially on structural wood, requires containment and proper remediation.

Structural concerns. Soft or spongy floor joists, cracked foundation walls, or compromised support systems need engineering evaluation.

Insurance claim filing needs. Professional documentation, moisture mapping, and detailed scopes help maximize coverage and prevent disputes.

Professional restoration services bring advantages that go beyond just faster drying. They deploy industrial grade dehumidifiers that remove 10 to 20 times more moisture per day than rental units. They understand psychrometry. They know how to balance airflow with moisture removal so you’re actually drying the structure instead of just moving wet air around. Their thermal imaging cameras find hidden moisture pockets in walls and subflooring that you’d miss with a basic meter. They coordinate with insurance companies, provide detailed documentation, and handle mold remediation if growth has started. The typical crawl space restoration runs $2,000 to $8,000 depending on water source, depth, affected area size, and contamination level. Insurance often covers this when the damage stems from sudden events like pipe bursts.

DIY equipment rental costs run $100 to $300 for basic drying with a crawl space dehumidifier and a couple air movers for a week. You’ll need a moisture meter ($30 to $150), wet/dry vacuum if you don’t own one ($80 to $200 to buy), and possibly a submersible pump for deeper water ($60 to $100 rental). That’s assuming you can do the work yourself and nothing goes wrong. Insurance typically won’t reimburse DIY equipment costs.

When selecting restoration contractors, look for IICRC (Institute of Inspection, Cleaning and Restoration Certification) credentials, specific crawl space and water damage restoration experience, local references from recent jobs, 24 hour emergency availability, and upfront pricing that breaks down labor, equipment, and materials separately.

Complete Step-by-Step Drying Process for Water-Damaged Crawl Spaces
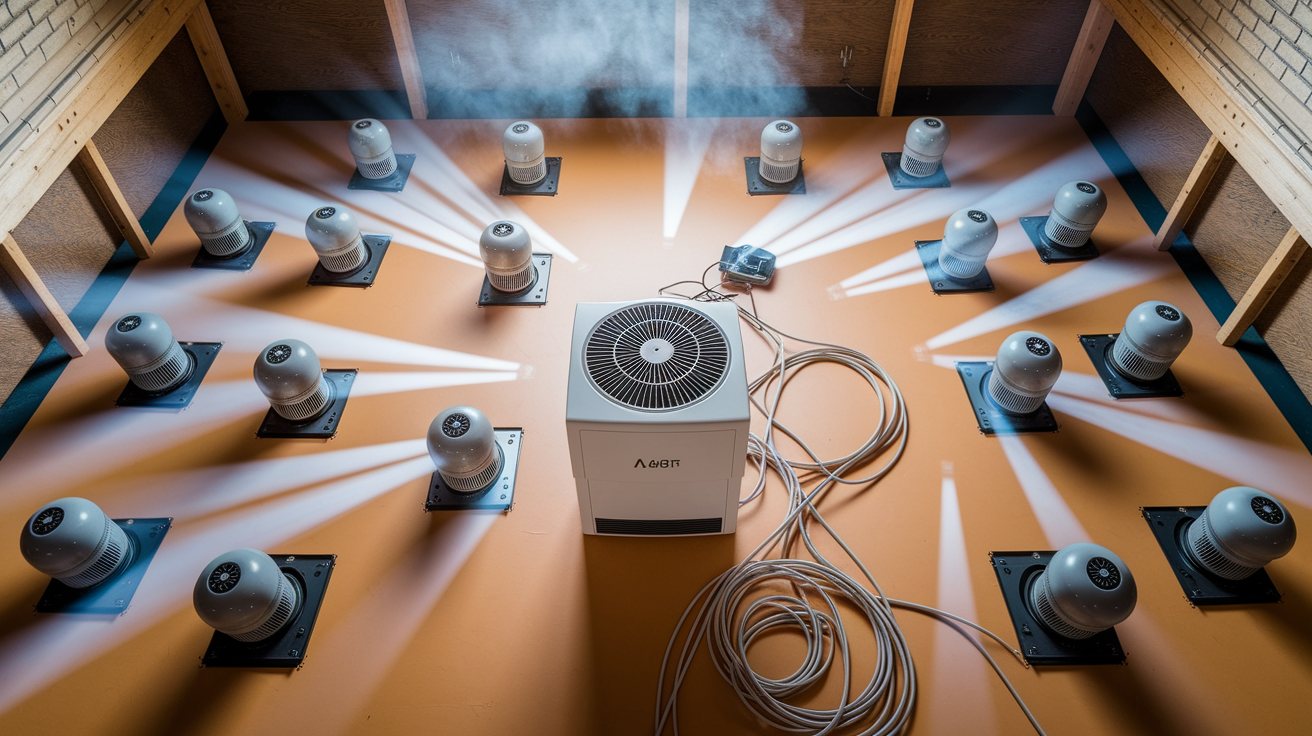
zoEAEQHgR0qVvrrwrtbfPw

The complete drying sequence typically takes 3 to 7 days for minor flooding where water depth stayed under 2 inches, 1 to 2 weeks for moderate saturation affecting insulation and structural wood, and 2 to 4 weeks for severe cases with deep standing water and prolonged exposure. Temperature makes a difference. Warmer crawl spaces dry faster. So does air exchange, but you’ll control that with equipment rather than just opening vents.

Step 1: Stop the Water Source and Extract Standing Water

Find and fix what’s causing the water before you start removing it. A burst supply line needs shutoff and repair. Poor grading needs exterior correction. A failed sump pump needs replacement. If water’s still coming in, you’re fighting a losing battle.

For surface moisture under 1 inch deep, use mops and towels to absorb what you can. Work from the outside edges toward a central low point where you can extract the concentrated water. For 1 to 4 inches of standing water, a wet/dry vacuum handles extraction well. Empty the tank frequently and have a discharge plan. Either dumping into a floor drain, sump pit, or carrying buckets outside. For water deeper than 4 to 6 inches, use a submersible pump. These move hundreds of gallons per hour and can handle debris without clogging. Professional help makes sense beyond 6 inches because the volume, weight, and structural concerns get serious.

Don’t try to get every last drop during extraction. You’ll finish surface water with equipment in later steps. The goal here is removing bulk standing water so your dehumidifier and air movers can work on structural drying instead of fighting puddles.

Step 2: Remove Wet Materials and Damaged Insulation

Wet fiberglass insulation is done. It loses R-value, holds moisture against floor joists and subflooring, and becomes a mold breeding ground. Pull it all down and bag it for disposal. Check the insulation type first. If you’ve got vermiculite or older materials, stop and get an asbestos test before disturbing anything.

Inspect structural elements while you’re removing insulation. Look at floor joists and subflooring from underneath. Check for dark staining, soft spots when you press with a screwdriver, or visible mold growth. Foundation walls need inspection too, especially where they meet wood sill plates.

Remove any stored items, cardboard boxes, wood pallets, or debris that got wet. Cardboard and organic materials hold moisture and feed mold growth. If you had a vapor barrier down before flooding, inspect it carefully. Small tears can be repaired with waterproof tape, but if it’s shredded or poorly installed, pull it out completely. You’ll install a new barrier after everything dries.

Step 3: Position Dehumidifiers and Drainage Setup

Crawl space dehumidifiers are different from the portable unit you’d use in a basement. You need an LGR (low grain refrigerant) or desiccant dehumidifier designed for high moisture loads and continuous operation. These units remove 90 to 150+ pints per day versus 30 to 50 pints for standard residential models.

Place the dehumidifier in a central location away from vents or access openings. It needs to sit on a stable, elevated surface, not directly on dirt or a compromised vapor barrier. Set it up so the intake pulls air from the wettest areas and the dry exhaust disperses throughout the space.

Connect a continuous drainage hose from the dehumidifier to a floor drain, sump pump pit, or discharge line that goes outside. Empty buckets every few hours isn’t a drying strategy. The unit should run unattended for days or weeks. Make sure the hose has a downward slope with no kinks or low spots where water can pool.

Close all crawl space vents before running the dehumidifier. Open vents let outdoor humidity in. You’ll be trying to dehumidify the entire neighborhood instead of your crawl space. Seal access doors and any other openings. You’re creating a controlled drying environment where the dehumidifier can actually lower humidity instead of fighting constant moisture infiltration.

Step 4: Deploy Air Movers for Strategic Circulation

Air movers increase evaporation by directing warm, dry air across wet structural materials. Position them along floor joists and subflooring, not pointed at the soil. You’re drying the wood structure, not the dirt underneath.

For a typical crawl space, start with 3 to 4 air movers creating airflow paths that reach all affected areas. Place one near the dehumidifier intake to help pull moisture toward it. Position others to direct airflow along wet floor joists, across subflooring, and into any corners or dead zones. Angle fans slightly upward so air hits wood surfaces directly.

Never let airflow outpace your dehumidifier’s moisture removal capacity. Too much airflow without enough dehumidification just moves wet air around. It can actually drive moisture deeper into wood instead of pulling it out. The dehumidifier should run continuously while air movers create circulation, not wind.

Use a power distribution box to run multiple fans and the dehumidifier from a single power source safely. Extension cords shouldn’t exceed 25 feet to prevent voltage drop and fire risks. Use 12 gauge cords rated for the amperage you’re drawing. Plug the distribution box into a GFCI protected outlet.

Step 5: Monitor and Document Progress Daily

Use a moisture meter to check floor joists, sill plates, and subflooring every 24 hours. Pin type meters give you accurate readings in wood. Floor joists should drop below 16% moisture content, subflooring below 14%. Those are the targets that indicate the structure is dry enough to prevent mold and rot.

Check humidity with a hygrometer daily. You’re targeting 30% to 50% relative humidity in the crawl space. Early in the drying process, humidity might stay high (70% to 90%) for several days while equipment works to remove airborne moisture. That’s normal. Steady downward progress matters more than hitting target numbers immediately.

Document everything. Daily moisture meter readings at consistent test points, humidity and temperature measurements, equipment runtime hours, and progress photos. Take pictures of the same areas each day so you can see visible drying progress. If you’re filing an insurance claim, this documentation is critical. Even without insurance involvement, records help you know when you’re actually done instead of guessing.

Adjust equipment based on what the readings tell you. If moisture levels aren’t dropping after 48 hours, you might need another air mover, better airflow positioning, or a second dehumidifier. If humidity is dropping too fast while wood moisture stays high, your airflow might be outpacing moisture removal.

These five steps work together as a system. Skipping equipment placement strategies, monitoring, or documentation leads to incomplete drying and problems six months later when mold starts growing behind closed vapor barriers.

Equipment Type Purpose Rental Cost
Submersible Pump Removes standing water deeper than 4-6 inches $60-$100 per day
Wet/Dry Vacuum Extracts shallow standing water and surface moisture $80-$200 to purchase
Crawl Space Dehumidifier Removes airborne moisture and prevents condensation $75-$150 per week
Air Movers Increases evaporation rate on structural wood surfaces $25-$40 per week each
Moisture Meter Measures wood moisture content to verify drying progress $30-$150 to purchase

Drying speed depends on initial moisture levels, outdoor temperature and humidity, equipment capacity, and how well you’ve sealed the crawl space from outside air. Warmer temperatures speed evaporation. Lower outdoor humidity helps dehumidifiers work more efficiently. You’ll know the space is fully dry when moisture readings stay in target range for 48 consecutive hours, musty odors are gone, and humidity remains stable between 40% to 50% without climbing.

Fixing the Root Cause: Common Water Sources and Drainage Solutions
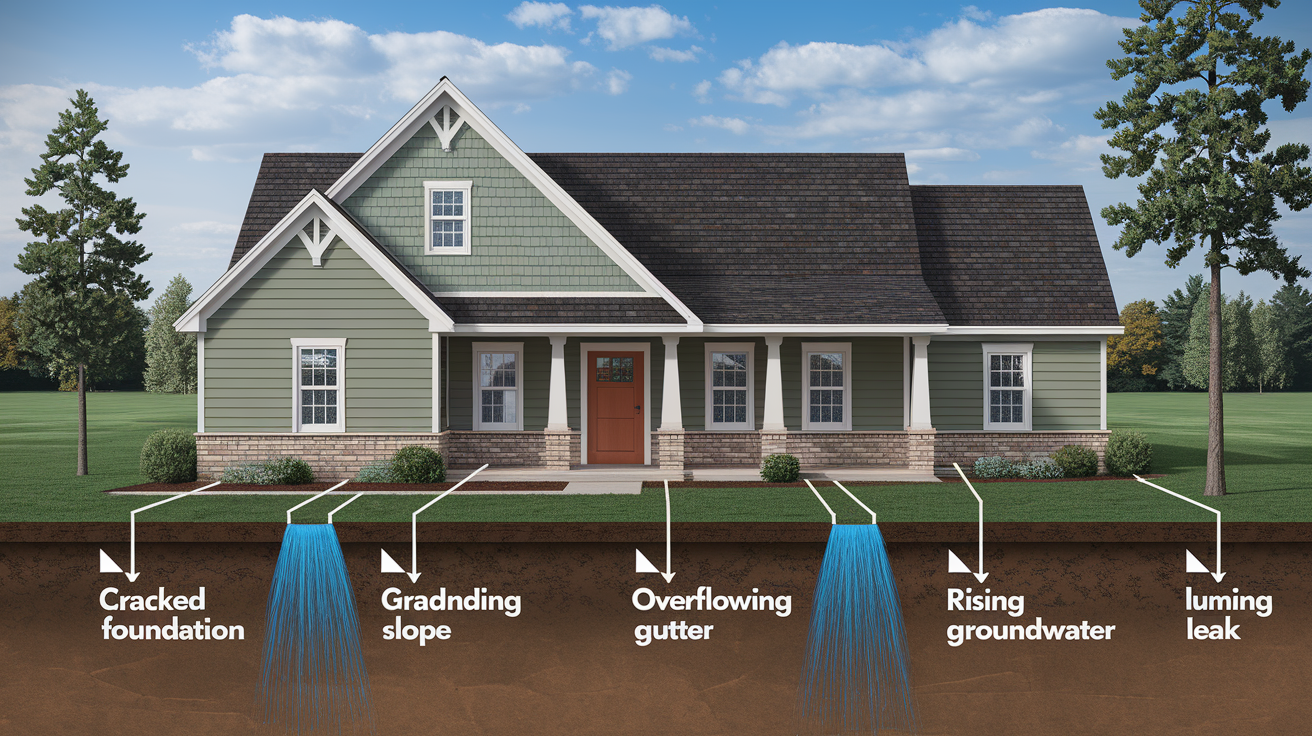
2hEmlm1RTQaREpBI5cgcIQ

Drying the crawl space handles the immediate damage. Fixing what caused the water prevents it from happening again next month or next spring. Most crawl space flooding comes from predictable, fixable sources.

Water Source Symptoms Solution
Plumbing Leaks Water appears near supply lines, water heater, or HVAC condensate drains; may be intermittent Repair leaking pipes, replace failing water heater, fix condensate drainage
Poor Grading Water pools next to foundation after rain; soil slopes toward house instead of away Regrade soil to slope 6 inches per 10 feet away from foundation
Inadequate Gutters/Downspouts Water overflows gutters or discharges within 3 feet of foundation; crawl space floods during heavy rain Clean gutters, extend downspouts 6-10 feet from house, add splash blocks
Foundation Cracks Water enters at specific points along foundation walls; visible cracks or gaps in concrete Seal with hydraulic cement or polyurethane sealant; larger cracks need professional assessment
High Water Table/Groundwater Water seeps through floor after extended rain; seasonal flooding pattern; water rises from below Install interior perimeter drain and sump pump; consider exterior French drain
Condensation Issues Moisture appears in summer humidity; dripping pipes; no external water source; worse in hot weather Insulate cold water pipes, install dehumidifier, improve ventilation

Exterior drainage improvements make the biggest difference for most flooding situations. Start with proper grading. Soil around your foundation should slope away at 6 inches of drop per 10 feet of horizontal distance. That grade directs surface water away from the house before it can soak into the ground near your foundation. If your yard slopes toward the house, you’ll need to bring in fill dirt and regrade.

Gutters and downspouts are the second line of defense. Clean gutters twice a year, more if you have trees overhead. Add gutter guards if debris clogs them frequently. Extend downspouts at least 6 to 10 feet from the foundation using rigid extensions, not flexible corrugated tubes that create low spots. For chronic groundwater problems where the water table rises seasonally, install a French drain (perforated pipe in a gravel filled trench) around the foundation perimeter to intercept groundwater before it reaches the crawl space.

Foundation waterproofing addresses water that’s getting through the walls themselves. Small cracks under 1/4 inch can be sealed with hydraulic cement or polyurethane sealant from the inside. Mix hydraulic cement per package directions and trowel it into cleaned, slightly dampened cracks. Polyurethane sealant works better for cracks that show slight movement or where hydrostatic pressure is present. For cracks wider than 1/4 inch, vertical cracks longer than 2 feet, or horizontal cracks, get a structural engineer’s assessment before sealing. These might indicate foundation settlement or failure.

Plumbing related sources need different fixes. Inspect all supply lines in the crawl space for corrosion, pinhole leaks, or failed fittings. Look at washing machine hoses, water heater connections, and any accessible plumbing. HVAC systems create condensate that should drain to a pump or exterior discharge. Check that condensate lines aren’t clogged and pumps are working. Even a small drip from a leaking pipe can dump hundreds of gallons into your crawl space over months.

Identifying and Preventing Mold Growth in Water-Damaged Crawl Spaces

kpGLRsQtRBSa8TwOEWP1bQ

Mold can start growing within 24 to 48 hours after water exposure, especially on organic materials like wood floor joists, paper backing on insulation, and cardboard. Early drying is your best prevention. If you waited a week before starting the drying process, you’re likely dealing with active growth.

Visual inspection after drying focuses on floor joists, subflooring, sill plates, and any remaining wood surfaces. Look for black, green, or white patches on wood. Mold doesn’t always appear as obvious fuzzy growth. It can look like dark staining or discoloration. Smell matters too. A persistent musty, earthy odor after drying indicates hidden mold growth, possibly behind insulation or between subflooring layers.

Check hidden areas that stay damp longer. Pull back any remaining insulation at random spots to inspect the back side and the wood it was touching. Look at the subflooring from underneath where it meets exterior walls. These dead zones where air doesn’t circulate well become mold hot spots.

Surface mold covering less than 10 square feet on non-porous materials or wood framing can often be cleaned with antimicrobial solution. Mix the solution per label directions, spray affected areas, let it sit for 10 to 15 minutes, then scrub with a stiff brush and wipe clean. Wear an N95 respirator, gloves, and eye protection during cleaning. Bag moldy insulation or debris in heavy plastic before carrying it through the house.

Extensive growth requires professional mold remediation, especially when you’re dealing with more than 10 square feet of visible mold, growth on structural wood members that need assessment for damage, or suspected toxic species like Stachybotrys (black mold). Professionals set up containment barriers, use HEPA filtration to prevent spore spread, and apply proper antimicrobial treatments. They also identify moisture sources you might have missed.

Prevent future mold with these measures:

Maintain humidity below 60%. Keep a dehumidifier running year-round in crawl spaces prone to dampness.

Ensure proper drainage. Fix grading, gutters, and foundation issues so water doesn’t re-enter.

Install vapor barriers. Properly sealed barriers prevent ground moisture from reaching structural wood.

Remove wet materials quickly. Don’t let wet insulation, cardboard, or debris sit for days hoping it’ll dry.

Regular inspections. Check crawl space quarterly for new leaks, condensation, or musty odors.

If anyone in your household has respiratory issues, asthma, allergies, or compromised immune systems, call mold remediation specialists for any visible growth instead of attempting DIY cleaning. What looks like a small patch on the surface can indicate extensive hidden colonization behind materials. Testing and professional assessment protect health and prevent incomplete remediation that allows regrowth.

Addressing Structural Damage and Wood Rot in Crawl Spaces
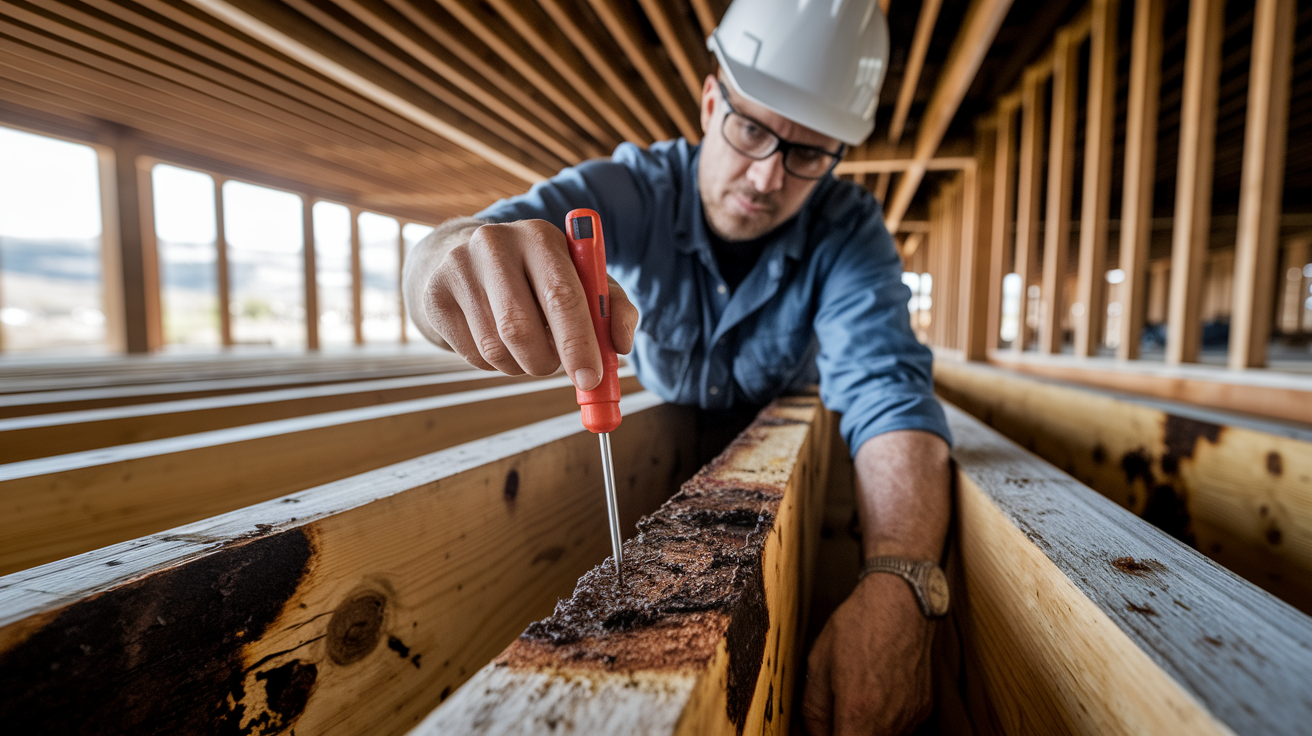
4yNkRPe_Q62-WnUuu9Touw

Prolonged moisture exposure does more than just create mold. It causes wood rot, compromises load bearing capacity, and leads to dimensional changes as wood swells when wet and shrinks when drying. Floor joists, subflooring, and sill plates are most vulnerable because they stay in contact with moisture longer.

Start your structural inspection at floor joists. Press a flat head screwdriver into the wood at several points along each joist, especially where you saw heavy water contact. Healthy wood resists penetration. Rotted wood feels soft, punky, and the screwdriver sinks in easily. Check for dark brown or black discoloration that goes deeper than surface staining. Look for dimensional changes like warping, twisting, or cupping where joists used to be straight.

Subflooring sits directly above floor joists and often shows damage first. Walk the floor above the crawl space and feel for soft, spongy areas that deflect under weight. From underneath, press up on subflooring between joists. It should feel solid. Compromised subflooring gives or flexes easily. Check edges where subflooring sheets meet joists, prime spots for water accumulation and rot.

Sill plates deserve extra attention because they sit on the foundation and connect masonry to wood framing. Water wicks up from concrete into wood here. Look for separation between the sill plate and foundation, crumbling wood, or insect damage (water damaged wood attracts termites and carpenter ants).

Use a moisture meter on structural wood even if it looks okay visually. Pin type meters give accurate readings. Check joists at multiple points. Near ends where they rest on foundation, mid-span where deflection is greatest, and anywhere you see staining. Readings above 20% indicate saturation and serious rot risk. Consistent readings above 16% after you’ve completed drying suggest ongoing moisture problems from sources you haven’t fixed, or existing damage that’s holding moisture.

Surface staining and light discoloration might be cosmetic. Test the wood’s structural integrity with a screwdriver and moisture meter. If the wood is firm, dry, and hasn’t lost strength, you might just have permanent staining. Soft wood, spongy areas, or visible decay requires replacement. You can’t fix rotted wood by drying it or treating it with hardener.

Extensive structural damage needs professional evaluation. If multiple floor joists show rot, subflooring is compromised across large areas, or you’ve got sagging and deflection, hire a structural engineer or qualified contractor experienced with foundation and floor framing repairs. They’ll determine if you need joist sistering (attaching new lumber alongside damaged joists), complete joist replacement, subfloor section replacement, or more extensive foundation work.

Time structural repairs after complete drying. Don’t install new wood or start repairs until moisture readings confirm the environment is dry. Installing new materials in a still-wet crawl space just gives you new rot problems in six months. Coordinate with carpenters or contractors who understand moisture dynamics and will verify conditions before starting work.

Long-Term Waterproofing Solutions: Vapor Barriers and Encapsulation

rbOUwurMTZ-mDeo4vuV5tg

Soil beneath crawl spaces constantly releases moisture through evaporation. Even after you’ve dried structural elements and fixed immediate water sources, ground moisture will re-wet your crawl space over time without permanent barriers.

Basic vapor barrier installation starts only after structural moisture drops below 16%. Installing a barrier too early traps moisture in floor joists and subflooring, creating worse rot and mold problems than you started with. Verify with moisture meter readings at multiple points before proceeding.

Use 6-mil thick polyethylene as minimum, but 10-mil or heavier is better for long-term protection. Thicker material resists tearing during installation and holds up to crawl space traffic better. Unroll the barrier across the entire crawl space floor, running it up foundation walls 6 to 8 inches. Overlap seams by at least 12 inches and seal them with waterproof tape designed for polyethylene (not regular duct tape, which fails in moisture). Press tape firmly along the entire seam length.

Secure the barrier to foundation walls using construction adhesive, mechanical fasteners, or batten strips. The goal is preventing the barrier from pulling away from walls and creating gaps where ground moisture can escape. Seal around support posts, plumbing penetrations, and any obstacles by cutting slits only as large as necessary and taping carefully around each penetration.

A damaged or improperly installed vapor barrier is worse than no barrier at all. If moisture gets between the barrier and the structure above, it’s trapped against wood with nowhere to go. That’s how you get accelerated rot on floor joists that were perfectly fine before barrier installation. If your existing barrier has more than a few small tears, or if it was installed without proper sealing and overlap, remove it completely and start fresh.

Full crawl space encapsulation is the comprehensive solution for chronic moisture problems or homes where you’ve already dealt with repeated flooding. Encapsulation creates a sealed system using heavy-duty vapor barrier on both floor and walls, seals all crawl space vents permanently, insulates foundation walls instead of floor joists, and adds a dedicated dehumidifier with continuous drainage and year-round operation. It converts the crawl space from an outdoor-like environment to a semi-conditioned space.

Consider full encapsulation if you’ve had repeated flooding from groundwater or poor drainage, existing vapor barriers keep failing, you’re dealing with persistent humidity and condensation problems, or you want to use crawl space for storage. One-time flooding from a burst pipe might only need a replaced vapor barrier and source repair.

Complementary drainage systems address water before it becomes a crawl space problem. Interior perimeter drains (drain tile installed around the inside foundation perimeter) collect water and direct it to a sump pump. This setup handles high water tables and groundwater seepage that exterior grading can’t prevent. Install a sump pump with battery backup so it keeps working during power outages that often accompany major storms. Run the discharge line at least 10 feet from the foundation so pumped water doesn’t recirculate back to the crawl space.

Negative pressure systems using radon fans create a different approach for severe cases. A radon style exhaust fan installed beneath the vapor barrier pulls air (and moisture) from the soil and vents it outside. This sub-slab depressurization prevents moisture from being pushed up into the crawl space by soil gas pressure. It’s the same concept used for radon mitigation but applied to moisture control.

Ongoing maintenance keeps these systems working long-term. Run the dehumidifier year-round, not just in summer. Set it between 40% and 50% relative humidity and let it maintain that automatically. Check humidity levels quarterly with a hygrometer. Inspect the vapor barrier annually for tears, pulled seams, or areas where it’s separated from walls. Test sump pumps monthly by pouring water into the pit until the float activates. Clean gutters twice a year because they’re still your first defense against water intrusion.

Cost for basic vapor barrier installation by professionals runs $1,500 to $3,000 for typical crawl spaces, depending on access difficulty and size. Full encapsulation with sealed vents, wall barriers, insulation, and dedicated dehumidification typically costs $5,000 to $15,000 based on crawl space size, complexity, and your geographic area. DIY partial solutions are possible if you’re comfortable working in tight spaces and have construction experience, but full encapsulation systems benefit from professional design and installation to ensure they actually work together.

h78YDdosRYaHPN_JmNEKTw

Homeowners insurance typically covers sudden and accidental water damage events like burst pipes, failed water heaters, or appliance malfunctions. Gradual seepage from poor grading, maintenance related issues like ignored plumbing leaks, or groundwater intrusion usually aren’t covered. Flood damage from rising water, rivers overflowing, or storm surge requires separate flood insurance policies through the National Flood Insurance Program or private carriers.

Contact your insurance company within 24 to 48 hours after discovering crawl space flooding. Most policies allow you to begin emergency stabilization work (stopping active leaks, removing standing water) before waiting for adjuster approval, but call first to confirm. Document everything before you start major cleanup. Insurance companies want to see the damage extent before restoration begins.

Essential documentation includes:

Photos and video of damage extent. Capture standing water depth, wet insulation, affected structural areas, equipment that got wet, and overall crawl space condition from multiple angles.

List of damaged belongings. Inventory items stored in the crawl space that are unsalvageable, with approximate age and replacement cost.

Moisture meter readings. Document moisture levels in structural wood, showing saturation extent.

Repair estimates. Get written quotes from contractors detailing scope, timeline, and cost.

Receipts for emergency services. Keep records of immediate mitigation work, equipment rental, and supplies purchased.

When the adjuster arrives for inspection, provide full access to the crawl space and all affected areas. Be present during the inspection to answer questions and point out damage that might not be immediately obvious. Bring your documentation and photos. Be prepared to explain what happened, when you discovered it, and what immediate steps you’ve taken.

Understand the difference between actual cash value (ACV) and replacement cost coverage. ACV pays for damaged items minus depreciation based on age. Replacement cost covers new materials regardless of age. Your policy might have different coverage types for the structure versus contents. Ask your adjuster specifically which applies to floor joists, subflooring, insulation, and stored items.

Don’t discard damaged materials until the adjuster has inspected and approved their removal. Insurance companies need to verify damage before authorizing replacement. Take detailed photos before disposal, but keep wet insulation, rotted wood samples, and failed equipment accessible until you get approval.

Professional restoration companies bring significant benefits for insurance claims. They create detailed documentation showing moisture readings, affected square footage, and equipment used. They communicate directly with insurance adjusters and speak their language about categories of water damage, psychrometric readings, and restoration standards. Their itemized scopes of work break down labor, equipment rental, and material costs in categories insurance companies recognize. This documentation often results in fuller claim payments compared to homeowner estimates.

Long-Term Maintenance to Prevent Future Crawl Space Water Problems

aX5UnWcSSuukZv2dA8mzXg

Preventive maintenance costs less and creates less disruption than emergency water damage repairs. A routine inspection schedule catches small problems before they become flooding events.

Seasonal inspection schedule addresses moisture risks that change throughout the year. In spring, check for winter freeze damage to plumbing, verify grading hasn’t settled around the foundation over winter, and prepare drainage systems for heavy rainfall season. Summer inspections focus on monitoring humidity and condensation as outdoor temperatures rise and relative humidity increases. Fall means cleaning gutters before leaves clog them, checking exterior grading before winter, and verifying vapor barriers are intact. Winter inspections verify heating system condensate drainage is working and pipes aren’t sweating or freezing.

Quarterly maintenance tasks keep systems working and catch developing issues:

Test sump pump operation. Pour 5 gallons of water into the pit and verify the float activates and pump discharges properly.

Inspect vapor barrier for tears. Walk the crawl space looking for pulled seams, punctures, or areas separating from walls.

Check foundation for new cracks. Look for fresh cracking in concrete or widening of existing cracks.

Verify dehumidifier function. Confirm it’s running, draining properly, and maintaining target humidity.

Clean gutters and downspouts. Remove debris and flush downspouts to ensure proper flow.

Examine grading around foundation. Look for settling or erosion that’s created low spots near the house.

Monitor indoor humidity. Use a hygrometer to check crawl space levels stay between 40% and 60%.

Early warning signs require immediate attention before they become full flooding events. Musty odors signal active mold growth or new moisture infiltration. Visible moisture on surfaces, especially condensation on foundation walls or metal components, means humidity is too high. Humidity readings consistently above 60% create mold friendly conditions. Standing water after rainfall indicates drainage system failures. Increased pest activity (termites, carpenter ants, rodents) often follows water intrusion. Floor squeaking or soft spots suggest subflooring moisture or structural damage developing.

Keep maintenance records showing inspection dates, photos documenting conditions over time, equipment service logs for sump pumps and dehumidifiers, and notes about repairs completed. Records create accountability and help identify developing patterns. If you notice humidity creeping up each spring, that pattern tells you to focus on drainage improvements. If the sump pump runs constantly after installing it, you’ve confirmed a high water table issue requiring additional solutions.

Final Words

Getting your crawl space dry is just the first step.

The real work is stopping the water at its source and keeping your structure protected long-term. Whether you handle the drying yourself or bring in professionals depends on the severity, your comfort level, and what you find during inspection.

Focus on how to dry out a crawl space after water damage with the right sequence: stop the water, extract what’s standing, run dehumidifiers and air movers strategically, and monitor progress until your moisture readings stay in the safe zone for 48 hours straight.

Then address the cause. Fix the drainage, seal the cracks, and consider a proper vapor barrier or full encapsulation if moisture keeps coming back.

Your home’s structural integrity depends on keeping that space dry and functional.

FAQ

Will a crawl space dry out on its own?

A crawl space will not dry out completely on its own after significant water damage. Without active moisture removal using dehumidifiers and air movers, trapped humidity remains in structural wood, insulation, and soil, creating conditions for mold growth and wood rot within 24 to 48 hours.

How do you dry out a crawl space quickly using DIY methods?

You can dry out a crawl space quickly using DIY methods by first extracting standing water with a wet vacuum or pump, then positioning a crawl space dehumidifier centrally with air movers directed at floor joists and subflooring. Close vents during drying, monitor moisture levels daily with a meter, and expect 3 to 7 days for minor flooding or 1 to 2 weeks for moderate saturation.

Will homeowners insurance cover water in a crawl space?

Homeowners insurance will typically cover water in a crawl space if caused by sudden accidental events like pipe bursts or appliance failures, but excludes gradual seepage, maintenance-related issues, or flood damage requiring separate flood insurance. Contact your insurer within 24 to 48 hours and document everything with photos, moisture readings, and receipts before starting cleanup.

How much does it cost to fix moisture in a crawl space?

Fixing moisture in a crawl space costs between $100 to $300 for DIY equipment rental for basic drying, $2,000 to $8,000 for professional restoration depending on severity, $1,500 to $3,000 for basic vapor barrier installation, or $5,000 to $15,000 for full encapsulation systems with permanent dehumidification.

When should I call professional restoration instead of attempting DIY crawl space drying?

You should call professional restoration instead of attempting DIY when dealing with sewage or contaminated water, water deeper than 6 inches, electrical system damage, extensive mold growth, structural concerns, or when filing insurance claims requiring detailed documentation and scope coordination.

How long does it take for a crawl space to dry completely after water damage?

A crawl space takes 3 to 7 days to dry after minor flooding, 1 to 2 weeks for moderate saturation, or 2 to 4 weeks for severe cases, depending on temperature, ventilation, equipment type, and how quickly drying began. The space is fully dry when moisture readings stay in target range for 48 hours with no musty odors.

What moisture level is safe for crawl space floor joists and subflooring?

Safe moisture levels for crawl space structures are floor joists below 16% moisture content and subflooring below 14% moisture content. Readings above 20% indicate saturation and rot risk, while consistent readings above 16% after drying suggest ongoing moisture problems or structural damage requiring professional assessment.

Can I install a vapor barrier immediately after water damage in my crawl space?

You cannot install a vapor barrier immediately after water damage because the structure must first reach target moisture levels below 16% verified with a moisture meter. Installing too early traps moisture between the barrier and home structure, creating worse mold and rot conditions than leaving it exposed.

What causes water to enter a crawl space repeatedly?

Water enters a crawl space repeatedly due to poor soil grading directing water toward the foundation, inadequate gutters or downspouts draining near the house, foundation cracks allowing groundwater seepage, high water tables, plumbing leaks, or HVAC condensate drainage problems. Permanent solutions require fixing these root causes, not just drying.

Should crawl space vents be open or closed when running a dehumidifier?

Crawl space vents should be closed when running a dehumidifier to avoid dehumidifying the entire outdoors and wasting energy. Closing vents allows the equipment to effectively reduce humidity in the enclosed space, speeding drying and preventing the system from fighting outdoor moisture constantly entering.

What equipment do I need to dry a flooded crawl space?

Equipment needed to dry a flooded crawl space includes a submersible pump or wet vacuum for water extraction, a crawl space-rated dehumidifier with continuous drainage, 3 to 4 air movers positioned at structural wood, a moisture meter for monitoring progress, and battery-powered lighting for safety during operation.

How do I know if my crawl space has mold after water damage?

You know your crawl space has mold after water damage by looking for black, green, or white patches on wood surfaces, noticing musty odors, seeing discoloration on insulation or subflooring, or finding growth in hidden areas behind insulation. Surface mold under 10 square feet can often be cleaned, but extensive growth requires professional assessment.

What are the signs of structural damage in a water-damaged crawl space?

Signs of structural damage in a water-damaged crawl space include soft spots or discoloration on floor joists, spongy areas in subflooring, sagging or deflection in structural beams, moisture meter readings above 20% indicating saturation, visible wood decay, or floors above squeaking and developing soft spots.


How to Repair a Ceiling Leak: Simple Steps

0

You can’t just slap paint over a ceiling leak and pretend it never happened. Water damage spreads through insulation, framing, and wiring you can’t see, weakening structure and creating conditions for unwanted moisture related growth. The good news? Most ceiling leak repairs follow a clear sequence any homeowner can understand: stop the water, find the source, dry it completely, remove damaged materials, patch properly, and finish clean. We’ll walk you through each step so you know exactly what needs to happen first and what a solid repair actually looks like.

Immediate Steps to Stop Active Ceiling Water Damage

xxIk4tLjQkOASRvsv9R3-Q

Water dripping from your ceiling or a dark, spreading stain overhead means you need to move right now. Every minute water soaks through your ceiling, it’s spreading into insulation, wiring, and framing you can’t see. The longer it sits, the more it weakens structure and creates conditions for unwanted moisture related growth behind drywall.

Active leaks create electrical hazards if water reaches light fixtures or outlets. The weight of pooling water can cause sudden ceiling collapse, dropping wet debris that could injure anyone below.

  1. Turn off electricity to affected rooms by flipping the breaker for that area
  2. Move furniture and valuables away from the leak area to protect them from dripping water and falling debris
  3. Place buckets and tarps to catch dripping water directly beneath visible leaks
  4. Create a controlled drainage point with screwdriver at leak center to prevent ceiling collapse. Push the screwdriver or awl into the bulging wet spot (away from framing boards where you can) to let trapped water drain into your bucket instead of spreading through more drywall
  5. Protect floors with drop cloths around the work area to catch splashes and debris
  6. Document the damage with photos for insurance from multiple angles showing extent and location
  7. For roof leaks, secure emergency tarp over damaged exterior area if you can safely access the roof
  8. Temporarily patch attic leaks with wooden planks or roofing tar if accessible to reduce water entry while arranging permanent repairs

These emergency steps buy you time while you figure out where the water’s actually coming from. Water travels, sometimes several feet along joists or rafters before it finally drips through. What looks like a bathroom leak might actually be roof damage twenty feet away. You need Emergency Water Damage Restoration Services right away if you’re dealing with large amounts of water, spreading stains across multiple ceiling sections, or if the ceiling’s sagging noticeably.

Don’t rely on temporary exterior patches for more than a few days. That tarp on your roof or the roofing tar in your attic stops water temporarily but won’t hold up to weather. These fixes give you breathing room to schedule proper repairs, not solutions you can ignore for weeks.

Locating the Source of Your Ceiling Leak

StovSV3qQNOnzL-Bo6l-gg

The wet spot on your ceiling is rarely right below the actual problem. Water follows the path of least resistance, running along pipes, joists, rafters, and even electrical cables before it finally soaks through drywall where you see it.

Inspecting Your Roof and Attic

Start in your attic during daylight if you have access. Look for water stains on the underside of roof decking, wet insulation, or active dripping. Check around roof penetrations first. Chimneys, vent pipes, skylights, and where roof planes meet. Missing or damaged shingles let water in during rain. Cracked flashing around chimneys or vent pipes creates entry points. Ice dams along roof edges force water backward under shingles in cold climates.

Walk your roof exterior carefully if it’s safe and accessible, looking for obvious damage, lifted shingles, or deteriorated flashing. Clogged gutters and soffits cause water to back up and seep under roofing materials instead of draining away properly.

Checking Plumbing Systems

If a bathroom, kitchen, or laundry room sits above the ceiling leak, inspect plumbing first. Check under sinks for dripping supply lines or leaking drain connections. Look at the base of toilets for water or loose wax rings. Run water in showers and tubs while someone watches from below or checks the attic above for active leaks.

Missing or cracked caulk around tub and shower edges lets water seep through, running down inside walls and across ceiling joists. Slow drains sometimes back up just enough to leak at connection points without flooding the bathroom floor. Supply lines can develop pinhole leaks or loose compression fittings that spray small amounts of water when you turn on faucets.

Evaluating HVAC and Condensation Issues

Air conditioning units produce condensation that normally drains away through dedicated pipes. When condensation drains clog or the unit’s drain pan rusts through, water drips into ceiling spaces. Check where your AC handler sits in the attic for standing water or moisture. Ductwork running through unconditioned attic space sometimes develops condensation on the outside during humid weather. Improperly vented dryer exhaust can dump humid air into attic spaces, causing moisture problems that eventually soak through ceilings.

Using Detection Methods

For intermittent leaks you can’t catch actively dripping, try the toilet paper test. Lay single sheets of toilet paper along visible pipes and across ceiling joists in your attic. Wait for the leak to occur (run water fixtures if you suspect plumbing), then check which sheets got wet to narrow your search area.

Sometimes you need to cut a small inspection hole in the ceiling itself to look directly at joists and plumbing above. Cut near the stain but position it where you’ll have ceiling joist access for easy patching later.

Professional moisture detection equipment and thermal imaging locate hidden wet areas that look dry on the surface. When you’ve checked obvious sources and still can’t find the leak, or when water damage keeps spreading despite your temporary fixes, that’s when inspection help makes sense.

Essential Tools and Materials for Ceiling Leak Repairs

L27GdyUSQcOuH08jaGhTlw

Gather everything before you start cutting or patching. Running to the store halfway through a repair leaves wet materials exposed and extends your timeline unnecessarily. Safety equipment comes first because you’re working overhead with sharp tools and potentially breathing dust or handling damaged materials that might contain unwanted moisture related growth.

Protecting yourself, preparing your workspace, and having the right tools organized makes the actual repair work faster and cleaner.

Category Items Needed Purpose
Safety Equipment Safety glasses, dust mask or respirator, gloves, sturdy ladder Protect eyes from falling debris, prevent inhaling dust or spores, maintain stable overhead work position
Cutting Tools Keyhole saw (drywall saw), utility knife, measuring tape, pencil Remove damaged ceiling sections cleanly and mark cutting lines accurately
Drying Equipment Box fans, dehumidifier, moisture meter (optional) Dry ceiling cavity thoroughly before patching to prevent growth from moisture
Patching Materials Drywall sheets or pre-cut patches, drywall screws, screw gun or drill Replace removed damaged sections and secure to ceiling joists
Finishing Supplies Joint compound (mud), drywall tape, putty knives (4-inch and 6-inch), sanding sponge or sandpaper, drop cloths Smooth and blend patch edges with existing ceiling surface
Painting Materials Oil-based or shellac-based stain-blocking primer, ceiling paint, paint roller and pan, small brush for edges Seal water stains permanently and match existing ceiling finish
Inspection Tools Flashlight or headlamp, screwdriver or awl Examine dark spaces and create controlled drainage points
Protective Coverings Plastic sheeting, tarps, buckets, painter’s tape Protect floors and furniture from water and debris during work

Don’t cheap out on joint compound or primer. They’re the difference between repairs that last and ones that fail. Basic drywall repair material kits run about $30 to $50 for small patches. Larger repairs requiring full drywall sheets, multiple gallons of compound, and quality stain-blocking primer can reach $100 to $150 in materials.

Use a stable, proper height ladder rated for your weight plus tool load. Never stand on the top two rungs. Keep windows open throughout the repair process for ventilation, especially when using oil-based primers. The fumes are strong but necessary for proper stain blocking.

Assessing Damage, Drying, and Removing Affected Materials

TMnCvn_9RoOW1clrxjOLUA

You can’t skip the assessment step, even when you’re eager to patch the hole and move on. Understanding how far moisture spread determines whether you’re fixing a small spot or replacing large ceiling sections. Rushing into repairs before everything’s completely dry guarantees you’ll be redoing this work within months when unwanted growth appears or paint bubbles up again.

Press gently on stained or discolored ceiling areas to check if the drywall feels soft, spongy, or crumbly. Firm ceiling with just surface staining might need only paint. Soft, sagging, or crumbling sections need complete removal. Use a moisture meter if you have one to check readings in surrounding areas that look fine. Readings above 16 percent moisture content mean those areas need drying time too. Sometimes the visible damage is minor but moisture wicked into insulation and framing well beyond the stain.

Surface drying means the face of your drywall feels dry to touch. Structural drying means the cavity behind the drywall, the insulation packed in there, and the framing lumber all dried out completely. That takes proper airflow and time.

Small leaks from brief events might dry naturally in 24 to 48 hours if you catch them fast and there’s good ventilation. Major leaks that soaked through insulation need help. You need to open up the ceiling, pull out wet insulation immediately because it stays damp and encourages unwanted moisture related growth, then position box fans to blow air through the cavity. Set up a dehumidifier in the room if the space is enclosed.

Check moisture levels daily. Minor water intrusion dries in 24 to 72 hours with good airflow, but extensive soaking needs 5 to 7 days of fans and dehumidifiers running. Complete drying shows moisture meter readings below 15 percent, no musty smell when you get close to opened sections, and firm texture when pressing on exposed materials.

Keep airflow going and monitor humidity levels throughout drying. Stopping fans too early because the surface looks dry leaves moisture trapped deeper in the structure. That trapped moisture creates unwanted growth you won’t see until it spreads enough to smell or stain through fresh paint weeks later.

Mark your cut lines back to the nearest ceiling joists on each side of damaged areas so you have solid framing to attach your patch. For really wet sections, mark back to completely dry material, even if that means removing more than the visible stain.

Wear your safety glasses and dust mask. Use your keyhole saw to cut along the lines carefully. Cut shallow so you don’t damage wiring or pipes that might run through the ceiling space. Pull down cut sections along with any wet insulation stuck to the back. Look up into the cavity with your flashlight for signs of structural damage, hidden plumbing problems, or electrical issues this leak exposed.

If you’ve got a drop ceiling with suspended tiles instead of drywall, this whole process is simpler. Just lift out water stained or sagging tiles and replace them with new ones once everything’s dry. Check the grid system above for rust or damage too.

Bag up damaged materials for disposal promptly so they’re not sitting around releasing moisture back into your space. Any musty smell after you think drying’s complete means you missed moisture somewhere or unwanted growth already started. Open more ceiling to find the source, or that smell will never leave no matter how much you paint.

Patching and Repairing Ceiling Drywall

GuxUtgOPQ22cFWcSVPqd0g

Measure your opening and cut replacement drywall pieces that fit snugly between exposed joists. For holes larger than a few inches, your patches need backing support. Cut the new piece about the same size as the opening. If ceiling joists are exposed on both sides, screw the patch directly to them. If you’re patching between joists, attach backer boards (small strips of wood or drywall) behind the edges of the opening first, then screw your patch to those. Drive drywall screws just below the surface without breaking the paper face, every 6 to 8 inches around the patch edge.

The joint compound process takes multiple applications and can’t be rushed. Spread a thin first coat over all seams and screw dimples using your 4 inch putty knife. Press joint tape into the compound at seams, then smooth another thin layer over the tape. Feather the edges outward so they blend gradually rather than creating ridges. Let this first coat dry completely overnight.

Apply your second coat with the 6 inch knife, spreading compound 2 to 3 inches wider on each side than your first coat. Feathering these edges creates the smooth transition you want. Wait for complete drying again, usually overnight. Lightly sand any high spots or ridges using your sanding sponge with gentle circular motions.

Third coat goes on even wider with a light touch, just filling any remaining low spots and smoothing transitions. Let it dry fully, then do your final sanding. Wipe away dust with a damp cloth before priming.

Applying Joint Compound and Finishing

Joint compound (also called mud) hides your patch by creating a smooth surface that blends into surrounding ceiling. Rushing through coats or skipping sanding steps leaves visible edges or bumps that show through paint. Each layer builds on the previous one, spreading wider to feather the patch into existing texture.

  1. First coat application covering seams and screw heads. Spread thin layer over tape at seams and fill screw dimples, smoothing edges outward
  2. Drying time requirements between coats. Wait overnight or at least 12 hours for each coat to fully cure before applying the next
  3. Second coat application with wider coverage. Use 6 inch knife to spread compound 2 to 3 inches beyond first coat edges on all sides
  4. Sanding technique for smooth transitions. Use fine sanding sponge with light circular motions to remove ridges, avoiding gouging into compound
  5. Third coat for final smoothing. Apply thin skim coat over any remaining imperfections using light pressure and wider spreading
  6. Final sanding before priming. Smooth entire repair area gently, wipe dust away with barely damp cloth, let dry before primer

Matching texture on popcorn ceilings, knockdown texture, or other patterns takes practice and the right products. Texture spray in a can works for small repairs on popcorn or orange peel finishes. Test your spray pattern on cardboard first to dial in the right distance and pressure.

For knockdown texture, spray slightly heavier then lightly flatten the peaks with a drywall knife after a few seconds. With large or extensive repairs, feathering your texture into a wider area, or even retexturing the entire ceiling section, gives better results than trying to match a small spot perfectly. Sometimes painting the whole ceiling after repair hides minor texture differences better than spot painting.

Priming and Painting Your Repaired Ceiling

PGAIuWuEQv-qEDQL4CavvQ

Stain blocking primer isn’t optional when you’re covering water stains. Miss this step and those brown or yellow marks will bleed right back through your paint no matter how many coats you apply.

Use oil based or shellac based primer specifically designed for stain blocking. Water based primers don’t create the waterproof barrier you need. The old stain will mix with the new paint and reappear like you never covered it. Apply the primer with a brush around edges and patches, then roll it over the broader repaired area. One coat of proper stain blocking primer seals the damage completely.

Let it dry according to the can directions, usually 2 to 4 hours depending on temperature and humidity. The primer will smell strong, that’s normal for oil based products and why you need good ventilation.

Choose ceiling paint that matches your existing sheen, usually flat or matte finish. Decide whether painting just the repair makes sense or if the whole ceiling needs fresh paint. Small repairs sometimes show as slightly different shades even with matched paint because of age and dirt on surrounding areas. Painting the entire ceiling from corner to corner eliminates any shade variation.

For large repairs or multiple damaged spots, whole ceiling painting is easier than trying to blend several patches perfectly. Cut in edges with your brush where walls meet ceiling, then roll the main area using even overlapping strokes. Roll in one direction first, then cross roll perpendicular for smooth coverage without roller marks. Let the first coat dry completely before deciding if you need a second.

Keep all windows open during priming and painting. Open doors to other rooms to create cross ventilation if possible. Oil based primer fumes build up fast in closed spaces. Plan on 4 to 6 hours of drying time before a second coat of paint if needed. Check the repair in natural daylight once everything’s dry to spot any missed areas or texture differences before calling it finished.

Preventing Future Ceiling Leaks in Your Home

UtrY57YwTKmhPAM5x9ESSg

Fixing the damage you’ve got is one thing. Making sure it doesn’t happen again costs way less than another round of ceiling repairs and paint. Small maintenance tasks done regularly catch problems before water ever reaches your ceiling. Think of prevention as buying yourself time and protecting your investment rather than adding annoying chores to your list.

Different prevention tasks align with seasons. Spring’s good for roof inspections after winter weather. Fall means gutter cleaning before leaves clog everything. Year round means paying attention to plumbing sounds and checking for small problems before they grow.

Roof and Exterior Maintenance

Inspect your roof twice a year, spring and fall, looking for damaged, loose, or missing shingles. You don’t have to walk the entire roof. Binoculars from the ground show problems on many roof pitches. Check flashing around chimneys, vent pipes, and where different roof sections meet for cracks, gaps, or rust.

Clean gutters at least twice annually, more often if you have trees overhead. Clogged gutters send water backward under shingles instead of down downspouts. Make sure downspouts direct water several feet away from your foundation, not right against the house.

Inspect chimney flashing and chimney cap condition annually. In cold climates, improve attic insulation and ventilation to prevent ice dams that force water under shingles. Trim tree branches that hang over your roof, they drop debris that clogs gutters and traps moisture against shingles.

Plumbing System Care

Walk around and check exposed supply line connections under sinks every few months. Look for moisture, corrosion, or dripping. Listen for running water sounds when all fixtures are off, that indicates hidden leaks. Check toilets for loose connections where supply lines meet fill valves. Inspect wax rings by watching for water at toilet bases after flushing.

Maintain caulk around tubs and showers, recaulking when you see gaps or cracks. Don’t let caulk failures go months, water sneaks through fast. Monitor water pressure because excessive pressure stresses pipes and connections. If pressure seems too high (fixtures spray hard, banging sounds in pipes), install a pressure regulator or adjust your existing one. Address slow drains promptly before partial clogs become full blockages that cause backups and overflow at connections.

HVAC and Ventilation

Clean or replace your AC condensation drain line annually before cooling season starts. Flush it with vinegar or use condensate pan tablets to prevent algae buildup that clogs drains. Check the condensation pan under your air handler for rust, cracks, or standing water. Inspect ductwork running through attic spaces for condensation forming on the outside, which means insulation around ducts is inadequate.

Maintain proper attic ventilation with adequate soffit and ridge vents so temperature and humidity stay balanced. High attic humidity causes condensation problems on ductwork, plumbing, and roof decking. If humidity runs consistently above 60 percent in your attic space, improve ventilation or add attic fans. Clean dryer vents completely at least once a year to prevent condensation buildup in exhaust pipes.

Create a simple checklist that rotates monthly and seasonally so you’re not trying to remember everything at once. Professional roof inspections every 2 to 3 years catch developing problems your ground level checks might miss. Annual plumbing inspections by a licensed plumber identify small issues before they cause leaks. Catching and fixing minor problems costs a fraction of what major leak damage and repairs run.

When to Call a Professional for Ceiling Leak Repairs

6G_PtIDBQ7OckACKQ7UY5g

Plenty of ceiling leak repairs fit within normal DIY capabilities if you’re comfortable with basic tools and patient with multi step finishing work. Other situations need professional expertise, specialized equipment, or licensed work to meet building codes and safety standards.

Situation DIY Appropriate Call Professional
Small isolated leaks Leak source is obvious, damage limited to small ceiling section, no structural sagging Can’t locate source, leak returns after repair attempts, spreading stains indicate hidden problems
Large affected areas Rarely appropriate for extensive damage Damage covers more than 10 square feet, multiple ceiling sections affected, or needs complete ceiling replacement
Active roof leaks Emergency tarping from ground level if safely accessible Permanent roof repairs, steep pitch work, second-story access, structural roof damage
Plumbing failures Tightening loose visible connections, replacing toilet wax ring (if experienced) Leaks inside walls, under slab, or requiring pipe replacement and soldering work
Structural concerns Never DIY Sagging ceiling joists, cracked framing, compromised structural integrity requiring engineering assessment
Unwanted moisture related growth presence Very small surface spots under 10 square feet Extensive growth, growth inside wall or ceiling cavities, musty smell throughout house, health concerns

Professional restoration companies use moisture meters, thermal imaging cameras, and borescopes to find hidden water damage your eyes can’t see. They track moisture migration through wall cavities and ceiling spaces to pinpoint leak sources that aren’t obvious from visual inspection alone. This equipment pays for itself when it prevents you from patching the wrong spot three times while the actual leak keeps spreading.

Professionals also document everything thoroughly for insurance claims, take moisture readings before and after drying, and warranty their work. Some repairs require permits and inspections to meet local building codes, particularly anything involving structural changes, electrical work near moisture damage, or extensive plumbing modifications.

Complex repairs need coordination between different trades. The roofer fixes the exterior leak source, the restoration team dries structure and removes damaged materials, the plumber repairs any pipe problems, the electrician checks and repairs wiring affected by moisture, then finish carpenters and painters handle the visible repairs. Professional Water Damage Repair Services coordinate that entire sequence under one contract instead of you scheduling and managing four different contractors yourself.

Licensed contractors carry insurance that covers additional damage if something goes wrong during repairs. Your homeowner policy might not cover your own DIY mistakes. When electrical components got wet, when structural integrity is questionable, or when you see unwanted moisture related growth spreading beyond surface discoloration, professional assessment isn’t optional. It’s about safety and liability protection.

Cost Estimation for Ceiling Leak Repairs

UwAyjWkdTO2JTDq4lkIXtA

What you’ll spend fixing ceiling leak damage ranges from under $100 for small DIY patches to $5,000 or more for extensive professional restoration. The leak source, damage extent, and whether you’re handling it yourself versus hiring pros creates that huge spread.

DIY material costs stay relatively low for contained damage. You’ll spend $30 to $75 on materials for patching a small area, including drywall, joint compound, primer, paint, and basic supplies. Add $50 to $150 if you need to buy or rent equipment you don’t already own like a quality ladder, fans, or a keyhole saw. Larger repairs needing multiple sheets of drywall, several gallons of compound, and extensive primer and paint run $150 to $300 in materials. That doesn’t include your labor time or potential mistakes that waste materials.

Hidden costs include dehumidifier rental at $30 to $50 per day if you need one, texture spray for matching ceiling patterns at $15 to $30 per can, and possible disposal fees for wet materials at $25 to $100 depending on local waste management rules.

Professional service costs vary dramatically based on what they’re fixing. Simple ceiling patch and paint runs $200 to $500 if the leak source is already handled and damage is minimal. Water damage restoration for medium sized leaks involving drying, material removal, and structural repairs typically costs $1,000 to $3,000. Extensive damage requiring large section ceiling replacement, remediation for unwanted moisture related growth, and coordination with roof or plumbing repairs easily reaches $3,000 to $7,000. Emergency service calls during nights, weekends, or holidays add 50 to 100 percent to standard rates because you’re paying for immediate response.

Several factors push costs higher than basic estimates suggest:

Size of damaged area requiring repair. Costs scale with square footage, but there’s usually a minimum service charge that makes tiny repairs disproportionately expensive through professionals.

Type of ceiling. Plaster costs more to repair than drywall because it requires specialized skills. Textured or popcorn ceilings need matching work that adds time and materials.

Source of leak and complexity of permanent fix. Roof repairs add $300 to $1,500 depending on extent. Plumbing repairs range from $150 for simple connection tightening to $1,000+ for pipe replacement inside walls.

Unwanted moisture related growth presence requiring remediation. Professional removal and containment adds $500 to $4,000 depending on affected area size and contamination level.

Accessibility challenges. High ceilings requiring scaffolding, furniture that needs professional moving, or difficult attic access all increase labor time and costs.

Emergency service timing. After hours emergency response typically costs 1.5 to 2 times regular rates due to immediate mobilization requirements.

Get multiple estimates for professional work and ask what’s included. Some quotes cover only the ceiling repair, leaving you to arrange and pay separately for leak source fixes. Others provide complete restoration from leak repair through finished paint. Understand what you’re comparing before choosing the lowest bid.

Understanding Insurance Coverage for Ceiling Leak Damage

vBj_POx0Qy67U9XVmOBdqw

Whether your homeowners insurance covers ceiling leak damage depends heavily on what caused the leak and how well you maintained your property before the problem occurred. Insurance typically covers sudden, accidental events but excludes damage from neglect or gradual deterioration you should have prevented.

Most policies cover ceiling damage from sudden pipe bursts, appliance supply line failures, storm damage that breaches your roof, toilet overflow from internal failures, and other unexpected events. You’re generally covered if a pipe freezes and bursts during extreme cold, if wind tears shingles off during a storm allowing rain inside, or if your water heater’s supply line suddenly ruptures. These qualify as covered perils because they happened without warning despite reasonable home maintenance.

Your insurance also typically covers resulting damage like ceiling repairs, drywall replacement, and necessary remediation for unwanted moisture related growth that stems from covered events. Policies commonly exclude gradual leaks from pipes that deteriorated over time, roof leaks from aging shingles you didn’t replace, damage from repeated small leaks you ignored, condensation problems from poor ventilation, and any water damage from external flooding (that requires separate flood insurance).

If the adjuster determines you knew about the problem or should have discovered it through normal maintenance, they’ll deny the claim as maintenance neglect.

Dwelling coverage pays for repairing your home’s structure, including ceilings, framing, and roof. Personal property coverage handles your damaged belongings like furniture, electronics, or stored items affected by the leak. These are separate coverage limits on your policy. Sometimes ceiling damage is covered but your ruined furniture isn’t, or vice versa, depending on circumstances and what limits you carry.

Document everything thoroughly the moment you discover damage because insurance claims require proof. Take detailed photos and video showing damage extent, water source if identifiable, affected areas throughout the house, and damaged belongings. Photograph from multiple angles and distances so the full scope is clear. If possible, document the actual water source or leak point, even if it means taking photos in your attic or under sinks. Show the insurance adjuster exactly what failed and what it damaged.

Keep receipts for any emergency repairs you make, including tarps, fans, dehumidifiers, or contractor services to stabilize the situation. Note specific dates, times, and circumstances of when you discovered the leak and what immediate steps you took. Maintain records showing your prior maintenance history, like roof inspection reports, plumbing service records, or HVAC maintenance receipts. This evidence proves you properly maintained your property and the damage was sudden rather than neglected. Many restoration companies work directly with insurance providers and understand the documentation they require, which simplifies the claims process significantly.

Photograph damage from multiple angles before any cleanup to establish full extent for adjusters.

Document the water source and leak cause if identifiable to prove it was sudden rather than gradual.

Keep receipts for emergency repairs and materials to support reimbursement claims for stabilization costs.

Maintain records of prior maintenance and repairs to demonstrate proper home care and defend against neglect claims.

Note dates, times, and circumstances of leak discovery to establish timeline for adjuster review.

Review your policy before you need it so you understand your coverage limits, deductible amount, and what documentation your insurer requires. Contact your insurance company immediately when you discover damage, before you make any permanent repairs beyond emergency stabilization. They’ll send an adjuster to assess damage and determine coverage. Some policies require you to use approved contractors or get multiple estimates. Others let you choose your own professionals but require certain documentation standards. Understanding these requirements upfront prevents claim delays or denials over procedural issues.

Final Words

Ceiling water damage stops being overwhelming once you break it down into clear steps.

Stop the active leak first. Find the real source next. Dry everything completely before any patches go up.

When you’re ready to learn how to repair a ceiling leak, remember that proper drying prevents mold and failed repairs down the road. Take your time with joint compound layers and don’t skip the stain-blocking primer.

Some leaks you can handle. Others need a pro with moisture meters and experience tracking hidden water paths.

Either way, you’ve got a plan now. Your ceiling can look right again.

FAQ

What should you do if water leaks through the ceiling?

If water leaks through your ceiling, immediately turn off electricity to affected rooms, move furniture and valuables away, place buckets under the leak, and create a small controlled drainage point at the leak’s center using a screwdriver to prevent ceiling collapse from water buildup.

How do you repair leak damage in a ceiling?

Repairing leak damage in a ceiling involves stopping the water source first, allowing affected areas to dry completely for 24 to 72 hours, removing damaged drywall sections back to dry material, installing drywall patches secured to ceiling joists, applying joint compound in multiple coats, and finishing with stain-blocking primer and ceiling paint.

Does homeowners insurance cover water leaks from the ceiling?

Homeowners insurance typically covers water leaks from ceilings caused by sudden events like pipe bursts, storm damage, or appliance failures, but excludes damage from gradual leaks, maintenance neglect, or flooding, making proper documentation and identifying the leak source critical for claim approval.

Can wet drywall ceiling be saved?

Wet drywall ceiling can be saved if it dried completely within 24 to 48 hours, shows no sagging or structural damage, has no mold growth, and maintains firm texture after drying, though staining may require priming and repainting even when the drywall structure remains sound.

How long does it take for a ceiling to dry after a leak?

A ceiling takes 24 to 72 hours to dry after minor leaks with proper ventilation and fan placement, while major leaks requiring ceiling section removal need 5 to 7 days of airflow through the ceiling cavity, dehumidifier use, and moisture meter verification before starting repairs.

What causes ceiling leaks when there is no visible roof damage?

Ceiling leaks without visible roof damage commonly result from plumbing issues like leaking drains, loose supply lines, or missing caulk in upstairs bathrooms, HVAC condensation from air conditioning units, dryer vent condensation, or water traveling from distant sources along pipes and joists before appearing.

How do you match ceiling texture when repairing water damage?

Matching ceiling texture when repairing water damage requires identifying your specific texture type (popcorn, knockdown, or smooth), using appropriate texture spray products, practicing application technique on cardboard first, and feathering repairs into larger surrounding areas rather than creating sharp lines between old and new texture.

Why must you use stain-blocking primer on water-damaged ceilings?

You must use stain-blocking primer on water-damaged ceilings because water-based primers allow stains to bleed through regardless of coat number, while oil-based or shellac-based stain blockers create a waterproof barrier that permanently seals discoloration and prevents reappearance after painting.

When should you call a professional for ceiling leak repairs?

You should call a professional for ceiling leak repairs when facing large affected areas exceeding four square feet, active roof leaks requiring exterior work, hidden water sources that standard inspection cannot locate, structural damage concerns, mold presence, or situations involving electrical wiring in wet areas.

How much does ceiling leak repair typically cost?

Ceiling leak repair typically costs $150 to $400 for small DIY patch repairs including materials, $500 to $1,500 for professional repairs of moderate damage, and $2,000 to $5,000 for extensive ceiling replacement, with additional costs for mold remediation, structural work, or emergency service timing.

What prevents future ceiling leaks in homes?

Preventing future ceiling leaks requires regular roof and gutter maintenance, seasonal shingle inspections, checking plumbing supply line connections and toilet seals, maintaining caulk around tubs and showers, servicing AC condensation drains, ensuring proper attic ventilation, and addressing small issues before they become major leak sources.

How do you document ceiling water damage for insurance claims?

Documenting ceiling water damage for insurance claims requires photographing damage from multiple angles before cleanup, identifying and recording the water source if possible, keeping receipts for emergency repairs and materials, noting exact dates and circumstances of leak discovery, and maintaining records of prior maintenance.

Fire Smoke Damage Cleanup: Hassle-free Solutions

0

Ever wonder if smoke damage means endless repairs? We have a simple guide to help you. First, we inspect your whole home to see what can be saved. Next, we secure your property and carefully remove debris and soot. Every step we take is designed to ease your stress and help restore your home. Let us help turn chaos into comfort.

Fire Smoke Damage Cleanup: Hassle-Free Solutions

We start by carefully checking your entire property. Our team looks at the fire and smoke damage to decide what can be saved and what needs to go. This first look helps us plan every step, so every part of your home gets the right care.

Next, we move on to assessment and mitigation. We inspect the area and shut off utilities like water and electricity to keep you safe. We quickly remove smoldering ashes and loose debris, making sure the space is secure for work. We also take photos to document the damage for insurance claims and to guide our cleanup.

Then, we begin the cleanup and restoration process. Our professionals remove smoke, dust, soot, and water by-products left from firefighting efforts. We use high-capacity dehumidifiers (machines that dry damp areas), air movers (devices that circulate air), and specialized vacuums to lift stubborn residues from surfaces. We repair or replace damaged items like furniture, cabinets, carpet, wallpaper, and paint so your home feels safe and welcoming again.

Taking quick action is key to stopping further damage. Fast cleanup helps prevent problems like mold growth, weak structures, and lingering smells. Acting quickly saves on repair costs and lowers long-term risks, making the process smoother and more effective.

Fire Smoke Damage Cleanup Assessment & Mitigation Phase

img-1.jpg

After a fire, we check your whole property to see how bad the damage is and find items that can be saved. Our careful inspection spots weakened structures and hidden hazards so we can secure your home fast and get ready for a deep clean.

  1. Turn off utilities and ensure gas lines are safe.
  2. Clear out ashes and loose char.
  3. Cover roofs with tarps and board up windows to keep weather out.
  4. Mark off danger areas and limit access.
  5. Take photos and videos to record the condition.

We complete these steps as one smooth process. This way, every action, from turning off utilities to recording damage, helps protect your home and supports your cleanup and insurance claim.

Fire Smoke Damage Cleanup: Soot & Smoke Residue Removal Techniques

Cleaning up after a fire is more than just wiping surfaces. Soot is a flaky, powdery material that sticks tightly to surfaces like stone, wood, and carpet. Smoke leaves behind different types of residue. Wet smoke can form a thick, chemical film on surfaces. Dry smoke quietly settles in with a light residue. Protein residue leaves a strong, sour smell. We use special vacuums, strong cleaning chemicals, HEPA filters (air filters that trap very small particles), and specific sponges or magic erasers to clean walls, ceilings, and all other affected areas.

After a kitchen fire, for instance, our team removed the greasy film using cleaning agents and careful air circulation. This method stops further reactions with your home materials and helps restore your space quickly.

Smoke Type Residue Characteristics Recommended Cleaning Method
Wet Smoke Thick, chemical-like film that coats surfaces Specialized vacuums and targeted sponges
Dry Smoke Light infiltration with a subtle residue Expert-grade cleaning chemicals and HEPA filtration
Protein Residue Sticky texture paired with a strong sour odor Strong deodorizers and magic eraser techniques

We tackle each type of residue with a method that fits best. This careful approach helps protect your home from long-term damage like lingering smells or worn-out materials. Fast and precise removal of soot and smoke stops secondary problems such as mold growth and makes insurance claims smoother. You can count on our process to bring your home back to a safe and livable condition.

Fire Smoke Damage Cleanup: Odor Neutralization Strategies

img-2.jpg

After a fire, lingering smells can make your home feel uncomfortable and hard to breathe in. Smoke particles and chemical residues can seep into carpets, walls, and floors. We understand that these persistent odors not only create an unpleasant environment but may also affect your health. Our goal is to remove these smells at their source.

The first step in clearing the odor is to boost ventilation. Turn off your HVAC system (the central heating and air system) to stop recirculating contaminated air. Open windows and doors to let fresh air in and use fans to push the old, smoky air outside. This method helps reduce smoke particles and chemicals in your home, paving the way for a more thorough cleaning.

We also use professional techniques to remove stubborn odors. Our team relies on advanced air scrubbers with HEPA filters (machines that trap tiny particles), ozone generators, and thermal fogging to break down odor molecules. In addition, industrial deodorizers and special cleaning chemicals are applied to dismantle harmful compounds. Together, these steps leave your home with cleaner air and a more comfortable feel.

Fire Smoke Damage Cleanup: Restoration & Reconstruction Process

Once the smoke and soot are cleared, we step in to fix your home. We repair or replace damaged walls (drywall), cabinets, floors, and trim. Our goal is to restore your home so it remains safe and looks welcoming. We focus on making every repair count to keep your home strong and secure.

Next, we clean your belongings. This step includes washing fabrics, shampooing upholstery (upholstery means the soft, padded parts on furniture), and cleaning hard surfaces. We handle your personal items with care to save your memories and reduce losses. Our work might also involve minor carpentry, replacing drywall, painting, and installing new fixtures. We pay attention to every detail in both delicate and sturdy parts of your home.

Before we finish, we run final safety checks to ensure all repairs meet building standards. We review every piece so your home is not only refreshed but also safe, healthy, and comfortable. Each step is done carefully to give you peace of mind after a fire.

Fire Smoke Damage Cleanup: DIY vs Professional Solutions

img-3.jpg

Some homeowners try simple fixes like vinegar and a multipurpose sponge to clean light soot. These home remedies might work for very minor issues, but fire damage cleanup is much more complex. Basic cleaning often leaves behind toxic soot and smoke residue that can harm your health and damage your home.

DIY cleaning can be risky. Without proper safety gear like gloves, masks, and eye protection, you might be exposed to harmful soot. Incomplete cleaning can leave stubborn stains or even cause mold to grow. Plus, water used to put out the fire might leave damage that gets worse over time, leading to more repairs and higher costs.

We believe a professional cleanup is a safer, more effective solution. Our certified experts arrive quickly, usually within one business day, and they wear the right protective equipment. They use advanced tools to clean every affected area thoroughly. We also take detailed photos and notes to support your insurance claim and help you recover fully.

Fire Smoke Damage Cleanup: Timeline & Cost Estimates

After a fire, cleaning is done in clear steps. We start with water extraction and drying (removing water and moisture) which usually takes 1 to 3 days. Soot removal (cleaning the black residue) can take 2 to 7 days. Odor elimination (removing the smoky smell) also takes about 3 to 7 days. We follow this timeline to work fast and treat every area of your home.

The cost to restore your home depends on several factors. The damage extent, the size of your home, and the types of surfaces affected all play a part. For example, carpets, wood, and stone may need extra care with special machines. We carefully review these factors to give you an accurate cost estimate that matches your situation.

Quick cleanup helps stop extra damage. Acting fast can prevent problems like mold or weakened structures. By scheduling early, you save money and lower long-term risks. We work quickly to bring your home back to a safe, livable state.

Final Words

In the action from assessment to restoration, we focused on every key step. We checked damage, shut off utilities, removed residue, and neutralized persistent odors.

We also compared DIY tactics with the safety and thoroughness of professional help. Each phase is designed to stop damage and speed recovery.

Taking prompt steps limits repair costs and future risks. With reliable fire smoke damage cleanup, your home will soon be safe and livable.

FAQ

Frequently Asked Questions

What is residential fire smoke damage cleanup?

Residential fire smoke damage cleanup involves assessing and restoring your home after a fire. We remove soot and odors and repair damage, helping prevent further issues and ensuring your home remains safe.

What are local fire smoke damage cleanup services?

Fire smoke damage cleanup services near you offer rapid response to inspect, clean, and restore properties after a fire. They use specialized equipment to safely remove soot, residues, and lingering smells.

What is the cost of fire smoke damage cleanup?

Fire smoke damage cleanup cost depends on damage severity, home size, and the work needed. Factors like soot removal and restoration influence pricing, and immediate action may help lower overall expenses.

What should you throw away after smoke damage?

After smoke damage, porous items like carpets, certain furniture, and paper goods may require disposal. Solid items might be salvageable with proper cleaning; professionals can help decide what to discard.

What cleaning products are used for smoke damage?

Smoke damage cleaning products include special chemicals for soot removal, HEPA vacuums, and targeted sponges or erasers. These items help eliminate residues and neutralize odors to restore surfaces.

How do you clean smoke damage on walls and ceilings?

Cleaning smoke damage on walls and ceilings requires gentle cleaning agents, soft sponges, and sometimes steam cleaning. These methods help remove soot residues and reduce persistent odors from fire damage.

How long does it take for fire smoke to clear out of a house?

The time for fire smoke to clear depends on damage extent and ventilation. With proper cleaning and drying techniques, residue removal and odor elimination can take several days to weeks.

Does smoke damage require professional cleaning?

Smoke damage usually calls for professional cleaning to ensure complete residue removal and odor neutralization. Experts use specialized equipment and methods, reducing risks like mold growth and further harm.

Subfloor Water Damage Signs Every Homeowner Should Know

0

Think your floor looks fine? Your feet and nose often know before your eyes do.
Water can hide under good-looking flooring and quietly soften the boards, feed mold, and warp trim.
Most subfloor problems start with small cues: a spongy spot when you step, a musty smell, new squeaks, or a dark stain that won’t go away.
Read on to learn the first signs to check, what each one means, and the quick actions that stop more damage and cut repair costs.

Key Subfloor Water Damage Signs You Should Check First

T44hIrzCQWWPrmmcASHisA

The first clues come through your senses. Your feet pick up problems before you ever see them. Most subfloor water damage shows up as changes you can feel when walking, smells that stick around, sounds that weren’t there last week, or surfaces that just look wrong once you stop and stare.

Walk through bathrooms, kitchens, and laundry rooms slowly. Bare feet or socks work best. Press down gently every few steps. Soft spots or a spongy give under your weight are clear warnings. If it feels like the floor’s absorbing you instead of holding you up, there’s moisture in the wood below. Your nose knows too. That musty, earthy smell that won’t quit, especially near fixtures or appliances, almost always means mold is growing somewhere hidden. Pay attention to sound. New squeaks, worse creaking, or a faint squish when you step on carpet all point to trapped water or movement happening underneath.

Then check what you can see. Warping in wood planks. Buckling near edges. Dark stains between boards or damp patches on carpet that stay wet for days. Cracked tile, lifting laminate corners, peeling paint on baseboards. White or grayish water lines on hardwood. Sagging sections anywhere. These are signs water’s been there long enough to start changing things.

Early signs you don’t want to ignore:

  • Soft, spongy, or bouncy feeling when you walk
  • Musty or moldy smell that keeps coming back
  • Warping, buckling, or cupping in wood floors
  • Dark or wet looking spots on carpet, stains on hardwood
  • Squeaks, creaks, or squishing sounds that are new
  • Cracked tiles, bubbling laminate, gaps between planks

Physical Subfloor Water Damage Indicators and Flooring Deformities

aNWb73dEQDqvv_5c7z03Ug

Water underneath flooring changes the shape of what’s on top. Wood swells when it soaks up moisture, and that expansion shows up in visible ways. Cupping is when the edges of a wood plank rise higher than the center, making a shallow U shape along the board. Crowning does the opposite. The center swells and peaks above the edges. Both mean moisture’s gotten into the wood layers underneath. Buckling is worse. The floor lifts noticeably away from the subfloor, sometimes creating gaps you can actually see or feel. When buckling happens, water’s been sitting there long enough to force the material to move.

Laminate and luxury vinyl plank react differently, but they still show damage. These materials don’t absorb water like wood does, but they can crack, bubble, or pull apart at the seams when moisture gets underneath. Tile floors might stay flat, but grout between tiles can crack or darken. Individual tiles can loosen or rock when you press them. Any kind of persistent warping usually means the subfloor itself is wet or starting to rot.

What different flooring types do when wet:

  • Hardwood: cupping, crowning, buckling, visible gaps between boards
  • Laminate and LVP: bubbling, cracking, edges lifting, seams separating
  • Carpet: rippling, bunching, uneven texture, backing gets dark or smells
  • Tile: loose tiles, cracked or discolored grout, movement when you walk

Tactile and Sound Based Signs of Subfloor Moisture Damage

H2yMORYtTfKaTkI67cjqCg

Your hands and feet catch problems your eyes can miss. Soft or spongy spots are the clearest sign that water’s soaked the subfloor and started breaking down the wood. When you press down and the floor gives a little, or when you feel a slight bounce as you walk, the structure underneath isn’t solid anymore. In bad cases, the floor might sag visibly or feel uneven across the room. These changes mean the plywood or OSB subfloor has absorbed enough water to weaken.

Sound changes tell you the subfloor is shifting. Squeaks that show up suddenly or get worse over time usually mean fasteners are loosening as the wood swells and contracts. Creaking that follows your steps can mean movement between the subfloor and the joists below. If you walk on carpet and hear a faint squishing noise, water’s likely trapped in the padding or subfloor underneath. These sounds aren’t normal wear. They’re signs of structural movement caused by moisture.

Simple Tests You Can Do at Home

Walk slowly through suspect rooms in socks. The thinner barrier between your feet and the floor makes it easier to feel small changes. Stop every few steps and press down with your full weight, then shift side to side. Notice any areas that flex, give, or feel different from the rest of the room. You can also try the marble test. Place a small marble or ball on the floor and see if it rolls toward a low spot, which might mean sagging caused by water damage.

Odor and Humidity Changes That Reveal Hidden Subfloor Damage

aP6ttXPZTYS-jvlu17GyAA

A musty smell that won’t go away is one of the most dependable signs of hidden water damage. If you walk into a room and catch a stale, earthy, or moldy odor, especially one that gets stronger near the floor, mold’s probably growing somewhere beneath the surface. Mold needs moisture to live, and a smell that lingers means the conditions have been right for days or weeks. The odor often sticks around even after you air out the room or clean what you can see.

Higher humidity is another clue. If you notice condensation forming on windows, walls, or even the floor itself, moisture levels in the room are too high. Bathrooms and basements are common trouble spots, but condensation in other rooms can signal that water’s evaporating from the subfloor into the air. Poor indoor air quality, stuffiness, or a damp feeling in a room that should be dry all point to trapped moisture below.

Common smell situations connected to subfloor moisture:

  • Persistent musty or moldy smell concentrated near the floor or in corners
  • Earthy or damp odor that gets stronger after running a shower, washing machine, or dishwasher
  • Stale smell in a closed room that returns quickly after you open windows

Visual Clues: Stains, Discoloration, and Changes in Adjacent Structures

ZRSN5J-MQAOovOxnIR19uw

Water leaves marks. On hardwood floors, stains can show up white or gray when moisture first gets through the finish, or they might darken to brown or black if water’s been there long enough to affect the wood itself. Dark patches between planks often mean mold growing in the gaps or on the subfloor below. Carpet shows water damage as darker, damp areas that feel cool to the touch and don’t dry even after days. The carpet backing might darken or start separating from the fibers.

Walls and baseboards near the floor also reveal subfloor water problems. Look for peeling paint, bubbling, or discoloration along the bottom edge of drywall. Baseboards can swell, warp, or pull away from the wall. White or gray water lines on trim are classic signs of past flooding or leaks. If you see these patterns, the water probably moved sideways from the floor into the wall materials. Caulk around tubs, showers, and sinks might crack or pull away, letting water seep into the floor structure.

Ceilings below the damaged floor tell their own story. Water rings, sagging drywall, peeling paint, or visible drips all mean moisture has traveled through the subfloor and into the space underneath. Where ceiling stains appear can help you trace the leak back to its source, whether it’s a bathroom fixture, washing machine supply line, or roof penetration above.

Inspecting Crawlspaces and Basements for Hidden Subfloor Water Damage

MYpplxPSRga1QC3wjauoyg

The underside of your floor often shows damage before the top does. Crawlspaces are especially revealing. Use a bright flashlight and look for dark stains on the underside of the plywood or OSB subfloor. Check for rusted nails or screws, which mean long term moisture exposure. Inspect the wooden joists that support the subfloor. Dark wood, soft or crumbling sections, and mold growth are all signs of rot. Soggy or compressed insulation between joists means water’s been dripping or condensing there.

Basements need a similar approach. Seepage through foundation walls or slab floors can pull moisture upward into the subfloor above. Look for efflorescence, those white chalky deposits on concrete, which signal water moving through the foundation. A failing sump pump, clogged floor drains, or high water tables during heavy rain can all raise moisture levels enough to damage the floor structure. Persistent dampness in a basement almost always affects the flooring above it.

Area What to Check Typical Issues
Crawlspace Underside of subfloor, fasteners, joists, insulation Dark stains, rusted screws, crumbling wood, mold, soggy insulation
Basement Ceiling joists, foundation walls, slab, sump pump area Efflorescence, damp spots, mold, seepage, dripping pipes
Joists Color, texture, firmness, fastener condition Darkened wood, soft spots, visible cracks, rusted nails
Insulation Compression, moisture, odor, visible mold Sagging, wet or heavy feel, musty smell, dark discoloration

Tools and Methods to Detect Moisture in Subfloors

njkfWrl-SkK4ytqCLTiwaQ

Moisture meters give you numbers instead of guesses. Two types are common for flooring inspections. Pin type meters use metal probes that you push into the wood to measure electrical resistance, which changes with moisture content. Pinless meters use a flat sensor you press against the surface. They read moisture levels without leaving holes. Both work well, but pin meters are more accurate for checking deep into thick subfloors or joists. Take readings in several spots. Compare suspect areas to clearly dry zones in the same room or an adjacent room. Wood moisture levels consistently above 16 to 20 percent create conditions where mold can grow and rot can start.

Infrared cameras reveal moisture patterns you can’t see. They detect temperature differences on surfaces. Wet areas appear cooler than dry ones. This tool’s especially useful for scanning large rooms or tracking water paths from a known leak to hidden damage. Homeowners can also lift carpet edges, remove vent covers, or pull up a small section of flooring in a closet to inspect what’s below. Shine a flashlight on the subfloor and padding, check for dampness with your hand, smell for mustiness. Small access points let you confirm suspicions before committing to larger repairs.

Document what you find. Mark soft spots or high moisture zones with painter’s tape so you can track changes over time. Take photos with your phone and note the date. If you’re using a moisture meter, write down the readings and locations. This record helps you see whether conditions are improving after you run fans and dehumidifiers, and it gives you evidence for insurance claims or contractor estimates.

Interpreting Moisture Meter Readings

Dry wood typically reads between 6 and 12 percent moisture content in most climates. Readings from 12 to 16 percent are borderline. Monitor them closely and check again in a few days. Anything above 16 percent is a concern, and levels above 20 percent strongly suggest active moisture intrusion or poor drying conditions. Always compare readings across multiple locations. A single high reading might be a fluke, but a cluster of elevated readings in one area confirms a problem. If your baseline reading in a dry hallway is 9 percent and a bathroom subfloor reads 22 percent, the bathroom floor is wet and needs attention.

Signs Subfloor Water Damage Has Become Structural

QCoRxj8fRE-0XJJqewxkBg

When rot reaches the joists, the damage isn’t cosmetic anymore. Joists are the horizontal beams that support the subfloor, and if they fail, the entire floor can collapse. Inspect joists from below with a flashlight. Dark stains, especially near plumbing or exterior walls, are early warnings. Soft or crumbling wood means the rot is advanced. If you press a screwdriver into a joist and the wood yields easily or crumbles, that section has lost its strength.

Widespread sagging is another red flag. A single soft spot may be limited to a small area of subfloor, but if the floor sags across an entire room or between multiple rooms, the structural support underneath is failing. You might also see gaps forming between the floor and the baseboards, or doors and cabinets near wet rooms may go out of alignment as the floor shifts.

Structural danger signs that need immediate professional help:

  • Visible sagging or unevenness across large sections of floor
  • Soft, crumbling, or darkly stained joists when inspected from below
  • Multiple rooms showing simultaneous warping, bouncing, or soft spots

Mold Growth Under Floors and Why It Matters

RqunPf_BT52zFMg9RuufGg

Mold thrives in dark, damp, enclosed spaces, making the area beneath flooring perfect when moisture is present. You might see black, green, or white fuzzy growth along the edges of baseboards, under lifted carpet, or on the underside of subfloor panels. Often you’ll smell mold before you see it. That persistent musty odor comes from microbial volatile organic compounds released as mold colonies grow. Once mold establishes itself, it keeps spreading as long as moisture remains.

Health effects vary by individual, but mold exposure commonly triggers respiratory irritation, coughing, sneezing, and worsened asthma or allergy symptoms. People with compromised immune systems or chronic lung conditions are especially vulnerable. Indoor air quality declines as spores circulate through heating and cooling systems. Even if you don’t see mold, the presence of a strong musty smell is enough reason to investigate further and consider remediation.

Mold types and warning signs under floors:

  • Black mold (Stachybotrys): dark, slimy appearance, often found on water damaged drywall, wood, or paper backing
  • Green or blue green mold (Penicillium, Aspergillus): powdery or fuzzy texture, common on damp wood and organic materials
  • White mold: may look like efflorescence but feels fuzzy, often early stage growth on damp subfloors

Immediate Steps to Take When You Discover Subfloor Water Damage

AqQImhggTWWnANmWWSoEnQ

Stop the water source first. If a pipe is leaking, turn off the supply valve or the main water shutoff. If an appliance is flooding, unplug it and close the supply line. If the ceiling is dripping, place buckets and move anything valuable out of the area. Until you stop the flow, damage will keep spreading.

Ventilate and dry the space as quickly as possible. Open windows if weather permits. Run fans to move air across wet surfaces. Place a dehumidifier in the room to pull moisture from the air. Keep these running for 24 to 72 hours, checking progress with a moisture meter or by feel. Lift area rugs and move furniture off affected zones so air can reach the floor from all sides. Don’t walk on soft or spongy areas. Your weight can worsen subfloor damage or cause injury if the structure is compromised.

Document everything. Take clear photos of visible damage, including stains, warping, mold, and any equipment you’re using to dry the area. Write down the date and time you discovered the problem, what you did to stop it, and any conversations with plumbers, contractors, or your insurance company. This record protects you if a claim is disputed or if hidden damage appears later during repairs.

Immediate actions when you find subfloor water damage:

  1. Stop the water source. Shut off valves, unplug appliances, or call a plumber for active leaks.
  2. Ventilate and dry. Open windows, run fans and dehumidifiers, remove wet materials where safe.
  3. Move valuables and limit foot traffic on soft or damaged sections.
  4. Take photos and document damage, source, and timeline.
  5. Contact your insurance company to report the damage and ask about coverage.

Repairing, Replacing, and Drying Subfloors After Water Damage

Drying comes before repairs. Even after you stop the leak, moisture can stay trapped in the subfloor for days. Use air movers positioned to blow across the floor surface and a dehumidifier to lower humidity levels in the room. Check moisture readings daily. When readings stabilize in the normal range (below 12 to 16 percent) and match baseline readings in dry areas, you can move forward with repairs. Rushing this step traps moisture inside, leading to mold and continued rot.

Laminate and luxury vinyl plank are easier to remove and replace. These materials usually install as floating floors with click together edges, so you can pull up damaged planks without disturbing the rest of the room. Inspect the subfloor underneath, clean and dry it thoroughly, then reinstall new planks. Carpet is more involved. You’ll need to remove the carpet, padding, and tack strips, dry or replace the padding, treat or replace affected subfloor sections, then reinstall everything. Hardwood repairs require skill. You may need to sand, stain, and refinish boards, or replace sections and blend them into the existing floor.

Professional help is necessary when rot extends to the joists, when mold growth is widespread, or when large sections of subfloor need replacement. Structural repairs require tools, knowledge of load bearing systems, and often building permits. If you’re unsure how far the damage extends, or if moisture readings stay high after several days of drying, bring in a licensed contractor or water damage restoration specialist.

How to Judge if a Subfloor Can Be Saved

If the plywood or OSB feels firm after drying, shows no visible mold, and returns moisture readings below 14 percent, you can probably save it. Sand away minor surface stains and treat the wood with a mold inhibiting primer if needed. If the subfloor is soft, spongy, or crumbles when probed with a screwdriver, it needs to be replaced. Visible mold growth, a persistent musty smell even after drying, or delamination (layers separating) are also signs that replacement is the safer option. When in doubt, expose a small test section to check the condition before committing to a repair plan.

Costs, Insurance, and Documentation for Subfloor Water Damage Repairs

The cost to replace water damaged flooring averages around $3,150, with most homeowners paying between $1,500 and $4,900. Actual costs depend on the flooring material, square footage, and extent of structural damage. Replacing carpet or laminate is less expensive per square foot than hardwood, stone, or tile. If subfloor or joist replacement is required, costs rise significantly because of labor, materials, and possible permit fees.

Insurance coverage depends on the cause of the damage and the specifics of your policy. Sudden events like a burst pipe, appliance malfunction, or storm related roof leak are often covered under standard homeowner’s policies. Flood damage requires separate flood insurance, which may cover water entering from outside during heavy rain or rising water. Claims are frequently denied when the damage results from long term neglect, deferred maintenance, or slow leaks that went unnoticed for months. Read your policy carefully and ask your agent to clarify what is and isn’t covered before filing a claim.

Required documentation for a successful water damage claim:

  • Photos and videos showing the extent of damage, including floors, walls, ceilings, and equipment
  • Written timeline describing when you discovered the problem, what caused it, and what you did immediately
  • Receipts for emergency services, equipment rentals (fans, dehumidifiers), and temporary repairs

Preventing Future Subfloor Water Intrusion and Moisture Problems

Prevention starts outside. Poor grading around your foundation can direct rainwater toward your home instead of away from it. Check that soil slopes away from the house at least six inches over the first ten feet. Gutters and downspouts need to be clear and should discharge water at least five feet from the foundation. Gutter overflow during heavy rain often causes basement seepage and foundation moisture that eventually reaches subfloors.

Inside, routine maintenance catches problems early. Walk through high risk rooms a few times a year, pressing gently on floors near sinks, toilets, tubs, and appliances. Run your hand along baseboards to check for dampness or swelling. Inspect under sinks every few months for slow drips or condensation on supply lines. Replace old washing machine hoses before they fail. Rubber hoses degrade over time, and a burst hose can flood a laundry room in minutes. Schedule a plumbing inspection every few years, especially in older homes where pipes may be nearing the end of their service life.

Key maintenance habits to prevent subfloor water damage:

  • Inspect your roof annually for missing shingles, damaged flashing, or clogged valleys
  • Repair window leaks at the first sign of water intrusion around sills or frames
  • Monitor appliances and plumbing. Check hoses, supply lines, drain connections, and shut off valves regularly
  • Improve ventilation in bathrooms, kitchens, and basements by using exhaust fans, dehumidifiers, and keeping vents clear
  • Set a recurring reminder once or twice a year to walk floors for soft spots, smells, and visual changes

Final Words

Check the floors now: look for warping, soft spots, musty smells, dark stains, or new squeaks.

We walked through the visual, tactile, odor, and sound clues; how to inspect crawlspaces and basements; tools like moisture meters and infrared; and the immediate steps to limit damage.

Document, stop the source, dry and monitor, then repair or replace as needed. These subfloor water damage signs give you a clear checklist to act fast and get your home back to normal.

FAQ

Q: How to know if a subfloor has water damage?

A: You know a subfloor has water damage by spotting warped or cupped flooring, soft or spongy spots, musty smells, louder-than-usual squeaks, and higher moisture meter readings; probe or open an access to confirm.

Q: What does water damage subfloor look like?

A: A water-damaged subfloor looks warped, buckled, or cupped, with white, gray, or dark stains, delaminated layers, swollen edges, and sometimes visible mold or dark patches between boards.

Q: Will subfloor dry out on its own?

A: A subfloor may dry on its own if the wet area was small and airflow is excellent, but hidden moisture often remains; targeted drying and moisture readings are needed to confirm safe dryness.

Q: Will homeowners insurance cover rotted subfloors?

A: Homeowners insurance may cover rotted subfloors when caused by a sudden event (like a burst pipe or storm), but insurers often deny claims for long-term neglect; document damage and review your policy.

Best Sealer for Smoke Smell in House That Actually Works

0

Think a fresh coat of paint will hide smoke smell?
It won’t.
Smoke soaks into drywall, trim, and ceilings and keeps smelling no matter how many topcoats you slap on.
You need a primer that locks in both stains and odor.
For heavy cigarette or fire smoke, shellac primers like Zinsser B I N are the go-to.
Oil and specialty water-based primers have their place when fumes or sensitivity matter.
This post cuts through the options and tells you which sealer actually works and how to use it.

Top Odor Blocking Sealers That Truly Work on Smoke Smell in a House

ZTybgGQhT4ChTrs9wcX1Ww

When smoke embeds itself into walls, ceilings, and trim, it doesn’t just stain the surface. It soaks into the material and holds the smell. Most paint can’t hide it. You need a primer that locks in both the yellowing and the odor before you repaint.

Shellac based primers like Zinsser B I N are considered the strongest option for sealing cigarette smoke and fire damage. They dry fast, seal heavy nicotine stains, and block odor more reliably than other formulas. Oil based primers such as Zinsser Cover Stain can hide discoloration, but they produce strong fumes and don’t trap odors as well as shellac. They still work for moderate staining, especially if ventilation and a respirator are available. Specialty water based primers like Ultra Recon Smoke and Odor Sealer are newer products designed to block smoke odor without the harsh solvent smell of shellac or oil. Most standard water based primers fail on cigarette smoke. These are the exceptions.

For most situations involving heavy nicotine buildup or fire smoke, shellac is the go to. Oil based primers are a fallback when shellac isn’t available or the damage is lighter. Water based options work best when low VOCs matter and the odor isn’t extreme.

Here are the top products for sealing smoke smell in a house:

Zinsser B I N Shellac Primer – Best overall for cigarette and fire smoke. Blocks odor and stains. Dries in 20 to 45 minutes.

KILZ Original Primer – Trusted by pros for over 40 years. Seals smoke, pet, and food odors. Works on interior walls and trim.

Zinsser Cover Stain (oil based) – Effective at locking in discoloration. Heavier fumes. Better for stains than odor.

Ultra Recon Smoke and Odor Sealer (water based) – Low odor alternative for nicotine and smoke. Newer niche product with less ventilation demand.

Magnolia Home Interior Paint – Not a sealer, but pairs well with KILZ or B I N as a low VOC finish coat after priming.

Comparing Smoke Odor Sealers: Shellac vs. Oil Based vs. Water Based

hILtEIOxQTyKThkz3Os6YQ

Shellac primers like B I N work by forming a hard, resin based barrier that traps both stains and odors inside the surface. They dry fast, usually within 20 to 45 minutes, and you can recoat quickly. The downside is strong solvent fumes. You’ll need a respirator and open windows. But for heavy nicotine buildup or fire smoke, shellac outperforms everything else. It’s the formula restoration pros reach for when smoke odor is embedded deep.

Oil based primers can seal nicotine stains and prevent yellowing from bleeding through your topcoat, but they don’t block odor as well. The fumes are heavy, cleanup requires solvents like mineral spirits, and drying takes longer. They work for moderate smoke damage. If the smell is bad, oil based alone may not be enough. Water based primers are easier to work with. Lower fumes, soap and water cleanup, faster ventilation. But most standard latex primers let smoke odor bleed through. The only exceptions are newer specialty products like Ultra Recon, which are formulated specifically to encapsulate smoke and nicotine. If you’re working in a space where ventilation is limited or occupants are sensitive, a water based smoke sealer is worth testing.

Sealer Type Best Use Case
Shellac (e.g., Zinsser B I N) Heavy cigarette smoke, fire damage, deep nicotine stains and embedded odor
Oil Based (e.g., Zinsser Cover Stain) Moderate staining where odor is less severe; requires strong ventilation
Water Based (e.g., Ultra Recon) Lower VOC environments with lighter smoke exposure; occupants sensitive to fumes
Standard Latex Not recommended for smoke odor; use only for non stained surfaces

Heavy nicotine may require two coats of any sealer, especially if tar buildup is visible. Shellac goes on thin, so real coverage is closer to 400 square feet per gallon, not the 500 listed on some cans. Oil based primers cover well but take hours to dry between coats. Water based specialty sealers may need more material to achieve the same blocking power as shellac.

Preparing Interior Surfaces Before Applying a Smoke Odor Sealer

EmsAnHWrQROiFZeOdhEK8g

Sealer won’t stick to soot, tar, or oily residue. If you skip cleaning, the primer can peel or let odor bleed through later. The prep matters as much as the product you choose.

Start by removing loose soot and nicotine buildup with a dry cleaning sponge. These are designed to lift smoke residue without smearing it. Work in small sections, wiping gently so you don’t grind particles into the drywall. After dry cleaning, wash the surface with a cleaner that cuts grease and tar. Some guides recommend TSP (trisodium phosphate), which is strong and effective. Others suggest vinegar mixed with water, which is gentler and doesn’t require rinsing as carefully. Either way, let the surface dry completely before moving forward. If the drywall is still damp, the primer won’t seal correctly.

Next, fill any holes or cracks with spackle, then sand the patched areas smooth. Use 120 grit sandpaper for walls. It’s enough to knock down rough spots without creating deep scratches. For trim or doors, you can go up to 220 grit if you want a smoother finish. After sanding, wipe everything down with a damp cloth to remove dust. Let it dry again. Moisture in the substrate can prevent the sealer from bonding, so don’t rush this step.

Here’s the prep sequence in order:

Dry wipe with a dry cleaning sponge to lift soot and heavy nicotine without spreading it.

Wash with TSP or a vinegar solution to remove remaining tar and grease. Rinse if using TSP.

Sand rough spots and patched areas with 120 grit sandpaper (220 grit for trim if desired).

Fill holes and cracks with spackle. Let dry, then sand smooth.

Remove all dust with a damp cloth or tack cloth.

Allow the surface to dry completely before applying primer. Check that moisture levels are below 12% if you have a meter.

Application Techniques That Improve Odor Blocking Performance

0rdSBnxuTp66tAWRWv1HJA

How you apply the sealer affects how well it blocks odor. Rolling the primer onto the wall increases adhesion and helps the material soak into the surface, which improves the seal. Brushing alone can leave thin spots, especially on textured drywall.

Start by stirring the primer thoroughly. Shellac and oil based products can separate or develop a skin, so mix well and stir occasionally while working. Pour only what you’ll use in the next 10 minutes into a roller tray or cut bucket. Shellac dries fast and will thicken if left open. Use a brush to cut in around edges, corners, and trim, working in sections about 4 to 6 feet long. Then immediately roll the same area to blend the cut in line and fill the field. This method keeps a wet edge and prevents lap marks.

Recoat timing matters. B I N shellac primer can usually be recoated in 20 to 45 minutes, depending on temperature and humidity. If you wait too long, the next coat may not bond as well. If you recoat too soon, the solvents can re wet the first layer and cause problems. Follow the window on the label. For heavy nicotine stains, plan on at least two coats of primer. The first coat may still show some yellowing. Don’t panic. The second coat locks it in.

Use a 3/8″ to 1/2″ nap roller for drywall. Longer naps help the primer reach into texture.

Stir the primer before use and occasionally during application to keep solids from settling.

Cut in 4 to 6 feet at a time, then roll immediately to maintain a wet edge.

Respect recoat windows. For B I N, that’s typically 20 to 45 minutes. Check the label.

Safety and Ventilation Considerations When Using Smoke Odor Sealers

Rn-5DEPMRkWRKoymXCbiow

Shellac and oil based primers produce strong fumes. The solvents are effective at sealing odors, but they’re also harsh to breathe. If you’re working indoors, open windows, use fans to push air out, and wear a respirator rated for organic vapors. A dust mask won’t protect you.

Shellac primers like B I N contain denatured alcohol and other solvents that evaporate quickly and can cause headaches or dizziness in poorly ventilated spaces. Oil based primers release heavier fumes that linger longer. Both require gloves. Shellac can dry on your skin and is difficult to remove without rubbing alcohol or acetone. If you’re sensitive to chemicals, consider testing a water based specialty sealer like Ultra Recon in a small area first. These products have lower VOCs and are easier to tolerate, though they may still require ventilation during application. After sealing, you can use a low VOC topcoat like Magnolia Home Interior Paint to reduce lingering odor from the finish coats.

Cost, Coverage, and Number of Coats Needed for Smoke Odor Sealers

bUef5wGNQbSXvWNWkt7fJA

Shellac primers like Zinsser B I N are often labeled at 500 square feet per gallon, but real world coverage is closer to 400 square feet because the material goes on thin and solids can settle. If you’re sealing a room with moderate nicotine staining, plan on one gallon per 400 square feet for the first coat. Heavy staining may require a second coat, so double your material estimate. Oil based primers like Cover Stain cover similarly, but they’re thicker and may stretch a bit further on smooth surfaces. Water based specialty sealers can vary. Some require more product per square foot to achieve the same blocking power as shellac.

For most smoke odor projects, expect to apply at least two coats total: one coat of sealer, then one or two finish coats of paint. If the nicotine is heavy or the smell is strong, you may need two coats of primer before painting. That brings the total to three coats. Budget accordingly, both for materials and time.

Product Coverage per Gallon Coats Needed
Zinsser B I N Shellac Primer ~400 sq ft (real use) 1–2 coats (2 for heavy nicotine)
KILZ Original Primer ~400 sq ft 1 coat typical
Zinsser Cover Stain (oil based) ~400–450 sq ft 1–2 coats
Ultra Recon Smoke & Odor Sealer Varies (check label) 1–2 coats

When to Choose Professional Grade Smoke Odor Encapsulants

5iGUGjOGSB-CZRKp-KvHHg

Sometimes a retail primer isn’t enough. If the smoke damage is structural (from a fire rather than cigarettes) or if the smell persists after two coats of shellac, you may need a professional grade encapsulant. These products are thicker, block more aggressively, and are often applied by restoration contractors who specialize in fire and smoke remediation.

Restoration pros typically use shellac based encapsulants like Zinsser B I N for structural smoke, but they also have access to industrial coatings designed for heavy soot, tar, and char. In extreme cases, sealing alone won’t work. Popcorn ceilings that absorbed years of cigarette smoke, for example, may need to be scraped and removed entirely before the substrate can be sealed. If you’ve already tried a retail sealer and the odor is still present after drying, or if the staining keeps bleeding through, it’s time to call someone who can assess whether the drywall, insulation, or framing needs to be treated or replaced.

Pairing Sealers with Odor Removal Methods for Best Results

HnLOlXLoTXC5kPTQq0r4mw

Sealing traps odors inside surfaces, but it doesn’t clean the air or remove smell from furniture, ducts, or fabric. For the best results, combine sealing with other odor removal methods. This is especially important in homes with heavy cigarette smoke or fire damage.

Air scrubbing with HEPA filters can pull smoke particles out of the air while you work. Ozone generators are sometimes used after sealing to oxidize remaining odor molecules, though they must be used carefully in unoccupied spaces. Activated charcoal placed around the room can absorb airborne odors after the sealer has dried. These methods don’t replace sealing. They support it. Sealing stops the smell from coming out of the walls. Air treatment clears what’s already floating around.

Here are complementary methods to use alongside sealing:

HEPA air scrubbers to filter smoke particles from the air during and after sealing.

Ozone treatment in unoccupied spaces to oxidize lingering odor molecules (use with caution).

Activated charcoal or odor absorbers placed in the room after sealing to capture airborne smell.

HVAC filter replacement to prevent recirculation of smoke residue through ductwork.

Sealing Wood Trim, Doors, and Other Porous Surfaces Against Smoke Odor

uZYL6qs7Ry-GTcGcGF9HEg

Wood absorbs smoke more deeply than drywall. Trim, doors, window frames, and built in shelving can hold odor for years, even after walls are sealed and repainted. You can’t skip these surfaces if you want the smell gone.

Shellac primers are particularly effective on wood because they soak into the grain and form a hard, odor blocking shell. Oil based primers can work on wood trim, but they’re more likely to allow some odor bleed through, especially if the nicotine buildup is heavy. Water based primers generally don’t seal wood well enough for smoke remediation. Before priming, sand the wood with 120 grit sandpaper to remove any finish or buildup that might prevent adhesion. For a smoother final look on trim, you can go up to 220 grit after the first sanding. Wipe the dust off with a damp cloth, let it dry, then prime.

If the wood is stained or varnished, you may need to strip the finish first. Smoke odor can soak through old varnish and resurface later. In some cases, it’s easier to replace heavily stained trim than to try sealing it. But if the wood is in good shape, sealing works. Just plan on at least two coats of shellac primer.

Here’s the process for sealing wood trim against smoke odor:

Sand the surface with 120 grit sandpaper to remove old finish and smooth rough spots. Use 220 grit for a finer finish if desired.
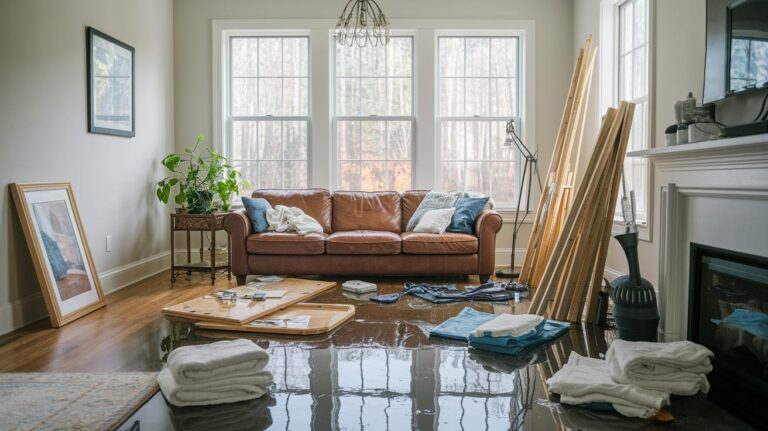
Wipe down with a damp cloth to remove dust. Let dry completely.

Apply the first coat of shellac primer with a brush, working in the direction of the grain.

Let dry for 20 to 45 minutes (follow the recoat window on the label).

Apply a second coat if the wood is heavily stained or if odor is still detectable after the first coat dries.

Sealing HVAC, Ceilings, and High Risk Areas to Prevent Odor Recirculation

Sz0a63S1Tqij7GQnoW3oUg

Smoke doesn’t just settle on walls. It rises into ceilings, collects in HVAC ducts, and clings to anything porous or horizontal. If you seal the walls but ignore the ceiling, the smell will come back as soon as the house heats up or the air moves.

Ceilings often need a full coat of shellac primer, especially if they’re textured or popcorn. The texture holds more residue, and the surface area is larger than it looks. Roll the primer on in sections, working across the ceiling in a consistent direction to avoid lap marks. If the staining is severe or the smell doesn’t go away after one coat, apply a second. For HVAC systems, sealing the registers and vents isn’t enough. Smoke residue can coat the inside of ductwork. That usually requires a professional duct cleaning or, in some cases, sealing the ducts from the inside with a coating designed for metal surfaces.

If the home had a fire, check attic spaces, crawl spaces, and any area where smoke could have traveled. Sealing visible surfaces won’t fix the problem if smoke is still trapped in hidden cavities.

Prime ceilings with at least one full coat of shellac based sealer. Two coats for heavy smoke staining.

Clean or seal HVAC ducts to prevent odor recirculation. Consider professional duct sealing if DIY efforts don’t resolve the smell.

Inspect and seal hidden areas like attics, crawl spaces, and wall cavities if fire smoke was present.

Final Words

Start by cleaning and tackling the worst smelling surfaces, like ceilings, trim, and HVAC, then pick the right primer: shellac for heavy nicotine and fire smoke, oil-based for tough stains, or specialty water-based products for lighter odors.

We walked through prep, application tips, safety, coverage, and when to call a pro. Take photos and note readings so insurance and repairs go smoothly.

Choosing the best sealer for smoke smell in house depends on damage level, but with the right sealer and steps you’ll stop the odor and get your home back.

FAQ

Q: What neutralizes smoke smell in a house?

A: To neutralize smoke smell in a house, clean soot and vacuum with HEPA, wash surfaces with TSP or vinegar, use air treatments (HEPA scrubbers, ozone, or charcoal), then seal contaminated surfaces with a strong primer.

Q: How to seal in smoke smell, and does KILZ block smoke smell?

A: To seal in smoke smell, clean and dry surfaces, then apply a smoke‑blocking primer. KILZ Original can block many smoke odors, but shellac primers like Zinsser B‑I‑N are usually stronger for heavy nicotine or fire smoke.

Q: How do professionals get rid of cigarette smell?

A: Professionals get rid of cigarette smell by deep cleaning (soot sponges, TSP), using HEPA air scrubbers and odor treatments, sealing with shellac encapsulants, and replacing or rebuilding heavily soaked materials when needed.

Cleaning Soot Off Ceiling: Safe Methods That Actually Work

0

Wiping soot off your ceiling with a regular wet rag just spreads a dark, greasy smear that makes everything worse. That’s the mistake most homeowners make when they try DIY cleanup after a candle mishap, furnace puffback, or small kitchen fire. Soot isn’t regular dust. It’s sticky, carbon-loaded residue that embeds fast if you use the wrong technique. The good news? You can remove most ceiling soot safely using a specific dry-to-damp sequence that lifts particles instead of grinding them deeper. Here’s the process that actually works.

Complete Soot Removal Process: Detailed Steps and Techniques

lrUj2IhGQQqtini2efNz4w

Soot removal needs a systematic approach that goes from gentle to stronger methods. You don’t jump straight to harsh chemicals. Following the complete sequence, including safety prep, prevents spreading soot or pushing it deeper into your ceiling. The whole thing typically takes 2 to 4 hours for an average room, though heavily soiled ceilings might need extra cycles.

1. Safety Preparation and Room Setup

Soot particles contain carbon compounds and chemical residues that irritate your lungs and skin when you’re working directly overhead. Before touching anything, gather your protective gear: N95 or better dust mask, safety goggles (not just glasses because soot falls into your eyes when you’re looking up), rubber gloves, and long sleeves. This isn’t optional.

Inhaling ceiling soot causes respiratory irritation that sticks around for days.

Open windows and position fans to create cross ventilation that pushes air outside, not just around the room. Regular household vacuums without HEPA filters blow soot particles back into the air, making your problem worse.

Remove small items from the room entirely. Cover remaining furniture with drop cloths, tucking the edges underneath so falling soot doesn’t settle on exposed surfaces. Protect floors with plastic sheeting, taping edges to prevent soot from sliding underneath during cleanup. If you’re using a ladder, make sure it’s stable on the protected floor and positioned so you’re not overreaching. Soot cleanup takes longer than you expect, and tired arms lead to falls.

2. Initial Loose Soot Removal with HEPA Vacuum

Attach the soft brush attachment to your HEPA filter vacuum. The soft bristles matter because hard attachments scratch surfaces and grind soot into porous materials. Work in small sections using gentle, overlapping strokes across the ceiling. Hold the vacuum nozzle 1 to 2 inches from the surface for textured ceilings. Direct contact crushes the texture and embeds soot.

Start from the least affected area and work toward the heaviest deposits. This prevents dragging concentrated soot across cleaner sections. Use light touch only. Hard pressure pushes soot deeper into porous materials. If you’re seeing dark smears instead of clean removal, you’re pressing too hard.

The vacuum removes the loose top layer, but don’t expect perfection at this stage. You’re preventing loose particles from smearing during the next steps.

3. Dry Cleaning Sponge Application

Get dry cleaning sponges, also called chemical sponges, made of vulcanized rubber. These look like dense foam blocks and feel slightly tacky. They work without water, lifting soot through gentle contact rather than pushing it around.

Wipe the ceiling surface gently using straight, overlapping strokes. Never circular motions that smear soot across a wider area. Turn the sponge frequently to expose clean surface as it becomes saturated with soot. The sponge darkens fast, sometimes after just a few passes.

Use a light touch and blotting motions that lift soot rather than pushing it into the surface. Think of it as dabbing, not scrubbing. When all sides of the sponge are saturated, slice away the soiled outer layer with a utility knife to expose fresh cleaning surface underneath. One sponge typically cleans 50 to 75 square feet before it’s spent, depending on soot density.

This method handles most light to moderate soot without introducing moisture that can set stains or damage ceiling materials.

4. Mild Cleaning Solution Application for Remaining Residue

Mix your cleaning solution in a bucket: 1 gallon warm water, 1 tablespoon mild dish soap, 1 tablespoon household ammonia. The ammonia cuts through greasy soot residue that dry sponges leave behind. Test this solution on a small inconspicuous area first before applying to larger surfaces, perhaps inside a closet or behind where a door swings open.

Dampen a microfiber cloth or soft sponge with solution, then wring it out until it’s barely damp. Never saturate the ceiling surface. Excess moisture soaks into drywall and textured surfaces, causing swelling, texture damage, and potential mold growth.

Work in 3×3 foot sections using gentle blotting and dabbing motions, not wiping or scrubbing. Press the damp cloth against the soot stain, hold for a moment, then lift straight away. Change to a clean cloth portion frequently. You’re absorbing soot into the cloth, not spreading it around. When your cloth is dark with soot, rinse it thoroughly or switch to a fresh one.

Allow each section to air dry before moving to the next. This lets you see if the stain is actually gone or if it’s just hidden by moisture that’ll reappear when dry.

5. Stubborn Stain Treatment with Stronger Solutions

If basic cleaning leaves persistent dark staining, greasy residue, or discoloration that remains after the section dries, you need stronger solutions. For moderate stubborn stains, create a paste using baking soda and small amount of water until it’s thick like toothpaste. Apply gently with a soft cloth, let sit 5 to 10 minutes, then wipe away with a damp cloth. The mild abrasive action lifts embedded soot without damaging paint.

For heavier carbon buildup that won’t budge, mix TSP (trisodium phosphate) solution following manufacturer instructions, typically 1/4 cup TSP per gallon water. TSP is harsh on skin and eyes, so wear heavy duty rubber gloves and goggles while handling it. TSP isn’t suitable for all surfaces. It can dull certain paint finishes and damage some ceiling materials, so consult manufacturer instructions and test in a hidden spot first.

Apply stronger solutions with dwell time: apply the solution, wait 3 to 5 minutes while it breaks down the soot bonds, then gently blot away. Don’t let it dry on the surface. For oil based soot residue, the kind that feels slightly greasy when you touch it, use a small amount of denatured alcohol or mineral spirits on a cloth for spot treatment only. These solvents cut through oily deposits but evaporate quickly.

Multiple applications may be necessary for deeply penetrated staining. Allow complete drying between attempts so you can accurately assess what’s left.

Never scrub hard. That grinds soot deeper into porous surfaces. Never start with wet cleaning before dry methods. Moisture turns dry soot into muddy paste that sets like dye. Never mix cleaning chemicals beyond these specified combinations. Mixing ammonia with bleach or other cleaners creates dangerous fumes.

6. Rinsing and Neutralizing

After using any cleaning solution, wipe the cleaned areas with a clean cloth dampened with plain warm water. This removes all cleaning solution residue, which attracts dirt and causes faster re-soiling if left behind. For TSP or ammonia use, thorough rinsing is critical. These chemicals continue working and can damage paint or drywall if not removed.

Change your rinse water frequently. If the water in your bucket is gray or brown, you’re redepositing soot instead of removing it. Use the same gentle blotting technique you used for cleaning.

7. Final Drying and Assessment

Allow the ceiling to dry completely, minimum 2 to 4 hours, or overnight for textured surfaces that hold moisture. Increase air circulation with fans pointed at the ceiling to speed drying. Don’t aim fans directly at wet textured ceilings at high speed, though. That can damage loose texture material.

Inspect under good lighting once dry. Natural daylight shows remaining discoloration better than artificial light. Determine if additional cleaning cycles are needed or if permanent staining has penetrated beyond what cleaning can fix. Heavy soot deposits often require 2 to 3 complete cleaning cycles, with full drying time between each round.

Patience and proper technique work better than aggressive scrubbing. Severely penetrated staining may have permanently discolored the ceiling material, requiring stain blocking primer and repainting as the final solution. Extensive damage from fires or major malfunctions requires professional restoration services with specialized equipment. The complete process with drying time typically spans 4 to 8 hours for a standard room when you account for multiple applications and waiting periods.

Understanding Different Ceiling Surfaces and Soot Removal Approaches

gEgAQOaTSZWtltf2s8SueQ

Ceiling surface type determines how aggressive you can be with cleaning and which methods work without causing damage. Porous materials absorb soot deeper and require gentler approaches, while smooth surfaces tolerate more direct cleaning. Always test any cleaning solution in a hidden area first, perhaps where a smoke detector covers the surface or in a closet corner.

Smooth Painted Ceilings

Smooth painted ceilings with non porous surfaces offer the most straightforward cleaning approach. The paint creates a barrier that keeps soot on the surface rather than letting it soak in. You can use slightly more pressure with dry sponges and damp cloths without worrying about crushing texture or embedding particles deeper.

Flat paint finishes show staining more than satin or semi gloss but clean about the same. The main concern is avoiding oversaturation that causes paint to soften or peel. Keep your cleaning cloths damp, not wet, and you’ll get good results with the standard cleaning solution method.

Textured and Popcorn Ceilings

Textured and popcorn ceilings present the biggest challenge because soot settles into all the crevices and texture valleys. These porous surfaces absorb soot like a sponge, and aggressive cleaning crushes the delicate texture material. Use extremely light touch with both vacuum and dry sponges. Hold the vacuum nozzle slightly above the surface rather than dragging it across.

Moisture is your enemy with popcorn texture. Too much liquid causes the texture material to soften and fall off in chunks. Keep cleaning cloths barely damp and use blotting motions only, no wiping or scrubbing. Multiple gentle cleaning cycles with complete drying between each round works better than one aggressive attempt.

Accept that heavily soiled textured ceilings may never return to original appearance. Popcorn texture naturally traps dirt, and severe soot staining often requires professional texture repair or removal followed by repainting.

Plaster Ceilings

Plaster ceilings in older homes are more delicate than modern drywall. The plaster surface is harder but more brittle, and moisture can damage the plaster to lath bond underneath. Use the dry cleaning sponge method first and keep wet cleaning minimal.

Test chemical cleaners carefully on plaster. TSP and other alkaline cleaners can react with lime based plaster, causing discoloration or surface degradation. Stick with mild dish soap solutions and short dwell times. If you notice any surface softening or chalking, stop immediately and switch to dry methods only.

Before starting any cleaning on textured or plaster ceilings, assess the overall condition. Cracking, sagging, or loose sections indicate underlying problems that cleaning moisture will make worse. If the ceiling already shows structural issues, professional assessment prevents turning a cleaning project into a ceiling repair emergency.

Addressing Smoke Damage Sources: Fireplaces, Candles, and Appliances

Y_4WsbiBQguL-z1r2q3IIw

Fireplace and chimney soot leaves heavy, oily residue that spreads across ceilings when draft problems or incomplete combustion send smoke into the room instead of up the flue. Wood burning residue contains creosote, a sticky tar like substance that resists water based cleaning and requires degreasing solutions. If you’re seeing black or brown oily deposits concentrated near your fireplace, address the draft and combustion issues through proper chimney maintenance before cleaning the ceiling. Otherwise, the problem returns immediately.

Candle smoke deposits produce fine, powdery soot that accumulates gradually and often goes unnoticed until you see dark shadows above your favorite candle spots. Scented candles burn less cleanly than unscented versions, and cheap candles with synthetic fragrances create more soot than quality candles with natural wicks. The accumulation pattern follows air currents, so you’ll see staining spreading outward and upward from the candle location. This type responds well to dry sponge cleaning because it hasn’t penetrated deeply.
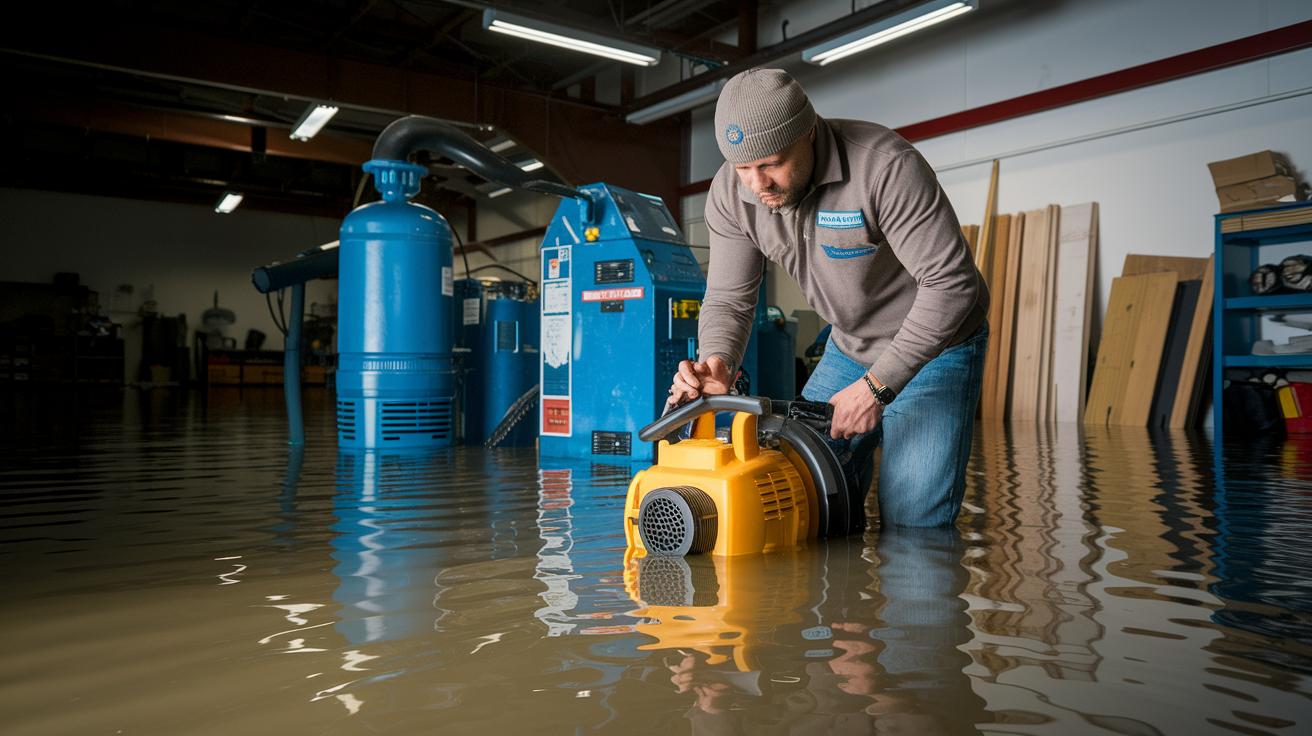
Gas appliance issues create yellow or orange flames that deposit soot through improper combustion. If you’re seeing soot near gas furnace vents, water heaters, or gas ranges, shut off the appliance immediately and call for professional inspection before cleaning anything. This indicates a serious safety problem. Incomplete combustion means carbon monoxide production. The soot is the visible warning sign of an invisible danger.

Determining your soot origin helps you choose the right cleaning approach and, more importantly, prevents recurrence. Light, powdery deposits suggest candle smoke that responds to gentle dry cleaning. Heavy, greasy stains point to fireplace or heating system problems requiring both cleaning and source repair. Sudden appearance of soot after years without problems indicates equipment malfunction needing immediate professional attention, not just cleanup.

Repainting and Sealing Your Ceiling After Soot Cleaning

HpaX7iEJQXy1ASMSQB3E2Q

Sometimes cleaning removes the surface soot but leaves permanent discoloration stained into the paint or ceiling material itself. If you’ve completed multiple cleaning cycles and the ceiling still shows obvious dark patches, yellow staining, or uneven discoloration, cleaning alone won’t restore the appearance. Stain blocking primer prevents the discoloration from bleeding through your new paint, which happens with regular primer when covering heavy smoke damage.

Once your ceiling is completely dry (wait at least 24 hours after final cleaning), lightly sand any rough spots or raised texture from the cleaning process using fine grit sandpaper. Wipe away dust with a dry cloth. Apply oil based or shellac based stain blocking primer to the affected areas or the entire ceiling if staining is widespread. Water based primers work for light smoke damage but allow heavier staining to bleed through. Use a roller with appropriate nap for your ceiling texture, shorter nap for smooth surfaces, longer nap for textured ceilings. Allow primer to dry per manufacturer instructions (usually 2 to 4 hours). Then apply your topcoat paint, matching the existing ceiling color and finish. Most ceilings use flat white latex paint, but check your existing finish first.

  • Remove all furniture or cover securely with plastic sheeting, not cloth drop cloths that let paint mist through
  • Apply stain blocking primer in thin, even coats using a roller, cutting in edges with a brush first
  • Allow primer to dry completely, checking that no staining shows through before proceeding
  • Apply first topcoat of ceiling paint, working in one direction with overlapping strokes
  • Let first coat dry 4 to 6 hours, then inspect coverage under good lighting
  • Apply second topcoat if needed for even color and complete coverage of primer

Removing Smoke Odor and Deodorizing After Soot Cleanup

bFId_T1wQuWSjP7wKNSGyw

Smoke odor persists even after visible soot removal because microscopic particles embed in porous materials throughout the room and in your ventilation system. The smell isn’t just in your ceiling. It’s in walls, insulation, ductwork, and any fabric or porous surface the smoke touched. Soot particles release odor molecules continuously until they’re sealed or removed completely.

Natural deodorizing methods work for light to moderate smoke odor. Place open containers of baking soda around the room and on top of furniture to absorb odor molecules from the air. Replace every few days until smell dissipates. Set out bowls of white vinegar, which neutralizes smoke odor through mild acidity. Position activated charcoal bags near the formerly soiled ceiling area. These absorb odors more effectively than baking soda and last for months. Increase air circulation with fans and open windows to flush out odor laden air and bring fresh air in. For persistent odor that survives these methods for more than a week, professional ozone treatment becomes necessary. Ozone generators produce O3 molecules that chemically break down odor compounds, but the process requires evacuating the space completely and running the equipment for hours.

  • Sprinkle baking soda on carpets and upholstered furniture, let sit overnight, then vacuum thoroughly with HEPA filter
  • Wash all removable fabric items (curtains, throw pillows, blankets) that were in the room during smoke exposure
  • Wipe down all hard surfaces including walls, trim, and furniture with diluted vinegar solution (1 cup vinegar per gallon water)
  • Change HVAC filters immediately and run the system with windows open to flush contaminated air from ductwork
  • Place activated charcoal bags in closed spaces like closets where odor concentrates and air circulation is limited

Prevention Methods to Minimize Future Ceiling Soot Accumulation

gXrmyI3HTYyN_e_GOJ2LeQ

Prevention is easier than cleanup, and source control reduces the maintenance burden significantly. Most ceiling soot problems develop gradually from repeated exposure to combustion sources that seem harmless individually but accumulate deposits over time.

Maintain proper ventilation during any combustion activities. Run kitchen exhaust fans when cooking, especially when frying or using high heat that produces smoke. Open windows when burning candles to prevent smoke buildup in stagnant air. Have your furnace, water heater, and gas appliances inspected annually to ensure complete combustion with proper venting. Clean or replace HVAC filters every 1 to 3 months to capture airborne particles before they settle on ceilings. If you use a fireplace or wood stove, ensure the damper opens fully and the chimney draws properly before lighting fires. Schedule professional chimney cleaning annually if you burn wood regularly. Creosote buildup restricts airflow and forces smoke into your home. Choose higher quality candles with cotton wicks and natural wax (soy or beeswax) instead of paraffin candles that produce more soot.

  1. Install and use exhaust fans in kitchen and bathrooms during and for 15 minutes after activities that generate smoke or steam
  2. Position candles away from air vents and ceiling fans that spread smoke particles across larger areas
  3. Trim candle wicks to 1/4 inch before each use to reduce smoking and soot production
  4. Schedule annual professional inspection and cleaning of all fuel burning appliances and venting systems
  5. Replace furnace filters on schedule and upgrade to higher MERV rated filters that capture smaller particles
  6. Avoid burning materials indoors that aren’t intended for indoor use (never burn trash, treated wood, or outdoor fire pit materials in fireplace)

When to Call Professional Restoration Services for Soot Damage

4byozX5OQqWExbIcKSr5Mw

Minor soot from occasional candle use or small cooking mishaps stays manageable with DIY approaches, but extensive smoke damage from fires or furnace malfunctions requires professional restoration services with specialized equipment and expertise. The difference comes down to penetration depth, contaminated area size, and health risks from the specific type of soot present.

Professional restoration teams use HEPA air scrubbers that filter the entire room’s air volume multiple times per hour, removing airborne particles that DIY cleaning stirs up. Thermal foggers and ozone generators neutralize odors chemically rather than just covering them. Hydroxyl generators break down odor molecules without requiring building evacuation. They also assess structural damage you might not see, soot that’s penetrated into wall cavities, insulation, or HVAC systems, where it continues releasing odor and particles. Professional work for moderate whole house soot damage typically costs $2,000 to $8,000 depending on severity and home size, with projects taking 3 to 10 days including drying time. That investment prevents ongoing health problems and protects your home’s value.

Insurance documentation requires professional assessment in most cases anyway. If you’re filing a claim for fire or smoke damage, insurance companies expect detailed scope documentation, moisture readings, and restoration protocols that meet industry standards. Even moderate damage benefits from professional evaluation that identifies hidden problems before you invest DIY time in incomplete fixes. Professional fire and smoke damage restoration addresses the complete scope including areas homeowners typically miss, preventing problems from returning months later.

  • Heavy soot coverage affecting multiple rooms or entire floors rather than isolated ceiling spots
  • Greasy, sticky soot that doesn’t respond to mild cleaning solutions and keeps returning
  • Smoke odor that persists more than one week after thorough cleaning and deodorizing attempts
  • Any soot from structure fires, even small contained fires that were quickly extinguished
  • Soot from furnace or heating system malfunction, which may contain hazardous combustion byproducts
  • Visible soot inside air vents or returns, indicating HVAC system contamination throughout the house
  • Textured ceiling damage, cracking, or discoloration beyond surface staining that suggests underlying structural problems

Cost and Time Estimates for Ceiling Soot Removal Projects

TV_Rj02iSzywZog4F0r7OA

Typical timeframes vary based on contamination severity and ceiling area. A small spot cleaning project for light soot above a candle location takes 1 to 2 hours including setup and cleanup. Single room ceiling cleaning with moderate soot coverage requires 3 to 5 hours for the initial cleaning cycle, plus drying time before you can assess results. Multiple rooms extend the timeline proportionally, and you’ll often need 1 to 2 additional cleaning cycles spaced a day apart for heavily soiled areas.

DIY costs stay reasonable for most projects when you already own basic supplies. Budget $30 to $60 for specialty items like dry cleaning sponges, TSP, and stain blocking primer if repainting becomes necessary. Professional service pricing reflects the labor intensity and specialized equipment required. Companies charge by square footage for cleaning and restoration, with minimum service charges for small jobs. The cost benefit analysis tips toward DIY for isolated spots or single rooms with light to moderate soot, but extensive contamination costs less professionally when you factor in your time, rental equipment needs, and risk of incomplete results requiring professional redo anyway.

Project Scope DIY Time DIY Cost Professional Cost
Small area spot cleaning (under 50 sq ft) 1 to 2 hours $20 to $40 $150 to $300 minimum
Single room (100 to 200 sq ft ceiling) 4 to 6 hours over 2 days $40 to $80 $300 to $600
Multiple rooms (500 to 800 sq ft ceiling) 12 to 20 hours over 3 to 4 days $100 to $200 $800 to $2,000
Whole house (1,500+ sq ft ceiling) 30 to 50 hours over 1 to 2 weeks $300 to $500 $2,000 to $5,000

Cleaning Adjacent Surfaces and Surrounding Areas After Ceiling Work

LGOfjlvtRuuDpX3mGIll9w

Ceiling soot rarely stays isolated. Smoke particles settle on walls, light fixtures, ceiling fans, and furnishings throughout the affected area. Cleaning only the ceiling leaves contamination sources that’ll continue releasing odor and may transfer soot back to your freshly cleaned ceiling through air movement. Complete cleanup prevents re-contamination and addresses the full scope of smoke damage.

Light fixtures and ceiling fans collect heavy soot deposits because they’re closest to the ceiling and often generate heat that attracts smoke particles. Remove light globes and fixture covers, then wash them in warm soapy water. Wipe down fixture hardware and fan blades with damp cloths using the same mild cleaning solution you used for ceiling work. Check the area where fixtures mount to the ceiling. Soot often concentrates in these recessed areas. For walls showing soot spread, use the same dry sponge method first, then damp cleaning if needed. Work from top to bottom so falling particles don’t recontaminate cleaned areas. Vacuum soft materials first using HEPA filter and upholstery attachment, then consider professional cleaning services for fabrics, curtains, and upholstery if odor or staining persists.

Dispose of used dry sponges, contaminated cleaning cloths, and soot filled vacuum bags as regular household waste. Soot from typical household sources doesn’t require hazardous waste handling. However, empty liquid cleaning solutions containing TSP or ammonia down a drain with plenty of running water rather than pouring large quantities at once. Don’t dump chemical solutions outside where they can enter storm drains or groundwater. After completing all cleaning, run a final inspection with good lighting: check corners where walls meet ceiling, look inside closets that might have been missed, verify that air vents are clean, and confirm all fixtures are reassembled properly. Make notes if any areas need repainting or additional attention so you can address them before considering the project complete.

Final Words

Cleaning soot off ceiling surfaces takes patience and the right sequence. Start with dry methods, move to gentle cleaning solutions, and save stronger treatments for stubborn stains that don’t lift easily.

Most homeowner-level soot cleanup takes a few hours if you work systematically and let each step dry properly.

If you’re looking at heavy deposits, persistent odor, or damage that spreads beyond the ceiling, that’s when you bring in pros who have the equipment and sealing methods to finish it right. Your home deserves a clean outcome that lasts.

FAQ

Does Dawn dish soap remove soot from ceilings?

Dawn dish soap can remove light soot deposits when mixed properly (1 tablespoon per gallon of warm water with 1 tablespoon ammonia). It works best after you vacuum loose soot first and use dry cleaning sponges, but stubborn carbon buildup may need stronger solutions like TSP.

Are soot stains on ceilings permanent?

Soot stains on ceilings are not always permanent, but heavy deposits can penetrate porous surfaces like textured or popcorn ceilings. Multiple gentle cleaning cycles often lift most staining, though severely penetrated discoloration may require stain-blocking primer and repainting as the final solution.

What will dissolve soot on ceiling surfaces?

Solutions that dissolve soot include mild dish soap with ammonia in warm water for light deposits, TSP (trisodium phosphate) for stubborn carbon buildup, and small amounts of denatured alcohol for oily residue. Always start with gentler solutions and progress to stronger cleaners only when needed.

Does Magic Eraser remove soot from walls and ceilings?

Magic Erasers can remove some soot but aren’t the best choice for ceilings because they require scrubbing pressure that pushes soot deeper into porous materials. Dry cleaning sponges made of vulcanized rubber work better because they lift soot without smearing when used with gentle blotting motions.

How long does it take to clean soot off a ceiling?

Cleaning soot off a ceiling typically takes 2-4 hours for initial work in an average room, but complete drying time extends the process to 4-8 hours total. Heavy deposits may require 2-3 cleaning cycles with drying time between applications for best results.

Can I use a regular vacuum to remove soot from my ceiling?

Regular household vacuums without HEPA filters will blow soot particles back into the air, making the problem worse. Use only vacuums with HEPA filters and soft brush attachments, holding the nozzle 1-2 inches from textured surfaces to avoid embedding particles deeper.

What safety equipment do I need for cleaning ceiling soot?

Safety equipment for cleaning ceiling soot includes an N95 or better dust mask, safety goggles, rubber gloves, and long sleeves to prevent skin contact and inhalation. Open windows and position fans to create cross-ventilation pushing air outside before starting cleanup work.

Why should I use a dry cleaning sponge before wet cleaning soot?

Dry cleaning sponges lift soot without water, preventing smearing that happens when you start with wet methods before removing loose particles. These vulcanized rubber sponges work by blotting and absorbing soot when wiped gently with straight overlapping strokes and turned frequently.

When does ceiling soot damage require professional restoration?

Ceiling soot damage requires professional restoration when it results from fires, furnace malfunctions, or covers large areas with heavy deposits. Professional services use specialized equipment like HEPA air scrubbers and thermal foggers that DIY methods can’t match for extensive contamination.

How do I remove smoke odor after cleaning soot from my ceiling?

Smoke odor removal after soot cleaning requires air circulation, activated charcoal, baking soda placement, or vinegar bowls to absorb embedded smells in porous materials. Severe odor cases that persist after cleaning may need professional ozone treatments to fully neutralize the smell.

What type of primer prevents soot stains from bleeding through paint?

Stain-blocking primer prevents soot stains from bleeding through new paint by sealing discoloration that cleaning couldn’t remove. Apply this primer after the ceiling dries completely, then finish with topcoat paint matched to your existing ceiling color for seamless results.

How do I clean soot from popcorn or textured ceilings?

Cleaning soot from popcorn or textured ceilings requires extra gentleness because the porous surface absorbs moisture and damages easily. Use HEPA vacuum with light touch, dry cleaning sponges with blotting motions, and barely damp cloths, avoiding oversaturation that causes texture collapse.

Professional Mold Remediation Service: Safe & Expert Results

0

Are you sure your DIY mold cleanup got every last spot? Many homeowners unknowingly miss hidden mold that can put your family at risk and lead to expensive repairs. We use state-of-the-art tools (like air scrubbers that clean the air, HEPA vacuums that trap tiny mold particles, and moisture meters that check for hidden water) to find and remove all mold. Our certified team follows strict safety steps to give you a thorough and lasting cleanup. Trust our professionals to make your home safer and leave mold in the past.

Why Professional Mold Remediation Service Is Essential for Safe Mold Removal

Mold is found in almost half of all homes. It can damage your house and pose health risks. When you try to remove mold yourself, you may miss hidden patches. This can allow mold to return and cost you more in the long run. Our certified experts use industrial-grade air scrubbers (machines that clean the air), HEPA vacuums (devices that trap tiny mold particles), and moisture meters (tools that detect dampness) to find mold in every corner.

Our licensed team follows strict safety steps to contain the affected area and prevent mold spores from spreading. They wear protective gear (PPE) to stay safe during cleanup. With our 24/7 emergency response, we quickly act to reduce health risks and prevent further damage.

We use specialized equipment and proven techniques to remove mold and address the moisture that causes it. This thorough method offers a long-lasting solution compared to temporary DIY fixes. You can trust our team to deliver safe and effective mold removal every time.

Certifications and Expertise of Licensed Mold Removal Specialists in Mold Remediation Service

img-1.jpg

We have trained mold removal specialists who hold state licenses. We follow EPA mold control guidelines (rules by the Environmental Protection Agency for mold safety) and government cleanup standards. Each technician completes fungal hazard training (steps to safely handle mold) so they can manage various mold issues. Our thorough inspections ensure that no hidden mold is left behind.

Our team members carry important abatement certifications and cleanup contractor licenses. These credentials show that we stay current on cleanup standards and the latest mold removal methods. We use trusted cleaning and inspection techniques to get a clear picture of the affected areas and guide our work.

Every step of our work is fully documented. We record key inspections, moisture readings, and spore tests to support our quality and help with both insurance claims and government reviews. Third-party clearance testing also confirms that the mold has been effectively removed and that your home's air meets strict health standards.

We keep you informed at every stage. We explain our findings and the steps we take, from containment to final testing, so you understand how each measure protects your home. With solid training, proper licensing, and careful oversight, our team consistently delivers safe and expert mold remediation you can trust.

Professional mold remediation service: Safe & Expert Results

Detailed Assessment

We start by carefully inspecting your property. Our team uses moisture meters (tools that measure wetness) and lab spore tests (simple tests to find mold particles) to check every area. This helps us understand the full mold impact and plan a targeted clean-up.

Containment and Isolation

Once we know where the mold is, we secure the area. We install sealed barriers to keep mold spores from drifting elsewhere. We also use negative air machines (devices that pull in and filter the air) to stop the spores from spreading to other parts of your home.

Mold Removal and Cleaning

Next, our certified crew gets to work. We use HEPA-filter vacuums (machines that trap tiny mold particles) and antimicrobial sprays to clean up the mold. We treat both parts you can see and hidden areas like air ducts. Our process helps return surfaces back to normal.

Drying and Dehumidification

After cleaning, we remove any leftover moisture with commercial dehumidifiers (machines that pull moisture out of the air) and high-flow fans. We lower the humidity to less than 15%, so mold cannot grow back. This step is very important to prevent future problems.

Final Clearance Testing

Before we wrap up, we run air tests to check mold spore levels. This final check makes sure your home meets EPA and state air quality guidelines. Only then do we consider the job complete.

Step Description Equipment
Detailed Assessment Inspection using moisture meters and spore tests Moisture meters, spore test kits
Containment and Isolation Sealed barriers and negative air machines keep mold contained Containment barriers, negative air machines
Mold Removal and Cleaning HEPA vacuums and antimicrobial sprays remove mold HEPA vacuums, antimicrobial sprays
Drying and Dehumidification Drying equipment reduces humidity to below 15% Commercial dehumidifiers, high-flow fans
Final Clearance Testing Air tests confirm mold spore levels are safe Air sampling tools

Transparent Pricing and Cost Analysis for Professional Mold Remediation Service

img-2.jpg

We know how stressful home damage can be, so we keep our pricing simple and clear. We explain every cost for cleaning up mold (removing harmful mold from your home) so you know exactly what you're paying for. Your final cost depends on factors like the mold's severity, the size of the affected area, and the steps needed to contain it safely.

Key cost factors include:

  • Affected square footage
  • Type and spread of mold
  • Ease of access and cleaning challenges
  • Containment and cleaning of HVAC ducts (air system parts)
  • Moving items for specialized cleaning

We use a square foot pricing method. This means we calculate the cost based on the size of the area with mold. It gives you a clear estimate based on how much mold there is and the special work needed at your home.

For larger jobs, we offer financing options so you can manage costs without delaying the cleanup. Our detailed, upfront quote helps you compare our professional service to the risks and extra work of doing it yourself. When you choose our team, you get a safe, complete cleanup that helps prevent future problems.

Case Studies and Client Testimonials of Professional Mold Remediation Service

In Rochester, MN, our team handled a basement cleanup in just 48 hours. We removed all mold spores and restored the strength of the structure. One client said, "The response was fast and thorough. Our basement is now safe, and the work was done with clear communication every step of the way." This project is one of our top mold removal success stories, showing how we quickly and effectively manage mold issues.

In La Crosse, WI, we worked on a commercial property cleanup. We carefully packed out electronics and dried important documents. The client shared, "I was impressed with the 24/7 emergency response and the return of our documents to their pre-mold condition. It exceeded our expectations." This feedback is one of many that highlight our honest methods and clear updates.

Our real-world projects have earned us many positive reviews because we work hard to restore your space fast and safely. We build trust with every project we complete.

Ensuring Compliance and Insurance Support with Professional Mold Remediation Service

img-3.jpg

We document every step of our work with clear photos, moisture readings (measures of wetness), and clearance reports. This record helps your insurance adjusters understand the work and supports your mold removal claims. We stick to EPA mold control guidelines (government rules for safe mold removal) and always follow local rules.

Our team captures all the details you need. We take photos before, during, and after our work. We also record moisture levels to show how our drying and cleaning worked. These clear records help you build a strong insurance claim and avoid future disputes.

We know filing an insurance claim can be overwhelming. That’s why we help with the paperwork and show you which documents to keep. We explain your coverage for fungal damage (mold-related issues) and share our best practices to document every step.

By following these strict rules, we not only protect your home but also make the claims process easier. With thorough records and clear reports, you can have peace of mind knowing our work meets all the required standards.

Preventive Maintenance and Annual Inspections by Professional Mold Remediation Service

Keeping your home safe from mold starts with regular checks and maintenance. When you sign up for our inspection program, we schedule visits to spot moisture problems early, before mold has a chance to grow. We check hidden spots and areas that often get damp, so even small issues are found quickly. Did you know many mold problems are avoided simply by catching moisture early? This can save you hundreds of dollars in repairs.

We stick to strict safety rules during our cleanup work. Our team recommends better ventilation and uses special anti-fungal treatments (products that stop mold) to keep your home mold-free and your air healthy.

Our service also covers regular HVAC and duct cleaning. We clean the air ducts and vents to remove dust and mold spores before they start circulating. This protects your home’s structure and your health.

By choosing our ongoing maintenance, you invest in long-term protection. We work hard to keep mold out so you can enjoy a safe and comfortable home.

Final Words

In the action from detailed assessments to rigorous containment and cleaning, we chart a path that stops mold in its tracks. We showed how licensed experts use modern tools like moisture meters and HEPA vacuums to safely remove mold, prevent future issues, and lower overall costs.

Our guide also covered transparent pricing, clear documentation, and insurance support. Experience the calm of a home restored by a professional mold remediation service, and know that brighter days lie ahead.

FAQ

How do I find a professional mold remediation service near me, such as in California or Texas?

Finding a local professional mold remediation service means looking for licensed experts in your area. You can search online, check reviews, or ask your neighbors for trusted recommendations.

What is the cost of professional mold remediation services?

Understanding the cost of professional mold removal starts with knowing that fees depend on mold severity, square footage, and specific treatments. Professionals provide detailed, upfront quotes without hidden charges.

Who pays for mold remediation services?

Who pays for mold remediation often depends on your insurance policy and damage details. Some policies cover mold removal, but homeowners typically work with adjusters to determine coverage.

Is professional mold removal worth it?

The value of professional mold removal shows in its ability to prevent recurring mold and structural harm. Certified experts use advanced equipment to ensure safe, thorough results that DIY methods may miss.

What do professionals do to get rid of mold?

Professionals begin by assessing the area with moisture meters and spore sampling, then isolate the zone with containment barriers. They use HEPA vacuums and antimicrobial treatments, followed by final clearance testing.

Who should I call for mold inspection and remediation services?

You should call a licensed remediation company to handle mold inspections and removal. These experts offer thorough evaluations and follow strict EPA and local guidelines to ensure your safety.

How to Dry Out Wet Subfloor Fast and Safely

0

You’re looking at water under your floor, and the clock’s already ticking. Mold can start growing on damp surfaces within 24 to 48 hours after flooding occurs. The good news? Most wet subfloors can be saved if you act fast and dry them correctly. This guide walks through exactly what to do first, what equipment you actually need, how to know when the subfloor’s truly dry, and when to call in help versus handling it yourself.

Immediate Steps and Complete Drying Process Overview

owJ_pK5aSzGXZrESvzyicA

You’re looking at water under your floor, and the clock’s already ticking. Mold can start growing on damp surfaces within 24 to 48 hours after flooding occurs. You need to start drying now, not tomorrow.

Step Action Equipment Needed Duration
1 Shut off electricity to affected areas Circuit breaker access 5 minutes
2 Stop water source and extract standing water Submersible pump or wet-dry vacuum 1-4 hours
3 Remove flooring and wet underlayment Pry bar, utility knife, gloves 2-6 hours
4 Set up air circulation across subfloor Air movers or box fans (3-4 units) 15-30 minutes
5 Run dehumidifiers continuously Commercial or residential dehumidifier 3-14 days
6 Monitor moisture levels daily Moisture meter 5 minutes per day
7 Apply antimicrobial treatment if needed EPA-registered antimicrobial spray 30-60 minutes
8 Verify dryness before reinstalling flooring Moisture meter 10 minutes

This table gives you the complete roadmap for drying a wet subfloor from start to finish. The sections that follow break down equipment specs, material-specific drying approaches, moisture testing techniques, and guidance on when you need professional help versus when you can handle it yourself.

Here’s the detailed process for each step.

Safety and electrical shutdown. Turn off electricity at the circuit breaker to all affected rooms before you touch anything wet. Water and electricity create a deadly combination, and even a small amount of moisture can conduct current through wet wood subflooring. If water’s reached electrical outlets or your breaker box is in the flooded area, call an electrician before you do anything else.

Water source identification and stoppage. Find where the water’s coming from and stop it. Shut off the main water valve if a pipe burst. Turn off the supply line if it’s a leaking appliance. If it’s groundwater seepage, you’ll need to address drainage, but first focus on what’s already inside. Document the source with photos for insurance purposes.

Standing water removal. For large amounts of standing water (more than an inch deep across a room), submersible pumps work best, moving hundreds of gallons per hour. Wet-dry vacuums handle smaller floods and give you more control in tight spaces. Start from the farthest point and work toward your drainage exit. Empty vacuum tanks frequently. They fill fast.

Flooring and underlayment removal. Most wet subfloor situations require removing the flooring above to access the subfloor surface. Carpet padding has to be removed and tossed in most flood cases because it acts like a sponge and is ridiculously hard to dry thoroughly. Laminate planks need to come up to reach the subfloor underneath. Pull up sections carefully if you’re hoping to save the flooring, but plan on replacement if water sat for more than a few hours.

Air circulation setup. Air movers beat standard box fans for blowing air across floors to speed up evaporation. Position them at 45-degree angles to the wet subfloor so air skims across the surface rather than blowing straight down. Use three to four units for an average-sized room, spacing them to create continuous airflow across the entire wet area. Point one toward an open window or door if outside air’s drier than interior air.

Dehumidifier operation. Dehumidifiers need to run continuously with regular reservoir emptying to pull moisture from air. A residential unit removes 50 to 70 pints per day, while commercial models handle 150-plus pints. Place the unit in the center of the affected space, not against a wall where airflow gets blocked. Empty the collection tank every 8 to 12 hours, or connect a drain hose if the model allows it. The goal is dropping relative humidity below 50 percent.

Moisture meter testing. Moisture meters give you objective measurement instead of guessing based on how the wood feels. Test the subfloor in multiple spots, especially near where standing water pooled deepest. Wood-based subflooring should read below 16 percent moisture content before you reinstall flooring, with 12 to 14 percent being ideal. Concrete slabs need different testing. We’ll cover that in the materials section.

Completion verification. Before calling it done, verify that moisture readings stay consistent over 24 to 48 hours without equipment running. A subfloor might feel dry but still hold moisture deeper in the material that’ll wick back to the surface once you stop drying. Retest after the equipment’s been off for a day. If readings climb back up, you’re not finished yet.

Continuous monitoring matters throughout this process because conditions change as drying moves forward. Check moisture readings daily and adjust equipment placement if certain areas aren’t drying as fast. Regular drying often requires waiting weeks or even a couple of months to reach appropriate moisture content levels, especially in below-grade basements where concrete walls hold moisture longer than above-grade spaces. The specific timeline depends on how saturated the subfloor got, what material it’s made from, your indoor humidity levels, and how much air circulation you can maintain.

Wet Subfloor Material Types and Drying Methods

hdJ1UAM_SXyn5dGHFXlDDQ

The material your subfloor’s made from determines how it absorbs water, how long drying takes, and whether you’re looking at repairs or replacement. Wood-based subflooring soaks up moisture and swells, concrete holds moisture in its pores and releases it slowly, and engineered products can delaminate when their bonded layers separate.

Subfloor Material Drying Challenges Recommended Approach Typical Drying Time
Plywood Absorbs water into wood layers, prone to delamination if soaked through Remove flooring, direct air movers across surface, monitor for warping 5-10 days
OSB (Oriented Strand Board) Swells significantly when wet, edges deteriorate faster than centers Aggressive airflow on both sides if possible, expect replacement if edges crumble 7-14 days if salvageable
Concrete Slab Holds moisture below surface, vapor transmission continues for weeks Surface drying with dehumidification, calcium chloride test for deep moisture 14-30 days
Engineered Wood Layers separate when adhesive fails, thin veneer vulnerable to damage Gentle drying to prevent further delamination, often requires replacement 3-7 days before assessment

Wood-based subfloor materials should dry to 12 to 14 percent moisture content before you reinstall flooring over them. You can push the upper limit to 16 percent in high-humidity climates, but going above that risks trapping moisture that’ll cause problems later. Test in multiple locations because edges and seams dry slower than open expanses. If one section reads 18 percent while the rest measures 13 percent, keep drying until the wet spots come down.

Below-grade basements naturally dry slower than above-grade spaces, which hurts subfloor moisture levels even after you’ve removed standing water. Modern homes with poured concrete basement walls retain more moisture compared to older block wall construction, creating subfloor drying challenges that extend timelines by a week or more. The concrete acts like a moisture reservoir that keeps feeding humidity into the air above it. That’s why commercial dehumidifiers make a bigger difference in basements than residential units do upstairs.

Flooring and Floor Covering Removal for Subfloor Access

ib61OlxERlaOjHapm1Nmog

You can’t dry a subfloor you can’t reach. Most floor coverings create a moisture barrier that traps water against the subfloor surface, which is exactly what you need to prevent. Getting access to the subfloor means pulling up enough flooring to expose the wet areas, and in many cases, that flooring isn’t going back down.

Carpet and Padding Removal

Carpet padding acts like a sponge and has to be removed and tossed in most flood cases. It’s designed to absorb impact, which also means it absorbs water fast and holds it against the subfloor. By the time you notice the carpet’s wet, the padding underneath is usually completely saturated. Roll it up, bag it, and get it out of the house. Wet padding also creates ideal conditions for mold growth within that 24 to 48 hour window.

The carpet itself might be salvageable if you act within the first few hours and it’s only moisture, not contaminated water. Pull it up, extract as much water as possible with a wet-dry vacuum, and hang it to dry in a space with good airflow. But if sewage or ground water soaked it, plan on replacement regardless of timing.

Hard Surface Flooring Considerations

Laminate planks have to be removed in most cases to access and dry subfloor underneath because laminate doesn’t breathe. The planks create a sealed surface, and moisture trapped beneath them has nowhere to go. Laminate also swells and warps when wet, so even if you want to save it, it’s often too damaged to reinstall.

Tile’s more forgiving because the grout lines allow some air movement, though tile grout is porous and can absorb water despite tile being water-resistant. You might not need to remove tile if the water exposure was brief and you can position air movers to push air across the grout lines. Test the subfloor moisture through the grout with a moisture meter probe to determine if drying’s happening.

Hardwood floors should be watched for warping or buckling signs during the drying process. If boards start cupping or crowning, you’re either drying too fast or the moisture content was too high to salvage them. In many cases, you can leave hardwood in place and dry it along with the subfloor if you catch the water quickly, but you need to watch for signs the wood’s moving.

Underlayment Assessment

Underlayment sits between your subfloor and finished flooring, and it’s often the forgotten layer that stays wet long after everything else appears dry. Foam underlayment used under laminate traps moisture and won’t dry effectively. Paper-backed underlayment used under vinyl disintegrates when soaked. If water reached the underlayment, it usually needs to be removed.

Cork and rubber underlayment materials have similar issues. They hold moisture and create a barrier to airflow. The exception is breathable rosin paper or certain mesh products designed to allow vapor transmission, but even those dry faster when removed. When in doubt, pull it up. Underlayment’s inexpensive compared to the cost of dealing with mold growth later.

Mold Prevention and Safety During Wet Subfloor Drying

d2xw5wnOQAiptyrMgvCBUA

Turn off electricity before beginning water extraction work to prevent hazards. This isn’t optional. Water conducts electricity, and wet subflooring can energize metal fasteners, nails, and even adjacent framing. Locate your electrical panel and shut off breakers to any room with water damage. If your panel’s in the flooded area or you’re unsure which breakers control which rooms, shut off the main breaker and work with extension cords from an unaffected area.

Here’s what you need to stay safe during the drying process.

Wear rubber gloves rated for water work to protect against electrical shock if energized components remain, plus bacteria and contaminants in the water. Use an N95 respirator or better when working in spaces where mold may already be growing or when applying antimicrobial treatments. Wear eye protection, especially when removing wet materials overhead or when spraying cleaning solutions, to prevent splashing into eyes. Make sure you’ve got adequate ventilation by opening windows and running exhaust fans to prevent airborne spore concentration buildup as materials dry. Apply antimicrobial treatment after initial water extraction but before complete drying to prevent spore establishment on damp surfaces. Never attempt sewage backup cleanup yourself. Sewage backup water is a biohazard requiring certified professional handling due to bacteria, viruses, and parasites present.

Early mold growth shows up as dark spots or discoloration on wood surfaces, usually in corners or along seams where moisture pools. You might smell it before you see it, that musty, earthy odor that indicates active spore growth. If you spot mold forming during drying, increase air circulation in that area and consider applying antimicrobial treatment to stop further spread. Small spots (less than a few square feet) can be treated with proper safety gear. Larger infestations mean you’re past the DIY stage.

Health hazards extend beyond mold. Contaminated water carries bacteria that cause illness through skin contact or breathing airborne particles as materials dry. If the water came from outside, from a toilet backup, or sat stagnant for more than 48 hours, treat it as potentially contaminated. Professional restoration services have the protective equipment and disposal protocols to handle contaminated materials safely, which matters when you’re talking about subflooring that affects your entire home’s air quality.

Signs of Structural Damage and Irreparable Wet Subfloor

NI8w9S1LQWed4hL5RfiGQg

Surface moisture dries out, but structural damage stays. Knowing the difference between wet material and compromised material determines whether you’re drying or replacing. Long moisture exposure causes wood-based flooring to warp and buckle, changing the shape and integrity of the subfloor itself. At that point, pulling out moisture doesn’t restore what the wood used to be.

Damage Sign Severity Level Salvageable or Replace
Surface warping or cupping in isolated spots Moderate Salvageable with aggressive drying and monitoring
Widespread buckling or separation between panels Severe Replace affected sections
Soft, spongy areas that compress under pressure Severe Replace, indicates wood rot or delamination
Visible black mold penetration into wood grain Severe Replace, mold has colonized the material
Persistent musty odor after drying to acceptable moisture levels Moderate to Severe Replace, odor indicates trapped moisture or mold inside layers
Floor joists showing water staining or deflection Critical Requires structural evaluation and likely replacement

Water can cause delamination in vinyl and engineered wood flooring layers, separating the bonded materials that make up the product. When this happens, the flooring literally comes apart, layers peeling away from each other. You’ll see it as bubbling, separating edges, or a floor that feels uneven when you walk on it. Delamination’s irreversible. The adhesives that failed won’t re-bond when dry.

Subfloor and joist water penetration compromises home structural integrity in ways that aren’t always immediately visible. Water that reaches floor joists can weaken the connections between joists and beams, or cause joists to sag as the wood loses rigidity. If you notice floors that bounce more than they used to, or if you can see sagging when looking at joists from below, water’s affected structural members. This requires professional assessment through water damage restoration services because you’re talking about the support system for your entire floor.

A structural inspection looks beyond moisture content to evaluate whether materials can still carry their designed loads. A floor joist might read dry on a moisture meter but have lost 30 percent of its load capacity due to wood rot or compromised grain structure. Professional restoration teams identify these concerns through deflection testing, visual inspection of support connections, and assessment of how materials responded to water exposure. When structural integrity’s questionable, replacement isn’t about being cautious. It’s about maintaining a safe floor.

Basement and Crawl Space Subfloor Drying Challenges

uEkiT3KuQ6mRP8TXk9Uh2w

Above-grade floors dry faster because physics works in your favor. Warm air holds more moisture, and gravity pulls that moisture-laden air away from the drying surface. Below-grade basements naturally dry slower than above-grade spaces, hurting subfloor moisture levels even when you run the same equipment and follow the same process. The ground stays cool, the concrete walls stay damp, and the whole space works against fast drying.

Modern homes with poured concrete basement walls retain more moisture compared to older block wall construction, creating subfloor drying challenges that show up as persistently high relative humidity even after standing water’s gone. Poured concrete’s denser and less permeable than block, which means moisture can’t migrate through the walls the way it used to in older construction. That moisture stays in the basement, feeding humidity into the air that your dehumidifier has to process.

A double-drying method uses one commercial dehumidifier to simultaneously dry multiple levels by drilling a 4-inch hole in the subfloor and blowing heated dry air into the basement. The technique was developed for high-end flooring projects that couldn’t wait weeks for basement subfloors to reach acceptable moisture content. By drying both the basement and the main level at the same time, you reduce relative humidity in the basement while actively drying the subfloor above. The air movement between levels speeds up evaporation in both spaces.

Here’s how it works in practice. Position a commercial dehumidifier in the main level room with the wet subfloor. Drill a 4-inch hole through the subfloor near the center of the wet area, making sure you’re not hitting plumbing or wiring. Attach flexible ductwork to the dehumidifier’s discharge and direct that heated, dry air through the hole into the basement below. The warm, dry air blows across the basement’s ceiling (which is the underside of your wet subfloor) while also reducing humidity in the basement. A single commercial unit running this setup can drop relative humidity in both spaces at once, cutting drying time by 30 to 40 percent compared to single-level drying.

Crawl spaces create different problems. Ground moisture migrates upward through soil into the crawl space, raising humidity even without active flooding. If your crawl space doesn’t have a vapor barrier covering the ground, moisture transmission from the earth below continues regardless of how much you dry the subfloor above. Ventilation alone won’t solve it because you’re fighting a constant moisture source.

Address crawl space moisture by installing a 6-mil polyethylene vapor barrier across the entire ground surface, overlapping seams by 12 inches and sealing the edges where the barrier meets foundation walls. This stops ground moisture from feeding humidity into the space. Then add dehumidification equipment designed for crawl space use, which typically means a unit that tolerates cooler temperatures and higher humidity levels than standard residential dehumidifiers handle. Target relative humidity below 60 percent in the crawl space to prevent the subfloor above from reabsorbing moisture.

Below-grade spaces require longer equipment operation times because the moisture has more places to hide and more sources feeding new humidity into the air. A main-level floor might dry in 5 to 7 days with proper equipment. That same level of water saturation in a basement subfloor might take 10 to 14 days, and a crawl space floor could stretch to 14 to 21 days depending on ground moisture conditions and ventilation.

DIY Versus Professional Restoration for Wet Subfloor

MnnzJokkS3GZmC-lraPt1g

Some wet subfloor situations you can handle yourself, and others you shouldn’t try. The decision factors include how much water you’re dealing with, how long it’s been sitting, where it came from, and whether structural components are affected. Professional water extraction services are critical when water’s been present for more than 48 hours, because at that point, mold growth’s likely started and contamination risks increase.

Scenario DIY Appropriate Professional Required Reason
Small leak caught within 2-4 hours, clean water source Yes No Limited water volume, quick response, manageable with rental equipment
Extensive flooding affecting multiple rooms or entire level No Yes Volume exceeds homeowner equipment capacity, coordination of drying needed
Sewage backup or contaminated water source No Yes Sewage backup water is a biohazard requiring certified professional handling
Water present for 48+ hours before discovery No Yes Mold growth likely established, contamination risk high, structural assessment needed
Visible structural damage, sagging floors, or joist concerns No Yes Structural integrity evaluation requires professional inspection and repair

IICRC-certified technicians have proper training and equipment for water damage restoration, which includes understanding water migration patterns, moisture mapping, proper drying protocols for different materials, and contamination safety. The certification isn’t just a piece of paper. It represents training in building science and restoration standards that DIY efforts usually miss. When a professional maps moisture content across an affected area, they’re identifying hidden pockets of water that’ll cause problems weeks later if you miss them now.

Commercial equipment makes a measurable difference in drying speed and effectiveness. A residential dehumidifier removes 50 to 70 pints per day. A commercial restoration dehumidifier pulls 150 to 200 pints per day and maintains lower relative humidity levels under high-moisture-load conditions. Air movers used by professionals move 2,000 to 3,000 cubic feet per minute compared to 1,000 to 1,500 CFM from rental units. When you’re racing a 48-hour clock before mold establishes, that capacity difference matters.

The cost-benefit analysis gets interesting when you factor in what happens if DIY drying fails. Renting a dehumidifier costs $40 to $70 per day. Renting air movers adds another $30 to $50 per day each. Over a 10-day drying period, you might spend $500 to $800 in rental costs, plus your time and effort. Professional fire and water damage restoration services for a moderate wet subfloor job typically run $1,500 to $3,500 depending on scope. But if DIY drying misses moisture pockets that turn into mold remediation needs a month later, you’re looking at $3,000 to $10,000 in additional costs for mold removal, plus subfloor replacement.

Emergency response timing matters because water damage compounds rapidly. Water that sits for 24 hours penetrates deeper into subfloor materials than water extracted in 4 hours. That deeper penetration extends drying time and increases the likelihood of permanent damage. Professionals respond with equipment and crews within hours, not days, which stops progression before it becomes replacement instead of drying.

Cost Estimates for Wet Subfloor Drying and Repair

BVTht6B_SbudcVSIMnT9nw

Cost varies by region, scope of damage, and whether you’re handling it yourself or hiring professionals. These estimates provide general ranges based on national averages, but your specific situation might run higher or lower depending on local labor rates and material costs.

Here’s what you’re looking at.

Equipment rental for residential dehumidifier: $40-$70 per day, $200-$350 per week. Equipment rental for air mover or fan: $30-$50 per day each, $150-$250 per week each. Moisture meter purchase: $40-$200 depending on pin-type versus pinless and accuracy level. Professional drying service: $150-$400 per day depending on equipment used and square footage affected, typically 5-10 day minimum. Subfloor material replacement (plywood): $45-$75 per sheet installed, covering approximately 32 square feet. Subfloor material replacement (OSB): $35-$55 per sheet installed, covering approximately 32 square feet. Labor for removal and reinstallation of flooring: $2-$6 per square foot depending on flooring type and complexity. Antimicrobial treatment application: $0.50-$2 per square foot for professional-grade products and application. Complete professional restoration package for moderate damage (single room): $1,500-$3,500 including water extraction, drying, monitoring, and basic repairs.

Insurance claim considerations affect whether you proceed with professional restoration or attempt DIY drying. Most homeowner policies cover sudden and accidental water damage, like a burst pipe or appliance failure, but exclude gradual damage from long-term leaks or maintenance issues. Review your policy’s water damage coverage limits and deductible before starting work. Document everything with photos, moisture readings, and receipts regardless of whether you file a claim, because you might need that documentation if damage appears later that’s related to this incident.

Insurance companies typically require professional restoration for claims above your deductible amount because they want documented proof that proper drying protocols were followed. An IICRC-certified company provides that documentation through moisture mapping reports, daily logs, and completion certificates that demonstrate industry-standard procedures. DIY drying rarely produces the documentation insurers require to confirm work was done properly.

Cost escalation happens fast when mold remediation becomes necessary after delayed response. If you wait 3 to 4 days before starting the drying process, mold growth’s likely established and requires professional remediation protocols instead of simple antimicrobial treatment. Mold remediation costs $1,500 to $4,000 for a single room with contained growth, or $10,000-plus for extensive colonization affecting multiple areas. Structural repairs add another layer of expense when long moisture weakens floor joists or causes subfloor delamination. Joist repair or replacement runs $100 to $300 per linear foot, and if water damaged multiple joists, you’re looking at several thousand dollars in framing repairs that could have been avoided with immediate water extraction.

Insurance Claims and Documentation for Subfloor Water Damage

wDn6anYRRhO6damaPWe7Cw

Contact your insurance company within 24 hours of discovering water damage, even if you’re not sure whether you’ll file a claim. Most policies require prompt notification, and delays can complicate coverage. The insurance company will assign an adjuster to assess damage, and that assessment determines what’s covered and what limits apply.

Document everything before you start major work.

Photograph standing water depth, affected areas, water source, and damaged materials from multiple angles showing extent and location. Record initial moisture meter readings across the entire affected area, marking locations so you can retest the same spots later. Document the water source classification: clean water (supply line), gray water (appliance discharge), or sewage backup, as category affects coverage decisions. Keep equipment usage logs showing what equipment ran, where, for how many days, including make and model if using rental units. Save all invoices for professional services, equipment rentals, material purchases, and disposal costs with itemized descriptions. Photograph removed materials before disposal, showing damage severity and why replacement was necessary rather than salvageable. Create a timeline documenting when water damage occurred, when discovered, when extraction started, when drying equipment was deployed, and when moisture readings reached acceptable levels.

Covered scenarios typically include sudden pipe bursts, appliance supply line failures, toilet overflows from internal blockages, and water heater ruptures. Non-covered scenarios usually include gradual seepage from aging plumbing, maintenance-related failures like a deteriorated wax ring under a toilet, ground water seepage due to inadequate drainage, and flood water from external sources requiring separate flood insurance.

Claim adjusters expect to see proof that immediate action was taken to prevent further damage, which the insurance industry calls “mitigation.” If you discovered water at 8 AM but didn’t start extraction until the next day without a justifiable reason, the adjuster might argue that additional damage resulted from delayed response rather than the original water event. That documentation timeline protects you by showing reasonable and prompt action.

Working with IICRC-certified professionals supports claim validity and proper restoration standards because insurance companies recognize IICRC protocols as industry-standard. When a certified technician documents moisture levels, equipment placement, and drying progress, the insurer has objective data showing appropriate restoration procedures were followed. That documentation reduces claim disputes and speeds approval because the work meets recognized restoration standards rather than subjective homeowner judgment about when a floor’s dry enough.

Most policies cover professional restoration costs above your deductible, with typical deductibles ranging from $500 to $2,500. If your damage estimate’s $3,000 and your deductible’s $1,000, the insurance company covers $2,000 of the restoration work. Whether professional restoration makes sense depends on comparing the covered amount to the cost difference between DIY and professional service. If you’d spend $800 on equipment rentals to DIY and the professional quote’s $3,000, you’re paying $1,000 out of pocket (your deductible) either way, making professional service the clear choice for proper documentation and faster completion.

Prevention and Maintenance to Avoid Future Wet Subfloor Issues

8DADWaQkSQSdDOW7O1c95A

Fixing wet subfloor damage once teaches you to prevent it from happening again. Prevention costs a fraction of remediation, and most wet subfloor situations come from predictable sources you can address with regular maintenance and targeted improvements.

Here’s what actually stops water before it reaches your subfloor.

Inspect plumbing supply lines to appliances every 6 months, checking for bulges, cracks, or corrosion especially on washing machine hoses and dishwasher connections. Replace washing machine hoses every 5 years regardless of appearance, as rubber and braided lines deteriorate internally before showing external damage. Install water heater catch pans with drain lines to floor drains or exterior, preventing leaks from flooding floors when units fail. Test sump pumps quarterly by pouring water into the pit to verify the float switch activates and the pump discharges properly. Clean gutters twice per year and make sure downspouts extend at least 6 feet from foundation, directing roof runoff away from basement walls. Install backwater valves on sewer lines if your home’s at risk for sewage backup during heavy rain events. Seal crawl space ground with 6-mil polyethylene vapor barrier, overlapping seams and securing edges to stop ground moisture migration. Grade soil around foundation to slope away at 6 inches drop over first 10 feet, preventing water from pooling against basement walls. Maintain HVAC condensation drain lines with vinegar flushes every 3 months, clearing algae buildup that causes overflow onto floors.

Below-grade moisture control requires more than fixing leaks because concrete naturally transmits moisture from exterior soil through walls into interior space. Modern homes with poured concrete basement walls retain more moisture compared to older block wall construction, creating conditions where even without active water intrusion, basement humidity stays high enough to affect subfloor moisture content. Address this with interior waterproofing membranes on basement walls, perimeter drainage systems that collect groundwater before it enters, and continuous dehumidification maintaining relative humidity below 50 percent.

Vapor barrier installation in crawl spaces controls ground moisture migration that feeds humidity into the space beneath your main floor. Without a vapor barrier, soil moisture evaporates into crawl space air, raising humidity to 70 to 80 percent or higher. That moisture-laden air contacts cooler subfloor surfaces above, condensing on the wood and creating dampness without any liquid water source. A proper vapor barrier with sealed seams stops this transmission at the source.

Early detection signs let you respond quick before minor moisture becomes subfloor saturation. Musty smell in a room indicates moisture and possible mold growth somewhere, often in subflooring or wall cavities before visible signs appear. Floor discoloration or staining, especially near plumbing fixtures, shows water’s been present even if no active leak’s currently visible. Squeaky floors that weren’t squeaky before can indicate subfloor movement from moisture causing wood to swell and shift against fasteners. Peeling vinyl or lifting laminate edges shows moisture underneath affecting adhesive or causing expansion. Any of these signs warrants investigation with a moisture meter before the problem progresses to flood-level damage.

Final Words

Speed matters when dealing with a wet subfloor.

The 24 to 48 hour window before mold takes hold means you need to act now, not tomorrow. Whether you’re renting equipment for a DIY approach or calling in professionals, the key is starting the drying process immediately and monitoring it consistently with a moisture meter until readings hit safe levels.

Learning how to dry out wet subfloor the right way protects your home’s structure, prevents health hazards, and saves you from much larger repair bills down the road.

If the damage is extensive, the water’s been sitting for days, or you’re seeing signs of structural problems, don’t hesitate to bring in certified help. Your home is worth it.

FAQ

How do you pull moisture out of a subfloor?

You pull moisture out of a subfloor by removing standing water first, then running air movers and dehumidifiers continuously to evaporate trapped moisture. Wood-based subfloors typically require several weeks of constant air circulation and moisture removal to reach safe dryness levels before you can reinstall flooring.

What should you do if the subfloor gets wet?

If the subfloor gets wet, shut off electricity to the affected area immediately, stop the water source, remove standing water with pumps or vacuums, and start air circulation within 24 to 48 hours. Remove wet flooring and carpet padding to allow direct airflow across the subfloor surface.

What draws moisture out of wood?

Air movement and low humidity draw moisture out of wood. Air movers blow air across wet wood surfaces to speed evaporation, while dehumidifiers pull water vapor from the surrounding air, creating conditions that force trapped moisture to leave the wood fibers.

How do you dry wet plywood fast at home?

You dry wet plywood fast at home by removing any covering materials, positioning air movers to blow directly across the surface, running a dehumidifier continuously in the space, and ensuring good ventilation. Even with aggressive drying, plywood subfloors typically need one to three weeks to dry completely depending on saturation depth.

How long does it take to dry a wet subfloor?

Drying a wet subfloor takes anywhere from one week to several months depending on material type, saturation level, and location. Above-grade floors with moderate moisture dry faster than below-grade basement subfloors, which naturally hold moisture longer due to concrete wall conditions and limited air exchange.

Can you dry a subfloor without removing flooring?

You cannot effectively dry a subfloor without removing most flooring types. Carpet padding traps moisture and must be removed, laminate planks block airflow completely, and tile prevents evaporation. Only certain breathable floor coverings allow adequate drying without removal.

When does wet subfloor require professional help?

Wet subfloor requires professional help when water has been present for more than 48 hours, when sewage contamination exists, or when you see structural damage like sagging or wood rot. IICRC-certified technicians have commercial-grade equipment and training to handle extensive flooding or category-three water damage safely.

How do you know if a wet subfloor is ruined?

You know a wet subfloor is ruined when you see delamination in plywood layers, soft spots indicating wood rot, persistent musty odor after drying attempts, or visible mold growth penetrating deep into the material. Moisture meter readings that won’t drop below 20 percent after extended drying also signal replacement needs.

What moisture level is safe for subfloor?

A safe moisture level for subfloor is typically 12 to 14 percent or lower before reinstalling flooring. You measure this with a moisture meter, testing multiple spots across the affected area to confirm uniform dryness before moving forward with repairs.

Does basement subfloor dry differently than main level?

Basement subfloor dries slower than main level because below-grade spaces naturally hold more moisture. Modern poured concrete walls retain water compared to older block construction, and limited air exchange in basements extends drying time by weeks or even months compared to above-grade floors.

What equipment do you need to dry wet subfloor?

You need submersible pumps or wet-dry vacuums for water removal, air movers to create surface airflow, dehumidifiers to pull moisture from the air, and a moisture meter to track drying progress. For extensive damage, commercial equipment dries faster than residential models.

Should you treat wet subfloor for mold?

You should treat wet subfloor for mold prevention after initial drying but before complete dryness. Antimicrobial treatment applied to damp surfaces helps prevent spore growth during the extended drying period, especially in below-grade spaces where moisture naturally lingers longer.

Storm Damage Restoration Company: Rapid, Trusted Aid

Has a storm turned your home into chaos overnight? When severe rain and wind hit, every second matters. We're here to secure your property fast and stop more damage. We remove water (water extraction) and board up your home to keep mold (a harmful growth) from starting. We deliver fast, reliable help to restore your safety and peace of mind. Let us show you how quick, clear action can turn a disaster into a manageable fix.

storm damage restoration company: Rapid, Trusted Aid

When a storm strikes, every minute matters. We know you are stressed, and we act fast to secure your home and stop further damage.

Our local team is ready at any hour. We have experts on call 24/7 to respond quickly and help keep your home safe.

We provide services like:

  • Water extraction and fast moisture removal
  • Structural drying with industrial dehumidifiers (machines that pull moisture from the air)
  • Temporary board-up of broken windows and doors
  • Removal of debris from fallen trees and loose materials
  • An initial damage check using moisture meters and infrared scanning (tools that show hidden moisture)

Our repair team moves quickly. They arrive with water extraction tools and industrial dehumidifiers to start working within minutes. We board up windows and doors, and we clear away debris to lower safety risks. This fast action helps prevent mold and further structural problems.

If you need emergency help, call us now. We will work quickly to restore your home and ease your worries.

Certified Damage Assessment Services by a Storm Damage Restoration Company

img-1.jpg

We quickly assess storm damage to your home with a team of certified repair specialists. We use reliable tools like moisture meters (devices that check water levels), thermal imaging cameras (cameras that show hidden water), and hygrometers (tools that measure air humidity) to spot both obvious and hidden issues. Our careful check helps us find signs of mold, rot, and water pockets that might make your home unsafe.

We follow local building codes and insurance rules so that every detail is recorded correctly. We also work with engineers, surveyors, and building experts to give you a clear damage analysis. This consultation helps us plan repairs that restore your home safely and efficiently.

Assessment Type Purpose Equipment Used
Visual Inspection Spot clear structural or cosmetic damage Standard inspection tools
Moisture Mapping Find moisture pockets in walls and floors Moisture meters, probes
Infrared Scanning Reveal hidden water intrusion and mold Infrared thermal camera
Structural Integrity Check Test load-bearing parts for safety Load testers, structural probes

Essential Cleanup and Repair Solutions from Storm Damage Restoration Experts

When a storm strikes, we move quickly to remove water and dry your home. Our team extracts water fast and sets up heavy-duty dehumidifiers (machines that remove moisture from the air). Next, we start sanitizing to lower health risks by using hospital-grade disinfectants (strong cleaning solutions) that cut down harmful germs.

After this initial work, we secure your property by boarding up openings and clearing debris. We remove fallen trees, branches, and loose materials only when needed to keep hazards away. This lets us focus on the extra steps required for complete cleanup.

Once immediate dangers are managed, we begin a full cleanup to ensure long-term safety. We clean air ducts, handle asbestos removal (if harmful material is present), disinfect for COVID-19 (covering every surface), and manage any biohazards. Our thorough COVID-19 disinfection uses advanced methods so you can feel at ease.

img-2.jpg

We work closely with insurance adjusters to make your claim process simple and help lower your costs. We start with a free on-site inspection and damage check that includes a detailed report and clear photos. This way, every bit of damage is noted, making your claim smoother and faster.

Next, we prepare itemized repair cost estimates that match your policy limits. We want you to know what to expect in terms of expenses. If extra cleanup is needed, we offer an emergency quote to cover that work as well. Our detailed numbers help guide your decisions and serve as a trusted record for your claim.

Throughout the process, we offer expert advice on disaster damage and keep in constant touch with your insurance company. By coordinating closely with claim adjusters and staying in regular contact, we work to keep your restoration project moving without delays. Our careful documentation and clear cost review help build your confidence while we secure repair approvals quickly.

Full-Scale Reconstruction and Rebuilding by Storm Damage Restoration Professionals

After a severe storm, we work quickly to rebuild your home or business. We start by safely taking out damaged parts that cannot be saved. Then, we rebuild the structure and fix the foundation (the base that keeps your home steady). We also repair important systems like electrical, plumbing, and HVAC (heating, ventilation, and air conditioning) so everything works safely.

We follow local building rules every step of the way. With over 40 years of experience, we manage the process carefully to prepare your property for the next phase of restoration.

Once the main structure is secure, our team moves on to finishing touches that bring your space back to its pre-loss condition. We install new walls, ceilings, and floors that meet local standards. We then perform final inspections and air quality tests (checks to make sure the air is safe) to confirm every area meets our high safety and performance standards.

We handle every detail with care and professionalism so you can trust that your home or business will be safe and comfortable again.

Proactive Pre-Loss Planning and Risk Assessment by a Storm Damage Restoration Company

img-3.jpg

Before a storm hits, we walk through your property to spot any weak spots and note its current condition. We check every area carefully, listing parts that may be at risk from severe weather. This early review lets us build a clear, custom disaster response plan with gear already staged and steps ready to follow. By understanding your home’s unique features, we set the stage for fast and efficient repairs, cutting down on both damage and repair costs.

Next, we add extra safety measures to protect your home ahead of a storm. We install strong tarping anchors and backup sump pumps (devices that remove water) to keep water away from vulnerable areas. After each event, our team meets to review what happened and improve your plan. These actions help you safeguard your investment and keep your home safe during extreme weather.

Proven Expertise: Certifications, Reviews, and Before-and-After Results from a Storm Damage Restoration Company

We have over 40 years of hands-on experience and have dealt with tough situations like Hurricane Ian. Our team holds state and industry certifications for building repair and fixing damage (mitigation), proving our skill and commitment to quality work.

We share clear before-and-after photos and videos of our projects so you can easily see the difference. We update you regularly and keep you informed every step of the way. Our customer reviews praise our clear communication and reliable expertise, making us one of the top storm damage restoration companies.

Take a look at our gallery and request a free quote by searching for storm damage cleanup near you.

Final Words

In the action, we quickly reacted to every challenge through immediate water extraction, board-up measures, and structural assessments. Our teams used simple yet effective steps to safeguard your home, keeping emergency restoration services near you in mind every step of the way.

We stand ready to help you overcome damage caused by storms. Trust our experience as a storm damage restoration company to restore your property, bringing a safe, renewed space for you and your family.

FAQ

storm damage restoration company near california

When you search for a storm damage restoration company near California, you are looking for local experts ready to deliver 24/7 emergency response, water extraction, board-up services, and debris removal to secure your home swiftly.

storm damage restoration company near texas

When you seek a storm damage restoration company near Texas, you are looking for local professionals who respond quickly with water removal, board-up services, and damage assessments to protect and restore your property immediately.

storm damage restoration company near me

When you look for a storm damage restoration company near you, you want local help that arrives fast to extract water, board up broken areas, clear debris, and perform immediate damage evaluations so your home stays safe.

Best storm damage restoration company

Describing the best storm damage restoration company means selecting a team with proven rapid response, thorough damage assessments, quick water extraction, effective board-ups, and reliable cleanup to restore your property confidently.

Storm restoration companies

The term storm restoration companies refers to groups that provide emergency services such as water extraction, dehumidification, debris removal, and temporary security measures to help homeowners recover quickly after severe weather.

Storm cleanup jobs

Storm cleanup jobs involve essential tasks like water removal, debris clearance, temporary board-ups, and initial damage checks, all designed to reduce further damage and prepare your property for complete restoration.

Water damage restoration company

When you refer to a water damage restoration company, you mean a team that responds rapidly to remove standing water, dry your property with industrial dehumidifiers, secure vulnerable areas, and assess structural damage efficiently.

Flood damage restoration

Flood damage restoration means a comprehensive service that includes water extraction, dehumidification, board-up services, debris removal, and detailed inspections, all aimed at restoring your home to a safe and livable condition quickly.

Property Damage Claim Estimate Process: Complete Workflow

0

Think an insurance estimate is a single number and the job is done?
Not even close.
The estimate process starts the moment you report the loss and runs through inspection, line‑item pricing, supplements, and final payment.
Delays and hidden damage can stretch timelines and cut your settlement if you aren’t ready.
This guide walks you step‑by‑step through the property damage claim estimate process so you’ll know what happens, what to document, how to speed things up, and how to get a repair scope that matches real contractor costs.

Step‑By‑Step Breakdown of the Property Damage Claim Estimate Process

zAur6_wyTuqCPBrax3YQIA

The property damage claim estimate process kicks off the second you report a loss and doesn’t stop until final settlement. You’re looking at eight distinct stages: immediate reporting, insurer assignment of an adjuster, on-site inspection and damage assessment, creation of a line item repair estimate, submission to you for review, negotiation or supplemental requests, approval of the final scope and cost, and issuance of payment. In 2024, the average claim cycle took about 24 days from first notice to initial payment. That’s roughly six days longer than the year before, with catastrophe driven backlogs responsible for most of the delay.

Catastrophe frequency affects claim timelines directly. 2024 recorded 28 catastrophic weather events causing over $92 billion in U.S. damage. In 2023, catastrophic claims accounted for 46 percent of all personal lines property claims, the highest share in seven years. When storms, fires, or floods damage hundreds or thousands of homes at once, insurers schedule adjuster visits in priority order. Field inspections can take days or weeks to arrange, and contractor shortages stretch repair timelines well beyond the initial estimate preparation window.

Here’s how it works:

  1. Report the claim immediately to your insurer by phone or online portal. You’ll provide your policy number, loss date, and a preliminary description of damage.
  2. Receive assignment confirmation from the insurer naming your adjuster and claim number. Log the date, time, and representative name.
  3. Schedule and prepare for the adjuster inspection. Gather photos, receipts for emergency repairs, and any contractor quotes already obtained.
  4. Adjuster conducts on-site walkthrough, documents visible and accessible damage, takes measurements and photographs, and reviews your evidence.
  5. Adjuster prepares a line item estimate using proprietary pricing software and submits it to the insurer for review.
  6. Insurer issues initial settlement offer, often as an actual cash value (ACV) advance minus your deductible, with additional depreciation held until repairs are complete.
  7. You review the estimate and negotiate or request supplements if contractor bids exceed the insurer’s figures or hidden damage is discovered.
  8. Final approval and payment release occur after you provide proof of completed repairs, invoices, and any required permits or inspection certificates.

Adjusters develop initial estimates by measuring damaged areas, counting materials (drywall sheets, linear feet of trim, square footage of flooring), applying unit costs from databases such as Xactimate or RSMeans, and adding labor rates, overhead, and profit margins. Timeline variability stems from property size, access restrictions (multi-story buildings, locked tenants, hazardous conditions), availability of pre-loss documentation, and whether the damage involves straightforward water intrusion or complex fire and structural issues requiring specialist engineers or industrial hygienists.

Early Documentation and Evidence Needed for an Accurate Claim Estimate

YXTLC12PRoGQ5MKi3gAHHg

Documentation quality determines how quickly and accurately an adjuster can price your repairs. Insurers require objective proof of what existed before the loss, what was damaged, and what steps you took to prevent further harm. Photos alone aren’t enough. A complete evidence package includes timestamped visual records, itemized inventories with original purchase information, receipts for any emergency work you authorized, permits pulled for temporary stabilization, and a written log of every phone call and email exchanged with the carrier, adjusters, and contractors.

Incomplete or delayed documentation forces adjusters to make conservative assumptions, lowball line items they can’t verify, or schedule follow-up inspections that stretch the claim cycle by days or weeks. Homeowners who deliver organized, detailed evidence on the first visit help adjusters produce accurate scopes faster, reduce the need for supplements, and support higher settlement offers when contractor bids come in above the insurer’s initial estimate.

You need to collect and provide:

  • Timestamped photographs and video showing all damaged areas from multiple angles, plus undamaged adjacent spaces for comparison. Include close-ups of materials, serial numbers on appliances, and wide shots establishing room layout.
  • Written inventory of damaged personal property listing each item’s description, approximate age, original purchase price, and replacement value. Attach receipts, warranties, or online product listings when available.
  • Receipts and invoices for emergency and temporary repairs such as tarping, board up, water extraction, drying equipment rental, or mold remediation performed immediately after the loss to prevent further damage.
  • Building permits and inspection reports if you obtained emergency permits for structural bracing, electrical shutoff, or other safety work. Some jurisdictions require permits even for temporary measures.
  • Communications log recording date, time, name, and summary of every conversation with your insurer, adjuster, contractor, or public adjuster. Include claim numbers and reference numbers from each call.
  • National Flood Insurance Program (NFIP) claim documentation if the damage involves rising water, storm surge, or surface flooding. Standard homeowners policies exclude flood, so a separate NFIP claim and adjuster will handle that portion of the loss.

Insurance Adjuster Evaluation and How the Estimate Is Created

t8Kp-MGMRWuDfTwoYanaBg

The adjuster’s walkthrough is the field investigation that converts your documentation and physical damage into a priced repair scope. Adjusters enter the property with a checklist, measuring tools (laser distance meters, moisture meters, thermal cameras), a camera, and access to the insurer’s estimating software loaded on a tablet or laptop. They inspect visible damage room by room, probe behind surfaces when safe and accessible, measure quantities (square feet of ceiling, linear feet of baseboard, number of outlet covers), note material types and finishes, and photograph conditions before any demolition or cleanup obscures the loss.

Inspection duration ranges from one hour for a single room water leak to multiple days for large scale fire or storm damage involving structural assessments, hazardous material testing, or coordination with engineers and industrial hygienists. Adjusters prioritize accessible, clearly damaged areas first and may schedule reinspections after emergency demolition or mitigation exposes hidden damage behind walls, under floors, or above ceilings. They also review your submitted evidence (photos, inventories, contractor quotes) to cross-check quantities, validate material quality, and confirm pre-loss condition, especially for personal property and high value finishes that may have depreciated over time.

Once field work is complete, the adjuster returns to the office and enters measurements, quantities, and observations into line item estimating software. The software applies unit costs for labor and materials drawn from regional pricing databases, adjusts for local market conditions, adds overhead and profit margins, accounts for code upgrade requirements triggered by the loss, and produces a detailed scope organized by trade (demolition, framing, drywall, painting, flooring, electrical, plumbing). The adjuster then reviews the estimate for accuracy, flags any exclusions (pre-existing damage, maintenance issues, non-covered perils), and submits the completed scope to the insurer’s claims examiner for approval before sending the settlement offer to you.

How Adjusters Use Line‑Item Pricing

Line item pricing databases (Xactimate is the most widely used in residential claims, RSMeans in commercial and builder’s risk scenarios) catalog thousands of construction tasks with standardized unit costs based on historical invoices, supplier price sheets, union wage scales, and regional cost of living indexes. Each line item specifies a quantity (10 sheets of ½ inch drywall), a unit of measure (per square foot, per linear foot, per each), a material cost, a labor hour estimate, and a total extended price. Adjusters select the appropriate line items, input the measured quantities from the inspection, and the software calculates the total repair cost.

Labor and material rates fluctuate with market demand, particularly after catastrophes when contractor backlogs drive up hourly wages and material shortages inflate lumber, roofing shingles, and HVAC equipment prices. Database publishers update unit costs quarterly or monthly, but extreme surge periods (such as the weeks immediately following a hurricane landfall) can outpace database revisions, causing insurer estimates to lag real world contractor pricing by 10 to 30 percent or more. Code upgrades add another layer. If your jurisdiction adopted new building codes since your home was built, repairs must meet current standards (wind rated shingles, fire rated drywall, GFCI outlets, energy efficient windows), and the insurer’s estimate must include those upgrade costs even if the policy covers only “like kind and quality” replacement.

Comparing Insurance Estimates to Contractor Bids

FhP8495LQfSKL8FVI4Ki8A

Insurer estimates and contractor bids frequently differ because they’re prepared using different pricing sources, different assumptions about labor efficiency, and different motivations. The adjuster’s estimate reflects the insurer’s obligation under the policy, applies database unit costs that represent averaged regional pricing, and excludes non-covered items or upgrades you may want but the policy doesn’t require. The contractor’s bid reflects current, real time local labor and material costs, includes the contractor’s actual overhead and profit margin (which may be higher than database allowances), and often accounts for site specific complications (difficult access, permit delays, coordination with occupied tenants) that the adjuster’s software doesn’t capture.

Differences are especially pronounced in high demand periods following catastrophes. Contractors operating in disaster zones face material shortages, extended lead times for specialty products, higher wages needed to attract available crews, and increased insurance and bonding costs. Database pricing lags these spikes, so an adjuster’s estimate prepared two weeks after a hurricane may still use pre-storm rates while contractors are quoting post-storm surge pricing. Collecting multiple contractor bids (at least three) gives you a realistic range of repair costs and strengthens your position when negotiating supplements or disputing an initial settlement offer that falls short of actual market conditions.

Insurance Estimate Contractor Bid
Prepared by adjuster using Xactimate or RSMeans database unit costs; updated quarterly or monthly Prepared by contractor using current local supplier invoices, subcontractor quotes, and real time labor rates
Reflects policy coverage, excludes betterments or upgrades unless code required or policy endorsed May include optional upgrades, premium materials, or homeowner requested improvements beyond minimum policy obligations
Overhead and profit margins standardized by database formulas; typically 10–20% combined Overhead and profit set by contractor based on business costs, risk, and demand; can exceed 20% in high demand or complex projects
May not account for site specific access challenges, permit fees, or inspection delays Itemizes site specific costs: boom lift rental, extended staging, expedited permit fees, hazardous material handling

Depreciation, ACV, RCV, and Recoverable Depreciation in the Claim Estimate

uKWM3RbJR6aFS7UOmjqf3Q

Most replacement cost policies pay claims in two stages to ensure homeowners actually complete repairs rather than pocketing settlement funds. The insurer first issues an actual cash value (ACV) payment, which equals the replacement cost of damaged items minus depreciation for age and wear, then subtracts your deductible. After you finish repairs and provide proof (contractor invoices, photos of completed work, permits, and final inspection certificates) the insurer releases the withheld depreciation, bringing your total recovery up to the full replacement cost value (RCV) minus the deductible.

Depreciation schedules vary by material and policy, but common examples include roofing (typically depreciated over 20 to 25 years), HVAC systems (15 to 20 years), carpeting (5 to 10 years), and appliances (10 to 15 years). If your roof was 10 years old at the time of loss and the policy depreciates it over 20 years, the adjuster withholds 50 percent of the replacement cost as depreciation. You receive the other 50 percent as your ACV advance, pay your deductible out of that amount, hire a contractor, complete the roof replacement, and submit the final invoice to recover the withheld 50 percent.

The workflow proceeds like this:

  1. Adjuster calculates full replacement cost for all damaged items and structures using current unit costs, producing the RCV estimate.
  2. Adjuster applies depreciation based on age, condition, and policy defined useful life, reducing RCV to ACV.
  3. Insurer issues ACV payment minus deductible. This is your initial settlement check, intended to fund the start of repairs.
  4. You complete repairs using contractors, retain invoices and photos, obtain required permits and final inspections.
  5. You submit proof of completion to the insurer. Claims examiner reviews invoices against the approved scope.
  6. Insurer releases recoverable depreciation as a final payment, completing the claim and bringing total payout to RCV minus deductible.

Recoverable depreciation isn’t automatic. You must request it and provide documentation. If you delay repairs beyond the policy’s time limit (commonly one to two years from the loss date), you forfeit the withheld depreciation and receive only the ACV settlement.

Supplemental Estimates, Reinspections, and Scope Revisions

dtag3Nr3RBq6e32_ot6_Jw

Scope changes are expected in property damage claims because initial inspections can’t reveal everything. Water that appears confined to drywall often wicks into wall cavities, saturates insulation, and travels along floor joists to rooms far from the visible leak. Fire and smoke infiltrate HVAC ducts, deposit soot inside wall chases, and char structural members hidden behind finishes. Storm wind lifts shingles and drives rain under roof decking, causing interior damage that only becomes apparent days later when ceilings stain or insulation sags.

When demolition, mitigation, or contractor tear out exposes additional damage, you or your contractor submit a supplement request to the insurer. The supplement documents the newly discovered scope with photographs, written descriptions, and an itemized estimate for the additional work. The insurer may accept the supplement based on your documentation alone, or it may dispatch the adjuster for a reinspection to verify quantities, assess whether the new damage is related to the covered loss or pre-existing, and authorize payment. Reinspections add days or weeks to the claim cycle, but they’re necessary when the added scope materially increases the settlement amount or introduces new trades and materials not included in the original estimate.

Documentation Needed for Supplements

Supplement approval hinges on clear, timestamped evidence that ties the additional damage directly to the original covered loss. Take photographs before demolition (showing the intact surface) and after (revealing hidden damage), annotate images with measurements and material descriptions, and ask your contractor to provide a written explanation of why the extra work is necessary and how it connects to the loss event. Include receipts or invoices for any emergency work already completed, such as additional drying equipment rental, mold remediation, or structural bracing installed after the original inspection.

Maintain a running log of discovery dates (when the hidden damage was found, who found it, and what immediate steps were taken). Submit contractor bids or line item estimates for the supplemental scope using the same format as the original estimate, breaking costs into demolition, framing, MEP trades, finishes, and any code upgrade items triggered by the expanded scope. If the supplement involves structural repairs, engineering reports, or industrial hygiene testing (mold, asbestos, lead paint), include those professional assessments and certifications. Insurers process well documented supplements faster and with fewer disputes than vague requests lacking proof of causation or cost justification.

Final Approval, Payment Releases, and Closing the Claim

pJeoqRCWQ12dET56SaCsFA

The claim closes after the insurer confirms that all covered repairs are complete, invoices match the approved scope, and any required permits and inspections have been finalized. Insurers typically require a final walkthrough by the adjuster or a third party inspection company to verify that the work was performed as specified, materials meet policy standards, and no additional damage remains unaddressed. Once the final inspection passes, the insurer releases any withheld recoverable depreciation, retainage, or contingency holdbacks, and you sign a claim closure acknowledgment confirming that all payments have been received and the loss has been fully settled.

Catastrophe periods extend repair timelines significantly because contractor availability bottlenecks after widespread events. In 2024, homeowners in high impact states such as Florida, Texas, Georgia, North Carolina, and South Carolina faced repair delays of months due to material shortages, permitting backlogs, and crews prioritizing emergency stabilization over final finishes. Plan for longer than normal timelines, communicate regularly with your contractor and adjuster to document progress, and submit interim invoices if your contractor requires staged payments tied to construction milestones (foundation, framing, drywall, final finishes).

Final close steps include:

  • Complete all line items in the approved scope. Don’t leave punch list items or deferred repairs unfinished, as the insurer will withhold final payment until all work is done.
  • Obtain required permits and final inspection certificates from your local building department. Submit copies to the insurer as proof of code compliance.
  • Retain all contractor invoices, material receipts, and change order documentation. The insurer will compare final costs to the approved estimate and may request explanations for overages.
  • Schedule the final adjuster walkthrough or third party inspection. Address any deficiencies or punch list items before requesting final payment release.
  • Submit a formal request for recoverable depreciation and retainage release with all supporting documentation. Include photos of completed work, invoices, permits, and inspection certificates.

Final Words

You’ve already reported the loss, an adjuster walked the rooms, and the initial estimate started the repair plan.

The post walked through the whole property damage claim estimate process: what to document, how adjusters build line‑item estimates, why contractor bids often differ, how depreciation and recoverable depreciation work, and how supplements and final payments close the claim.

Keep documentation tight, get a few contractor bids, and expect timelines to stretch after big storms. That way repairs finish right and you get your home back sooner.

FAQ

Q: How long does a property damage claim take?

A: A property damage claim typically takes about 24 days from first notice to initial payout, but catastrophe surges, hidden damage, or slow adjuster scheduling can extend it to weeks or months.

Q: What not to say to the insurance adjuster?

A: You should avoid admitting fault, guessing repair costs, or signing releases without proof; stick to clear facts, hand over documentation, and say you’ll get contractor estimates.

Q: Should I file a claim or get an estimate first?

A: You should get an estimate first when possible to document repair scope, but if water or ongoing damage exists report the claim immediately so mitigation and an adjuster can be scheduled.

Q: What are the four stages of the insurance claim process?

A: The four stages of the insurance claim process are: 1) report the loss, 2) adjuster inspection and estimate, 3) payments and repairs, and 4) final inspection and claim close.

Best Primer for Sealing Smoke Odor That Works

0

Painting over smoke damage without proper primer is like putting a lid on a pot of boiling water and expecting it to stay quiet. It won’t. Smoke particles penetrate deep into drywall, wood, and plaster, releasing odor and yellowing through fresh paint for months or years. Shellac based and oil based primers create an impermeable seal that traps nicotine and tar molecules inside the surface. This guide covers which products actually work, how they compare, and the application steps that make smoke odor sealing stick for good.

Top-Performing Primers That Lock Out Smoke Odor

uKagK7dQoGi-troCs_s_g

Shellac based and oil based primers work best for blocking smoke odor and sealing nicotine stains before you paint. These formulas create a barrier that traps odor molecules and stops yellowing from bleeding through your topcoats.

Zinsser B-I-N is the top shellac option for smoke odor sealing. It’s affordable, you can find it at most home improvement stores, and it consistently beats alternatives at blocking both nicotine discoloration and embedded smoke smell. The shellac formula dries fast and creates a tight seal that locks odor inside the wall surface. KILZ Original leads the oil based category with over 40 years of professional trust. It provides heavy duty odor blocking and excellent stain coverage, though you’ll need good ventilation during application. Both products deliver reliable results when you apply them over properly prepared surfaces.

Water based alternatives like KILZ Restoration and Ultra Recon Smoke and Odor Sealer offer lower VOC options if you’re sensitive to solvent odors. These newer formulations claim performance comparable to traditional shellac and oil based primers while producing less smell during application and allowing soap and water cleanup. They work well for light to moderate smoke contamination. But shellac or oil based primers remain the better choice for heavy nicotine buildup.

Primer Product Base Type Odor Blocking Rating Best For
Zinsser B-I-N Shellac Excellent Heavy nicotine and severe smoke odor
KILZ Original Oil-based Very Good All-weather odor and stain blocking
KILZ Restoration Water-based Good Lower-VOC projects with moderate odor
Ultra Recon Water-based Good Low-odor application with nicotine sealing

Understanding Different Primer Types for Smoke Odor Control

8v4WxVJTTBuqmwp9fcoHtA

Three main primer categories seal cigarette smoke effectively: shellac based primers, oil based primers, and specialized water based formulas. Smoke particles and nicotine penetrate deep into porous surfaces like drywall, wood, and plaster, creating sticky residues that keep releasing odor for months or years. Standard primers can’t stop this. You need specialized formulations that create an impermeable barrier to trap odor molecules and prevent nicotine from leaching through fresh paint.

Shellac Based Primers: Maximum Odor Blocking Power

Shellac primers represent the gold standard for smoke odor sealing because they create the tightest molecular barrier against nicotine and tar residues. Zinsser B-I-N uses an alcohol based shellac formula that penetrates surface pores and forms a hard, impenetrable seal that locks odor molecules inside the substrate. This primer dries in 45 minutes to 1 hour, significantly faster than oil based alternatives, and covers approximately 400 square feet per gallon on smooth drywall.

You’ll need multiple coats when dealing with heavy nicotine buildup. Walls that show yellow or brown staining usually require two coats of shellac primer to completely block discoloration and odor. The first coat seals most of the contamination, while the second coat catches any spots where nicotine might bleed through. The fast drying property makes it practical to apply both coats in a single day.

Application requires denatured alcohol for cleanup since shellac is alcohol based, not water soluble. The primer releases a strong alcohol odor during application that goes away quickly as it dries. Work with windows open and fans running. A respirator rated for organic vapors protects your lungs during application, especially in rooms with limited airflow.

Oil Based Primers: Reliable Alternative Solutions

Oil based primers block nicotine from leaching through and prevent yellowing on painted surfaces, though they’re slightly less powerful than shellac for pure odor control. KILZ Original has earned its 40+ year professional track record by consistently sealing smoke damage in rental turnovers, fire restoration jobs, and home renovations. Zinsser Cover Stain offers similar performance with excellent adhesion on difficult surfaces. Both products create an effective barrier against smoke odor, just not quite as impermeable as shellac.

These primers contain mineral spirits and naphtha as solvents, which means they release strong fumes during application and drying. You’ll need 2 to 4 hours of drying time before recoating, and the smell lingers in the space for several hours after application. Coverage runs around 350 to 400 square feet per gallon depending on surface porosity. Cleanup requires mineral spirits or paint thinner, and you’ll want to seal used brushes and rollers in plastic bags between coats to avoid cleanup waste.

Proper ventilation isn’t optional with oil based primers. Set up cross ventilation with fans in windows, wear a respirator rated for organic vapors, and plan to keep the space well ventilated for 24 hours after application. The VOC levels make oil based primers a poor choice if you’re working in occupied spaces where residents can’t leave during application.

Water Based Specialty Primers: Low VOC Options

Traditional water based primers fail against smoke because nicotine is water soluble and simply bleeds through the coating as it dries. But newer specialty formulations like KILZ Restoration and Ultra Recon use modified chemistry that claims to match the performance of oil and shellac primers while maintaining the benefits of water based products. These primers work by creating a plastic like barrier that encapsulates nicotine rather than trying to dissolve or absorb it.

The advantages include lower VOC levels, easier cleanup with soap and water, reduced odor during application, and drying times of 1 to 2 hours between coats. These products work better for sensitive occupants who can’t tolerate solvent fumes, and they allow you to stay in the space during application with just basic ventilation. Water based primers also accept latex topcoats immediately after drying without compatibility concerns.

Shellac or oil based options remain superior for severe smoke contamination. Water based specialty primers handle light to moderate cigarette smoke well, but they struggle with heavy tar buildup or fire damage situations. If you can still smell smoke after proper surface cleaning, or if you see dark brown nicotine staining, stick with shellac primer for reliable results.

Primer Type Drying Time Coverage Per Gallon VOC Level Cleanup Method Odor Blocking Power
Shellac-based 45 min – 1 hour 400 sq ft High Denatured alcohol Excellent
Oil-based 2-4 hours 350-400 sq ft High Mineral spirits Very Good
Water-based 1-2 hours 300-350 sq ft Low Soap and water Good

Essential Surface Preparation Before Applying Smoke Sealing Primer

PGhYeRBJSbivXE_OSV1XnA

Proper surface preparation is critical for primer effectiveness. No primer can seal smoke odor if you apply it over greasy nicotine residue and loose soot. The contamination prevents adhesion and continues releasing odor through the primer layer.

Start with dry chemical sponges to remove loose soot and surface nicotine buildup. These sponges work like erasers, lifting contamination without water that would smear tar residues across the wall. Work from top to bottom in overlapping strokes, rotating the sponge to clean sections as they load up with soot. Once you’ve removed the loose layer, follow with a TSP (trisodium phosphate) solution wash. Mix TSP according to package directions and wash the entire surface with a sponge, working in sections. TSP cuts through nicotine’s greasy film and deep cleans the surface so primer can bond directly to the substrate. Rinse with clean water and let surfaces dry completely before priming.

Remove outlet covers, light switch plates, and any fixtures mounted to walls or ceilings before cleaning. Protect floors with drop cloths and use painter’s tape on trim if you’re not priming it. Check for water-related home repairs that might need attention before sealing surfaces, since you don’t want moisture trapped behind primer. Allow at least 24 hours of drying time after TSP washing, longer if humidity is high or you used substantial water during cleaning.

  • Dry chemical cleaning sponges (also called soot sponges)
  • TSP cleaner or heavy duty degreaser
  • Protective gloves and eyewear
  • Drop cloths and painter’s tape
  • Clean water and sponges for rinsing

Application Techniques for Smoke Odor Blocking Primer

GmbVIblBQBe9k7PQaQX0GQ

Select your application method based on project size and primer type. Rollers work best for most wall and ceiling projects, brushes handle detail work, and sprayers speed up large jobs if you have the equipment and experience.

Rolling promotes maximum adhesion to prepared surfaces and gives you good control over coat thickness. Use a 3/8″ to 1/2″ nap roller cover for smooth drywall and plaster. The shorter nap holds enough primer to cover well without leaving heavy texture. Load the roller evenly, roll in overlapping W patterns to spread the primer, then make straight vertical passes to smooth it out. Work in 4 foot by 4 foot sections, maintaining a wet edge to avoid lap marks. Roll ceiling areas before walls to catch drips.

Brush application handles edges, corners, and trim work that rollers can’t reach cleanly. Cut in around outlets, switches, door frames, and ceiling lines with a 2″ to 3″ angled brush. Load the brush about one third of the way up the bristles and use steady pressure to work primer into corners and along edges. Smooth out any heavy brush marks before moving to the next section.

Spray application speeds coverage on large projects and delivers the smoothest finish. HVLP (high volume, low pressure) sprayers work well with all primer types if you thin them according to manufacturer guidelines. Spray in overlapping passes, keeping the gun perpendicular to the surface and maintaining consistent distance and speed. Spraying requires more prep work to mask and protect surfaces, but it cuts application time substantially on whole house projects.

Multiple coats are usually needed depending on contamination extent. Apply the first coat, let it dry completely, then inspect for any yellowing or brown spots bleeding through. Those spots indicate areas where nicotine is still trying to come through. A second coat typically catches these issues. In cases of severe smoke damage where primer alone might not be sufficient, drywall replacement becomes the better solution. Coverage rates run 300 to 400 square feet per gallon depending on surface texture and primer viscosity, so calculate your needs based on total wall and ceiling area.

Safety Precautions When Working With Smoke Sealing Primers

o7pPIFTORwGUXSMfCMvcTA

Safety precautions are essential when working with solvent based primers because the fumes can cause headaches, dizziness, and respiratory irritation during application. The high VOC content in shellac and oil based formulas releases concentrated fumes in enclosed spaces.

Respiratory protection requires an organic vapor respirator, not just a dust mask. Dust masks filter particles but don’t remove chemical vapors. Look for a respirator with NIOSH rating for organic vapors (typically marked with a black or gray cartridge). Fit the respirator properly with a tight seal around your nose and mouth before you open the primer can. If you smell strong fumes through the respirator, the cartridge is saturated and needs replacement.

Ventilation setup should create cross flow that pulls fresh air in from one side of the room and exhausts contaminated air out the other. Place a box fan in a window on one side blowing outward, then open windows or doors on the opposite side to draw fresh air through. Run exhaust fans continuously during application and for at least 24 hours after you finish. Plan to vacate the space during application if possible, especially if you’re using shellac or oil based primer. These products make indoor air temporarily unsafe for anyone without respiratory protection.

Wear nitrile gloves to protect skin from solvent contact, and safety glasses to prevent splashes from reaching your eyes. Store primers in their original containers with lids tightly sealed, away from heat sources and out of reach of children and pets. Water based options exist for households with children, pets, or residents with respiratory sensitivities who can’t tolerate solvent exposure. KILZ Restoration and similar water based specialty primers deliver good smoke sealing with significantly lower fume levels.

Smoke Odor Primer Performance in Fire Damage vs. Cigarette Smoke Situations

Rl5bv76qQRm0KDndStKDlw

Long term cigarette smoke contamination differs from acute fire damage in both the type of residue and the remediation approach required. Cigarette smoke creates sticky nicotine and tar deposits that build up slowly over months or years, penetrating carpet, upholstery, wood, plaster, and drywall. Fire damage produces immediate contamination with soot, charring, and chemical residues from burned materials.

Cigarette smoke leaves a greasy yellow brown film that requires aggressive cleaning before priming. The nicotine penetrates deep into porous surfaces and lodges in carpets, upholstery, and inside wall cavities where air purifiers can’t reach it. You’ll need the two step cleaning process (dry sponge followed by TSP wash) to remove surface buildup before primer application. Fire damage involves black soot that often wipes away more easily but can include char that’s burned into the substrate. Soot cleaning requires similar dry sponge technique, but fire residues often include corrosive compounds that need neutralizing treatments before sealing.

Shellac primers excel with nicotine because they create an alcohol based seal that encapsulates water soluble tar compounds. Fire damage may require specialized sealers designed specifically for soot and char, particularly after structure fires that involve petroleum products, plastics, or chemicals. These situations often need commercial grade sealers beyond standard primers. Application techniques differ too. Cigarette smoke typically requires two coats of primer on all exposed surfaces, while fire damage might need three coats or specialized products on heavily affected areas plus single coats on surfaces with light smoke exposure.

Primer alone becomes insufficient when smoke contamination reaches structural materials. Severe fire damage to framing, subfloors, or ceiling joists may require complete material replacement rather than sealing. If you still smell smoke after proper cleaning and two coats of quality shellac primer, the contamination has penetrated beyond what surface sealing can fix. Consider fire and smoke-related home repairs for severe situations requiring professional restoration, particularly when structural safety is a concern.

Topcoat Paint Compatibility After Sealing Smoke Odor

9SzM7IxRTOuoyhOm_0wXSw

All smoke sealing primers accept standard latex or oil based topcoats once properly cured. You’re not limited in your finish paint choice after using specialized smoke primers.

Shellac and oil based primers provide excellent adhesion for any topcoat type. You can apply latex paint, oil based paint, or specialty finishes over them without compatibility issues. The cured primer creates a stable surface that accepts whatever you want to put on top. Water based primers bond best with latex topcoats since both are water based systems. You can still use oil based topcoats over water based primer, but latex delivers better flexibility and durability with water based primer underneath.

Timing matters for topcoat application. Shellac primer cures fast and usually accepts topcoats after 1 hour, though overnight drying gives you the most durable bond. Oil based primers need 4 to 6 hours minimum before topcoating, and overnight drying works better for heavy use areas. Water based primers dry to the touch in 1 to 2 hours but benefit from 4 hours of cure time before topcoating. Apply two coats of quality paint over sealed surfaces for best appearance and durability. The first topcoat evens out any slight texture from the primer, while the second coat delivers rich color and a uniform finish.

Sheen selection remains your choice regardless of primer type. Flat, eggshell, satin, semi gloss, or gloss topcoats all work over smoke sealing primers. The primer type doesn’t restrict finish options.

Cost Analysis and Where to Buy Smoke Odor Sealing Primers

k8IUomRET1uxF2572TDv4A

Typical price ranges for smoke sealing primers run $30 to $60 per gallon depending on type and brand. Budget for the higher end if you’re buying premium shellac or specialized water based formulas.

Shellac based primers like Zinsser B-I-N typically cost $45 to $60 per gallon, putting them at the premium end of the price range. The higher cost reflects better odor blocking performance and the specialized alcohol based chemistry. Oil based primers including KILZ Original run $35 to $50 per gallon, making them the most affordable option that still delivers reliable smoke sealing. Water based specialty primers like KILZ Restoration and Ultra Recon fall in the $40 to $55 per gallon range, positioned between oil based and shellac pricing. The cost reflects the newer chemistry required to make water based formulas perform like solvent products.

You’ll find these products at big box home improvement stores including Home Depot and Lowe’s, which stock the major brands year round. Paint specialty retailers like Sherwin Williams and Benjamin Moore dealers carry smoke sealing primers and can often order specific products if they’re not on the shelf. Online purchasing through Amazon, paint supplier websites, and big box store websites works well for price comparison and delivery to your door.

Bulk purchasing for larger projects sometimes qualifies for contractor pricing at paint stores if you’re buying five gallons or more. Case discounts typically save 10 to 15 percent over single gallon pricing. Product availability varies by location. KILZ Original and Zinsser B-I-N are widely stocked locally, while water based specialty primers and less common formulations may require special order with a few days lead time.

Common Primer Application Mistakes That Reduce Smoke Odor Blocking Effectiveness

fmG4n6NyRTKBHARt9rACKw

Application mistakes can allow smoke odor to persist through sealed surfaces even when you use quality primer products. Small errors in prep work or application technique compromise the barrier that’s supposed to lock odor inside the walls.

  • Skipping the pre cleaning step and priming over greasy nicotine residue
  • Using standard water based primer instead of specialized smoke sealing formulas
  • Applying only one coat when heavy contamination requires two or three
  • Failing to seal hidden surfaces (inside closets, behind switch plates, in attics)
  • Not allowing adequate drying time between coats
  • Using inadequate ventilation which allows fumes to settle back onto surfaces
  • Applying primer too thin to achieve proper mil thickness for odor blocking

You’ll know these mistakes happened if you see bleed through, returning odor, or yellowing after the primer dries. Yellow or brown spots appearing through the primer coat indicate nicotine still migrating to the surface. Lingering smoke smell after primer application and drying means contaminated areas didn’t get sealed or the primer coat was too thin. Yellowing that shows up after topcoat application points to inadequate primer coverage or using the wrong primer type.

Corrective action starts with identifying what went wrong. If you see bleed through spots, lightly sand those areas and apply an additional primer coat just on the affected spots, then check again after drying. If odor persists throughout the space, you likely need a full second coat over all surfaces. When yellowing appears after topcoating, you’ll need to sand the finish paint, apply proper smoke sealing primer, and start the topcoat process over. Severe cases where mistakes included skipping surface prep require sanding everything back to the substrate, completing proper TSP cleaning, and starting fresh with the right primer and technique.

DIY Smoke Odor Sealing vs. Professional Restoration Services

xVBo_jS4QX-fiw5NOafYWw

Minor to moderate smoke odor issues are suitable for DIY priming, while extensive contamination often justifies professional help. The difference comes down to project scope, contamination severity, and your comfort level with the materials and safety requirements.

A project fits DIY approach when you’re dealing with limited square footage like a single room or two, surface level smoke exposure without deep penetration into structural materials, and you’re comfortable working with primers that require respirators and ventilation. If you’ve done painting projects before and can commit the time to proper surface prep, primer application, and adequate drying between steps, you can handle smoke sealing successfully. The process takes more care than standard painting but doesn’t require specialized trade skills.

Professional services make sense for whole house contamination where smoke has reached every room, severe fire damage beyond cosmetic staining, inaccessible areas requiring specialized equipment like attic spaces or crawlspaces, tight timelines for rental turnover or sale preparation that need guaranteed completion dates, and situations where occupants have health sensitivities that make DIY work impractical. Professionals bring commercial grade equipment, experience identifying hidden contamination, and insurance coverage if anything goes wrong during the process. Consider interior rebuilding and finishing services when smoke damage extends beyond surfaces you can seal with primer.

Cost benefit considerations compare your material and time investment against professional pricing. DIY materials for an average bedroom run $100 to $200 including primer, cleaning supplies, application tools, and safety equipment. Your time investment runs 8 to 12 hours spread across prep, priming, drying, and topcoating. Professional services for the same room typically cost $400 to $800 but include guaranteed results, faster completion, and no risk to your health from fume exposure. The value proposition shifts based on project size. Single room DIY makes financial sense, while whole house professional work delivers better results per dollar spent.

Many homeowners choose a hybrid approach where they hire professionals for assessment and severe contamination areas while handling lighter smoke damage themselves. A professional inspection identifies problem areas you might miss, particularly in hidden spaces, and gives you a realistic scope of what needs sealing versus what needs replacement.

Final Words

Shellac-based primers like Zinsser B-I-N remain the most effective choice when you need maximum smoke odor blocking power, especially for nicotine and tar deposits.

Oil-based options like KILZ Original offer reliable performance for most smoke situations. Water-based specialty primers work when you need lower VOC levels.

The best primer for sealing smoke odor only works when you prep the surface right and apply it with proper ventilation and safety gear.

Skip the cleaning step or use standard paint, and you’ll smell the problem again in a few weeks. Do it right the first time, and the odor stays locked out for good.

FAQ

What is the best paint primer for smoke smell?

The best paint primer for smoke smell is Zinsser B-I-N shellac-based primer, which creates an impermeable barrier that locks in nicotine and odor molecules better than other primer types. KILZ Original oil-based primer is another trusted professional choice for heavy smoke odor blocking with excellent sealing properties.

Will primer cover cigarette smoke?

Primer will cover cigarette smoke when you use specialized smoke-sealing formulas like shellac-based or oil-based primers designed to encapsulate nicotine and odor molecules. Standard water-based primers are not sufficient because nicotine is water-soluble and bleeds through, causing yellowing and returning odor.

Does Kilz get rid of cigarette smoke smell?

KILZ Original primer gets rid of cigarette smoke smell by blocking heavy odors and stains with excellent sealing properties trusted by professionals for over 40 years. KILZ Restoration is a water-based alternative that seals persistent smoke odors while offering lower VOC levels and easier cleanup than oil-based formulas.

Which Kilz is best for smoke damage?

KILZ Original oil-based primer is best for smoke damage when you need maximum odor blocking power and reliable nicotine stain prevention. KILZ Restoration works well for moderate smoke damage when you prefer a water-based, low-VOC option with easier cleanup and reduced application odor.

How many coats of primer do I need for smoke odor?

You need multiple coats of primer for smoke odor depending on contamination severity, typically two coats for moderate nicotine buildup and three for heavy exposure. Apply the second coat after the first dries completely, watching for bleed-through or yellowing that signals additional coats are necessary.

Can I use water-based primer over cigarette smoke?

You can use water-based primer over cigarette smoke only with specialty formulas like KILZ Restoration or Ultra Recon designed specifically for smoke odor sealing. Traditional water-based primers fail against smoke because nicotine is water-soluble and bleeds through the coating, causing yellowing and persistent odor.

Do I need to clean walls before applying smoke-sealing primer?

You need to clean walls before applying smoke-sealing primer using a two-step process: dry chemical sponge to remove loose soot, followed by TSP solution wash to degrease surfaces. Proper cleaning ensures maximum primer adhesion and prevents greasy nicotine residue from interfering with the primer’s odor-blocking performance.

What safety equipment do I need when applying smoke-sealing primer?

You need an organic vapor respirator rated for VOCs when applying smoke-sealing primer, not just a dust mask, especially with shellac or oil-based formulas. Proper ventilation with cross-airflow, protective gloves, and eye protection are essential because these primers contain strong solvents that off-gas during application.

How long does smoke-sealing primer take to dry?

Smoke-sealing primer takes different drying times depending on type: shellac-based dries in 45 minutes to 1 hour, oil-based requires 2-4 hours, and water-based specialty primers dry in 1-2 hours. Allow full cure time before applying topcoat paint to ensure maximum odor blocking and proper adhesion.

Should I hire a professional for smoke odor sealing?

You should hire a professional for smoke odor sealing when dealing with whole-house contamination, severe fire damage, inaccessible areas, or tight timelines requiring guaranteed results. DIY priming works well for limited square footage with surface-level smoke exposure when you’re comfortable with proper safety equipment and application techniques.

Black Mold Removal Costs: Pricing Breakdown for Your Home

0

Would you pay $500 or $30,000 to remove black mold from your home?
Most homeowners pay about $1,200 to $3,400 for professional black mold remediation in 2024.
The real price depends on how much square footage is affected, what materials are contaminated—drywall, insulation, HVAC—and whether growth hides inside walls or crawl spaces.
This guide breaks down typical price ranges, what contractors charge, when DIY is okay, and how insurance and moisture repairs change the bill.
Read on so you can act fast, stop more damage, and plan the right fix without surprises.

National Costs for Black Mold Removal

0SkdQ5Z5QcKYexv5_UNm4g

Most homeowners pay between $1,200 and $3,400 for professional black mold remediation in 2024. That range covers moderate contamination, enough to require containment, equipment, and disposal, but not extensive structural rebuilding. The final number depends on how much square footage is affected, what materials are contaminated, and whether moisture damage runs deeper than what’s visible on the surface.

Cost per square foot typically falls between $10 and $25 for standard remediation work. Light surface cleaning on nonporous materials runs on the lower end. Jobs requiring drywall removal, insulation disposal, and HEPA filtration push toward the higher range. Hidden growth inside wall cavities or above ceilings often costs more because contractors bill for demolition, containment, and reconstruction in addition to actual removal.

Small areas under 10 square feet may not need a contractor at all, but when you do hire one for a minor spot, expect $150 to $500. Larger projects, especially when HVAC systems, crawl spaces, or basements are involved, quickly climb into the thousands. Whole home remediation, common after flooding or severe long term leaks, frequently exceeds $6,000 and can reach $30,000 or more when structural repairs and full reconstruction are included.

  • Small area (under 10 sq ft): $150–$500
  • Bathroom removal: $500–$1,500
  • HVAC system remediation: $500–$3,000
  • Crawl space treatment: $500–$2,000
  • Whole home remediation: $6,000–$30,000+

Factors That Influence Removal Costs

xvTGgzVgQOiUJ2lx5b5GFw

Severity drives the biggest swings in pricing. A few spots on bathroom grout cost very little to treat. Widespread contamination across drywall, insulation, and structural framing requires demolition, disposal, air filtration, containment barriers, and reconstruction. All of which add thousands to the bill. Contractors assess the extent before quoting, and hidden growth behind walls or above ceilings often surprises homeowners once demo begins.

Location inside the home matters too. Tight crawl spaces and attics require protective gear, special lighting, and slower work. HVAC ducts spread contamination throughout the house and demand duct cleaning or replacement in addition to removal. Accessibility also affects labor time. Second story exterior walls or hard to reach corners take longer to contain and clean than open basement floors.

Moisture source repair is separate from removal but almost always necessary. If the leak, condensation issue, or plumbing failure isn’t fixed, it returns. Contractors may include minor repairs in their scope, but larger plumbing or roofing work typically adds $200 to $2,000 or more to the total project cost. Testing fees for air samples or surface swabs, plus post remediation clearance testing, commonly add another $200 to $600.

Cost Differences by Location in the Home

94FhSkgNQViUEym-nn-sAA

Bathrooms are one of the most common spots, and remediation here typically costs $500 to $1,500. Most bathroom jobs involve tile grout, caulk, drywall behind showers, or subfloor damage under leaking toilets. Contractors remove contaminated drywall or underlayment, treat the framing, and replace materials. Small surface spots cost less. Wet wall cavities cost more.

Attics run $1,000 to $3,000 depending on insulation removal and roof leak repairs. Growth happens on roof sheathing, rafters, and blown in insulation when ventilation is poor or leaks go unnoticed. Remediation requires removing contaminated insulation, HEPA vacuuming wood surfaces, treating with antimicrobial solutions, and replacing insulation. Access is tight, and contractors often work in protective suits under heat lamps or in freezing cold, which slows the process.

Crawl spaces cost $500 to $2,000 for removal. Contamination here usually affects floor joists, subfloors, and vapor barriers. Crawl space jobs require encapsulation, moisture control, and sometimes structural repairs if wood rot is present. The confined space makes containment and air filtration equipment setup more expensive per square foot than open areas.

Basements are among the most expensive locations, typically $2,000 to $6,000 or higher. Finished basements with drywall, carpet, and insulation require extensive demo and reconstruction. Unfinished basements cost less but still need moisture control, foundation sealing, and sometimes sump pump installation to prevent recurrence. Large square footage and the need to address chronic moisture issues drive costs upward quickly.

What Affects Removal Quotes from Contractors

t1jFNE7hSMm5yd-wieNBIQ

Inspections often cost $200 to $600 and include visual assessment, moisture mapping with meters, and sometimes air or surface sampling. Some contractors offer free visual inspections if you hire them for remediation, but third party inspectors charge separately. Testing adds to upfront costs but helps confirm the type and whether HVAC systems are contaminated, which changes the scope and price of the job.

Experience, certifications, and equipment all influence what contractors charge. IICRC certified technicians (trained and tested for remediation work) typically charge more than uncertified crews, but they follow containment protocols, use HEPA filtration, and provide documentation for insurance claims. Companies that own negative air machines, commercial dehumidifiers, and thermal cameras can complete jobs faster and more thoroughly, but their overhead is higher.

Key elements that change contractor quotes include:

  • Certifications and training — IICRC or state licensing usually raises hourly rates but improves quality and insurance acceptance.
  • Equipment requirements — HEPA air scrubbers, negative air machines, and moisture meters add daily rental or ownership costs to the bill.
  • Testing and clearance requirements — Air sampling before and after remediation adds $200–$600 but may be required by insurance or local code.
  • Contamination level — Light surface growth costs far less than contamination inside walls, HVAC ducts, or structural cavities requiring demolition.

DIY vs Professional Removal Costs

kzDtmbEwQUy7IOs2ol6tfw

DIY supplies for small spots typically cost $20 to $150. That includes a respirator with P100 or N95 filters, disposable gloves, goggles, antimicrobial cleaner or diluted bleach alternative, plastic sheeting for containment, and disposal bags. HEPA vacuum rentals run $40 to $100 per day if you don’t own one. These costs work only when contamination is under 10 square feet, on nonporous surfaces like tile or painted wood, and there’s no HVAC involvement or structural damage.

Professional remediation starts around $500 for small jobs and climbs quickly for anything involving porous materials, hidden growth, or widespread contamination. Professionals bring containment barriers, negative air pressure systems, HEPA filtration, licensed technicians, and post remediation clearance testing. The gap between DIY and professional costs is large, but pros handle risks DIY can’t. Cross contamination, incomplete removal, and exposure to high spore counts that can trigger respiratory problems or worsen asthma.

  • DIY material costs: $20–$150 for small surface jobs under 10 sq ft.
  • Professional minimum: $500–$1,000 for contained, small area remediation with equipment and disposal.
  • Risk and liability: Professionals carry insurance and provide documentation. DIY leaves liability and health risk with the homeowner.

Insurance Coverage for Remediation

lr5ypZtRFmloLnUbv-c4A

Homeowners insurance rarely covers it unless it’s caused by a sudden, covered event like a burst pipe, appliance failure, or storm damage. Policies typically exclude growth resulting from long term leaks, poor maintenance, condensation, or gradual seepage. When coverage does apply, it usually caps payouts between $1,000 and $10,000 depending on the policy. Some insurers offer endorsements or riders that raise limits to $25,000 or $50,000, but those cost extra and aren’t standard.

Documentation matters if you file a claim. Take photos immediately after discovering contamination, document the moisture source and timeline, and keep all contractor invoices and inspection reports. Adjusters often require proof that the damage was sudden and accidental, not the result of deferred maintenance. Some policies also require you to mitigate damage immediately. Meaning you can’t wait weeks to dry out wet materials or stop an active leak, or the insurer may deny the claim.

Policy language varies widely. Read your declarations page and exclusions section carefully, or call your agent before hiring a contractor. If remediation is tied to a covered water loss, the insurer may cover removal and repairs up to the cap. If it’s tied to an excluded cause, like foundation seepage or years of bathroom humidity, you’ll pay out of pocket. Coverage for testing, air quality monitoring, and temporary relocation also depends on the policy and the scope of contamination.

Timeline and What to Expect During Removal

Qvrbx6IvSeCHDUIeDRW2Bw

Most remediation projects take 1 to 5 days depending on contamination severity and square footage. Small bathroom jobs may finish in a single day. Larger projects involving multiple rooms, HVAC decontamination, or structural repairs stretch to a week or more. Drying time after water mitigation can add another 24 to 72 hours before remediation even begins, especially if contractors are waiting for materials to reach safe moisture levels.

Duration directly affects labor costs and equipment rental fees. Contractors typically charge daily rates for air scrubbers, dehumidifiers, and negative air machines. Jobs that take longer cost more, which is why timelines are included in written estimates. If hidden growth is discovered during demolition, the scope and timeline expand, often requiring a change order and additional cost approval before work continues.

  1. Inspection and containment setup — Day 1: visual assessment, moisture readings, plastic barriers installed, negative air machines running.
  2. Removal and disposal — Days 1–3: contaminated drywall, insulation, or other porous materials removed. HEPA vacuuming of framing and surfaces.
  3. Cleaning and antimicrobial treatment — Days 2–4: surfaces scrubbed, treated with specific solutions, air filtration continues.
  4. Clearance testing and reconstruction — Days 3–5+: air or surface samples taken to verify safe spore levels. Drywall, insulation, and finishes reinstalled if clearance passes.

When Professional Help Is Necessary

ceWvMJ5vRiSK9cDPbKHBlA

Professional remediation is required whenever contamination covers more than 10 square feet. That’s the threshold the EPA uses in its cleanup guidelines, and most contractors follow it. Small spots on tile or nonporous surfaces can be cleaned with household products. Anything larger, especially on drywall, insulation, carpet, or wood, needs containment and equipment to prevent spores from spreading during removal.

HVAC contamination makes professional help mandatory. Growth inside ducts or on air handler components spreads spores throughout the home every time the system runs. Duct cleaning alone costs $300 to $1,000, but full remediation with replacement of contaminated sections or units can reach several thousand dollars. DIY methods can’t address airflow systems safely or effectively.

  • Contamination over 10 square feet — EPA guidance and most local codes require pros for jobs this size.
  • HVAC or ductwork involvement — Growth in vents or air handlers spreads spores. Needs containment and specialized cleaning.
  • Structural or hidden contamination — Growth inside walls, above ceilings, or under floors requires demolition and moisture verification tools homeowners don’t own.
  • Recurring growth or ongoing moisture — If it returns after cleaning, the moisture source isn’t fixed and needs professional assessment and repair.

Final Words

Stop the leak and get a written estimate.

This post gives national averages, price per square foot, and how location and severity change costs. We covered DIY vs pro, contractor quote differences, insurance, and typical timelines.

If you’re wondering how much is black mold removal, expect a wide range and plan for an inspection. We’ll document damage, stop more harm, and give you clear numbers and a repair plan so you can move forward with confidence.

FAQ

Q: What kills 100% of black mold and can black mold be fully removed?

A: What kills 100% of black mold and whether it can be fully removed: no single home product guarantees complete kill; pros remove contaminated materials, use HEPA filtration and antimicrobials, then verify with testing and moisture readings.

Q: Will insurance pay for black mold?

A: Whether insurance will pay for black mold depends on the cause: insurers often cover mold from a sudden, covered event like a burst pipe, but not long-term leaks or neglect; check your policy and document damage.

Q: Is professional mold removal worth it?

A: Whether professional mold removal is worth it: yes for areas over 10 square feet, HVAC contamination, or structural issues—pros contain the area, remove unsafe materials, prevent spread, and provide insurance documentation.

Emergency Restoration Company Brings Instant Relief

0

Have you ever worried about getting help when you need it most? When unexpected damage hits your home, every minute counts. We're here 24/7 with trucks fully loaded and technicians ready to work fast. We begin within 60 to 90 minutes, quickly checking the damage and planning repairs to ease your worries. We work swiftly to secure your home and bring you comfort. Let us show you how we turn crisis into calm.

Rapid Response from Your Emergency Restoration Company

When emergencies hit, we are available 24/7 to help you. As soon as damage occurs, our hotline connects you with our team. We start working immediately to get your home back in order. If you need help right away, search for emergency restoration services near me or call us directly.

Our smart dispatch system sends a fully equipped truck to your location within 60 to 90 minutes. We arrive and inspect the damage to understand what needs to be done. Our licensed and insured technicians then develop a plan that fits your home or business. We serve areas including Troy, MI along with Southern and Northern California.

  • 60 to 90 minute arrival
  • Fully stocked response trucks
  • On-site damage check
  • Licensed and insured technicians
  • 24/7 hotline support

We focus on quick property recovery. We know damage is stressful, so we act fast to stop further harm and secure your property. Every minute, our team works hard to bring back safety and comfort so you can feel at peace again.

Emergency Restoration Company Water Damage Services

img-1.jpg

When floods or leaks hit your home, we jump into action to help you feel safe again. We work fast to stop extra damage. Our trained team removes standing water, dries your home, and helps avoid future problems. We use proven water removal methods to clear water, dry walls and floors, and protect your property.

Our trucks come ready with advanced equipment. We can fix issues like a wet basement or a failed sump pump with careful attention and skill.

Equipment Function
Dehumidifier Pulls moisture from the air to speed up drying
Air mover Circulates air to help water evaporate from surfaces
Extraction pump Quickly removes large amounts of water
Moisture meter Measures dampness inside walls and floors to check drying progress

After we extract the water, we focus on drying the structure. We set up our tools to dry both visible areas and hidden spots. This stops mold from growing and avoids more structural damage. Think of it like drying a sponge, the water slowly leaves with the help of our special equipment and careful monitoring. You can rely on us for quick water removal and lasting moisture control, so your home stays safe and you have peace of mind.
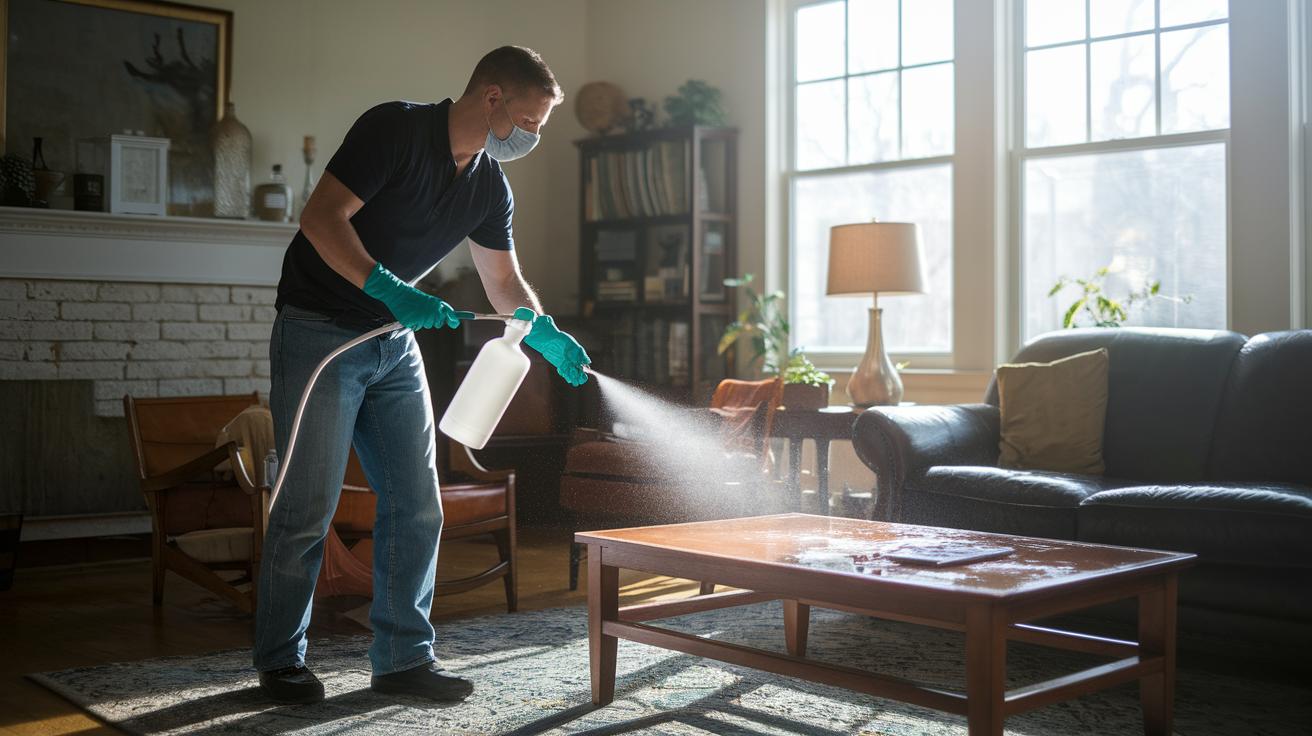
Emergency Restoration Company Fire Damage Restoration

After a fire, the smell of smoke and the layer of soot can feel overwhelming. We use proven fire damage restoration steps to clear away soot and eliminate smoke odors with special cleaning techniques. Our IICRC-certified technicians work quickly to secure your home and clean up both fire and water damage. We also guide you through the insurance claim process, so you can rebuild with confidence. For example, one technician said, "We follow strict procedures to remove even the stubborn smoke odor and soot." This careful process helps bring back calm in a stressful time.

Once the smoke is gone, we focus on repairing damaged items and structures. Our team carefully restores your belongings by cleaning and providing pack-out services (moving items safely for cleaning). If needed, we handle full demolition and rebuild damaged areas. Every step is designed to help you recover quickly, restoring your home to a safe and comfortable place.

Emergency Restoration Company Mold Remediation Services

img-2.jpg

When mold appears, our team gets to work fast. We start by testing for black mold to see how big the problem is. We use special tests and air monitors (devices that measure mold spores in the air) to find hidden mold. Our IICRC-certified technicians work by CDC rules to contain the area and stop mold spores from spreading. We also check for any signs of birds or rodents that might have caused more damage, and we take care of cleaning up any animal remains. This careful approach helps protect your family while we find and remove the mold.

Next, we move on to the cleanup stage with our professional mold remediation process. We remove all damaged materials and clean all surfaces thoroughly. We set up barriers to keep the affected area separate during the cleanup and do follow-up tests to make sure the mold is gone. This step-by-step method restores your home and gives you peace of mind.

Emergency Restoration Company Storm Damage Repair

When harsh weather hits, we jump into action. We board up your home and cover damaged areas with tarps to stop more harm from hitting your property. This fast work holds your home steady until we can finish the cleanup.

  • Tarps for covering fragile spots
  • Board-up services to secure openings
  • Tree removal to clear hazards
  • Debris cleanup to remove storm waste
  • Roof tarping for extra protection
  • Stabilization to keep the structure safe

If you see signs of wind or storm damage, search for storm damage cleanup near me to get help quickly.

We know a storm can be overwhelming. Our team is ready 24/7 for a same-day response. Whether falling trees or after severe weather, we are here to protect your home and start repairs fast. Call us anytime and let us help you get back to safety.

Emergency Restoration Company Residential & Commercial Restoration

img-3.jpg

When your home suffers damage from water, fire, or harsh weather, we step in quickly to restore comfort and safety. We handle every repair with care, from small fixes to full renovations like kitchen and bathroom remodels, additions, or rebuilding both inside and out. We even offer handyman services, such as installing granite countertops (a sturdy, attractive surface), to help improve your living space.

For commercial and industrial sites, we serve as your dependable restoration partner. We quickly clean up and repair offices, retail spaces, and industrial facilities to reduce downtime. Our team handles complete building restorations along with special installations to restore functionality and appearance. As your local contractor, we are ready to tackle complex repairs and upgrades, whether your facility needs strong structural fixes or a refined finishing touch.

If you need help, call us anytime. We’re here to get your property back to its best.

Emergency Restoration Company Process & Insurance Support

When damage occurs, you call us. We start a quick check to record every detail for your insurance. Our team takes clear photos and makes notes so your claim moves fast. One client said, "When my kitchen fire hit, their call made all the difference."

Our team arrives with a fully stocked truck and modern tools. We secure the area immediately and use special equipment to stop more damage from happening.

We then inspect the damaged areas closely. Our certified crew checks for visible harm, hidden issues, and damage to your belongings. We prepare a clear damage estimate and give you simple steps for both short-term fixes and long-term repairs. A recent review mentioned, "Their clear photos and step-by-step notes helped me see what needed to be done."

Next, we create an action plan. This plan covers water extraction, board-up work, and full documentation for your insurance. Each step is explained clearly so you know what to expect. Our 30+ years of experience show in our fast and effective fixes.

Finally, we work to restore your property. We finish with careful clean-up and precise repairs. Our goal is to get your home or business back to normal quickly while handling all insurance details for you.

Integrated Service Expertise and Client Feedback

img-4.jpg

We are an IICRC-certified, licensed, and insured team ready to help in any emergency. Whether it's fire damage, water extraction (removing water fast), or mold remediation (cleaning harmful mold), we act quickly and record every step for your insurance review. For example, in a recent water damage event, we removed the standing water and set up drying equipment within 30 minutes to prevent further damage.

One homeowner shared, "The team's clear steps in fire restoration made a scary event easier to handle." Another said, "Their fast assessment and detailed report during water damage helped ease my stress." Our recent project reviews show a 98% satisfaction rate from over 250 jobs, proving our track record of reliability.

Final Words

In the action, we shared our fast and effective response for water, fire, mold, and storm damage. We broke down our 24/7 hotline, rapid arrival times, and detailed restoration process to make sure every step is clear.

Our emergency restoration company stands ready to secure your home and belongings with skilled technicians and complete documentation for your insurance. We work swiftly to restore your property safely so you can return to normal with peace of mind.

FAQ

Where can I find an emergency restoration company near me, in California, Texas, or other areas?

The emergency restoration system covers many regions. We serve parts of California and have partners in other states like Texas. Visit our website to see your nearest service area.

What do emergency restoration company reviews say about these services?

Emergency restoration company reviews point out fast response, on-site damage assessments, and high-quality work by certified teams, ensuring clear communication and dependable restoration.

What makes the best emergency restoration company?

The best emergency restoration company provides rapid response, fully equipped trucks, insured technicians, and efficient work to restore your home safely and quickly after damage.

Are there any lawsuits involving emergency restoration companies?

Questions about emergency restoration company lawsuits generally refer to isolated claims. Most companies maintain strong records by focusing on clear, safe practices and customer satisfaction.

Where are Restoration Management Company locations found?

Restoration Management Company locations are regional and vary by service area. They focus on fast, local response, so you should check their website for the most current office addresses.

What is an emergency restoration system?

An emergency restoration system is a structured process that starts with a fast response, damage survey, and tailored action plan to restore your property quickly and effectively.

How do restoration companies get paid?

Restoration companies typically get paid through insurance claims and direct customer payments after providing detailed damage assessments and transparent cost estimates.

Is Serpro a reliable company?

Serpro is seen as a dependable firm by many customers. Local testimonials and industry ratings can offer additional insights into their reliability and service quality.

What is a disaster restoration company?

A disaster restoration company quickly addresses damage from floods, fires, storms, or mold, using certified professionals and efficient equipment to return your property to a safe, livable state.

Property Damage Claims: What They Are and How to File

0

Your insurance policy might cover way more damage than you think, or it might cover way less. Most homeowners find out which one during the worst possible moment: standing in water, staring at a burnt wall, or watching a contractor quote numbers that make their stomach drop. A property damage claim is how you ask your insurance company to pay for fixing what got wrecked, but knowing what counts, what’s covered, and how to file correctly separates families who recover fast from families who fight for months and still come up short.

Property Damage Claims Explained: Core Concepts and Examples

zyzoi5CHR9mN_VG4EmGZZw

A property damage claim is how you ask your insurance company (or whoever’s responsible) to pay for fixing or replacing something that got wrecked. Could be a window some kid broke with a baseball. Could be your roof after a hail storm tore it apart. Either way, the claim process lets you get reimbursed instead of eating the entire cost yourself. The goal’s simple: get your property back to how it was before everything went sideways.

There are two main claim types. First-party claims go to your own insurance company under whatever policy you’ve got (homeowners, renters, auto, whatever). You’re asking for coverage on your stuff, doesn’t matter who caused it. Third-party claims get filed against someone else’s insurance when they’re the one who messed things up. Your neighbor’s tree crushes your fence? That’s a third-party claim against their homeowners policy.

Property damage claims are completely separate from personal injury claims, even though sometimes they happen together. Car plows into your house? You’d file one claim for the building repairs and a different one if anybody got hurt. This matters because the two types follow different rules, get calculated differently, and usually involve different insurance coverage.

You’ll see property damage claims for things like:

Storm and hail damage to roofs: wind-driven rain, missing shingles, debris impacts

Water damage from burst pipes or flooding: sudden pipe failures, appliance leaks, groundwater pushing in

Fire and smoke damage: the actual fire destruction plus smoke and soot contamination spreading everywhere

Vandalism including graffiti and broken windows: intentional damage to exterior surfaces, glass, landscaping

Vehicle accidents causing structural damage: cars hitting buildings, fences, mailboxes, fixed property

Natural disasters: hurricanes, tornadoes, earthquakes, catastrophic weather

In 2024, 28 catastrophic weather events caused over $92 billion in damage nationwide. That number shows how storms, flooding, and disasters keep hitting harder and more often.

Here’s the thing. You can file a property damage claim whether the damage was intentional or accidental. Windows broken by some vandal with a bat or by hail during a storm? Same claim process. Intent matters for legal stuff and criminal prosecution, but it doesn’t stop you from seeking compensation.

Insurance Coverage Types for Property Damage Claims

K_HGQYcURIy2bAY_9daPLg

Which coverage applies determines what gets paid and how much you’ll see.

Dwelling coverage protects your home’s physical structure. Foundation, walls, roof, attached structures like garages or decks. This kicks in when storm damage rips off your roof, fire burns through walls, or a tree crashes into your bedroom. Covers repair or reconstruction up to your policy limit.

Contents coverage (personal property coverage) protects your stuff inside. Furniture, clothing, electronics, appliances, personal items. Water damage ruins your furniture or fire destroys your belongings? Contents coverage reimburses you. Separate from dwelling coverage, with its own limit and deductible.

Replacement cost versus actual cash value matters big time at settlement. Replacement cost coverage pays what it costs today to replace or repair the damaged item with similar quality materials. No deduction for age or wear. Actual cash value pays replacement cost minus depreciation, meaning less money because they factor in how old and worn down everything was before damage hit. Ten-year-old roof gets a way smaller payout under actual cash value than replacement cost.

Policy limits cap what your insurance company will pay, period. Dwelling coverage limit is $250,000 but rebuilding costs $280,000? You’re covering that $30,000 difference. Additional living expenses coverage pays for temporary housing, meals, other costs if you can’t stay home during repairs. When filing third-party claims, payouts max out at the other party’s coverage amount. Anything beyond that, you’re chasing the individual directly. Flood damage requires separate coverage through the National Flood Insurance Program since standard homeowners policies exclude it.

Filing and Documentation: The Complete Claims Process

jVs_ojWBQo2C6ZNgp4Y_Kw

Start the claims process as soon as it’s safe to look around. Delays can tank your coverage or slow everything way down.

Prompt notification protects your claim. Most policies want damage reported within a specific window, often 24 to 72 hours for urgent situations. Even if you’re not sure about filing, notify your insurance company right away. You can decide not to proceed later, but missing the notification deadline can get your claim denied outright.

Here’s how to file your property damage claim:

  1. Ensure safety and prevent further damage: Make sure the area’s safe first. Shut off water if pipes burst, kill the electricity if there’s flooding, cover broken windows or roof holes with tarps to keep rain out, move valuables away from damaged areas. These mitigation steps prevent more damage and show the insurance company you acted responsibly.

  2. Document the damage with comprehensive photos and videos: Take photos and videos from multiple angles soon as it’s safe. Wide shots showing full damage extent and close-ups showing specific problems. Document every affected room, item, area. Save these files with dates and times intact. This visual evidence becomes your most powerful negotiating tool.

  3. Contact your insurance company immediately: Call your insurance company’s claims line or hit up your agent. Give them the basics about what happened, when it occurred, what got damaged. They’ll assign a claim number and walk you through next steps. Write down the claim number, representative’s name, what they told you.

  4. Complete claim forms accurately: Your insurance company sends claim forms, online or by mail. Fill them out completely and honestly. Describe what happened clearly without guessing or exaggerating. Incomplete or inconsistent forms trigger delays.

  5. Gather supporting documents including repair estimates: Collect repair estimates from licensed contractors, receipts for emergency repairs you’ve already handled, maintenance records proving your property’s condition before the incident, any other documents establishing damage scope and cost. Multiple professional estimates strengthen your negotiating position.

  6. Submit police reports if applicable: Vandalism, theft, or vehicle accident caused the damage? File a police report and include it with your claim. Police reports and witness statements add credibility when another party’s responsible.

  7. Keep detailed communication logs with dates and representative names: Every time you talk with your insurance company, write down the date, time, rep’s name, what got discussed. This log becomes critical if disputes pop up later about what was promised or agreed to.

Negotiation skills and thorough documentation are the single most important factors in getting favorable claim outcomes. Insurance companies employ trained pros whose job includes limiting payouts. Your ability to present organized, comprehensive evidence determines whether you get a fair settlement or get shortchanged.
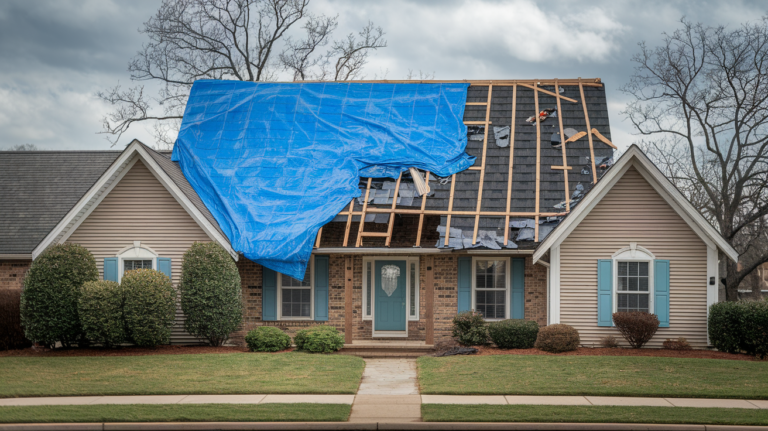
Maximize your settlement with these practices:

Take photos and videos from multiple angles showing context and detail. Get at least two professional repair estimates from licensed contractors. Document pre-damage property condition with maintenance records, previous inspection reports, earlier photos. Save all receipts and invoices for emergency repairs, temporary housing, damage mitigation. Provide property valuation evidence like recent appraisals or comparable sales data. Take immediate mitigation steps and document them with photos and receipts. Keep detailed communication logs tracking every conversation with your insurer. Understand your policy coverage thoroughly before negotiating so you know what you’re entitled to receive.
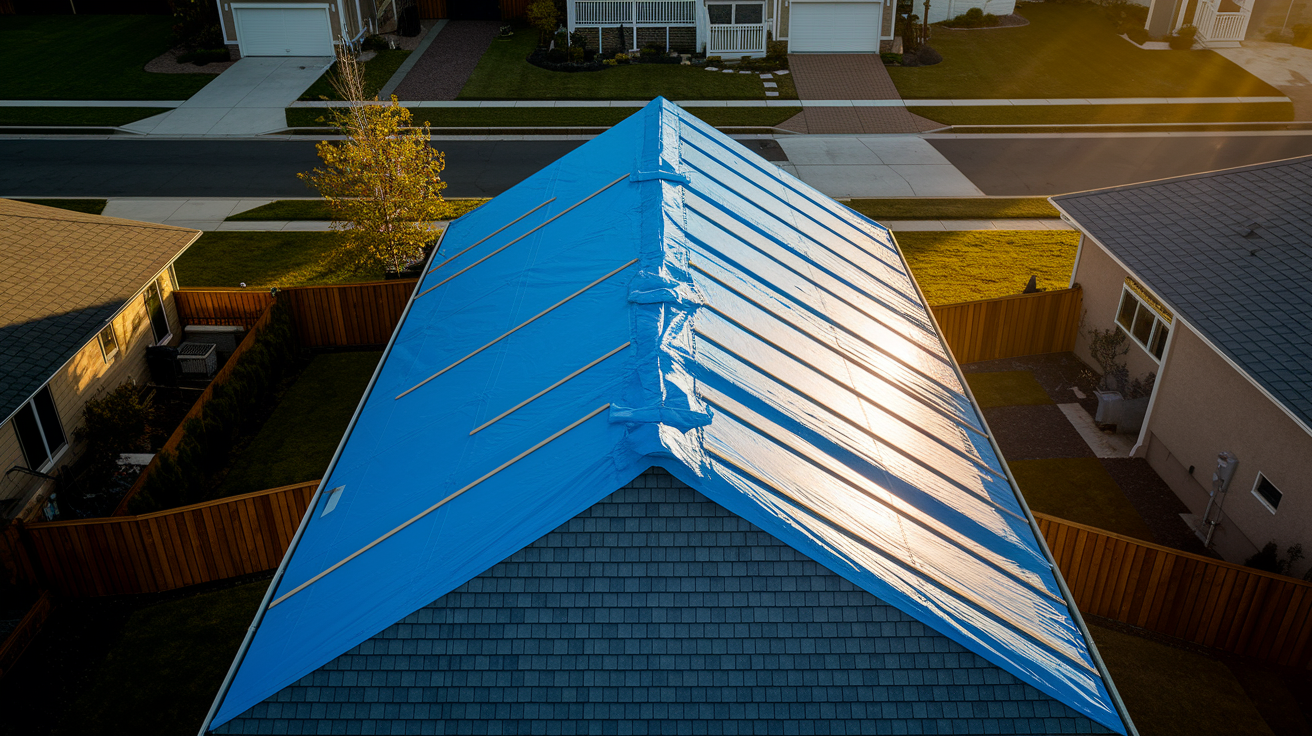

Insurance companies look for inconsistencies or gaps in documentation that justify reducing payouts or questioning damage extent. They compare your photos against their adjuster’s findings, scrutinize contractor estimates for inflated pricing, search for any excuse to classify damage as pre-existing or excluded. Thorough preparation and organized records prevent these tactics from working. More evidence you provide, harder it becomes for the insurance company to dispute your claim.

Working with Insurance Adjusters During Damage Assessment

yL8DWV7EQG-w6K0QIcIjow

An insurance adjuster assesses the damage and figures out how much compensation you’ll get after filing your claim. The adjuster inspects your property, reviews your documentation, compares damage against your policy coverage, calculates a settlement offer. Understanding their role helps you handle this stage better.

Reality check: adjusters work for the insurance company, not you, and they often try to minimize payouts. Their job involves protecting the company’s financial interests while staying within policy terms and legal requirements. Some adjusters are fair and thorough. Others look for reasons to cut your settlement. Assume you’ll need to advocate for yourself and prepare accordingly.

Average claims cycle time jumped to nearly 24 days in 2024, over six days longer than the previous year. This slowdown reflects increased claim volumes, staffing shortages, rising complexity as catastrophic events pile up. Expect the process to take weeks, not days, especially after major storms when hundreds of claims flood the system simultaneously.

Work effectively with adjusters by staying engaged throughout their assessment. Be present during the inspection so you can point out damage they might miss, especially hidden issues like water staining in closets or cracks in less obvious areas. Provide all your documentation upfront: photos, videos, contractor estimates, receipts, maintenance records. Ask questions about their assessment. They note something as excluded or pre-existing? Ask them to explain why and show you the policy language backing that up. When you’re getting ready for the adjuster’s visit, checking out Home Inspection Preparation Tips helps you organize documentation and make the property accessible for a thorough look.

Adjuster’s offer seems weak? You’ve got options. Negotiate by providing additional evidence or challenging their valuation with competing contractor estimates. Request a second opinion from another adjuster within the same company. Hire an independent adjuster or public adjuster who works for you instead of the insurance company. Public adjusters charge a percentage of your settlement but can seriously increase payouts on complex or high-value claims. The appraisal process offers formal dispute resolution when you and the insurance company disagree on damage valuation but agree coverage applies.

Understanding Deductibles and Claim Reimbursement Amounts

Gq3CWRbjTsCKdK619mv9uQ

Your deductible is what you pay out of pocket before insurance coverage starts. Got a $2,500 deductible and your claim totals $10,000? Insurance company pays $7,500 and you pay the first $2,500. Deductibles apply per claim, so multiple incidents in the same year mean multiple deductibles.

Depreciation affects actual cash value settlements by cutting your payout based on age and condition of damaged items. Roof with a 20-year lifespan that’s already 15 years old has depreciated 75%, meaning an actual cash value settlement pays only 25% of replacement cost. Replacement cost policies pay the full amount to install a new roof, but many insurers issue depreciation holdbacks initially and release the withheld amount only after you complete repairs and submit proof.

Insurers often issue payments in installments: initial amount for starting repairs and final payment upon completion. Protects the insurance company from paying for work that never gets done, but creates cash flow problems for homeowners and contractors who need money upfront for materials and labor. Settlement offers may not fully cover repair costs, especially after catastrophic events when contractor and material prices spike due to high demand.

Reimbursement Type How It Works What You Receive
Replacement Cost Full cost to replace damaged property with new, similar-quality items without deducting for depreciation Higher payout, often issued in two payments (initial minus depreciation, final after repairs complete)
Actual Cash Value Replacement cost minus depreciation based on age, condition, and useful life of damaged property Lower payout, issued in one payment covering depreciated value only
Partial Payment Installment structure where initial payment covers immediate repairs and final payment released after completion and documentation Split payments requiring proof of completed work before receiving full settlement
Total Loss When repair costs exceed a certain percentage of property value (often 50-80%), property is declared a total loss Policy limit payout minus deductible, damaged property may transfer to insurance company

Watch out for underinsurance and coinsurance penalties. Insured for less than your policy’s required percentage of replacement value (typically 80%)? You’ll face a coinsurance penalty that cuts your payout proportionally. Home worth $300,000 requiring 80% coverage ($240,000 minimum) but insured for only $200,000 results in a reduced settlement even on partial losses. Insurance companies and offending parties typically want to pay as little as possible, often less than what’s actually needed to properly fix your property, so verify your coverage limits match actual replacement costs.

Timeline Expectations for Property Damage Claim Resolution

2smNHulKROC4lgwcBdWnwA

Average claims cycle time sits at nearly 24 days in 2024, meaning most claims take about three to four weeks from initial filing to settlement approval. That’s an average. Simple claims with clear documentation might close in ten days while complex or disputed claims can drag on for months.

Several factors affect how long your claim takes. Claim complexity matters. Straightforward incidents with obvious damage and clear coverage settle faster than situations involving multiple damage types, coverage disputes, or questions about what caused it. Catastrophic events slow everything down because adjusters and contractors get overwhelmed with volume. Documentation completeness speeds up processing, while missing information triggers delays as the insurance company requests additional evidence. Adjuster availability varies wildly depending on seasonal claim loads and staffing levels.

Catastrophic claims made up 46% of personal lines property claims in 2023, highest in seven years. Hurricanes, wildfires, or major storm systems hit? Expect way longer timelines as insurance companies work through hundreds or thousands of claims simultaneously. The property and casualty insurance sector has underperformed compared to other U.S. industries in recent years, with challenges including increasing catastrophic events, higher premiums, slower service.

Emergency repairs can often start before full claim approval. Need to board up windows, tarp a damaged roof, or extract standing water to prevent further damage? Most policies let you proceed immediately and submit receipts for reimbursement. Just document everything, keep receipts, notify your insurance company soon as possible. Expedited claims processes exist for urgent situations involving safety hazards, uninhabitable homes, or rapidly deteriorating damage. Ask your adjuster whether your situation qualifies for expedited handling.

Managing Repairs and Working with Restoration Contractors

MSl0gOwCRAygW8IbpECbow

Work with licensed and reputable contractors who carry proper insurance and have verifiable experience with insurance restoration work. Check their license status with your state’s contractor licensing board, verify their liability and workers’ compensation insurance, ask for references from recent insurance jobs. Skip the storm chasers who show up in your neighborhood immediately after disasters, pressure you to sign contracts, and disappear before finishing the work.

Get multiple estimates from different contractors before picking one. Three estimates give you a range to compare against your adjuster’s valuation and strengthen your negotiating position if the insurance payout falls short. Contractor estimates that align closely with each other but exceed the adjuster’s offer provide evidence the adjuster undervalued repairs.

Coordinate between insurance payment schedules and contractor payment requirements carefully. Most contractors want a deposit before starting work and progress payments as work continues, but insurance companies often delay full payment until completion. Discuss payment timing with your contractor upfront and confirm your insurance company’s payment schedule. Some contractors work directly with insurance companies on larger claims, accepting assignment of benefits where the insurance company pays them directly. Simplifies cash flow but reduces your control over the settlement.

Make sure repairs meet current building codes even if your original construction was built to older standards. Insurance companies typically pay only for code-compliant repairs, which can cost more than simply replacing what was there before. Your 40-year-old electrical system got damaged and current codes require upgraded wiring? Expect coverage disputes about whether the upgrade is a covered repair or an improvement you must pay for separately. For situations involving water intrusion, starting with professional Emergency Water Damage Services prevents secondary damage and documents proper mitigation efforts for your insurance claim.

Keep detailed records of all repair work, invoices, material receipts, change orders. Your insurance company may audit the work or request proof before releasing final payments. Detailed records also protect you if disputes arise about whether specific repairs got completed or whether costs were reasonable. Emergency repairs and mitigation efforts should begin immediately to prevent further damage: cover roof openings, extract standing water, stabilize structural issues, protect undamaged areas. Just document everything with photos and receipts before you start.

Common Reasons for Property Damage Claim Denials

h2YXkW61TnqXBfNNxIiYEQ

Insurance companies sometimes deny claims or offer settlements that don’t fully cover losses, leaving homeowners confused and frustrated about why coverage got rejected.

Common reasons insurance companies deny property damage claims:

Missed notification deadlines: failing to report damage within the required timeframe specified in your policy

Excluded perils: damage caused by something specifically excluded in your policy, like flood, earthquake, or normal wear and tear

Policy lapsed or not in effect: coverage wasn’t active when damage occurred due to non-payment or cancellation

Insufficient documentation: unable to prove damage occurred, when it happened, or its extent

Pre-existing damage: the insurance company claims damage existed before the incident or resulted from long-term neglect

Failure to mitigate further damage: not taking reasonable steps to prevent additional damage after the initial incident

Suspected fraud: inconsistencies in your claim or evidence suggesting you misrepresented the damage or its cause

Review denial letters carefully to understand the specific reasoning behind the decision. Denial letters must cite the policy provisions or facts supporting the denial. Read this documentation thoroughly before reacting. Sometimes denials result from simple misunderstandings or missing information that can be corrected.

Delays in reporting can tank coverage entirely or give the insurance company ammunition to deny claims based on inability to verify when damage occurred. Denials can sometimes be challenged with additional evidence that addresses the stated reason or with alternative policy interpretations that support coverage. Denial seems unfair or the reasoning appears flimsy? Don’t accept it as final without exploring your appeal options.

Negotiating Disputes: Appeals and Settlement Challenges

CAealg-fS0il7MfW65P0pA

Settlement offers are often insufficient, denials do happen, and insurance companies typically want to pay as little as possible while staying within legal boundaries.

If you get a denial or inadequate settlement, follow these steps to appeal:

  1. Review the denial or settlement letter thoroughly to understand specific reasoning: Figure out exactly what the insurance company is claiming. Coverage issue, valuation dispute, documentation gap? You can’t effectively appeal until you understand their position.

  2. Gather additional supporting evidence and documentation: Collect whatever addresses their concerns. They claim insufficient proof of damage? Get more photos or contractor statements. They dispute valuation? Obtain additional professional estimates. They claim pre-existing damage? Provide maintenance records or earlier inspection reports proving the property was sound before the incident.

  3. Submit a formal appeal in writing with new evidence or policy interpretation challenges: Send a written appeal referencing your claim number, stating clearly why you believe the denial or settlement is incorrect, providing supporting evidence. Keep the tone professional and fact-based. Skip emotional arguments.

  4. Request independent appraisal if valuation is disputed: You and the insurance company agree coverage applies but disagree on how much damage costs to repair? Invoke the appraisal clause in your policy. Each party hires an appraiser, the two appraisers select an umpire, and they determine a binding valuation.

  5. Consider hiring a public adjuster for complex disputes or bad faith situations: Public adjusters work for you instead of the insurance company, handling documentation, estimates, negotiation, appeals in exchange for a percentage of your settlement. Especially valuable on high-value claims or when you suspect bad faith practices.

The formal appraisal process serves as dispute resolution when parties disagree on damage value but agree coverage exists. Faster and cheaper than litigation while providing a neutral determination of repair costs. Most policies include appraisal clauses that allow either party to trigger this process.

Bringing in an independent or public adjuster makes sense when the settlement offer falls way short of reasonable repair costs, when the insurance company repeatedly undervalues damage despite evidence you’ve provided, or when you lack the time or expertise to manage a complex claim yourself. Independent adjusters provide one-time assessments for a flat fee, while public adjusters manage the entire claim process for a percentage.

Additional evidence or challenging policy interpretation can flip denials or boost settlements substantially. Insurance companies deny claims or lowball settlements hoping you’ll accept their initial decision without pushback. Many homeowners do exactly that, costing themselves thousands of dollars. Providing contractor statements that contradict the adjuster’s findings, citing policy language that supports coverage, or demonstrating that damage resulted from a covered peril rather than an excluded cause can flip denials into approvals.

Bad faith insurance practices happen when insurance companies unreasonably deny valid claims, deliberately undervalue damage, fail to investigate claims properly, or use deceptive tactics to avoid paying. Suspect bad faith? Document everything, escalate through the company’s internal complaint process, consider filing a complaint with your state insurance commissioner. Bad faith situations often warrant hiring an attorney since they may entitle you to damages beyond your policy limits.

When to Hire an Attorney for Your Property Damage Claim

0ik__X4KR6Cy_w1lQ1chVQ

Most property damage claims don’t need an attorney and settle reasonably through standard negotiation with the insurance company. But certain situations demand legal representation to protect your interests and maximize recovery.

Hire a property damage attorney when you’re facing denied claims you believe should be covered, bad faith insurance practices where the company acts unreasonably or deceptively, disputes over coverage interpretation when policy language is ambiguous or the insurance company misapplies exclusions, significantly undervalued settlements where the offered amount falls far short of documented repair costs, or complex commercial claims involving business property, loss of income, or multiple insurance policies. Success depends heavily on the ability to negotiate with insurance companies, adjustors, and claims attorneys, and most property damage claims involve dealing with these professionals at some point.

Property damage attorneys handle policy interpretation by analyzing your coverage in detail and identifying provisions that support your claim, often finding coverage the insurance company overlooked or misapplied. They manage evidence gathering by coordinating with contractors, engineers, and other experts to document damage and establish what caused it. They negotiate aggressively on your behalf without the emotional attachment that often undermines homeowners’ bargaining power. When negotiation fails, they file complaints with state insurance commissioners who regulate insurance company conduct and can pressure companies to reconsider. If all else fails, they pursue litigation to force the insurance company to honor its obligations or pay damages for bad faith.

Insurance regulations vary by state, affecting claim procedures, coverage requirements, homeowner protections. An attorney practicing in your state provides personalized guidance based on local laws and regulatory environment. What works in Florida doesn’t necessarily apply in Texas or North Carolina. Consulting an attorney specializing in property insurance claims is valuable for disputes over coverage, payout amounts, or claim denials.

Many property damage attorneys work on contingency for larger claims, meaning they take a percentage of your settlement or award rather than charging hourly fees. Makes legal representation accessible even when you’re already financially stressed from property damage. Before hiring an attorney, ask about their fee structure, success rate with similar claims, estimated timeline for resolution.

Final Words

A property damage claim connects you directly to the resources you need after unexpected damage disrupts your home.

The process moves through clear stages: document everything, file promptly, work with adjusters, negotiate fairly, and coordinate repairs with professionals who understand what needs fixing.

Thorough preparation and honest communication give you the best shot at fair reimbursement. Start with photos, keep records of every conversation, and don’t hesitate to ask questions when something doesn’t make sense.

Your home matters. Getting it back to safe and functional isn’t optional, and understanding the claims process helps you protect what you’ve built.

FAQ

What is classified as property damage?

Property damage is classified as physical harm to structures, belongings, or land caused by accidents, weather events, vandalism, or other incidents. This includes broken windows, roof damage from hail, water damage from burst pipes, fire damage, vehicle collision damage to buildings, and destruction from natural disasters like storms or floods.

What is the average settlement for property damage?

The average settlement for property damage varies widely based on the extent of damage, policy limits, deductible amount, and whether you receive replacement cost or actual cash value. Settlement amounts depend on your specific coverage, the adjuster’s assessment, repair estimates, and successful negotiation with your insurance company to reach a fair payout.

What are common examples of property damage?

Common examples of property damage include storm or hail damage to roofs and siding, water damage from burst pipes or flooding, fire and smoke damage to structures and contents, vandalism including graffiti and broken windows, vehicle accidents causing structural damage to buildings, and destruction from natural disasters like hurricanes or tornadoes.

What does $25,000 property damage coverage mean?

Property damage coverage of $25,000 means your insurance policy will pay up to $25,000 maximum for covered property damage from a single incident. This coverage limit caps the total amount the insurance company will reimburse, and any damage costs exceeding $25,000 must be paid out of pocket or pursued directly from responsible parties.

Drywall Replacement After Water Damage: Simple, Fast Fix

0

Are you ready to fix water damage fast? Even a tiny leak can weaken your wall, leaving soft spots and peeling paint that worry any homeowner. We know it’s stressful to see your wall in disarray. That’s why we created a simple guide to help you quickly replace damaged drywall and restore stability to your home.

In this guide, we explain:

  1. How to spot the damage.
  2. How to safely remove the old drywall.
  3. How to install new panels for a secure fix.

We’re here to help you get back to a safe, comfortable home.

Comprehensive Step-by-Step Guide to Drywall Replacement After Water Damage

  1. First, turn off the water right away and check where the leak is coming from. If you suspect a burst pipe or a hidden leak, call a licensed plumber (an expert who fixes water problems). For example, if you find water pooling under a sink, shut off the main valve and look closely to find the leak.

  2. Next, inspect the drywall for damage. Look for signs like sagging, bubbling paint, or crumbling edges. Drywall loses strength quickly after absorbing water. If only a small area (less than 1 square foot) is affected, you might repair it. But if the panel feels soft or starts to separate, replacing it completely is the safer option.

  3. Carefully remove the damaged parts using a utility knife or a drywall saw. Work slowly to avoid harming the surrounding wall. This careful removal follows standard guidelines for checking moisture damage.

  4. Dry the wall cavity thoroughly. Use fans, industrial dehumidifiers (machines that remove moisture from the air), and open windows to help the process. Allow 48 to 72 hours for complete drying, especially in humid conditions.

  5. Check the wall studs and any insulation behind the wall for mold or damage. Replace or treat any compromised areas immediately. Mold can start growing within 24 to 48 hours, so it’s important to address this quickly.

  6. Install new drywall panels that match the original thickness. Secure them with corrosion-resistant screws to ensure a sturdy repair.

  7. Finish by taping the seams, applying joint compound (a type of mud used to smooth the surface), sanding until smooth, priming, and painting. This final step not only makes your wall look good again but also helps protect it from future water damage.

Identifying Drywall Damage: Repair vs Full Replacement

img-1.jpg

Look at your walls closely for water damage. Bubbling paint, crumbling edges, or a soft, sagging feel means the wall has absorbed too much water. If the affected spot is small (less than one square foot) and there is no musty smell or visible mold, you can cut out the damaged part and patch it up. For example, after a minor leak, a simple patch saved time and money.

If a larger area is affected or the wall starts to pull away, you will need to replace the whole panel. According to IICRC S500 guidelines (industry rules for safe restoration), walls that lose their firmness should be replaced to keep your home secure.

A musty smell can signal mold, which might appear in just 24 to 48 hours. If you notice this odor, replacing the full panel is the best way to stop further mold growth.

Damage Size Action
Less than 1 square foot Patch if there is no musty smell or mold
More than 1 square foot or soft/sagging panels Replace the entire panel

Safety Protocols and Drying Equipment for Water-Damaged Walls

When water damages a wall, safety comes first. Wear goggles, N95 masks (respirators that filter small particles), and gloves to protect yourself from debris and mold spores. If you spot a soft spot on the wall, put on your safety gear before you start any work.

We use high-powered fans and industrial dehumidifiers (machines that pull moisture from the air) to dry the wall cavity. The drying process takes about 48 to 72 hours, depending on how humid the room is. We also use a moisture meter (a tool that shows how wet materials are) to check inside the studs and wall cavity. This step makes sure the structure is dry before new drywall is installed.

Controlling the indoor climate is important too. Keeping the humidity below 50% helps speed up drying and keeps mold away. Follow these steps to stay safe and dry the area properly:

  • Wear goggles, N95 masks, and gloves
  • Use fans and industrial dehumidifiers
  • Check moisture with a moisture meter
  • Keep indoor humidity below 50%

These methods keep your home safe and ready for lasting drywall repairs.

Choosing Materials and Tools for Effective Gypsum Panel Refurbishment

img-2.jpg

When you replace water-damaged drywall, the right materials make a big difference. In areas prone to dampness, we suggest using moisture-resistant drywall (designed to fight water damage) or mold-resistant drywall (keeps mold at bay). For example, in a bathroom, green board or blue board can help avoid mold in the future.

Before you put in new panels, check the insulation in the wall. If you see insulation that is moldy or wet, replace it right away to prevent more problems later. Using quality materials now means fewer repairs down the road.

Make sure you have the proper tools to work quickly and safely. You will need a utility knife, drywall saw (for accurate cutting), T-square (for straight lines), screw gun, mesh tape, and joint compound. Each tool helps you work better. For example, the drywall saw lets you neatly remove damaged areas while the T-square helps you keep your cuts straight.

It is also important to check the thickness of the panels. Drywall usually comes in either 1/2 inch or 5/8 inch thickness. Matching the thickness of the original wall helps create a smooth finish. Finally, use screws that do not corrode to ensure your wall stays strong over time.

By using good quality materials and the right tools, the repair process becomes faster and your walls will last longer.

DIY vs Hiring Professionals for Drywall Substitution

When water has damaged your drywall, you have two clear choices. If the damage is very small (less than one square foot) with no mold and the leak is fixed, you may choose the DIY route. In these cases, you can use basic tools like a utility knife, drywall saw (a tool with a serrated edge to cut through wallboard), and T-square for straight lines. For a minor leak, a small patch often brings the wall back to normal without extra help.

If you notice widespread water damage, hidden mold, damaged studs, or suspect a deep leak, it’s best to call professionals. Certified experts use industrial equipment (machines that measure moisture and speed up drying) to find leaks and repair the damage up to code. Their certified work comes with guarantees, giving you peace of mind when structural issues or mold are involved.

Aspect DIY Professionals
Scope of Damage Small patches (less than 1 sq ft) Widespread damage or structural issues
Mold Concerns No visible mold Mold present or musty smells
Tools and Equipment Basic tools like a utility knife and drywall saw Industrial equipment for drying and moisture testing
Work Guarantees No built-in guarantee Certified work with guarantees and code compliance

Consider these points to choose the repair method that best fits your situation.

Calculating Costs and Managing Insurance for Drywall Renewal

img-3.jpg

When water damages your drywall, we know it can feel overwhelming. Costs and insurance details matter so you feel prepared for safe repairs. Small repairs may cost a few hundred dollars, while major fixes that need mold clean-up (removing mold from the affected area) and plumbing repairs can run into the thousands. Make a list of each repair with its estimated cost so you have a clear restoration budget.

Start by breaking down your costs. List small repairs apart from full replacement projects. For example, you might budget $300 for a small patch and $2,500 or more for replacing an entire drywall panel along with mold cleaning. A detailed cost breakdown helps you plan realistically.

When it comes to insurance, careful documentation is key. Most policies cover sudden issues like burst pipes. But slow leaks or damage from long-term problems are often not covered. Call your insurance company as soon as you can and document the damage. Take clear photos, record moisture readings (using a moisture meter, a tool that shows the amount of water in materials), and get contractor estimates. Having a checklist of what to document can help you keep track. You can view a checklist here: insurance claim documentation checklist for homeowners.

Also, plan for extra costs that might come up unexpectedly. Ask experts for a professional report and match their notes with your documentation. Good paperwork speeds up your claim process and helps you get a faster response. Accurate cost estimates and careful records are the key to a smooth insurance process.

Mold Mitigation Strategies During Post-Leak Wall Recovery

Water damage can lead to mold formation in just 24 to 48 hours. Molds like Aspergillus and Cladosporium (molds that grow in damp conditions) can quickly spread on wet walls. We start mold mitigation immediately to protect your health and the structure of your home.

First, clear away any debris left from the water damage. Removing loose material stops mold from gaining a foothold. Next, disinfect wall studs and any wet insulation with an EPA-approved biocide (a safe, approved chemical to kill mold). For example, one homeowner spotted a small mold patch near a baseboard. After treatment with an approved spray, the mold was contained before new drywall was installed.

Before replacing drywall, ensure the wall cavity is completely dry. We use industrial fans and dehumidifiers (machines that remove moisture from the air) to speed up drying. Keeping indoor humidity below 50% greatly reduces the chances of mold returning.

  • Remove debris and disinfect wall studs.
  • Treat visible mold with an EPA-approved biocide.
  • Use dehumidifiers and fans to dry the area.
  • Monitor humidity levels to keep them below 50%.

Long-Term Prevention and Maintenance for Drywall After Water Events

img-4.jpg

We know that water damage can be stressful. That is why we recommend taking simple, proactive steps to keep your home safe. Start by installing moisture barriers behind your drywall in high-risk areas (places that might flood). Also, seal any gaps around pipes and windows to stop leaks before they begin. These steps have been proven to block water from seeping in where you least expect it.

It is important to check your gutters regularly and keep your exterior drainage clear. Clean gutters help divert rainwater away from your foundation, reducing the chance of moisture building up in your walls.

Improve ventilation in key areas like basements and bathrooms. Good air flow aids in drying and reduces humidity. Take time to check your HVAC system (heating, ventilation, and air conditioning) and look for any gaps in your insulation. Catching these issues early protects your home from weather damage.

Plan to have a moisture inspection once a year. This helps find hidden damp spots before they cause bigger problems. And when you repair any damage, follow local building rules to ensure everything meets safety standards.

Here are some essential steps:

  • Install moisture barriers behind drywall and seal gaps around pipes and windows.
  • Clean and maintain gutters and drainage.
  • Improve ventilation in damp-prone areas such as basements and bathrooms.
  • Check your HVAC system and inspect for insulation gaps.
  • Schedule annual moisture inspections and follow local renovation guidelines.

Taking these steps will help protect your new drywall and keep your home a safe, dry place for you and your family.

Final Words

In the action, we walked through stopping the leak, drying the area, and assessing the damage. We broke down the steps from small repairs to major fixes and explained when to call in professionals. We also covered cost tips, insurance advice, and simple mold prevention measures. With this guide, you have a clear plan for handling drywall replacement after water damage. You’re set to move ahead with confidence and get your home back to a safe, livable state.

FAQ

Frequently Asked Questions

What is the best way to handle drywall replacement after water damage?

The best way to handle water-damaged drywall is to assess the damage for sagging, crumbling, or mold. Small areas can be patched, but widespread moisture damage typically calls for complete replacement with moisture-resistant panels.

How do you repair minor water-damaged drywall?

Repairing minor water-damaged drywall involves cutting out the wet area, allowing the space to dry fully, and then patching the hole with new drywall. Finish with tape, joint compound, sanding, primer, and paint.

How do you dry a wet drywall ceiling?

Drying a wet drywall ceiling means removing any water source, then using fans, dehumidifiers (machines that remove moisture), and open windows over 48–72 hours. This process helps lower moisture and prevent mold growth.

How much does it cost to repair or replace wet drywall?

Repair costs vary based on damage severity. Small patches may cost a few hundred dollars. In contrast, extensive replacement with mold remediation and extra work can run into the thousands due to material and labor expenses.

How long does it take for drywall to dry after a leak?

Drying drywall after a leak usually takes 48–72 hours. Using fans and dehumidifiers can help speed up the process, while proper ventilation and moisture checks ensure complete drying.

How can you tell if drywall has water damage?

Signs of water damage in drywall include bubbling paint, sagging panels, crumbling edges, and musty odors. These symptoms indicate deep moisture penetration and might require patching or full replacement.

Can wet drywall be dried out successfully?

Wet drywall can sometimes be dried out if the damage is minimal. However, if the gypsum core has softened or mold appears, replacing the drywall ensures a safe and durable repair.

Will drywall grow mold if it gets wet?

Drywall may grow mold if it remains wet for 24–48 hours. Mold thrives on moisture, so quickly drying, repairing, or replacing the affected areas is crucial to prevent mold from developing.