| Washable fabrics and linens |
75-85% with professional treatment |
Specialized laundering, o
Final Words
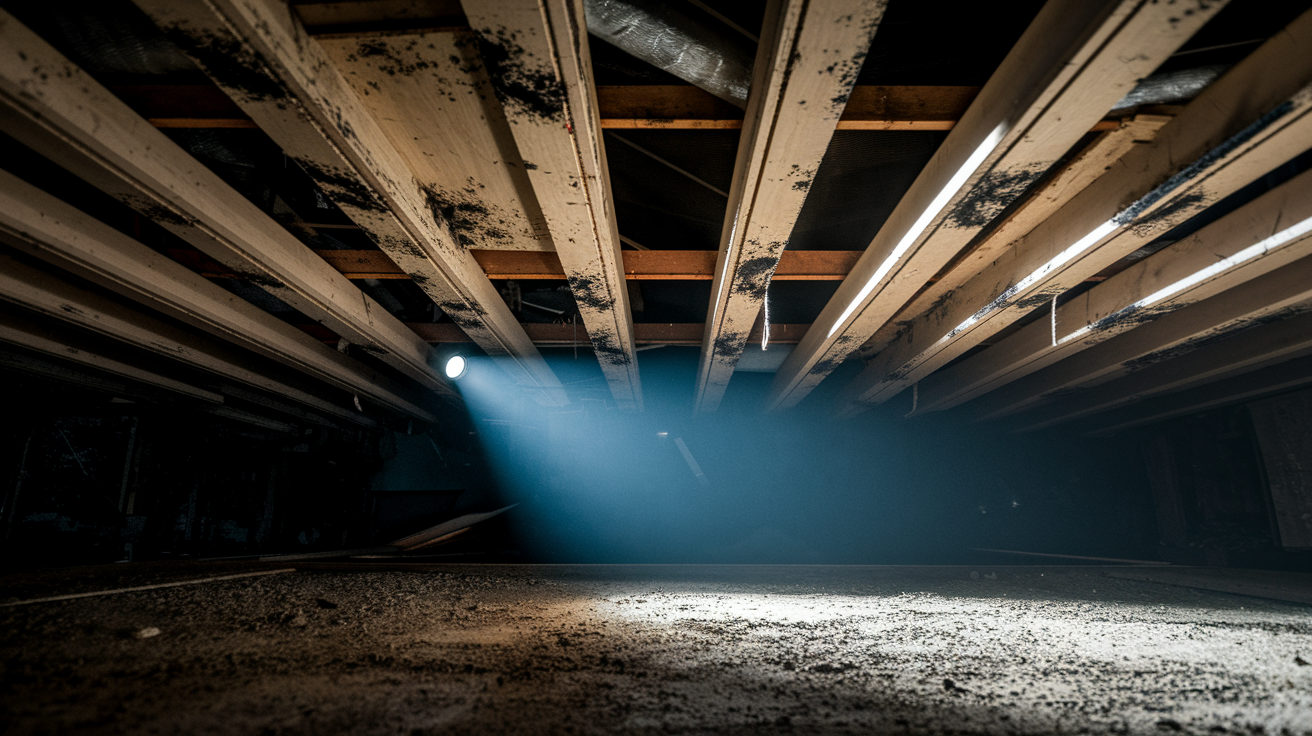
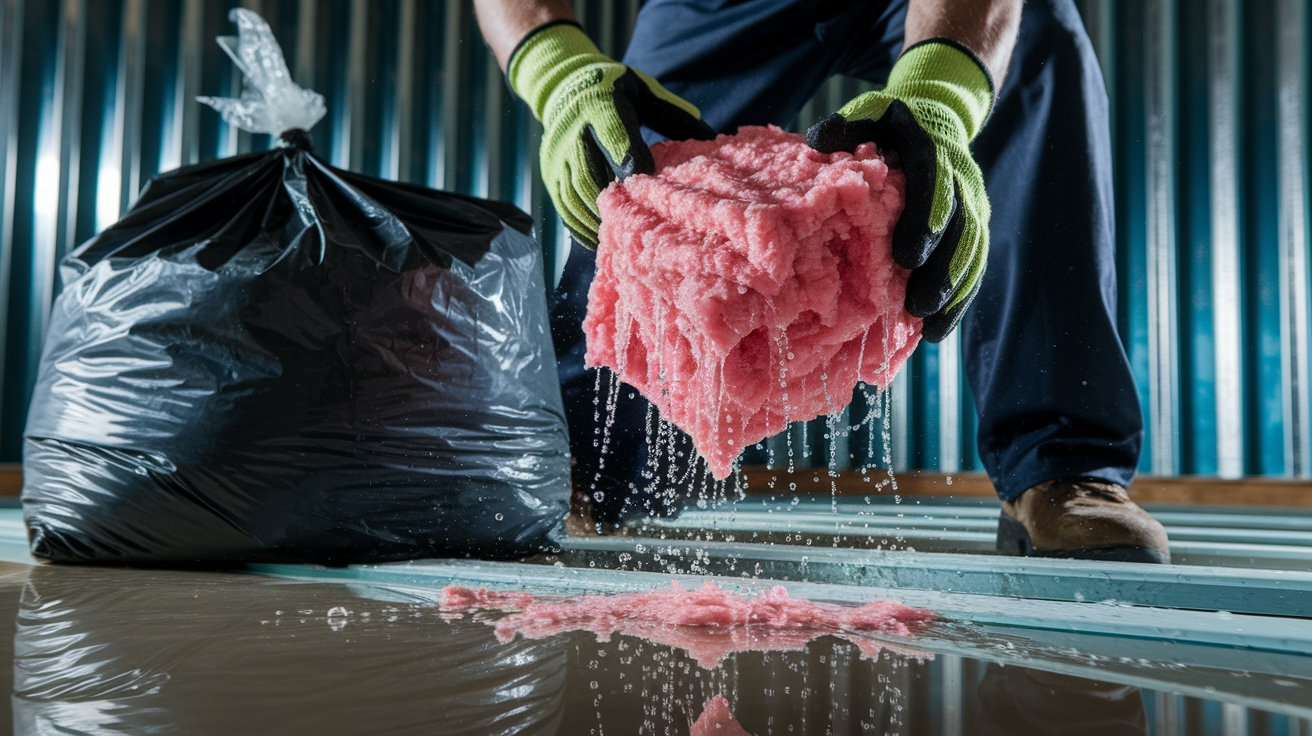
Soot damage after fire spreads fast and corrodes surfaces immediately.
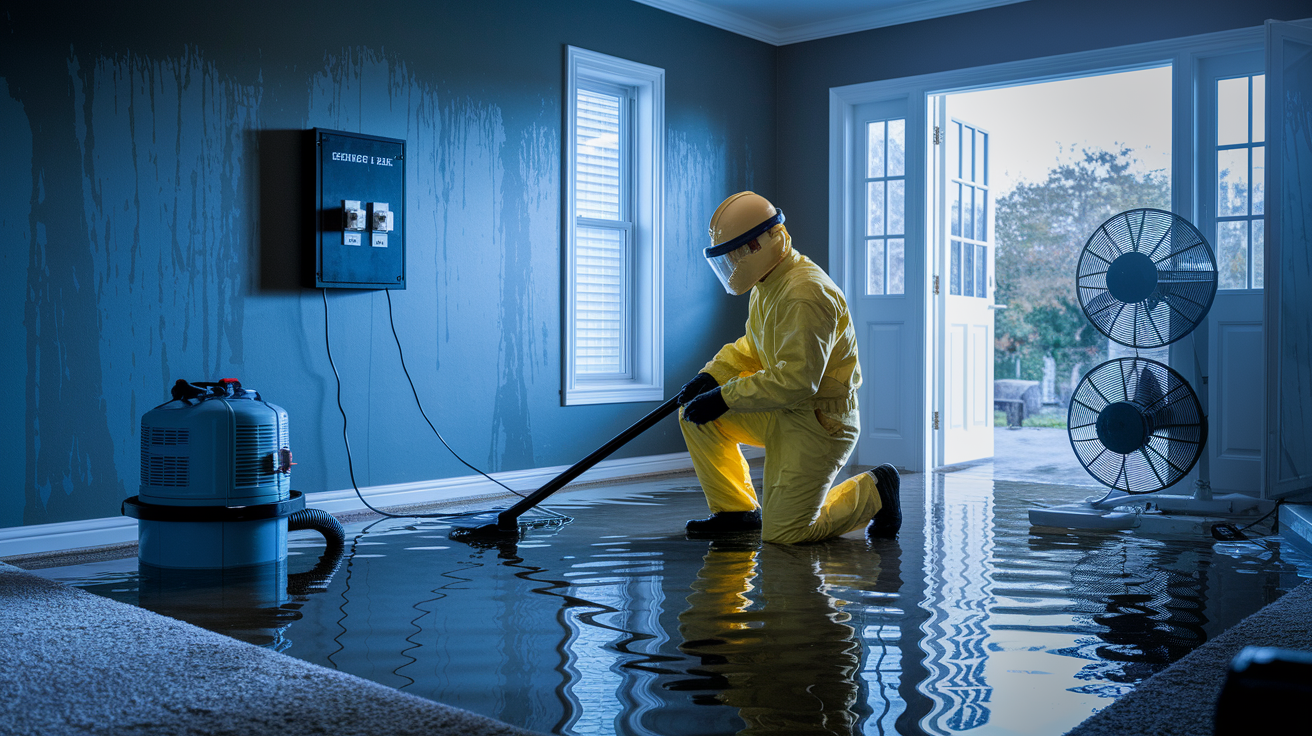
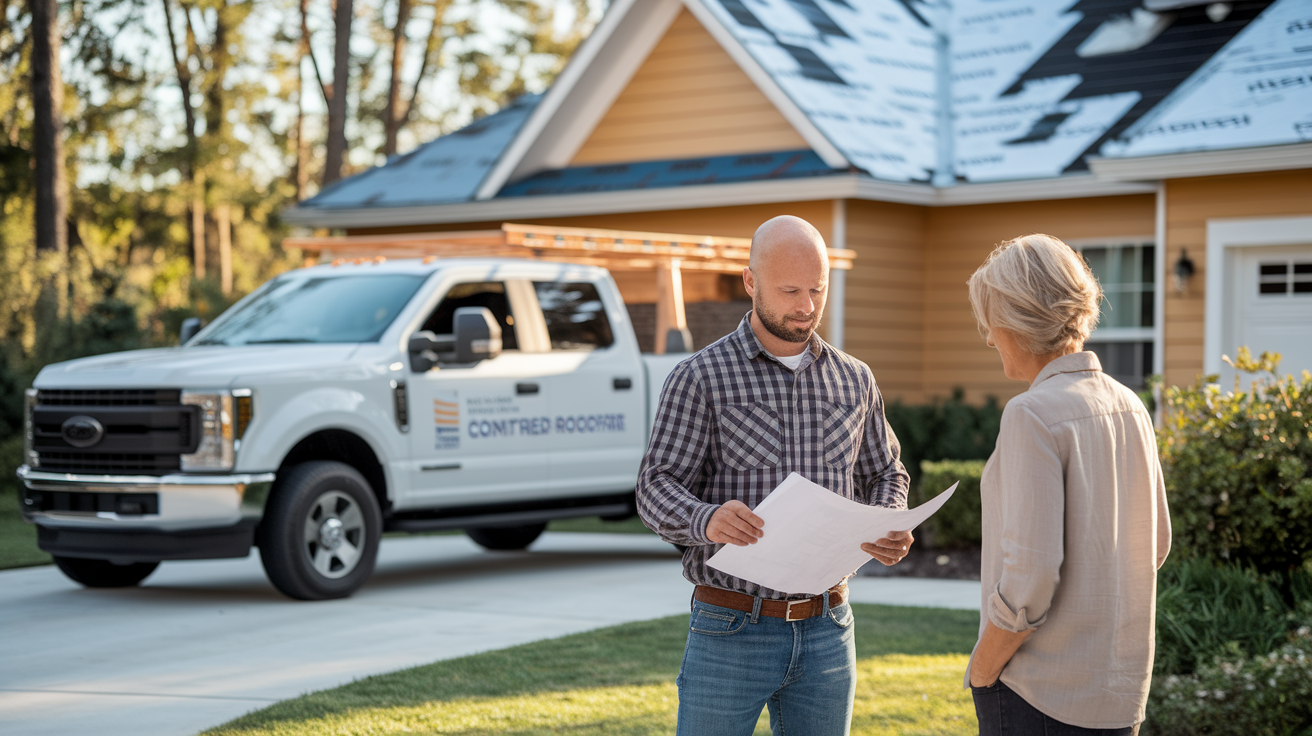
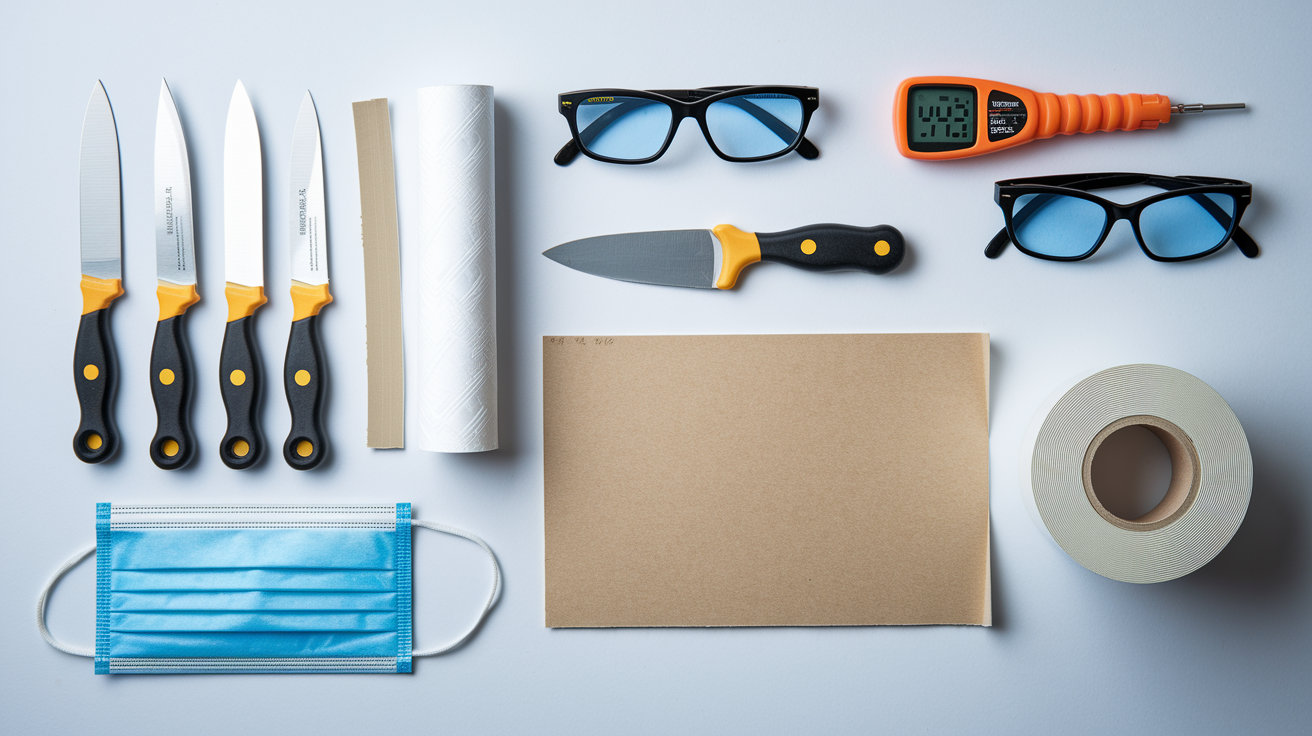
Start with safety first. Shut down your HVAC, wear protective gear, and document everything before you touch anything.
For minor surface damage on hard materials, careful DIY methods can work. But most situations need professional help because soot hides in places you can’t reach and keeps causing damage you can’t see.
The faster you act, the more you can save and the less it costs to fix.
We handle assessment, containment, deep cleaning, deodorization, and finish work as one coordinated plan so you get your home back to safe and comfortable.
FAQ
Is it safe to breathe in soot after a fire?
It is not safe to breathe in soot after a fire because soot contains toxic substances including acids, chemicals, metals, and hazardous combustion byproducts. Inhaling soot particles causes breathing issues, aggravated asthma, bronchitis, and severe respiratory illnesses, particularly dangerous for children, older adults, and those with existing respiratory conditions.
How long does soot stay in the air after a fire?
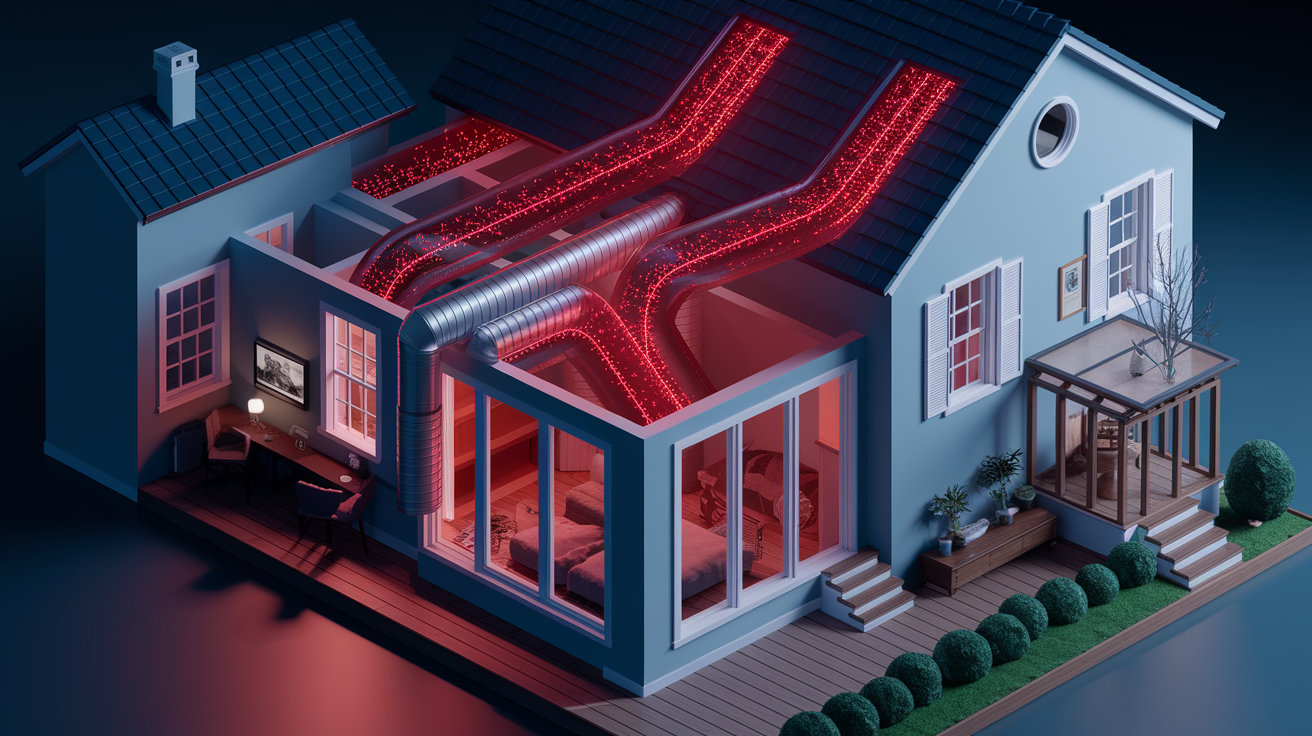
Soot can stay in the air after a fire for days or weeks depending on ventilation and containment efforts. Microscopic soot particles travel through HVAC systems and air currents, settling far from the original fire source and recirculating every time heating or cooling systems operate without proper filtration and duct cleaning.
How to clean up soot after a fire?
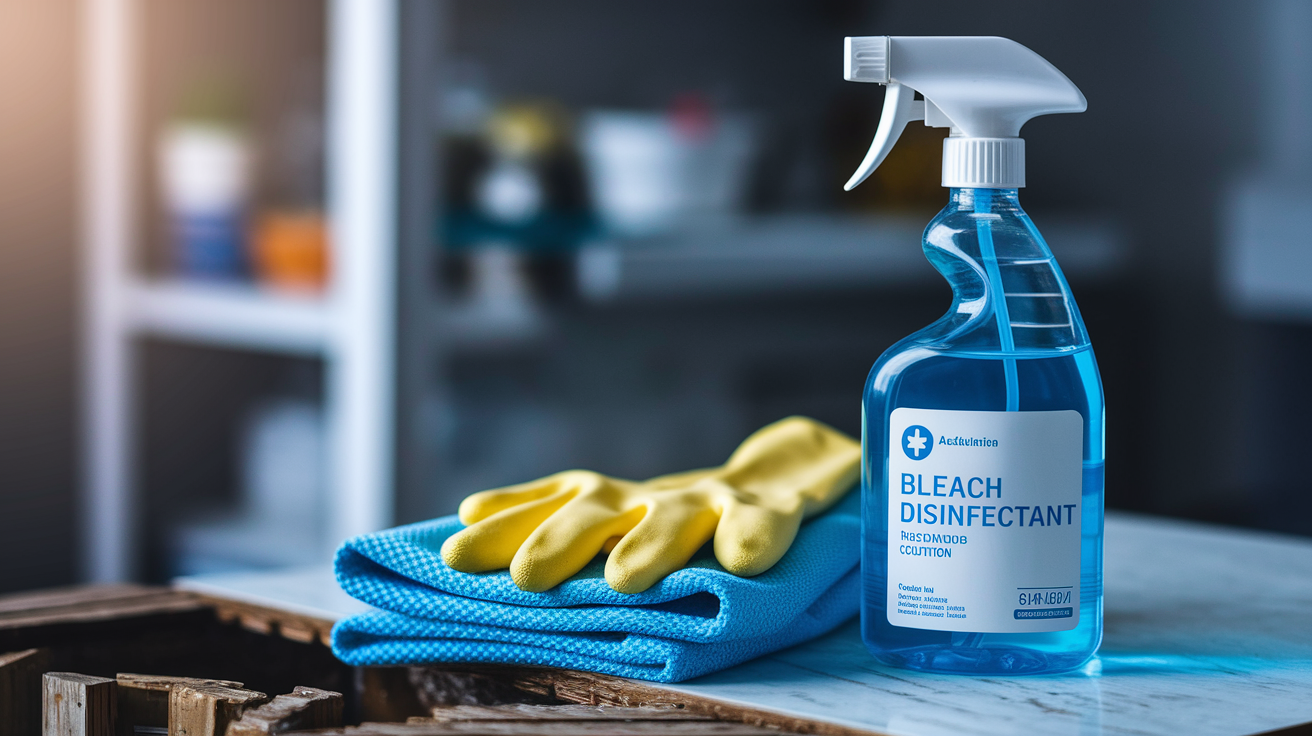
To clean up soot after a fire, start with HEPA vacuuming using gentle outside-in patterns, then use dry chemical sponges on walls and ceilings, followed by damp cloths with mild soap or vinegar solution on hard surfaces. Always wear N95 masks, gloves, safety glasses, and protective clothing before any contact with soot.
Why is my nose black soot after a fire?
Your nose shows black soot after a fire because you inhaled microscopic soot particles that stuck to nasal passages and mucous membranes. This indicates respiratory exposure to toxic combustion byproducts and means you need to wear proper N95 respiratory protection immediately and seek medical evaluation if breathing difficulty occurs.
What is the difference between smoke and soot?
The difference between smoke and soot is that smoke consists of gases and microscopic airborne particles released during active burning, while soot is the solid black carbon-based residue that settles on surfaces after incomplete combustion of materials like wood, oil, or plastics.
Can I clean soot myself or do I need professionals?
You can clean soot yourself only for very minor, surface-level damage on non-porous materials in small areas without health vulnerabilities. Professional restoration is required when odors persist, HVAC systems are contaminated, porous materials are affected, structural involvement exists, or anyone with respiratory conditions occupies the home.
Will soot damage get worse over time if not cleaned?
Yes, soot damage will get worse over time if not cleaned because soot is acidic and begins corroding surfaces immediately upon contact. Trapped soot residue continues causing metal corrosion, wood deterioration, persistent odors, and material breakdown inside structural cavities, increasing restoration costs and permanent damage risk.
Does homeowners insurance cover soot and smoke damage?
Homeowners insurance typically covers soot and smoke damage from fire events, including structural cleaning, contents restoration, professional mitigation services, and temporary living expenses. Coverage requires immediate notification, adjuster inspection, professional documentation with itemized estimates, and comprehensive photo evidence taken before cleanup begins.
How do professionals remove smoke odor that keeps coming back?
Professionals remove persistent smoke odor using specialized technologies including ozone treatment that oxidizes odor molecules, thermal fogging that penetrates the same pathways smoke traveled, and hydroxyl generators for occupied-space treatment. These methods neutralize odors at the molecular source rather than temporarily masking airborne smells like DIY methods.
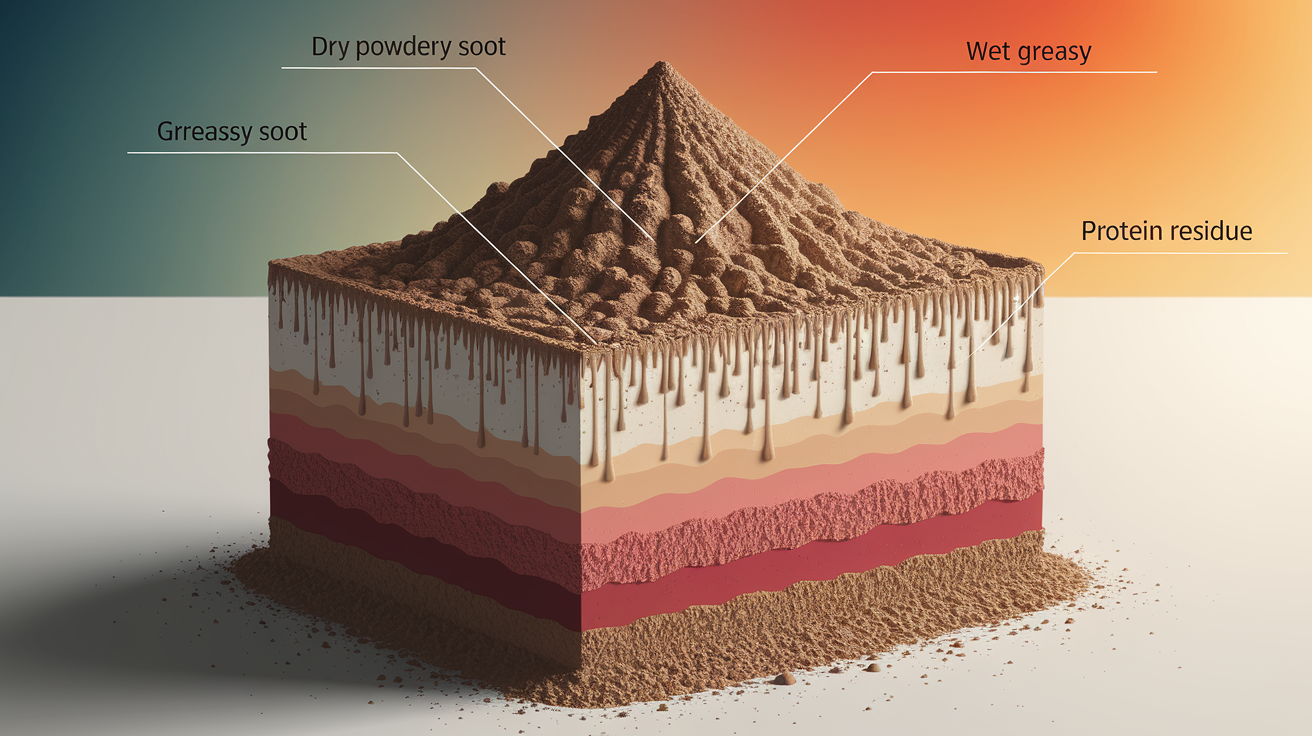
What types of soot are there from different fires?
The types of soot from different fires include dry soot from fast-burning paper or wood fires with powdery characteristics, wet soot from slow-burning plastics or rubber with sticky properties, protein residue from kitchen fires that’s nearly invisible but intensely odorous, and fuel oil soot from furnace malfunctions with thick greasy characteristics.
Can electronics be saved after soot exposure?
Electronics can sometimes be saved after soot exposure depending on contamination severity and immediate response. Professional restoration technicians use ultrasonic cleaning and component-level assessment in controlled environments, but acidic soot causes progressive corrosion on circuit boards and metal contacts, making early professional intervention critical for successful recovery.
What should I do with my HVAC system after a fire?
You should turn off your HVAC system immediately after a fire and not restart it until professionally inspected and cleaned. Soot particles travel through ductwork spreading contamination throughout your entire home with every heating or cooling cycle, requiring specialized negative air pressure cleaning and HEPA filtration before safe operation.

Think a fresh coat of paint will stop smoke smells? Think again.
Paint can fail when odor molecules and soot push back through.
Sealing walls the right way—after you ventilate, remove soot, and fully dry—stops smells and keeps stains from reappearing.
This post walks you through the start‑to‑finish restoration steps: what to do first, how to clean and choose the right sealer, how to apply it, and how to confirm the odor is gone.
No guesswork. Real steps that make repainting stick.
Start-to-Finish Workflow for Sealing Smoke‑Damaged Walls
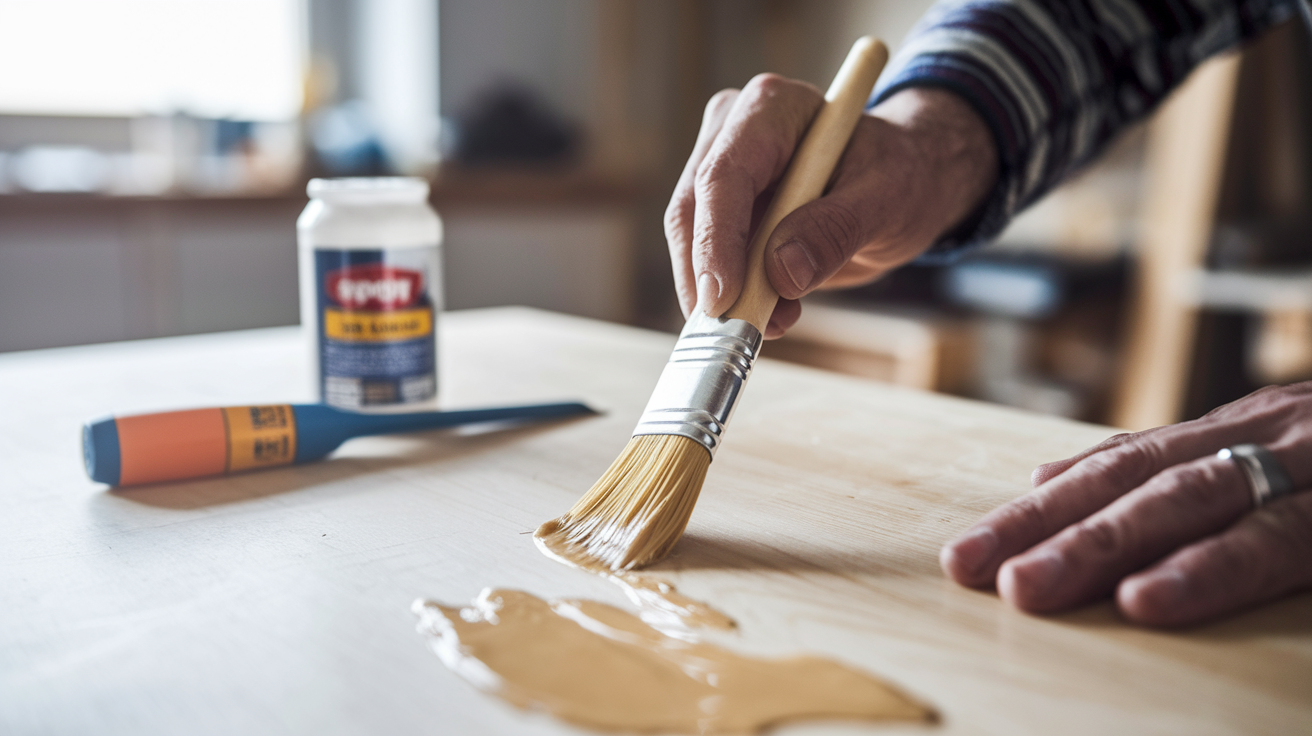
Sealing walls after smoke damage stops odor molecules from bleeding through fresh paint and prevents lingering soot stains from reappearing months later. A proper sealer acts as a barrier, not just cosmetic coverage. Without it, you’ll smell smoke every time the walls warm up, and yellow-brown ghosts of soot patterns will slowly push through your new finish coats.
Before you roll or spray any sealer, the walls must be dry, and the soot must be removed. Ventilation comes first. Open windows, set up box fans blowing outward, and place dehumidifiers in every affected room to pull moisture left by firefighting efforts out of carpets, draperies, and wall cavities. Next, use dry cleaning sponges or a commercial soot cleaner to lift as much residue as possible. Only when surfaces are clean and bone dry should you apply a specialized smoke odor sealer like ULTRA RECON Smoke Odor Sealer, which encapsulates malodors and locks down stains on porous substrates.
Here’s the complete sealing workflow:
- Ventilate immediately. Open all windows and run fans throughout the house to dry wet materials and push smoke particulates outdoors.
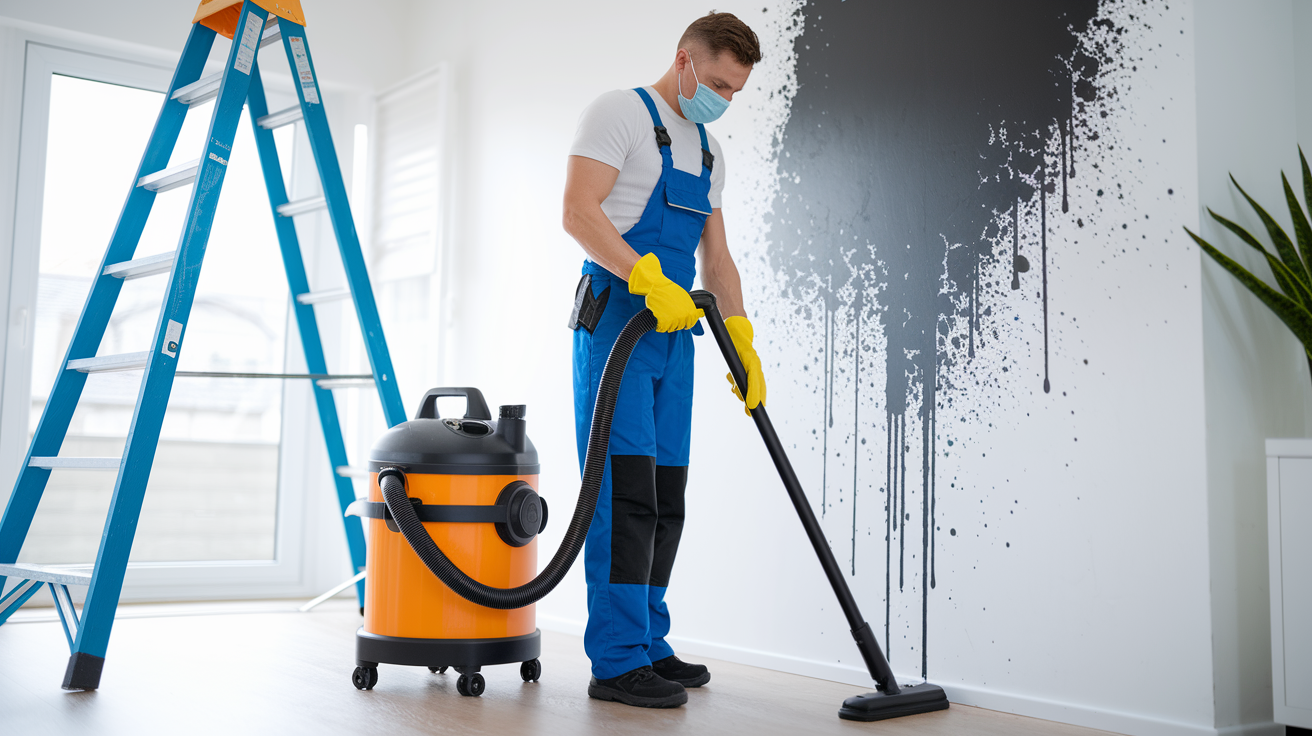
- Remove loose soot. Wipe walls ceiling down with chemical sponges or HEPA vacuum loose particles before wet cleaning.
- Wet clean stubborn residue. Apply a heavy duty cleaner formulated for soot removal, then rinse and let walls dry completely.
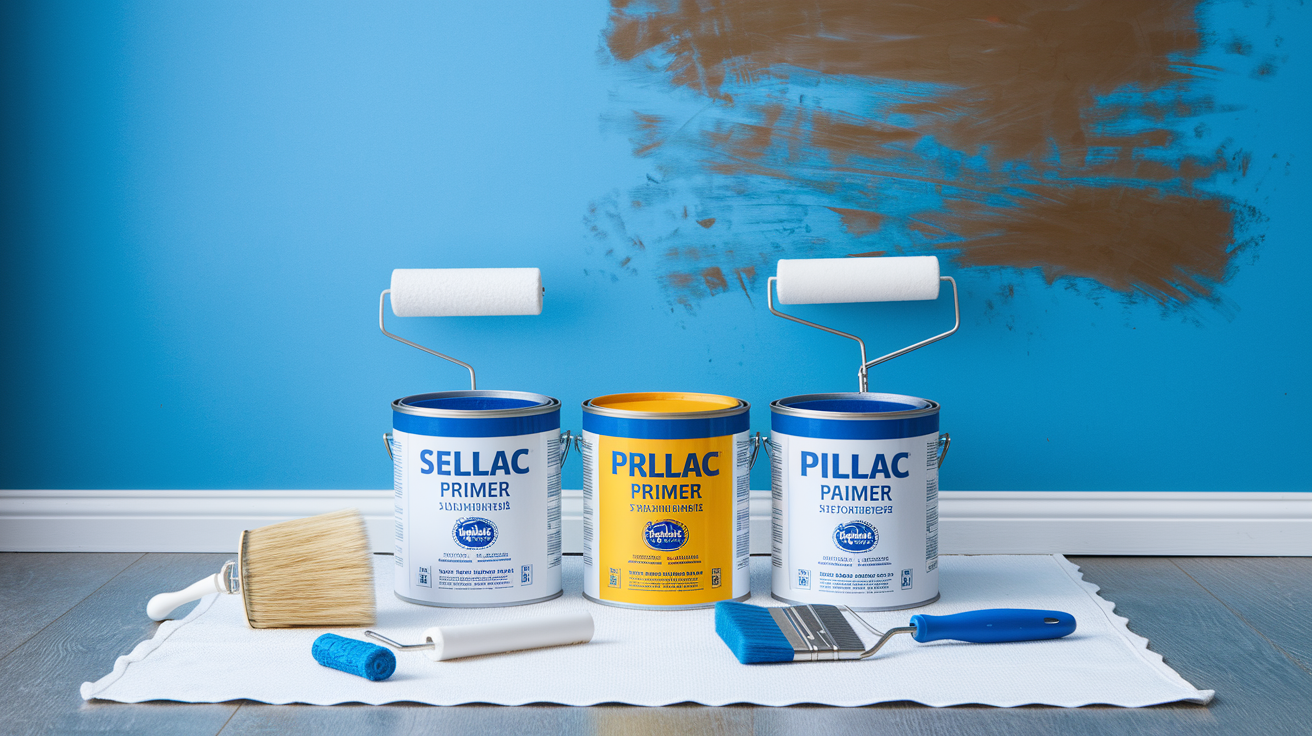
- Select the right sealer. Choose shellac based, water based, or oil based primer depending on odor severity, substrate condition, and occupant sensitivity.
- Apply sealer generously. Use brush, roller, or airless spray to coat all affected surfaces in one or two thick, even layers.
- Verify odor encapsulation. Wait for full cure, then smell test the space before applying finish paint.
Skipping any step or sealing over damp, dirty walls wastes time and money. Odors trapped under primer without proper cleaning will migrate back. Moisture sealed inside drywall can trigger mold or cause paint to peel. The correct sequence (dry, clean, seal) ensures long term odor control and a finish that lasts.
Advanced Soot‑Cleaning Techniques Before Sealing

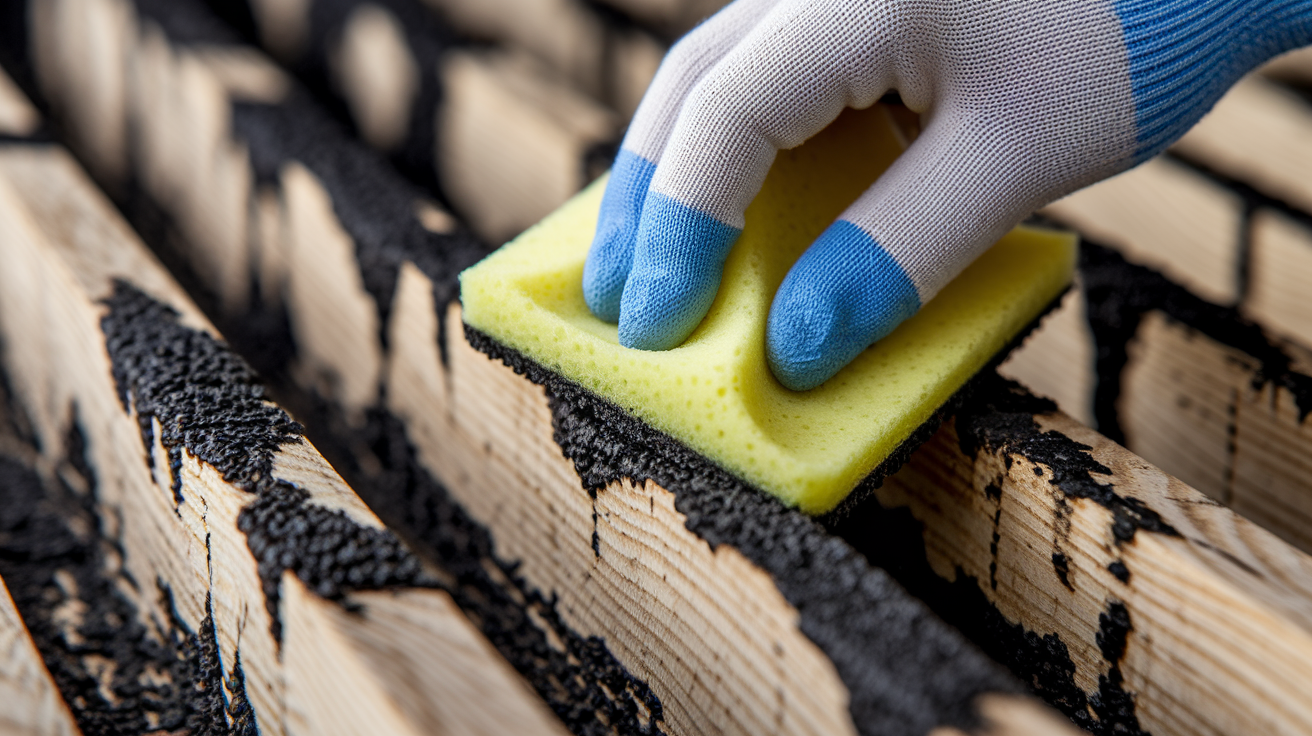
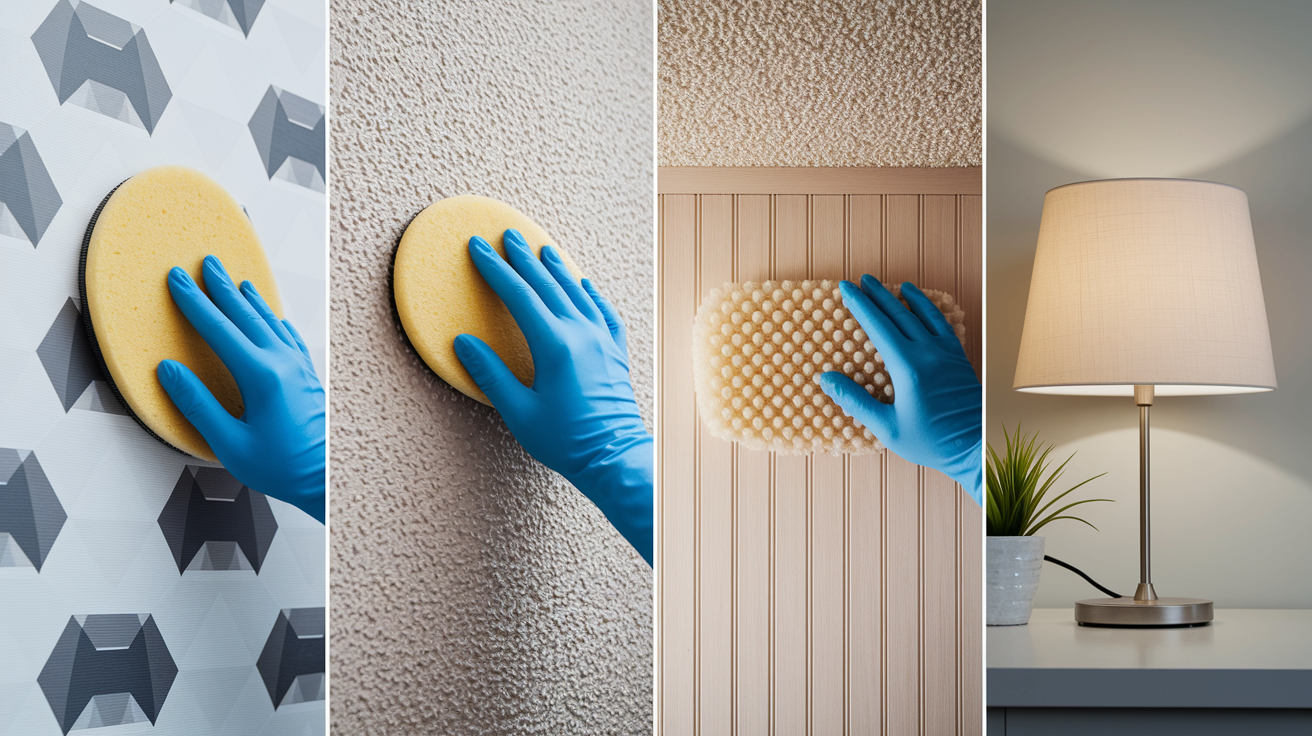
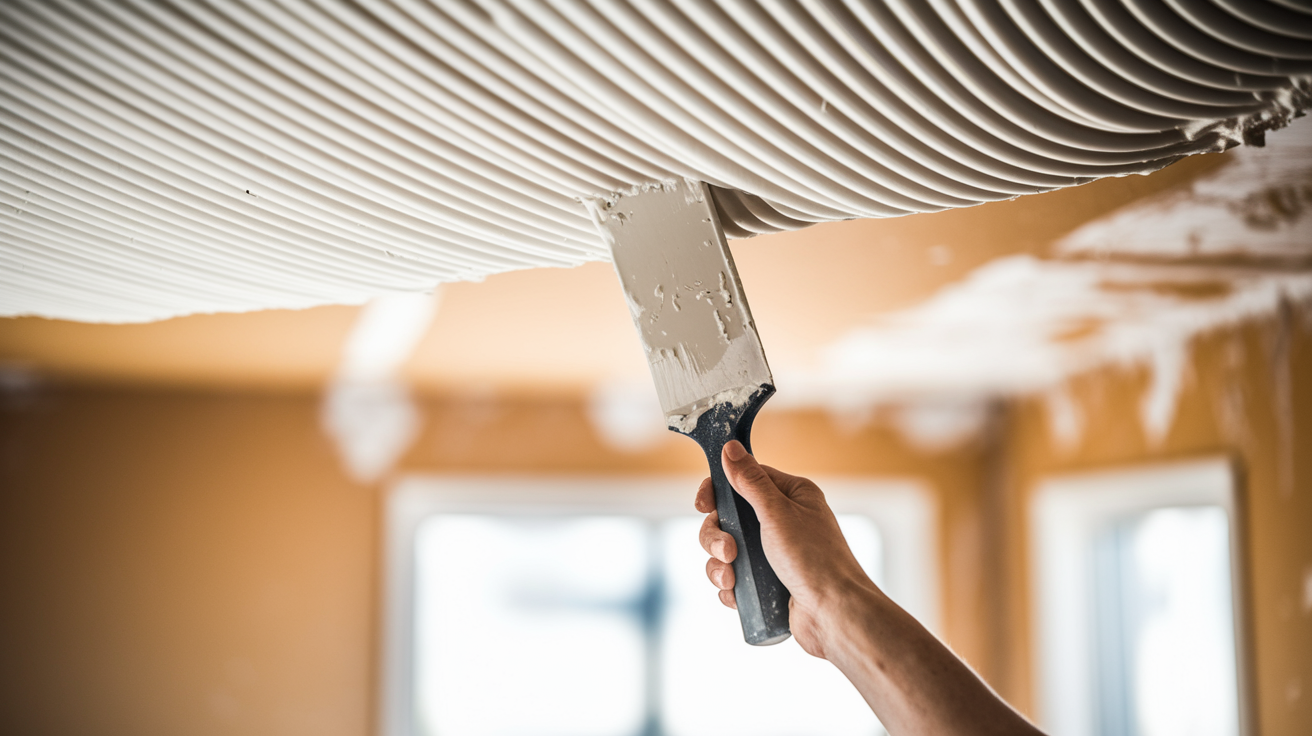
Dry cleaning always comes before wet cleaning. Start at the ceiling and work downward in straight, vertical strokes using a chemical sponge, a rubber like block designed to lift dry soot without smearing. When the surface of the sponge turns black and stops grabbing particles, slice off the dirty layer with a utility knife or discard the sponge and grab a fresh one. Never scrub in circles. That grinds soot deeper into paint and wallpaper.
Once dry soot is removed, stubborn oily residue (especially in kitchens where grease mixed with smoke) requires wet cleaning. Apply a commercial cleaner like RECON Heavy Duty Cleaner with a sponge or microfiber cloth, working in small sections and rinsing frequently. Let each cleaned section air dry or use fans to speed the process. Walls must be completely dry before you prime. If drywall paper is still cool to the touch or darker in color, keep drying.
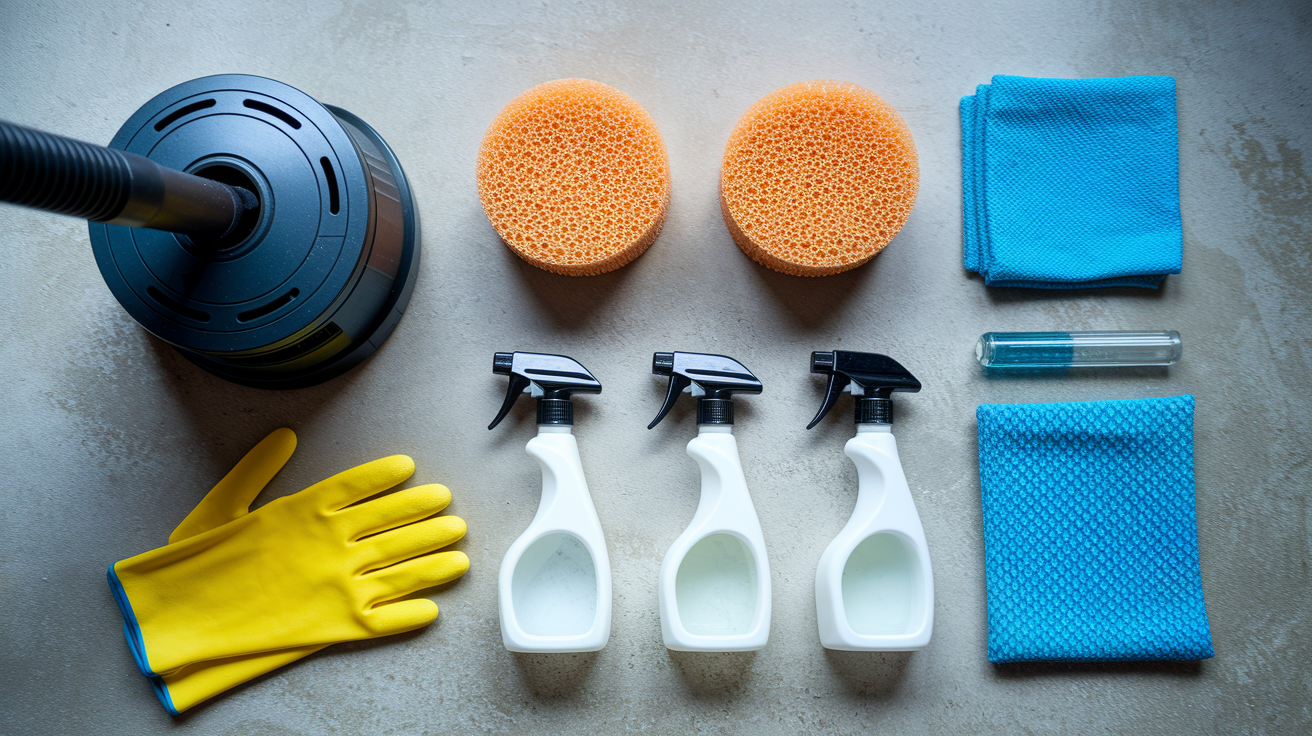
Common soot removal tools and when to use each:
HEPA vacuum removes loose, powdery soot from textured surfaces, baseboards, and corners before any wet or dry wiping.
Chemical dry sponge is best for painted drywall, wallpaper, and flat ceilings with light to moderate dry soot.
Degreaser or TSP solution cuts through oily kitchen smoke film and heavy residue that dry sponges can’t lift.
Microfiber cloths are ideal for final wipe down and rinsing after wet cleaning. Lint free and reusable.
Soft bristle brush is useful on textured or porous surfaces like stucco and brick, paired with wet cleaner.
If soot or odor remains after two rounds of cleaning, you’re chasing hidden contamination. Check above drop ceilings, inside HVAC ducts, or behind switch plates. Clean those sources before sealing, or the smell will keep coming back.
Primer and Sealer Types for Blocking Smoke Odors on Walls
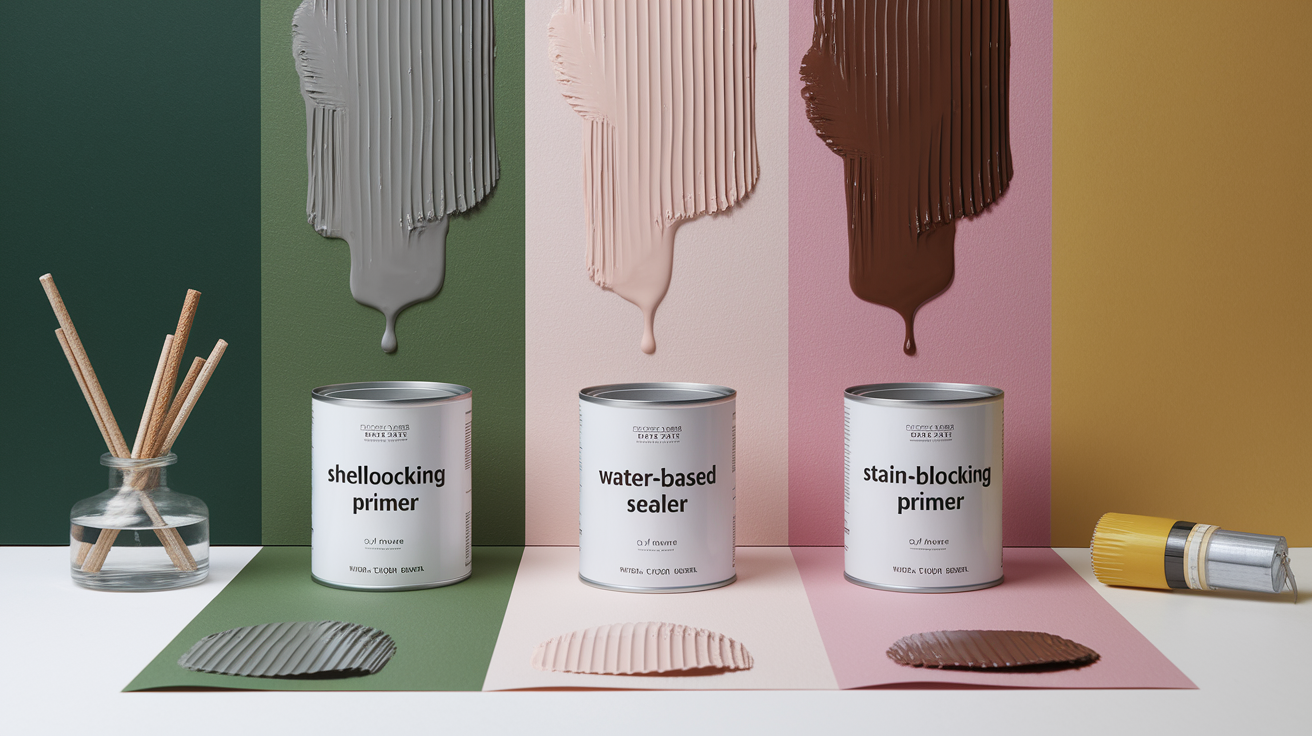
Not all primers block smoke odor. Standard latex or oil primers may hide stains, but they won’t stop volatile odor molecules from migrating through the dried film. You need a product specifically formulated to encapsulate smoke compounds: shellac based, water based odor sealers, or specialty oil primers designed for fire restoration.
Shellac Based Odor Blocking Primers
Shellac primers like Zinsser BIN have been the contractor go to for severe smoke odor for decades. They dry in under 30 minutes, adhere to almost any substrate (even glossy or imperfect surfaces), and create a hard, vapor impermeable film that locks odors in permanently. You can apply shellac in temperatures as low as 10°F, which helps when winter fires leave homes unheated.
The trade offs: shellac is the most expensive sealer type, it smells strongly of alcohol for up to a week (you may need to run carbon filtered air scrubbers), and it requires cleanup with denatured alcohol. It’s also flammable during application. Because it’s vapor impermeable, shellac can trap moisture inside walls if applied before materials are fully dry.
Water Based Odor Sealers
Water based acrylic sealers cost less than shellac and produce minimal odor and VOCs, making them safer for occupied homes and chemically sensitive individuals. Many formulations allow water vapor to pass through the cured film, which is critical for exterior walls or basements where trapped moisture can cause peeling or mold. Products like ULTRA RECON Smoke Odor Sealer apply by brush, roller, or airless spray and are designed to encapsulate odors and block tough stains on multiple substrates.
Limitations: water based sealers require better surface prep because they don’t adhere as well to glossy or dirty substrates. You may need two coats to fully block heavy soot stains, and you can’t apply them below about 45°F.
Oil/Alkyd Stain Blocking Primers
Oil based primers are widely available at home centers and are often the least expensive option. They tolerate imperfect surfaces, sand easily, and block stains well. But most alkyd primers make no smoke odor containment claims. They’re built for water stains, tannin bleed, and general priming, not fire restoration. They also require mineral spirits for cleanup, smell strongly during drying, and face tightening VOC restrictions that limit availability in some states.
| Primer Type |
Odor Blocking |
Stain Blocking |
VOC/Smell Level |
Best Use Cases |
| Shellac based |
Excellent |
Excellent |
High VOC; strong alcohol odor for ~7 days |
Severe smoke; cold weather; imperfect substrates |
| Water based acrylic |
Good to Very Good |
Good (may need 2 coats) |
Low VOC; minimal odor |
Occupied homes; sensitive occupants; vapor permeability needed |
| Oil/Alkyd |
Poor (not odor specific) |
Excellent |
Moderate to High VOC; persistent petroleum smell |
Stain blocking only; budget projects without odor issues |
Applying Sealers Correctly on Smoke Damaged Walls

Thick, even coverage matters more than speed. Pour your sealer into a lined tray if rolling, or load your airless sprayer and set the tip size according to the product label. Most smoke sealers are thicker than standard paint and need a .015 to .017 tip. Brush application works well for small areas, trim, and edges, but rolling or spraying is faster for full walls and ceilings.
Start at the top corner farthest from the door and work in sections, overlapping each pass by about half. Don’t stretch the product too thin. A generous coat encapsulates better than two skimpy ones. For shellac primers, one coat is often enough if applied heavily. Water based sealers usually require two coats for full odor suppression, especially over dark soot stains. Let the first coat dry to the touch (shellac in 30 minutes, water based in 1 to 2 hours) before recoating.
Application tips for consistent results:
Mix thoroughly. Some sealers settle or separate in the can. Stir for at least two minutes before pouring.
Maintain wet edges. Work quickly enough that each new section overlaps still wet primer to avoid lap marks.
Check temperature and humidity. Shellac tolerates cold but water based products need 45°F minimum and moderate humidity to cure properly.
Seal ceilings first, then walls, then trim, so drips and overspray land on unpainted surfaces.
Don’t apply finish paint until the sealer is fully cured. Shellac cures fast but off gasses alcohol vapor for days. Water based sealers may feel dry in two hours but need 24 hours or more to harden enough for a topcoat. If you smell smoke after the sealer dries, you either missed a spot, didn’t clean thoroughly, or need a second sealer coat.
Safety and Ventilation Precautions During Smoke Damage Sealing

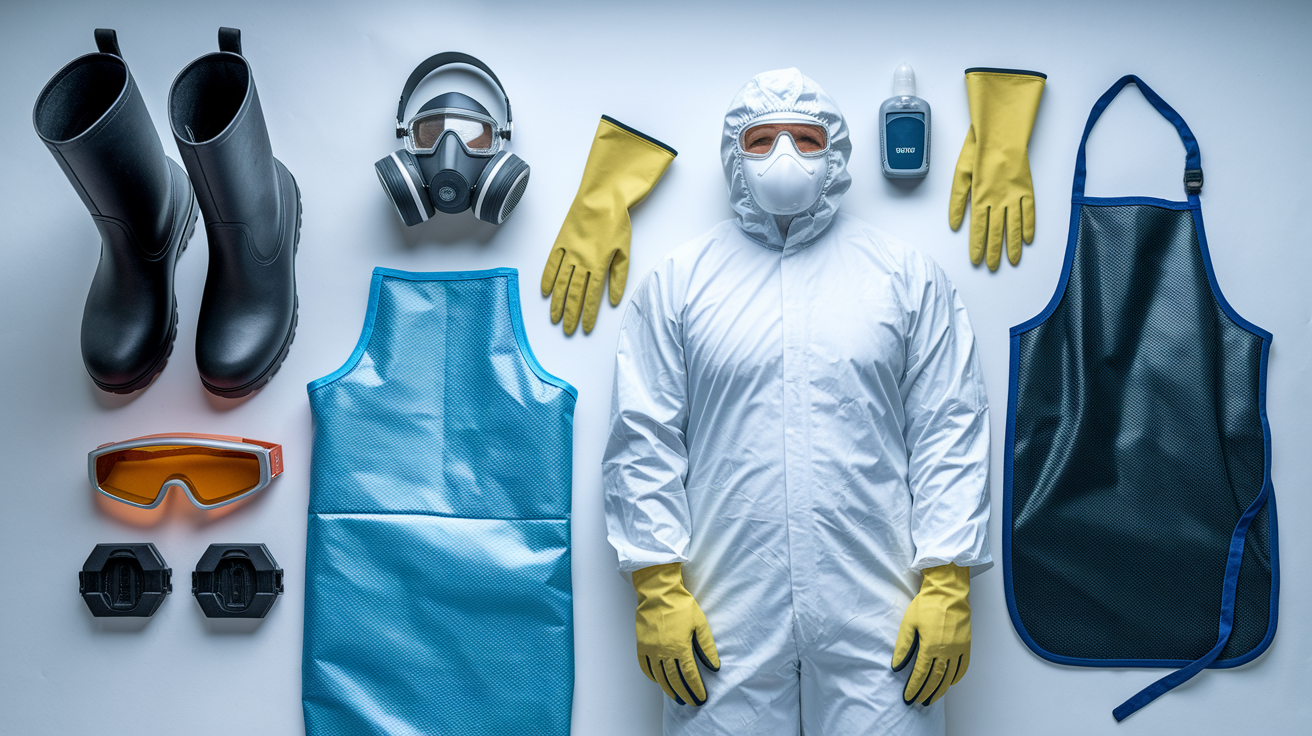
Soot particles, especially from synthetic materials like foam or carpet, carry toxins: formaldehyde, benzene, and other volatiles that irritate skin, eyes, and lungs. Wear nitrile gloves, safety glasses, and a respirator with organic vapor cartridges and a P100 particulate filter when cleaning or applying solvent based sealers. Standard dust masks don’t filter chemical vapors.
Ventilation is non negotiable. Open windows on opposite sides of the room to create cross flow, and position box fans in windows blowing outward to exhaust fumes. If you’re using shellac primer, the alcohol vapor is flammable. Turn off pilot lights, avoid sparks, and keep a fire extinguisher nearby. The strong odor can also trigger headaches or nausea, so take breaks outdoors every 20 to 30 minutes.
For occupied homes or projects with sensitive individuals, run a HEPA air scrubber with activated carbon filtration while priming and for several days afterward. Carbon filters adsorb volatile organic compounds that HEPA alone can’t capture. If shellac odor lingers past one week, increase air exchange or switch to a water based sealer for remaining areas.
Essential safety gear and ventilation controls:
Respirator with organic vapor and P100 filters protects lungs from soot dust and solvent fumes during cleaning and priming.
Cross ventilation and exhaust fans push contaminated air outdoors and bring fresh air in. Critical during and after shellac application.
HEPA air scrubber with carbon filtration removes airborne particles and adsorbs lingering chemical odors in occupied spaces.
Repairing and Restoring Walls Before and After Smoke Sealing
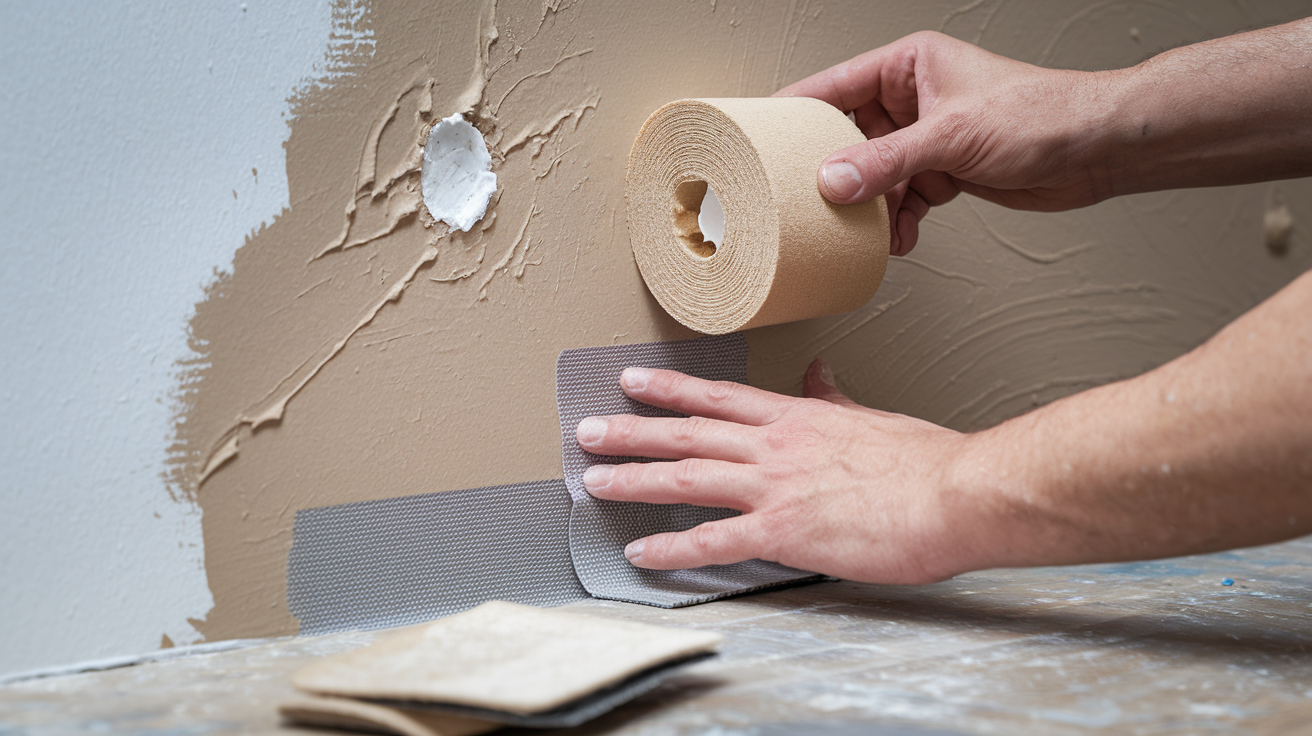
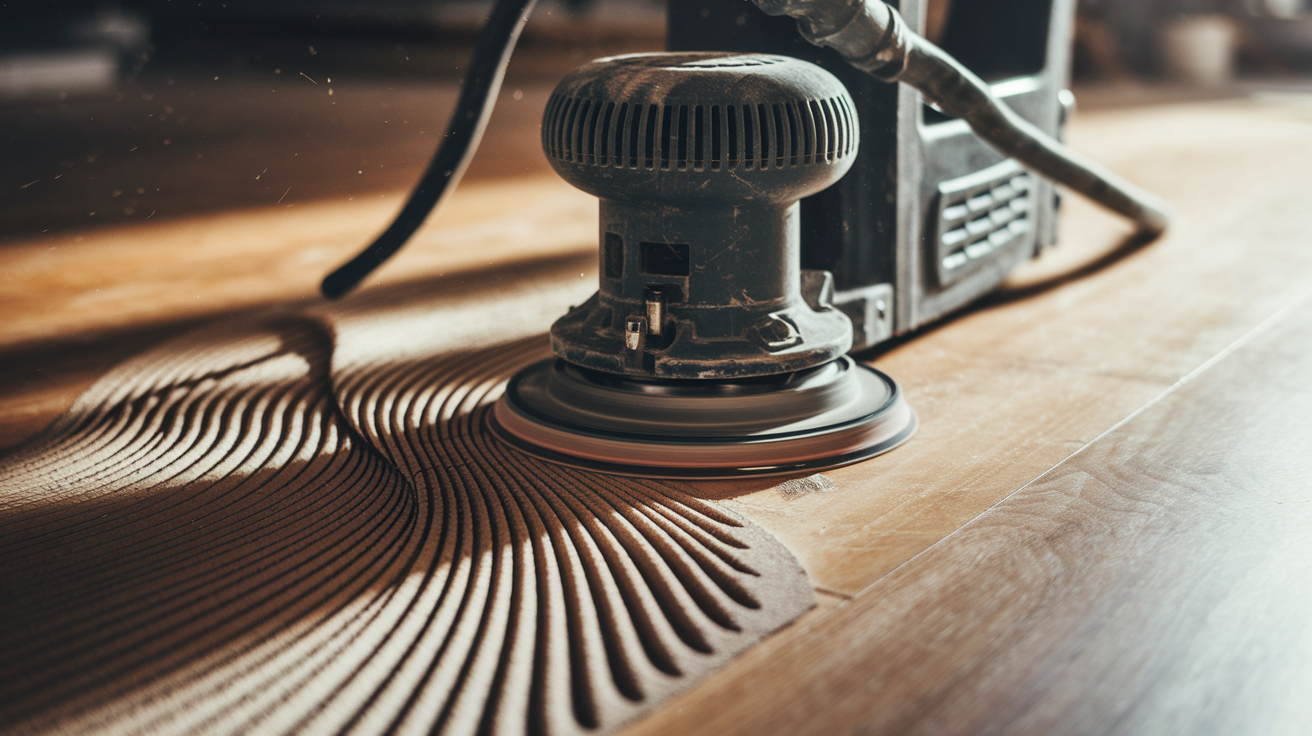
Small holes, cracks, and loose drywall tape must be fixed before you prime. Smoke often reveals damage that was easy to ignore before: screw pops, nail holes, seams that have pulled apart. Fill holes with lightweight spackle, wider cracks with setting type joint compound, and re tape any loose seams with mesh tape and a thin skim coat. Let repairs dry completely, then sand smooth with 120 grit paper.
Sanding creates dust, and dust on walls prevents sealer adhesion. After sanding, vacuum walls with a brush attachment, then wipe every surface with a tack cloth, a sticky, resin treated rag that picks up fine dust without leaving residue. If you skip this step, you’ll see grit bumps in your dried primer and rough texture in your finish coat.
Water based sealers are less forgiving of imperfect substrates than shellac or oil primers. If your walls are rough, stained, or previously coated with glossy paint, scuff sand with 80 grit paper to create tooth for the new sealer. Oil based and shellac primers stick to almost anything, but water based products may peel or fish eye over slick or contaminated surfaces.
Pre and post sealing repair sequence:
- Inspect for hidden damage. Check behind switch plates, inside closets, and above ceilings for soot, char, or water damage.
- Patch and fill. Repair all holes, cracks, and damaged drywall with appropriate compounds and let dry 24 hours.
- Sand repairs smooth. Use 120 grit paper on patches and 80 grit on glossy or rough areas that need tooth.
- Vacuum and tack. Remove all sanding dust with a HEPA vacuum and wipe surfaces with a tack cloth.
- Prime, then inspect again. After sealer dries, check for missed spots, bleed through, or new cracks that need a second fill and prime cycle.
If stains or odor bleed through after one coat of sealer, don’t start painting. Apply a second sealer coat and let it cure fully. Rushing to finish paint traps the problem under a cosmetic layer that will fail within months.
Eliminating Smoke Odors Before Sealing Walls
Sealing encapsulates odor molecules, but it doesn’t eliminate odor sources. If burnt carpet padding, charred insulation, or soot soaked HVAC ducts remain in the structure, sealing walls alone won’t solve the smell. Before you prime, walk every room and sniff: closets, behind appliances, inside cabinets. If you find concentrated odor, remove or clean the source.
Thermal fogging and hydroxyl generators are professional odor removal tools. Thermal fogging disperses a deodorizing fog that penetrates porous materials and neutralizes smoke compounds. Hydroxyl generators break down odor molecules with UV light and are safe to use in occupied spaces, unlike ozone machines, which are effective but require full evacuation and ventilation afterward. Activated charcoal placed in open containers absorbs airborne odors in enclosed spaces like closets or drawers.
Low cost DIY methods (bowls of baking soda, vinegar wipes, or open boxes of activated charcoal) help with light residual odor but won’t handle structural contamination. If you still smell smoke after cleaning, fogging, and ventilating, the source is still present.
Common hidden odor sources to remove before sealing:
Carpet padding and underlayment absorb smoke and hold moisture. Usually must be removed and replaced.
HVAC ducts and filters distribute soot throughout the house. Ducts need cleaning and filters immediate replacement.
Insulation in walls and attics is porous and impossible to clean. Remove and replace if saturated with smoke.
Contents and furnishings like upholstered furniture, drapes, and clothing hold odor and re contaminate cleaned spaces.
Hidden cavities are spaces above drop ceilings, behind baseboards, and inside wall chases that trap soot and smell.
Once sources are removed and surfaces cleaned, sealing locks down the remaining trace odors that cling to framing, drywall paper, and subfloors.
DIY vs Professional Smoke Damage Wall Sealing

Homeowners can handle small, contained smoke events: a stovetop grease fire in one room, a fireplace backpuff that left soot on a single wall. The workflow is manageable. Ventilate, clean, dry, seal, paint. You’ll spend a weekend and a few hundred dollars on sealers, cleaning supplies, and basic PPE.
Whole house smoke damage from a structure fire is a different job. Professionals bring commercial grade HEPA air scrubbers, thermal foggers, moisture meters, and the training to find hidden contamination you’ll miss. They follow ANSI/IICRC S520 and RIA Guidelines, which specify inspection protocols, acceptable moisture readings, and Post Remediation Verification steps that confirm the structure is safe to seal and occupy. Certified restorers also document every step with photos and readings, which your insurer needs for claims and supplements when hidden damage appears.
If any of the following apply, hire an IICRC certified fire and smoke restoration contractor:
Smoke traveled through HVAC ducts. Ductwork cleaning and decontamination require specialized equipment and access.
Structural materials are charred or heat damaged. Hidden damage to framing, wiring, or sheathing needs inspection and safe removal.
Occupants are chemically sensitive or immune compromised. Professional grade containment, HEPA filtration, and low VOC methods reduce exposure.
Insurance claim is involved. Restorers provide the documentation, estimates, and communication with adjusters that protect your claim.
You smell smoke after two rounds of cleaning and sealing. The source is hidden, and finding it requires tools and experience.
Fire involved synthetic materials, plastics, or chemicals. Toxic residues require hazmat level PPE and disposal procedures beyond DIY scope.
Trying to DIY a job that needs professional intervention wastes money on materials that won’t solve the problem and delays the proper repair, which lets odors set deeper into porous materials.
Costs and Timelines for Sealing Walls After Smoke Damage
Sealer material costs range from $30 per gallon for basic oil primer to $80 or more per gallon for specialty shellac or high performance water based smoke sealers. A typical 12×15 room with 8 foot ceilings needs about two gallons for walls and ceiling at two coats, so figure $60 to $160 in sealer alone. Add cleaning supplies, sponges, PPE, and paint, and a DIY single room project runs $150 to $300.
Professional restoration and sealing timelines depend on damage extent and drying requirements. A small kitchen fire with localized smoke might take three to five days: one day for emergency cleaning and drying setup, two days for dehumidification and odor treatment, one day for sealing and priming, one day for final paint. Whole house smoke from a structure fire can take two to four weeks or longer if contents need pack out, HVAC cleaning, or structural demolition.
Shellac’s strong odor may require temporary relocation for sensitive occupants during application and cure, adding hotel costs to the project budget. Water based sealers allow same day re occupancy in most cases but take longer to fully cure.
| Expense Factor |
Notes |
| Sealer material |
$30–$80/gal; shellac most expensive, oil least; water based mid range; coverage ~200–400 sq ft/gal depending on porosity |
| Professional labor |
$50–$100/hr typical; may include cleaning, sealing, and light repairs; whole house projects often bid as flat rate scope |
| Drying and odor equipment |
Air scrubbers, dehumidifiers, thermal foggers billed daily or per project; $200–$800 depending on size and duration |
| Temporary housing |
Required if shellac odor or safety concerns prevent occupancy; duration depends on ventilation and cure time |
Final Words
Start by drying and ventilating the space so you’re not sealing trapped moisture or soot. That first step keeps odors from coming back.
We walked through quick prep—ventilation, basic soot removal, full drying—then picked the right sealer, how to apply it, and how to check the job. We also covered safety, repair needs, and when to call a pro.
Do the steps in order and document as you go. Proper sequencing makes sealing walls after smoke damage stick for good, and your room will feel right again.
FAQ
Q: Can you paint over smoke damage on walls?
A: You can paint over smoke damage on walls only after you remove soot, fully dry the surface, and seal with an odor- and stain-blocking primer; otherwise stains and smell will bleed through.
Q: Will Kilz cover smoke damage?
A: Kilz can cover some smoke damage, but coverage depends on the Kilz product; shellac- or oil-based Kilz primers block heavy stains and odors better than basic water-based formulas.
Q: Do you have to replace drywall after smoke damage?
A: You have to replace drywall after smoke damage only if it’s warped, crumbling, soaked, or charred; otherwise thorough cleaning, drying, and sealing usually restore the wall.
Q: How to fix smoke damaged walls?
A: To fix smoke damaged walls, remove loose soot with a dry sponge or HEPA vacuum, ventilate and dry, repair damaged drywall as needed, then apply an odor-blocking primer and repaint.

Waiting to report damage is the quickest way to lose your claim.
The first hours after a loss decide whether you get paid or get stuck in delays.
This guide walks you through the exact documents, photos, forms, and steps insurers expect so you can file successfully.
You’ll learn what to do right away, what to save, how to organize evidence, and how to meet deadlines so repairs don’t stall.
No guesswork, just clear steps to protect your home and your payout.
The first hours after property damage happen are everything. What you do right now determines whether your insurer pays or finds a reason to stall. Miss one step and you’re looking at delays, reduced payments, or a flat-out denial. Speed protects your property and your claim.
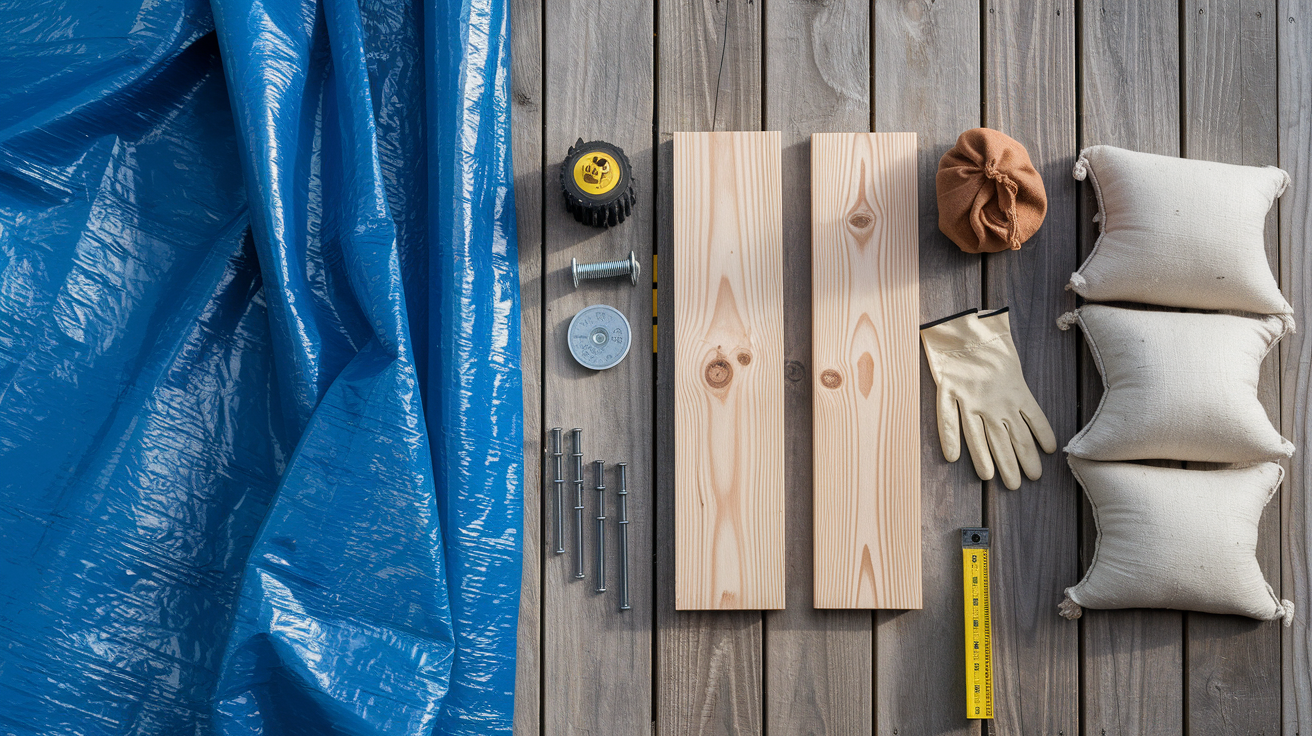
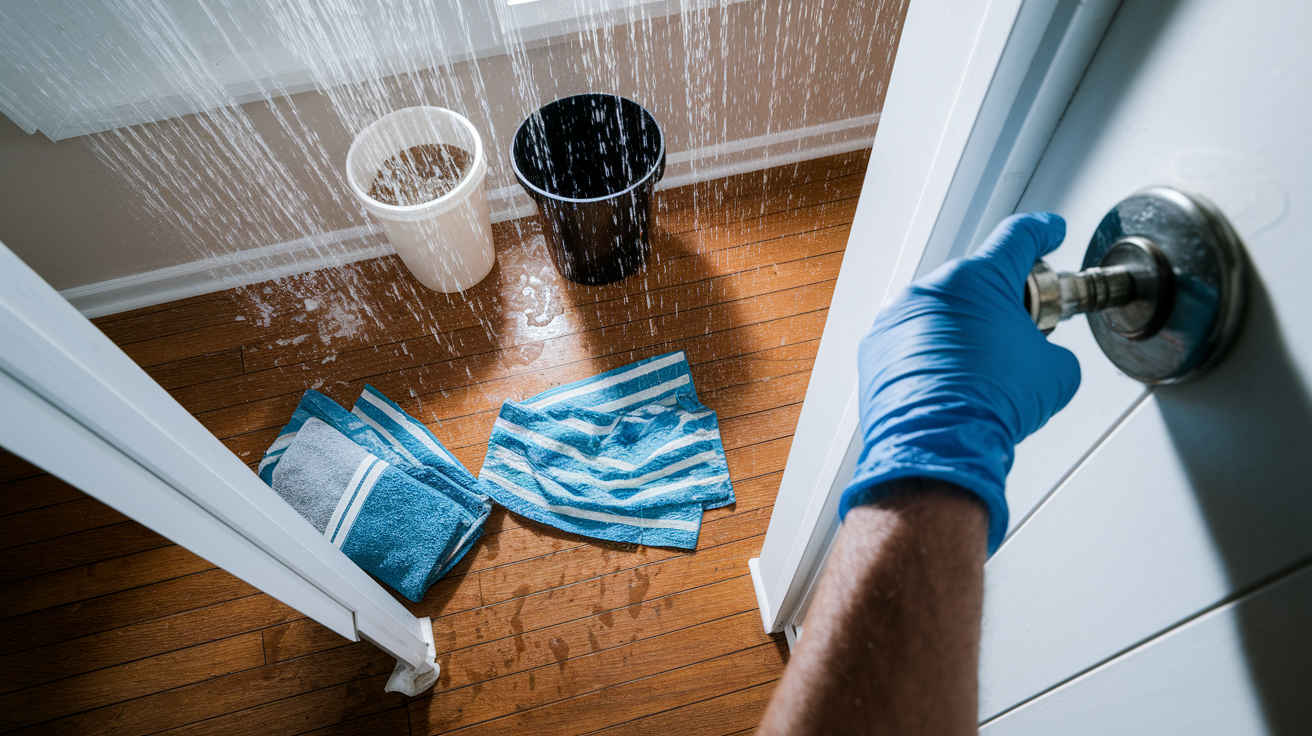
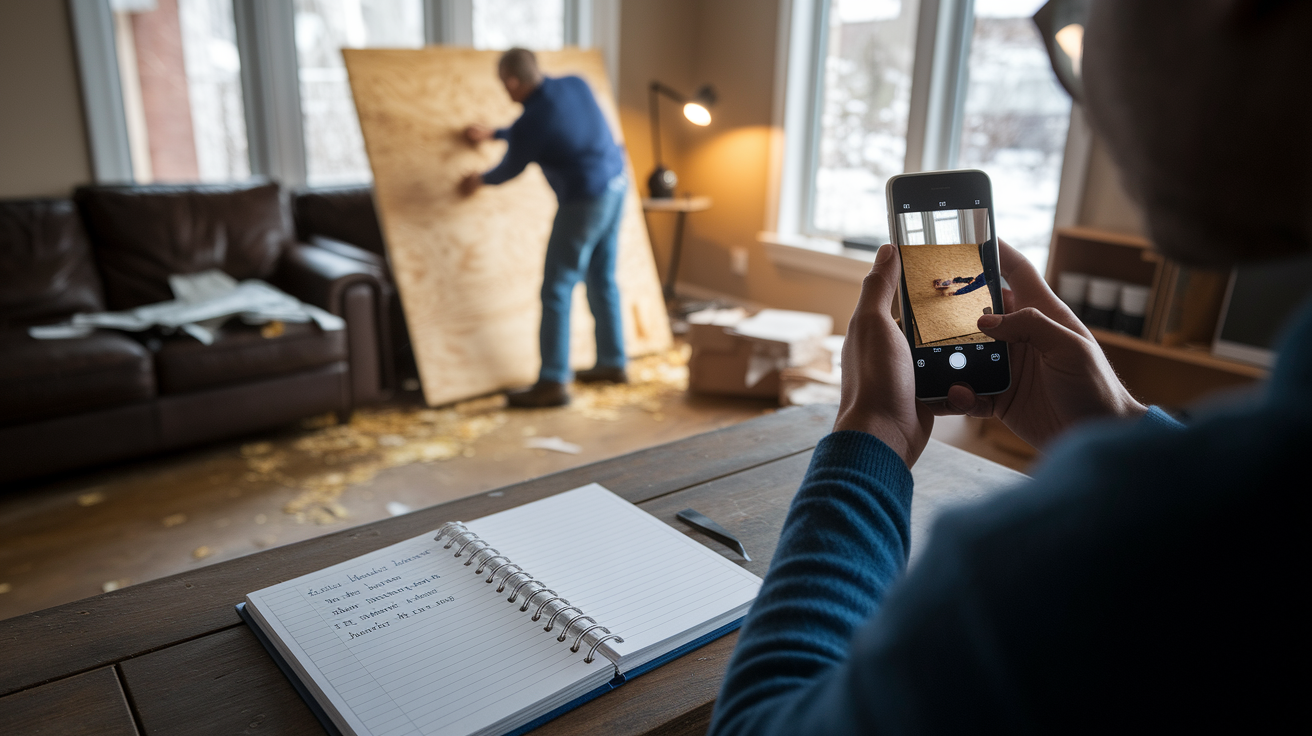
Stop more damage immediately. Board up broken windows, shut off water mains if pipes burst, move valuables out of wet zones, and keep every receipt for materials you buy. Don’t throw anything away. Insurers need proof, and once you toss damaged property, there’s nothing left to inspect or photograph. Grab your phone and capture everything from multiple angles, even if the scene’s chaotic. Turn on timestamp settings or make sure your camera’s recording date and time metadata.
Call your insurance company as soon as it’s safe. Most policies want to hear from you within 24 to 72 hours. Write down the claim number, the rep’s name, and the exact time you reported it. Keep a simple log with dates, times, who you talked to, and what was said. That log becomes your evidence if anyone questions your timeline later.
What you need to do immediately:
- Get high resolution photos and videos with timestamps or saved metadata before you start cleanup.
- Document temporary repairs with receipts for tarps, plywood, fans, and any contractor work you pay for.
- Report the loss within 24 to 72 hours and write down the claim number and rep contact info.
- Don’t discard damaged items. Keep them for the adjuster even if they’re wet, broken, or smell terrible.
- Start a communications log. Note every call, email, and text with dates, times, names, and quick summaries.
- Move undamaged stuff to a safe, dry spot and photograph where everything was originally if the scene’s stable enough.
Understanding Insurance Policy Requirements for Property Damage Claims

Your policy language controls every requirement. Coverage limits, exclusions, notice deadlines, proof of loss procedures…it’s all spelled out in your declarations page and policy contract. Read both before damage happens, and check them again after every renewal. Coverage can shift without you realizing it.
Flood damage usually needs a separate flood policy and a separate claim. Homeowners policies cover your dwelling and personal property but often exclude certain water damage, wear and tear, and maintenance problems. Commercial policies add business interruption documentation and equipment inventories. Auto policies want police reports, VINs, and copies of your title or registration. Know which policy applies before you file.
| Policy Type |
Key Documents Required |
Coverage Notes |
| Homeowners |
Declarations page, dwelling/contents inventory, contractor estimates, receipts, permits, mortgagee info |
Covers dwelling structure, personal property, sometimes temporary living expenses. Flood’s usually excluded |
| Auto |
Police report, VIN photos, title/registration, repair estimates, tow/storage receipts, rental records |
Collision, comprehensive, liability vary. Must verify driver and vehicle eligibility at time of loss |
| Commercial |
Business interruption records (revenue, payroll, invoices), equipment serial numbers, inventory counts, supplier contracts, financial statements |
Covers property and income loss. Requires proof of lost profits and operational disruption |

Insurers deny claims when your documentation’s incomplete. Collect and organize evidence right away because waiting tanks quality and credibility. You need to prove what you owned, what got damaged, when it happened, and how much repairs cost.
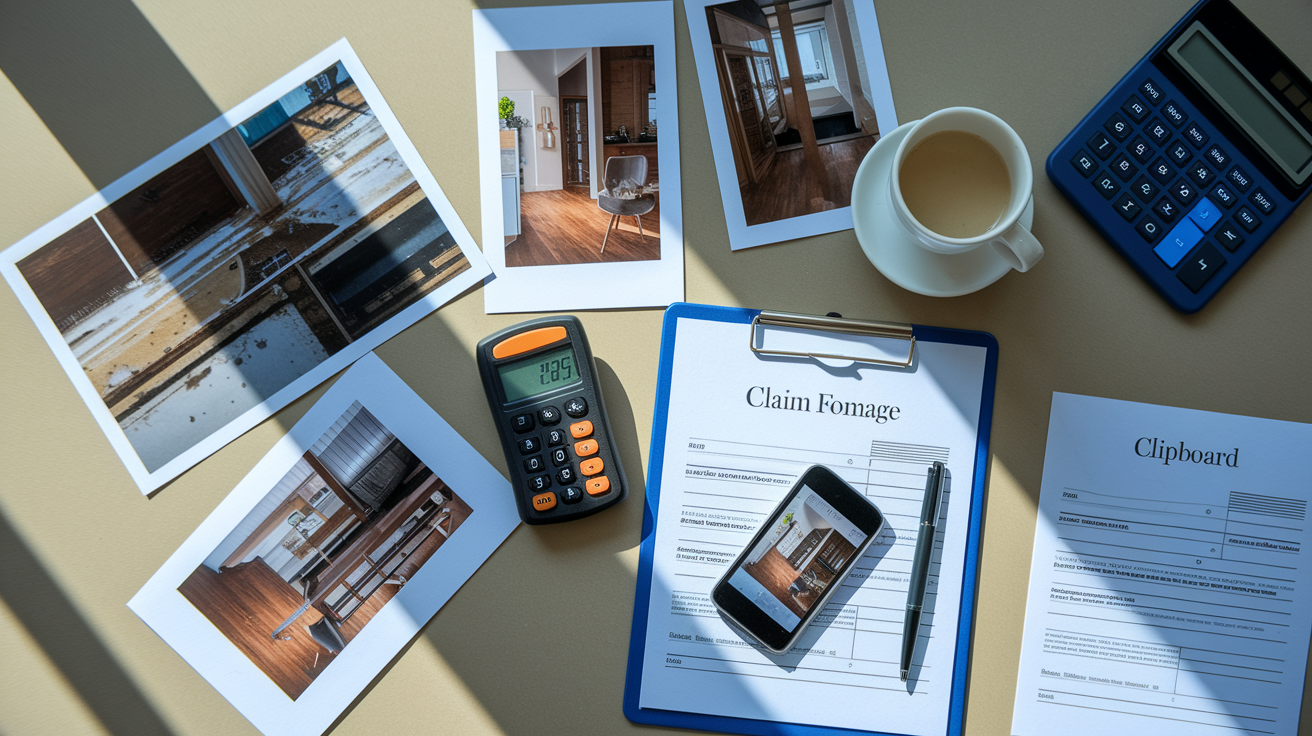
Visual evidence comes first. Take high resolution photos and videos from every angle. Close-ups of damage, wide shots showing context, serial numbers or identifying marks on items. Turn on camera timestamps or preserve file metadata. Save original digital files and back them up in cloud storage or on an external drive. Photograph receipts, purchase invoices, and any records showing the property was maintained and undamaged before the event.
Organize everything into groups so the adjuster can review it fast. Create an itemized inventory listing every damaged item with description, quantity, approximate value, purchase date, and receipt or proof of ownership. Keep a communications log with dates, times, phone numbers, rep names, and summaries of what was discussed. Retain copies of all emails, texts, and written correspondence from the insurer.
Documentation groups you need to collect and preserve:
- Visual evidence: Time stamped photos and videos, multiple angles per item, close-ups of serial numbers, wide shots showing room layouts, before and after comparisons when you have them.
- Itemized inventories: Descriptions, quantities, values, purchase dates, receipts, serial numbers, proof of ownership for every damaged item.
- Receipts for mitigation and temporary repairs: Invoices for tarps, plywood, fans, dehumidifiers, contractor labor, emergency services. Insurers reimburse reasonable mitigation expenses.
- Repair estimates and contractor bids: Written, itemized scopes of work from licensed contractors detailing materials, labor, code upgrades, permits.
- Official reports and supporting documents: Police, fire, or emergency services incident reports. Bank statements, credit card records, titles, product manuals, warranties.
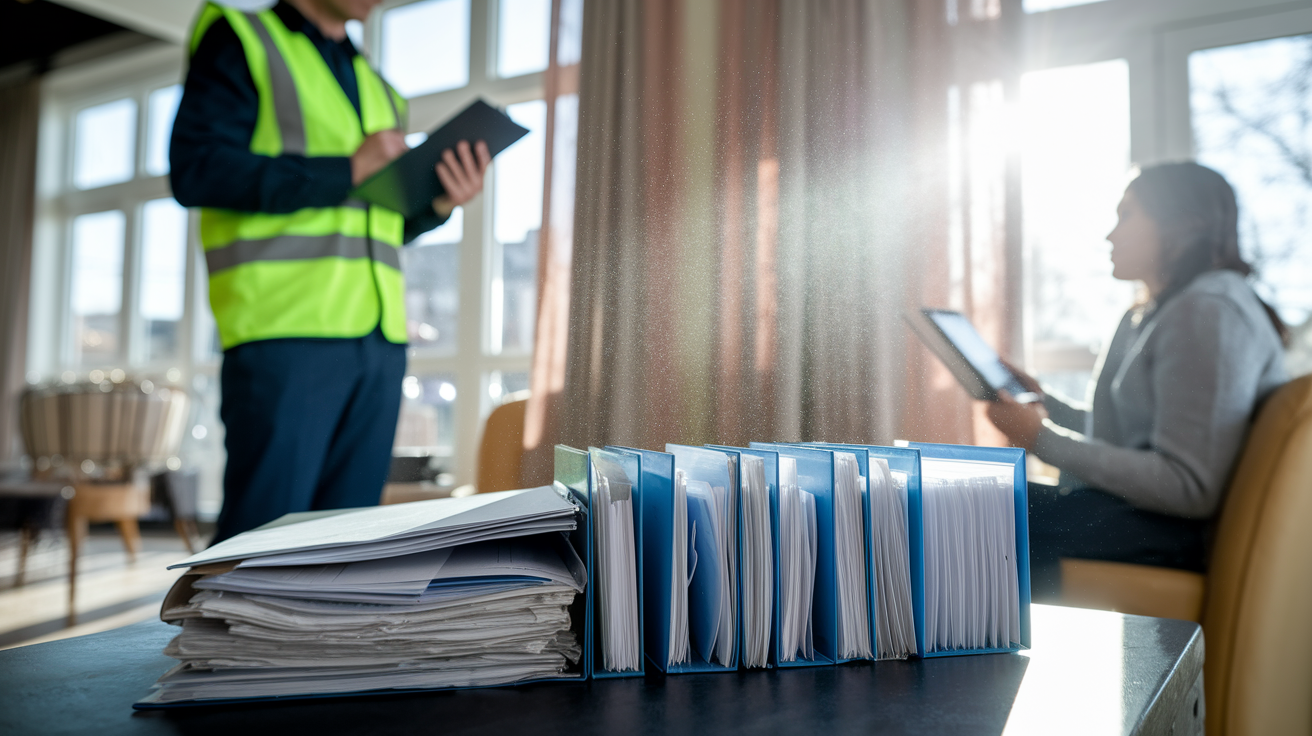
Property Damage Claim Requirements for Adjuster Inspections and Assessments
The adjuster inspection determines what your insurer pays. Adjusters review the cause of damage, the severity, and whether your documentation backs up your claim. Inspections typically happen within 3 to 14 days after you file, but catastrophic events can push scheduling back by weeks.
You’ve got to provide full access to the damaged property and cooperate with the inspection. Have your organized documentation ready with photos, inventories, estimates, and receipts in labeled folders or files. Answer questions honestly and completely. Don’t start major repairs before the inspection unless safety or further mitigation requires it. Unauthorized repairs can reduce or void coverage. If you disagree with the adjuster’s findings, request a re-inspection or hire an independent adjuster for a second opinion.
Preparing Documentation for the Adjuster
Organize your photos into folders by room or damage type. Print a summary inventory list and attach receipts or screenshots of online purchase confirmations. Gather at least one contractor estimate that matches the scope of damage the adjuster will see. Keep originals and bring copies to the inspection so you can hand over documents without losing your records. The adjuster’s going to ask for your claim number, policy number, and contact information. Have those ready along with a timeline of when the damage occurred and when you first noticed it.

Most policies require a formal proof of loss document within 30 to 90 days after the damage. This form’s a sworn statement listing what was damaged, the cause, the date, and the estimated cost. Missing the deadline can forfeit your right to payment. Read your policy to confirm the exact timeframe and submission method.
Proof of loss forms ask for your policy number, claim number, loss date, description of how the damage occurred, itemized lists of damaged property, repair estimates, and sometimes a notarized signature. Insurers may also request a recorded or sworn statement under oath, especially for large losses or when liability’s unclear. Submit everything the insurer requests and keep copies of every form, email, and piece of supporting documentation you send.
Use the insurer’s preferred submission method. Online portal, email, or certified mail. When mailing, send copies and keep originals. Include a cover letter listing every document enclosed, and request a confirmation receipt. Track deadlines on a calendar and follow up if you don’t receive acknowledgment within a few business days.
| Form Type |
Required Information |
Typical Deadline |
| Proof of Loss |
Policy/claim numbers, loss date, cause description, itemized inventory, estimated costs, notarized signature |
30 to 90 days from loss date (verify policy language) |
| Claim Notification Form |
Contact info, incident date/time/location, initial damage description, claim number assignment |
Immediate or within 24 to 72 hours |
| Sworn Statement / Examination Under Oath |
Detailed account of events, ownership verification, answers to insurer questions, recorded or transcribed testimony |
Scheduled by insurer. Typically within 30 to 60 days if requested |
| Supplemental Claim Documentation |
Additional estimates, hidden damage photos, updated inventories, receipts for completed mitigation |
As requested or when new damage discovered. Often 14 to 30 days after initial claim |
Meeting Property Damage Claim Requirements for Repair Estimates and Contractor Documentation

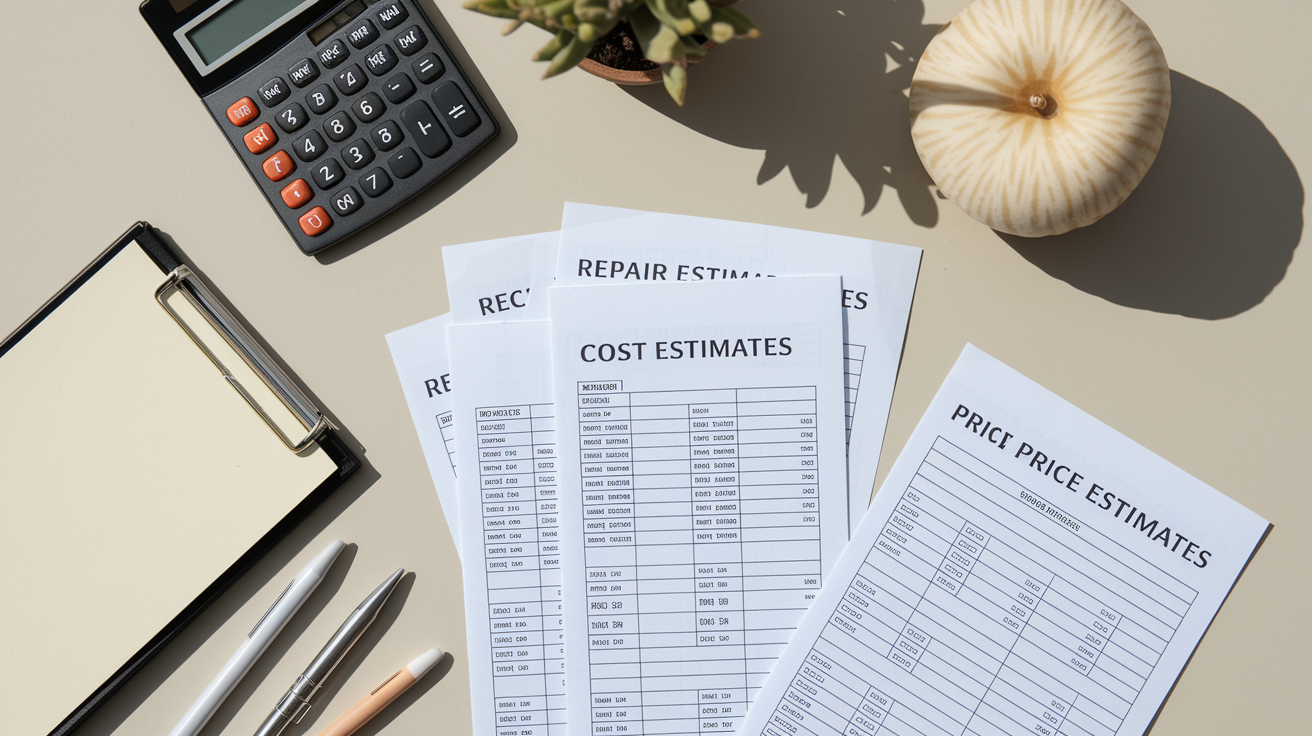
Insurers base settlement amounts on repair estimates. Get at least two to three written, itemized estimates from licensed contractors to compare scope and pricing. Each estimate should break down materials, labor, permits, code upgrade costs, and related repairs like matching finishes or replacing damaged trim.
Verify contractor licensing, insurance coverage, and references before hiring. Ask if the contractor has experience documenting insurance repairs. Experienced contractors know how to write scopes that match policy language and adjuster expectations. Don’t choose based solely on the lowest bid. Make sure the scope covers hidden damage, code compliance, and quality materials. Keep copies of contractor licenses, insurance certificates, permits, and final invoices. Submit these documents to your insurer to release withheld or final payments.
What an acceptable repair estimate must include:
- Itemized breakdown of materials (quantities, unit costs, product specs) and labor (hours, rates, tasks).
- Scope of work describing each repair step, including demo, disposal, rebuilding, and finishing.
- Permit and inspection requirements, including jurisdiction, estimated permit fees, and code upgrade costs.
- Matching or betterment notes explaining when new materials must match existing finishes or when code requires upgrades beyond original condition.
- Contractor license number, insurance certificate, business contact info, and references or proof of prior similar work.
Submission Deadlines, Claim Timelines, and Time-Sensitive Requirements

Understanding timelines prevents missed deadlines that void coverage. Policies and state laws set specific windows for notification, proof of loss, suit filing, and dispute resolution. The average claim cycle runs about 24 days under normal conditions, but catastrophic events stretch timelines significantly.
Track every date in your communications log. Loss date, report date, adjuster inspection date, estimate submission date, settlement offer date, payment dates. Follow up if you don’t receive acknowledgment or updates within the insurer’s stated timeframe. Keep records of follow up calls and emails to prove you met deadlines and cooperated fully.
Typical claim timeline and key deadlines:
- Immediate notice (24 to 72 hours): Report the loss as soon as it’s safe. Record claim number and rep contact info.
- Adjuster inspection (3 to 14 days): Insurer schedules inspection. Catastrophic events may delay this by weeks. Provide organized documentation and full property access.
- Proof of loss and supporting documents (30 to 90 days): Submit completed forms, itemized inventories, photos, estimates, receipts, official reports. Verify exact deadline in your policy.
- Settlement decision and payment (7 to 90 days): Insurer reviews documentation and issues initial or final payment. Timelines vary by state law and claim complexity. Large losses and disputes extend this period.
Common Reasons Property Damage Claims Fail to Meet Requirements
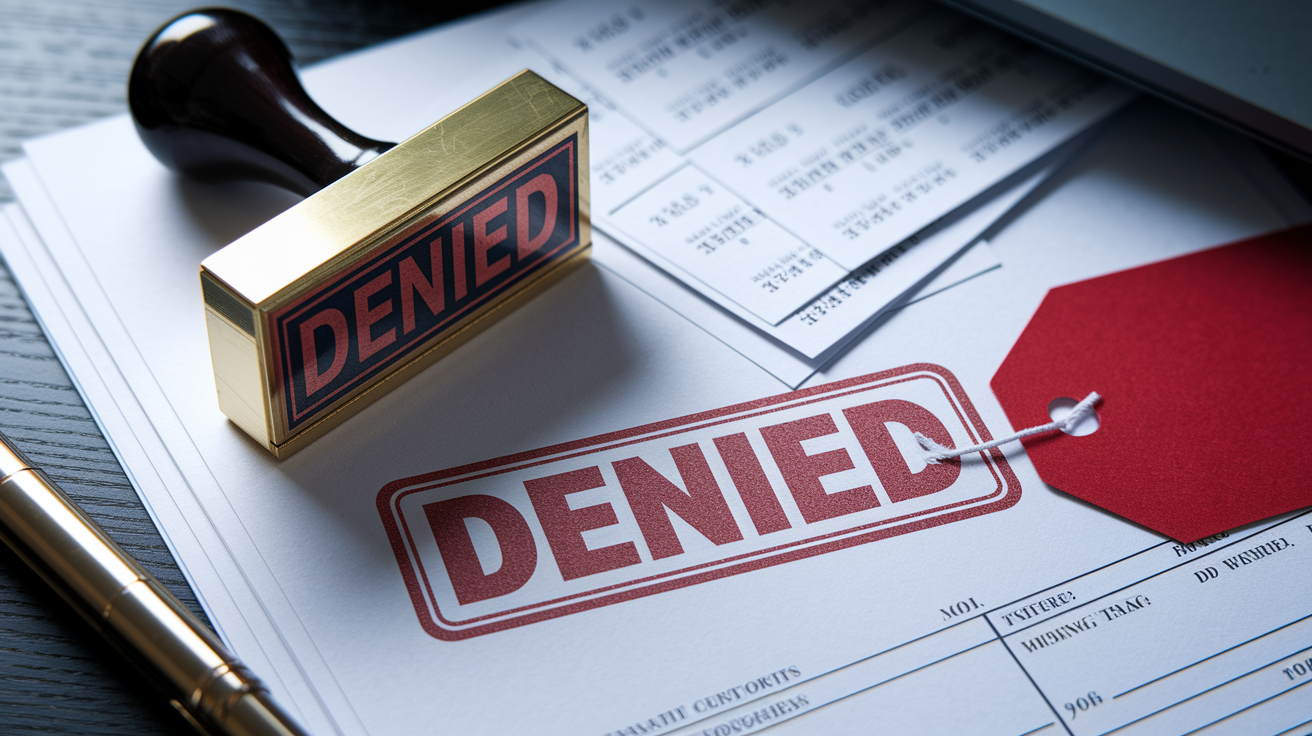
Late filing tops the list of denial reasons. Missing the notice deadline, even by a day, can let insurers deny the entire claim. Insufficient documentation comes next. No photos, missing receipts, incomplete inventories, no contractor estimates. Failure to mitigate further damage also triggers denials. If you left a tarp off a roof and rain caused more loss, the insurer may refuse to pay for the preventable portion.
Unauthorized repairs before inspection or approval reduce settlements. Insurers argue they can’t verify the original damage if repairs erase the evidence. Excluded perils like wear and tear, maintenance issues, certain floods aren’t covered regardless of documentation quality. Inconsistent statements during recorded interviews or examinations under oath raise fraud concerns and can void coverage entirely.
Common denial triggers to avoid:
- Late notification. Reporting the loss after the policy required notice period expires.
- Insufficient or missing documentation. No photos, no receipts, incomplete inventories, or failure to preserve damaged items.
- Failure to mitigate. Allowing further damage when reasonable temporary repairs could have prevented it.
- Unauthorized repairs. Completing permanent work before insurer inspection and approval, erasing evidence of original damage.
- Excluded perils or pre-existing damage. Claiming losses from maintenance issues, wear and tear, or uncovered events like certain floods or earthquakes.
- Material misrepresentation or inconsistent statements. Providing conflicting accounts during sworn statements, examinations under oath, or recorded interviews.
Escalation Options When Property Damage Claim Requirements Become Disputed
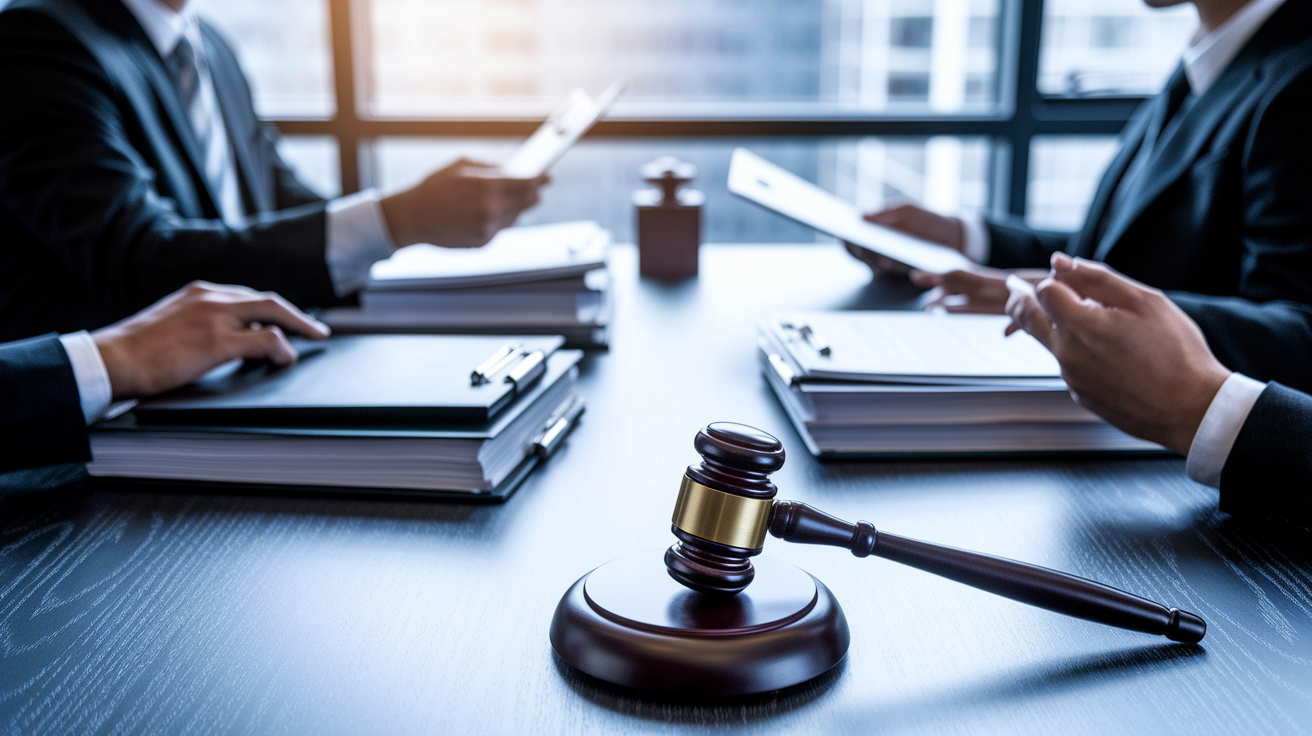
When settlement offers fall short, gather additional evidence and request a re-inspection. Get a second contractor estimate with a more detailed scope, or hire a public adjuster to review your documentation and negotiate on your behalf. Public adjusters work for you, not the insurer, and charge a percentage of the settlement increase.
If hidden damage shows up after the initial claim, file a supplemental claim immediately. Document the newly discovered damage with photos, estimates, and expert reports. Insurers must evaluate supplemental claims under the same policy terms. Review your policy’s dispute resolution procedures. Many require appraisal, arbitration, or mediation before you can file suit. Request a litigation hold in writing to preserve all insurer documents, emails, and claims processing records if you anticipate legal action.
When to Seek Professional Help
Consult an attorney experienced in property insurance claims when the insurer denies coverage without adequate explanation, undervalues the loss significantly, or refuses to preserve records. Red flags include adjuster reports that contradict your contractor estimates by large margins, unexplained delays beyond policy timeframes, or settlement offers that ignore code upgrade costs or matching requirements. Attorneys can issue formal litigation holds, negotiate directly with insurer counsel, and file suit if the insurer acts in bad faith. Early legal help preserves your rights and prevents destruction of critical evidence like metadata, emails, and adjuster notes.
Final Words
First stop the water or secure the scene, take time-stamped photos and notes, and notify your insurer within 24-72 hours. No guesswork. Protect what you can with temporary repairs.
Next, organize photos, receipts, inventories, and get 2-3 contractor estimates so you’re ready for the adjuster and any proof-of-loss forms. Keep copies and log communications.
Following these property damage claim requirements keeps your claim on track and helps you move from cleanup to repair faster. We’ll help you through each step.
FAQ
Q: What are the 4 major classifications of property damage?
A: The 4 major classifications of property damage are structural (building), contents (personal items), loss of use (additional living expenses), and consequential financial loss (business interruption). Document each type clearly for claims.
Q: What not to say to the insurance adjuster?
A: What not to say to the insurance adjuster is any admission of fault, guesses about the cause, promises about repairs, or accepting the first offer; stick to factual statements and refer them to your documentation.
Q: How long do I have to make an insurance claim for property damage?
A: How long you have to make an insurance claim for property damage depends on your policy and state, but notify your insurer immediately—typically within 24–72 hours—and file proof of loss within 30–90 days.
Q: What is the average settlement for property damage?
A: The average settlement for property damage varies widely; minor home claims often run a few thousand dollars, while major losses can reach tens of thousands. Documentation and coverage limits set the amount.

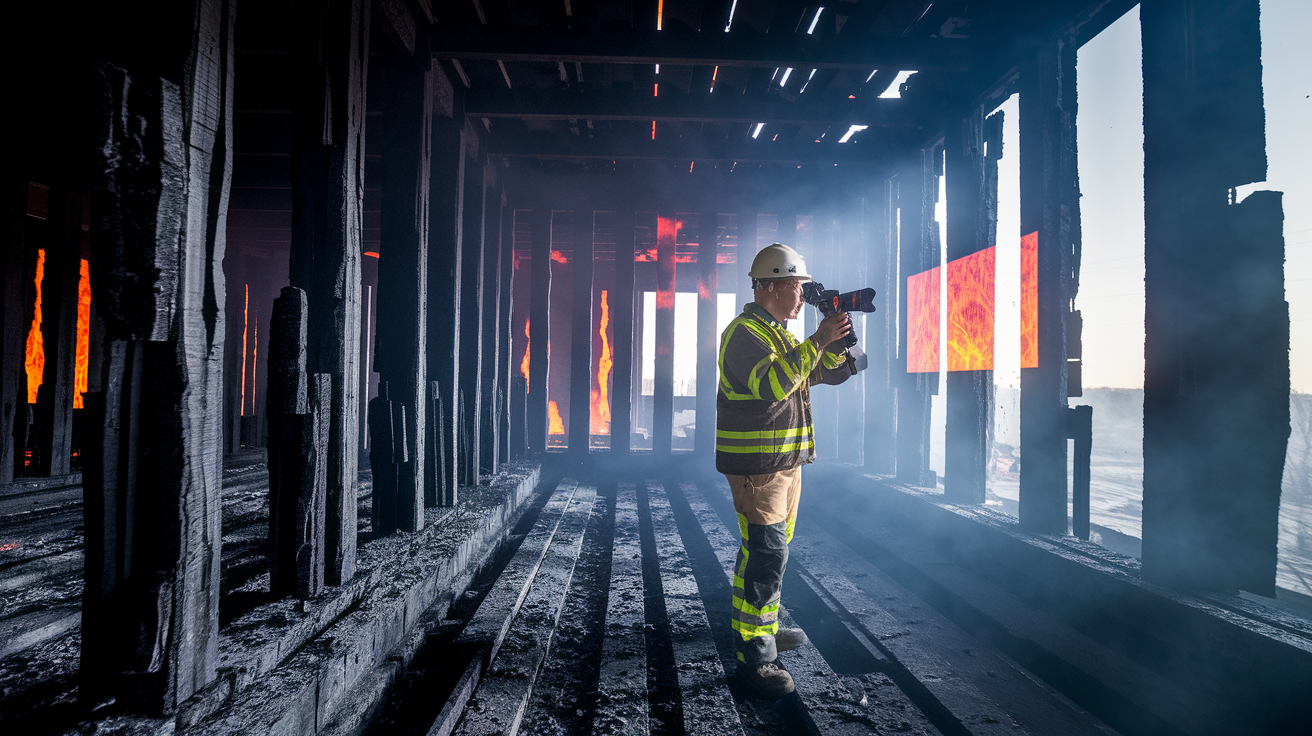
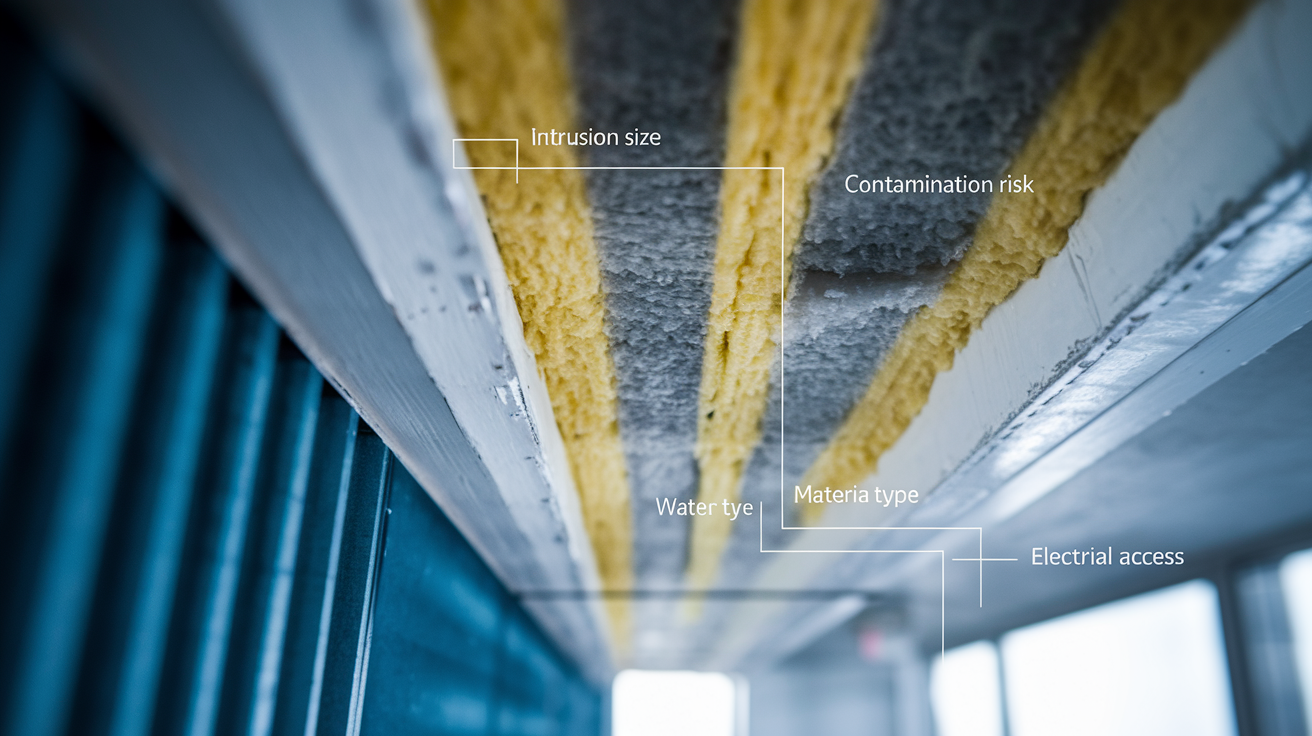
After a fire, your ceiling might look stable, but heat weakens joists and framing in ways you can’t see until it’s too late. Even small fires leave behind toxic soot, compromised electrical wiring, and water damage from firefighting that spreads through hidden cavities. This guide walks you through the critical safety steps, structural assessment, smoke remediation, and proper repair sequence you need to restore your ceiling safely and prevent hidden problems from causing failure later.
Emergency Response & Safety First Steps for Fire Damaged Ceilings

The moment you discover fire damage to your ceiling, safety is all that matters. A fire damaged ceiling puts you at immediate risk. Structural collapse, falling debris, compromised electrical systems, toxic residues. If your ceiling sags, shows large cracks, or looks unstable at all, get out and call 911. Heat weakens ceiling joists and framing, and even ceilings that look fine can fail without warning. Electrical wiring in ceiling cavities may have damaged insulation, creating shock hazards. Toxic soot and smoke coat surfaces and become airborne when you move around, so you need respiratory protection.
Before you touch anything or start cleanup, document the damage thoroughly. Photos and written descriptions. Take pictures from multiple angles showing the ceiling damage, surrounding walls, affected rooms, any visible structural components. Photograph smoke staining, charred materials, water damage from firefighting, debris. This documentation is essential for your insurance claim. Contact your insurance company within 24 to 48 hours to start the claim. Many policies require prompt notification, and delays complicate coverage.
Here are the 5 immediate steps after discovering ceiling fire damage:
- Evacuate if the ceiling looks unstable, sags, or has large cracks showing structural problems
- Call the fire department right away if you see smoke, smoldering materials, or suspect hidden fire in ceiling cavities
- Document everything with photos and written descriptions before any cleanup or removal starts
- Contact your insurance company within 24 to 48 hours to report damage and start your claim
- Secure the property from weather and unauthorized entry with tarps, boards, or temporary barriers
Professional restoration services and structural engineers determine whether your space is safe. They assess load bearing integrity, electrical hazards, contamination levels you can’t see. This assessment happens before any repair work begins.
Comprehensive Damage Assessment and Structural Evaluation

Professional fire damage assessment examines every component, from surface staining to hidden structural compromise. This evaluation determines repair scope, safety concerns, whether reconstruction is even feasible.
The visual inspection identifies cracks, holes, discoloration, areas exposed to heat, smoke, or water. Inspectors document grainy soot residue, smoky odors, charred or melted materials throughout affected spaces. They examine ceiling surfaces for bubbling paint, sagging sections, texture changes that indicate heat exposure. Water stains reveal where firefighting saturated materials. Surface inspection provides the foundation for understanding damage extent.
Structural component evaluation examines ceiling joists, load bearing structures, framing members for compromised integrity. Heat weakens structural members even without visible charring, reducing their capacity to carry loads. Inspectors check for warping, cracking, delamination in wooden joists and beams. They assess whether sistering new joists alongside damaged ones provides enough support or whether complete replacement is necessary. Metal components like light fixture mounting boxes and HVAC hangers get evaluated for heat related failure. Temporary shoring may be required when load bearing components are compromised during repair.
Fire damage severity falls into six distinct levels:
• Surface residue requiring dry cleaning only, with light soot deposits that respond to HEPA vacuuming and dry sponges
• Light staining needing wet cleaning, where smoke created visible discoloration requiring chemical cleaning solutions
• Moderate damage requiring aggressive techniques, including specialized cleaners and multiple treatment applications
• Heavy contamination demanding restoration with intensive cleaning, sealing, possible material replacement
• Severe damage necessitating replacement, where cleaning isn’t cost effective or materials can’t be adequately restored
• Structural damage beyond repair, requiring complete removal and reconstruction of ceiling assemblies
Hidden damage in attic spaces requires special attention since insulation and framing conceal problems. Electrical wiring, junction boxes, light fixtures need inspection by licensed electricians for heat damage, melted insulation, connection integrity. Smoke travels through wall and ceiling cavities, contaminating areas far from visible fire damage. Structural repairs must be completed and approved before cosmetic work begins. Building codes and safety standards govern all repairs. Structural engineer involvement is often necessary to verify the building is safe for occupancy.

Smoke residue must be removed before structural repairs begin, or you’ll seal odor and contamination behind new materials. Timing matters because acidic smoke residues start etching surfaces within hours of exposure, permanently damaging paint, metal fixtures, even drywall facing. Different fire temperatures create different smoke types. Each requires specific cleaning methods. Low temperature fires produce wet smoke with sticky, smeary residues that require aggressive cleaning. High temperature fires create dry smoke with powdery deposits that respond to different approaches. The longer smoke residue stays on surfaces, the deeper it penetrates and the harder it becomes to remove.
The systematic cleaning sequence follows a specific order to prevent spreading contamination. HEPA vacuuming removes loose soot and debris first, working from ceiling to floor to prevent recontaminating cleaned areas. Dry cleaning sponges follow, using their chemical properties to absorb smoke residues without water. Wet cleaning comes next, using appropriate solutions for the specific smoke type present. Surfaces must dry completely before priming to prevent moisture from being trapped behind sealers. This approach addresses both visible contamination and embedded residues that cause persistent odors.
| Smoke Type |
Fire Source |
Residue Characteristics |
Cleaning Approach |
| Wet Smoke |
Low temperature smoldering fires, plastics, rubber |
Sticky, smeary, strong odor, difficult to clean |
Aggressive cleaning with specialized solvents, multiple applications required |
| Dry Smoke |
High temperature fast burning fires, wood, paper |
Powdery, dry, easily smears when wiped |
Dry cleaning sponges first, then controlled wet cleaning |
| Protein Smoke |
Kitchen fires from organic materials |
Nearly invisible but extremely odorous, discolors varnishes |
Specialized enzyme cleaners, repeated treatments, strong sealing required |
Smoke penetrates porous ceiling materials and remains after surface cleaning is complete. Odor causing molecules embed deep in drywall, insulation, structural members. Stain blocking primers seal these molecules before painting, preventing odor from bleeding through finish coats. These specialized primers contain ingredients that encapsulate smoke residue and create a barrier between contaminated surfaces and new finish layers. Standard primers fail on smoke damaged surfaces because they lack the sealing properties needed to contain persistent odors.
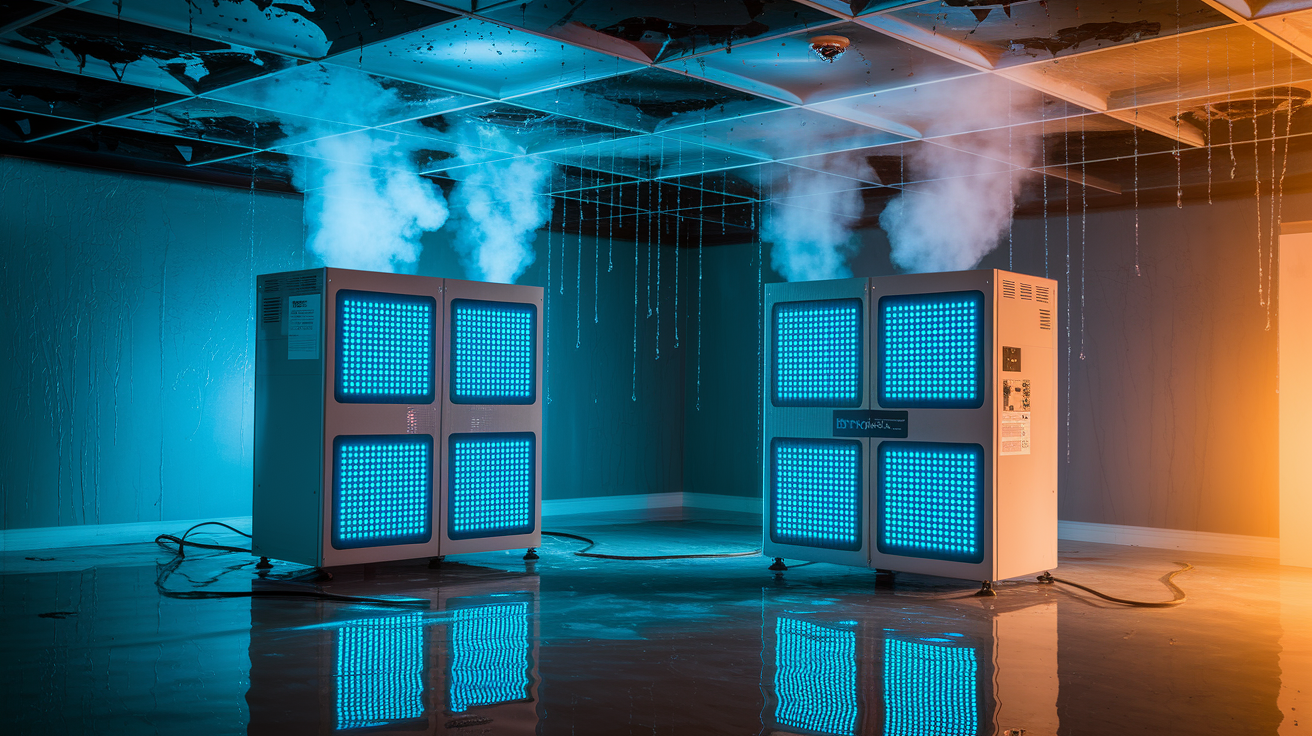
Professional odor elimination technologies address contamination that cleaning can’t reach:
• Ozone generators create powerful oxidizing molecules that break down odor molecules at a chemical level and penetrate porous materials deeply, but require complete evacuation during treatment
• Hydroxyl generators work safely during occupancy and neutralize organic compounds through advanced oxidation, making them suitable for occupied spaces during treatment
• Thermal fogging recreates the fire’s heat dynamics, with deodorizing fog penetrating where smoke traveled and neutralizing odor molecules chemically throughout hidden cavities
• Air scrubbers with HEPA filtration continuously clean the air during restoration work, capturing airborne particles and preventing cross contamination to clean areas
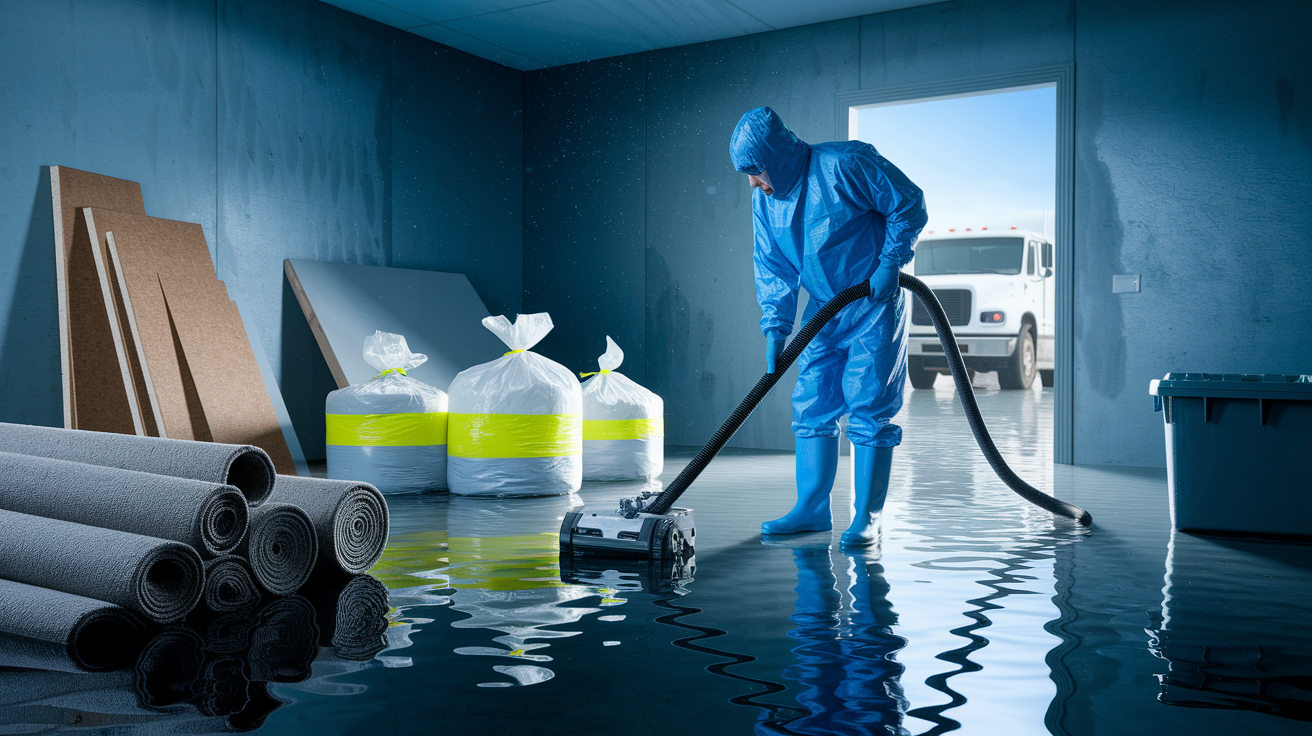
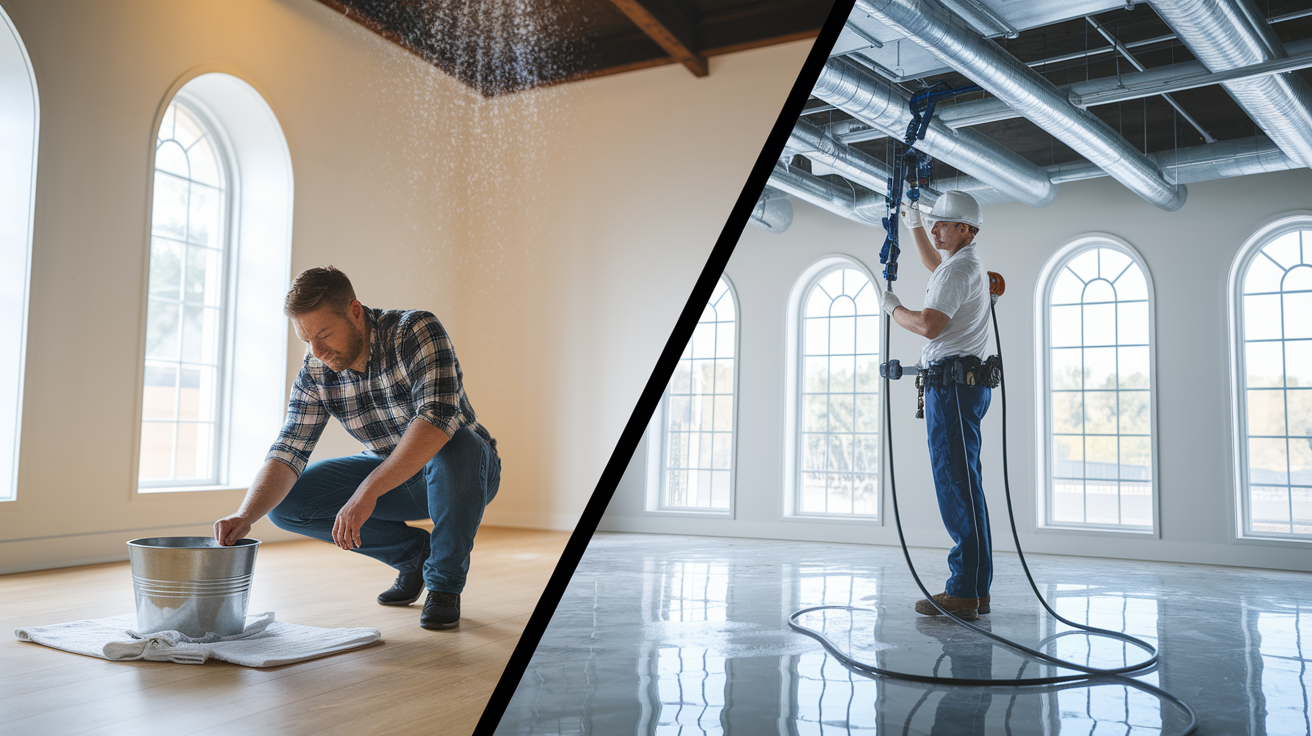
Water Damage and Moisture Control in Fire Damaged Ceilings
Firefighting water often causes more extensive damage than fire itself to ceiling materials. Hoses pump thousands of gallons into structures, and gravity pulls this water downward through ceiling assemblies. Water saturates insulation, drywall, ceiling joists, requiring removal and replacement even in areas with minimal fire damage. Soaked insulation loses its R value permanently and becomes a breeding ground for mold. Drywall paper facing delaminates when saturated, and the gypsum core loses structural integrity.
Moisture control begins immediately after the fire department clears the scene. Commercial dehumidification equipment extracts moisture from affected areas, processing hundreds of pints per day.
Professional restoration teams use moisture meters to verify complete drying before reconstruction begins. These meters measure moisture content deep in structural members, not just surface dampness. Readings must return to normal levels throughout the ceiling assembly before repairs proceed. Rushing this drying phase leads to trapped moisture and mold growth.
Trapped moisture leads to mold growth within 24 to 48 hours in warm conditions. Mold spreads rapidly through porous materials, requiring expensive remediation and posing health risks. Water damaged insulation can’t be salvaged and must be completely removed and replaced. Attempting to dry and reuse compromised insulation leaves moisture pockets that guarantee future problems. Drying must be complete before applying joint compound or paint, or moisture gets sealed behind finish surfaces, causing bubbling, peeling, odor problems.
Drywall and Plaster Ceiling Repair Methods After Fire

Determining repair extent starts with identifying where damage ends and sound material begins. Small areas of surface damage may only need patching, while extensive fire exposure requires removing entire ceiling sections.
All compromised drywall sections must be removed back to ceiling joists for solid attachment points. Cut damaged sections using a straightedge to create clean, straight edges that overlap joists on either side. An oscillating multi tool provides precision cutting for drywall removal without damaging structural framing. Remove all charred, water damaged, or smoke saturated material down to bare joists if necessary. Temporary support may be required for any compromised load bearing structures during removal. Once damaged material is out, clean all exposed framing and joists to remove soot and debris before installing replacement pieces.
New drywall pieces must be measured and cut to fit exactly into the opening with smoothed rough edges. Use 1/2 inch drywall for most ceiling applications, though some building codes require 5/8 inch Type X fire rated drywall. Secure replacement pieces with drywall screws spaced 8 inches apart along joists, placing screws at least 3/8 inch from edges. Screws provide better stability than nails for securing ceiling drywall, especially overhead. Pre drill screw holes near edges to prevent cracking. Ensure the replacement piece sits flush with surrounding ceiling surfaces, shimming behind if necessary to achieve proper alignment.
The drywall repair sequence follows these 5 steps:
- Remove damaged sections by cutting back to the nearest ceiling joists, creating clean straight edges for solid attachment points
- Install replacement pieces, securing them with drywall screws spaced appropriately and ensuring flush alignment with existing ceiling surfaces
- Tape joints using mesh drywall tape, which provides better adhesion than paper tape and reduces the risk of future cracking
- Apply compound in multiple layers, starting with embedding coat over tape, then two or three finish coats with complete drying and feathering between applications
- Sand smooth when completely dry, using progressively finer grits to achieve a finish ready for priming and painting
Ceiling texture matching presents unique challenges for fire damaged ceiling repair. Popcorn, knockdown, smooth finishes each require specific techniques and materials. Practice texture application on scrap drywall before working on the ceiling to match existing patterns. Overhead work requires proper scaffold or sturdy ladder setup with platforms that allow comfortable reach without overextending. Mesh drywall tape application over seams and joints provides reinforcement, followed by generous amounts of joint compound applied and smoothed for blending. Joint compound must dry completely between applications, typically 24 hours per coat. Feather edges outward to blend repairs with surrounding surfaces, extending each coat slightly beyond the previous one. Learn detailed drywall repair techniques and materials selection for fire damage scenarios.
Specialized Ceiling Types: Popcorn, Acoustic Tile, and Drop Ceiling Restoration

Three specialized ceiling types require different approaches than standard drywall when dealing with fire damage. Popcorn and textured ceilings, acoustic tile systems, drop ceiling grids each respond differently to fire, smoke, water exposure.
Popcorn and Textured Ceiling Fire Damage Repair
Popcorn ceilings installed before 1980 require asbestos testing before any cleaning or removal work begins. Many older popcorn textures contain asbestos fibers, and disturbing this material without proper containment creates serious health hazards. Testing costs $200 to $400 but prevents exposure to carcinogenic materials. If asbestos is present, certified abatement contractors must handle all removal work. HEPA vacuuming with soft brush attachments removes loose soot from popcorn textures without aggressive contact that dislodges texture material. Controlled misting with cleaning solutions, applied lightly to avoid saturating the texture, allows chemical cleaning without texture failure. Careful dabbing rather than rubbing prevents texture removal while addressing smoke staining. When cleaning fails to remove smoke damage adequately, encapsulation with specialized sealers locks in remaining contamination. Texture matching for partial repairs challenges even experienced professionals because spray texture patterns vary by application technique, gun settings, product formulation.
Acoustic Tile Ceiling Restoration After Fire
Porous acoustic tiles absorb smoke deeply, making replacement more cost effective than cleaning in most fire damage situations. Individual tile replacement involves carefully removing damaged tiles from grid systems and installing matching replacements. Finding exact tile matches for older installations can be difficult since manufacturers discontinue products regularly. Complete ceiling replacement becomes warranted when more than 30 to 40% of tiles show smoke damage, or when the grid system itself sustained heat damage. New acoustic tile systems cost less than extensive cleaning and treatment of heavily contaminated existing tiles. Insurance coverage often makes full replacement the practical choice.
Drop Ceiling Grid System Repairs
Grid systems require evaluation for heat damage to metal components, which can warp or lose strength when exposed to fire temperatures. Tile replacement in drop ceiling systems is straightforward. Lift damaged tiles out and drop new ones into place. Clean metal grid components using appropriate cleaners for smoke residue, paying attention to corners and connection points where soot accumulates. The advantage of complete replacement for insurance covered repairs is that new systems provide fresh, clean materials without contamination concerns, and installation goes quickly compared to cleaning and treating existing systems.
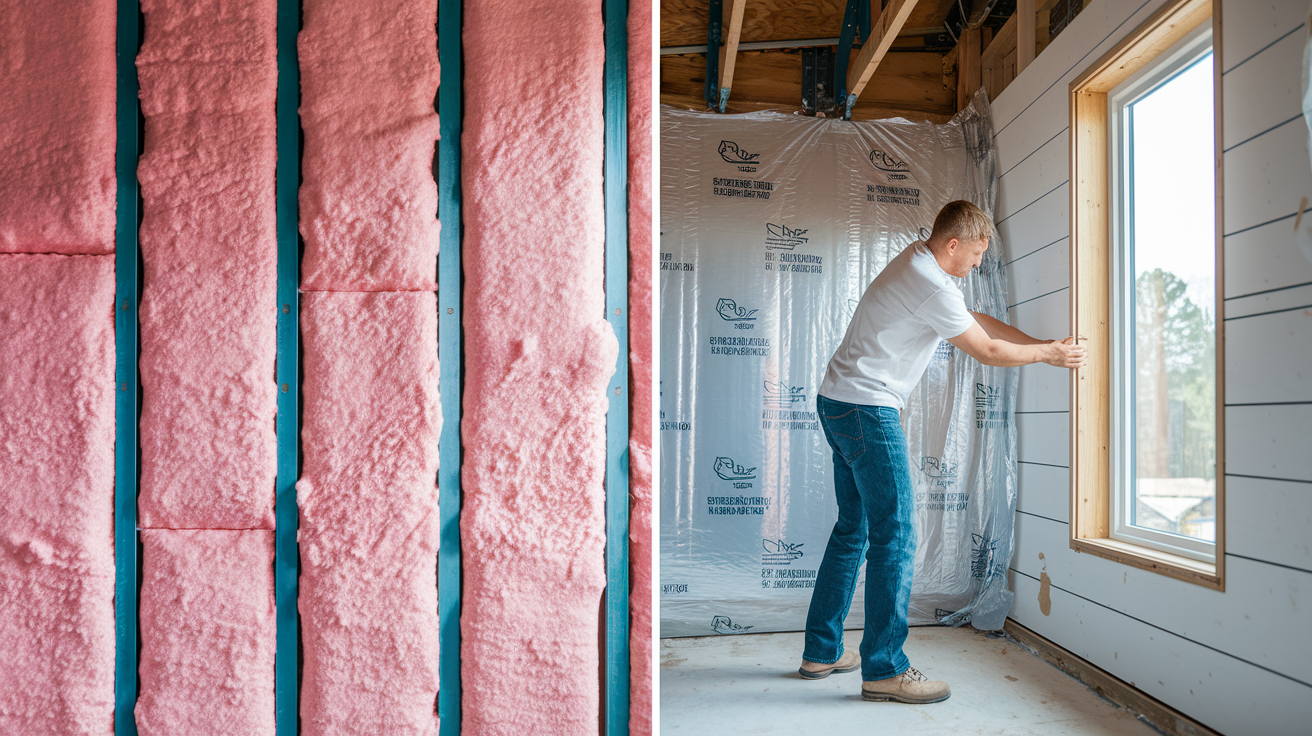
Insulation Replacement and HVAC System Considerations
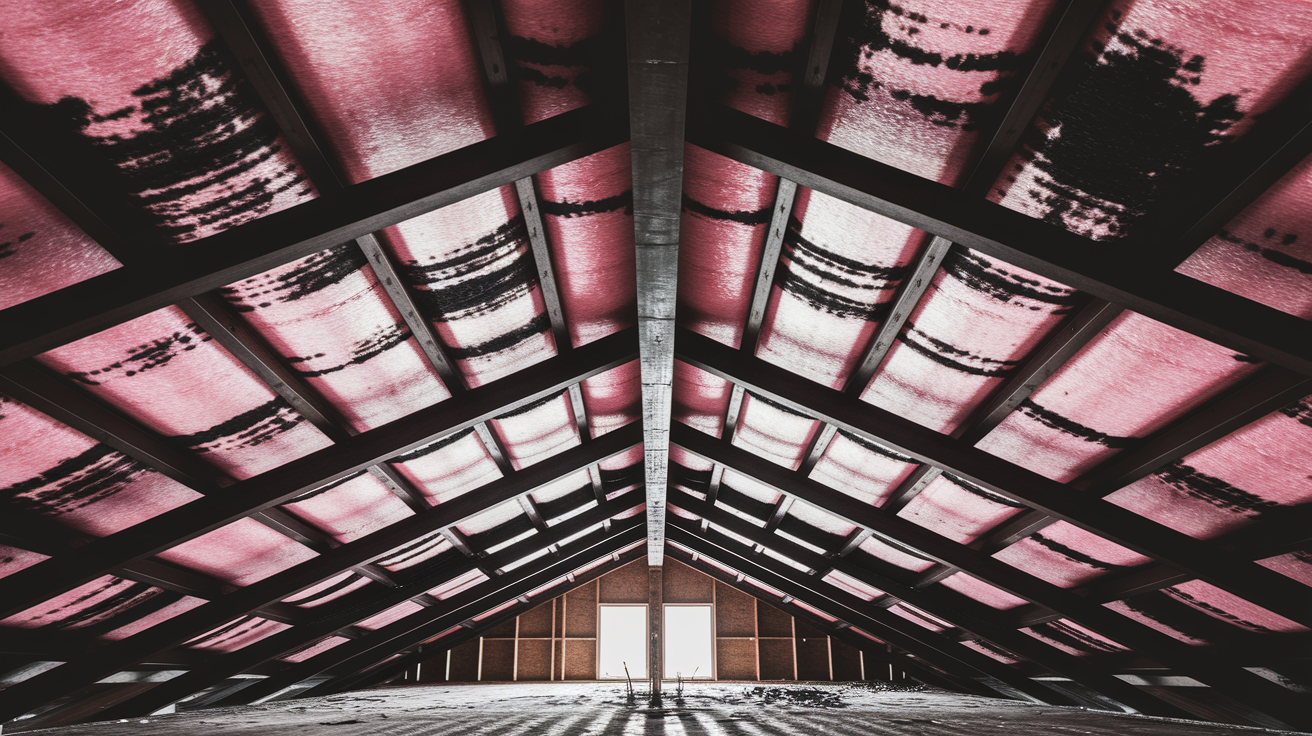
Ceiling fire damage always affects insulation above the damaged area. Fire exposed insulation must be completely removed because soot contamination, reduced R value, and odor retention make it unusable. Heat degrades insulation’s thermal properties permanently, and smoke particles embed throughout the material. Attempting to leave compromised insulation in place guarantees persistent odor problems and reduces energy efficiency.
Water damaged insulation from firefighting efforts requires complete removal even in areas with minimal fire exposure. Fiberglass insulation loses effectiveness when saturated and takes weeks to dry completely in enclosed ceiling cavities.
Cellulose insulation turns into heavy, soggy clumps when wet and promotes mold growth rapidly. Contaminated insulation must be properly bagged and disposed of according to local regulations for fire damaged materials. Some jurisdictions classify fire debris as special waste requiring specific handling.
HVAC ductwork evaluation determines whether smoke contamination requires professional cleaning. Ducts pull smoke throughout the system during and after fires, depositing residue on interior surfaces. Smoke particles then circulate to clean areas every time the system runs, spreading contamination and odor. Professional duct cleaning uses specialized equipment to remove smoke residue from sheet metal interiors. Ceiling cavity cleaning before new insulation installation ensures no soot or debris remains on framing members or behind new materials. Proper insulation replacement meets current building code requirements, which often exceed the R values of older insulation. This upgrade improves energy efficiency while addressing fire damage.
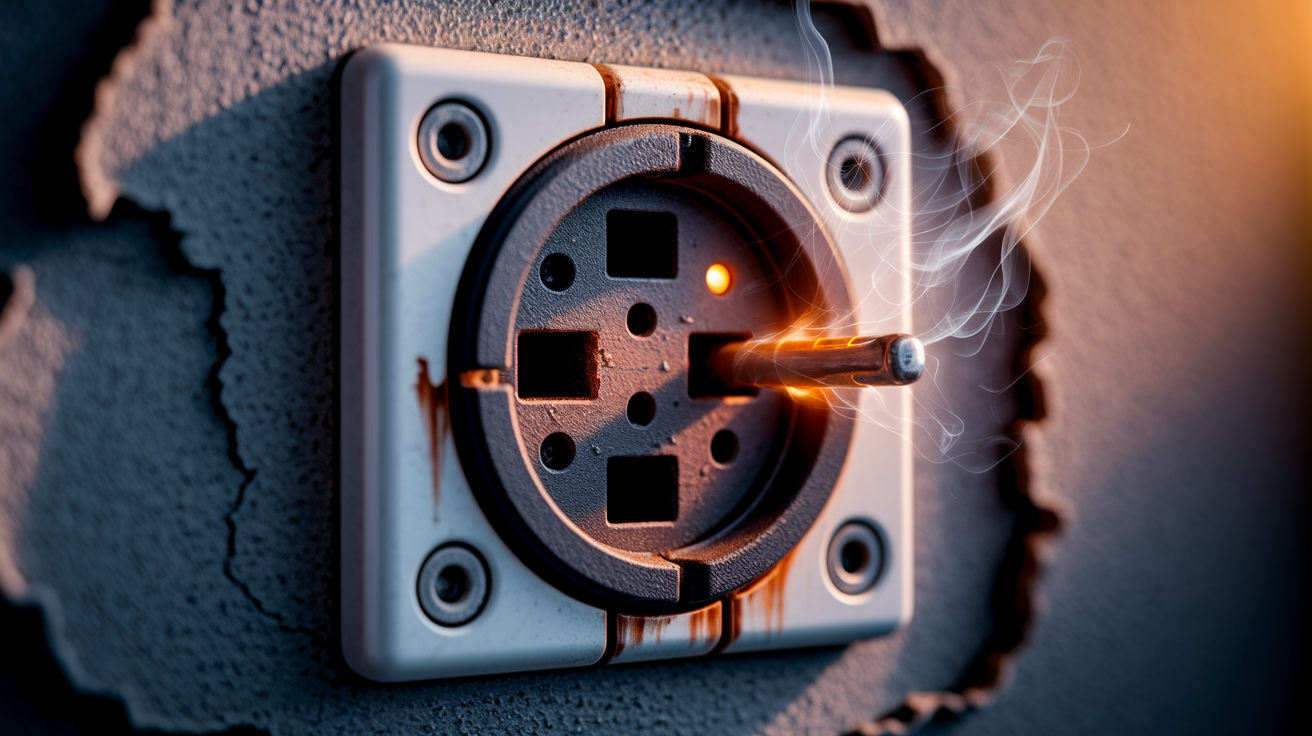
Electrical System and Light Fixture Repairs in Fire Damaged Ceilings

Heat exposure damages electrical wire insulation even without visible burning, creating shock and fire hazards. Temperatures well below visible flame damage degrade plastic and rubber insulation on wiring, compromising its protective properties.
Junction box evaluation examines both the boxes themselves and all wire connections inside them. Metal boxes may show heat discoloration, while plastic boxes can melt or deform. Replace any junction box exposed to fire temperatures to ensure safe, code compliant electrical systems. All wire splices and connections require inspection for heat damage, corrosion, proper attachment.
Light fixture assessment determines when replacement is required versus simple cleaning. Heat exposure weakens fixture mounting, degrades sockets, damages wiring connections. Ceiling fan electrical connections and mounting box integrity after fire exposure need verification by licensed electricians because inadequate support leads to dangerous failures. Fans weigh 35 to 50 pounds and require properly rated mounting systems.
Licensed electrician involvement in all electrical repairs is non negotiable. Insurance companies require licensed work, building inspectors demand it, safety depends on it. Electrical repairs must be inspected and approved before concealment behind new drywall, so coordinate this inspection timing with your restoration schedule. Thermal damage to wire insulation that creates shock and fire hazards may not show visible signs, making professional evaluation essential even when wiring looks intact.
Sealing, Priming, and Paint Preparation for Fire Damaged Ceilings
Standard primers fail on fire damaged surfaces because they lack the sealing properties needed to block smoke odor and prevent stain bleedthrough. Smoke damaged ceilings require specialized primers beyond regular paint products. These stain blocking primers contain shellac, oil based resins, or advanced polymers that encapsulate odor causing molecules and prevent them from penetrating through finish coats. Without proper primers, smoke odor returns within days or weeks, and brown staining appears through new paint.
Oil based stain blocking primers provide superior smoke sealing compared to water based products, though they require longer drying times and solvent cleanup. Shellac based primers offer the strongest odor blocking and fastest drying, making them ideal for severe smoke damage. Water based stain blockers work for light smoke exposure and offer easier application and cleanup. Surface preparation before primer application requires complete cleaning, drying, sanding to create proper adhesion. Any remaining soot or moisture reduces primer effectiveness. Multiple primer coat requirements depend on damage severity. Light smoke damage may need one coat, while heavy contamination requires two or three applications. Allow complete drying between coats, typically 3 to 4 hours for shellac based, 12 to 24 hours for oil based products.
Paint selection for ceiling specific formulations matters because standard wall paint doesn’t perform well overhead. Ceiling paints contain ingredients that reduce spattering during application and provide better coverage in one coat. They’re formulated to minimize roller marks and provide uniform appearance under various lighting conditions. Apply paint in thin, even coats with sufficient drying time between layers. Two finish coats over properly applied primer provide durable, professional results. Use quality roller covers designed for ceiling work to minimize texture and achieve smooth coverage.
| Primer Type |
Best Used For |
Drying Time |
| Shellac Based |
Severe smoke damage, strongest odor blocking, heavy staining |
45 minutes to 1 hour between coats |
| Oil Based |
Moderate to heavy smoke damage, excellent stain blocking, water damage |
12 to 24 hours between coats |
| Water Based Stain Blockers |
Light smoke damage, easier cleanup, low odor application |
2 to 4 hours between coats |
Insurance Claims and Documentation for Ceiling Fire Damage

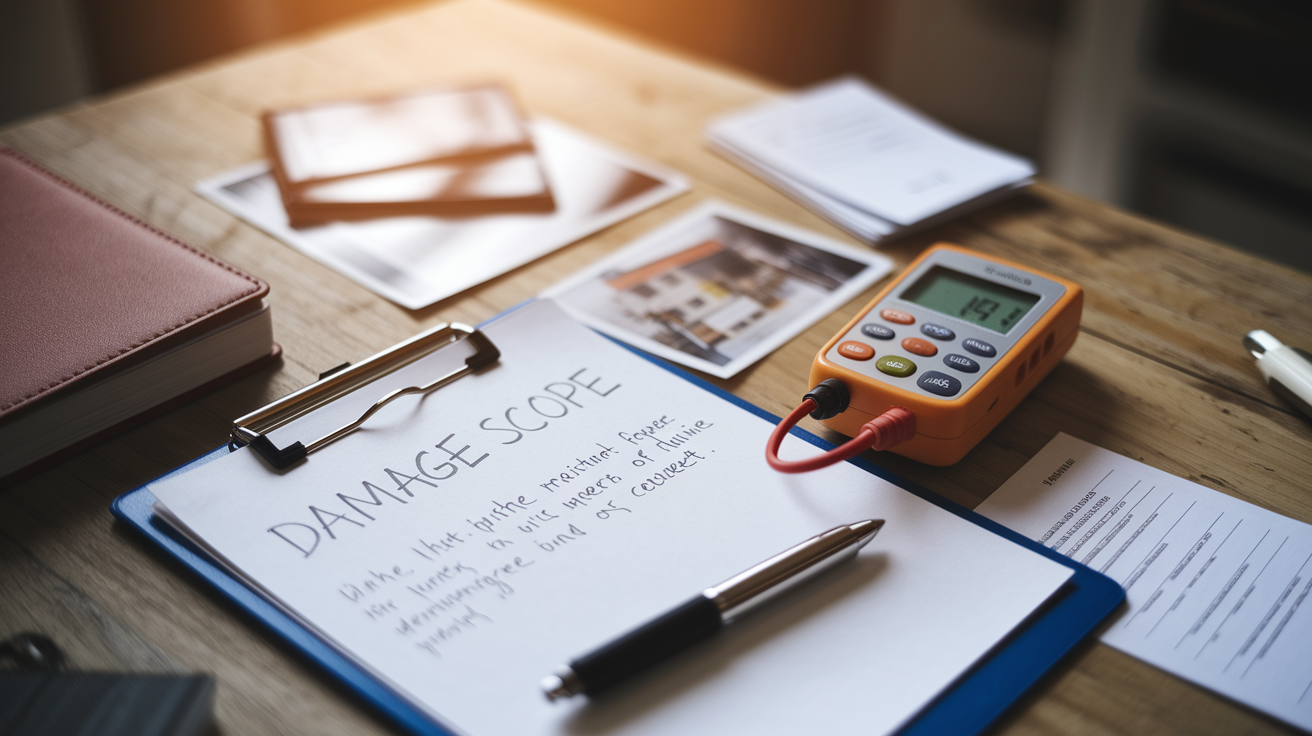
Immediate documentation with photos before any cleanup begins protects your insurance claim and provides evidence of damage extent. Take photos showing the ceiling from multiple angles, close ups of specific damage areas, wide shots showing affected rooms in context.
The insurance adjuster evaluation process examines damage, determines coverage, authorizes repair scope. Adjusters document what they observe, take their own photos, compare your damage to policy coverage terms. They assess whether damage resulted from the fire event covered by your policy or from other causes. Their evaluation determines initial claim approval and payment amounts. Be present during adjuster visits to point out damage they might miss and answer questions about the fire event.
Proper documentation requirements include photos taken immediately after the fire, written descriptions of damage to all affected areas, contractor estimates for repairs, the fire department report detailing the incident. The NFIRS report contains details on the fire’s cause and estimated losses, supporting your claim documentation. Save all receipts for emergency repairs, temporary lodging, expenses related to the fire damage. Document conversations with insurance representatives, noting dates, times, what was discussed.
Insurance typically covers structural repairs to restore your ceiling to pre loss condition, smoke remediation including cleaning and odor elimination, temporary living expenses if your home is uninhabitable. Specialized techniques like ozone treatment or thermal fogging may require justification beyond basic cleaning, so obtain detailed estimates explaining why these services are necessary. Evaluation of replacement versus restoration costs influences whether insurance approves extensive cleaning or authorizes complete replacement. Sometimes replacing materials costs less than intensive restoration efforts. Additional living expenses coverage includes hotel costs, restaurant meals, other expenses while your home is being repaired. Understand whether your policy pays actual cash value (depreciated value) or replacement cost (full cost of new materials and labor). The difference significantly affects your out of pocket expenses. Work with insurance approved or experienced restoration contractors who understand claim documentation and can communicate effectively with adjusters. Some repairs require multiple estimates for insurance approval, particularly for expensive specialized treatments. Professional restoration techniques that insurance may cover vary by policy and damage severity.
Fire Damaged Ceiling Repair Costs and Pricing Factors
Repair costs vary dramatically based on damage severity, ranging from minor smoke cleaning at a few hundred dollars to complete ceiling reconstruction costing tens of thousands. Surface smoke damage requiring only cleaning and repainting runs $500 to $2,000 for a typical room. Moderate damage requiring drywall replacement, insulation, finishing costs $3,000 to $8,000. Severe structural damage with joist replacement, electrical repairs, complete reconstruction ranges from $10,000 to $30,000 or more.
Material cost factors include drywall prices ($12 to $20 per sheet), insulation costs ($0.50 to $2.00 per square foot depending on type and R value), electrical components for replacement fixtures and wiring, finishing products including primer, paint, texture materials. Specialty materials like fire rated drywall or acoustic tiles increase costs. Structural lumber for joist repairs or replacement adds significant expense, especially for large dimensional timbers. Hidden damage discoveries increase initial estimates when inspection reveals problems concealed behind ceiling surfaces or above insulation. This happens frequently because fire and smoke travel through cavities invisible during initial assessment.
Six repair cost components affect your total project price:
• Damage assessment fees ranging from $200 to $500 for professional evaluation, moisture testing, structural analysis, though some contractors include assessment in project pricing
• Structural repairs including joist replacement, framing reinforcement, temporary shoring during reconstruction, typically the largest cost component for severe damage
• Material replacement costs for drywall, insulation, electrical components, finishing products, varying based on quality and building code requirements
• Odor elimination treatments including ozone generation, hydroxyl treatment, or thermal fogging when needed to address persistent smoke smell, adding $500 to $2,000
• Finishing work covering taping, mudding, sanding, priming, painting, texture matching to blend repairs with existing surfaces
• Permit fees required by local building departments for structural, electrical, significant repairs, typically $100 to $500 depending on project scope
Labor costs for specialized trades vary by region and contractor experience. Structural work runs $75 to $150 per hour, electrical repairs cost $85 to $150 per hour, drywall installation and finishing ranges from $50 to $90 per hour, painting services cost $40 to $75 per hour. Emergency response services carry premium pricing, sometimes 50 to 100% above standard rates, because they involve immediate availability and after hours work. Regional cost variations reflect local labor markets, material availability, cost of living differences. Contractor availability impacts pricing during busy seasons or in areas with limited qualified restoration professionals.
Choosing Qualified Contractors for Fire Damaged Ceiling Restoration
Contractor selection matters critically for fire restoration because this work requires specialized skills beyond general contracting. Fire damage involves structural assessment, smoke remediation chemistry, moisture control expertise, understanding of building codes specific to fire repairs. General contractors without restoration training miss hidden damage, use inadequate cleaning methods, create problems that emerge months later. Restoration specialists understand the complete sequence from emergency stabilization through final finishing, coordinating trades and maintaining quality standards throughout.
IICRC certification demonstrates that restoration professionals have completed formal training in fire and smoke damage restoration, water damage mitigation, applied structural drying. This certification isn’t just a piece of paper. It represents hundreds of hours of education and tested competency. Insurance company approval matters because approved contractors understand claim documentation requirements, communicate effectively with adjusters, follow protocols that facilitate payment. Working with approved contractors often speeds claim processing and reduces payment disputes. Emergency response capabilities and availability separate restoration companies from standard contractors. Restoration firms maintain 24/7 availability, rapid response teams, equipment ready for immediate deployment. Verify proper licensing for all trades involved in your repairs. General contractors need state or local contractor licenses, electricians require electrical licenses, some jurisdictions mandate restoration specific credentials. Bonding protects you if the contractor fails to complete work, and insurance coverage (general liability and workers compensation) protects you from liability for accidents during repairs.
Five essential questions to ask fire restoration contractors reveal their qualifications and suitability:
- What certifications do your technicians hold, specifically IICRC credentials for fire and smoke damage restoration, and are these certifications current and verifiable?
- How much experience do you have with fire damage similar to mine in scope and severity, and can you provide references from recent projects I can contact?
- What is your experience working with insurance claims, including documentation, communication with adjusters, your approval status with major insurance carriers?
- What timeline do you estimate for my specific project, broken down by assessment, structural repairs, drying, reconstruction, finishing phases with realistic completion dates?
- What warranty coverage do you provide on your work, including duration, what’s covered, whether warranty protection transfers if I sell the property?
Contract considerations and work guarantees protect both parties and establish clear expectations. Review contracts carefully before signing, ensuring they specify detailed scope of work listing all services and materials, payment schedules tied to completed phases rather than upfront payment, timeline commitments with start and completion dates, change order procedures for addressing unexpected damage discoveries, warranty terms covering workmanship and materials. Quality contractors stand behind their work with written guarantees covering repairs for at least one year. Some offer longer warranty periods for structural work or waterproofing components.
Repair Timeline and What to Expect During Ceiling Fire Restoration
Timeline variability depends on damage extent, ranging from quick surface repairs to months long reconstruction projects. Minor smoke damage requiring only cleaning and repainting takes 3 to 5 days. Moderate damage with drywall replacement needs 2 to 3 weeks. Severe structural damage requiring joist replacement and complete reconstruction extends to 4 to 8 weeks or longer.
The emergency stabilization and assessment phase begins within hours of initial contact. Restoration teams secure the property against weather intrusion and further damage, using tarps to cover roof openings and boarding damaged windows. They extract standing water and begin drying operations immediately to prevent mold growth. Initial assessment documents damage extent and identifies safety concerns requiring immediate attention. This emergency phase typically completes within 24 to 48 hours, establishing a stable situation before detailed planning begins.
The repair and reconstruction phase involves multiple steps, each with specific duration requirements. Structural repairs including joist replacement or reinforcement take 3 to 7 days depending on extent. Permit requirements and inspection scheduling affect timelines when building departments must review and approve structural work before proceeding. Drying time requirements for water damage must be completed before repairs begin, typically 3 to 7 days with commercial dehumidification equipment. Moisture testing verifies complete drying before reconstruction starts. Drywall installation and taping takes 1 to 2 days, followed by joint compound application requiring 24 hours drying time between coats. Multiple compound coats mean 3 to 5 days from first application to final sanding. Primer application requires complete drying before painting begins, adding another 12 to 24 hours. Paint application in multiple coats with drying time extends finishing by 2 to 3 days. Hidden damage discoveries extend timelines when inspection reveals concealed problems. Material availability affects schedules when specialty products require ordering. Weather delays impact timelines during roofing or exterior work.
| Damage Level |
Assessment Phase |
Repair Phase |
Finishing Phase |
Total Timeline |
| Light (surface smoke only) |
1 day |
1 to 2 days cleaning |
2 to 3 days priming and painting |
4 to 6 days |
| Moderate (drywall replacement) |
1 to 2 days |
5 to 7 days removal and installation |
7 to 10 days taping, mudding, painting |
2 to 3 weeks |
| Heavy (structural concerns) |
2 to 3 days |
10 to 14 days structural and material work |
7 to 10 days finishing |
3 to 4 weeks |
| Structural (joist replacement) |
3 to 5 days including engineering |
14 to 21 days structural repairs |
10 to 14 days complete finishing |
4 to 8 weeks |
Preventing Future Ceiling Damage and Fire Safety Measures
Smoke detector placement matters after ceiling repairs, with units positioned according to manufacturer specifications and building codes. Install detectors on ceilings or high on walls, avoiding corners where dead air spaces reduce effectiveness.
Kitchen ventilation prevents grease accumulation that contributes to fire risk and creates cleaning challenges. Range hood systems vented to the exterior remove cooking smoke, grease particles, combustion byproducts before they deposit on ceiling surfaces. Clean range hood filters monthly to maintain effectiveness. Electrical safety practices reduce fire risk throughout your home. Avoid overloading outlets with multiple high wattage appliances on single circuits. Replace damaged electrical cords showing fraying or exposed wires. Use surge protectors for electronic equipment clusters. Install AFCI (Arc Fault Circuit Interrupter) breakers in bedrooms and living areas as required by current electrical codes. Attic ventilation reduces fire spread risk by maintaining cooler temperatures and preventing heat buildup. Proper ventilation systems include soffit vents for intake and ridge or gable vents for exhaust, creating continuous airflow.
Building code compliance for fire safety features includes properly rated drywall in certain locations, fire rated assemblies between garage and living spaces, adequate electrical system capacity. Maintain electrical systems and fixtures through regular inspection. Look for warm outlets, flickering lights, frequently tripping breakers indicating problems. Schedule electrical system evaluations every 3 to 5 years to identify deteriorating components before they fail.
Fireproof materials and fire rated assemblies for ceiling construction provide improved protection in new construction or major renovations. Type X drywall contains special additives that improve fire resistance. Fire rated ceiling assemblies meet specific time ratings, typically 30, 60, or 90 minutes of fire resistance. Regular inspection schedules for fire safety equipment ensure smoke detectors function properly, fire extinguishers remain charged and accessible, escape routes stay clear. Test smoke detectors monthly by pressing test buttons. Replace detector batteries annually or when low battery warnings sound. Replace entire smoke detector units every 10 years as sensors degrade with age.
Final Words
Fire damaged ceiling repair starts with safety assessment and ends with a ceiling that looks like the damage never happened.
The process moves through clear stages: stabilize the structure, remove all smoke and soot, dry everything completely, repair or replace damaged materials, seal odors, and finish with quality paint and texture matching.
Yes, it’s a coordinated effort involving structural work, electrical repairs, insulation replacement, and careful finishing. But when each step happens in order with the right materials and techniques, your ceiling gets back to normal.
Work with qualified restoration contractors who understand the full sequence. Document everything for insurance. And trust the process to protect your home and give you a solid, clean ceiling overhead.
FAQ
How much does fire damage restoration cost?
Fire damage restoration costs typically range from $3,000 for minor smoke cleaning to $50,000 or more for complete ceiling reconstruction, depending on damage severity, structural repairs needed, and the size of the affected area.
Does insurance rebuild a house after a fire?
Insurance typically covers fire damage repairs including structural work, smoke remediation, and temporary living expenses, though coverage depends on your policy type, with replacement cost policies providing fuller coverage than actual cash value policies.
Can you paint over a smoke-damaged ceiling?
You cannot paint directly over a smoke-damaged ceiling because smoke residue will bleed through standard paint. You must first clean the surface, then apply specialized stain-blocking primers designed to seal odors before painting.
What is the average cost to repair a ceiling with water damage?
Water-damaged ceiling repair costs average $500 to $1,500 for minor fixes and $2,000 to $5,000 for extensive damage requiring drywall replacement, insulation removal, structural drying, and complete refinishing to match existing textures.
How long does fire damaged ceiling repair take?
Fire damaged ceiling repair takes 3 to 7 days for minor smoke damage and 2 to 6 weeks for structural repairs, depending on damage extent, drying time requirements, permit approvals, and the number of coats needed for finishing work.
What are the first steps after discovering ceiling fire damage?
The first steps after discovering ceiling fire damage include evacuating if the ceiling appears unstable, documenting all damage with photos before cleanup, contacting your insurance company within 24 to 48 hours, and calling professional restoration services for safety assessment.
When do I need a structural engineer for fire damaged ceilings?
You need a structural engineer for fire damaged ceilings when load-bearing joists show charring, the ceiling sags or has large cracks, or when building inspectors require professional verification that repairs meet local codes before occupancy approval.
What certifications should fire restoration contractors have?
Fire restoration contractors should have IICRC certification for smoke and fire damage restoration, proper state licensing for construction work, general liability and workers compensation insurance, and preferably insurance company approval for direct claim billing.
How do professionals remove smoke odor from ceilings?
Professionals remove smoke odor from ceilings through HEPA vacuuming, specialized cleaning solutions, complete surface drying, stain-blocking primers that seal odor molecules, and advanced techniques like ozone treatment or thermal fogging for deep penetration.
Should I replace or clean fire damaged acoustic ceiling tiles?
You should replace fire damaged acoustic ceiling tiles rather than clean them because the porous material absorbs smoke deeply, making effective cleaning nearly impossible, and replacement often costs less than the specialized restoration attempts required.

You can paint over smoke damage all you want, but the smell will always come back if you don’t seal it first. Most people waste money repainting every few months because they skip the crucial odor-blocking step between cleaning and topcoat. This guide walks you through the exact primers that stop smoke odor permanently and the five-step process that prevents yellowing stains and lingering smells from pushing through your fresh paint. Get it right once, or keep repainting forever.
Essential Products and Quick-Start Process for Smoke Odor Sealing
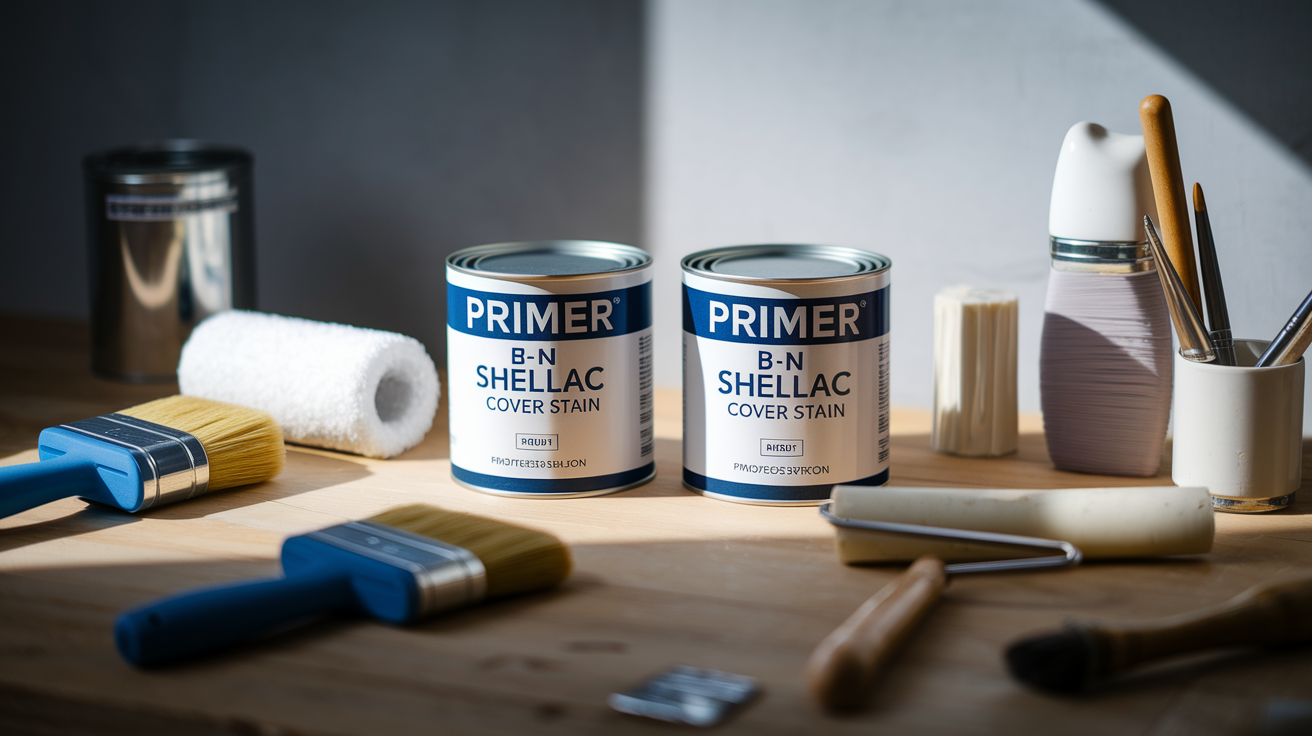
Smoke odor sealing needs specialized primers, not regular paint. The top two picks are B-I-N Shellac Primer by Zinsser for maximum strength and Zinsser Cover Stain Oil-Based Primer as a solid backup. You can grab both at most hardware stores, though the shellac-based B-I-N handles heavy nicotine and cigarette smoke better. These primers create a barrier between contaminated surfaces and fresh paint, stopping the endless cycle of repainting every few months when smells come back.
Smoke particles work their way into drywall over time, embedding deep and creating stains that push through standard paint. Without proper sealing, odors show up again within weeks and yellow nicotine stains reappear on your walls and ceilings. Total waste of paint and effort. Cigarette smoke creates progressive yellow discoloration that gets darker with exposure. Fire smoke leaves soot particles that keep releasing odor long after you can’t see the damage anymore.
Top Three Odor-Blocking Primers:
- B-I-N Shellac Primer by Zinsser: best overall for heavy nicotine and smoke damage, ready for second coat in 45 minutes
- Zinsser Cover Stain Oil-Based Primer: works well for moderate smoke stains and blocks multiple stain types
- Kilz Original Oil-Based Primer: budget pick for lighter contamination
Five-Step Condensed Process:
- Deep clean walls with TSP solution and dry cleaning sponges to remove soot buildup
- Apply first coat of odor-blocking primer to all walls and ceilings
- Wait minimum drying time (45 minutes for shellac, longer for oil-based)
- Apply second primer coat for complete sealing
- After 3-day cure period, apply two topcoat layers
Comprehensive Primer Selection Guide: Comparing All Sealing Options
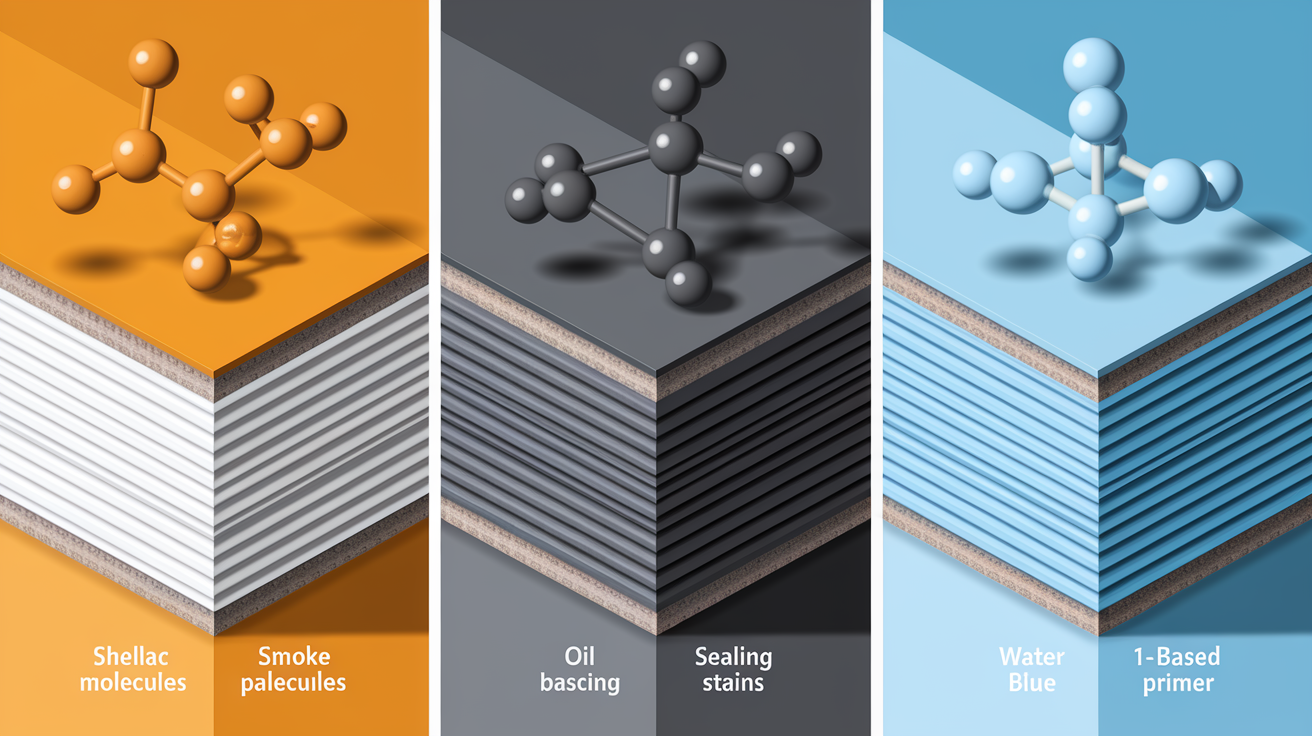
Picking the right primer depends on three things: how bad the contamination is (light cooking smoke versus years of indoor cigarette use), your timeline when rental prep demands fast turnaround, and health concerns about VOC exposure during application in occupied homes. Light smoke from occasional cooking needs less aggressive treatment than decades of cigarette smoke that’s turned walls brown and created sticky buildup. Timeline matters because shellac products dry faster but smell stronger during application. Water-based options take longer but produce milder fumes.
Three primer categories handle smoke damage. Shellac-based primers work as maximum-strength sealers blocking the heaviest contamination. Oil-based primers serve as effective alternatives for moderate damage while also addressing water stains and wood tannin bleeding. Specialty water-based options provide lower VOC solutions for lighter contamination when indoor air quality concerns outweigh maximum sealing power needs. Shellac-based B-I-N by Zinsser uses shellac resin specifically designed to block soot stains and smoke odors, delivering the highest effectiveness. Oil-based primers like Zinsser Cover Stain lock in surface discoloration but require good ventilation and respirator use. Standard water-based primers usually can’t handle nicotine, though Ultra Recon Smoke and Odor Sealer is a newer water-based product designed specifically for nicotine sealing.
| Primer Type |
Best For |
Drying Time Between Coats |
Full Cure Time |
Odor During Application |
Ventilation Required |
Effectiveness Rating |
Top Product |
| Shellac-Based |
Heavy nicotine/smoke damage |
45 minutes |
3 days |
Very Strong |
Respirator + cross-ventilation |
Highest |
B-I-N by Zinsser |
| Oil-Based |
Moderate smoke + multi-stain blocking |
2-4 hours |
24 hours |
Strong |
Respirator recommended |
High |
Zinsser Cover Stain |
| Water-Based Specialty |
Light smoke + low-VOC priority |
1-2 hours |
24 hours |
Mild |
Standard ventilation |
Moderate |
Ultra Recon Smoke Sealer |
Go with shellac-based for rental prep with heavy cigarette smoke damage where previous tenants smoked indoors for years, creating sticky yellow residue everywhere. Choose oil-based when you’re combining smoke sealing with water stain or tannin blocking on wood surfaces, like paneling affected by both smoke and roof leaks. Pick water-based specialty when indoor air quality matters more than maximum sealing power, like working in occupied homes with kids or pets around. Severe contamination always needs shellac regardless of VOC concerns. Failed sealing wastes more time and money than dealing with stronger fumes upfront.
Surface Preparation and Deep Cleaning Before Applying Odor-Blocking Primer

You can’t skip surface prep and deep cleaning before primer application. Primers won’t properly stick to smoke residue, oils, and soot buildup coating your walls and ceilings. Contaminated surfaces reduce primer effectiveness by creating a barrier between primer and substrate, preventing the bond that locks odors inside walls. Smoke particles embed into surfaces creating stains and odors that stick around for months without proper treatment. Skip the cleaning and your primer fails within weeks when odors return and yellow stains bleed through new paint.
Pre-primer wall cleaning involves two steps: dry cleaning sponge followed by TSP wash. Dry cleaning sponges remove soot and heavy nicotine buildup without spreading contamination or adding moisture that can damage drywall. TSP cleaner removes surface buildup after dry sponge treatment, getting embedded nicotine oils that dry sponges can’t lift. Trisodium phosphate breaks down greasy smoke residues, creating a clean surface for maximum primer adhesion.
Step-by-Step Cleaning Process:
- Use dry cleaning sponges first for heavy soot removal with downward wiping motions, don’t scrub in circles because that spreads contamination sideways
- Prepare TSP solution at 1/2 cup powder per gallon warm water in bucket, mix until completely dissolved
- Apply TSP solution with sponge scrubbing walls and ceilings, work in 4×4 foot sections so solution doesn’t dry before you rinse
- Rinse with clean water using separate sponge to remove TSP residue, which messes with primer adhesion if you leave it on
- Allow 24 hours minimum drying time before primer application, use fans to speed drying in humid conditions
- Sand loose or flaking material with 120-grit sandpaper after drying, remove any raised texture or peeling paint that creates uneven primer coverage
Protective gear during cleaning protects you from chemical irritation and contamination exposure. Wear nitrile gloves and safety goggles for TSP handling because the alkaline solution irritates skin. Open windows and position fans for ventilation, creating air movement that removes airborne particles disturbed during cleaning. Dispose of contaminated cleaning water outside rather than down household drains. Bag contaminated materials like disposable sponges and rags in sealed plastic before tossing. Protect your workspace with drop cloths covering floors and furniture, because TSP solution and dislodged soot create a mess.
Application Techniques, Safety Protocols, and Coverage Methods
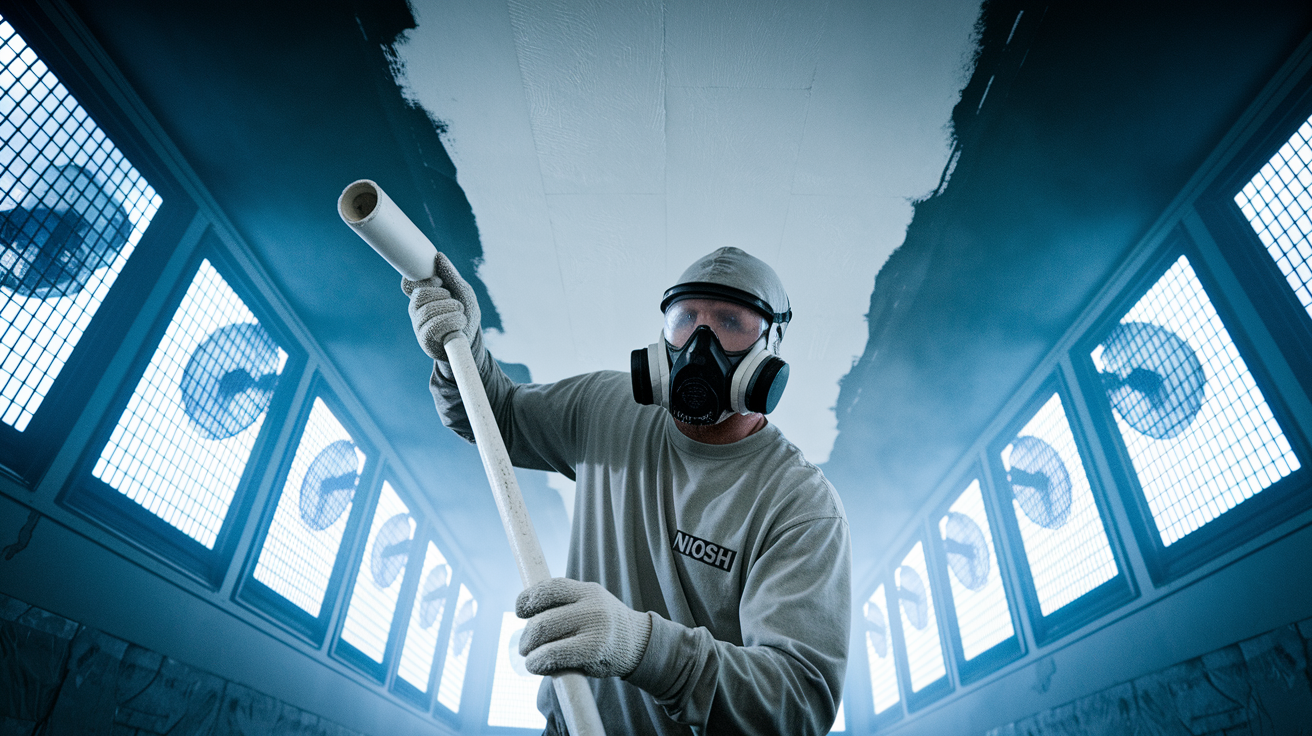
How you apply the primer affects sealing effectiveness by determining how completely it penetrates porous surfaces and covers contaminated areas. Primer thickness and surface type determine tool selection, with thicker shellac-based products needing more aggressive application than thinner water-based alternatives. Proper technique gives you complete coverage without thin spots that allow odor to migrate through gaps in dried primer film. Rolling primer onto walls promotes maximum adhesion by forcing material into surface texture and pores.
Prep for application by stirring primer thoroughly for 2 to 3 minutes to get consistent color and texture throughout the can. Especially important with shellac-based products that settle during storage. Cut in edges and corners first with a 2-inch angled brush before rolling large areas, creating clean lines along trim and ceiling junctions. Work in manageable sections maintaining wet edge, preventing lap marks where dried primer meets fresh application and creates visible lines on finished walls.
Five Application Methods:
- Brush application for trim work, baseboards, door frames needing precision with 2-inch angled brush for edges and tight spaces around electrical outlets
- Roller coverage for large wall and ceiling areas using 3/8-inch nap for smooth surfaces, 1/2-inch nap for textured walls with orange peel or knockdown texture
- Spray application for cabinet surfaces, textured surfaces needing fast coverage in rental prep scenarios with multiple rooms
- Back-rolling technique after spraying for maximum primer penetration into porous drywall, working material deeper than spray alone achieves
- Edging technique around electrical outlets, light switches, and ceiling fixtures using painter’s tape and careful brush work to keep primer off hardware
Safety equipment isn’t optional when working with shellac and oil-based primers. Use a NIOSH-approved respirator mask with organic vapor cartridges. Paper dust masks provide zero protection against harmful fumes and VOC off-gassing during application. Wear nitrile gloves to prevent skin absorption of solvents and chemical components that penetrate latex gloves. Wear safety goggles for ceiling work and spray application protecting against drips and overspray. Set up cross-ventilation with exhaust fan in one window and intake in another, creating air flow that removes fumes from your workspace. Don’t run your HVAC system during application to avoid contaminating your entire house through ductwork circulation. Maintain minimum 4 hour ventilation period after application before re-entry without a respirator, allowing initial off-gassing to clear the workspace.
Coating strategy requires specific timing for proper curing and odor blocking. Check first coat coverage for missed spots or thin areas showing wall color through primer, mark problem zones for extra attention on second coat. Wait the minimum drying time between coats, 45 minutes for shellac-based B-I-N or 2 to 4 hours for oil-based products before recoating. Apply second coat for complete encapsulation and odor blocking. Single coats rarely provide enough barrier against heavy contamination. Wait the full 3 day cure period for shellac or 24 hours for oil-based before topcoat application, allowing complete hardening and off-gassing. Do a smell test after primer cure to verify effectiveness before proceeding to topcoat. Correcting failed sealing costs less before paint application than after.
Fire Damage Restoration and Heavy Smoke Contamination Sealing
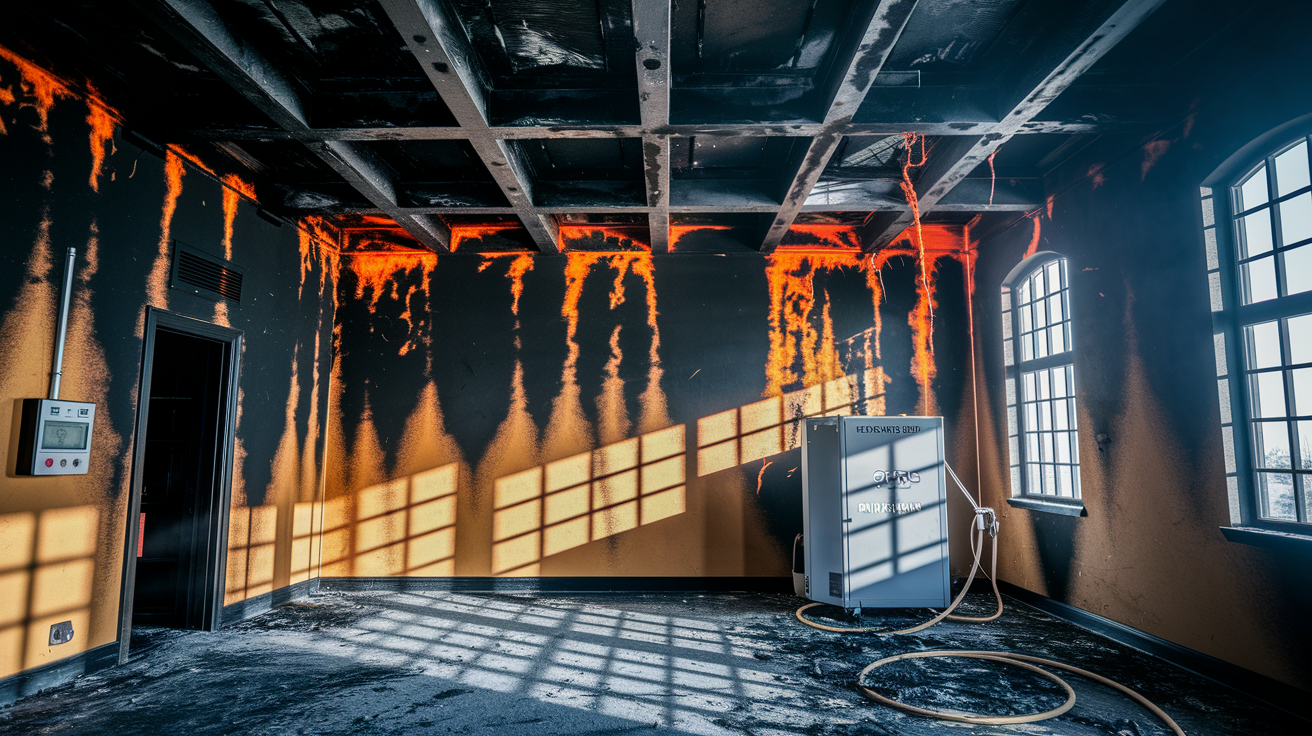
Fire damage restoration differs from routine smoke sealing by requiring structural assessment and moisture testing before any primer application begins. Structural assessment includes beam integrity inspection checking for char depth and load-bearing capacity reduction, especially on exposed wood framing in basements and attics. Test moisture content with a moisture meter at multiple wall locations. Surfaces must have moisture content below 12% before priming can begin. Wet or damp drywall prevents primer adhesion and traps moisture behind sealed surfaces, leading to mold growth and material failure within weeks. Figure out which materials can be sealed versus needing complete replacement. Heavily charred drywall with more than 1/4-inch char depth lacks structural integrity for primer adhesion.
Additional cleaning requirements for fire-affected surfaces go beyond standard TSP washing protocols. Heavy soot removal requires multiple dry sponge passes before TSP wash, working from ceiling downward to prevent contaminating cleaned areas with falling debris. Address char on wood surfaces with wire brush or coarse sandpaper, removing unstable material down to solid wood before applying primer. Deal with melted plastic or synthetic materials by scraping residue with a putty knife and disposing of contaminated material. Primer can’t seal melted substances that keep off-gassing indefinitely.
Extra odor elimination techniques work alongside primer sealing for fire-affected properties. Ozone treatment timing matters. Run the ozone generator for 24 to 48 hours after cleaning but before primer application, allowing ozone molecules to break down odor compounds in air and on surfaces. Vacate the property during ozone treatment because high concentrations irritate lungs and damage houseplants. Use thermal fogging for HVAC cleaning and air duct treatment to prevent recontamination from smoke particles deposited throughout ductwork system during the fire. Apply enzyme cleaners to concrete floors and basement areas where smoke penetrated deeply into porous masonry, breaking down organic compounds that primers can’t seal effectively. Learn more about comprehensive fire and smoke damage restoration approaches when damage exceeds cosmetic surface treatment.
Professional services become necessary when damage severity exceeds DIY capabilities. Extent of structural damage affecting load-bearing elements requires engineering assessment and repair permits before cosmetic work begins. Contamination in inaccessible areas like inside wall cavities requires wall removal and replacement rather than surface sealing. Hidden smoke damage keeps off-gassing behind sealed surfaces. Health hazards from third-hand smoke and toxic residue buildup require specialized equipment beyond consumer respirators, including negative air machines and professional-grade containment barriers. Insurance documentation requirements for property restoration claims typically need professional invoices and certificates of completion, making DIY work unsuitable for insurance-covered projects requiring warranty and liability coverage.
Selecting and Applying Compatible Topcoats After Smoke Sealing
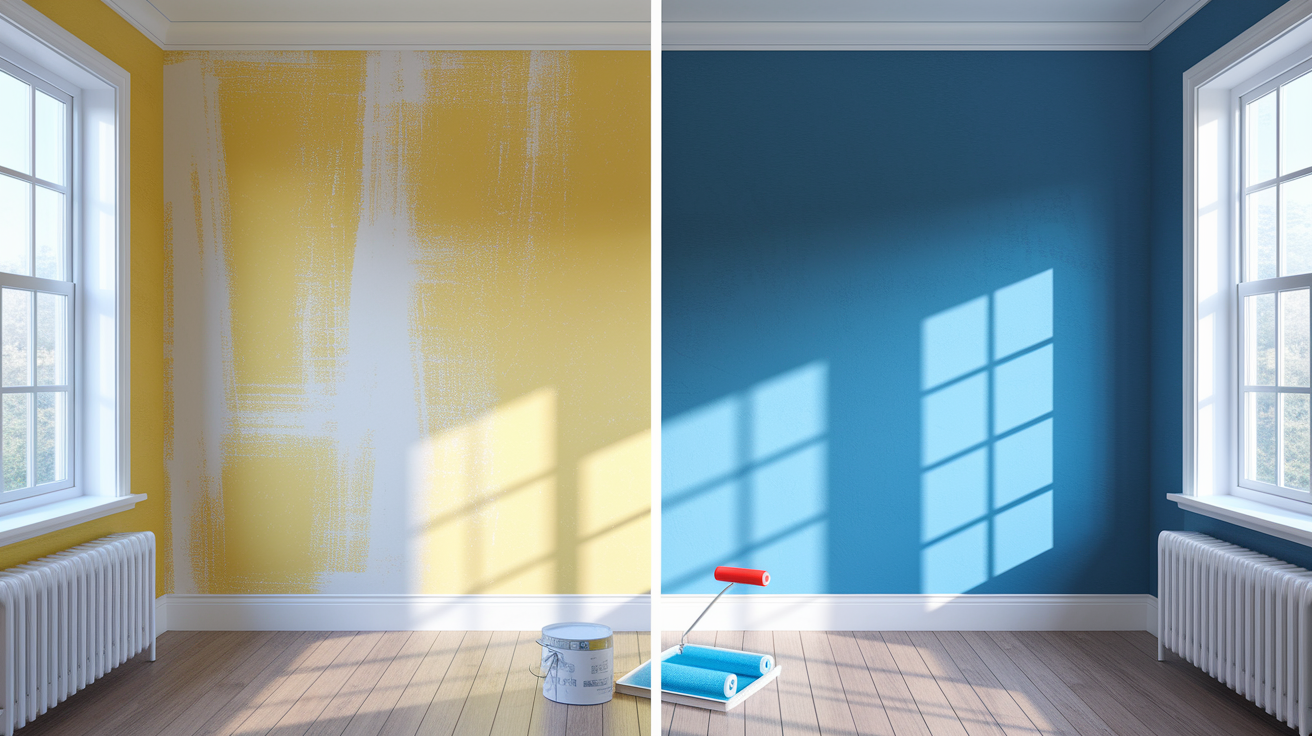
Topcoat compatibility matters because not all paints stick equally to different primer bases. Latex topcoats work on all primer types including shellac, oil-based, and water-based sealers without compatibility issues. Check manufacturer specifications before using specialty coatings or unconventional paint types to prevent adhesion failure. Finish selection affects durability and future cleaning ease, especially important for rental prep scenarios where tenant turnover requires washable surfaces that withstand repeated cleaning without paint damage.
Finish options serve different applications based on traffic levels and cleaning requirements. Flat finish works for low-traffic areas and ceiling coverage where light reflection creates glare, hiding surface imperfections better than glossier alternatives. Eggshell finish balances washability with appearance for living areas, providing subtle sheen that allows spot cleaning without showing scrub marks. Semi-gloss options work for trim, baseboards, and high-contact surfaces like door frames requiring frequent cleaning. Glossier surfaces resist dirt absorption and wipe clean more easily than flat paint.
Four Recommended Topcoat Types:
- Standard acrylic latex paint for typical interior surfaces with good breathability and color options, covering sealed walls without special formulation requirements
- Moisture-resistant formulations like PermaWhite for bathroom and kitchen applications preventing mold growth on sealed surfaces exposed to humidity
- Washable semi-gloss or satin finishes for rental prep and tenant turnover situations enabling easy maintenance between occupancies
- Low-VOC or zero-VOC alternatives for improved indoor air quality post-restoration and sensitive occupant needs, reducing chemical exposure after already dealing with primer fumes
Apply minimum two topcoats for opacity and durability over sealed primer. First coat requires 2 hour minimum drying interval before second coat application, though overnight drying produces better results by allowing complete solvent evaporation. Second coat goes on after first coat reaches complete dryness, showing consistent color without darker wet spots indicating trapped moisture. Coverage rate averages 350 to 400 square feet per gallon for smooth walls, though textured surfaces require 20 to 30% more paint due to increased surface area. Do a final smell test 24 hours after last topcoat application to verify complete odor elimination before calling the project done. Any remaining smoke smell means sealing failure requiring corrective action.
Cost Estimation and DIY Approach Versus Professional Smoke Sealing Services

Cost breaks down into material expenses versus labor costs, with professional services typically charging $2 to $4 per square foot versus $0.50 to $1.00 per square foot for DIY materials alone. Project scope based on square footage affects bulk pricing. Treating an entire house qualifies for contractor discounts on primer and paint unavailable to individual buyers purchasing single gallons. Contamination severity affects material quantities significantly. Light smoke from a kitchen fire may need single primer coat covering 300 to 400 square feet per gallon, while heavy nicotine buildup from decades of indoor smoking requires two primer coats plus extra cleaning supplies including multiple boxes of dry sponges and several pounds of TSP powder.
| Cost Category |
DIY Range |
Professional Range |
Notes |
| Primer Materials |
$40-60/gallon |
$35-50/gallon bulk |
Covers 300-400 sq ft, heavy contamination needs 2 coats |
| Topcoat Paint |
$25-45/gallon |
$20-35/gallon bulk |
Two coats required, 350-400 sq ft coverage per gallon |
| Tools and Equipment |
$80-150 |
Included in service |
One-time investment: respirator, rollers, brushes, sprayer rental |
| Cleaning Supplies |
$20-40 |
Included in service |
TSP, dry sponges, buckets, drop cloths, disposal bags |
| Labor/Service Fee |
Your time |
$200-800 per room |
Professional timeline 1-2 days versus DIY 2-3 days minimum |
DIY approach requirements include intermediate skill level for application techniques including cutting in edges and maintaining wet edge to prevent visible lap marks on finished walls. Time commitment spans 2 to 3 days minimum for cleaning, two primer coats with mandatory drying intervals, and two topcoats with proper curing between layers. Physical demands include working on 8-foot walls and ceilings requiring ladder work and overhead rolling that strains neck, shoulders, and arms during extended application sessions. Safety management includes respirator use and proper ventilation setup, monitoring air quality and taking breaks when fume exposure causes headache or dizziness despite protective equipment.
Professional services provide better value in specific situations. Rental prep with tight timelines between tenant move-out and move-in requires completion within 3 to 5 days, faster than most DIY schedules allow while maintaining day jobs. House flipping requires quality documentation and warranty for buyer assurance during home inspection and final walkthrough. Property restoration involving fire damage beyond cosmetic repairs often coincides with water damage requiring coordinated professional repair, where insurance claims require professional invoices showing scope of work and materials used. Tenant turnover situations in multi-unit buildings benefit from consistent results across units, maintaining uniform appearance and sealing quality that reflects professional management standards. Complex projects affecting real estate value justify professional fees because sealing failure requiring complete redo costs more than hiring professionals upfront.
Troubleshooting Smoke Odor Return and Stain Bleed-Through After Sealing
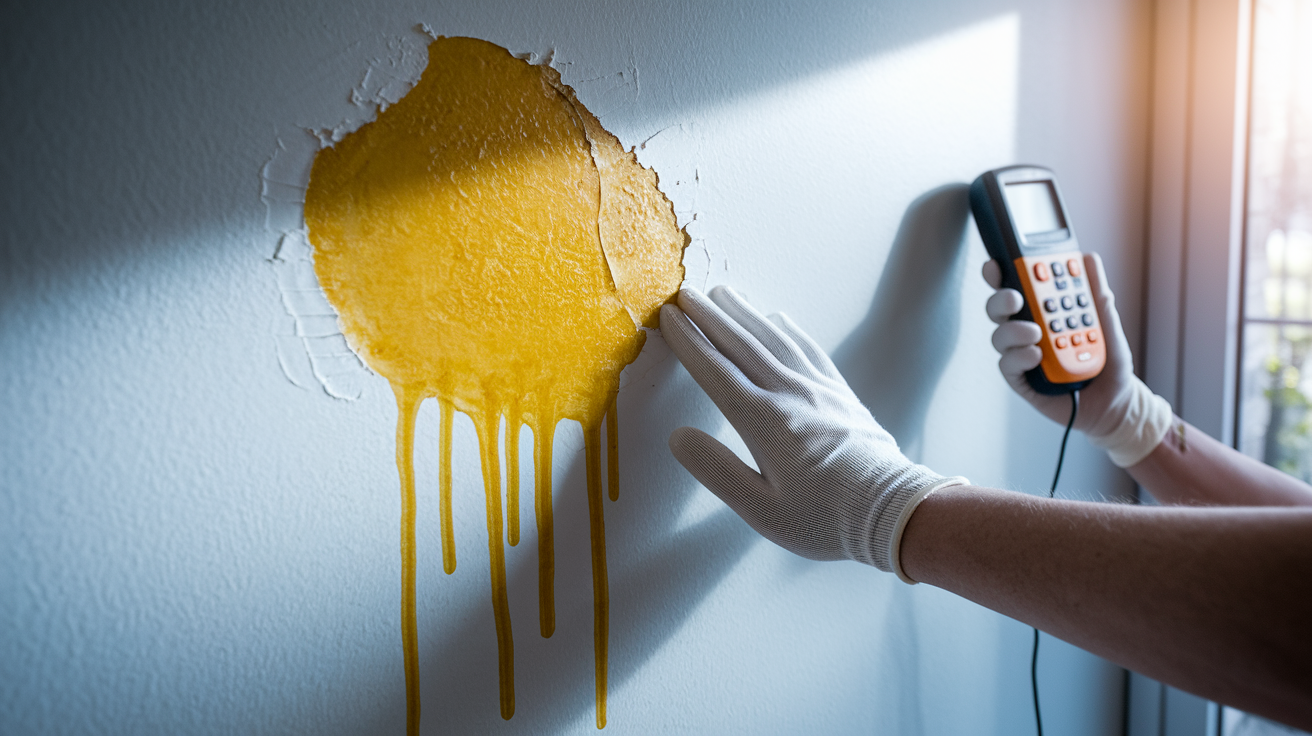
Sealing failure symptoms appear weeks after completing paint work, indicating problems with primer application or contamination severity assessment. Persistent odor return 2 to 4 weeks after painting means incomplete encapsulation, where primer coat was too thin or contamination exceeded product capabilities. Yellowing prevention breakdown causes discoloration to reappear on walls and ceilings especially near windows and heat sources, where temperature fluctuations accelerate nicotine migration through failed primer barriers. Stain bleeding through topcoat layers despite primer application shows brown or yellow spots, particularly noticeable on white or light-colored paint where contrast highlights sealing gaps. Smoke particles can work into drywall and wooden surfaces creating hidden damage beyond visible areas, continuing to off-gas long after surface treatment appears complete.
Six Common Causes and Solutions:
- Insufficient surface prep leaving residue buildup preventing primer adhesion. Solution: strip failed areas to bare surface using paint scraper or chemical stripper, re-clean with TSP solution following original protocol, reapply primer at proper coverage rate with two full coats
- Wrong primer type selected for contamination severity (water-based on heavy smoke). Solution: apply shellac-based product over existing primer after light sanding with 120-grit sandpaper to improve adhesion between layers
- Inadequate primer coverage with single coat when contamination required two coats. Solution: lightly sand topcoat with 220-grit sandpaper, apply additional shellac sealer coat covering entire surface, re-topcoat after proper cure time
- Premature topcoat application before primer reached full 3 day cure time. Solution: allow complete off-gassing by waiting additional days, may require stripping and restart if solvent entrapment caused chemical reaction between uncured primer and topcoat
- Hidden contamination in ceiling tiles, behind baseboards, inside wall cavities, or attic spaces. Solution: expand treatment area by removing and replacing porous materials that absorbed deep contamination, seal backside of materials before reinstallation, treat HVAC system and attic spaces
- HVAC system circulating contaminated air from untreated ductwork. Solution: schedule professional air duct cleaning and treatment before resealing walls, replace all air filters with high-MERV rated alternatives, seal register openings during primer application
Testing effectiveness requires systematic odor evaluation over time. Do a smell test by closing the room for 24 hours with windows and doors shut, then entering to detect odor concentration without nose fatigue from continuous exposure. Compare before and after odor levels on a scale of 1 to 10 to quantify improvement, documenting whether sealing reduced smell by 50%, 75%, or 90%. Identify specific problem areas by smelling along baseboards and in corners where contamination hides, noting locations requiring spot treatment or additional primer application. Apply spot primer to test areas before committing to full re-coat, verifying that additional sealer resolves odor in a limited section before treating the entire room. Monitor results during a 2 week period when odors typically return if sealing failed, checking daily for smell intensity changes indicating primer breakdown. Document long-term prevention success at 30 day and 90 day intervals for warranty purposes in rental prep situations, creating records showing sustained odor elimination over time.
Final Words
Smoke odor sealing before painting isn’t optional if you want lasting results. It’s the foundation that keeps nicotine stains buried and odors locked down for good.
Clean the surfaces, use the right shellac or oil-based primer, let it cure completely, and apply quality topcoats.
Skip a step, and the smell comes back.
Follow the process, and you’ll have walls that look clean, smell clean, and stay that way.
FAQ
Q: What is the best primer to seal smoke smell?
A: The best primer to seal smoke smell is B-I-N Shellac Primer by Zinsser, which permanently blocks heavy nicotine and smoke odors better than oil-based alternatives. Shellac-based primers like B-I-N dry in 45 minutes between coats and provide maximum odor-blocking effectiveness for severe contamination.
Q: Can you paint over smoke smell?
A: You cannot paint over smoke smell with regular paint alone because smoke particles penetrate drywall and odors return within weeks without proper sealing. Specialized shellac-based or oil-based odor-blocking primers must be applied to cleaned surfaces before topcoat painting to permanently seal smoke odors.
Q: How to seal in smoke smell?
A: Sealing in smoke smell requires deep cleaning walls with TSP solution and dry sponges, then applying two coats of shellac-based primer like B-I-N to all affected surfaces. After the primer cures for three days, apply two topcoat layers to complete the odor-blocking process.
Q: Will Kilz paint cover cigarette smoke?
A: Kilz Original Oil-Based Primer will cover cigarette smoke in lighter contamination scenarios, though shellac-based primers like B-I-N work more effectively for heavy nicotine buildup. Kilz provides a budget-friendly option for moderate smoke stains when combined with proper surface cleaning and multiple primer coats.
Q: Why does smoke odor return after painting?
A: Smoke odor returns after painting when insufficient primer coverage, wrong primer type, or incomplete surface cleaning prevents proper molecular encapsulation of nicotine particles. Hidden contamination in wall cavities, HVAC ducts, or behind baseboards can also reintroduce odors even after visible surfaces are sealed correctly.
Q: How long should primer dry before topcoating over smoke damage?
A: Shellac-based primer should dry for three full days before topcoating over smoke damage to reach complete cure and maximum odor-blocking effectiveness. Oil-based primers require 24 hours minimum drying time, while rushing topcoat application before full cure causes sealing failure and odor return.
Q: Do I need professional help for fire damage smoke sealing?
A: You need professional help for fire damage smoke sealing when structural damage affects load-bearing elements, contamination reaches inside wall cavities requiring removal, or insurance claims require documented restoration. Heavy soot buildup, toxic residue, or rental preparation timelines also benefit from professional smoke sealing services.
Q: What safety equipment is required when sealing smoke odor?
A: Safety equipment required when sealing smoke odor includes NIOSH-approved respirator masks with organic vapor cartridges, nitrile gloves, safety goggles for ceiling work, and cross-ventilation with exhaust fans. Standard dust masks are insufficient for high-VOC shellac and oil-based primers that release harmful fumes during application.

Here’s your intro paragraph:
Did you know most insurance claim denials happen because of incomplete documentation, not because the damage isn’t covered? When disaster hits your home, gathering the right paperwork can mean the difference between a fair settlement and fighting for months over what you’re owed. The truth is, your insurance company will ask for specific forms, photos, receipts, and reports before they’ll pay a dime. This guide walks you through exactly what you need to collect, how to organize it, and when to submit it so your claim moves forward fast and you get the settlement your policy actually covers.
Master Checklist: All Documents Required for Your Property Damage Claim
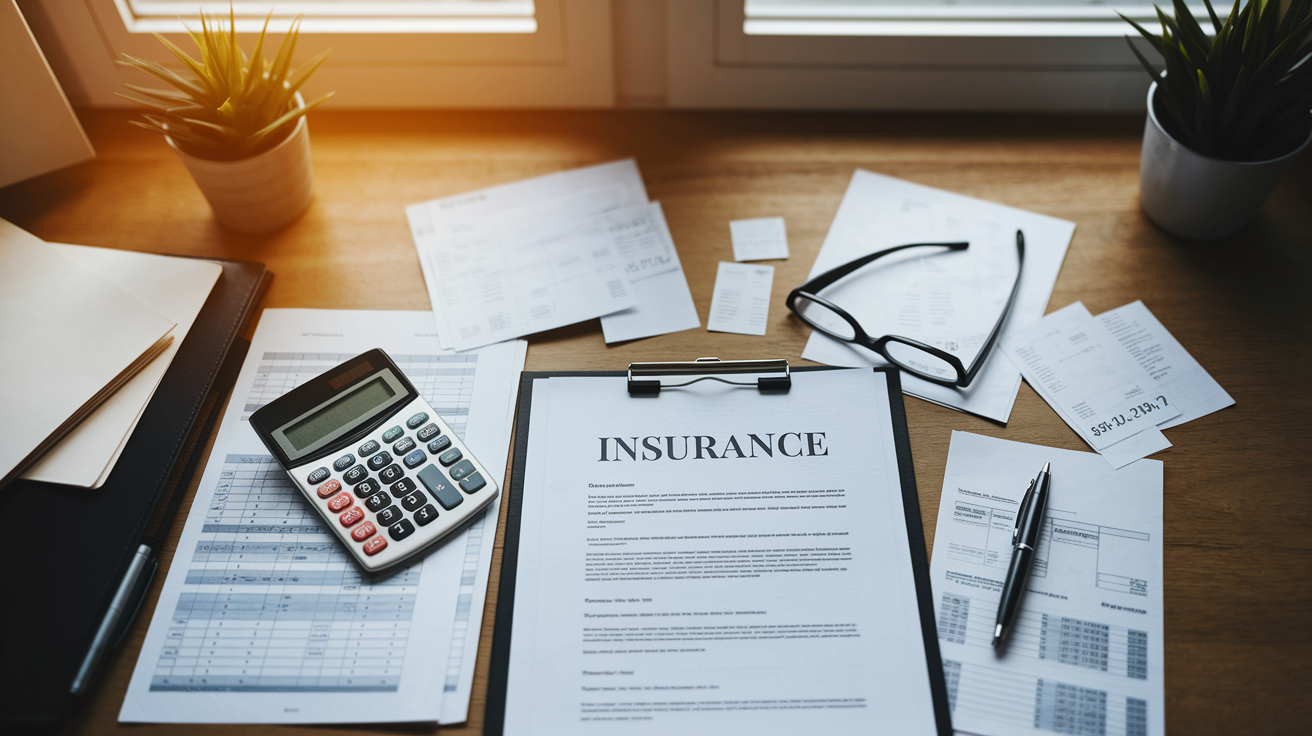
You need solid documentation to keep your insurance company honest. Having too much evidence beats having too little, especially when your settlement’s on the line.
What You’ll Need to Gather:
-
Insurance Policy Documents – Grab your complete policy with the declarations page showing coverage limits, deductibles, and your policy number (check the Essential Policy Coverage section below)
-
Photographic Evidence – Take tons of photos of each damaged item and area. Get closeups and wide shots from different angles, and turn on timestamp features if you’ve got them (see Visual Documentation section below)
-
Video Recordings – Walk through with your phone recording, talking about what you’re seeing. Include security camera footage if you’ve got it (see Visual Documentation section below)
-
Written Inventory Lists – Go room by room and write down every damaged item. Brand, model, age, what it looked like before, what it looks like now (see Visual Documentation section below)
-
Purchase Receipts – Proof you owned it and what you paid. Credit card statements work if you can’t find the original receipt (see Essential Policy Coverage section below)
-
Repair Estimates – Get licensed contractors to write up what needs fixing and what it’ll cost (see Working With Your Insurance Adjuster section below)
-
Contractor Quotes – Pull multiple estimates so you know current market pricing. This matters even more after big disasters when prices jump (see Working With Your Insurance Adjuster section below)
-
Incident Reports – Write down when it happened, where, and how. Timeline matters here (see Incident Reports section below)
-
Police or Fire Department Reports – Official paperwork when you’ve got criminal damage, fire, or emergency services showed up (see Incident Reports section below)
-
Weather Service Records – Official proof of storm conditions, rain amounts, wind speeds (see Incident Reports section below)
-
Communication Records – Every email, text, and phone call with your insurance company. Dates, times, who you talked to (see Communication Log section below)
-
Professional Assessments – Written estimates from repair pros on what things cost to fix or replace, especially after hurricanes or major events (see Working With Your Insurance Adjuster section below)
-
Emergency Repair Receipts – Bills for temporary fixes. Tarps, boarding, water extraction, whatever you had to do fast (see Emergency Repairs section below)
-
Building Permits – Copies of required permits and code compliance stuff (see Incident Reports section below)
-
Proof of Loss Forms – The sworn statement documenting your claimed amount. Most insurers want this before they’ll settle (see Master Checklist section above)
-
Maintenance Records – Documentation showing you took care of your property. This can affect how they value things (see Essential Policy Coverage section below)
-
Tax Returns with Depreciation Schedules – For business property claims or expensive items where depreciation changes the settlement math (see Essential Policy Coverage section below)
-
Property Lease Documents – Copy of your lease if it’s a rental, showing who’s responsible for what (see Incident Reports section below)
Before You Submit Everything:
• Make sure your claim number’s on each document
• Check that supporting docs are attached and sorted by category
• Look up your policy’s submission requirements. Online portal, mail, email to claims department
• Copy everything and note when you submitted it in your communication log
• Get confirmation they received it. Email confirmation or certified mail receipt
• Know that they might pay you in installments. Initial payment to start repairs, final payment when you’re done
Put copies everywhere. Digital files on your hard drive and in cloud folders with clear labels showing dates, locations, what’s what. Physical copies in accordion folders or binders, stored in a safe or somewhere secure away from the damaged property if possible. Keep this stuff for tax purposes and potential future problems. The IRS might want records of casualty losses and insurance reimbursements, and policy disputes can pop up months or years after you thought things were settled.
Documentation Process: Step-by-Step Evidence Collection
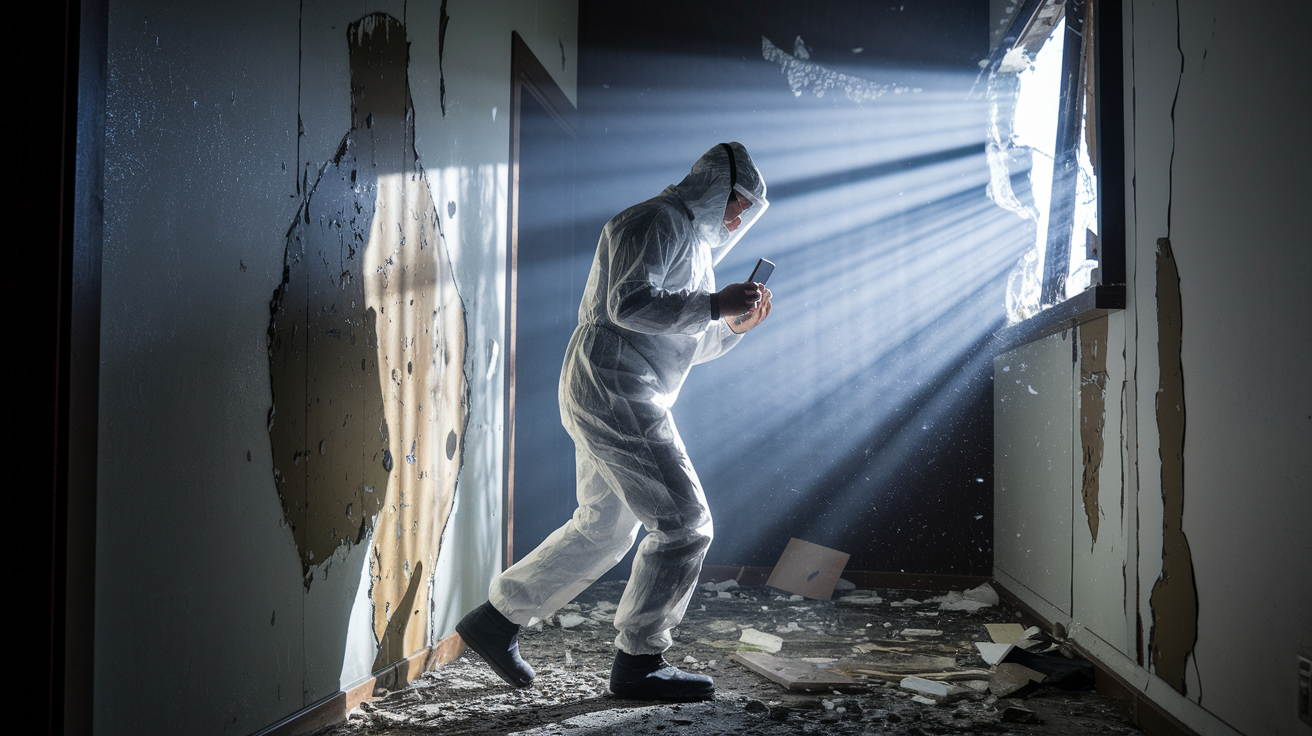
Move fast after damage happens. It strengthens your claim and stops things from getting worse. But don’t do anything until you know it’s safe.
Here’s Your Sequence:
-
Initial Safety Assessment – Check for hazards before you walk into damaged areas. Turn off main power if there’s water or electrical damage. Block off dangerous spots with caution tape. If the building looks unstable, get out
-
Immediate Damage Documentation – Once it’s safe, photograph and video everything while it still looks exactly how the damage left it
-
Emergency Stabilization Recording – Document any emergency repairs before you make them. Photograph tarps going up over leaks, record yourself boarding up broken windows, capture images of furniture you’re moving or covering
-
Detailed Inventory Creation – Within the first day or two, create room by room written lists of everything damaged with descriptions and estimated values while it’s fresh in your mind
-
Professional Assessment Scheduling – Contact licensed contractors within the first week to get repair estimates and expert opinions on how bad things are
-
Ongoing Damage Monitoring – Photograph anything new that shows up over time. Mold growth, structural settling, secondary water damage. Date stamp everything
-
Correspondence Documentation – Keep detailed notes of all insurance company conversations. Dates, times, who you talked to, from the moment you report the claim
-
Final Submission Preparation – Organize everything you collected, check it against the master checklist, and submit according to what your policy requires
Most policies give you a window for reporting claims you can’t miss unless you want to pay out of pocket. Delays slow things down and might mess up your coverage, so call your insurance company within 24 to 48 hours even if you haven’t finished gathering everything yet.
Visual and Written Documentation: Photos, Videos, and Inventory Lists

Photograph everything. Closeups and distance shots from multiple angles. Turn on timestamp features if your camera or phone’s got them. Take wide shots showing the entire room or area, then move in for detailed closeups of cracks, water stains, broken components, destroyed finishes. Get context shots too. Include doorways, windows, or undamaged areas in the frame so the adjuster understands where the damage is and how much there is.
Record video with commentary. Walk through each affected area while recording, talking out loud about what you’re showing, when it happened, what you’re seeing. Video with audio creates a story that photos can’t. If you’ve got surveillance footage showing wind tearing off roof sections, water pouring through ceilings, or the moment a tree hit your building, include every second.
Document both damaged and undamaged areas. You might not know what proves useful later. Insurance companies sometimes question whether stuff existed before the damage, and photos of intact rooms show what your property looked like before the loss.
For Each Damaged Item, Note:
• Brand name and manufacturer
• Model number and serial number when you can see it
• Purchase date or approximate age
• Original purchase cost with receipts or credit card statements if available
• Detailed description. Size, color, features, anything special about it
• Condition before damage (new, excellent, good, fair)
• Condition after damage with specific description of what’s wrong
• Estimated replacement value based on current market pricing
• Reference to supporting docs like receipt number, photo file name, warranty paperwork
• Room location and whether it was attached or unattached property
Create written inventories describing every damaged item. Brand, model, features, age, before and after condition, value. Insurance companies love claiming losses are less than they actually are, and the gap between their valuation and reality can be huge. An insurance company might value office equipment at $50 based on depreciation schedules, while actual replacement cost of similar used equipment runs closer to $1,000. Detailed documentation with market research backs you up during settlement negotiations. Store photo and video files in multiple places. Computer hard drives and cloud storage with complete metadata, organizing files by room, damage type, or date with clear file names like “2024-01-15KitchenWaterDamageWide_Angle” instead of whatever your camera automatically names things.
Essential Policy Coverage and Financial Documentation

Understanding your policy coverage, limits, and deductibles tells you what documentation you need and what you can actually claim. Look at your declarations page to find your coverage limits for dwelling, personal property, and additional living expenses, plus your deductible amount that you pay before insurance kicks in. Check for special limits on stuff like jewelry, electronics, or business equipment, and review exclusions that might affect your claim. Flood damage requires separate National Flood Insurance Program coverage, for instance.
Financial documentation includes purchase receipts showing original cost and purchase date, bank statements or credit card records proving transactions when you can’t find the original receipt, maintenance records showing you kept things up, and tax returns with depreciation schedules for business property or expensive items where depreciation affects what you get. These records prove you owned it and what it was worth.
Settlement offers might not cover repair costs completely, especially after catastrophic events when contractor and material prices shoot up past normal rates. Understanding the difference between replacement cost and actual cash value helps you know what to expect and when to push back.
| Valuation Type |
Calculation Method |
Example Amount |
| Replacement Cost |
Current cost to replace item with similar new item at today’s prices |
$1,200 for new laptop computer |
| Actual Cash Value |
Replacement cost minus depreciation based on age and condition |
$400 for same laptop after depreciation deduction |
Incident Reports and Official Documentation Requirements
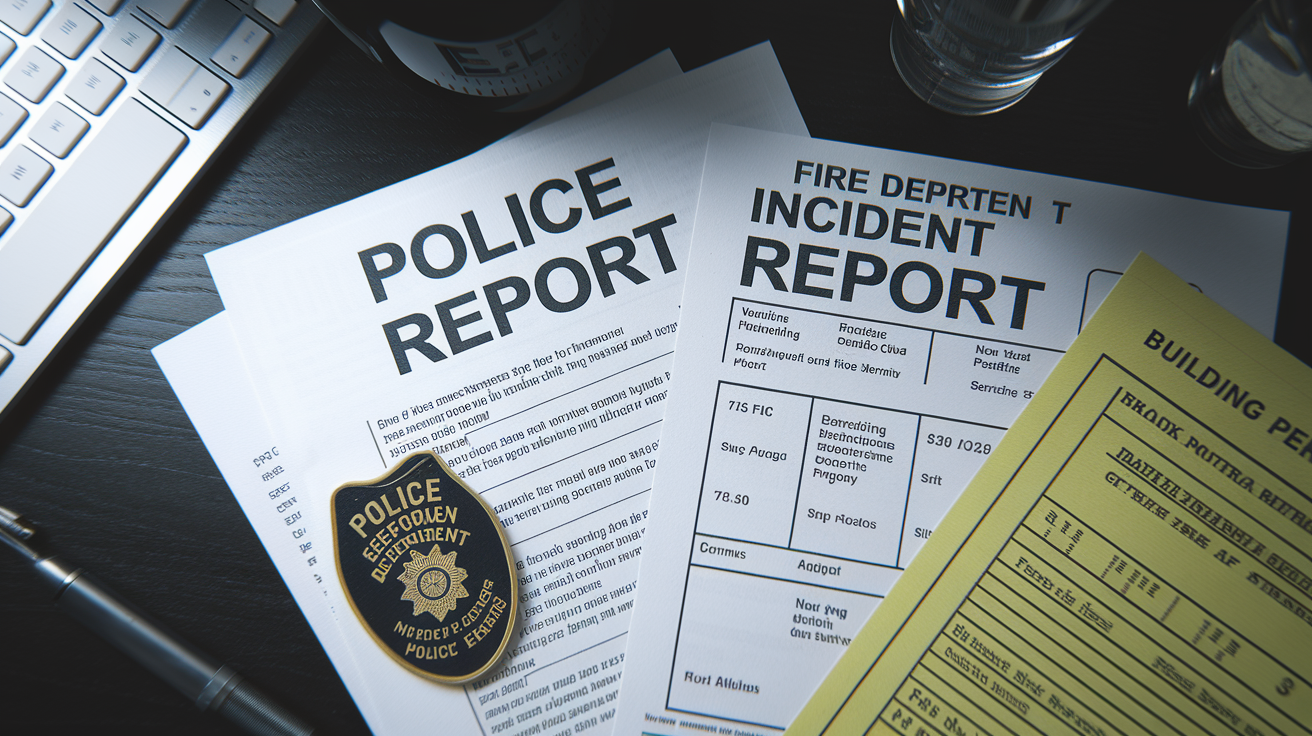
You need police or fire department reports when damage involves criminal activity like vandalism or burglary, when fire damage happens and emergency services respond, or when your insurance company specifically asks for official documentation. Contact the responding agency to request copies of incident reports. Note report numbers and officer or investigator names in your communication log. These official reports provide third party verification of when and how damage occurred, which stops disputes about whether you’re covered.
Weather service records for storm damage claims prove that the damaging weather actually happened at your location on the date you reported. The National Weather Service provides historical weather data showing rainfall amounts, wind speeds, hail reports, and tornado confirmations that back up your claim. Building permits and code compliance documentation become necessary when repairs require permitted work. Your insurance company may request copies to verify that restoration meets local building codes and safety standards.
Flood damage may require a separate claim under the National Flood Insurance Program, not standard homeowner policies. Standard property insurance typically excludes flood coverage, which the insurance industry defines as water entering from ground level or rising water sources rather than roof leaks or burst pipes. If flooding contributed to your damage, contact the National Flood Insurance Program separately at 1-800-621-3362 or through FloodSmart.gov. This requires different claim forms, adjusters, and documentation procedures. Don’t assume your regular policy covers all water damage, and report flood damage to the appropriate program within the required timeframe to avoid denial.
Communication Log and Correspondence Documentation

Logging all interactions with your insurance company and contractors creates a clear record of what was promised, what info got exchanged, and how your claim’s progressing.
Communication Details to Record:
• Date of contact in month, day, year format
• Time of contact. Use 24 hour format or clearly note AM/PM
• Name of person contacted. First and last name when provided
• Method of communication. Phone call, email, text message, in person meeting, certified mail
• Topics discussed with brief summary of what you talked about
• Commitments made by either party. Promised actions, follow up dates, documentation requests
• Claim number, reference number, or file number mentioned during the conversation
Document phone calls with insurance reps or contractors noting date, time, and what you discussed. A simple note might read: “January 15, 2024, 2:30 PM, spoke with Sarah Johnson, claims adjuster, claim #12345. Discussed water damage extent in basement. She requested contractor estimates by January 22. I asked about coverage for contents damage. She confirmed personal property coverage applies minus $1,000 deductible.”
Save all correspondence including emails and text messages. Don’t delete digital communications thinking they don’t matter. Forward claim related emails to a dedicated folder, screenshot text message conversations, and save voicemail messages when they contain claim info or instructions. Insurance companies sometimes dispute what was said or promised, and your records protect you during settlement negotiations or disputes. Keep all documentation including correspondence, photographs, and receipts for tax purposes and future disputes, organizing these records chronologically or by topic in clearly labeled physical and digital files that you can access fast when questions come up months or years later.
Emergency Repairs and Mitigation Efforts Documentation

Contact your insurance company before making emergency repairs. Some policies have rules about unauthorized repairs that could mess with coverage or reimbursement. Most policies require you to mitigate further damage, meaning you can’t just leave a hole in your roof or a broken window exposed to weather, but you should notify your insurer first when possible and get authorization for major emergency work.
Emergency repair steps you might document include using tarps or plastic sheeting for leaks, boarding up broken windows or doors with plywood, moving undamaged stuff to dry areas, and calling emergency response contractors for water extraction, structural stabilization, or debris removal. Photograph each temporary repair before, during, and after. Capture images showing the tarp being secured over the damaged roof section, the boarded window from inside and outside, or the water extraction equipment running. This documentation proves you took reasonable steps to prevent additional damage and shows the scope of emergency work you did.
Keep all receipts for emergency repair materials and services. They may be reimbursable under your policy. Tape and tarp purchases from hardware stores, plywood and lumber for boarding, emergency contractor invoices for after hours response, equipment rental fees, and labor costs all qualify as mitigation expenses your policy should cover. Your restoration timeline often depends on how fast you stabilize things, and proper documentation of these urgent first steps ensures you get reimbursed for necessary protective measures. Be ready to provide receipts for temporary repairs during your adjuster meeting, organizing these documents separately from permanent repair estimates so the adjuster can clearly see what you spent on immediate stabilization versus long term restoration.
Common Documentation Mistakes That Delay Claim Processing

Delays in reporting claims can slow processing and potentially mess up your coverage eligibility, particularly as average claims cycle time increased to nearly 24 days in 2024, over 6 days longer than the previous year. Insurance companies love claiming losses are less than actual amounts, making complete initial documentation critical for faster payments and stronger legal cases when disputes happen.
Common Documentation Errors:
• Missing filing deadlines in your policy, which can range from 24 hours to several days depending on policy language and damage type
• Submitting incomplete inventories without detailed descriptions, valuations, or supporting documentation for claimed items
• Providing poor quality photos that are too dark, too far away, out of focus, or taken from limited angles that don’t show how bad the damage is
• Failing to keep receipts for emergency repairs, temporary housing, or other covered expenses that should be reimbursable
• Writing descriptions that lack specifics about damage location, cause, extent, or affected materials and components
• Omitting policy info like policy number, insured name spelling, or property address from submitted documentation
• Not maintaining communication logs that record dates, times, names, and content of conversations with adjusters or contractors
• Forgetting to document emergency repairs before making them, which makes it hard to prove necessity or cost of mitigation work
• Submitting only damaged area photos without context shots showing room layout, building location, or undamaged comparison areas
• Assuming verbal communications are enough without following up in writing through email or certified mail to create paper trails
Claim review happens faster when your initial submission is complete and organized. Insurance companies request additional documentation when initial submissions lack necessary info, and each request and response cycle adds days or weeks to processing time. Submit everything on the master checklist the first time, and your adjuster can move directly to assessment and settlement rather than sending follow up requests. After initial settlement, you can file supplemental claims for additional damages discovered during repairs, but these require their own documentation showing the newly discovered damage and explaining why it wasn’t included in the original claim.
Special Documentation for Different Property Damage Types
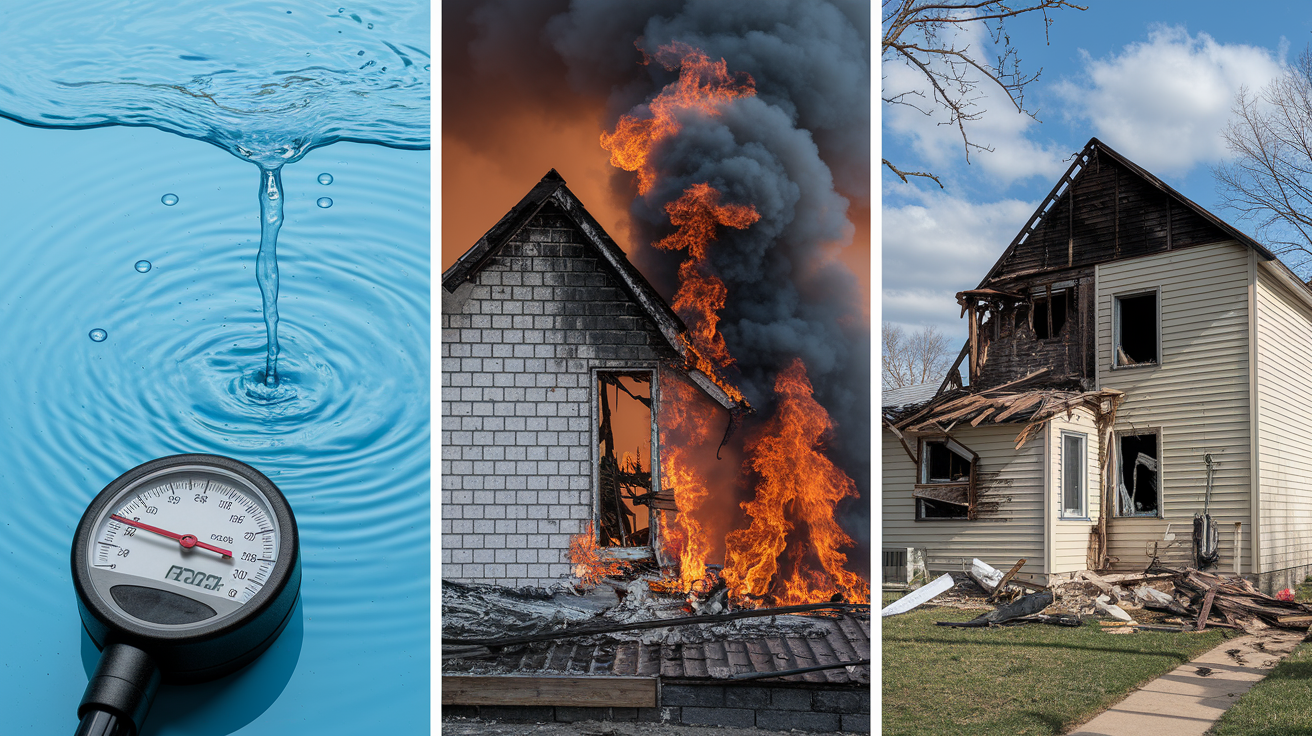
Catastrophic claims made up 46 percent of personal lines property claims in 2023, the highest percentage in 7 years. In 2024, 28 catastrophic weather events caused over 92 billion dollars in property damage nationwide. Different damage types require specialized documentation beyond standard photos and inventories.
Water and Flood Damage Documentation
Water source identification determines coverage eligibility, so document whether water entered from a burst pipe, roof leak, sewage backup, or ground level flooding. Take photos showing the water entry point, water level marks on walls, standing water depth, and moisture spread to surrounding areas. Professional moisture readings using specialized meters establish hidden water presence in walls, floors, and ceilings that cameras can’t capture. If mold growth appears or develops during the claim process, photograph it right away and request professional mold testing and documentation. Remember that flood damage may require a separate claim under the National Flood Insurance Program rather than your standard policy, so identify the water source clearly in your initial documentation.
Fire and Smoke Damage Documentation
Fire department reports provide official documentation of the fire incident, response time, fire cause determination, and damage assessment from trained firefighters. Request copies from the responding fire department and include the incident report number in your claim submission. Smoke residue documentation requires photos showing soot patterns on walls, ceilings, and contents, with closeups of affected surfaces before any cleaning attempts. Note smoke odor concerns in writing. Odor often sticks around even after visible soot removal and may require specialized cleaning or sealing. Structural integrity assessments from engineers or licensed contractors become necessary when fire damaged load bearing walls, floor joists, roof trusses, or other structural components. Your fire and smoke damage restoration process documentation should include air quality testing results, specialized cleaning requirements, and structural engineer reports when fire extended beyond cosmetic damage.
Storm and Structural Damage Documentation
Weather service records from the National Weather Service establish that documented severe weather occurred at your location on the claimed date. Download and save official weather reports showing wind speeds, hail size, rainfall amounts, or tornado confirmations for the date and time of your loss. Engineering reports and structural assessments become necessary when storm damage affects foundations, load bearing walls, roof structures, or overall building stability. Licensed structural engineers can evaluate damage extent and specify required repairs to restore structural integrity and safety. Roof and exterior damage documentation should include ground level photos showing overall roof condition, closeup photos of damaged shingles or materials, attic interior photos showing roof deck damage or water intrusion, and photos of damaged siding, windows, or other exterior building components from multiple angles and distances.
Working With Your Insurance Adjuster: Documentation and Assessment Process
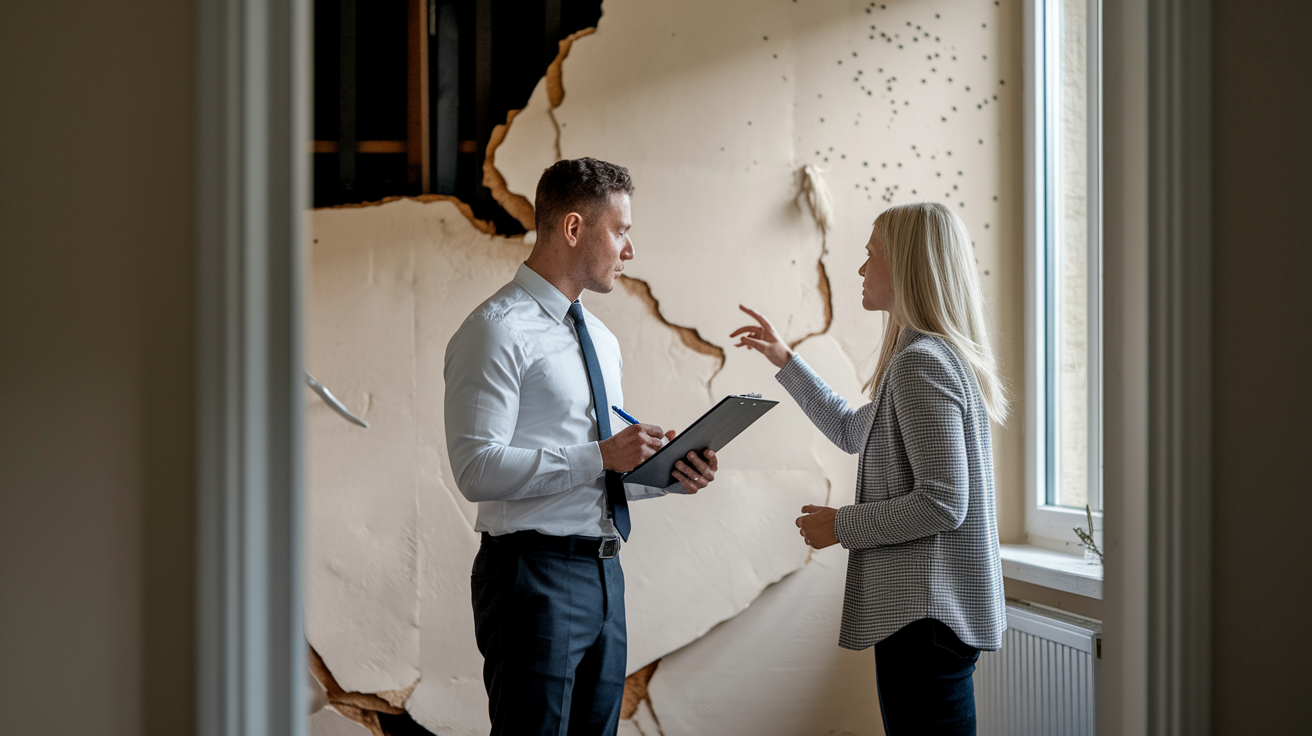
Your insurance company typically assigns an adjuster within a couple days of filing to evaluate damage, review your documentation, and determine coverage extent and payout estimates. This adjuster becomes your primary contact for claim processing, so note their name, phone number, email address, and claim number in your communication log right away.
Before meeting the adjuster, review your policy for deductibles, coverage limits, and exclusions, and get professional repair estimates from licensed contractors. Understanding what your policy covers and what current repairs cost puts you in a stronger negotiating position. Scheduling contractor assessments before your adjuster meeting provides comparative estimates that support your position if the adjuster’s initial valuation seems low. Professional assessments from repair and valuation pros become particularly important after major events like hurricanes when contractor availability tightens and material costs increase.
Professional estimates should include detailed scope of work breaking down each repair task, specific material costs listing products, quantities, and unit prices, and labor expenses showing hourly rates, estimated hours, and total labor cost. A complete estimate might specify “Remove and replace 450 square feet water damaged drywall, $2.50 per square foot materials, $3.75 per square foot labor, total $2,812.50” rather than just “drywall repair $3,000.” This level of detail prevents disputes about what work is necessary and what it should cost.
Insurance adjusters evaluate damage, review documentation, and determine coverage extent and payout estimates during their site visit. Be ready to provide organized evidence including photos, repair estimates, and receipts for temporary repairs. Walk the adjuster through damaged areas, pointing out specific damage that might not be immediately visible like moisture in walls, structural concerns, or hidden damage behind finished surfaces. Answer questions directly, stick to facts about what happened and what was damaged, and don’t speculate about repair costs or coverage decisions during the initial assessment.
If settlement offers seem unsatisfactory, negotiation may require additional documentation like professional estimates, new photos and videos showing damage the adjuster might have missed, or consultation with a lawyer or insurance professional who specializes in property claims. You can request a second opinion or hire an independent adjuster if you disagree with the initial assessment. Settlement offers may not fully cover repair costs, especially after catastrophic events when contractor and material prices increase beyond normal market rates. Getting multiple comparative estimates from different licensed contractors demonstrates current market pricing and strengthens your negotiating position when your adjuster’s initial offer falls short of actual repair costs.
Final Words
Property damage claim documentation is your strongest defense against disputes and undervaluation.
Start documenting immediately after damage occurs, keep everything organized in multiple locations, and submit complete evidence the first time.
Save all correspondence, receipts, and professional estimates. Store copies digitally and physically.
The time you spend on thorough property damage claim documentation now prevents frustration and financial shortfalls later. When your claim is backed by clear photos, detailed inventories, and organized records, the process moves faster and you’re more likely to get a fair settlement.
We’ll help you protect what you’ve built.
FAQ
What should I avoid saying to an insurance adjuster?
You should avoid saying anything to an insurance adjuster that could be interpreted as accepting full responsibility for the damage, speculating about causes you’re uncertain about, minimizing damage extent before full assessment, or agreeing to settlement amounts without reviewing all repair costs and policy coverage details.
How do I write a property damage report?
A property damage report is written by documenting the time, place, and specific details of the incident, creating an itemized list of all damaged items with descriptions and estimated values, including photos from multiple angles with timestamps, and noting any responsible parties with their insurance information if applicable.
What documentation is needed for a documented loss claim?
A documented loss claim needs your insurance policy with coverage details, photographic and video evidence of all damage, room-by-room inventory lists with item values, purchase receipts and proof of ownership, repair estimates from licensed contractors, incident reports, correspondence records, and receipts for any emergency repairs already completed.
What are common examples of property damage?
Common examples of property damage include water damage from pipe leaks or roof failures, fire and smoke damage from household fires, storm damage including wind and hail impacts to roofs and siding, structural damage from tree falls or vehicle impacts, and flooding from natural disasters requiring separate flood insurance coverage.
|