Home Blog Page 9

Interior Wall Replacement After Water Damage: Complete Repair Steps

Think that brown stain on your wall is just cosmetic?
It’s not.
Water trapped inside walls hides rot, breeds mold, and often means the drywall and insulation must come out.
This post walks you through the complete repair steps: stopping the leak, documenting damage, testing and drying the framing, removing and replacing wet materials, treating mold if needed, and rebuilding so the problem doesn’t return.
Read on for fast, practical steps, safety checks, timing, and what to show your insurer.

Immediate Steps to Take When Your Interior Wall Has Water Damage

McWPPQVESE-F-T0H2avXVQ

First, find the water source. Look for burst pipes, leaking appliances, roof leaks, or overflowing gutters. If you can safely shut off a supply valve or the main water line, do it. Every minute water flows into the wall adds damage and cost.

Turn off electrical power to the affected area at the breaker box. Water inside walls can reach outlets, switches, and wiring. Don’t touch wet walls near electrical components until power is off. If water’s actively dripping near electrical fixtures, stay clear and call a licensed electrician.

Start drying the area as soon as the leak stops. Pull furniture and rugs away from the wall. If baseboards are wet, remove them so air can reach the wall cavity. Set up fans to push air across the surface and open windows if the weather allows. The faster you begin drying, the better your chance of limiting mold growth and structural damage.

Within the first 24 hours, you should:

  • Document the damage with photos for insurance and contractors
  • Remove wet carpet, padding, or floor coverings near the wall
  • Place a dehumidifier in the room to pull moisture from the air
  • Check adjacent rooms and floors for hidden water spread

How to Assess the Extent of Interior Wall Water Damage

aj8ghFeUTV2B8f6lqaK6vQ

Use your eyes and hands first. Press gently on the drywall. If it feels soft, spongy, or crumbles under light pressure, the gypsum core has absorbed too much water. Look for bubbling paint, brown or yellow stains, warping, or visible mold. Sniff for musty odors. They often signal moisture trapped inside the wall cavity.

A moisture meter gives you numbers instead of guesses. Press the pins into the drywall at multiple heights, near the floor, mid-wall, and near the ceiling. Readings above 16 to 20 percent mean the material’s still wet and at risk for mold. An infrared camera shows temperature differences that reveal hidden moisture traveling up studs or across insulation. Water doesn’t always stay where you first see the stain.

To identify structural or concealed damage:

  1. Test moisture in multiple spots along each stud to map the wet zone
  2. Check behind baseboards and inside closets on the same wall
  3. Look at the wall from an angle under strong light to spot warping you might miss head on

When Interior Walls Need Replacement Instead of Repair

2OOzR92tTQOGNTI5nI2-AA

If drywall stays soft after you dry the surface, the core’s compromised. Gypsum loses its strength when saturated, and even after drying it may not regain rigidity. Sagging, crumbling edges, or a spongy feel all point to replacement, not patching.

Moisture readings that remain above 20 percent after drying efforts, or any visible mold growth on the drywall surface or paper backing, mean the material must come out. Mold doesn’t just sit on the surface. It sends roots into the paper and gypsum, so wiping it down won’t solve the problem.

Insulation behind the drywall often holds water longer than the wall itself. Fiberglass batts turn heavy and compressed when wet, and they rarely dry completely in place. Wet insulation loses its insulating value, traps moisture against studs, and creates conditions for mold. If the insulation’s damp or stained, plan to remove and replace it during the wall rebuild.

Step by Step Guide to Replacing an Interior Wall After Water Damage

BG_JkzrgSYWkbt64Ple4nQ

Replacing a water damaged wall means working in stages. Remove what’s ruined, dry what’s left, rebuild with new materials, and finish it so the repair blends in. The goal is to eliminate all wet or moldy material, confirm the framing is dry and sound, then close the wall correctly so it stays dry.

  1. Mark your cut line at least 12 inches above the highest visible water stain or moisture reading. For basement floods, that’s typically 6 to 12 inches above the waterline. Use a straightedge or laser level to keep the line level and plan vertical cuts to land on stud centers so you’ve got solid backing for the new drywall.

  2. Cut out the damaged drywall with a utility knife or reciprocating saw. Score the face paper deeply, snap the panel, then cut the back paper. Pull sections away carefully to avoid tearing drywall you’re leaving in place.

  3. Remove all wet insulation from the wall cavity. Bag it immediately and dispose of it. Don’t try to dry and reuse soaked fiberglass or cellulose.

  4. Dry the studs, plates, and remaining wall structure. Use fans, dehumidifiers, and open ventilation. Check moisture levels in the wood framing daily with a moisture meter. Don’t close the wall until wood studs read below 15 percent moisture.

  5. Inspect the studs for mold, rot, or damage. If you see dark staining, fuzzy growth, or soft wood, treat it with an EPA registered antimicrobial or replace the affected framing. Photograph any mold or damage for your records.

  6. Install new insulation in the wall cavity. Use unfaced fiberglass batts or the insulation type that matches the rest of your wall assembly. Press it snugly between studs without compressing it.

  7. Cut and hang new drywall panels. Screw them to the studs every 12 inches along edges and every 16 inches in the field. Sink screws just below the surface without breaking the paper.

  8. Apply joint tape and joint compound over seams and screw dimples. Let the first coat dry completely, then apply a second and third coat, feathering edges wider each time. Sand smooth after the final coat cures.

  9. Prime with a stain blocking primer, then paint to match the surrounding wall. In high moisture areas like basements or bathrooms, use a mold resistant primer.

Drying the wall cavity often takes 3 to 5 days with good airflow and dehumidification. Joint compound needs at least 24 hours between coats. Plan on a full week from demolition to paint for a typical single wall repair, longer if the damage is widespread or if you’re waiting for materials.

Safety Precautions During Water Damaged Wall Replacement

cYj90gTFSpOqS7Liwj9NKQ

Shut off electrical power to any circuits running through the damaged wall before you cut or remove drywall. If you’re unsure which breaker controls the area, turn off the main panel or call a licensed electrician to verify it’s safe.

Wear an N95 mask, safety goggles, and work gloves during demolition. Cutting into wet drywall releases dust, fibers, and potential mold spores into the air. Even if you don’t see mold, assume it may be present when materials have been wet for more than 48 hours.

If you see black mold, widespread fuzzy growth, or smell strong musty odors when you open the wall, stop work and contact a mold remediation professional. Disturbing large mold colonies without containment and HEPA filtration can spread spores throughout your home and increase health risks, especially for children, seniors, and anyone with asthma or allergies.

Materials and Tools Needed for Interior Wall Replacement

ksp8YKWNRMKh86DxKBovyA

Using the right materials from the start prevents callbacks and ensures the repair lasts. Moisture resistant drywall works better in bathrooms, basements, and kitchens. Quality joint compound and stain blocking primers stop old water stains from bleeding through your new paint.

  • Drywall panels (standard ½ inch or moisture resistant for wet prone areas)
  • Insulation batts to match existing wall depth
  • Drywall screws (1¼ inch for ½ inch drywall)
  • Joint tape (paper or fiberglass mesh)
  • Joint compound (all purpose or lightweight)
  • Stain blocking primer
  • Utility knife with sharp blades
  • Reciprocating saw or drywall saw
  • Drill or screw gun
  • Moisture meter
  • Sanding block or pole sander
  • Fans and dehumidifier for drying
  • N95 masks, safety goggles, and gloves
  • Tarps to catch debris

Cost Breakdown for Replacing Water Damaged Interior Walls

3GemSqskSG6SJzQZ46dzDw

Costs vary by room size, extent of damage, and whether you hire help or do the work yourself. A straightforward drywall replacement in a small area may run a few hundred dollars. Larger jobs involving plumbing repairs, mold remediation, or multiple rooms can reach several thousand.

Cost Category Typical Range
Materials (drywall, insulation, compound, primer, screws) $150–$400 per room
Labor (if hiring a contractor) $50–$90 per hour or $1.50–$3.50 per sq ft installed
Waste disposal (wet drywall, insulation) $75–$200
Mold remediation (if needed) $500–$3,000+ depending on extent

Factors that raise costs include concealed plumbing or electrical work, structural framing repairs, extensive mold growth, and insurance claim coordination. If your water source was a burst pipe or roof leak and you need a plumber or roofer before rebuilding, add those repair costs to your total. Upgrades like moisture resistant drywall or improved ventilation also increase material expenses but can save money long term by preventing future damage.

Mold Risks and Remediation Before Installing New Walls

hrgS5LxzSQyurlfmvwQOYg

Mold can start growing within 24 to 48 hours after water exposure. Once drywall’s removed, inspect studs, plates, and subfloor for dark staining, fuzzy patches, or discoloration. Mold thrives in enclosed, damp cavities, so even if the drywall face looked clean, the back side and framing may be contaminated.

Treat affected wood framing with an EPA registered antimicrobial product. Apply it with a fogger, pump sprayer, or brush, and allow the manufacturer’s recommended cure time before closing the wall. If mold covers more than a few square feet, or if you identify black mold, hire a professional with containment equipment and HEPA filtration. Disturbing large colonies without proper controls spreads spores and increases health risks.

Before you hang new drywall:

  • Confirm all framing moisture readings are below 15 percent
  • Photograph treated areas and mold locations for insurance and future reference
  • Verify the original water source is fully repaired so the wall won’t get wet again

DIY vs Hiring a Professional for Water Damaged Wall Replacement

HekUXHUPSze4wu1oTLMOoQ

A small, isolated patch, one wall, clean water source, no mold, is manageable for a homeowner with basic carpentry skills and the right tools. If the leak’s fixed, the studs are dry, and you’re comfortable cutting drywall and taping seams, you can handle the project in a few days and save on labor costs.

Hire a professional when damage spans multiple rooms, involves structural concerns, or includes contaminated water from sewage or outdoor flooding. Pros bring moisture meters, thermal cameras, industrial dehumidifiers, and experience identifying hidden damage you might miss. They also carry insurance, follow IICRC standards, and provide documentation that supports your insurance claim. If mold’s present, electrical work is needed, or plumbing repairs must happen inside the wall, a licensed contractor ensures the job is safe, code compliant, and warrantied.

How to Prevent Future Water Damage Inside Interior Walls

Shu7OLEPSmumTOdSyKNwKA

Regular maintenance stops most interior wall water damage before it starts. Inspect visible plumbing under sinks, around toilets, and near water heaters every few months. Tighten connections, replace worn supply lines, and fix small drips before they become bigger problems.

  • Keep gutters and downspouts clear so roof water drains away from the foundation
  • Seal cracks around windows, doors, and pipe penetrations with caulk or weatherstripping
  • Insulate pipes in unheated areas to prevent freeze related bursts
  • Install water leak detectors near washing machines, dishwashers, and water heaters to catch leaks early

Final Words

Stop the leak first. Shut off the water, protect electrical areas, and remove wet materials so mold and warping don’t get worse.

Next, check how deep the damage goes with moisture readings and visual inspection. If drywall or studs stay wet or show mold, replacement is the right call. Follow the step-by-step removal, drying, and rebuild process and use proper PPE (mask, gloves, goggles).

Whether you DIY or hire pros, document everything for insurance. interior wall replacement after water damage is manageable when you act fast and follow the right steps, and your home will be whole again.

FAQ

Q: How to know if drywall needs to be replaced after water damage? Do walls need to be replaced after a flood?

A: You can tell drywall needs replacement when it stays soft or crumbles after drying, shows bubbling paint, deep stains, warped studs, visible mold, or moisture readings above about 20 percent; flooded walls are often replaced for safety.

Q: How to fix a wall after water damage?

A: To fix a wall after water damage, stop the water, remove wet drywall and insulation, dry studs to under 15 percent, install new drywall, tape and mud seams, sand, prime, and repaint.

Q: How much to replace a water damaged wall?

A: The cost to replace a water-damaged wall typically runs $1.50–$3.50 per square foot for drywall alone; full repairs including labor, disposal, and minor mold work usually range $300–$800 per room.

How to Prevent Mold After Flooding: Act Within 48 Hours

0

What if waiting 48 hours after a flood costs you the walls, carpet, and the smell that never leaves? Mold can begin growing within 24 hours once floodwater soaks into drywall, flooring, and insulation. This post gives you a clear, hour-by-hour plan: how to extract standing water first, start airflow and dehumidifiers, what to remove and what you might save, how to check moisture and humidity targets, plus simple steps to document the work for your insurance. Move fast and you’ll stop most mold before it starts.

Immediate Steps to Stop Mold Growth After Flooding (Do This First)

ad2V99ARRti5vVDOtxMGrw

Mold starts growing within 24 hours of floodwater entering your home. Once it takes hold, it spreads fast, especially when humidity pushes past 60 percent and materials like drywall, insulation, and carpet stay soaked. You’ve got about 48 hours to stop the process before it turns into a much bigger mess.

Get the standing water out first. Nothing else matters until you do this. The longer water sits, the deeper it soaks into floors, baseboards, and wall cavities. Even a thin layer will wick into porous materials and create hidden moisture pockets that feed mold for weeks. Use a wet/dry vacuum, a submersible pump, or just buckets and towels if that’s what you’ve got. Just get it out.

Start moving air the second you remove standing water. Open windows if it’s not humid outside, turn on ceiling fans, and aim box fans or air movers at wet surfaces. Moving air speeds up evaporation and stops moisture from settling into materials. Without airflow, a damp room can stay wet for days even after the visible water is gone.

Track your humidity to know if your efforts are actually working. A basic hygrometer will tell you the relative humidity in each room. You’re shooting for below 50 percent, ideally between 30 and 40. If the number stays high, mold will grow even if things look dry.

Here’s what you need to do in the first hours after flooding:

  1. Pull out all standing water using a wet/dry vacuum, pump, or manual extraction with towels and buckets.
  2. Start drying fast by placing fans or air movers in every affected room and aiming them at wet floors and walls.
  3. Get air moving by opening windows and doors if outdoor conditions allow, and running exhaust fans in bathrooms and kitchens.
  4. Toss soaked porous materials like carpet padding, wet insulation, and any drywall that stayed wet for more than a day or two.
  5. Track humidity with a hygrometer in each room and adjust equipment until readings drop below 50 percent.

Speed is everything. Every hour of wetness gives mold a better shot at taking hold. If you move within the first 24 to 48 hours, you can stop most of it before it starts.

Safety Measures Before Beginning Cleanup

vlzZ3HDCR-W7HkB0gEinOQ

Floodwater isn’t clean. It’s usually carrying sewage, chemicals, pesticides, and bacteria from streets, yards, and industrial areas. Touching contaminated water or breathing dust from dried flood residue can cause infections, respiratory problems, and skin reactions. Wear nitrile gloves, rubber boots, and an N95 respirator at minimum before you step into any flooded space.

Electrical hazards are everywhere after flooding. Water reaches outlets, appliances, breaker boxes, and wiring inside walls. If you see standing water near electrical equipment or if water got to outlet level, shut off power at the main breaker before you go in. Don’t assume circuits are safe just because lights are off. If you’re not sure whether it’s safe to kill the power yourself, call an electrician or your utility company first.

Protective gear cuts your exposure to mold spores, contaminants, and sharp debris hidden under murky water. You need waterproof gloves, rubber boots that cover your ankles, safety goggles to protect against splashes, and a respirator rated N95 or higher. If you’re pulling out moldy drywall or insulation, upgrade to a P100 respirator and wear disposable coveralls. Keep your gear on the whole time you’re working in the affected area. Wash your hands and face thoroughly when you’re done.

Detailed Drying Techniques and Equipment Options

dVx8nZ0ZQiay9HaGw5Tu1Q

High capacity dehumidifiers pull moisture from the air faster than small household units. They work better in large or heavily saturated rooms. A dehumidifier rated for 30 to 70 pints per day is usually enough for a single room, but severe flooding might need commercial units that remove 100 pints or more. The dehumidifier condenses water vapor and collects it in a tank or drains it through a hose, lowering humidity so wet materials can release moisture into the air.

Air movers are specialized fans built to push large volumes of air across surfaces and into tight spaces. They’re more effective than household box fans because they move air at high velocity, which speeds evaporation from floors, walls, and baseboards. For a flooded room, place two to four air movers in corners and aim them toward wet areas. If you don’t have air movers, use multiple box fans on high speed and position them so air circulates constantly. Leave them running 24 hours a day until moisture readings return to normal.

Combining dehumidifiers and air movers creates the fastest drying conditions. The air movers pull moisture out of materials, and the dehumidifier removes that moisture from the air before it can settle back onto surfaces. This cycle keeps the drying process moving instead of stalling. Check your hygrometer every few hours. Adjust fan positions or add more equipment if humidity isn’t dropping.

Key equipment for effective drying:

  1. Wet/dry vacuum to extract standing water and pull moisture from carpets and upholstery before drying.
  2. High capacity dehumidifier rated for the square footage of your affected space, running continuously until humidity drops below 50 percent.
  3. Air movers or box fans positioned to maximize airflow across all wet surfaces, with at least two units per large room.
  4. Hygrometer and moisture meter to track progress and confirm materials have returned to normal moisture levels before you close walls or replace flooring.

Material-Specific Mold Prevention (Floors, Walls, Furniture)

wdZRfDa_QLGXh3BLyHU67Q

Drywall and insulation absorb water fast and hold it deep inside, where it can’t evaporate without removal. If drywall stayed wet for more than 24 to 48 hours, cut it out at least 12 inches above the visible water line and pull out the soaked insulation behind it. Wet drywall might look intact, but the paper facing and gypsum core create perfect conditions for mold. Leaving it in place usually means hidden mold and persistent musty odors later.

Carpet and padding require different decisions depending on how long they stayed wet and what type of water soaked them. Carpet padding almost always needs to be tossed if it was underwater for more than a day or two. It acts like a sponge and holds contaminated water against the subfloor. The carpet itself can sometimes be saved if you extract the water immediately, dry it thoroughly with air movers, and have it professionally cleaned. If the water was contaminated or the carpet stayed wet for more than two days, replacement is safer.

Hardwood floors can often be salvaged if you act fast. Lift a few boards or create small gaps to allow airflow underneath, then run dehumidifiers and air movers continuously. Monitor the wood with a moisture meter. Don’t attempt sanding or refinishing until readings return to the normal range for your wood species. Warped or cupped boards may flatten as they dry, but some damage can be permanent if water sat too long.

Material Action Needed Salvageable?
Drywall (wet >24–48 hours) Cut out and remove at least 12 inches above water line; discard wet insulation No
Carpet padding Remove and discard if soaked >24–48 hours No
Hardwood flooring Lift or gap boards, dry with air movers and dehumidifiers, monitor moisture levels Often yes, if dried quickly
Upholstered furniture Extract water, dry rapidly; discard if soaked >24–48 hours or contaminated Sometimes, with professional cleaning

Furniture and upholstery are tough calls. Solid wood furniture can usually be dried and refinished, but upholstered pieces that stayed soaked for more than a day or two are hard to save. Foam cushions and fabric hold water, bacteria, and odors that don’t come out with ordinary cleaning. For high value pieces, contact a professional restoration company within the first day. For everyday furniture, expect to discard most upholstered items if they were underwater.

Preventing Mold in the Weeks After Cleanup

W3KaGfqrTNSAeXERx3HwfA

Mold can come back days or weeks after you finish drying if moisture finds its way back into the structure. Hidden leaks, condensation, or another weather event can restart the process, especially if humidity climbs back above 50 percent. Keep your dehumidifier running and your hygrometer in place for at least two to four weeks after the initial cleanup. Check readings daily.

Regular inspections help you catch new problems before they turn into mold. Walk through every affected room once a week and look for water stains, soft spots in drywall, musty smells, or discoloration on baseboards and trim. Check closets, cabinets, and areas behind furniture where air doesn’t circulate well. If you notice any of these signs, measure the moisture level with a moisture meter and restart drying immediately if readings are elevated.

Humidity control is your long term defense against mold. Even after repairs are complete, indoor humidity above 50 percent creates conditions that allow mold to grow on dust, fabrics, and any surface that holds a little moisture. Run your HVAC system with a clean filter, use bathroom and kitchen exhaust fans during showers and cooking, and keep at least one dehumidifier running if your home tends to stay humid.

Key ongoing prevention checks:

  • Inspect all previously flooded areas weekly for new stains, odors, or soft spots that indicate hidden moisture.
  • Monitor indoor humidity with a hygrometer and keep levels between 30 and 50 percent.
  • Replace HVAC filters monthly and check ductwork for signs of moisture or mold growth after flooding.

Final Words

In the action of the first hours, stop the water, extract standing water, and kick on air movers and dehumidifiers to keep mold from taking hold. Wear protective gear, shut off power if needed, and remove soaked porous materials.

After drying, keep checking materials and humidity for several weeks, and document readings and photos for your insurer.

If you want to know how to prevent mold after flooding, move fast, measure, and follow the steps above. You’ll cut the risk and get things back to normal sooner.

FAQ

Q: How soon does mold grow after a flood and how do I stop it?

A: Mold can begin growing within 24–48 hours after a flood; to stop it, remove standing water, start rapid drying with air movers and dehumidifiers, increase ventilation, and discard soaked porous materials.

Q: What are the 10 warning signs of mold toxicity?

A: The 10 warning signs of mold toxicity include persistent cough, wheeze, nasal congestion, throat irritation, headaches, fatigue, brain fog, skin rashes, eye irritation, and recurrent sinus infections.

Q: Will spraying vinegar in the shower prevent mold?

A: Spraying vinegar in the shower can help reduce surface mildew but won’t fully prevent mold; it removes light growth, yet ventilation, drying, and regular cleaning are needed for lasting prevention.

How to Prevent Basement Flooding Effectively

0

Most homeowners assume basement flooding just happens during storms, but the truth is most water problems start with simple maintenance you skipped last spring. Your gutters, grading, and sump pump create a protection system that either keeps water out or lets it pour in. This guide walks through the prevention steps that actually work, from extending downspouts to sealing cracks, plus a maintenance schedule so you know exactly what to check and when. We’ll help you layer multiple defenses so water stays outside where it belongs.

Essential Steps to Prevent Basement Flooding

4xi7EReOSUqlsw4hja063g

Why Basements Flood: Basements sit below ground level where water naturally flows, making them vulnerable to hydraulic pressure that pushes moisture through any opening. During heavy rain, a typical 2,000 square foot home must manage around 1,250 gallons of runoff from just one inch of rainfall. That volume combined with underground water pressure creates perfect conditions for basement flooding.

Here are the specific prevention steps that protect your basement:

  1. Clean and maintain gutters. Remove leaves, twigs, and debris from gutters at least twice yearly, checking that water flows freely toward downspouts. Inspect for proper pitch (gutters should slope slightly toward downspouts) and look for rust holes or separated joints that leak. When gutters overflow, thousands of gallons pour directly next to your foundation instead of being directed safely away.

  2. Extend downspouts properly. Position downspout extensions at least five feet from your foundation, using solid extensions or splash blocks that channel water away from the house. Short downspouts dump water right against basement walls where it seeps through over time. Walk your property during rain to verify water flows away from the foundation rather than pooling near it.

  3. Install and test sump pump systems. Pour a bucket of water into your sump pit monthly to verify the pump activates, runs smoothly, and shuts off when water drops. Check that the float mechanism moves freely without sticking. Install a battery backup or water powered backup system so your pump keeps running during power outages when storms are worst.

  4. Seal foundation and floor cracks. Apply waterproof sealant, epoxy injection, or hydraulic cement to any visible cracks in foundation walls or basement floors, following product instructions for surface preparation. Inspect your entire basement annually (mark it on your calendar in spring) looking for new cracks or areas where old sealant has failed. Even hairline cracks let water seep through under pressure.

  5. Improve yard grading and slope. Verify that your yard slopes at least six inches downward in the first ten feet from your house, meeting International Residential Code requirements. Check current grading by placing a long board or string level extending from your foundation, measuring the drop at the ten foot mark. If needed, add soil near the foundation and regrade to create proper slope, packing it firmly so it doesn’t settle back.

  6. Install proper drainage systems. French drains use perforated pipes buried in gravel trenches around your home’s perimeter to collect groundwater before it reaches your basement walls. Interior drain tile systems work similarly inside your basement, channeling water to your sump basin. Both systems redirect subsurface water to sump pumps or storm drains, relieving hydrostatic pressure against your foundation.

  7. Maintain sewer and septic systems. Flush only water, human waste, and biodegradable toilet paper down drains. Never pour fats, oils, or grease down sinks, and avoid flushing wipes (even “flushable” ones), paper towels, or feminine products. Cap unused basement floor drains with tight screw-on caps so sewer backups can’t flood through them. Install a backwater valve if your municipality allows it.

  8. Monitor water heaters. Inspect water heaters annually if they’re out of warranty, every two years if still under warranty. Flush the tank every six months to remove sediment that causes rust and failure. Check the anode rod that prevents corrosion, replacing it when heavily corroded. Water heaters hold 40 to 50 gallons that can flood your basement instantly when they fail.

Combining multiple prevention methods creates layered protection. No single step prevents all flooding scenarios, but working together they address the various ways water enters basements. The maintenance schedule section below details exactly when to perform each task throughout the year.

Creating a Basement Flood Maintenance Schedule and Inspection Checklist

W813LVE2T_WD1vqWlRSwsQ

Regular maintenance catches problems before they become flooding disasters. A water heater inspection might cost an hour and nothing if everything looks good, but it prevents the $4,444 average post deductible damage when heaters fail. The same applies to every prevention method, so consistency matters.

Task Frequency Season
Gutter cleaning Twice yearly Spring and fall
Sump pump testing Monthly Year round
Foundation inspection Annually Spring
Downspout check Twice yearly Spring and fall
Water heater inspection Annually or bi-annually Spring
Water heater flushing Every 6 months Spring and fall
Crack resealing As needed Spring
Grading inspection Annually Spring
Window well cleaning Twice yearly Spring and fall
Drainage system check Annually Spring
Backup system testing Quarterly Year round
General moisture inspection Seasonally All seasons

Document what you find during each inspection. Take photos of cracks, note water stains, record when you replace parts or apply sealant. A simple notebook or phone photos folder labeled by date helps you track whether problems are getting worse or staying stable. When a contractor asks “how long has that crack been there,” you’ll know exactly.

Spring brings the heaviest maintenance load because winter freeze thaw cycles create new foundation cracks and spring thaw sends massive water volumes toward your house. Fall preparation matters too, clearing gutters before leaf drop finishes and testing systems before winter storms arrive. Summer storms can dump inches of rain in minutes, so monthly sump pump tests catch problems before the next severe weather event.

Gutters and Downspouts: Your First Line of Defense

z4wCEh-kT7u76SWmaTk9sA

Your roof collects every drop of rain that falls on it and funnels that water to gutters. On a 2,000 square foot home, one inch of rain generates 1,250 gallons of runoff. Without gutters directing that volume away from your foundation, it pours down your walls and pools at the base of your house where it seeps into your basement.

Clean gutters twice per year minimum, more often if you have trees that drop leaves, needles, or seeds directly onto your roof. Use a sturdy ladder, work gloves, and a bucket to collect debris as you scoop it out by hand or with a gutter scoop. Check that water flows freely toward downspouts by running a hose in the gutters and watching the flow. Look for sections that sag or hold standing water, inspect joints where sections connect for gaps or separation, and examine the gutter bottom for rust holes or cracks. While you’re up there, verify that gutters pitch slightly downward toward downspouts rather than sloping the wrong direction.

Key gutter system requirements include:

  • Extend every downspout at least five feet from your foundation using rigid extensions, flexible tubing, or in ground drain pipes that carry water to drainage areas
  • Install splash blocks or concrete pads under downspout ends so water doesn’t erode soil and create puddles that soak back toward your house
  • Check ground level drainage areas where downspouts empty, making sure water flows away rather than sitting stagnant
  • Look for water staining on siding below gutters, indicating overflow during heavy rain that needs immediate attention
  • Notice if basement moisture problems line up with sections of house where gutters overflow or downspouts dump water too close

Replace gutters when you see persistent overflow despite cleaning, extensive rust damage creating holes, or sections pulling away from the house because fascia boards have rotted. Sagging gutters that can’t be adjusted to proper pitch need replacement too. New gutter systems cost less than repairing water damaged foundations and basements.

Proper Grading and Slope Requirements for Basement Protection

rT03-gDLRsqtn4qbV24TVw

The ground around your foundation controls whether rainwater flows away from your house or toward it. Soil that slopes toward your basement creates a funnel effect, directing hundreds of gallons straight against foundation walls during every storm.

The International Residential Code requires six inches of fall in the first ten feet of slope away from your house. That means if you measure ten feet from your foundation, the ground at that point should be at least six inches lower than the ground touching your house. This grade pushes water away from your basement before it has a chance to soak in near foundation walls.

Check your current grading by placing one end of a long, straight board against your foundation at ground level and extending it ten feet out into your yard. Use a level on top of the board, then measure the gap between the board’s far end and the ground. If that gap is less than six inches, you need to regrade. Add topsoil against your foundation (not right against siding or brick, leave a small gap) and slope it gradually downward, packing it firmly so it doesn’t wash away or settle. Recheck with your board and level to verify you’ve achieved the proper slope.

Watch where you place shrubs, trees, and garden beds. Roots trap moisture against foundation walls, and dense plantings block air circulation that helps soil dry. Keep plantings at least two feet from your house. Reposition lawn sprinklers so they don’t spray against your foundation, and reduce watering frequency if your basement shows dampness during summer when you’re irrigating heavily. Grass doesn’t need as much water as people think, and overwatering can create basement moisture problems.

Installing and Maintaining a Sump Pump System

fdxTBzR_Qm6lo2xQcdkuvw

A sump pump sits in a pit in your basement floor, automatically pumping out water that collects there before it can flood your basement. The system only works when installed correctly and maintained regularly.

Proper sump pit installation requires specific sizing (typically 18 to 24 inches in diameter and 24 inches deep), a gravel base for drainage, and a solid liner that prevents soil from caving in. The pit bottom should slope slightly toward the center where the pump sits. The pit needs a sealed cover to prevent debris, humidity, and radon gas from entering your basement, but the cover must allow inspection access.

Test your sump pump monthly by pouring a large bucket of water into the pit quickly. Watch the float mechanism rise and trigger the pump, listen for smooth motor operation without grinding or squealing, and verify that the pump shuts off automatically when water drops to the low level. The discharge pipe outside should flow freely without backwashing into the pit.

Common sump pump failures include:

Overheating from running continuously because the pump is undersized for water volume or the discharge line is blocked

Undersized capacity unable to handle heavy flow during major storms, leading to basement flooding even with a working pump

Stuck float mechanisms jammed against the pit wall or tangled in debris, preventing the switch that activates the pump

Frozen discharge lines in winter that block water from exiting, causing the pump to run without actually removing water

Faulty check valves that allow pumped water to drain back into the pit, making the pump cycle constantly and wear out quickly

Power outages during storms that shut down electric pumps exactly when you need them most

Install a backup sump pump system if your basement has finished space or expensive equipment. Battery backup pumps cost $300 to $800 installed and automatically take over when power fails. Water powered backup pumps use municipal water pressure to create suction that removes sump water without electricity, with similar installation costs and lower long term maintenance since they have no motor to fail. The added protection makes sense in areas with frequent storms or unreliable power.

Sealing Foundation Cracks and Basement Floor Gaps

1FXNerctRMicQ5iHJWt47Q

Foundation cracks let water seep through under pressure during heavy rain and snow melt. Even hairline cracks you barely notice can channel water into your basement when saturated soil creates hydraulic pressure against foundation walls.

Identify different types of cracks during your annual spring inspection. Hairline cracks (less than 1/8 inch wide) usually result from normal concrete settling and shrinkage as it cures. Wider vertical cracks may indicate settling or minor foundation movement. Horizontal cracks, stair step cracks in block foundations, or cracks wider than 1/4 inch signal structural problems that need professional foundation repair.

For DIY crack sealing, clean the crack thoroughly by brushing out loose concrete and debris, then use a shop vacuum to remove dust. Let it dry completely (run a dehumidifier if needed). Apply waterproof concrete sealant, epoxy injection, or hydraulic cement according to product instructions. Hydraulic cement works well for active leaks because it sets up even in wet conditions. Epoxy injection provides the strongest seal for dry cracks. Paint on concrete sealers work for minor surface sealing.

Mark your calendar for annual crack checks every spring after winter freeze thaw cycles. Walk your entire basement with a flashlight, looking at all foundation walls and floor edges. Check previously sealed cracks to verify the sealant hasn’t shrunk, cracked, or pulled away. Look for new cracks, efflorescence (white mineral deposits that indicate water seepage), or damp spots on walls.

Call for professional foundation repair solutions when you see warning signs beyond simple crack sealing. Horizontal cracks in poured concrete foundations or stair step cracks following mortar joints in block foundations indicate serious structural movement. Cracks that reopen after sealing, walls bowing inward, or cracks wider than 1/4 inch need structural evaluation and repair. Trying to seal structural cracks yourself just hides the problem temporarily while damage continues.

French Drains and Interior Drainage Tile Systems

6BGSoTAqQbSFKvtGvx6D6g

French drains manage groundwater before it reaches your basement walls. These subsurface drainage systems collect water that’s moving through saturated soil and redirect it to drainage areas, storm sewers, or sump basins where pumps can remove it.

A French drain consists of a perforated four inch diameter pipe buried in a gravel filled trench around your home’s perimeter. The pipe is wrapped in filter fabric that allows water in while blocking soil and roots that would clog perforations. Water moving through saturated soil enters the gravel surrounding the pipe, then flows into the perforations and along the pipe to wherever it drains. The trench is backfilled with more gravel, then topped with soil and landscaping.

Critical installation requirements include proper pitch. Foundation drains must slope at least four inches per hundred feet of length so water flows by gravity rather than sitting stagnant in the pipe. The trench needs adequate depth (typically 12 to 18 inches below the basement floor level outside) to intercept water before it reaches foundation walls. The gravel or sand surrounding the pipe must be clean and sized correctly to allow water flow while supporting the soil above.

Interior drain tile systems work on the same principle but are installed inside your basement along the perimeter. Contractors jackhammer a trench in your basement floor next to foundation walls, install perforated pipe in gravel, and connect it to a sump basin. Water that seeps through foundation walls is immediately collected and pumped out. Interior systems avoid exterior excavation but require more invasive basement work.

Both systems redirect collected water somewhere it can drain safely. In most cases that means a sump basin with a pump that discharges water away from your house. In some properties with sloped lots, the drain can daylight (exit above ground) at a lower elevation. Storm sewer connection is possible if your municipality allows it and you have appropriate access.

Installing French drains requires digging trenches around your entire house to proper depth and pitch, which most homeowners can’t accomplish without excavation equipment. Contractors typically charge $3,000 to $8,000 depending on home size, trench length, depth requirements, and site conditions. Interior drain tile costs run similar or higher because of concrete cutting and sump installation. The investment makes sense when persistent groundwater problems can’t be solved with surface solutions like grading and downspouts.

Preventing Sewer Backup and Septic System Flooding

pBmYBguWQYCzA_19YI3Kyg

Sewer backups flood basements with contaminated water containing human waste and bacteria. Main sewer lines clog or overflow during heavy storms, sending sewage back up through basement floor drains and toilets instead of flowing away to treatment plants.

The simplest prevention is controlling what goes down your drains. Flush only water, human waste, and biodegradable toilet paper down toilets. Sounds obvious, but people regularly flush sanitary wipes (even ones labeled “flushable”), facial tissues, paper towels, feminine hygiene products, cotton swabs, and accidentally dropped items. All of these contribute to clogs in your home’s drain pipes and municipal sewer systems.

Protect your drains with these practices:

Never pour fats, oils, or grease (FOG) down kitchen sinks because they accumulate inside pipes as they cool, creating blockages that trap other debris and slow drainage

Use sink strainers to catch food particles, coffee grounds, and other solids that should go in trash instead of down drains

Run hot water for several seconds after using sinks to keep pipes clear

Try weekly drain maintenance by filling sinks completely, then releasing the water all at once to create pressure that helps clear pipes

Keep trees and large shrubs away from sewer lines because roots invade pipes seeking moisture, creating blockages

Cap any unused sewer connections in your basement with tightly fitted screw on caps. Older homes may have capped floor drains that once served laundry or utility sinks. If those caps are loose or missing, sewer backups can flood directly through those openings.

Install a backwater valve (also called a backflow preventer) in your main sewer line if your municipality allows it. This valve automatically closes when sewage tries to flow backward into your house, preventing backup even when main sewer lines overflow. The valve needs professional installation and costs $1,500 to $3,000 depending on access and local code requirements.

Septic system flooding differs from municipal sewer backups. If you have a septic tank, heavy rain can saturate the drain field where wastewater is supposed to filter into soil. When the drain field is flooded, wastewater backs up into your house. Prevent septic flooding by pumping the tank on schedule (typically every three to five years), avoiding excessive water use during saturated soil conditions, and keeping the drain field area clear of vehicles or structures that compact soil.

Water Heater Monitoring to Prevent Catastrophic Floods

CTioGusZTbiWuE96NuXVKg

Water heater failure ranks in the top five causes of home water damage. The average post deductible cost when a water heater floods your basement is $4,444. Standard tanks hold 40 to 50 gallons that can release instantly when the tank ruptures, flooding your basement in minutes while you’re at work or asleep.

The typical water heater lasts about ten years. Start planning replacement a few years before that deadline, especially if yours is approaching nine or ten years old. Waiting for failure means emergency replacement at higher cost, often with flood damage to deal with simultaneously.

Follow this maintenance schedule based on warranty status. Inspect annually when your water heater is out of warranty, every two years if still under warranty. During inspection:

  1. Flush the tank every six months by attaching a garden hose to the drain valve at the tank bottom, running it to a floor drain or outside, and draining several gallons to remove sediment and rust buildup that accumulates at the bottom and causes corrosion

  2. Check the anode rod which prevents tank corrosion by corroding itself instead (it’s a sacrificial component), replacing it when heavily corroded or every three to five years depending on water conditions

  3. Inspect all valves and connections for rust, moisture, or mineral deposits indicating slow leaks or seepage that will worsen over time

  4. Look for signs of imminent failure including rust colored water, rust spots or moisture on the tank exterior, water pooling at the base, or rumbling and popping sounds when heating

  5. Wrap the tank with an insulation blanket if it’s not already insulated, preventing condensation that promotes rust formation while saving energy by reducing heat loss

Keep clear access to your water heater for regular inspection. Don’t stack boxes, build shelves, or place equipment that blocks your ability to walk around the unit and see all sides. Place a shallow drain pan under the heater if your basement floor slopes toward vulnerable areas or finished space. Install a water sensor alarm on the pan that alerts you to leaks before they become floods.

Consider replacing water heaters older than eight or nine years even if they’re still working, especially if your basement has finished space or expensive equipment stored there. The cost of proactive replacement ($800 to $2,000 depending on capacity and fuel type) beats flood damage repair costs and the hassle of dealing with sudden failure.

Exterior and Interior Waterproofing Methods for Basements

SdoAjvgYTLi0Y-kf0aGRjA

Waterproofing creates moisture barriers that prevent water from entering your basement even when it’s present outside foundation walls. Interior and exterior approaches work differently but often are used together for comprehensive protection.

Interior basement waterproofing addresses the inside surface of foundation walls and floors. Methods include applying waterproof sealants or concrete sealer to foundation walls that block moisture penetration, installing vapor barriers (plastic sheeting or specialized membrane systems) that prevent humidity transmission, and creating interior drainage channels that collect any water that does seep through and direct it to sump basins. Interior waterproofing works best for minor moisture problems, managing humidity, and dealing with older foundations where exterior access is difficult or expensive.

Exterior basement waterproofing stops water at the source before it contacts foundation walls. This approach requires excavating soil away from the foundation to expose exterior walls, repairing any foundation cracks, cleaning and preparing the surface, then applying waterproof membrane or rubberized coating that creates a continuous moisture barrier. Contractors often install exterior drainage systems (French drains or drainage boards) at the same time to manage groundwater. Backfilling uses carefully selected soil or gravel that drains freely rather than holding water against the foundation.

Exterior waterproofing offers more thorough protection because it prevents moisture from ever reaching your foundation walls. This reduces hydrostatic pressure against the foundation and helps maintain structural integrity. The approach costs significantly more than interior methods, typically $8,000 to $15,000 or higher depending on foundation depth, access challenges, and whether foundation repairs are needed before waterproofing.

Additional benefits beyond flood prevention include structural improvements from relieved hydrostatic pressure and repairs to deteriorated foundation surfaces. Moisture control measures also create a 70 percent decrease in pest invasion problems since insects and rodents seek moisture rich environments near foundations. Reduced humidity in basements also means lower energy costs for cooling and less mold growth that affects indoor air quality throughout your home.

Choose interior waterproofing when you have minor moisture problems, need a more affordable solution, or can’t excavate due to landscaping, driveways, or neighboring structures too close to your house. Select exterior waterproofing for persistent flooding problems, visible foundation deterioration, new construction, or major renovation projects. Some situations call for both approaches, especially when dealing with severe water problems or finishing basement living space.

For comprehensive professional waterproofing services, contractors can assess your specific situation, test moisture levels, identify water sources, and recommend the appropriate combination of interior or exterior methods plus drainage improvements.

Window Wells, Standpipes, and Additional Flood Entry Points

Basement flooding doesn’t only happen through foundation walls. Windows, utility penetrations, door entries, and floor drains create additional paths for water to enter your basement during heavy rain or flooding.

Window wells surround below grade basement windows, creating a recessed area that collects water like a bucket during storms. Without proper protection, that collected water eventually forces its way through window frames or breaks the window under pressure. Install window well covers (clear plastic or metal grates) that keep rain and debris out while still allowing emergency exit access. Make sure each window well has a gravel base that drains water away and check that the drain isn’t clogged with soil or plant growth.

Standpipes provide temporary protection during known flood events. These three foot tall plastic or metal cylinders fit over floor drains or sewer connections, preventing backflow from overwhelming drains during heavy rain when municipal systems overload. They work for short term protection but aren’t a substitute for proper drainage and backwater valves.

Other flood entry points require attention:

Seal around all utility penetrations where water lines, gas lines, electrical conduit, or cables enter through foundation walls using hydraulic cement or expanding foam rated for exterior use

Protect basement door entries (bulkhead doors or walk out doors) with proper weather stripping, threshold seals, and check that doors close tightly against seals

Maintain floor drain traps with water (pour a bucket of water down drains monthly) so the trap prevents sewer gas and backflow from entering

Address bulkhead door leaks by replacing rotted framing, installing new rubber gaskets, and verifying the doors latch securely at all latching points

Walk your entire basement seasonally (spring, summer, fall, before winter) looking at every potential water entry point. Check windows, doors, utility penetrations, floor drains, and any place where different materials meet (like where concrete foundation meets wood framing). Look for water staining, efflorescence, rust, or damp spots that indicate previous water entry. Address each vulnerable location before the next heavy rain tests your prevention efforts.

Emergency Response Steps When Basement Flooding Occurs

When your basement floods despite prevention efforts, quick and safe response minimizes damage. Safety comes first because water and electricity create lethal conditions.

Do not enter a flooded basement if water is more than two inches deep or if it reaches electrical outlets, your electrical panel, your furnace, or any electrical equipment. Water conducts electricity and energized equipment or wiring can electrocute you even if you can’t see the source.

If safe entry is possible, follow these steps:

  1. Shut off power at the main electrical panel for your entire house if the panel is in a dry location you can access safely; if the panel is in the flooded basement, call your utility company to disconnect power at the meter

  2. Turn off gas at the main valve if you have gas service and can access the shutoff safely to prevent gas leaks if water has damaged gas lines or appliances

  3. Shut off water at the main water valve to prevent additional water entering if the flood source is a plumbing failure rather than external flooding

  4. Document damage with photos and video before moving or cleaning anything, for insurance claims and contractor estimates of repair needs

  5. Remove standing water using a submersible pump for deep water or a wet dry vacuum for shallower flooding; if using a pump, ensure the power cord and pump are rated for submersion

  6. Begin drying immediately using dehumidifiers, box fans, and opening windows if outdoor humidity is lower than inside; remove wet materials like cardboard, paper, fabric, and porous items that can’t be dried within 48 hours to prevent mold

  7. Disinfect all surfaces that contacted flood water using a solution of four to eight teaspoons chlorine bleach per gallon of hot water, applying with a mop or spray bottle while wearing rubber gloves

Wear proper protective equipment for all water removal and cleanup work. Use rubber boots, rubber gloves that cover your forearms, and eye protection to prevent contaminated water contact. If flood water contains sewage (from toilet backup, sewer overflow, or floodwater that crossed ground surface), treat all contacted items as contaminated and dispose of anything that can’t be thoroughly disinfected. Sewage contains bacteria and pathogens that cause serious illness.

Throw away items that absorbed sewage containing flood water including drywall, insulation, carpeting, upholstered furniture, mattresses, and similar porous materials. The cost of saving these items isn’t worth the health risks from bacteria growth.

Call emergency professionals immediately if flooding is extensive (several inches deep across the entire basement), if the source can’t be stopped quickly, if sewage is involved, or if water has contacted electrical systems. Professional water damage restoration services have truck mounted extraction equipment, commercial dehumidifiers, air movers, and expertise to dry structural components before mold growth begins.

DIY Basement Flood Prevention vs. Professional Waterproofing Services

Some flood prevention work fits well within DIY capability while other tasks require professional equipment, expertise, or liability insurance. Understanding which is which helps you protect your basement effectively without overpaying for simple maintenance or risking failure by attempting complex work yourself.

Prevention Method DIY Feasible Professional Recommended Typical Cost Range
Gutter cleaning Yes When 2+ stories $0-$200
Downspout extensions Yes For buried drainage $50-$300
Minor crack sealing Yes for hairline cracks For structural cracks $50-$500
Sump pump testing Yes For repairs/replacement $0-$1,200
Grading adjustments For minor touch-ups For major resloping $500-$3,000
French drain installation No Yes $3,000-$8,000
Exterior waterproofing No Yes $8,000-$15,000
Foundation repair No Yes $2,000-$10,000+

DIY appropriate tasks include routine maintenance and inspection work, minor repairs, and installations that don’t require excavation or specialized equipment. Clean your own gutters if you’re comfortable on ladders and your house is single story or you can work safely from a ladder. Install surface downspout extensions that simply attach to existing downspouts. Seal hairline foundation cracks after cleaning and preparing surfaces according to product instructions. Test your sump pump monthly and replace it if you’re comfortable with basic plumbing connections and electrical work. Touch up grading by adding bagged topsoil near your foundation and sloping it properly.

Professional services become necessary for excavation work (French drains, exterior waterproofing), structural repairs (foundation cracks wider than 1/4 inch, bowing walls, or any horizontal cracking), installations requiring permits and inspections (backwater valves, major drainage systems), and work requiring specialized equipment (commercial dehumidifiers for major flooding, concrete cutting for interior drain tile). Liability considerations also favor professionals for roofing related work on multi story homes or work near underground utilities.

Average basement flood repair costs range from $1,038 to $3,067 depending on water depth, affected area, and whether sewage contamination is involved. Costs can reach $6,000 for severe flooding or drop to around $450 for minor water entry caught quickly. Investing in prevention makes sense compared to these repair costs, especially since flooding often causes recurring damage if underlying problems aren’t addressed.

Get free estimates from licensed contractors for any work you’re considering having done professionally. Describe your specific flooding concerns, show them your basement and exterior drainage, and ask what they recommend to address your situation. Compare estimates from at least three contractors, checking that they’re licensed, insured, and established in your area. Ask about warranties on their work, typically ranging from one year for basic waterproofing to lifetime warranties for comprehensive systems.

Understanding Flood Insurance and Coverage for Basement Water Damage

Most homeowners assume their insurance covers flood damage. It doesn’t. Standard homeowners insurance policies specifically exclude flood coverage, defining flood as water entering from outside the home including rain, storm surge, overflowing bodies of water, and surface water.

The National Flood Insurance Program (NFIP) provides flood coverage through policies purchased separately from your homeowners insurance. NFIP policies cover structural elements of your home including the foundation, flooring, walls, electrical systems, plumbing, HVAC systems, and essential equipment like water heaters and sump pumps. The program also covers cleanup costs and structural repairs needed after flooding.

What NFIP doesn’t cover in basements includes finished walls, floors, ceilings, personal belongings, and furniture. If you’ve finished your basement with drywall, flooring, painted walls, and furnished living space, standard flood insurance won’t replace those improvements or contents. You need separate coverage endorsements to protect finished basement spaces, and those endorsements cost extra.

Sewer backup coverage is different from flood insurance and addresses water entering through drains, toilets, or sewer lines. Most homeowners policies exclude sewer backup damage but offer it as an endorsement for an additional $100 to $500 annually depending on coverage limits you select. This endorsement makes sense if your home has basement floor drains, is in an area with older sewer infrastructure prone to backup, or has experienced previous sewer related water damage.

Research your flood risk through FEMA flood maps, municipal planning departments, county engineering offices, or your insurance agent who can access flood zone mapping. Properties in Special Flood Hazard Areas (shown as zones A or V on flood maps) face the highest risk and mortgage lenders require flood insurance. Properties in moderate to low risk zones (B, C, or X) can still flood, especially during severe weather, but insurance isn’t mandatory.

Final Words

Stopping basement flooding means working multiple angles at once. Keep gutters clear, extend those downspouts at least five feet, test your sump pump monthly, and watch for foundation cracks before they turn into problems.

The maintenance schedule isn’t optional. It’s how you catch small issues before they dump hundreds of gallons into your basement.

Most of this is straightforward homeowner work. Some of it, like French drains or exterior waterproofing, needs pros. Either way, a dry basement doesn’t happen by luck. It happens because you planned ahead and stayed on it.

FAQ

How do you get your basement to stop flooding?

You get your basement to stop flooding by implementing multiple prevention layers including cleaning gutters twice yearly, extending downspouts at least five feet from your foundation, installing and testing a sump pump monthly, sealing foundation cracks annually, and ensuring proper yard grading with six inches of drop in the first ten feet away from your home.

Is it common for basements to flood?

Basement flooding is common because basements sit below ground level where water naturally collects, foundation cracks develop over time, drainage systems fail, and a typical 2,000-square-foot home manages approximately 1,250 gallons of runoff from just one inch of rainfall, creating significant pressure on basement waterproofing systems.

How much does it cost to waterproof a 1000 sq ft basement?

Waterproofing a 1,000 square foot basement typically costs between $1,038 and $3,067 on average, with highs near $6,000 and lows around $450 depending on whether you need interior sealing, exterior excavation and membrane application, drainage system installation, or comprehensive foundation repairs.

Does homeowners insurance cover basement flooding from rain?

Homeowners insurance typically does not cover basement flooding from rain because most standard policies exclude flood damage. You’ll need separate National Flood Insurance Program coverage for structural protection and cleanup, plus a sewer backup endorsement costing $100 to $500 annually for drain-related flooding.

What are the warning signs that my sump pump is failing?

Warning signs that your sump pump is failing include strange noises during operation, the pump running continuously without shutting off, visible rust or corrosion on the pump body, a stuck or jammed float mechanism, the pump not activating when you pour a bucket of water into the pit, and age approaching seven to ten years.

How often should I inspect my foundation for cracks?

You should inspect your foundation for cracks annually, preferably in spring after freeze-thaw cycles and before heavy rain seasons. Look for new cracks, widening of existing cracks, horizontal cracks indicating structural issues, and reseal any compromised areas immediately using waterproof sealants or hydraulic cement.

What is the proper slope for yard grading around my home?

The proper slope for yard grading around your home requires six inches of fall in the first ten feet away from your foundation, as specified by International Residential Code. This slope directs surface water away from basement walls and reduces hydrostatic pressure that forces water through foundation cracks.

When should I replace my water heater to prevent basement flooding?

You should replace your water heater when it approaches 10 years old, shows visible rust or moisture around connections, makes unusual noises, or requires frequent repairs. Plan replacement a few years before the expected lifespan ends, since failed water heaters cause average post-deductible damage of $4,444 per incident.

Can I install a French drain myself or do I need a professional?

Installing a French drain requires professional help because it involves digging trenches around your entire home, properly pitching perforated pipes at least four inches per hundred feet of length, wrapping pipes in gravel or sand, and connecting drainage to sump basins or storm drains correctly.

What items should never go down basement drains?

Items that should never go down basement drains include fat, oil, and grease that accumulate and cause blockages, sanitary wipes, facial tissue, paper towels, feminine products, toys, and anything except water, human waste, and biodegradable toilet paper to prevent sewer backup into your basement.

How do I test if my sump pump is working correctly?

You test if your sump pump is working correctly by pouring a bucket of water into the sump pit and watching the pump activate automatically when water reaches the trigger level, then shut off completely after pumping water out. Perform this test monthly year-round as part of your maintenance schedule.

What’s the difference between interior and exterior basement waterproofing?

Interior basement waterproofing addresses foundation cracks and weak spots from inside using sealants, concrete sealer, vapor barriers, and interior drainage systems, while exterior waterproofing stops water at the source through excavation, crack filling, waterproof membrane coating, and exterior drainage that also improves structural integrity.

Interior Wall Reconstruction: Costs, Materials and Safety Tips

0

Ever tried patching a wall only to realize days later that the real problem’s hiding three inches deeper? You can sink cash into surface repairs while rot, compromised framing, or water damage keeps spreading behind the finish. Interior wall reconstruction pulls everything back to the studs so you rebuild it right, but it costs more and takes longer than patching. Knowing when you actually need full reconstruction, what it involves, and how to handle it safely keeps you from either wasting money on weak repairs or tearing out walls that didn’t need it.

When Walls Need Full Reconstruction vs. Simple Repair

6uEDNUd1SWWzTORyRZgjKw

Interior wall reconstruction means tearing everything out and starting fresh, from studs to the surface you’ll eventually paint. Repair just fixes what’s broken without pulling the whole thing apart. Getting this right affects your budget, timeline, and whether you’re in over your head or handling something manageable.

You’re looking at full reconstruction when water’s gotten into multiple stud spaces and compromised the framing and insulation. If a load-bearing wall shows sagging, bowing, or serious cracks, you need more than patching. The framing itself is failing. In older homes, when big chunks of plaster have let go from the lath backing, it’s usually smarter to strip it all and go with modern drywall. And if you find mold behind the wall during inspection, everything comes out. You’ll treat the affected wood and rebuild with clean materials.

Small cracks up to about 1.5mm rarely mean trouble. Fill them with flexible compound and move on. Nail pops, little holes from picture hangers, surface moisture that didn’t reach the framing… these are repair jobs. Hairline settling cracks and minor corner dings respond fine to patching and sanding.

Start your assessment with a tap test. Move along the wall knocking with your knuckles. Hollow sounds mean the plaster’s separated or there’s voids behind drywall. Look for bowing (sight down from corner to corner), water stains showing penetration patterns, and crack width. If a £1 coin fits in the crack, you’re past simple repair territory. Run a moisture meter over questionable areas. Readings above 17% mean active water problems and likely reconstruction.

Wall Demolition and Material Removal Methods

eofp1KJCTcSCdWJ5942NVw

Get your safety gear sorted before you swing anything. N95 or P100 respirator for demolition dust, safety glasses with side protection, heavy gloves, hearing protection if you’re using power tools. Hang 6-mil plastic from ceiling to floor and tape the edges tight before you start. This keeps dust out of the rest of the house. HEPA vacuums actually capture fine particles instead of blowing them around like regular shop vacs do. Cover your floors with drop cloths or plastic sheeting, securing the edges. Makes cleanup possible and protects finished flooring.

Kill power at the panel before touching any wall that might have wiring. Use a non-contact voltage tester to confirm it’s actually dead, then cap exposed wires with wire nuts and tape. Work systematically. Pull trim and baseboards first (save them if they’re going back up), cut and cap utilities, strip drywall or plaster from studs, then yank out damaged framing. Drywall and plaster come off differently. Drywall breaks clean when you score and snap it. Plaster needs to be chipped away from lath in sections or you’ll crack everything around it.

Different materials need different approaches. For drywall, score along stud lines with a utility knife, snap panels away from framing, pull fasteners or break the board around screw heads. Plaster removal means using a flat bar and hammer to break the plaster keys behind wood lath strips. Work small sections to control the dust. When cutting studs, use a reciprocating saw at top and bottom, twist to break the nails free from plates, extract without wrecking adjacent framing. Wire lath gets cut with tin snips, fold sections away from framing, watch those sharp edges. For masonry walls, score with a grinder and masonry blade, break sections with a sledge, remove in chunks you can actually lift.

Plan for debris disposal. A 10-yard dumpster handles a single wall. Multiple walls need 20 yards. Materials with asbestos or lead paint require separate handling.

Framing Repair and Stud Replacement Techniques

uwd97YJeTCK5j36Yr_1OLg

Standard interior partition walls use 2x4s. Exterior walls or walls with plumbing runs typically get 2x6s. Studs sit 16 inches on center in standard construction, though some builders go 24 inches for non-load-bearing partitions. Older houses are all over the place with spacing.

Damaged Stud Replacement

The sister-stud fix works when damage is partial. Cut a matching piece of lumber and nail it right alongside the damaged stud using 16d nails every 16 inches. You’ve just doubled up the member and restored strength. Full replacement becomes necessary when rot, bugs, or structural problems affect more than a third of the stud. Cut top and bottom, twist it free from the nails, install a new stud toe-nailed into top and bottom plates. Drive three 16d nails through the plates into stud ends at angles for solid connection.

Header Installation for New Openings

Header size depends on span and what’s sitting above. A 2×6 handles a 3-foot opening in a non-load-bearing wall. 2×8 works for 4 feet. Go wider or deal with load-bearing conditions and you need engineered beams. Check span tables or talk to a structural engineer. King studs run full height on each side of the opening. Jack studs (trimmers) sit inside the kings and carry the header. The header rests on jack studs with its wide face vertical.

Blocking and Bracing Requirements

Fire blocking at 10-foot intervals slows fire through wall cavities. Install horizontal 2×4 blocks between studs mid-height in tall walls. Horizontal bracing strengthens walls over 10 feet, stops lateral movement. Put backing blocks behind planned fixture points (towel bars, grab bars, wall-mounted sinks) so you’re anchoring into solid wood instead of relying on drywall anchors. Corner bracing uses let-in diagonal pieces notched into stud faces or structural sheathing panels.

Safety Protocols and Health Hazard Management

truvIqlhTNWmVQmfmy1TeQ

PPE protects you from the stuff that’ll actually hurt you. N95 respirators filter construction dust fine for most work. P100 filters are required for plaster demo, which creates particles that blow right through lower-rated masks. Safety glasses with side shields stop flying debris. Heavy gloves protect from sharp edges, splinters, rough materials. Hearing protection matters during extended saw, grinder, or drill use. Prolonged exposure above 85 decibels causes permanent damage.

Test for asbestos before disturbing materials in homes built before 1980. Plaster, joint compound, some insulation from that era may contain it. Professional testing runs $200-500 but keeps you from breathing carcinogenic dust. If it’s there, pros handle removal. Homeowner abatement is illegal most places and dangerous regardless. Lead-safe practices are mandatory for pre-1978 painted surfaces. Lead dust from sanding or demo causes neurological damage, particularly in kids. Containment, HEPA vacuuming, wet methods minimize dust.

Don’t assume circuits are dead without testing. Use a non-contact voltage tester on all wires before touching them. Even with the breaker off, wires may be hot from another circuit, miswired, or backfed through multi-wire branches. Get a qualified electrician for panel work, circuit rerouting, or anything you’re uncertain about.

Dust containment protects the rest of your house. Plastic barriers sealed with tape create physical boundaries. Negative air machines with HEPA filtration pull air into the work zone so dust doesn’t migrate out. HEPA vacs capture particles during cutting and sanding. Seal HVAC registers to stop dust circulation. Tape plastic over vents in the work area and consider shutting the system down during heavy dust work.

Structural Assessment: Load-Bearing Identification and Damage Documentation

1LVRVsM1RTiyXdrhDifBVQ

This matters because pulling out or compromising a load-bearing wall without proper support causes sagging floors, cracked ceilings, stuck doors, potentially catastrophic failure. Permits exist specifically for load-bearing mods to ensure engineering review and inspection. Adding temporary supports and permanent beams can tack $1,500-$4,000 onto your budget. Know what you’re dealing with before you start.

Check the attic or crawlspace where ceiling joists and roof struts rest. Walls supporting these are load-bearing. Look at floorboard direction upstairs since joists run perpendicular to boards. Walls parallel to joists often carry no load, walls perpendicular likely do. Assume all walls bear load until proven otherwise. Spine walls in Victorian houses that divide front and rear rooms and support floors above always carry loads. Party walls between attached homes typically carry roof loads. Interior walls stacked directly above basement beams usually carry significant loads. Central location often indicates load-bearing, especially in older homes with simpler framing. Thicker walls in masonry construction generally carry more load. Review blueprints if available. Inspect the basement or crawlspace for beams and posts that terminate at walls above.

Seven Load-Bearing Identification Methods:

  1. Attic joist direction check: Walls perpendicular to ceiling joists usually support those joists, parallel walls typically don’t
  2. Perpendicular floor joist alignment: Exposed basement joists reveal which walls run perpendicular and likely carry floor loads
  3. Exterior wall alignment: Interior walls directly above foundation walls or basement beams carry structural loads
  4. Central location in floor plan: Walls dividing the house into major sections often carry roof and upper floor loads
  5. Wall thickness comparison: Noticeably thicker walls may indicate load-bearing masonry
  6. Blueprint review: Original documents show structural walls, though renovations may have changed things
  7. Basement/crawlspace inspection for supporting beams: Steel or wood beams below terminate at load-bearing walls or posts above

Document damage with visual inspection. Vertical cracks at wall junctions often result from inadequate fixing or movement between different materials like timber stud meeting solid external walls. Horizontal cracks suggest foundation settlement or roof load issues. Diagonal cracks from door and window corners indicate structural movement or inadequate support. Water stains show moisture routes and help identify hidden damage. Bulging means plaster separation from lath or drywall buckling from moisture. Soft spots, crumbling plaster, wood rot all need documentation. Cracking above door frames or sticking doors may indicate structural problems in load-bearing walls. Photograph everything with measurements for insurance and contractor quotes. Put a ruler or tape in photos for scale.

Detect hidden damage before it surprises you. Moisture meters measure water content in materials. Readings above 17% mean active problems requiring source identification before reconstruction. Thermal cameras reveal temperature differences indicating missing insulation, air leaks, moisture behind surfaces. Exploratory holes (small access cuts in hidden spots) let you see cavity conditions, framing, insulation, hidden pipes and wiring.

Get professional help when planning load-bearing modifications. Structural engineers design beam systems to carry loads when walls get removed, ensuring proper sizing, support placement, connection details. Beam installation requires permits and inspections. Test for hazardous materials in older homes. Asbestos in plaster (common pre-1980s) and lead paint (most pre-1978 homes) need identification before disturbance for proper abatement planning and cost estimation.

Permit Requirements and Building Code Compliance

UOkX3rwNQK-sFoxgNQXgnQ

Permit necessity depends on scope. Structural work always requires permits. Removing or modifying load-bearing walls, adding walls that affect the building’s structure, installing beams all trigger permits. Electrical beyond simple device replacement needs permits. Plumbing rerouting needs permits. Cosmetic stuff like patching drywall, repainting, replacing trim typically doesn’t, though local rules vary.

Inspections happen at project milestones. Pre-closing inspection after framing mods but before insulation and drywall lets the inspector verify header sizing, stud spacing, blocking, bracing. Rough-in covers electrical and plumbing before walls close. Final inspection verifies completed work meets code for fire blocking, insulation, finish materials, workmanship. Failed inspections delay projects, prevent legal occupancy, affect resale. Buyers’ inspections and appraisers check for unpermitted structural work.

Work Type Permit Typically Required Inspection Stages
Load-bearing wall removal Yes Framing, final
New non-load-bearing partition wall Sometimes (check locally) Final (if required)
Electrical circuit relocation Yes Rough-in, final
Plumbing rerouting Yes Rough-in, final
Cosmetic drywall repair and painting No None

Code compliance covers multiple requirements. Fire-rated materials in attached garages. Walls separating garage from living space need 5/8-inch Type X fire-rated drywall on the garage side. Fire blocking in stud cavities at 10-foot intervals and at ceiling/floor intersections slows vertical fire spread. Electrical standards require outlets every 12 feet along walls, GFCI protection in bathrooms and kitchens within 6 feet of water, proper wire gauge for circuit amperage. Insulation standards vary by climate but require minimum R-values for exterior walls and air sealing.

Insulation Installation and Moisture Barrier Integration

pluwEJ34SwqpNoMjGYbfwA

Insulation type depends on application and performance needs. Fiberglass batts rated R-13 to R-15 fit standard 2×4 walls and provide adequate thermal resistance for most interior partitions. Mineral wool batts offer R-15 value with better sound blocking and fire resistance. Spray foam delivers R-6 per inch, seals air gaps, works well in irregular cavities but costs more. Studwork can be packed with sound-deadening mineral wool for better acoustic control between rooms.

Install batts friction-fit to fill cavities completely without gaps at top, bottom, sides. Gaps allow air movement that tanks thermal performance. Complete fill prevents thermal bridging where heat transfers through uninsulated stud faces. Don’t compress batts. Compressed R-15 performs at R-11 or less. Cut around electrical boxes, plumbing, blocking, filling voids with scrap. Split batts when necessary to wrap around wiring rather than compressing insulation behind cables.

Vapor barriers control moisture into wall cavities. Install 6-mil poly on the warm side, the interior in heating climates, potentially unnecessary or problematic in cooling climates. Seal seams with vapor barrier tape to prevent moisture bypass. Overlap sheets 6 inches at joints and seal to top and bottom plates. Direction differs by climate. Check local codes.

Soundproofing matters for party walls and bedrooms. Higher-density mineral wool beats standard fiberglass for noise reduction. STC ratings (Sound Transmission Class) measure sound blocking, with STC 50+ providing good privacy. Cheaply built party walls may need acoustic drywall over timber battens with an air void. The gap behind drywall enhances sound blocking by decoupling surfaces. Resilient channel or sound isolation clips between studs and drywall reduce sound transmission through framing.

Electrical Wiring and Plumbing Integration

uUzh-ArKSjO6eqGdttNueA

Electrical relocation becomes necessary when removing load-bearing walls or creating openings that eliminate existing outlet and switch locations. Outlets required every 12 feet along walls per NEC, ensuring no point is more than 6 feet from an outlet. GFCI protection required in bathrooms, kitchens within 6 feet of sinks, other wet locations. Wire gauge must match circuit amperage. 14-gauge for 15-amp circuits, 12-gauge for 20-amp.

Licensed electrician requirements apply to panel mods, adding circuits, any work beyond basic device replacement. Homeowners can typically replace switches and outlets but can’t alter circuit wiring or add new circuits without licensed help in most places. Permits and inspections for electrical changes ensure code compliance and safety. Shut off circuits, verify power is dead, route new cables through walls before closing, make connections at boxes, restore power, schedule inspections.

Plumbing considerations include maintaining proper drain slope (1/4 inch per foot minimum for waste lines) when rerouting. Water line rerouting requires shutting supply, draining lines, cutting and installing new runs, pressure-testing before closing walls. Shutoff accessibility matters. Code requires accessible shutoffs for fixtures, so plan valve locations before closing walls. Plumbing vents can’t be eliminated without rerouting to maintain drainage and prevent sewer gas. Vent pipes must terminate through the roof or tie into existing stacks.

HVAC duct rerouting and register relocation may be necessary when wall mods block existing ductwork. HVAC balance gets affected by wall removal in some floor plans. Opening spaces can change air pressure and comfort. Consult HVAC contractors before closing walls if ductwork mods are needed.

Drywall Installation and Sheetrock Hanging Standards

eswLaO7jSBCqvQwODU5y_Q

Drywall type matches conditions and requirements. Standard 1/2-inch panels work for most interior walls. 5/8-inch provides better sag resistance for ceilings and improved sound control. Moisture-resistant green board suits bathrooms and damp areas, though cement board is preferred for tile backing in showers. Abuse-resistant panels with fiberglass facing withstand impacts in high-traffic areas like hallways and garages. Victorian lath and plaster is thicker than modern drywall and provides better soundproofing, but reconstruction typically uses drywall for cost and availability.

Six Hanging Best Practices:

  • Perpendicular panel orientation to framing: Hang sheets across studs rather than parallel for max strength and minimal seams
  • Tight butt joints without forcing: Panels should meet firmly without gaps, but forcing creates bulges and broken edges
  • Tapered edge joints where possible: Factory tapered edges create recessed seams that fill flush; cut edges need more compound
  • Cutouts marked from backside: Measure outlet and fixture locations, transfer to panel back, cut before hanging to avoid cracking installed panels
  • Floating corner technique: Don’t fasten ceiling panels within 7 inches of corners to reduce cracking from structural movement
  • Stagger seams between layers: When double-layering for fire rating or sound control, offset seams by 16 inches minimum

Fasteners ensure secure attachment. Drywall screws beat nails. They don’t pop out as framing lumber dries and shrinks. Screw spacing follows 16 inches on center along studs for walls, 12 inches for ceilings. Drive screws perpendicular, dimpling the paper face slightly without breaking through. Broken paper loses holding power. Ring-shank nails work if properly driven, but screws provide better long-term performance. Horizontal vs. vertical hanging depends on wall height. Horizontal reduces seams on 8-foot walls, vertical works better for taller walls.

Drywall Type Thickness Primary Use Moisture Rating
Standard 1/2 inch Interior walls, dry areas Not moisture-resistant
Moisture-resistant 1/2 or 5/8 inch Bathrooms, laundry rooms Water-resistant core and paper
Fire-rated Type X 5/8 inch Garage walls, fire separations Not specifically moisture-resistant
Abuse-resistant 1/2 or 5/8 inch High-traffic areas, impact zones Not moisture-resistant

Corner bead and edge treatments finish wall intersections. Metal corner bead protects outside corners from impacts. Fasten every 9 inches with screws or crimping tool, keeping it straight and flush to both surfaces. Vinyl corner bead installs with joint compound instead of fasteners, providing similar protection with easier install. J-bead and L-bead trim drywall edges at windows, doors, other terminations. Paper-faced corner bead combines corner protection of metal with finishing ease of tape.

Joint Compound Application and Taping Methods

P1jMGsVNSxuvepVFl83Ipw

Joint compound types serve different purposes. All-purpose works for all three coats but dries slowly between applications. Lightweight sands easier and shrinks less but costs more. Setting-type (hot mud) hardens chemically within 20-90 minutes depending on formulation, allowing same-day multiple coats but offering limited working time and difficult sanding. Paper tape provides stronger joints than fiberglass mesh and works better for flat seams. Mesh tape self-adheres and works well for repairs but requires setting-type compound for adequate strength.

First Coat: Tape Embedding

Apply thin compound base along the seam using a 6-inch taping knife, filling the tapered joint recess about halfway. Center paper tape over the seam immediately and embed while the compound’s wet, pressing firmly with the knife to squeeze out excess and eliminate air bubbles. Remove excess by running the knife along the tape at a slight angle, leaving just enough to bond the tape. Allow 24 hours drying between coats. Rushing causes problems as wet compound beneath creates soft spots and bubbles. First coat coverage extends about 4 inches wide centered on the seam.

Second Coat: Joint Filling

Apply compound wider than first coat, typically 8-10 inches, using a 10 or 12-inch knife. Feather edges thin to blend into the wall, avoiding ridges. Fill fastener dimples with compound, scraping flush. Address any tape wrinkles or bubbles discovered after first coat dried. Cut out problem areas and re-tape if necessary. This coat fills the joint depression and begins blending the repair into surrounding surface.

Third Coat: Finishing and Blending

Final wide coat extends 12 inches or more using a 12-inch knife, creating gradual transition from joint to wall. Thin application matters. Thick coats crack and shrink. Feather edges to nothing, making the compound disappear into the wall. Light sanding between coats with 120-grit removes ridges and high spots. Final sanding with 220-grit creates smooth surface ready for primer. Don’t over-sand and expose tape or create low spots.

Texture Matching and Wall Finish Options

Texture matching matters because mismatched texture highlights repairs rather than hiding them. Seamless repairs require matching depth, pattern, direction of existing texture. Sample texture on scrap drywall before applying to the wall. Practice achieves consistent results and builds confidence.

Five Common Texture Types:

  • Orange peel (light spray): Fine spray pattern resembling citrus peel, applied with hopper gun, covers minor imperfections while maintaining relatively smooth appearance
  • Knockdown (troweled spray): Heavier spray pattern partially flattened with trowel after brief setup, creates varied surface with rustic character, hides larger imperfections
  • Skip trowel (hand-applied): Joint compound randomly applied and smoothed with trowel, creates irregular pattern with high and low areas, labor-intensive traditional method
  • Popcorn (ceiling): Heavily textured spray pattern typically limited to ceilings, hides major imperfections but difficult to match and contains asbestos in older applications
  • Smooth (skim coat): Thin compound layer troweled smooth over entire surface, eliminates texture for modern appearance, requires skilled application

Texture application techniques vary by type. Spray textures require hopper guns connected to air compressors, with material consistency and air pressure adjusted to achieve desired pattern. Hand trowel methods use wide finishing knives or specialized texture trowels to apply and manipulate compound. Roller textures use special textured roller covers to create patterns in wet compound or paint. Skip-trowel timing matters. Knockdown texture requires waiting 5-15 minutes after spraying before troweling, exact timing depending on temperature and humidity.

Smooth finish alternatives and skim-coating eliminate texture for uniform appearance. Skim-coating existing texture requires applying thin layers of joint compound over the entire textured surface, building up and smoothing until texture is buried. Multiple thin coats work better than single thick applications that crack and sag. Sanding between coats and final sanding create smooth surface. This converts textured walls to modern smooth finish without demolition.

Plaster Repair and Lath Reconstruction

The lath and plaster system in older homes consists of wood lath strips nailed horizontally across wall studs with gaps between strips. Plaster pushed through gaps creates “keys” that lock the plaster to the wall. Traditional three-coat system includes scratch coat (pushed through lath to form keys), brown coat (builds thickness and levels surface), finish coat (smooth final surface). Victorian lime plaster was made from lime putty, sharp sand, chopped ox or horse hair for strength and crack reduction. When full replacement is needed depends on damage extent. Loose or missing plaster covering more than 25% of wall area often justifies full removal and drywall replacement, while smaller damaged areas respond to repair.

Lath repair starts with securing loose sections. Screw loose laths back using trim-head screws driven through plaster into studs, pulling loose areas tight to framing. Replace damaged sections by cutting out broken strips and installing new wood lath or expanded metal lath in the gap. Expanded metal provides better plaster key than wood strips and resists future movement. Fasten replacement lath to studs with roofing nails or screws, leaving slight gaps between sections for plaster to penetrate. Simple timber studwork with lath and plaster covering was widely used, similar to ceiling construction, making repair techniques applicable to walls and ceilings.

Three-coat plaster application follows traditional methods. Scratch coat is mixed thicker and pushed firmly through lath to form keys on the backside, then scratched with a scarifier tool to create horizontal grooves for brown coat adhesion. Allow 48-72 hours drying before applying brown coat. Brown coat builds thickness to near-final surface level, applied in layers if thickness exceeds 1/2 inch, with drying time between applications. Straightedging and darby work creates level surfaces. Final finish coat goes on thin (1/8 inch or less) and is troweled smooth with steel finishing trowels. Proper drying between layers prevents cracking from trapped moisture.

Modern alternatives simplify plaster repair. Bonding plaster over lath creates a base coat for modern joint compound finishing, combining traditional substrate with contemporary materials. Blueboard and veneer plaster systems use special gypsum panels as substrate for thin veneer plaster finish coats, providing plaster-like durability with easier application. Modern setting-type joint compound can substitute for traditional lime plaster in small repairs, hardening quickly and sanding reasonably smooth. Full replastering requires skilled tradespeople for proper finish. Trowel techniques take practice to master.

Painting Preparation and Surface Priming

Dust removal after sanding creates the foundation for quality paint finish. Vacuum all surfaces with a HEPA-filter vacuum, including walls, floors, horizontal surfaces where dust settles. Wipe walls with tack cloth to capture remaining fine particles. Damp wipe with clean water and lint-free cloths removes residual dust that tack cloths miss. Allow surfaces to dry completely before priming. Clean dust and dirt before applying primer for paint adhesion.

Primer types match surface conditions. PVA (polyvinyl acetate) primer seals porous new drywall and joint compound, preventing topcoat from absorbing unevenly and creating flat spots. Without primer, paint soaks into compound faster than into drywall paper, creating sheen differences visible in finished work. Stain-blocking primer prevents water stains, smoke damage, other discoloration from bleeding through topcoat. For fire and smoke-related home repairs, stain-blocking primer becomes essential. Smoke residue requires odor-sealing preparation before painting to prevent persistent smells from permeating fresh paint. High-hide primer covers dark colors or significant color changes with fewer topcoats. Two primer coats may be needed over bare drywall for uniform sheen, especially with deep or bright finish colors.

Primer application technique affects coverage and performance. Cut in edges first along corners, ceilings, trim using a 2-inch angled brush, creating a 2-3 inch band. Roll the field (main wall area) with a 3/8-inch nap roller for smooth surfaces or 1/2-inch nap for light texture. Maintain a wet edge by working in sections small enough to complete before the leading edge dries. Overlapping wet and dry primer creates visible lap marks. Apply even coverage without excessive thickness that drips or sags.

Spot-priming repairs and color-matching considerations apply when reconstruction affects only portions of walls. Prime all repaired areas even if surrounding wall was previously painted. Bare compound absorbs paint differently than sealed surfaces. Feather primer edges beyond repair areas to blend transitions. Color-matching existing paint requires paint store analysis of a chip or sample if original paint is unknown. Test paint color on primed surface before full application, as colors shift between wet and dry and appear different under room lighting than on small store samples.

Trim Installation and Architectural Detail Restoration

Measuring and cutting trim requires precision for professional results. Coping inside corners creates tight joints that accommodate wall irregularities. Cut the first piece square into the corner, then cut the second piece following the trim profile with a coping saw, creating a shaped end that overlaps the first piece. Mitering outside corners uses 45-degree cuts on both pieces, meeting at the corner point. Proper reveal at door casings leaves a slight setback (typically 1/8 to 1/4 inch) between door jamb edge and casing edge, creating a shadow line.

Five-Step Trim Installation Sequence:

  1. Door and window casings: Install first since baseboards butt against casing edges, ensuring clean transitions at openings
  2. Chair rail or wainscoting: Install at designed height (typically 32-36 inches) before crown and base, establishing middle wall datum
  3. Crown molding: Install after wall painting but before baseboard, allowing baseboard to hide small gaps at bottom wall if needed
  4. Baseboards: Install after flooring is complete so base sits on finished floor surface without gaps underneath
  5. Final caulking and touch-up: Fill gaps between trim and wall, touch up paint on trim faces and walls where installation caused marks

Fastening methods secure trim permanently without damage. Finish nails (15 or 16-gauge) work for most trim applications. Thinner nails reduce wood splitting compared to larger fasteners. Brad nails (18-gauge) suit thin or delicate trim profiles. Nail placement matters. Drive fasteners through trim into studs rather than just drywall for solid attachment. Locate studs before starting (stud finder or by tapping and listening for solid sound). Space nails 16 inches apart along trim length. Construction adhesive applied to trim back before nailing supplements mechanical fastening and fills minor gaps. Countersink nails slightly below wood surface using a nail set, then fill holes with wood putty matching the wood or paint color.

Matching existing trim profiles when working with partial wall reconstruction in older homes requires finding matching molding or having custom profiles milled. Architectural salvage yards stock period trim. Lumber yards carry common historical profiles. Custom milling shops can replicate unique profiles from samples. Door casing installed before baseboard creates proper layering. Crown molding requires compound miter cuts at corners where wall angles aren’t exactly 90 degrees. Adjustable miter saws and careful measurement solve this common challenge. Caulk gaps between trim and wall before painting using paintable latex caulk, creating seamless transitions.

Project Cost Estimation and Budget Planning

Typical cost components for interior wall reconstruction break down into demolition (10-15% of total), framing materials (15-20%), drywall and finishing materials (15-20%), trim and finish materials (10-15%), labor (60-70% of the professional total for full-service work). Material costs for a standard 12-foot partition wall run $200-400

Final Words

Interior wall reconstruction goes beyond patching holes. You’re restoring structural integrity, protecting your home from moisture damage, and creating walls that look finished, not fixed.

The work involves careful assessment, proper framing, code-compliant installation, and finish quality that matches the rest of your home.

When water damage, settling cracks, or structural issues compromise your walls, the right approach brings everything back to safe and solid. That’s what makes the difference between a temporary fix and a lasting repair.

FAQ

What is the 30% rule for renovations?

The 30% rule for renovations suggests limiting your renovation budget to approximately 30% of your home’s current value to avoid over-improving for your neighborhood. This guideline helps maintain reasonable investment expectations and prevents spending more than you can recover at resale.

How much does it cost to replace an interior wall?

The cost to replace an interior wall typically ranges from $1,000 to $3,000 for a standard non-load-bearing partition wall, including demolition, framing, drywall, and finishing. Load-bearing wall replacement costs significantly more, ranging from $3,500 to $10,000, due to structural engineering requirements and support beam installation.

What is the cheapest way to finish interior walls?

The cheapest way to finish interior walls is standard painted drywall with a smooth or light texture finish, costing $200 to $400 in materials for a typical wall. DIY installation saves 60-70% on labor costs, though professional results require proper taping, mudding, and sanding skills.

Is it worth replastering a wall?

Replastering a wall is worth it in historic homes where maintaining original lath-and-plaster construction preserves architectural character and superior soundproofing compared to modern drywall. For homes with minor damage, patching loose plaster costs less than full replacement, but extensive water damage or structural failure makes drywall replacement more cost-effective.

When should I hire a professional instead of doing wall reconstruction myself?

You should hire a professional for wall reconstruction when the project involves load-bearing modifications, requires building permits, affects electrical or plumbing systems, or includes structural concerns. Licensed contractors ensure code compliance, proper permit handling, and safe beam installation that DIY work cannot legally or safely accomplish.

How long does interior wall reconstruction take?

Interior wall reconstruction takes 5 to 10 days for a single wall from demolition through final paint, depending on project scope and drying time requirements. Load-bearing wall removal adds 1 to 3 weeks for permit approval, engineering consultation, and inspection scheduling at multiple project stages.

What materials are needed for basic interior wall reconstruction?

Basic interior wall reconstruction requires framing lumber (2×4 studs, top and bottom plates), 1/2-inch drywall panels, joint compound, paper tape, insulation, fasteners, primer, and paint. Additional materials include corner bead, baseboard trim, and specialty items like moisture-resistant drywall for bathrooms or fire-rated materials for attached garages.

Do I need a permit to remove or rebuild an interior wall?

You need a permit to remove or rebuild an interior wall when the work involves load-bearing modifications, electrical or plumbing relocation, or structural framing changes. Non-structural partition wall repairs typically don’t require permits, but local building codes vary, so check with your municipal building department before starting work.

How do I know if my wall is load-bearing?

You can identify a load-bearing wall by checking if ceiling joists or roof structures rest on it from the attic, examining if the wall runs perpendicular to floor joists, or confirming it aligns with exterior foundation walls. Central walls dividing front and rear rooms typically support floors above, and you should assume all walls are load-bearing until a structural engineer confirms otherwise.

What safety equipment is required for wall demolition?

Wall demolition requires N95 or P100 respirators for dust protection, safety glasses, heavy gloves, and hearing protection during power tool use. Homes built before 1980 need asbestos testing before disturbing plaster materials, and pre-1978 homes require lead-safe work practices when painted surfaces are involved.

How much does it cost to hire a contractor for wall reconstruction?

Hiring a contractor for wall reconstruction costs $800 to $1,500 in labor for a standard partition wall, with total project costs ranging from $1,000 to $3,000 including materials. Load-bearing wall removal with beam installation costs $3,500 to $10,000 due to structural engineering fees ($500-$1,500) and specialized labor requirements.

What’s the difference between drywall repair and full wall reconstruction?

Drywall repair involves patching existing materials for small holes, hairline cracks, or surface-only damage, while full wall reconstruction requires complete removal and rebuilding when water damage affects multiple stud bays, mold grows behind walls, or structural compromise occurs. Repair works for cosmetic issues; reconstruction addresses material failure or safety concerns.

How to Test for Electrical Hazards Safely at Home

0

Think flipping the breaker makes a circuit safe?
A lot of people do that, and that’s how hidden voltage ends up hurting someone.
Before you touch a panel, outlet, or wire, assume it’s live until you prove otherwise.
This guide walks you step by step through what to check, how to verify your tester using the live-dead-live method (check a known live source, test the circuit, recheck the known live), when to use a non-contact tester versus a multimeter, and which PPE and tool checks actually keep you safe.
No guesswork. Just clear steps you can follow at home.

Essential Methods for Testing Electrical Hazards Safely

N7yocwWTQKuRTG6l3QT_3g

Testing for electrical hazards starts with knowing what you’re hunting: exposed wires, trashed insulation, overheated connections, moisture creeping near devices, and circuits carrying voltage where there shouldn’t be any. Before you put your hands anywhere near a panel or outlet, assume everything’s live until you prove otherwise. That mindset keeps you breathing. The process begins with a visual once-over, then moves to tool verification, and ends with direct testing using calibrated instruments that match the voltage class you’re checking.

OSHA 1910.333(b) and NFPA 70E standards require that circuits be placed in an electrically safe condition before work starts. That means more than just flipping a breaker. It means verifying absence of voltage with a tester you know actually works. The live-dead-live method is standard practice: verify your tester on a known live source, test the circuit you just killed, then verify the tester again on that same live source. If the tester quits at any point, you stop. Non-contact voltage detectors help with initial screening, but they can miss voltage in shielded cables, metal enclosures, or when you’re standing on an insulated surface. Direct contact testing with a digital multimeter or fused electronic tester is what confirms a circuit is truly dead.

Here are the five core checks every electrical hazard test needs to include:

  • Visual inspection for exposed wiring, burn marks, discoloration, moisture, and damaged insulation
  • Non-contact voltage detection to screen for presence of voltage before touching conductors
  • Direct voltage measurement phase to neutral and phase to ground using a calibrated multimeter
  • Ground continuity test to verify protective conductors are intact and low resistance
  • Tool verification before and after testing to confirm the instrument is functioning correctly

Electrical Hazard Identification Techniques for Home and Workplace Systems

6PiITf1WTiSpNtBr2MX4Eg

Electrical hazards show themselves in predictable ways if you know where to look. Start at the panel. Check for scorched breaker slots, melted bus bars, loose wire terminations, and signs of overheating like discoloration or warped plastic. Move to outlets and switches. Look for melted face plates, loose devices that wobble in the box, and any scorch marks around screw terminals. Damaged insulation is one of the most common issues: cracked rubber, frayed cloth covering, or exposed copper at junction boxes. Moisture near electrical equipment is an immediate red flag, especially in basements, crawl spaces, and outdoor enclosures. Overloaded circuits often reveal themselves through repeatedly tripped breakers, warm outlet covers, or multiple high draw devices daisy chained on extension cords.

Improper splices and missing grounding conductors are harder to spot but just as dangerous. Look for wire nuts that are loose or cracked, tape only splices hidden in walls, and any junction that isn’t enclosed in a code compliant box. Grounding issues show up as two prong outlets in older homes, missing ground wires at receptacles, or green grounding screws left floating. Loose connections create heat and resistance. Check for blackened wire ends, discolored terminals, and any junction where the insulation has pulled back from the connector. If you smell burning plastic or see smoke residue inside a panel, that circuit has already failed partway and needs immediate shutdown and inspection.

Common hazard indicators to inspect for include:

  • Exposed or frayed conductors at outlets, switches, and junction boxes
  • Burn marks, melted insulation, or discolored device covers
  • Overloaded panels with multiple breakers tripped or warm to the touch
  • Moisture intrusion, corrosion, or rust on electrical components
  • Missing or improperly connected grounding conductors
  • Loose wire terminations that move when lightly tugged

Safe Electrical Testing Procedures and Required Protective Measures

x5fj3Z3BRsOFA1edS-lQvQ

Personal protective equipment isn’t optional when testing electrical systems. You wear PPE until the circuit is proven de-energized. No shortcuts. NFPA 70E requires that PPE match the incident energy and arc flash boundary of the equipment you’re testing. For most residential panels and low voltage branch circuits, that means insulated gloves rated for the system voltage, safety glasses with side shields, and long sleeves made from natural fibers or arc rated fabric. If you’re working on energized panels or testing circuits above 240 volts, you need arc rated clothing with a minimum rating of 8 cal/cm² and a face shield. Dielectric footwear and insulated tools add layers of protection, especially when standing on damp concrete or working near grounded metal surfaces.

OSHA standards emphasize shock and arc flash boundaries. Imaginary lines that define how close you can safely approach energized parts. For low voltage systems under 50 volts, the risk is lower but still present. Above that, you stay outside the limited approach boundary unless you’re qualified, authorized, and wearing the correct PPE. The safest assumption is that every conductor is live until your tester proves otherwise. That means gloves go on before you open a panel cover, and they stay on until lockout/tagout is complete and absence of voltage is verified. If you feel uncertain about the voltage level or the condition of the equipment, stop and call a licensed electrician. Testing electrical hazards is not the time to learn by doing.

Required PPE for High and Low Voltage Testing

Insulated gloves are the first line of defense. Use gloves rated for the highest voltage present in the system. Class 00 gloves for up to 500 volts AC, Class 0 for up to 1,000 volts. Inspect gloves before every use: look for cuts, punctures, ozone cracking, and any sign of wear. Arc rated clothing becomes mandatory when testing energized equipment that could produce an arc flash. For low risk tasks like testing a residential panel with a multimeter, a minimum arc rating of 8 cal/cm² is common. Higher risk work, like fault finding on commercial distribution panels, requires higher ratings and a full face shield. Dielectric footwear provides an extra ground barrier, especially useful when working in damp environments. Safety glasses with side shields protect against arc flash and debris. Hard hats are required in commercial and industrial settings where overhead hazards exist. All PPE must be inspected, maintained, and replaced when damaged. Worn out gloves or faded arc rated clothing won’t protect you when the fault happens.

Using Non-Contact Voltage Testers for Initial Hazard Screening

80eaz2CvTRWuNNNqLjIH4g

Non-contact voltage testers detect the electric field around energized conductors without requiring direct contact. You hold the tip near a wire, outlet slot, or device terminal, and the tester beeps or lights up when it senses voltage. These tools are excellent for initial screening. Walk up to a panel, wave the tester near breaker terminals, and get a quick sense of what’s live. They work best on low voltage systems where you’re checking phase to ground presence, like household 120 volt circuits. For medium and high voltage systems, non-contact testers are the preferred first check because they keep you at a safer distance from exposed conductors.

But non-contact testers have real limitations. They can give false negatives, meaning they fail to detect voltage that’s actually present, in several common situations: shielded cables where the outer jacket blocks the electric field, metal enclosures that act as Faraday cages, partially buried conduit, or when you’re standing on an insulated surface and not providing a ground reference. If the test point is in contact with grounded metal, the tester may not pick up the voltage. That’s why non-contact detection is never enough by itself. You use it to screen, then follow up with direct contact testing using a multimeter or fused electronic tester to confirm absence of voltage. Relying solely on a non-contact tester for safety verification has led to injuries and fatalities. “Dead until proven dead” requires touching the conductors with calibrated probes.

Use Case Reliability Notes
Initial screening of exposed panel terminals and outlet slots Reliable for quick detection; good first step before opening enclosures
Testing shielded cables or wiring inside metal conduit Unreliable; shielding blocks electric field and can cause false negatives
Confirming absence of voltage before touching conductors Not acceptable; must follow with direct contact multimeter or tester
Tracing circuits and identifying energized wires in junction boxes Useful, but verify findings with a second method before making contact

Multimeter Testing Techniques for Accurate Voltage and Continuity Checks

lST3EPKxQpiTyOMQa5YboA

Digital multimeters give you precise voltage, resistance, and continuity readings, but only if you use them correctly. The most dangerous mistake is selecting the wrong function or range. Switch the meter to amps instead of volts, and when you touch the probes to a live circuit, you create a dead short through the meter’s low resistance current path. That arc can be fatal. Newer auto ranging multimeters reduce that risk, but older models require you to manually set the range. If you guess wrong, the meter won’t display the voltage. It’ll just show zero, making you think the circuit is dead when it isn’t. Always start on the highest voltage range, then step down if needed. True RMS meters are better for testing circuits with non-sinusoidal loads like LED drivers and variable speed motors, because they measure the actual heating effect of the current rather than assuming a perfect sine wave.

Before you test anything, inspect your multimeter and test leads. Look for cracked insulation, melted or discolored plastic, bent probe tips, and loose connections where the leads plug into the meter body. Then verify the leads with a continuity test: set the meter to ohms (Ω), touch the probe tips together, and check the reading. It should be at or below 0.3 Ω. Anything higher means the leads have excessive resistance from corrosion, internal breaks, or worn contacts, and you need to replace them. Test leads are cheap and should be swapped out annually as a standard practice. Once the leads pass, verify the meter itself on a known live source. Plug a lamp into an outlet, confirm it lights, then measure that outlet with your multimeter. You should read around 120 volts ±5% for a standard U.S. residential circuit. That’s your live reference for the live-dead-live sequence.

Here’s the correct order for multimeter testing on a de-energized circuit:

  1. Verify the multimeter on a known live outlet or panel (expect ~120 V or ~240 V depending on circuit type).
  2. Test the target circuit phase to neutral and phase to ground; both readings should be zero volts.
  3. Test neutral to ground; this should also read zero volts unless there’s a fault or improper bonding.
  4. Switch to continuity or low resistance mode and verify ground path continuity from device to panel ground bus (expect near 0 Ω).
  5. Re-verify the multimeter on the same known live source to confirm the meter still works. If it now reads zero, the meter failed mid-test and your dead reading is invalid.

Advanced Electrical Hazard Testing: Insulation, Grounding, Impedance, and Fault Detection

1mCEn1swSKCoxUVQ2J-uGQ

Insulation resistance testing uses a megger (insulation tester) to apply a high DC voltage, typically 250, 500, or 1,000 volts, between conductors and ground, then measures how much current leaks through the insulation. Healthy low voltage wiring should show insulation resistance greater than 1 megohm (MΩ). Readings below that threshold indicate degraded insulation from moisture, age, rodent damage, or thermal stress. You perform this test only on de-energized circuits, after lockout/tagout is complete and all connected devices are disconnected or isolated. Wet insulation, even if it looks intact, can drop resistance into the kilohm range, creating shock and fire risk once the circuit is re-energized.

Ground resistance testing measures how well your grounding electrode system connects to earth. Code typically requires ground rod resistance below 25 ohms, and many engineers target below 5 ohms for critical systems. You use a three pole ground tester with two auxiliary stakes driven into the soil at specific distances, or a clamp on ground tester that measures resistance without disconnecting the ground. High ground resistance limits fault current, which can prevent breakers from tripping during a ground fault, leaving exposed metal energized. Loop impedance testing goes further by measuring the total resistance of the fault path from the phase conductor, through the protective device, and back via the grounding system. High loop impedance means slow or failed breaker operation during a fault. Neutral ground bonding issues, like improper bonding at subpanels or missing bonds at the service entrance, create shock hazards and are detected by measuring voltage between neutral and ground under load. Correct bonding shows near zero voltage; incorrect bonding can show several volts or fluctuating readings.

Interpreting Common Fault Readings

Low megohm readings, anything significantly below 1 MΩ on a standard branch circuit, point to insulation breakdown. Common causes include water intrusion at outdoor boxes, cables run through damp crawl spaces, overheating from overloaded circuits, and physical damage like nails driven through Romex. The fix is usually replacing the damaged section of cable, drying out the enclosure, and re-testing before re-energizing. High ground resistance, above 25 ohms, often comes from poor electrode contact with soil, corroded connections at the ground rod, or using a single rod in very dry or rocky soil. Adding a second ground rod in parallel or treating the soil with conductive material can bring resistance down.

Incorrect neutral ground bonding is more subtle but just as dangerous. At the main service panel, neutral and ground must be bonded together. That’s code. But at subpanels and branch devices, neutral and ground must remain separate. If you measure continuity or low resistance between neutral and ground at a subpanel, someone installed an illegal bond, and fault current can flow on grounding conductors and metal enclosures. High loop impedance shows up as longer than expected breaker trip times during fault tests or as inability to trip at all on ground faults. That usually means loose connections, undersized grounding conductors, or long circuit runs without adequate wire gauge. All of these faults require immediate correction by a licensed electrician before the circuit is returned to service.

Lockout/Tagout and Safe Isolation Procedures Before Hazard Testing

CSmQtJybRa2VGKsJiOrgLQ

Lockout/tagout prevents circuits from being re-energized while you’re testing or working on them. OSHA estimates that proper LOTO procedures prevent around 120 fatalities and 50,000 injuries every year in the United States. The core idea is simple: you physically disconnect the energy source, apply a lock that only you control, and tag the disconnect with your name and the date so everyone knows the circuit is out of service. No lock means someone else can flip that breaker back on while your hands are in the panel. No tag means the next shift might not know why the circuit is off and restore power without checking.

LOTO isn’t just for maintenance crews. If you’re testing a residential circuit and need to verify it’s de-energized, you follow a simplified version of the same process: turn off the breaker, verify with a tester, and either lock the panel or stay in direct control of it until testing is complete. For workplace environments, OSHA’s lockout/tagout electrical safety standards require a formal written procedure and trained personnel. The isolation sequence protects you from accidental re-energization, backfeeds from alternate sources, and stored energy in capacitors or long cable runs that can hold a charge even after the breaker opens.

The standard isolation sequence before any electrical hazard testing includes these five steps:

  1. Identify all energy sources and disconnect points for the circuit or equipment you’re testing. Check for backfeeds, parallel feeds, and alternate sources like generators or UPS systems.
  2. Notify all affected personnel that the circuit will be de-energized and locked out; post signs if the work area is accessible to others.
  3. Isolate the energy by opening the circuit breaker, pulling fuses, or opening a disconnect switch; for critical systems, also open upstream disconnects.
  4. Apply a personal lock to the disconnect device using a lockout hasp if multiple workers are involved, and attach a tag with your name, date, and reason for lockout.
  5. Verify the circuit is de-energized using a voltage tester on all conductors, then release any stored energy by discharging capacitors, grounding long cable runs, and confirming zero voltage before beginning work.

Verifying Absence of Voltage: Applying the Live-Dead-Live Method

orRDxfE3QiuH8O0-umCVnQ

The live-dead-live method is the only reliable way to confirm a circuit is truly de-energized. OSHA requires this procedure for any work on circuits above 600 volts, and NFPA 70E extends the requirement to all voltages in section 120.1(5). The sequence is straightforward: you verify your voltage tester works by testing a known live source, then you test the circuit you just de-energized, and finally you re-verify the tester on the same known live source. If the tester fails either verification step, you can’t trust the dead reading you got in the middle. This method is explained in detail in Fluke’s guide to preparing for absence of voltage testing.

The known live source must match the voltage magnitude and type, AC or DC, of the circuit you’re testing. If you’re verifying a 240 volt dryer circuit is dead, test your meter on a 240 volt range using a known live 240 volt outlet first. Using a 120 volt outlet to verify your meter, then testing a 240 volt circuit, doesn’t prove the meter’s 240 volt range works. After you confirm zero volts on the target circuit, go back to that same live source and test again. If the meter now reads zero on a source that’s definitely live, the meter failed during your test. Battery died, fuse blew, lead broke. And you have no idea whether the circuit you thought was dead actually is.

Step Purpose
Verify tester on known live source (before testing circuit) Confirms the voltage tester, test leads, and meter function are working correctly before you rely on them for safety decisions
Test the target circuit for absence of voltage at all points Measures voltage phase to phase, phase to neutral, and phase to ground to confirm the circuit is de-energized and safe to touch
Re-verify tester on the same known live source (after testing circuit) Proves the tester still works after the circuit test; detects meter or lead failure that would invalidate the dead reading

Electrical Testing Tools: Selection, Calibration, and Maintenance

Gljv0kubTgicgjNSOsrQOg

Choosing the right electrical tester starts with matching the tool’s category (CAT) rating to the circuit you’re testing. CAT III meters are rated for fixed wiring and distribution panels inside buildings, most residential and light commercial testing. CAT IV meters are built for service entrances, utility connections, and outdoor overhead lines where transient voltages and fault currents are higher. Using a CAT II meter (designed for portable appliances and low energy circuits) on a main panel is dangerous; the meter’s internal protection can’t handle the energy, and it may explode during a fault. Always check the voltage rating too. A CAT III 300V meter is not safe for testing 480 volt panels.

True RMS capability is essential if you’re testing modern homes with LED lighting, variable speed HVAC, and other non-linear loads. Standard averaging meters assume a perfect sine wave and give incorrect readings on distorted waveforms, sometimes underestimating voltage by 10 percent or more. Fused test leads add a critical layer of protection. If you accidentally create a short, the fuse blows before the arc gets out of control. Replace fused leads annually as a standard practice, because the wire inside fatigues with repeated flexing and temperature cycling. Calibration prevents false confidence: have your multimeter and specialized testers like meggars calibrated annually by a qualified lab, and keep records. A meter that reads zero on a live circuit because it’s out of calibration is worse than no meter at all.

When maintaining and selecting electrical test tools, always verify these four specs:

  • CAT rating and voltage class match the system being tested (CAT III for panels and fixed wiring, CAT IV for service entrances)
  • True RMS measurement for accurate readings on circuits with harmonic distortion and non-sinusoidal loads
  • Fused test leads with current limiting fuses rated for the meter’s category and maximum voltage
  • Current calibration date documented and within the recommended interval (typically 12 months for professional use)

Final Words

You kneel by the panel and see burn marks, so don’t guess, stop power if safe, apply lockout/tagout, and put on PPE. First actions: look for exposed wiring, use a non-contact tester for a quick scan, then use a verified DMM for voltage and continuity.

Remember the live-dead-live method: verify your tester on a known live source, test the circuit, then re-verify the tester. That’s how to test for electrical hazards and keep people and property safe. You’re doing the right thing.

FAQ

Q: What are the 7 electrical tests?

A: The common electrical tests are visual inspection, non-contact voltage detection, direct DMM voltage checks, continuity and ground-bond testing, insulation resistance (megger), loop impedance, and leakage-current measurement; exact list varies by job.

Q: What are the 5 main electrical hazards and what are the four types of electrical hazards?

A: The main electrical hazards are exposed conductors, damaged insulation, moisture intrusion, overloaded circuits, and loose or improper connections; they generally fall into shock, arc-flash, fire, and fault-pathway hazard types.

Flood Damaged Drywall Repair After Water Damage

0

If you’re staring at wet, sagging drywall after a flood, yeah, that’s scary. But here’s the truth most contractors won’t lead with: not all flood damaged drywall needs to be ripped out, and the stuff that does need replacement won’t fix itself by drying. This guide walks you through exactly when to patch, when to replace entire panels, and how to do the work safely so you’re not trapping mold or creating bigger problems three months from now. We’ll cover safety first, damage assessment, proper drying, removal, and installing replacement drywall that actually blends in and lasts.

Critical Safety Protocols Before Any Flood Repair Work

VQAu2LgmQHWAN5ViJDf_jw

Turn off electricity at the breaker box before you get anywhere near wet drywall, outlets, switches, or fixtures. Water conducts electricity. Touching a wet wall with live power behind it can shock or kill you.

Floodwater isn’t just wet. It’s contaminated. Even clean looking water carries bacteria, chemicals, and sewage residue once it’s been sitting in your home. Protective equipment isn’t optional. You’re dealing with materials that can make you sick, cause respiratory issues, or expose you to mold spores that started growing within the first 24 hours.

Wear an N95 or N100 respirator mask, not a dust mask. Rubber gloves, safety glasses, long sleeves, long pants, and sturdy closed toe shoes complete the minimum protection. Wet drywall crumbles, releases particles, and hides contamination you can’t see.

  1. Shut off electricity at the main breaker panel before entering rooms with standing water or wet walls. Never assume circuits are safe based on how they look.

  2. Wear an N95 or N100 respirator mask to protect your lungs from mold spores, dust, and airborne contaminants released when cutting or handling wet drywall.

  3. Put on rubber gloves, safety glasses, long sleeves, and sturdy shoes before touching any flood damaged materials to prevent skin contact with contaminated water residue.

  4. Open windows and set up fans for ventilation before starting demolition work to reduce airborne particle concentration and improve air quality during removal.

  5. Keep children and pets out of work areas until all damaged materials are removed, dried, sealed, and finished to prevent exposure to health hazards.

Assessing Flood Damage Severity and Repair Decisions

6SafO6YXTYKtXebyOFT0vw

Drywall is porous. It soaks up water like a sponge and starts breaking down fast. The gypsum core swells, the paper facing separates, and mold spores find a perfect growing environment within 24 to 48 hours. Assessing damage severity right away helps you decide if you’re patching, replacing panels, or calling professionals before things get worse.

Category 1 water from clean supply line breaks? DIY repair is usually safe after proper drying if the damaged area is under 10 square feet and shows no mold growth.

Category 2 water from washing machine overflow or dishwasher leaks requires thorough drying, disinfection, and mold resistant materials during replacement. Still possible for small areas under 10 square feet.

Category 3 water from sewage backup, contaminated floodwater, or river flooding requires professional remediation. Contaminated water carries pathogens that make DIY unsafe, and improper cleanup creates long term health risks.

Flood events affecting multiple rooms or floors need professional assessment to evaluate hidden damage behind walls, under flooring, and within structural cavities you can’t access. Any situation where the water source is unclear means professionals need to inspect before you repair anything. If you can’t identify where water entered or if moisture keeps appearing after you think it’s fixed, don’t move forward on your own.

Black mold or widespread mold growth, those black, green, or fuzzy patches, indicate established colonies that require containment and specialized removal beyond basic cleaning.

Look at the drywall. If it sags when you press on it, crumbles to the touch, or feels soft and spongy, it’s done. Replacement is the only option. Discoloration, staining, and bubbling paint are visible markers, but the real test is structural integrity. Heavily saturated drywall loses strength and won’t return to normal even after drying.

Small isolated spots under 8 inches in diameter with only surface damage can be patched if the drywall dried quickly and remains firm. Anything larger than 8 inches across, or scattered damage in multiple areas, means replacing entire panels makes more sense than trying to patch a failing surface. When removing damaged sections, cut at least 2 inches beyond visible damage on all sides. You want to remove all compromised material, not just what looks bad. In basement flooding situations, mark and cut 6 inches above the waterline around the room to ensure you’re removing everything that absorbed contaminated water.

Small isolated damage under 8 inches with surface staining only? Patch if drywall is dry, firm, and shows no sagging or soft spots.

Damage between 8 inches and 10 square feet affecting one area means replace the damaged panel section rather than attempting large patches that won’t blend or hold up long term.

Scattered damage over 8 inches in multiple spots across the same wall calls for replacing entire panels to avoid a patchwork wall that shows seams and texture mismatches.

Basement flooding with visible waterline means cut and remove drywall 6 inches above the waterline around the entire affected room perimeter.

Sagging, crumbling, or soft drywall regardless of size needs replacement immediately. Structural integrity is gone and the material will fail even if it dries.

Active mold growth over 10 square feet or black, green, fuzzy patches means call professionals immediately for containment and remediation before attempting any repairs.

Visible stud damage, insulation saturation, or framing concerns behind drywall require professional inspection to assess structural elements before proceeding with cosmetic drywall replacement.

Stopping Water Sources and Drying Flooded Walls

Na_QoDKFRK-hNXJZCLjNMg

First, find the water source and stop it. Until the leak is fixed, the pipe is capped, or the exterior breach is sealed, drying and repairing drywall is pointless. Water will keep coming back, keep saturating materials, and keep feeding mold growth. Fix the cause, then fix the damage.

Dry affected areas for at least 48 to 72 hours before starting repairs. Mold develops within 24 to 48 hours of water exposure, and installing new drywall over damp framing or insulation traps moisture and guarantees problems. Use a moisture meter to confirm readings below 15% moisture content before you proceed. Set up fans aimed at wall cavities, run dehumidifiers to pull humidity out of the air, and open windows for cross ventilation when outdoor conditions allow. The goal is removing moisture from wall cavities, studs, insulation, and subfloor, not just drying the surface.

Drying Method Duration Best For
High velocity fans aimed at exposed wall cavities 48 to 72 hours continuous operation Increasing air circulation and evaporating surface moisture after drywall removal
Dehumidifiers running in enclosed spaces 48 to 72 hours, emptying collection tanks regularly Reducing indoor humidity levels and pulling moisture from air in closed rooms
Natural ventilation with open windows and doors 48 to 72 hours when outdoor humidity is below 60% Cross ventilation in mild, dry weather conditions with low outdoor humidity
Combination of fans, dehumidifiers, and ventilation 48 to 72 hours with moisture meter confirmation below 15% Maximum drying efficiency in most flood damage scenarios with saturated materials

Removing Water Damaged Drywall Sections Properly

1YnCNfpATZqey7qqZm4JyA

You’ll need a utility knife, a drywall saw, and a pry bar. If baseboards are in the way, remove them first. Trying to cut around them leaves jagged edges and makes installation harder later.

Mark your cutting lines with a pencil. Extend cuts at least 2 inches beyond visible damage on all sides. For basement flooding, mark 6 inches above the waterline around the room. Score the drywall face with the utility knife along marked lines, then use the drywall saw to cut through. The saw works better than a knife for long cuts and reduces dust compared to power tools. Cut to the center of the nearest wall stud on each side so you’ll have a solid fastening surface for new drywall.

  1. Remove baseboards and trim carefully with a pry bar to avoid damaging reusable pieces and to expose the bottom edge of drywall for clean cutting.

  2. Mark cutting lines with a pencil and straightedge at least 2 inches beyond visible damage, or 6 inches above waterline in flood situations, extending cuts to the center of wall studs.

  3. Score the drywall face deeply with a utility knife along marked lines to create a clean starting edge and reduce tearing during saw cuts.

  4. Cut through the drywall with a drywall saw following scored lines, cutting to stud centers for solid backing support on replacement panels.

  5. Pry out damaged sections carefully with a pry bar, removing fasteners and pulling drywall away from studs without damaging framing behind it.

  6. Remove and discard wet insulation from wall cavities and check for standing water, mold growth, or debris inside the wall before proceeding.

Inspect wall studs and framing once drywall is removed. Look for water staining, soft spots, mold growth, or structural damage. If studs show signs of rot or mold penetration, they’ll need treatment or replacement before installing new drywall. Wet insulation must be removed and replaced. It doesn’t dry properly and becomes a mold reservoir.

Installing Replacement Drywall After Flood Damage

T7OtlGe7SIyp_RiYxquqHQ

Use mold resistant drywall in flood prone areas. Standard drywall works for dry locations, but greenboard (moisture resistant) or purple board (mold resistant and moisture resistant) makes sense in basements, bathrooms, and anywhere flooding has happened before. Cement board is overkill for most wall repairs unless you’re tiling over it.

Measure the opening and cut replacement drywall to fit. A utility knife scores the face, then you snap the panel along the score line and cut the back paper. Test fit the piece before fastening. It should fit snug against studs without forcing or leaving gaps wider than 1/4 inch. Drywall that’s too tight will buckle. Drywall with big gaps creates weak seams that crack later.

Fasten the replacement panel with drywall screws every 6 to 8 inches along all edges where it meets stud backing. Screws should sink just below the drywall surface without breaking the paper facing. A dimple, not a tear. Drive screws into stud centers, not edges, and make sure every seam has solid wood backing behind it for support.

Drywall Type Moisture Resistance Best Application
Standard drywall (white or gray paper facing) None, absorbs moisture readily Dry living areas, bedrooms, and upper floors with no history of water intrusion
Greenboard (green paper facing) Moderate moisture resistance in paper and core Bathrooms, laundry rooms, and basements with occasional moisture exposure
Purple board (purple paper facing) High moisture and mold resistance in paper and treated core Flood prone basements, high humidity areas, and locations with previous water damage
Cement board (fiber cement core) Waterproof, does not absorb moisture Shower surrounds, tile backer, and areas with direct water contact

Finishing, Priming, and Painting Repaired Drywall

G1M7LfC2TiCozlawFjg1DQ

Finishing takes patience because each coat needs to dry completely before the next step. Rushing this part shows in the final result.

  1. Apply fiberglass mesh tape over all seams where new drywall meets existing walls, pressing it flat against the surface.

  2. Spread the first coat of joint compound over taped seams with a 6 inch drywall knife, embedding the tape and feathering edges outward.

  3. Let the first coat dry 24 hours in a well ventilated room before touching it or applying the second coat.

  4. Apply the second coat of joint compound with an 8 inch knife, extending coverage 2 inches wider than the first coat and feathering edges.

  5. Let the second coat dry 24 hours before proceeding to the third coat.

  6. Apply the third coat of joint compound with a 10 inch knife, feathering edges even wider for a smooth transition to existing wall surface.

  7. Let the third coat dry 24 hours before sanding.

  8. Sand dried compound smooth with 120 grit sandpaper on a sanding block, using light pressure and checking frequently to avoid over sanding.

  9. Remove loose or flaking paint around the repair area with a scraper, then sand the wall smooth to create a clean surface for primer.

  10. Apply oil based or shellac based stain blocking primer over the entire repair area to prevent tannin and mineral bleed through, allowing 2 to 4 hours drying time per manufacturer instructions, then apply a coat of mold resistant primer before painting.

Match existing wall texture before final painting. Smooth walls get sanded flat. Knockdown, orange peel, or other textures require matching with a spray texture product or hand tools. Practice on scrap drywall first if you’re unfamiliar with the texture pattern. Extend paint coverage at least 6 inches beyond the repair area to blend the finish with the existing wall. Apply two coats of matching paint, letting the first coat dry completely before applying the second. If you’re unsure of the paint color, take a paint chip from an inconspicuous area to a paint store for color matching.

Estimated Costs for Flood Drywall Repair Projects

FdEXRT6XRamNC9UwLOTEoA

DIY material costs for small repairs run low. One 4×8 sheet of standard drywall costs $10 to $15, a bucket of joint compound runs $15 to $20, primer costs $20 to $30 per gallon, and paint adds another $30 to $50 per gallon. Add taping supplies, sandpaper, and basic tools if you don’t already own them, and a small patch job stays under $100 in materials. Larger repairs requiring multiple sheets, mold resistant drywall, more compound, and additional primer push material costs to a few hundred dollars.

Professional service pricing depends on square footage, damage extent, and what’s involved beyond drywall replacement. Minor wall repairs handled by a contractor cost a few hundred dollars for labor and materials combined. Larger issues involving plumbing repairs, mold remediation, structural framing work, or multi room restoration run into the thousands. Mold remediation alone adds significant cost due to containment procedures, specialized cleaning, and disposal requirements.

Repair Scope DIY Material Cost Professional Cost Range
Small patch under 1 square foot (surface damage only) $30 to $75 $150 to $300 including labor
Moderate damage 10 to 50 square feet (panel replacement, no mold) $100 to $250 $500 to $1,500 including labor and finishing
Large area 50 to 100 square feet (multiple panels, minimal mold) $200 to $500 $1,500 to $3,500 including labor, materials, and mold treatment
Full room (all walls, extensive water exposure) $400 to $800 $3,000 to $6,000 including demolition, drying, and reconstruction
Multiple rooms with mold remediation and structural repairs Not recommended for DIY $5,000 to $15,000+ depending on extent and contamination level

When to Hire Professional Drywall Restoration Contractors

IjJ4ULBGSm2t452OMjp22g

The threshold where DIY becomes unsafe or impractical is clear: 10 square feet of damage, active mold growth, or contaminated water. Beyond that point, you’re dealing with health risks, structural concerns, or repair complexity that requires more than basic skills and tools. Trying to handle large scale flood damage without proper equipment, containment procedures, or mold remediation certification puts your health at risk and often creates bigger problems than you started with.

Professional water damage restoration contractors bring specialized moisture detection equipment, commercial grade dehumidifiers, mold containment systems, and the experience to assess hidden damage behind walls, under floors, and within structural cavities you can’t see. They know building codes, understand when structural elements need reinforcement, and coordinate the full sequence from water extraction through final finish work. When electrical systems are involved, they bring licensed electricians. When plumbing caused the flood, they handle that repair before touching drywall.

Category 3 contaminated water from sewage backup, river flooding, or storm surge requires professional remediation due to pathogen contamination and specialized disinfection procedures beyond DIY capabilities.

Black mold or active mold growth covering more than 10 square feet requires containment, proper removal procedures, and often air quality testing that DIY methods can’t provide safely.

Electrical system involvement, wet outlets, switches, fixtures, or wiring means licensed electricians must assess and repair electrical hazards before any drywall work begins.

Structural damage to wall studs, floor joists, or framing members requires structural assessment and potentially engineered repairs beyond cosmetic drywall replacement.

Persistent moisture after 72 hours of drying efforts indicates hidden water sources, trapped moisture, or conditions requiring professional moisture mapping and extraction equipment.

Unknown or inaccessible leak source? Professionals use thermal imaging and moisture detection to locate hidden leaks behind walls, under slabs, or in concealed plumbing.

Damage affecting multiple rooms or floors creates a scale of work requiring coordinated demolition, drying, and reconstruction that’s impractical for DIY timelines and equipment.

Insurance claim complexity requiring documented estimates and licensed contractor coordination matters because many insurers require professional assessment, detailed scopes, and licensed contractor invoices for claim approval.

Health concerns, respiratory issues, or occupants with mold sensitivity mean professional containment and removal protects vulnerable household members from exposure during remediation.

Filing Insurance Claims for Flood Drywall Damage

N6qF3f8KRVesV_3iqAAuQw

Insurance typically covers sudden events like burst pipes, storm damage, or appliance failures but excludes gradual damage from slow leaks, poor maintenance, or long term neglect. The difference matters when filing a claim. A pipe that bursts overnight gets covered. A pipe that’s been dripping for months and finally causes visible damage usually doesn’t. Read your policy to understand what’s covered before assuming flood damage qualifies.

Document everything immediately. Take photos and videos of all damaged areas before touching anything, including wide shots showing room context and close ups of specific damage. Written notes with dates, times, and observations help later when details blur together.

Coordinate between your insurance adjuster, restoration contractors, and repair timelines. Adjusters need to assess damage before major demolition happens, but waiting too long risks mold growth and secondary damage. Contractors can provide estimates and document damage for the adjuster while beginning emergency stabilization work like water extraction and drying. Clear communication keeps the claim moving and prevents disputes over what was damaged initially versus what worsened due to delays.

  1. Notify your insurance company immediately after discovering flood damage, providing basic details about the water source, affected areas, and approximate extent of damage.

  2. Document all damage with photos and videos before beginning cleanup or repairs, capturing wide angle room views and detailed close ups of every damaged surface.

  3. Write detailed notes describing when you discovered damage, what caused it, and what actions you’ve taken to prevent further damage (water shutoff, emergency drying).

  4. Wait for adjuster visit before removing damaged materials unless immediate safety hazards exist (active mold, electrical hazards, structural collapse risk).

  5. Get written estimates from licensed contractors covering full scope of repairs including demolition, drying, reconstruction, and finishing to compare against adjuster assessments.

  6. Keep receipts for all emergency measures including equipment rentals, temporary repairs, hotel stays if displacement occurs, and mitigation efforts to include in claim documentation.

Preventing Future Drywall Water Damage After Repairs

J8UbGvj4Tq6X58Ba4iOdkw

Repair is only half the solution. Preventing future water damage protects your investment and avoids going through this process again. Most flood damage is preventable with regular maintenance, monitoring, and addressing small issues before they become big problems.

Prevention works as a multi layered approach. Plumbing failures, exterior water intrusion, appliance leaks, and condensation issues all threaten drywall differently. Address each potential source with specific preventive actions rather than hoping one fix covers everything.

Schedule annual plumbing inspections by a licensed plumber to identify deteriorating pipes, loose connections, corrosion, and early leak signs before failures occur.

Clean gutters and downspouts twice yearly (spring and fall) to prevent overflow that saturates exterior walls and seeps into basements or crawl spaces.

Install water leak detectors behind washing machines, dishwashers, water heaters, and under sinks to alert you immediately when small leaks start before they cause visible damage.

Insulate exposed pipes in unheated spaces (crawl spaces, attics, exterior walls) to prevent freezing and bursting during cold weather.

Test sump pumps quarterly by pouring water into the pit to confirm activation, and install battery backup systems to prevent basement flooding during power outages.

Seal window and door frames with caulk and weatherstripping to prevent rain intrusion during storms and reduce condensation from temperature differentials.

Improve grading around foundation so ground slopes away from the house at least 6 inches over 10 feet to direct surface water away from basement walls.

Replace washing machine hoses every 5 years and dishwasher supply lines every 7 years regardless of visible condition to prevent age related failures.

Maintain HVAC systems with annual service including drain line clearing, condensate pan inspection, and ductwork checks to prevent overflow and condensation damage.

Monitor indoor humidity levels with a hygrometer, keeping levels between 30% and 50% to prevent condensation on walls and reduce conditions that support mold growth.

Final Words

Flood damaged drywall repair starts with safety and ends with prevention.

Shut off power, assess contamination level, dry everything completely, and remove damaged sections beyond the visible waterline. Replace with mold-resistant materials when flooding is a risk.

Finish carefully with proper taping, stain-blocking primer, and paint that blends into the existing wall.

Know when to call professionals, especially with Category 3 water, active mold over 10 square feet, or structural concerns. Document everything for insurance if the damage qualifies.

Once repairs are complete, protect your work with regular plumbing checks, leak detectors, and smart moisture control. Prevention keeps you from doing this twice.

FAQ

Can water damaged drywall be repaired?

Water damaged drywall can be repaired if the damage is minor and the material dried quickly without severe saturation or contamination. Small surface damage under 8 inches in diameter can be patched, while heavily saturated or crumbling drywall must be completely replaced to prevent structural failure and mold growth.

How do you patch flood cuts to drywall?

Flood cuts to drywall are patched by cutting replacement drywall to fit the removed section, fastening it to wall studs with screws every 6 to 8 inches, taping seams with joint compound, applying three coats of mud with 24-hour drying between each, sanding smooth, and priming before painting.

How much does it cost to repair water damaged drywall?

Water damaged drywall repair costs range from a few hundred dollars for small DIY patches under 1 square foot to several thousand dollars for professional repairs involving multiple rooms, mold remediation, or structural damage. Material costs for DIY projects include drywall sheets, joint compound, primer, paint, and basic tools.

Do you have to replace drywall after a flood?

You have to replace drywall after a flood if the material is heavily saturated, sagging, crumbling to the touch, or exposed to contaminated Category 3 water like sewage. Slightly damp drywall that dries quickly within 48-72 hours and shows no structural compromise may be salvageable without replacement.

What are the safety precautions before repairing flood damaged drywall?

Safety precautions before repairing flood damaged drywall include shutting off electricity at the breaker box, wearing N95 or N100 respirator masks, using rubber gloves and safety glasses, and ensuring proper ventilation. These steps protect against electrical hazards, contaminated floodwater exposure, and respiratory issues from mold or airborne particles.

How long does drywall need to dry before repair?

Drywall needs to dry for at least 48 to 72 hours before repair work begins to prevent mold growth and ensure structural stability. Use moisture meters to confirm readings below 15 percent moisture content before installing replacement material, as mold can develop within 24 to 48 hours of water exposure.

What type of drywall should be used after flood damage?

The type of drywall used after flood damage should be mold-resistant or moisture-resistant material like purple board or greenboard in flood-prone areas. Standard drywall works for low-risk locations, while cement board provides maximum protection in high-moisture environments like basements or areas with recurring water exposure.

When should you call a professional for water damaged drywall?

You should call a professional for water damaged drywall when damage exceeds 10 square feet, shows active mold growth with black or green patches, involves Category 3 contaminated water, affects electrical systems, or persists across multiple rooms. Structural damage, unknown leak sources, and moisture remaining after 72 hours also require professional intervention.

How do you prevent mold growth after drywall water damage?

Preventing mold growth after drywall water damage requires drying affected areas within 24 to 48 hours, using dehumidifiers and fans for air circulation, removing all saturated material, applying mold-resistant primer before painting, and maintaining proper ventilation. Regular moisture monitoring and fixing water sources immediately also prevent future growth.

Will insurance cover flood damaged drywall repair?

Insurance will cover flood damaged drywall repair for sudden events like burst pipes or storm damage but typically excludes gradual damage from poor maintenance or long-term leaks. Document damage immediately with photos and written assessments, notify your insurer quickly, and coordinate with adjusters and contractors for claim approval and repair timelines.

Roof Tarp Wind Resistance: Best Materials and Securing Methods

0

Think a tarp will hold in a storm? Think again—basic lightweight poly usually fails at 25 to 35 mph.
When a tarp peels off, rain soaks drywall, warps trim, and gives mold a place to start.
This post cuts straight to what works: which materials (heavy vinyl, canvas, reinforced poly) resist uplift, and which fastening steps (rope-lined hems, furring strips, sandbags, cross-ties, reinforced grommets) actually keep a tarp on the roof.
You’ll get clear, practical steps to reduce damage now and make repairs easier later.

Understanding Wind Resistance Performance of Roof Tarps

RtrbRJwWQNOUI1QyHpWrfQ

Your basic lightweight poly tarp starts failing when sustained winds hit 25 to 35 mph. Heavy-duty vinyl or canvas can push that to 45 or 55 mph if you install it right. Commercial-grade reinforced tarps handle 50 to 60 mph, and when professionals install them, you’re looking at effective wind tolerance up to 70 or 80 mph. Those numbers are for sustained speeds, not gusts. Actual performance depends on how you attach it, what your roof pitch looks like, and what the terrain does to the wind around your house. A tarp rated for moderate wind will rip or lift away if you skimp on anchors or don’t reinforce the edges properly.

Material thickness matters. A 6-mil poly tarp tears under moderate gusts. 12-mil and 16-mil versions do better but still fail under sustained heavy wind. Heavy-duty tarps at 20 mils or higher give you the best temporary protection during storms. Thickness gets measured in mils (thousandths of an inch) or ounces per square yard for canvas and woven stuff. Higher numbers mean more puncture and tear resistance.

Reinforced edges, rope-lined hems, and grommets spaced about every 18 inches reduce tear-out and uplift where you attach things. A lightweight tarp with weak grommets will rip at the holes before the material itself tears. Reinforced grommets and double-stitched hems spread the load more evenly across the fabric, preventing isolated failures when wind pressure spikes. Tarps without edge reinforcement will balloon, flutter, and eventually peel away from anchor points even in moderate winds.

Material Strength Factors That Influence Roof Tarp Wind Resistance

8dX0qLT9Sg-d-mWGq1GuMQ

Heavy-duty vinyl gives you the best combo of tear resistance and complete waterproofing. That’s why it’s the go-to for emergency roof protection. Canvas provides high tensile strength and breathability but isn’t fully waterproof, so it works better when some moisture permeability is acceptable. Reinforced polyethylene costs less for short-term jobs and performs okay in moderate conditions, but it degrades faster under prolonged sun and wind than vinyl does.

Denier ratings describe fiber thickness in woven tarps like canvas and poly fabrics. Higher denier means thicker, stronger fibers that resist tearing and abrasion. Weight ratings, usually in ounces per square yard, reflect overall density and durability. Polyurethane or vinyl coatings applied to base fabrics improve waterproofing and UV resistance without adding much weight.

Core strength characteristics that determine wind performance:

Rope-reinforced hems create continuous edge strength and prevent tearing at anchor points under tension.

Reinforced corner patches distribute load at high-stress zones where wind uplift concentrates.

UV-resistant coatings prevent material degradation that leads to cracking and tearing after weeks of sun exposure.

Grommets set in reinforced backing plates reduce the chance of tear-out when rope or straps pull against anchor points.

Laminated or woven construction increases puncture resistance compared with single-layer extruded plastic sheeting.

Installation Techniques That Improve Roof Tarp Wind Resistance

4TbZ4tGdQd-XZ_FMhjK_4w

Extend the tarp at least 4 feet beyond the damaged area on all sides. That provides enough overlap for secure attachment and reduces water intrusion at the edges. Perimeter attachment points should be spaced every 2 to 3 feet to create a continuous hold along the entire edge. That prevents wind from lifting the tarp at gaps between anchors. Concrete blocks placed every 4 to 6 feet along the perimeter provide distributed weight, and sandbags weighing 25 to 50 pounds each add conforming ballast that adjusts to roof contours.

Use screws with 2- to 3-inch-diameter washers to spread the load across the tarp material and reduce tear-out risk. Furring strips (wood or metal) secured through the tarp and into solid roof decking create continuous attachment lines when you drive fasteners every 6 to 8 inches along the strip. Don’t use oversized tarps that create excessive sail area. Always fold tarp edges to create double-thickness barriers under weights and anchors. Triangular reinforcement patches cut from excess tarp material and bonded with waterproof adhesive at corners add strength where uplift forces concentrate.

Step-by-step anchoring and tensioning process:

Secure all four corners first with weighted sandbags or mechanical anchors to establish the tarp footprint and prevent shifting.

Attach perimeter edges every 2 to 3 feet using rope threaded through grommets, tarp clips with stakes, or furring strips with fasteners.

Install cross-ties in a crisscross pattern from corner to corner to reduce billowing and distribute tension across the entire tarp surface.

Add supplemental weights along all edges, spacing sandbags or blocks every 4 to 6 feet and concentrating extra weight at corners.

Apply tensioning using rope and bungee combinations to maintain consistent pressure without overtightening, which creates stress points.

Seal overlaps and seams with professional-grade waterproof tape and verify that no wrinkles or air pockets remain that could catch wind.

Roof Tarp Wind Uplift Forces and How to Reduce Them

4ty7dInDQECGPo5Bmqj28g

Wind flowing over a roof creates higher pressure underneath a tarp than above it. That generates uplift that pulls the tarp away from the surface. Steep roof pitches amplify this effect because wind accelerates as it moves up the slope, increasing the pressure differential. Two-story structures experience wind speeds about 15 to 20 percent higher than ground-level measurements, so tarps installed on upper floors face greater uplift forces. Complex roof geometries with valleys, dormers, and multiple slopes create turbulent airflow that concentrates uplift at specific points rather than distributing forces evenly.

Single-point anchors fail under gusts because all the wind load transfers to one fastener or weight, exceeding the holding capacity of the tarp material or the anchor itself. Cross-tie rope patterns, multiple attachment points spaced closely along edges, and weighted perimeter edges all work together to spread uplift forces across many anchors. Using a combination of sandbags, mechanical fasteners, and continuous furring strips creates redundant systems. If one anchor point fails, others absorb the load without allowing the entire tarp to lift away.

Roof Condition Wind Effect Recommended Mitigation
Steep pitch (6:12 or greater) Increased uplift and acceleration of airflow Use heavier tarps, add fasteners every 12 inches along edges, apply furring strips
Two-story or elevated Wind speeds 15–20% higher than ground level Increase anchor weights by 20%, add cross-ties, use mechanical fasteners
Complex geometry (valleys, dormers) Turbulence concentrates uplift at corners and transitions Install triangular corner patches, double-weight corners, seal all seams
Open site with no wind barriers Sustained high winds without turbulence reduction Combine sandbags + rope systems + mechanical anchors for layered redundancy

Preventing a Roof Tarp from Blowing Away During Storms

VL_hMIomT6GOVEiftjRY7Q

Always secure the windward edge first to prevent the tarp from acting as a sail during installation. If you anchor the leeward edge before the windward side, wind can catch underneath and lift the entire tarp, making it impossible to control. Working from the direction the wind is coming from lets you pin down the high-pressure side and progressively tension the tarp toward the downwind edge. Sandbags weighing 25 to 50 pounds each should be placed every 4 to 6 feet along all edges, with additional concentrated weight at corners where uplift forces peak.

Cross-tie rope patterns distribute tension across the tarp surface and prevent billowing. Thread heavy-duty braided nylon rope (minimum 3/8-inch diameter) through grommets in a diagonal crisscross layout, then tie each rope end to a solid anchor point such as a chimney, vent pipe, or mechanical fastener. Don’t leave wrinkles or air pockets in the tarp because these areas catch wind and create localized lifting forces that can tear the material or pull anchors loose. If gusts are expected, add elastic straps or bungee cords between rope tie-downs to absorb sudden pressure spikes without transferring the full load to rigid anchors.

Storm-specific securing strategies:

Double-layer corners by folding the tarp back on itself and placing weighted blocks on the folded section to create a thicker, stronger anchor zone.

Use tarp clips along edges to add attachment points between grommets, increasing the number of anchors without drilling or punching new holes.

Monitor weather forecasts and add supplemental weights or tighten ropes within 12 hours of predicted high winds.

Create windbreaks using portable barriers, lumber, or natural features like trees to reduce direct gust exposure on the tarp surface.

Inspect and retighten all ropes, straps, and fasteners immediately after the first gust event to correct any loosening before sustained winds arrive.

Common Roof Tarp Failures Under Wind and How to Avoid Them

PE2osgC1SaqzrE4riCgSYg

Inadequate continuous perimeter attachment is the most frequent failure mode. When anchors are spaced too far apart or skipped along sections of the edge, wind intrudes underneath and inflates the tarp like a balloon. Once the tarp lifts away from the roof surface, it flaps violently, tearing at anchor points and accelerating material fatigue. Improper tensioning (either overtightening that creates stress points or leaving the tarp too loose) also leads to failure. Overtightening concentrates load at individual fasteners, while loose tarps flutter and develop fatigue cracks along fold lines.

Insufficient overlap between adjacent tarp sections allows water and wind to penetrate seams. Seam separation occurs when overlapping edges aren’t bonded or weighted adequately. Wrinkles and air pockets act as wind scoops, catching gusts and generating localized uplift that pulls the tarp away from anchors. Loose or missing fasteners reduce the total holding capacity of the installation, and a single missing anchor can shift load to neighboring points, triggering a progressive failure as each anchor exceeds its design limit.

Root causes of blow-off incidents:

Gaps between perimeter anchors allowing wind intrusion underneath the tarp

Single-layer edges with no reinforcement patches at high-stress zones

Lack of cross-tie rope systems to distribute tension and prevent billowing

Installation during windy conditions that prevent proper tensioning and sealing

Safety Protocols When Securing a Wind-Resistant Roof Tarp

Z_OltVeiRp-qC6f7dEAmBA

Installation should only occur when sustained winds are below 15 mph and gusts remain under 25 mph. Working in higher wind creates loss-of-control hazards where partially secured tarps can act as sails, pulling workers off balance or tearing free and becoming airborne projectiles. Don’t attempt tarp installations within 12 hours of an approaching storm because changing weather can rapidly increase wind speeds and make safe completion impossible.

Use fall-protection harnesses rated for rooftop work and anchor them to solid structural points, not to the tarp or temporary fasteners. Wear non-slip footwear with aggressive tread to maintain traction on wet or debris-covered roof surfaces. Secure each tarp section fully (corners, edges, and cross-ties) before moving to the next section to prevent partially installed materials from catching wind and creating additional hazards.

Personal protective equipment and hazard-avoidance rules:

Fall-arrest harnesses with lanyards anchored to permanent roof structures or dedicated anchor points installed before tarp work begins.

Hard hats and safety glasses to protect against dropped tools, flying debris, or fasteners that slip during installation.

Two-person minimum crews so that one worker can stabilize the tarp while the other secures anchors, and both can assist in emergency situations.

Wind Resistance Longevity and Maintenance for Roof Tarps

Z0l4lShDQRySCrm4OoQoWg

Weekly inspections are recommended during extended tarp coverage to catch small problems before they turn into catastrophic failures. Check for frayed edges, enlarged grommets, seam separation, sagging sections, and water pooling that stretches the material. Standard polyethylene tarps exposed to outdoor conditions typically last 30 to 60 days before UV degradation and wind fatigue compromise strength. Heavy-duty vinyl and canvas tarps can remain effective for 90 to 120 days, depending on weather exposure and initial installation quality.

After each wind event exceeding 30 mph, inspect all anchor points, retighten ropes and straps, and verify that sandbags and weights haven’t shifted. Apply waterproof tape to reseal edges if the original seal has lifted, and add reinforcement patches over any small tears or punctures using material-specific repair kits. If brittleness, surface cracking, or color fading appears, the tarp has reached the end of its service life and should be replaced rather than repaired. Any tarp exposed to sustained winds above 40 mph should be inspected immediately and replaced if material fatigue is visible, even if no obvious tears have developed.

Proactive maintenance extends the functional lifespan of a tarp and reduces the risk of sudden failure during the next storm. Small tears grow rapidly under wind load, and loose fasteners allow progressive edge separation that can’t be corrected once significant tearing begins. Retightening anchors, adding supplemental weights, and resealing seams take minimal time compared with the cost and disruption of a tarp failure that exposes the interior to rain and wind damage.

Emergency Professional Tarping Services for Wind-Resistant Roof Protection

CDRmZzHXT5aOGiMEiU6GVQ

Professional emergency tarping services use commercial-grade materials and fastening systems engineered to achieve wind tolerance of 70 to 80 mph. That’s significantly higher than typical DIY installations that top out around 40 to 45 mph. Professionals document pre-installation roof conditions, damage extent, and installation methods with photographs and written reports. That creates the detailed records insurance adjusters need to process claims and approve coverage. Temporary roof covers must comply with local building codes, and professional installers understand permitting requirements, safety regulations, and liability considerations that homeowners may overlook.

Steep roofs, complex geometries with multiple slopes and valleys, and two-story or higher structures present fall hazards and installation challenges that exceed the capabilities of most homeowners. Professional crews carry fall-protection equipment, use scaffolding or lift systems for safe access, and complete installations faster because they work in trained teams with specialized tools. When sustained winds are forecast within 24 hours, professionals can mobilize quickly and secure tarps before conditions become unsafe, while DIY efforts often run out of daylight or face worsening weather mid-installation.

Key benefits of professional wind-resistant tarping:

Commercial materials with reinforced edges, heavy-duty grommets, and higher mil ratings than consumer tarps available at retail stores.

Engineered attachment systems using furring strips, mechanical fasteners, and tensioning hardware designed for sustained high wind loads.

Insurance documentation including damage photos, moisture readings, installation records, and scope-of-work reports that support claim approval and supplement requests.

Final Words

Light poly usually gives up around 25–35 mph, heavy-duty vinyl or canvas holds 45–60 mph, and commercial/pro installs can stand near 70–80 mph.

We covered what materials do, why thickness and reinforced hems matter, and how proper anchoring and ballast cut uplift. Check seams, grommets, and inspect after high winds.

If you need the tarp to actually stay put, focus on material choice, edge reinforcement, and the right installation. That’s how you improve roof tarp wind resistance and get back to normal with confidence.

FAQ

Q: How to keep a tarp from blowing in the wind?

A: Keeping a tarp from blowing in the wind requires securing the windward edge first, attaching the perimeter every 2–3 feet, adding sandbags or weights every 4–6 feet, and tensioning cross-ties.

Q: What is the best roofing material for high wind areas?

A: The best roofing material for high wind areas is metal or concrete tile for permanent roofs; for temporary covers, use commercial-grade reinforced vinyl tarps of 20+ mil thickness for stronger tear and wind resistance.

Q: Are tarps wind resistant?

A: Tarps are wind resistant depending on material and thickness: lightweight polyethylene often fails at 25–35 mph, heavy-duty vinyl or canvas holds around 45–55 mph, and commercial reinforced tarps withstand 50–60+ mph.

Q: How long will a 20 mil tarp last on a roof?

A: A 20 mil tarp will last about 90–120 days on a roof as a temporary cover, assuming regular inspections, edge resealing, and retightening of anchors to maintain wind resistance.

Safety Shoes Electrical Hazard: Protection Standards and Top Options

0

Ever thought about the ground beneath your feet being the difference between a close call and a deadly shock? When you’re standing near energized equipment, your footwear either blocks electrical current or lets it flow straight through your body to the ground. EH-rated safety shoes create that barrier with thick insulating soles tested to resist 18,000 volts, protecting electricians, maintenance workers, and anyone working around live circuits. But here’s what matters: EH protection only works in dry conditions, and it’s backup protection, not your primary defense against electrical hazards.

What Electrical Hazard Safety Shoes Are and How They Protect You

IcFEZE6wSYi45TFEgvERzA

EH-rated safety shoes protect against electrical shock by using thick insulating soles rated for 600-volt workplace protection, with testing showing resistance up to 18,000 volts. These shoes work by blocking electrical current from traveling through your body to the ground when you’re standing on or near energized equipment. The non-conductive soles create a barrier that stops electricity flow, preventing you from becoming a path to ground during accidental contact with live circuits or energized surfaces.

The ASTM F2413 standard defines how electrical hazard footwear gets certified. During testing, shoes must resist 18,000 volts at 60 Hz for one full minute while allowing less than 1 milliampere of leakage current to pass through. This rigorous test confirms the footwear’s ability to provide shock resistance under controlled lab conditions. Certified EH-rated shoes carry labels inside the footwear clearly showing their EH Series rating, and the boots themselves get marked with EH Series labels on the upper portion.

Key protection features and certification identifiers include:

  • Non-conductive sole and heel construction using thick insulating materials that prevent current flow to ground
  • ASTM F2413 certification with interior labeling confirming electrical hazard rating and compliance
  • 18,000-volt test resistance with maximum leakage current below 1 milliampere during standardized testing
  • Dry condition requirement, electrical protection functions only when both the shoe and ground surface remain dry
  • Step potential protection while standing on ground near energized equipment or circuits

EH protection works only in dry conditions and serves as supplemental protection, not primary protection against electrical hazards. Moisture creates conductive paths that bypass the sole’s insulation, eliminating the electrical barrier between your body and ground. EH-rated footwear can’t protect workers who directly contact energized circuits or work on live electrical systems. That requires de-energizing circuits and using insulated gloves, tools, and other primary protective equipment. You’ve also got to maintain safe working distance from energized parts, following lockout/tagout procedures and comprehensive electrical safety protocols.

OSHA Requirements and Regulatory Compliance for EH-Rated Footwear

syHGkoZsRVq_lu9wJbl8GA

OSHA requires workers exposed to live electrical circuits and energized equipment to wear EH-rated safety footwear as part of their personal protective equipment. This mandate applies when employees face potential electrical shock hazards from step potential, voltage differences that can exist between two points on the ground near energized equipment. Workers performing tasks around live wires, electrical panels, power distribution systems, or any location where accidental contact with electricity could occur must wear footwear meeting electrical hazard standards.

OSHA adopts ASTM F2413 standards as the benchmark for electrical hazard footwear compliance, making ASTM certification the regulatory requirement for workplace electrical safety programs.

Specific occupations and industries mandated to wear EH-rated shoes include:

  1. Electricians installing, maintaining, and repairing electrical systems in residential, commercial, and industrial settings
  2. Linesmen working on utility power lines and electrical distribution infrastructure
  3. Industrial engineers overseeing electrical equipment and production machinery in manufacturing facilities
  4. Maintenance workers servicing building electrical systems, HVAC equipment, and facility infrastructure
  5. Construction workers operating near temporary power sources, overhead lines, and electrical site installations
  6. Utilities workers in power generation plants, substations, and electrical distribution networks
  7. Manufacturing technicians operating electrical machinery and automated production equipment
  8. Power line workers installing and maintaining overhead and underground electrical transmission systems

Employers carry responsibility for conducting workplace hazard assessments to identify electrical risks, providing appropriate ASTM-certified footwear to exposed workers, and delivering training on proper use and limitations of EH-rated shoes. This includes documenting the hazard assessment, making sure footwear certification matches identified electrical risks, establishing inspection and replacement protocols, and confirming employees understand when and how to wear their protective footwear correctly.

OSHA requires EH shoes as one component within layered electrical safety systems, not as standalone protection against electrical hazards. Complete electrical safety programs include circuit de-energization as the primary control, followed by lockout/tagout procedures, insulated tools, rubber insulating gloves rated for voltage levels, and EH-rated footwear as supplemental protection.

How Electrical Hazard Shoes Differ from Static Dissipative and Dielectric Footwear

jmaZ3yDYQEKC25rTEH5fGQ

These footwear types serve opposite electrical functions. Some prevent current flow while others promote it, making proper selection critical for worker safety in different electrical environments.

EH-Rated Footwear Characteristics

EH-rated footwear uses non-conductive design that actively blocks electrical current from passing through the shoe to ground. These shoes provide 600-volt workplace protection, tested to withstand 18,000 volts under controlled conditions, specifically protecting against step potential when standing near energized equipment. EH protection functions strictly in dry conditions. Moisture on the shoe or ground surface creates conductive paths that eliminate the insulating barrier.

Dielectric Footwear for Higher Voltage Environments

Dielectric footwear undergoes testing to higher voltage levels than standard EH-rated shoes and maintains electrical protection even in wet conditions. This specialized footwear serves electrical utility workers and other professionals who face higher voltage exposure or work in environments where moisture can’t be controlled.

Static Dissipative (SD) and ESD Footwear

Static dissipative footwear intentionally conducts electricity from your body through the shoe to ground, preventing static buildup that could ignite flammable atmospheres or damage sensitive electronic components. These shoes protect against ignition hazards from flammable materials and gases by continuously dissipating static charges before they accumulate to dangerous levels. Static dissipative boots with steel toe comply with ASTM F2413 certification standard, while soft toe versions meet ASTM F2892 requirements. This footwear requires regular cleaning and resistance testing because flexing, contamination, and moisture can change electrical resistance properties over time. Static dissipative and ESD footwear serve the opposite function from EH-rated shoes. They’re designed to conduct electricity, not block it.

Electrically Conductive Footwear

Conductive footwear provides maximum conductivity for fastest static discharge in explosive atmospheres where even brief static accumulation poses immediate fire or explosion risks when working with volatile chemicals, dusts, or gases.

Footwear Type Electrical Function Primary Hazard Addressed Wet Use Capability Typical Applications
EH-Rated Blocks current flow to ground Electrical shock from step potential Dry conditions only Construction, utilities, manufacturing with electrical equipment
Dielectric Blocks current at higher voltages High-voltage electrical shock Wet and dry conditions Electrical utility linework, high-voltage maintenance
Static Dissipative Conducts static safely to ground Static ignition of flammable atmospheres Controlled resistance in various conditions Electronics manufacturing, refineries, chemical plants, explosive atmospheres
Electrically Conductive Maximum conductivity for rapid discharge Static ignition with immediate fire/explosion risk Controlled maximum resistance Munitions handling, volatile chemical processing, explosive dust environments

Industries and Work Environments Requiring Electrical Hazard Boots

MjT9OESWQWWSnQyBq1C8rg

Electrical hazards exist in numerous industries beyond dedicated electrical trades, affecting workers who operate near energized equipment, power sources, and electrical distribution systems even when electrical work isn’t their primary job function.

Work environments and scenarios where electrical hazards exist include:

  • Construction sites near overhead power lines, temporary electrical service, and underground utilities
  • Manufacturing plants with electrical machinery, motor-driven equipment, and automated production systems
  • Utilities and power generation facilities including substations, generation plants, and distribution networks
  • Building maintenance operations servicing lighting, HVAC, elevators, and electrical infrastructure
  • HVAC installation and repair involving electrical connections to heating, cooling, and ventilation equipment
  • Telecommunications infrastructure work on cell towers, network equipment, and communication systems
  • Food processing plants with electrical conveyor systems, refrigeration equipment, and processing machinery
  • Healthcare facilities maintaining medical imaging equipment, power distribution, and critical electrical systems
  • Transportation maintenance shops servicing electric vehicles, charging systems, and rail electrical systems
  • Industrial machinery operations with motor-driven equipment, control panels, and electrical automation

Construction sites present electrical risks from proximity to power lines during excavation, crane operation, and scaffold installation near overhead conductors. Manufacturing environments expose workers to energized machinery, control panels, and electrical drives that power production equipment. Building systems maintenance requires working around electrical panels, circuit breakers, and distribution equipment that remains energized during facility operations. Healthcare and food service facilities maintain electrical equipment that can’t be fully de-energized during working hours, creating step potential hazards for maintenance staff. These diverse environments share common electrical risks requiring supplemental protection through EH-rated footwear combined with comprehensive electrical safety protocols.

Key Construction Features That Make Safety Shoes Electrical Hazard Rated

BX5SsukoT9K773uilVCkDg

Sole and heel construction forms the foundation of electrical hazard protection, using thick insulating materials that create high electrical resistance between the foot and ground. These materials, typically specialized rubber compounds and engineered polymers, must maintain their insulating properties under compression and flexing during normal walking. The sole thickness and material density work together to stop current flow, preventing electricity from passing through the shoe when you stand on or near energized surfaces. Both the outsole and heel require consistent electrical resistance across their entire surface since current will follow the path of least resistance through any weak point in the construction.

Upper materials don’t determine EH rating status. The sole and heel construction carry full responsibility for electrical protection. Leather footwear doesn’t automatically qualify as EH-rated, even when it includes arc flash protection or fire-resistant properties. A boot can feature premium full-grain leather uppers, moisture barriers, and advanced comfort systems while completely lacking electrical hazard protection if the sole hasn’t been constructed with insulating materials and tested to ASTM F2413 standards. The certification comes from complete construction validation through standardized testing, not from assumptions based on material type or appearance.

Safety toe protection options including composite, steel, and alloy toe caps integrate with EH-rated footwear without compromising electrical protection when properly designed. Composite toe styles (135 available options) use non-conductive materials that complement EH protection. Steel toe (17 styles) and alloy toe (21 styles) caps are isolated from ground contact by the insulating sole, preventing them from creating conductive paths. Soft toe options (44 styles) eliminate metal components entirely while maintaining full electrical hazard protection through sole construction. The toe protection choice depends on impact and compression hazards in the work environment, selected independently from the electrical hazard rating.

Complete boot integrity throughout its service life determines whether electrical protection remains effective. Any puncture, embedded conductive material, or structural damage that breaches the sole creates a direct path for current to flow from your foot to ground. A single nail penetrating the outsole, metal shavings embedded in the tread, or excessive wear reducing sole thickness all eliminate the electrical barrier the shoe was designed to provide. This makes ongoing inspection and proper maintenance critical. EH protection exists only when the insulating barrier remains completely intact with no conductive bridges connecting the interior of the shoe to the ground surface.

Component Material Type EH Protection Role
Outsole Specialized rubber compounds, engineered polymers Primary electrical resistance barrier between foot and ground
Midsole Non-conductive foam, cushioning polymers Secondary insulation layer, maintains electrical resistance through shoe structure
Heel High-resistance rubber, insulating compounds Prevents current flow through heel strike area during walking
Upper Leather, synthetic materials, textile No direct EH protection role, contains foot within protective sole structure
Toe Cap Composite, steel, alloy (when present) Isolated from ground by insulating sole, doesn’t compromise electrical protection

Conditions That Compromise Protection and Proper Maintenance Practices

UxNdi8QNTIiMe0hLBiW5cg

EH protection functions only in dry conditions because moisture creates conductive paths that bypass the sole’s insulation properties. Water conducts electricity far better than the insulating materials in EH-rated soles, so even a thin film of moisture on the outsole or ground surface provides an alternative route for current to flow from you to ground. Standing water, wet concrete, rain-soaked surfaces, and even high humidity that causes condensation on the sole all eliminate the electrical barrier the footwear was designed to provide. The insulating materials remain intact, but moisture bridges the gap they’re meant to maintain.

Environmental conditions that compromise EH protection include:

  • Wet surfaces including water, oil, coolant, or other liquids on floors
  • Humid environments where condensation forms on sole surfaces
  • Rain exposure saturating footwear exteriors and ground contact areas
  • Standing water from flooding, drainage problems, or outdoor weather conditions
  • Perspiration buildup inside footwear that saturates insole and migrates to outsole
  • Cleaning with excessive water that doesn’t fully dry before wearing

Physical damage, sole wear, and contamination create electrical pathways through footwear that completely eliminate EH protection. Excessive wear reduces sole thickness until the remaining material no longer provides adequate insulation. Think of it like wearing through the tread on a tire until the thinner inner layers become exposed. Punctures from nails, screws, or sharp objects create direct holes connecting the inside of the shoe to ground. Metal shavings, wire fragments, staples, or other conductive debris embedded in the tread act as tiny conductors carrying current through the insulating sole material. Any of these conditions turn EH-rated footwear into standard work shoes with no electrical protection capability.

Specific contaminants and damage types that eliminate EH protection:

  • Metal shavings and wire fragments embedded in sole tread patterns
  • Screws, nails, staples, or other fasteners penetrating through sole material
  • Excessive sole wear reducing thickness below effective insulation levels
  • Punctures, cuts, or tears in sole material creating pathways through the insulation
  • Cracks in sole or heel from age, flexing, or environmental degradation

Daily inspection routines before each shift prevent you from relying on compromised footwear. Visual inspection checks the entire outsole for embedded metal, visible punctures, and worn areas where thickness has diminished noticeably. Run your hand across the sole to feel for embedded objects your eyes might miss. Flex the shoe to check for cracks in the sole or separation between layers. Look at heel wear patterns. Uneven wear can expose thinner material or create gaps. This takes 30 seconds and catches problems before you step onto a work site where electrical hazards exist.

Proper cleaning procedures that maintain EH protection:

  1. Remove loose debris, dirt, and visible contaminants from sole surface after each work shift
  2. Apply mild soap solution to outsole and heel using clean water
  3. Scrub tread patterns with soft brush to dislodge embedded particles without damaging sole material
  4. Rinse thoroughly with clean warm water to remove soap residue and loosened contamination
  5. Check carefully for embedded conductive materials like metal shavings that resist removal
  6. Inspect sole thickness and overall integrity for wear, punctures, or structural damage
  7. Air-dry completely away from direct heat sources before storing or wearing

Storage away from electric motors, transformers, and electrical equipment prevents premature material degradation that compromises EH protection. Electrical fields can cause cracking and deterioration in the rubber compounds and polymers used in insulating soles. Store footwear in cool, dry locations away from temperature extremes, direct sunlight, and ozone-generating equipment. Keep them elevated off damp concrete floors. Don’t leave EH-rated shoes in vehicles where heat cycles speed up material breakdown. Clear replacement indicators include outsoles with embedded conductive materials that can’t be removed, sole thickness diminished noticeably from wear patterns, any punctures or tears visible in sole material, and cracks in the sole or heel structure. When you see these signs, the footwear has lost its electrical protection capability. Dispose of it immediately rather than risking electrical shock from compromised insulation.

Combining Electrical Hazard Protection with Other Safety Features

5ey7I8GFTdyjVcgNl4y2Hg

Workers face multiple simultaneous hazards in most industrial and construction environments, requiring integrated protection rather than single-function safety footwear. A maintenance electrician might encounter electrical shock risks, slip hazards from oil on concrete floors, and impact dangers from dropped tools during a single shift. Construction workers near power lines also walk on uneven ground, handle heavy materials, and work in weather conditions creating slip risks. Multi-hazard footwear addresses these layered workplace dangers through engineered designs that don’t compromise any individual protection element.

Slip-resistant outsoles combined with EH rating use tread patterns and rubber compounds that maintain both traction and electrical insulation properties simultaneously. The deep lugs and channels that provide grip on slick surfaces are molded from the same non-conductive materials that block current flow to ground. Oil-resistant rubber formulations prevent the sole from breaking down when exposed to petroleum products while maintaining the electrical resistance required for EH certification. This dual protection matters in manufacturing plants where machine coolant creates slippery floors around energized equipment, and in food processing facilities with both electrical machinery and wet, greasy work surfaces.

Impact protection through safety toes doesn’t compromise electrical hazard rating when the toe cap remains isolated from ground contact by the insulating sole. Composite toe caps (135 available styles) use non-metallic materials that complement EH protection with no conductive components. Steel toe (17 styles) and alloy toe (21 styles) options protect against crushing and impact while the thick insulating sole prevents the metal toe cap from creating a path to ground. The toe protection sits above the EH-rated sole structure, separated from ground contact during normal wear, allowing both safety features to function independently.

Additional protective features integrate into EH-rated footwear including puncture-resistant plates in the midsole that stop nails and sharp objects from penetrating, metatarsal guards protecting the upper foot from falling objects, and waterproof uppers that keep feet dry in wet conditions. It’s critical to understand that waterproof uppers don’t enable EH protection in wet environments. The outsole still requires dry ground contact for electrical insulation to function. Waterproof construction prevents moisture from entering the shoe during rain or puddle contact, maintaining comfort without changing the dry-condition requirement for electrical protection.

Feature Combination Protection Provided Typical Use Case
EH + Slip Resistant Electrical shock protection and traction on slick surfaces Manufacturing with machine coolant, food processing with wet floors near electrical equipment
EH + Composite Toe Electrical insulation and impact/compression resistance with non-metal construction Construction near power lines with heavy material handling, warehouse electrical maintenance
EH + Steel Toe + Metatarsal Guard Multi-layer foot protection from electrical, impact, and falling object hazards Heavy industrial settings with overhead crane operations and energized equipment
EH + Puncture Resistant Plate Electrical insulation and protection from sharp objects penetrating sole Construction demolition, industrial maintenance, scrap yard operations with electrical hazards
EH + Waterproof Upper Electrical protection with moisture barrier for foot comfort (dry ground still required) Utilities outdoor work, construction in variable weather with electrical equipment exposure
EH + Chemical Resistant Electrical insulation with sole material resistant to chemical degradation Refineries, chemical plants, industrial facilities with both electrical and chemical exposure

Selecting the Right Electrical Hazard Safety Shoes for Your Workplace

iOYdkFVjSM-e7Gp9bwV8wg

Assess all job-specific requirements including electrical hazards and additional workplace risks before selecting footwear that matches your complete exposure profile.

Proper fit and sizing matter for both safety and comfort during long work shifts. Measure both feet at the end of your workday when feet are at their largest from standing and walking, since morning measurements don’t account for normal swelling. Fit to your larger foot if they differ in size. Try footwear while wearing the actual work socks you’ll use on the job. Thickness affects fit significantly. Length sizing should provide approximately half an inch of space between your longest toe and the shoe’s end when standing. Width matters as much as length. Your foot should sit comfortably across the widest part without pinching or excessive room. Extended width options including 4E, 6E, and EW accommodate wider feet that standard widths compress uncomfortably.

Style choices between athletic designs and traditional boots depend on work environment demands and personal preference. Athletic work shoe styles (122 EH-rated options available) provide flexibility, lighter weight, and modern cushioning systems suited for lighter-duty work environments where ankle support isn’t critical. These work well in manufacturing, maintenance, and indoor industrial settings with level walking surfaces. Traditional work boot styles (33 EH-rated options) offer ankle support, more durable construction for heavy-duty applications, and better protection from debris, making them appropriate for construction sites, outdoor utilities work, and industrial environments with uneven terrain or falling object risks.

Comfort features reduce fatigue during 8-12 hour shifts and directly affect your ability to stay safe and productive throughout the workday. Cushioning in the midsole absorbs impact during walking and standing. Arch support prevents foot strain and back pain from inadequate support structures. Moisture management through breathable materials and moisture-wicking linings keeps feet dry, reducing blister formation and odor. Padded collars and tongues eliminate pressure points around the ankle. These comfort technologies matter because uncomfortable footwear causes distraction, reduces mobility, and leads workers to remove their safety shoes when they shouldn’t.

Key selection criteria to evaluate when choosing EH-rated footwear:

  • Verified EH certification meeting ASTM F2413 standards with interior labeling confirmation
  • Additional safety features matching your workplace hazards (slip resistance, safety toe, puncture protection, metatarsal guards)
  • Proper fit in both length and width with adequate toe room and no pressure points
  • Work environment conditions assessment (indoor vs outdoor, dry vs occasionally damp, temperature extremes)
  • Shift duration comfort requirements including cushioning, arch support, and breathability for all-day wear
  • Style preference between athletic work shoes for flexibility and boots for ankle support and durability
  • Expected durability based on work environment severity and typical replacement timeline
  • Budget considerations balancing initial cost against expected lifespan and cost-per-wear value

Try footwear while wearing your work socks and spend time walking and standing to identify pressure points before purchase. Walk around the store for at least five minutes. Comfort in the first 30 seconds doesn’t predict all-day wearability. Stand in one position to simulate work tasks and notice any pinching across the forefoot or heel slippage. Flex your foot as if climbing stairs or ladders to check for excessive tightness or looseness during movement. These few minutes reveal fit problems that won’t become apparent until you’re already on the job site where returning footwear becomes complicated.

Understanding Pricing and Long-Term Value of EH-Rated Safety Footwear

TKTUp85BTqqj_5ddgcuzsQ

Typical price ranges for EH-rated safety footwear span entry-level options starting around budget-conscious pricing, mid-range selections offering enhanced comfort and durability features, and premium models incorporating advanced materials and technologies for maximum performance and longevity.

Factors influencing pricing include leather quality (full-grain leather costs more than split leather or synthetic materials but offers superior durability), sole construction complexity (multi-layer cushioning systems and specialized rubber compounds increase manufacturing costs), additional safety features beyond EH rating (each added certification or protective element adds to production expense), integrated comfort technologies from athletic shoe development (gel cushioning, memory foam, moisture management systems), and brand reputation built through consistent quality and warranty support. Premium footwear uses materials and construction methods that extend usable lifespan, maintain protection effectiveness longer, and provide better support throughout their service life.

Calculate long-term value based on durability, expected lifespan, and replacement frequency rather than focusing solely on initial purchase price. Entry-level EH-rated footwear might require replacement every 3-6 months in demanding work environments due to sole wear, structural breakdown, or comfort degradation. Mid-range quality typically delivers 6-12 months of effective service. Premium construction often provides 12-18 months or longer before replacement becomes necessary. When you calculate cost-per-wear, dividing the purchase price by the number of work shifts the footwear lasts, higher initial investment frequently reduces your actual cost while providing better protection and comfort throughout the longer service life. A premium boot lasting 300 work shifts costs less per day than a budget option requiring replacement after 80 shifts.

Manufacturer warranty coverage typically includes materials and workmanship defects discovered during normal use, protecting against sole separation, stitching failure, and premature material breakdown that occurs before expected wear limits. Most warranties run 30 to 90 days, with premium manufacturers offering extended coverage up to six months or one year. Warranties don’t cover normal wear from use, contamination, improper care, or damage from workplace hazards. Understanding warranty terms helps assess total cost of ownership. A manufacturer confident in their construction quality stands behind their product with meaningful warranty coverage that provides recourse if the footwear fails prematurely.

Ensuring Proper Fit and All-Day Comfort in EH Safety Footwear

FjAHNz1iTV2hvJeqaZR2YA

Proper fit matters because poor fit compromises both safety feature effectiveness and causes injuries from inadequate support during long work shifts. Loose-fitting safety shoes allow your foot to slide forward during walking, reducing the protective space safety toes provide and causing impact injuries the toe cap should prevent. Excessive foot movement inside the shoe creates friction that produces blisters, hot spots, and pressure sores that worsen throughout your shift. Shoes that fit too tightly compress your foot, restricting blood circulation and causing numbness, cramping, and pain that distracts from safe work practices. The safety features built into EH-rated footwear work correctly only when the shoe fits properly and stays positioned correctly on your foot during movement.

Measure both feet correctly by standing with your full weight distributed evenly, since foot dimensions change between sitting and standing positions. Measure at the end of your workday when feet have swollen to their largest daily size from hours of standing and walking. Morning measurements don’t account for this natural expansion that affects fit throughout your work shift. Always fit to your larger foot if they differ in size, even if the difference seems small. Account for work sock thickness by wearing your actual job socks during fitting, since thick work socks consume interior space that affects how the shoe fits. The goal is replicating actual wearing conditions to get accurate fit assessment rather than measuring under ideal conditions that don’t match real-world use.

Arch support options and orthotic compatibility matter for workers with flat feet, high arches, plantar fasciitis, or other foot conditions requiring customized support for all-day comfort. Many EH-rated safety shoes include removable insoles that allow insertion of custom orthotics prescribed by podiatrists or preferred over-the-counter arch supports. This accommodation enables workers with specific medical needs to get both required electrical protection and the personalized support their feet need to remain pain-free during long shifts.

Properly fitting safety shoes before purchase requires these steps:

  1. Measure both feet while wearing work socks and standing with full weight on each foot
  2. Check for minimum half-inch space between your longest toe and the shoe’s end when standing
  3. Make sure the heel stays firmly in place without slipping up and down during walking
  4. Test width across the ball of foot. The widest part should sit comfortably without pinching or excessive looseness
  5. Walk and stand continuously for 5-10 minutes to simulate work conditions and identify developing pressure points
  6. Confirm complete absence of pressure points anywhere on your foot, ankle, or heel during extended standing

Realistic break-in expectations with quality safety footwear involve 2-3 days of gradually increasing wear time as materials conform to your foot shape and flex points soften through normal movement. Some initial stiffness is normal as leather uppers and structured support elements adapt to your specific foot contours. Persistent discomfort continuing beyond this break-in period indicates poor fit requiring exchange. Quality safety footwear shouldn’t cause ongoing pain, hot spots, or numbness after the brief initial adaptation period. Sharp pressure points, numbness in toes, heel blisters continuing past the first week, or pain in arches or ankles during normal use all signal incorrect fit rather than break-in issues.

Common Mistakes and Safety Risks with Electrical Hazard Footwear

The critical misconception that EH-rated shoes provide complete electrical protection creates dangerous situations where workers believe they’re fully protected when they’re actually at severe risk. EH footwear provides supplemental protection designed for accidental contact with energized circuits and step potential hazards when standing near electrical equipment. It’s secondary protection against unexpected energization, not protection enabling intentional work on live electrical systems. Workers who believe EH-rated shoes make them safe to work on energized panels, touch live conductors, or bypass lockout/tagout procedures misunderstand the fundamental purpose of electrical hazard footwear and face life-threatening shock risks the shoes were never designed to prevent.

Common dangerous mistakes that compromise electrical safety when using EH-rated footwear:

  • Relying on EH shoes as primary electrical protection instead of supplemental backup protection within comprehensive electrical safety systems
  • Wearing EH-rated footwear in wet conditions, standing water, or on moisture-covered surfaces where electrical insulation doesn’t function
  • Failing to conduct daily pre-use visual and tactile inspections for sole damage, embedded metal, and wear before each shift
  • Assuming leather construction, work boot appearance, or arc flash protection automatically equals verified EH rating and ASTM certification
  • Ignoring visible sole wear and reduced thickness that eliminates effective electrical insulation before reaching obvious failure
  • Contaminating outsoles with metal shavings, wire fragments, and conductive debris without cleaning between tasks
  • Using EH-rated footwear in environments requiring static dissipative properties, creating static ignition risks in flammable atmospheres
  • Working on electrical circuits and equipment exceeding the 600-volt workplace protection rating EH footwear provides
  • Continuing to wear footwear with punctures, embedded conductive materials, or structural damage that eliminates electrical protection

Comprehensive electrical safety protocols position EH footwear as one component within complete electrical safety systems that prioritize hazard elimination as the primary control method. The electrical safety hierarchy starts with de-energizing circuits whenever possible. You can’t be shocked by equipment that’s completely disconnected from power sources through verified lockout/tagout procedures. Engineering controls including insulated barriers, guard rails around energized equipment, and physical separation create distance between workers and electrical hazards. Administrative controls establish safe work procedures, require qualified person designations, and mandate permits for energized work. Personal protective equipment including rubber insulating gloves rated for specific voltage levels, insulated tools, arc-rated clothing, and EH-rated footwear form the final protective layer. Critical backup protection when other controls don’t eliminate the electrical hazard completely. EH footwear serves as the ground-level backup preventing step potential injuries when standing near energized equipment that’s been properly controlled through primary safety measures. This layered approach recognizes that supplemental protection fills gaps in primary controls rather than replacing comprehensive electrical safety planning with a single piece of protective equipment.

Leading Manufacturers and Product Categories for EH-Rated Work Footwear

Numerous established safety footwear manufacturers offer ASTM F2413 EH-rated certified footwear across entry-level, mid-range, and premium price points, making proper electrical protection accessible regardless of budget constraints. The marketplace includes both traditional work boot manufacturers who’ve added electrical hazard protection to their industrial product lines and athletic-focused brands bringing sports shoe technology into occupational safety footwear. This variety means workers can select EH-rated footwear matching their specific job requirements, comfort preferences, and workplace culture (some sites prefer traditional boot appearance while others welcome athletic styling) while maintaining verified electrical protection across all categories.

Athletic-style work shoe manufacturers integrate sports shoe cushioning systems, lightweight materials, and flexibility technologies into EH-rated occupational footwear. These brands bring gel cushioning, memory foam midsoles, engineered mesh uppers for breathability, and modern athletic aesthetics to safety footwear design. The result is EH-rated shoes that feel more like running shoes than traditional work boots while meeting identical ASTM F2413 electrical protection standards. These manufacturers typically offer the widest variety of EH-rated styles (some product lines include 122+ athletic work shoe options with electrical protection), appealing to workers in lighter-duty industrial environments, manufacturing facilities, maintenance operations, and jobs requiring extensive walking where traditional boot weight becomes fatiguing.

Traditional work boot manufacturers offer EH-rated options in their heavy-duty industrial and construction boot lines, emphasizing durability, ankle support, and rugged construction for demanding work environments. These brands focus on full-grain leather uppers, Goodyear welt construction for resoling capability, aggressive tread patterns for traction on construction sites, and reinforced toe and heel counters for extended service life. EH-rated work boots from these manufacturers (typically 30+ styles per product line) suit construction workers, utilities personnel, heavy industrial applications, and outdoor work requiring ankle stability on uneven terrain. The traditional boot category prioritizes longevity and protection in harsh environments over lightweight comfort, targeting workers who value proven durability.

Specialized EH-rated footwear designed for specific sectors addresses unique requirements beyond general industrial applications. First responder footwear combines electrical hazard protection with features needed by police, fire, and EMS personnel including slip resistance on varied surfaces, quick-dry materials for water exposure, and uniform appearance standards.

Final Words

Safety shoes electrical hazard rated footwear protects you only when you understand exactly how it works and where it fails.

Check your soles every morning. Keep them dry. Get rid of boots with embedded metal or worn-down heels.

Remember, EH-rated shoes are backup protection, not permission to work on live circuits. They give you a safety margin during the unexpected.

Pair them with proper lockout procedures, insulated tools, and the right training. That’s how you make it home safe.

FAQ

Do all safety shoes protect against electrical hazards?

Not all safety shoes protect against electrical hazards because only footwear specifically tested and certified to ASTM F2413 EH standards provides electrical shock resistance. Regular work boots, even with safety toes or leather construction, do not automatically qualify as EH-rated without proper sole insulation and certification testing.

What is the OSHA standard for electrical safety shoes?

The OSHA standard for electrical safety shoes requires footwear meeting ASTM F2413 specifications when workers are exposed to live electrical circuits or energized equipment. OSHA mandates EH-rated footwear as part of comprehensive personal protective equipment protocols for electrical workers, not as standalone protection against electrical hazards.

What are the electrical hazards of OSHA?

The electrical hazards OSHA addresses include shock from contact with energized circuits, step potential from voltage gradients in the ground, burns from arc flash incidents, and electrocution risks in construction and industrial environments. OSHA requires employers to conduct hazard assessments and provide appropriate protective equipment including EH-rated footwear where electrical risks exist.

Are electrical hazard shoes the same as ESD shoes?

Electrical hazard shoes are not the same as ESD shoes because they serve opposite functions. EH-rated footwear blocks electrical current from traveling through the body to ground, while ESD and static dissipative shoes intentionally conduct electricity away from the body to prevent static buildup that could ignite flammable atmospheres.

What voltage do electrical hazard safety shoes protect against?

Electrical hazard safety shoes protect against up to 600 volts in workplace conditions and are tested to resist 18,000 volts at 60 Hz for one minute with maximum leakage current below 1 milliampere. This protection functions only in dry conditions as supplemental defense against accidental contact with energized circuits.

How can I tell if my work boots are EH-rated?

You can tell if your work boots are EH-rated by checking for the interior label marked with ASTM F2413 EH certification and the EH Series designation on the boot upper. Leather construction or work boot appearance alone does not guarantee electrical hazard protection without proper testing and certification markings.

Can I wear EH-rated shoes in wet conditions?

You cannot rely on EH-rated shoes in wet conditions because moisture creates conductive pathways that bypass sole insulation and eliminate electrical protection. EH-rated footwear provides shock resistance only in dry settings, and workers facing wet environments with electrical hazards should use dielectric overshoes for step potential protection.

How often should I replace electrical hazard safety shoes?

You should replace electrical hazard safety shoes when sole thickness diminishes noticeably from wear, when conductive materials become embedded in the sole, or when punctures, tears, or cracks appear in sole material. Daily pre-use inspection helps identify damage that eliminates EH protection and requires immediate replacement.

What is the difference between EH-rated and dielectric safety boots?

The difference between EH-rated and dielectric safety boots is that dielectric footwear is tested to higher voltage levels than standard EH-rated shoes and can be used in wet conditions. EH-rated boots protect against 600-volt workplace hazards in dry settings, while dielectric boots serve electrical utility workers facing higher voltage exposure.

Do composite toe boots work with electrical hazard protection?

Composite toe boots work with electrical hazard protection because non-metallic toe caps do not compromise the sole’s non-conductive properties. Many manufacturers offer composite toe options in EH-rated footwear, providing both impact protection and electrical shock resistance in a single boot.

How do I clean electrical hazard boots without damaging protection?

You clean electrical hazard boots without damaging protection by removing loose debris, applying mild soap solution, scrubbing with a soft brush, rinsing with warm water, and air-drying away from heat sources. Avoid harsh chemicals that degrade insulating materials and always inspect for embedded conductive materials during cleaning.

Can you combine slip resistance with electrical hazard protection?

You can combine slip resistance with electrical hazard protection because tread patterns can maintain both traction and electrical insulation properties. Many manufacturers offer dual-certified footwear with slip-resistant outsoles that meet ASTM F2413 EH standards, providing multi-hazard protection for workers facing both electrical and slip risks.

Crawlspace Flooding Causes: Why Water Accumulates Under Your Home

0

Think crawlspace flooding only happens in big storms? It’s not just storms.
Water gets in two main ways: from the surface—bad grading, clogged gutters, downspouts too close to the house—and from below—rising groundwater, hydrostatic pressure (soil pushing on walls), or wet soil finding tiny cracks.
Plumbing and HVAC leaks hide under the house, too.
This post walks through the six main causes, shows what to check after rain, and explains the fixes that stop water and keep rot, mold, and expensive repairs away.

Key Crawlspace Water Entry Causes Explained

udZ2SpokRpuHfNaKe6-l3A

Water gets into crawlspaces two ways: from the surface and from below. Surface water is rainwater that pools around your foundation because of bad grading, gutters that don’t work, or downspouts dumping water right next to the house. Just a few inches of rain on your roof can create enough runoff to flood a crawlspace if the drainage isn’t working. You want grading that slopes away from the foundation at about 5%, which is roughly 6 inches of drop over 10 feet. Downspouts need to extend at least 4 to 6 feet out to keep water away from the perimeter.

Subsurface water moves through soil and pushes against foundation walls from below and from the sides. When groundwater rises during storms, hydrostatic pressure (that’s the force of saturated soil pressing on concrete) forces moisture through hairline cracks, mortar joints, and the spots where walls meet floors. Clay soil holds onto water and swells when it’s wet, which makes the pressure worse. Even homes without visible cracks can see seepage when groundwater climbs after days of heavy rain.

Here are six major causes you need to check when you’re trying to figure out why your crawlspace is flooding:

  • Grading that slopes toward the foundation instead of away from it
  • Gutters and downspouts that are clogged or missing, concentrating roof runoff right at the foundation
  • High water table during long storms or seasonal changes
  • Hydrostatic pressure from saturated soil pressing on walls
  • Foundation entry points like cracks, joints, and gaps around pipes
  • Seasonal storms that overwhelm drainage systems fast

Catching it early matters. The longer water sits in a crawlspace, the faster it spreads into joists, insulation, and support beams. Homeowners who check after heavy rain and fix small drainage problems before they turn into chronic flooding save thousands on structural repairs and mold cleanup.

Surface Level Crawlspace Flooding Causes Homeowners Overlook

85oSmTf7Qi-omVNl41r4pA

Most people worry about foundation cracks and forget that the majority of crawlspace flooding starts at ground level. Yard grading is your first defense, but soil settles, landscaping changes, and uneven fills create low spots that collect water and send it toward the foundation instead of away. When soil slopes toward your home (even a little), every rainstorm pushes runoff into the crawlspace perimeter. Overwatering your lawn, flower beds, or foundation plantings with sprinklers adds hundreds of gallons each week to soil near the foundation, keeping it saturated and ready to flood during the next storm.

Gutters that overflow dump concentrated streams of roof water directly onto soil next to your foundation. Without working gutters and extended downspouts, even moderate rain becomes a localized flood at the base of your home. Retaining walls installed too close to the foundation can trap water and stop drainage. Nearby construction, new driveways, or regraded neighboring yards sometimes redirect stormwater onto your property, changing drainage patterns that worked fine for years.

Common things people miss that contribute to surface flooding:

  • Overwatering landscaping, which keeps soil saturated near the foundation
  • Yard settling over time that creates low spots near crawlspace access
  • Retaining walls or hardscaping too close to the home, blocking natural drainage
  • Neighboring property grading changes or new construction that redirect runoff your way

Subsurface Crawlspace Flooding Causes: Groundwater, Pressure, and Soil Behavior

H3fRXiB-Ty60jp6NFxFy4A

High water table happens when underground water levels rise close to the surface during long rain events or seasonal snowmelt. Homes built in areas with naturally high groundwater or near rivers, creeks, or floodplains see this regularly. During multi-day storms, the saturated zone underground can rise into the crawlspace through the dirt floor or press against foundation walls from below. You might see a damp footprint or water line rising on concrete walls even when the surface outside looks dry. Efflorescence (those white powdery deposits on masonry) marks where groundwater has seeped through and evaporated, leaving mineral salts behind.

Clay soil holds water like a sponge and expands when wet, then shrinks when dry. This cycle creates pressure against foundation walls and opens small gaps in mortar joints or concrete. Sandy soil drains faster but offers less support, letting water move quickly toward the lowest point, often your crawlspace. Capillary action pulls moisture upward through soil and porous concrete like a wick, wetting materials above the visible water line. Even when standing water drains away, capillary rise keeps the lower portions of foundation walls and floor joists damp for weeks.

Subsurface water needs somewhere to go. Without perimeter drainage systems (French drains, exterior footing drains, or interior drain channels tied to a sump pit), hydrostatic pressure keeps pushing water through any weak point it finds. Relieving that pressure means either redirecting groundwater away from the foundation or capturing it and pumping it out before it enters the crawlspace. Ignoring subsurface causes means your crawlspace will flood every time the water table rises, no matter how perfect your gutters and grading are.

Crawlspace Flooding From Gutters, Downspouts, and Roof Runoff Mismanagement

eUXD5wbSR9y09PJfS9F6Vg

Gutters should be cleaned at least twice a year. More often if you’ve got overhanging trees. Leaves, shingle grit, and debris clog gutter channels and downspouts, causing water to overflow and pour directly onto the soil beside your foundation. A single inch of rain on a 1,500 square foot roof produces nearly 1,000 gallons of runoff. Without gutters or with clogged systems, that volume dumps in a narrow band right where your foundation meets the ground, saturating soil and forcing water into the crawlspace through cracks, vents, or the dirt floor.

Downspouts that discharge within a few feet of the foundation might as well dump directly into your crawlspace. Water needs distance to disperse and soak into soil safely. Extending downspouts 4 to 6 feet away (either with above-ground extensions, buried drain lines, or splash blocks on a slope) moves the water far enough that it won’t pool and seep back toward the foundation. If your yard slopes back toward the house, even extended downspouts can fail unless you add underground discharge lines that daylight farther away or tie into a storm drain system.

Three signs that gutter and downspout problems are causing crawlspace flooding:

  • Gutters overflowing during moderate rain, with water streaming over the edges instead of flowing to downspouts
  • Soil erosion or visible channels in mulch and landscaping directly below gutter edges
  • Downspout discharge pooling within three feet of the foundation, with damp or muddy soil that stays wet between storms

Foundation Related Crawlspace Flooding Causes

pmPKhjDERayoU7EyC1Q00g

Foundation cracks are entry points for water whenever surrounding soil is saturated. Hairline cracks (those thinner than 1/16 inch) can still let seepage in during heavy rain or when hydrostatic pressure spikes. Cracks wider than 1/4 inch need structural evaluation because they may mean settlement, soil movement, or freeze/thaw damage that’s getting worse. Mortar joints between concrete blocks erode and crack as homes age, creating gaps that let groundwater seep through. Wall-floor joints, where the foundation wall meets the footing or slab, are common failure points because the two poured surfaces don’t bond perfectly and can separate slightly as soil shifts.

Freeze/thaw cycles make concrete fractures worse. Water enters a small crack, freezes, expands, and widens the gap. Over multiple winters, hairline cracks grow into structural problems. Signs of active seepage include damp spots on interior foundation walls after rain, mineral staining that spreads over time, or small puddles that appear along the base of walls even when the crawlspace floor looks dry. Foundation settlement (caused by soil compression, poor compaction during construction, or erosion) creates uneven stress on walls and opens cracks that weren’t there before.

Not all cracks need immediate repair, but any crack that admits water during storms should be sealed. Passive cracks in dry conditions might only need monitoring. Active seepage requires either interior sealant, exterior excavation and waterproofing, or crack injection with epoxy or polyurethane depending on whether the crack is structural or just leaking. Ignoring foundation related flooding leads to progressive damage. More cracks, more water, more repair cost.

Crawlspace Flooding From Plumbing, HVAC, and Mechanical Failures

QOWqE3LdRUeMYEcNh10rFQ

Plumbing leaks under the house create continuous moisture even during dry weather. A slow drip from a supply line, a pinhole leak in copper pipe, or a failing valve can release hundreds of gallons over weeks, soaking the crawlspace floor and creating conditions that look like storm flooding. HVAC systems with condensate drain lines routed into the crawlspace sometimes drip onto dirt floors when the line clogs or disconnects. In humid climates or during cooling season, an air handler can produce several gallons of condensate daily. If that water doesn’t drain away, it pools under ducts and near equipment, wetting insulation and wood framing.

Sewer backups are rare but catastrophic. When a main sewer line clogs or a septic system fails, wastewater can back up into the lowest drains, including any fixtures or floor drains in or near the crawlspace. Sewage contamination needs immediate professional cleanup because of health hazards and the need for disinfection and safe waste removal. Even clean water plumbing failures, like a burst washing machine supply hose on the first floor, can send water through the subfloor into the crawlspace below.

Three warning signs of mechanical and plumbing related crawlspace water problems:

  • Dampness or standing water in the crawlspace even during weeks without rain
  • Water stains or corrosion near plumbing runs, below bathrooms, kitchens, or laundry areas
  • Musty odors or visible mold near HVAC equipment, condensate lines, or water heater installations

Seasonal, Storm, and Weather Driven Crawlspace Flooding Causes

Grqr1UHvSYG0sQhmUuFGUA

Heavy rainstorms saturate soil faster than it can drain, spiking hydrostatic pressure and overwhelming exterior drainage systems. A few inches of rain in a short period (common during thunderstorms or tropical systems) can flood a crawlspace in hours if gutters, grading, and perimeter drains aren’t sized and maintained for peak flow. Properties near rivers, creeks, or mapped floodplains see rapid groundwater rise during storms as runoff raises the water table temporarily. Flash floods push surface water toward homes faster than soil can absorb it, pooling around foundations and forcing entry through vents, cracks, and dirt floors.

Seasonal patterns matter. Spring snowmelt combined with rain creates the highest groundwater levels of the year in many regions. Late summer thunderstorms dump intense rainfall on dry, compacted soil that sheds water instead of absorbing it. Winter ice dams on roofs can cause water to back up under shingles and drip into wall cavities or run down to the foundation, entering the crawlspace from above instead of below. Homes in areas with high annual rainfall (40+ inches per year) face chronic moisture pressure and need more robust drainage and waterproofing systems than homes in arid climates.

Five weather related risks that cause crawlspace flooding:

  • Multi-day storms that saturate soil and raise the water table into the crawlspace zone
  • Flash floods that overwhelm surface drainage and push water into vents and access doors
  • Spring snowmelt combined with rain, creating peak groundwater conditions
  • Ice dams in winter that force roof runoff down exterior walls into the crawlspace perimeter
  • Properties in floodplains or near bodies of water that experience rapid water level changes during storms

Vapor Barrier, Encapsulation, and Ventilation Issues That Cause Crawlspace Flooding Symptoms

17yLF3IdSX-oZLrHPfu37w

Vapor barriers are supposed to block ground moisture from evaporating into the crawlspace, but thin 6 mil or 12 mil polyethylene sheets tear easily during installation or from foot traffic, pest activity, or settling. Once torn, soil moisture rises through the dirt floor and condenses on cooler surfaces (joists, ducts, insulation), creating damp conditions that mimic active flooding. A 20 mil vapor barrier, properly sealed at seams and edges, prevents ground moisture from entering the air. Seams must overlap and be taped with quality barrier tape, and edges should be sealed to foundation walls with adhesive or mechanical fasteners to stop moisture from wicking around the barrier.

Poor ventilation in a vented crawlspace during humid months pulls warm, moist outside air into the cooler crawlspace, where it condenses on cold surfaces and drips like rain. This condensation can wet insulation, rust fasteners, and promote mold growth even without any groundwater or surface water intrusion. Relative humidity above 60% in the crawlspace increases mold risk significantly. The target after remediation and encapsulation is 30 to 50% RH, maintained with a crawlspace rated dehumidifier. Homes that encapsulate and seal vents eliminate the outdoor humidity source and stabilize moisture levels year-round.

Encapsulation failures (poorly installed barriers, missed seams, or gaps around piers and penetrations) allow ground moisture to bypass the system. When homeowners see damp conditions after encapsulation, the issue is usually installation quality, not the concept itself. A proper encapsulation seals the floor, walls up to the sill plate, and all penetrations, turning the crawlspace into a conditioned or semi-conditioned space with controlled humidity. Without addressing ventilation and vapor barriers, crawlspace “flooding” becomes a recurring cycle of condensation and evaporation that never fully dries.

How Drainage System Failures Become Crawlspace Flooding Causes

3ojTogRwSfKwpVYGL1KZhQ

Perimeter drainage systems (French drains, exterior footing drains, or interior perimeter channels) are designed to intercept groundwater before it reaches the foundation. When these systems clog with soil, roots, or sediment, water backs up and floods the crawlspace instead of draining away. French drains installed without proper gravel bedding or filter fabric can collapse or fill with fines over time, losing capacity. Exterior drains buried during construction may have been damaged by landscaping, settling, or root intrusion, and homeowners often don’t realize the system has failed until flooding occurs.

Sump pumps remove water that collects in a sump pit, typically at the lowest point of the crawlspace or basement. Residential pumps rated at 1/3 to 1/2 horsepower can move 2,000 to 4,000 gallons per hour at zero head. Pumps fail when the float switch sticks, the impeller clogs, or the motor burns out from continuous use during prolonged storms. Pumps without check valves allow water to flow backward into the pit after each cycle, causing the pump to run constantly and wear out faster. Battery backup systems prevent flooding during power outages, which often occur during the same storms that cause the heaviest runoff.

Interior drain systems installed along the foundation perimeter collect seepage and direct it to a sump pit. If the pit fills faster than the pump can remove water (due to undersized pump capacity, clogged discharge lines, or pump failure), the crawlspace floods. Regular sump pump maintenance includes testing the pump monthly by pouring water into the pit to verify it activates, checking the discharge line for clogs or freezing, and replacing pumps every 5 to 10 years depending on use.

System Typical Failure Flooding Result
French Drain Clogged with soil, roots, or sediment; damaged by landscaping or settling Groundwater backs up and enters crawlspace through foundation cracks or dirt floor
Sump Pump Float switch failure, motor burnout, clogged impeller, power outage without backup Pit overflows; standing water spreads across crawlspace floor
Interior Perimeter Drain Channel clogs, discharge line blocked, or undersized for storm volume Water seeps through foundation and pools along walls instead of draining to sump

Structural Damage Caused by Crawlspace Flooding and Why It Matters

ItcdgG2Te-X1U0OQCEXHA

Prolonged moisture in a crawlspace causes wood rot in floor joists, sill plates, and support beams. Mold starts growing within 24 to 48 hours of wetting, spreading through wood framing and insulation. Wet wood loses strength, sags, and becomes spongy to the touch. Floors above the crawlspace feel soft or bouncy when joists lose structural integrity. Sill plates (the treated lumber that sits on top of the foundation and supports the house framing) rot from the bottom up when exposed to constant moisture, compromising the connection between the foundation and the home.

Wet insulation loses R-value and traps moisture against wood framing, speeding up decay. Fiberglass batt insulation absorbs water like a sponge and stays wet for weeks, increasing HVAC energy use by 15 to 25% because the home loses conditioned air through the floor. Wet insulation also adds weight to the floor system, pulling down on joists and fasteners. Once insulation is soaked, it must be removed and replaced after the crawlspace is dried and the water source is fixed. Leaving wet insulation in place guarantees mold growth and structural damage.

Major structural risks from crawlspace flooding:

  • Wood rot in floor joists and beams, leading to sagging floors, bounce, and eventual structural failure
  • Sill plate rot that weakens the connection between foundation and house framing, requiring expensive sister joist repairs or full sill replacement
  • Mold growth on framing lumber, subfloor, and insulation, contaminating indoor air and requiring remediation
  • Insulation saturation that increases energy costs, adds weight to the floor system, and traps moisture against wood

Long Term Prevention for Crawlspace Flooding Causes

Preventing crawlspace flooding starts with controlling surface water. Regrade soil so it slopes away from the foundation at least 6 inches over 10 feet, ideally for the first 10 feet around the entire perimeter. Fill low spots near the foundation and extend downspouts at least 4 to 6 feet away, using buried extensions or above-ground splash blocks that discharge onto sloped ground. Gutters should be cleaned every 6 months minimum. More often in areas with heavy tree cover or frequent storms. Inspect gutters after major storms to confirm they aren’t overflowing or pulling away from the fascia.

Subsurface water requires drainage systems. Install French drains or exterior footing drains if groundwater regularly enters the crawlspace. Interior perimeter drains tied to a sump pump work when exterior excavation isn’t feasible. Sump pumps need regular testing (pour water into the pit monthly to confirm the pump activates) and should include a battery backup or generator connection to handle power outages during storms. Replace sump pumps every 5 to 10 years, or sooner if the pump cycles constantly or fails to keep the pit empty during rain.

Encapsulate the crawlspace with a sealed 20 mil vapor barrier on the floor and up the foundation walls. Seal all seams, edges, and penetrations. Install a crawlspace rated dehumidifier to maintain relative humidity between 30 and 50%, preventing condensation and mold. Inspect the vapor barrier, dehumidifier filters, and sump pump annually, and check the crawlspace after every heavy rain for standing water, new odors, or moisture readings above 60% RH. Scheduling an annual professional inspection catches small problems (cracked barriers, clogged drains, failing pumps) before they cause flooding.

Five long term prevention steps every homeowner should take:

  • Regrade yard to slope away from foundation and fill low spots that collect water near the house
  • Clean gutters every 6 months and extend downspouts 4 to 6 feet minimum from the foundation
  • Install or upgrade perimeter drainage systems (French drains or interior channels) and tie them to a reliable sump pump with battery backup
  • Encapsulate the crawlspace with a heavy duty vapor barrier and maintain 30 to 50% relative humidity with a dehumidifier
  • Schedule annual professional inspections of drainage systems, sump pumps, and vapor barriers to catch failures early

When Crawlspace Flooding Causes Require Professional Help

DIY methods work for minor moisture issues, but certain conditions demand professional waterproofing, structural repair, or mold remediation. Standing water deeper than 1 inch that won’t drain after a storm or reappears after pumping indicates a chronic drainage failure that needs excavation, perimeter drains, or sump system installation. Mold covering more than 10 square feet, or any mold on structural framing, requires professional remediation to contain spores, remove contaminated materials safely, and verify clearance with post remediation testing.

Foundation cracks wider than 1/4 inch, or any crack that shows vertical displacement or ongoing movement, need structural evaluation. These cracks may indicate settlement, soil pressure, or foundation failure that can’t be fixed with surface sealants. Repeated sump pump failures (where the pump runs continuously, doesn’t keep the pit empty, or fails during every storm) signal an undersized system, clogged discharge, or capacity problem that requires a pump upgrade, additional pits, or exterior drainage improvements.

Document all damage before starting repairs. Photograph standing water, measure depths, capture images of stains, mold, and damaged materials. Record dates and weather conditions. This documentation supports insurance claims for water damage, mold remediation, and structural repairs. Some policies cover sudden plumbing failures but exclude gradual seepage or maintenance related flooding. Professional remediation companies provide detailed reports, moisture readings, and scope documents that help with claims and provide a record of work completed. When damage is severe, hiring professionals protects your home’s structure, your family’s health, and your insurance recovery options.

Final Words

First, stop the water and reduce ongoing damage—clean gutters, extend downspouts, run the sump pump, or call someone who can.

This post walked through how surface runoff, high groundwater and hydrostatic pressure, blocked drains, foundation cracks, plumbing failures, and poor encapsulation all lead to wet crawlspaces. It also covered checks, fixes, and when to bring in a pro.

Knowing the common crawlspace flooding causes helps you act fast, document what happened, and move from emergency to repair. You’ll get this fixed and back to normal.

FAQ

Q: Is it normal for a crawl space to flood?

A: It’s common for crawl spaces to flood when grading, gutters, or groundwater fail, but it’s not acceptable. Act quickly to stop water, dry the space, and repair to prevent mold and rot.

Q: Does homeowners insurance cover a flooded crawl space?

A: Homeowners insurance coverage for a flooded crawl space depends on the cause. Sudden plumbing leaks are often covered; flood from heavy rain or rising groundwater usually needs a separate flood policy. Document and report promptly.

Q: How to unflood a crawl space?

A: To unflood a crawl space, stop the water source, extract standing water, run a sump or pump, then use air movers and dehumidifiers. Measure moisture and remove wet insulation; call pros for sewage or deep flooding.

Q: When to worry about water in a crawl space?

A: You should worry about water in a crawl space when you see standing water over one inch, musty smells, visible mold, sagging floors, repeated leaks, or sump pump failure—call a pro for inspection and documentation.

Ceiling Drywall Repair After Leak: Restore Your Water-Damaged Ceiling

0

Think a water stain on your ceiling is just cosmetic?
It isn’t.
A leak can soak drywall, weaken joints, feed mold, and even make a ceiling sag or fall.
In this guide on ceiling drywall repair after leak you’ll get the exact first steps.
Stop the water, cut power, and begin drying.
You’ll learn how to check whether to patch or replace, what tools and materials you need, and clear signs it’s time to call a pro.
No guesswork.
Just steady steps to stop more damage and restore the ceiling.

What To Do Immediately After Discovering Water Damage

OwaRAJ9fRRCtIplJer7UEw

First thing you need to do is stop the water. If it’s a burst pipe or supply line, shut off the water main. Roof leak? Get a tarp over the damaged section outside or set buckets underneath until the weather clears. Can’t reach the roof? Contain what you can below and call for help.

Turn off electricity in the affected room. Water and electricity don’t mix, and wet drywall can conduct current. Flip the breaker for any lights, outlets, or fixtures near the damaged ceiling. Not sure which breaker controls that area? Turn off the main panel until you can figure it out. Move furniture, electronics, and anything else you want to keep dry out of the room or cover them with plastic sheeting.

Start drying the space as soon as the leak stops and it’s safe to work. You want to begin within the first 24 to 48 hours, before mold shows up or the ceiling gets worse. Follow these steps to protect the structure and keep damage from spreading:

  1. Open windows and doors to get air moving and let moisture escape.
  2. Set up fans aimed at the wet ceiling and surrounding walls to speed up evaporation.
  3. Run a dehumidifier if you’ve got one. It pulls moisture from the air faster than fans alone.
  4. If the ceiling is bulging with trapped water, puncture the lowest point carefully with a small utility knife and catch the water in a bucket. Relieving that pressure prevents collapse.
  5. Remove soaked insulation from the attic or ceiling cavity if you can reach it safely. Wet insulation holds moisture and slows everything down.

Don’t start repairs until everything’s dry. Sealing in moisture will cause mold, odors, and a failed patch.

How To Assess the Severity of the Ceiling Drywall Damage

HUb-lzz2Qi-BVJ42P2IreA

Once the leak is stopped and drying has started, you need to figure out whether the ceiling can be patched or needs replacing. Walk the room and look for visible stains, sagging sections, peeling tape at seams, and soft or crumbly texture. Press gently on stained areas with your fingertips. If the drywall feels spongy, cool to the touch, or gives under light pressure, it’s compromised and has to come out.

Measure the size of the damage. Small stains (less than a foot across) with firm, dry drywall around them can often be patched after treating the stain. Larger stains, sagging panels, or areas where the ceiling paper is peeling or blistering usually mean the drywall core absorbed too much water and lost its structure. If tape along seams is lifting or bubbling, or if you see a gray or chalky appearance when you peel back a small section, replacement is required.

When you’re not sure, cut a small inspection hole in a stained area using a utility knife. Look at the gypsum core inside. If it’s dark, soft, or crumbling, that section has to go. Cutting back to solid, dry material is the only reliable repair.

Tools and Materials Needed for Repair

rdm9HgFCR-6lwoGnK0mnw

Having the right tools and materials on hand before you start makes the job faster and cuts down on mistakes. You don’t need specialty equipment for most ceiling repairs, but skipping key items will slow you down or leave a rough finish. Here’s what to gather:

  • Utility knife with extra blades
  • Drywall saw or oscillating multi-tool for cutting out damaged sections
  • Tape measure and pencil
  • 1 ¼” drywall screws
  • Cordless drill or screw gun
  • Replacement drywall (½” or ⅝” to match your existing ceiling)
  • Fiberglass mesh tape or paper joint tape
  • All purpose joint compound (also called mud)
  • 6 inch and 10 or 12 inch putty knives
  • Sanding block or pole sander
  • Stain blocking primer (shellac based, oil based, or a recommended water based sealer)
  • Dust mask, safety glasses, and gloves

Using the correct thickness of drywall and the right primer will prevent visible seams and stains from bleeding through your finished ceiling.

Step By Step Ceiling Drywall Repair After a Leak

v-jOYGtZST-BeCMhevW3ew

This is the full sequence to remove damaged drywall, install a new piece, and prepare the ceiling for paint. Each step builds on the one before it, so follow the order and confirm dryness before you begin.

Start by marking the area you’ll remove. Use a pencil and straightedge to draw a square or rectangle around all visible damage, extending at least 6 to 12 inches beyond stains, soft spots, or sagging sections. Cutting back to solid drywall and ideally to the nearest ceiling joists gives you a stable base for the patch.

  1. Cut along your marked lines with a drywall saw or utility knife, scoring deeply and snapping the drywall if needed. Wear a dust mask and eye protection.
  2. Remove the damaged drywall and bag it right away to keep dust and contamination contained.
  3. Inspect the ceiling cavity. Look at the joists, insulation, and any plumbing or wiring. If insulation is wet or stained, pull it out and replace it after everything dries.
  4. Let the exposed framing and surrounding drywall dry for 24 to 48 hours. Use fans, dehumidifiers, or both, and confirm dryness by touch and with a moisture meter if you have one.
  5. Cut a replacement piece of drywall to fit the opening, trimming carefully so edges meet existing drywall without large gaps.
  6. Screw the new drywall into the ceiling joists every 8 to 12 inches, driving screws just below the surface without breaking the paper. If you’re working alone, use a drywall lift or temporary wood cleats nailed to the joists to hold the panel while you fasten it.
  7. Apply fiberglass mesh tape or paper tape over all seams, pressing it flat. Mesh tape is easier for beginners, but paper tape produces a flatter finish when done right.
  8. Spread a thin coat of joint compound over the tape with a 6 inch knife, embedding the tape fully and removing excess mud. Let it dry for 24 hours, then apply a second coat with a wider knife, feathering the edges outward, and repeat with a third coat if needed. Sand lightly between coats and after the final coat dries.

After sanding, the patch should feel smooth and flush with the surrounding ceiling. Wipe away dust with a damp cloth before priming.

Preventing Mold and Ensuring the Area Dries Properly

P2BwES8JT9Cm-Jq4rOwAtA

Mold can start growing within 24 to 48 hours of water exposure, so drying the ceiling completely isn’t optional. Even if the surface feels dry, moisture can remain inside the drywall core, behind insulation, or in the framing. That hidden moisture will cause mold, odors, and a patch that fails within weeks.

Use fans to move air across wet surfaces and into the ceiling cavity if you’ve removed drywall. A dehumidifier is more effective than fans alone because it pulls moisture out of the air instead of just circulating it. In cold weather, raising the heat in the room helps speed evaporation. If you see condensation forming on windows or walls, the air is too humid. Keep the dehumidifier running. A moisture meter is the most reliable way to confirm dryness. Readings should match the surrounding, undamaged drywall before you close the ceiling. If you don’t have a meter, the “touch test” works for most cases. Drywall shouldn’t feel cool, damp, or spongy.

If you see visible mold on framing, insulation, or drywall, don’t seal it in. Small surface mold on wood framing can be scrubbed with a diluted bleach solution (1 cup bleach per gallon of water), allowed to sit for 10 to 15 minutes, then wiped or rinsed. Replace any moldy insulation and discard moldy drywall. Mold covering more than 10 square feet, or mold that’s spread deep into materials, requires professional remediation with containment and HEPA filtration.

Estimated Costs for Ceiling Drywall Repair After a Leak

A7HxjdzQTJmZ6RI1lK6Q_A

A small DIY patch using materials you already have or can buy at a hardware store might cost less than $100. That estimate includes a small sheet of drywall, joint compound, tape, sandpaper, primer, and paint. If you need to rent or buy tools like a drywall saw, sander, or moisture meter, add another $50 to $150.

Professional repairs vary widely depending on the size and complexity of the job. Factors that affect cost include:

Size of the damaged area. Larger patches or full panel replacements cost more in labor and materials.

Water category. Clean water from a supply line is simpler than contaminated water from a toilet or roof. Contaminated water requires additional cleaning and safety steps.

Mold remediation. If mold is present, expect containment, HEPA air scrubbing, and antimicrobial treatment, which can add hundreds to thousands of dollars.

Structural repairs. If ceiling joists are damaged or sagging, reinforcement or replacement raises the total significantly.

Hiring a contractor for a straightforward ceiling patch in one room might run $300 to $800. Larger jobs involving mold, multiple rooms, or structural work can reach several thousand dollars. Insurance often covers sudden incidents like burst pipes or water heater failures, but coverage depends on your policy and the cause of the leak.

When You Should Call a Professional

TFXv3MQPTPy1yrZpPiyjVw

You can handle small patches under 10 square feet if the leak is fixed, the drywall is dry, the damage is cosmetic, and there’s no mold. Anything beyond that moves into territory where mistakes cost more than hiring help from the start.

Call a professional if the ceiling is sagging or if you see cracks in the drywall that run along joists. Both are signs that framing may be compromised and need reinforcement or replacement. Electrical fixtures, junction boxes, or wiring near the damaged area also require a licensed electrician to verify safety before you close the ceiling. Mold covering more than 10 square feet, or any mold you can’t positively identify as surface level, needs a remediation company with proper containment and air filtration. Sewage backups or water from toilets, drains, or flooding are contaminated and unsafe for DIY cleanup.

Textured ceilings are difficult to match without experience, and a poorly blended repair will be obvious every time you look up. If your ceiling has knockdown, orange peel, or popcorn texture, a drywall contractor can match it and make the repair invisible. High ceilings, vaulted spaces, or areas that are hard to reach safely are also better left to professionals who have lifts, scaffolding, and the experience to work overhead for long periods without injury.

Final Words

Stop the leak, shut off power if it’s near the wet area, move valuables, and start controlled drying right away. Quick action limits hidden damage.

Next, assess the ceiling, measure moisture, and gather the right tools. Follow the step-by-step patch and replacement process, and use moisture readings before you close the ceiling.

Know typical costs and when to call a pro for structural or electrical problems. With these steps, ceiling drywall repair after leak is manageable, and your home will be back to normal soon.

FAQ

Q: How to dry out a drywall ceiling after a leak?

A: To dry out a drywall ceiling after a leak, stop the source, remove wet insulation, run fans and a dehumidifier, and verify dryness with a moisture meter before closing the ceiling.

Q: How to repair a ceiling after a water leak?

A: To repair a ceiling after a water leak, cut out soaked drywall, inspect framing, replace wet insulation, install new drywall, tape and mud seams, sand, then prime and paint.

Q: How much does it cost to repair a ceiling after a leak?

A: The cost to repair a ceiling after a leak ranges from a few hundred dollars for small patches to several thousand for large or hidden damage; size, materials, mold, and electrical work drive the price.

Tarp vs Emergency Roof Repair: Which Protects Your Home Best?

0

You’re staring at roof damage after a storm. A tarp costs $300. Emergency repair runs $3,000. Which one actually stops the next rainstorm from destroying your ceilings, walls, and everything inside? The answer isn’t always what you think. Tarps buy you time when you need it, but they’re not a fix. Emergency repairs solve the problem permanently, but you don’t always need them right away. Here’s how to know which protects your home when minutes matter.

Quick Decision Guide: Tarp or Emergency Repair?

HOdm-rATRvu4yjhSJWfHzQ

Situation Tarp Solution Emergency Repair Urgency Level
Minor leak, attic drip during heavy rain Usually sufficient for 30-90 days Not immediately required Low – schedule within 1 week
Moderate damage, missing shingle section Adequate temporary protection Recommended within 2-3 weeks Moderate – tarp then plan repair
Structural compromise, sagging decking Immediate tarp, then urgent repair Required within 48-72 hours High – both needed quickly
Widespread shingle loss, exposed underlayment Emergency tarp to prevent next storm Schedule within 1 week High – tarp immediately
Leak near electrical fixtures or wiring Not sufficient alone Immediate professional response required Critical – safety hazard

Tarping provides temporary protective coverage lasting 30 to 90 days depending on material quality and weather exposure. It stops active water coming in and prevents further damage while you get permanent fixes arranged. Emergency repair delivers immediate solutions that restore your roof’s structural integrity and weatherproofing. The key difference is duration and purpose. Tarps buy you time. Repairs solve the problem.

Most people use tarping as the first response before professional assessment and permanent repair work begins. This makes sense when you’re waiting for insurance adjusters to inspect damage, when roofing materials are backordered, or when weather conditions prevent safe repair work. Tarping during these waiting periods keeps a small problem from becoming catastrophic interior damage.

Getting an accurate damage assessment determines the right response level. Walk through your attic during daylight and look for visible light coming through roof boards. Check for active dripping or water stains, and see whether structural components like rafters show sagging or cracking. When you’re not sure, get a professional inspection before deciding between temporary tarping and immediate emergency repair.

Cost Comparison: Tarping Versus Emergency Roof Repair

ZMWuzcLXT92c2yY8H4OL3w

Cost drives most emergency roofing decisions, especially when damage happens unexpectedly and budgets are tight. Understanding the financial trade-offs between temporary protection and permanent fixes helps you make practical choices that protect both your home and your wallet.

Professional tarp installation typically costs between $200 and $1,000 depending on damage size, roof accessibility, and how bad the situation is. A $300 tarp installation can prevent $5,000 in water damage by stopping interior damage before it spreads to ceilings, walls, insulation, and belongings. DIY tarping runs $50 to $200 for materials if you already own basic tools and safety equipment. According to FEMA, one inch of standing water inside a home can cause over $25,000 in damage, making even professional tarping a worthwhile prevention measure.

Emergency roof repair costs vary significantly based on damage extent, roof pitch and accessibility, required materials, and contractor availability during peak seasons. Minor emergency repairs fixing small sections of shingles or flashing typically run $500 to $2,000. Moderate repairs addressing larger damaged areas or partial decking replacement range from $2,000 to $7,000. Major emergency work involving structural repairs, extensive shingle replacement, or underlayment damage can exceed $10,000. Prices spike during peak storm seasons when contractors are in high demand and emergency service fees apply.

Solution Type Typical Cost Range Duration Best For
DIY Tarping $50 – $200 30-60 days Minor damage, homeowners with safety equipment and roofing experience
Professional Tarping $200 – $1,000 60-90 days Most situations requiring temporary protection while arranging permanent repairs
Emergency Roof Repair $500 – $10,000+ Permanent Structural damage, electrical hazards, extensive damage, or when tarping won’t provide adequate protection

Critical Situations Requiring Immediate Professional Repair

PuNOth5dTkGv1gE1OCB33Q

Some roof damage exceeds what tarping can safely protect. These situations require immediate professional emergency repair instead of temporary covering.

When you see any of these, call a roofing contractor before attempting to tarp:

Active water pouring or streaming inside your home creates immediate interior damage to ceilings, walls, insulation, furniture, and personal belongings. Costs increase the longer water flows in.

Large sections of missing shingles exposing underlayment or bare wood decking leave your home vulnerable to devastating water intrusion during the next rainstorm.

Structural damage to rafters, joists, or decking with visible sagging or dipping indicates dangerous weakening that could worsen or lead to collapse in extreme cases.

Leaks near light fixtures, electrical outlets, fuse boxes, or attic wiring create serious shock and fire hazards requiring power shutdown and both roofing and electrical professional response.

Visible daylight shining through roof boards from inside your attic means complete roof penetration that tarping may not adequately seal.

Water stains spreading rapidly across multiple rooms or floors indicates extensive hidden damage behind walls and ceilings.

Compromised valley areas where two roof planes meet channel water incorrectly and speed up damage to surrounding structure.

Extensive granule loss across large shingle sections signals advanced deterioration where remaining material won’t hold tarp anchors securely.

Damaged chimney structures or failed flashing systems allow water penetration that tarps can’t address without professional metalwork repairs.

Professional roofing contractors assess structural integrity beyond visible surface damage. They identify hidden problems beneath symptoms you can see, provide accurate repair scopes, ensure work meets building codes, and determine whether damaged areas require spot repairs or more extensive reconstruction. Delaying professional help in these emergency cases risks safety, allows damage costs to grow as problems spread, and may create insurance complications if carriers determine you didn’t take reasonable steps to prevent additional damage.

Complete DIY Tarping Guide: Materials, Tools, and Installation

TOKce9_5Sr25UcgeuuwrBw

DIY tarping suits minor damage during clear weather when you have proper safety equipment and roofing experience. Professional installation is recommended for steep roofs above 6/12 pitch, extensive damage covering more than 100 square feet, or when weather conditions remain unstable with continued rain or wind forecasts.

Material/Tool Specification Purpose
Heavy-duty polyethylene tarp UV-resistant, minimum 6-mil thickness, sized 2-3 feet beyond damage perimeter Primary waterproof barrier preventing rain, snow, and debris infiltration
2×4 wooden boards Pressure-treated, 8-foot lengths, quantity based on perimeter securing needs Anchor strips distributing fastener stress and preventing tarp tear-through
Roofing nails or screws 1.5-inch minimum length with rubber washers to seal penetrations Secures boards through tarp grommets into roof decking without creating new leak points
Extension ladder Reaches 3 feet above roof edge with standoff stabilizer Safe roof access without damaging gutters or siding
Fall protection harness Full-body style with roof anchor point and minimum 6-foot lanyard Prevents falls on steep or high roofs
Cordless drill or hammer 18V drill with driver bit or 16-ounce framing hammer Drives fasteners through boards and tarp into decking
Utility knife and measuring tape Retractable blade knife, 25-foot measuring tape Cuts tarp to size and measures coverage area accurately
Sandbags or weights 40-50 pounds each, quantity based on tarp perimeter Holds down tarp edges preventing wind uplift between anchor points

Use minimum 6-mil thickness UV-resistant polyethylene as your standard tarp material for typical coverage lasting 30 to 60 days. Polyethylene tarps are lightweight yet tough, making them popular for roof repairs and easier to handle during installation. Vinyl tarps offer better durability and waterproof properties for extended coverage beyond 60 days, though they cost more and weigh significantly more during installation. Canvas tarps provide breathable coverage preventing condensation buildup under the tarp, but they’re not fully waterproof and work better for protecting materials than sealing roof damage.

Gather all tools and materials before climbing onto your roof. Safety equipment isn’t optional. Fall protection harnesses, proper footwear with slip-resistant soles, and a partner helping from the ground are essential components of safe tarp installation. Work during clear weather with dry roof surfaces and temperatures above 40 degrees when materials remain flexible and grip is reliable.

Installation steps:

  1. Assess damage extent from inside your attic first. Look for daylight penetration, water stains, and compromised decking, then measure the damaged area adding 2 to 3 feet on all sides for adequate overlap.

  2. Select an appropriately sized tarp with reinforced grommets spaced every 18 to 24 inches around the perimeter for secure anchoring without tear-through.

  3. Position the tarp with smooth side facing up centered over the damaged area. Make sure it extends from ridge peak down past the damaged section toward the eaves to channel water properly.

  4. Anchor the peak side first using 2×4 boards laid across the tarp through grommets, secured with roofing nails or screws with rubber washers driven into solid decking every 12 inches.

  5. Pull the tarp downward toward eaves. Get rid of wrinkles and ensure taut coverage, then secure side edges with boards and fasteners maintaining consistent tension.

  6. Secure all perimeter edges with wooden boards fastened through grommets at 12 to 18 inch intervals, paying extra attention to corners where wind uplift starts.

  7. Weight the perimeter with sandbags placed every 3 to 4 feet between anchor points. This prevents wind from getting underneath and lifting edges during storms.

Never attempt tarp installation during active storms, high winds above 20 mph, or on wet and slippery roof surfaces where fall risk increases dramatically. Always use a safety harness on roofs steeper than 4/12 pitch or higher than one story off the ground. Never work alone. Keep a partner on the ground for tool passing, emergency help, and ladder stabilization. Maintain three points of contact when climbing ladders, avoid working near power lines, and stop immediately if conditions feel unsafe.

Tarp Lifespan and When Temporary Protection Fails

9Uk8bjDVR5W7B9Puy4ti7Q

Properly installed roof tarps last 30 to 90 days depending on material quality, weather exposure intensity, UV radiation levels, and installation quality. Standard 6-mil polyethylene tarps in moderate climates with mixed sun and rain typically provide 30 to 45 days of reliable protection. Heavier 12-mil polyethylene or vinyl tarps in similar conditions extend coverage to 60 to 90 days. Harsh conditions with intense sun exposure, high winds, temperature extremes, or heavy snow loads shorten these timeframes significantly.

Vinyl tarps offer the longest lifespan with better UV resistance and tear strength, making them worth the extra cost for extended coverage periods. Polyethylene tarps are lightweight and popular for typical emergency situations, but they degrade faster under intense sun exposure. Canvas tarps provide breathability preventing condensation buildup underneath, but they’re not fully waterproof and work better for material protection than roof damage coverage.

Check your tarp condition weekly during the first month, then every 3 to 4 days as it ages past 45 days. Inspect after every storm or high wind event for displacement, new tears, or fastener pull-through. Catching degradation early lets you replace before complete failure during the next rain event.

Degradation Sign Meaning Action Required
Fading or chalky discoloration across surface UV breakdown weakening material structure Replace within 1-2 weeks before material tears
Visible tears, holes, or separation at grommets Material failure allowing water penetration Replace immediately, repair not reliable
Reduced water resistance with seepage or dripping Waterproof coating degraded by weather exposure Replace within days to prevent interior water damage
Loose edges flapping during moderate winds Fastener pull-through or inadequate securing Re-secure with additional boards and fasteners, or replace if material torn
Brittleness or cracking when handling material Extreme UV or cold damage making tarp fragile Replace immediately, brittle material will fail during next storm

Insurance Coverage for Roof Tarping and Emergency Repairs

hDYkfe56RfinLMILEAYx3A

Most homeowner insurance policies cover emergency tarping costs as part of storm damage or weather-related roof damage under dwelling coverage. Coverage typically includes both materials and professional installation labor when damage results from covered events like wind, hail, falling trees, or other acts of nature. Review your specific policy or call your insurance agent to confirm emergency protection coverage before damage occurs.

Insurance policies include a mitigation duty clause requiring you to take reasonable steps preventing additional damage after a covered loss occurs. Properly tarping damaged roof sections demonstrates good faith effort meeting this requirement and protects your claim from potential denial due to neglect. A $300 professional tarp installation prevents $5,000 to $25,000 in secondary water damage by stopping infiltration before it spreads through ceilings, walls, insulation, and interior belongings. According to FEMA data, one inch of standing water inside a home causes over $25,000 in damage on average, making immediate tarping one of the most worthwhile protection measures available.

Document everything before, during, and after tarping. Take timestamped photos of roof damage from multiple angles before covering it, showing the extent and type of damage clearly. Photograph tarp installation from ground level and closer views showing securing methods and coverage area. Save all receipts for materials purchased and services hired, including tarp supplies, installation labor, and related emergency protection expenses. Get written estimates from roofing contractors for permanent repairs before your insurance adjuster visits. Most insurers require inspection before authorizing permanent repair work, and solid documentation supports accurate damage assessment and claim approval.

Coordinate adjuster inspection timing with your contractor to ensure proper damage evaluation happens before tarp removal. Some adjusters want to see damage uncovered, while others accept thorough photo documentation. Ask your insurance company about their specific requirements when you file your claim.

Photograph any progressive damage that develops during your tarp coverage period, such as new water stains appearing, additional shingle loss around tarped areas, or interior damage spreading despite temporary protection. Maintain regular communication with your insurance adjuster about condition changes, tarp replacement needs, or developing secondary damage issues. This ongoing documentation protects your claim by showing you monitored the situation responsibly while waiting for permanent repairs.

Safety Risks of DIY Tarping Versus Hiring Professionals

nO64uCJ7RfWovhiysbTopA

Roof work accounts for thousands of homeowner injuries annually, with falls causing the majority of serious accidents requiring hospitalization or resulting in permanent disability. Climbing onto damaged roofing material adds to normal roof access risks with unstable surfaces, unexpected weak spots, and compromised structural support that can give way under body weight.

Specific safety hazards include:

Steep pitch instability on roofs above 6/12 slope where footing becomes difficult and fall risk increases dramatically without proper equipment.

Wet or icy surface conditions making shingles slippery and eliminating reliable foot traction.

Damaged structural integrity creating unexpected soft spots where decking has weakened from water infiltration.

Power line proximity near roof edges or overhanging nearby structures creating electrocution risk.

Inadequate fall protection equipment with improper harness use, missing anchor points, or insufficient lanyard length.

Weather exposure during installation including sudden wind gusts, temperature extremes, or unexpected rain making surfaces hazardous.

Professional roofing contractors bring OSHA-required safety training covering fall protection, ladder use, and hazard recognition that most homeowners lack. They use proper commercial-grade safety equipment including full-body harnesses, roof anchors rated for fall arrest loads, and slip-resistant footwear designed for pitched surfaces. Licensed contractors carry liability insurance and workers’ compensation coverage protecting you from financial responsibility if accidents occur on your property. Their experience working on unstable and damaged surfaces translates to faster, safer installation with better securing techniques and damage assessment. Team coordination during professional installation provides immediate help if problems develop, while solo DIY attempts leave you without help during emergencies.

Homeowner injuries sustained during DIY roof repairs may not be covered by your homeowner’s insurance policy, leaving you responsible for medical expenses, lost wages, and long-term care costs if serious injury occurs. Property liability coverage typically excludes injuries to the homeowner performing maintenance or repairs, a gap many people don’t discover until after an accident happens.

Weather Considerations for Roof Tarping and Emergency Repairs

pD6d_xs0QtCPq41gjXCHnw

Safe tarp installation requires clear weather windows with dry roof surfaces and wind speeds below 20 mph. Plan installation during morning hours when dew has dried but afternoon thunderstorms haven’t developed yet. Avoid working during temperature extremes below 40 degrees when materials become brittle or above 95 degrees when heat stress becomes dangerous and asphalt shingles soften underfoot.

Winter weather creates multiple challenges for both tarping and permanent repairs. Ice formation under tarps traps moisture against roof surfaces, speeding up rot in exposed decking. Snow load accumulation on tarped areas stresses already damaged structure and can cause fastener pull-through or material tearing. Freezing temperatures limit adhesive-based products like roofing cement and tape that won’t bond properly below 40 degrees. Shorter daylight work windows from November through February reduce available installation time and increase pressure to rush jobs as darkness approaches.

Summer conditions speed up UV degradation of tarp materials, shortening effective lifespan from 90 days to 45 days in intense sun exposure. Thermal expansion of roofing materials and tarp fabric during midday heat creates tension on fasteners and anchor points. Afternoon thunderstorm patterns in many regions limit safe work windows to morning hours only. Heat stress on workers during installation reduces focus and increases accident risk, making hydration breaks and shade rest periods essential but time-consuming.

Pre-season roof inspection during spring or fall provides valuable early warning of vulnerabilities before storm seasons arrive. Stock emergency tarp supplies in hurricane zones or severe weather areas so materials are immediately available when damage occurs and stores sell out. Recognize that contractor availability bottlenecks develop quickly during widespread disaster events when demand for emergency services overwhelms local capacity, making advance relationships with reputable contractors valuable for faster response when you need help.

How Long Emergency Roof Repairs Take Compared to Tarping

AUiIazuXQSytoZ3RRoPeTw

Time becomes critical when roof damage threatens ongoing interior damage with every passing hour and each approaching storm. Understanding realistic timeframes for different solutions helps you set appropriate expectations and plan accordingly.

Typical timeframes for different scenarios:

DIY tarp installation takes 2 to 4 hours for homeowners with basic skills and help, covering damage areas up to 200 square feet.

Professional tarp service responds same-day to within 24 hours depending on service availability and weather conditions, completing installation in 1 to 2 hours.

Minor emergency repair fixing small shingle sections or simple flashing issues requires 1 to 3 days from initial contact to completion.

Moderate emergency repair addressing larger damaged areas or partial decking replacement needs 3 to 7 days including assessment, material procurement, and installation.

Major emergency repair or partial replacement involving structural repairs, extensive shingle work, or underlayment replacement takes 1 to 3 weeks depending on scope and material availability.

Damage extent determines baseline repair duration, with each additional complication adding time. Material availability affects scheduling when specific shingle styles, colors, or specialty products require ordering from manufacturers or distant suppliers. Current weather conditions delay outdoor work during rain, high winds, or temperature extremes. Contractor schedule availability varies seasonally, with spring and fall storm seasons creating backlogs of 2 to 4 weeks while winter months often allow faster scheduling. Permit requirements in some jurisdictions add 3 to 10 business days for plan review and approval before work begins.

Peak season delays during spring hail storms or summer hurricane events can extend contractor response times from days to weeks as widespread damage overwhelms local capacity. Maintain your tarp properly during extended repair waits by checking condition weekly and replacing degraded tarps before failure. Many contractors charge emergency service fees of 50 to 100 percent above standard rates for immediate response during storms or outside normal business hours, a cost that may make sense for severe damage but seems excessive for minor issues that can wait.

Preventing Additional Damage While Waiting for Permanent Repairs

27rQ89vqRruKc1Y8e1YbJg

Proper interior moisture management prevents mold growth and secondary damage while your temporary tarp protects the roof above. Place large catch basins, buckets, or plastic bins under any active drip points where water penetrates despite tarping. Move furniture, electronics, and valuable belongings away from affected areas to prevent damage from unexpected leaks or tarp failure. Run dehumidifiers in rooms below damaged roof sections to reduce ambient moisture levels and prevent mold establishment. Increase ventilation by opening windows during dry weather to promote air circulation and faster drying. Check insulation in affected attic areas for saturation by squeezing material. If water drips out, that insulation needs removal to prevent mold growth and ceiling staining.

Tarp monitoring prevents small problems from becoming major failures. Conduct weekly visual inspections from ground level looking for sagging areas indicating water pooling, loose edges flapping during winds, or visible deterioration. Perform post-storm checks within 24 hours after high winds, heavy rain, or hail events that could damage or displace tarps. Address pooling water on tarp surfaces by improving drainage slope or adding support underneath to prevent ponding stress. Re-secure loose edges immediately by adding fasteners, replacing pulled-through boards, or repositioning sandbags before wind gets underneath and tears material. Watch for new leaks developing around tarp perimeter where water may channel under edges, indicating need for coverage expansion.

Attic ventilation and insulation management become critical during extended tarp coverage periods. Ensure ridge vents, soffit vents, and gable vents remain clear and functional to prevent condensation buildup under tarps. Remove saturated insulation from damaged areas within 48 hours of initial water exposure to prevent mold establishment and spreading. Monitor weekly for mold growth on wood framing, decking, or remaining insulation by looking for black, green, or white fuzzy growth and musty odors. Maintain airflow through affected spaces by running fans when weather permits, avoiding stagnant humid conditions where mold thrives.

Selecting a Qualified Emergency Roofing Contractor

Vetting contractors during roofing emergencies creates time pressure when your instinct is to hire the first person who answers the phone. Taking 30 minutes to verify credentials and check references prevents costly mistakes from hiring underqualified or fraudulent operators who disappear after collecting deposits or perform substandard work that creates more problems than it solves.

Essential contractor qualifications:

Active state and local licensing verifiable through your state contractor licensing board website or phone inquiry.

Current liability insurance and workers’ compensation coverage with certificates you can verify directly with insurance carriers.

Emergency response availability including after-hours phone contact and realistic response timeframes, not vague promises.

Established local business presence for at least 5 years with verifiable physical address, not just post office boxes.

Recent emergency work references you actually call to ask about response time, quality, communication, and final satisfaction.

Written estimates before work begins detailing scope, materials, labor, and timeline, never verbal-only agreements.

Insurance claim experience working with major carriers and understanding documentation requirements for smooth claim processing.

Manufacturer certifications from major shingle brands indicating advanced training and access to extended warranties.

Red flags require walking away immediately. Contractors requesting full payment upfront before starting work create unacceptable risk of abandonment or substandard completion. Door-to-door solicitation immediately after storms often signals storm chasers who lack local licensing, insurance, or quality commitment. Businesses without physical addresses or verifiable office locations can’t be contacted for warranty issues or problem resolution later. High-pressure tactics demanding immediate contract signing prevent proper comparison shopping and verification. Contractors who refuse to provide insurance verification or claim they’re covered by homeowner’s policies aren’t properly insured. Prices significantly below competitors by 30 percent or more often indicate cut corners, inadequate materials, or undisclosed limitations in scope.

Establish documented communication patterns from first contact. Get written agreements covering all work scope, materials specifications, timeline commitments, payment schedules, and warranty terms before work starts. Set expectations for progress update frequency like daily text message updates or scheduled phone calls every other day. Confirm after-hours contact availability for urgent questions during installation or if weather emergencies develop. Document these communication standards in writing so both parties understand expectations before problems occur.

Permit and Building Code Requirements for Emergency Roof Work

Emergency roof tarping typically doesn’t require building permits because it’s considered temporary protective covering rather than permanent construction. Permanent repair work usually requires permits when repairs exceed certain square footage thresholds that vary by jurisdiction, commonly 100 square feet in many areas, or involve structural components like decking replacement, rafter repair, or load-bearing modifications. Check with your local building department when scheduling permanent repairs to determine specific permit requirements for your situation, understanding that permits protect you by ensuring work meets code standards and gets proper inspection.

HOA notification and approval can complicate emergency roof work even when immediate protection is necessary. Review your homeowner association covenants for notification requirements after emergency damage, material and color restrictions that may affect repair options, architectural committee approval processes and typical timeline, and timeline exceptions granted for genuine emergency situations versus aesthetic-only concerns. Most HOAs allow temporary emergency tarping without pre-approval, but confirm this before installation if time permits. Permanent repairs may face restrictions on shingle colors, metal roofing materials, or solar equipment that affect your options for matching existing roof appearance.

Manufacturer warranties on roofing materials may be voided by unpermitted work that doesn’t meet installation standards or receive proper inspections. Future home sales face complications from undocumented repairs when buyers’ inspectors or title companies discover work without permits, potentially requiring expensive corrective work or price reductions to close transactions. Taking time to obtain permits during permanent repairs protects your investment despite the 3 to 10 day processing delays most jurisdictions require.

Common Mistakes Homeowners Make with Emergency Roof Damage

Emergency situations create decision-making pressure and stress that leads to predictable mistakes you can avoid by recognizing common patterns.

Seven common mistakes:

  1. Delaying initial damage assessment and allowing active water infiltration to continue for hours or days while deciding what to do, multiplying interior damage costs unnecessarily.

  2. Choosing undersized tarps that don’t extend 2 to 3 feet beyond damage perimeter, leaving edges exposed to wind-driven rain that seeps under tarp edges.

  3. Inadequate tarp securing using too few fasteners, insufficient board anchoring, or missing sandbag perimeter weighting that allows wind to lift edges and flap material.

  4. Waiting too long for permanent repairs while tarps degrade beyond 90-day design limits, eventually failing during storms and restarting damage cycles.

  5. Not documenting damage before covering with tarps, creating insurance complications when adjusters can’t assess original damage extent from photos.

  6. Hiring unlicensed contractors due to urgency without verifying credentials, insurance, or references, leading to substandard work or liability exposure.

  7. Attempting dangerous DIY repairs on steep roofs, high elevations, or unstable damaged sections without proper safety equipment or skills.

Recognizing these mistakes in your own response allows quick course correction. If you’ve waited several days already, tarp immediately rather than delaying further while researching perfect solutions. Replace an undersized tarp before the next rain rather than hoping it holds. Call professionals when your DIY attempt feels unsafe rather than pushing through and risking injury. Document current conditions even if you didn’t photograph initial damage, then explain the timeline to your insurance adjuster rather than hiding the gap.

Professional consultation redirects your approach before costs multiply. A $150 inspection fee seems expensive during an emergency, but it prevents $3,000 mistakes from choosing wrong repair approaches or missing hidden damage that compounds later. Most reputable contractors provide free assessments for repair work they’ll perform, giving you expert guidance without upfront cost while you evaluate options and make informed decisions rather than panicked guesses.

Final Words

A tarp stops water from getting worse right now. Emergency roof repair fixes the problem completely.

Both have their place, and knowing which one fits your situation keeps small damage from turning into major interior problems.

Tarp when you need immediate protection and time to plan repairs properly. Call for emergency roof repair when the damage threatens safety, structure, or electrical systems.

Either way, move fast. The longer water sits, the more rooms it reaches and the more it costs to fix.

We’re here when you need help making that call.

FAQ

Can I put a tarp on my roof to stop leaks?

You can put a tarp on your roof to stop leaks as a temporary 30-90 day solution when properly installed with UV-resistant polyethylene, wooden anchor boards, and secure fastening. Tarping immediately prevents water damage to interior spaces while you arrange permanent repairs or wait for insurance adjusters.

What is the 25% rule in roofing?

The 25% rule in roofing refers to the guideline that if damage affects more than 25% of a roof section or overall surface area, complete replacement often becomes more cost-effective than patching. This threshold helps homeowners and contractors determine when comprehensive replacement delivers better long-term value than incremental repairs.

What constitutes an emergency roof repair?

Emergency roof repair is constituted by active water intrusion causing immediate interior damage, structural compromise with sagging or exposed decking, large missing shingle sections, or leaks near electrical components. These situations require immediate professional intervention beyond temporary tarping to prevent safety hazards and escalating damage.

How much does it cost to emergency tarp a roof?

Emergency roof tarping costs between $200 and $1,000 depending on damage size, roof accessibility, and installation complexity. Professional installation includes materials, labor, and proper securing methods that prevent wind displacement while protecting your home until permanent repairs can be completed.

How long does a roof tarp last in weather?

A roof tarp lasts 30 to 90 days in weather depending on material quality, UV exposure, and installation method. Vinyl tarps offer the longest durability for extended coverage, while standard polyethylene tarps require inspection and potential replacement after severe storms or prolonged sun exposure.

Will insurance cover emergency roof tarping?

Insurance will cover emergency roof tarping under most homeowner policies as part of storm or weather damage claims because tarping demonstrates good faith mitigation effort. A $300 tarp installation can prevent $5,000 in secondary water damage claims, satisfying your duty to minimize loss.

When should I call a professional instead of tarping myself?

You should call a professional instead of tarping yourself when damage involves steep roof pitch, structural instability, electrical component proximity, or adverse weather conditions. Professional installation includes proper safety equipment, experience with unstable surfaces, and insurance coverage that DIY attempts lack.

Can I leave a tarp on my roof permanently?

You cannot leave a tarp on your roof permanently because tarps degrade from UV exposure, develop tears and holes, and lose water resistance within 30-90 days. Tarps serve as temporary emergency protection while arranging permanent repairs, not as long-term roofing solutions.

How Long Does It Take to Dry a Crawl Space Safely

0

Looking at a wet crawl space, most homeowners ask the same question: how long until this is actually dry? The answer’s frustrating because it’s not simple. Drying a crawl space safely takes anywhere from 10 hours to a month, and the huge range matters because rushing the process leaves hidden moisture that comes back to hurt you later. The timeline depends on how much water you’re dealing with, what kind of floor’s down there, and whether you’ve got the right equipment running in the right order.

Crawl Space Drying Timeframes: Key Variables and Expected Duration

MtKFKnHGSkG1t8aTvqqiRg

Crawl space drying takes anywhere from 10 hours to several weeks. The range is huge because it depends on what you’re actually dealing with down there. Understanding what slows things down or speeds them up helps you know if your situation’s normal or if something’s off.

Quick drying happens when you’ve got minor moisture and decent equipment. Run a solid dehumidifier in a small crawl space with concrete floors and okay ventilation, and you’re looking at 10 hours to maybe 2 days. That’s assuming there’s no standing water, just elevated humidity that needs correction. If you’ve got standing water to pull out first, tack on another 12 to 24 hours. Small spaces with hard surfaces don’t hold much moisture, so mechanical drying works faster.

Most situations need several days to a week. This covers typical water damage where you’ve got some standing water (under 2 inches), average square footage (800 to 1,500 sq ft), and humidity somewhere in the 60 to 80% range. With professional equipment and enough ventilation, these mid range conditions respond pretty well. You’re running equipment nonstop for 3 to 5 days, then doing verification testing before you shut everything down.

Extended drying stretches from 2 to 4 weeks when you’re dealing with serious flooding, terrible ventilation, large spaces, or dirt floors that have soaked up a lot of water. Dirt floors hold water way longer than concrete because moisture sinks deep into the soil. Poor ventilation means saturated air has nowhere to go. When you stack multiple problems together, like extensive water coverage plus bad airflow plus a dirt floor, the drying time doesn’t just add up. It multiplies.

The specific timeframe for your crawl space comes down to measurable factors you can check before you even start. These variables determine whether you’re facing a quick 2 day job or a month long project.

Factor Impact on Drying Time
Water Extent/Severity Minor dampness dries in days, standing water over 2 inches adds 1 to 2 weeks
Crawl Space Size Under 800 sq ft dries fastest, over 2,000 sq ft may require 2 to 3x longer
Floor Material Type Concrete dries in days, dirt floors absorb moisture deeply and require weeks
Initial Humidity Level 60 to 70% RH dries quickly, 90%+ humidity extends timeline significantly
Ventilation Quality Good airflow cuts time in half, poor ventilation doubles or triples duration
Temperature/Season Warm, dry weather accelerates drying, cold, humid conditions slow progress
Existing Drainage Systems Working sump pump removes water continuously, no drainage means manual extraction
Presence of Insulation Wet insulation holds moisture and must be removed, adding 1 to 3 days

Multiple problems compound instead of just adding together. Severe flooding combined with poor ventilation and a big space creates the longest possible timeline because each issue makes the others worse. Standing water in a poorly ventilated space means the dehumidifier pulls moisture from the air, but that air can’t escape and gets resaturated from the standing water. The large square footage means equipment coverage is spread thin. This combination can push drying into the 3 to 4 week range.

Optimal conditions work together to speed things up dramatically. Good airflow means the dehumidifier operates efficiently because fresh air cycles through continuously. Warm temperatures speed evaporation from surfaces. A small space with concrete floors means minimal surface area and minimal moisture absorption. Combine these factors with high capacity equipment, and you can complete drying in the shortest timeframes. Sometimes as fast as 10 to 12 hours for minor moisture problems.

Quick Reference Timeframe Scenarios:

Minor dampness with dehumidifier only: 10 hours to 2 days
Small water intrusion with extraction and equipment: 2 to 4 days
Moderate flooding with professional equipment: 5 to 7 days
Severe flooding or poor conditions: 2 to 3 weeks
Extensive damage with dirt floor and poor ventilation: 3 to 4 weeks

Equipment and Drying Process for Effective Moisture Removal

uAXKm9EjQHGABGuxxGPu2Q

Passive drying through ventilation alone takes weeks or fails completely in humid climates because outdoor air often has more moisture than the crawl space itself. Active drying with equipment cuts timeframes by 60 to 80% compared to natural methods. Following the correct equipment sequence matters for both safety and effectiveness. Starting dehumidifiers before removing standing water wastes energy, while skipping safety checks risks electrical hazards.

Step-by-Step Drying Process:

1. Safety assessment. Check for electrical hazards near water, inspect for structural damage like sagging joists or cracked supports, make sure crawl space access is stable before entering with equipment.

2. Standing water removal. Use submersible pumps for water deeper than 2 inches, wet/dry vacuums for remaining shallow puddles and surface moisture, install or activate sump pump systems for ongoing water that keeps entering the space.

3. Debris and damaged material removal. Clear fallen insulation, damaged wood pieces, and debris that blocks equipment placement and restricts airflow. Remove saturated insulation that won’t dry effectively.

4. Dehumidification setup. Position crawl space dehumidifiers based on capacity ratings measured in pints per day (PPD). High capacity commercial units like those with 120 to 235 PPD ratings cover up to 3,300 square feet, while residential models at 50 to 70 PPD handle smaller areas. Set up continuous drain lines or pump attachments so units run unattended without bucket emptying. Place units centrally for even coverage.

5. Air circulation positioning. Place industrial fans and air movers to create airflow patterns that move moisture toward dehumidifier intake. Position exhaust fans near vents or openings to actively remove saturated air. Don’t point fans directly at wet surfaces without dehumidification running because this just moves moisture around.

6. Continuous monitoring and equipment adjustment. Check humidity levels and equipment operation every 12 to 24 hours during the first 48 hours. Adjust dehumidifier settings if humidity isn’t dropping as expected. Reposition fans if certain areas stay damp while others dry.

7. Final drying verification. Test multiple locations with moisture meters. Confirm humidity stays in the 30 to 50% range for 48 consecutive hours before stopping equipment. Check that all surfaces feel dry to touch and show no visible dampness.

Typical progression through these steps takes 3 to 7 days for moderate water damage when you’re running equipment continuously during the active drying phase. The dehumidifier pulls moisture from the air around the clock, fans keep that air moving, and drainage systems prevent new water from entering. Combining multiple equipment types produces the fastest results because each tool handles a specific part of the drying process. Pumps remove bulk water, dehumidifiers extract airborne moisture, and fans accelerate evaporation from surfaces.

Equipment capacity must match your space size for drying to happen within standard timeframes. Small crawl spaces under 800 square feet need dehumidifiers with 50 to 70 PPD capacity to complete drying in 2 to 4 days. Medium spaces from 800 to 1,500 square feet require 90 to 120 PPD units for similar results. Large spaces over 1,500 square feet demand 150 to 235 PPD capacity or multiple smaller units positioned strategically for coverage. Undersized equipment runs constantly but never catches up with moisture levels, which extends your timeline by weeks.

Monitoring Progress and Knowing When Your Crawl Space Is Dry

pCuCACLeQqmG6nkGS-jSfA

Monitoring determines whether you stop equipment at the right time or make costly mistakes. Stopping too early leaves hidden moisture that feeds mold growth within days. Running equipment too long after the space is dry wastes electricity and wears out dehumidifier components unnecessarily.

Target moisture levels define when drying is complete: 30 to 50% relative humidity for the air, and moisture content below 15 to 20% for wood and building materials. These numbers prevent mold growth, protect structural integrity, and maintain conditions that discourage pests. Readings above 50% RH create environments where mold spores colonize surfaces. Material moisture above 20% causes wood rot and deterioration over time.

Monitoring tools provide objective data instead of guesswork. Hygrometers measure air humidity in real time. Place one in your crawl space and check readings daily during drying. Digital models with remote sensors let you monitor from inside your home without crawling into the space repeatedly. Moisture meters test wood joists, subflooring, and other building materials by measuring water content percentage. Pin type meters insert probes into wood for deep readings. Pinless meters scan surfaces without causing damage. Use the hygrometer to track overall space conditions and the moisture meter to verify specific materials have dried completely.

Physical signs confirm complete drying when they align with instrument readings. Surfaces feel completely dry to touch, with no cool or damp sensation. Musty odors disappear entirely as moisture leaves. If you still smell dampness, moisture remains somewhere. Visible dampness, dark staining, or water marks are gone. Most importantly, humidity readings stay consistently in the 30 to 50% range for 2 to 3 consecutive days without climbing back up after equipment shuts off temporarily.

Verification Checkpoints Before Stopping Equipment:

Hygrometer shows 30 to 50% RH for 48 hours straight
Moisture meter readings on wood and materials below 15 to 20%
No musty odors present when entering space
All surfaces visibly dry with no damp spots or staining

Mold Risk and Timeline Concerns for Wet Crawl Spaces

Cm3v84abTWGZrwWC1P5ISg

Mold spores begin colonizing damp surfaces within 24 to 48 hours of moisture exposure under favorable conditions. You won’t see visible growth immediately, but microscopic colonies establish themselves and start spreading. Visible mold growth appears within 7 to 10 days when humidity stays above 60% and temperatures are moderate. This creates urgency. Every day you delay drying increases the likelihood of a mold problem that requires separate remediation.

Health and structural consequences develop quickly once mold establishes itself in your crawl space. About 50% of the air in your home originates from the crawl space through the stack effect, which means airborne mold spores travel directly into living areas. This affects indoor air quality and causes respiratory issues, allergies, and aggravated asthma, especially in children and sensitive individuals. Structurally, mold feeds on wood and organic materials, causing deterioration that compromises floor joists, supports, and subflooring. This damage decreases home value and creates expensive repair needs that far exceed the cost of prompt drying.

The urgency window is tight. Immediate action within the first 24 to 48 hours after water intrusion prevents most mold issues entirely. Your crawl space stays in a “safe zone” where moisture hasn’t had time to support colonization. Delay beyond 72 hours significantly increases remediation complexity and cost because you’re no longer just drying. You’re also killing established mold and treating affected materials. The difference between 48 hour response and week long delay often means $500 in drying costs versus $3,000+ in combined drying and mold remediation.

If visible mold growth already exists before you start drying, professional mold remediation is necessary as a separate process before or during drying, depending on the extent.

DIY Crawl Space Drying Versus Professional Restoration Services

X74WvpbzQUSf99Bbh2iYug

Both DIY and professional approaches handle crawl space drying successfully when matched to the right situations and your available resources.

When DIY Drying Is Appropriate

DIY drying works for minor moisture issues like small plumbing leaks, condensation problems, or situations where humidity climbed gradually without flooding. If you’re dealing with minimal standing water under 2 inches and you have access to rental dehumidifiers and fans from home improvement stores, you can handle this yourself. The scenario must be free from electrical hazards (no submerged outlets or wiring) and you shouldn’t see structural concerns like cracked supports or sagging joists. DIY equipment typically costs $200 to $500 for a 3 to 5 day rental period covering dehumidifier, fans, and moisture meter purchase. Expect your DIY timeline to run 2 to 4 days longer than professional work would take because rental equipment has lower capacity than commercial grade units.

When Professional Services Are Necessary

Professional restoration services become necessary when you face severe flooding with standing water over 2 inches deep, any black water or sewage contamination that creates health hazards, or visible mold growth already present on surfaces. Call professionals if you see structural damage concerns, lack access to proper high capacity equipment, need documentation for insurance claims, or face time sensitive scenarios where every hour matters to prevent additional damage spreading. Professional teams complete typical crawl space drying in 10 hours to 5 days using truck mounted extraction equipment, commercial dehumidifiers with 150 to 235 PPD capacity, and coordinated airflow systems. They work faster because they understand moisture behavior, equipment placement, and verification standards.

Factor cost against risk and time value when deciding. DIY equipment rental runs $200 to $500 over several days. Professional service for moderate crawl space drying costs $1,500 to $4,000 depending on size and severity. Consider your time investment. DIY requires multiple trips to the rental store, daily monitoring visits, and equipment return coordination. Also weigh the risk. Incomplete drying leads to mold remediation costs of $2,000 to $6,000 later, which eliminates any DIY savings.

Cost Considerations for Crawl Space Drying and Restoration

uUJb80zlTamR1q20kUl4sQ

Cost variables include the severity of water damage, crawl space square footage, equipment needed to complete drying, DIY versus professional service selection, and whether additional repairs are required beyond moisture removal. A small space with minor dampness costs far less than a large crawl space with extensive flooding and structural damage.

DIY equipment costs break down into daily rentals and purchases. Dehumidifier rental runs $40 to $80 per day, or purchase a residential unit for $200 to $600 if you want to own it for future prevention maintenance. Industrial fan rental costs $30 to $50 per day. Purchase a moisture meter for $25 to $150. This is worth buying rather than renting since you’ll use it for ongoing monitoring. If you need a pump for standing water extraction, rental runs $50 to $100 per day. For a moderate drying job completed over 3 to 5 days, expect total DIY costs between $200 to $500 for rentals plus the moisture meter purchase.

Professional service costs reflect both labor and commercial grade equipment. Water extraction and drying service for a typical crawl space (1,000 to 1,500 square feet) runs $1,500 to $4,000 depending on water severity and access difficulty. Emergency service calls on nights or weekends add 20 to 50% premiums. Complete restoration that includes structural repairs, damaged material replacement, and finish work ranges from $3,000 to $8,000 or more for extensive damage. Full encapsulation systems installed after drying cost $3,000 to $7,000 depending on size, material quality, and features like dedicated dehumidifiers with warranties.

Insurance coverage applies to most sudden water damage from burst pipes, appliance failures, or storm related intrusion through damaged roofs or windows. Policies typically exclude flooding from external sources and gradual damage that developed over time from neglected maintenance. Documentation matters for claims. Photograph damage immediately, keep equipment receipts, and get professional assessments that detail scope and necessary repairs. Your deductible usually applies to water damage claims, commonly ranging from $500 to $2,500, which means minor drying jobs may fall below your deductible threshold while major restoration triggers coverage.

Preventing Future Moisture Problems in Your Crawl Space

XqpSBFifR8as9bz2zWB12g

Prevention costs less than repeated drying cycles and eliminates the structural damage and health risks that develop during moisture exposure. Ongoing maintenance keeps humidity controlled in crawl spaces with minor moisture tendencies. Comprehensive encapsulation solves chronic moisture problems permanently by creating a sealed environment.

Encapsulation makes sense for crawl spaces with recurring moisture issues, spaces in high water table areas, or situations where you’ve already dried the space twice and want to prevent future problems. The system installs a heavy duty vapor barrier (6 to 20 mil polyethylene sheeting) covering the entire ground surface and sealing it to foundation walls. Foundation vents get sealed permanently since bringing outside air into an encapsulated space introduces humidity. A dedicated crawl space dehumidifier maintains 30 to 50% humidity year round. Proper drainage integration (either interior perimeter drains or sump pump systems) handles any water that enters. This work happens after initial drying is complete, turning your crawl space into a controlled environment that resists moisture intrusion.

Ongoing maintenance applies whether you’ve encapsulated or not. These tasks take 1 to 2 hours quarterly and prevent the conditions that lead to costly redrying and damage repair later.

Regular Maintenance Tasks:

1. Run dehumidifier regularly. Continuous operation until humidity stabilizes in the 30 to 50% range, then reduce to a few hours daily for maintenance depending on seasonal humidity levels and your space’s tendency to accumulate moisture.

2. Adjust dehumidifier runtime seasonally and clean filters monthly. Increase use during humid or rainy seasons when outdoor moisture levels rise, decrease during dry winter months in most climates. Clean or replace filters every 30 days to maintain efficiency and airflow.

3. Check drainage systems quarterly. Inspect gutters for clogs, verify downspouts discharge at least 6 feet from foundation, check that ground grading still slopes away from the house without settling or erosion.

4. Monitor humidity levels monthly with hygrometer. Keep a hygrometer in your crawl space and check readings monthly. Investigate immediately if humidity climbs above 50% to catch problems early.

5. Inspect crawl space every 3 to 6 months for moisture signs. Look for water staining, damp spots, musty odors, or condensation on pipes and surfaces during seasonal inspections. Check that vapor barriers remain intact without tears or separation.

6. Address exterior drainage issues and seal new cracks promptly. Fix downspout problems or grading issues as soon as you notice them. Seal foundation cracks before they allow water entry. Repair plumbing leaks within 24 hours of discovery.

This maintenance time investment of a few hours every few months prevents situations where you’re looking at another multi day drying project or thousands in water damage repairs because a small problem went unnoticed for months.

Final Words

How long it takes to dry a crawl space depends on water severity, equipment capacity, and space conditions.

Most minor moisture issues resolve in 10 hours to 2 days with proper dehumidifiers. Moderate flooding takes 5-7 days with professional equipment. Severe situations with poor ventilation or dirt floors can need 2-4 weeks.

Start drying within 24-48 hours to prevent mold growth. Use the right equipment for your space size. Monitor humidity levels until they stay between 30-50% for several days straight.

Once dry, regular maintenance and proper drainage keep your crawl space protected.

FAQ

How long does it take for a crawl space to dry out?

A crawl space typically takes anywhere from 10 hours to several weeks to dry out completely, depending on the severity of water intrusion, crawl space size, ventilation quality, and equipment used.

How do you dry out a crawl space fast?

You dry out a crawl space fast by removing standing water immediately with pumps, positioning high-capacity dehumidifiers and industrial fans for maximum airflow, and running equipment continuously until humidity reaches 30-50%.

How serious is water in a crawl space?

Water in a crawl space is serious because it can trigger mold growth within 24-48 hours, cause wood rot and structural weakening, and affect indoor air quality throughout your home if not addressed quickly.

Will a dehumidifier dry out a crawl space?

A dehumidifier will dry out a crawl space for minor to moderate moisture issues, typically within 10 hours to 2 days for small spaces, though severe flooding requires water extraction first before dehumidification begins.

What factors affect crawl space drying time?

Crawl space drying time is affected by water severity, square footage, floor material (concrete versus dirt), initial humidity levels, ventilation quality, temperature, existing drainage systems, and presence of insulation.

When should I call professionals for crawl space drying?

You should call professionals for crawl space drying when facing severe flooding over 2 inches, visible mold growth, structural damage concerns, sewage contamination, or when insurance documentation is needed for claims.

What humidity level means my crawl space is dry?

Your crawl space is dry when relative humidity consistently stays between 30-50% for 2-3 days, moisture meters show wood content below 15-20%, and no visible dampness or musty odors remain.

How much does professional crawl space drying cost?

Professional crawl space drying typically costs $1,500-4,000 for water extraction and drying services in a standard 1,000-1,500 square foot space, with complete restoration including repairs ranging $3,000-8,000 or more.

How can I prevent future crawl space moisture problems?

You prevent future crawl space moisture problems by running a dehumidifier regularly, maintaining gutters and drainage systems quarterly, monitoring humidity monthly, inspecting every 3-6 months, and considering encapsulation for chronic issues.

What’s the difference between crawl space encapsulation and basic drying?

Crawl space encapsulation is a permanent moisture prevention system using sealed vapor barriers and dedicated dehumidifiers, while basic drying simply removes existing water and moisture after a specific water event.

How to Remove Soot from Wood Successfully

0

Think a quick wipe will fix soot on wood? Think again.
Soot is full of tiny particles, oils, and acids that can sink into the grain, stain finishes, and leave a smell that won’t quit.
This post gives clear, step-by-step methods you can do right away—how to protect yourself, why you dry-clean first, when to bring in stronger cleaners, and the signs you’re stripping the finish.
You’ll also learn safe odor fixes and the few times it makes sense to call a professional so the job’s really done.

Immediate Method for Cleaning Soot from Wood

OySeAE47SSy3-1MM6BsjzA

Before you touch anything, suit up. Soot particles are tiny enough to slip into your lungs, and the oils and acids in the residue can irritate your skin. Grab an N95 or P100 respirator, nitrile gloves, and safety glasses. Crack open your windows and position a fan pointing out so airborne particles get pulled away from you instead of floating around the room.

Don’t reach for a damp cloth first. That’s the fastest way to push carbon deeper into the grain and smear it across the finish. Dry cleaning lifts the loose layer without bonding it to the surface. Once you’ve removed the dry soot, you can use a barely damp cloth to get what’s left.

What you’ll need:

• N95 or P100 respirator and nitrile gloves
• Chemical sponge (dry soot sponge), sometimes called a rubber sponge
• HEPA vacuum with soft brush attachment
• Microfiber cloths (at least 6)
• Small bucket of warm water
• Mild dish soap (1 tablespoon per quart of water)
• Second bucket of clean rinse water
• Drop cloths to protect your floor

How to clean it:

  1. Vacuum the wood surface gently with the HEPA brush attachment. Hold the nozzle just above the surface so you’re lifting soot instead of grinding it in.
  2. Wipe with the chemical sponge using light, straight strokes. Work in one direction only. Don’t press hard.
  3. Rotate or flip the sponge when the working surface turns black. Toss it when all sides are saturated.
  4. Mix 1 tablespoon of mild dish soap into 1 quart of warm water. Dampen a microfiber cloth and wring it until it feels almost dry.
  5. Wipe the wood in the direction of the grain. Use light pressure and short passes.
  6. Right away, follow with a second cloth dampened in clean rinse water. Wipe away any soap residue.
  7. Dry the surface immediately with a clean, dry microfiber cloth.

Stop if the finish starts to dull, lift, or feel sticky. That means you’re removing the protective coating along with the soot. At that point, you need to either switch to something gentler or plan to refinish the piece. Pushing harder won’t remove the soot. It’ll just strip the finish and leave you with worse damage than you started with.

Differences Between Cleaning Finished and Unfinished Wood

BV4I8NW4Sx-ziTvEJqG7Hg

Finished wood has a sealed surface. Polyurethane, varnish, lacquer, or paint. That layer blocks moisture and keeps soot from soaking into the grain. You can use slightly damp cleaning methods because the liquid sits on top of the finish instead of being absorbed. The soot usually wipes away without staining the wood underneath.

Unfinished wood has open pores. Soot particles settle into the grain and bond with the natural oils and fibers. If you use too much water or cleaner, the liquid carries the soot deeper and spreads it sideways. That’s why unfinished wood requires slower, layered cleaning. Mostly dry methods, with solvents used sparingly on a nearly dry cloth. You’re lifting carbon out of the grain, not washing it across the surface.

You’ll know the method is working when each pass of the sponge or cloth comes away visibly dirty, and the wood surface looks cleaner without appearing darker or wetter. If the wood starts to swell, darken unevenly, or feel fuzzy, you’re using too much liquid. Stop, let it dry completely, and reassess. For unfinished pieces, mineral spirits on a lint free rag may be safer than water based cleaners. Test in a hidden spot first.

Deep Cleaning Methods for Stubborn Soot

81XZEaEQTmSplcuXS4fwA

When dry cleaning and mild soap don’t remove the residue, you can escalate to stronger options. Trisodium phosphate, or TSP, is a heavy duty cleaner that cuts through oily carbon buildup. Mix 1/3 cup of TSP powder into 1 gallon of warm water. Wear gloves and eye protection. TSP will dull or strip some finishes, so test it on a hidden edge first. If the finish stays intact after 5 minutes, you can proceed.

Use TSP sparingly. Dampen a cloth in the solution, wring it almost dry, and wipe the soot in straight passes. Rinse immediately with a second cloth dampened in clean water, then dry the surface. Don’t let TSP sit on the wood. If the finish starts to soften or turn cloudy, stop and rinse thoroughly.

White vinegar is a gentler alternative for light soot and odor. Mix 1 part vinegar to 4 parts water. The acid cuts oily residue without the harshness of TSP. Vinegar works well on finished wood but can raise the grain on unfinished surfaces, so test first. Apply with a damp cloth, rinse, and dry right away.

Commercial wood cleaners labeled for smoke or soot often contain surfactants designed to lift carbon without stripping finish. Follow the product instructions exactly and always spot test. Over cleaning—scrubbing too hard, using too much cleaner, or repeating the process too many times—removes the protective finish along with the soot. Once the finish is gone, the wood will absorb stains, water, and dirt. At that point, you’re no longer cleaning soot. You’re planning a refinish.

Removing Lingering Smoke or Soot Odor From Wood

87-d9Gi3SEauOjO8u9l4Jg

Soot leaves behind volatile organic compounds. Small odor molecules that settle into the wood grain. Even after the visible residue is gone, the smell can stick around. That’s because the carbon particles carried oils, chemicals, and combustion byproducts that bonded to the porous fibers.

Place shallow bowls of baking soda on or near the wood surface. Replace the baking soda every 24 to 48 hours. Activated charcoal pouches work the same way. They pull odor molecules out of the air around the wood. Keep the space ventilated with fans and open windows to help the odors disperse. Expect measurable improvement in 2 to 7 days for light smoke exposure.

If the odor doesn’t fade after a week, it means soot penetrated deeper than surface cleaning can reach. That usually happens with unfinished wood, porous trim, or pieces that were exposed to heavy smoke for an extended period. In those cases, the wood may need sealing with a stain blocking primer or sanding to remove the top layer of contaminated grain. Persistent odor isn’t just unpleasant. It’s a sign that cleaning alone won’t solve the problem.

When Professional Restoration Is Necessary

NSyM4_ZmTl-U5kmqJEcsjg

If the wood is charred, blistered, or warped, household cleaning won’t fix it. Structural damage means the heat changed the wood fibers, not just the surface. Professionals use moisture meters, thermal imaging, and air quality testing to measure damage you can’t see. They also have HEPA filtered equipment, industrial air scrubbers, and commercial grade soot removers that aren’t sold in retail stores.

Call a professional restorer when soot covers more than 100 square feet, when it’s entered wall cavities or HVAC ducts, or when odor lingers after 48 to 72 hours of ventilation and cleaning. Professionals can seal contaminated surfaces with vapor barriers, apply thermal fogging or ozone treatment for odor, and replace materials that can’t be salvaged. They document the work with photos and moisture readings, which helps with insurance claims. If your insurance requires certified cleanup or if you’re unsure whether the damage is safe to handle, that’s when you stop and make the call.

Preventing Future Soot Buildup on Wood

6DsSz5ldTi-QJIaOiQGXkQ

Soot forms when fuel doesn’t burn completely. That happens with dirty chimneys, poorly vented stoves, low quality firewood, or candles burning in drafty areas. Annual chimney inspections and cleanings reduce creosote and carbon buildup. Use seasoned hardwood with low moisture content. Wet or green wood produces more smoke and soot.

Keep wood surfaces sealed. A coat of polyurethane, varnish, or wax creates a barrier that soot can’t penetrate. Wipe trim, mantels, and furniture near fireplaces every few weeks with a dry microfiber cloth to remove dust before it bonds with airborne oils. Run an air purifier with a HEPA filter in rooms with wood burning appliances or frequent candle use. Those small habits keep soot from settling in the first place.

Final Words

Start by lifting loose soot with dry methods—vacuum with a soft brush and wipe with gentle cloths—before any wet cleaning. That stops smearing and keeps the finish safe.

We covered safety basics, finished vs unfinished wood care, deeper options like TSP or vinegar, odor control, and when to call a pro.

Following these steps for how to remove soot from wood will save many surfaces. If it gets worse, experts can finish the job. You’ll have your wood back to normal.

FAQ

Q: What gets soot out of wood?

A: Soot on wood is removed by lifting dry soot first (vacuum with a soft brush or dry sponge), then gentle washing with mild detergent and water, using TSP or commercial cleaners for stubborn residue.

Q: Will Dawn dish soap remove soot? Does rubbing alcohol remove soot?

A: Dawn dish soap can remove light soot when mixed with water; rubbing alcohol can dissolve oily soot but may strip finishes, so test a hidden spot and use sparingly.

Q: Does soot stain permanently?

A: Soot staining can be permanent if it soaks into unfinished wood. Finished wood often cleans up, but deep penetration may require sanding, refinishing, or replacing the damaged piece.

Smoke Residue Removal Drywall: Restore Walls After Fire Damage

Wiping smoke off drywall is a waste of time.
Smoke residue is a sticky mix of tar, soot, and other compounds that cling to paint and dig into the drywall paper.
For smoke residue removal drywall needs a tested approach, and we’ll show the quick test to know what you’re dealing, the safe cleaners and techniques that don’t ruin the wall, and when sealing or replacement is the right call.
You’ll learn step-by-step actions to stop stains, cut the smell, and document the job so your claim is clear.

Immediate Steps for Smoke Residue Removal on Drywall

R2-p0LfeSHGTDidk0G2LJQ

Smoke residue isn’t just sitting on your wall. It’s a sticky mix of tar, nicotine, and carbon that grabs hold of the textured surface and digs into the pores of your paint and paper face. Even a small kitchen fire or a few days of indoor smoking can leave compounds that bond deep, making this way more complicated than wiping down a countertop.

Before you grab any cleaner, run a quick test. Get a white microfiber cloth damp with plain water and wipe a 4 inch square somewhere you won’t notice, maybe behind a door. If the cloth turns yellow or brown, you’ve got smoke residue. If it smears instead of lifting, that’s oily tar and water won’t touch it. “Before I even opened the bucket, I wiped one square behind the bedroom door. The cloth turned mustard yellow in two strokes.”

Drywall is porous and hates too much water. Soak it and you’ll watch the paper face bubble, the gypsum core soften, and seams swell. Work gently. Keep things damp, not wet. Dry each section as you go.

Cleaning sequence:

  1. Dry dust the walls with a microfiber mop head or soft brush so you’re not smearing loose soot around.
  2. Test a hidden 4 inch spot with a damp cloth to see what you’re dealing with.
  3. Clean that test area lightly with mild dish soap, about 1 teaspoon per quart of warm water.
  4. Don’t oversaturate. Wring cloths until they’re barely damp and blot any drips right away.
  5. Dry the cleaned section with a clean towel so you don’t get mineral spots or let moisture soak in.

Identifying the Severity of Drywall Smoke Damage

OiDQ1PYKQiWYrB-KeKlA4A

Not all smoke leaves the same mess. Oily soot from burning plastics or cooking grease smears heavy and you’ll need surfactants to break it down. Dry soot from wood or paper lifts easier with gentle wiping. Protein based smoke from burned food might look almost invisible but produces a smell that won’t quit, even after you clean.

Run your 4 inch microfiber test in a few different rooms. If the cloth picks up light gray dust that rinses clean, you’ve got dry soot and mild contamination. If it smears brown and leaves a greasy film, expect heavier buildup and more time. If the wall looks clean but smells sharp, you’re dealing with protein residue or deep tar penetration.

Severity indicators:

  • Light: Thin gray film, lifts with damp microfiber, no odor after one pass, only in one room.
  • Moderate: Yellow brown transfer on cloth, smearing when you first wipe, mild smoky smell, visible color change on flat paint or around vents.
  • Heavy: Thick oily residue, cloth soaked in one wipe, strong smell that won’t leave, bubbling or peeling paint, staining on multiple walls or ceilings.
  • Structural concern: Drywall feels soft or spongy, seams are swollen, paper face is lifting, water was used during fire suppression and walls are still damp.
  • Hidden damage: Residue inside wall cavities, HVAC ducts contaminated, insulation holding odor, baseboards showing wicking stains.
  • Replacement threshold: Drywall that stayed wet longer than 48 hours, visible mold growth, crumbling gypsum, or odor that comes back after cleaning and priming.

Best Cleaners for Removing Smoke Stains from Drywall

QF2pM_ZAQX-PriQm8boyRA

Start with mild dish soap for most painted drywall. Mix 1 teaspoon of clear dish soap per quart of warm water. Apply with a damp microfiber cloth, let it sit for 60 to 90 seconds, then wipe gently in small circles and rinse with clean water. This works for light residue on semi gloss or satin finishes and won’t hurt your paint.

For moderate to heavy staining, grab a TSP substitute. It’s got stronger alkaline surfactant action without the environmental headaches of old school TSP. Mix about 1/4 cup of powder per gallon of water, but check the label. Wear nitrile gloves, tape off your baseboards, apply with a damp sponge, let it dwell for 2 to 3 minutes, then rinse really well with plain water. Don’t use TSP substitutes if your paint manufacturer says it’ll dull the finish. Check your paint can or call them if you’re not sure.

A vinegar rinse helps knock down odors after you’ve cleaned with surfactants, but it’s not a degreaser. Mix equal parts white vinegar and warm water, mist or wipe the cleaned wall lightly, then rinse again with plain water so you’re not leaving acid on the surface. Don’t use vinegar on unsealed lime plaster, natural stone, or delicate wallpapers. Baking soda paste (1 tablespoon baking soda mixed with 2 tablespoons water) works as a mild scrub for small spots on glossy paint. Wipe and rinse well. For brightening small spots on white painted surfaces, 3% hydrogen peroxide can help, but spot test first and don’t leave it on too long or you’ll bleach streaks.

Cleaner Best Use Case Mix Ratio Notes
Dish Soap Light residue, eggshell or semi gloss paint 1 tsp per quart warm water Safe for most latex paints; rinse well
TSP Substitute Moderate to heavy tar/nicotine on painted drywall About 1/4 cup per gallon water Wear gloves; rinse thoroughly; may dull some finishes
Vinegar Solution Odor neutralizing after surfactant cleaning Equal parts white vinegar and warm water Not a degreaser; avoid on stone/unsealed plaster
Baking Soda Paste Small localized stains on glossy paint 1 tbsp baking soda + 2 tbsp water Mild abrasive; rinse completely
Hydrogen Peroxide Brightening white painted spots 3% solution, undiluted Spot test; avoid prolonged contact; risk of bleaching
Commercial Smoke Removers Heavy professional grade jobs Follow manufacturer instructions Often pH balanced; may include surfactants and odor neutralizers

Techniques for Effective Drywall Smoke Residue Removal

yY4h9xxtRsWzPCqXVfMXuA

Always clean from top to bottom. Gravity pulls dirty rinse water down the wall, so if you start at the ceiling you won’t streak over sections you already cleaned. Keep the wall evenly damp, not saturated. Wring your microfiber cloth or sponge until it’s just moist, not dripping. Uneven moisture causes blotchy drying and can leave mineral deposits if your water’s hard.

Microfiber cloths lift oils better than cotton rags because the split fibers create tiny channels that trap tar and nicotine instead of smearing them around. Use a two bucket method. One bucket holds your cleaning solution, the other holds clean rinse water. Dip, wipe a small section, then rinse the cloth in the clean bucket before you reload with cleaner. Change the rinse water when it turns cloudy. This keeps you from redepositing residue onto areas you just cleaned. “I learned the hard way that a dirty rinse bucket just spreads the problem around.”

Don’t use abrasive pads or scrub brushes on flat paint. Flat and matte finishes have a porous, non reflective surface that burnishes easily, leaving shiny streaks where you scrubbed. For stubborn spots on flat paint, let the cleaner sit longer or move to a stronger product instead of scrubbing harder. On satin, eggshell, or semi gloss finishes, a soft sponge is fine, but test your pressure in a hidden spot first. Steam cleaning and pressure washing will destroy drywall. Both dump way too much moisture into the gypsum core and paper face.

Odor Removal Methods After Cleaning Drywall Smoke Residue

4Y-Fd9rIS4iHvQ7lEQIfDA

Cleaning the visible residue takes out most surface odor, but smoke compounds can hang around in soft goods, HVAC systems, and porous materials even after walls look clean. A vinegar rinse helps neutralize some odor compounds, but it can’t touch deep set smells embedded in drywall, insulation, or ductwork.

Replace your HVAC filters right after smoke exposure. Old filters hold soot and recirculate the smell every time the system runs. Run ventilation with windows open whenever the weather’s decent, and point box fans outward to push contaminated air out. In small rooms or closets, set out activated charcoal or baking soda in shallow trays to passively absorb airborne odor molecules. If odor sticks around after thorough cleaning and drying, the tar and nicotine have soaked into the drywall surface and you’ll need a sealing primer before you repaint. Professional deodorization methods like thermal fogging or ozone treatment can handle whole home contamination, but both need you to clear out and should only be done by trained technicians.

Odor removal strategies:

  • Apply a vinegar and water rinse (equal parts) after surfactant cleaning, then rinse again with plain water.
  • Replace all HVAC filters and check ductwork for visible soot buildup.
  • Use charcoal based odor absorbers in enclosed spaces like closets, pantries, and bathrooms.
  • Wash or dry clean curtains, upholstery, and bedding that absorbed smoke.
  • Run an air purifier with a HEPA filter and activated carbon stage in affected rooms.
  • Ventilate continuously for at least 72 hours after cleaning, weather permitting.
  • Apply a shellac based or oil based sealing primer to lock in residual odor before repainting.
  • Consider professional thermal fogging or ozone treatment for severe whole home contamination (requires evacuation and certification).

Priming and Sealing Smoke Stained Drywall Before Painting

5hR0yjbGRL-O5PQxqHDpTQ

If yellow or brown staining stays visible after cleaning, or if odor lingers even after everything’s dry, you need a sealing primer before you repaint. Painting directly over smoke residue almost always fails. Tar and nicotine bleed through latex paint within days or weeks, and the smell comes back as soon as the room warms up.

Shellac based primers block odor most aggressively. They dry fast, seal porous surfaces tight, and stop volatile organic compounds from migrating through the paint film. Oil based primers also give you strong stain and odor blocking, though they take longer to dry and need mineral spirits for cleanup. Specialty smoke blocking primers are made specifically for fire and smoke restoration and usually combine shellac or oil resins with odor neutralizing additives. All three work, but shellac is the go to for heavy nicotine and stubborn smells. “We primed a rental unit three times with latex before switching to shellac. One coat of shellac finally stopped the bleed through.”

Apply primer in thin, even coats using a roller with the right nap for your wall texture. Let it dry all the way before you topcoat. In bad cases, you might need a second primer coat. Once the primer is dry and odor free, you can apply standard latex or oil based paint as your finish.

Primer Type Strength Best For
Shellac based Highest odor and stain blocking Heavy nicotine, persistent smoke odor, fast drying needs
Oil based Strong stain blocking, good odor control Moderate smoke damage, when extended dry time is acceptable
Specialty Smoke blocking Formulated for fire/smoke restoration Professional remediation, insurance documented jobs, combined stain and odor issues

When Cleaning Isn’t Enough: Replacing Smoke Damaged Drywall

0hHSNmGzTL6gYNmYwHhKiA

DIY cleaning works when smoke residue sits on the surface and the drywall itself is still solid. It fails when the gypsum core is compromised, the paper face is peeling, or odor hangs on even after you’ve sealed with primer. In those cases, tearing it out and replacing it is faster, cheaper, and more reliable than trying over and over to save contaminated material.

Drywall that stayed wet longer than 48 hours after fire suppression is at high risk for mold growth inside the wall cavity. If seams are swollen, the paper face is bubbling, or you can push the surface in with light finger pressure, the core has soaked up too much water and needs to be replaced. Deep smoke odor that comes back after cleaning, drying, and priming usually means tar and nicotine have punched through the paper face into the gypsum, insulation, or framing. No amount of surface cleaning will fix it.

Get rid of contaminated drywall according to local rules. Some places treat fire damaged building materials as special waste because of heavy metals, asbestos in older homes, or hazardous combustion byproducts. Contact your municipal waste office before you haul material to a standard landfill. When you cut out damaged sections, wear a respirator rated for particulates, contain dust with plastic sheeting, and check the wall cavity for hidden soot, char, or moisture before you install new drywall.

Conditions indicating replacement:

  • Drywall stayed saturated longer than 48 hours and now feels soft, spongy, or crumbles under pressure.
  • Seams are swollen, tape is lifting, or paper face is peeling away from the gypsum core.
  • Visible mold growth on the surface or a musty smell behind the wall.
  • Odor sticks around after thorough cleaning, drying, and application of shellac based sealing primer.
  • Structural damage from fire, like charring, cracking, or loss of rigidity.
  • Heavy tar saturation that bleeds through multiple primer coats or shows up again seasonally when heat or humidity rises.

Professional Smoke Remediation Services for Drywall

g1nnqnLmS0yVDv3XlQesmA

Professionals bring tools, training, and insurance documentation workflows you can’t match on your own. IICRC certified restoration technicians use HEPA air scrubbers to capture airborne soot, apply commercial grade alkaline surfactants made for tar and nicotine, and follow multi stage drying and deodorization protocols. They also carry moisture meters, thermal imaging cameras, and particle counters to verify that hidden contamination is gone, not just covered up.

Severe tar buildup from long term smoking, whole home smoke damage from structure fires, or contamination in HVAC systems and wall cavities usually need professional remediation. Contractors document every step with photos, moisture readings, and detailed scopes of work, which makes insurance claims and supplements easier when hidden damage shows up during tearout. If cleaning fails or the job grows beyond a single room, hiring a licensed, insured restoration contractor saves time, cuts health risk, and gives you results you can verify.

Criteria for choosing a smoke remediation contractor:

  1. IICRC certification in fire and smoke restoration (a nationally recognized training standard for damage cleanup and rebuild).
  2. Active general liability and workers’ compensation insurance. Ask for certificates before work starts.
  3. Detailed written estimates that separate cleaning, priming, and reconstruction line items. Skip lump sum bids without breakdowns.
  4. References from recent smoke or fire restoration projects. Ask to see before and after photos and contact past clients.
  5. Clear communication about timeline, access needs, and how they’ll protect unaffected areas during containment and cleaning.

Tools, PPE, and Safety Measures for Drywall Smoke Cleaning

xylLfNVvSaSu-Rv7rWgr3w

Wear nitrile gloves to protect your hands from alkaline cleaners and oily soot. Latex gloves can break down when exposed to petroleum based residues. Use safety glasses or goggles to stop splashes, especially when you’re working overhead on ceilings. A respirator rated N95 or higher protects against fine soot particles and volatile organic compounds released during cleaning. Standard dust masks don’t filter tar vapors or sub micron carbon particles.

Ventilation matters. Open windows, run box fans pointed outward, and don’t trap chemical vapors or soot dust in the work area. If you can’t ventilate well, stop and reschedule for better conditions. Never mix ammonia based cleaners with bleach or other chlorine products. The combination makes toxic chloramine gas that damages your respiratory system within minutes.

Drywall should stay damp, not wet. Wring cloths and sponges well before wiping, blot drips right away, and dry each section with a clean towel after rinsing. Oversaturating drywall weakens the gypsum core, lifts the paper face, and sets up conditions for mold. Work in small sections, check your progress often, and stop if the surface starts to feel soft or shows bubbling.

Advanced Deep Clean Steps for Stubborn Smoke Residue

dWReJLksSEeNIh48x_bMUQ

When initial cleaning leaves behind visible staining or lingering odor, step through a methodical deep clean workflow before you commit to primer and paint. This targets embedded residue without over wetting or damaging the drywall surface.

  1. Dry dust the entire wall again with a clean microfiber mop head to grab any soot loosened during the first cleaning pass.
  2. Apply dish soap solution (1 teaspoon per quart warm water) with a damp microfiber cloth, working top to bottom in 3 foot sections. Let it dwell 60 to 90 seconds, wipe gently, then rinse with clean water.
  3. Move stubborn areas to TSP substitute (about 1/4 cup per gallon water). Apply with a damp sponge, allow 2 to 3 minutes of dwell time, then rinse thoroughly. Change rinse water when it turns yellow or cloudy.
  4. Apply a vinegar deodorizing rinse (equal parts white vinegar and warm water) to the entire cleaned surface, then rinse again with plain water to remove acidity.
  5. Dry the wall completely with clean towels, working in the same top to bottom pattern to stop streaking.
  6. Allow 24 hours of drying with good ventilation, then check under neutral white light (3500 to 4000K) instead of warm bulbs, which make yellowing look worse and hide true residue removal.
  7. Spot treat any remaining discoloration with 3% hydrogen peroxide on a cotton swab (white painted surfaces only). Blot and rinse right away to avoid bleaching.
  8. If staining or odor sticks around after full drying and spot treatment, apply a shellac based or oil based smoke sealing primer before repainting. Don’t try more wet cleaning, because the residue has soaked into the drywall surface.

Maintaining Clean Drywall After Smoke Residue Removal

If smoking keeps happening indoors, plan a light maintenance wipe down every 1 to 3 months to stop heavy buildup. Use the same mild dish soap solution (1 teaspoon per quart warm water) on a damp microfiber cloth, focusing on high traffic areas, walls near seating, and ceilings above smoking zones. Regular cleaning stops tar from bonding deep into paint pores and makes each session faster.

Air purifiers with HEPA filtration and activated carbon stages cut down airborne particulates before they land on walls. Put purifiers in rooms where smoking happens and run them all the time. Washable paint finishes like satin or semi gloss instead of flat tolerate repeated cleaning without burnishing or losing sheen, making long term maintenance easier and less damaging to the wall surface.

Ongoing maintenance actions:

  • Wipe walls every 1 to 3 months with mild dish soap solution to stop tar accumulation.
  • Replace HVAC filters every 30 to 60 days in smoking households instead of the standard 90 day interval.
  • Run a HEPA air purifier with activated carbon continuously in rooms where smoking occurs.
  • Use satin or semi gloss paint on high contact walls to improve washability and cut staining.
  • Ventilate rooms right after smoking by opening windows and running exhaust fans to reduce particle deposition.

FAQ: Common Questions About Drywall Smoke Residue Removal

Can I use only vinegar to remove smoke stains?
Vinegar helps knock down odors but doesn’t break down oily tar and nicotine as well as surfactant based cleaners like dish soap or TSP substitute. Use vinegar as a deodorizing rinse after cleaning with a grease cutting product.

Is TSP substitute safe for all painted drywall?
TSP substitutes are phosphate free and generally safe for latex and oil based paints, but always rinse well and test in a hidden area first. Some manufacturers warn that alkaline cleaners may dull flat or matte finishes.

Will hydrogen peroxide damage my paint?
3% hydrogen peroxide is safe for spot treating small stains on white painted surfaces, but leaving it on too long or using higher concentrations can bleach or discolor paint. Always spot test and rinse right after application.

Can I paint over smoke stains without cleaning first?
No. Tar and nicotine will bleed through standard latex paint within days or weeks. Clean the surface, let it dry completely, then apply a shellac based or oil based sealing primer before painting.

How do I prevent streaking when cleaning walls?
Work top to bottom, keep the surface evenly damp instead of saturated, change rinse water when it turns cloudy, and dry each section with a clean towel right after rinsing.

What if the odor comes back after cleaning and priming?
Persistent odor usually means tar has soaked into the drywall core or contaminated insulation and framing. At that point, replacing the affected drywall works better than more cleaning or priming.

Can I clean smoke residue off wallpaper?
Vinyl wallpaper can handle mild dish soap solution if you keep it barely damp and don’t soak seams. Paper wallpaper needs dry cleaning sponges and gentle dabbing instead of wiping. Test in a hidden corner first.

How long does drywall take to dry after cleaning?
With good ventilation and moderate humidity, drywall dries within 12 to 24 hours. Use fans to speed drying and don’t prime or paint until the surface feels completely dry to the touch.

What is the best primer for heavy smoke damage?
Shellac based primers give you the strongest odor and stain blocking for heavy nicotine and tar. Oil based primers also work well but take longer to dry.

Do I need to clean ceilings the same way as walls?
Yes. Smoke rises and deposits heavily on ceilings. Use the same cleaning methods, work in small sections, and protect yourself from drips by wearing safety glasses and putting drop cloths below your work area.

Final Words

You’re wiping a 4‑inch test square and seeing yellow transfer — that tells you right away what to do next.

Start with dry dusting, a spot test, and light cleaning. Then judge severity, pick the right cleaner, keep surfaces evenly damp, and dry thoroughly. Seal stubborn stains with primer, or replace board that’s ruined. Use PPE, document for insurance, and call a remediation pro for heavy contamination.

Following these steps for smoke residue removal drywall helps stop stains and smells and gets your walls ready for paint. You’ll be back to normal soon.

FAQ

Q: How to get cigarette smoke residue off walls? Can you get smoke out of drywall?

A: Getting cigarette smoke residue off walls and removing smoke from drywall is possible, but it takes testing, dry dusting, mild cleaning, and often a sealing primer or stronger cleaner if stains or odor persist.

Q: Will Dawn dish soap clean nicotine off walls?

A: Dawn dish soap can remove surface nicotine when mixed sparingly with warm water, acting as a mild degreaser; heavy tar or deep staining usually needs a stronger alkaline cleaner or a sealing primer.

Q: How do you clean a house that has been smoked in for years?

A: Cleaning a house smoked in for years means staged work: dry dusting, deep cleaning walls and fabrics, HVAC filter changes, odor absorbers, and likely priming or replacing heavily contaminated drywall; consider professional remediation for whole-house issues.

Ceiling Leak Repair Costs: What You’ll Actually Pay in 2024

0

Most contractors say $500 to $2,500, but that wide range doesn’t tell you what you’ll actually pay when you’re staring at a water stain spreading across your ceiling. The real number depends on three things: how far the damage spread, what your ceiling’s made of, and where the water’s coming from. A small stain from a slow drip costs way less than a sagging section holding gallons from a burst pipe. Here’s how to figure out where your repair falls, what drives the price up, and what “done” actually looks like.

Comprehensive Ceiling Leak Repair Cost Overview

U3Yv5ePXQlO62F-dwis91w

Ceiling leak repair typically costs $500 to $2,500, with most homeowners paying around $884 for detection, repair, and finishing work combined.

What you’ll actually pay comes down to three things: how much of your ceiling got damaged, what kind of ceiling you’ve got, and where the water’s coming from. A tiny stain from a slow drip costs way less than a sagging ceiling holding gallons from a burst pipe.

Contractors price these repairs two ways. Square footage pricing runs $45 to $90 per square foot and makes sense for bigger jobs, while hourly rates of $60 to $90 for installation and $20 to $50 for painting work better for small patches. Just about every contractor charges minimum service fees between $125 and $200. That means your tiny repair might cost the same as something twice the size.

Expense Category Typical Cost Range What’s Included
Leak detection and inspection $80 to $200 Thermal imaging and moisture testing
Plumbing repairs $175 to $3,000 Pipe fixes and supply line replacement
Roof repairs $360 to $1,550 Shingle and flashing repairs
Drywall materials $1.50 to $3 per sq ft Panels and joint compound
Drywall installation labor $40 to $100 per hour Cutting and hanging
Painting and texture matching $1 to $2 per sq ft Primer and finish coats
Additional finishes $50 to $150 Trim or primer matching existing details
Mold remediation $10 to $30 per sq ft Removal and treatment
Insulation replacement $1.50 to $3 per sq ft When saturated from water
Emergency same-day service $100 to $200 additional Priority response

Labor eats up 40 to 60 percent of your total bill. Cutting out damaged sections, installing new material, blending textures, and matching paint takes both time and skill.

Here’s how costs shake out by repair size. Minor patches for small water stains run $200 to $500 when the damage stays localized and your ceiling structure’s still solid. Moderate water damage hitting larger sections or multiple areas costs $500 to $1,200. Extensive damage needing serious drywall replacement, structural drying, and multiple finish coats ranges from $1,200 to $2,500. When you’re fixing both the leak source and the ceiling damage, projects can hit $2,000. These numbers cover labor and materials for ceiling work, but fixing what actually caused the leak shows up as a separate charge.

Primary Factors Influencing Ceiling Leak Repair Costs

jM5IuSMeTdSmcn5wLMv4ig

Six things determine what you’ll pay to fix a ceiling leak: damage severity, ceiling material, leak accessibility, square footage, location, and how old your home is.

Extent and Severity of Water Damage

Damage severity creates distinct price levels based on how much work’s actually needed. Cosmetic water stains needing just paint and primer cost $150 to $300 since the ceiling structure itself is fine. Minor leaks with small drywall damage run $200 to $500 when you’re cutting out and patching a limited section. Moderate leaks needing extensive drywall replacement cost $500 to $1,200 as multiple panels or large sections get swapped out.

Sagging ceilings from water buildup hit $250 to $1,000, or $2 to $4 per square foot. Waterlogged drywall pulls away from fasteners and you’ve got to remove everything that’s affected. Severe structural damage to ceiling joists or beams jumps to $800 to $3,000 when framing members need fixing or reinforcement before new ceiling material goes up. Complete ceiling collapse needing emergency stabilization and rebuild reaches $1,500 to $4,500.

Structural damage to joists tacks on $150 to $750 beyond standard ceiling repair costs. Weakened or rotted framing gets addressed before any cosmetic work starts.

Ceiling Material Type and Complexity

What your ceiling’s made of directly impacts both labor rates and material costs. Standard drywall stays most affordable at $45 to $55 per square foot. It’s common, contractors work with it constantly, and replacement panels are easy to get.

Plaster and lath needs specialized skills and longer drying time, running $50 to $125 per square foot or $200 to $500 for small repairs. Plasterers are tougher to find than drywall installers, and matching existing plaster texture takes real experience.

Popcorn ceiling hits the high end at $75 to $90 per square foot or $200 to $600 for fixes because texture matching’s difficult. Pre-1980 popcorn might contain asbestos, which needs special handling and testing.

Drop tile systems are physically easiest to replace, but water damages multiple tiles since moisture spreads across the grid. Costs run $2 to $17 per square foot, with individual tiles priced at $4 to $40 each depending on style.

Tongue and groove wood requires matching species and finish at $60 to $100 per square foot. Finding boards that match your existing ceiling’s age and patina adds time and expense.

Texture matching and paint blending add time to any project. Getting perfectly invisible repairs might mean repainting the entire ceiling instead of just the patched section.

Leak Source Accessibility and Location

How easily contractors can reach the leak source impacts investigation and repair costs big time. Easily accessed sources in basements or exposed plumbing cost less than hidden plumbing buried in walls. Exploratory opening to find concealed leaks adds $150 to $400 to your total. Roof penetrations needing extensive investigation require multiple site visits and testing.

Upstairs bathroom leaks affecting lower ceilings typically cost $300 to $1,200 because of fixture access challenges. Contractors often need to work from above and below at the same time.

Square Footage of Affected Area

Larger damaged areas increase both material and labor costs proportionally. Contractors often offer better per square foot rates on bigger projects since they’re already there and working efficiently. Very small repairs get hit with premium rates because of minimum service fees. It costs the contractor nearly as much to show up for a one hour patch as a half day replacement.

Two other factors significantly affect pricing. Geographic location creates wide variations in labor rates. Florida projects run $400 to $1,380, California ranges from $550 to $1,660, and New York spans $570 to $1,380. These differences reflect local cost of living and contractor availability.

Age of home drives costs higher in older properties. Plaster materials cost more to repair than drywall. Asbestos concerns in pre-1980 popcorn ceilings require testing and specialized removal. Outdated plumbing often has multiple weak points beyond the obvious leak. Material compatibility challenges pop up when matching vintage textures and finishes.

Leak Source Identification and Repair Expenses

cnwY-_4dSmCsDhM8pfnfyg

Ceiling repair is only half the job. You’ve got to fix the leak source first to prevent recurring damage and wasted repair money.

Common leak sources and their typical repair costs:

Plumbing leaks from supply lines or drains cost $175 to $3,000 depending on pipe location and how corroded things are. Bathroom plumbing from upstairs fixtures runs $300 to $1,200 when toilets, showers, or tubs develop seal failures. Roof leaks from damaged shingles or flashing cost $360 to $1,550 for localized repairs to problem areas. HVAC condensate line or evaporator coil leaks run $200 to $1,500 based on whether it’s a simple drain clear or coil replacement. Burst pipes needing emergency repair hit $500 to $2,500 for immediate pipe replacement and water shutoff.

Leak detection sometimes requires opening additional ceiling sections or walls when the visible damage sits far from the actual source. Water travels along joists, through insulation, and across vapor barriers before showing up as a stain. Exploratory work adds $150 to $400 when contractors need to check multiple areas before finding the problem. Addressing leak sources quickly through proper Water Damage Restoration prevents recurring ceiling damage and escalating repair costs.

Most contractors separate leak source repair from ceiling repair in their estimates. A plumber fixes the pipe, a roofer patches the roof, or an HVAC tech repairs the condensate line. Then the ceiling contractor handles the visible damage. This needs coordination between multiple trades and clear communication about scheduling.

Repair Timeframes and Project Duration for Ceiling Leaks

26qiT4jwT-OcJSydmLDQNA

Repair duration depends on damage extent, drying requirements, and whether multiple trades need to coordinate their work.

Typical project timelines follow this sequence:

Emergency leak containment and initial assessment happens same day or within 24 hours when you call for active leaks. Drying period for water saturated materials takes 2 to 5 days with fans and dehumidifiers running continuously to pull moisture from ceiling cavities and insulation. Leak source repair by plumber or roofer spans 1 to 3 days depending on complexity and parts availability. Ceiling material removal and replacement requires 1 to 3 days for standard drywall, longer for plaster that needs multiple coats and extended drying. Finishing work including mudding, sanding, priming, and painting takes 3 to 5 days because of mandatory drying time between coats.

Rushing repairs before materials fully dry leads to mold growth behind new drywall, bubbling paint that peels within weeks, and failed patches that crack and separate. Joint compound needs 24 hours minimum between coats. Paint requires proper drying or it won’t bond correctly.

Most ceiling leak projects span 1 to 2 weeks from initial call to final walkthrough. Occupied homes often take longer because of furniture protection requirements, access scheduling around family routines, and ventilation concerns while primers and paints cure.

DIY Ceiling Leak Repair vs. Professional Services

qTYDbZ2USpCovxiHzqfISw

Very minor cosmetic repairs might work for DIY, but most leak related damage needs professional assessment and repair because of hidden moisture and structural concerns.

When DIY Makes Sense

DIY works for small cosmetic water stains under 6 inches where the leak’s been fixed, no active moisture remains, no visible mold appears, and the ceiling feels structurally sound when you press against it. You’ll need a repair kit costing $9 to $25, primer, matching paint, and basic sanding supplies. Total DIY cost runs around $45 to $75 for materials.

Test the area first. If it feels soft, spongy, or gives when you push, that’s structural damage needing professional work.

When to Hire Professionals

Professional contractors are necessary for active leaks requiring source repair you can’t identify or fix yourself, water damage larger than 12 inches in any direction, any sagging or soft spots indicating structural compromise, visible mold or musty odor suggesting hidden growth, damage to plaster or textured ceilings requiring specialized skills, and structural concerns with joists or beams. Insurance claims also need professional documentation.

Professional advantages include proper leak detection equipment like thermal cameras and moisture meters that find hidden problems, experience identifying concealed damage behind visible staining, insurance coverage protecting you if additional damage gets discovered during work, warranties on labor typically running 1 to 2 years, and coordination of multiple trades when plumbers, roofers, and ceiling contractors all need to work together.

Improper DIY repairs often cost more to fix later than hiring professionals initially. Painting over active moisture traps it inside, creating mold. Patching without addressing the source means repeated failures. Missing structural damage leads to ceiling collapse.

Homeowners Insurance Coverage for Ceiling Leak Repairs

DGOu9CbHQr-AWPMoP3H3CQ

Coverage depends entirely on what caused the leak. Sudden and accidental events are typically covered, while gradual deterioration or maintenance issues aren’t.

Coverage scenarios break down like this:

Burst pipe or appliance malfunction is usually covered as sudden and accidental damage. Storm damage or roof leak from wind or hail is typically covered under dwelling coverage. Plumbing backup or overflow is often covered with specific endorsement added to standard policy. Slow leak from poor maintenance isn’t covered since it’s considered preventable neglect. Foundation seepage or groundwater intrusion is rarely covered under standard homeowners policies. Condensation or humidity issues aren’t covered as maintenance related problems.

The claims process requires documentation and quick action. Take photos of all damage before any repairs begin, showing water stains, sagging areas, and the leak source if visible. Contact your insurance company immediately to report the claim and get a claim number. Obtain multiple contractor estimates with detailed scope of work describing what needs repair and why. Understand your deductible, typically $500 to $2,500, which you pay before insurance coverage begins. Know that emergency stabilization to prevent further damage may be covered before an adjuster visits your property.

Some contractors work directly with insurance companies and can help with required documentation, detailed estimates, and photo evidence. Acting quickly prevents secondary damage like mold growth, which insurance companies may argue developed because of delayed response rather than the original covered event.

Getting Accurate Quotes and Choosing a Ceiling Repair Contractor

REvBPQWpTQe2DBpcKVvWmg

Get 2 to 3 detailed written estimates for comparison before committing to any contractor for ceiling leak work.

Estimates should include these seven elements:

Itemized breakdown of labor and materials showing exactly what you’re paying for. Square footage or hourly rate structure explaining the pricing method used. Timeline from start to completion with specific phases and durations. Payment schedule and terms stating when payments are due and what triggers them. License and insurance verification with policy numbers you can verify independently. Warranty details on labor and materials specifying coverage length and what’s included. Exclusions or additional costs that might apply if hidden damage gets discovered.

Check contractor qualifications before signing anything. Verify active license and insurance through your state’s licensing board. Check online reviews and Better Business Bureau rating for complaint patterns. Ask for recent references with similar water damage projects and actually call them. Confirm whether they handle both leak source and ceiling repair or coordinate separate trades.

Lowest bid isn’t always best value. Consider experience specifically with water damage restoration, warranty terms and how disputes get resolved, and availability to start work quickly before damage spreads.

Emergency services provide 24 hour response but add $100 to $200 to standard pricing. That premium prevents escalating damage when active leaks are spreading. Quick response through Emergency Water Damage services prevents minor leaks from becoming major reconstruction projects. Initial inspection fees of $50 to $100 are often waived when you hire that contractor for the full repair.

Warning Signs Your Ceiling Leak Needs Immediate Attention

kJ7j4O5ATBadkQaSMI-XNQ

Certain symptoms indicate immediate structural risk or active water intrusion requiring emergency professional response versus situations that can wait for scheduled repair.

Urgent warning signs requiring same day response:

Visible sagging or bowing where the ceiling plane has changed shape or dropped. Water accumulation adds significant weight with one gallon weighing over 8 pounds, creating collapse risk. Active dripping or streaming water indicates the leak’s ongoing and damage is increasing by the hour. Dark or spreading water stains show active moisture movement, not old staining that’s stable. Soft or spongy ceiling texture when you press against it lightly means structural integrity is compromised. Visible mold growth or strong musty odor indicates health hazard developing in ceiling cavities. Cracks wider than 1/8 inch or growing in size suggest possible structural movement in framing.

Delayed response allows minor leaks to saturate insulation that holds moisture against framing, spread to larger ceiling areas as water follows joists and electrical runs, damage framing members through prolonged moisture exposure and rot, and create ideal mold conditions in dark, damp ceiling cavities. Each of these increases final repair costs substantially, sometimes doubling or tripling the bill compared to immediate response.

Emergency response contractors charge premium rates of $100 to $200 extra for immediate mobilization, but they prevent thousands in additional damage by stabilizing the situation, stopping active water flow, and beginning drying procedures immediately. A $200 emergency fee beats a $2,000 mold remediation project that develops from waiting three days.

Final Words

Ceiling leak repairs typically cost $500 to $2,500, but understanding what drives those numbers helps you plan and avoid surprises.

Damage extent, material type, and leak source location all shape the final bill. Getting clear written estimates from licensed contractors who itemize labor, materials, and timeline gives you control of the process.

The faster you address active leaks, the less damage spreads. Small water stains caught early stay small. Ignored leaks turn into sagging ceilings, mold growth, and structural repairs that cost far more to fix.

When you’re ready for an estimate, focus on contractors who explain how much it costs to repair a ceiling leak in plain terms and coordinate both leak source and ceiling work.

FAQ

How expensive is it to fix a leaking ceiling?

Fixing a leaking ceiling typically costs between $500 and $2,500, with a national average of $884, depending on damage extent, ceiling material type, and leak source location.

Is a leaking ceiling covered by insurance?

A leaking ceiling is covered by homeowners insurance when the leak results from sudden, accidental events like burst pipes or storm damage, but gradual deterioration from poor maintenance is not covered.

How much does it cost to fix a leak and part of a ceiling?

Fixing both the leak source and ceiling damage costs $1,200 to $2,500 for combined repairs, with plumbing or roof leak repairs ($175-$3,000) billed separately from ceiling restoration ($500-$1,200).

How do you know if a ceiling leak is serious?

You know a ceiling leak is serious when you see visible sagging or bowing, active dripping water, soft or spongy texture when touched, spreading dark stains, visible mold growth, or cracks wider than 1/8 inch.

What is included in a ceiling leak repair estimate?

A ceiling leak repair estimate includes itemized labor and materials costs, square footage or hourly rates, repair timeline, payment terms, license and insurance verification, warranty details, and any exclusions or additional costs.

How long does ceiling leak repair take?

Ceiling leak repair takes 1 to 2 weeks from start to completion, including 2 to 5 days for drying, 1 to 3 days for leak source repair, and 3 to 5 days for finishing work like mudding, sanding, priming, and painting.

Should I repair a ceiling leak myself or hire a professional?

You should hire a professional for ceiling leak repair if damage exceeds 12 inches, involves active leaks, shows any sagging, has visible mold, affects plaster or textured ceilings, or requires insurance documentation and warranties.

What affects the cost of ceiling leak repair most?

The cost of ceiling leak repair is most affected by damage severity (cosmetic stains versus structural compromise), ceiling material type (drywall versus plaster), square footage of affected area, and accessibility of the leak source.

When should I call for emergency ceiling leak repair?

You should call for emergency ceiling leak repair immediately when you see active dripping, visible sagging that indicates water accumulation, soft spots suggesting structural compromise, or rapidly spreading water stains indicating ongoing intrusion.

Do contractors charge minimum fees for ceiling leak repairs?

Contractors charge minimum service fees of $125 to $200 for ceiling leak repairs, with inspection fees of $50 to $100 that are often waived when you hire that contractor for the repair work.

How to Get Soot Off Painted Walls Safely

0

Ever try wiping soot off a wall, only to watch the black streak spread wider instead of disappear? That’s because soot’s got oily, acidic particles that embed into paint when you scrub the wrong way. This guide walks you through the exact order of steps, from dry removal to gentle wet cleaning, that actually lifts soot without forcing it deeper or damaging your finish. You’ll learn which tools prevent spreading, how to test your paint’s tolerance, and when mild soap works versus when you need stronger solutions.

Essential Safety Precautions Before Cleaning Soot

QJv00ZtMQoiDszR0BSZSyg

Soot’s got acidic compounds and fine particles that’ll irritate your lungs, eyes, and skin without proper protection. Setting up safety measures first means you won’t be halfway through the job, coughing and scrambling for a mask you should’ve put on twenty minutes ago.

Here’s what you need to do:

Open windows and doors for ventilation to push contaminated air out while fresh air comes in. Wear protective gloves so acidic soot particles don’t contact your skin. Use a respirator mask, not just a dust mask, because fine particles settle deep in your lungs where you don’t want them. Cover furniture and undamaged surfaces with drop cloths or old newspaper to contain the mess. Keep children and pets away from the work area until cleaning’s complete and everything’s dry.

Let the space ventilate for at least 30 minutes before you begin. Keep airflow going throughout the entire process. If you start feeling lightheaded, dizzy, or your throat’s irritated, step outside immediately for fresh air. Don’t push through discomfort. That’s your body telling you the air quality isn’t safe.

Required Tools and Materials for Soot Removal

JH2TmOudRxaPMCI-D-N2wA

Having everything within reach before you start prevents those frustrating mid-project store runs when you’re already wearing dirty gloves. You’ll need specialty items mixed with common household supplies. Some tools are absolute must-haves. Others just make the job easier or faster.

Tool/Material Purpose Essential or Optional
Dry cleaning sponge (chemical sponge) Lifts soot without spreading it Essential
Vacuum with upholstery attachment Removes loose soot particles first Essential
Bucket Holds cleaning solution and rinse water Essential
Dish soap or degreaser Breaks down oily soot residue Essential
Clean rags or microfiber cloths Applies solution and dries walls Essential
Protective gloves Protects hands from soot and cleaners Essential
Respirator mask Prevents inhalation of particles Essential
Drop cloths Protects floors and furniture Optional but helpful

Chemical sponges are usually available at hardware stores, janitorial supply shops, or online. They look like dense foam blocks and cost around $5 to $15 each. Working on a tight budget? Multiple clean rags work for most steps, but the chemical sponge really isn’t something you should skip. It’s designed specifically to lift soot without water, which prevents spreading stains and makes everything that follows easier.

Testing Cleaning Products on Painted Wall Surfaces

sBOxs2CORdWdiSCg6HS_Nw

Different paint finishes respond differently to cleaning products. The last thing you want is removing the soot but damaging your paint in the process. Matte and flat finishes are more delicate and absorb moisture faster than glossy or semi-gloss paints. Oil-based paints generally handle stronger cleaners better than latex.

Find a spot that’s normally hidden. Behind furniture or inside a closet works well. Apply a small amount of your cleaning solution to that area and gently wipe with the same technique you plan to use on visible walls. Let it sit for about 10 minutes without touching it.

Check the test spot for discoloration, shine changes, or texture differences. If the paint looks darker, lighter, or the finish appears duller or shinier than surrounding area, that cleaner’s too strong. You might also notice the paint texture feeling rougher or the surface getting slightly tacky. Wait at least 30 minutes for the spot to fully dry before making your final judgment. If everything still looks good after it’s completely dry, you’re safe to move forward with the full cleaning.

Complete Soot Removal Process for Painted Walls

sScr93ltS0-3jRqtt4n-g

Soot’s acidic nature makes it tricky because scrubbing actually forces those particles deeper into the paint’s pores, creating permanent stains you’ll never get out. The gentle-to-stronger approach protects your paint and gives you the best chance of complete removal. Following these steps in exact order matters because each one builds on the previous step’s results.

Here’s the complete process:

  1. Vacuum loose soot particles using your vacuum’s upholstery brush attachment with very light brushing motions across the wall surface. Don’t press hard. Just let the bristles barely touch the wall while the suction pulls particles away. Work from top to bottom so falling soot doesn’t land on areas you’ve already cleaned.

  2. Use the dry cleaning sponge with straight wiping motions across the wall. Don’t scrub in circles. The sponge works by absorbing soot on contact, so you’re literally wiping the particles onto the sponge surface. When one side gets dark and stops picking up soot, rotate to a clean side. Once all sides are contaminated, use a knife to slice off the dirty outer layer and keep using the fresh sponge underneath. When it gets too small to hold comfortably (about the size of a deck of cards), toss it and grab a new one if needed.

  3. Prepare your cleaning solution by mixing six tablespoons of dish soap or degreaser into one gallon of hot water in your bucket. Stir it gently so you don’t create a bunch of suds that make rinsing harder later.

  4. Apply the solution by dipping a clean rag into the bucket, wringing it out until it’s damp but not dripping, and wiping the wall from top to bottom using overlapping strokes. Use that same straight wiping motion, not circular scrubbing. Keep light, even pressure. Work in sections about three feet wide so the solution doesn’t dry on the wall before you rinse it.

  5. Rinse with clean water using a second bucket filled with fresh water and new rags. Dampen the rag, wipe away the cleaning solution, and wring it out in the bucket when it gets dirty. Change your rinse water when it starts looking gray or murky.

  6. Dry thoroughly using clean, dry cloths or set up a fan pointing at the wall to speed up the drying process. Getting the wall completely dry prevents water damage and stops any remaining soot from spreading.

Why Wiping Beats Scrubbing for Soot Removal:

Scrubbing creates friction that forces tiny soot particles into the microscopic texture of your paint surface. Once they’re embedded in those tiny valleys and pores, they’re essentially permanent. The particles actually bond with the paint at that point.

The correct wiping motion uses straight, overlapping strokes with just enough pressure to maintain contact with the wall. Think of it like you’re gently pushing soot along the surface and picking it up, not grinding it in. If you notice the paint texture starting to change, the finish getting rougher, or the stains spreading outward instead of lifting, stop immediately. That means you’re using too much pressure or the wrong motion.

If stains do spread, grab your dry cleaning sponge again and go back over that area before any liquid cleaners touch it. Sometimes you need multiple passes with the dry sponge before moving to wet cleaning, especially with heavy soot deposits.

You’ll know each step is complete when you stop seeing soot transfer to your tools. After vacuuming, the brush should come away clean. After dry sponging, the sponge sides should stay their original color. After wet cleaning, your rags should rinse clear. That visual feedback tells you when you’re ready to move forward, and when you need to keep working the current step.

Cleaning Solutions That Work on Soot-Stained Walls

w_XTwjgCRhyPFGA2HSd7Qg

Starting with the mildest effective cleaner protects your paint and gives you room to increase strength if needed. The dish soap solution we covered (six tablespoons per gallon of hot water) handles most light to moderate soot and should always be your first attempt. Homemade solutions work great for smaller jobs and when you want to avoid harsh chemicals, while commercial products earn their cost when you’re dealing with greasy, stubborn deposits.

Here are your alternatives when basic dish soap isn’t cutting it:

White vinegar and warm water (1:1 ratio) works for light soot from candles or minimal fireplace residue. The mild acidity helps break down soot without harsh chemicals. Mix equal parts in a spray bottle or bucket. Baking soda paste (3 parts baking soda, 1 part water) creates a gentle abrasive for concentrated spot treatment on stubborn marks. Apply, let sit for 2 to 3 minutes, then wipe away with damp cloth. TSP solution (follow manufacturer’s instructions exactly) tackles heavy buildup from fireplaces or extensive smoke exposure. This is strong stuff, wear gloves and eye protection. Usually mixed at about 1/4 to 1/2 cup per gallon of water. Commercial degreaser (as directed on bottle) specifically targets greasy soot from cooking fires or oil-burning sources. The formulation cuts through oily residues that water-based cleaners leave behind. Ammonia solution (1/4 cup per gallon water) removes stubborn stains but requires excellent ventilation and can’t be mixed with bleach or other cleaners. Open all windows and use fans to pull fumes out. This is your last-resort option before repainting.

Light soot from occasional candle use or minimal fireplace smoke typically responds to vinegar or the standard dish soap solution. Heavy deposits from a house fire, years of fireplace use without cleaning, or smoking indoors usually need TSP or commercial degreasers. For households with kids, pets, or chemical sensitivities, stick with vinegar and baking soda combinations. They’re gentler and safer even if they require more work and multiple applications.

Tackling Stubborn Soot and Different Smoke Residue Types

VRQyTFzFRhK9Fq3-UJ3bZg

The source of your soot determines its texture, how it bonds to the wall, and what cleaning approach works best. Fireplace soot behaves completely differently than candle residue. Both are different from the tar-heavy deposits left by house fires or heavy tobacco smoke. Identifying what you’re dealing with helps you choose the right products and set realistic expectations.

Fireplace Soot and Wood Smoke Residue

Wood-burning fireplaces create a dry, powdery soot that’s usually black or dark gray and sits on the surface rather than bonding tightly to paint. This type responds well to the dry cleaning sponge technique. Start with thorough vacuuming, then multiple passes with the chemical sponge before you introduce any liquid. Most fireplace soot comes off relatively easily if you catch it before it builds up for years. When deposits get heavy (thick enough that you can see texture when you run your hand near the wall), you might be looking at buildup that’s soaked into the paint over time. At that point, even aggressive cleaning might leave shadows, and you’re better off planning to repaint after cleaning what you can.

Candle Soot and Greasy Deposits

Candle soot contains paraffin or other waxes that create a slightly sticky, greasy film rather than dry powder. You’ll notice it’s harder to wipe away and leaves a smear when you touch it. This type absolutely requires degreasing solutions to break down the waxy residue. Skip straight to dish soap or degreaser rather than wasting time with vinegar. One trick: let your cleaning solution dwell on the wall for 2 to 3 minutes before wiping. That gives the degreaser time to break down the waxy bonds. The soot often looks worse when you first apply water because the residue spreads before the cleaner starts working. That’s normal, just keep wiping.

Heavy Smoke Damage and Tar Buildup

House fires, even small ones, or years of indoor smoking create tar-based residues that are sticky, brown or yellow-tinted, and smell strongly even after cleaning. If your soot feels tacky to the touch or leaves brown-yellow stains on rags instead of pure black, you’re dealing with tar deposits. This level of damage usually penetrates beyond the paint surface into the wall material itself. You can clean the surface, but the odor and staining will likely return because contamination sits deeper than you can reach with regular cleaning. This is when professional restoration services with specialized equipment (ozone treatment, thermal fogging, seal coatings) become necessary rather than just helpful.

How do you know if a stain is stubborn or actually permanent? Stubborn stains lighten with each cleaning attempt, even if they don’t completely disappear. Permanent stains look exactly the same after two or three thorough cleaning attempts using progressively stronger products.

When standard cleaning isn’t enough, try these advanced techniques:

Increase solution strength gradually with each cleaning round. Start at the recommended dilution, then increase cleaner concentration by 50% if the first attempt shows improvement but doesn’t complete the job. Allow cleaning solution to dwell for 2 to 3 minutes on the wall before wiping. This soaking time helps cleaners penetrate and break down bonded soot particles. Use baking soda paste as a concentrated treatment on specific marks that won’t lift. Apply, let it sit, then wipe gently. The mild abrasive action sometimes releases particles that liquid cleaners can’t reach. Try TSP for grease-based soot that resists dish soap and standard degreasers. This is significantly stronger and works when other products fail on oily deposits. Apply rubbing alcohol to isolated stubborn spots using a clean cloth. The alcohol can dissolve certain soot compounds that water-based cleaners leave behind. Test first, especially on delicate paint finishes.

Typically, you should see noticeable improvement within two to three thorough cleaning attempts. If you’ve gone through the full process three times with progressively stronger products and the stains look unchanged, that’s your signal to consider professional help. Other signs that you need a restoration service: paint texture has changed (feels rough or damaged), color has absorbed into the wall rather than sitting on the surface, or strong smoke odor persists even after the visible soot is gone. These indicate contamination that’s soaked through the paint into the drywall or plaster underneath, which means surface cleaning alone won’t solve it.

Preventing Water Damage While Cleaning Soot

VLkDrNtQT68nk7UhDW7nQ

Over-wetting your walls during cleaning creates its own problems. Bubbling paint, water stains, damaged drywall paper, or even mold growth if moisture soaks in and doesn’t dry properly. The irony of causing water damage while trying to clean smoke damage is real, and it happens more often than you’d think when people scrub too enthusiastically with soaking wet rags.

The key is using damp cleaning cloths, not wet ones. After dipping your rag in the cleaning solution, wring it out until you can’t squeeze any more water from it. The cloth should feel moist to the touch but shouldn’t leave the wall looking wet or show any drips. That amount of moisture is enough to activate your cleaner and lift soot without saturating the paint layer.

Proper rinsing removes cleaning residue without adding excessive moisture. Use a separate bucket of clean water and fresh rags for rinsing. Dampen the rag, wipe away the cleaning solution, then immediately follow with a dry cloth to absorb excess moisture. Work in small sections, about three feet square, so you complete the wash-rinse-dry sequence before moving on. This prevents water from sitting on the wall long enough to cause problems.

After you’ve finished the entire wall, set up fans to keep air moving across the surface. Even with careful technique, the wall will be slightly damp and needs airflow to dry completely. Point fans at the wall from about three to six feet away and let them run for two to three hours. If the room feels humid or the wall still looks darker (indicating moisture), run a dehumidifier while the fans work. Plaster walls and other porous surfaces need extra attention because they absorb water more readily than modern drywall with latex paint. On plaster, use even less water, work in smaller sections, and increase drying time to four to six hours.

When to Repaint Walls After Soot Removal

6TsEhArRTMSJf8JEUJrmBg

Sometimes cleaning gets you close but can’t deliver the completely clean look you’re after. Soot particles can penetrate through the paint layer and stain the drywall or plaster underneath, especially when it’s been sitting for weeks or months before you cleaned it. Once contamination reaches that deep, surface cleaning just won’t bring the original appearance back. Matte and flat finishes are more vulnerable because their porous texture absorbs stains more easily than glossy paints.

Here’s when you know cleaning isn’t enough and repainting is the answer:

Discoloration remains after thorough cleaning. The wall shows yellow, brown, or gray shadows even after you’ve completed the full cleaning process with appropriate products. Paint texture has changed or roughened. The finish feels different to the touch, no longer smooth, indicating damage to the paint layer itself. Odor persists after cleaning. Smoke smell lingers in the room even though visible soot is gone, meaning particles have soaked deeper than cleaning can reach. Multiple cleaning attempts show no improvement. The stains look exactly the same after two or three cleaning rounds with progressively stronger solutions. Paint finish appears dulled or damaged. Glossy or semi-gloss paint now looks flat, or the sheen is inconsistent across the wall. Stains have penetrated through paint layer. You can see discoloration bleeding through from underneath, not just sitting on the surface.

Before you repaint, wash the wall one final time with TSP or a heavy-duty degreaser to remove any remaining surface oils or residue that would prevent new paint from bonding. Rinse thoroughly and let the wall dry completely, at least 24 hours. Then apply a stain-blocking primer specifically rated for smoke damage. Regular primer won’t seal odors or prevent stains from bleeding through your new paint. Products designed for smoke and fire restoration contain sealers that lock contamination in place.

If you’re only repainting one wall or a section of a room, color matching becomes critical. Paint fades over time from sunlight and age, so even if you have the original paint color name and formula, the new paint will likely look slightly different next to your existing walls. For the best match, take a paint chip from an inconspicuous area to your paint store for computer color matching, or plan to repaint the entire room for consistent appearance. If the soot damage came from a fire or significant smoke event, FireFloodRescue.com provides fire and smoke-related home repairs including drywall replacement and odor-sealing preparation that coordinates the full restoration from cleanup through finished surfaces.

Professional Soot Removal vs. DIY Cleaning

4ImzmU9TSLelqxz_57choA

The decision to handle soot cleaning yourself or hire professionals comes down to the scope of damage and your available time. Light soot from candles or a small amount of fireplace residue is absolutely manageable as a DIY project. Heavy smoke damage from a house fire or persistent staining that won’t respond to cleaning is where professional services earn their cost through specialized equipment and experience you can’t replicate at home.

Situation DIY Appropriate Professional Recommended
Light candle soot on small wall area Yes, chemical sponge and basic cleaning handles this easily No, cost would exceed DIY effort
Regular fireplace residue buildup Yes, if buildup is light to moderate and responds to cleaning attempts Consider if heavy deposits or staining persists
House fire damage No, contamination typically penetrates too deep Yes, requires specialized odor sealing and restoration
Persistent smoke odor No, odor in walls indicates absorbed contamination Yes, needs ozone treatment or thermal fogging equipment
Large affected area (multiple rooms) Possible but time-intensive for homeowner Yes, professionals complete the work faster with better equipment

Professional restoration services go beyond basic surface cleaning. They include contamination testing to determine if soot has penetrated into wall cavities or insulation, specialized HEPA vacuuming that captures particles too fine for home equipment, industrial-strength cleaning compounds, ozone generators or hydroxyl machines for odor elimination, thermal fogging that reaches inside walls and ductwork, and stain-sealing primers applied before repainting. FireFloodRescue.com handles fire and smoke-related home repairs including odor-sealing preparation and drywall replacement, coordinating the full sequence from stabilization through finished repairs.

For moderate smoke damage from a contained fire, expect professional cleaning to cost $3,000 to $7,000 for a typical single-family home, depending on affected square footage and contamination severity. Timeline is usually three to seven days from initial assessment through completion. When interviewing restoration companies, ask about their process for odor elimination (not just masking), whether they perform air quality testing before and after, if their estimates include repairs or just cleaning, and how they handle insurance documentation if you’re filing a claim.

Maintaining Clean Walls and Preventing Soot Buildup

1cIb2rM1SpCvrGOV4F9IOg

Stopping soot before it accumulates is significantly easier than removing thick deposits that have baked onto your walls over months or years. Most household soot comes from preventable sources. Fireplaces without proper maintenance, candles placed too close to walls, cooking without ventilation, and inadequate furnace filter changes.

Identify where soot originates in your home first. Stand in the rooms where you notice the most discoloration and look for patterns. Dark streaks above fireplaces, shadowing near candle holders, and kitchen walls near the stove are obvious sources. Less obvious: return air vents can create soot patterns on nearby walls if your furnace filter is overloaded with dirt.

Here’s what prevents buildup:

Clean fireplace chimneys annually to remove creosote that releases particles into your home, even when the damper is closed. Use proper candle placement by keeping candles at least 12 inches away from any wall surface and always using candle holders that catch drips. Install air purifiers in rooms with combustion sources like fireplaces, wood stoves, or frequently used cooking areas to capture particles before they settle on walls. Wash walls quarterly in high-soot areas using a damp microfiber cloth and mild soap solution to remove light deposits before they bond to the paint. Ensure proper ventilation when cooking by running range hood fans that vent outside (not recirculating models) every time you use the stove. Replace furnace filters regularly (every 30 to 90 days depending on filter type) to prevent particle buildup in your HVAC system that spreads through your home. Address smoking indoors practices if applicable, or establish designated outdoor smoking areas, as indoor smoking is the single biggest contributor to persistent wall staining.

A simple monthly routine catches soot early: wipe walls near combustion sources with a dry microfiber cloth, checking for any dark residue transfer to the cloth. If you see particles, do a quick wash with soap and water before they build up. This takes about 10 minutes per room and prevents the hours of intensive cleaning needed when deposits get thick. Early intervention when you first notice any darkening means you’re cleaning loose surface particles rather than bonded stains, and that’s the difference between a quick wipe-down and a full restoration project.

Addressing Soot Odor Removal from Walls

Visible soot removal is only half the job when smoke odor lingers in the room after cleaning. That persistent smell indicates particles have soaked into the porous structure of your paint, drywall, or plaster. Even tiny amounts of contamination trapped in those microscopic spaces release odor molecules continuously, especially when temperature and humidity change.

Paint isn’t actually solid. It has a porous structure at the microscopic level that allows the material to expand and contract with temperature changes. Soot particles smaller than what you can see get trapped in those tiny spaces. Drywall paper and plaster are even more absorbent. Once contamination reaches those depths, surface cleaning can’t pull particles back out.

Here’s the sequence for odor removal:

  1. Wash walls with vinegar solution mixed at equal parts white vinegar and water. The acetic acid in vinegar helps neutralize odor compounds. Work from top to bottom across all affected walls, not just where you see staining.

  2. Allow walls to air dry completely with fans running to create constant airflow across the surface. Point fans toward open windows to push odor-laden air out rather than just circulating it in the room. Run fans for at least four to six hours, longer if the room still smells smoky.

  3. Place odor absorbers around the room after walls are dry. Fill shallow bowls with baking soda and set them on the floor along walls where odor is strongest. The baking soda absorbs odor molecules from the air. Replace the baking soda every three to five days. You’ll know it’s saturated when it no longer reduces the smell noticeably.

  4. Repaint with odor-sealing primer if odor persists after washing, drying, and absorption attempts. Standard primers won’t work here. You need products specifically formulated to seal smoke odors. Apply two coats of sealing primer, then finish with your chosen paint color. This physically locks remaining contamination behind an impermeable barrier.

Mild odors typically dissipate within one to two weeks after thorough cleaning, ventilation, and baking soda absorption. If the smell remains strong after three weeks or returns when you run the heat or air conditioning, that indicates contamination has penetrated beyond the wall surface into insulation, framing, or ductwork. At that point, odor-sealing primer on walls alone won’t solve it. You’re looking at a situation where professional restoration with ozone treatment or hydroxyl generation becomes necessary to reach contamination in spaces you can’t access for direct cleaning.

Final Words

Getting soot off painted walls takes patience and the right approach, but most homeowners can handle light to moderate deposits with proper technique.

Start with dry methods like vacuuming and chemical sponges before adding any liquid cleaners. Always wipe, never scrub, to avoid pushing soot deeper into the paint.

Test your cleaning solution in a hidden spot first, work from top to bottom, and know when you’ve reached the limit of DIY cleaning.

If stains persist after two thorough attempts, if the paint texture changes, or if you’re dealing with house fire damage, that’s when professional restoration makes sense. We’ll assess what’s salvageable, seal odors properly, and finish repairs so they blend right back into your home.

FAQ

How do you remove soot from painted walls?

You remove soot from painted walls by first vacuuming loose particles with an upholstery brush, then using a dry cleaning sponge with a wiping motion, followed by washing with dish soap solution (six tablespoons per gallon hot water), rinsing with clean water, and drying thoroughly.

Does soot stain permanently?

Soot can stain permanently if handled incorrectly, particularly when scrubbed into paint pores or left untreated. Proper removal using wiping techniques with dry cleaning sponges before liquid cleaners prevents permanent staining, though some heavy deposits may penetrate paint layers beyond cleaning.

Does Dawn dish soap remove soot?

Dawn dish soap removes soot when mixed at six tablespoons per gallon of hot water and applied with a gentle wiping motion. The degreasing properties work well on light to moderate soot, though stubborn deposits may require stronger cleaners like TSP or commercial degreasers.

Does vinegar remove soot from walls?

Vinegar removes light soot from walls when mixed with warm water in a 1:1 ratio and applied with a wiping technique. It works best after using a dry cleaning sponge first, though heavier deposits require dish soap solution or commercial degreasers for complete removal.

What safety equipment do I need before cleaning soot?

You need protective gloves, a respirator mask, drop cloths, and proper ventilation before cleaning soot. Open windows and doors, cover furniture and undamaged surfaces, and keep children and pets away from the work area to prevent exposure to hazardous particles.

When should I hire professionals for soot removal?

You should hire professionals for soot removal when dealing with house fire damage, persistent odors after multiple cleaning attempts, large affected areas, or stubborn stains that won’t come out after two to three thorough cleanings using proper techniques.

How do I know if my wall needs repainting after soot cleaning?

Your wall needs repainting after soot cleaning if discoloration remains after thorough cleaning, paint texture has changed, odor persists, or stains have penetrated through the paint layer. Use stain-blocking primer before repainting to prevent soot from bleeding through new paint.

Why shouldn’t I scrub soot stains?

You shouldn’t scrub soot stains because scrubbing pushes the acidic particles deeper into paint pores, spreads contamination across larger areas, and embeds stains permanently. Instead, use straight wiping strokes with light pressure to lift soot from the surface.

What’s the difference between a dry cleaning sponge and a regular sponge?

A dry cleaning sponge (chemical sponge) lifts soot particles through a specialized rubber material when used dry with a wiping motion, while regular sponges spread wet soot and worsen stains. Always use the dry cleaning sponge before any liquid cleaners.

How long should walls dry after cleaning soot?

Walls should dry completely after cleaning soot, typically taking several hours depending on ventilation and humidity. Use fans to speed up the drying process and prevent water damage, ensuring walls are fully dry before repainting or sealing.

Can I use baking soda to remove soot from walls?

You can use baking soda to remove soot from walls by mixing three parts baking soda with one part water to create a paste for concentrated spot treatment. Apply to stubborn stains after trying gentler methods like dish soap solution.

What causes soot to smell even after cleaning?

Soot smells even after cleaning because smoke particles penetrate porous wall surfaces and paint layers beyond what surface cleaning reaches. The odor indicates trapped contamination that may require odor-sealing primer or professional restoration to fully eliminate.

How to Seal Smoke Smell in Ceiling Permanently

0

Think smoke smell stuck in your ceiling is permanent? Think again.
Smoke doesn’t just sit on the surface, it soaks into drywall, plaster, and texture, and ordinary paint lets it come back when the room warms or gets humid.
This quick-start guide walks you through cleaning away residue, choosing and applying a true odor-blocking primer (shellac or oil), and finishing so the smell stays sealed for good.
Follow these steps and you won’t be chasing that musty smoke smell every time the heat kicks on.

How to Permanently Block Smoke Odor Coming Through Your Ceiling (Quick Start Guide)

26FnoFRdTsarxpTwrfViZQ

When smoke smell soaks into your ceiling, it doesn’t just sit on the surface. It gets inside the drywall, plaster, or texture, and standard paint won’t lock it in. The smell comes back every time the room heats up or humidity changes. Permanently sealing smoke odor means cleaning what’s already there, then applying a primer designed to trap and block odors before you repaint.

Here’s the step by step quick start process to seal smoke smell in ceiling surfaces:

  1. Turn off the HVAC and open windows. Stop air circulation from pushing odor into other rooms. Run exhaust fans toward open windows.
  2. Vacuum loose soot. Use a HEPA vacuum with a brush attachment to remove loose particles without smearing them deeper into the ceiling.
  3. Degrease with TSP solution. Mix 1/4 cup trisodium phosphate (TSP) or TSP substitute in one gallon of warm water. Scrub the ceiling in sections, rinse with clean water, and allow 24 hours to dry.
  4. Repair surface damage. Patch cracks or holes. Let repairs cure for 24 to 48 hours before moving forward.
  5. Apply shellac based odor blocking primer. Use a product like Zinsser BIN. Apply one to two coats, allowing 45 minutes to two hours between coats.
  6. Paint with latex ceiling paint. After the primer dries, apply one to two topcoats of quality ceiling paint.
  7. Ventilate for 48 to 72 hours. Keep fans running and windows open to clear fumes and allow the sealer to cure fully.
  8. Inspect for remaining odor. After three days, check if smell persists. If it does, investigate insulation, HVAC ducts, or wall cavities.

This process stops smoke odor from bleeding through by creating a sealed barrier inside the paint layer. It works on drywall, plaster, and most textured ceilings as long as you clean first and seal with the right primer.

Preparing the Room and Protecting Surfaces Before Odor Removal

8eioa94ERM2FqkTnyWHcjw

Prep work keeps smoke residue from spreading to clean areas and makes cleanup easier. Before you start cleaning or priming, you need to contain the work zone and protect anything you don’t want covered in dust, cleaner, or primer.

Start by moving all furniture out of the room. If you can’t move something, push it to the center and cover it with heavy plastic sheeting, not just a drop cloth. Tape plastic over air vents and return grilles to stop soot and fumes from entering the HVAC system. Remove or cover light fixtures, ceiling fans, and smoke detectors. Lay canvas drop cloths on the floor. Canvas absorbs drips better than plastic and won’t slide under your stepladder.

Key prep steps:

  • Seal HVAC vents with painter’s tape and plastic to prevent contamination.
  • Cover floors with canvas drop cloths anchored with tape at seams.
  • Remove ceiling mounted fixtures or wrap them tightly in plastic.
  • Set up cross ventilation with box fans blowing outward through windows.

This containment setup protects the rest of your home and gives you safe airflow while you work. Don’t skip ventilation. Both cleaning chemicals and sealing primers release fumes that need to exit the room continuously.

Cleaning the Ceiling to Remove Residue Before Sealing

J3VQiOA0Rrq6L_j_tSLDiQ

Sealing over smoke residue doesn’t work. Tar, nicotine, and soot will bleed through almost any primer if you don’t remove the surface layer first. Cleaning pulls out the greasy film so the primer can bond to the ceiling material instead of sitting on top of contamination.

TSP is one of the most effective cleaners for breaking down smoke residue. Mix 1/4 to 1/2 cup of TSP or TSP substitute in one gallon of warm water. Work in small sections so the ceiling doesn’t stay wet too long. Use a sponge or microfiber cloth, wring it out until it’s damp but not dripping, and scrub in firm strokes. Rinse each section with a separate bucket of clean water and a fresh cloth, then dry with a towel to check if staining remains.

Here’s the cleaning sequence:

  1. Vacuum the ceiling with a HEPA filter and brush attachment. This lifts loose soot without pushing it into the pores.
  2. Mix TSP solution in a bucket. Use 1/4 to 1/2 cup per gallon. Wear thick rubber gloves and eye protection.
  3. Scrub one section at a time. Work from corner to corner in three foot squares. Keep the sponge damp, not soaked.
  4. Rinse immediately with clean water. Use a second sponge and bucket. Change rinse water frequently.
  5. Dry each section with a clean towel and inspect. If yellow or brown staining shows through the towel, scrub that area again.

Let the ceiling dry completely for 24 hours with fans running and windows open. Don’t skip drying time. Moisture trapped under primer causes blistering, peeling, and mold. If the ceiling still smells strong after cleaning and drying, the odor has soaked deeper than surface residue, which is why the primer step is critical.

Choosing the Right Odor Blocking Primer or Sealer

f1OkvPdcS82uP6uRvNl5gw

Not all primers block odor. Standard latex primers seal stains visually but don’t stop smell from passing through. Smoke odor needs a primer that chemically binds to odor molecules and creates an impermeable barrier. Shellac based and oil based primers are the two types that actually work for smoke.

Shellac based primers like Zinsser BIN are the strongest option for blocking smoke smell. They dry fast, seal tightly, and lock in phenolic odors that other products can’t touch. Shellac primers work on nicotine, fire smoke, and tar. They’re solvent based, so they release strong fumes and require good ventilation and a respirator with organic vapor cartridges. Recoat time is usually 45 minutes to two hours, which means you can prime and paint in the same day on a small ceiling. One quart of shellac primer typically covers 100 to 200 square feet on porous or sooty surfaces.

Oil based primers are the second best choice. They create a strong odor barrier and cost less per gallon than shellac products. Oil based primers take longer to dry. Plan on 12 to 24 hours between coats. And they also require ventilation and a respirator. Coverage is around 300 to 400 square feet per gallon. They work well for moderate smoke contamination but may not fully block heavy fire damage or years of cigarette smoke without a second coat.

Primer Type Odor Blocking Strength Recoat Dry Time
Shellac based (e.g., Zinsser BIN) Highest – blocks severe smoke, nicotine, fire odor 45 minutes to 2 hours
Oil based (e.g., KILZ Original) High – effective for moderate smoke contamination 12 to 24 hours
Water based latex Low – insufficient for smoke odor alone 1 to 4 hours

Water based primers don’t block smoke smell reliably. They’re fine for general stain coverage, but smoke molecules pass right through. If cost or ventilation limits your options, use an oil based primer as your minimum standard. For certainty, choose shellac.

Applying Sealers and Primers on Different Ceiling Types

LY4RQHY5R6a705AadRJExQ

Different ceiling materials absorb smoke differently and require adjusted application techniques. Drywall, textured surfaces, and acoustic tiles all hold odor, but the way you apply primer changes based on porosity and fragility.

Drywall Ceilings

Drywall is porous but relatively smooth, so it accepts primer evenly with a standard roller. Use a 3/8 inch nap roller for flat drywall and an extension pole to avoid working directly overhead. Apply shellac or oil based primer in one direction for the first coat, then cross roll the second coat perpendicular to the first if heavy staining remains. Let the first coat dry fully before adding a second. On clean, well prepped drywall, one coat of shellac primer usually seals the odor. If bleed through appears after drying, apply a second coat before painting. Drywall that was damaged by scraping or heavy soot may need patching with joint compound. Allow 24 to 48 hours for patches to cure, then sand lightly and prime.

Textured/Popcorn Ceilings

Popcorn and textured ceilings have deep crevices that trap soot and absorb odor throughout the texture layer. Use a roller with a 1/2 to 3/4 inch nap, or consider an HVLP sprayer for even coverage without pressing the texture flat. Don’t oversaturate the surface. Textured ceilings can sag or release from the drywall if loaded with too much liquid. Roll gently and let the primer soak in naturally. Avoid back rolling excessively. If the texture is severely stained or the odor persists after two coats of shellac primer, the contamination may have soaked into the drywall underneath. At that point, removing and replacing the texture, or covering it with a smooth skim coat, may be the only permanent solution.

Acoustic Drop Ceiling Tiles

Acoustic tiles are highly porous and absorb smoke deeply. Cleaning them rarely works because water damages the fiber. If the tiles smell after cleaning, sealing them with primer is possible but not always effective long term. Spray shellac based primer lightly on both sides of the tile if you can remove them. If tiles are installed, spray the visible side only with an HVLP sprayer, working in a well ventilated space. Let the primer cure fully. If odor remains after sealing, replace the tiles. Acoustic tiles are inexpensive, and replacement is often faster and more reliable than sealing when smoke contamination is heavy.

Safety Precautions When Removing Smoke Odor

EWw-IBEmSDOnLyFIHu93QQ

Shellac and oil based primers release fumes that can cause headaches, dizziness, and respiratory irritation if you work in a closed room. Ventilation isn’t optional. Open all windows, set up box fans to blow air out of the room, and use an exhaust fan if available. Cross ventilation (fresh air coming in one side, contaminated air pushing out the other) keeps fumes from building up.

Wear a respirator rated for organic vapors, not just an N95 mask. N95 masks filter particles like soot but don’t block solvent fumes. Look for a half face respirator with replaceable cartridges labeled for organic vapors and VOCs. If you start to feel lightheaded, leave the room immediately, get fresh air, and increase ventilation before returning. Don’t work alone if you’re using solvent based products for the first time.

Essential protective gear:

  • Respirator with organic vapor cartridges (not just an N95).
  • Rubber or nitrile gloves rated for solvents (not thin latex).
  • Eye protection to prevent primer splatter from reaching your eyes.

Keep the room ventilated for 24 to 48 hours after priming, even if the smell seems gone. The fumes continue off gassing as the sealer cures. Don’t let pets or children into the space until ventilation is complete and the odor has cleared.

Identifying Active Smoke Infiltration vs. Old Odor Residue

lZG1uS_FQ7mT5RAU7BYGUw

Sealing works when the smoke source is gone and you’re dealing with residual odor trapped in the ceiling material. It doesn’t work if smoke is still entering the room. Before you prime, confirm whether the odor is old contamination or active infiltration from an ongoing source.

Active smoke infiltration happens when gaps, cracks, shared walls, or ventilation systems allow smoke to move into your space from elsewhere. Common signs include smell that gets stronger at certain times of day, odor that appears near vents or light fixtures, or new staining that wasn’t there before. Temperature changes and airflow shifts can pull smoke through ceiling penetrations, especially in apartments or multi unit buildings. If you’re smelling smoke from a neighbor or an attic, sealing the ceiling surface won’t stop it. You need to seal the gaps where smoke enters, or address the source directly.

Residual smoke odor stays consistent or fades slowly over time. It doesn’t get worse. It’s strongest when the room heats up or humidity rises because heat releases trapped odor molecules from porous materials. Old cigarette smoke, past kitchen fires, and prior occupants’ smoking habits all leave residual contamination. Sealing this type of odor works because the smell is already inside the material, not actively entering.

Key differences to check:

  • Does the smell get stronger when the HVAC runs or the temperature changes? (Likely residual odor.)
  • Do you see new yellow or brown stains forming after cleaning? (Possible active infiltration.)
  • Is the odor isolated to one room, or does it appear near shared walls and ceilings? (May indicate infiltration from adjacent units or attic.)
  • Does the smell fade when you ventilate, then return later? (Residual odor releasing from materials.)

If you’re not sure, clean and ventilate the room for 48 hours with fans running. If the smell comes back without any new smoke source, it’s residual and sealing will help. If it returns only near vents, gaps, or ceiling fixtures, investigate those entry points before priming.

When to Call a Professional for Smoke Odor Remediation

6BbJq0yhQOuw1mcdGnQzlg

If two coats of shellac based primer, thorough cleaning, and full repainting don’t eliminate the smell, the contamination has spread beyond the ceiling surface. Smoke can soak into insulation above the drywall, infiltrate HVAC ductwork, or settle into wall cavities and structural framing. At that stage, DIY sealing won’t reach the source, and professional remediation is the reliable next step.

Professionals use tools and methods that aren’t practical for homeowners. Thermal fogging releases a deodorizing vapor that penetrates porous materials and neutralizes odor molecules. Ozone generators oxidize odor compounds, but they’re hazardous to occupants and pets and must be used in unoccupied spaces with proper ventilation and timing. Ozone is effective but requires training and safety precautions. Improper use can damage materials and harm respiratory systems. Restoration companies also have moisture meters, infrared cameras, and air quality testing equipment to locate hidden contamination that you can’t see or smell from the room itself.

You should call a professional if the odor persists after proper cleaning and sealing, if smoke damage extends to multiple rooms, if insulation or drywall needs replacement, or if you’re dealing with fire damage that affected structural elements. Professionals can also handle situations where smoke has contaminated HVAC systems, requiring duct cleaning or filter replacement throughout the ventilation network. Heavy smoke exposure, especially from fire, often leaves residues that require material removal rather than surface treatment. Trying to seal over severe contamination without removing affected insulation or drywall usually just delays the problem.

Final Words

Start by cleaning and degreasing the ceiling with TSP, neutralizing residue, then lock it in with a shellac-based primer.

We walked through prepping and protecting the room, step-by-step cleaning, primer choices for different ceiling types, and safety tips like ventilation and respirators.

Follow the steps on how to seal smoke smell in ceiling and you’ll stop the odor from coming back and restore a fresh, livable space. If the smell persists, call a pro, you’re not stuck alone.

FAQ

Q: How to get rid of smoke smell from ceiling?

A: The best way to get rid of smoke smell from a ceiling is to clean soot with TSP, neutralize odors, then seal with a shellac-based primer and repaint, ventilating well afterward.

Q: Does Kilz get rid of cigarette smoke smell?

A: Kilz primers can reduce cigarette smoke smell, with oil-based Kilz blocking many stains and odors; shellac-based primers seal strongest. Clean residue first and expect multiple coats for heavy penetration.

Q: What absorbs smoke odor and what absorbs cigarette smoke smell in a house?

A: Activated charcoal and baking soda absorb smoke odor; HEPA-plus-carbon air purifiers remove airborne particles and smells, but porous materials often need cleaning, sealing, or replacement.

Property Damage Claim After Water Leak: Filing Steps That Work

0

Skipping clear photos and notes is the costly mistake most homeowners make after a water leak.
That can shrink your payout and slow repairs.
This post walks you step-by-step through what to do right away: stop the water, document the damage, notify your insurer, hire a licensed restorer, and protect evidence so you don’t lose coverage.
Follow these steps to limit mold, speed the claim, and get the repairs covered—no guesswork, just what works.

Stop the Water Immediately

lj5h7AZgRhOxEFp1xClk7Q

Turn off the water the second you spot a leak. If you know which fixture or appliance is leaking, find the individual shut-off valve. It’s usually a small oval handle or round knob under sinks, behind toilets, or near washing machines. Turn it clockwise by hand. Can’t find the local valve, or is the leak inside a wall or ceiling? Shut off the main water valve for the whole house. Main valves usually need a wrench to turn. Some homes have a round wheel valve, others have a lever style ball valve. Turn the wheel clockwise until it stops, or flip the lever a quarter turn so it sits perpendicular to the pipe.

Speed matters. Mold and mildew can start growing on wet materials in 24 to 48 hours. The longer water runs, the deeper it soaks into drywall, insulation, subfloors, and trim. More damage, more expensive repairs, and more evidence the insurance adjuster will document.

Once the water’s off, check for immediate safety hazards. Water pooling near electrical outlets, appliances, or your breaker box? Shut off electricity to that area at the circuit breaker. If you smell gas or suspect structural instability (sagging ceilings, bulging walls), leave the space and call for professional help. Your safety comes first.

Document Everything Before You Touch Anything

VaGAPU15R_-tfHjEIvajEg

Before you start mopping or moving furniture, pull out your phone and take photos and videos of every wet surface, every damaged item, and the source of the leak if you can see it. Walk through each room. Capture wide shots that show how far the water spread, then close-ups of specific damage: bubbled paint, warped baseboards, soaked carpet, water stains on drywall, wet furniture, and any rusted or corroded pipes or fittings.

Open closets and drawers and photograph wet clothing, shoes, linens, and anything else that absorbed water. If you can see the failed component (a cracked supply line, a burst pipe joint, a leaking roof membrane), photograph it from multiple angles. Include a timestamp if your camera allows it, or note the date and time separately in a document.

This visual record is the foundation of your insurance claim. Adjusters and insurers rely on photos to verify the scope of damage and determine what’s covered. Without clear documentation, you may struggle to prove the full extent of loss, especially for items that had to be discarded quickly or damage that happened behind walls.

Take notes as you go. Write down the date and time you discovered the leak, where the water came from, which rooms were affected, and what immediate actions you took. Shutting off the main valve, moving electronics to dry ground, calling a restoration company. Keep this log with your photos. It becomes part of your claim file and helps you stay organized as the process unfolds.

Notify Your Insurance Company Right Away

pTh7BI3lSPy__0uxgYetbg

Call your insurance company or agent as soon as you have the leak under control and initial documentation complete. Most carriers operate 24/7 claim hotlines, and many let you file online through a web portal or mobile app. Report the loss immediately. Delaying the call can raise questions about how much damage happened before you acted and may complicate coverage.

When you speak to the claims representative, provide clear, factual information: the date and time of the loss, the suspected cause (burst pipe, appliance failure, roof leak), which areas of the home were affected, and what steps you’ve already taken to stop the water and prevent further damage. Mention if you hired a water damage restoration company or if you moved belongings to protect them. The insurer will assign a claim number and schedule an adjuster to inspect your property.

Ask the representative what your policy covers and what it excludes. Confirm whether your policy pays actual cash value (current depreciated value) or replacement cost value (cost to replace with new, like-kind materials), and whether any depreciation will be withheld until you complete repairs and provide proof of payment. Find out if temporary housing or additional living expenses are covered if your home is uninhabitable, and clarify the claims process for those expenses. Some insurers reimburse after the fact, others may pay directly.

Write down the claim number, the name of the representative you spoke with, and the date and time of the call. Save all correspondence. This paper trail protects you if disputes arise later.

Understand What’s Covered and What’s Not

5548-BUqS5KsTmi7nrsb5w

Most homeowner’s insurance policies cover sudden, accidental water damage: a pipe that bursts because it froze overnight, a washing machine hose that splits and floods the laundry room, a roof that leaks during a windstorm, or ice dams that force water under shingles. The policy typically pays to repair or replace damaged building materials (drywall, flooring, cabinets, trim) and to dry out the structure so mold doesn’t take hold.

What policies usually exclude: flood damage from natural disasters (rising rivers, storm surge, heavy rain that overwhelms drainage), gradual or maintenance related leaks (a slow drip under the sink that went unnoticed for months, a roof that deteriorated over decades without repair), sewage backup (often requires a separate endorsement), and damage caused by earth movement like seepage from groundwater or settling. If the leak was caused by your failure to maintain the home (ignoring a known problem, neglecting repairs, leaving the house unheated in winter), the insurer may deny coverage on grounds of negligence.

The appliance or fixture that failed is often not covered under your homeowner’s policy. If your water heater rusts out and floods the basement, the policy may pay to repair the wet drywall, replace soaked carpet, and dry the framing, but it won’t buy you a new water heater. That component is considered a maintenance item. You may have warranty coverage or a product liability claim against the manufacturer, but your home policy won’t replace it.

Check your policy’s declarations page and endorsements to confirm your coverage limits, deductible, and any special conditions. If you live in a flood zone or an area with frequent storms, you may need a separate flood policy through the National Flood Insurance Program or a private flood insurer. If sewage backup is a concern, confirm you have that endorsement. Knowing these details before you file prevents surprises when the adjuster delivers the estimate.

Hire a Licensed Water Damage Restoration Company

ZS4pI-VQnif7wFQ9zfI8g

Unless the leak is very minor (a small puddle you can towel up in minutes), hire a licensed, insured water damage restoration company to extract standing water, set up drying equipment, and monitor moisture levels in walls, floors, and ceilings. These companies use truck mounted extractors, commercial dehumidifiers, air movers, and moisture meters to dry materials thoroughly, not just on the surface.

Ask for proof of license and insurance before you sign a work order. Request a written estimate that itemizes the scope of work: water extraction, affected square footage, number of air movers and dehumidifiers, estimated drying time, and cost. Compare quotes from at least one other company if time allows, but don’t delay the start of drying just to shop around. Every hour matters in preventing mold growth and further material damage.

The restoration company isn’t the same as the contractor who will rebuild drywall, replace flooring, or repaint. Some restoration firms offer both services, but it’s smart to get separate bids for reconstruction work once drying is complete. Don’t sign contracts for full scale repairs until you know what the insurance adjuster will approve and what your out of pocket costs will be.

Document what the restoration company does. Take photos of the equipment they set up, keep copies of daily moisture readings if they provide them, and save all invoices. If your policy includes a depreciation holdback (money the insurer withholds until repairs are done), you’ll need proof that you paid for this work in order to recover those withheld funds.

Mitigate Further Damage While You Wait for the Adjuster

3CMeiAc9Q3WME99J1divxg

You have a duty under most policies to prevent additional damage once you discover a loss. This means you can’t just leave wet carpet sitting for a week while you wait for the adjuster. Pull up soaked rugs, move furniture away from wet walls, remove wet insulation if it’s accessible, and run fans to increase airflow. If the roof is leaking, place buckets to catch drips and cover valuables with plastic sheeting. If a window broke and rain is coming in, board it up with plywood or heavy plastic.

Keep receipts for any materials you buy (tarps, plastic sheeting, plywood, cleaning supplies) and take photos of the mitigation work you do. Reasonable mitigation expenses are typically reimbursable under your policy. If you hire a handyman to tarp the roof or board a broken door, save the invoice.

Do not make permanent repairs before the adjuster inspects and documents the damage. If you tear out all the wet drywall and dispose of it before the adjuster sees it, you lose critical evidence of the scope of loss. The adjuster needs to measure, photograph, and assess the damage firsthand. Temporary measures (stopping the leak, drying the space, protecting belongings) are expected and covered. Permanent fixes (patching walls, replacing flooring) should wait until the claim is settled or at least until the adjuster gives you the go-ahead.

Collect and Organize All Required Documentation

gJ395oekQq6pQT1zWJygIg

Insurers need proof to process claims. Gather every piece of evidence that supports your loss: the photos and videos you took immediately after the leak, an inventory of damaged personal property (furniture, clothing, electronics, appliances) with purchase dates and prices if you have receipts or credit card statements, and estimates from contractors or restoration companies.

If you had to move out temporarily, keep receipts for hotel stays, restaurant meals, and any other additional living expenses your policy covers. If you hired a plumber to diagnose the leak or a roofer to inspect storm damage, save those invoices. If you paid for emergency board up or tarping, include those receipts.

Create a simple spreadsheet or document that lists each damaged item, the room it was in, what it cost when you bought it, and its approximate age. For high value items (jewelry, electronics, antiques), include serial numbers, model numbers, or appraisals if you have them. The more detail you provide, the easier it is for the adjuster to validate your claim and calculate a fair settlement.

Organize everything in a folder (digital or paper) with the claim number on the cover. Make copies of key documents before you submit them. If the insurer requests additional information, you can respond quickly without scrambling to recreate records.

Work With the Insurance Adjuster During the Inspection

J4SjdpyjSWmcodQYtjfRpA

The adjuster will visit your home to inspect the damage, take measurements, photograph affected areas, and write a detailed estimate of repair costs. Be present for this visit if possible. Walk the adjuster through each damaged room, point out hidden damage if you’ve discovered it (wet insulation in the attic, moisture inside wall cavities), and share your documentation.

Answer the adjuster’s questions honestly and factually. Describe what happened, when you noticed the leak, and what you did to stop it. Show the source if it’s visible. If you don’t know the answer to a question, say so. Don’t guess or speculate.

The adjuster’s job is to determine what’s covered under your policy and estimate the cost to repair or replace covered damage. The adjuster isn’t your enemy, but the adjuster works for the insurance company. Be polite, cooperative, and clear, but remember that you have the right to question the adjuster’s findings if you believe they’re incomplete or inaccurate.

After the inspection, the adjuster will prepare a written estimate with line items for labor and materials. This estimate forms the basis of your settlement offer. Review it carefully when you receive it. Compare it to contractor bids you collected. If there are discrepancies (missing items, lower unit costs, excluded areas you believe should be covered), ask the adjuster to explain and provide your contractor’s estimates as a counter reference.

Understand Actual Cash Value Versus Replacement Cost

8HtYoyIcS3uv_m1dSXMSWw

Your policy will settle your claim on either an actual cash value basis or a replacement cost basis. Actual cash value means the insurer pays you the current depreciated value of damaged materials and belongings (what they were worth at the time of loss, accounting for age and wear). Replacement cost means the insurer pays the amount it would cost to replace or repair with new, like-kind materials, without deducting for depreciation.

Most policies initially issue payment at actual cash value, then release the depreciation holdback once you complete repairs and submit proof (typically canceled checks, receipts, or bank statements showing you paid contractors and suppliers). This two stage payment protects the insurer from paying for repairs that never happen, but it means you may need to front some costs or arrange financing to get work started.

For example, if your 15 year old hardwood floor is damaged and the replacement cost is $10,000, the insurer might pay you $6,000 up front (the depreciated value) and hold $4,000 until you install the new floor and prove you spent the money. Once you submit the invoice and proof of payment, the insurer releases the remaining $4,000.

Check your policy to confirm which settlement method applies to the structure and to personal property. Some policies cover the building on a replacement cost basis but personal property on an actual cash value basis. Know what to expect so you can plan your repair budget and avoid surprises.

EeXFCvYSRrm-gqhDx1NdAw

If you have a mortgage, the insurance settlement check will often be made payable to both you and your mortgage lender. The lender has a financial interest in the property and wants to ensure repair funds are used to restore the collateral. You’ll need to endorse the check and send it to the lender’s loss draft or insurance claim department for their endorsement before you can deposit it.

The lender may require an inspection before releasing funds, or release funds in stages as work progresses. This process can add weeks to your timeline. Contact your lender as soon as you know a claim check is coming. Ask what their endorsement process looks like, what documents they need, and how long it typically takes. Some lenders move quickly, others require multiple inspections and reviews.

Plan your repair schedule around this delay. If you need cash to pay contractors before the lender releases funds, consider a short term loan, a home equity line of credit, or negotiate a payment schedule with your contractor that aligns with the lender’s draw schedule.

Get Multiple Contractor Bids and Compare Them to the Adjuster’s Estimate

Once you have the adjuster’s written estimate, solicit bids from at least two licensed, insured contractors who specialize in water damage repairs (drywall replacement, flooring installation, cabinetry, trim work, and painting). Share the adjuster’s estimate and ask the contractors to provide their own detailed scope of work and pricing.

Compare the bids line by line. If multiple contractors tell you the adjuster’s estimate is too low (missing items, underestimating labor hours, using outdated material costs), document those discrepancies and present them to your insurer. Attach the contractors’ bids and a cover letter explaining the differences. Your insurer may agree to a supplement (an increase to the original estimate) if the evidence supports it.

Choose a contractor based on reputation, references, proof of license and insurance, and clear communication, not just the lowest bid. Ask to see examples of similar water damage repairs they’ve completed, and call previous customers if possible. A cheap bid that results in poor workmanship or an unfinished job will cost you more in the long run.

Don’t let the contractor talk you into upgrades or changes that go beyond like-kind repairs unless you’re prepared to pay the difference out of pocket. Insurance covers restoring your home to its pre-loss condition, not improving it. If you want to upgrade from laminate countertops to granite, or from builder grade carpet to hardwood, you’ll pay the cost difference yourself.

Submit Proof of Completed Repairs to Recover Depreciation Holdback

If your policy withholds depreciation until repairs are complete, gather proof of payment and completion as soon as the work is done. Submit copies of final invoices, canceled checks, bank statements showing wire transfers or check clearances, and photos of the finished repairs. Some insurers also require a signed completion certificate from the contractor and a final inspection by the adjuster.

Label everything clearly with your claim number and a cover letter that lists each document you’re submitting. Send the package via certified mail or upload it through the insurer’s online portal so you have a record of submission. Follow up within a week if you don’t receive confirmation that your depreciation release is being processed.

This step is often overlooked, which means homeowners leave money on the table. Don’t assume the insurer will automatically send the withheld funds. You must initiate the request and provide the required proof.

Understand Subrogation and Deductible Recovery

If a third party is responsible for the water leak (a plumber who installed a faulty supply line, an appliance manufacturer whose product failed, a roofing contractor whose work let water in), your insurer may pursue subrogation, which means the insurer sues or negotiates with the at fault party to recover the money it paid on your claim. If the insurer is successful, you may be reimbursed for your deductible.

Cooperate with your insurer’s subrogation investigation. Provide the names and contact information for any contractors, plumbers, or product manufacturers involved. Save purchase receipts, warranties, and installation contracts. If you believe a third party is at fault, tell your adjuster during the initial claim interview so the insurer can start the investigation early.

Subrogation can take months or even years to resolve, so don’t count on recovering your deductible immediately. But if the insurer does recover, it’s required by law to reimburse your deductible before keeping the rest.

Know That a Claim May Affect Your Future Insurability

Filing a water damage claim can lead to higher premiums at renewal or, in some cases, non-renewal of your policy. Insurers track claim history through databases like CLUE (Comprehensive Loss Underwriting Exchange), and multiple claims within a few years can label you as a high risk customer.

If your insurer non-renews your policy after a claim, you’re not automatically uninsurable. An independent insurance agent can help you shop for coverage with other carriers. Some insurers specialize in homes with prior claims. Expect to pay higher premiums, and consider whether installing leak detection devices, automatic shut off valves, or other risk mitigation systems might qualify you for discounts with a new carrier.

Weigh the cost of a claim against your deductible and future premium increases before you file. If the damage is minor and the repair cost is only slightly above your deductible, paying out of pocket may be smarter than filing a claim and risking non-renewal or a rate hike.

Consider Legal Help if Your Claim Is Denied or Underpaid

If your insurer denies your claim or offers a settlement you believe is inadequate, consult a public adjuster or an attorney who specializes in insurance disputes. Public adjusters work for you, not the insurer, and can re-inspect the damage, prepare a detailed independent estimate, and negotiate with the insurer on your behalf. They typically charge a percentage of the settlement (often 10 to 15 percent), so weigh that cost against the amount in dispute.

An attorney may be necessary if the insurer denies coverage based on a policy exclusion you believe doesn’t apply, if the insurer is slow walking the claim or refusing to communicate, or if you suspect bad faith (deliberate underpayment or wrongful denial). Many insurance attorneys work on contingency, meaning they only get paid if they recover money for you, but confirm fee arrangements up front.

Before you hire representation, try to resolve the dispute through your insurer’s internal appeals process. Request a written explanation of the denial or low settlement, cite specific policy language that supports your position, and provide additional documentation (contractor estimates, expert opinions, photos) that counter the insurer’s findings. If that fails, escalate to your state’s department of insurance, which can investigate complaints and sometimes mediate disputes.

Legal help is a last resort, but it exists for a reason. If you’re facing significant out of pocket costs because of an unreasonable claim decision, don’t hesitate to protect your rights.

Communicate Clearly and Keep Records of Every Interaction

From the moment you discover the leak until the final check clears, document every phone call, email, text, and letter related to your claim. Note the date, time, person you spoke with, and a summary of what was discussed. Save copies of all written correspondence. If you make a promise (sending documents by a certain date, scheduling a contractor visit), follow through and confirm completion in writing.

When you email your insurer or adjuster, use a clear subject line that includes your claim number and the topic. “Claim #123456, Request for Written Estimate and Payment Timeline” or “Claim #123456, Submission of Contractor Bids and Repair Receipts.” Attach supporting documents as PDFs with descriptive file names: “ContractorBidABCRestoration.pdf” or “PhotosWaterDamageLiving_Room.pdf.”

If you need to request additional living expense reimbursement, send a separate email with the subject line “Claim #123456, ALE Reimbursement Request” and attach all hotel and meal receipts, along with the dates you were displaced. In the body, list the total amount you’re claiming and ask for confirmation of coverage, required documentation, and expected reimbursement timeline.

Clear, organized communication speeds up the claims process and reduces misunderstandings. It also creates a record you can reference if disputes arise or if you need to escalate a stalled claim.

Install Preventive Devices to Avoid Future Claims

After you settle the current claim, take steps to prevent the next one. Install water leak detection sensors near water heaters, washing machines, sump pumps, and under sinks. These battery powered devices sound an alarm when they detect moisture and some connect to smartphone apps that alert you even when you’re away. Automatic shut off valves, installed on the main water line or at individual fixtures, can stop the flow of water when a sensor detects a leak.

Inspect hoses and supply lines annually and replace them every five years or sooner if you see cracks, bulges, or corrosion. Upgrade rubber washing machine hoses to braided stainless steel versions. Insulate pipes in unheated areas (crawl spaces, attics, exterior walls) and maintain heat in the home during winter to prevent freezing. Clean gutters and downspouts twice a year to prevent ice dams and roof leaks. Check caulking around tubs, showers, and sinks and re-seal as needed.

Some insurers offer premium discounts if you install leak detection or automatic shut off systems. Ask your agent whether your carrier has such a program and what documentation they require to qualify for the discount.

Prevention won’t eliminate all risk, but it reduces the likelihood of a major loss and demonstrates to your insurer that you’re a responsible homeowner, which can help when renewal time comes.

Final Words

Leak stopped, standing water removed, air movers and dehumidifiers set to work. Photos and receipts collected and the loss reported so the damage wouldn’t get worse.

Next, professionals check behind walls with moisture meters, contain wet areas, remove unsalvageable materials, and prepare a clear repair scope. Dryness is confirmed before rebuilding. No guesswork.

Good records make a property damage claim after water leak smoother and speed repairs. The home is on track to be safe and restored.

FAQ

Q: Will home insurance pay for water leak damage?

A: The home insurance policy may pay for water leak damage if the leak was sudden and accidental, not from neglect; document damage, stop the leak, and notify your insurer promptly.

Q: What not to say to a home insurance adjuster?

A: You should avoid admitting fault, guessing cause, promising repairs, or saying you delayed mitigation to the insurance adjuster; stick to facts, provide documentation, and say you’ll follow up with estimates.

Q: How long after water damage can you claim on insurance?

A: You can file a claim as soon as you discover water damage, but policies set time limits (commonly one to two years); report promptly and keep photos and receipts to avoid denial.

Q: Who pays for water leak damage?

A: Responsibility depends on cause: an insurer covers sudden accidental leaks, the homeowner covers damage from poor maintenance, and a landlord, neighbor, or contractor may be responsible if their actions caused the leak.

Wet Insulation Replacement: Health Risks and When to Act Fast

0

Most homeowners don’t realize wet insulation stops working the second water hits it, yet they wait weeks trying to decide if replacement’s really necessary. By then, mold’s already growing and your energy bills are climbing while moisture spreads to structural wood you can’t even see. Whether you need immediate removal or can attempt drying comes down to three factors: insulation type, how soaked it got, and how fast you caught it. Get this call wrong and you’ll either waste money replacing material that could’ve been saved, or keep damaged insulation that’s actively making your family sick while rotting out your home’s framing.

When Wet Insulation Must Be Replaced and When It Can Be Saved

6QPWYOsXRt2RKVyD4EjBqw

Whether wet insulation needs replacement comes down to three things: what it’s made of, how soaked it got, and how fast you caught it. These work together to tell you if drying might work or if you’re looking at immediate removal. Get this wrong and you’ll waste time trying to save something that’s already done for, or throw out material that could’ve been salvaged.

Fiberglass batts don’t soak up much water since they’re spun glass, not sponge material. Catch them early when they’re just damp and you can sometimes dry them with fans and dehumidifiers in a few days. You need to jump on it immediately though, with strong airflow hitting the material from multiple angles. Closed-cell spray foam actually repels water, making it the easiest to save if moisture reaches it. But here’s the catch: water can still get trapped between the foam and your structural wood, rotting it out while the insulation itself looks perfectly fine.

Cellulose loose-fill always gets replaced when wet. Always. It’s pulverized paper that acts exactly like you’d expect paper to act around water. Once it’s saturated, it stays damp for weeks or months and resists every practical drying method you throw at it. Even if the surface feels dry, moisture’s still trapped deep inside. Heavily soaked fiberglass batts are the same deal because they get so dense that water can’t evaporate completely. Any insulation that’s compressed, dark-stained, growing mold, or smells musty has permanently lost what made it work and should come out regardless of what it’s made from.

You’ve got 48 hours after finding a leak to stop the damage and start drying before mold takes over. After that window closes, even stuff that could theoretically dry should usually get replaced because mold spores have already moved in. Compressed insulation loses those air pockets that actually provide the thermal resistance, so it won’t insulate right even if you dry it completely. Wait too long and what could’ve been a targeted drying project turns into full removal with added mold remediation costs.

Identifying Water-Damaged Insulation in Your Home

LgfJa5o9QFSpYJIjDjeqIA

Early detection keeps water damage from spreading to your structure and protects your family from health problems that develop when moisture sits there doing its thing. The longer saturated insulation stays put, the more damage spreads to surrounding wood, drywall, and everything else nearby.

Look for these six signs:

  • Fiberglass turning gray or clumping instead of staying white and fluffy, cellulose darkening and feeling mushy or packed down instead of loose
  • Strong musty smells in attics, crawl spaces, or near walls even when there’s no visible water
  • Ceiling stains, wall discoloration, or paint bubbling showing moisture traveling through materials
  • Condensation forming on windows, pipes, or structural surfaces where insulation’s installed
  • Insulation that feels heavy when you touch it or sags noticeably from where it normally sits
  • Black, green, or brown mold spots on insulation surfaces or surrounding materials

Check attics first since roof leaks make this the most common damage spot. Then inspect crawl spaces under first floors, wall cavities near plumbing runs, and areas under flooring where pipes pass through. Moisture meters catch hidden saturation that you can’t see, while thermal imaging cameras show temperature differences indicating trapped water. Both tools help pros assess damage more accurately than just looking at the surface.

Water doesn’t always damage insulation right below a leak. It runs along rafters, joists, and other framing before soaking into insulation twenty feet away from the actual entry point. That’s why you need to check areas that seem totally unrelated to visible water damage. A roof leak near the chimney might saturate insulation way over at the eaves where water traveled along a rafter before finally dripping down.

Common Causes of Insulation Water Damage

BEvppcyyTsa4eJJqkXWBJA

External water intrusion causes most insulation damage in homes. Roof leaks from damaged shingles, deteriorated flashing around chimneys and vents, or worn pipe boots let rain into attic spaces. Ice dams form along roof edges in cold climates when escaping heat melts snow that refreezes at the eaves, creating barriers forcing water under shingles. Storm damage can lift roofing materials or drive rain sideways through vents that normally shed water fine. Blown-in snow enters through ridge caps and soffit vents during high winds, then melts when temperatures rise.

Internal moisture sources hit insulation even when no external water enters. Burst pipes dump hundreds of gallons into wall cavities and ceiling spaces within minutes. Plumbing failures at connection points, worn supply lines, or leaking drain pipes slowly saturate surrounding insulation over days or weeks. HVAC systems generate condensation that drips into ductwork insulation or ceiling spaces when drain lines clog or disconnect. Humid air from bathrooms and kitchens rises into attics through gaps in ceiling penetrations, light fixtures, and attic hatches.

Poor ventilation creates condensation problems that look similar to leaks but have no water source. Warm indoor air escapes into attics during cold months and hits cooler roof deck surfaces, forming water droplets that drip onto insulation below. This happens most in homes with inadequate soffit and ridge venting or blocked airflow paths. Water travels along structural members before soaking insulation, which explains why damage shows up far from the actual problem. A small roof leak near the peak can saturate insulation at the eaves after water runs down a rafter for fifteen feet.

Health and Energy Risks from Saturated Insulation

JXTQqNO3R0SF4fsn0VrAGw

Water replaces the trapped air in insulation that provides thermal resistance, eliminating what makes the material work. This R-value drop forces heating and cooling systems to run longer trying to maintain comfortable temperatures. The result shows up immediately in higher utility bills, sometimes increasing monthly costs by 20 to 30 percent in heavily affected areas. Water also conducts temperature naturally, actively pulling warm air outside during winter and hot air inside during summer.

Mold and mildew grow on wet insulation within 24 to 48 hours, releasing spores into your home’s air supply. These spores circulate through HVAC systems and spread to other rooms, affecting air quality throughout the house. Family members develop respiratory problems, allergy symptoms, and breathing difficulties even in rooms far from the damaged area. Some mold types produce mycotoxins creating serious health risks with extended exposure. The musty smell that develops means active mold growth and poor air quality.

Moisture damages more than just insulation. It encourages wood rot in rafters, joists, and structural framing supporting your home. Rot weakens these members over time, creating safety hazards and expensive structural repairs. Carpenter ants and termites get attracted to damp wood, bringing pest problems on top of moisture damage. Bacterial contamination can develop in standing water or severely saturated materials, particularly in crawl spaces and basements where ventilation’s limited.

Beyond costs and health risks, wet insulation makes your home uncomfortable. Rooms feel drafty because damaged insulation can’t block air infiltration. Temperature regulation fails, leaving some areas too hot while others stay cold no matter how much you adjust the thermostat. Humidity levels rise as wet materials release moisture into indoor air, making spaces feel clammy and unpleasant even when the temperature seems reasonable.

Complete Removal and Replacement Process

0ACRgHacTOSiT6bPGF1uDg

Safe and effective insulation replacement follows a systematic approach protecting workers and preventing contamination spread while ensuring new materials perform correctly. The process differs based on whether drying gets attempted first or immediate replacement is necessary.

  1. Safety preparation starts before anyone enters the affected area by gathering protective equipment including heavy-duty gloves, N95 respirators or better masks, and eye protection to shield against insulation fibers and mold spores
  2. Assessment and containment involves isolating damaged areas with plastic sheeting sealed at edges to prevent spores and contaminated dust from spreading to clean spaces during removal work
  3. Material evaluation determines if drying makes sense by checking the insulation type, saturation extent, presence of any visible mold or musty odor, and how much time passed since water exposure occurred
  4. Drying attempts for salvageable materials work only for slightly damp fiberglass batts caught within 48 hours using multiple fans positioned for cross-ventilation, commercial dehumidifiers, and open windows when outdoor humidity’s low, with moisture meters confirming complete drying before stopping
  5. Remove unsalvageable insulation by carefully pulling material free from joists, studs, or surfaces and immediately bagging it in heavy contractor bags to prevent spore dispersal as the material gets disturbed
  6. Dispose properly by checking local hazardous waste disposal regulations since many jurisdictions classify moldy or contaminated insulation as special waste requiring specific handling procedures
  7. Dry structural elements thoroughly means checking hidden moisture pockets behind vapor barriers, inside wall cavities, and within wood framing using moisture meters, not visual inspection, before installing new material
  8. Install replacement insulation matched to the location’s requirements because attic insulation, wall cavity applications, and crawl space needs call for different materials, installation methods, and R-values to meet local building codes
Insulation Type Drying Potential Typical Timeline Recommended Approach
Fiberglass batts – slightly damp Possible if caught early 3-5 days with fans and dehumidifiers Attempt drying with moisture meter verification
Blown-in fiberglass – minimal saturation Sometimes salvageable 7-10 days with continuous airflow Professional assessment recommended
Cellulose loose-fill – any wetness Not salvageable N/A – replacement required Remove immediately and replace
Spray foam – contaminated Check surrounding materials Variable based on hidden moisture Inspect for trapped water behind foam

When drying gets attempted, fan placement creates the biggest impact on success. Position fans to blow across the wet insulation surface rather than directly at it, which prevents material disturbance while maximizing evaporation. Place dehumidifiers in the center of the affected space with doors and windows closed after initial ventilation. Run equipment continuously for days, not hours, and check progress with moisture meters rather than assuming the material’s dry. Professional moisture meters provide accurate readings at different depths within the insulation, while visual inspection and touch only reveal surface conditions.

Installation timeframes range from a single day for small attic sections to a week or more for whole-house projects involving wall cavities. Access challenges in tight crawl spaces, between floor joists, or within finished wall cavities slow installation and may require opening drywall or removing exterior siding. Dust control during removal protects living spaces using plastic barriers, negative air pressure when possible, and immediate bagging of contaminated materials. Site cleanup includes vacuuming work areas with HEPA-filtered equipment, wiping surfaces with damp cloths to capture remaining dust, and removing all plastic sheeting carefully to avoid spreading trapped particles. Consult professionals when projects involve mold remediation, confined space access, or uncertainty about proper installation methods, since improper work wastes money and fails to restore proper thermal performance.

Wet Insulation in Wall Cavities and Confined Spaces

k4jG8qVYRXyenvjkRsUx_Q

Wall cavity insulation presents unique challenges because the enclosed space prevents air circulation needed for natural drying. Unlike attic insulation you can access directly, wall insulation sits trapped between studs with only the interior drywall and exterior sheathing allowing moisture to escape. Standard fans and dehumidifiers positioned in the room can’t reach the wet material inside. Visual inspection’s impossible without opening walls, making it difficult to assess damage extent or verify that materials are actually dry after treatment.

Specialized drying equipment injects warm, dry air directly into wall cavities through small holes drilled near the base of affected walls. Professional restoration teams use this injection drying approach along with wall cavity monitoring systems tracking moisture levels inside the space over time. The process requires technical expertise to determine injection point locations, set appropriate air volume and temperature, and verify complete drying without damaging electrical wiring or other systems running through the walls. Attempting DIY solutions on wall cavity insulation typically fails because homeowners lack the equipment to dry enclosed spaces effectively.

Vapor barriers inside wall cavities complicate moisture problems further. Water gets trapped between the barrier and the insulation or between the barrier and the drywall, creating pockets that resist drying. The barrier that normally protects insulation from interior humidity works against you when exterior water enters through siding or roof leaks. Prolonged hidden moisture causes structural damage to wall studs, creates ideal conditions for mold growth on hidden surfaces, and may affect electrical systems before problems become visible on interior walls. When wall cavity insulation gets wet, professional intervention becomes necessary rather than optional because the risks of incomplete drying and hidden damage outweigh any potential cost savings from DIY attempts.

Replacement Costs and Budget Planning

Z7Z88fo3StuqXtPbGjnjRA

Insulation replacement costs vary significantly based on project scope, material choices, and site conditions affecting labor requirements and installation difficulty.

Cost factors include:

  • Square footage of affected areas drives base material and labor costs, with typical ranges from several hundred square feet in localized damage to thousands of square feet for whole-house projects
  • Insulation material type selected determines price per square foot, from economical fiberglass batts at lower cost to premium closed-cell spray foam at three to four times the price
  • Labor expenses for removal and installation reflect skill requirements and project complexity, with straightforward attic work costing less per hour than confined wall cavity projects
  • Disposal fees for contaminated materials add to base costs, particularly when local regulations classify moldy insulation as special waste requiring specific handling
  • Access difficulty increases labor time and total cost when projects involve tight crawl spaces, finished wall removal and restoration, or areas requiring scaffolding
  • Mold remediation requirements add significant expense when contamination’s present, sometimes doubling the total project cost compared to simple water-damaged insulation replacement

Written estimates from licensed professionals protect you by clearly defining scope, materials, timeline, and total costs before work begins. Request estimates from three contractors to compare pricing and approaches. Look for detailed breakdowns listing material quantities and types, labor hours by project phase, disposal costs as separate line items, and completion timelines with start and end dates. Ask what happens if additional damage gets discovered during removal, how change orders get handled, and whether the estimate includes final cleanup and restoration of access points.

Financing options help homeowners manage emergency repair costs that appear without warning in household budgets. Many restoration companies offer payment plans for larger projects, while home equity lines of credit provide flexible funding at reasonable interest rates. Some utility companies and state energy offices run rebate programs for insulation upgrades that improve energy efficiency, offsetting a portion of replacement costs. The energy savings from properly installed insulation help recover the upfront investment through lower monthly heating and cooling bills, typically showing measurable reduction within the first billing cycle after completion.

Insurance Coverage and Claims for Water-Damaged Insulation

X0d2F8oHTX2nSka4q4L-og

Insurance policies typically cover wet insulation damage when water intrusion happens suddenly from burst pipes, storm damage, or appliance failures homeowners couldn’t prevent through normal maintenance. These sudden water events clearly fall within covered perils under most standard homeowners policies. Gradual damage from poor maintenance, ongoing roof deterioration, or repeated minor leaks usually isn’t covered because insurance expects homeowners to maintain their property and address problems before they cause major damage.

Documentation requirements for successful claims start immediately after discovering water damage. Take photos of wet insulation, water sources, affected areas, and any visible damage to surrounding materials before touching anything. Moisture readings from professionals establish saturation levels objectively rather than relying on subjective descriptions. Written estimates from licensed restoration contractors detail repair scope, costs, and timeline in the format insurance adjusters expect. Create a timeline documenting when you discovered the problem, what immediate steps you took to stop water flow, and when you contacted restoration professionals. This timeline proves you acted promptly to prevent further damage.

Emergency mitigation obligations require homeowners to stop active water damage and prevent additional problems while waiting for insurance approval. Tarp damaged roofs, turn off water supplies to broken pipes, and remove standing water promptly. Insurance policies require reasonable efforts to minimize loss, and failure to take these basic steps can reduce claim payments or result in denial. Document mitigation costs separately though since emergency stabilization’s often covered even when the underlying cause might not be. Delays between discovering damage and beginning mitigation work give insurance companies reason to question claim legitimacy or reduce payments for damage that developed during the delay period.

Working with insurance adjusters means providing access for their inspection, answering questions about how damage occurred and when you discovered it, and sharing all documentation you’ve collected. Professional restoration companies experienced with insurance work understand adjuster expectations and provide documentation in formats that streamline the claims process. Their estimates include technical details about drying methods, disposal requirements, and code-compliant installation that support claim approval. Similar to Fire and Smoke Damage Restoration, water damage claims require thorough documentation showing proper disposal methods and installation meeting current building codes to satisfy both insurance requirements and local regulations.

DIY Risks Versus Professional Insulation Services

BeX30vAEQbiqlyYReeBkBg

Some small insulation projects suit DIY handling when specific conditions get met. Accessible attic areas with minimal saturation caught within hours, fiberglass material without any mold present, and homeowners who already own proper safety equipment including respirators and protective clothing can sometimes handle limited projects. Small sections of slightly damp fiberglass batts in easily reached areas represent the upper limit of reasonable DIY scope. Even then, moisture meters to verify complete drying and proper disposal of contaminated materials present challenges for homeowners.

Improper DIY handling creates serious risks that often cost more to fix than hiring professionals initially. Mold exposure without proper respiratory protection causes health problems ranging from allergic reactions to serious respiratory illnesses, particularly dangerous for anyone with asthma or compromised immune systems. Incomplete drying leaves hidden moisture causing wood rot, persistent mold growth, and continued indoor air quality problems that only become apparent months later. Code violations from incorrect installation or improper material selection for specific applications can reduce your home’s value, cause problems during future home sales, and void manufacturer warranties on insulation products. Some insurance policies reduce or deny coverage for water damage repairs when homeowners attempt DIY remediation instead of hiring licensed professionals.

Professional restoration services bring specialized equipment homeowners can’t practically own for one-time use. Industrial dehumidifiers remove moisture far more effectively than consumer models. Thermal imaging cameras and deep-reading moisture meters detect hidden saturation behind surfaces and deep within materials. Wall cavity drying systems inject treated air directly into enclosed spaces. Mold remediation expertise includes containment methods, proper removal techniques, antimicrobial treatments, and verification testing ensuring complete remediation. Professionals understand building code requirements for insulation R-values, vapor barrier placement, ventilation clearances, and fire-resistance standards that vary by location and application.

Contractor selection criteria protect you from unlicensed operators and ensure quality work. Verify active licenses for both general contracting and specialized restoration work required in your state. Confirm liability insurance and workers compensation coverage protect you from responsibility if workers get injured on your property. Request written estimates with detailed scope descriptions rather than vague verbal quotes. Ask for references from recent similar projects and actually call them to ask about work quality, timeline accuracy, and how the contractor handled unexpected issues. Check experience specifically with your insulation type and damage situation since comprehensive professional approaches to wet insulation replacement require familiarity with multiple trades, material handling, and coordinated sequences preventing problems during restoration.

Preventing Future Insulation Water Damage

w2LeeaNuRYerOh4t7rvRXQ

Prevention costs far less than repeated insulation replacement and protects your home from the structural damage and health risks that develop when moisture problems go unaddressed or keep recurring.

Eight effective prevention measures include:

  • Regular roof inspections twice yearly checking for damaged or missing shingles, deteriorated flashing around chimneys and vents, worn pipe boots, and loose or damaged roofing materials that could allow water entry
  • Gutter cleaning and maintenance ensuring downspouts direct water at least five feet from foundation walls, fixing sagging sections that pool water, and repairing leaks at seams before they overflow
  • Siding inspection for holes, gaps, and damage where water could penetrate behind exterior cladding, with particular attention to areas around windows, doors, and utility penetrations
  • Basement and foundation sealing that closes cracks in concrete walls and floors, addresses gaps where pipes enter the building, and applies appropriate waterproofing to below-grade surfaces
  • Proper attic ventilation installation providing continuous soffit intake and ridge exhaust to prevent warm air accumulation and condensation on cold roof surfaces
  • Vapor barrier integrity checks ensuring barriers remain continuous without tears, gaps, or improper installation allowing moisture migration into insulation layers
  • HVAC condensation line monitoring with regular checks that drain lines flow freely, condensate pumps work correctly, and drip pans don’t overflow during high-use periods
  • Seasonal preparation for ice dams including attic insulation upgrades, air sealing to reduce heat loss through ceilings, and heat cable installation on roof edges in cold climates

Seasonal timing matters for prevention work. Fall roof inspections before winter weather catch problems before storms test weak points. Spring checks after snow melt identify damage from ice and verify that winter didn’t create new leaks. Summer humidity control in attics and crawl spaces prevents condensation problems before they saturate insulation during cooling season. Always address root causes before replacing insulation since new material will fail just as quickly if the moisture source remains active. Flood-prone areas benefit from reinforced prevention including elevated electrical systems keeping critical equipment above potential water levels and permanent flood barriers at entry points keeping water outside during overflow events.

Selecting Moisture-Resistant Insulation for Replacement

When replacing water-damaged insulation, consider upgrading to materials that resist future moisture problems while meeting or exceeding your home’s energy efficiency requirements for your climate zone.

Closed-Cell Spray Foam Benefits

Closed-cell spray foam provides superior moisture resistance compared to traditional insulation materials because its dense structure doesn’t absorb water like fibrous products. The material adds structural integrity to walls and roof assemblies by bonding to framing members and sheathing surfaces. It creates an air barrier in addition to thermal resistance, stopping moisture-laden air from entering wall cavities where condensation can form. The higher upfront cost compared to fiberglass or cellulose pays off in flood-prone areas, high-humidity climates, and locations where past water damage indicates ongoing moisture risk. Properly installed closed-cell foam can get wet from exterior sources without losing performance once it dries.

Foam Board and Rigid Insulation

Foam board and rigid insulation panels work particularly well for basements and crawl spaces where moisture contact’s more likely than in above-grade walls or attics. These products install directly against foundation walls using mechanical fasteners or adhesive, creating a continuous moisture-resistant barrier. The rigid structure resists compression from minor water exposure and maintains R-value even in damp conditions. Foam board also resists mold growth better than organic materials like cellulose. Applications in foundation walls, beneath slab edges, and as exterior continuous insulation provide consistent thermal performance in environments where moisture’s present.

Fiberglass with Enhanced Vapor Barriers

Fiberglass batts with properly installed vapor barriers remain cost-effective for standard moisture conditions when upgraded from basic kraft-faced products. Install separate polyethylene vapor barriers on the warm-in-winter side of wall and ceiling assemblies in cold climates, or use unfaced batts with separate smart vapor retarders that adjust permeability based on seasonal humidity changes. Proper vapor barrier installation protects traditional fiberglass from moisture migration while costing significantly less than spray foam options. This approach suits homes with normal moisture conditions rather than high-risk locations but requires careful installation attention to seal all penetrations and maintain continuous barrier coverage.

Mold Assessment and Remediation Requirements

Wet insulation grows mold and mildew within 24 to 48 hours of saturation in most conditions, with some materials like cellulose showing growth even faster. This rapid timeline means any delay in addressing water damage creates mold problems on top of moisture issues. Once mold colonies establish, they continuously release spores into indoor air affecting your home’s air quality and creating respiratory problems for occupants. Mold growth doesn’t stop at the insulation itself but spreads to surrounding wood framing, drywall, and other building materials.

Visual inspection for mold looks for discoloration patterns on insulation surfaces including black, green, brown, or gray spots or patches that differ from the material’s normal color. Check surrounding wood for dark staining or fuzzy surface growth. Musty odors indicate active mold growth even when visual inspection doesn’t reveal obvious colonies because mold releases volatile organic compounds creating the characteristic smell. Surface growth on insulation visible without tools represents advanced colonization that’s been active for days or weeks already.

Professional mold testing becomes necessary when damage extent’s unclear, when sensitive occupants report health symptoms but no visible mold appears, or when contamination might have spread through HVAC systems to other areas. Testing identifies specific mold species and spore concentrations, informing remediation scope and methods. Remediation protocols include containment barriers with negative air pressure to prevent spore spread, removal of all contaminated materials, HEPA vacuuming of surfaces, and antimicrobial treatments on structural materials that remain in place. Professional mold remediation protects workers with proper respirators and protective equipment while preventing contamination spread to unaffected areas. Health risks from DIY mold handling include respiratory illness, allergic reactions, and chemical exposure from improper cleaning product use.

Any insulation showing visible mold growth, heavy musty odors, or dark staining should never be reused regardless of the material type or how well it appears to dry. Mold colonies penetrate deep into fibrous materials where they can’t be effectively cleaned or killed. Even dead mold spores cause allergic reactions and health problems when disturbed and released into indoor air. The only safe approach to moldy insulation is complete removal and disposal followed by surface treatment of surrounding materials before new insulation installation.

Timeline Expectations for Complete Insulation Replacement

Project timelines vary significantly based on damage extent, whether mold remediation’s required, access limitations at the site, and how quickly structural drying can be verified before new insulation installation.

Project Phase Typical Duration Variables Affecting Timeline
Emergency response and assessment 24-48 hours from initial contact Contractor availability, access to affected areas, initial damage extent
Drying phase 3-10 days depending on materials Humidity levels, ventilation quality, hidden moisture pockets, material type
Removal and disposal 1-3 days for most residential projects Square footage affected, access difficulty, containment requirements
Installation of replacement insulation 1-5 days depending on scope Material type selected, total area, wall cavity versus attic work
Final inspection and testing 1 day plus waiting for appointments Local building department schedules, code compliance verification needs

Several factors extend timelines beyond these typical ranges. Mold remediation adds 3 to 7 days for containment setup, removal, treatment, and verification testing before new insulation can be installed. Building permit approvals in some jurisdictions require 1 to 2 weeks of waiting before work can legally begin on extensive projects. Material availability affects schedules when specialty products or large quantities aren’t in local stock. Access limitations in tight crawl spaces or areas requiring scaffolding slow installation work significantly. Weather delays prevent roof repair completion needed before replacing attic insulation underneath the leak source.

Never rush the drying phase despite urgency to get your home back to normal. Incomplete drying leads to mold growth on new insulation and surrounding materials within weeks of installation, forcing you to repeat the entire process. Professional moisture meter readings verify complete drying throughout affected materials rather than just at surfaces. This verification step prevents future problems even though it extends the project timeline by several days compared to visual assessment alone.

Final Words

Wet insulation creates real problems, from mold growth within 48 hours to energy bills that jump without warning. The choice between drying and wet insulation replacement depends on material type, saturation level, and how fast you act.

Fiberglass batts might dry if you catch them early and run the right equipment. Cellulose won’t. Spray foam hides trouble behind it.

Stop the water first. Inspect thoroughly. Replace what’s soaked or contaminated. Your home gets back to safe, dry, and comfortable faster when you don’t guess at hidden moisture.

FAQ

Do I need to replace insulation if it gets wet?

Wet insulation needs replacement depending on three factors: the insulation material type, how saturated it became, and how quickly you respond. Cellulose insulation always requires replacement because it absorbs water like a sponge and breaks down quickly. Fiberglass batts can sometimes be dried with fans and dehumidifiers if only slightly damp and caught within 48 hours, but heavily saturated fiberglass must be replaced. Any insulation showing mold, compression, or contamination loses effectiveness permanently and cannot be saved.

Will mold grow on wet insulation?

Mold will grow on wet insulation within 24 to 48 hours of saturation, affecting indoor air quality and causing respiratory problems. Cellulose insulation grows mold even faster, sometimes within just a few days, because its pulverized paper construction retains moisture. Once mold appears as discoloration or creates musty smells, the insulation must be replaced immediately. Professional mold remediation becomes necessary because DIY handling exposes you to health hazards without proper respiratory protection.

What does wet insulation look like?

Wet insulation looks different depending on the material type, with fiberglass appearing gray and clumped instead of white and fluffy. Cellulose insulation darkens in color, feels mushy and compacted, and develops noticeable musty odors. Fiberglass batts get heavy, sag, flatten, and show water marks or mildew on kraft paper backing. Additional visual signs include ceiling stains above the insulation and condensation on nearby surfaces.

Does insulation lose R-value when wet?

Insulation loses R-value when wet because water replaces the trapped air that provides thermal resistance, forcing your HVAC system to work harder. Water acts as a natural temperature conductor, transferring warm air outside your home and eliminating the insulation’s effectiveness. Even after drying, compressed or damaged insulation never regains its original R-value. Higher energy bills and uncomfortable temperatures result until you replace the saturated material.

How to Test for Black Mold: Simple Detection Methods

0

What if that dark, musty patch in your bathroom is black mold, and it’s been quietly growing for months?
You need to know fast because mold spreads where moisture lingers and can make people sick.
This post shows simple, safe ways to test for black mold at home, what clues to trust, how to use an at-home kit or basic tools, and when to call a trained inspector.
No guesswork. Just clear steps to find, document, and stop the problem before it gets worse.

Key Indicators of Black Mold in Your Home

Q9em0w_kT3S9Ydu4orufZQ

Black mold usually shows up as dark green to black patches with a slimy, wet texture. It grows in concentric rings or irregular blotches, especially on surfaces with cellulose content like drywall, wood trim, paper backing on insulation, and fabric. If you run your finger over it, it often feels slippery or damp. Not dry or powdery. The color can range from deep black to greenish black, and the growth may spread quickly when moisture levels stay high.

The smell is usually the first warning. Black mold produces a persistent musty or earthy odor, sometimes described as similar to wet soil or rotting wood. If you walk into a room and notice that smell, especially in areas that stay damp (bathrooms, basements, crawlspaces, or around leaky windows), there’s a good chance mold is growing somewhere nearby. Even if you can’t see it yet.

Common locations for black mold include bathroom grout and caulk, under sinks where pipes sweat or leak, behind washing machines, in basements with poor drainage, attic spaces with roof leaks, around window frames where condensation builds, and inside HVAC ducts. It thrives anywhere moisture lingers for more than a day or two.

Most definitive signs to watch for:

  • Dark discoloration on walls, ceilings, or floors (green black or deep black spots)
  • Slimy or fuzzy texture rather than flat staining
  • Strong musty or earthy smell that doesn’t go away after cleaning
  • Visible moisture, water stains, or condensation in the same area
  • Patches that spread over days or weeks
  • Staining on fabric, carpet, or wallpaper that feels damp to the touch

Visual Characteristics to Differentiate Black Mold

P1UwgaPFTFS78yn2gkS7ng

Black mold has a darker, wetter look compared to common mildew, which usually appears white, gray, or light yellow and has a dry, powdery surface. Mildew sits on top of materials and wipes off fairly easily. Black mold penetrates porous surfaces, so scrubbing it away without removing the underlying material often just spreads the spores or leaves growth embedded in the substrate.

Look at the growth pattern. Black mold often forms irregular patches or circular colonies with defined edges. It may appear in layers, with older growth looking darker or thicker. If the surface feels soft, warped, or spongy underneath the mold, that’s a sign moisture has soaked into the material for a while. Mildew doesn’t usually cause structural changes. It stays surface level and cosmetic. Black mold signals deeper moisture problems.

Using Smell, Moisture, and Environmental Clues

pINJvyx8SzOxGqOMgwJ7Lw

A damp or musty smell is often the first clue that mold is growing somewhere you can’t see. That odor comes from microbial volatile organic compounds released as the mold feeds on organic material. If a closet, basement corner, or bathroom always smells musty even after you clean, check behind baseboards, inside walls near plumbing, or under flooring.

Moisture presence is the key environmental clue. Mold needs water to grow, so any sign of leaks, condensation, or high humidity points to potential growth. Feel walls and floors for dampness. Check for water stains, peeling paint, bubbling wallpaper, or warped trim. If a surface stays cold or feels clammy, moisture may be trapped inside.

You can detect humidity problems without tools by watching for condensation on windows, wet spots on carpet after rain, or a general sticky feeling in the air. If towels or clothing stored in a room take a long time to dry, relative humidity is likely too high. Keeping indoor humidity below 50 percent reduces mold risk significantly.

At Home Mold Testing Kits

fHzHYXA6QdS5L0mcezYhQQ

DIY mold test kits let you collect samples and confirm whether what you’re seeing is black mold or another species. Most kits use tape lifts, surface swabs, or petri dishes to capture growth, then send the sample to a certified lab for species identification. Results typically come back within three to seven business days.

Step by step process for using a home test kit:

  1. Collect the sample. Press a clear tape strip onto the suspected mold, peel it off, and place it sticky side down on the slide provided. For swab kits, gently rub the swab across the moldy area, then seal it in the sterile tube. For air sampling kits, expose the petri dish to room air for the time specified in the instructions, usually one to two hours.

  2. Seal and label. Close the sample container or slide case immediately to avoid contamination. Write the location, date, and any notes about moisture or odor on the label.

  3. Send to the lab. Pack the sample according to kit instructions and mail it to the lab address provided. Some kits include prepaid return envelopes.

  4. Wait for results. Labs analyze the sample under a microscope and identify species present. Reports usually list genus and species names, spore counts, and whether the growth is considered significant.

  5. Interpret the findings. If the lab confirms Stachybotrys chartarum or another potentially harmful species, follow up with remediation. If results show common environmental molds at low levels, focus on fixing the moisture source and monitoring.

Home kits are useful for screening, but they have limits. They only test the specific spot you sampled, so hidden growth elsewhere may go undetected. Lab analysis adds cost, often thirty to one hundred dollars per sample on top of the kit price, but it gives you species level identification that a visual inspection can’t provide.

When to Call a Professional Mold Inspector

WTK6j-fdT4SEtbnpDTx0pg

DIY methods work for small, visible patches, but professionals have equipment and training to find hidden contamination. Certified inspectors use air sampling devices to measure spore counts throughout your home, moisture meters to detect wet materials inside walls, and infrared cameras to locate cold spots where water may be pooling. They can cut small inspection holes in drywall to confirm growth behind surfaces without tearing apart entire rooms.

Call a professional if visible mold covers more than ten square feet, if you smell mold but can’t find the source, if occupants have unexplained respiratory symptoms that improve when they leave the building, or after flooding or major leaks where water soaked into walls, floors, or insulation. Professionals also help when mold appears in HVAC systems or ductwork, since disturbing it without containment spreads spores throughout the house. If you’re buying or selling a home and suspect mold, an independent inspection with lab backed results protects both parties and informs repair negotiations.

Health Risks Linked to Black Mold Exposure

O9x3HTKvQC299_bpY5d1RA

Exposure to black mold can cause coughing, sneezing, wheezing, nasal congestion, itchy or watery eyes, and skin rashes. People with asthma often experience worsened symptoms like tightness in the chest, difficulty breathing, more frequent attacks. These reactions happen because mold releases spores and microbial compounds into the air, triggering allergic and inflammatory responses in the respiratory system.

Long term exposure can lead to chronic sinus infections, persistent fatigue, headaches, difficulty concentrating, and mood changes. In rare cases, prolonged contact with high spore levels has been linked to more serious lung infections, particularly in people with weakened immune systems. While most healthy adults experience mild to moderate symptoms, the effects are real and disruptive, especially when mold growth is extensive or when occupants spend many hours in contaminated spaces.

Children, elderly individuals, people with asthma or chronic lung disease, and anyone with a compromised immune system face the highest risk. Infants and young children are more vulnerable because their respiratory systems are still developing. If anyone in your household has ongoing respiratory issues, allergies that won’t resolve, or unexplained illness that improves away from home, investigate for mold and consider medical evaluation.

What to Do After Confirming Black Mold

WOtSmvb9TomQo-41X5a_xQ

Once you confirm black mold, your first priority is stopping the moisture source. Fix leaks, improve drainage, repair roof damage, seal foundation cracks, or install dehumidifiers to bring indoor humidity below fifty percent. Mold won’t stop spreading until the water problem is resolved.

Next, decide whether you can handle cleanup yourself or need professional remediation. Small areas (less than ten square feet) can usually be cleaned by homeowners if the growth is on non porous surfaces and you follow safety procedures. Larger infestations, growth inside walls, contamination of porous materials like drywall or insulation, or mold in HVAC systems require professional containment and removal to prevent spore spread.

Immediate steps after detection:

  • Wear personal protective equipment: nitrile gloves, goggles without vent holes, and a NIOSH approved N95 respirator minimum (a half face respirator with P100 filters is better for heavy contamination)
  • Isolate the affected area by closing doors, sealing vents with plastic sheeting, and turning off HVAC to that zone
  • Stop the moisture source before starting any cleaning or removal work
  • Clean small non porous surfaces with detergent and water or EPA registered mold cleaners; remove and replace porous materials that are moldy (drywall, insulation, carpet)
  • Decide if you need professional remediation based on area size, material type, and occupant health risks

Final Words

in the action, we covered spotting dark, slimy patches, that musty smell, and the usual hiding spots, plus how black mold looks different from mildew.

We walked through using smell and moisture clues, step-by-step DIY test kits, when to call a pro with moisture meters and cameras, the health signs to watch for, and the first steps to protect your home.

If you’re wondering how to test for black mold, start with a simple kit or call an inspector. Quick action keeps the problem from getting worse, and you’ll get this fixed.

FAQ

Q: Can you test for black mold yourself?

A: You can test for black mold yourself with DIY kits (tape lifts, swabs, petri dishes), but kits have limits and often need lab analysis. Call a professional if infestation, hidden growth, or health concerns appear.

Q: What are signs of mold sickness? / What are the 10 warning signs of mold toxicity?

A: The signs of mold sickness or toxicity include coughing, wheezing, nasal congestion, frequent headaches, chronic fatigue, brain fog, eye or skin irritation, persistent sinus infections, worsening asthma, and unexplained digestive upset.

Q: How can you tell if black mold is in your house?

A: You can tell if black mold is in your house by dark green or black slimy spots, a musty odor, recurring stains, damp areas, spreading patches, or warped materials. Confirm with moisture readings or a professional inspection.

Sealing Smoke Damaged Drywall: Effective Solutions That Work

0

If you paint over smoke damaged drywall without sealing it first, those stains and smells will bleed right through your fresh paint. It’s like putting a lid on a pot with holes. Smoke residue contains oils and acids that migrate through standard paint, showing up as yellow or brown stains weeks later. Sealing creates a solid barrier that locks contamination in place so it can’t reach the surface. The key is using the right primer and applying it correctly after you’ve cleaned the wall properly.

Assessing Smoke Damage Severity on Drywall

mNwZXLxIToec5Yn44oUN8w

Before you grab cleaning supplies, figure out what you’re dealing with. Assessment determines your approach and keeps you from wasting time on drywall that’s already toast. Trying to seal something too far gone just burns money.

Smoke damage breaks down into six levels:

Surface residue only. Light soot on painted surfaces that wipes away with dry cleaning sponges. The drywall paper and gypsum underneath are fine.

Light staining. Yellowish or gray discoloration that’s gotten through the paint but hasn’t reached the drywall paper yet. You’ll need wet cleaning with degreasers before sealing.

Moderate damage. Visible staining with oily residue soaked into the drywall paper. Surface feels tacky or greasy, and regular cleaning leaves some discoloration.

Heavy contamination. Deep staining through the paper with strong odor that won’t quit. The paper shows darkening, and smoke oils have started getting into the gypsum core.

Severe damage. Paper facing is charred, bubbled, or separating from the gypsum. You’re seeing physical deterioration, not just color changes.

Structural damage beyond repair. Charred gypsum, crumbling core, or warped panels that have lost integrity. Sealing won’t fix these.

Smoke residue chemistry changes fast after a fire. Acidic compounds start etching painted surfaces within hours. What looks like simple soot on day one becomes bonded contamination by day three. Oily components keep migrating deeper into porous materials the longer they sit. That’s why quick action matters. The sooner you start cleaning, the more contamination stays near the surface where you can reach it.

Check for structural compromise before deciding to seal. Run your hand across the surface, feeling for soft spots, bumps, or areas where the paper feels loose. Press gently on suspect areas. Solid drywall pushes back firm. Compromised drywall feels spongy or the surface paper shifts under light pressure. Look for delamination where the paper’s pulling away from the gypsum core, especially around seams and corners. Check for warping by sighting down the wall from an angle. Gypsum that got hot enough or wet enough from firefighting efforts won’t stay flat. If you find crumbling gypsum, significant warping, or paper coming loose, you’re looking at replacement.

Safety Equipment and Workspace Preparation for Drywall Sealing

TD-ZPopAQwe14nQekO7YEA

Smoke residue isn’t just dirty. It contains carcinogens, acidic compounds, and irritants you don’t want in your lungs or on your skin. The soot you’re about to disturb will go airborne, and the chemicals in primers give off fumes that need proper protection.

You need an N95 respirator minimum. Not a dust mask. N95 filters out at least 95% of airborne particles including the fine soot you’ll kick up during dry cleaning. If you’re using shellac based primers, upgrade to a respirator with organic vapor cartridges because those solvents are strong. Wear sealed safety glasses. Not just regular glasses. Soot gets everywhere, including your eyes when you’re working overhead. Use nitrile gloves rated for chemical resistance. Latex tears too easily, and you’ll be working with solvents and degreasers. Disposable coveralls keep contamination off your clothes and prevent you from tracking soot through clean areas.

Cover your floors with plastic sheeting and tape the edges down. Soot becomes airborne the second you start cleaning, and it settles everywhere. Use 6 mil plastic. Not the thin painter’s plastic that tears when you walk on it. Set up ventilation before you start. Open windows in the work area and place box fans in the windows blowing outward. This creates negative pressure that pulls contaminated air out instead of pushing it into other rooms. If you’re working in a room without windows, point fans toward the door and open windows elsewhere to create airflow. Position a dehumidifier if the area got wet from firefighting efforts. Drywall needs to be completely dry before you seal it. Cover electrical outlets with plastic and tape because disturbed soot is conductive. Seal doorways to adjacent rooms with plastic sheeting and tape to contain the mess.

Dry Cleaning Smoke Residue from Drywall Surfaces

qhcpKJXFRX2-0TwbdrC6Lg

Dry cleaning removes loose soot particles without introducing moisture that would set stains deeper into the surface. This step lifts the bulk of surface contamination so wet cleaning can tackle what’s left. Skip this, and you’ll just smear oily soot around when you start scrubbing.

Start with a HEPA vacuum using a soft brush attachment. Work in sections, moving the brush gently across the surface. Don’t press hard. You’re lifting loose debris, not scrubbing. Work from ceiling to floor so falling particles don’t recontaminate areas you’ve already vacuumed. The vacuum removes the top layer of dry soot that would otherwise become airborne during sponge cleaning or turn into a smeared mess during wet cleaning.

Now switch to chemical sponges. Sometimes called dry cleaning sponges. These aren’t regular sponges. They’re made from vulcanized rubber that grabs soot particles through friction. Start at the ceiling and work downward in overlapping sections about three feet wide. Use light pressure and straight downward strokes toward the baseboards. Don’t scrub in circles or back and forth. That spreads contamination. The sponge lifts embedded residue from the paint surface without spreading it around. As you work, the sponge surface loads up with soot and turns black. When a section gets saturated, fold the sponge to expose a clean surface. Keep folding until all sides are loaded, then switch to a fresh sponge. Some people try to rinse and reuse these sponges. Don’t. Once loaded, they smear instead of lift.

You’ll know dry cleaning is complete when the sponge stops picking up visible soot transfer. The wall should look significantly lighter, though it probably won’t look clean yet. That’s fine. You’ve removed the loose particles. The remaining discoloration is oily residue and staining that needs wet cleaning. If fresh sponge surfaces still show heavy black transfer after multiple passes, keep working that section. But if the sponge comes away mostly clean after a stroke, move on.

Wet Cleaning and Degreasing Smoke Damaged Drywall

C7RfvAKxRe23JxgV4f_zoQ

Wet cleaning tackles the oily smoke residues, nicotine stains, and embedded contamination that dry cleaning leaves behind. This is where you actually remove the chemistry that causes persistent odor and staining.

The wet cleaning process follows five steps.

First, mix your cleaning solution. Use TSP (trisodium phosphate) at 1/4 cup per gallon of warm water, or use a TSP substitute product if you prefer something less caustic. Commercial smoke removers work well for heavy residues.

Second, apply solution to the wall. Use a sponge or cleaning cloth, working in 3 foot sections. Keep the surface damp but not dripping. You want to loosen the residue, not soak the drywall.

Third, allow dwell time. Let the cleaner sit for 2 to 3 minutes so it can break down the oily deposits. Don’t let it dry on the surface.

Fourth, scrub with controlled pressure. Use a soft scrub brush or abrasive sponge with enough pressure to remove residue but not enough to damage the paint or drywall paper. Work in circular motions.

Fifth, rinse thoroughly. Go over each section with clean water and a fresh sponge to remove all cleaner residue. Change your rinse water frequently.

TSP cuts through smoke residue effectively and it’s been the professional standard for decades. It’s alkaline, so it neutralizes acidic smoke deposits and breaks down oily films. The downside? It’s caustic. Wear gloves, and don’t let it sit on the wall too long or it can damage paint. TSP substitute products use different chemistry to accomplish similar results with less risk to your skin and painted surfaces. They take a bit more elbow grease but work fine for most smoke damage. Commercial smoke removers are formulated specifically for fire restoration. They cost more but they’re designed to handle the protein residues from kitchen fires and the sticky tars from low temperature smoldering fires that TSP sometimes struggles with.

Thorough rinsing matters more than most people realize. Any cleaner residue left on the wall will interfere with primer adhesion and can cause odor problems later. Go over each section at least twice with clean rinse water. Then wait. The drywall must be completely dry before you apply any primer. Touch the surface. It should feel dry, not cool or damp. If you have a moisture meter, confirm the reading matches normal indoor drywall levels (usually 5 to 12% depending on your climate). Running fans and a dehumidifier speeds drying. Most walls need 24 hours minimum to dry thoroughly after wet cleaning.

Product Selection Guide for Smoke Damage Primers and Sealers

LJdHmrHRSt6rvO7jk7_zkw

Primer selection matters critically for smoke damage because unprimed walls allow odors and stains to pass through paint. When you use the wrong product, you’ll see yellowing or brown stains bleeding through your finish coat within weeks. Then you’re repainting, or worse, stripping everything and starting over. Proper sealing creates a barrier that locks contamination in place so it can’t migrate to the surface. When discussing proper primer selection, getting this step right prevents bleed through in restoration scenarios.

Primer Type Odor Blocking Stain Blocking Dry Time Best For
Shellac Based Excellent Excellent 45 minutes Heavy smoke damage, persistent odors, nicotine staining
Oil Based Very Good Very Good 4 to 6 hours Moderate damage, when shellac fumes are concern
Water Based Limited Fair 1 to 2 hours Light surface damage only, minimal odor

Zinsser BIN shellac based primer is the gold standard for heavy smoke damage. It seals in odors and stains better than anything else available, and it dries fast so you can apply a second coat the same day. The shellac creates a hard barrier that smoke oils and nicotine can’t penetrate. Use BIN when you’re dealing with significant smoke exposure, strong persistent odor, or visible nicotine staining. The downside is the fumes. Shellac based primers use denatured alcohol as a solvent, which means strong odors during application. You need serious ventilation and a respirator with organic vapor cartridges. KILZ Original oil based primer works as an alternative for moderate damage. It provides excellent stain blocking and good odor control without the intense fumes of shellac. Oil based primers take longer to dry, usually 4 to 6 hours before recoating, but they’re easier to work with for most homeowners. For light surface damage where you barely smell smoke anymore, water based stain blocking primers can work. But if you’re reading this article, your damage probably isn’t that light.

Bleed through happens when smoke contaminants penetrate through an insufficient sealer barrier. The wrong primer type simply doesn’t create a strong enough barrier. Shellac and oil based primers form a harder, denser film than water based products. When you use water based primer over smoke damage, the thin barrier allows volatile compounds to migrate through over time. You’ll see yellowing appear gradually as tannins, nicotine, and smoke oils work their way to the surface. Using too few coats causes the same problem. One thin coat of even good primer may not provide enough thickness to fully encapsulate the contamination. And if you applied primer over surfaces that weren’t completely clean and dry, you’ve trapped moisture or oily residues that will eventually push back through.

Wait 24 to 48 hours after sealing before testing. The primer needs to fully cure and off gas. Then apply a small test patch of your finish paint in an inconspicuous area. Let that dry completely and inspect it under good light. Look for any yellowing, brown spots, or discoloration bleeding through. Get your nose close and check for odor. If you detect breakthrough, you need more sealing. Apply an additional coat of sealer over the entire surface. If breakthrough is significant, switch to a stronger formula. You can apply shellac based primer over dried oil based primer if needed. That additional layer usually solves persistent problems.

Applying Smoke Damage Sealer to Drywall Surfaces

8wVfLX3iS4yqE8ZRRfSy3Q

Choose your application method based on project size and what you’re working with. Rollers work best for large flat wall areas. They provide fast coverage and even film thickness. Brushes handle edges, corners, trim, and detail work where rollers can’t reach. Airless sprayers make sense for heavily textured surfaces or whole house projects, but they require practice, generate overspray, and need thorough masking.

For roller work on walls, select a 3/8 inch to 1/2 inch nap roller cover. Shorter nap for smooth walls, longer nap if your surface has any texture. Load the roller by rolling it in the paint tray until it’s saturated but not dripping. Start with a W pattern about four feet tall. Roll the primer on with moderate pressure in vertical strokes from ceiling to floor, then cross roll horizontally to even out the coverage. Overlap each pass by 10 to 15 percent so you don’t leave thin spots or holidays. Work in sections you can complete while maintaining a wet edge. If one section dries before you roll into it, you’ll see lap marks in the final finish.

Use a 2 inch angled sash brush for cutting in. Cut in all edges, corners, ceiling lines, and trim before rolling the main wall areas. Load the brush by dipping it about one third of the way into the primer, then tap off the excess against the inside of the can. Don’t wipe the brush across the rim because that removes too much product. Apply the primer with steady strokes, working it into corners and edges. Keep a wet edge by working quickly and maintaining overlap with adjacent areas. Good brushwork takes practice. The goal is smooth, even coverage without drips, runs, or heavy brush marks.

Most smoke damage requires two coats minimum. Shellac based primers dry fast, usually ready for a second coat in 45 minutes to an hour. Oil based primers need 4 to 6 hours between coats. Check the product label for specific recoat times. Environmental conditions matter. Ideal temperature range is 60 to 80°F with moderate humidity. Extreme cold slows drying and causes application problems. High humidity extends dry times and can cause the primer to take longer to cure. Run fans to maintain air circulation but don’t point them directly at wet primer because that can cause surface defects. Calculate coverage before you buy. A gallon of primer typically covers 300 to 400 square feet depending on surface porosity and application method. Measure your wall area by multiplying height times width, subtract major openings like doors and windows, then divide by your expected coverage rate. Most bedrooms need 2 to 3 gallons of primer for two coats.

Texture Matching and Paint Application Over Sealed Drywall

sCpS0zZoSD25ga7dBJr4bA

Finishing work makes repaired areas invisible and restores your home’s appearance. After all the cleaning and sealing, the goal is to make the walls look like the fire never happened.

If you had to patch damaged sections or if the cleaning process wore through existing texture, you need to match what’s there. Most homes have either smooth walls, orange peel texture, or knockdown texture. For orange peel, use a spray on texture product in a can. Hold the can about 18 inches from the wall and spray in short bursts using a circular motion. Build the texture in light layers. For knockdown texture, spray on orange peel texture, wait 10 to 15 minutes until it’s tacky but not wet, then lightly skim across the high spots with a drywall knife to flatten them slightly. Smooth walls just need a light skim coat of joint compound to fill any imperfections, then sand smooth. Practice your texture technique on cardboard first. Getting texture to match existing surface takes a few tries.

For paint application as the final restoration step after sealing, paint selection matters for long term performance in smoke affected areas. Semi gloss or satin finishes are more washable and resistant to future staining than flat paint. Smoke damaged rooms sometimes develop new light staining over the first year as remaining trace contamination in carpets or furnishings off gasses. Washable paint lets you wipe down walls without damaging the finish. Match the sheen to what’s already on adjacent walls unless you’re painting the whole room. Mixing sheens on the same wall looks wrong under angled light. If you’re unsure about your existing sheen, paint a small test area and compare when dry.

Apply two coats of finish paint minimum over sealed surfaces. One coat might look acceptable initially, but it won’t provide adequate protection or coverage. Cut in edges first with a brush, then roll the main areas within 15 minutes while the cut in paint is still wet. This prevents lap marks where brush and roller work meet. Roll in the same direction for uniform sheen. Most people roll floor to ceiling in vertical passes. Use good paint. Cheaper paints require more coats and don’t cover stain blocking primers as well as quality products. After the first coat dries completely (check the label, usually 2 to 4 hours), inspect for any areas where the primer shows through. Touch those up before applying the second coat. The second coat should give you complete, even coverage with consistent sheen and color.

Odor Testing and Verification After Sealing Drywall

IiG-vcuATHmnNJtY7p8Ytg

Odors hide under normal conditions but emerge with heat and humidity changes. What smells fine today might smell like smoke tomorrow when weather changes or you close up the house and run heat. You need to test under conditions that will reveal hidden contamination before you call the job complete.

Close the affected room and run a space heater to raise the temperature above 80°F. Don’t overheat the space, just get it warm. Leave the room closed for 2 to 3 hours. Heat causes any remaining volatile compounds to off gas faster. Then leave. Go outside, breathe fresh air, reset your nose. After 10 to 15 minutes away, come back and open the door. Your first impression when entering tells you whether odor remains. Don’t stand there trying to detect smell. That first sniff when you walk through the door is most reliable. If you smell smoke, you’ve still got active contamination. Try the same test on a humid day or run a humidifier in the closed room. Moisture causes different compounds to release odor. Some smoke contamination only becomes noticeable when humidity is high.

Persistent odor after sealing indicates one of three problems. First possibility is incomplete sealing. You might have missed areas, applied primer too thin, or used a product that isn’t strong enough for your contamination level. Second possibility is hidden contamination in wall cavities, behind baseboards, or in other areas you didn’t treat. Smoke travels through electrical outlets, into attics, behind walls. If cavities weren’t addressed, they’ll keep releasing odor into living spaces. Third possibility is contamination in other materials. Carpet pad, furniture, HVAC system, or other porous materials continue releasing smoke smell even after walls are sealed. If you get persistent odor after proper sealing, add another coat of shellac based sealer first. If that doesn’t solve it, pull outlet covers and check whether smoke smell is stronger near openings into wall cavities. Consider professional ozone treatment or hydroxyl generator treatment for deep contamination. These machines generate oxidizing molecules that break down odor compounds at a molecular level, reaching areas that sealing can’t address.

DIY vs Professional Restoration: Costs and Decision Factors

ngraAT-uSTimpFOtMuXyYw

Total cost varies with room size, damage severity, and whether you hire professionals. A typical 12×12 bedroom with moderate smoke damage will cost significantly less as a DIY project, but you’ll invest substantial time and physical effort.

Item DIY Cost Range Professional Cost Range
Chemical Sponges (box of 6) $15 to 25 Included
TSP/Cleaner (5 lbs) $15 to 20 Included
Primer/Sealer (2 gallons) $80 to 120 Included
Finish Paint (2 gallons) $60 to 100 Included
Tools/Supplies (rollers, brushes, plastic, tape, PPE) $60 to 90 Included
Labor Your time $800 to 1500
Total Per Room (12×12) $230 to 355 $1200 to 2000

DIY saves 50 to 70 percent on labor costs but requires 2 to 4 days of work for an average room. Day one is prep, dry clean, and wet clean. Day two, let everything dry, apply first primer coat. Day three, second primer coat, possibly texture matching. Day four, two coats of finish paint. That’s if everything goes smoothly and you’re working efficiently. First time DIY projects usually take longer. You’ll save money by buying materials yourself, using your own labor, and renting rather than owning specialized equipment like HEPA vacuums or airless sprayers. Keep materials receipts and photograph your work at each stage. If insurance is involved, documentation helps with reimbursement.

DIY makes sense for single room surface damage when you have time and basic skills. If smoke contamination is limited to one bedroom or an isolated area, the project scope stays manageable. Surface damage that responds to standard cleaning and sealing doesn’t require industrial equipment or specialized knowledge. You need reasonable DIY skills, meaning you’ve painted before and you’re comfortable working carefully on a ladder. And you need time. Rushing smoke remediation causes mistakes that lead to recurring odor or staining. If you’re dealing with small isolated areas, you’re physically capable of the work, and you can dedicate a week to the project, DIY saves significant money.

Professional restoration becomes necessary for extensive whole house damage, structural concerns that require assessment, proper insurance documentation and claims support, or situations where you need guaranteed odor elimination. When discussing scenarios that need professional restoration services, consider that professionals provide comprehensive damage assessment to determine what can be sealed versus what requires replacement. They use industrial strength cleaners and sealers that outperform retail products. Thermal foggers reach into cavities and penetrate porous materials where smoke has traveled. HEPA air scrubbers remove airborne particles while work progresses. And professionals provide completion guarantees backed by business insurance. If odor returns after professional remediation, they come back and address it. Most professional restoration includes assessment, containment setup, HEPA vacuuming, chemical cleaning, primer sealing, finish painting, and air quality verification.

Look for contractors with IICRC (Institute of Inspection, Cleaning and Restoration Certification) credentials, specifically the Fire and Smoke Restoration Technician certification. Ask for recent references from smoke damage jobs, not just general remodeling projects. Get written estimates that break down labor, materials, and specific scope. The estimate should detail which rooms they’ll address, how many primer coats they’ll apply, what type of sealer they’re using, and what the final finish will look like. Verify they carry insurance coverage for restoration work. Check that they have experience working with insurance companies if your project involves a claim. Local restoration companies with 5 plus years in business usually provide more reliable service than new startups or general contractors taking on restoration work.

When to Replace Rather Than Seal Smoke Damaged Drywall

uZ2YUSRJSoq-Zl9GMhbwGQ

Sealing only works when drywall structure remains sound and contamination is surface level. No primer technology can fix drywall that’s physically compromised or so deeply contaminated that the gypsum core has absorbed smoke throughout its thickness. Trying to seal badly damaged drywall wastes time and money on repairs that will fail.

Six conditions require replacement instead of sealing.

Charred paper facing. If the paper surface shows black charring, bubbling, or heat damage, the paper no longer bonds properly to the gypsum core and won’t hold primer or paint reliably.

Crumbling gypsum core. Gypsum that crumbles when you press it or shows powdery deterioration has lost structural strength and can’t support a finish surface.

Delamination. Paper facing that’s separating or pulling away from the gypsum core, especially around seams, corners, and edges, will continue separating under the weight of primer and paint.

Water saturation from firefighting. Drywall that stayed wet for more than 48 hours, shows heavy water staining, or feels soft has absorbed too much moisture and will remain prone to mold growth even after drying.

Structural warping. Panels that show significant bowing, twisting, or distortion from heat exposure won’t flatten and will create visible irregularities under paint.

Contamination into wall cavities. When smoke has penetrated behind the drywall into insulation and wall cavities with ongoing odor release, surface sealing won’t solve the problem.

Compare the economics of sealing versus replacement over 5 to 10 years. Proper replacement lasts indefinitely. You remove damaged material, install new drywall, finish it properly, prime with quality sealer, and paint. The result performs like new wall construction. Marginal sealing might work for a year or two, then stains start bleeding through or odors return. At that point, you’re repainting or worse, stripping and replacing anyway. If you’re questioning whether your drywall is too damaged, replacement is usually the right answer. The material cost difference between sealing and replacing isn’t huge for most rooms. A 12×12 room needs roughly 500 square feet of drywall at $12 to 15 per sheet, plus joint compound, tape, and labor. Compare that to the primer and paint costs you’ll spend anyway, and replacement often makes economic sense when damage is significant.

For partial replacement, cut damaged sections back to the nearest wall studs. Use a drywall saw or utility knife to score and snap the damaged panel. Remove fasteners and pull out the damaged section. Cut new drywall to fit the opening, leaving a slight gap (about 1/8 inch) around edges. Secure the new piece to studs with drywall screws every 8 inches. Apply paper tape and joint compound to all seams, feathering the edges 8 to 12 inches onto surrounding wall. After compound dries, sand smooth and apply texture to match existing surface. Then prime the entire wall surface, not just the patched area. Priming only the patch will show as a different sheen or slight color variation. Sealing the entire surface after patching ensures uniform appearance and complete odor blocking across the whole wall.

Final Words

Sealing smoke damaged drywall works when you follow the sequence and use the right products.

Start with honest damage assessment. If the paper’s charred or the gypsum crumbles, replace it. If the structure’s sound, move through dry cleaning, wet cleaning, and proper sealing with shellac or oil-based primers.

Test your work before you call it done. Close the room, warm it up, and check for lingering odors.

For small, isolated damage, DIY saves money and gets good results. For whole-house smoke damage or insurance work, bring in professionals with commercial-grade equipment and guaranteed odor elimination.

Either way, the goal’s the same: clean, sealed surfaces that stay odor-free and look finished.

FAQ

Do you have to replace drywall after smoke damage?

You do not always have to replace drywall after smoke damage. Surface-level soot and light to moderate smoke staining can usually be cleaned and sealed effectively. Replacement becomes necessary only when the drywall is charred, structurally compromised, water-saturated from firefighting efforts, or shows crumbling gypsum and paper delamination.

Will Kilz cover smoke damage?

Kilz Original oil-based primer will cover moderate smoke damage effectively by blocking stains and sealing odors. For heavy smoke damage, nicotine staining, or severe odor problems, shellac-based primers like Zinsser BIN provide stronger blocking performance. Water-based Kilz products offer limited effectiveness for smoke damage and should be avoided for this application.

How do you fix smoke damaged walls?

You fix smoke damaged walls by first dry cleaning with chemical sponges to remove loose soot, then wet cleaning with TSP or degreaser to remove oily residues. After the walls dry completely, apply two coats of smoke-sealing primer, then finish with texture matching and two coats of paint in the original sheen.

How do you fix severely damaged drywall after smoke exposure?

You fix severely damaged drywall by cutting out compromised sections to the nearest studs and installing new drywall pieces. Tape and finish the seams with joint compound, then seal the entire repaired surface with smoke-blocking primer before texture matching and painting. Complete replacement becomes necessary when charring, crumbling, or structural warping affects large areas.

How long does it take to seal smoke damaged drywall?

Sealing smoke damaged drywall typically takes 2 to 4 days for an average room when done properly. This includes dry cleaning, wet cleaning and drying time, applying two coats of sealer with drying time between coats, and final paint application. Professional crews can complete the process faster using commercial equipment and coordinated teams.

Can you paint over smoke damage without primer?

You cannot successfully paint over smoke damage without primer. Smoke residues, oils, and odors will bleed through standard paint within weeks, causing discoloration and lingering smells. Smoke-blocking primer creates a sealed barrier that prevents contaminants from penetrating the finish coat and is essential for permanent results.

What type of primer blocks smoke odor best?

Shellac-based primers like Zinsser BIN block smoke odor best because they create an impermeable barrier against both stains and volatile odor compounds. Oil-based primers like Kilz Original provide excellent blocking for moderate damage. Water-based primers lack the sealing properties needed for smoke damage and should not be used for this purpose.

How do you know if smoke sealing worked?

You know smoke sealing worked by conducting a warm room test after the sealer and paint dry completely. Close the room, raise the temperature to 80°F or higher with a space heater, wait 2 to 3 hours, then leave and return with a fresh perspective. No smoke odor should be detectable under these conditions.

What surfaces need smoke damage sealing?

Surfaces needing smoke damage sealing include painted drywall, bare drywall, wood trim, doors, ceilings, and any porous material exposed to smoke residue. Even surfaces that appear clean may harbor invisible protein smoke residues or penetrated oils that will cause odors later. Sealing creates a complete barrier across all affected surfaces.

How much does it cost to seal smoke damaged walls?

Sealing smoke damaged walls costs approximately $150 to $300 per room for DIY projects including cleaners, primer, and paint. Professional restoration runs $500 to $1,500 per room depending on damage severity, room size, and whether replacement sections are needed. Whole-house smoke damage restoration ranges from $3,000 to $15,000 depending on square footage and contamination extent.

Property Damage Claim Negotiation: Maximize Your Insurance Settlement

0

You’d be surprised how many homeowners lose thousands in settlement money simply because they didn’t know they could say no to the first offer. Insurance adjusters count on that. They send lowball numbers, wait for you to accept, and close the file. But when you understand how claim negotiation actually works, document damage the right way, and challenge undervalued estimates with solid evidence, you shift the entire conversation. This guide walks you through the negotiation process step by step so you can push for a fair settlement and actually get your home fully restored.

Strategic Framework for Maximizing Your Property Damage Settlement

W7gYfHjZQMefxgwN-uD-Wg

Insurance companies expect most claimants to accept whatever offer arrives first. That won’t be you. Instead, follow this four step negotiation framework: (1) Calculate independent damage valuation before contacting the adjuster, (2) Document all damages comprehensively, (3) Never accept first offers, (4) Justify counteroffers with evidence while maintaining strategic padding. These steps shift the negotiation dynamic from reactive acceptance to informed control.

Insurance adjusters work for one client, the insurance company. Their job performance often depends on minimizing payouts and closing files quickly. They take the path of least resistance. When they encounter a disorganized, uninformed claimant who seems desperate for a quick check, they lowball. When they encounter a prepared policyholder who asks specific questions, provides detailed documentation, and demonstrates understanding of claim valuation methods, they settle faster and for higher amounts. Your leverage comes from knowledge, organization, and persistence.

You must calculate your total property damage losses independently before the adjuster’s first call. Visit your property. Walk every room. Photograph everything. Get contractor estimates. Price out your damaged belongings. Add up your expenses. Determine what full restoration actually costs. Then set your minimum acceptable settlement, the floor below which you won’t agree. Never share that floor number with the adjuster. This independent calculation becomes your negotiation anchor. Without it, you’re negotiating blind against someone who does this professionally.

Insurance companies intentionally send low initial offers. They expect rejection. They budget for second, higher offers. This isn’t personal, it’s standard operating procedure. Your response to that first lowball offer sets the tone for everything that follows. Organized victims who document thoroughly, respond with evidence based counteroffers, and show willingness to escalate receive better settlements. The adjuster needs to close your file, but they need to close it within defensible parameters. Give them the documentation that justifies a higher number, and you make their job easier while increasing your settlement.

Essential Documentation and Evidence for Property Damage Claim Negotiations

IfoVmEfYRwWY2Wxrz6E_oQ

Comprehensive documentation is your primary negotiation leverage. Every photograph, every receipt, every contractor estimate strengthens your position and directly counters insurer valuation disputes. Documentation doesn’t just support your claim. It defines what’s claimable. Without proof, damage doesn’t exist in the adjuster’s file. The stronger your documentation, the weaker their position when they try to minimize your settlement.

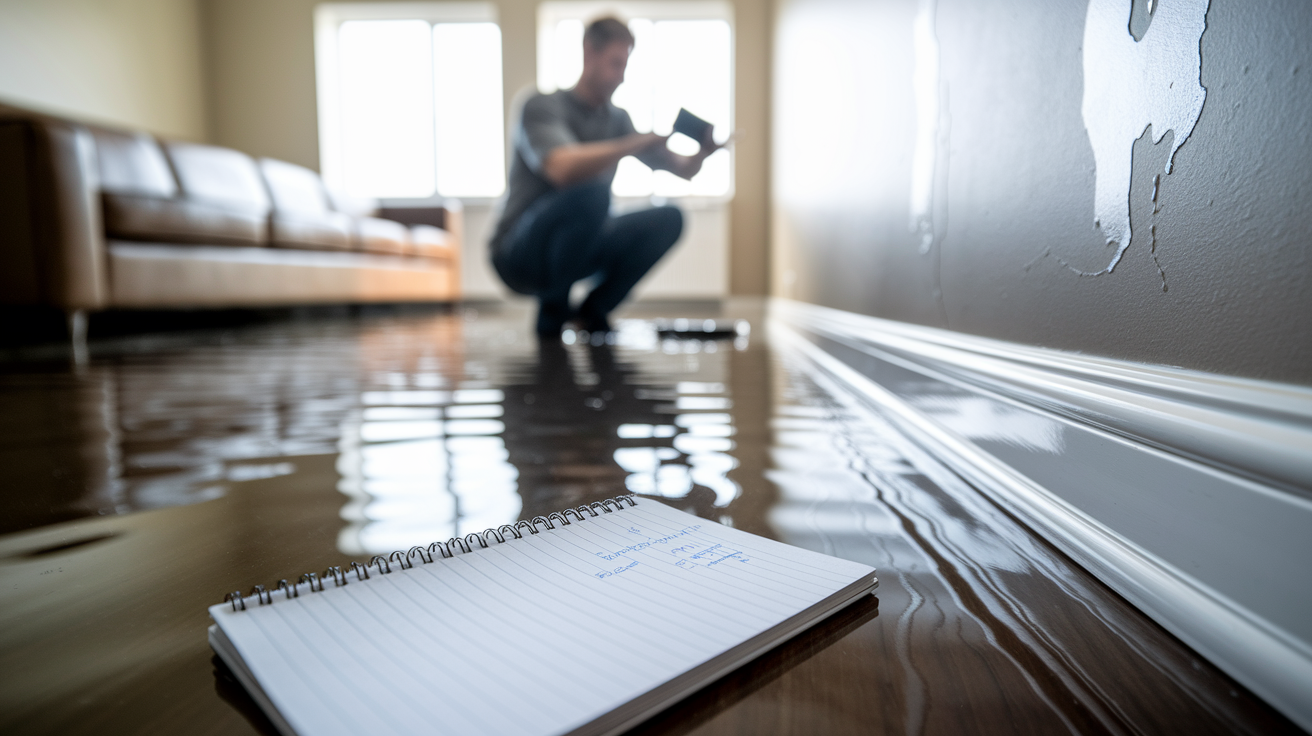
Timing matters. Documentation should begin the moment you discover damage and continue throughout the entire repair process. Damage changes. Water spreads. Mold develops. Items get discarded during cleanup. If you wait to document, you lose proof of what actually happened. Start with your phone camera today, then build from there.

Photographs and videos. Capture damage from multiple angles, with close ups of specific problems and wide shots showing overall impact. Include date stamps when possible. Photograph undamaged areas for comparison. Document the progression as you uncover hidden damage during repairs.

Professional repair estimates. Get written quotes from licensed contractors detailing scope of work and material costs. Multiple estimates demonstrate consistent market pricing and prevent insurers from claiming your numbers are inflated.

Receipts for all expenses. Keep every receipt related to the damage. Emergency repairs, temporary housing, meals away from home, storage unit rentals, cleaning supplies, equipment rentals, professional services. If you spent money because of this damage, document it.

Damage inventory with values. List every damaged item. Include purchase dates, original costs, and current replacement values. For significant items, include receipts or credit card statements proving purchase price.

Contractor inspection reports. Hire qualified professionals to assess structural damage, electrical systems, plumbing, HVAC, and other technical components. Their written reports carry weight adjusters can’t easily dismiss.

Incident reports. Obtain copies of police reports for vandalism or theft, fire department reports for fires, weather service documentation for storms. Official reports corroborate your claim and establish third party verification of events.

All insurance correspondence. Save every email, letter, text message, and note from phone calls with your insurance company. Document dates, times, names, and what was discussed. This paper trail becomes critical if disputes escalate.

Witness statements. If neighbors saw the damage occur, ask them to provide written statements describing what they observed. Third party accounts strengthen claims where insurers question causation or damage extent.

Organize documentation systematically. Create both physical files and digital backups. Label everything clearly with dates and damage categories. When the adjuster asks for supporting documentation, and they will, you should be able to provide it within minutes, not days. That responsiveness signals you’re serious, prepared, and not someone they can wait out or overwhelm with requests.

Understanding Property Damage Valuation Methods and Challenging Low Calculations

lwIWJJuZT0m7aerlB4amdA

Understanding valuation methodology is essential for both calculating justified settlement amounts and identifying insurer calculation errors. Insurers use specific formulas and standards to determine what they owe. When you understand these methods, you can spot where they’ve undervalued damage, misapplied depreciation, or excluded legitimate costs. Without this knowledge, you’re arguing in the dark.

Actual Cash Value (ACV) methodology accounts for depreciation. The insurer calculates what an item or repair was worth when new, then subtracts depreciation based on age and condition. This results in lower settlements. If your ten year old roof gets damaged, they pay for a ten year old roof’s value, not a new roof. ACV settlements often leave policyholders unable to fully repair or replace damaged property because depreciated value doesn’t cover current market costs. The adjuster determines depreciation rates, sometimes accurately, sometimes aggressively.

Replacement Cost Value (RCV) coverage provides compensation without depreciation factoring. The insurer pays the cost to replace damaged property with new, substantially similar items at current market prices. Most RCV policies have a two payment structure. First, they pay ACV upfront. Once you complete repairs and submit receipts, they release recoverable depreciation, the difference between ACV and full replacement cost. Understanding this timing prevents confusion when initial settlement checks seem low. The full amount comes after you prove you actually replaced or repaired the damage.

Betterment charges and depreciation disputes commonly arise during negotiations. Insurers sometimes claim that repairs improve your property beyond its pre loss condition and reduce settlement accordingly. If replacing your damaged laminate floor with similar laminate also requires updating subflooring to current code, they might argue that’s betterment you should pay for. If your water damage restoration process requires comprehensive work, they might depreciate labor costs despite replacement cost coverage. These disputes require pushback with specific policy language and documentation showing repairs restore rather than improve.

Independent calculation before receiving the insurer’s valuation gives you negotiating power. Your calculation should include all damage categories, not just the obvious ones. Develop a comprehensive scope that covers structural repairs, hidden damages discovered during work, code upgrade requirements, and all associated costs. When you’re dealing with comprehensive damage assessment, understanding the full restoration requirements before negotiating claim amounts strengthens your position significantly.

Claimable damage typically includes six categories.

Structural repairs. Foundation work, framing, roofing, walls, floors, ceilings, and all building components damaged in the incident.

Property and contents replacement. Furniture, appliances, clothing, electronics, personal items, stored goods, and everything inside the structure.

Temporary living expenses. Hotel costs, rental housing, meals, and additional costs when damage makes your home uninhabitable.

Emergency services and mitigation. Water extraction, board up services, tarp installation, temporary power, immediate repairs to prevent further damage.

Loss of use costs. Compensation for inability to use your property for its intended purpose during the repair period.

Professional fees and assessments. Engineering reports, contractor consultations, permit fees, and reasonable costs for building your claim.

Calculate your minimum acceptable amount before negotiations begin, but set your opening position higher. The opening position should be reasonable and justifiable, inflated enough to leave negotiation room without being so excessive that it damages your credibility. For example, if independent estimates total $47,000, your minimum might be $45,000 (accounting for some negotiation), but your opening demand might be $52,000. The gap lets you negotiate downward while still reaching your actual goal. Identify hidden damages during initial assessment. Water damage often conceals mold, electrical damage, and structural deterioration that won’t surface until work begins. Your scope should anticipate these discoveries and include contingency amounts for supplemental claims.

Challenge low valuations with these tactics.

Request complete valuation methodology in writing, forcing adjusters to document their calculation process and expose errors.

Compare market prices for similar properties or items, providing screenshots, listings, and quotes showing current costs exceed their valuation.

Obtain independent professional appraisals from licensed appraisers who calculate damage value using industry standard methods.

Identify errors in condition assessments where adjusters underestimate pre loss condition or overestimate depreciation.

Document upgrades, improvements, and features not factored into their calculations, such as recent renovations or high end finishes.

Effective Communication Strategies and Responding to Lowball Offers

tzrJagiTR16Le88a7YQWiA

All significant communication must be documented in writing to create an evidence trail. Verbal agreements mean nothing if the insurer later disputes what was said. After every phone conversation with an adjuster, send an email summarizing what you discussed, what they agreed to, and what happens next. Request they confirm your summary if anything is inaccurate. Keep copies of everything. If negotiations go badly and you need to escalate, file a complaint, or hire an attorney, your documented communication history becomes critical proof of the insurer’s conduct.

Insurance companies strategically present low initial offers. They know most claimants don’t understand valuation methods, won’t get independent estimates, and feel pressure to settle quickly. The first offer tests whether you’ll accept without pushback. It’s not their final number. Adjusters budget for negotiation. They expect rejection. Warning signs of lowball offers include vague valuation explanations without detailed breakdowns, significant gaps between your contractor estimates and their calculations, and pressure to accept quickly with language like “This offer won’t stay on the table” or “We need to close this file.” These tactics create artificial urgency designed to prevent you from organizing a strong counteroffer.

Demand that adjusters justify low offers with specific methodology rather than accepting arbitrary numbers. When you receive an offer that seems inadequate, respond with direct questions. “Can you walk me through exactly how you calculated this amount?” “Which line items account for the $8,000 difference between your valuation and my contractor’s estimate?” “What depreciation schedule did you apply to the flooring, and where does that schedule come from?” “Your offer doesn’t include temporary housing costs. Can you explain why those aren’t covered under loss of use?” These questions force adjusters to document their reasoning. Sometimes they’ll realize they made errors. Other times they’ll provide explanations you can counter with evidence. Either way, you move from passive acceptance to active negotiation.

The counteroffer formula balances justified valuation based on documentation plus strategic padding without losing credibility. Start with your independently calculated damage total. Add reasonable padding, maybe 8% to 12%, that you can justify if challenged. Present this counteroffer with supporting documentation attached. Don’t just say “I think it should be more.” Explain: “Your offer of $34,000 undervalues the claim based on the attached estimates from three licensed contractors averaging $43,500. Your valuation applies 40% depreciation to flooring, but replacement cost coverage eliminates depreciation per policy section 12(b). Your scope omits electrical repairs identified in the attached electrician’s report totaling $3,200.” Specific, documented counteroffers are hard to ignore. If the adjuster remains unresponsive or continues offering inadequate amounts, escalate to their supervisor. Request the supervisor’s contact information directly. Document the lack of progress and explain you’re seeking resolution at a higher level. You can also file complaints with your state insurance commissioner if the insurer violates claim handling regulations or acts in bad faith.

Warning Sign What It Means Appropriate Response
Offer significantly below estimates Insurer testing if you’ll accept without research or using aggressive depreciation methods Provide multiple independent contractor estimates and request detailed explanation of valuation methodology
No detailed valuation breakdown Adjuster avoiding documentation of how they calculated settlement to prevent challenges Refuse to negotiate without written line item breakdown showing how each damage category was valued
Pressure to accept quickly Artificial urgency designed to prevent you from consulting contractors, attorneys, or public adjusters Ignore deadline threats and state you’ll review the offer thoroughly before responding
Major items excluded from settlement Insurer claiming certain damages aren’t covered or outside policy scope without specific explanation Request policy language citations supporting exclusions and provide documentation proving coverage applies
Excessive depreciation applied Adjuster using depreciation rates that exceed industry standards or misapplying depreciation to replacement cost coverage Challenge with independent appraisals and specific policy language regarding replacement cost provisions

Policyholder Rights and Insurance Company Obligations During Claim Negotiations

1zPw3wh3RlmUF3jFhhuhQg

Insurance policies are legal contracts with binding obligations on both parties, not voluntary charity from insurers. You paid premiums. In exchange, the insurer promised to cover specific losses according to policy terms. When damage occurs, they must fulfill their contractual obligations. Too many policyholders approach negotiations feeling grateful the insurance company is “helping” them. Wrong mindset. They’re fulfilling a purchased contract. You have legal rights throughout this process.

Insurers must meet specific timelines for claim acknowledgment, investigation, and resolution. State regulations typically require insurers to acknowledge claims within a few business days of notification, begin investigation promptly, and resolve claims within reasonable timeframes, often 30 to 90 days after receiving proof of loss. These aren’t suggestions. They’re legal requirements. If your insurer drags out the process, stops responding, or delays without legitimate reason, they may be violating state insurance regulations. For example, Florida Statutes Section 627.70131 requires insurers to acknowledge, investigate, and resolve claims within 90 days after receiving proof of loss. Your state likely has similar provisions.

Bad faith insurance practices occur when insurers violate their obligations through unreasonable delays, inadequate investigations, unjustified claim denials, or refusal to pay valid claims. Examples include refusing to provide claim file documentation, not conducting thorough damage inspections, denying claims without investigating, or offering settlements obviously below actual damage value without justification. When insurers act in bad faith, policyholders have legal remedies. Florida Statutes Section 624.155 allows homeowners to sue insurers for bad faith practices, and most states have equivalent protections. Bad faith claims can result in penalties beyond the original claim value, including attorney fees and punitive damages.

Insurers have a duty to investigate thoroughly and provide detailed claim denials with specific policy language citations. If they deny your claim or any portion of it, they must explain exactly why in writing, referencing the specific policy provisions that support the denial. Vague denial letters without policy citations are often legally insufficient. You can challenge denials by requesting detailed explanations, disputing their interpretation of policy language, and providing evidence that contradicts their denial basis.

Before negotiations begin, review policy exclusions, endorsements, and coverage limits so you understand what’s actually covered. Standard homeowner policies exclude floods and earthquakes unless you purchased separate coverage. If you’re in a FEMA designated high risk flood zone, you may have been required to purchase flood insurance. That ruby pendant valued at $3,000 won’t be reimbursed if you didn’t specifically list it on your policy before the loss. Personal property coverage limits might cap electronics at $2,500 total or jewelry at $1,000. Knowing these limits before you negotiate prevents wasted time demanding coverage that doesn’t exist.

When to Hire Professional Help for Property Damage Claim Negotiations

M-7J7JOHQzCszXIXnuf56g

The decision framework balances claim value against professional fees and your capability versus claim complexity. Small, straightforward claims with responsive insurers might not justify hiring help. Large, complex claims with uncooperative insurers almost always benefit from professional assistance. The question isn’t whether professionals could help, they usually can. The question is whether their help adds more value than it costs.

Different professionals serve different purposes in the negotiation process. Public adjusters assess damage and negotiate settlements on your behalf. Independent appraisers calculate damage values when you and the insurer dispute amounts. Attorneys provide legal representation when insurers deny claims, act in bad faith, or when coverage disputes require legal interpretation. Understanding what each professional does helps you hire the right help at the right time.

Public Adjusters for Property Damage Claims

Public adjusters work for policyholders, not insurance companies. They assess your damage, document losses, prepare claim estimates, and negotiate directly with the insurance company’s adjuster on your behalf. Unlike insurance company adjusters who work to minimize payouts, public adjusters work to maximize your settlement. They handle the entire claim process while you focus on getting your life back to normal.

Public adjusters typically charge fees based on a percentage of the settlement amount, usually 5% to 15% depending on claim size and complexity. Large claims often justify lower percentage fees. Emergency claims right after disasters might carry higher percentages due to demand. Some public adjusters charge flat fees for smaller claims. The percentage comes out of your settlement, so a 10% fee on a $100,000 settlement means you receive $90,000.

Public adjusters add value when claims are complex, damage is extensive, or you lack time or expertise to manage the process. They’re particularly useful for commercial property claims, large residential losses, or situations where the insurance company grossly undervalues damage. The cost benefit calculation is simple: Will the public adjuster increase my settlement by more than their fee? If your independent estimate suggests $80,000 in damage but the insurer offers $45,000, a public adjuster who negotiates a $70,000 settlement costs you $7,000 in fees but nets you $25,000 more than the original offer.

Independent Appraisers and Expert Evaluations

When you and the insurer cannot agree on damage value, most policies contain appraisal provisions. Each party hires an independent appraiser. The two appraisers inspect the damage and attempt to agree on the value. If they can’t agree, they select an impartial umpire who reviews both appraisals and makes a binding decision. This process resolves valuation disputes without litigation.

Independent appraisers charge hourly rates or flat fees depending on claim complexity, typically ranging from $1,000 to $5,000 for residential claims. Engineering reports for structural damage cost more. The appraisal clause process can be faster and cheaper than hiring an attorney and filing a lawsuit, but both sides split the umpire’s cost, and the outcome is binding.

Specialized assessments become necessary for complex damage. Structural engineers evaluate foundation damage, framing issues, and load bearing concerns. Industrial hygienists test for mold and environmental contamination. Electrical engineers assess fire damage to wiring and systems. These expert opinions carry significant weight with adjusters because they come from credentialed professionals using scientific methods. When adjusters dispute your contractor’s assessment, an engineer’s report often ends the argument.

Property Damage Attorneys and Legal Representation

Attorneys become necessary when insurers deny valid claims, engage in bad faith practices, disputes involve complex coverage interpretation, or claim values justify legal costs. Property damage attorneys review policies, interpret coverage, demand insurers fulfill obligations, negotiate settlements, and file lawsuits when negotiation fails.

Fee structures vary. Some attorneys work on contingency, taking a percentage of recovery (often 33% to 40%). Others charge hourly rates. Some combine both methods. For property only claims, hiring an attorney may reduce your net settlement if the insurer’s offer is already close to acceptable, because attorney fees come out of your recovery. Run the math. If the offer is $68,000, your minimum acceptable is $65,000, and the attorney might negotiate it to $75,000 but takes 33%, you net $50,000, less than the original offer.

However, attorneys add value in complex cases or when insurers act unreasonably. If your claim is denied entirely, hiring an attorney is often the only path to recovery. If the insurer offers $30,000 for $100,000 in documented damage and refuses to budge, legal representation might be your best option. One significant advantage: if you’re handling both property damage and bodily injury claims from the same incident, attorneys representing your bodily injury case typically assist with property damage negotiations at no additional charge.

Decision criteria for professional assistance include claim value exceeding $25,000, insurer denying coverage or offering settlements below 60% of documented damages, complex policy interpretation questions, time constraints preventing you from managing the claim yourself, or situations where the insurer stops responding or repeatedly delays without justification.

Dispute Resolution Options Beyond Direct Property Damage Claim Negotiation

KKgpBoxATwyyEPxYxgxEKQ

Multiple formal dispute resolution mechanisms exist when negotiations reach impasse. These options provide structured processes for resolving valuation disputes, coverage disagreements, and claim denials without immediately resorting to litigation. Each mechanism has specific procedures, costs, and outcomes.

Appraisal Clause and Umpire Process

Most property insurance policies contain appraisal clauses that provide a formal mechanism for resolving valuation disputes. When you and the insurer cannot agree on the amount of loss, either party can demand appraisal. This process focuses solely on damage valuation, not coverage disputes. If the insurer denies your claim entirely based on coverage exclusions, appraisal won’t help because there’s no dispute about amount, there’s a dispute about whether coverage exists at all.

The appraisal process works like this: Each party selects a competent, impartial appraiser. Your appraiser and the insurer’s appraiser independently assess the damage and attempt to agree on the loss amount. If they cannot agree, they select an umpire, a neutral third party who reviews both appraisals. A written agreement signed by any two of the three (your appraiser, their appraiser, or the umpire) becomes binding.

Appraisal outcomes are binding and enforceable like court judgments. You cannot reject an appraisal award you don’t like unless you can prove fraud, bias, or significant procedural errors. Costs include paying your appraiser’s fees (typically $1,500 to $5,000 depending on claim complexity) and splitting the umpire’s fee with the insurer. This is usually faster and cheaper than litigation, with most appraisals completed within 60 to 90 days of initiation.

Insurance Mediation for Claim Disputes

Mediation involves a neutral mediator who facilitates negotiation between you (often with your attorney present) and the insurance company’s representatives. Unlike appraisers or arbitrators who make binding decisions, mediators help both sides reach voluntary agreements. The mediator doesn’t decide who wins, they guide productive discussion and help identify settlement options both parties can accept.

Mediation is nonbinding until both parties sign a settlement agreement. You can walk away any time before signing. This flexibility makes mediation less risky than arbitration or litigation. If mediation fails, you haven’t waived other options. The process is also confidential. Nothing discussed in mediation can be used in subsequent litigation.

Mediation typically takes one day, though complex cases might require multiple sessions. Each party usually splits mediator costs, which range from $200 to $500 per hour. Despite the cost, mediation resolves many disputes that seemed deadlocked because the structured format and neutral facilitator help both sides move past emotional positions and focus on practical solutions. Mediation is appropriate when both parties want to settle but can’t find common ground through direct negotiation, or when communication has broken down and a neutral third party can restart productive discussion.

Arbitration in Property Damage Claims

Arbitration differs from mediation because the arbitrator makes a binding decision rather than facilitating voluntary agreement. Some insurance policies contain binding arbitration clauses requiring disputes to be resolved through arbitration instead of court. Other times, parties voluntarily agree to arbitration to avoid litigation costs and delays.

The process involves selecting an arbitrator (or panel of arbitrators), exchanging evidence, presenting arguments, and receiving a written decision. Arbitration is more formal than mediation but less formal than court trials. Rules of evidence are relaxed, procedures are streamlined, and timelines are faster. Depending on the arbitration agreement, the arbitrator’s decision may be binding with limited appeal rights, or nonbinding (serving as a strong recommendation both parties consider before proceeding to litigation).

Costs include arbitrator fees, which parties typically split, plus your attorney fees if you hire legal representation. Total costs often run lower than full litigation, but higher than mediation. The benefit is speed and finality. Most arbitrations conclude within six months, much faster than typical court timelines. The drawback is limited appeal options. If you disagree with the arbitrator’s decision, you’re usually stuck with it unless you can prove bias, fraud, or that the arbitrator exceeded their authority.

Litigation and Lawsuit Filing for Property Damage

Litigation means filing a lawsuit in court, the most formal and expensive dispute resolution option. You file when negotiations, appraisal, mediation, and arbitration all fail or aren’t available. Lawsuits make sense for large claims with significant disputes, bad faith insurance practices requiring legal penalties, or situations where the insurer refuses to engage in good faith settlement discussions.

Statute of limitations creates hard deadlines for filing lawsuits. These vary by state and claim type, but typical timeframes range from two to six years from the date of loss or claim denial. For example, Florida homeowners have five years to file breach of contract lawsuits for property damage claims under Florida Statutes Section 95.11. Miss the deadline and you lose the right to sue permanently, regardless of how valid your claim is.

Breach of contract claims assert the insurer violated policy terms by not paying what they owed. Bad faith claims assert the insurer violated their duty to act in good faith and deal fairly, for example, by denying a claim without proper investigation or offering unreasonably low settlements. Bad faith claims can result in penalties, attorney fees, and punitive damages beyond the original claim amount.

The cost benefit analysis matters. Litigation is expensive. Attorney fees, expert witness costs, court fees, and depositions quickly add up. Cases can take two to four years to reach trial. If your claim is worth $25,000 and the insurer offers $18,000, litigation might cost more than the $7,000 gap you’re fighting over. But if your claim is worth $200,000, the insurer offers $80,000, and they’ve acted in bad faith, litigation becomes necessary. Your attorney can help evaluate whether lawsuit filing is justified based on potential recovery versus costs and risks.

Common Property Damage Claim Negotiation Mistakes to Avoid

lhNE4H-VTT-q2pmNswFvhg

Negotiation mistakes can permanently reduce settlement value or create legal liability. Some errors simply cost money, accepting low offers, missing documentation opportunities, or poor communication that weakens your position. Other mistakes have legal consequences, signing releases that waive future claims, missing deadlines that bar recovery entirely, or breaching your duty to mitigate damages. The good news is these mistakes are easily avoidable with proper knowledge.

The insurance industry counts on claimants making predictable errors. Adjusters see the same mistakes repeatedly. People who accept first offers without question, sign documents they don’t understand, or fail to document damage before starting repairs. Every time you avoid these common pitfalls, you shift negotiating power in your direction. Awareness alone prevents most negotiation disasters.

Accepting first offers without analysis. Insurance companies lowball initial offers expecting rejection. Accepting immediately signals you’re uninformed and desperate, guaranteeing you leave money on the table. Always compare first offers to your independent damage calculation and contractor estimates before responding.

Signing releases without legal review. Some release forms contain broad liability waivers extending beyond property damage. Signing the wrong release can waive personal injury claims, future damage claims, or bad faith claims. Have an attorney review any release before signing, especially if the language goes beyond simple property damage settlement.

Failing to document communications. Verbal agreements have no enforcement value. Without documentation, “he said, she said” disputes favor the insurance company. Send email summaries after every phone conversation. Save all correspondence. Document who you spoke with, when, and what was discussed.

Allowing unnecessary delays that breach mitigation duties. Most states impose a legal duty to mitigate damages. You must take reasonable steps to prevent damage from worsening. If you let a totaled vehicle sit accruing storage fees, or don’t protect a damaged roof allowing water intrusion to continue, the insurer can reduce settlement by damages attributable to your failure to mitigate.

Providing recorded statements without preparation. Adjusters sometimes request recorded statements early in the claim process. Everything you say gets scrutinized for inconsistencies later. Never give recorded statements without first consulting an attorney or at minimum preparing thoroughly by reviewing all facts, photographs, and documentation.

Accepting partial settlements that waive future claims. Some insurers offer “partial” payments for obvious damages while still evaluating other damage. The payment comes with a release. If you sign, you might waive rights to claim additional damages discovered later. Review release language carefully or reject partial payments until all damage is assessed.

Missing claim filing deadlines. Policies typically require reporting losses within specific timeframes, often 30 to 60 days. Some policies require written proof of loss submissions within shorter periods. Missing these deadlines can result in complete claim denial, regardless of validity. Report damage immediately and provide required documentation promptly.

Inadequate damage documentation before repairs. Once repairs begin, damage evidence disappears. Photograph and document everything before cleanup or repairs start. You cannot retroactively prove damage that’s already been repaired without documentation.

These pitfalls share a common theme. They result from acting too quickly without adequate preparation, or from trusting that the insurance company will protect your interests. They won’t. Their job is protecting their interests. Your job is protecting yours through informed, documented, persistent negotiation.

Property Damage Claim Negotiation Timelines and Deadlines

AeIpCWS0TJ2oqAiItL_TgQ

Typical claim processing timelines from initial report through settlement payment span weeks to months depending on damage complexity, claim size, and insurer responsiveness. Simple claims with cooperative insurers sometimes settle within three to four weeks. Complex claims with significant damage, coverage disputes, or uncooperative adjusters can take six months or longer. Understanding realistic timelines helps you set appropriate expectations and identify when unreasonable delays justify escalation.

Insurers have legal obligations for timely claim acknowledgment, investigation, and resolution. Most state regulations require acknowledgment within three to ten business days of receiving notice of loss. Investigation should begin promptly, typically within a week of acknowledgment. Adjusters must inspect damage, review documentation, and make coverage determinations within reasonable timeframes. Resolution requirements vary but often mandate final settlement decisions within 30 to 90 days after receiving all necessary documentation and proof of loss. Florida insurers, for instance, must acknowledge, investigate, and resolve claims within 90 days after receiving proof of loss under Florida Statutes Section 627.70131.

When insurers miss these deadlines without legitimate reasons, they violate claim handling regulations. Legitimate reasons for delays include waiting for additional documentation you haven’t provided, ongoing investigations into fraud concerns, or complex coverage questions requiring legal review. Illegitimate delays include adjusters simply not responding, repeated requests for documentation you’ve already submitted, or files sitting dormant without any investigation activity. If your claim stalls beyond reasonable timeframes and you’re following up regularly without progress, escalate to supervisors or file complaints with your state insurance department.

Statute of limitations considerations and policy specific claim filing deadlines create hard stops. Even if you have a valid claim, waiting too long eliminates your right to recover. Most states impose statute of limitations periods ranging from two to six years for breach of contract claims against insurers. These deadlines typically begin running from the date of loss or claim denial. Know your state’s specific limitation period and track deadlines carefully. Some policies also contain shorter claim reporting requirements, provisions requiring you to notify the insurer within 30 or 60 days of discovering damage, separate from the statute of limitations for lawsuits.

Phase Typical Timeline Action Required
Initial claim report Day 0 (Report immediately upon discovering damage) Contact insurer by phone, follow up with written notice, document date and time of report
Adjuster inspection 3 to 10 business days after claim report Schedule inspection, provide access to damaged property, accompany adjuster during inspection, take notes on what they photograph and examine
Insurer valuation 10 to 30 days after inspection Receive written valuation and settlement offer, request detailed breakdown if not provided, review against independent estimates
Negotiation period 2 to 8 weeks depending on complexity Submit counteroffer with documentation, respond to insurer requests for additional information, maintain regular communication, escalate to supervisor if progress stalls
Settlement agreement 1 to 3 days after verbal agreement Review written settlement agreement, verify all terms are accurate, confirm coverage scope and payment details, consult attorney if release language is unclear
Payment processing 7 to 14 business days after signed agreement Confirm payment delivery method, follow up if payment doesn’t arrive within stated timeframe, verify check amount matches agreement

Finalizing Your Property Damage Settlement Agreement

3_QxTImyT6aNL7KZpbikNg

Verbal agreements have no enforcement value. The adjuster might promise a specific payment amount during a phone call, but until that promise exists in writing with signatures, it’s legally meaningless. Insurance companies know this. They sometimes make verbal offers that sound acceptable, then send written agreements with different terms, lower amounts, or additional conditions. Your response should be simple: everything must be documented in writing. No exceptions. Confirm verbal agreements immediately with follow up emails restating the terms and asking for written confirmation.

Essential settlement agreement components protect your interests and create enforceable contracts. Every settlement agreement should include the specific dollar amount being paid, an itemized list of what damages that payment covers, the payment timeline including expected check delivery date, and clear scope limitations explaining what claims are being released. “We’ll pay $67,500 for water damage repairs to the home” is too vague. Better: “We’ll pay $67,500 covering structural repairs ($42,000), flooring replacement ($18,000), drywall and painting ($5,500), and contents replacement ($2,000), with payment delivered via check within 10 business days of executing this agreement.”

When you’re documenting emergency mitigation work and temporary repairs, this documentation becomes part of your final settlement calculation

Final Words

Property damage claim negotiation isn’t about being difficult. It’s about being prepared, organized, and informed enough that adjusters see you’re serious about fair compensation.

Calculate your damages independently. Document everything comprehensively. Never accept the first offer without comparison. Justify your counteroffers with solid evidence.

Insurance companies expect you to negotiate. They respect homeowners who understand the process and bring receipts, contractor estimates, and clear scope documentation to the table.

When you show up organized and persistent, you get better settlements. That’s how property damage claim negotiation works when you treat it like the business transaction it actually is.

FAQ

How do you negotiate property damage?

To negotiate property damage effectively, start by calculating an independent damage valuation before contacting the adjuster, document all damages with photos and professional estimates, never accept the first settlement offer, and prepare evidence-based counteroffers that justify your claim amount without revealing your minimum acceptable settlement.

What is the 80% rule in property insurance?

The 80% rule in property insurance requires homeowners to insure their property for at least 80% of its replacement cost to avoid coinsurance penalties. If you insure below this threshold, you’ll receive reduced claim payments proportional to the coverage shortage, even on partial losses that don’t total the structure.

What is the average settlement for property damage?

Property damage settlements vary widely based on damage extent, policy limits, and valuation methods, making averages unreliable. Your settlement depends on actual repair costs, depreciation calculations, coverage type (Replacement Cost versus Actual Cash Value), and your negotiation effectiveness backed by comprehensive documentation and independent repair estimates.

How do you negotiate a settlement with an insurance claims adjuster?

To negotiate with an insurance claims adjuster, document all damages thoroughly before discussions, obtain independent professional repair estimates, request written justification for low offers, respond with evidence-based counteroffers supported by market pricing, and maintain written records of all communications while being prepared to escalate to supervisors if needed.

What damages can be included in property damage claims?

Property damage claims can include structural repairs, personal property replacement, temporary living expenses during repairs, emergency mitigation services, loss of use costs, professional inspection fees, and related out-of-pocket expenses directly caused by the covered damage event.

What is the difference between Actual Cash Value and Replacement Cost coverage?

Actual Cash Value coverage pays for damages minus depreciation, resulting in lower settlements that account for age and wear, while Replacement Cost coverage pays the full cost to repair or replace damaged property without depreciation deductions, often releasing recoverable depreciation after repairs are completed.

Should you accept the first settlement offer from insurance?

You should not accept the first settlement offer from insurance companies because initial offers are typically intentionally low, expecting rejection and leaving room for negotiation. Insurers anticipate presenting more reasonable second offers after you counter with documented evidence supporting higher valuations.

When should you hire a public adjuster for property damage claims?

You should hire a public adjuster when claim complexity exceeds your expertise, the settlement amount justifies their percentage-based fee (typically 5-15% of settlement), the insurer disputes significant portions of your claim, or you lack time to manage extensive documentation and negotiation processes yourself.

What are bad faith insurance practices during claim negotiations?

Bad faith insurance practices include unreasonable claim delays beyond state-mandated timelines, denying claims without proper investigation, refusing to provide detailed valuation methodology, pressuring quick settlements before full damage assessment, and failing to acknowledge legitimate evidence supporting your claim amount.

How long do you have to file a property damage lawsuit?

The statute of limitations for property damage lawsuits varies by state but typically ranges from two to five years from the damage date or discovery. Missing this deadline permanently bars your ability to sue the insurance company for breach of contract or bad faith practices.

What should final settlement agreements include?

Final settlement agreements should include the specific dollar amount, itemized list of covered damages, payment timeline with expected dates, payment method details, lien holder payment provisions if applicable, scope limitations clearly stated, and confirmation that no future related claims are being waived.

Can you reopen a property damage claim after settlement?

You typically cannot reopen a property damage claim after signing a release agreement unless the settlement specifically preserves rights for supplemental claims or hidden damages discovered later. Release language waiving “all claims” permanently prevents additional recovery, making careful review before signing essential.

Vapor Barrier Installation for Basements: Protect Your Home from Moisture Problems

0

Think a single sheet of plastic can’t stop basement moisture? Think again.
Water vapor moves up through concrete and can ruin drywall, warp baseboards, and leave a musty smell that won’t quit.
A proper vapor barrier, the right thickness, taped seams, and clean installation stop that vapor before it hits your living space.
In this post we’ll show how to choose materials, test the slab so you don’t trap moisture, and seal every seam so your finished floors and walls stay dry and mold-free.

Core Principles of Basement Vapor Barrier Installation

GwyvlBcVRRKeyy3q_Yb3qA

A basement vapor barrier is basically a thick plastic membrane you install on foundation walls and sometimes floors to stop water vapor from creeping up from the ground into your living space. It blocks vapor before it can jack up your indoor humidity, trigger condensation on cold surfaces, or start growing mold inside wall cavities and finished rooms. Common materials include polyethylene plastic sheeting (usually 6 to 20 mil thick), closed-cell spray foam, and specialized vapor-blocking coatings. The effectiveness gets measured in perms, which is just a way to say how much water vapor can sneak through. A real vapor barrier sits at 0.1 perm or lower, meaning almost nothing gets through. A 6-mil polyethylene sheet typically rates around 0.06 perms, so it works well in high moisture environments.

Moisture gets into basements through a few different routes. Water vapor naturally moves from damp soil through porous concrete and block foundations. Poor ventilation traps humid air inside. Warm indoor air rises through your home in what’s called the stack effect, pulling humid basement air upward and dragging fresh moisture in from below. When that warm, humid air hits cold basement walls or floors, condensation forms and soaks into framing, insulation, and drywall. Installing a vapor barrier on the interior side of basement walls stops ground vapor before it reaches your living space. When you install it on floors, it blocks vapor rising through slabs. The barrier creates a physical layer that vapor molecules can’t pass through, unlike porous stuff like untreated concrete or fiberglass insulation.

Proper installation means using the right material thickness and managing seams carefully. Thinner sheeting like 6 mil works fine for basic wall coverage, but floors and high traffic areas need thicker, reinforced products (10 to 20 mil) to resist punctures from sharp stones, framing fasteners, or foot traffic during construction. All seams between sheets must overlap by at least 4 to 6 inches and be sealed completely with specialized vapor barrier tape. Gaps, tears, or loose edges create pathways for vapor to bypass the whole system. Every penetration for plumbing, electrical conduit, or HVAC ducting has to be cut precisely and sealed with tape or compatible sealant to keep a continuous barrier from floor to ceiling.

Types of Basement Vapor Barriers and Material Specifications

J9RrESavTmSzLAhdC4u48Q

Vapor barrier materials get classified by their permeance rating, which determines how much moisture can pass through. Class I materials have a permeance of 0.1 perm or less and they’re considered true vapor barriers. Class II materials range from 0.1 to 1.0 perm and work as semi-permeable vapor retarders. Class III materials allow 1.0 to 10 perms, giving you high breathability but minimal vapor control. For basement work, Class I materials are standard because they fully block vapor migration from ground sources. Polyethylene sheeting dominates the market since it’s cheap, easy to install, and has proven performance.

Walls and floors need different durability levels. Wall installations don’t face much physical stress once studs and drywall are up, so standard 6-mil polyethylene works well. Floors have to handle foot traffic, construction debris, and potential settling or shifting of the slab, so reinforced membranes with woven scrim layers or thicker 15 to 20 mil HDPE are what you want. Reinforced barriers resist tearing and punctures better than single layer plastic, especially in basements where sub-slab gravel, uneven concrete, or protruding aggregate can create pressure points.

6-mil polyethylene sheeting: Lightweight and inexpensive. Perfect for interior basement walls where you won’t have much physical abuse.

10-mil polyethylene: Moderate puncture resistance. Works for most floor applications when you don’t expect heavy construction traffic.

15 to 20 mil reinforced HDPE: Has woven scrim or cross-laminated structure. Recommended for sub-slab or floor installations where you need high durability.

Closed-cell spray foam (2 to 3 inches): Serves as both vapor barrier and insulation. Often used on walls combined with plastic sheeting or as a standalone system where you need insulation.

Step-by-Step Basement Vapor Barrier Installation (Walls and Floors)

wcq8TS_KSU6OuxDTW73X6A

  1. Clear and clean all surfaces. Remove debris, dust, loose mortar, and any flaking paint or efflorescence from walls and floors. Sweep, then vacuum to get rid of fine particles that could puncture the barrier or stop tape from sticking properly.

  2. Inspect and repair foundation cracks and penetrations. Fill hairline cracks in concrete with hydraulic cement or epoxy sealant. Seal gaps around window frames, utility penetrations, and pipe chases so the vapor barrier has a solid surface to anchor against.

  3. Measure walls and floors to calculate material needs. Measure wall height from floor to top plate and total linear footage around the room. Add 10 percent for waste and overlap. For floors, measure length and width and account for a 4 to 6 inch extension up each wall.

  4. Cut and position sheeting with proper overlap. Unroll plastic sheeting and cut to size, leaving extra length at top and bottom edges. Position each sheet so adjacent pieces overlap by at least 4 to 6 inches. On floors, the first sheet should extend up the wall by 4 to 6 inches to tie into the wall barrier.

  5. Anchor wall sheeting every 24 inches. Use a staple gun or mechanical fasteners (plastic cap nails or adhesive-backed buttons) to secure the top edge of each sheet to the rim joist or top of the wall. Work down the sheet, anchoring every 2 feet along vertical seams and mid-sections to keep the material taut and wrinkle-free.

  6. Seal all seams with vapor barrier tape. Apply specialized vapor barrier tape (not general purpose duct tape) over the full length of every seam, from top to bottom. Press firmly for full adhesion. Tape should cover the entire overlap zone.

  7. Cut and seal penetrations for pipes, outlets, and ducts. Use a utility knife to make precise cuts around electrical boxes, plumbing pipes, and HVAC registers. Seal the edges of each cut with vapor barrier tape or compatible sealant to prevent vapor leakage.

  8. Install wall studs, insulation, and finish materials over the barrier. Once the vapor barrier is inspected and verified, frame interior walls over the sheeting. Install insulation between studs if you want, then hang drywall or other finish materials as normal.

Wall vs Floor Installation Details

Wall installations are simpler because gravity and fasteners hold the barrier in place while you work. Anchoring happens at the top edge and at intervals down the wall, with overlaps running vertically and sealed with tape. Floor installations need more care. The barrier has to tie into perimeter drainage systems, such as dimple board panels or French drains, so water that reaches the slab can escape without pooling under the plastic. Floor sheeting doesn’t get fastened down. Instead, it’s laid flat, overlapped at seams, fully taped, and extended up the wall where it meets the wall barrier. Penetrations through floors (like sump pump discharge pipes or floor drains) must be sealed carefully with tape or gasketed collars to keep the barrier continuous without blocking water flow.

Moisture Testing and Verification Before Vapor Barrier Installation

2qSQeSrtS7WoWR97iLuGSA

Before installing a vapor barrier, you need to confirm that the concrete slab or foundation wall is dry enough to accept a sealed membrane. Installing a vapor barrier over wet concrete traps moisture inside the slab, causing efflorescence, spalling, adhesive failure, and mold growth behind finished walls. Moisture meters give surface readings but don’t reveal moisture content deep inside thick concrete. Relative humidity (RH) testing uses probes embedded in drilled holes to measure vapor levels within the slab. Calcium chloride testing places absorbent dishes on the concrete for 60 to 72 hours to measure the rate of moisture vapor emission from the surface. Infrared inspection detects thermal variations that point to hidden dampness or active leaks that must be fixed before barrier installation.

Each test serves a different phase of the project. Surface moisture meters work for quick checks, but RH and calcium chloride tests are required when the slab is new, recently poured, or suspected of retaining curing moisture. If RH readings exceed 80 percent or calcium chloride results show high emission rates, the slab needs additional drying time or mechanical dehumidification before barrier installation. Ignoring these tests means trapped moisture that can spread mold spores throughout your home via the stack effect, where rising air pulls contaminated basement air into upper floors.

Test Method What It Detects When It’s Used
Relative Humidity (RH) Probe Moisture vapor inside slab (percentage of RH) New slabs, suspected moisture retention, pre-flooring installs
Calcium Chloride Test Rate of moisture vapor emission from concrete surface Before adhesive flooring, coating, or vapor barrier installation
Infrared Thermal Imaging Temperature variations indicating hidden moisture or active leaks Suspected foundation leaks, post-storm inspections, hidden damp zones

Integrating Vapor Barriers with Drainage and Sump Systems

8YY-JxhNTP2pDwanVfFmmA

Floor vapor barriers in basements often tie into interior perimeter drainage systems designed to manage hydrostatic pressure and groundwater intrusion. When water vapor barriers are installed over slabs, they can’t obstruct the flow of liquid water that enters through foundation cracks or rises through the slab under pressure. Dimple board panels (also called drainage mats) get installed vertically along the foundation wall, creating a small air gap between the concrete and the vapor barrier. Water that seeps through the foundation runs down the dimple board and into a perimeter French drain or footer drain system, which channels it to a sump pump basin for removal. The vapor barrier sheeting on the floor extends up the wall and tucks into the top edge of the dimple board, creating a sealed transition that stops vapor but allows liquid drainage.

Sump pump integration requires careful detailing around the basin and discharge pipe. The floor vapor barrier gets cut to fit around the sump pit, and the edges are sealed to the basin liner with tape or sealant. If the discharge pipe penetrates the barrier, a gasketed boot or taped collar seals the opening. You’re trying to prevent vapor from rising through the gap while making sure the sump pump can still receive water from the perimeter drain. Improper sealing at the sump pit or dimple board connection can create a vapor bypass, letting ground moisture into the basement even with a barrier in place.

Managing hydrostatic pressure is critical. If exterior drainage is poor and water pressure builds under the slab, no vapor barrier will stop liquid water from finding a path into the basement. Vapor barriers control vapor diffusion, not flooding. Before installing a floor barrier, verify that exterior foundation drains are functional, downspouts discharge away from the house, and grading slopes away from the foundation. If hydrostatic pressure is high, install or repair footer drains and consider exterior waterproofing before relying only on an interior vapor barrier.

Building Code Requirements and Compliance for Basement Vapor Barriers

M7lJd-dtTjKr-0wXIhVTOA

Local building codes dictate whether a vapor barrier is required in basement construction, what materials are acceptable, and where the barrier must be installed. Some jurisdictions require Class I vapor barriers on basement walls and floors in new construction or major remodeling projects. Others specify minimum thickness (commonly 6 mil for walls, 10 mil for floors) and may require flame spread ratings for materials used in habitable spaces. Inspectors check installations for proper overlap, seam sealing, fastening intervals, and integration with drainage systems.

Permit requirements vary. In some areas, installing a vapor barrier as part of finishing a basement requires a building permit and inspection sign off before walls can be closed. Other regions treat vapor barriers as routine work not requiring permits unless tied to structural changes or mechanical systems. Verify local code and permit requirements before starting the project, especially if you plan to convert basement space into living areas. Failing inspection can require tearing out finished walls to correct barrier defects.

Seam overlap and tape verification: Inspectors measure overlap width and confirm that all seams are fully taped with approved vapor barrier tape.

Fastening intervals and material anchoring: Wall barriers must be fastened at specified intervals (commonly every 2 feet) to prevent sagging or gaps.

Permeance rating and material certification: Installed materials must meet local permeance standards (typically 0.1 perm or lower) and be labeled or certified by the manufacturer.

Vapor Barriers and Basement Insulation Compatibility

b2p7blP9SAyiMdf-UIOahw

Installing insulation over or against a vapor barrier requires understanding the vapor profile of the entire wall assembly. Closed-cell spray foam insulation has a permeance rating low enough to act as both thermal insulation and a vapor barrier. When sprayed directly on foundation walls at 2 to 3 inches thickness, it eliminates the need for separate plastic sheeting. Rigid foam board insulation (such as extruded polystyrene or polyisocyanurate) can also serve as a vapor retarder when installed against the foundation, but only if joints are taped and edges are sealed. Combining an interior vapor barrier with the wrong type of insulation can trap moisture between layers, causing condensation, mold, and rot inside wall cavities.

Fiberglass batt insulation is vapor permeable and should never be installed directly against a foundation wall without a vapor barrier on the warm (interior) side. If you install plastic sheeting on the wall first, then frame studs and fill cavities with fiberglass, the plastic must be on the interior face (the warm side in winter) to prevent warm, moist indoor air from reaching the cold foundation and condensing. Placing the vapor barrier on the wrong side of the insulation reverses the intended moisture control and can make condensation problems worse.

Thermal bridging happens when metal studs or uninsulated framing members create paths for heat loss through the wall assembly. To minimize thermal bridging and maintain vapor control, install rigid foam board directly against the foundation, then frame interior walls with wood or metal studs over the foam. The foam board acts as a continuous insulation layer and, if joints are sealed, provides vapor control. A second layer of plastic sheeting is often unnecessary if the foam board meets local vapor barrier requirements and is installed correctly.

Cost Estimates, Material Comparisons, and Labor Considerations

CChIRe-DQkqrw4rEqeTITw

Material costs for basement vapor barriers depend on thickness, area, and reinforcement. Basic 6-mil polyethylene sheeting costs roughly $0.10 to $0.20 per square foot, making it the most economical choice for wall installations. Thicker 10-mil sheeting runs $0.20 to $0.30 per square foot, and reinforced 15 to 20 mil HDPE membranes range from $0.40 to $0.70 per square foot. Vapor barrier tape, fasteners, and sealant add another $0.05 to $0.10 per square foot. A typical 1,000 square foot basement wall installation might require 1,200 square feet of material (accounting for overlap and waste), resulting in material costs of $120 to $360 depending on product choice.

Labor costs for professional installation vary by complexity. Simple wall barrier installations in open, unobstructed basements may cost $1.00 to $1.50 per square foot for labor, while complex jobs with many penetrations, tight corners, or drainage integration can reach $2.00 to $3.00 per square foot. Professional installers bring experience with seam sealing, penetration detailing, and drainage tie-in, and most offer warranties covering installation defects. Errors in DIY installations (missed seams, improper drainage connections, or punctured sheeting) are costly to fix once walls are framed and finished, because repairs require removing drywall and studs.

DIY advantages: Lower cost, flexible scheduling, control over material quality and installation pace.

Professional advantages: Warranty coverage, correct drainage integration, faster completion, and reduced risk of installation errors that require expensive wall removal later.

Complexity factors: Many plumbing and electrical penetrations, sump pump and drain tie-in, code compliance verification, and time constraints favor professional installation.

Common Vapor Barrier Installation Mistakes and How to Avoid Them

JlXafILhT-CzHngxaR9ljA

Installing a vapor barrier over undetected moisture or active mold traps the problem and makes it worse. Water vapor and mold spores continue to pile up behind the barrier, degrading indoor air quality and structural materials. Before installation, inspect the foundation for wet spots, efflorescence, musty odors, and visible mold. Use a moisture meter to confirm walls and floors are dry. If moisture is present, identify and fix the source (exterior grading, gutter downspouts, foundation cracks, or high groundwater) before sealing the space. If mold is found, complete mold remediation and verify clearance before installing the barrier.

Insufficient seam overlap or missing tape: Seams must overlap by at least 4 to 6 inches and be sealed from top to bottom with vapor barrier tape, not duct tape or painter’s tape.

Unsealed penetrations around pipes and outlets: Every hole cut for electrical boxes, plumbing pipes, or HVAC ducts must be sealed with tape or sealant to prevent vapor bypass.

Installing barriers over wet concrete: Trapping moisture under plastic sheeting causes efflorescence, spalling, and mold inside wall cavities.

Improper drainage integration: Floor barriers that block water flow to sump pumps or perimeter drains create standing water under the plastic, defeating the system.

Using the wrong material for the application: Lightweight 6-mil sheeting on floors tears under construction traffic. Use reinforced or thicker membranes where durability is critical.

Preventing these mistakes requires careful planning, proper material selection, and verification at each step. Measure twice and cut once to minimize waste and make sure you get clean, precise cuts around penetrations. Inspect seams and tape joints before covering them with framing and insulation. Test drainage flow by pouring water near perimeter drains and confirming it reaches the sump basin without pooling under the barrier. If you’re unsure about drainage integration, moisture testing, or code compliance, hire a professional to verify the design before you commit to finishing the space.

Final Words

You’ve seen what a good vapor barrier does, which materials meet the perm target, and why thickness and taped overlaps matter. We walked through testing, wall and floor steps, drainage tie-ins, insulation choices, common mistakes, and code checks.

Next, confirm moisture tests, plan how the barrier ties to your drain or sump, and seal every penetration. No guesswork. Measure and document.

If you follow these steps, your basement will stay drier and healthier. For reliable results, consider professional help for vapor barrier installation for basements.

FAQ

Q: Where should the vapor barrier be installed in a basement?

A: A vapor barrier should be installed on basement walls and, when used on floors, extend 4–6 inches up the wall. Place it against concrete, tape seams, and tie floor barriers into drainage or sump systems.

Q: Should you put a vapor barrier on basement walls?

A: You should put a vapor barrier on basement walls when blocking ground moisture; install Class I material (low permeance) against the concrete and seal seams to prevent vapor migration.

Q: Will mold grow under a vapor barrier in the basement?

A: Mold can grow under a vapor barrier if moisture or existing mold is trapped; proper moisture testing, complete drying, sealed seams, and fixing leaks first prevent hidden growth.

Q: How much does it cost to install a vapor barrier in a basement?

A: The cost to install a vapor barrier in a basement depends on square footage, material thickness, drainage tie-ins, and labor; DIY material costs are low, while professional installs with repairs run higher. Get local estimates.

Bathroom Rebuild After Water Damage: Complete Recovery Steps

0

Think a little leak won’t wreck your bathroom? Think again.
Water soaks drywall, subfloor, and framing fast, and mold can start in 24 to 48 hours.
This post gives clear, step-by-step actions you need right now: stop the leak, make the area safe, document the damage, remove wet materials, dry with the right equipment, and rebuild with inspection-ready repairs.
No guesswork.
We explain how to confirm dryness with a moisture meter, prevent hidden mold, and work with your insurer so the repair is complete and permanent.

Immediate Actions After Discovering Bathroom Water Damage

lOdCHIjPTxSFmfr4jQf8Dw

Water spreads fast. A cracked supply line or leaking toilet flange can push hundreds of gallons through drywall, into subfloors, and down to joists in less than a day. Within 24 to 48 hours, that moisture creates conditions where mold starts colonizing and wood begins warping. The first hours determine whether you’re dealing with a controlled repair or a full gut.

Safety comes first. Standing water near outlets or light fixtures creates shock hazards, and weakened floors can fail under weight. Before you wade in, shut down power to the bathroom circuit at the breaker panel and stop the water source.

Here’s the sequence:

  1. Stop the water flow. Close the bathroom shutoff valve or the main water supply if the leak source isn’t clear.
  2. Shut off power. Flip the breaker for the bathroom to eliminate shock risk, especially if water’s near outlets or fixtures.
  3. Document everything. Take photos and videos with timestamps showing water location, depth, and affected surfaces before you move anything.
  4. Remove standing water. Use a wet vac, mop, or towels. Every gallon you extract now is moisture that won’t soak deeper.
  5. Increase ventilation. Open windows, run exhaust fans (if safe), and set up box fans to push humid air out.
  6. Call your insurance company. Report the claim immediately so an adjuster can schedule a visit and you can start the documentation trail.

Assessing the Extent of Damage

UhkfJQIaTjy7EYcVH4Gozw

What you see on the floor or wall is rarely the full story. Water migrates through grout lines, under baseboards, into wall cavities, and between subfloor layers. A wet spot on the ceiling below the bathroom means the floor structure is soaked. Bubbling paint or soft drywall two feet from the visible stain means saturation spread farther than it looks.

Use your hands and your eyes. Press on drywall near the damage. If it feels spongy or your finger dents the surface, the gypsum core is compromised. Step on the floor near the toilet or tub. If it feels soft or flexes more than usual, the subfloor has absorbed water and may be delaminating. Pull up a corner of vinyl or check under the edge of the vanity to see if the underlayment is swollen or dark.

Look for these signs of deeper structural issues:

  • Drywall that crumbles when you press it or has visible mold spots beyond the wet zone
  • Subfloor that feels spongy, shows dark staining, or has a musty smell when you lift flooring
  • Baseboards or trim that have pulled away from the wall or show waterlines above the floor level
  • Ceiling stains, sagging, or cracking in the room below the bathroom
  • Grout that has loosened, tiles that rock when stepped on, or caulk that has separated and allowed water behind the tub surround

A moisture meter takes the guesswork out. Readings above 15 to 20 percent in wood framing or subfloor mean those materials need to come out or be dried aggressively before you close anything back up.

Safe Removal of Damaged Materials

igG2F1RMR0Ko5JEu-GwOZA

Once you know what’s wet, you have to pull it out. Leaving damp drywall or soggy insulation in place just delays mold growth. It doesn’t stop it. The goal is to expose structural framing and subfloor so air can reach every surface and drying equipment can do its job.

Start with the finishes. Cut drywall at least 12 inches above any visible stain or moisture line. Water wicks upward inside the paper facing even when the surface looks dry. If the baseboard is wet or warped, pull it off so you can check the bottom plate of the wall and the edge of the subfloor. Peel up vinyl, tile, or laminate flooring in the affected area. If the flooring is glued down and the subfloor underneath is compromised, you’ll often take both up together to avoid breaking through weakened plywood.

Pull any insulation that got wet. Fiberglass and cellulose insulation lose R-value and hold moisture against framing, which accelerates rot. Bag it and get it out of the house.

The demolition sequence usually goes like this:

  1. Remove baseboards, trim, and transition strips to expose wall bases and floor edges.
  2. Cut and pull damaged drywall, extending cuts into dry zones to confirm the moisture boundary.
  3. Pull out wet insulation from walls and floors (if accessible from below or through openings).
  4. Lift flooring and underlayment. If the subfloor is swollen or soft, cut out damaged sections and expose the joists underneath.

Contain the dust. Seal doorways with plastic sheeting and tape, and run a box fan in a window to create negative pressure so dust and airborne spores don’t spread to the rest of the house.

Drying and Dehumidification Requirements

NFxbdV0mQFyMqqsP_M6TBw

Drying is not passive. Leaving a bathroom open with a household fan running will take weeks and often won’t reach the moisture levels you need before framing starts to rot or mold takes hold. You need forced air movement across all wet surfaces and a way to pull moisture out of the air continuously.

Set up axial air movers. Two to four units depending on room size, aimed at walls, subfloor, and any exposed framing. These fans push large volumes of air across damp materials, which pulls moisture to the surface where it evaporates into the room air. At the same time, run a commercial dehumidifier rated for at least 30 to 50 pints per day. The dehumidifier captures that moisture from the air and keeps relative humidity below 50 percent so evaporation can continue.

Leave the equipment running 24 hours a day. Most bathrooms dry in three to seven days if the demo was thorough and the equipment is sized correctly. Check progress daily with a moisture meter. Wood framing should drop below 12 to 15 percent moisture content, and concrete or masonry surfaces should read dry to the touch and show no cool spots when you press your hand against them.

Don’t rush it. Closing up walls or laying new flooring over materials that still read wet just traps that moisture inside, where it will cause the exact problems you’re trying to avoid. If readings aren’t dropping after 48 hours, you may have missed a wet zone or need more airflow in a concealed cavity.

Preventing and Treating Mold Growth

xhakgVdsTx6VQzdKCpPFZA

Mold needs moisture, organic material, and time. In a wet bathroom, it has all three. Drywall, wood framing, and insulation are food sources, and if those materials stay damp for more than 24 to 48 hours, spores that are already present in every home will start to colonize.

If you see mold growth (black, green, or white patches on framing, drywall, or subfloor), don’t just wipe it off. Surface cleaning leaves roots in porous materials, and growth resumes as soon as conditions allow. Pull out and bag any material with visible mold. Studs and joists that show surface mold but are structurally sound can be scrubbed with a HEPA vacuum and treated with an antimicrobial cleaner, but if the growth is deep or widespread, those members may need replacing.

Run a HEPA air scrubber during demo and drying if mold is present. The scrubber filters airborne spores and reduces cross-contamination to other rooms. Keep the bathroom sealed with plastic sheeting and negative air pressure so spores don’t migrate through doorways or HVAC returns.

Prevention is straightforward. Get the space dry within 48 hours, remove all porous materials that got soaked, and confirm with a moisture meter that framing and subfloor are below 15 percent before you rebuild. If you’re uncertain about the extent of mold or if anyone in the house has respiratory sensitivities, bring in a mold inspector to take samples and give you a clear scope before you start cutting.

Planning the Bathroom Rebuild

dwwQwaBqRUG-4y8WELv5pA

Before you buy a single sheet of drywall or schedule a plumber, confirm the space is bone dry and the systems that caused the damage are fixed. Running new tile over a subfloor that still reads 18 percent moisture or closing walls before you’ve verified the leaking valve is replaced just sets up a second round of the same problem.

Walk the framing with a moisture meter one more time. Check studs, joists, and subfloor in multiple spots, especially in corners and near old leak points. If readings are good, inspect the plumbing. Look for corrosion on supply lines, cracks in drain fittings, and any flex or movement in connections when you wiggle pipes. If the original failure was a slow leak behind the wall, you may find other weak points that need attention now while everything is open.

Rebuild plans should include any code-required upgrades. If your bathroom was built decades ago, current code may require GFCI outlets, an exhaust fan vented to the exterior, and waterproof backer board in wet zones. Permitting requirements vary, but structural repairs, plumbing changes, and electrical work typically need permits and inspections. Your contractor should handle that, or if you’re doing the work yourself, check with your local building department before you start closing walls.

Rebuilding Structural Components

dkeHb8K8RsG4rRbu3_rjxw

The subfloor goes in first. Use 3/4 inch tongue and groove exterior grade plywood or oriented strand board (where allowed by local code). Fasten it to joists with screws every 6 inches along edges and every 8 inches in the field. If you’re replacing only a section, make sure your cuts land on joist centers so you have solid bearing and the seam doesn’t telegraph through the finish floor.

Walls in wet zones (around tubs, showers, and behind sinks) get cement backer board, not drywall. Backer board won’t dissolve or support mold growth if it gets wet again. Standard thickness is 1/2 inch for walls. Fasten it to studs with backer board screws every 8 inches and leave a 1/8 inch gap at all panel edges and a 1/4 inch gap where panels meet the tub or shower base. Those gaps get filled with thin set, not caulk.

In areas outside the direct splash zone, you can use mold resistant drywall (often called green board or purple board). It’s not waterproof, but it resists moisture better than standard paper faced drywall and costs only slightly more.

Key structural materials and their roles:

  • 3/4 inch plywood subfloor provides a stable, flat base for tile, vinyl, or other finish flooring. Must be fully dry before installation.
  • 1/2 inch cement backer board required behind tile in showers and tub surrounds. Will not degrade when exposed to water.
  • Waterproof membrane (liquid or sheet) applied over backer board seams and screw heads before tile. Creates a continuous barrier against water penetration.
  • Mold resistant drywall used on walls and ceilings outside wet zones. Paper facing is treated to resist mold growth during occasional moisture exposure.

Restoring Plumbing, Electrical, and Ventilation Systems

dZb0c5u0T5-vqgxrpVQL8g

With walls open, this is the time to replace any plumbing that looks marginal. Corroded galvanized pipes, old gate valves that won’t close fully, and plastic drain fittings with hairline cracks should all be swapped out. If the original leak was at a shutoff valve or a supply line, replace both. Run a pressure test on the supply system and a fill test on drains before you close anything up.

Electrical circuits exposed to water need a full inspection. Look for corrosion on wire connections, discolored insulation, or any sign of arcing. Bathrooms require GFCI protection on all receptacles and any circuits near water sources. If your existing outlets aren’t GFCI, upgrade them now. Test GFCI function with the test button after installation. If it doesn’t trip immediately, replace the device.

Ventilation prevents the next moisture problem. Install or upgrade the exhaust fan to move at least 50 CFM for bathrooms under 100 square feet, or follow the manufacturer’s spec for larger spaces. The fan must vent to the exterior through rigid or flex duct, not into the attic or a soffit. Seal all duct joints with foil tape (not cloth duct tape) and insulate the duct run if it passes through unconditioned space to prevent condensation inside the duct.

Installing New Finishes and Fixtures

EQxWViHXS22lMj7rggGH_g

Once rough in inspections are complete and walls are closed, you can start finish work. Tile installation begins with a waterproof membrane over the backer board. Liquid membranes go on with a roller or trowel and cure in 24 to 48 hours. Sheet membranes are adhered with thin set and provide immediate coverage. Either system works. Just follow the manufacturer’s instructions on coverage and overlap.

Set tile in thin set mortar, keeping grout joints consistent. After the mortar cures (typically 24 hours), grout the joints and let that cure for another 24 to 48 hours before sealing. Seal grout in wet areas to reduce water absorption, and caulk (don’t grout) any joint where tile meets a tub, shower pan, or change of plane.

Flooring options after water damage often shift toward waterproof or water resistant products:

  • Ceramic or porcelain tile is fully waterproof when installed over proper substrate and waterproof membrane. Grout joints should be sealed.
  • Luxury vinyl plank with waterproof core is popular after water events. No grout, easy to clean, and handles occasional standing water without damage.
  • Sheet vinyl is budget friendly and water resistant. Seams are the weak point, so fewer seams are better.
  • Natural stone tile is durable and water resistant, but requires sealing and more maintenance than porcelain.
  • Engineered wood or laminate generally not recommended in full bathrooms due to moisture sensitivity, even with water resistant coatings.

Install the vanity, toilet, and fixtures last. Set the toilet on a new wax ring or modern foam gasket, and torque the bolts evenly to avoid cracking the base. Connect supply lines with braided stainless flex hoses, and check for leaks under pressure before you walk away.

Costs, Timelines, and Insurance Considerations

4P_sR0DbQJC_BeaxIM-bUA

A bathroom rebuild after water damage typically costs between $8,000 and $25,000, depending on the size of the room, the extent of structural repairs, and the quality of finishes you choose. If joists or subfloor need replacing, or if mold remediation is required, expect costs toward the higher end. A simple drywall patch, new flooring, and fixture reset might land closer to $3,000 to $6,000.

Timelines run two to six weeks for most projects. The first week is mitigation and drying. Week two covers demo, rough in, and inspections. Weeks three through five handle drywall, tile, and finish work. Delays happen when parts are back ordered, permits take longer than expected, or hidden damage appears once walls are open.

Insurance coverage depends on the cause. Sudden failures (burst pipes, supply line breaks, overflows) are usually covered under standard homeowner policies. Slow leaks from deferred maintenance, worn out wax rings, or neglected caulking are often excluded. File your claim as soon as you discover damage, and keep every receipt, photo, and contractor estimate. Adjusters may take days to weeks to schedule a visit, and claim payouts can be delayed further if the event affected a large area.

Cost Category Typical Price Range Notes
Emergency water extraction and drying $300–$2,500 Depends on volume of water and equipment run time (3–7 days typical)
Mold remediation (limited area) $500–$3,000 Small patches on framing; extensive remediation can exceed $5,000
Demolition, subfloor replacement, and rough in repairs $2,000–$8,000 Includes labor, materials, and waste removal; structural work adds cost
Finish work (drywall, tile, fixtures, painting) $5,000–$15,000 Mid range materials; luxury finishes or layout changes increase total

Final Words

Shut off the water and power, then take photos and moisture readings so you have a clear record. Do this first to stop more damage.

This post walked you through quick steps, how to check behind surfaces, safe removal, drying and mold control, and then planning the rebuild—plumbing, electrical, and finishes—plus what insurers expect.

We’ll get the house stable and then rebuild right. A careful bathroom rebuild after water damage brings your space back safe, dry, and ready to use.

FAQ

Q: How much does it cost to remodel a bathroom with water damage?

A: The cost to remodel a bathroom with water damage typically ranges $6,000-$25,000 depending on severity, hidden repairs, and plumbing or subfloor replacement; insurance may cover sudden events if well documented with photos and moisture readings.

Q: How to tell if water damage is permanent?

A: To tell if water damage is permanent, look for crumbling drywall, swollen subfloors, persistent musty odors or visible mold, and confirm with moisture meter readings or a professional inspection before planning repairs.

Q: Can you renovate a bathroom for $10,000 or $5,000?

A: Renovating a bathroom for $5,000 or $10,000 is possible; $5,000 usually covers basic cosmetic updates, while $10,000 can fund a modest rebuild if no major hidden water or structural repairs are required.

Black Mold Removal with Bleach: Safe Steps and Limitations

0

You’ve probably heard bleach kills black mold, and technically, that’s true on the right surfaces. But here’s what most homeowners don’t realize: bleach only works on hard, non-porous materials like tile and glass. On drywall, wood, or carpet, bleach actually makes the problem worse by feeding mold roots with water while only lightening the surface stain. We’ll walk you through when bleach works, how to use it safely with proper protection and ventilation, and when to stop and call a professional instead.

Bleach for Black Mold Removal: Effectiveness and Safe Usage Overview

mlPkNQJyQi6c7WF72Ez-bg

Yes, bleach kills black mold on non-porous surfaces when you dilute it properly and apply it right. The EPA recognizes bleach as the only registered product proven to kill mold, so it’s a legitimate option for hard surfaces like tiles, glass, bathtubs, sinks, metal, plastics, and varnished wood. Mix ⅓ to 1 cup of household bleach per gallon of water to get the proper dilution ratio (1500 ppm available chlorine solution). This concentration breaks down mold cell structure on contact when the surface stays wet for the required time.

Bleach fails completely on porous materials like drywall, unfinished wood, carpet, and fabric because chlorine can’t penetrate beneath the surface where mold roots spread. On these materials, bleach only lightens surface stains while the water content in the solution actually feeds deeper mold growth. Safe bleach application requires full protective gear: N95 respirator, safety goggles, rubber gloves, and proper ventilation with open windows and running exhaust fans. The CDC emphasizes complete personal protection when handling bleach due to respiratory hazards and skin contact risks.

Call a professional mold remediation company if mold covers more than 10 square feet of surface area (roughly a 3×3 foot section), appears in your HVAC system, or follows major water damage or flooding. Professionals have containment equipment and can identify underlying moisture sources that cause recurring mold problems.

How Bleach Eliminates Mold and Its Surface Limitations

i3-TQYfDSoCn-X07HKncTg

Sodium hypochlorite in bleach breaks down mold cell walls on contact, destroying the organism at a cellular level on hard surfaces. This chemical process makes bleach effective as a surface disinfectant when mold hasn’t penetrated beneath the material. The EPA registration confirms bleach kills mold successfully when applied to non-porous materials where roots can’t establish deep into the substrate.

Non-porous surfaces where bleach works include ceramic tiles, glass shower doors, porcelain bathtubs and sinks, metal fixtures, hard plastics, sealed concrete, and varnished wood surfaces.

The critical limitation appears on porous building materials. Household bleach contains approximately 90 percent water mixed with 10 percent sodium hypochlorite. When you spray or wipe bleach onto drywall, unfinished wood, or carpet, the chlorine evaporates quickly from the surface while the water component absorbs deep into the material. This water penetration feeds mold roots that have spread into the porous substrate searching for nutrients and moisture.

On drywall and wood, bleach lightens or removes visible black staining but leaves the living root system intact beneath the surface. Mold regrows within days or weeks because you’ve only addressed cosmetic appearance, not the actual organism.

OSHA doesn’t recommend bleach for routine mold treatment, and the EPA advises against it due to health risks and material damage concerns. Bleach’s corrosive properties permanently weaken wood fibers and corrode metal surfaces over time. The surface level treatment creates a false sense that you’ve solved the problem when deeper contamination continues spreading unseen.

Materials where bleach should never be used:

  • Drywall and sheetrock (mold roots penetrate deep into gypsum)
  • Unfinished or unsealed wood surfaces (porous grain structure absorbs water)
  • Carpet and fabric materials (fibers trap moisture and mold throughout)
  • Ceiling tiles (porous composition allows root penetration)
  • Insulation materials (impossible to reach embedded mold)
  • Any water damaged building materials where mold has grown for more than 48 hours

Essential Safety Precautions When Using Bleach for Mold

ExULH3PCR5u3HgVR7ym80A

Bleach exposure causes respiratory problems, skin irritation, chemical burns, and eye damage. The fumes alone irritate lung tissue and nasal passages, especially in enclosed spaces without proper ventilation.

Chlorine bleach in gaseous form produces dioxin, a recognized cancer causing compound. Chlorine gas exposure creates a burning sensation on skin, in eyes and nostrils, and directly affects lung function.

Required safety equipment and precautions:

  • Rubber gloves (chemical resistant, not latex)
  • Safety goggles (sealed eye protection, not regular glasses)
  • N95 respirator or face mask (filters airborne particles and fumes)
  • Open windows and doors in the work area
  • Exhaust fans running continuously during application
  • Avoid all skin contact with bleach solution
  • Never mix bleach with any other cleaning product
  • Work only in well ventilated spaces with active air circulation

Never mix bleach with ammonia, vinegar, acids, drain cleaners, or any other household cleaning product. This combination produces toxic chlorine gas that can be fatal in enclosed spaces. Mixing chlorine bleach with ammonia based cleaners creates an immediate chemical reaction releasing gas that causes severe respiratory distress, lung damage, and death in high concentrations. Even small amounts of chlorine gas in a bathroom or basement can overwhelm you quickly because the fumes are heavier than air and concentrate at breathing level.

Complete Step by Step Process for Black Mold Removal with Bleach

syAtkYxmQueCf5d4XOCFCQ

Following the proper sequence with correct dilution ratios ensures effective mold killing on appropriate surfaces and reduces safety risks during application.

Prepare the Work Area

Open all windows in the room and turn on exhaust fans to create continuous air circulation. Put on your N95 respirator first, then safety goggles, then rubber gloves before handling any bleach. Move furniture, decorations, and other items away from the moldy surface. Cover floors with plastic sheeting or old towels if you’re working on walls or ceilings to catch drips. Check that your ventilation is actually moving air out of the space, not just circulating it around the room.

Pre-Clean the Moldy Surface

Wipe away loose mold and surface debris with a damp cloth before applying bleach solution. This pre-cleaning removes the bulk of visible growth so the bleach can reach the actual surface underneath. Test your bleach solution on a small inconspicuous area first, especially on colored tiles, painted surfaces, or any material you’re uncertain about. Wait five minutes to check for discoloration, surface damage, or unwanted bleaching effects before treating the entire moldy area.

Mix the Bleach Solution Correctly

Pour one gallon of cool water into a large bucket. Measure ⅓ to 1 cup of fresh household bleach (not old bleach that’s been sitting in your garage for years) using a measuring cup. Add the bleach to the water, never water to bleach, to prevent splashing concentrated bleach. Stir gently with a long handled spoon. Mix this solution fresh each time you treat mold because bleach degrades quickly when diluted with water, losing effectiveness within hours. Pour the solution into a clean spray bottle or prepare a sponge for application, depending on the surface size and location.

Apply Solution and Maintain Contact Time

Spray or wipe the bleach solution generously across all visible mold stains until the surface is completely wet. The surface must stay wet for 10 full minutes to kill mold effectively. If the solution dries or runs off before 10 minutes pass, reapply immediately to maintain contact. Use a scrub brush on stubborn mold stains, applying firm pressure while the surface is still wet with bleach solution. For ceiling mold, apply carefully to avoid excessive dripping, and wear eye protection positioned correctly because solution will run down your arms.

Rinse and Dry Thoroughly

After the 10 minute contact time, rinse the treated area with clean water using a fresh cloth or sponge. Wipe down the entire surface to remove bleach residue, which can damage materials if left to sit. Allow complete air circulation for thorough drying. Open windows and keep exhaust fans running for at least an hour after treatment. Optionally, position a regular fan (not pointed directly at the treated surface) to speed drying time. Check the area the next day to confirm the surface dried completely and no moisture remains.

Health Risks of Black Mold Exposure and Toxic Mold Concerns

ytSwt_LUTqW6zmIPH2PrBA

Black mold releases microscopic spores into your home’s air, compromising indoor air quality and triggering respiratory problems and allergic reactions in occupants. These airborne spores circulate through rooms, settle on furniture and clothing, and get inhaled during normal breathing.

Common health symptoms from black mold exposure include persistent coughing, wheezing, nasal congestion, eye irritation and redness, skin rashes and irritation, headaches, and fatigue. Individuals with existing asthma, allergies, or compromised immune systems experience more severe reactions, including asthma attacks, chronic sinus infections, and prolonged respiratory distress. Young children and elderly family members face higher risk from mold exposure because their immune systems are more vulnerable. Water damage situations that led to mold growth require professional assessment to determine the full extent of contamination and prevent ongoing health impacts.

Even dead mold continues producing toxic spores after you’ve killed it with bleach. This means surface treatment that only lightens the color without complete removal still leaves health hazards in place. Complete mold removal, not just cosmetic color change, protects your family’s health and indoor air quality.

Alternative Solutions to Bleach for Mold Removal

njbVODroQ426P7OvfZYjNw

While bleach remains the only EPA registered mold killer, several household alternatives offer different effectiveness profiles and improved safety characteristics for users concerned about bleach hazards.

Alternative Solution Application Method Best For Limitations
White Vinegar Spray undiluted, wait 1 hour, wipe clean Porous surfaces, routine cleaning Not EPA proven, damages natural stone
Hydrogen Peroxide (3%) Spray on surface, wait 10 minutes, scrub and wipe Fabrics, porous materials, colored surfaces May bleach some materials, test first
Baking Soda Paste Mix with water, apply paste, scrub, rinse after 10 minutes Gentle cleaning, deodorizing, safe for most surfaces Less effective on heavy growth, requires elbow grease
Commercial Mold Cleaners Follow product instructions for dilution and contact time Specific formulations for different surfaces More expensive, varying effectiveness, check ingredients

White vinegar destroys 82 species of mold and doesn’t emit toxic fumes during application, making it a safer choice for extended cleaning sessions or when working in spaces with limited ventilation. Vinegar works better than bleach on porous surfaces because its mild acidity penetrates slightly into materials without the moisture problems bleach creates. However, vinegar lacks EPA testing and proven effectiveness standards that bleach meets. Never use vinegar on granite countertops, marble surfaces, or other natural stone because the acid etches and permanently damages these materials.

When to Call Professional Mold Remediation Instead of DIY

7nw5fZYWSuqosPSZQaZCbg

The EPA and industry standards establish 10 square feet as the threshold where mold contamination requires professional remediation rather than DIY treatment. This measurement roughly equals a 3 foot by 3 foot section of wall or ceiling. Mold covering larger areas indicates deeper moisture problems, extensive contamination, and risks of cross contamination during amateur removal attempts.

Professional mold remediation includes comprehensive mold testing to identify species and spore counts, proper containment using plastic barriers and negative air pressure to prevent spores spreading to clean areas, determining the full extent of growth including hidden mold behind walls, identifying and repairing the moisture sources causing growth, complete removal using appropriate techniques for each material type, and final air quality testing to confirm safe spore levels. Professionals understand how mold spreads through building cavities and HVAC systems, allowing them to address problems homeowners can’t see or reach. Fire and smoke damage restoration professionals use similar containment and assessment methods to evaluate damage extent and implement proper removal protocols.

Situations requiring professional help:

  • Mold covering more than 10 square feet of any surface
  • Mold growth inside HVAC systems or ductwork
  • Mold appearing after major water damage, flooding, or sewage backup
  • Recurring mold growth that returns after DIY treatment
  • Mold on structural materials like floor joists, studs, or roof decking
  • Health symptoms worsening despite surface cleaning efforts
  • Uncertainty about mold type, whether it’s toxic, or full extent of infestation

Professionals prevent spore spreading through proper containment techniques and controlled removal methods. DIY attempts often make contamination worse by disturbing mold colonies without containment, releasing thousands of spores that settle in previously clean areas throughout your home. Never place a running fan in front of moldy surfaces because it blows spores into unaffected rooms, spreading the problem exponentially.

Preventing Black Mold Regrowth After Bleach Treatment

TMubsLezSiqZzaZpT1WDow

Bleach treatment provides only temporary cosmetic results unless you identify and eliminate the moisture source feeding mold growth in that location.

Prevention strategies:

  • Fix all leaks immediately in pipes, roofs, windows, and plumbing fixtures
  • Use dehumidifiers in damp areas to maintain humidity levels below 50 percent
  • Run exhaust fans during showers and cooking, then for 20 minutes after
  • Improve ventilation in bathrooms, kitchens, basements, and crawl spaces
  • Wipe down wet surfaces promptly after showers or condensation appears
  • Repair water damage within 24 to 48 hours to prevent mold establishment
  • Inspect walls, ceilings, and corners regularly for condensation or damp spots
  • Ensure proper drainage around your foundation directs water away from the house
  • Clean and maintain gutters so water doesn’t overflow near walls

Mold requires moisture to grow and survive. Controlling indoor humidity levels and addressing water damage quickly are the only long term solutions that prevent regrowth after any surface treatment method. If mold keeps returning to the same spot after bleach treatment, the underlying moisture problem remains unfixed. Check for hidden leaks inside walls, condensation from temperature differences, poor ventilation trapping humid air, or exterior water penetration through foundation cracks or damaged roofing. Surface treatment without moisture control wastes time and money while mold continues spreading behind the scenes.

Final Words

Bleach works for black mold removal on hard surfaces like tiles and tubs when mixed correctly and used safely.

But it fails on porous materials where mold roots penetrate deep.

The real key isn’t just killing visible mold. It’s fixing the moisture source that caused it and knowing when the job is too big for DIY treatment.

If you’re dealing with mold larger than 10 square feet, recurring growth, or damage inside walls, call professionals who can test, contain, and restore your home properly.

FAQ

Does bleach kill black mold permanently?

Bleach kills black mold on hard, non-porous surfaces like tiles and glass, but it does not permanently eliminate mold on porous materials like drywall or wood. On porous surfaces, bleach only removes surface stains while the water content feeds mold roots beneath, causing regrowth within days or weeks.

When should I call a professional instead of using bleach on mold?

You should call a professional mold remediation company when mold covers more than 10 square feet, appears in HVAC systems, or follows major water damage. Professionals use proper containment, determine mold type, identify moisture sources, and restore air quality without spreading spores throughout your home.

What safety gear do I need when using bleach for mold removal?

Safety gear for using bleach on mold includes an N95 respirator, safety goggles, and rubber gloves. Work with windows open and exhaust fans running for ventilation. Never mix bleach with ammonia or other cleaners, as this creates toxic chlorine gas that can cause serious injury.

What is the correct bleach dilution ratio for killing mold?

The correct bleach dilution ratio for killing mold is one-third to one cup of household bleach per gallon of water. Apply this solution to the moldy surface and keep it wet for a full 10 minutes to effectively break down mold cells on non-porous surfaces.

Why does bleach fail to remove mold from drywall and wood?

Bleach fails on drywall and wood because it is 90 percent water, so chlorine evaporates from the surface while water penetrates deep into porous materials. This moisture actually feeds mold roots beneath the surface, causing regrowth while only bleaching visible stains. The mold root system stays intact and continues spreading.

Can I use vinegar instead of bleach to kill black mold?

Vinegar can destroy 82 species of mold and does not emit toxic fumes like bleach, making it safer for home use. However, vinegar is not EPA-registered as a proven mold killer, can damage natural stone surfaces like granite or marble, and may be less effective than bleach on hard surfaces.

What health risks does black mold exposure cause?

Black mold exposure causes respiratory problems, allergic reactions, coughing, wheezing, eye irritation, and skin rashes. Even dead mold produces toxic spores that compromise indoor air quality. Sensitive individuals can experience more severe reactions, which is why complete removal matters, not just color change.

How do I prevent mold from coming back after bleach treatment?

Mold prevention after bleach treatment requires fixing all leaks immediately, maintaining humidity below 50 percent with dehumidifiers, and running exhaust fans during showers. Regular inspection for condensation, prompt repair of water damage, and improved ventilation in bathrooms and basements stop moisture that feeds mold growth.

Which surfaces should never be cleaned with bleach for mold?

Surfaces that should never be cleaned with bleach for mold include drywall, unfinished wood, carpet and fabric, ceiling tiles, insulation, and any water-damaged building materials. Bleach’s corrosive properties damage wood fibers, corrode metal surfaces, and the water content feeds mold roots in porous materials, worsening the problem.