Home Blog Page 10

Flood Damaged Carpet Salvage: When to Save or Replace

0

Think you can always save a soaked carpet? Not even close.
What matters most is where the water came from and how fast you act.
Clean supply water gives you the best shot if you extract and start drying within 24 to 48 hours.
Greywater needs faster action and probably new padding.
If the flood brought sewage or the carpet sat wet past 72 hours, replacement is the safer, smarter choice.
This post walks you through the quick checks and steps so you can decide right away.

Immediate Guidance for Flood Damaged Carpet Salvage Decisions

PEbKGNNxTGSxLmRAzcqt4Q

Whether you can save flood damaged carpet comes down to two things: what kind of water soaked it and how fast you move. Category 1 clean water (think burst pipe or fresh rainwater) gives you the best shot if you can pull the water out and dry everything within 24 to 48 hours. Category 2 greywater (cloudy runoff from appliances or groundwater) can work if you’re really fast and you ditch the padding. Category 3 blackwater (sewage, river floods, storm surge) almost never allows salvage because the pathogens make cleaning unsafe.

Salvage makes sense when the carpet’s under five years old, the water was clean, and you started drying within hours of the flood. Once you’ve got extraction and drying gear running, you’ve got 48 to 72 hours to finish before mold sets up shop in the backing and pad. Carpets that were already beat up, faded, or splitting at the seams before the flood rarely justify the work, even if the water was clean.

You can’t save carpet if it sat wet longer than 48 to 72 hours, if the water had sewage or chemicals in it, or if you’re already seeing mold on the backing or smelling stubborn odors after cleaning. At that point replacement is safer, faster, and often cheaper than trying to sanitize materials that are already compromised.

Check these right away:

  1. Water source and category. Figure out if it was clean supply water, appliance runoff, or sewage.
  2. Time wet. Note when flooding started. More than 72 hours and you’re likely looking at replacement.
  3. Visible mold or strong odor. If either’s present, don’t try to salvage.
  4. Carpet age and condition. Older or already damaged carpet rarely survives restoration.
  5. Pad saturation. If padding’s soaked or contaminated, plan to replace it even if the carpet might be saved.

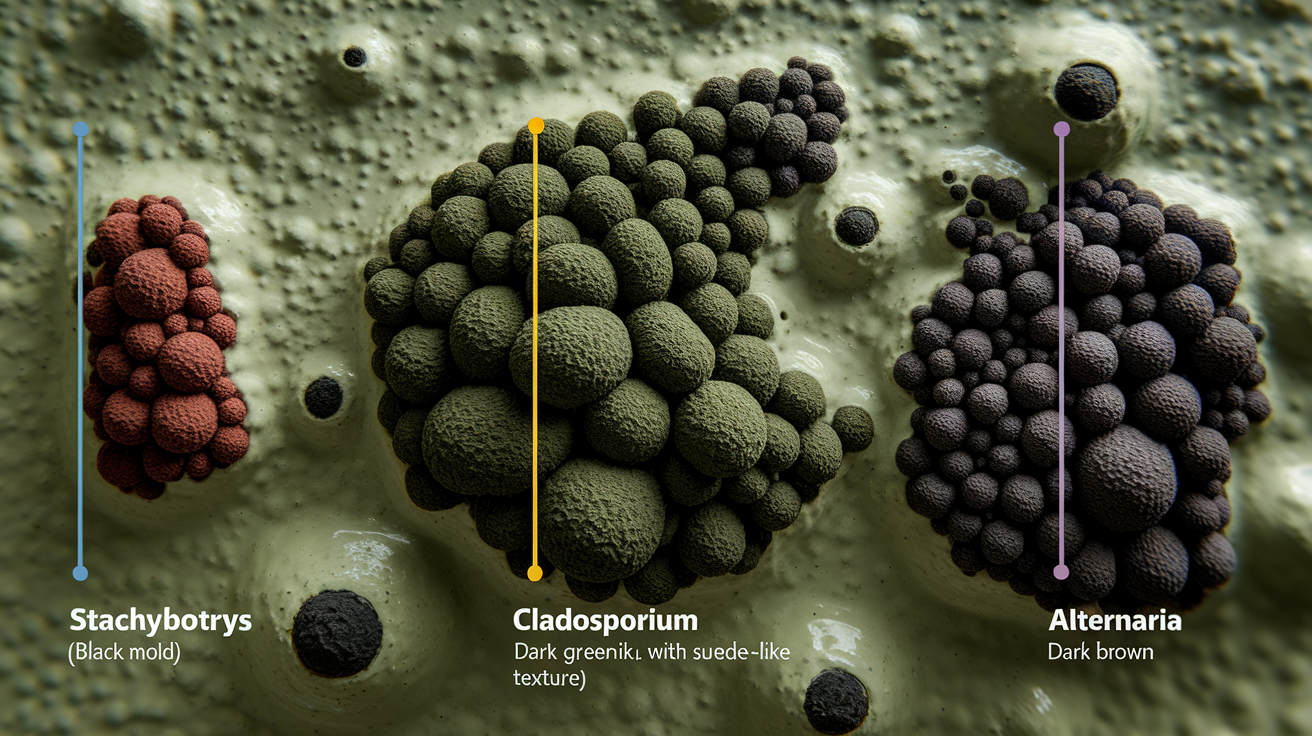
How to Identify Water Category and Contamination Sources in Flooded Carpets

9jj-w5BlRGC02p-0crFB6g

Knowing the contamination level tells you if restoration’s safe and legal. Clean water can be dried and disinfected. Contaminated water leaves bacteria, chemicals, and pathogens that normal cleaning can’t touch. Guess wrong and you risk health problems plus wasted effort.

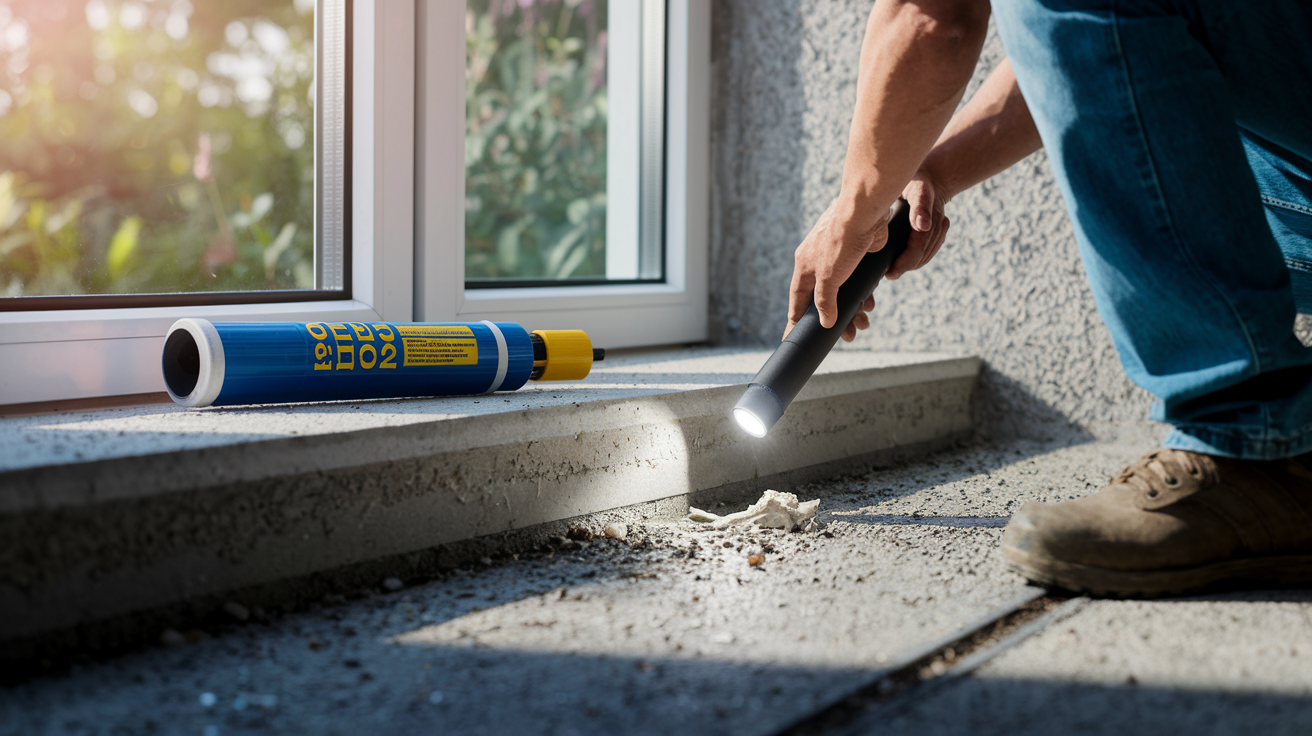
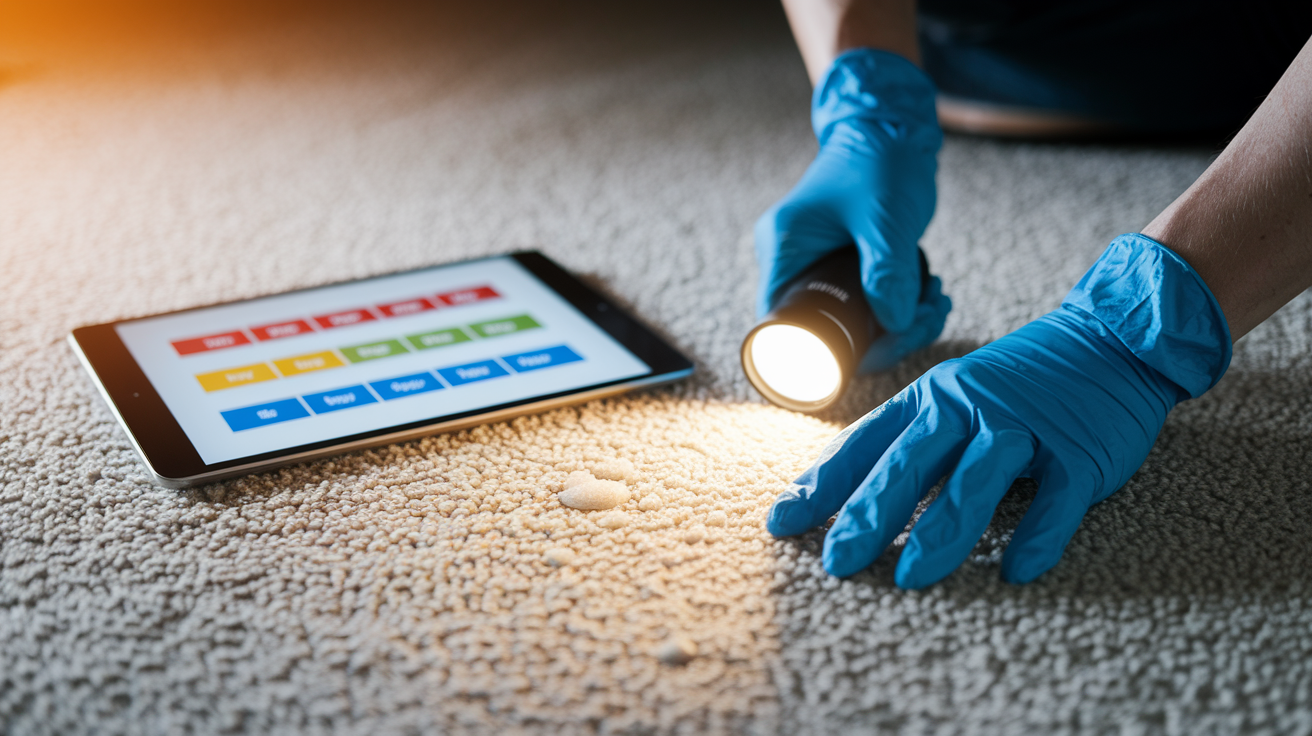
Visual clues help but aren’t always enough. Clear water doesn’t guarantee safety. Rising groundwater can carry soil bacteria and still look clean. Odor’s more reliable: fresh water has no smell, greywater often smells musty or soapy, and blackwater carries a sharp sewage or chemical stench. Residue matters too. Look for dirt, grease, fecal matter, debris, or discoloration on carpet fibers and backing.

If you’re uncertain, treat the water as one category worse than it looks. Use a flashlight to inspect the carpet backing and pad for staining or particles. Moisture meters find hidden saturation but won’t detect contamination. Swab tests and lab analysis exist but take days. Most homeowners make the call based on source, appearance, and smell.

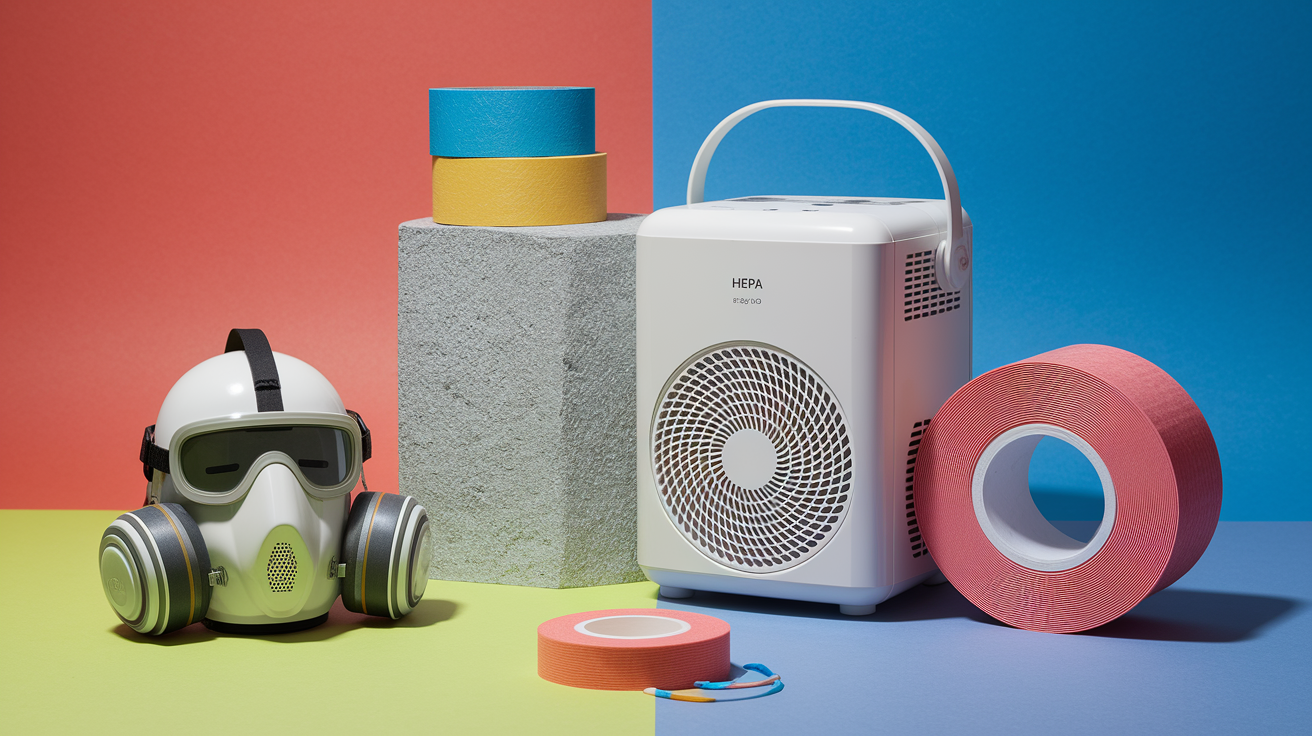
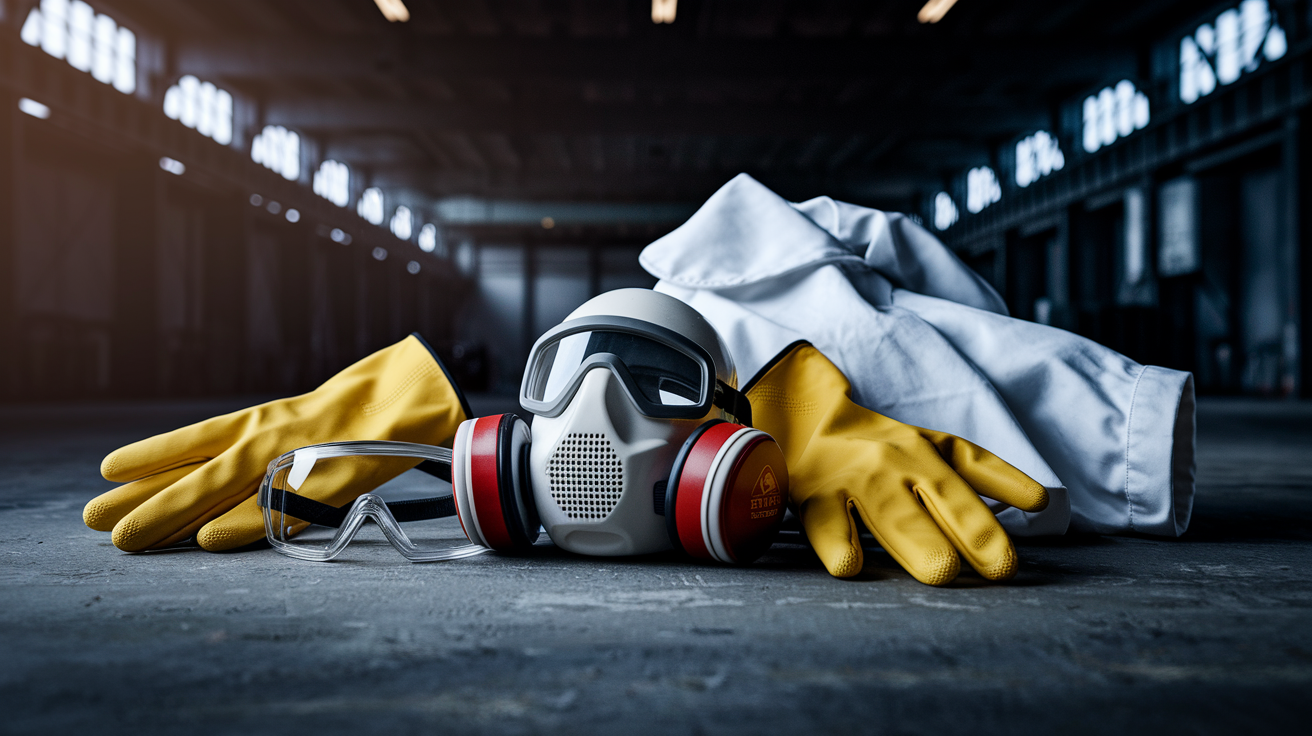
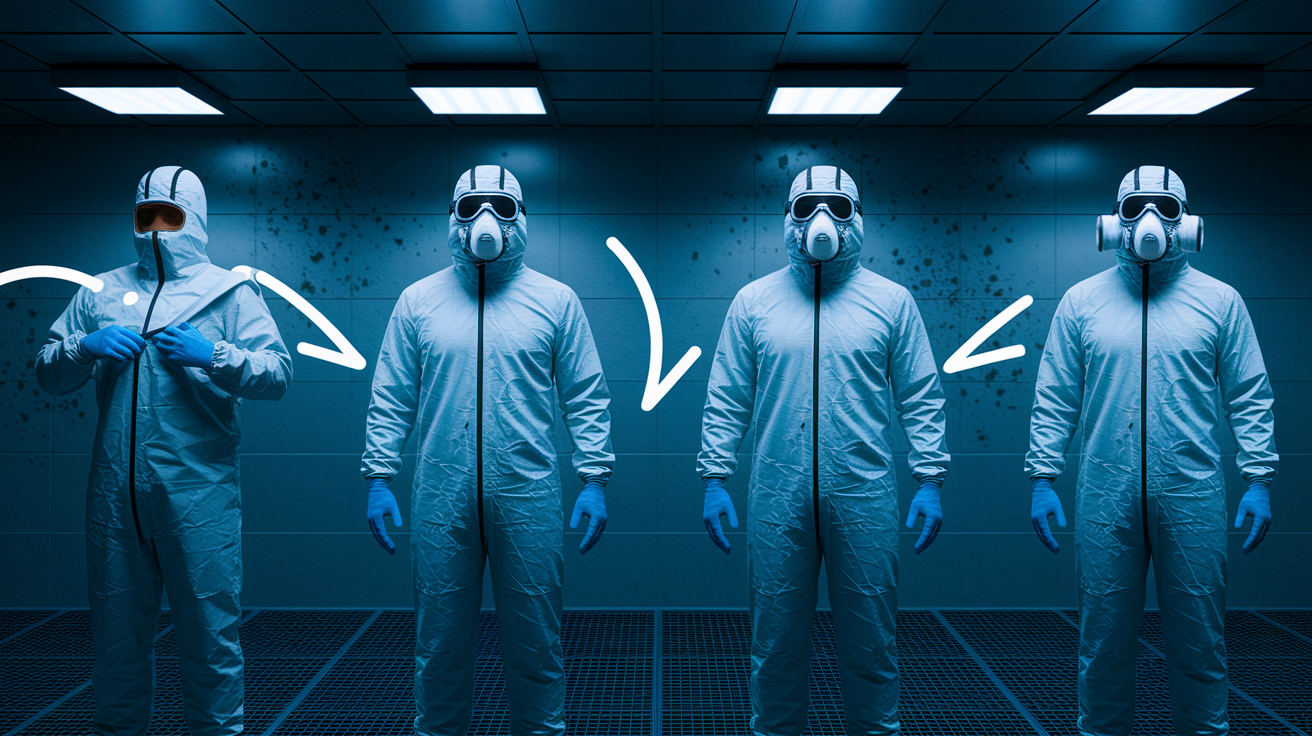
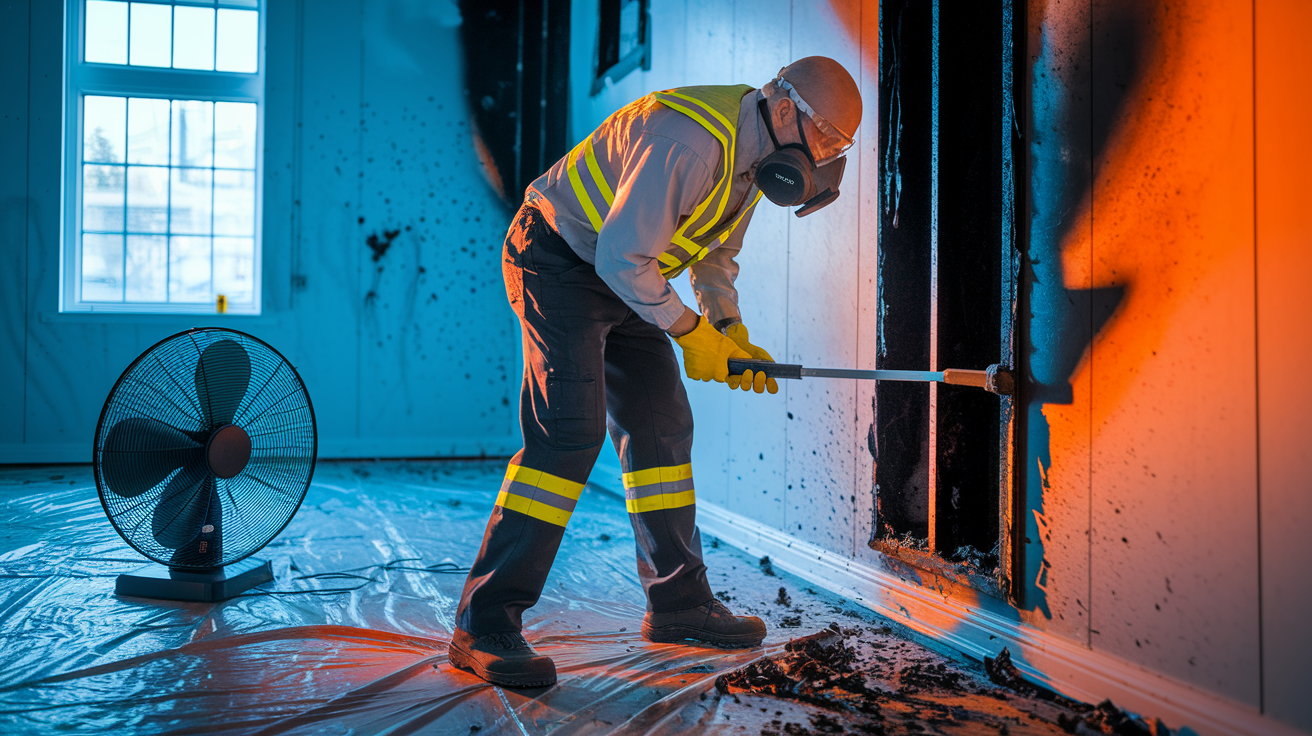
Before touching wet carpet, wear nitrile gloves, waterproof boots, eye protection, and an N95 or P100 respirator. Turn off electricity in the affected area if floors are wet. Don’t walk on saturated carpet more than you have to. It damages fibers and spreads contaminants.

Recognizing Category 1 Clean Water

Category 1 water is clear, odorless, and comes from sanitary sources: broken supply lines, leaking faucets, melting ice, or fresh rainwater that came through a roof leak before touching soil or debris. If you can trace the water straight to a clean pipe or recent precipitation and the carpet shows no discoloration or smell, it’s Category 1. This is the only category where homeowners can safely try DIY salvage if they move within hours.

Recognizing Category 2 Greywater

Category 2 water looks cloudy or slightly dirty and may smell musty, soapy, or stale. Common sources include dishwasher overflows, washing machine discharge hoses, sump pump backups, aquarium breaks, and groundwater seepage through foundation cracks. The water has organic matter, detergents, or soil but no raw sewage. Greywater can turn into Category 3 if it sits longer than 48 hours, so speed’s critical. Salvage is possible with professional grade extraction and EPA registered disinfectants, but padding almost always needs replacing.

Recognizing Category 3 Blackwater

Category 3 water is heavily contaminated with sewage, chemicals, or outdoor floodwater. You’ll smell it. A sharp, foul odor that doesn’t fade. Visible signs include fecal matter, toilet paper, dirt, leaves, oil, or industrial residue. Sources include sewer backups, river or ocean flooding, storm surge, and any water that flowed across soil or pavement for more than a short distance. Don’t try to clean or salvage carpet exposed to blackwater. Both carpet and padding need removing and disposal as contaminated waste. Walking on it without full PPE is a health risk.

Detailed Carpet Salvage Assessment: Fibers, Backing, and Padding

uxYuTLyxTauJ8Z86O8dlvQ

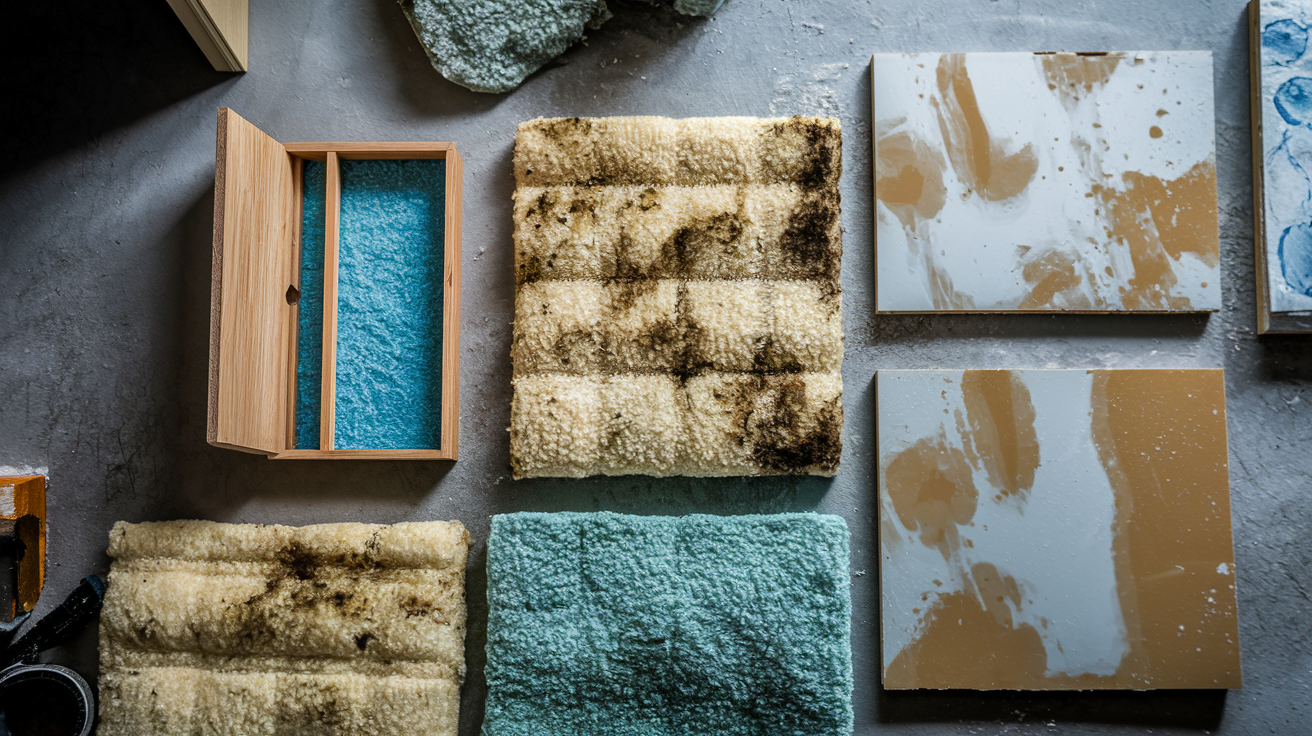
Start by inspecting the carpet face. Run your hand across the pile. If fibers feel slimy, gritty, or leave residue on your glove, contamination’s penetrated deep and cleaning might not work. Check for color bleeding, permanent staining, or a matted texture that doesn’t spring back when you lift it. Synthetic fibers like nylon and polyester handle moisture better than natural wool, but all carpets lose strength when saturated.

Next, lift a corner at the wall and look at the backing. Healthy backing is firm and tightly bonded to the face fibers. If you see delamination (separation between the primary and secondary backing layers), or if the backing feels soft, crumbly, or tears easily, the carpet can’t be reinstalled safely. Seams that have separated or bubbling in the face are automatic disqualifiers. These defects will get worse after drying, leaving wrinkles and trip hazards.

Pull the carpet back farther to expose the padding. Squeeze it. Saturated padding releases water when compressed and rarely dries without trapping odors and mold. Padding exposed to Category 2 or 3 water needs cutting out and discarding. Even with clean water, padding that stayed wet longer than 24 hours is a mold risk. If the padding’s compressed into a flat, dense mat or shows dark stains, replacement’s required.

Replacement is certain if you find backing separation, visible mold on fibers or backing, persistent sewage or chemical odor after extraction, or if the carpet was already worn or older than eight to ten years before the flood. Salvage may succeed if the carpet’s under five years old, the backing’s intact, water was Category 1, and you can finish drying within 48 hours.

Signs the carpet’s salvageable:

  • Water source was Category 1 clean water
  • Carpet’s under five years old with minimal prior wear
  • Backing remains bonded and doesn’t tear or crumble
  • No visible mold growth on face, backing, or pad
  • Odor is mild and fades after extraction
  • You can start drying within 6 to 12 hours of flooding

DIY Flood Damaged Carpet Salvage Steps for Homeowners

qHvxMk5QQ-yWCHpVzaHj7Q

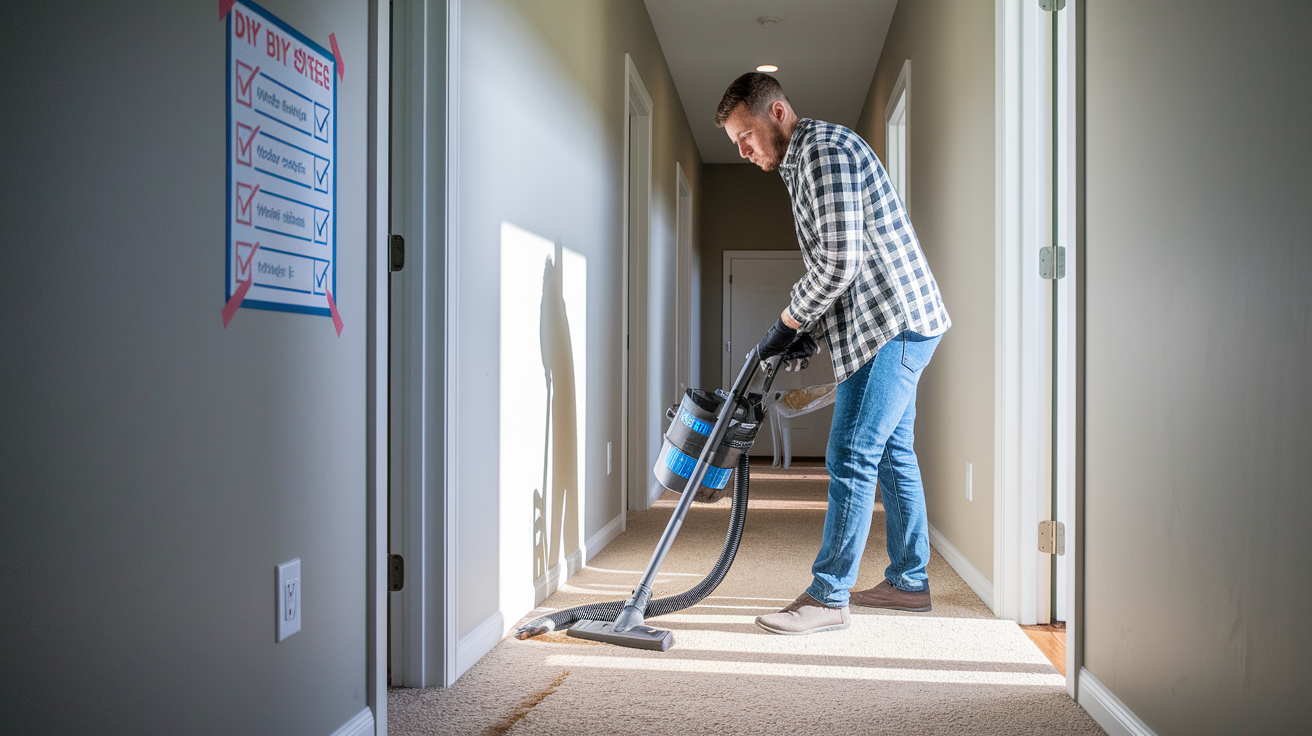
DIY salvage only makes sense for small areas flooded with Category 1 water if you own or can rent commercial extraction and drying equipment. Household tools (towels, box fans, shop vacuums) are useful for immediate stopgap work but can’t finish the job. If the affected area’s larger than 200 square feet, the water is Category 2 or 3, or you don’t have proper equipment, call a licensed restoration company.

  1. Ensure safety first. Turn off electricity to the flooded area at the breaker panel if standing water’s present. Put on PPE: N95 or P100 respirator, nitrile gloves, waterproof boots, and eye protection.

  2. Stop the water source. Shut off the supply valve, fix the leak, or block further intrusion. If you can’t stop it, evacuate and call professionals.

  3. Document the damage. Take photos and video of the flooded area, carpet surface, visible water line, and any damaged contents before you move anything. Note the time flooding began and the suspected water category.

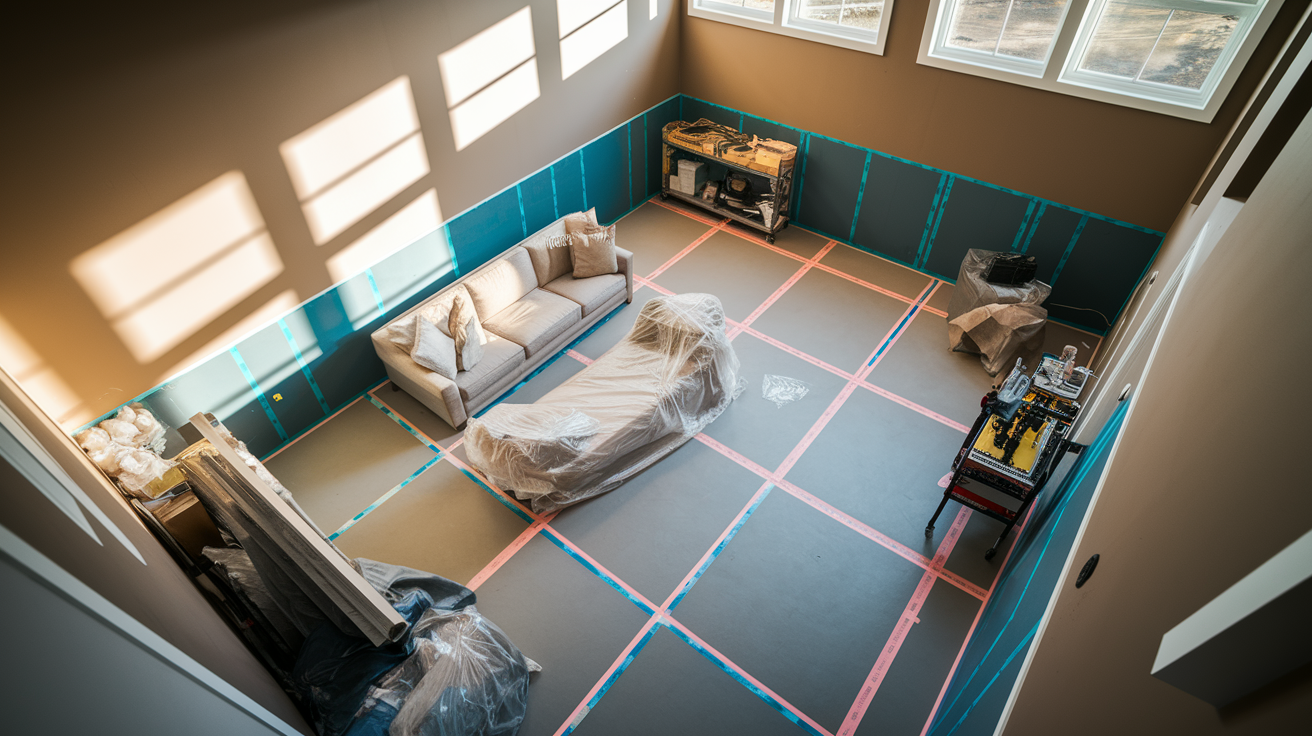
  4. Remove furniture and contents. Move everything off the wet carpet to a dry area. Don’t store wet items on top of dry carpet or against walls.

  5. Extract standing water. Use a wet/dry vacuum or rent a carpet extractor. Work in overlapping passes, moving slowly to allow maximum suction. For standing water deeper than one inch, use a sump pump or call pros with truck mounted extraction.

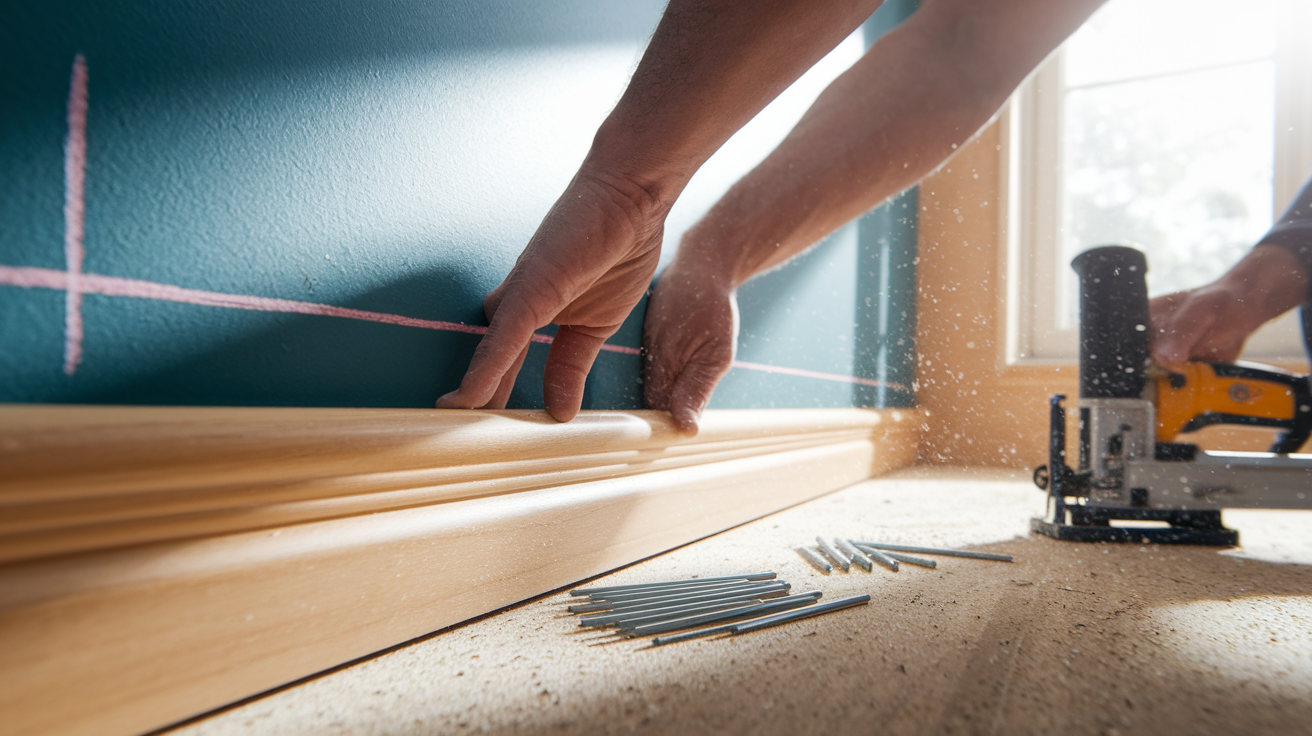
  6. Lift the carpet. Starting at a corner, pull the carpet free from tack strips. Roll it carefully. Don’t fold wet carpet or it’ll crease permanently. Prop the roll on blocks or sawhorses to expose the underside to airflow.

  7. Remove and discard the padding. Cut soaked padding into manageable sections. Bag it and dispose of it immediately. Don’t try to dry and reuse padding.

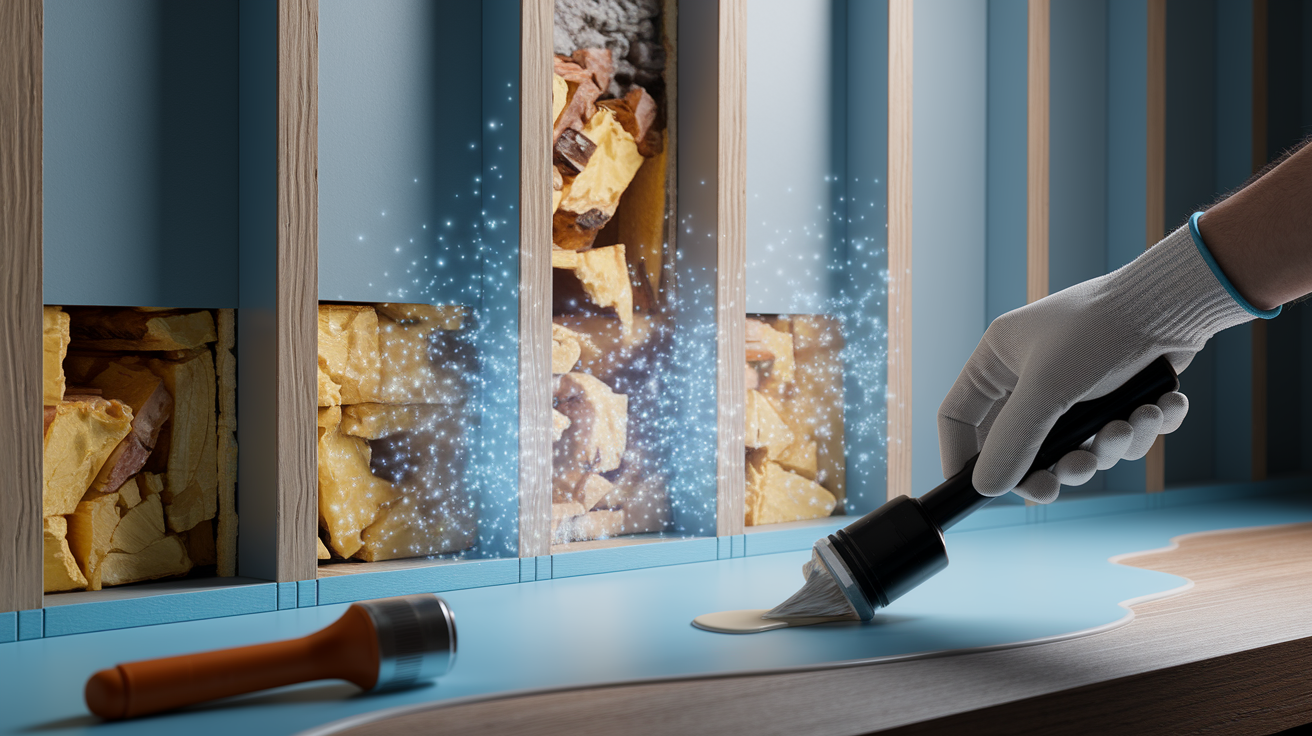
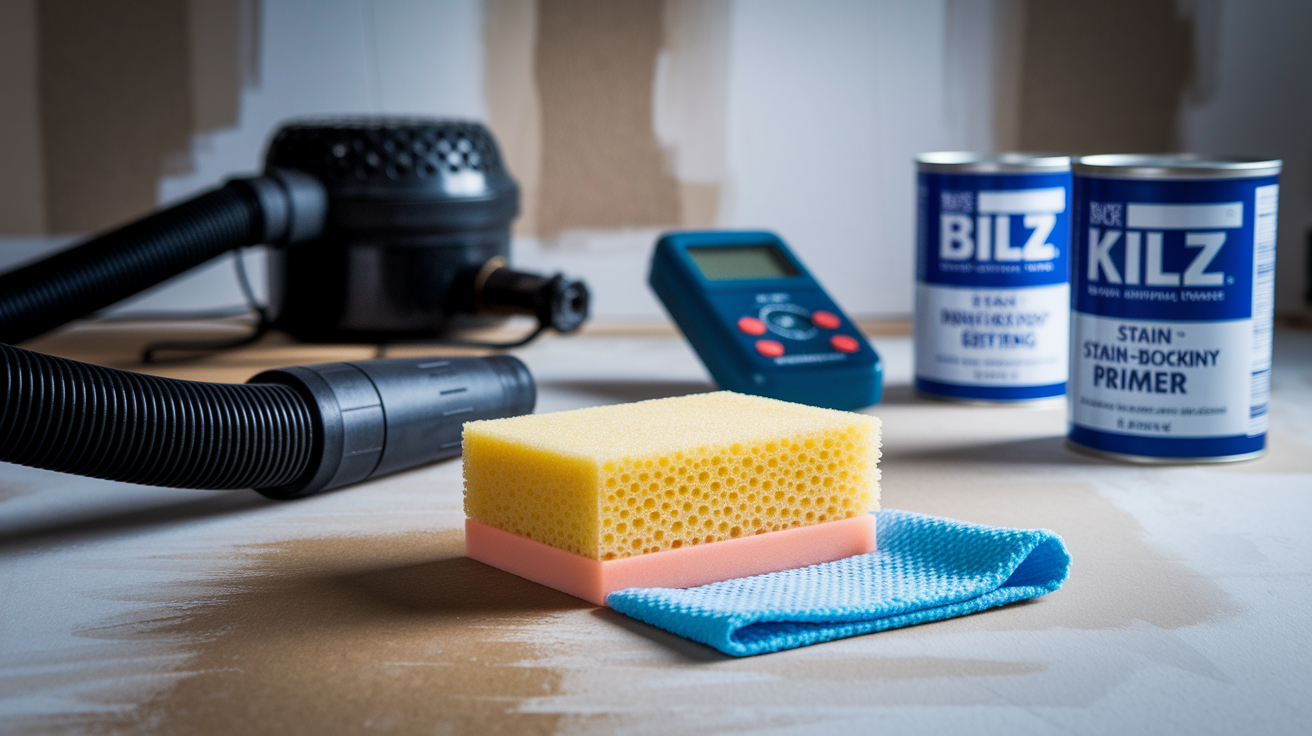
  8. Clean and sanitize the subfloor. Vacuum debris, then mop with an EPA registered disinfectant if the water was Category 2. Allow the subfloor to dry completely before reinstalling carpet. Check moisture levels with a meter.

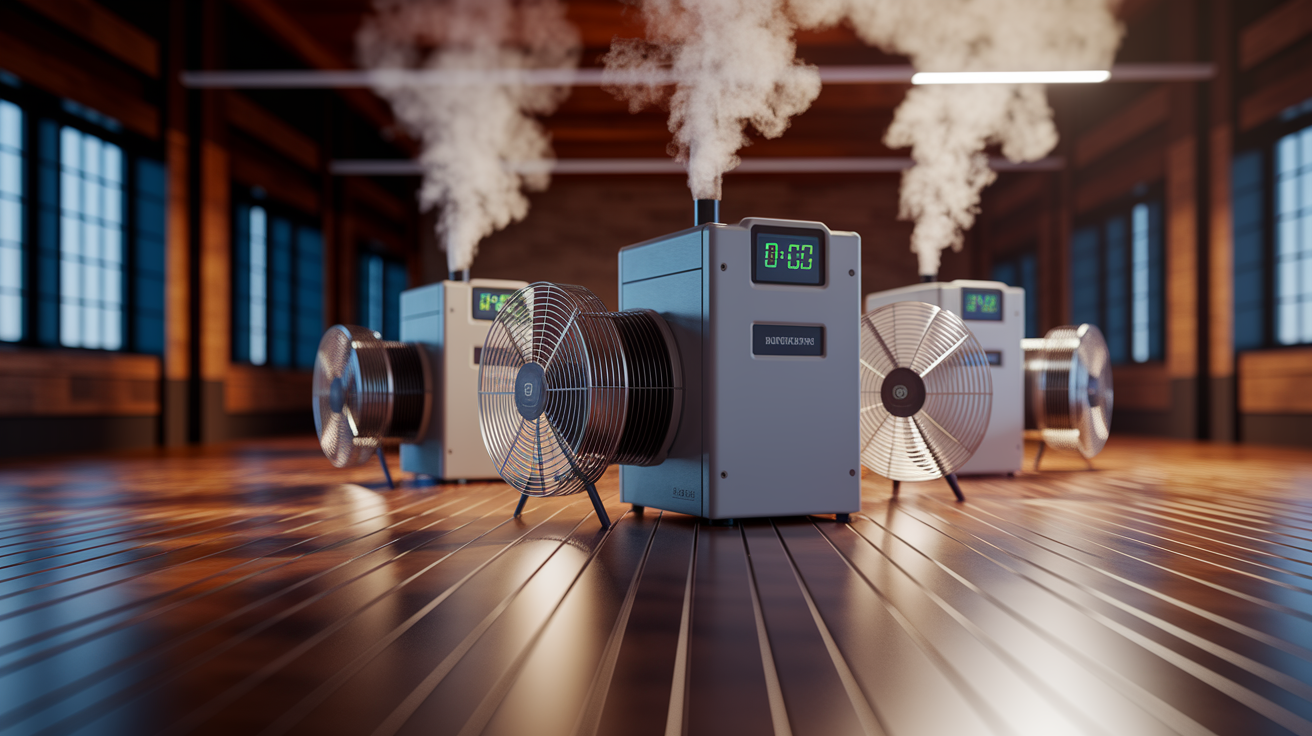
  9. Set up drying equipment. Place 2 to 4 air movers per room, angled to blow across the carpet face and backing. Run one commercial dehumidifier. Monitor humidity with a hygrometer. Target relative humidity below 50 percent.

  10. Monitor and decide. Check moisture readings daily. Drying should be complete within 48 to 72 hours. If the carpet smells musty, shows mold, or doesn’t dry in that window, don’t reinstall it. Replace the carpet and padding.

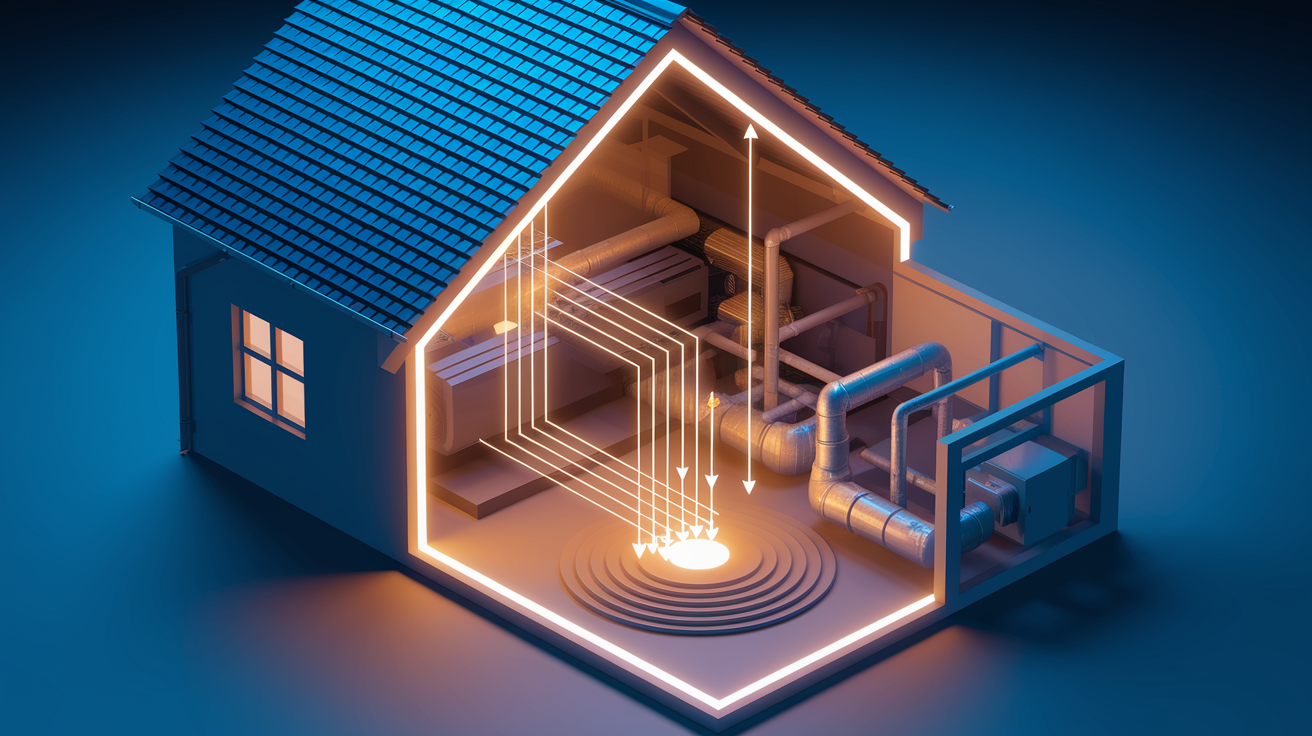
Drying Techniques and Structural Moisture Control for Flood Damaged Carpet Salvage

pclw2kPDQR-7EuYhNNndAw

Effective drying requires controlling temperature, humidity, and airflow. Set your HVAC to maintain 70 to 80 degrees if possible. Warmer air holds more moisture and speeds evaporation. Air movers create turbulence across wet surfaces, breaking up the boundary layer of saturated air. Dehumidifiers pull moisture from the air so it doesn’t redeposit onto materials. Both pieces of equipment need running continuously until moisture readings stabilize.

Position air movers to blow directly onto the carpet backing if the carpet’s lifted, or across the face if it remains in place. Space units evenly and avoid stacking airflow in one corner. For a typical 200 square foot room, use two to four air movers. Larger rooms or multi room jobs may need six or more units. Run at least one commercial dehumidifier rated for 50 to 70 pints per day. Residential units are too small for flood work. Empty collection tanks or connect a hose to a drain so the unit runs without interruption.

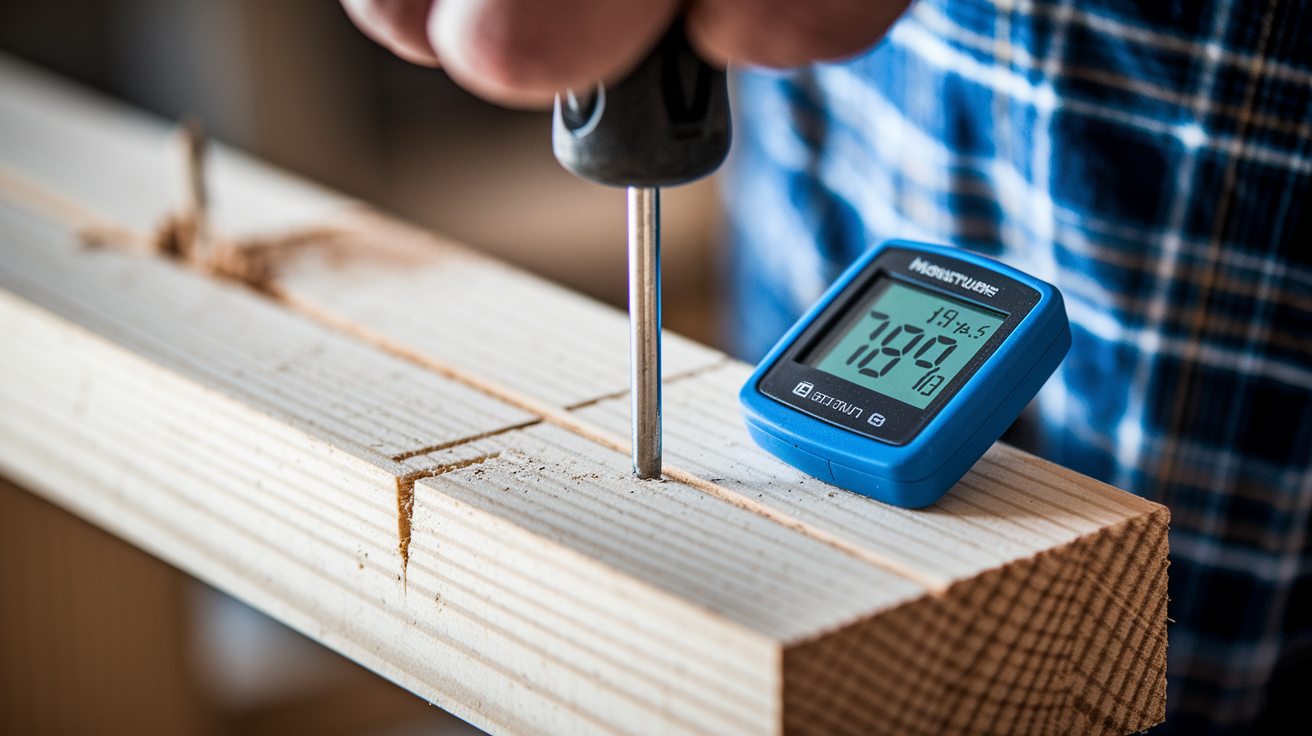
Check progress every 12 hours using a moisture meter on the carpet backing, pad area, and subfloor. Relative humidity in the room should drop below 50 percent within the first 24 hours and stay there. If readings plateau or rise, increase airflow or add another dehumidifier. Drying typically takes 24 to 72 hours with proper equipment. Longer timelines increase mold risk and reduce salvage success.

Equipment Typical Quantity Purpose
Air movers 2–6 per room Creates airflow to accelerate evaporation from carpet and subfloor
Commercial dehumidifier 1 per 500–1,000 cu ft Removes moisture from air to prevent reabsorption and speed drying
Moisture meter 1 Measures moisture content in carpet backing and subfloor to confirm dryness
Hygrometer 1 Monitors relative humidity in the room; target below 50%

Cleaning, Sanitizing, and Odor Removal for Water Damage Carpet Restoration

A3HPhdeOTuSGTK81xgNbSA

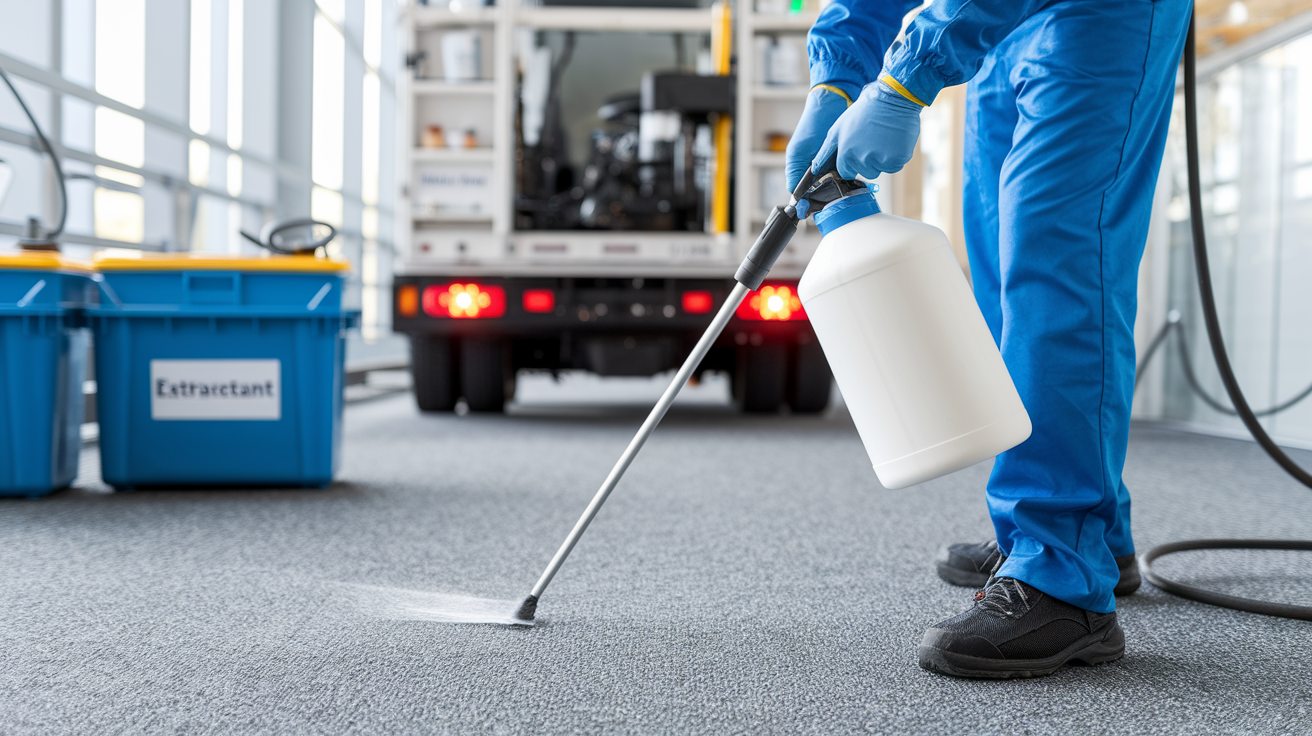
Once water’s extracted and drying’s underway, the carpet needs cleaning to remove dirt, bacteria, and odors. For Category 1 clean water, hot water extraction with quality detergent is usually enough. Rent a carpet cleaning machine or hire a service that uses truck mounted equipment. Make slow, overlapping passes and extract as much rinse water as possible. Follow with a light application of an EPA registered antimicrobial if you want, but it’s not always required for clean water.

Category 2 greywater demands more aggressive treatment. After hot water extraction, apply an EPA registered disinfectant labeled for porous surfaces. Follow the manufacturer’s dwell time (usually 10 to 15 minutes), then extract again. Don’t skip the second extraction or you’ll leave chemical residue that attracts dirt. Avoid household bleach on colored carpet. It causes fading and doesn’t penetrate backing effectively. Use products designed for textiles.

Category 3 blackwater carpet can’t be cleaned or sanitized. The contamination’s too deep and the health risk too high. Remove the carpet and padding, bag them as contaminated waste, and dispose according to local regulations. Disinfect the subfloor thoroughly and let it dry before installing new flooring.

Safe cleaning products and methods for salvageable carpet:

  • Hot water extraction with low residue detergent (Category 1 and 2)
  • EPA registered antimicrobials labeled for water damage restoration (Category 2)
  • Enzymatic cleaners for organic stains and odors (Category 1 only)
  • HEPA vacuuming after drying to capture residual dust and spores
  • Avoid ozone generators unless the space is unoccupied and ventilated afterward. Ozone’s a respiratory irritant.

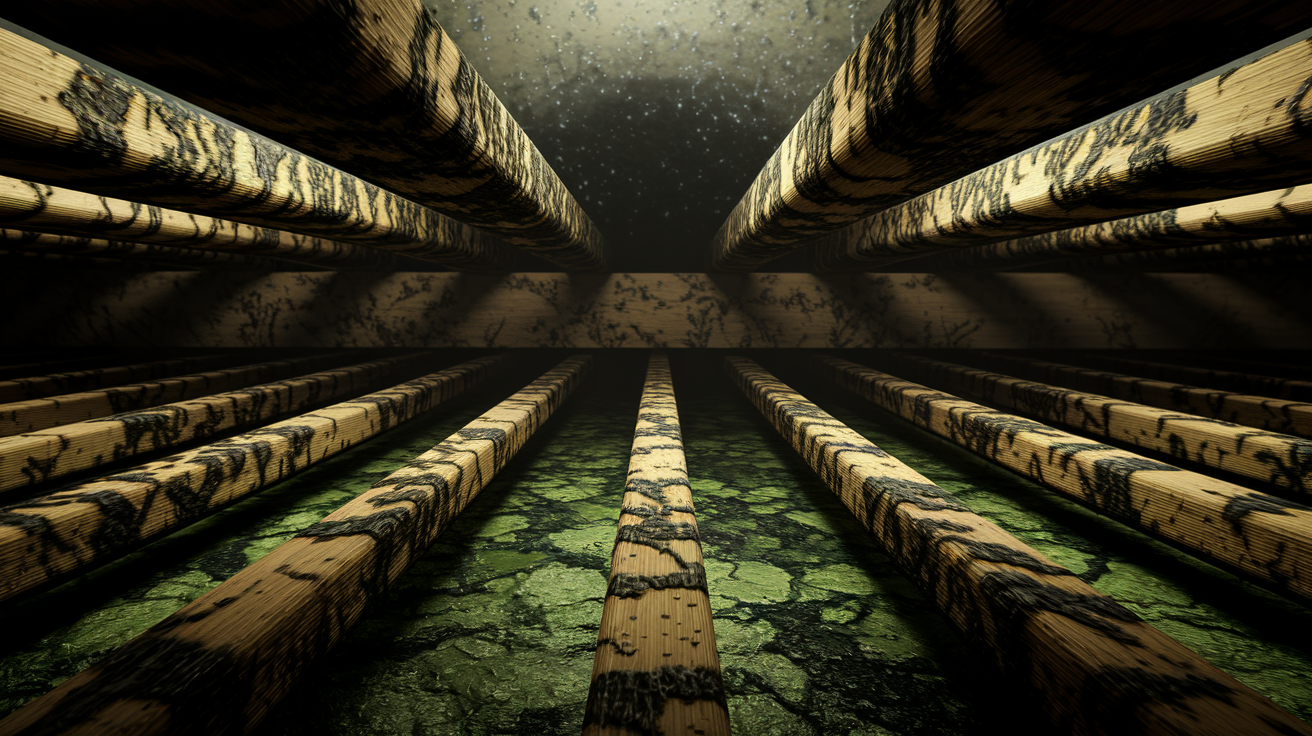
Mold Prevention and Monitoring During Flood Damaged Carpet Salvage

ohcJiDeXT5uF1GeQfNFrCw

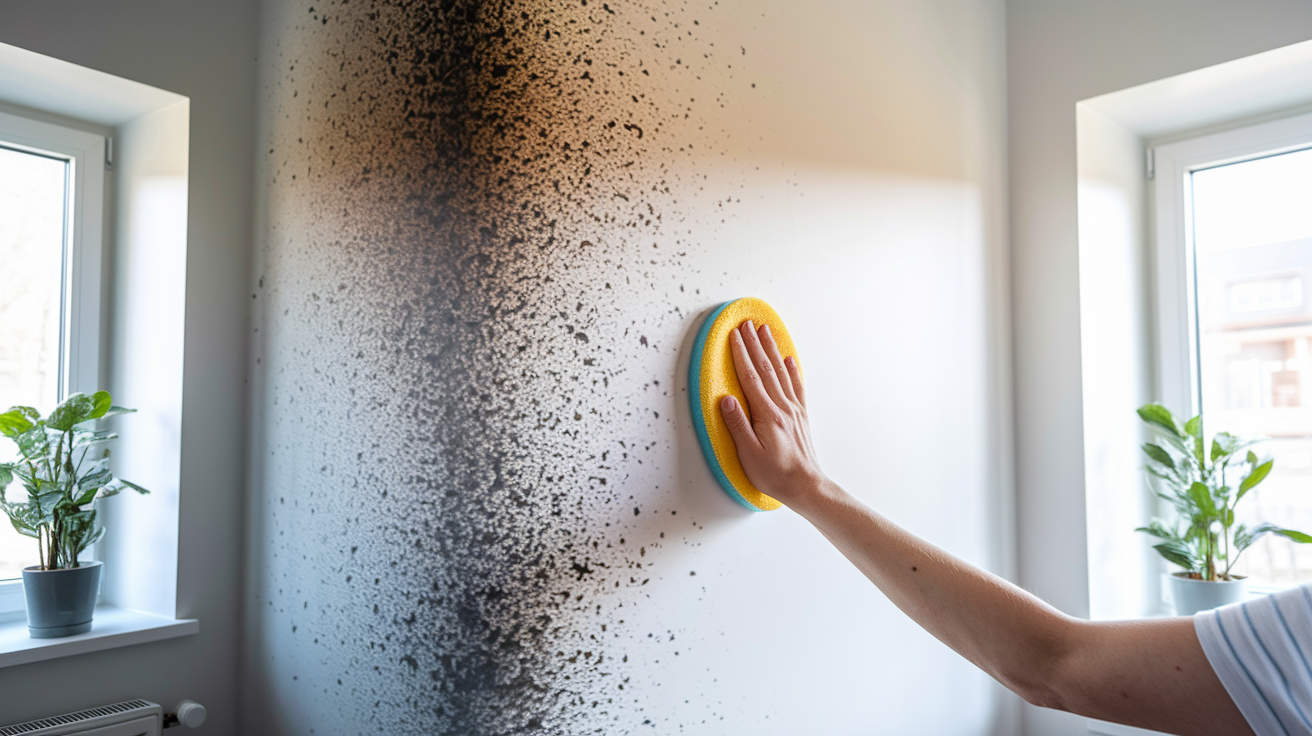
Mold spores are everywhere, but they only colonize when moisture, oxygen, and organic material are present together for 24 to 48 hours. Carpet backing, padding, and the dust trapped in pile fibers provide plenty of food. If relative humidity stays above 60 percent or materials remain wet past 72 hours, mold growth’s almost certain. Once mold takes hold, it spreads rapidly and releases spores that contaminate the entire room.

Keep indoor humidity below 50 percent throughout the drying process and for at least two weeks afterward. Use your hygrometer to verify conditions daily. After the carpet’s dry and reinstalled, inspect baseboards, seams, and the underside weekly for the first month. Look for discoloration, fuzzy growth, or a musty smell that returns. If any of these appear, pull the carpet back and check the subfloor and backing. Small patches of mold can sometimes be cleaned with antimicrobial and HEPA vacuuming, but widespread growth means the salvage failed.

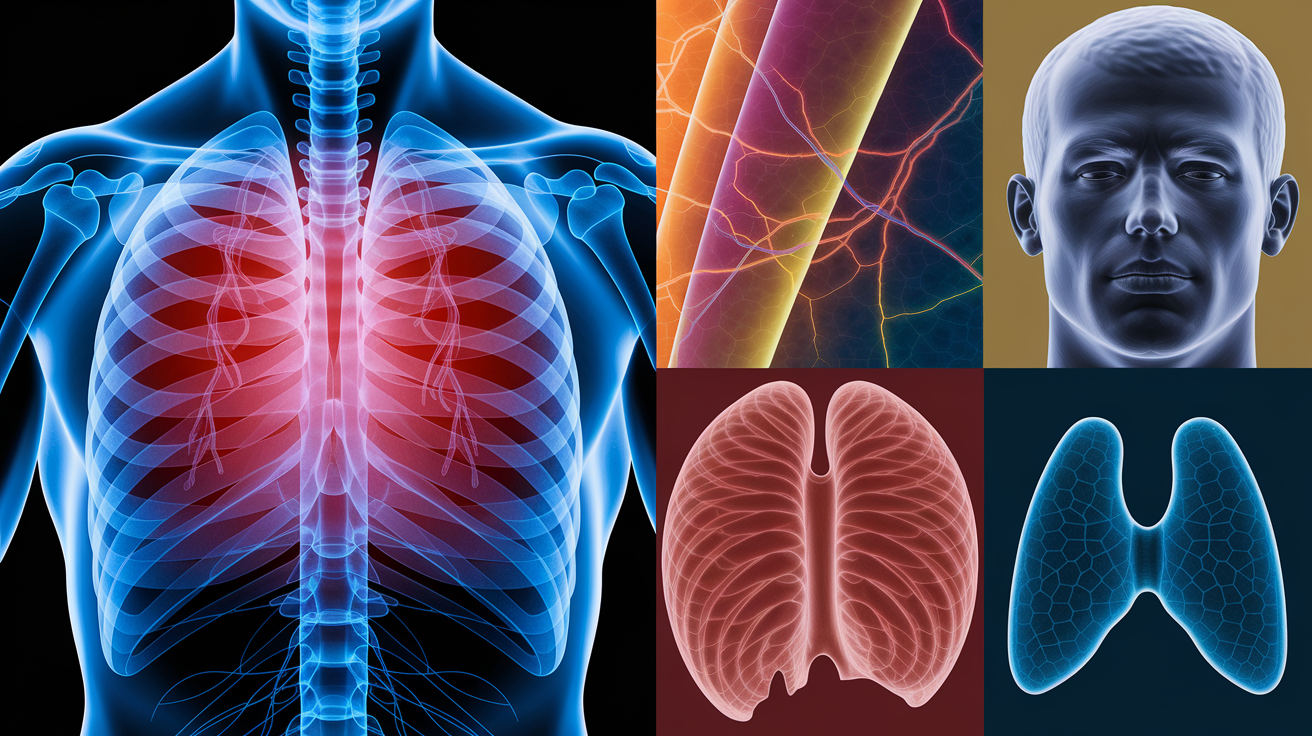
Health risks from moldy carpet include coughing, eye irritation, skin rashes, and worsening asthma or allergies. Immunocompromised individuals, young children, and the elderly are at higher risk. If anyone in the household develops respiratory symptoms after carpet reinstallation, inspect for hidden mold immediately and consider professional testing.

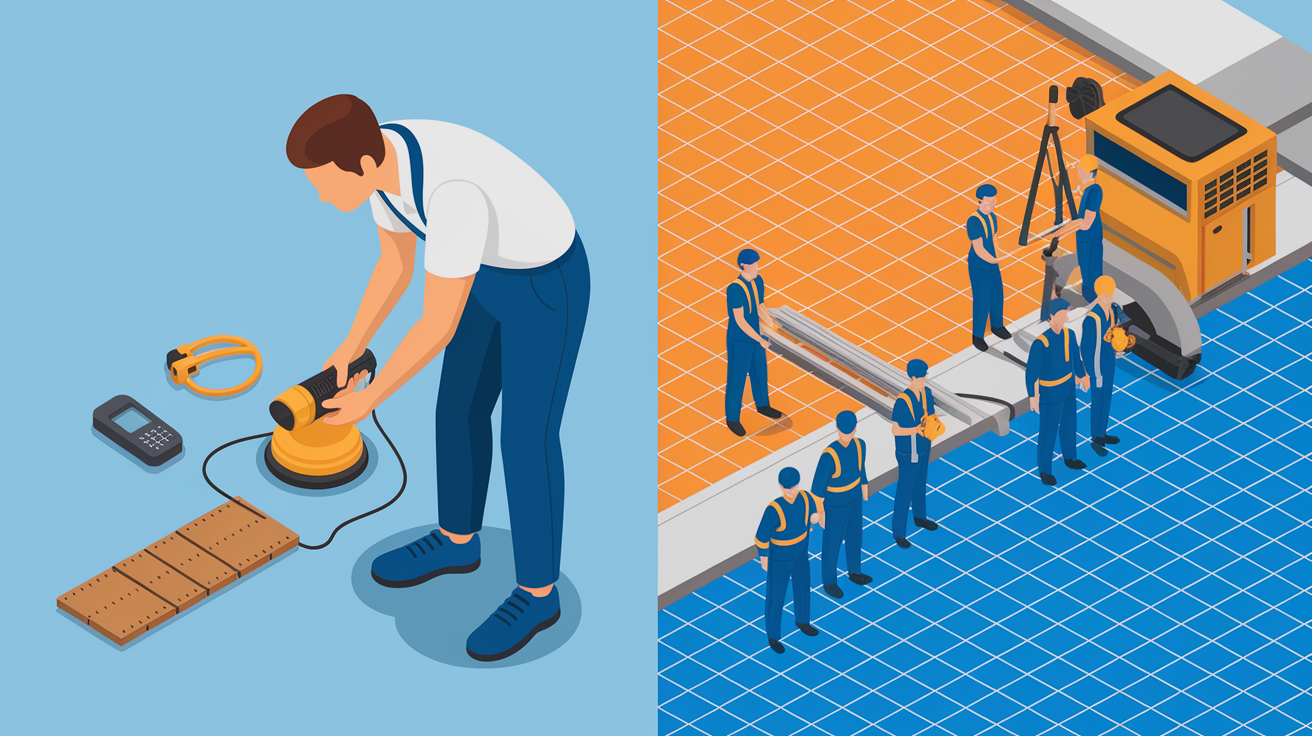
Professional Restoration vs DIY Carpet Salvage: When to Call Experts

8KICIB4nSveKuBihWzQTIw

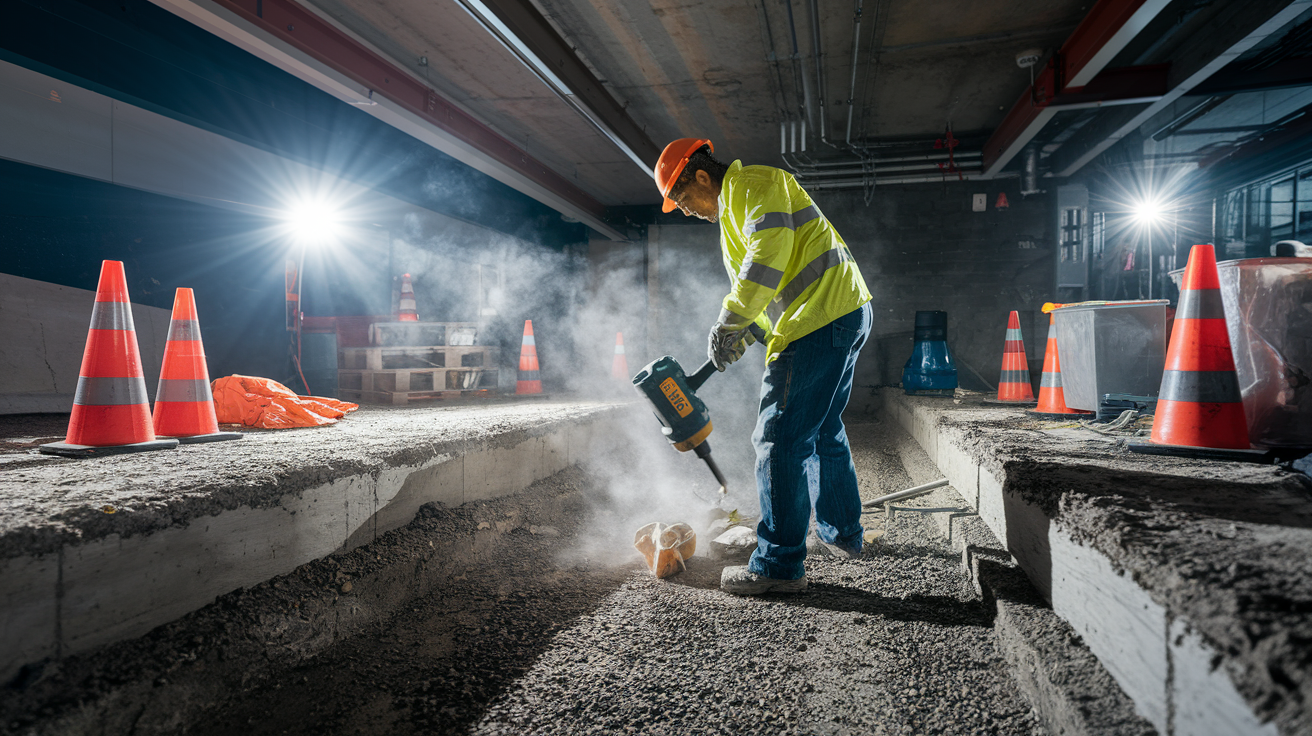
Professionals bring industrial extraction equipment, moisture mapping tools, thermal imaging cameras, and the experience to assess hidden damage you can’t see. Truck mounted extractors pull far more water than portable machines. Moisture meters and infrared cameras locate trapped water in subfloors, walls, and padding. Restoration techs can also document the entire process with photos, readings, and written logs that satisfy insurance adjusters and reduce claim disputes.

Call a licensed restoration company if the flooded area’s larger than 200 to 300 square feet, the water is Category 2 or 3, you see visible mold, or you don’t own commercial drying equipment. Professionals are also necessary when the subfloor is plywood or particleboard and may be compromised, when electrical systems were submerged, or when insurance requires third party verification of damage and mitigation. Trying to cut costs with DIY work on a large or contaminated job often backfires. Mold, odors, and incomplete drying lead to full replacement later at much higher expense.

DIY’s appropriate only for small, clean water incidents where you can start extraction within hours and have access to the right tools. Even then, rent commercial air movers and a dehumidifier instead of relying on box fans. If you’ve got any doubt about water category, timeline, or your ability to finish drying in 48 to 72 hours, make the call.

What Professionals Do Beyond DIY Capacity

Licensed restorers perform moisture mapping to identify all affected materials, including those behind walls and under flooring. They use thermal imaging to locate temperature differentials that indicate trapped water. Monitoring logs track humidity, temperature, and moisture content at multiple points throughout the drying cycle, creating a documented timeline that proves due diligence for insurers. Pros also apply hospital grade disinfectants and antimicrobials not available to consumers, and they understand dwell times, dilution ratios, and safe application methods. If hidden damage appears during the job (like soaked drywall or floor joists), they adjust the scope and notify your adjuster immediately, preventing coverage disputes later.

Cost Comparison: Flood Damaged Carpet Salvage vs Replacement

uvVV1u4IQw-tnM1jmoSHOQ

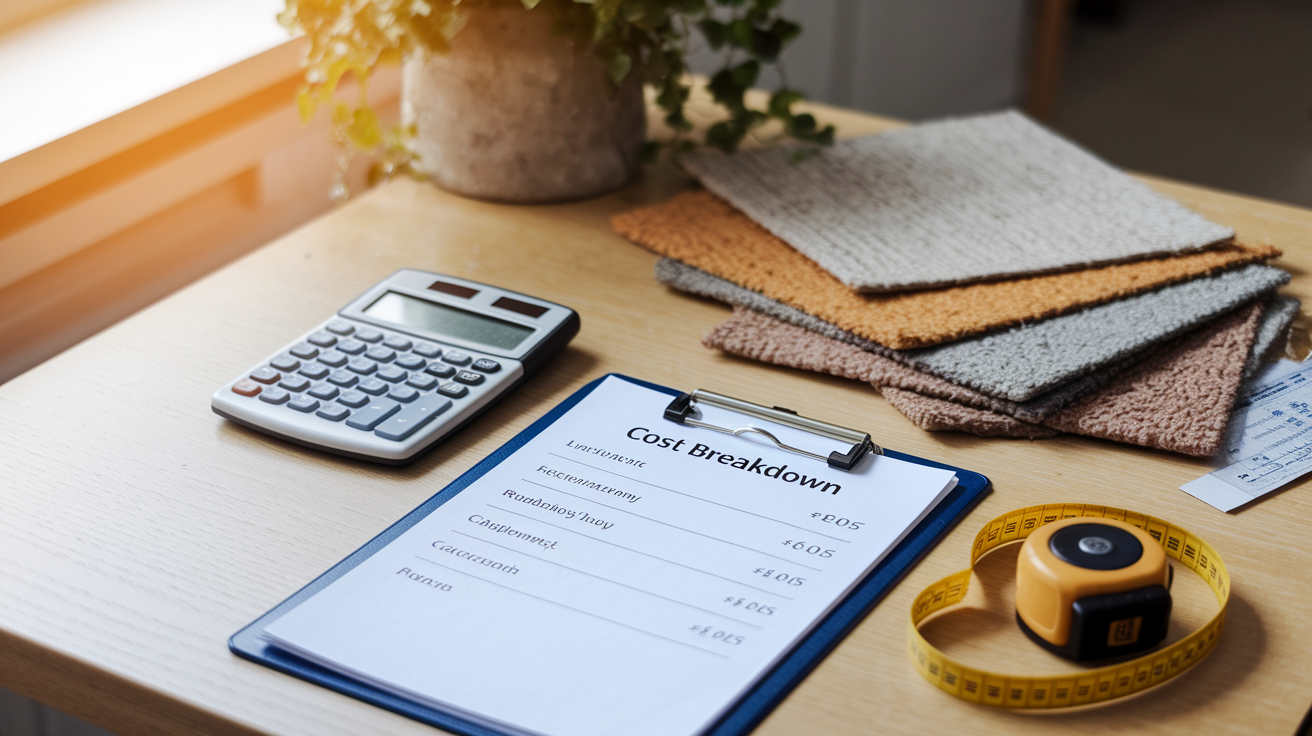
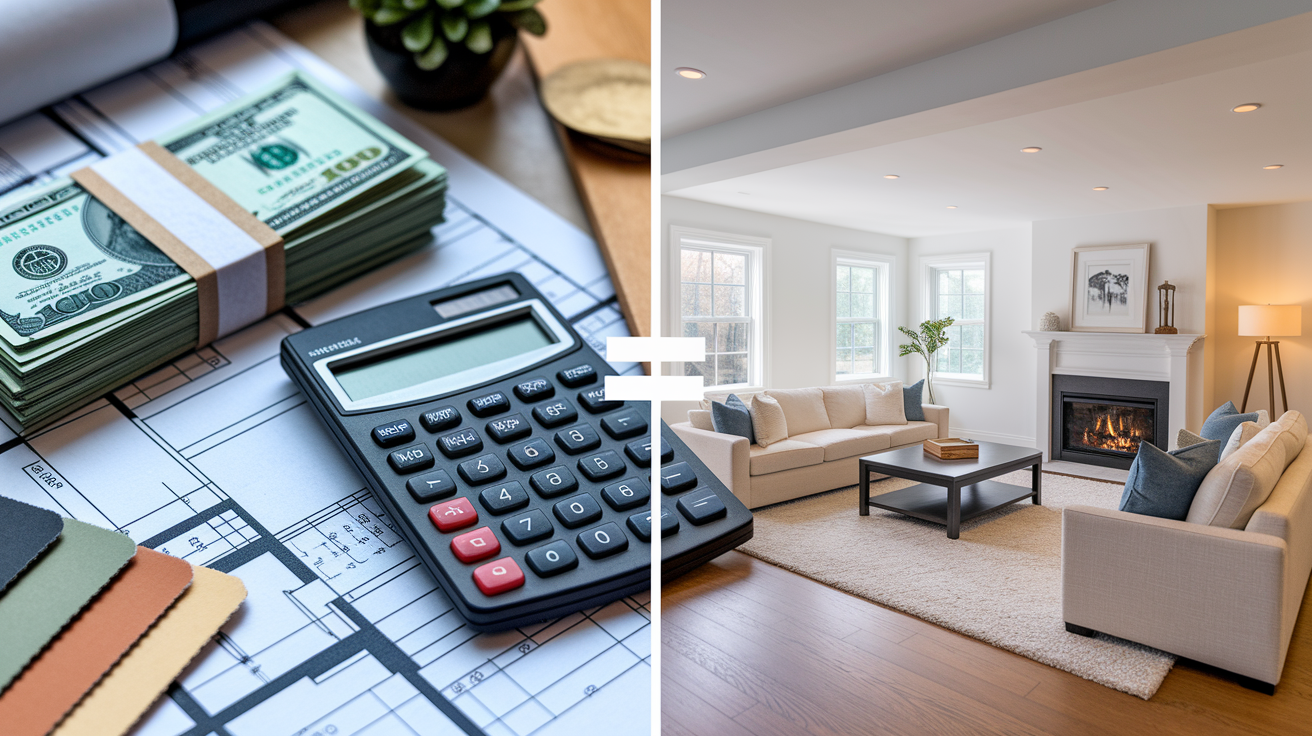
Restoration costs depend on water category, affected area, and how fast you act. Professional water extraction and cleaning for a moderately damaged room typically runs $1.00 to $4.00 per square foot, including equipment rental, labor, antimicrobials, and disposal of padding. Padding replacement alone costs $0.50 to $1.50 per square foot. A 200 square foot room might cost $200 to $800 to restore if the water was Category 1 and you called within hours.

Carpet replacement ranges from $3.00 to $12.00 per square foot installed, depending on fiber type and quality. Budget polyester or olefin starts around $2.00 to $4.00 per square foot plus $1.00 to $3.00 for installation. Mid range nylon or wool blends run $4.00 to $8.00 per square foot, and premium products exceed $8.00. For the same 200 square foot room, replacement costs $600 to $2,400. Restoration looks cheaper on paper, but only if the carpet’s salvageable and drying succeeds. Failed salvage attempts waste money and delay the inevitable replacement.

Calculate total cost by adding extraction, cleaning, padding replacement, and any subfloor repairs, then compare that to full replacement. If restoration costs exceed 60 to 70 percent of replacement and the carpet was already five years old or showed wear before the flood, replacement usually makes more sense. You’ll get a fresh warranty, better appearance, and no risk of lingering odors or hidden mold.

Service Typical Cost Range Notes
Professional extraction & cleaning $1.00–$4.00 per sq ft Includes labor, equipment, antimicrobials; varies by water category and severity
Carpet padding replacement $0.50–$1.50 per sq ft Material and labor; required for most Category 2 incidents
Carpet replacement (installed) $3.00–$12.00 per sq ft Range reflects budget polyester to premium nylon or wool
Example 200 sq ft restoration $200–$800 Category 1, fast response, padding replaced

Insurance Documentation and Claims for Flood Damaged Carpet Salvage

p2FkAmM_R_6Kd36Ie0y6Tg

Insurance companies require proof of damage, proof of prompt mitigation, and itemized costs. Start documentation the moment you discover flooding. Take wide angle photos showing the entire affected area, then close ups of water lines on walls, soaked carpet, and any damaged contents. Record video while walking through the space and narrating what you see. Note the date, time, and suspected cause. Save these files in multiple locations.

Contact your insurer within 24 to 48 hours. Many policies include a “duty to mitigate” clause that requires you to stop further damage as soon as it’s safe to do so. Delayed action can reduce or void your claim. Ask whether the policy covers water damage or requires separate flood insurance. The distinction matters. Standard homeowners policies cover sudden internal water events like burst pipes but exclude rising water from rivers, storm surge, or sewer backups unless you purchased additional riders.

Keep every receipt: equipment rentals, cleaning supplies, contractor invoices, disposal fees, and temporary lodging if you had to leave the home. Request written estimates from at least two restoration companies. If you hire a contractor, make sure they’re licensed, insured, and provide itemized scopes of work. Insurers trust documentation from certified restorers more than DIY claims, so professional invoices and moisture logs strengthen your position.

Essential documentation items:

  • Date and time stamped photos and video taken before mitigation begins
  • Written description of the water source and category
  • Floor plan or sketch showing affected rooms and square footage
  • Contractor estimates and final invoices with line item costs
  • Receipts for all purchased or rented equipment, materials, and disposal

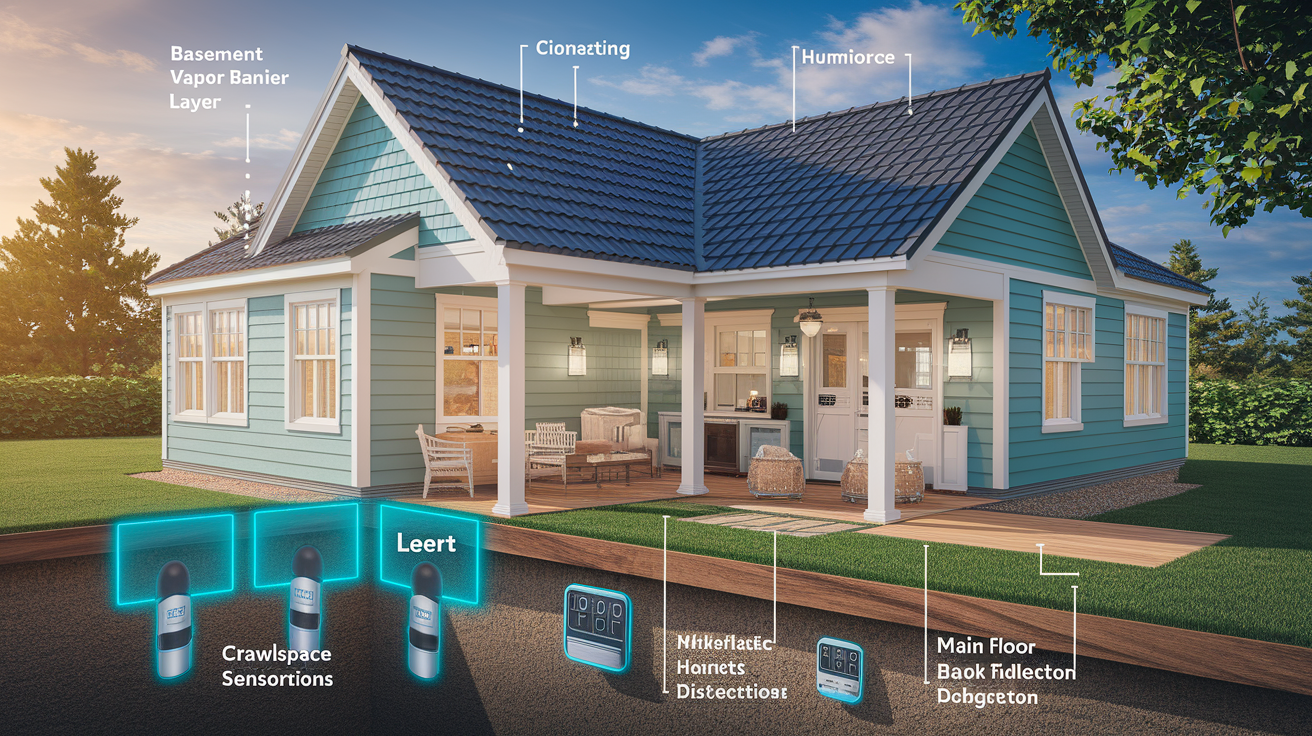
Basement and Crawlspace Issues Affecting Flood Damaged Carpet Salvage

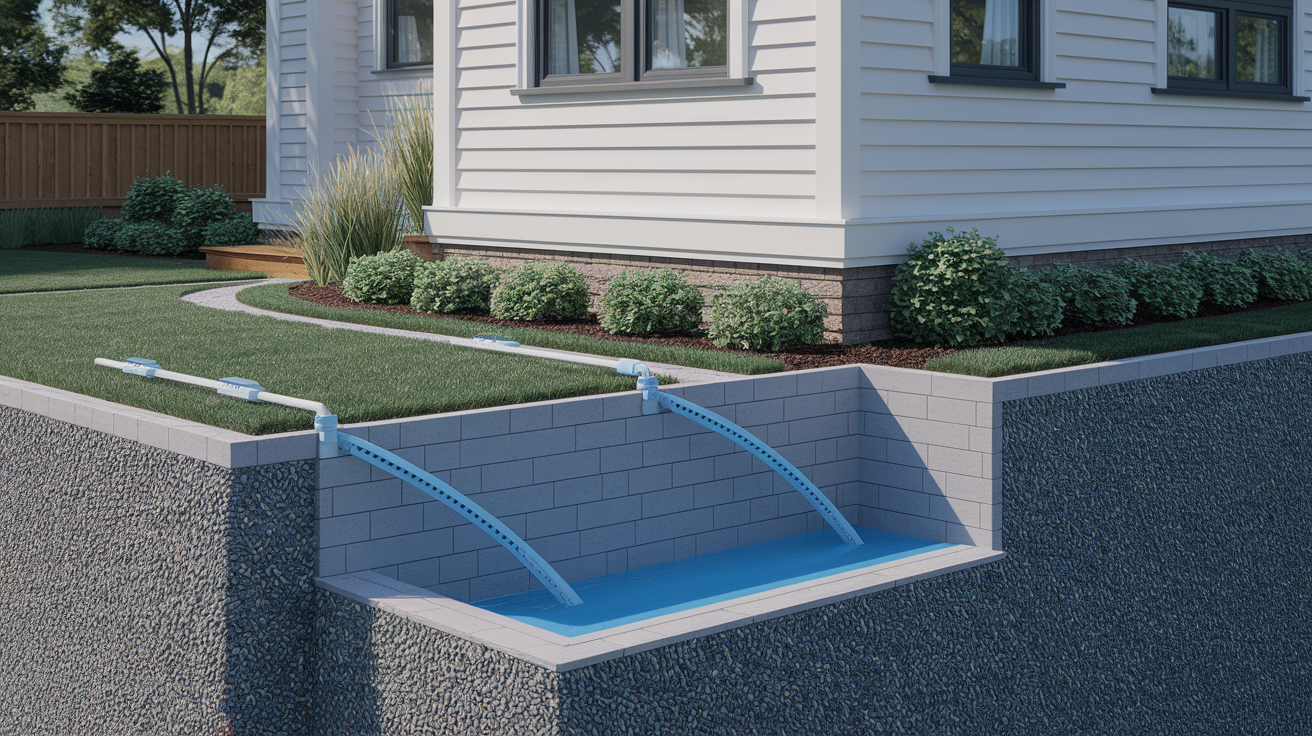
Concrete slab foundations and below grade rooms present special drying challenges. Concrete’s porous and holds moisture for weeks, even after the carpet appears dry on top. Water migrates up through the slab via capillary action, re-wetting padding and backing from below. If the slab wasn’t sealed with a vapor barrier during construction, long term drying may be impossible without removing the carpet entirely.

Crawlspace humidity also sabotages salvage efforts. Even if you dry the carpet and subfloor, high ambient moisture in an unvented or damp crawlspace will keep relative humidity above 60 percent in the room above. Mold can colonize the underside of flooring and carpet backing without ever appearing on the surface. Before reinstalling carpet over a crawlspace, verify that the space is dry, vented, and free of standing water. Consider a crawlspace dehumidifier if the problem’s chronic.

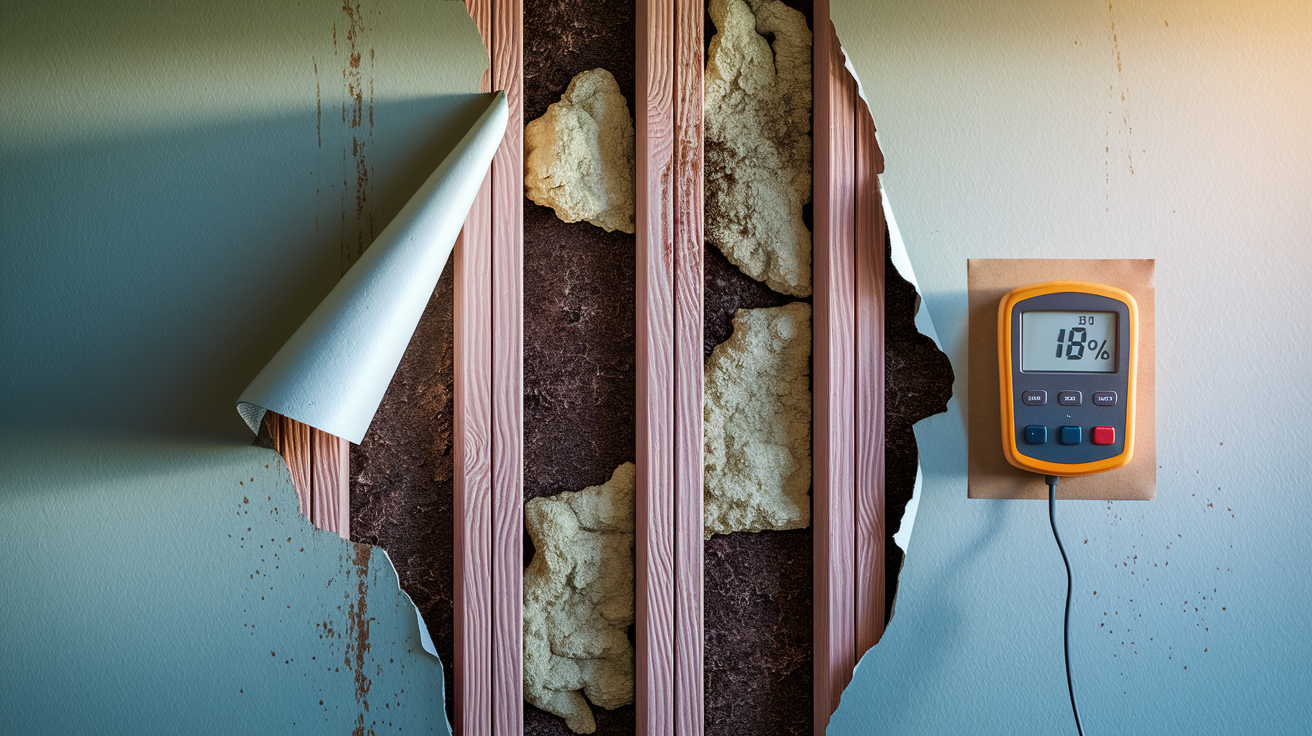
Always check subfloor moisture with a meter before reinstalling carpet, especially on concrete or over crawlspaces. Readings should match the baseline for your climate (typically 12 to 15 percent moisture content for wood subfloors, and relative humidity below 50 percent at the surface of concrete). If readings are elevated, continue drying or investigate hidden sources like foundation leaks or poor drainage. Reinstalling carpet over wet subfloor guarantees mold, buckling, and odor problems within weeks.

Environmental Disposal and Recycling Options for Unsalvageable Carpet

Category 3 blackwater contaminated carpet and padding need handling as hazardous waste in many jurisdictions. Bag the material in heavy duty plastic, seal it, and label it if required by local codes. Contact your municipal waste authority or a licensed disposal company to confirm whether the material can go to a standard landfill or requires special handling. Don’t leave contaminated carpet at the curb without checking regulations.

Even Category 1 and 2 carpet that can’t be salvaged creates disposal challenges. Wet carpet’s heavy, difficult to handle, and takes up significant landfill space. Some areas restrict wet waste or require it to be dried before disposal. Cut carpet and padding into manageable sections, roll them tightly, and secure with tape or twine. If the material’s not contaminated, ask whether your waste hauler accepts it or if you need to rent a dumpster.

Carpet recycling programs exist for clean, uncontaminated materials. Some manufacturers and retailers offer take back programs that separate fibers, backing, and padding for reprocessing into new products or industrial fill. Check with the Carpet America Recovery Effort (CARE) or local recycling centers to find drop off locations. Contaminated or moldy carpet’s not eligible for recycling and must be landfilled.

Disposal guidelines:

  • Bag and seal Category 3 contaminated materials. Confirm local hazardous waste rules.
  • Cut carpet and padding into sections under 4 feet wide for easier handling.
  • Dry materials before disposal if required by your waste hauler.
  • Explore recycling options for clean, non-contaminated carpet to reduce landfill impact.

Final Words

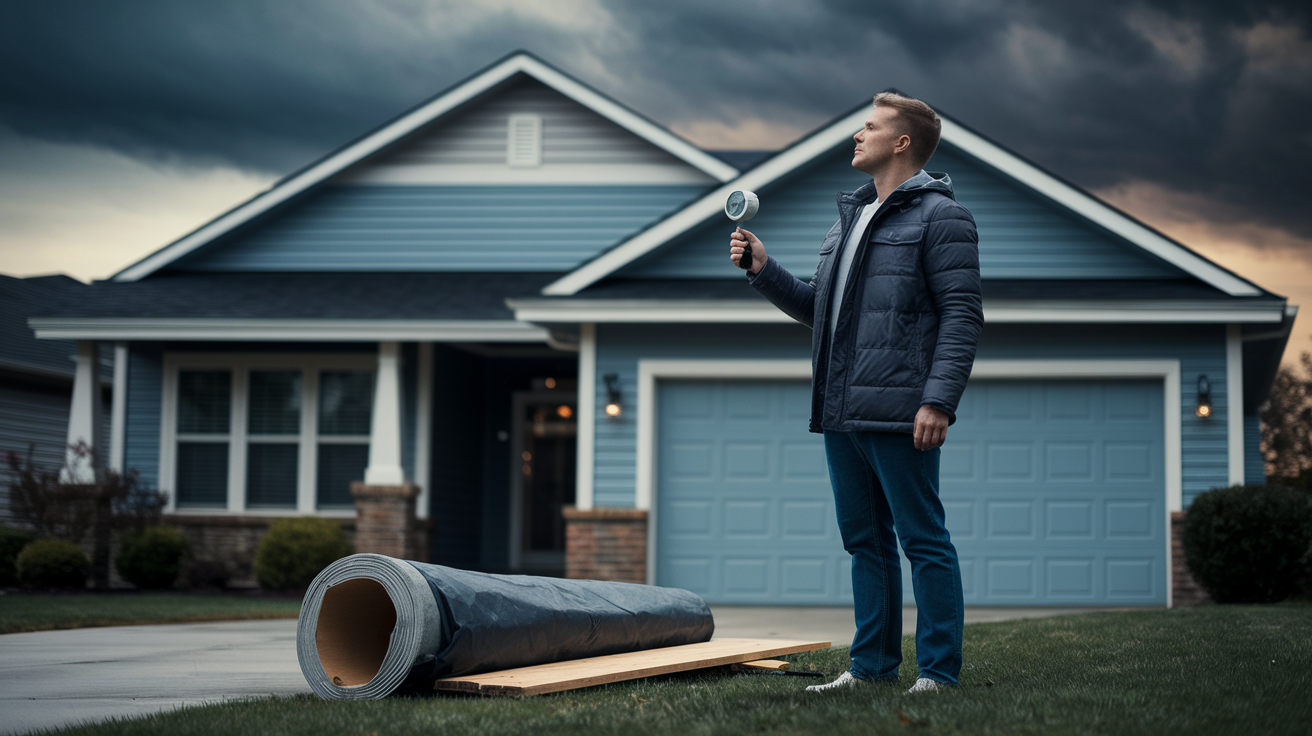
If water is still on the floor, stop the source and start extraction now. The water category and the clock (24–72 hours) decide whether the carpet can be saved.

Check fibers, backing, and padding fast. Take photos, use a moisture meter if you have one, and run air movers and dehumidifiers to keep mold from starting.

If the area is large or the water is contaminated, call a pro to document and restore. With quick action and clear records, flood damaged carpet salvage is often possible, and you’ll be back in your home sooner.

FAQ

Q: Can carpet be salvaged after a flood? What is salvageable after a flood?

A: Carpet can be salvaged after a flood, but salvage depends on water category, time wet, and carpet condition—Category 1 within 24–48 hours and newer, low-wear carpet is most salvageable; Category 3 usually needs removal.

Q: What to do with water damaged carpet?

A: With water damaged carpet, stop the water source, take photos, extract standing water, lift the carpet and remove the pad, start drying with fans/dehumidifiers, and call pros for grey or contaminated water or large areas.

Q: How quickly can mold grow under wet carpet?

A: Mold can begin growing under wet carpet within 24–48 hours; finishing drying by 48–72 hours lowers risk. If you smell mustiness or see growth, remove affected material and contact professionals.

Sump Pump Maintenance for Leak Prevention: Essential Tasks to Keep Your Basement Dry

0

Your sump pump only matters when it’s running, but most homeowners never test it until water’s already pooling in the basement. That $200 piece of equipment stands between your finished basement and thousands in water damage, yet it sits ignored in the corner until it fails during the next heavy storm. Regular maintenance keeps your pump ready to activate the second water enters the pit, protects the motor from debris damage, and catches small problems before they turn into emergency flooding. Here’s what you need to check monthly and quarterly to keep your basement dry.

Critical Maintenance Checklist for Leak Prevention

MIoYP-1fQKi_TN3t_G6qHQ

Proper sump pump maintenance stops basement flooding before it starts. Your system needs to kick on when water shows up and run smoothly through the whole cycle.

Monthly Maintenance Checklist:

  1. Test pump operation by pouring water into the pit
  2. Inspect discharge pipe connections for leaks or separation
  3. Verify float switch moves freely without obstructions
  4. Check pump position to ensure it remains upright and level
  5. Clean inlet screens to prevent debris blockage
  6. Inspect electrical connections and GFCI outlet function
  7. Test backup system operation if installed
  8. Monitor for unusual sounds during pump cycle

Testing your sump pump with water matters more than anything else you’ll do. Grab a 5 gallon bucket, fill it up, and slowly pour it into the sump pit. Watch the float switch rise with the water level. It should move smoothly without catching on the pit walls or pump housing. When the water hits the activation point, the pump should start automatically within seconds. You’re looking for strong, steady discharge flow. The pump keeps running until the water level drops below the shutoff point, then stops on its own. Walk outside and check the discharge location to make sure water flows freely away from your foundation.

Normal operation sounds like a steady hum with consistent water movement through the discharge pipe. Warning signs? Grinding or rattling noises usually mean debris in the impeller. Continuous running points to positioning problems or a stuck float switch. Complete failure to start when water reaches the activation level needs immediate attention. Weak discharge that barely trickles from the outlet pipe also tells you something’s wrong. These symptoms need fixing before the next heavy rain.

Test your pump monthly to catch problems early. In early spring before heavy rain season, run a thorough test even if the pump hasn’t run recently. After extended dry periods when the pump sits idle for weeks, run a test cycle to verify it’s ready. Monthly checks take less than five minutes but prevent emergency failures that lead to basement flooding and expensive water damage.

Cleaning the Sump Pump and Pit to Remove Debris Buildup

augXkytgR3-a5rfcny_jIw

Debris buildup causes pump failure and water backup by clogging inlet screens, jamming impellers, and stopping the float switch from moving properly.

Cleaning the Sump Pump Unit

Disconnect power completely before removing the pump from the pit. Lift the unit out and place it on a protected surface outside or in a utility sink. Use a garden hose to spray down visible dirt and gunk covering the pump housing. For stubborn debris, scrub with a stiff brush. Pay attention to the inlet openings where water enters the pump. Remove the bottom grate if your model allows access to the impeller. Check for wrapped debris like roots, fabric, or hair that stops the impeller from spinning freely.

Cleaning the Pit and Basin

Use a wet/dry vacuum to remove standing water and sediment from the bottom of the pit. That accumulated silt reduces the pit’s capacity and shortens the time between pump cycles. Scrub the pit walls with a brush to remove mineral deposits and grime. Check the pit liner for cracks or damage that could allow soil to get in. Clear the weep hole, that small opening near the pump base that equalizes pressure and prevents air lock.

Cleaning Inlet Screens and Vent Holes

Clean the inlet screen at least every four months using an old toothbrush and water. This screen acts as a filter, allowing water in while keeping dirt and debris out of the pump mechanism. When the screen clogs, water pools around the pump instead of being drawn in efficiently. That creates conditions for potential microbial growth. The vent hole on top of the pump maintains proper air pressure inside the housing. Use a small wire or toothpick to clear this opening if it gets blocked.

Clean your sump pump every few months during active seasons, or quarterly if your basement experiences frequent water intrusion. Signs that cleaning’s overdue include slower pumping action, visible debris floating in the pit, musty odors from standing water, or the pump running longer than normal to clear the same amount of water.

Discharge Pipe System Maintenance and Proper Placement

yKWyksJtTriCseGwvnXI4A

Discharge pipe failures cause water to flow back toward your foundation, overwhelming the sump pump and creating the exact flooding you’re trying to prevent.

Inspect pipe joints and connections every month for signs of separation or damage. Walk the entire discharge line from the pump to the outdoor exit point. Feel each connection to make sure pipes fit tightly together without gaps. Look for cracks in PVC piping, especially at elbows where stress concentrates. Check that mounting brackets hold the pipe securely without sagging sections where water could pool and freeze. Replace any damaged sections immediately. A $15 pipe replacement prevents thousands in water damage.

Water must discharge at least 20 feet from your home foundation to prevent it from seeping back into the soil around your basement and returning to the sump pump. Never allow discharge water to flow into sewer or septic systems. The volume overwhelms these systems and causes damage or backups. Avoid discharging onto driveways and sidewalks where continuous water exposure speeds up concrete deterioration and creates ice hazards in winter. Some municipalities restrict discharge into storm drains, so check local regulations before connecting to municipal systems.

The check valve prevents water in the discharge pipe from flowing backward into the pit after the pump shuts off. During your quarterly cleaning, remove and inspect the check valve for debris buildup inside the valve body. Rinse it thoroughly under running water. Check that the internal flapper moves freely. It should swing open easily when you blow through one end but seal completely when you try blowing from the opposite direction. A failing check valve forces your pump to re-pump the same water repeatedly, shortening motor life.

Winterize your discharge pipes in cold climates to prevent freeze related backups. Insulate above ground sections with foam pipe insulation rated for outdoor use. Consider installing a bubbler pot at the discharge point. This underground reservoir allows water to percolate into the soil even when the ground surface freezes. Alternatively, extend the discharge line underground below the frost line. Ice blockages turn a functioning pump into a useless motor that runs continuously without moving water.

Check local building codes before modifying your discharge system. Code violations can result in fines during home inspections and create insurance coverage problems if pump failure causes water damage. Proper discharge placement reduces maintenance requirements by preventing the pump from working against its own expelled water, which extends motor life and reduces how often you’ll need to replace components.

Checking Sump Pump Position and Float Switch Function

foXndtgJTvaXQJNqx0Aorg

Motor vibrations during normal operation gradually shift the pump from its original position. Even small movements affect performance enough to cause continuous running or complete failure to activate.

Every month, verify the pump sits upright and centered in the basin. The pump base should rest flat on the pit bottom without tilting to any side. Natural vibrations during the pumping cycle cause the unit to “walk” across the pit floor over time. When a pump tips or leans, the float switch can catch against the pit wall, preventing it from rising with the water level. An off kilter pump also puts uneven stress on the impeller shaft and bearings, speeding up wear.

Inspect the float switch for free movement through its entire range of motion. The float, whether a ball on an arm or a vertical switch, needs several inches of clearance from the pit walls and pump housing. Manually lift the float to trigger the pump, then lower it to verify automatic shutoff. Some float switches hang from cords that can wrap around discharge pipes or get pinned under the pump body. Untangle any caught components and reposition them for unrestricted movement. The float should activate the pump when water reaches about two thirds of the pit depth and shut off when water drops to about six inches from the bottom.

Common positioning problems show specific symptoms. Continuous running usually means the float can’t drop low enough to trigger the shutoff switch. Check if the pump has shifted too close to one wall. Failure to start often indicates the float is pinned or the pump has tipped backward, preventing the float from rising. Pumps that cycle rapidly on and off suggest the float has minimal clearance and triggers at the slightest water movement. Reposition the pump by centering it in the pit, making sure the base sits level, and verifying at least three inches of clearance on all sides for the float mechanism.

Electrical Safety and Power Supply Maintenance

zp2cmSweS4K9dhAuLsyNlQ

Working with electrical equipment in damp basement environments requires strict safety protocols to prevent shock hazards and make sure the pump functions when needed.

Verify your pump plugs into a working ground fault circuit interrupter outlet. GFCI outlets detect electrical current leaks and cut power instantly to prevent shock. Test the GFCI monthly by pressing the “test” button. The outlet should click and cut power. Press “reset” to restore function. GFCI breakers trip frequently in damp basement conditions, which effectively shuts off the pump without warning. After any power interruption or if you find the pump not running, check that the GFCI hasn’t tripped before assuming pump failure.

Inspect the power cord every month for damage, fraying, or deterioration from moisture exposure. Look closely where the cord enters the pump housing. This junction point often shows wear first. Check the entire cord length for cuts, exposed wiring, or soft spots in the insulation. The pump must plug directly into the outlet without extension cords, which create additional connection points where moisture can cause problems and reduce the electrical current reaching the motor.

Electrical Safety Precautions:

  • Always disconnect power before any maintenance by unplugging the pump, not just turning off the switch
  • Never touch the pump or electrical connections with wet hands or while standing in water
  • Keep all electrical connections at least 12 inches above the highest potential water level in the pit
  • Test the GFCI outlet monthly by pressing the test button to ensure it trips properly
  • Inspect for any exposed wiring at the cord, plug, or pump connection points
  • Call a licensed electrician immediately if you see sparking, smell burning, or the circuit breaker trips repeatedly

Before any maintenance work, unplug the pump and verify power is completely off. Don’t rely on the float switch being in the “off” position. Accidental water introduction during cleaning could trigger the pump unexpectedly. Set the unplugged cord where you can see it as a visual reminder that power is disconnected. After completing maintenance, make sure your hands and the plug are completely dry before reconnecting power.

Installing and Maintaining Backup Battery Systems

P5JrzJDIQ3eGz2iWrSggGg

Backup systems prevent flooding during storms that knock out power exactly when your primary sump pump faces the highest demand from heavy rainfall.

Backup Type How It Works Pros Cons
Battery Backup Separate pump powered by deep cycle marine battery, activates automatically when primary pump loses power Reliable during outages, works 4 to 8 hours depending on pumping frequency, easy to test Requires battery replacement every 3 to 5 years, needs charging system maintenance, limited runtime
Water Powered Backup Uses municipal water pressure to create suction that removes water from pit, no electricity required Unlimited runtime, no batteries to maintain, works during extended outages Requires adequate water pressure (40+ PSI), uses 1 gallon of municipal water per 2 gallons pumped, not suitable for homes on well water
Backup Generator Portable or standby generator powers primary pump and other essential systems during outages Powers entire home, supports primary pump at full capacity, handles other appliances Expensive initial cost, requires fuel storage and maintenance, needs manual startup unless professionally installed

Battery backup pumps install directly in the sump pit alongside your primary pump. Choose a system with enough battery capacity to match your typical pumping needs. Homes with high water tables need larger batteries than homes with occasional seepage. The charging system requires a dedicated outlet and should show a steady green light indicating full charge. Test the battery backup every three months by unplugging the primary pump and pouring water into the pit to trigger the backup system. Replace the battery when it can’t maintain a charge or fails to run the pump for at least 30 minutes during testing.

Inspect your backup system monthly using the same procedure as your primary pump. Verify the battery charger shows a full charge indicator. Check that automatic switchover functions properly. When the primary pump loses power, the backup should activate within seconds. Clean corrosion from battery terminals using a wire brush and baking soda solution. Keep water level in flooded batteries topped off with distilled water. A backup system that isn’t maintained provides false security and won’t protect your basement when you need it most.

Installing Alarm Systems and Monitoring for Water Level Issues

WnULyuNPSxC00qOJt9xvmQ

Alarm systems provide early warning of pump failure or excessive water levels, giving you time to respond before flooding damages your basement.

Water level alarms alert you when water rises above the normal pumping range, indicating your sump pump isn’t keeping up with water intrusion or has failed completely. Basic alarms consist of a sensor probe mounted on a bracket inside the pit, positioned several inches above the pump’s normal activation point. When rising water touches the sensor, the alarm sounds. Typically a loud 85 decibel alert you can hear throughout the house. Install the sensor high enough to trigger before water reaches floor level but low enough to give meaningful warning time, usually about halfway up the pit depth.

Smart monitoring systems add WiFi connectivity and smartphone notifications to traditional alarms. These systems track pump cycles, runtime, and water levels continuously. You receive alerts on your phone when the pump runs longer than normal, cycles too frequently, or when water reaches alarm levels. Some systems send notifications when power outages occur, warning you that your primary pump is offline. Advanced models monitor backup battery charge levels and alert you when the battery needs replacement. Smart systems cost more than basic alarms but provide monitoring even when you’re away from home.

Test your alarm monthly by manually raising the sensor probe or triggering the test button if your system includes one. Replace batteries in wireless alarms annually, even if they still show charge. Weak batteries fail during emergencies. Keep the sensor probe clean by wiping it with a damp cloth during your regular pit cleaning to ensure reliable water contact and activation.

Seasonal Inspection Requirements and Maintenance Schedule

mTysM0kVQ_KGOdBu5q-UoQ

Scheduled maintenance prevents emergency failures by addressing small problems before they escalate into system breakdowns during storms.

Adjust your maintenance frequency based on conditions specific to your home. Homes with high water tables or frequent groundwater intrusion need more frequent inspections than homes with occasional seepage. Regional climate affects schedules. Areas with heavy spring rainfall require thorough pre-season preparation, while regions with year round precipitation need consistent monthly attention regardless of season.

Maintenance Task Monthly Quarterly Spring Fall Annual
Test pump with water pour
Inspect discharge pipe connections
Check pump position and float switch
Test GFCI outlet and inspect power cord
Clean inlet screen
Clean pump unit and pit
Inspect and clean check valve
Test backup battery system
Comprehensive pre-season testing
Winterize discharge pipes (cold climates)
Replace alarm system batteries
Professional inspection

Keep a maintenance log noting the date of each task, pump runtime observations, and any problems discovered. Track how long the pump runs during test cycles. Increasing runtime for the same amount of water suggests declining efficiency. Note unusual sounds, vibrations, or performance changes. These records help identify gradual deterioration and provide valuable information when consulting professionals about repair versus replacement decisions.

Recognizing Signs of Mechanical Failure and Troubleshooting Common Problems

uxNOFwkQRyVLgHbMSXDmw

Catching problems early through observation during monthly checks prevents minor issues from escalating into complete pump failure and basement flooding.

Common Problems and Diagnostic Steps:

Strange grinding or rattling noises. Likely cause is debris caught in the impeller. Disconnect power, remove pump, and inspect the impeller chamber for rocks, roots, or wrapped materials. Clean thoroughly and test. Persistent grinding after cleaning suggests bearing failure requiring replacement.

Pump runs continuously without shutting off. Check pump position first. It may have shifted so the float can’t drop low enough to trigger shutoff. Verify the float moves freely without catching on pit walls. Inspect the float switch mechanism for damage. Test by manually lowering the float. If the pump doesn’t stop, the switch has failed.

Pump won’t start when water reaches activation level. Verify power by checking the GFCI outlet hasn’t tripped. Confirm the float rises freely with water level. Manually lift the float. If the pump starts, the problem is float positioning or water level isn’t reaching the activation point. If manually triggering the float doesn’t start the pump, suspect electrical failure or a seized motor.

Pump cycles on and off rapidly. Indicates the check valve is stuck open, allowing water to flow back into the pit after each cycle. Remove and clean or replace the check valve. Can also result from a discharge pipe that’s too small in diameter for the pump capacity.

Excessive vibration intensity. Some vibration is normal, but violent shaking suggests an unbalanced impeller from debris accumulation or damage. Can also indicate loose mounting or a pump that’s shifted off center in the pit. Reposition the pump and clean the impeller.

Visible rust or corrosion on pump housing. Surface rust is cosmetic, but corrosion around seals, the power cord entry point, or the motor housing indicates water intrusion that will cause electrical failure. Inspect closely for pitting or flaking metal. Advanced corrosion requires pump replacement.

Musty or sewage like odors from pit. Suggests standing water between pump cycles where bacteria grows. Clean the pit thoroughly, improve drainage to the pit, and verify the weep hole isn’t clogged. Persistent odors may indicate sewer gas entering through cracks in the pit liner.

Weak discharge flow or water barely trickling out. Points to a clogged inlet screen, partially blocked discharge pipe, or failing impeller. Clean the inlet screen first, then inspect the discharge line for obstructions. If flow remains weak after cleaning, the impeller may be damaged or motor is losing power.

Sump pumps typically last 7 to 10 years with proper maintenance. Performance issues in pumps approaching or exceeding this age often indicate it’s time for replacement rather than repair. Frequent breakdowns, declining pumping capacity despite cleaning, or multiple component failures within a short period suggest the unit has reached end of life. Replacement costs $800 to $1,500 installed, while repeated repairs on an aging pump quickly approach this amount without providing long term reliability.

Keep notes on pump behavior changes between maintenance checks. Document when symptoms first appear, what conditions trigger them, and whether they worsen over time. These observations help professionals diagnose problems accurately and provide specific recommendations rather than general assessments.

Understanding Submersible vs. Pedestal Pump Maintenance Differences

EGsx1wBCQOeJcRRGuJhttA

The two main sump pump types require different maintenance approaches based on their design and component accessibility.

Submersible pumps sit entirely underwater in the sump pit with the motor sealed inside a waterproof housing. Maintenance focuses on seal integrity and gasket condition because any water penetration into the motor housing causes electrical failure. Inspect the power cord entry point where it enters the sealed housing. This junction uses a special gasket that can deteriorate from constant submersion. Check the base plate gasket that seals the motor compartment from the water intake section. Look for oil sheens on the pit water surface, which indicate seal failure and motor oil leaking from the housing. Complete submersion means you’ll remove the entire pump for cleaning and inspection rather than accessing components while the unit remains in the pit.

Pedestal pumps mount the motor on a column above the water level with only the intake hose submerged. This design allows easier maintenance access since the motor stays dry and visible at all times. You can inspect motor condition, check for overheating, and listen for bearing noise without removing anything from the pit. The motor shaft that connects to the submerged impeller requires occasional lubrication at the bearing points. Check your owner’s manual for lubrication type and frequency. Clean the intake screen at the bottom of the suction hose more frequently than submersible inlet screens because the narrower hose diameter clogs faster.

Combination systems use a primary pump (usually submersible for efficiency and quiet operation) with a secondary backup pump (often pedestal style for different activation points and power sources). Maintain each pump according to its specific type requirements. Test them separately by disconnecting one while testing the other to verify each unit functions independently.

Check manufacturer specific maintenance recommendations in your owner’s manual. Different brands use various float switch designs, seal materials, and motor configurations that affect maintenance procedures and parts replacement. Following manufacturer guidelines preserves warranty coverage and ensures you’re addressing the actual maintenance needs of your specific model rather than using generic procedures that might miss critical tasks.

DIY Maintenance Guidelines and Knowing When Professional Help Is Required

Safe DIY Maintenance Tasks:

Monthly water testing. Pouring water into the pit and observing pump operation requires no tools and carries minimal risk when you avoid touching electrical components.

Basic cleaning of pump exterior and pit. Disconnecting power first makes this safe for homeowners comfortable with simple hand tools.

Visual inspections. Checking pump position, examining discharge pipes, and verifying float movement are observation tasks requiring no specialized knowledge.

Alarm system checks. Testing and replacing batteries in alarm systems involves basic household skills.

Discharge pipe inspection. Walking the discharge line and checking connections requires no technical expertise.

Position verification and adjustment. Repositioning a shifted pump within the pit is straightforward once power is disconnected.

Professional help is required when the pump won’t start after water testing and you’ve verified power is reaching the outlet, any electrical issues beyond a simple GFCI reset such as sparking or burning smells, the pump experiences repeated failures despite proper maintenance, unusual grinding or squealing noises persist after thorough cleaning, water backs up into the basement despite the pump appearing to run, major component replacement like motors or complete pump units is needed, or water damage restoration services become necessary after pump failure causes flooding. Don’t attempt to repair sealed motor housings, replace internal electrical components, or diagnose complex mechanical failures. These situations require professional assessment for safety and proper repair.

Cost considerations favor a balanced approach. Professional annual inspections typically cost $150 to $300 and include thorough testing, cleaning, and component assessment that extends pump life. DIY monthly maintenance costs almost nothing beyond minimal cleaning supplies and your time. Emergency pump replacement during active flooding costs $1,200 to $2,000 with rush service fees, while planned replacement during dry conditions costs $800 to $1,500. Regular professional inspections combined with monthly DIY checks provide the most cost effective protection. You catch problems early when repairs are simple and inexpensive rather than waiting for complete failure that requires emergency service.

Find qualified professionals by asking for sump pump specialists rather than general plumbers. Specialists understand the nuances of different pump types and drainage systems. Verify they service any pump model regardless of who installed it, which matters if you move into a home with an existing system. Establish a relationship with a trusted provider for annual inspections rather than calling different companies each time. Consistent service from the same technician means they track your pump’s history and spot gradual performance decline. Check if they offer emergency service contracts that guarantee rapid response during pump failures, which provides protection during storms when multiple customers call simultaneously.

Protecting Your Foundation Through Drainage System Integration

Sump pump effectiveness depends on proper integration with exterior drainage systems. The pump removes water that’s already entered your drainage network, but comprehensive water management reduces how hard the pump works and how often it cycles.

French drains and interior perimeter drainage systems collect groundwater before it enters living spaces and direct it to the sump pit through perforated pipes embedded in gravel beds. These drainage pathways need maintenance to function efficiently. Check that exterior French drains remain clear of debris that blocks water flow. Inspect interior perimeter drains during your quarterly pit cleaning. If you notice reduced water flow into the pit during wet periods, the drainage pipes may be clogged with silt. Professional hydro jetting services clear blocked drainage lines, restoring proper water collection and reducing the load on your pump.

Downspout diversion keeps roof water away from your foundation and prevents massive water volume from overwhelming your sump pump during storms. Extend downspouts at least 10 feet from the foundation using solid pipe or roll out extensions. Never allow downspouts to discharge next to the foundation where water immediately seeps into the soil around your basement. A single downspout can deliver hundreds of gallons during heavy rainfall. Water that your sump pump must handle if it enters the drainage system instead of flowing away from the house.

Slope grading around your home creates the first line of defense against basement water intrusion. The ground should slope away from the foundation at least 6 inches over the first 10 feet. This simple grading directs surface water away before it can saturate the soil around your basement walls. Proper exterior drainage reduces sump pump cycling frequency dramatically. Pumps in homes with good exterior drainage may run only during heavy rainfall, while pumps fighting poor drainage run constantly during wet periods. Reduced cycling extends motor life, lowers electricity costs, and decreases the likelihood of failure during critical storms. Address exterior drainage problems and foundation grading issues as part of comprehensive basement water damage repair rather than relying solely on your sump pump to compensate for preventable water intrusion.

Replacement Parts, Costs, and Extending Your Sump Pump Lifespan

Typical sump pump lifespan ranges from 7 to 10 years, but proper maintenance can extend this to 12 years or more by reducing wear and preventing premature component failure.

Part Typical Lifespan Replacement Cost Range Signs of Wear
Float Switch 5 to 7 years $20 to $60 Pump won’t activate or shut off, erratic cycling, visible cracks in float ball
Check Valve 3 to 5 years $15 to $40 Water flowing backward after pump stops, pump cycling rapidly, clicking sounds in discharge pipe
Discharge Pipe 10 to 15 years $30 to $100 Cracks especially at elbows, separation at joints, freezing damage, brittle or discolored PVC
Backup Battery 3 to 5 years $100 to $250 Won’t hold charge, backup pump runs less than 30 minutes during testing, corrosion on terminals
Inlet Screen 7 to 10 years $10 to $25 Clogged beyond cleaning, cracked or broken mesh, warped frame
Impeller 5 to 8 years $30 to $80 Reduced pumping capacity, unusual vibration, visible damage to blades, bent shaft
Complete Pump 7 to 10 years $150 to $600 Multiple component failures, motor overheating, seal leaks, cost of repairs approaching replacement cost

Annual maintenance costs break down clearly between DIY and professional approaches. DIY maintenance requires minimal investment, perhaps $20 annually for cleaning supplies, replacement inlet screens, and testing materials. Your time investment runs about 30 minutes monthly plus quarterly deep cleaning sessions. Professional annual service typically costs $150 to $300 depending on your region and includes comprehensive testing, cleaning, component inspection, and a written assessment of pump condition. Many homeowners combine approaches by handling monthly checks themselves while scheduling professional service each spring before heavy rain season.

Regular maintenance improves energy efficiency by keeping the impeller clean and making sure the motor doesn’t work harder than necessary. A well maintained pump cycles less frequently because it removes water efficiently during each cycle rather than struggling with reduced capacity from debris buildup. Reduced cycling means lower electricity consumption. The difference may only be a few dollars monthly, but it adds up over the pump’s lifespan while also reducing wear on the motor and components.

Prevent corrosion and rust through proper cleaning that removes moisture trapping debris, adequate pit ventilation to reduce humidity around the pump housing, and addressing standing water between pump cycles that creates a corrosive environment. Standing water indicates either excessive groundwater intrusion that exceeds your drainage capacity or a pit that’s too shallow and doesn’t provide enough storage between cycles. Consider having a professional assess whether a deeper pit or additional drainage would reduce the corrosive conditions affecting your pump.

Mold Prevention and Humidity Control After Sump Pump Issues

Proper sump pump maintenance prevents moisture related problems by removing water before it saturates basement air and creates conditions where mold develops on surfaces and belongings.

A functioning sump pump controls basement moisture by actively removing groundwater before it accumulates and evaporates into the air. When pumps fail or struggle to keep up with water intrusion, humidity levels rise quickly. Elevated humidity above 60 percent creates ideal conditions for mold growth on drywall, wood framing, stored items, and furnishings. Your monthly maintenance routine directly prevents these moisture problems by making sure the pump activates reliably and removes water efficiently.

Monitor basement humidity levels using a simple hygrometer that costs $10 to $20 at hardware stores. Keep humidity between 30 and 50 percent year round. Install a dehumidifier as backup protection during humid summer months or after heavy rainfall when your sump pump runs frequently. The dehumidifier removes moisture from the air that evaporates from the sump pit and any dampness on basement walls. This two part approach, active water removal through the sump pump and humidity control through dehumidification, provides comprehensive moisture management.

After any pump failure that allows water to pool in the basement, inspect immediately for moisture damage. Check walls for water staining, feel carpets and belongings for dampness, and look for musty odors that indicate hidden moisture. Address small problems quickly by drying affected areas with fans, removing wet materials, and cleaning surfaces with appropriate solutions. Speed matters. Mold can begin developing within 24 to 48 hours of water exposure, so rapid response prevents small moisture incidents from becoming major problems.

When pump failure causes significant water intrusion or when you discover mold growth from extended moisture exposure, professional help becomes necessary. Water damage restoration services provide specialized equipment for thorough drying, moisture detection tools that find hidden dampness, and proper techniques for cleaning contaminated surfaces. Professional mold remediation may be required if growth covers more than 10 square feet or appears in HVAC systems where it can spread throughout your home. These situations affect property value because undisclosed moisture and mold problems create legal liability during home sales, and they impact flood insurance since repeated water damage from preventable maintenance failures can affect coverage and rates.

Final Words

Sump pump maintenance for leak prevention isn’t complicated, but it demands consistency.

Test your pump monthly. Clean the pit every few months. Check the discharge pipe, float switch, and electrical connections regularly.

These simple tasks protect your basement from flooding and save you from dealing with water damage, mold problems, and expensive emergency repairs.

Most maintenance work takes less than an hour and costs almost nothing compared to replacing a failed pump or repairing a flooded basement.

Start with a simple water pour test today. If the pump runs smoothly, you’re already ahead. If it doesn’t, you caught a problem before it turned into a leak.

FAQ

What maintenance needs to be done on a sump pump?

Sump pump maintenance needs include monthly testing by pouring water into the pit to trigger operation, inspecting discharge pipe connections and float switch movement, cleaning inlet screens every four months, checking pump position and electrical connections, testing backup systems, and monitoring for unusual sounds or performance issues.

Can I put a chlorine tablet in my sump pump?

No, you should not put a chlorine tablet in your sump pump. Chlorine can damage pump components, seals, and gaskets. Instead, clean the pump every few months by disconnecting power, removing it from the pit, hosing down debris, and using a wet/dry vac to remove sediment from the basin.

What can I put in my sump pump to keep it clean?

You should keep your sump pump clean using plain water and a scrub brush rather than adding chemicals. Hose down dirt and gunk, clean the inlet screen with a toothbrush and water, clear the weep hole, and use a wet/dry vac to remove standing water and sediment from the pit every few months.

Should I replace the water pump as preventative maintenance?

You should replace your sump pump when it’s 7 to 10 years old or showing signs of failure like continuous running, strange noises, or weak discharge, rather than on a fixed preventative schedule. Regular maintenance and repair is more cost-effective than premature replacement and extends pump lifespan significantly.

How often should I test my sump pump?

You should test your sump pump monthly by pouring a bucket of water into the pit to verify it triggers and drains properly, with additional testing in early spring before heavy rain season and after extended periods of inactivity to ensure reliable operation when needed most.

What are signs my sump pump needs professional repair?

Your sump pump needs professional repair if it won’t start during testing, makes unusual grinding or rattling noises, runs continuously without stopping, shows weak discharge flow, or cycles on and off too frequently despite cleaning and basic troubleshooting. Electrical issues beyond simple GFCI reset also require professional help.

How far should sump pump discharge be from my house?

Sump pump discharge should be at least 20 feet from your home foundation to prevent water from returning to the basement and overworking the unit. Never discharge into sewer or septic systems, and avoid draining onto driveways and sidewalks where continued water exposure speeds deterioration.

Do I need a battery backup for my sump pump?

You need a battery backup sump pump if you live in areas with frequent power outages or severe storms, as your primary pump won’t operate without electricity. Battery backup systems automatically take over during power failures, preventing basement flooding when protection matters most and primary pumps fail.

How do I know if my float switch is working?

You know your float switch is working by pouring water into the pit and watching it rise freely without catching on pit walls, activate the pump at the proper water level, and allow the pump to shut off automatically when water drains. Restricted movement or failure to trigger indicates adjustment or replacement is needed.

What causes a sump pump to run constantly?

A sump pump runs constantly when it’s shifted out of position due to motor vibrations, the float switch is stuck or misaligned, the check valve is broken allowing backflow, the pump is undersized for water volume, or there’s a leak in the discharge pipe returning water to the pit.

Rebuilding Drywall After Water Damage: Step-by-Step Restoration Process

0

If you’ve got wet drywall right now, here’s what most homeowners get wrong: they wait to see if it’ll dry on its own. It won’t. Water-damaged drywall doesn’t bounce back. The gypsum core turns soft, paper facing separates, and mold starts growing inside the wall where you can’t see it yet. We’re walking you through the actual restoration sequence: stopping active damage first, drying everything the right way, then rebuilding sections so they blend back into your wall. This isn’t about patching. It’s about making it safe, dry, and finished correctly.

Immediate Assessment and Action Plan for Water-Damaged Drywall

4W_q1d6jQyiDP7e5emMV3Q

The first thirty minutes after you discover water damage pretty much decide whether you’re fixing one wall or gutting the whole room.

What to do first (and in this order):

  1. Stop the water – shut off the main supply if you can’t find the exact leak, throw tarps over roof holes
  2. Kill the power – flip breakers for any room with standing water or soaked walls
  3. Figure out what kind of water this is – clean water from a pipe, gray water from an appliance, or black water from sewage or flooding
  4. See how bad it really is – one small spot or half the house
  5. Check if anything’s about to collapse – push gently on wet ceiling sections, watch for sagging or bulging
  6. Decide if you’re doing this yourself – depends on what kind of water it is, how much damage there is, whether you’re comfortable with electrical work, and if insurance is involved

Before you cut anything or haul equipment in there, use a non-contact voltage tester on outlets and switches near the damage to make sure power’s actually off. Wet ceiling drywall can drop without warning, so don’t stand directly under sagging sections. If this water came from a toilet, sewage line, or flooding, stop right now and call someone. Contaminated water needs hazmat protocols and gear you probably don’t own.

Grab a basic moisture meter from the hardware store for thirty or forty bucks and check walls that look dry but sit next to obvious damage. Water travels 12 to 24 inches past what you can see. You’ve got maybe 24 to 48 hours before mold becomes a real problem, which means if you found this Friday night and can’t start work until Monday, you’re already looking at professional help. You need to call pros immediately when you’ve got more than one wall damaged, any contaminated water, visible mold, soft framing or sagging areas, or when insurance documentation matters.

Assessing Water Damage Severity and Planning Drywall Replacement

YAcV8eo_RMmQHElMyOjAXg

Start by running your hand flat against the wall, feeling for soft spots, temperature changes, or spongy areas compared to the rest of the surface. Hold a four-foot level vertically and horizontally against suspect sections. Anything off plumb has lost its structure and can’t be saved. Press gently with your thumb on questionable spots. If it leaves a dent or feels soft instead of solid, that section needs replacing. Look for paint blisters, bubbling paper, or places where the drywall separated from the studs behind it.

You’re replacing drywall when you see:

  • Soft, crumbly gypsum when you press the surface
  • Sagging that’s no longer flush with surrounding wall
  • Gaps between drywall and framing
  • Screws that pulled through the paper
  • Water stains extending more than 12 to 24 inches from where the damage started
  • Any exposure to gray water (appliances, washing machines) or black water (sewage, flooding)

Water doesn’t just sit where it lands. It travels up and out through the paper facing, then soaks into the gypsum core. That visible water line isn’t where damage stops, it’s where it began. Mark your cut line 12 to 24 inches above the highest moisture reading on your meter. This flood cut approach opens the wall cavity for drying and inspection while saving upper portions that stayed dry.

Ceiling damage needs extra caution. Water-soaked ceiling drywall gets heavy fast and can collapse suddenly. Before you work under any wet ceiling section, get up in the attic or crawl space above to inspect the backside, find the water source, and check if insulation’s holding extra moisture. Load-bearing walls showing structural damage need professional engineering review before you proceed. Removing compromised drywall might expose framing problems affecting the whole building’s stability.

Complete Drying and Mold Prevention Protocol

74wVu40yTTCuvW93jyvMPg

The drying phase is where most DIY repairs fail. Waiting feels like wasted time when you’re staring at torn up walls, but installing new drywall over moisture guarantees you’ll rip it out again in six months to deal with mold.

Drying Method Timeline Moisture Target Equipment Needed
Professional equipment 3 to 5 days Under 1% gypsum moisture Industrial dehumidifiers, air movers, wall cavity ventilation systems, commercial moisture meters
DIY with rental equipment 7 to 10 days Under 1% gypsum moisture Rental dehumidifier, box fans, moisture meter, space heaters (winter only)
Natural air drying 2 to 4 weeks (high mold risk) Under 1% gypsum moisture Open windows, fans, moisture meter, extended timeline with humidity-dependent results

Professional drying equipment moves way more air and pulls moisture from wall cavities through specialized ventilation systems you can’t replicate with box fans. Industrial dehumidifiers remove gallons of water per day from the air. Air movers create constant circulation that speeds evaporation from exposed surfaces. Wall cavity drying involves cutting small access holes to direct airflow behind intact drywall, pulling moisture from insulation and framing. Your moisture meter should read under 1% when pressed against gypsum core and under 12% on wood framing before you move forward.

Water contamination categories determine how aggressive your drying needs to be. Clean water from supply lines needs thorough drying but no special treatment. Gray water from appliances, washing machine overflow, or dishwasher leaks needs antimicrobial treatment on all exposed surfaces. Black water from sewage, toilet overflow, or flooding requires complete removal of affected materials. You don’t dry and save drywall that’s been contaminated with sewage. Fix the leak source before you start drying, or you’re just running dehumidifiers while water keeps coming in. Common sources include burst supply lines, roof leaks, failed appliance connections, and plumbing issues behind walls.

Antimicrobial treatment goes on all exposed wood framing, subflooring, and back sides of salvageable drywall sections after the space is completely dry. Use EPA-registered antimicrobial solutions designed for post-water-damage application, following label directions for mixing and dwell time. This step is required whenever moisture sat for more than 24 to 48 hours, regardless of water source. If you’re seeing visible mold growth on framing, stop and bring in a mold inspector to test what species you’re dealing with. Some types require professional remediation beyond DIY scope.

Essential Tools and Materials for Drywall Reconstruction

4V9LQPa7T0GNuEHGR6VcXg

Having everything on site before you start means you can move through phases without stopping mid-project for hardware store runs, which stretches your timeline and leaves wall cavities exposed to humidity longer than necessary.

Required Tools:

  • Utility knife with fresh blades and blade storage
  • Drywall saw or reciprocating saw for rough cuts
  • Cordless drill/driver with drywall bit and Phillips bits
  • 4-foot level for checking plumb and layout
  • Tape measure (25 foot minimum)
  • Moisture meter for verifying drywall and framing dryness
  • Drywall square or T-square for marking straight cut lines
  • Safety equipment: N95 or N100 respirator for mold exposure, safety glasses, heavy-duty work gloves, non-contact voltage tester for electrical verification

Materials Needed:

  • Drywall panels in appropriate thickness (1/2 inch for walls, 5/8 inch for ceilings), use moisture-resistant green board for bathrooms or purple board for high-humidity areas
  • Drywall screws (1-1/4 inch for walls, 1-5/8 inch for ceilings)
  • Joint compound (all-purpose or lightweight formula)
  • Paper or fiberglass mesh drywall tape
  • Stain-blocking primer for water-damaged areas
  • Interior paint matching existing finish
  • Antimicrobial solution for treating exposed framing

Upgrade your respiratory protection based on what the water contained. Mold exposure requires minimum N95 filtration, but if you’re dealing with sewage-contaminated areas, move to N100 or P100 respirators with replaceable cartridges. Test every electrical box location with your voltage tester before cutting near it, even after you’ve flipped the breakers. Wiring from other circuits sometimes runs through boxes you’re about to expose. Black water scenarios require disposable protective clothing, rubber boots, and heavy-duty gloves rated for biohazard work.

Removing Damaged Drywall Sections and Treating Framing

ZVYMwTabSlKmEchoaQjXnQ

Verify electrical shutoff with a circuit tester at every outlet and switch in the affected area, then test again with a non-contact voltage detector before making any cuts. Wiring doesn’t always follow logical paths and you might have circuits from other rooms running through the wall you’re opening. For water-saturated ceiling sections, push gently from below with a braced board to test structural integrity before you position yourself underneath with cutting tools.

The flood cut technique involves removing drywall from the floor up to 12 to 24 inches above the highest point where your moisture meter shows elevated readings. This exposes wall cavities for inspection and drying while preserving upper sections that stayed dry, cutting material costs significantly compared to full wall replacement. Use a utility knife to score horizontal cut lines, then finish with a drywall saw. Cut lines should land on stud centers when possible, giving you solid backing for attaching new panels. Contaminated water scenarios require more extensive removal. If sewage or flood water touched the drywall, remove it completely from floor to ceiling regardless of how high the water actually reached.

Start removal by pulling off baseboards carefully if you plan to reuse them. Cut horizontal lines at your marked height, staying level across the entire span. Score vertical lines at stud locations, then use the drywall saw to complete cuts while avoiding electrical boxes. Remove fasteners from sections you’re keeping, then pull damaged sections away carefully to avoid damaging the intact drywall above your cut line. Work methodically rather than rushing. Damaged drywall that’s been wet often crumbles during removal, creating way more mess than dry demo work.

Pull out any wet insulation and set it aside for disposal. It won’t dry properly and creates mold risk if you leave it in place. Spray all exposed studs, plates, and subflooring with antimicrobial solution, following label directions for application and dwell time. Verify complete drying of framing members with your moisture meter before proceeding. Wood framing should read under 12% moisture content. Check the wall cavity for any hidden plumbing damage, electrical issues, or structural problems that need addressing before you close things back up.

Measuring, Cutting, and Hanging Replacement Drywall Panels

mOPmaheSR56zrdjCBTdOhw

Accurate measurements prevent gaps, reduce the number of seams you’ll need to finish, and ensure new panels sit flush with existing sections, which matters a lot when you’re blending repairs into surrounding walls.

Step-by-Step Installation Sequence:

  1. Measure the opening – width, height, and any irregular cuts around outlets or obstacles
  2. Mark measurements on new panel – use a drywall square to ensure straight, perpendicular lines
  3. Score the face paper – one firm pass with a sharp utility knife along marked lines
  4. Snap the gypsum core – bend the panel away from the scored line to break the core cleanly
  5. Cut the back paper – fold the panel and slice through the paper on the backside
  6. Test fit the panel – verify it fits the opening with minimal gaps (1/8 to 1/4 inch is ideal)
  7. Attach with screws – drive screws through panel into studs at proper spacing and depth

Place screws 8 to 12 inches apart along all studs, starting from the center of the panel and working outward to prevent bowing. Drive screws until the head sits just below the paper surface, creating a slight dimple without breaking through the facing. This is called “dimpling” and it lets joint compound cover the screw head smoothly. Screws driven too deep tear the paper and lose holding power. Screws not driven deep enough create bumps that show through your finish coats.

Install metal corner bead on any outside corners using drywall screws or crimping tool, ensuring it sits perfectly straight before fastening. Cut outlet and switch openings by measuring from a reference point (adjacent stud or existing drywall edge), transferring those measurements to your panel, and using a drywall saw to rough-cut the opening slightly smaller than the box. You can expand it for final fit. New panels must sit flush with existing drywall, not proud or recessed, or you’ll never hide the transition with joint compound. Use shims behind panels if needed to bring them flush with surrounding surfaces.

Taping, Mudding, and Sanding Drywall Seams

wR1siW_lREemX0sXjQ8Irg

The three-coat system exists because you can’t build a smooth, flat surface in one pass. Each coat serves a specific purpose and requires complete drying before the next application.

Start with the tape coat, which embeds paper or mesh tape in a thin layer of joint compound directly over seams. Load a 6-inch taping knife with compound, spread a layer along the seam, press tape into the wet mud, then smooth it with firm pressure to squeeze out excess compound and eliminate bubbles. Inside corners get folded paper tape creased along the center line. Let this coat dry completely, typically 24 hours depending on humidity.

The fill coat goes on next, using an 8 or 10-inch knife to spread compound wider than the tape coat, feathering edges outward to start blending the repair into surrounding wall. This coat fills the depression created by the tape and begins building the flat plane you’re after. Apply compound to screw dimples during this phase, filling them flush. Drying time depends on how thick you applied it. Another 24 hours is typical.

The finish coat uses a 12-inch knife with very thin compound, feathered 12 to 16 inches beyond the previous coat to create an imperceptible transition. Experienced finishers apply this coat almost translucent at the edges. Let it dry 24 hours before sanding.

Sand with 120-grit paper on a sanding block or pole sander, using light pressure to remove ridges and blend transitions without gouging into the compound. Progress to 150-grit for final smoothing. Wear your respirator and control dust with plastic sheeting and ventilation. Set up a work light at a low angle (raking light) to cast shadows across the surface. Imperfections that are invisible under overhead lighting show up clearly under raking light.

Texture Matching, Priming, and Painting Repaired Drywall

2Sm5y4YhRnWBn5ZDwwJbOw

Stain-blocking primer is non-negotiable on any drywall that got wet, even if it doesn’t look stained. Water-soluble compounds in the gypsum core will migrate through standard primer and bleed yellow-brown marks through your finish paint months after you thought the job was done.

Apply two coats of stain-blocking primer (Zinsser BIN or Kilz are common brands) to all repaired areas, allowing proper drying time between coats per label directions. This seals the surface and creates uniform absorption so your paint doesn’t flash differently over repaired versus original sections. Don’t skip this step because you’re in a hurry. Bleed-through happens slowly and you won’t see it until after you’ve moved furniture back.

Texture matching requires identifying what type of finish exists on your walls, then replicating it. Common textures include:

  • Orange peel – apply with a hopper gun sprayer loaded with thinned drywall compound
  • Knockdown – spray orange peel texture, then lightly flatten high spots with a drywall knife before it dries
  • Smooth/level 5 – no texture, requires impeccable finishing work and careful sanding
  • Skip trowel – hand-applied with a trowel in random arching patterns
  • Popcorn (ceilings) – spray-applied acoustic texture, often contains asbestos in homes built before 1980

Practice your texture technique on scrap drywall before applying it to the repair. Texture hides minor finishing imperfections but must match the surrounding pattern or it draws more attention than a smooth patch would.

Paint selection matters for blending. Use the same sheen (flat, eggshell, satin) as existing walls. Apply primer first, then two finish coats, feathering paint 12 to 18 inches beyond the repair area to blend transitions. Roll the entire wall from corner to corner if possible rather than just painting the patch. Repaired areas often show subtle color or sheen differences that disappear when you paint the full surface.

Cost Planning and Professional vs DIY Decision Making

56kgUfGPSYCE1gGtFJwWEA

DIY repairs keep costs in the $200 to $500 range for small single-wall projects when you own basic tools, with expenses covering drywall panels ($15 to $30 each), joint compound ($15 to $25 per bucket), primer and paint ($60 to $80), and rental equipment like dehumidifiers ($40 to $60 per day). Professional restoration runs $1,500 to $4,000 for comparable work, but that includes industrial drying equipment, guaranteed moisture removal, proper antimicrobial treatment, code-compliant installation, and warranty protection if problems develop later.

Cost factors extend beyond materials and labor. Damage extent is the biggest variable. A small patch repair costs dramatically less than multiple walls requiring flood cuts. Accessibility affects pricing, with ceiling work and tight spaces requiring more time. Contamination level determines scope, since gray water adds antimicrobial treatment and black water requires complete material removal rather than selective drying. Drying timeline differences are significant: professional equipment achieves safe moisture levels in 3 to 5 days versus weeks with DIY methods, and every extra day of elevated humidity increases mold risk. Insurance coverage typically pays for sudden water events like burst pipes when documented properly with photos, moisture readings, and professional invoices.

Repair Scope DIY Cost Range Professional Cost Range Timeline
Small patch repair (under 4 square feet) $50 to $150 $300 to $600 3 to 5 days DIY, 1 to 2 days professional
Single wall flood cut (8×4 feet) $200 to $400 $800 to $1,500 7 to 10 days DIY, 3 to 5 days professional
Multiple walls (2 to 3 walls) $500 to $1,000 $2,000 to $4,000 2 to 3 weeks DIY, 5 to 7 days professional
Full room with ceiling $800 to $1,500 $3,500 to $7,000 3 to 4 weeks DIY, 7 to 10 days professional

Professional services become necessary rather than optional when you’re facing extensive damage across multiple rooms, any contaminated water from sewage or flooding, visible mold growth requiring testing and remediation, structural concerns like compromised framing or sagging sections, or insurance claims requiring detailed documentation with photos, moisture readings, and itemized scopes. Code compliance and permit requirements for major rebuilds often require licensed contractor involvement with inspections at rough-in and final stages.

DIY makes sense for small isolated damage under 4 square feet, clean water sources only like supply line leaks, confirmed absence of mold after professional moisture verification, and purely cosmetic repairs after someone else handled the drying phase. Get professional moisture testing even if you plan to do cosmetic work yourself. Spending $150 on verification beats redoing failed repairs six months later. Professional advantages include proper insurance documentation that protects your claim, warranties on workmanship, guaranteed moisture removal with certified equipment, and code-compliant installation that passes inspection.

Preventing Future Water Damage and Maintenance

muCbTMsBS1m7aFZdViL1gg

Fixing damaged drywall without addressing why it got wet guarantees you’ll be back here again. Identify the water source before you close up walls. Common culprits include burst supply lines, roof leaks, HVAC condensation drain failures, washing machine supply hoses, water heater leaks, and slow plumbing failures behind walls that went unnoticed until major damage developed.

Leak detection starts with visual inspection every few months: look for water stains on ceilings, check under sinks for moisture, inspect supply line connections at toilets and fixtures for corrosion or mineral deposits, examine washing machine hoses for cracks or bulges, and monitor the water heater relief valve for dripping. Moisture meters let you check wall areas near plumbing even when no visible damage shows. Catching elevated readings early means fixing a small leak before it becomes major damage. Early warning signs include musty odors in closed spaces, water bill increases without explanation, sounds of running water when fixtures are off, and warm spots on floors near supply lines suggesting hidden leaks.

Install moisture-resistant drywall in vulnerable areas: green board in bathrooms and laundry rooms, purple board in high-humidity basements or areas with previous water problems. These products cost $2 to $4 more per panel than standard drywall but resist moisture absorption significantly better, buying you time to catch leaks before damage becomes severe. Proper waterproofing behind tile in showers and tubs prevents moisture from reaching drywall, and vapor barriers in exterior walls control condensation in cold climates. These preventative measures cost less than repairs.

Schedule regular maintenance inspections annually: check supply lines and replace washing machine hoses every 5 years before they fail, inspect roof flashing and penetrations each spring, verify HVAC drain pans aren’t clogged and condensate drains flow freely, test water heater relief valves, and address small plumbing drips immediately rather than waiting until they become problems. Early intervention on a $50 supply line replacement beats $3,000 in water damage repairs.

Common Mistakes and Best Practices in Water Damage Drywall Repair

The mistakes that cause failed repairs share a common theme: rushing through steps that require patience because you want to see finished walls instead of torn up rooms. But shortcuts in the drying and preparation phases guarantee you’ll redo this entire project.

Common Mistake Why It Fails Best Practice Alternative
Installing before complete drying Traps moisture behind new drywall, creates mold growth within weeks, causes repeat repairs Use moisture meter to verify under 1% gypsum, under 12% wood framing before installation
Skipping stain-blocking primer Water-soluble compounds in wet gypsum bleed through regular primer, creating yellow-brown stains months later Apply two coats of stain-blocking primer on all previously wet surfaces
Inadequate damage removal Leaving wet sections because they don’t look bad leads to hidden mold growth and structural failure Remove to 12 to 24 inches above highest moisture reading, inspect wall cavities thoroughly
Poor moisture testing Assuming surfaces are dry without verification results in mold growth and failed repairs Test multiple locations with calibrated moisture meter, document readings before proceeding
Rushing finish coats Applying next coat before previous layer fully dries causes cracking, poor adhesion, extended sanding time Wait full 24 hours between coats, verify dryness by touch before proceeding

Additional best practices include maintaining proper ventilation during all repair phases with fans and dehumidifiers running continuously, exercising patience with drying times even when it feels excessive, addressing root causes like failed supply lines or roof leaks before rebuilding, and seeking professional guidance when you encounter unexpected conditions like extensive mold, structural damage, or contaminated water. Don’t use compression fittings or push-connect plumbing fittings behind walls where you can’t access them later. Spend the extra time on permanent connections approved for concealed installation.

Project Timeline Expectations for Drywall Rebuilding After Water Damage

Total project duration varies significantly based on damage extent, chosen drying method, and whether you’re working DIY or bringing in professionals. But the drying phase always takes longer than homeowners expect because moisture doesn’t evaporate on your preferred schedule.

Project Phase Professional Timeline DIY Timeline
Water source repair Same day emergency response 1 to 2 days for parts and plumbing work
Drying and mold prevention 3 to 5 days with industrial equipment 7 to 14 days with rental equipment, 2 to 4 weeks natural drying
Removal and framing prep 1 day for typical single-wall project 1 to 2 days working evenings and weekends
Drywall installation 1 day including hanging and first tape coat 1 to 2 days for hanging, learning curve on first project
Finishing (tape/mud/sand) 2 to 3 days for three coats with drying time 4 to 6 days allowing full drying between coats
Texture and painting 1 to 2 days for primer, texture, and finish coats 2 to 3 days including practice and touch-ups

Factors that extend timelines beyond these estimates include high humidity conditions slowing drying regardless of equipment used, hidden damage discovery requiring expanded scope, permit requirements adding inspection scheduling delays, and material availability issues when matching existing textures or discontinued products. Winter projects take longer due to reduced ventilation options and slower drying times in cold conditions.

Final Words

Rebuilding drywall after water damage takes patience, the right approach, and honest judgment about what you can handle.

If your damage is small, the water was clean, and everything tests dry with no mold, a careful DIY repair can work. But if you’re dealing with contaminated water, structural concerns, or damage that keeps spreading, call in a team that can stabilize it fast and rebuild it right.

Either way, don’t skip the drying phase. That’s where most failures happen.

Fix the source. Dry it completely. Rebuild it solid. Your home will be back to normal.

FAQ

Can water damaged drywall be repaired?

Water damaged drywall can be repaired if the damage is minor, cosmetic, and the drywall is completely dry with no mold present. Small patches with surface staining are repairable, but structurally compromised, saturated, or contaminated drywall requires complete replacement for safety and long-term durability.

How long does it take for drywall to dry from water damage?

Drywall drying from water damage takes 3-5 days with professional equipment (dehumidifiers and air movers) versus several weeks with natural air drying alone. Complete drying before reconstruction is critical because moisture remaining longer than 24-48 hours creates mold growth and structural integrity problems requiring re-work.

Is it cheaper to repair or replace drywall?

Repairing drywall is cheaper for small isolated areas under 2 square feet with surface damage only, while replacing sections becomes more cost-effective for extensive damage, water-saturated areas, or contaminated water exposure. Flood cuts (removing lower sections to 12-24 inches above waterlines) save material costs versus full wall replacement.

How do you dry a wall after water damage?

You dry a wall after water damage by first stopping the water source, then removing baseboards and cutting inspection holes to allow air circulation behind drywall. Use industrial dehumidifiers, air movers, and wall cavity ventilation to reduce moisture content below 1% within 3-5 days, preventing mold growth beyond the critical 24-48 hour window.

What are signs that water damaged drywall must be replaced?

Water damaged drywall must be replaced when it shows soft crumbly texture, sagging or blistering surfaces, separation from studs, or exposure to contaminated gray or black water. Visual indicators include texture loss, failure to return to original shape when pressed, fastener pull-through, or drywall sections that are off-plumb when checked with a level.

Why is the 24-48 hour window critical for water damaged drywall?

The 24-48 hour window is critical for water damaged drywall because mold growth becomes likely when moisture remains longer than this timeframe in porous materials. Acting within this window allows proper drying to prevent microbial growth, structural deterioration, and the need for more extensive contaminated material removal requiring professional protocols.

Should you use moisture-resistant drywall after water damage repairs?

You should use moisture-resistant drywall (green board or purple board) after water damage repairs in areas prone to future moisture exposure like bathrooms, basements, and laundry rooms. Moisture-resistant options provide added protection in vulnerable locations while standard drywall works fine for typical living areas with addressed leak sources.

When does water damaged drywall require professional restoration?

Water damaged drywall requires professional restoration when damage is extensive (multiple walls), involves contaminated gray or black water, shows mold growth, affects structural elements, or involves insurance claims requiring proper documentation. Professional equipment achieves safe drying in 3-5 days versus weeks with DIY methods, preventing secondary damage.

How far does water travel beyond visible damage in drywall?

Water travels 12-24 inches beyond visible damage in drywall through capillary action, first affecting the paper facing then wicking into the gypsum core. This invisible moisture spread means removal cuts (flood cuts) must extend well above visible waterlines to ensure all compromised material is removed and hidden moisture doesn’t cause future problems.

What primer prevents water stains from bleeding through paint?

Stain-blocking primer prevents water stains from bleeding through paint on repaired drywall by sealing discoloration and tannins that would otherwise show through standard primer and topcoats. Skipping stain-blocking primer on water-damaged areas causes bleed-through requiring re-work, making this step non-negotiable for invisible repairs.

Electrical Hazard Warning Signs Every Safety Manager Needs

0

Think a little sticker can’t stop a deadly shock?
Think again.
Clear electrical hazard warning signs stop people from touching energized parts, prevent arc flash injuries, and keep untrained workers out of danger zones.
This post gives safety managers the ten warning signs you must know, explains what each one means, where to put them, and what to document for compliance.
It also ties each sign to OSHA, ANSI, and NFPA rules so your team meets legal and safety standards.

Key Electrical Hazard Warning Sign Types and What They Mean

Xd9wUyj5TtC3zwN6D5Kr8w

Every workplace with electrical equipment needs clear, standardized warning signs. These signs prevent contact with energized parts, reduce arc flash injuries, and keep untrained people out of hazard zones. The ten most critical sign types address different scenarios, from high-voltage power distribution to sensitive electronics manufacturing. Each one targets a specific risk with placement rules tied to where accidents happen most.

Understanding what each sign means helps supervisors decide which signs to install and where. High-voltage warnings mark areas where contact with energized conductors or equipment can cause fatal shock. Arc flash signs identify locations where sudden electrical energy release through air could cause severe burns. Ground fault labels point to circuits where a missing or broken grounding path creates hidden electrocution risk, especially in wet environments like kitchens and bathrooms.

Other signs manage access and work procedures. “Do Not Enter When Light Is On” controls entry to spaces with active hazardous machinery. “Electrical Maintenance In Progress” keeps unauthorized workers away during repairs. Static-sensitive device warnings protect delicate electronics from electrostatic discharge that can destroy components or corrupt data.

High Voltage Signs mark power stations, industrial electrical rooms, and commercial building distribution areas where voltage exceeds safe contact levels. They restrict access to qualified personnel only.

Caution: Ground Fault indicates a compromised or broken grounding path. You’ll find these in bathrooms, kitchens, outdoor outlets, and other areas where moisture increases shock risk. They recommend Ground Fault Circuit Interrupters (GFCIs).

Danger: Electrical Shock Hazard appears near exposed wiring, open electrical panels, and machinery under maintenance. It signals the need for appropriate protective gear and lockout procedures.

Danger: Do Not Enter When Light Is On shows up in industrial settings to indicate active hazardous processes or machinery cycles. Employees must be trained to recognize and respect the indicator light.

Warning: Arc Flash Risk gets placed on switchboards, motor control centers, and large industrial electrical panels. These warn of sudden electrical energy release through air that can cause severe burns, injuries, or death. They require specific training and personal protective equipment (PPE).

Warning: Explosive Atmosphere marks areas where flammable gases, vapors, or dust may be present, such as chemical plants, refineries, and grain silos. Electrical equipment in these zones must be specially designed, installed, and maintained. Ventilation must be continuously monitored.

Caution: Live Electrical Parts alerts workers to exposed energized components on panels, junction boxes, and equipment enclosures. Only authorized, trained personnel wearing proper PPE should approach.

Danger: Confined Space identifies spaces not designed for continuous occupancy, with limited entry or exit points, possible hazardous electrical equipment, and poor ventilation. Entry requires permits, atmospheric monitoring, and rescue readiness.

Warning: Electrical Maintenance In Progress are temporary signs that prevent unauthorized entry and accidental contact with live components during active maintenance or repair work.

Caution: Static Sensitive Devices appear in electronics manufacturing, repair facilities, and data centers where electrostatic discharge (ESD) can damage sensitive components. They recommend wrist straps, antistatic mats, and controlled ESD environments.

Recognizing these ten sign types is the first step in preventing electrical accidents. When workers know what a sign means and why it’s there, they follow the warning instead of ignoring it.

OSHA and ANSI Requirements for Electrical Hazard Warning Signs

7a6zFLpiTpaKkN1IR2AZBA

OSHA requires employers to provide warning signs wherever electrical hazards exist and where contact with energized parts could result in injury. These signs must be visible, legible, and placed before workers enter the hazard zone. While OSHA sets the general requirement, it references voluntary consensus standards like ANSI Z535 for specific design and content rules.

ANSI Z535.2 defines signal words (Danger, Warning, Caution, and Notice) and assigns each to a specific level of risk. Danger indicates situations that will cause death or serious injury if not avoided. Warning signals situations that could result in death or serious injury. Caution marks hazards that may cause minor or moderate injury. Notice addresses property damage or equipment-related information without physical injury risk. Every electrical hazard sign must include the Safety Alert Symbol, a black triangle with an exclamation point, unless the hazard is so well understood that the symbol isn’t needed.

NFPA 70E governs arc flash labeling on electrical equipment rated 50 volts or more. It requires labels to show the nominal system voltage, the arc flash boundary, the minimum PPE rating required at the working distance, the incident energy level or PPE category, and the limited approach boundary for shock protection.

ISO 7010 provides internationally recognized symbols for electrical hazards, including the black lightning bolt inside a yellow triangle. Facilities that operate globally or follow international machinery directives often adopt ISO 7010 symbols to maintain consistency across sites and reduce language barriers.

Standard What It Regulates Example Application
OSHA 29 CFR 1910.145 Workplace accident prevention signs and tags Danger tags on locked-out electrical panels
ANSI Z535.2 and Z535.4 Signal word hierarchy, color rules, and Safety Alert Symbol design Danger: High Voltage signs with black text on orange background
NFPA 70E Arc flash and shock hazard labeling on electrical equipment Arc flash labels on motor control centers showing PPE category and boundary distance
ISO 7010 Standardized hazard symbols for international use Electrical shock hazard symbol (lightning bolt in yellow triangle) on export machinery

Failure to comply with these standards can result in OSHA citations, fines, and increased liability after an incident. Inspectors look for missing labels during facility audits, especially on electrical panels, disconnects, and arc flash hazard locations. More important, missing or incorrect signs leave workers unaware of hazards they can’t see, which is why regulators treat signage as a core element of electrical safety programs.

Design Specifications for Effective Electrical Hazard Warning Signs

v2XVuRipQcWRoKC26_SYvg

A compliant electrical hazard sign must be seen, read, and understood in seconds. ANSI Z535 specifies color rules that create instant recognition. Orange backgrounds signal danger from energized equipment, yellow indicates general caution, and red marks fire-related electrical hazards or emergency stops. The signal word appears at the top in large, bold letters: Danger in white on black, Warning in black on orange, or Caution in black on yellow.

Below the signal word sits the Safety Alert Symbol, followed by a concise hazard statement like “High Voltage” or “Arc Flash Hazard,” and finally instructions such as “Authorized Personnel Only” or “Wear Required PPE.”

Sign size and legibility depend on viewing distance. A small 2″ x 4″ label works on an electrical panel door viewed from arm’s length. A 10″ x 14″ sign is needed on a substation fence viewed from 20 feet away. The rule of thumb is one inch of letter height for every 50 feet of viewing distance under good lighting.

Reflective sheeting or photoluminescent materials improve visibility in low light or during power outages. Reflective electrical signs use glass bead or microprismatic coatings that bounce light back toward the source, making them visible to flashlight beams or vehicle headlights. Photoluminescent signs absorb ambient light and glow in the dark for up to eight hours, which is critical for marking electrical rooms and exit routes during blackouts.

Font choices matter. Helvetica and Arial provide clean, sans-serif readability. Avoid decorative fonts or condensed type. Text must contrast sharply with the background: black on white, white on black, or black on yellow. Symbols should be large enough to interpret from the maximum expected viewing distance. Every sign element (signal word, symbol, hazard statement, and instruction) must work together to deliver the message in under three seconds.

Essential sign elements for compliance and clarity include signal word sized proportionally larger than body text and placed at the top, standardized symbol (Safety Alert Symbol, ISO 7010 lightning bolt, or arc flash graphic) positioned prominently, high-contrast color combination following ANSI Z535 or ISO standards, clear and concise hazard statement and instruction in simple language readable from the intended distance, plus durable material that resists fading, chemicals, abrasion, and weather exposure for the expected service life.

Placement Rules for Electrical Hazard Warning Signs in Workplaces and Public Spaces

cIeyCg_4R0qWl9rBXHOlNw

Signs must be placed where workers will see them before entering the hazard zone. On electrical panels and switchgear, mount the label directly on the cabinet door or the access cover so it’s impossible to open the enclosure without reading the warning. For substations and outdoor electrical equipment, attach heavy-gauge aluminum signs to perimeter fencing at intervals no greater than 50 feet, and at every gate or access point. The bottom edge of the sign should sit at least 42 inches above ground level to remain visible above vegetation, snow, or debris.

Overhead power lines require “Danger: High Voltage Overhead” signs posted in areas where cranes, lifts, or tall equipment operate. Place these signs at the entrance to the work zone and on any equipment that could contact the lines. Buried cable locations need visible markers installed on stakes or posts at excavation sites, with labels identifying the voltage level and utility contact information.

Temporary power distribution at construction sites must be marked with weatherproof danger signs at each connection point and along cable runs where vehicles or foot traffic could create contact risk.

Arc flash hazard boundaries require floor markers or barrier tape at the calculated arc flash boundary distance, supplemented with wall-mounted arc flash warning signs on the equipment itself. Motor control centers, switchboards, and panelboards rated 50 volts or higher need arc flash labels positioned so they’re visible to anyone approaching the equipment. ESD protective areas in electronics manufacturing use both wall signs and floor markers to define the controlled zone where wrist straps, antistatic mats, and grounded workstations are mandatory.

Key placement zones include electrical panel doors and cabinet access covers, where labels must be read before the enclosure is opened. Substation perimeter fencing and gates need signs at regular intervals and at every point of entry. Overhead power line work zones require warnings at entry points and on cranes, lifts, or tall equipment. Excavation sites with buried cables need markers on stakes showing voltage and utility contact. Arc flash hazard boundaries call for floor markers at the boundary distance, plus wall signs on the equipment. Temporary power distribution requires weatherproof danger signs at connection points and along exposed cable runs.

Grouping signs near entry points reduces clutter while ensuring visibility. Mounting height, angle, and lighting must allow the sign to be read under the worst conditions: dim light, rain, or when the worker is distracted by other tasks.

Arc Flash Electrical Hazard Signage and How to Read Labels

6P2XI2SKSRK4j68EKgAaKg

An arc flash is a sudden release of electrical energy through the air, caused by a fault or short circuit in electrical equipment. The resulting explosion of superheated plasma can reach temperatures over 35,000°F and create pressure waves that throw workers across a room. Arc flash injuries include severe burns, blindness, hearing loss, and blunt trauma. NFPA 70E requires arc flash warning labels on equipment where the potential incident energy exceeds 1.2 cal/cm², which includes most motor control centers, switchboards, and industrial panelboards.

Arc flash labels must show four pieces of critical information. The PPE category or incident energy level tells the worker what protective clothing, face shield, and gloves are required. The arc flash boundary distance marks how close a worker can approach the equipment while it’s energized. Crossing that boundary without proper PPE is prohibited. The shock hazard information includes the nominal system voltage and the limited approach boundary for shock protection. Some labels also list the available fault current and the clearing time of the protective device, which together determine the incident energy calculation.

A complete arc flash label might read: “Danger: Arc Flash Hazard. PPE Category 2 required. Arc flash boundary: 36 inches. Limited approach boundary: 42 inches. Nominal voltage: 480V.”

Label Element What It Tells You Example Value
PPE Category or Incident Energy Level of protective clothing and equipment required PPE Category 2 or 8 cal/cm²
Arc Flash Boundary Distance Minimum safe distance without PPE; closer approach requires full protection 36 inches
Shock Hazard Info (Voltage and Approach Limit) Nominal system voltage and limited approach boundary for shock protection 480V / 42 inches
Working Distance and Fault Current Distance at which incident energy was calculated and available fault current 18 inches / 25 kA

Workers must be trained to interpret these labels before performing any task on or near energized electrical equipment. Arc flash labels aren’t static. They must be updated whenever equipment, fault current levels, or protective device settings change. Annual arc flash studies recalculate boundaries and PPE requirements and generate new labels to replace outdated ones.

Materials, Durability, and Weather Resistance of Electrical Hazard Warning Signs

FlELae5ZSze4UftkIFTm2A

Electrical hazard signs face harsh conditions. Outdoor substation signs endure decades of sun, rain, snow, ice, and temperature swings from below zero to over 100°F. Indoor signs in industrial facilities are exposed to chemicals, oils, solvents, and abrasion from equipment movement and cleaning. The substrate, adhesive, and graphics must all survive these conditions without fading, peeling, cracking, or becoming illegible.

Heavy-gauge aluminum is the standard for outdoor electrical signs. It resists corrosion, won’t warp or become brittle, and can be drilled or riveted to fencing, posts, or equipment housings. Thickness ranges from 0.040 inches for general use to 0.080 inches for high-traffic or high-abuse locations.

UV-resistant inks and coatings prevent fading. Direct sunlight breaks down organic pigments over time, turning bright orange to pale yellow and black text to gray. Modern electrical hazard signs use UV-stabilized inks or digitally printed graphics covered with a clear UV-protective laminate. Some manufacturers back their outdoor signs with a 7 to 10 year warranty against fading, a useful benchmark when comparing products.

Reflective signs add a layer of glass bead or microprismatic sheeting that bounces light back toward the source, making the sign visible in headlights or flashlight beams. ASTM D4956 classifies retroreflective sheeting into types, with Type III (high-intensity) and Type XI (diamond-grade prismatic) offering the best performance for electrical hazard applications.

Adhesive-backed labels must bond permanently to the substrate: steel, aluminum, powder-coated surfaces, or textured plastic enclosures. No bubbling, lifting, or residue. Acrylic adhesives perform well in temperature extremes and resist moisture, oils, and most solvents. Some labels use a peel-and-stick design with a protective overlay that resists scratching and chemical exposure. For labels applied to outdoor equipment, verify that the adhesive is rated for the expected temperature range and surface type. A poorly bonded label that peels off in the first winter storm defeats the purpose.

Custom Electrical Hazard Warning Signs and Templates

0vhYbFl0QXmwHLTM1cdO9g

Not every electrical hazard fits a preprinted sign. Facilities with multilingual workforces need bilingual labels in English and Spanish, or other language pairs. Equipment with stored energy from capacitors may require a sign that reads: “Risk Of Electrical Shock From Energy Stored In Capacitors. Entry Prohibited For 5 Minutes After Shutdown Of Equipment.” Substations with multiple voltage levels need custom signs that list each voltage and the corresponding hazard.

Manufacturers and sign suppliers offer customization services that let you specify text, symbols, colors, sizes, and materials to match your exact requirements.

Downloadable templates simplify ordering and ensure consistency across a facility. Many suppliers provide PDF or vector files for common messages (Danger High Voltage, Authorized Personnel Only, Arc Flash Hazard, Buried Cable) that can be edited with site-specific details and sent directly to production. Serialized labels add unique identifiers or barcodes for asset tracking and maintenance records. MIL-SPEC formats meet military and aerospace requirements for material traceability and performance. UL-recognized component marks verify that a label supplier’s materials and processes meet UL 969 standards for safety signage.

Customization options to consider include bilingual or multilingual text for diverse workforces, site-specific wording including voltage levels, PPE requirements, or shutdown procedures, serialized or asset-tagged labels for tracking and maintenance scheduling, and custom sizes and shapes to fit non-standard equipment or mounting locations.

Representative pricing for electrical hazard signs starts around $9.14 for standard 3.5″ x 5″ Danger signs and scales up to $16.80 for reflective floor markers. Custom orders typically add a setup fee and longer lead times, but volume discounts apply for facilities ordering hundreds of signs at once.

Lockout/Tagout (LOTO) Electrical Hazard Warning Signs

9CZTeFyDRTiKDZNBksN77A

Lockout/Tagout procedures prevent accidental energization during maintenance or repair. After the equipment is de-energized, a lockout device is applied to the disconnect switch, breaker, or control, and a LOTO tag is attached to identify who installed the lock and why the equipment is out of service. The tag serves as a warning sign to all other workers: “Do Not Operate. Electrical Maintenance In Progress.” Tags must include the employee’s name, the date and time the lockout was applied, and a clear instruction not to remove the lock or re-energize the equipment until authorized.

LOTO tags are part of a larger signage and procedure system. Permanent signs near electrical disconnects and control panels remind workers to follow the facility’s lockout procedure before beginning work. These signs often include step-by-step instructions: verify the equipment is de-energized, apply a lock, attach a tag, test for zero energy, and perform the work. Some facilities use color-coded tags (red for electrical lockout, blue for mechanical, yellow for pneumatic) to help workers identify the energy source at a glance.

All LOTO signs and tags must be durable enough to remain legible in the work environment, resist tampering or accidental removal, and clearly identify the person responsible for the lockout.

Essential components of LOTO electrical hazard signs include permanent instructional signs at disconnects and control panels outlining the lockout procedure and required steps. Individual LOTO tags get applied to each lockout device, showing the worker’s name, date, and reason for lockout. Serialized or barcode tags work for facilities that track lockouts electronically and require audit trails for compliance.

LOTO signage must be integrated into training and regularly audited. Workers who bypass or ignore lockout procedures face serious injury or death from unexpected equipment startup. Clear, visible LOTO signs reinforce the importance of the procedure and reduce the chance that a coworker will remove a lock without authorization.

Inspection, Maintenance, and Replacement of Electrical Hazard Warning Signs

2aXgU7JwSpuS-9lMzWw9tg

Electrical hazard signs lose effectiveness when they fade, peel, become obscured by dirt or equipment, or get damaged by impact or weather. A sign inspection program ensures that every label and placard remains visible and legible. Schedule visual inspections quarterly for high-traffic or high-abuse areas, and annually for indoor or low-traffic locations. During each inspection, check for fading, physical damage, missing signs, obstructions (such as equipment moved in front of a sign), and any changes to the electrical system that require new or updated labels.

Replacement triggers include any sign where the text or symbol is no longer fully legible from the intended viewing distance, signs with torn or peeling substrates, and signs that no longer reflect current voltage levels, arc flash boundaries, or PPE requirements. Regulatory updates also drive replacement. When NFPA 70E revises arc flash labeling requirements or ANSI Z535 updates signal word colors, existing signs may need to be replaced to maintain compliance.

Maintain a replacement inventory of the most common signs (Danger High Voltage, Arc Flash, Authorized Personnel Only) so you can swap out damaged signs immediately instead of waiting for an order.

Issue How It Affects Safety Required Action
Faded text or symbol Sign may not be noticed or read correctly, especially from a distance Replace with UV-resistant or higher-grade material
Peeling or damaged substrate Appearance suggests neglect; workers may ignore the sign Remove damaged sign and install new one with proper adhesive or mounting
Outdated arc flash boundary or PPE category Workers may use insufficient protection, leading to injury Conduct arc flash study update and replace all affected labels

Keep a log of all sign inspections, replacements, and updates. This record demonstrates due diligence during audits and provides a timeline for future replacement cycles. Many facilities photograph each sign location and file the image with the inspection date, making it easy to track deterioration over time.

Workplace Training and Employee Awareness Using Electrical Hazard Warning Signs

RtcqEg_GS3OXV9pSVRr39Q

Signs only work if workers know what they mean and respect the hazards they identify. New-hire orientation must include a walk-through of the facility’s electrical hazard signs, explaining each signal word, symbol, and instruction. Show employees the difference between Danger, Warning, and Caution. Explain that Danger means immediate risk of death or serious injury, while Caution signals a lower-severity hazard. Point out arc flash boundary markers and the PPE storage locations. Demonstrate the LOTO procedure at an electrical disconnect and explain why removing someone else’s lock is prohibited.

Refresher training reinforces awareness. Annual or biannual sessions review electrical hazard locations, any new signage installed during equipment upgrades, and incident reports from other facilities. Use real-world examples to illustrate consequences: photos of arc flash injuries, news reports of electrocution incidents, or case studies showing how proper signage and adherence prevented an accident.

Posters and awareness materials placed in break rooms, tool cribs, and near electrical rooms keep the message visible daily. Some facilities use digital signage or video loops that cycle through common hazards and the signs that warn against them.

Key training topics for electrical hazard awareness include signal word meanings (Danger, Warning, Caution, Notice) and when each applies. Cover arc flash boundaries and required PPE for different equipment types. LOTO procedures and the importance of respecting lockout tags matter. ESD protective areas and the use of wrist straps and antistatic mats should be explained. And make sure workers know how to report damaged or missing signs so they can be replaced immediately.

Case studies from OSHA investigations and NFPA reports show that facilities with strong sign-based training programs experience fewer electrical incidents. When employees understand that a Danger: High Voltage sign marks a zone where one mistake ends in a fatality, they treat it with the respect it deserves.

Final Words

You spot a high-voltage sign and stop. We walked through the ten most common electrical hazard warning signs, where they belong, and what each one means.

We also covered rules and standards, design and placement tips, arc flash labels, durable materials, custom tags, LOTO labels, inspection schedules, and how to train people to read and respect signs.

Knowing these electrical hazard warning signs helps you keep people safe and keeps the work site compliant. You’ve got the checklist—now use it confidently.

FAQ

Q: What are the 5 main electrical hazards?

A: The five main electrical hazards are electric shock/electrocution, arc flash or blast, electrical fire from overload or short, contact burns from energized equipment, and ignition of flammable atmospheres by sparks.

Q: What is the warning sign of an electrical hazard? What are 7 examples of a warning sign? What are the 9 hazard symbols?

A: The warning sign of an electrical hazard is a clear label or pictogram with a signal word. Common examples/symbols include: high voltage, electrical shock, arc flash, ground-fault/GFCI, live parts, do-not-enter (light on), explosive atmosphere, confined space, static-sensitive device.

How to Dry Out a Flooded Basement Fast and Safely

0

Standing water in your basement isn’t just about removing the flood. It’s about stopping the clock before mold locks in, materials rot, and your foundation takes permanent damage. Most homeowners focus only on pumping water out, then wonder why their basement still smells damp weeks later or why walls start crumbling. Real basement drying is a sequence: safe extraction, aggressive air movement, controlled humidity, and knowing when you’re actually done. Here’s how to dry your flooded basement the right way, step by step.

Essential Steps and Overview for Drying Your Flooded Basement

spAbE8vnSVuz0_tH3Oy9Pw

Basement flood recovery isn’t one thing. It’s a sequence: immediate safety measures, water extraction, drying and dehumidification, sanitization, damaged material removal, and long term waterproofing. Understanding the full sequence helps you work systematically instead of just reacting when the next problem shows up.

Before you touch anything in a flooded basement, turn off electrical power to affected areas at the circuit breaker. Standing water and electricity create lethal shock hazards. Don’t step into flooded areas until power is confirmed off. Use battery powered flashlights or work lights for visibility during cleanup. Wear rubber boots that cover your ankles, waterproof gloves, an N95 respirator to filter airborne contaminants, and safety goggles to protect against splashing contaminated water. If you’re working in a basement with minimal natural light, set up battery powered floodlights before you start removing water.

Water removal methods depend on flooding depth. For water less than 2 inches deep, towels, mops, and buckets handle the job. Between 2 and 6 inches, a wet shop vacuum pumps water efficiently. For deeper flooding, rent a submersible pump to handle the bulk of the water, then switch to a wet vac for the final inches. Check the water level outside your foundation before pumping. If exterior water sits higher than interior water, pump slowly. Pumping too fast creates pressure differences that can push walls inward or cause structural damage.

After standing water removal, the drying race begins. You’ve got a 48 hour window to dry everything completely before mold and mildew establish themselves in damp materials. Deploy dehumidifiers immediately to pull moisture from the air. Position fans to create cross ventilation and speed evaporation from wet surfaces. Open all doors, windows, closets, and cabinets to expose hidden damp areas. Remove wet carpet padding right away, even if you plan to save the carpet itself. Padding holds moisture and never dries properly. Monitor humidity levels and keep them below 50% throughout the drying period.

Sanitization requirements depend on water contamination. Clean water from a broken pipe needs basic disinfecting. Gray water from washing machines or dishwashers requires more thorough cleaning with stronger solutions. Black water from sewage backups demands professional remediation. Scrub all affected surfaces with appropriate disinfectants to prevent bacterial growth and eliminate odors.

Call professional restoration services when flooding exceeds 1 inch deep, when you’re dealing with sewage contamination, when structural damage appears (cracks, bowing walls, shifting foundations), when mold coverage exceeds 10 square feet, or when you can’t complete drying within 48 hours. These situations exceed safe DIY limits and require specialized equipment, expertise, and often insurance documentation.

Safe Water Extraction Methods Based on Flooding Severity

bE0kTwBWRgW3G4AcwbgXOQ

Water depth determines which extraction method works best and how quickly you can restore your basement to dry conditions.

For shallow flooding under 2 inches, manual methods work fine. Old towels, a mop and bucket, or a household wet dry vacuum handle small water volumes. Start at the highest point and work toward floor drains or the lowest corner. Wring towels into buckets, dump buckets outside away from your foundation, and repeat. This approach works when flooding affects only part of your basement or when water depth barely covers the floor.

When water reaches 2 to 6 inches deep, rent or buy a wet shop vacuum with sufficient capacity. A 6 gallon shop vac fills quickly, so consider a 16 gallon model for faster progress. Position the vacuum at the deepest point, let it fill, then carry it outside to empty. Work in sections, moving systematically across the basement. Wet vacs work well for this depth range because they handle debris mixed with water (leaves, mud, small stones) without clogging.

For flooding deeper than 6 inches, a submersible pump moves water much faster than a shop vac. Submersible pumps sit directly in the water and can move hundreds of gallons per hour through a discharge hose. Run the hose outside, directing water at least 10 feet from your foundation so it doesn’t seep back in. Let the pump run until water drops below 2 inches, then switch to a wet vac for the remaining shallow water. Pumps struggle with the last inch or two because they need minimum depth to function properly.

Here’s the critical pumping technique that prevents wall damage: never pump faster than the exterior water table drops. If heavy rain saturated the ground around your foundation, exterior water pressure supports your basement walls from outside. Pumping the interior too quickly removes that interior support while exterior pressure remains, which can bow or crack walls inward. Pump slowly when exterior water levels are high. Remove a few inches, wait an hour, check for wall movement, then continue. This gradual approach prevents structural damage that costs thousands to repair.

Equipment rental sources and costs:

Local hardware stores and home improvement centers: Wet vacs $30 to $50 per day, submersible pumps $50 to $75 per day. Equipment rental specialists: Heavy duty pumps $60 to $90 per day, industrial dehumidifiers $40 to $70 per day. Big box home improvement chains: Weekend packages combining pumps, fans, and dehumidifiers $150 to $200. Restoration equipment suppliers: Professional grade air movers $35 to $60 per day. Online tool rental platforms: Delivery available, similar pricing to local stores with convenience fees.

For long term protection, install a permanent sump pump system. Dig a sump basin at your basement’s lowest point (typically a corner) about 24 inches deep and 18 inches in diameter. Install a basin liner, then set the pump inside. Connect perimeter drain tile to the basin so groundwater collects there instead of seeping through walls. The pump automatically activates when water reaches a set level, discharging it through a pipe that exits your home and slopes away from the foundation. Install a backup battery system so the pump continues working during power outages, when you need it most.

Test your sump pump monthly during wet seasons by pouring a bucket of water into the basin. The pump should activate within seconds. Clean the inlet screen seasonally to prevent debris clogs. Replace pumps every 7 to 10 years even if they still function, because motor failure during a flood creates expensive damage.

Drying Your Basement with Dehumidifiers and Air Circulation

JOslrrqNT_2Z0jidZBXw6g

Air circulation and humidity removal work together to dry your basement efficiently. Moving air carries moisture away from wet surfaces into the air. Dehumidifiers pull that moisture from the air and collect it as water. Without circulation, damp air sits against wet walls and floors. Without dehumidification, humid air can’t absorb more moisture. You need both systems working simultaneously.

Strategic fan placement accelerates drying more than simply turning on fans and hoping for the best. Position fans to create cross ventilation by aiming them from one side of the basement toward opposite windows or doors. Place fans at angles that direct airflow across wet walls, not directly at them. Glancing airflow works better than perpendicular blasts. Set up oscillating fans to cover wider areas. Point fans at wet carpet to speed surface drying. Open windows only when outdoor air is less humid than basement air. Check weather forecasts or use a hygrometer to compare humidity levels. Opening windows when outside air holds more moisture than inside air actually slows drying and can introduce additional humidity.

Dehumidifier and fan placement strategy:

Position one dehumidifier per 500 square feet of flooded basement space for adequate moisture removal capacity. Place dehumidifiers in the center of rooms away from walls to allow air circulation around all sides. Aim floor fans at 45 degree angles across walls to maximize surface area coverage and evaporation rates. Set up air movers in corners pointing toward the center to eliminate stagnant humid pockets. Open all closet and cabinet doors to expose interior surfaces to circulating air. Remove dresser drawers and position fans to blow through the openings for interior drying. Check and empty dehumidifier collection buckets every 4 to 6 hours during heavy use.

Don’t use your HVAC system if any part of it got wet during flooding. Running a contaminated system spreads mold spores and bacteria through every room in your house via air ducts. If you must use climate control, run air conditioning only, not heat. Cold air holds less moisture than warm air, so AC helps remove humidity while heating adds moisture capacity to the air and slows drying.

Maintain indoor humidity below 50% throughout the drying process. Use a hygrometer to monitor levels in different basement areas. Humid air feels heavy and slightly damp on your skin. Dry air feels lighter and more comfortable. If humidity stays above 50% despite running dehumidifiers, you need additional units or more powerful equipment.

Basement Drying Timeline and Moisture Monitoring

3Rgh3r7CSFC3rpTmd4yYOQ

Drying speed depends on water volume, material types, ventilation quality, and ambient temperature. A lightly damp concrete floor in a well ventilated basement with good dehumidification might dry in 24 hours. Heavy flooding that saturated walls, insulation, and framing in a poorly ventilated space might take 5 to 7 days even with professional equipment.

Items that remain wet beyond safe limits must be discarded. The 48 hour threshold applies to porous materials that can harbor mold growth. If you can’t dry something completely within two days, the mold risk outweighs the item’s value. This is especially true for upholstered furniture, mattresses, and carpet padding. Materials that absorb water deeply and dry slowly.

Material Type Typical Drying Time Monitoring Method
Concrete floors (unsealed) 3 to 5 days with active drying equipment Moisture meter probe reading below 4% moisture content
Drywall (unpainted or primed) 48 to 72 hours for surface; 5 to 7 days for complete interior drying Surface feels completely dry to touch; moisture meter reads below 1% at depth
Wood framing (studs, joists) 5 to 10 days depending on wood species and saturation level Pin type moisture meter inserted into wood reads below 15% moisture content
Fiberglass insulation Cannot be effectively dried; removal and replacement required Visual inspection; if compressed, soaked, or contaminated, remove immediately
Carpet and padding Carpet surface 24 to 36 hours; padding must be replaced regardless of drying time Carpet backing should feel completely dry; lift corners to check moisture beneath

Use a moisture meter to verify complete drying in areas you can’t easily see or touch. Pin type meters insert probes into materials to measure internal moisture content. Pinless meters use sensors pressed against surfaces to detect moisture without creating holes. Check behind baseboards, inside wall cavities through small inspection holes, beneath flooring edges, and in wood framing. Hidden moisture pockets cause mold growth weeks after visible surfaces appear dry. The concrete might feel dry on top while still holding moisture 2 inches down. Drywall might seem fine on the surface while the paper backing against studs remains damp. Verify dryness with meters, not assumptions.

Removing Damaged Materials from Your Flooded Basement

cvAPTWeNSZ6EWYs9jFHoLw

Some materials can be dried and saved. Others absorb contamination, hold moisture indefinitely, or lose structural integrity when wet. Knowing which category each material falls into saves time and prevents future problems.

Assess flooding severity and contamination level first. Clean water from a broken supply line causes less damage than sewage backup. Materials touched by sewage must be removed regardless of drying potential. Gray water from washing machines or dishwashers affects salvage decisions based on how long materials stayed wet. Quick response saves more materials than delayed cleanup.

Carpet evaluation depends on carpet type, padding condition, and water cleanliness. Pull up a corner and check the backing. If it looks heavily soiled or smells musty even after surface drying, the carpet needs replacement. Carpet padding must always be removed and replaced, even if you successfully dry and reinstall the carpet itself. Padding absorbs water like a sponge and creates a damp layer that never fully dries against the concrete floor. This trapped moisture causes mold growth beneath the reinstalled carpet within weeks. Roll up padding, cut it into manageable sections, and dispose of it immediately. Professional carpet cleaning and sanitizing can save quality carpet that dried within 48 hours, but padding is always a loss.

Inspect drywall at the flood line. Water wicks upward through drywall paper facing, typically 12 to 18 inches above the waterline. Look for swelling, discoloration, or soft spots. Use a drywall saw or reciprocating saw to cut horizontally across damaged sections, cutting back to studs on either side for clean edges. Remove all wet or contaminated drywall below the flood line plus an additional 12 inches above for safety. Check insulation behind removed drywall. Wet fiberglass insulation compresses, loses R value, holds moisture against framing, and promotes mold growth. Remove it while wearing gloves, long sleeves, pants, and an N95 respirator. Wet fiberglass releases irritating particles. Bag it immediately for disposal. Spray foam insulation sometimes survives if dried quickly and not contaminated, but fiberglass insulation never recovers from soaking.

Furniture decisions depend on construction and contamination. Solid wood furniture can be dried if cleaned quickly. Particle board or MDF furniture swells and crumbles when wet. Discard it. Upholstered furniture depends on water cleanliness and frame type. Clean water on a solid wood frame might be salvageable with professional cleaning. Sewage contact means disposal. Move furniture out of wet areas immediately to assess damage and prevent additional absorption. Don’t turn on any electronics or appliances that got wet until a professional inspects them. Water and electricity create shock hazards, and internal moisture causes shorts that damage components or create fire risks.

For important documents and photos soaked during flooding, freeze them immediately to stop mold growth. Place wet papers and photos in ziplock bags and put them in your freezer. This stabilizes damage until you can properly dry them later using specialized techniques or professional document restoration services. Don’t attempt immediate drying. Papers stick together, ink runs, and photos fuse if handled wet.

Materials requiring immediate removal:

Carpet padding of any type. Replacement mandatory even if carpet is salvageable. Wet fiberglass insulation loses effectiveness and promotes mold growth. Drywall below the waterline plus 12 inches above. Paper facing holds moisture and contaminants. Particle board and MDF furniture swells and loses structural integrity when wet. Cardboard boxes and contents stored on basement floors absorb water rapidly and transfer moisture to contents. Contaminated porous items touched by sewage or gray water can’t be adequately sanitized.

Disinfecting and Sanitizing Your Basement After Water Removal

y_ojNdj2Sx2WTrgpAERiIw

Water contamination level determines sanitization intensity and health risks. Category 1 water comes from clean sources: broken supply lines, sink overflows, appliance leaks. It contains no sewage or chemical contamination. Category 2 gray water comes from washing machines, dishwashers, sump pump failures, or toilet overflows containing only urine. It holds bacteria and requires thorough disinfection. Category 3 black water contains sewage, chemicals, or floodwater from outside. It poses serious health risks and usually requires professional remediation. Understanding your water category helps you decide whether DIY cleanup is safe or whether professional help is necessary.

Start sanitization by removing all debris, mud, and solid contaminants from floors and walls. Sweep or shovel out mud. Pick up and dispose of leaves, sticks, insulation pieces, and other flood debris. Pressure wash walls and floors using a high pressure hose or electric pressure washer at 1,500 to 2,000 PSI to remove dirt stuck to surfaces. Work from top to bottom, starting at walls and ending at floor drains or the lowest point where wash water can exit or be vacuumed up. After pressure washing, mix a bleach disinfecting solution: 1 cup household bleach (5 to 6% sodium hypochlorite) per gallon of water. Apply this solution to all surfaces that touched floodwater. Walls, floors, studs, concrete, and exposed framing. Use a pump sprayer for large areas or a sponge mop for floors. Let the bleach solution sit on surfaces for 10 minutes minimum to kill bacteria, viruses, and mold spores effectively. Don’t rinse the bleach solution off. Let it air dry. The remaining residue continues providing antimicrobial protection as surfaces dry. For Category 2 gray water cleanup, increase bleach concentration to 1.5 cups per gallon for stronger disinfection.

Wear full protective equipment during all disinfection work. Rubber gloves protect your hands from bleach and contaminants. An N95 or P100 respirator filters airborne bacteria and bleach fumes. Safety goggles prevent splashes from reaching your eyes. Wear long sleeves, long pants, and rubber boots that cover your ankles. Ventilate the space by opening windows and doors and running fans, but never mix bleach with ammonia or other cleaners. This creates toxic chloramine gas that causes serious respiratory damage.

When contamination levels involve sewage (Category 3 black water), professional remediation is necessary instead of DIY cleaning. Sewage contains harmful bacteria like E. coli, viruses like hepatitis A, and parasites that cause serious illness. Professional remediation companies use specialized antimicrobial treatments, dispose of contaminated materials properly, and follow health department protocols for sewage cleanup. Attempting DIY sewage cleanup exposes you and your family to health hazards that outweigh any cost savings.

Preventing Mold Growth in Your Dried Basement

Kh1F9V5JTwWsbWxi7JBTUg

Mold spores exist everywhere. In the air, on surfaces, in dust. They remain dormant until conditions favor growth: moisture, organic food sources (wood, drywall paper, carpet), temperatures between 60 to 80°F, and poor ventilation. After flooding, your basement offers ideal mold conditions unless you dry everything within 48 hours. Mold establishes itself faster than most homeowners realize. Within 24 to 48 hours of flooding, spores begin colonizing damp surfaces. By 72 hours, visible growth appears as fuzzy patches or discoloration. After one week, established mold spreads aggressively and produces more spores that contaminate other areas.

Early warning signs help you catch mold before it spreads. A musty, earthy smell indicates mold presence even when you can’t see visible growth. It’s often growing behind walls or beneath flooring. Black, green, or white spots appearing on walls, floors, ceiling joists, or stored items signal active mold colonies. Condensation on walls, pipes, or windows shows humidity levels support mold growth. Water stains that reappear after cleaning suggest ongoing moisture problems feeding mold behind surfaces.

Eight mold prevention strategies:

Maintain basement humidity below 50% year round using dehumidifiers set to run automatically when humidity rises. Ensure proper ventilation throughout the basement by installing exhaust fans or opening windows during dry weather. Use mold resistant drywall (paperless or fiberglass faced) and mold resistant paint for basement renovations and repairs. Conduct monthly inspections of basement walls, floors, corners, and stored items for early mold detection. Run a dehumidifier continuously during humid summer months and damp spring/fall periods. Install air circulation fans to prevent stagnant humid air pockets in corners and closed spaces. Repair plumbing leaks, foundation cracks, and window seal failures immediately to eliminate moisture sources. Install vapor barriers on concrete walls and floors to prevent moisture transmission from exterior soil.

For small mold areas under 10 square feet, DIY cleaning works safely. Mix water and detergent (dish soap works fine) in a bucket. Scrub mold spots with a stiff brush dipped in the solution while wearing a mask and gloves. The physical scrubbing removes mold from surfaces more effectively than cleaning solutions alone. After scrubbing, apply the bleach disinfecting solution described earlier (1 cup bleach per gallon water) and let it sit for 10 minutes. Dry the cleaned area thoroughly using fans and dehumidifiers. Mold returns quickly to damp surfaces, so drying is as important as cleaning. Open windows to ventilate the space and exhaust mold spores outside while you work.

When mold coverage exceeds 10 square feet, professional mold remediation is required. Large mold infestations release massive spore counts during cleaning that contaminate your entire home through HVAC systems and air currents. Professionals use containment barriers, negative air pressure systems, HEPA filtration, and specialized cleaning agents to safely remove extensive mold growth. They also identify and correct the moisture sources that allowed mold to spread so widely. Health risks from large mold exposures include respiratory problems, allergic reactions, asthma attacks, and immune system effects. For more information about professional services, see our guide on Professional Mold Inspection and Remediation: Protecting Your Health.

To learn more about addressing the underlying moisture problems that lead to mold growth, review our article Understanding Common Causes of Water Damage in Homes.

Long Term Waterproofing Solutions for Basement Flooding Prevention

GbKc7ADYQhaH0V6F6pcBJA

Interior waterproofing manages water that already penetrated your foundation. Exterior waterproofing prevents water from reaching foundation walls in the first place. Most effective flood prevention combines both approaches, creating multiple barriers between groundwater and your basement.

Exterior Waterproofing Methods

Exterior drainage systems intercept groundwater before it contacts foundation walls. French drains are the most common exterior system: a perforated pipe buried in gravel alongside your foundation’s footing, sloped to drain water away from your home. Installing a French drain requires excavating around your foundation to the footing depth (typically 6 to 8 feet), installing filter fabric, laying perforated drain pipe in gravel, covering it with more gravel, and backfilling with soil. The drain pipe carries groundwater to a discharge point away from your house, either to daylight at a lower grade, to a dry well, or to a storm drain if local codes allow.

Foundation excavation also allows applying waterproof membranes to exterior walls. After excavating, clean all soil from foundation walls, then apply rubberized waterproofing membrane or spray applied coatings designed for below grade use. These membranes create a continuous moisture barrier from footing to grade level. Dimpled drainage boards installed over membranes add a second protection layer by creating an air gap that guides water down to footing drains instead of pressing against walls.

Proper landscape grading directs surface water away from your foundation before it saturates soil and creates hydrostatic pressure. Create at least a 6 inch slope over the first 10 feet from your foundation. This means soil should drop 6 inches in elevation for every 10 feet of distance from your house. This grade prevents water from pooling near foundations and seeping down to create basement flooding. Regrade settled soil periodically to maintain proper slope.

Window wells collect water if not properly designed. Fill window wells with 3/8 inch to 3/4 inch coarse aggregate (gravel) from the window sill level down to the footing. This allows water to drain rapidly instead of pooling against basement windows. Connect a perforated drain pipe from the bottom of the window well to your foundation’s perimeter drain tile system so water flows away continuously.

Interior Waterproofing Solutions

Interior sealants and coatings create moisture barriers on the inside surface of foundation walls. Hydraulic cement fills cracks in concrete walls and floors. It expands slightly as it cures, locking into cracks and stopping active water leaks. Clean cracks thoroughly, then pack hydraulic cement deep into the opening using a trowel or putty knife. Work quickly. Hydraulic cement sets fast.

Interior waterproof coatings are thick paints formulated to block moisture transmission through concrete walls. Apply two coats following manufacturer directions. These coatings handle minor moisture vapor transmission but can’t stop significant water pressure or active leaks. Use them on walls that show dampness but no flowing water.

Interior drainage channels capture water that seeps through floors at the wall floor joint. Installing interior drains requires cutting a channel along basement perimeters, removing concrete, installing perforated drain pipe in gravel, and covering it with new concrete. These drains connect to a sump basin where a pump discharges water outside. Interior drains work when exterior excavation is impossible or too expensive.

Vapor barriers are plastic sheeting (6 mil or thicker polyethylene) applied to walls and floors before finishing basements. They prevent moisture from reaching drywall, insulation, and framing. Install vapor barriers with sealed seams and edges to create continuous protection.

Solution Type Cost Range Effectiveness Level Best For
French drain installation (exterior) $3,000 to $10,000 depending on excavation depth and perimeter length Very high, prevents water from reaching foundation Homes with high water tables or chronic groundwater problems
Exterior membrane application $4,000 to $12,000 including excavation and membrane materials Very high when combined with drainage system Foundations with multiple leaks or porous concrete
Sump pump system (basin, pump, discharge line) $500 to $1,500 for DIY; $1,200 to $2,500 installed professionally High for managing collected water Basements at lowest point of property or with interior drainage
Interior sealant and coating $200 to $800 for DIY materials; $1,500 to $3,500 installed Moderate, handles moisture vapor but not active leaks Damp walls without flowing water or as supplement to other methods
Hydraulic cement crack repair $50 to $200 for DIY materials; $300 to $800 per crack professionally Moderate to high for small isolated leaks Individual cracks less than 1/4 inch wide with slow seepage

Combining multiple waterproofing approaches provides the most reliable flood prevention. Installing exterior drainage, applying foundation membranes, maintaining proper grading, operating a sump pump system, and sealing interior surfaces creates redundant protection. If one barrier fails or becomes overwhelmed, others continue protecting your basement. This layered approach costs more initially but prevents repeated flooding damage that quickly exceeds prevention costs.

Ongoing Maintenance to Keep Your Basement Dry

QjJdnYKcSzmQfAddepU3iQ

Small routine maintenance tasks prevent major flooding events and protect waterproofing investments. Neglected maintenance allows minor problems to compound into expensive failures that flood basements repeatedly.

Gutters and downspouts move thousands of gallons of water away from your foundation during rainstorms. When gutters clog with leaves and debris, water overflows and saturates soil next to your foundation, creating exactly the hydrostatic pressure that causes basement flooding. When downspouts discharge too close to your house, water pools and seeps down to footings. These simple maintenance failures cause more basement flooding than any other preventable factor.

Nine essential maintenance tasks with recommended frequencies:

Clean gutters twice yearly (spring and fall) to remove leaves, shingle granules, and debris that block water flow. Inspect and extend downspouts annually to ensure they discharge at least 4 feet from your foundation, adjusting extensions that shifted or broke during winter. Monitor foundation cracks seasonally (quarterly checks) to identify new cracks or widening existing cracks that allow water intrusion. Clean window wells after heavy storms to remove accumulated debris, soil, and vegetation that blocks drainage. Test sump pumps monthly during wet seasons (spring and fall) by pouring water into the basin to verify automatic operation. Inspect landscape grading annually to identify settled areas near foundations where water pools instead of draining away. Renew caulk and sealant every 2 to 3 years around basement windows, pipe penetrations, and wall floor joints where materials degrade over time. Monitor basement humidity weekly during humid summer months using a hygrometer, adjusting dehumidifier settings to maintain levels below 50%. Flush drainage systems annually by running hoses into drain openings to clear accumulated sediment and verify water flows freely.

Document maintenance activities in a simple log: date completed, work performed, and observations noted. Patterns emerge when you review maintenance records. If you clean gutters three times in one season because they keep filling rapidly, nearby trees may need trimming. If foundation cracks reappear after repairs, you may have ongoing settling that requires structural evaluation. If window wells fill with soil repeatedly, regrading may be needed to redirect surface water. Records turn random tasks into systematic prevention and help you identify deeper issues before they cause flooding.

When to Call Professional Restoration Services for Basement Flooding

6-o8R7zFSkOdzNI91Yb3Kg

Certain flooding situations exceed safe DIY capabilities due to health risks, required expertise, specialized equipment needs, or time constraints. Understanding these limits protects your safety, prevents inadequate cleanup that creates long term problems, and helps you make informed decisions about when professional restoration delivers better outcomes than DIY efforts.

Several factors determine whether professional services are necessary. Flooding extent matters. A few gallons from a broken pipe differs from 6 inches of standing water throughout your basement. Contamination level affects health risks and cleanup requirements. Time availability determines whether you can complete drying within the critical 48 hour window. Structural concerns require engineering knowledge beyond typical homeowner expertise. Insurance involvement often requires professional documentation and certified restoration work.

Twelve scenarios requiring professional restoration services:

Water depth exceeding 1 inch covering significant basement area. Volume and weight exceed DIY equipment capacity and require professional pumps, extractors, and drying equipment. Sewage backup or black water contamination poses serious health risks requiring specialized disposal and sanitization beyond safe DIY limits. Mold coverage exceeding 10 square feet total area releases dangerous spore concentrations requiring containment, professional cleaning, and HEPA filtration. Horizontal cracks in foundation walls wider than 1/8 inch or any horizontal crack accompanied by wall movement indicates structural failure needing engineering assessment. Basement walls bowing or leaning inward more than 1 inch shows foundation failure from hydrostatic pressure requiring immediate stabilization. New foundation cracks or widening of existing cracks suggests ongoing structural movement needing professional evaluation and repair. Efflorescence mineral deposits (white powdery substance) on walls indicating chronic groundwater intrusion reveals moisture problems requiring exterior drainage solutions. Door frames or window frames becoming distorted or difficult to operate signals foundation movement affecting structural integrity. Flooded HVAC systems, furnaces, or water heaters require professional inspection before reactivation due to electrical hazards and component damage. Valuable items requiring specialized restoration (antiques, important documents, electronics) need professional equipment and techniques for successful recovery. Insurance claims involvement because insurers typically require professional documentation, certified estimates, and licensed contractor repairs for claim approval. Time limitations preventing 48 hour drying completion because missed deadline creates mold growth requiring professional remediation to prevent health hazards.

Structural warning signs deserve special attention because they indicate foundation damage that threatens your home’s stability. Horizontal wall cracks form when exterior soil pressure overwhelms foundation strength. These cracks differ from common vertical settlement cracks. Horizontal cracks mean the wall is failing and may collapse inward. Bowing walls show advanced failure stages where pressure has pushed walls past their structural limits. Efflorescence looks like white mineral powder or crystal formations on concrete surfaces. It appears when groundwater carries dissolved minerals through concrete walls, leaving deposits as water evaporates. Efflorescence proves ongoing water intrusion through foundation walls. One time flooding doesn’t create efflorescence. It develops from chronic moisture exposure over months or years. When you see efflorescence, your foundation is soaking up groundwater continuously, weakening concrete and creating conditions for failure.

Structural repairs cost substantially more than basic flood cleanup. According to industry data, structural crack repairs range from $2,165 to $7,793, with an average cost around $4,975 for professionally engineered solutions. Foundation stabilization using carbon fiber reinforcement strips, steel I beams, or wall anchors adds $4,000 to $15,000 per wall depending on failure severity. These costs seem high, but they’re far less than foundation collapse and whole home structural damage that occur when warning signs are ignored.

Select qualified contractors by verifying state licensing for general contracting or specialized restoration work. Confirm insurance coverage including general liability and workers’ compensation. Request references from recent basement flooding projects and contact those homeowners about their experience. Obtain at least three detailed written quotes covering scope of work, materials specified, timeline for completion, and payment schedule. Compare not just prices but approaches. Some contractors take shortcuts that create problems later. Ask how they plan to handle your specific issues: what equipment they use, how they verify complete drying, what structural repairs they recommend, and what warranties they provide on completed work.

For situations requiring immediate professional response to prevent escalating damage, review our guide on Emergency Water Removal Services: When Every Minute Counts. Professional restoration companies respond 24/7 with industrial equipment and trained teams who stabilize flooding situations quickly. Restoration costs vary based on flooding severity, contamination level, and required structural repairs. Basic water extraction and drying for a 1,000 square foot basement ranges $2,500 to $4,500. Adding sewage sanitization increases costs to $4,000 to $7,000. Structural repairs, mold remediation, and content restoration add to base costs depending on damage extent. Most restoration companies work directly with insurance companies, handling claims documentation and coordination to streamline the process for homeowners.

Final Words

Get the water out fast, dry everything within 48 hours, and watch for hidden moisture that can turn into mold.

That’s how to dry out a flooded basement without creating bigger problems down the road.

Safety comes first. Then speed. Then thorough drying and sanitizing.

When you handle it right, your basement goes back to being dry, clean, and usable. If the job’s bigger than you can handle in two days, or if you’re seeing structural damage, call someone who does this every day.

Either way, you’re protecting your home from the kind of damage that gets worse when you wait.

FAQ

How long does it take to dry out a basement after a flood?

Drying out a basement after a flood typically takes 24 to 72 hours depending on water volume, material types, ventilation quality, and outdoor humidity levels. Complete drying within 48 hours prevents mold and mildew formation, which starts when excessive moisture remains beyond this critical timeframe.

How much does it cost to dry out a flooded basement?

The cost to dry out a flooded basement ranges from equipment rental fees of $50 to $200 per day for DIY efforts to $2,000 to $10,000 for professional restoration services depending on flooding severity, contamination level, and required structural repairs or material replacement.

How to get moisture out of the basement?

Getting moisture out of the basement requires removing standing water with wet vacuums or submersible pumps, then running dehumidifiers and fans for 24 to 72 hours while maintaining indoor humidity below 50 percent. Open windows only when outdoor air is less humid than indoor air to speed evaporation.

Will homeowners insurance pay for a flooded basement?

Homeowners insurance typically covers basement flooding from sudden internal water sources like burst pipes or appliance failures but excludes groundwater seepage, sewer backups without specific riders, and gradual damage from poor maintenance. Check your policy for water damage coverage details and required endorsements before assuming coverage.

What safety precautions should I take before entering a flooded basement?

Before entering a flooded basement, turn off electrical power to the basement at your main panel to prevent shocks and fires, then wear rubber boots, waterproof gloves, N95 respirator, and safety goggles. Use battery-powered lighting only and never touch wet electrical equipment or outlets.

When should I call professionals instead of drying my basement myself?

Call professionals for flooding over 1 inch deep, sewage or chemical contamination, mold exceeding 10 square feet, structural damage signs like wall cracks or bowing, or when you cannot complete drying within 48 hours. Professional equipment and expertise prevent secondary damage and health risks.

What materials must be removed after basement flooding?

Materials requiring removal after basement flooding include carpet padding (even if carpet dries), wet fiberglass insulation, water-damaged drywall below the flood line, particle board, soaked cardboard, and porous items contaminated by sewage. These materials cannot be adequately sanitized or dried.

How do I prevent mold growth after basement flooding?

Preventing mold growth after basement flooding requires completing all drying within 48 hours, maintaining humidity below 50 percent, ensuring proper ventilation throughout the space, and using dehumidifiers until moisture meters confirm dryness. Clean all surfaces with disinfectant and discard items that remain wet beyond the safe timeframe.

What’s the difference between clean water and contaminated water flooding?

Clean water flooding (Category 1) comes from supply lines and requires basic sanitization, gray water (Category 2) from appliances needs thorough disinfection, and black water (Category 3) from sewage or outdoor sources requires professional remediation due to dangerous bacteria and health risks requiring specialized equipment and safety protocols.

How do I know if my basement has hidden moisture after drying?

Hidden moisture in your basement appears through moisture meter readings above 15 percent in drywall or wood, musty odors indicating trapped dampness, condensation on cool surfaces, or continued high humidity readings above 50 percent. Check wall cavities, beneath flooring, and inside enclosed spaces where moisture pockets hide.

What are signs of structural damage from basement flooding?

Signs of structural damage from basement flooding include horizontal wall cracks, bowing or leaning foundation walls, new or widening cracks, white mineral deposits (efflorescence) indicating groundwater intrusion, and distorted door or window frames. These conditions require professional structural assessment before proceeding with repairs.

Should I use my HVAC system while drying my flooded basement?

Do not use your HVAC system if it flooded, as this risks spreading mold spores through air ducts throughout your home. Use air conditioning only, not heat, because warm air holds more humidity than cold air, which slows the drying process and maintains conditions favorable for mold growth.

Emergency Roof Weatherproofing Methods That Actually Work

0

Think a little leak won’t hurt? That’s the costly mistake most homeowners make.
Before you touch a ladder, check weather and your safety. Falling is worse than a wet ceiling.
Act fast: a tarp, a taped patch, or roofing cement can stop water from soaking decking, insulation, and ceilings.
This guide walks you through the emergency roof weatherproofing methods that actually work, when to climb, how to tarp and seal correctly, what to document for insurance, and when to call a pro so the problem doesn’t get worse.

Immediate Steps to Protect Your Roof Right Now (Do This First)

t-FZMwdLT5uJQ5iS8y_RRA

Before you touch a ladder or grab a tarp, stop and check the weather. If the wind’s gusting above 15 to 20 mph, rain is still heavy, or lightning is anywhere nearby, stay off the roof. Even a small slip on wet shingles can mean a serious fall. Your first job is keeping yourself safe, then stopping more water from getting in.

If conditions allow you to move, the fastest way to protect your roof is covering the damaged area with a heavy duty tarp or plastic sheeting. Lay the cover flat over the hole or missing shingles, extending it at least three to four feet past the damage on all sides. Water runs downhill, so make sure the material overlaps the problem area in the direction rain flows. Pull it tight to avoid puddling, then secure the edges with wood boards and nails or screws driven through the tarp into the roof deck.

Speed matters because every minute of exposure lets more water soak into your decking, insulation, and ceiling. A small leak can turn into warped wood and mold within days. Get the opening covered, even if the fix isn’t perfect.

Here’s what to do in order:

Check current weather and roof surface conditions before climbing. If it’s unsafe, wait or call for help. Move valuables, electronics, and furniture away from the leak zone inside your home. Place buckets under active drips. Position your tarp or plastic sheeting over the damaged section, making sure it extends well beyond the edges. Secure all four edges using 1×4 or 1×6 boards nailed or screwed through the cover into solid roof decking. Walk the perimeter and check for gaps, loose corners, or areas where wind could catch the material and pull it free.

How to Assess Roof Damage Safely and Quickly

1xGvkpZTQB2ZdZLTv_uAtw

Start your inspection from the ground using binoculars or a camera with a zoom lens. Look for obvious signs like missing shingles, torn sections, visible holes, or sagging areas. If you can see daylight through your attic ceiling or water stains spreading across drywall, you already know there’s a breach. Walk around your house and check all roof slopes, paying attention to valleys, ridge lines, and spots near chimneys or plumbing vents where flashing might’ve pulled loose.

If you must get closer, use a sturdy extension ladder and only climb high enough to see the roof surface clearly. Never step onto the roof unless it’s completely dry, the wind is calm, and you’re wearing non slip shoes. Watch for soft or spongy spots in the decking, which signal rot or water damage underneath. Missing shingles, cracked flashings, punctures from fallen branches, and large sections of exposed underlayment all require immediate temporary coverage. Any area where you can see tar paper, felt, or bare wood is letting water in and needs to be sealed or tarped right away.

Temporary Covering Methods for Emergency Weatherproofing

4W-vaoqKRxqxaeC5Ndnvmw

A heavy duty tarp is your best short term shield against rain and wind. Choose a tarp that’s at least 12 feet by 20 feet for most localized damage, or go up to 20 by 30 feet if the affected area is large. Lay it smooth and flat across the damaged zone, making sure it runs from a point above the damage all the way down past the eaves if possible. That way, water hitting the tarp flows off the roof instead of pooling or seeping under the edges.

If you don’t have a tarp, thick plastic sheeting can work in a pinch. The key difference is durability. Tarps resist tearing and UV damage better than most plastic, so they’ll last weeks or even months if secured properly. Plastic sheeting is fine for a day or two, but plan to upgrade or call a roofer soon after. Whichever material you use, avoid letting it flap in the wind. Loose fabric acts like a sail and can rip free, taking shingles with it. Also, don’t punch unnecessary holes. Every fastener you drive through the cover is a potential leak point if not sealed or positioned correctly.

Here’s a reliable six step installation sequence:

Clear loose debris, broken shingles, and branches from the damaged area so the tarp lays flat. Unroll the tarp and position it to cover the damage plus at least three to four feet of surrounding roof on all sides. Align one long edge near the roof ridge (if accessible) and let the opposite edge drape past the eaves. Place a 1×4 or 1×6 wood board along the top edge of the tarp, then drive 1 1/4 inch galvanized roofing nails or screws through the board and tarp into the roof deck every two to three feet. Repeat the board and fastener method along the sides and bottom edge, pulling the tarp taut before securing each section. Inspect all edges and add extra nails or rope tie downs if wind is forecast.

Emergency Sealing and Patch Options for Small Roof Openings

6hsZZhmSSGqnjA9s1GOKhA

When the hole is smaller than a dinner plate, a tarp might be overkill. Roofing cement, butyl tape, or a peel and stick patch can seal the opening in fifteen to thirty minutes. Roofing cement comes in caulk tubes (around 10 ounces) for small cracks or one gallon tubs for larger repairs. Squeeze or trowel a thick bead around the edges of a puncture, nail hole, or split flashing, then press the sealant into the gap. If the surface is wet, dry it as much as you can with a towel first. Most cements won’t bond well to standing water.

Roofing tape works best on seams, flashings, and areas where two materials meet. Look for butyl or EPDM tape that’s two to four inches wide. Peel off the backing, press the tape firmly over the leak, and smooth out any air bubbles. These tapes are sticky enough to grab onto shingles, metal, and even damp surfaces, making them handy when you’re racing the weather.

Common emergency sealants and their uses:

Roofing cement or tar. Thick paste for sealing cracks, coating nail heads, and bonding patches around vents and chimneys.

Roofing tape (butyl or EPDM). Adhesive strips for sealing seams, flashing edges, and small tears in shingles.

Asphalt roof patch fabric. Fiberglass mesh embedded in adhesive. Cut to size and press over punctures or worn spots for a reinforced seal.

Silicone or polyurethane caulk. Flexible sealant for narrow gaps in flashings or around penetrations. Holds up in temperature swings.

Safety Considerations During Emergency Roof Work

0BW2C_UQQb-OI4rtYHKokQ

Roofs are slippery when wet, steep, and often higher than they look from the ground. A fall from even a single story roofline can cause broken bones or worse. Never climb onto a roof during active rain, high wind, ice, or lightning. If you’re not confident working at heights, or if the roof pitch is steep enough that you feel unstable, stay off and call a professional. Temporary damage is better than a trip to the emergency room.

When conditions are calm and dry, use a sturdy extension ladder rated for your weight plus the tools you’re carrying. Set the base one foot away from the wall for every four feet of ladder height, and make sure both feet are on solid, level ground. Wear rubber soled shoes with good grip, work gloves, and safety glasses. If the roof slope is steeper than 6:12 (six inches of rise for every twelve inches of run), consider using a roof harness anchored to a rated point that can hold at least 5,000 pounds of force. Don’t rely on chimneys or vent pipes as anchor points unless they’re specifically designed for fall protection. Keep one hand free whenever possible, and move slowly. Rushing leads to mistakes.

When to Call a Professional for Emergency Roof Repair

xDpc7R_2QEOwWnNrY_1H6w

Some damage is beyond a tarp and a tube of roofing cement. If you see sagging sections, large holes where decking has collapsed, or multiple leaks scattered across different areas, the structure might be compromised. A professional crew has the equipment, safety training, and heavy duty materials to secure a damaged roof quickly, even in bad weather. Many roofing companies offer 24/7 emergency response and can be on site within hours.

You should also call for help if water is pouring in faster than you can catch it, if electrical fixtures are sparking or getting wet, or if you’re simply not comfortable climbing a ladder. Trying to DIY a repair when you’re unsure can make the damage worse and void insurance coverage if the insurer determines the work was done improperly. Professional emergency tarping typically costs between $150 and $500 depending on roof size and access difficulty, which is a small price compared to the cost of interior water damage spreading through ceilings, walls, and insulation.

Situations that require expert help right away:

Structural instability such as bowed rafters, sagging roof deck, or ceilings that feel soft or bulge downward. Damage covering more than 10 to 15 percent of the roof area, or multiple leaks in different zones that can’t be covered with a single tarp. Electrical hazards including wet wiring, sparking outlets, or water dripping near your breaker panel or light fixtures.

Final Words

In the action, stop the leak and cover exposed areas with a tarp or heavy plastic. Do a quick safety check before you climb and move furniture out of harm’s way. These steps slow damage right away.

Next, inspect from the ground for missing shingles, punctures, sagging, or active drips. Use roofing tape or patch sealant for small holes. If the roof is unstable, or water keeps coming in, call a professional.

These emergency roof weatherproofing methods — fast tarping, safe assessment, temporary sealing, and timely pro help — keep water out and protect what matters. You’ll be back to normal soon.

FAQ

Q: How to temporarily waterproof a roof?

A: Temporarily waterproofing a roof means covering exposed areas with a tarp or heavy plastic, sealing small holes with roofing tape or sealant, and securing edges to stop more water until permanent repairs.

Q: What is the 25% rule in roofing?

A: The 25% rule in roofing usually means if less than 25% of the roof is damaged you can patch or repair sections; if damage exceeds 25% a full replacement or different permit and insurance handling is often needed.

Q: How do I stop my roof leaking in heavy rain?

A: Stopping a roof leak in heavy rain means first protecting people and belongings, then placing buckets, applying a tarp or plastic over the roof, temporarily sealing small holes, and calling a pro if the leak continues.

Q: Does liquid rubber roof coating work?

A: Liquid rubber roof coating works as a flexible, waterproof layer on clean, dry roofs, good for sealing leaks and flat surfaces, but it won’t fix structural damage or major storm failures.

Electrical Hazard Safety Shoes: Protection Standards and Top Picks

0

Ever stepped over an extension cord on a job site without thinking twice? That simple move puts you at risk if the cord’s damaged and you’re not wearing electrical hazard rated footwear. Construction crews, warehouse workers, electricians, and manufacturing teams all share one thing: incidental contact with live wiring or energized equipment during normal work. ASTM F2413 certified EH shoes create a non-conductive barrier between your feet and electrical shock, but only when you pick the right pair for your actual conditions and keep them dry and intact.

EH Safety Shoe Models: Brand Comparisons and Top Choices

pdnLYrkSTu267BLDqgmnBw

EH rated footwear uses non-conductive materials to protect workers from electrical shock when they step on live wires or energized equipment. All electrical hazard shoes must meet or exceed ASTM F2413 certification standards, which verify the boot’s ability to resist voltage and prevent circuit completion through the wearer’s body in dry conditions.

Brand Collection Size Key Models Notable Features Price Range Category Purchase Availability
Reebok Work 218 models (191 with EH protection) Sublite Cushion (RB4051, RB4041), Rapid Response (RB8894, RB8694), BB4500 Work (RB4132, RB4166), Nano Tactical (RB7120, RB7125) Athletic performance technology, lightweight shock absorption, multiple width options Budget to Mid-Range Free shipping to contiguous US, 200+ in stock
Rockport Works 24 models More Energy series (6-inch lace-to-toe), Sailing Club boat shoes, Pulse Tech Work line Cushguard Internal Met Guard, Poron XRD technology, fashion-forward designs Mid-Range to Premium Free shipping to all states except Alaska and Hawaii
Frye Supply 16 ASTM certified models Chelsea, Harness, Wellington, Western, Logger, Utility Moc styles Premium leather craftsmanship, heritage dating to 1863, traditional boot construction Premium Free shipping to all states except Alaska and Hawaii

Reebok Work dominates the market with the broadest selection, targeting workers who prioritize lightweight comfort for long shifts. The Sublite Cushion Work series (RB4051, RB4041, RB4059, RB4058, RB4144) uses athletic cushioning systems originally designed for running shoes. This makes them popular in warehousing and manufacturing where workers log miles on concrete. The Rapid Response series (RB8894, RB8694, RB8850, RB8674, RB8874, RB8650) serves tactical applications including law enforcement and emergency services with quick-dry materials and aggressive tread patterns. The BB4500 Work line (RB4132, RB4166) brings basketball shoe styling to the job site, while Nano Tactical boots (RB7120, RB7125, RB7100) offer CrossFit-inspired flexibility for dynamic movements.

Rockport Works positions itself in the comfort-technology segment with the More Energy series featuring Cushguard Internal Met Guard protection built into 6-inch lace-to-toe boots. Their Sailing Club boat shoes incorporate Poron XRD Internal Met Guard technology in a casual silhouette suitable for lighter industrial work or technical roles where traditional boots aren’t required. The Pulse Tech Work line offers fashion-forward designs in Grey, Wheat, and Merlot colors for workers in customer-facing positions.

Frye Supply targets buyers who value premium leather heritage and traditional boot construction. All 16 models feature full-grain leather and Goodyear welt or cement construction methods dating back to 1863.

Price categories generally correlate with material quality and feature complexity. Budget options ($80 to $120) typically offer composite toes with basic EH protection and limited additional features. Mid-range models ($120 to $180) add slip resistance, waterproofing, or metatarsal guards alongside athletic cushioning systems. Premium boots ($180 to $300+) incorporate advanced met guard technology like Poron XRD, premium full-grain leather, or specialized applications like tactical response footwear.

Free shipping to most US states reduces total cost and makes online purchasing practical for comparing options. Warranty coverage varies by brand but typically ranges from 30-day satisfaction guarantees to one-year defect protection. When selecting retailers, prioritize those offering free returns within the contiguous United States. This allows you to order multiple sizes or styles and send back what doesn’t fit. Compare in-stock availability, since 200+ items being immediately available from one retailer means faster delivery than special-order situations.

Understanding ASTM F2413 EH Certification and Voltage Protection

k5hA50IXRkO8UpYYoTKeCw

Why ASTM F2413 Certification Matters When Comparing Options

ASTM F2413 certification establishes identical minimum safety thresholds across all electrical hazard footwear, regardless of brand or price. Every boot meeting this standard must pass the same voltage resistance testing and electrical insulation protocols under controlled laboratory conditions. This standardization means the $90 composite toe work shoe and the $250 premium leather boot both provide equivalent electrical shock protection when new and dry.

Certification testing requires footwear to withstand specific voltage exposure without allowing dangerous current flow to the wearer’s body. Once you confirm ASTM F2413 compliance, your comparison shifts to secondary factors like comfort features, durability expectations, additional safety certifications (slip resistance, waterproofing, met guards), and price. The certification itself doesn’t degrade by price point, so a budget option protects electrically just as well as premium alternatives on day one. Your decision then focuses on how long that protection lasts given your work conditions and whether added features justify higher cost.

Electrical resistance testing subjects footwear to 18,000 volts in an open circuit configuration while measuring any leakage current that might pass through the boot to the wearer. To earn ASTM F2413 EH certification, the footwear must limit leakage current to 1.0 milliamp or less when exposed to this voltage under dry test conditions. The test uses a conductive medium inside the boot representing the worker’s foot and measures whether dangerous current can complete a path from an energized surface through the sole, insole, and into that foot-simulating conductor.

The voltage threshold of 18,000 volts represents exposure to 600-volt circuits under worst-case fault conditions with a 3:1 safety factor built into testing. Testing occurs at room temperature with clean, dry footwear that hasn’t been subjected to wear or contamination. This baseline establishes the boot’s electrical insulation capability when properly maintained.

Open circuit requirements mean the test simulates a worker standing on energized equipment or a live wire while not simultaneously touching any grounded surface with their hands or body. Non-conductive materials in the sole, midsole, and any metal components (if present) must create complete insulation preventing current flow. Shock resistant soles use rubber compounds, polyurethane, or advanced elastomers with high dielectric strength.

Any metal shanks, hardware, or toe caps must be fully isolated from both the outsole and the interior where the foot contacts the boot. Even steel toe boots can maintain EH certification if the metal component is completely surrounded by non-conductive material creating an insulation barrier. The sole thickness, material density, and construction method all contribute to preventing circuit completion through the worker’s body when they accidentally contact energized equipment.

EH shoes serve as secondary protection, not primary safeguards against electrical work. The certification assumes you’re following lockout/tagout procedures, using insulated tools, wearing electrical gloves when required, and maintaining proper work practices. Footwear provides an extra insulation layer if something goes wrong, like stepping on a damaged extension cord or contacting exposed wiring.

Certification testing requires completely dry conditions because moisture creates conductive paths that compromise electrical resistance. Water, sweat, oil, or other liquids penetrating the boot’s materials drastically reduce insulation effectiveness. Similarly, physical damage like cracks in the sole, separated stitching, or worn-through outsoles create potential current pathways. Once footwear gets soaked or shows structural damage, it no longer provides reliable electrical hazard protection even though it may still be wearable.

Who Needs Electrical Hazard Safety Shoes in Their Workplace

Vj6ew_aAT5ioM90JuE37ug

Electrical hazard protection extends well beyond electricians and power line workers into nearly every industrial and construction environment. Construction sites contain temporary wiring, extension cords, and power tools creating multiple contact points with live electricity. Manufacturing facilities run machinery on 480-volt three-phase power with junction boxes, control panels, and floor-mounted disconnects presenting shock risks. Warehouse operations use electric forklifts with charging stations and damaged power cords that may contact wet floors.

Even landscaping crews encounter underground utilities, irrigation control boxes, and commercial property electrical pedestals. The common thread across these industries isn’t deliberate electrical work. It’s incidental exposure where workers might accidentally step on damaged wiring or contact energized equipment while performing their primary job duties. “I’m not an electrician” doesn’t eliminate electrical hazards from your workplace.

Profession/Industry Electrical Hazard Exposure EH Footwear Necessity
Electricians and Electrical Contractors Direct work on energized circuits, panel installation, troubleshooting live systems Required – primary electrical work creates constant exposure
Construction Workers (General Trades) Temporary power distribution, damaged extension cords, contact with buried utilities Highly Recommended – frequent incidental contact with electrical systems
Utility Line Workers and Power Plant Operators High-voltage transmission lines, substations, generation equipment Required – specialized electrical environments with extreme voltage exposure
Manufacturing Personnel and Machine Operators Industrial machinery controls, junction boxes, floor-mounted electrical equipment Recommended – machinery operates on higher voltages with accessible electrical components
Maintenance Technicians and Facility Managers HVAC electrical systems, lighting repairs, equipment troubleshooting Highly Recommended – regular contact with building electrical infrastructure
Telecommunications and Data Center Installers Rack-mounted power distribution, battery backup systems, overhead cable trays with power lines Recommended – enclosed spaces with concentrated electrical infrastructure
Postal Service and Delivery Drivers Loading dock electrical hazards, vehicle charging stations, damaged building wiring Situational – depends on facility conditions and route characteristics
Restaurant and Hospitality Equipment Operators Commercial kitchen equipment, walk-in cooler systems, damaged cords on wet floors Recommended – combination of electrical equipment and wet conditions increases risk

Proper hazard assessment determines when EH footwear transitions from optional to required personal protective equipment. OSHA requires employers to evaluate workplace electrical hazards and specify appropriate PPE based on voltage exposure, work proximity to energized equipment, and environmental conditions.

Hazard identification looks at both obvious electrical work areas and secondary exposure zones. A maintenance technician might not work on electrical panels daily, but troubleshooting a malfunctioning conveyor means accessing the motor control center. A warehouse worker doesn’t perform electrical repairs, but operates a walkie stacker that could contact damaged wiring near floor outlets.

Document your hazard assessment noting specific electrical systems present, their voltage levels, how frequently workers come within contact distance, and what conditions (wet floors, metal surfaces, confined spaces) might increase shock severity. Once you identify credible electrical contact scenarios, EH footwear becomes mandatory PPE rather than an optional upgrade.

OSHA Compliance and Personal Protective Equipment Requirements

oLAvnFvGTcSNSYiH1k2qLQ

OSHA compliance for electrical hazard PPE starts with 29 CFR 1910.137, which mandates electrical protective equipment for employees exposed to hazards from flames or electric arcs, and 29 CFR 1910.132, which requires employers to assess workplace hazards and provide appropriate PPE. When your hazard assessment identifies potential contact with energized electrical equipment or circuits, OSHA requires you to provide footwear meeting ASTM F2413 electrical hazard standards at no cost to employees.

Compliance isn’t optional when electrical exposure exists. The regulation covers voltage levels from standard 120-volt circuits through industrial 480-volt systems and higher transmission voltages, scaling protection requirements to match exposure severity. Electrical safety protocols must include written PPE selection criteria, documentation of hazard assessments, and records showing which job classifications require EH footwear.

Employer responsibilities extend beyond just purchasing boots. Hazard identification requires evaluating each work area and task for electrical shock potential, documenting findings, and updating assessments when conditions change or new equipment arrives. You must provide adequate quantities so workers aren’t sharing footwear or wearing damaged boots because replacements aren’t available.

Training requirements for EH footwear cover three critical areas: when to wear electrical hazard boots, how the protection works, and what limitations exist. Workers must understand that EH shoes serve as secondary protection, not a substitute for de-energizing circuits or using insulated tools. Training includes recognizing conditions that compromise protection such as wet environments, damaged soles, or worn-through outsoles.

Employees need clear instruction that electrical hazard certification only applies in dry conditions and that boots soaked from rain, spills, or sweat lose insulation effectiveness. Annual refresher training reinforces proper use and connects foot injury prevention to broader electrical safety protocols and regulatory standards. Documentation of training dates, attendees, and topics covered protects both workers and employers by demonstrating compliance with OSHA’s PPE training mandates under 29 CFR 1910.132(f).

Fit and Comfort Considerations for All-Day EH Footwear Performance

1MOKKajXSOuj8xfzH6vaHA

Proper fit is essential for both safety effectiveness and comfort during 10 to 12-hour shifts where poor-fitting boots cause blisters, fatigue, and pressure points that make you want to take them off mid-shift. Sizing ranges from 3 through 16 across the EH footwear market, accommodating nearly all foot lengths.

Width availability matters just as much as length, with extensive options including medium (216 models available), wide (213 models), extra wide or EW (5 models), 4E (6 models), and 6E (2 models). Many workers default to medium width when they actually need wide, leading to pinched toes, rubbing along the sides, and premature sole breakdown from uneven pressure distribution.

If you typically buy wide-width dress shoes or athletic shoes, start your EH boot search with wide options rather than assuming medium will stretch. The internal volume of a safety toe boot is already reduced by the protective cap, so sizing up in width prevents your foot from fighting the toe box all day.

Modern athletic-shoe science integration has transformed EH footwear from heavy, stiff work boots into comfortable all-day wear. Cushioning systems borrowed from running shoes include EVA midsoles, polyurethane foam, and gel heel inserts that compress with each step and return energy rather than transmitting impact shock straight to your joints. Arch support options range from flat profiles for workers with neutral arches to structured supports for those with high arches or plantar fasciitis.

Lightweight design has become standard, with many models weighing under 2 pounds per boot compared to traditional 3 to 4-pound leather work boots. Fatigue reduction technologies focus on the cumulative effect of thousands of steps per shift. A warehouse worker might log 12,000 to 15,000 steps daily, so even small improvements in shock absorption multiply across those repetitions. Long shift comfort depends on breathable linings that wick moisture away from your foot, preventing the sweat buildup that causes hot spots and blisters.

Ankle support varies significantly between low-cut work shoes and 6-inch or 8-inch boots. Higher boots provide lateral stability preventing ankle rolls on uneven surfaces, debris, or when stepping off loading docks.

Break-in period expectations for leather work boots typically span one to two weeks of gradually increasing wear time. Start with half-shifts if possible, letting your feet adapt to pressure points while the leather softens and conforms to your foot shape. Comfort features like breathable lining and moisture wicking reduce break-in friction by keeping your skin dry where it contacts seams and edges.

Assess fit during your first few wears by checking for heel slippage (your heel should stay planted when walking), toe room (you should have thumb-width space between your longest toe and the boot end when standing), and any pressure points across the top of your foot or along the sides. Synthetic and mesh materials break in faster, often becoming comfortable within two to three days, but may not provide the same long-term durability as leather.

Online purchasing considerations include retailer return policies, with free returns within the contiguous United States allowing you to order two or three sizes or widths simultaneously. Try them on at home with the socks you’ll actually wear at work, walking on hard surfaces rather than carpet to feel how the sole flexes and where pressure points develop. Order early in the week so boots arrive with time to test them and still return within the policy window if needed.

Style Categories and Boot Height Options for EH Footwear

o19I5JgCSaS1ufrA7WBu9A

EH protection is available across a surprisingly broad style range from traditional 8-inch leather work boots to athletic work shoes that look more like running shoes than safety footwear. This variety lets you match footwear style to your specific work environment, dress code, and comfort preferences rather than forcing everyone into the same heavy boot design.

Athletic work shoes (122 models available) dominate the market because they deliver electrical hazard protection in lightweight, breathable designs that feel like the athletic shoes workers already wear off the job. These low-cut styles work well in warehouses, light manufacturing, delivery driving, and any environment where ankle support isn’t critical but comfort over long distances matters. Expect mesh panels, synthetic uppers, and cushioned midsoles.

Traditional work boots (33 models available) provide 6-inch or 8-inch ankle coverage with leather uppers and rugged outsoles suited to construction sites, utility work, and outdoor environments. These boots offer maximum ankle support, protection from debris, and durability in harsh conditions but weigh more and require break-in time.

Work booties and Chelsea styles split the difference with 4-inch to 5-inch heights and elastic side panels or pull-on construction for quick on-off convenience. Popular in maintenance roles and light construction where you’re frequently moving between indoor and outdoor areas.

Boat shoes for lighter-duty environments (4 models available) bring electrical hazard protection to technical roles, facility management, and indoor industrial settings where traditional work boots feel excessive but electrical exposure still exists around control panels and machinery.

Casual work oxfords (3 models available) offer professional appearance for electricians and technicians making service calls in occupied buildings, retail spaces, or healthcare facilities where heavy boots look out of place.

Work sneakers (2 models available) specifically target younger workers and those transitioning from pure athletic footwear, easing the adjustment to safety footwear by maintaining familiar sneaker styling.

Hiking styles (1 model available) suit utility line workers, telecommunications installers, and outdoor maintenance crews who need trail-capable traction and weather protection alongside electrical hazard certification.

Slip-on options (1 model available) prioritize convenience for workers who frequently need to remove footwear for clean rooms, residential service calls, or facility access requirements while maintaining ASTM F2413 protection.

Closure systems affect both ease of use and security throughout your shift. Lace-up systems provide the most adjustable fit, letting you tighten or loosen specific zones across your foot and accommodate swelling that develops during long days on your feet. Zipper closures speed up the process of getting boots on and off, valuable when you’re changing between indoor and outdoor work areas multiple times per day. Pull-on styles like Chelsea boots or Wellington work boots eliminate laces entirely for maximum convenience but offer less fit customization.

Gender-specific designs now include 147 men’s models and 71 women’s models with anatomical differences beyond simple size scaling. Women’s work boots feature narrower heels, different arch placement, and adjusted toe box proportions matching female foot shapes.

Professional appearance requirements vary significantly by industry. An electrician working residential service calls may prefer casual work oxfords or boat shoes that won’t alarm homeowners, while a power plant operator needs rugged 8-inch boots capable of handling industrial environments. Law enforcement and emergency services often specify tactical boot styling with quick-dry materials and aggressive tread, while food service electrical hazard shoes must meet slip resistance standards for kitchen environments. Match your style selection to both the physical demands of your work and any dress code expectations from customers or management.

Safety Features and Toe Protection Options in EH Work Boots

n7LQWWB7S7eheysBmMZeiA

EH footwear combines electrical hazard protection with multiple safety certifications addressing the range of hazards present in industrial environments. Most boots pair ASTM F2413 EH rating with at least one additional feature like safety toes, slip resistance, or waterproofing, creating comprehensive protection rather than addressing electrical shock alone.

Composite Toe Caps

Composite toe protection dominates the market with approximately 135 models available across major brands, representing roughly 60 percent of all EH-rated footwear options. These non-metallic caps use carbon fiber, fiberglass, Kevlar, or plastic polymers engineered to meet the same ASTM F2413 impact (75 foot-pounds) and compression (2,500 pounds) standards as steel toes.

Lightweight construction is the primary advantage, with composite toes weighing 30 to 50 percent less than steel equivalents and reducing overall boot weight by half a pound or more. Non-conductive properties make composite toes ideal for electrical work since there’s no metal component requiring insulation from foot contact. Metal detector friendliness matters in secured facilities, airports, and sites where you’d otherwise trigger screening equipment and face delays removing boots for inspection.

Composite toes also don’t conduct temperature extremes the way steel does, staying warmer in freezing conditions and cooler in hot environments. The wider toe box shape of composite caps (required because the materials are less dense than steel) actually provides more room for foot splay and accommodates wider feet better than the tapered shape of steel toes.

Steel Toe Protection

Traditional steel toe durability remains relevant for workers in heavy industrial environments where maximum impact resistance and compression protection matter more than weight considerations. Approximately 12 to 17 models across brands still use steel toe construction.

Steel toes are noticeably thinner than composite caps because the material density allows engineers to achieve ASTM standards with less volume, creating a lower-profile toe box that fits into tighter spaces under machinery or equipment. The narrow shape suits people with naturally narrow feet who find composite toe boxes too roomy.

Steel provides “peace of mind” durability where there’s no question the toe cap will hold up to repeated impacts, dropped materials, and compression hazards over years of use. Workers in scrap yards, demolition, heavy equipment operation, and metalworking often prefer steel because the work environment destroys footwear quickly regardless of material, so the lower replacement cost of steel toe boots makes economic sense.

Alloy Toe Construction

Alloy toe construction serves as the middle-ground option with approximately 21 models featuring aluminum alloy, titanium alloy, or other metallic blends lighter than steel but still metallic. These caps weigh 30 to 40 percent less than steel toes while maintaining a thinner profile than composite options.

Alloy toes appeal to workers transitioning from steel who want reduced weight without fully committing to composite materials. The metallic composition provides similar impact feel and compression resistance to steel, just at lower weight. Alloy toes still conduct electricity and temperature, requiring the same insulation considerations as steel, and will trigger metal detectors. Price points usually fall between steel (least expensive) and premium composite options.

Carbon Fiber and Specialty Materials

Emerging carbon fiber toe technology and advanced composite materials offer premium protection with minimal weight penalty but currently appear in limited availability (approximately 1 model featuring carbon toe caps). Carbon fiber provides exceptional strength-to-weight ratios, creating safety toes as thin as steel but as light as standard composite materials.

These specialty toes target workers willing to pay premium prices for maximum comfort and minimum bulk. Other advanced composites include fiberglass-resin blends and engineered thermoplastics developed specifically for safety footwear rather than adapted from other industries.

Each toe material performs equally well in combination with electrical hazard protection because ASTM F2413 testing evaluates the complete boot assembly, not individual components. A steel toe boot maintains EH certification as long as the metal cap is fully isolated from both the outsole and the interior foot contact surfaces by non-conductive materials. Composite toes simplify this requirement since the cap itself is non-conductive.

Impact and compression testing (75 foot-pounds and 2,500 pounds respectively) remains identical across all toe types, meaning a composite toe provides the same crush protection as steel when both meet ASTM F2413 standards. Your choice comes down to weight preference, temperature considerations, metal detector requirements, and whether you prioritize thin toe profiles or roomier toe boxes.

Additional safety features commonly paired with EH protection include:

Slip resistant outsoles (137 models available) using rubber compounds and tread patterns tested for traction on wet, oily, or contaminated surfaces. These outsoles maintain grip on smooth concrete, tile, and metal surfaces where standard tread patterns would slip. Particularly important in food service, healthcare, manufacturing with coolant or hydraulic fluids, and any environment where liquid spills are common.

Waterproof construction (29 models available) featuring sealed seams, waterproof membranes, and treated leathers that prevent water penetration during wet conditions. Essential for outdoor utility work, construction in rain, or environments with regular washdowns. Remember that waterproof boots still lose EH protection effectiveness if water enters through the top opening and saturates the interior.

Metatarsal guards (26 models available) protect the top of your foot between the ankle and toes from falling objects, dropped tools, or compression from heavy materials. Internal met guards use foam padding or rigid plastic shields built into the boot’s upper. External met guards attach to the outside of the boot with adjustable straps.

Puncture resistant midsoles prevent nails, screws, metal shards, or other sharp objects from penetrating through the outsole and into your foot. These midsoles use steel plates, flexible Kevlar fabric, or composite materials rated to ASTM F2413 puncture resistance standards.

Oil resistant soles are formulated to resist degradation from petroleum products, hydraulic fluids, and industrial chemicals that break down standard rubber compounds. Extended contact with oils softens and swells non-resistant materials, reducing traction and shortening sole life.

Heat resistance matters in foundries, welding operations, asphalt work, and roofing where hot surfaces or materials contact the sole. Heat-resistant outsoles maintain structural integrity and prevent melting when exposed to temperatures that would damage standard rubber.

Chemical resistance protects against corrosive substances, solvents, and aggressive cleaners in industrial settings. Chemical-resistant materials prevent breakdown of boot components when exposed to acids, bases, or organic solvents present in manufacturing and maintenance environments.

Select boots matching your specific multi-hazard workplace profile by identifying all applicable risks, not just electrical exposure. A power plant maintenance technician working outdoors in winter needs waterproof construction and insulation alongside EH protection. A food service equipment installer requires both EH certification and slip resistance for kitchen environments. An industrial electrician benefits from combining EH protection with metatarsal guards and puncture resistance when working around heavy machinery and metal debris.

Static Dissipative vs. Electrical Hazard Shoes: Understanding the Difference

eIhdBRq0QNqTNSXx8J4PKg

Static dissipative (ESD) and electrical hazard (EH) footwear serve opposite electrical purposes, and confusing them creates serious safety risks in both directions.

Footwear Type Purpose Electrical Property Typical Work Environment
Electrical Hazard (EH) Prevent electrical shock to worker Insulating – blocks current flow from energized surface through body Construction sites, utility work, electrical contracting, maintenance near energized equipment
Static Dissipative (ESD) Protect sensitive electronics from static discharge Conductive – allows controlled grounding of static electricity Electronics manufacturing, clean rooms, explosive atmospheres, semiconductor facilities
Conductive Rapidly dissipate static charges and prevent spark ignition Highly conductive – provides direct path to ground Explosive material handling, munitions, areas with flammable vapors or dust

ESD shoes are designed to safely dissipate static electricity by creating a controlled electrical path from your body through the footwear to the ground, preventing the buildup of static charges that could damage microelectronics or ignite explosive atmospheres. Static dissipative footwear typically maintains electrical resistance between 1 megohm and 100 megohms, allowing enough conductivity to bleed off static without creating a shock hazard path for normal electrical currents.

Conductive footwear provides even lower resistance (less than 500,000 ohms) for rapid static dissipation in highly sensitive environments. Both ESD and conductive shoes intentionally create grounding paths, the exact opposite of what EH shoes do.

Wearing EH boots in an ESD-required environment leaves you ungrounded, allowing static buildup that can destroy circuit boards, computer chips, and precision electronics costing thousands of dollars. Wearing ESD shoes where EH protection is required eliminates your electrical shock protection, creating a direct path for electrical current to flow through your body if you contact energized equipment.

Six styles in one major collection offer static dissipative properties for electrostatic discharge environments, but these models would be completely inappropriate for electrical maintenance work.

The wrong footwear type creates immediate hazards. An electronics technician wearing EH-rated insulating boots while servicing circuit boards becomes a walking static generator, potentially destroying components with every touch. An electrician wearing ESD-rated conductive shoes while troubleshooting a 480-volt panel removes their secondary shock protection, gambling that they’ll never accidentally contact energized parts.

Some workers mistakenly believe combining both properties is ideal, but the fundamental electrical characteristics conflict. You can’t simultaneously insulate against shock and provide grounding for static dissipation. Read your company’s electrical safety program to confirm which hazard you’re protecting against. When in doubt, your safety manager or industrial hygienist determines appropriate footwear based on formal hazard assessment.

Workplaces that require different footwear for different tasks or zones must establish clear policies about where each type is appropriate and provide separate storage or changing areas. A semiconductor manufacturing facility might require ESD footwear in clean rooms and production areas but allow EH boots in maintenance shops where technicians service electrical panels and motor controls.

Workers moving between zones need to change footwear rather than wearing a compromise that fails to protect in either area. Color-coding, labeling, or storing different footwear types in designated areas prevents mix-ups. The importance of proper hazard assessment becomes obvious when you recognize that the same boot providing critical protection in one environment creates danger in another based entirely on the electrical properties needed for that specific work.

Material Quality, Durability, and Maintenance of EH Safety Footwear

OMsPGD0KT-S9nVbiRAMj1g

Leather uppers dominate electrical hazard footwear because the material provides proven durability, breathability, and resistance to workplace abuse that synthetic materials struggle to match. Full-grain leather work boots have served industrial workers for over a century, with premium leather construction heritage dating back to 1863 in established safety footwear brands.

All boots are safety-crafted to exceed industry standards while maintaining durability for demanding work environments where boots face daily exposure to abrasion, impacts, chemicals, and weather extremes. Leather naturally resists tearing and punctures better than synthetic mesh or textile uppers, important when you’re working around sharp metal, rough lumber, or jagged concrete.

The material breathes, allowing moisture vapor from your feet to escape while blocking liquid water penetration (especially in treated or waterproof leathers). Leather also breaks in rather than breaks down, conforming to your foot shape over the first few weeks and becoming more comfortable with wear instead of degrading. Expect to pay more for full-grain leather compared to split leather or synthetic alternatives, but factor in replacement intervals when calculating real cost.

Sole construction determines both electrical insulation effectiveness and long-term durability under the mechanical stresses of walking, climbing, and standing. Sole thickness in EH-rated boots typically ranges from 10mm to 20mm, providing enough non-conductive material to maintain electrical resistance while still allowing adequate flexibility for walking comfort. Thicker isn’t always better. Excessive sole thickness reduces ground feel and makes precise foot placement difficult on uneven surfaces or ladders.

Tread patterns balance slip resistance with wear characteristics. Aggressive lugs provide maximum traction on loose surfaces and shed mud or debris but wear faster on smooth concrete. Shallow, densely packed tread patterns last longer on pavement and indoor floors while still maintaining wet traction through rubber compound formulation.

Sole attachment methods affect water intrusion potential: cement construction (sole glued directly to upper) creates clean lines and flexibility but may separate under extreme stress, direct-attach polyurethane (sole chemically bonded during molding) provides waterproof integrity and durability, and Goodyear welt construction (sole stitched to a welt strip) allows resoling but creates more seams where water might enter.

Insulated work boots for cold weather layer additional materials between the outer upper and interior lining to trap warm air and slow heat loss from your feet. Winter insulation ratings typically range from 200 grams (light insulation for moderate cold) through 400 grams (standard winter work) to 600 or 800 grams (extreme cold or minimal activity). Insulation layers must maintain electrical hazard protection by using non-conductive materials like Thinsulate, PrimaLoft, or foam that don’t create moisture-wicking paths compromising electrical resistance.

Heat dissipation matters in war

Final Words

Choosing electrical hazard safety shoes starts with ASTM F2413 certification, then moves to fit, style, and the specific hazards you face daily.

Composite toes dominate the market with 135 models because they’re lightweight and metal-free. Reebok, Rockport, and Frye offer hundreds of certified options across athletic styles, traditional boots, and specialty designs.

Remember, EH shoes insulate. They’re the opposite of static dissipative footwear.

Inspect your boots regularly. Replace them when soles crack, leather deteriorates, or water soaks through. Proper care keeps the protection working shift after shift.

FAQ

What does “electrical hazard” mean on work shoes?

Electrical hazard (EH) on work shoes means the footwear provides secondary protection against electrical shock when you accidentally step on live wires or charged equipment. The shoes use non-conductive materials and shock-resistant soles to prevent electrical current from completing a circuit through your body.

What is the OSHA standard for electrical safety shoes?

The OSHA standard for electrical safety shoes requires appropriate personal protective equipment based on workplace hazard assessments. Employers must provide EH-rated footwear meeting ASTM F2413 certification when workers face electrical hazards, and training on proper use and limitations of this secondary protection.

What are the requirements for electrical safety shoes?

Electrical safety shoes must meet or exceed ASTM F2413 certification standards, which requires specific voltage resistance testing and dielectric properties in dry conditions. The footwear must use non-conductive materials and shock-resistant soles that prevent circuit completion through the worker’s body during accidental contact with energized equipment.

What are electrical safety shoes?

Electrical safety shoes are certified footwear designed to protect workers from electrical shock when accidentally stepping on live wires or charged equipment. They meet ASTM F2413 standards and serve as secondary electrical insulation, reducing the risk of circuit completion through the body when working near energized systems.

Who needs to wear electrical hazard safety shoes at work?

Workers who need electrical hazard safety shoes include electricians, construction workers, utility line workers, manufacturing personnel, maintenance technicians, telecommunications installers, power plant operators, and facilities managers. Any profession with potential live wire exposure or contact with charged equipment requires this protection.

Can electrical hazard shoes get wet?

Electrical hazard shoes lose protection effectiveness when wet because the certification requires dry conditions for proper insulation. Moisture compromises the non-conductive properties that prevent electrical current flow. Replace boots showing water damage or excessive wet environment exposure to maintain reliable electrical shock protection.

What’s the difference between EH shoes and static dissipative shoes?

EH shoes insulate against electrical shock by preventing current flow through the body, while static dissipative (ESD) shoes do the opposite by safely grounding static electricity. Wearing the wrong type creates serious hazards. EH shoes protect against energized equipment, while ESD shoes prevent static buildup in electronics manufacturing.

How do composite toe EH boots compare to steel toe options?

Composite toe EH boots are lighter, non-conductive, and metal-detector friendly, representing the majority with approximately 135 models available. Steel toe options offer maximum impact resistance and compression protection with 12-17 models available. Both toe types meet ASTM standards while maintaining electrical hazard certification.

How long do electrical hazard work boots last?

Electrical hazard work boots typically last 6-12 months in harsh environments before performance degradation compromises protection effectiveness. Regular inspection for sole cracks, water damage, stitching integrity, and insulation breakdown determines actual replacement intervals. Proper cleaning, storage, and maintenance extend functional life.

What brands make the best EH rated work boots?

Top EH rated work boot brands include Reebok Work with 191 EH styles across 218 models, Rockport Works offering 24 models with Cushguard and Poron XRD technology, and Frye Supply with 16 ASTM certified models. Each brand offers different technologies, price ranges, and style options from athletic work shoes to traditional boots.

Do EH safety shoes come in wide widths?

EH safety shoes come in extensive width options including medium (216 models), wide (213 models), extra wide (5 models), 4E (6 models), and 6E (2 models). Sizing ranges from size 3 through 16 depending on style and gender, with 147 men’s models and 71 women’s models featuring gender-specific designs.

What safety features come with electrical hazard boots besides EH protection?

Electrical hazard boots commonly include slip-resistant outsoles (137 models), waterproof construction (29 models), metatarsal guards (26 models), puncture-resistant midsoles, and oil-resistant soles. Additional features include composite, steel, or alloy toe caps for impact and compression protection, creating comprehensive multi-hazard workplace protection.

How to Prevent Crawl Space Moisture Effectively

0

Think a little damp crawl space won’t hurt anything? Think again.
Moisture under the house can rot joists, feed mold, and push repair bills way up.
This post walks you through what to do in the first 24–48 hours to stop active water and cut humidity, then how to fix the root cause with drainage, vapor barriers, dehumidifiers, and sealing.
You’ll get quick DIY steps, what a pro should handle, and what to document for insurance.
Simple, steady, practical.
So you stop damage before it gets worse.

Immediate Crawl Space Moisture Prevention Steps for Homeowners

Kze0VWRcTkCyuNhuHmFzmw

When you spot crawl space moisture, the first day or two actually matter. Standing water or wet soil isn’t going to fix itself. Wait too long and you’re looking at structural damage or mold growth instead of a manageable fix. Most homeowners can knock out basic triage in less than an hour with almost no special tools.

Start by figuring out what you’re dealing with. Common signs include puddles on the floor, damp or muddy soil, a heavy musty smell, wet or sagging insulation hanging from ceiling joists, hairline cracks in foundation walls, and white chalky deposits (efflorescence) on concrete. These symptoms tell you where water’s getting in and how long it’s been sitting there.

Your goal right now is to stop active water intrusion and cut humidity before it spreads. You’re not rebuilding the foundation or installing permanent systems yet. You’re buying time and keeping the problem from getting worse while you figure out long term fixes.

  1. Turn off any standing water source. If you see a plumbing leak, shut off the valve or main water supply until you can get repairs done.

  2. Clear gutters and downspouts. Remove leaves, twigs, and debris so rainwater can flow away from the foundation instead of pooling near the crawl space.

  3. Extend downspouts temporarily. Use flexible tubing or extenders to push water at least several feet away from the house until you can install permanent solutions.

  4. Patch torn vapor barrier sections. If you see rips or gaps in the plastic sheeting on the floor, tape them with waterproof repair tape to slow moisture rising from the soil.

  5. Run a portable dehumidifier. Set it to pull humidity below 60 percent, ideally closer to 45 percent, to stop mold from starting and reduce condensation on wood and metal.

  6. Circulate air with a temporary fan. A small box fan near the crawl space entrance helps move damp air out and brings drier air in, reducing stagnant pockets where mold loves to grow.

  7. Document what you see. Take photos of water, cracks, wet insulation, and any visible mold so you have a record for insurance claims or contractor estimates.

These steps won’t solve chronic moisture problems. But they stop the immediate damage and give you a stable baseline to work from. Once the emergency’s under control, you can move into permanent drainage, sealing, and monitoring solutions.

Crawl Space Moisture Causes and How They Lead to Damage

XMXpB9wBSveRci61vbE-uQ

Moisture enters crawl spaces from three main directions: above, below, and through. Rainwater runs off roofs and flows toward the foundation when gutters are clogged or downspouts discharge too close to the house. Groundwater rises after heavy storms or snowmelt, pushing through cracks and seams in the foundation walls and floor. Plumbing leaks from supply lines or drain pipes can drip or spray for weeks before anyone notices.

Poor grading is one of the most common causes. When soil slopes toward the house instead of away from it, every rainstorm sends water straight to the foundation. Freeze thaw cycles open hairline cracks in concrete during winter, and those cracks widen each spring when melting snow saturates the ground. Once water’s inside, it soaks into wood joists, insulation, and posts. The crawl space becomes a humid pocket where mold and mildew start within 24 to 48 hours.

The damage spreads upward. According to the EPA, air from your crawl space flows into your home through gaps around ducts, pipes, and the subfloor. That means musty odors, mold spores, and elevated humidity move into your living areas. Over time, wet wood loses strength. Floor joists sag and posts rot at the base. Left untreated, you can end up with bouncy floors, foundation movement, and repair bills that climb into the tens of thousands.

Exterior Drainage Solutions for Reducing Crawl Space Moisture

B-2Ipeb8TweDz5fcEYQlmQ

Most crawl space moisture problems start outside. If water pools near your foundation or soaks into the soil around your house, it’s going to find a way into the crawl space no matter how many dehumidifiers you run. Exterior drainage work stops water before it reaches the concrete, and it’s often the most effective single step you can take.

Gutters and downspouts are the first line of defense. Clean them at least twice a year, in spring and fall, so rainwater flows freely off the roof and into the downspouts. Then extend those downspouts at least several feet away from the foundation using rigid or flexible extensions. If water dumps right next to the house, it saturates the soil and seeps through cracks or along the footing.

Regrade landscaping so the ground slopes away from the foundation. Aim for about 6 inches of drop over the first 10 feet to guide surface water away from the crawl space.

Install a French drain along the perimeter. A trench filled with perforated pipe and gravel collects and diverts groundwater before it reaches the foundation walls.

Clean vent wells and window wells. Debris and leaves can block these low points, creating standing water right against the foundation during storms.

Check vent screens for damage. Torn or missing screens let pests in and allow debris to clog the airflow, trapping moisture inside the crawl space.

Inspect and repair exterior foundation cracks. Seal small cracks with hydraulic cement or masonry filler to block seepage from saturated soil.

After every major storm or period of heavy rain, walk the perimeter of your house and look for puddles, soft soil, or signs that water’s pooling near the foundation. Catching drainage problems early keeps water out of the crawl space and reduces the load on interior moisture control systems.

Vapor Barriers and Crawl Space Encapsulation for Long Term Moisture Prevention

qjnXrQqjTeO5RUceFzhVMg

A vapor barrier is a sheet of heavy duty plastic installed on the crawl space floor and sometimes the walls to block moisture rising from the soil. When installed correctly, it creates a sealed layer between damp ground and the wooden structure above. Most professionals recommend polyethylene sheeting rated at 12 to 20 mils thick, which resists tears and punctures better than lightweight tarps.

Full encapsulation goes further. It covers the entire crawl space floor, wraps up the foundation walls, seals around piers and posts, and integrates with dehumidification and drainage systems. Encapsulation reduces humidity, blocks mold growth, keeps out pests, and cuts down on drafts that make your floors cold in winter. It also makes future inspections easier because you can walk on a clean, dry surface instead of damp soil.

Professional installation typically costs between $5,000 and $15,000 depending on crawl space size, site conditions, and whether drainage or dehumidification equipment is included. DIY encapsulation is possible for smaller, accessible crawl spaces, but sealing seams and attaching the barrier to walls requires attention to detail. Any gaps or loose edges let moisture bypass the system.

Vapor Barrier Seam Sealing

Seams are the weak point in any vapor barrier. When you roll out sheets of polyethylene, overlap them by at least 12 inches at every seam. Use waterproof seam tape designed for crawl space barriers, not general purpose duct tape, which peels off in humid conditions. Press the tape firmly along the entire seam to create an airtight bond.

At the perimeter, pull the barrier several inches up the foundation wall and fasten it with mechanical fasteners or adhesive termination strips. Seal around piers, posts, and plumbing penetrations with tape or mastic to close every gap. The goal is to create a continuous sealed layer with no open edges where soil moisture can escape into the crawl space air.

Using Crawl Space Dehumidifiers and Humidity Monitoring Equipment

A64vldU0T2uZXqm2G5f8LA

Dehumidifiers remove moisture from the air after it enters the crawl space. They work by pulling humid air across cold coils, condensing the water into a collection tray or drain line, and returning drier air to the space. Crawl space rated units are built to operate in cooler temperatures and higher humidity than typical basement models.

Your target is to keep relative humidity below 60 percent. The ideal range is 30 to 50 percent, which stops mold growth and protects wood framing and insulation. Crawl space dehumidifiers sized for residential use typically cost $1,500 to $4,000 for the equipment alone, plus installation labor if you hire a contractor. Place the unit in a central location with good airflow, and run a condensate drain line to a sump pump or exterior discharge point so you don’t have to empty a bucket.

Device Function Typical Cost
Basic hygrometer Displays current temperature and relative humidity on a digital screen $10–$50
Data logging humidity sensor Records humidity over time and sends alerts when levels exceed set thresholds $50–$200
Moisture meter Measures moisture content in wood and insulation to confirm drying progress $50–$200

Install at least one hygrometer or data logger in your crawl space and check it monthly when you first set up moisture control. Once humidity stabilizes, quarterly checks are usually enough unless you notice musty odors or see condensation forming on surfaces.

Sealing Vents, Air Gaps, and Rim Joists to Block Moisture Intrusion

V_yOUjeQS1CagzJjp_aVeg

Air leaks around the rim joist, sill plate, and crawl space vents let humid outdoor air flow into the crawl space and condense on cooler surfaces. In summer, warm air carries more moisture, and when it meets the cool foundation walls or floor joists, water droplets form. In winter, cold air flowing through gaps can freeze and crack pipes or allow freeze thaw cycles to damage insulation.

Sealing these gaps is part of full encapsulation, but it also works as a standalone upgrade. Use spray foam or caulk to close gaps between the sill plate and foundation, around rim joists where the floor structure meets the walls, and at penetrations for plumbing, electrical, and HVAC lines. Foam board insulation cut to fit between rim joists adds an R value barrier and blocks drafts.

Rim joist bays. The space where floor joists rest on the foundation wall, often left open and drafty.

Sill plate seams. The gap between the wooden sill and the top of the concrete foundation, where air and pests enter.

Crawl space vents. Older homes were built with open vents for airflow, but modern encapsulation practice often seals them to prevent humid air intrusion.

Pier and post bases. Moisture wicks up through untreated wood posts in contact with damp soil or concrete, leading to rot at the base.

Check vent screens for tears or rust and replace damaged units. If you’re moving toward full encapsulation, you’ll seal the vents entirely and rely on conditioned air or a dehumidifier to control humidity instead of outdoor ventilation.

Sump Pumps, Interior Drains, and Groundwater Management

iKHRFDnzRt2qGPgrajt57g

A sump pump is installed in a pit at the lowest point of the crawl space to collect and pump out groundwater before it spreads across the floor. When water rises into the pit, a float switch activates the pump and pushes the water through a discharge pipe that runs several feet away from the foundation. Sump pump units cost $300 to $800, and installed systems typically run $400 to $1,200 depending on labor and site conditions.

Interior perimeter drains or French drains inside the crawl space work with the sump pump to channel water from the edges of the space into the pit. These systems are most common when exterior drainage isn’t enough or when groundwater pressure is high after storms. Installation costs for perimeter drains range from $1,000 to $10,000 depending on the size of the crawl space and the complexity of the excavation.

Backup systems prevent flooding during power outages. Battery powered backup pumps or water powered backup units kick in when the primary pump fails or loses electricity. Some homeowners also install high water alarms that send a phone alert when the pit level rises too high.

  1. Excavate a sump pit. Dig a hole at the crawl space’s low point, typically 18 to 24 inches deep and wide enough to fit a standard sump basin.

  2. Install the pump and basin. Set the sump basin in the pit, level it, and connect the pump to a PVC discharge line that exits the crawl space and terminates several feet from the foundation.

  3. Test and maintain annually. Pour water into the pit to verify the float switch activates and the pump discharges correctly, and clean debris from the basin each spring.

Seasonal Moisture Risks and Spring Maintenance Routine

f3FDwtenRDCmtszv1SKOIg

Spring brings the highest moisture risk of the year. Snowmelt saturates the ground, heavy rainstorms increase groundwater pressure, and rising outdoor humidity makes crawl spaces damp even when no visible water’s present. Winter freeze thaw cycles open new cracks in foundation walls, and debris that accumulated over the cold months clogs gutters and vent wells.

Plan your main crawl space inspection for early spring, before the wettest weather hits. Check vapor barriers for tears, inspect dehumidifier operation and drain lines, look for new foundation cracks, and confirm that gutters and downspouts are clear and functional. If you had any moisture issues the previous year, this is the time to address them before they repeat.

Clean gutters and downspouts. Remove winter debris and extend discharge points if needed.

Inspect vapor barrier seams and fasteners. Retape any loose edges and replace torn sections.

Test sump pump and backup systems. Pour water into the pit and verify the pump activates and discharges correctly.

Replace wet or moldy insulation. Pull down any insulation that stayed damp over winter and install fresh, dry material rated for crawl spaces.

After major storms throughout the year, do a quick visual check for standing water, new cracks, or displaced vapor barrier. Catching problems early keeps small repairs from turning into expensive reconstruction projects.

DIY vs Professional Crawl Space Moisture Solutions

tIs5h7DUR_2zn9MHTXQqzw

Homeowners can handle many moisture prevention tasks without specialized equipment or expertise. Cleaning gutters, extending downspouts, patching small foundation cracks with hydraulic cement, and replacing torn sections of vapor barrier are all common DIY jobs. Installing a basic hygrometer or moisture meter to monitor conditions is straightforward, and resealing rim joist gaps with spray foam or caulk requires only a few tools and an afternoon.

Professional help is necessary when the scope or risk exceeds typical homeowner skill. Large foundation cracks, structural movement, persistent standing water, or widespread mold growth all need trained contractors who can assess the root cause and recommend permanent solutions. Full encapsulation with integrated drainage and dehumidification systems involves coordination between vapor barriers, sump pumps, perimeter drains, and sealed vents. Most full encapsulation projects cost $5,000 to $15,000 and take several days to complete.

Task Type Typical Responsibilities
DIY Gutter cleaning, downspout extensions, small crack patching, vapor barrier repairs, installing monitors, light grading, debris removal
Professional Full encapsulation, sump pump and perimeter drain installation, structural crack repair, mold remediation, complex regrading, system integration
DIY with guidance Installing crawl space dehumidifiers, sealing rim joists and sill plates, replacing wet insulation, seasonal maintenance checks
Always professional Foundation stabilization, French drain excavation, encapsulation on large or difficult crawl spaces, electrical work for pumps and alarms

When you’re deciding whether to DIY or hire help, ask yourself three questions: Do I have safe access to the crawl space? Can I identify the root cause of the moisture? Do I have the tools and time to complete the work correctly? If the answer to any of those is no, call a contractor for an inspection and estimate before you start. A professional assessment often costs a few hundred dollars and saves you from expensive mistakes or wasted effort on temporary fixes that don’t address the real problem.

Final Words

First, stop active water, clear gutters, and remove standing puddles while you check for damp insulation, musty odors, and soft wood. That short triage limits more damage.

Next, the article covered causes and fast fixes, including grading and drains, vapor barriers and dehumidifiers, sealing vents and rim joists, sump pumps, and seasonal checks, plus when DIY works and when to call a pro.

Follow these steps to stop immediate harm and plan permanent repairs so you know how to prevent crawl space moisture. You’ll get the space dry and the house back to normal.

FAQ

Q: What is the best way to keep a crawl space dry?

A: The best way to keep a crawl space dry is to stop water at the source: clean and extend gutters, regrade soil away from the foundation, fix leaks, install a heavy-duty vapor barrier, and control humidity with a dehumidifier and monitoring.

Q: Is 70% humidity too high for a crawl space and how do I lower it?

A: Seventy percent relative humidity is too high for a crawl space; aim for 30–50%. Lower it by fixing leaks, improving drainage and grading, adding a vapor barrier, running a crawl-space dehumidifier, and using hygrometers to monitor.

Q: Can I put a dehumidifier in my crawl space without encapsulation?

A: You can install a dehumidifier without encapsulation, but it’s less efficient and may run constantly; use a crawl-space-grade unit, ensure good airflow and drainage, monitor humidity, and plan for full encapsulation for best results.

Roof Tarp Installation Steps: Safe Emergency Protection

0

When your roof gets torn open by a storm, waiting days for repairs isn’t an option. Water keeps pouring in, damaging ceilings, insulation, and everything below. A properly installed emergency tarp stops the bleeding right now. But most homeowners skip critical steps, secure edges too loosely, or leave gaps that turn their tarp into a useless flapping sheet. This guide walks you through the exact sequence professionals use to create waterproof protection that holds until permanent repairs can start.

Complete Step-by-Step Installation Guide for Emergency Roof Tarping

Tnk1Y1OKSoKe1vzOOJD5Xw

Proper installation follows a specific sequence. You need to combine measurement, preparation, and securing techniques to create effective protection. Each step builds on the last one to prevent water intrusion, wind uplift, and further damage until you can get permanent repairs done.

  1. Assess and photograph damage from ground level before accessing roof. Use your smartphone or camera to capture multiple angles showing how bad the damage is, missing shingles, visible holes, and any debris. Take close ups and wide shots that show the damaged area compared to roof features like chimneys, vents, and edges. Document what’s happening inside too. Water stains, ceiling damage, or active leaks all need photos. These serve as insurance documentation and help you plan your approach before you climb onto the roof.

  2. Measure damaged area length and width, adding minimum 4 feet to each dimension for overlap. From ground level or using binoculars, estimate the damaged zone. Use this formula: Tarp length equals damaged area length plus 8 feet, tarp width equals damaged area width plus 8 feet or extend to ridge line. For a hole that’s 6 feet by 4 feet, you’ll need a tarp at least 14 feet by 12 feet. Extending coverage over the ridge line gives you optimal water runoff, allowing rain to roll down both sides without getting beneath the tarp edges.

  3. Gather all materials and verify weather conditions are safe. Check that you have your tarp, 2×4 boards (enough to cover the entire perimeter), deck screws or galvanized nails, drill with bits, ladder, safety harness, gloves, and debris removal tools. Confirm the roof surface is completely dry, winds are below 20 mph, and no precipitation is forecast for the next 24 hours. Wet shingles are slippery. Even light winds can turn a large tarp into a sail that pulls you off balance.

  4. Implement safety protocols including fall protection harness, ladder stability check at 4:1 angle ratio, non-slip footwear, and ground-level spotter. Position your ladder so that for every 4 feet of height, the base sits 1 foot away from the wall. Secure the top of the ladder and have someone hold it steady while you climb. Wear your fall protection harness attached to a secure anchor point, put on work gloves for grip, and make sure your shoes have good tread. Your ground level spotter should stay positioned to steady the ladder and hand up tools as needed.

  5. Remove all loose debris including shingles, nails, branches, leaves using soft bristle broom or leaf blower. Start at the center of the damaged area and work outward, sweeping everything toward the roof edge where your spotter can collect it below. Pull out any protruding nails that could puncture the tarp. If there’s standing water, use towels to dry the surface as much as possible. Avoid installation over wet surfaces when temperatures are below 40°F, as moisture can freeze and mess up the seal.

  6. Unfold and position tarp over damaged area ensuring equal overlap on all sides. With your helper, carry the folded tarp onto the roof and position it so the damaged section sits roughly in the center. Unfold it carefully, keeping tension on the material so wind doesn’t catch it. If possible, extend the tarp over the ridge line so water can run off both sides. Check that you have at least 4 feet of overlap extending past the damaged area on all edges. Walk around the tarp and smooth out any wrinkles, folds, or bunched sections that could trap water or catch wind.

  7. Secure edges using sandwich board method or direct board attachment. For the sandwich method, position the tarp edge between two 2×4 boards, drill pilot holes every 12 to 18 inches through both boards and the tarp, then fasten with 3 inch deck screws or galvanized nails. This prevents tearing and increases wind resistance. For direct attachment, lay a single 2×4 along the perimeter, then fasten through the board and tarp at 12 inch intervals. Start fastening from the center of each edge and work toward the corners to maintain even tension across the entire tarp.

  8. Pull tarp taut before placing each fastener. Before you drill or nail, use your gloved hands to pull the tarp tight, working outward from the center toward the edges. Smooth any wrinkles as you go. Position your boards at a slight angle with one end lower to create drainage paths that prevent water from pooling. At corners, double up your boards or add extra fasteners at 6 inch spacing since corners take the most stress from wind. Drive fasteners straight down through the shingles. These shingles will need replacement during permanent repairs anyway.

  9. Perform final inspection checking all edges are secured, no lifted corners, no water collecting pockets. Walk the entire perimeter and tug gently on edges to verify they’re held firmly. Look across the tarp surface for any low spots where water might collect. If you’re in a high wind area, place sandbags on the tarp surface every 6 to 8 feet to add weight and reduce billowing. Check that the tarp lies flat against the roof without gaps where wind could get underneath.

This approach prevents common installation failures including inadequate coverage, water intrusion at edges, and wind uplift. When executed properly, the entire process takes 2 to 4 hours depending on damage extent and roof accessibility. But rushing through steps means you won’t get the protection your roof needs until permanent repairs can be completed.

Essential Materials and Tools for Roof Tarp Installation

XI3o5lD-RlWAYK9SZlLbaA

Having the right materials before you start prevents mid installation delays and keeps you from making multiple dangerous trips up and down the ladder.

Required Tools:
Extension ladder (reaching at least 3 feet above roof edge), OSHA rated fall protection harness with roof anchor, work gloves with grip texture, 25 foot measuring tape, utility knife with extra blades, cordless drill with screwdriver bits, hammer or pneumatic nail gun, chalk line for marking straight edges, rope or heavy duty bungee cords (for additional securing in high wind areas), soft bristle broom or leaf blower (for debris removal).

Required Materials:
Heavy duty polyethylene tarp (minimum 6 mil thickness for emergency use, 12 mil for extended coverage lasting over 30 days), 2×4 lumber boards (calculate linear feet needed to cover entire tarp perimeter, plus extra for corner reinforcement), 3 inch galvanized deck screws or roofing nails (approximately 50 to 100 depending on perimeter size), butyl tape or specialized roof tape (for sealing around penetrations), sandbags or weight bags (6 to 10 bags for roofs with high wind exposure), plastic sheeting or drop cloths (to protect interior spaces if active leaks exist).

Tarp material selection matters based on weather conditions and coverage duration. Polyethylene tarps are the most common choice for emergency protection, lightweight enough to handle but thick enough to resist tears. Canvas tarps offer better breathability if you’re concerned about moisture being trapped against the roof surface, though they’re heavier and more difficult to position. Vinyl tarps provide the strongest protection in severe weather conditions but cost more and require careful handling to avoid creasing that creates weak points.

Safety Protocols and Fall Protection During Tarp Installation

DgFI7q5QiqDAB9U3dTV8w

Fall risks are the primary danger when working on damaged roofs. Professional installation is strongly recommended for steep pitches above 6:12 or any roof where structural damage is visible. If you decide to proceed with DIY installation, safety protocols are non negotiable.

Critical Safety Measures:
Wear an OSHA rated fall protection harness connected to a secure anchor point (never trust a damaged roof structure as your anchor). Position ladder at proper 4:1 angle ratio (4 feet of height for every 1 foot of distance from wall), extending at least 3 feet above roof edge. Maintain three points of contact (two hands and one foot, or two feet and one hand) when climbing ladder. Wear non slip footwear with ankle support and aggressive tread patterns designed for roof work. Use work gloves that provide grip without being bulky enough to interfere with tool handling. Work only in dry conditions with wind speeds confirmed below 20 mph (not just calm at ground level). Check for power line proximity and maintain at least 10 feet of clearance from any electrical lines. Require a ground level spotter who stays present throughout the entire installation to steady ladder and assist with material handling.

Weather limitations determine when you absolutely can’t access your roof. Never attempt installation during rain, even light drizzle, as wet shingles become as slippery as ice. Lightning within 10 miles means immediate evacuation. High winds above 25 mph can knock you off balance or turn your tarp into a sail that pulls you toward the edge. Ice or frost must melt completely before you climb. If you’re checking conditions and feel any hesitation about safety, trust that instinct and wait for better weather or call professionals.

Special Installation Scenarios Around Roof Penetrations

XcsJKjTHRBS9B1gam6WUAg

Roof penetrations like chimneys, vents, and skylights require modified techniques to maintain a waterproof seal without leaving gaps where water can enter.

Tarping Around Chimneys

Measure and mark the chimney location on your tarp before you position it on the roof. Cut an opening that’s 2 inches smaller than the chimney base perimeter. Position the tarp over the chimney, letting the opening settle around it. Cut relief slits at each corner of the opening so the tarp material can lay flat against the roof surface rather than bunching up. Seal the edges to the chimney flashing using butyl tape or specialized roof tape, pressing firmly to create a watertight bond. Never attach tape directly to brick or masonry because it won’t stick properly and will peel off during the first rain. Instead, tape to the metal flashing that surrounds the chimney base.

Covering Vents and Skylights

For active vents like plumbing stacks or exhaust vents, cut precise openings in your tarp and seal edges with flexible boot flashings that allow the vent to function while keeping water out. For damaged skylights that need complete coverage, don’t cut openings. Instead, cover the entire skylight and ensure you have at least 12 inches of tarp overlap on all sides, secured with your board and fastener method to prevent water from running underneath.

Complex roof geometries with multiple penetrations positioned close together make it difficult to get proper coverage without creating weak points where seams overlap. If your roof has several chimneys, multiple vent pipes, or a combination of features in the damaged area, professional installation ensures proper flashing integration and reduces the risk of leaks developing at transition points.

Common Installation Mistakes and How to Avoid Them

uDpub-8TQCWlUeCSjcpsgg

Most tarp failures happen within the first 48 hours and result from predictable mistakes that hurt the installation’s effectiveness.

Frequent Errors That Cause Failure:
Using undersized tarp that doesn’t extend at least 4 feet past the damage zone on all sides. Installing during wet conditions or when wind speeds exceed 15 mph. Overdriving fasteners so they tear through tarp material instead of gripping it. Spacing fasteners more than 18 inches apart, allowing wind to lift edges between attachment points. Failing to remove debris before installation, leaving branches or shingles that puncture the tarp from below. Choosing lightweight tarps under 6 mil thickness that can’t withstand normal weather exposure. Working alone on pitched roofs where you need one person to hold tension while the other fastens. Skipping corner reinforcement where wind stress concentrates. Leaving wrinkles or folds that collect water and create heavy sagging pockets.

The consequences of these mistakes create cascading problems. Undersized tarps allow water to run underneath at the edges and continue damaging your interior. Overdriven fasteners create new leak points through your roof deck. Not enough fastener spacing lets wind get under the edges and peel back sections, sometimes pulling the entire tarp loose during storms. Working alone means you can’t maintain proper tension, resulting in a loose, billowing installation that fails quickly.

Taking time to do the installation correctly the first time prevents you from having to climb back onto a wet, damaged roof during the next storm to redo everything under emergency conditions. Spend the extra 30 minutes to add more fasteners, reinforce corners properly, and ensure every edge lies flat and tight against the roof surface.

Insurance Documentation and Emergency Response Requirements

c_UhYTBJSN-Qel8kOnOdkg

Most homeowners insurance policies include a “duty to mitigate” clause requiring you to take reasonable steps to prevent additional damage after a covered event. Failing to tarp a damaged roof promptly can result in denial of subsequent water damage claims for interior damage that occurs after the initial storm.

Documentation starts before you touch anything on the roof. Photograph the damage from multiple angles, capturing wide shots that show the overall roof and close ups that detail missing shingles, holes, or structural damage. Document the debris field around your home, including any roofing materials, tree branches, or other materials that caused the damage. During installation, take photos showing your tarp size in relation to the damaged area and your securing method with boards and fasteners. After completion, photograph the finished installation from ground level, showing that the entire damaged area is covered with adequate overlap.

Documentation Best Practices:
Install tarp within 24 to 48 hours of damage occurring (delays may indicate you didn’t consider the situation urgent). Notify your insurance company immediately with preliminary photos before installation. Save all damaged materials removed from the roof (broken shingles, torn flashing, etc.) until the adjuster completes their inspection. Maintain a written log recording installation date, time, weather conditions, and materials used. Keep receipts for all materials purchased and any professional services hired for emergency work.

Emergency response coverage in most policies reimburses reasonable costs for temporary protective measures, including tarp materials and professional installation fees. This coverage typically applies even if you haven’t met your deductible yet, though you’ll need to confirm your specific policy terms. Professional installation costs are more likely to be covered than DIY material expenses, so keep detailed receipts and contractor invoices.

Duration Expectations and Maintenance of Temporary Roof Tarps

MOHzjI89Rc67kiPpBRcy-g

Roof tarps are emergency measures designed to protect your home for weeks or months while you arrange permanent repairs, not permanent solutions that can stay in place indefinitely.

Duration depends on tarp quality and weather exposure. High quality 12 mil polyethylene tarps typically last 90 to 120 days in moderate weather conditions with temperatures between 40 to 80°F and normal rain patterns. UV exposure from direct sunlight degrades the material, causing brittleness and cracking after 3 to 4 months even if the tarp looks intact. Wind and temperature cycling stress the fastening points, gradually loosening screws and enlarging holes in the tarp material. Accumulated debris like leaves, branches, and dirt holds moisture against the tarp surface, speeding up deterioration.

Maintenance requirements increase as the tarp ages. Inspect after every significant weather event, including heavy rainstorms, wind over 30 mph, or hail. Check for lifted corners where wind may have gotten underneath, loose fasteners that need tightening, and any tears or holes that developed. Monthly inspections during calm weather help you catch problems before they become failures. Remove accumulated leaves and branches that hold moisture and add weight. Look for separated seams where tarp sections were overlapped or taped together.

Replacement Indicators:
Visible tears larger than 2 inches that can’t be effectively patched. Water stains appearing on interior ceilings directly below tarped area. Fasteners pulling through tarp material instead of holding firm. Significant color fading from dark blue or silver to pale white, indicating UV breakdown. Flapping or billowing during moderate winds under 20 mph, showing the tarp has lost structural integrity.

Schedule permanent repairs immediately after tarp installation. Don’t wait for the tarp to fail before you start getting estimates and planning the work. Most roofing contractors are booked weeks in advance, so early scheduling ensures you can complete permanent repairs before the temporary protection deteriorates.

Seasonal Weather Considerations for Roof Tarp Installation

p76y1lXyR4KVAsm4NEnYew

Weather conditions affect both installation safety and how long your tarp will effectively protect your home.

Season Primary Challenge Installation Modification Tarp Lifespan
Winter Freezing temperatures, ice formation, brittle tarp material Use cold rated tarps rated to -20°F, warm tarps indoors before installation, avoid installing over ice or frost Reduced to 60 to 90 days due to freeze thaw cycles
Spring Frequent storms, high winds, rapid weather changes Increase fastening intervals to every 10 inches, add extra corner reinforcement, use sandbags Moderate 90 to 120 days with regular maintenance
Summer UV degradation, thermal expansion, intense heat Apply slightly looser initial tension to allow for expansion, consider UV resistant tarps Shortest at 60 to 90 days due to sun exposure
Fall Debris accumulation from falling leaves, temperature swings Plan for weekly debris removal, check fasteners after each cold front Moderate 90 to 120 days with frequent inspection

Wind limitations are critical for safe installation. Avoid accessing your roof when sustained winds exceed 20 mph, even if gusts are intermittent. Delay work if gusts above 30 mph are forecasted within the next 24 hours. If you’re already on the roof and wind picks up, secure what you’ve completed and evacuate immediately. Use additional fastening intervals, placing screws or nails every 8 to 10 inches instead of the standard 12 inches, when you’re installing before predicted high wind events like approaching storm systems.

Temperature affects tarp handling and performance. Cold weather below 40°F makes tarps stiff and difficult to unfold or position smoothly. The material won’t conform to roof contours as easily, leaving gaps and wrinkles. Hot weather above 85°F causes expansion that may create slack as temperatures drop overnight, requiring you to check tension the next morning. Rapid temperature cycling between day and night speeds up fastener loosening, making inspection more critical during spring and fall when temperature swings are greatest.

When to Call Professionals vs. DIY Tarp Installation

xsIUEILR_2xreYiCdD46A

The decision to hire professionals or attempt DIY installation depends on your roof characteristics, personal capability, and safety considerations.

Situations Requiring Professional Installation:
Roof pitch steeper than 6:12 (26.5 degrees) where footing becomes unstable. Damage extending over 200 square feet, requiring multiple tarp sections and complex overlapping. Structural damage visible in roof decking or framing that may not support your weight. Multi story homes where roof height exceeds single story accessibility. Damaged areas near roof edges without proper fall protection anchor points. No experience working on roofs or lack of proper safety equipment. Installation needed during active weather threats when conditions are marginal.

Appropriate DIY scenarios include single story homes with accessible low slope roofs at 4:12 pitch or less, where you can work safely without extreme fall risk. Small damaged areas under 100 square feet are manageable for homeowners who have an assistant available for two person safety. You’ll need a proper ladder that reaches at least 3 feet above the roof edge and fall protection equipment including harness and anchor. Calm weather with a 48 hour clear forecast gives you time to work carefully without rushing before the next storm.

Cost comparison helps with the decision. DIY materials typically cost $100 to $300 for a quality tarp, lumber boards, fasteners, and basic supplies. Professional emergency tarping services range from $300 to $1,500 depending on roof size, accessibility, urgency, and regional labor rates. The price difference narrows when you factor in equipment rental costs for ladders, harnesses, and tools you don’t own.

Professional installation includes insurance liability coverage if the roofer is injured during the work, guaranteed installation quality with warranty on labor, and proper safety equipment and training that reduces risk. Most emergency roofing companies can complete tarp installation in 1 to 2 hours compared to 4 to 6 hours for DIY first timers.

Transitioning from Temporary Tarp to Permanent Roof Repair

Tk7Sg-QTR7qq21QwnIQLpA

Tarps buy you time to plan permanent repairs carefully, but that doesn’t mean you should delay starting the repair process.

Contact licensed roofing contractors within 48 hours of installing your tarp. Schedule inspections while the tarp is still protecting your interior so contractors can assess damage without causing additional water intrusion. Obtain estimates from at least three different contractors for complete repair scope, not just replacing the damaged section. Understand that the area where you drove tarp fasteners now has additional holes that will need new shingles even if the underlying shingles weren’t originally damaged. Coordinate with your insurance adjuster to complete their damage assessment before you remove the tarp and begin permanent work.

Timing considerations affect both repair quality and long term roof performance. Most permanent repairs should begin within 30 to 60 days of the damage occurring. Extended tarp coverage beyond 90 days risks additional deterioration where the fasteners penetrated your roof deck, and moisture can accumulate under aging tarps even when they appear intact. Schedule repairs during dry seasons when possible, typically late spring through early fall, to ensure proper installation conditions and allow roofing materials like shingles and adhesives to bond correctly.

Tarp removal and disposal is typically included in permanent repair contracts, so you don’t need to climb back onto the roof to take it down yourself. Save all damaged materials that were removed during tarp installation until your insurance claim is completely finalized and the adjuster confirms they don’t need to inspect the physical evidence.

Final Words

Getting the roof tarp installation steps right means stopping water damage fast and protecting what matters until permanent repairs can happen.

Measure accurately, secure properly, and check your work after every storm.

A well-installed tarp keeps your home dry and prevents small problems from turning into expensive ones. Take your time with the sandwich board method and eliminate those wrinkles.

If the roof is steep or the damage is widespread, call in professionals who have the gear and experience to do it safely. Either way, you’re buying valuable time to plan the right permanent fix without panicking through another rainstorm.

FAQ

Q: What is the best way to put a tarp on a roof?

A: The best way to put a tarp on a roof involves measuring the damaged area and adding 4 feet to each dimension, removing all loose debris, positioning the tarp with equal overlap on all sides, and securing edges using the sandwich board method (placing the tarp between two 2×4 boards fastened every 12-18 inches). Pull the tarp taut while working from center to edges to eliminate wrinkles and prevent water pooling.

Q: What is the 25% rule in roofing?

A: The 25% rule in roofing states that if more than 25% of your roof’s total area is damaged or needs replacement, many building codes and insurance policies require replacing the entire roof rather than patching sections. This ensures structural integrity and uniform material aging. Always check your local building codes and insurance policy requirements when assessing storm damage extent.

Q: How much do roofers charge to tarp a roof?

A: Roofers typically charge $300-1,500 to tarp a roof, depending on damage extent, roof size, accessibility, and urgency of the situation. DIY materials including tarp, boards, and fasteners cost $100-300, but professional installation includes liability coverage, proper safety equipment, and guaranteed work quality. Emergency tarping during active storms or after-hours may cost more.

Q: How should roof underlayment be installed?

A: Roof underlayment should be installed starting at the eaves and working upward toward the ridge, overlapping each row by 6 inches horizontally and 4 inches at vertical seams, with all seams running down-slope to direct water flow. For emergency tarp installation, extend coverage over the ridge line when possible to allow water runoff to both sides. Permanent underlayment installation requires professional roofing contractors to ensure proper integration with flashing and ventilation.

Q: How long can a roof tarp stay in place?

A: A roof tarp can stay in place for 90-120 days in moderate weather conditions when using high-quality 12-mil polyethylene material, though UV exposure and temperature cycling begin degrading materials after 3-4 months. Inspect the tarp after every significant weather event and schedule permanent repairs within 30-60 days of installation. Tarps are emergency measures designed for weeks or months, not permanent solutions.

Q: Can I install a roof tarp by myself?

A: You should not install a roof tarp by yourself because roof tarping is a two-person job for safety and efficiency, requiring one person on the roof and a ground-level spotter. DIY installation is appropriate only for single-story homes with low-slope roofs (4:12 or less), small damaged areas under 100 square feet, and when you have proper safety equipment. Steep roofs, multi-story homes, or damaged areas near edges require professional installation.

Q: What size tarp do I need for roof damage?

A: You need a tarp that extends at least 4 feet beyond the damaged area on all sides, calculated using this formula: Tarp length equals damaged area length plus 8 feet, and tarp width equals damaged area width plus 8 feet or extends to the ridge line. Undersized tarps that don’t extend past the damage zone allow water intrusion at edges. Consider extending coverage over the ridge line for optimal water runoff to both sides.

Q: How do I secure a roof tarp in high winds?

A: To secure a roof tarp in high winds, use the sandwich board method by placing the tarp edge between two 2×4 boards and fastening with 3-inch deck screws every 8-10 inches instead of the standard 12-18 inches. Reinforce corners with doubled boards or additional fasteners at 6-inch spacing, and distribute sandbags every 6-8 feet for extra weight. Avoid installation when sustained winds exceed 20 mph or gusts above 30 mph are forecasted.

Q: When should I not attempt roof tarp installation?

A: You should not attempt roof tarp installation during rain, lightning, strong winds above 20 mph, on wet or icy surfaces, within 10 feet of power lines, or on roofs steeper than 6:12 pitch (26.5 degrees) without fall protection. Wait until bad weather clears completely and surfaces are dry. Professional installation is required for structural damage, multi-story homes, or when you lack proper safety equipment and training.

Q: Does homeowners insurance cover emergency roof tarping?

A: Homeowners insurance typically covers emergency roof tarping as part of emergency mitigation requirements, which obligate policyholders to take “reasonable steps” to prevent additional damage after a covered event. Install the tarp within 24-48 hours of damage, photograph the damage before and after installation, keep all receipts, and notify your insurance company immediately. Failing to tarp a damaged roof promptly may result in denial of subsequent water damage claims.

Ceiling Stain Repair from Water Leak: Fix Damage Fast

0

Think painting over a water stain will fix the problem?
It won’t. Cosmetic paint hides the mark, not the moisture that caused it.
First, stop the leak. Then dry the ceiling, clean the stain, prime with a stain blocking primer, and repaint so the stain doesn’t come back.
This guide walks you through each step, safety checks, the tools you need, and when to call a pro.
Fix it fast, prevent mold, and restore your ceiling the right way.

Step-by-Step Ceiling Stain Repair After a Water Leak

tazN9zukT_OrtOo5Ix_4pA

Before you touch primer or paint, confirm that the leak is fixed. If water’s still coming in, cosmetic repair will fail. Check the source. Inspect pipes, look at the roof deck from the attic, confirm drip pans are draining. Can’t find it or can’t reach it? Call someone who can.

Once the leak stops, the ceiling must dry completely. This isn’t optional. Wet drywall feels damp to the touch, and moisture meters will confirm it. Most ceilings need 24 to 48 hours of dry air to stabilize. If the stain’s large or the drywall stayed wet for days, you may need longer. You can speed this with fans or a dehumidifier, but don’t skip the wait.

After drying, wipe down the stained area with a damp rag and mild detergent or a bleach solution (1 part bleach to 10 parts water). This removes surface grime, dust, and any mildew starting to form. Rinse lightly with a spray bottle of clean water and a clean rag, then let it dry again.

Paint peeling or the drywall surface soft and bubbled? Scrape off the loose material with a putty knife. Fill any gouges or small holes with spackle or joint compound. Let it dry, then sand smooth. The goal is a stable, even surface before you prime.

Now follow these repair steps:

  1. Lay a drop cloth under the work area and set up your ladder on stable, dry flooring.
  2. Put on safety glasses and a dust mask if you’re sanding or scraping.
  3. Wipe the stain one more time to remove sanding dust or residue.
  4. Apply a coat of stain blocking primer with a brush or roller, covering the stain and extending a few inches beyond its edges.
  5. Let the primer dry for the time listed on the can, typically 1 to 2 hours for oil based products.
  6. Paint over the primed area with ceiling paint, blending into the surrounding finish. Apply a second coat if the repair’s still visible.

Stain blocking primers exist for one reason: they seal tannins, smoke residue, and mineral deposits so they don’t bleed back through your topcoat. Without primer, brown and yellow stains reappear as the paint dries. Use an oil based or shellac based stain blocker for the best seal. If the stain was minor and the ceiling dried fast, a quality latex stain blocking primer may be enough. Either way, don’t skip the primer.

Materials and Tools Needed for Repair

5FRIy-fyQlSGuVuZzbw0hA

You don’t need a truck full of specialty equipment, but you do need the right primer and clean tools. Most repairs use items you already own or can pick up at a hardware store in one trip.

Primer type matters more than brand. Oil based and shellac based stain blockers lock in discoloration better than standard latex primers. Oil based products take longer to dry and require mineral spirits for cleanup, but they handle severe stains and nicotine bleed through. Shellac based primers dry faster and seal just as well, though the fumes are strong and you’ll need denatured alcohol for brushes. Latex stain blocking primers work for light water marks and are easier to clean up, but they don’t seal as aggressively.

Gather these materials and tools before you start:

  • Drop cloth or plastic sheeting
  • Putty knife or scraper
  • Spackle or joint compound
  • Sandpaper or sanding block (120 grit or finer)
  • Cleaning rags and spray bottle
  • Stain blocking primer (oil based, shellac based, or high quality latex)
  • Ceiling paint (flat finish, latex)
  • Paint roller with extension pole and appropriate nap (3/8 inch for smooth ceilings, 3/4 inch for textured)
  • Paintbrush for edges
  • Safety glasses, dust mask, and work gloves
  • Painter’s tape (optional, for protecting trim)

Cost Overview for Ceiling Stain Repair

5TKcSNmCR4iwHAmMrX2ckg

If you already own a ladder and basic painting tools, a small DIY ceiling stain repair typically costs between $20 and $100. That includes a quart of stain blocking primer, a gallon of ceiling paint, spackle, sandpaper, a roller cover, and cleaning supplies. Need to buy a roller frame, extension pole, drop cloth, and safety glasses? Add another $30 to $50.

Professional ceiling repairs for water stains generally run $150 to $500, depending on stain size, ceiling height, and whether drywall needs replacement. A single small stain on an 8 foot ceiling with no material damage sits at the lower end. A large stain on a vaulted ceiling, or one that required cutting out and replacing a drywall section, moves toward the upper range. If the ceiling sagged or mold spread behind the surface, expect higher pricing because more labor and materials are involved.

Cost also shifts with primer choice and finish quality. Oil based stain blockers cost more per quart than latex versions, but you use less because coverage is better. Ceiling specific paints with better hiding power reduce the need for multiple topcoats, saving time and material. Textured ceilings may require spray application or thicker nap rollers, which adds to supply cost but improves the final appearance.

Safety Considerations Before Repair

JO1o6TU2S1aY4fxXNalDxw

Water stains are often the visible part of a bigger moisture problem. Mold can start growing within 24 to 48 hours after drywall gets wet, especially in warm or humid conditions. Before you scrape, sand, or prime, look closely at the stained area. See dark spots, fuzzy patches, or smell a musty odor? You may have mold. Small surface mold can be wiped with a diluted bleach solution, but if it’s widespread or the drywall feels soft, stop and call someone trained in mold remediation.

Ladder safety is straightforward but critical. Set the ladder on dry, level ground. Don’t stand on the top two rungs. If the ceiling is vaulted or you’re working near a stairwell, rent or borrow a taller ladder or scaffolding rather than stretching. Falling while holding a paint roller or putty knife is how people end up in the emergency room.

Protect yourself during the work:

  • Wear safety glasses when scraping or sanding overhead to keep debris out of your eyes.
  • Use a dust mask or N95 respirator when sanding joint compound or working around possible mold.
  • Put on work gloves when handling bleach solutions or oil based primers to avoid skin irritation.
  • Ventilate the room with open windows and a fan, especially when using oil based or shellac based primers that release strong fumes.

Identifying and Preventing Recurring Ceiling Leaks

umDTtgpJRSCAZsnZsZIcqA

Stains come back when the source isn’t truly fixed. Roof leaks are common culprits. Missing or cracked shingles, failed flashing around chimneys or vents, and clogged gutters that push water under the roofline all send moisture into the attic. Water travels along rafters and insulation before it drips through the ceiling, so the stain may appear several feet away from the actual entry point.

Plumbing problems create stains too. A slow drip from a supply line, a leaking toilet wax ring, or a cracked drain pipe in the wall can saturate drywall for weeks before you notice. Bathroom and laundry areas are high risk zones. Check caulking around tubs and showers, inspect under sinks, and listen for dripping when fixtures are off.

HVAC systems cause straight line stains along duct runs when condensation forms on cold metal and drips onto the ceiling. Cracked drip pans under air handlers, clogged condensate drain lines, and poorly insulated ducts in hot attics are frequent issues. If the stain follows a duct path or appears near the air handler closet, start there.

Prevent future leaks by inspecting high risk areas twice a year, ideally in spring and fall. Clear gutters and downspouts so water flows away from the house. Check roof shingles and flashing after storms. Replace worn caulking in bathrooms before it fails. Flush HVAC drain lines annually and confirm drip pans aren’t rusted through. Improve attic ventilation if condensation’s forming on roof decking. Small maintenance steps catch problems before they become ceiling stains.

When to Call a Professional

PKhJAya1Rzi0eJqsE2WdGQ

If the ceiling’s sagging, soft to the touch, or bowing downward, do not attempt cosmetic repair. That means the drywall is saturated or the framing above is damaged. Walking under a sagging ceiling is risky, and patching the surface won’t fix the structural problem. A contractor needs to assess the framing, replace damaged drywall, and confirm the leak is fully resolved.

Call a professional when you can’t locate the leak source. Water sometimes travels long distances inside walls or along roof decking before it shows up as a stain. Thermal imaging, moisture meters, and experience help pinpoint hidden leaks that aren’t obvious from a visual inspection. Guessing and repainting won’t stop the cycle.

Widespread mold, black staining, or a strong musty smell signals contamination beyond surface cleaning. Mold remediation requires containment, HEPA filtration, safe removal of affected materials, and verification that spores aren’t spreading. Trying to sand or scrape moldy drywall without containment releases spores into the air throughout your home. If the affected area’s larger than a few square feet or mold has grown behind the drywall, hire a certified restoration company to handle it safely.

Final Words

Start by stopping the leak, then dry the ceiling fully and check for mold. Clean, scrape or patch damaged drywall, apply a stain-blocking primer, then repaint—measure moisture, don’t guess.

Gather the right supplies, mind ladder and mask safety, and weigh DIY cost versus hiring a pro for big or moldy jobs. Regular checks help keep this from coming back.

For straightforward ceiling stain repair from water leak, follow the steps and let drying and primer do the heavy lifting. You’ll be back to normal soon.

FAQ

Q: How to fix a water leak stain on a ceiling?

A: Fixing a water leak stain on a ceiling (and painting over discoloration) starts by confirming the leak is stopped, drying 24–48 hours, cleaning, patching, using a stain-blocking primer, then repainting.

Q: How much does it cost to fix water stains on a ceiling?

A: Fixing water stains on a ceiling costs about $20–$100 DIY for materials, or $150–$500 for a pro, depending on stain size, drywall damage, primer choice, and ceiling height.

Crawlspace Mold After Flooding: Removal Steps and When to Hire Help

0

If your crawlspace flooded last week and you’re catching whiffs of that musty smell through your vents, you’re already losing time. Mold colonies establish within 24 to 72 hours after flooding, and once they lock in, they start launching spores into every room above. We’ll walk you through the critical removal steps homeowners can tackle safely, explain what testing actually tells you, and show you exactly when DIY cleanup turns into a job that needs professional equipment and containment.

Is Your Crawlspace Dangerous? Critical Assessment After Flooding

D3kz_qVdToS5S05gCgw1Tw

Crawlspace mold after flooding is dangerous and needs immediate attention, especially within that critical 24 to 72 hour window when colonies establish and start spreading spores throughout the living areas above.

Immediate danger signs you need to check:

Persistent musty odors coming through floors, closets, and HVAC vents, especially noticeable after rain or when humidity’s high. Visible mold colonies on accessible framing, subflooring, or joists appearing as black, green, or white patches. Condensation on plumbing lines, ductwork, or exposed wood framing showing elevated humidity levels under your home. Increased allergy irritation or respiratory discomfort while you’re indoors that wasn’t there before the flooding. Discolored or wet insulation sagging from subflooring, appearing compressed or falling away when it’s saturated.

Health symptoms getting worse in immunocompromised individuals, children, or elderly residents with chronic exposure. Moisture or water droplets on joists and beams, sometimes heavy enough that saturated wood literally drips. Warped or stained subflooring visible from below showing dark patches or cupping.

Immediate health effects include respiratory issues like coughing and wheezing, allergic reactions causing watery eyes and skin rashes, persistent headaches, and exposure symptoms from mycotoxins that develop on contaminated organic materials. Heightened risks affect immunocompromised individuals who may develop serious infections, children whose developing respiratory systems are more vulnerable, and elderly residents with existing conditions worsened by poor air quality. The danger increases with chronic exposure as spore counts build up over weeks and months.

HVAC systems distribute spores from crawlspaces throughout your entire home, affecting every room and living area. This becomes particularly severe in older homes where high efficiency cooling systems create cold ductwork that meets warm humid air entering the crawlspace. Professionals call this mold explosions. It’s rapid colony growth that launches millions of spores into circulation every time the system runs. Air quality degrades throughout the home even when visible growth stays confined to the crawlspace below.

Emergency Response: Immediate Actions and Drying Protocol

cp2QqEPYRFiwn1SUvt7Wiw

The critical 24 to 72 hour window before mold colonies establish determines whether you prevent contamination or face extensive remediation. Controlling humidity during this narrow timeframe is the most important factor because once growth starts, it spreads rapidly across wood framing and subflooring.

Sequential emergency and drying protocol:

  1. Remove standing water immediately using pumps, wet vacuums, or professional extraction equipment to eliminate the primary moisture source.
  2. Open crawlspace access points for ventilation and clear blocked vents to begin air circulation and humidity reduction.
  3. Remove saturated insulation to prevent moisture from being held against wood framing where it creates ideal conditions for growth.
  4. Document damage with photos showing water levels, affected materials, and moisture readings for insurance claims.
  5. Eliminate sources of ongoing moisture intrusion including plumbing leaks, foundation cracks, or drainage failures before drying begins.
  6. Install dehumidifiers when humidity reaches above 60%, positioning units to maximize coverage across the crawlspace.
  7. Use supplemental fans and blowers for air circulation combined with dehumidification, directing airflow across wet surfaces.
  8. Monitor wood moisture content with goal of below 20% before remediation begins, testing multiple locations throughout the space.
  9. Contact your insurance provider within 24 to 48 hours to report flooding and begin the claims process with proper documentation.

Critical errors sabotage drying efforts and worsen contamination. Using fans alone without moisture removal spreads spores throughout the crawlspace and into living areas through air currents. You’re distributing the problem instead of solving it. Sealing or encapsulating before complete drying locks moisture inside, creating a permanent high humidity environment that guarantees growth. Rushing remediation without allowing wood to dry below 20% causes mold to return quickly, sometimes the next morning, because wet wood provides everything colonies need to re-establish within hours.

Material Target Moisture Level Typical Drying Time
Wood framing Below 20% 3-7 days
Concrete Below 15% 7-14 days
Soil Reduced saturation 5-10 days
Insulation Complete drying impossible/replace N/A
Subflooring Below 20% 4-10 days

Emergency response professionals should be contacted immediately for sewage backup which introduces health hazards requiring specialized disinfection. Extensive flooding covering more than 500 square feet where DIY drying is impractical. Or rapid mold spread visible within 48 hours indicating aggressive contamination. For Water Damage Restoration Services, professionals bring extraction equipment, industrial dehumidifiers, and moisture monitoring tools that accelerate drying and prevent growth.

Complete Inspection and Testing Guide for Crawlspace Mold

afSEfN-4Rz6V04si0BYyOA

Personal safety precautions and protective equipment are essential before entering a flooded crawlspace. Wear respirators rated N95 or higher to prevent spore inhalation. Waterproof gloves to avoid skin contact with contaminated materials. Eye protection against spore exposure. And full body covering with long sleeves and pants to minimize exposure across all skin surfaces.

You’ll need moisture meters to test wood and material moisture content accurately, hygrometers to measure relative humidity levels, flashlights or headlamps for adequate visibility in dark spaces, cameras or smartphones for documentation photos showing affected areas and moisture readings, and marking materials like colored tape or markers to identify contaminated zones requiring attention.

Step by step comprehensive inspection protocol:

  1. Access the crawlspace safely checking for structural stability, looking for sagging joists or damaged supports before entering.
  2. Check for standing water and active leaks requiring immediate attention before proceeding with inspection.
  3. Measure humidity levels with hygrometer targeting below 60% to prevent growth, taking readings in multiple locations.
  4. Test wood moisture content in multiple locations targeting below 20% for remediation readiness, focusing on framing, subflooring, and joists.
  5. Visually inspect framing, subflooring, and insulation for discoloration showing dark patches or water staining, condensation indicating ongoing moisture problems, visible mold colonies appearing as colored growth, and sagging or compressed materials showing saturation.
  6. Check for musty odors concentrated in specific areas indicating hidden contamination behind insulation or in enclosed spaces.
  7. Photograph all affected materials and moisture readings for documentation and insurance claims, capturing wide shots showing scope and close ups showing detail.

Professional mold testing options include air sampling for spore count analysis that measures airborne contamination levels throughout the crawlspace. Surface testing for species identification determines whether toxic varieties like black mold are present. And thermal imaging to detect hidden moisture inside walls or beneath subflooring that visual inspection misses. Professional assessment becomes necessary versus DIY methods when contamination exceeds 10 square feet indicating widespread growth, suspected black mold presence requires laboratory confirmation, or ongoing health symptoms persist despite visible cleanup suggesting hidden sources releasing spores.

Step by Step Crawlspace Mold Removal Process

uNs_O2gSSP2x2BveBVqMbA

Essential protective equipment includes respirators rated N95 or higher that filter airborne spores during all remediation activities, waterproof gloves protecting hands from contact with contaminated surfaces and cleaning solutions, eye protection preventing spore exposure to sensitive mucous membranes, and full body covering with disposable suits or old clothing that gets discarded after remediation to prevent bringing spores into living areas.

Sequential removal protocol:

  1. Verify wood moisture below 20% and humidity below 60% confirming the space is dry enough for remediation without immediate regrowth.
  2. Set up containment barriers using plastic sheeting secured with tape to prevent cross contamination to living areas during disturbance.
  3. Install HEPA filtration and air scrubbers to capture airborne spores during disturbance, positioning units to create negative pressure.
  4. Remove and double bag saturated insulation for disposal as it can’t be salvaged once contaminated and holds moisture against framing.
  5. Apply antimicrobial treatment or disinfection solution like Anabec Advanced Cleaning Solution Plus to all affected surfaces, following product instructions for contact time and dilution rates.
  6. Scrub or soda blast visible mold from porous surfaces like wood framing and subflooring, using stiff brushes for light contamination or professional soda blasting for heavy growth.
  7. HEPA vacuum all surfaces including joists, beams, and subflooring to capture residual spores left after scrubbing, making multiple passes.
  8. Apply biocide application or mold preventative coating to inhibit future growth, covering all previously affected areas thoroughly.
  9. Monitor humidity levels for 48 to 72 hours post treatment ensuring levels stay below 50% permanently, confirming conditions won’t support regrowth.

Proper disposal methods for contaminated materials include double bagging all affected materials and absorbent materials in heavy duty plastic bags rated for construction waste. Seal bags immediately to prevent spore release during transport. And follow local regulations for disposal of mold contaminated waste. Some jurisdictions require special handling for mold contaminated debris or designated facilities that accept biological waste rather than standard landfills. Contact your local waste management authority to confirm disposal requirements in your area.

When to Hire Professional Mold Remediation Specialists

S0d-QOPsQEOTm2-gglKVvQ

The limitations of DIY remediation become clear when contamination spreads beyond small isolated patches or when complexity requires specialized knowledge and equipment. Large scale mold contamination demands professional expertise because improper handling spreads spores throughout homes, incomplete removal allows rapid regrowth, and exposure during amateur cleanup creates health risks for household members.

Certified specialists bring EPA guidelines compliance ensuring remediation meets federal standards for safe and effective mold removal. Specialized equipment like air scrubbers that create negative pressure preventing spore escape and soda blasters that remove embedded growth from porous wood without damaging structural integrity. Proper containment procedures that isolate work areas preventing cross contamination. And guaranteed results backed by warranties addressing regrowth within specified timeframes.

Situations requiring professional help:

Mold covering more than 10 square feet of surface area, the EPA threshold where DIY methods become inadequate. Black mold or toxic species present requiring laboratory identification and specialized removal protocols. Structural damage to joists and beams compromising home integrity and requiring both remediation and repairs. Ongoing moisture intrusion from groundwater seepage or sewage backup that DIY methods can’t address.

HVAC system contamination spreading spores throughout the home every time heating or cooling runs. Immunocompromised individuals in household facing elevated health risks from spore exposure during cleanup. Failed DIY attempts with mold regrowth within weeks indicating incomplete remediation or unresolved moisture problems. Insurance claims requiring certified documentation and licensed contractor work for reimbursement approval.

Select qualified contractors by verifying certifications from IICRC or NORMI showing completed training in proper remediation techniques. Check references from recent flood remediation projects to confirm successful outcomes in similar situations. Confirm restoration services capabilities beyond just removal including structural repairs and finish work. Evaluate insurance claim experience to ensure proper documentation for reimbursement. And review detailed written estimates with scope of work outlining every step and timeframe expectations showing when work begins and completes. For Mold Remediation Services, professionals coordinate the entire process from initial assessment through final clearance testing.

Costs and Insurance Coverage for Crawlspace Mold Remediation

JhaJlbQrQ6yJrBOWHf2Hdw

Typical cost factors include extent of contamination measured in square feet where larger affected areas require more labor and materials. Accessibility challenges in low clearance crawlspaces where workers must operate in confined spaces increasing labor time. Materials requiring replacement versus salvageable surfaces that can be cleaned and treated. And professional versus DIY approaches where equipment rental and product costs add up quickly even without labor expenses.

Service Cost Range Timeframe
Professional inspection/testing $300-$800 1-2 days
Small DIY remediation $200-$500 3-5 days
Professional remediation (500 sq ft) $1,500-$4,000 3-7 days
Professional remediation (1500 sq ft) $4,000-$10,000 5-14 days
Insulation replacement $1-$3 per sq ft 1-3 days
Vapor barrier installation $0.50-$2 per sq ft 1-2 days

Insurance coverage variables create confusion because flood insurance versus homeowners policies handle mold differently. Flood insurance through NFIP typically covers water intrusion from flooding events but specifically excludes resulting mold unless it develops within 72 hours and gets documented immediately. Standard homeowners policies generally exclude flood damage entirely but may cover mold resulting from sudden pipe bursts or appliance failures.

Sudden versus gradual damage distinctions matter because insurance covers unexpected events but denies claims for maintenance issues like slow leaks. Claim filing timelines require notification within 24 to 48 hours after discovery, making immediate contact essential even before full damage assessment completes.

Documentation photos taken immediately after discovery provide crucial evidence showing water levels, affected materials, and contamination extent before any cleanup begins. Professional assessment reports from certified inspectors add credibility to claims by providing third party verification of damage and recommended remediation scope. Before and after evidence for successful claims maximizes reimbursement by demonstrating the work performed and results achieved, particularly important when carriers question whether remediation was necessary or properly executed.

Property value impact from disclosed mold history varies but typically reduces buyer interest and negotiating power even after successful remediation. Disclosure requirements when selling homes with previous mold issues vary by state but generally require honest reporting of known contamination events. Most states mandate disclosure of material defects including prior mold problems, and failure to disclose creates legal liability when buyers discover undisclosed issues after purchase. Even in states without specific mold disclosure laws, general material defect requirements typically cover significant contamination events.

Long Term Prevention Strategies for Flood Prone Crawlspaces

gU0o1u3YSLq4ANilNzWSwQ

Prevention is more cost effective than repeated remediation cycles that cost thousands of dollars every few years and consume weekends dealing with the same recurring problem. Protecting property value and health by breaking the 24 to 48 hour growth cycle means addressing the conditions that allow colonies to establish rather than fighting the same battle repeatedly after every heavy rain or seasonal flooding event.

Unconditioned crawl spaces in humid climates create ideal mold growth environments when moisture remains in contact with organic materials like wood framing and subflooring that provide the nutrients colonies need to spread. Trapped moisture in soil maintains humidity above 60% even after surface water disappears because saturated ground beneath homes releases water vapor continuously, feeding the cycle. Wood saturation from absorbed humidity provides the conditions spores need to colonize within 24 to 72 hours. Damp wood with relative humidity above 60% in the surrounding air becomes a perfect environment for rapid growth that spreads across entire crawlspaces within days.

Moisture Barriers and Encapsulation Solutions

Vapor barrier installation using 6 mil or thicker polyethylene sheeting covering soil prevents groundwater seepage by blocking water vapor rising from saturated earth beneath homes. Proper sealing techniques including taping seams with specialized vapor barrier tape creates continuous protection without gaps, and extending barriers up foundation walls at least 6 inches prevents moisture from bypassing the system at the edges.

Full crawlspace encapsulation benefits include controlled humidity maintained below 50% year round through sealed systems. Improved air quality by eliminating soil gases that carry moisture and contaminants into living areas. And long term moisture control preventing the trapped moisture conditions that enable growth even during heavy rainfall or seasonal high water tables.

Drainage and Water Management Systems

Exterior solutions including grading issues correction direct water away from foundation with minimum 6 inch drop over 10 feet, preventing pooling against foundation walls that saturates soil and increases crawlspace moisture intrusion. Gutter maintenance and downspout extensions direct water minimum 6 feet from foundation, preferably 10 feet, to prevent soil saturation in the immediate foundation zone where it enters crawlspaces most easily.

French drains installation around foundation perimeter addresses persistent water intrusion from high water tables by collecting groundwater before it reaches foundation walls, channeling it to daylight or sump systems. Sump pump installation with battery backup addresses sump pump failure risks during power outages accompanying storms when homes need pumping capacity most, preventing flooded crawlspaces when grid power fails during heavy weather events.

Ongoing Monitoring and Maintenance

Year round preventive measures include permanent dehumidifier installation with automatic humidity control maintaining levels below 50%, running continuously during humid months and cycling as needed during dry periods to maintain stable conditions. Seasonal crawlspace inspection schedule checking for new leaks or moisture intrusion every 3 to 6 months catches problems early before they develop into major contamination events requiring extensive remediation.

Hygrometer monitoring of relative humidity especially after heavy rainfall events confirms systems are working properly and humidity stays below growth thresholds. Ventilation assessment ensures adequate air circulation in vented crawlspaces or confirms encapsulation systems remain sealed. Addressing soil saturation after storm damage events before the 24 to 48 hour growth window closes means pumping standing water, running dehumidifiers, and monitoring moisture levels until wood and soil return to safe levels.

Regional Considerations for Crawlspace Flooding and Mold

TRDcsHBETM-vU4uWzU5Jgg

Low lying areas including river valleys like Puyallup River and White River valleys and flood plains experience higher risk of seasonal flooding and groundwater seepage requiring enhanced preventive measures. Communities along these waterways including Puyallup, Orting, Sumner, and Auburn share similar post flood moisture conditions due to geographic locations in valley bottoms where water tables rise during wet seasons and storm events. Enhanced preventive measures such as elevated sump pump systems installed above expected flood levels and robust encapsulation with sealed vapor barriers become essential rather than optional upgrades in these flood prone zones.

Climate considerations affect prevention strategies across regions. Humid regions require permanent dehumidification systems running year round to combat naturally high moisture levels that keep crawlspaces damp even without flooding. Areas with heavy rainfall need robust drainage systems with French drains and extended downspouts that handle high water volumes during storms. Regions prone to natural disasters including hurricanes, river flooding, and severe storms necessitate emergency preparedness including backup power for dehumidifiers through generators or battery systems that keep moisture control running during grid outages when protection matters most.

Soil saturation patterns vary with soil type and affect how water moves through ground beneath homes. Clay soils hold moisture longer, increasing crawlspace moisture intrusion rates because saturated clay releases water vapor slowly over weeks after flooding events end. Sandy soils drain faster, reducing standing water duration but potentially allowing groundwater seepage during high water table periods when water flows through permeable sand directly into crawlspaces. Understanding local soil characteristics helps homeowners choose appropriate prevention strategies for their specific conditions.

Region specific solutions include flood zone rated sump pumps for communities like Puyallup, Orting, Sumner, and Auburn that handle higher water volumes and resist damage from debris laden floodwater. Elevated equipment installation above expected flood levels protects dehumidifiers, HVAC components, and electrical systems from water damage during flooding events. Compliance with local building codes for waterproofing in high risk areas ensures new construction and renovations meet minimum standards designed to address known regional flooding patterns and moisture challenges.

Final Words

Crawlspace mold after flooding moves fast, but you can stay ahead of it with the right plan.

Stop the water first. Dry everything below 20% moisture. Remove what can’t be saved. Treat what stays. Monitor until you’re sure it won’t come back.

If the job’s too big or mold keeps showing up, call in certified help. Your home, your family’s health, and your property value all depend on handling this right the first time.

FAQ

How quickly does mold form after a flood?

Mold forms within 24 to 72 hours after flooding when moisture remains in contact with organic materials like wood framing and subflooring in your crawlspace. This critical window determines whether you can prevent colonies from establishing and spreading spores throughout your home.

How serious is mold in a crawl space?

Mold in a crawl space is dangerous because HVAC systems distribute spores from contaminated crawlspaces throughout your entire home, affecting all living areas. Health risks include respiratory issues, allergic reactions, and heightened exposure for immunocompromised individuals, children, and elderly residents with chronic exposure.

What are the 10 warning signs of mold toxicity?

Warning signs of mold toxicity include persistent musty odors from floors and vents, increased allergy irritation while indoors, respiratory discomfort, visible mold colonies, condensation on plumbing lines, discolored or sagging insulation, health symptoms worsening in vulnerable individuals, moisture on joists, warped subflooring, and symptoms intensifying after rain or high humidity.

Will homeowners insurance cover mold in crawl space?

Homeowners insurance coverage for crawlspace mold varies significantly based on water source and damage timeline. Flood insurance typically covers water intrusion but not resulting mold, while sudden damage claims differ from gradual damage exclusions, requiring documentation photos and notification within 24 to 48 hours for successful claims.

When should I contact professionals for crawlspace mold?

Contact professionals immediately for mold covering more than 10 square feet, sewage backup, extensive flooding over 500 square feet, black mold presence, structural damage to joists and beams, HVAC system contamination, immunocompromised household members, or failed DIY attempts with regrowth within weeks.

What moisture levels prevent mold growth in crawlspaces?

Wood moisture content below 20% and relative humidity below 60% prevent mold growth in crawlspaces. Permanent dehumidifier installation maintaining levels below 50% provides long-term protection, while hygrometer monitoring after heavy rainfall confirms conditions remain unfavorable for spore colonization.

How long does crawlspace drying take after flooding?

Crawlspace drying takes 2 days to 2 weeks depending on conditions, flood extent, ventilation, and dehumidification equipment. Wood framing typically dries in 3 to 7 days, concrete in 7 to 14 days, and soil saturation reduces in 5 to 10 days when proper protocols combine air circulation with moisture removal.

Can I remove crawlspace mold myself?

You can remove crawlspace mold yourself if contamination covers less than 10 square feet, you have proper protective equipment including N95 respirators, and wood moisture drops below 20%. Larger areas, black mold, structural damage, or HVAC contamination require certified specialists with specialized equipment like air scrubbers and containment systems.

What causes mold to return after remediation?

Mold returns after remediation when wood moisture stays above 20%, humidity exceeds 60%, trapped moisture remains in soil, ongoing leaks continue, or remediation begins before complete drying. Sealing or encapsulating before materials dry completely locks moisture in, creating conditions for rapid regrowth within weeks.

How much does professional crawlspace mold remediation cost?

Professional crawlspace mold remediation costs $1,500 to $4,000 for 500 square feet and $4,000 to $10,000 for 1,500 square feet. Cost factors include contamination extent, accessibility challenges, materials requiring replacement, professional inspection fees of $300 to $800, and additional waterproofing solutions like vapor barriers.

Soot Damage to Lungs: Respiratory Risks and Recovery

0

Could a few breaths of black smoke change your lungs for life?

Soot is more than dirt. It’s tiny particles, toxic chemicals, and carbon monoxide that slip past your nose and reach the deepest air sacs.

Within minutes your airways can swell, mucus ramps up, and oxygen delivery drops.

People with asthma or heart conditions are especially at risk, and carbon monoxide can make things much worse.

This post walks you through immediate health risks, how clinicians diagnose soot-related lung injury, and steps for treatment and recovery.
So you know what to watch for and what to do next.

Immediate Medical Impact of Soot Exposure on the Lungs

ZGFKd5NsRj6KUKNMpxYs-A

Soot isn’t just black dust. It’s a nasty mix of microscopic carbon bits, volatile organic compounds, polycyclic aromatic hydrocarbons, acids, and heavy metals that form when things don’t burn completely. When you breathe it in, these particles move through your nose and throat into your bronchial airways. Because they’re incredibly small, they can reach the deepest parts of your lungs, the alveoli. From there, some particles actually cross into your bloodstream. Carbon monoxide gas, which shows up in smoke right alongside soot, pushes oxygen out of your red blood cells. That cuts oxygen delivery to vital organs and makes your body’s response to the particles even worse.

Within minutes to hours after breathing soot-laden air, your respiratory system starts fighting back. Airways become inflamed, mucus production ramps up, and smooth muscle in the bronchi can tighten, narrowing the tubes that carry air. PM2.5 particles (fine particulate matter measuring 2.5 micrometers or smaller) are especially dangerous because they bypass your body’s upper respiratory defenses and land directly on sensitive lung tissue. The result is rapid airway inflammation and a measurable drop in lung function, even if you were healthy before the exposure.

Carbon monoxide adds a separate layer of danger. At moderate levels, it causes headache, dizziness, nausea, and confusion. At high concentrations, it can lead to unconsciousness or death. The combination of carbon monoxide poisoning and direct soot damage to the lungs produces what’s often called “smoke poisoning.” That term describes the immediate, toxic reaction to inhaled combustion products.

Common short-term symptoms after soot inhalation:

  • Persistent coughing and throat irritation
  • Wheezing and shortness of breath
  • Chest tightness or discomfort
  • Headache, dizziness, or confusion (often from carbon monoxide)
  • Eye redness and nasal irritation

Particle Behavior and Deep-Lung Penetration from Soot Exposure

p2y9IH5-TD-GP4_VtvgjNA

Soot particles are extraordinarily small. Many wildfire smoke particles measure no larger than one third the width of a human hair. When you inhale, larger dust and debris get filtered out by nose hairs and mucus in the upper airways. But particles in the PM2.5 range, and the even tinier ultrafine particles smaller than 0.1 micrometers, slip past those defenses and travel deep into the respiratory tree. They settle in the alveoli, the tiny air sacs where oxygen moves into the blood. Once lodged there, they trigger inflammation and oxidative stress. Some particles are so small that they cross the alveolar membrane and enter the bloodstream, carrying toxic chemicals to other organs and triggering systemic inflammation.

Your body struggles to clear these particles. Alveolar macrophages (immune cells that normally engulf foreign material) can become overwhelmed or damaged by the volume and toxicity of the soot. That delayed or incomplete clearance means the particles stay in contact with lung tissue for extended periods, increasing injury. The inflammation spreads, lung function drops, and symptoms persist or worsen over hours to days. People with asthma or chronic obstructive pulmonary disease experience acute flare-ups because their airways are already compromised and more reactive to irritants.

Particle Size Category Health Impact Range
PM10 (10 micrometers or smaller) Deposits in upper airways; irritates throat and bronchi
PM2.5 (2.5 micrometers or smaller) Reaches deep lung tissue and alveoli; triggers inflammation and reduced lung function
Ultrafine particles (less than 0.1 micrometers) Can cross into bloodstream; linked to systemic inflammation, cardiovascular events, and multi-organ impact

Long-Term Pulmonary Consequences of Repeated Soot Exposure

FTaXJqChTamRqvAQPqPnXg

A single severe exposure can produce lasting lung injury, but repeated or prolonged exposure to soot dramatically increases the risk of chronic respiratory disease. Over months and years, the cumulative inflammation and cellular damage lead to structural changes in the airways and lung tissue. Chronic bronchitis (persistent inflammation of the bronchial tubes) develops as the airways produce excess mucus and lose their ability to clear it efficiently. Asthma may appear for the first time in adults exposed repeatedly, or existing asthma becomes more severe and harder to control.

Chronic obstructive pulmonary disease is one of the most serious long-term outcomes. COPD includes chronic bronchitis and emphysema, conditions that permanently damage the airways and alveoli. Lung function declines progressively, shortness of breath becomes constant, and patients require ongoing medical management including bronchodilators, corticosteroids, and sometimes supplemental oxygen. The systemic inflammation caused by inhaled soot also damages blood vessels, increasing the risk of heart attack and stroke. Endothelial cells (the lining of blood vessels) become dysfunctional, blood pressure rises, and clotting mechanisms are disrupted.

Soot contains polycyclic aromatic hydrocarbons, compounds known to cause mutations in DNA. Long-term exposure to PAHs and other carcinogenic chemicals in soot elevates the risk of lung cancer. The risk is highest when the soot comes from synthetic materials like plastics, treated wood, or foam burned at high temperatures, which produce especially toxic residues. Some lung damage becomes irreversible, and patients may need lifelong pulmonary care and rehabilitation to maintain quality of life.

Major chronic lung diseases linked to repeated soot exposure:

  1. Chronic bronchitis with persistent cough and mucus production
  2. Adult-onset asthma or severe worsening of existing asthma
  3. Chronic obstructive pulmonary disease, including emphysema
  4. Pulmonary fibrosis (scarring of lung tissue in severe cases)
  5. Elevated lung cancer risk from carcinogenic combustion byproducts
  6. Recurrent respiratory infections due to impaired immune clearance

Chemical Toxins in Soot and Their Direct Impact on Lung Tissue

15ksJpxDQ1aI8_32dGPYUw

Soot isn’t just carbon. It carries a payload of chemicals that are independently toxic to lung cells. Polycyclic aromatic hydrocarbons form when organic materials burn incompletely. Once inhaled, PAHs generate reactive oxygen species inside cells, causing oxidative stress that damages DNA, proteins, and cell membranes. This cellular injury triggers inflammation and, over time, raises the risk of mutations and cancer. Benzene and formaldehyde (two volatile organic compounds commonly found in smoke) are both classified as human carcinogens and irritants that inflame airway linings.

Heavy metals such as lead, cadmium, and arsenic can be released when painted surfaces, treated wood, or electronics burn. These metals deposit on soot particles and are inhaled into the lungs, where they accumulate in tissue and exert toxic effects on cellular metabolism and repair processes. Acids formed during combustion (including hydrochloric acid and sulfuric acid when plastics or sulfur-containing materials burn) corrode the delicate mucous membranes of the respiratory tract, worsening irritation and inflammation. Carbon monoxide, nitrogen oxides, and carbon dioxide add further respiratory and cardiovascular stress by reducing oxygen availability and increasing blood vessel reactivity.

Five major toxins commonly found in soot:

  • Polycyclic aromatic hydrocarbons (PAHs): cause oxidative stress, DNA damage, and cancer risk
  • Carbon monoxide: displaces oxygen in blood and impairs organ function
  • Formaldehyde: irritates airways and is a known carcinogen
  • Benzene: linked to blood disorders and cancer
  • Heavy metals (lead, cadmium, arsenic): accumulate in tissue and disrupt cellular processes

Soot-Related Lung Injury Diagnosis and Medical Evaluation

AO-9Hl02QBKAIMcaI-GErw

When someone shows up with respiratory symptoms after soot or smoke exposure, doctors start with a detailed history of the exposure event. How long were you exposed? What materials burned? Did carbon monoxide alarms sound? What symptoms appeared first? A physical exam includes listening to the lungs for wheezing, crackles, or decreased breath sounds, and checking oxygen saturation with a pulse oximeter. Low oxygen levels signal significant lung involvement and often prompt immediate supplemental oxygen.

Chest X-rays are commonly ordered to look for signs of inflammation, fluid, or structural damage in the lungs. In more severe cases or when initial imaging is unclear, a CT scan provides detailed cross-sectional images that can reveal early signs of damage not visible on X-ray. Pulmonary function tests (spirometry) measure how much air the lungs can hold and how quickly air can be exhaled. A drop in these values indicates airway obstruction or reduced lung capacity. Blood tests may include arterial blood gas analysis to measure oxygen and carbon dioxide levels, and carboxyhemoglobin levels to detect carbon monoxide poisoning.

In cases of severe inhalation injury or when airway burns are suspected, a bronchoscopy may be performed. A flexible camera is passed through the nose or mouth into the airways, allowing the physician to directly see soot deposits, inflammation, swelling, or damage to the bronchial lining. Sputum samples can be collected and analyzed for infection or cellular changes. Persistent symptoms like ongoing shortness of breath, chest pain, or worsening cough require urgent medical evaluation, as they may indicate progressive lung injury or secondary complications like pneumonia.

Test What It Evaluates
Chest X-ray or CT scan Visualizes inflammation, fluid, or structural lung damage
Pulse oximetry and arterial blood gas Measures oxygen and carbon dioxide levels in blood
Spirometry (pulmonary function tests) Assesses lung capacity and airflow obstruction
Bronchoscopy Direct visualization of airway damage and collection of tissue samples

Treatment Approaches for Lung Damage Caused by Soot

xgAWylZSR_6IA08-JBjKjA

Treatment begins with removing the person from the contaminated environment. Fresh air and rest allow the body’s natural clearance mechanisms to begin working. For mild cases, this may be all that’s needed, along with monitoring for worsening symptoms. When oxygen levels are low, supplemental oxygen is administered through a nasal cannula or face mask to maintain adequate tissue oxygenation. Humidified air or saline nebulizers help soothe irritated airways and loosen mucus.

Bronchodilators (medications that relax and open the airways) are used when wheezing or shortness of breath is present. These are usually delivered via inhaler or nebulizer and provide rapid relief. Corticosteroids reduce inflammation in the airways and lungs. Inhaled steroids are used for ongoing management, while systemic (oral or intravenous) steroids may be given in more severe cases to control acute inflammation. If bacterial infection develops as a complication, antibiotics are prescribed based on sputum culture results.

Severe inhalation injuries may require hospitalization and advanced respiratory support. Continuous positive airway pressure or mechanical ventilation may be needed if the patient can’t maintain adequate oxygen levels on their own. Pulmonary rehabilitation programs help patients with chronic damage rebuild lung function and stamina through supervised exercise, breathing techniques, and education. Long-term care often includes ongoing use of inhalers, regular monitoring of lung function, and referral to a pulmonologist for specialized management.

Common medical interventions for soot-related lung injury:

  • Immediate removal from exposure and fresh air
  • Supplemental oxygen to correct low blood oxygen levels
  • Bronchodilators (inhaled or nebulized) to open constricted airways
  • Corticosteroids (inhaled or systemic) to reduce inflammation
  • Humidified air or saline nebulizers to soothe airways and loosen mucus
  • Mechanical ventilation or hospital-level respiratory support for severe cases

High-Risk Groups Vulnerable to Lung Damage from Soot Exposure

OjBQW_KsRveae61bjLE5Pw

Children and infants are at heightened risk because their lungs are still developing and they breathe faster than adults, inhaling more air and more pollutants per kilogram of body weight. Their smaller airways are more easily obstructed by inflammation and mucus. Studies show that children exposed to wildfire smoke or indoor soot have higher rates of asthma attacks, bronchitis, respiratory infections, and emergency department visits. Elderly individuals face increased vulnerability because lung function naturally declines with age, and many have preexisting conditions like COPD, heart disease, or weakened immune systems that make recovery slower and complications more likely.

People with asthma, chronic bronchitis, COPD, or other chronic lung diseases experience severe flare-ups after soot exposure. Their airways are already inflamed and reactive, so even small amounts of particulate matter can trigger bronchospasm, increased mucus production, and respiratory distress. Individuals with cardiovascular disease (including heart failure, coronary artery disease, or a history of heart attack or stroke) are at risk for acute cardiac events because soot exposure raises blood pressure, increases clotting risk, and triggers systemic inflammation that stresses the heart. Pregnant individuals exposed to high levels of air pollution, including soot, may face higher risks of preterm birth, low birth weight, and pregnancy complications.

At-risk populations for soot-related lung damage:

  • Children and infants (developing lungs, higher breathing rates)
  • Elderly adults (reduced lung function, comorbidities, weaker immune response)
  • People with asthma, COPD, chronic bronchitis, or other chronic lung conditions
  • Individuals with cardiovascular disease or diabetes

Indoor Soot Sources and Ongoing Lung Exposure Risks

7xT1hcNlQFaTg2RhMuauxA

Soot and smoke residues don’t disappear after a fire is extinguished. They settle onto walls, ceilings, carpets, upholstery, curtains, and inside HVAC ducts. Volatile organic compounds and fine particles remain in porous materials and are released slowly over time, especially when temperatures rise or air circulates. Every time the heating or cooling system runs, soot particles trapped in ductwork are blown back into living spaces, creating repeated low-level exposure that can persist for months. That ongoing exposure can produce chronic respiratory irritation, persistent odors, and gradual accumulation of toxic residues in the body.

Common indoor sources of soot include candles (especially scented or paraffin-based candles), wood-burning fireplaces, gas stoves, and malfunctioning heating equipment. Cooking smoke from high-heat frying or charring releases fine particles that settle on surfaces and circulate in the air. Smoking indoors deposits tar and particulate residues throughout the home. Even small, repeated exposures add up, especially in homes with poor ventilation or older HVAC systems that lack proper filtration. Upgrading to HEPA-grade filters and ensuring regular duct cleaning can reduce recirculation of soot, but thorough professional remediation is often necessary after a fire to fully remove embedded residues.

Cleaning indoor soot requires careful technique. Dry soot should first be removed with a HEPA vacuum to avoid smearing or embedding particles deeper into surfaces. Non-water-based cleaners work best for oily soot, while alkaline cleansers are effective on acidic smoke residues. Testing cleaning products on inconspicuous areas prevents damage to finishes. Ventilation during and after cleaning (opening windows and using fans) helps clear airborne particles and VOCs.

Indoor Source Lung Risk Mechanism
Candles and incense Emit fine particulate matter and VOCs during combustion
Wood-burning fireplaces Release soot and carbon monoxide; residues settle in ducts
Cooking smoke High-heat cooking releases PM2.5 and acrolein; settles on surfaces

Wildfire Smoke as a Major Source of Soot-Related Lung Damage

23H96ggxS4up-6jXMuFD6g

Wildfire smoke is one of the most widespread and harmful sources of soot exposure. In recent years, wildfires have burned millions of acres annually, and smoke plumes can travel thousands of miles from the fire site. A single large wildfire event has transported smoke into North Dakota, South Dakota, Minnesota, and Iowa from fires burning in northern Canada. These plumes carry PM2.5, carbon monoxide, nitrogen oxides, formaldehyde, and other hazardous air pollutants that blanket entire regions, sometimes for days or weeks. The 2003 Southern California wildfires and subsequent events documented in 2006 and 2009 studies showed sharp increases in hospital admissions for respiratory and cardiovascular causes during and after smoke episodes.

Children exposed to wildfire smoke experience higher rates of asthma attacks, bronchitis, colds, and doctor visits for respiratory issues. Adults, especially those with preexisting lung or heart conditions, see worsening symptoms, increased use of rescue medications, and higher emergency department utilization. Even healthy individuals report breathing difficulties, coughing, and eye irritation during heavy smoke events. The particles in wildfire smoke are small enough to penetrate deep into the lungs and enter the bloodstream, triggering inflammation, oxidative stress, and acute cardiovascular events including heart attacks and strokes.

Climate change has extended and intensified wildfire seasons. Higher spring and summer temperatures, earlier snowmelt, drier soils, and prolonged droughts create conditions that allow fires to ignite more easily, burn longer, and spread faster. Lightning strikes and human activities (like discarded cigarettes) serve as common ignition sources. The result is more frequent, larger, and more destructive fires, and more people exposed to hazardous smoke over longer periods.

Five major lung risks from wildfire smoke exposure:

  1. Acute asthma attacks and bronchospasm from PM2.5 inhalation
  2. Increased respiratory infections (bronchitis, pneumonia) due to airway irritation and impaired immune clearance
  3. COPD exacerbations requiring hospitalization and oxygen therapy
  4. Cardiovascular events (heart attack, stroke) triggered by systemic inflammation and blood clotting
  5. Long-term lung function decline in children and adults with repeated seasonal exposures

Protecting the Lungs: Prevention Strategies to Reduce Soot Exposure

OD-Fo1SZQR29xskWjP20Ig

Reducing exposure to soot begins with awareness and planning. During wildfire season or after indoor fires, check the Air Quality Index daily. The AQI translates pollutant concentrations (including PM2.5) into a color-coded scale. When the AQI enters the “unhealthy” range (orange or red), vulnerable groups should stay indoors, close windows, and avoid strenuous outdoor activity. On the worst days (purple or maroon), everyone should limit time outside. The U.S. Environmental Protection Agency and World Health Organization publish guidelines that define safe thresholds for particulate pollution, and local health departments issue advisories when those levels are exceeded.

Indoors, HEPA air purifiers can capture PM2.5 and ultrafine particles, significantly improving indoor air quality. Place purifiers in bedrooms and main living areas, and run them continuously during smoke events. Upgrade HVAC filters to MERV 13 or higher to trap smaller particles. Seal gaps around windows and doors with weather stripping or damp towels to prevent outdoor smoke from entering. Avoid activities that generate additional indoor particles, such as burning candles, using gas stoves without ventilation, or vacuuming with non-HEPA equipment.

When outdoor exposure is unavoidable (during evacuations, firefighting, cleanup work, or commuting through smoky areas), wear a properly fitted N95 respirator. N95 masks filter at least 95% of airborne particles, including PM2.5. Surgical masks and cloth face coverings don’t provide adequate protection against fine particles. Fit is critical. Gaps around the edges allow unfiltered air to bypass the mask. OSHA guidelines recommend respiratory protection for workers exposed to particulate hazards, and employers must provide appropriate respirators and training.

Six practical steps to prevent lung damage from soot exposure:

  1. Monitor the Air Quality Index daily during wildfire season or after fires; stay indoors when AQI is unhealthy
  2. Run HEPA air purifiers continuously in bedrooms and main living areas during smoke events
  3. Upgrade HVAC filters to MERV 13 or higher and seal windows and doors to block outdoor smoke
  4. Wear properly fitted N95 respirators when outdoor exposure is unavoidable
  5. Avoid indoor activities that generate particles (candles, gas stoves, non-HEPA vacuuming)
  6. Seek professional remediation and duct cleaning after any indoor fire to remove embedded soot and VOCs

Final Words

If soot reaches your airways, act fast: watch for coughing, wheeze, shortness of breath, chest tightness, or confusion. Get fresh air and seek medical care if symptoms are serious.

This article walked through what soot is, how PM2.5 and tiny particles bury deep in the lungs, the immediate signs to watch for, tests doctors use, long-term risks, and practical ways to cut exposure at home.

Early action and simple protections help limit soot damage to lungs and get you back to normal.

FAQ

Q: How bad is soot for your lungs?

A: The soot is harmful to your lungs because tiny particles reach deep airways, cause inflammation and reduced lung function, and can worsen asthma or heart conditions; get fresh air and seek care for breathing trouble.

Q: Do lungs heal after smoke damage?

A: Lungs can partly heal after smoke damage. Short exposures often improve over weeks to months, but severe or repeated exposure can cause lasting scarring and chronic lung disease.

Q: How long does it take for dust to damage lungs?

A: Dust can irritate lungs right away, but permanent damage usually needs repeated or heavy exposure over months to years. Some toxic dusts (silica, asbestos) can cause disease faster.

Q: Can the smell of soot make you sick?

A: The smell of soot can make you sick because it signals airborne particles and gases; breathing that air may cause headache, nausea, throat or eye irritation, and breathing problems in sensitive people.

Ceiling Leak Repair Contractors: Fast Emergency Service Near You

0

A ceiling leak doesn’t care if it’s midnight or Monday morning. It just keeps dripping, weakening drywall, soaking insulation, and spreading damage through spaces you can’t see. The longer water sits, the worse it gets. Calling the right ceiling leak repair contractor fast stops active damage, identifies the hidden source, and gets your home dry before structural problems or unwanted growth take hold. This guide shows you how to find verified local contractors, match the right specialist to your leak type, and get emergency repairs started within hours instead of days.

Local Contractor Search and Comparison Resources

aKeZqPYPRbS2fd9ArcnyjA

Start with the search tools you already use. Google Maps, Yelp, and Angi surface ceiling leak repair contractors in your area within seconds. Type “ceiling leak repair contractors near me” and filter for licensed professionals with emergency repair services. Local licensing boards maintain searchable directories of verified contractors, plumbers, and roofers. These lists confirm credentials before you even make a call.

Contractor matching platforms like HomeAdvisor, Thumbtack, and Porch connect you with multiple professionals who provide cost estimates based on your specific leak situation. These services let you describe the problem once and receive quotes from several contractors, saving hours of repeated phone calls. Many platforms show verified reviews, response times, and whether contractors offer free consultations. Check your state’s contractor licensing board website. Most have lookup tools where you can verify a contractor’s license status, insurance coverage, and complaint history.

Identifying which contractor type you need speeds up the entire process. If water appears after rain or storms, start with roofing contractors who handle shingle replacement and flashing repairs. If the leak sits directly below a bathroom, water heater, or kitchen, contact plumbers first. They locate hidden pipe leaks and fix supply line failures. For visible ceiling damage after the leak source is already fixed, general contractors or handymen handle drywall replacement, texture matching, and paint blending. Many ceiling leaks need two specialists: one to stop the water, another to repair the damage.

Request quotes from at least three contractors to compare pricing, timelines, and repair approaches. Most reputable ceiling leak repair contractors offer free consultations where they assess the damage, explain their process, and provide written estimates. Use these consultations to evaluate communication style, thoroughness, and whether the contractor asks detailed questions about your home’s age, ceiling type, and when the leak started.

Emergency Response and Temporary Damage Control

h-OwuBz-Rb2kJjwYiJEl5w

Water dripping through your ceiling creates urgency, but taking controlled steps protects your home until professionals arrive. Immediate damage control prevents a manageable leak from becoming extensive structural failure, harmful growth, or electrical hazards. Safety comes first. If water contacts light fixtures, outlets, or electrical panels, shut off power to affected areas at your breaker box before touching anything.

Never ignore a ceiling leak, even a small one. Water pooling above drywall adds weight that can cause sudden collapse, especially with older plaster ceilings. Small leaks signal bigger problems hidden in wall cavities, attic spaces, or between floors.

Here’s what to do the moment you discover ceiling water damage:

  1. Move belongings and furniture away from the leak zone to prevent secondary damage to valuables and create workspace for repairs.

  2. Contain the water with buckets, plastic bins, or waterproof tarps spread on floors to catch dripping water and prevent it from spreading across flooring.

  3. Relieve bulging ceiling pressure carefully. If the ceiling sags or bulges with trapped water, use a screwdriver to puncture the lowest point and let water drain in a controlled way into a bucket rather than collapsing suddenly.

  4. Shut off the main water supply if you suspect burst pipes, leaking water heaters, or plumbing failures. This stops additional water from entering the damaged area.

  5. Document everything with photos and videos showing the ceiling damage, water source if visible, affected rooms, and damaged belongings for insurance claims.

  6. Call professionals immediately and describe the situation clearly. Mention when the leak started, approximate water volume, and whether it’s ongoing or stopped.

True ceiling leak emergencies require same-day service from contractors who respond within 2 to 4 hours. Active water pouring through, electrical hazards, or structural sagging qualify as emergencies. Urgent situations like discovered water stains with confirmed ongoing leaks typically get same-day assessment, though repairs may start the following day. Standard ceiling leak repairs without active water flow usually schedule within 24 to 48 hours. Ask contractors directly about their emergency response capabilities, after-hours availability, and whether they charge premium rates for immediate dispatch.

Temporary containment measures buy time but don’t fix anything. Professional assessment identifies leak sources you can’t see and prevents damage from spreading through ceiling cavities, wall framing, and insulation.

Identifying Leak Sources and Matching Contractor Specialists

uHBQEqf3TNeXIgQP0zx7OQ

Understanding where ceiling water originates determines which specialist can actually fix the problem. Calling the wrong contractor wastes time and money. A roofer can’t repair a burst pipe, and a plumber won’t replace damaged shingles.

Plumbing-Related Ceiling Leaks

Internal plumbing failures cause most ceiling leaks in lower-floor rooms and spaces below bathrooms, kitchens, or laundry areas. If water appears after someone showers upstairs, while running the dishwasher, or near water heater locations, you’re likely dealing with plumbing issues. Licensed plumbers locate hidden pipe leaks using pressure testing, thermal imaging, and moisture meters that detect water behind walls. They repair or replace leaking supply lines, damaged drain pipes, failed toilet seals, and corroded water heater connections. Plumbers also handle less obvious sources like leaking shower pans, failed tub caulking that lets water seep through subfloors, and condensation from uninsulated cold water pipes. Call plumbers first when ceiling leaks happen regardless of weather, appear directly below plumbing fixtures, or you hear running water sounds inside walls.

Roofing System Failures

Roof-related leaks typically show up on top floors, in attic spaces, or along exterior walls after rain events or snowmelt. Roofing contractors inspect and repair broken or missing shingles, cracked or separated flashing around chimneys and skylights, improperly sealed roof valleys where two slopes meet, and damaged vent pipe boots that let water penetrate. They also address ice dam buildup that forces water under shingles during winter freezes, gutter and downspout problems that overflow and saturate roof edges, and chimney issues including cracked crowns or deteriorated flashing. Skylight leaks require roofing expertise to properly reseal or replace failed weather barriers. Storm damage falls entirely within roofing contractor territory. Wind-lifted shingles, hail impacts, or fallen branches all qualify. Contact roofers when leaks occur during or shortly after precipitation, appear near roof penetrations, or affect upper-level ceilings.

HVAC and Condensation Issues

Sometimes ceiling water isn’t a leak at all. It’s condensation from temperature differences, humidity problems, or HVAC system failures. Uninsulated or poorly ventilated attics create moisture buildup that drips onto ceilings below, especially in humid climates or during temperature swings. Ductwork leaks, particularly from air conditioning systems, generate condensation that saturates insulation and seeps through drywall. Clogged condensate drain lines cause AC units to overflow water into ceiling cavities. Bathroom exhaust fans venting into attics instead of outside create moisture accumulation. HVAC contractors diagnose these issues using humidity testing and duct inspection. Insulation contractors address ventilation and thermal barrier problems that contribute to condensation.

Some ceiling leaks require teamwork between specialists. A roof leak might need temporary tarping from roofers while plumbers check whether bathroom vent pipes penetrating the roof also contributed. General contractors often coordinate multi-trade repairs, scheduling roofers to fix the source, then managing drywall contractors, painters, and finish carpenters to restore damaged ceilings. This coordination prevents scheduling gaps and ensures leak source repairs complete before ceiling restoration begins.

Avoid guessing about leak sources. Misidentification leads to paying for repairs that don’t solve the problem. Professional leak detection services use moisture mapping, infrared cameras, and tracer dyes to pinpoint exact water entry points before recommending which specialist to hire. Spending $150 to $300 on proper diagnosis beats wasting $1,500 on fixing the wrong problem.

Warning Signs That Require Professional Ceiling Leak Contractors

Fy4XxCfnTwqYFynCI64a_w

Recognizing ceiling leak symptoms early prevents minor water intrusion from becoming structural damage, harmful growth, or ceiling collapse. Some signs are obvious. Active dripping water, for instance. But others develop slowly and get ignored until damage becomes expensive.

Watch for these warning signs that professional ceiling leak contractors need to assess your home:

  • Brown, yellow, or rust-colored stains spreading across ceiling surfaces indicate water saturation, even if currently dry
  • Peeling paint or bubbling drywall texture shows moisture trapped behind surface layers, weakening adhesion
  • Sagging or bowed ceiling sections signal water weight accumulating above drywall, creating collapse risk
  • Musty odors suggesting unwanted growth developing in damp ceiling cavities, wall spaces, or insulation
  • Dripping sounds when it’s not raining point to active plumbing leaks hidden inside walls or above ceilings
  • Hairline cracks or spiderweb crack patterns appearing around water-damaged areas as drywall weakens and shifts
  • Water rings that mark the edges of previous leak events, often overlapping as leaks recur (typically light brown circles)
  • Visible growth in corners where ceiling meets walls, appearing as dark spots or fuzzy patches where moisture concentrates

Left unaddressed, ceiling leak damage accelerates. Small water stains expand as leaks continue. Drywall that starts slightly discolored becomes saturated, heavy, and structurally compromised. Unwanted growth spreads from small corner spots to large ceiling sections requiring complete replacement rather than simple patching. Wood framing exposed to ongoing moisture develops rot that requires structural repairs costing thousands more than early leak fixes. Professional contractors assess damage extent accurately, identifying problems you can’t see and preventing minor leaks from becoming major restoration projects.

Comprehensive Repair Process and Prevention Integration

1_gQXYCXTfmjvrmzSjxtbA

Professional ceiling leak repair follows a systematic sequence that addresses both visible damage and hidden moisture problems that cause future issues.

Here’s the complete repair process ceiling leak contractors use from initial assessment through final restoration:

  1. Inspection and damage assessment begins with contractors examining the ceiling, checking surrounding areas, using moisture meters to map water spread, and inspecting attic spaces or upper floors to locate leak sources before starting any repairs.

  2. Water removal and extraction happens immediately using wet/dry vacuums, submersible pumps for standing water, and extraction units that pull moisture from saturated materials. Speed matters because every hour delays unwanted growth risk.

  3. Drying and dehumidification starts during the contractor’s first visit when they place commercial air movers, dehumidifiers, and fans positioned to maximize airflow across wet surfaces. This equipment typically runs 3 to 5 days with technicians monitoring daily to verify moisture levels drop to safe ranges below 15% in building materials.

  4. Damaged material removal strips out wet ceiling drywall, soaked insulation that can’t be salvaged, and any compromised framing members. Contractors cut beyond visible damage to ensure all moisture-affected materials get replaced.

  5. Source repair resolution by plumbing, roofing, or specialized contractors who fix the actual leak before ceiling restoration begins. Without solving the water entry point, repairs fail immediately.

  6. Cleaning, sanitizing, and antimicrobial treatment applied to all exposed surfaces, wall cavities, and framing prevents unwanted development from remaining moisture. Contractors use EPA-registered antimicrobial solutions on wood framing, spray encapsulants on surfaces that can’t be fully dried, and HEPA-vacuum debris before reconstruction.

  7. Ongoing moisture monitoring and adjustment continues throughout the drying process as technicians return to affected spaces, take readings with moisture meters at multiple depths, and adjust equipment placement or add dehumidification capacity if readings don’t decrease as expected. This prevents hidden moisture from supporting unwanted growth after repairs close up wall cavities.

  8. Ceiling reconstruction and finishing rebuilds damaged sections by installing new drywall, matching existing ceiling texture through spray application or hand techniques, priming all new surfaces, applying finish paint matched to surrounding ceiling color, and blending transitions so repairs disappear.

Professional prevention happens at every phase, not as a separate step. Antimicrobial treatments during sanitization create hostile environments for unwanted growth. Controlled drying with specific humidity targets prevents conditions that support development. Moisture monitoring catches hidden dampness before organisms establish. Contractors experienced with water damage know when separate remediation specialists are necessary. Typically when existing growth covers areas larger than 10 square feet, appears in HVAC systems, or affects immunocompromised household members. For most ceiling leak situations, general ceiling leak repair contractors handle prevention measures during normal restoration work.

Quality contractors document moisture readings, photograph each phase, and conduct final inspections before declaring work complete. They verify repairs match existing ceiling appearance. Texture depth, paint sheen, and transitions between new and old sections should be nearly invisible when done right.

Contractor Vetting: Credentials, Reviews, and Red Flags

KtCM4OU2TUaswelgLSpxnQ

Proper licensing, insurance, and verified credentials separate qualified ceiling leak repair contractors from unlicensed handymen who create liability risks and substandard repairs. Homeowner protection depends on hiring contractors who carry the right coverage and demonstrate verified expertise.

Licensing requirements vary by state. Some require general contractor licenses for any work exceeding specific dollar amounts, while others license trades separately. Licensed contractors pass examinations proving code knowledge, maintain continuing education, and operate under regulatory oversight that includes complaint resolution processes. Insurance matters even more. General liability insurance covers property damage caused during repairs, while workers’ compensation protects you if contractor employees get injured on your property. Without these protections, homeowners become legally liable for accidents and damage.

Verify credentials before hiring anyone who’ll work inside your home:

Credential Type Why It Matters How to Verify
State Contractor License Confirms legal authorization to perform repairs and proves basic competency through examination Check state licensing board website or call directly with contractor license number
Liability Insurance Protects your property from contractor-caused damage during repairs Request certificate of insurance and call insurance company to verify active coverage
Workers’ Compensation Shields homeowners from injury claims if contractor employees get hurt on your property Ask for workers’ comp certificate and verify coverage dates include your repair timeline
Manufacturer Certifications Shows specialized training in specific materials, systems, or techniques from product manufacturers Check certification directly with manufacturer or view original certificates, not photocopies
Better Business Bureau Accreditation Indicates business meets BBB standards for ethical practices and has complaint resolution history Search BBB.org for contractor name and review rating, complaint patterns, and resolution responses

Watch for these red flags that signal contractor problems before they start work:

  • Pressure to sign immediately or claims that “today’s price expires tomorrow” indicate high-pressure sales tactics rather than professional service
  • Cash-only payment requests or resistance to providing written contracts suggest unlicensed operation or tax avoidance
  • Unwillingness to provide proof of insurance or licensed status means you’re assuming all liability and legal risk
  • Vague timeline estimates without specific start and completion dates show poor project management or contractor overcommitment
  • Upfront payment demands exceeding 10 to 30% before work begins create risk of contractor disappearance or fund misuse
  • Missing written scope of work detailing specific repairs, materials, and what’s included leaves room for disputes and unexpected charges
  • Generic online presence with no local address, recent reviews, or verifiable past projects suggests new fly-by-night operations

Read contractor reviews across multiple platforms, not just the testimonials they select for their website. Google Reviews, Yelp, and industry-specific sites like Houzz show patterns in contractor performance. Look for recent reviews (within the past year), responses to negative feedback, and whether reviewers mention the same strengths or concerns repeatedly. Photos in reviews showing actual completed work verify quality claims. Ask contractors for references from jobs completed in the past six months with similar ceiling leak repairs. Talk to these homeowners about communication, timeline accuracy, cleanup practices, and whether they’d hire the contractor again.

Ask direct questions during initial consultations about warranty coverage, how they handle unexpected problems discovered during repairs, their process for change orders if scope expands, and who supervises daily work. Qualified contractors answer clearly, provide examples from past projects, and welcome questions rather than deflecting them. Trust your instincts. Contractors who communicate well during estimates usually communicate well during repairs.

Cost Estimates and Pricing Factors for Ceiling Leak Repairs

UIkMGmTLQdesX6NAINrJxA

Ceiling leak repair costs vary dramatically based on leak complexity, damage extent, and materials involved. Simple cosmetic patching might cost $300 to $600, while extensive water damage requiring structural repairs runs $2,500 to $7,500 or more.

Primary cost drivers include leak source identification difficulty. Finding hidden plumbing leaks behind walls costs more than obvious roof damage you can see. Extensive water damage affecting multiple ceiling areas, wall cavities, insulation, and flooring multiplies repair scope and pricing. Material selection impacts costs significantly. Basic flat ceiling drywall replacement costs less than matching specialty textures like knockdown, orange peel, or popcorn finishes. Accessibility issues add expense when contractors need scaffolding for vaulted ceilings, must work around furniture in occupied homes, or repair ceilings above finished living spaces requiring extra protection and cleanup. Geographic location influences both labor rates and material costs, with urban contractors typically charging more than rural areas.

Detailed written estimates should itemize leak source diagnosis fees, water extraction and drying services, material removal and disposal, source repairs (plumbing or roofing), ceiling reconstruction materials and labor, texture matching and paint finish, and cleanup and final inspection. Beware of estimates that show only a single total number without breakdown. You can’t evaluate fairness or compare options without seeing component costs. Emergency service rates run 50 to 100% higher than standard pricing because contractors mobilize crews outside normal hours, prioritize your job over scheduled work, and incur overtime labor costs. Ask whether quoted prices include emergency premiums or assume standard service.

Insurance involvement changes repair dynamics significantly. Document ceiling leak damage immediately with photos, videos, and detailed notes about when water appeared and under what circumstances. Contractors experienced with insurance work provide documentation formats adjusters expect: moisture maps, scope of loss forms, detailed material lists, and repair protocols matching industry standards. Some contractors offer free insurance claim assistance, handling adjuster communication and supplemental claim preparation if initial estimates don’t cover full damage. Get estimates from contractors before filing claims so you understand repair scope and costs. This prevents under-claiming.

Compare quotes from at least three licensed contractors rather than accepting the first estimate. Evaluate total project cost, included services, warranty terms, timeline commitments, and payment schedules. Lowest price often signals cut corners, unlicensed labor, or inferior materials. Highest price doesn’t guarantee quality. It might reflect overhead costs unrelated to your repair. Mid-range estimates from contractors with verified credentials, clear communication, and strong local reviews typically deliver best value.

Specialty Ceiling Repairs and Material Considerations

8bWZf0XGTiWtVjMDGVnf8A

Different ceiling types require specialized contractor skills, specific tools, and material knowledge that general handymen often lack. Choosing contractors experienced with your ceiling style prevents mismatched repairs that stand out visually and fail prematurely.

Ceiling Type Repair Complexity Specialist Required
Standard Drywall (smooth or lightly textured) Low to Moderate General contractor or experienced handyman can handle most repairs
Popcorn or Heavy Texture Moderate to High Drywall specialist with texture-matching experience and spray equipment
Drop or Suspended Grid Systems Low Handyman or ceiling tile specialist for tile replacement and grid adjustment
Plaster (historic homes) High Plasterer with historic restoration experience and traditional technique knowledge
Vaulted or Cathedral Ceilings High Contractor with scaffolding, safety equipment, and access to height-work experience
Specialty Finishes (wood, tin, coffered) High Finish carpenter or restoration specialist matching architectural elements

Texture and paint matching separate obvious patches from invisible repairs. Professional drywall contractors carry texture samples showing common patterns and can replicate existing finishes through spray application, hand troweling, or roller techniques. Paint matching requires more than eyeballing. Contractors take ceiling samples to paint stores for computer color matching, then test patches in inconspicuous areas before painting entire repaired sections. Sheen matters as much as color. Flat, eggshell, and satin finishes reflect light differently, making mismatched sheens obvious even with perfect color.

Ceilings with integrated features complicate repairs significantly. Recessed lighting requires waterproofing around fixtures, electrical inspection if water contacted wiring, and careful reinstallation to maintain fire ratings required by building codes. Ceiling fans need structural support verification. Water damage to ceiling joists might compromise mounting safety. Built-in speakers, sprinkler systems, and HVAC vents all require coordination with specialized trades during ceiling reconstruction. Crown molding and decorative trim removed during drywall replacement needs careful reinstallation, caulking, and paint blending. Contractors experienced with these elements plan removal sequences that minimize damage and coordinate subcontractors efficiently.

Long-Term Prevention Strategies and Maintenance Contracts

D3x-TjekQXSo-1eHBLPOYw

Preventing ceiling leaks costs substantially less than repairing water damage repeatedly. Proactive maintenance protects your investment, extends ceiling repair longevity, and catches small problems before they become emergencies.

Implement these prevention strategies with recommended frequencies:

  1. Annual roof inspections by licensed roofers before winter weather and after major storms to identify damaged shingles, deteriorating flashing, and potential leak points before water enters.

  2. Gutter and downspout cleaning twice yearly (spring and fall) to prevent overflow that saturates roof edges and foundation areas, with additional checks after heavy leaf-fall.

  3. Plumbing system checks every 2 to 3 years including water heater inspection, supply line examination for corrosion or wear, drain testing for slow clogs, and toilet seal verification. Earlier for homes older than 20 years.

  4. Insulation and ventilation assessment in attics and crawl spaces to prevent condensation buildup that mimics leak damage, with particular attention to bathroom exhaust venting properly outside.

  5. HVAC maintenance contracts covering annual service that includes condensate drain line clearing, ductwork inspection for leaks, and humidity control system verification.

  6. Moisture monitoring technology using water leak detection devices placed near water heaters, under sinks, and in basements that alert you via smartphone when moisture appears.

  7. Pipe insulation installation on exposed water lines in unheated spaces before winter to prevent freeze-related burst pipes that cause extensive ceiling damage.

  8. Caulking and seal renewal around tubs, showers, sinks, and roof penetrations every 3 to 5 years as materials deteriorate and allow water seepage.

Maintenance contracts with trusted ceiling leak repair contractors or specialized trades provide scheduled inspections, priority emergency response, and often discounted repair rates. Annual inspection services typically include roof evaluation, plumbing system checks, moisture scanning in known problem areas, documentation with photos of current conditions for future comparison, and written reports identifying concerns before they become urgent. These programs cost $200 to $500 annually but catch problems at the $100 to $300 repair stage rather than waiting for $3,000 emergency fixes.

Contractors who maintain your systems know your home’s history, past leak locations, and vulnerable areas requiring extra attention. This relationship delivers faster emergency response when problems do occur and better repair outcomes because contractors understand your home’s specific construction, previous modifications, and material types.

Working With Contractors on Insurance Claims and Documentation

5H6oInPbS6iO6ZT6jsoEbQ

Proper documentation when ceiling leaks occur determines insurance claim success and affects out-of-pocket costs significantly. Professional contractors experienced with insurance processes provide documentation that adjusters require and can’t easily dispute.

Start documenting immediately when you discover ceiling water damage. Photograph the ceiling from multiple angles showing stain extent, any sagging or structural deformation, water actively dripping or pooled above, affected furniture or belongings, and the suspected water source if visible. Take videos walking through affected areas while verbally describing what you see and when you discovered it. Date-stamp all documentation and save backups to cloud storage before contractors begin emergency mitigation. Insurance companies sometimes question claims lacking proper initial documentation.

Contractors should provide comprehensive insurance documentation including detailed written estimates with line-item breakdowns of all necessary repairs, digital moisture mapping showing water damage extent beyond visible ceiling stains, photographic evidence at each repair phase from initial damage through reconstruction completion, material specifications listing exact products used with pricing, and scope of loss documentation following insurance industry standard formats like Xactimate that adjusters recognize and accept. This level of detail prevents common disputes where adjusters question repair necessity or material costs.

The contractor’s role extends beyond repairs when insurance is involved. Experienced contractors communicate directly with adjusters, explaining technical aspects of water damage, why specific repairs are necessary rather than optional, and what happens if repairs are incomplete. They provide technical assessments about structural impact, unwanted growth risk, and code compliance requirements that homeowners can’t articulate effectively. When initial claim amounts fall short of actual repair costs, contractors prepare supplemental claim documentation showing additional damage discovered during work, unforeseen complications requiring scope expansion, and pricing verification from suppliers.

Keep complete records beyond the claim settlement: final invoices showing all work completed, warranty documentation for materials and labor with coverage terms and contractor contact information, before-and-after photos proving repairs restored your home properly, and receipts for any deductible or out-of-pocket payments. These records protect you if future ceiling problems appear in the same area and you need to prove current repairs were completed correctly. They also provide documentation if you sell your home and buyers request repair history during inspection negotiations.

Residential vs Commercial Ceiling Leak Repair Services

Residential and commercial ceiling leak repairs differ substantially in scope, code requirements, timeline expectations, and contractor specialization. Understanding these differences helps you find contractors properly equipped for your property type.

Residential ceiling leak repairs typically involve single-family homes, condos, or small multi-unit buildings where contractors work directly with homeowners or property managers. Projects focus on matching existing home aesthetics, minimizing disruption to occupied spaces, and using residential-grade materials designed for homeowner budgets and longevity expectations. Residential contractors schedule around family needs, often working during business hours when homes are empty. Timeline flexibility allows for material delivery delays and homeowner decision-making without major financial consequences.

Commercial ceiling leak repairs serve office buildings, retail spaces, restaurants, warehouses, and large apartment complexes where business interruption costs multiply urgency and scheduling demands. Commercial contractors must work around business operations, often nights or weekends, to avoid revenue loss. They coordinate with facility managers, tenants, and sometimes multiple business owners in shared buildings. Commercial projects require higher-grade materials meeting commercial building codes that differ from residential standards, specialized equipment for large-scale water extraction and drying in buildings with complex HVAC and electrical systems, and teams large enough to complete repairs quickly, sometimes mobilizing 10 to 15 workers versus the 2 to 3 typical for residential jobs.

Factor Residential Projects Commercial Projects
Typical Timeline 3 to 10 days depending on damage extent 1 to 3 days for urgent repairs to minimize business disruption
Code Requirements Local residential building codes, basic fire safety Commercial building codes, ADA compliance, fire-rated assemblies, occupancy-specific regulations
Disruption Management Work around family schedules, protect living spaces After-hours work, containment barriers, coordinated tenant notification
Equipment Needs Standard drywall tools, residential moisture meters, household protection Industrial water extractors, commercial dehumidifiers, large-scale air movers, scaffolding systems
Contractor Specialization General contractors, residential handymen, local repair services Commercial restoration companies, licensed commercial contractors with bonding capacity

Verify contractor experience matches your property type before hiring. Ask residential contractors how many homes they repair annually and request references from recent projects similar in size to yours. Question commercial contractors about their largest projects, experience with your building type (office, retail, industrial), and whether they carry commercial-grade liability insurance with coverage limits appropriate for commercial property values. Typically $2 to $5 million versus $500,000 to $1 million for residential work. Multi-unit building specialists should demonstrate tenant communication experience, ability to work in occupied buildings with minimal disruption, and familiarity with property management company requirements.

Questions to Ask Before Hiring Ceiling Leak Repair Contractors

Thorough contractor interviews reveal expertise, communication style, and reliability before you commit to hiring. Prepared questions prevent assumptions that lead to disputes and disappointment.

Ask these questions organized by category when evaluating ceiling leak repair contractors:

Credentials & Experience

  • What specific licenses do you hold, and can I verify them with the state licensing board?
  • How long have you been performing ceiling leak repairs in this area?
  • Can you provide references from three customers with similar ceiling leak repairs completed in the past six months?
  • What manufacturer certifications or specialized training do you have for ceiling restoration work?

Process & Timeline

  • What’s your process for identifying leak sources before starting ceiling repairs?
  • How long will diagnosis, drying, and repair phases take with expected start and completion dates?
  • Do you work on my project continuously, or will crews rotate to other jobs during my repair?
  • What happens if you discover additional damage once ceiling materials are removed?

Pricing & Payment

  • Can you provide a detailed written estimate breaking down labor, materials, and other costs separately?
  • What’s your payment schedule, and how much deposit do you require before starting?
  • Are there scenarios where the final cost might exceed the estimate, and how do you handle change orders?
  • Do you offer payment plans, and do you work with homeowners insurance companies directly?

Warranties & Follow-up

  • What warranty do you provide on labor and materials, and is it in writing?
  • How do you handle warranty claims if issues appear after repairs are completed?
  • Will you provide documentation of all work performed, materials used, and moisture readings throughout the process?
  • Do you offer maintenance agreements or annual inspection services after repairs are complete?

Emergency Response

  • Are you available 24/7 for ceiling leak emergencies, and what’s your typical response time?
  • Do you charge premium rates for after-hours or weekend emergency calls?
  • What emergency services can you provide immediately versus what requires scheduled follow-up?

Compare answers across multiple contractors rather than hiring the first one you contact. Contractors who answer thoroughly, provide specific examples from past projects, offer to show proof of credentials, and explain their process clearly demonstrate professionalism and transparency. Watch for vague responses, reluctance to provide references, or pressure to decide immediately. These signal problems. Trust contractors who welcome your questions, take time to understand your specific ceiling leak situation, and communicate in straightforward language without construction jargon meant to confuse rather than inform.

Final Words

Finding qualified ceiling leak repair contractors doesn’t have to be overwhelming when you know what to look for.

Start with verified credentials, clear communication, and contractors who explain the full process from leak source identification through final restoration.

The right professional will coordinate specialists when needed, provide detailed estimates, and deliver repairs that match your existing ceiling.

When you act quickly and choose experienced contractors, you protect your home from escalating damage and get back to normal faster.

FAQ

How much does it cost to fix a ceiling leak?

The cost to fix a ceiling leak typically ranges from $500 to $2,500, depending on the leak source, extent of water damage, ceiling material type, and accessibility. Simple repairs with minimal drywall replacement cost less, while extensive damage requiring structural work, insulation replacement, and finish matching increases total project costs significantly.

Who should I call to fix a leaking ceiling?

You should call a plumber first if the leak occurs below bathrooms or near pipes, a roofing contractor if the leak happens after rain or storms, or a general contractor who coordinates ceiling leak repairs for comprehensive water damage restoration. The leak source determines which specialist you need, though many restoration contractors handle complete repairs from source identification through final finish work.

Does homeowners insurance cover ceiling leaks?

Homeowners insurance typically covers ceiling leaks caused by sudden, accidental events like burst pipes, storm damage, or appliance failures, but excludes damage from gradual wear, poor maintenance, or neglect. Document all damage immediately with photos and videos, contact your insurance company quickly, and work with contractors who provide detailed estimates and communicate directly with insurance adjusters to support your claim.

How quickly can contractors respond to ceiling leak emergencies?

Professional ceiling leak repair contractors typically respond to true emergencies within 2 to 4 hours, offer same-day service for urgent situations to prevent mold growth and structural damage, and schedule standard repairs within 24 to 48 hours. Emergency response includes water extraction, temporary containment, leak source identification, and damage stabilization before comprehensive repairs begin.

What causes most ceiling leaks in homes?

Most ceiling leaks come from roof damage like missing shingles or failed flashing, plumbing failures including leaking pipes or toilet seals, clogged gutters forcing water into attic spaces, HVAC condensation or duct leaks, and ice dam buildup in cold climates. Identifying the actual source before hiring contractors prevents costly misdiagnosis and ensures you contact the right specialist.

How long does professional ceiling leak repair take?

Professional ceiling leak repair typically takes 3 to 7 days from initial water extraction through final paint touch-up, though timelines vary based on damage extent and drying requirements. Emergency stabilization happens day one, drying and dehumidification takes 2 to 4 days to prevent microbial growth, and rebuilding with drywall replacement, texture matching, and finish work follows once moisture levels are safe.

What credentials should ceiling leak repair contractors have?

Ceiling leak repair contractors should carry valid state licensing for their trade, liability insurance protecting your property, worker’s compensation coverage, and bonding for financial protection. Look for specialized certifications in water damage restoration, documented experience with your ceiling type, verifiable local references, and membership in industry associations that require ongoing training and code compliance.

Can contractors match existing ceiling texture after repairs?

Professional contractors can match most existing ceiling textures including knockdown, orange peel, skip trowel, and popcorn finishes using specialized tools and techniques. Texture matching requires skill and experience, so ask to see portfolio examples of previous ceiling repairs, understand that slight variations may occur with older textures, and expect professionals to blend repairs into surrounding areas for seamless transitions.

When do ceiling leaks require mold remediation specialists?

Ceiling leaks require separate mold remediation specialists when visible microbial growth covers more than 10 square feet, contamination spreads into HVAC systems, structural materials show extensive decay, or occupants experience health symptoms. Most ceiling leak repair contractors handle mold prevention through quick drying, antimicrobial treatments, and moisture monitoring, but severe contamination needs certified remediation before rebuilding begins.

What documentation do I need for ceiling leak insurance claims?

You need immediate photos and videos showing active leaking and visible damage, a detailed written estimate from licensed contractors including scope of work and material specifications, moisture readings documenting water intrusion extent, and records of emergency mitigation steps taken. Professional contractors experienced with insurance work provide comprehensive documentation, communicate technical assessments to adjusters, and help maximize your claim while ensuring code-compliant repairs.

How do I prevent future ceiling leaks?

You prevent future ceiling leaks by scheduling annual roof inspections, cleaning gutters and downspouts quarterly, maintaining plumbing systems and fixing small leaks immediately, insulating pipes in unheated spaces to prevent freezing, and checking attic ventilation to control condensation. Consider maintenance contracts with trusted contractors who perform regular inspections, install water leak detection devices near water heaters, and address minor issues before they become expensive emergencies.

What’s the difference between emergency and standard ceiling leak repair pricing?

Emergency ceiling leak repair typically costs 50 to 100 percent more than standard repairs because of after-hours response, immediate equipment deployment, and rapid crew mobilization to prevent escalating damage. Standard repairs scheduled during business hours cost less but risk additional water damage, structural deterioration, and microbial growth if you delay professional response for active leaks or saturated ceiling materials.

Wall Studs Water Damage: Spotting and Fixing Structural Issues

0

Think a brown stain on drywall is just a cosmetic problem? Think again.
Wall studs water damage can hide behind paint and quietly weaken framing.
You might smell a musty odor, press the wall and find it spongy, or see baseboards pulling away.
This post shows how to spot the signs, confirm hidden moisture with simple checks, and walk you through spotting and fixing structural issues in studs so you know when to repair, sister, or replace them.
Act fast. Small leaks become big repairs.

Identifying Water Damage in Wall Studs

6Gn6DUAWQG-csYqUlPZZNg

Water damage behind drywall doesn’t show up with a dramatic burst or puddle. Most of the time, you’re catching it weeks or even months after moisture’s already soaked into the studs and started eating away at the wood.

The first thing you’ll see is discoloration on the drywall itself. Brown or yellow stains that bleed outward from wherever the leak started. Paint might bubble or peel in vertical strips that follow where the stud runs. Press the wall gently. If it feels spongy or gives under your hand, moisture’s already saturated the stud behind it. You might also notice baseboards pulling away, warping, or darkening along the bottom edge where they meet the floor.

A musty smell that won’t go away, even after you clean, almost always means moisture’s been sitting in the wall cavity long enough to encourage mold. If the smell gets stronger when you run your hand along a certain section, that’s your starting point for closer inspection.

When you need to confirm what’s happening inside the wall, here are six ways to verify hidden moisture in the studs:

  • Moisture meter readings above 16% in wood mean active water intrusion (normal indoor wood stays between 6% and 12%)
  • Infrared camera scans showing cool spots or temperature differences along stud lines, which signal wet material holding onto moisture
  • Probing studs through small inspection holes with a flat screwdriver or awl. Soft or crumbling wood means rot’s started.
  • Checking for texture changes in drywall like sagging, rippling, or crumbly paper that tears easily when you touch it
  • Looking for visible mold colonies on baseboards, trim, or drywall seams near the suspected stud
  • Tracking musty odor patterns by smell testing along the height of the wall to locate where the moisture is concentrated

If a moisture meter consistently reads above 20%, or if you see black streaks running vertically behind removed drywall, the studs are holding too much water and need immediate attention. Any time more than one stud in a load bearing wall shows signs of rot or structural softening, stop and call a licensed contractor or structural engineer before you remove anything.

Common Causes of Water Damage Behind Walls

2pqha8nDQCS7J-4zKzof-g

Most stud damage starts with plumbing. A slow drip from a supply line, a pinhole leak in a drain fitting, or a corroded valve behind a washing machine can run for months before anyone notices. The water travels down inside the wall cavity, soaking insulation and studs from the top of the leak all the way to the bottom plate. By the time drywall shows a stain, the framing may already be soft.

Roof leaks and window failures are just as common, especially in older homes. Water enters through missing shingles, cracked flashing around chimneys, or poorly sealed window frames. Then it follows the path of least resistance down the inside of exterior walls. Gutters that overflow or discharge too close to the foundation can also push water through exterior sheathing, particularly if siding joints are cracked or caulking’s failed. Once moisture gets past the exterior envelope, it saturates the studs from the outside in.

Interior humidity problems contribute more than most homeowners expect. Bathrooms without exhaust fans, kitchens with undersized ventilation, and basements with chronic condensation all create conditions where moisture condenses on wall surfaces and works its way into cavities. Laundry rooms are bad for this too, especially those with dryers vented improperly or not at all. They can pump enough humid air into a space to rot studs over time. If you can see condensation on windows or walls during cold weather, the studs are likely absorbing moisture too.

Assessing Structural Risks of Damaged Studs

vLl6fX2uQ96Ib-uM5p2CjA

Not all water damage to studs requires full replacement, but you need clear criteria to decide whether a stud can be salvaged or must come out. The difference matters because load bearing studs support the weight of the structure above them. Compromised framing can lead to sagging ceilings, cracked drywall, or worse.

Start by measuring moisture content with a pin type meter. If the reading stays above 18% after you’ve stopped the water source and allowed at least 72 hours of drying with fans and a dehumidifier, the wood is holding too much moisture to repair in place. Any reading above 20% means active saturation, and the stud is at high risk for rot and mold colonization.

Next, check these four factors to determine replacement urgency:

  • Wood softness level. If you can push a screwdriver into the stud more than a quarter inch with hand pressure, the wood’s lost structural integrity.
  • Mold penetration. Surface mold on studs can often be treated, but black or green colonies that run deep into the grain indicate the wood is too far gone.
  • Moisture content percentage. Sustained readings above 20% mean replacement, especially in load bearing walls.
  • Wall load bearing role. Exterior walls, walls running perpendicular to floor joists above, and walls supporting roof trusses are load bearing. Damage to these studs requires professional evaluation and often temporary shoring before removal.

If rot affects more than 30% of a stud’s cross section, or if decay runs for more than 12 inches vertically, plan to replace the entire stud. Partial repairs using epoxy fillers or wood hardeners work only for shallow surface damage on non load bearing studs where structural strength isn’t critical. Any visible bowing, sagging, or cracking in the framing around a damaged stud is a red flag. Stop work and call a structural contractor or engineer before you proceed.

Repair Methods for Water‑Damaged Wall Studs

BTU0JxTsSmaRAuoKtNZWkA

Repairing water damaged studs starts the moment you confirm the moisture source is stopped. Until the leak is fixed, any drying or repair work is temporary.

Once the source is under control, the priority shifts to drying the wall cavity as fast as safely possible. Pull off baseboards and cut away drywall at least two feet above the highest moisture mark. Cutting on stud centers gives you clean edges to attach new drywall later. Remove all wet insulation. It won’t dry properly and will hold moisture against the framing. Set up at least one dehumidifier in the room and aim high velocity air movers at 45 degree angles toward the exposed studs. Seal off the room with plastic sheeting if you can to concentrate the drying. Keep the space between 70 and 90 degrees, and recheck moisture levels every 24 hours. Most studs dry to safe levels in 48 to 72 hours, but thicker lumber or poorly ventilated cavities can take longer.

After drying, assess each stud. If the wood is still firm and moisture readings are below 15%, you can treat surface mold with an EPA registered antimicrobial solution and move to rebuilding. If a stud shows localized rot but the damage is small and non structural, you can sister a new stud alongside it. Fasten a full length 2×4 next to the damaged one with construction adhesive and 3 inch screws every 12 inches. The new stud shares the load and restores strength.

When a stud is too compromised to sister, it has to come out entirely. Here’s the step by step replacement process:

  1. If the stud is load bearing, install temporary support under the header or top plate using adjustable jacks or a horizontal 2×4 shore before you remove anything.
  2. Cut through the damaged stud near the top and bottom plates using a reciprocating saw, then pry out the pieces.
  3. Measure and cut a new 2×4 to fit snugly between the plates. The new stud should be the same length as the old one or slightly longer to create a friction fit.
  4. Slide the new stud into place, tapping it with a hammer if needed, then toenail or screw it to the top and bottom plates with at least two fasteners per connection point.
  5. Remove temporary shoring once the new stud is secured, then treat all exposed framing with antimicrobial solution before closing the wall.

If multiple studs are damaged, or if the bottom plate itself is rotted, the scope grows quickly. Replacing plates often means cutting into flooring and dealing with fasteners you can’t see. That’s where most DIY repairs stop and professional help starts.

Preventing Future Water Damage to Wall Studs

OG6ll7lNQMykrauMgi7qtw

The best repair is the one you never have to do. Most stud damage is avoidable if you catch leaks early and control humidity before it soaks into the walls.

Start with a quarterly walk through of every plumbing fixture and appliance in the house. Look under sinks for drips, check supply lines to toilets and washing machines for corrosion or bulging, and run your hand along exposed pipes in basements and crawlspaces to feel for dampness. Install water leak detectors behind washing machines, under water heaters, and near sump pumps. They cost $20 to $50 each and will alert you to leaks before drywall gets soaked. Inspect your roof twice a year, especially after heavy storms, and clear gutters and downspouts so water discharges at least six feet away from the foundation.

Inside the house, control humidity with properly sized exhaust fans in every bathroom and above the stove. Bathrooms need at least 1 CFM of ventilation per square foot of floor area, and fans should run for at least 20 minutes after showers. If you see condensation on windows or mirrors that doesn’t clear within an hour, your ventilation isn’t keeping up. Basements and crawlspaces should stay below 50% relative humidity year round. Use a dehumidifier if levels creep higher, and make sure it drains automatically so you don’t have to remember to empty it.

Exterior moisture barriers matter as much as interior ventilation. Check window and door caulking annually and re seal any gaps before water finds its way in. Make sure your home’s grade slopes away from the foundation at least one inch per foot for the first six to ten feet. If you have a vapor barrier in exterior walls, confirm it’s intact during any remodeling work. Tears or gaps let humid indoor air condense on cold sheathing and studs, which leads to the same rot as a direct leak, just slower.

Final Words

You spot a dark stain and the trim feels soft — act fast. This post walked you through spotting visual and hidden signs, common causes, and the tools pros use like moisture meters and infrared scans.

We explained how to judge structural risk, when to dry versus replace, the repair steps, and simple prevention like vapor barriers and better ventilation.

No guesswork. If you suspect wall studs water damage, document what you see and get an inspection. Quick action stops more harm and gets your home back to normal.

FAQ

Q: Do water damaged studs need to be replaced?

A: Water-damaged studs need replacing when they are soft, rotten, moldy, or lose structural strength; mildly damp studs can often be dried and treated, and we confirm with moisture readings before cutting anything out.

Q: Is sheetrock ruined if it gets wet?

A: Sheetrock isn’t always ruined if it gets wet. Surface damp can often dry, but sagging, crumbling, foul-smelling, or moldy drywall usually needs removal and replacement to stop ongoing damage.

Q: How much does it cost to replace all my house studs?

A: The cost to replace all house studs varies by home size, wall count, and extra repairs; expect several thousand to tens of thousands of dollars. Get an on-site estimate and a documented scope for insurance.

Q: How long does it take for drywall to dry after water damage?

A: Drying time for drywall after water damage depends on how wet it is and conditions. Surface drywall may feel dry in 24 to 72 hours, while inside layers can take days to weeks. Verify with moisture meters.

Removing Soot Smell from House: Simple Steps That Work

0

If you think airing out the house for a few hours will get rid of soot smell, you’re about to be disappointed. Soot doesn’t just float around waiting to blow outside. It embeds itself in fabrics, soaks into drywall, settles deep in your HVAC ducts, and keeps releasing that smoky odor for weeks or months if you don’t attack it properly. This guide walks you through the real three-part process: assess and ventilate first, deep clean everything the soot touched, then neutralize lingering odor with methods that actually work.

Effective Strategies for Eliminating Soot Odor

pAmV0Gr-TniOS5Un7AR_vA

Getting soot smell out of your house takes a three part approach: assessment and ventilation first, then deep cleaning everything the soot touched, and finally targeted odor neutralization using both natural methods and mechanical equipment. Soot doesn’t just sit on surfaces where you can see it. It embeds itself in fabrics, soaks into porous materials like drywall and wood, travels through your HVAC system, and settles in spots you’d never think to look. Air fresheners won’t touch this problem because you’re fighting microscopic combustion particles that stick to everything and keep releasing smell over time.

The sections below walk through each phase step by step. We’ll start with identifying your specific soot source and making sure it’s safe to begin work, then move through ventilation techniques, surface specific cleaning methods, and finally odor absorption and air purification strategies. The process takes anywhere from a few days for minor candle soot to several weeks for extensive fire damage, depending on how much soot you’re dealing with and how fast you get started.

Identifying the Soot Source and Assessing Damage Severity

qsbYu8S4T8ebzyFgIe-q1Q

What caused your soot problem determines which cleaning methods will actually work and whether you can handle it yourself or need professional help.

Common soot sources include fireplace backflow when downdrafts push smoke into your living space instead of up the chimney, scented candles burning wrong and producing black smoke, furnace puffback incidents where oil burners misfire and blast soot throughout your ductwork, cooking fires that spread greasy smoke residue, and actual house fires of any size. Each source produces different types of soot. Some dry and powdery, others oily and sticky. They respond to different cleaning approaches.

Soot Source Soot Type DIY or Professional
Fireplace backflow Dry soot DIY
Candles burning improperly Dry soot DIY
Furnace puffback Oily soot Professional
Minor cooking incident Dry soot DIY
House fire Both types Professional

Assess your damage by examining how much area the soot covers, whether it wipes away easily or feels greasy, and how long it’s been sitting there. Dry soot appears powdery and brushes off somewhat easily with a dry sponge. Oily soot feels sticky and smears when you touch it. Time matters because acidic soot compounds corrode metal surfaces within hours and cause permanent discoloration on porous materials like wood, wallpaper, and painted drywall if you don’t remove them quickly. If you see widespread oily residue, notice soot inside your heating vents, or find permanent staining on surfaces, you’re looking at professional level work.

Essential Safety Precautions Before Removing Soot Smell

ag1Bvfd3SZqehhPevl0rVg

Soot contains toxic combustion byproducts and acidic compounds that pose real health risks when inhaled or absorbed through skin. Those same acidic compounds start corroding metal surfaces and degrading materials within hours of contact.

Before starting any cleaning work, gather this protective equipment:

  • N95 or P100 respirator masks to prevent inhaling fine particles
  • Rubber or nitrile gloves to protect skin from acidic compounds
  • Eye protection to keep particles out of eyes
  • Long sleeves and pants to minimize skin exposure
  • Closed toe shoes that you can clean or discard afterward
  • Hair coverage to keep soot out of hair
  • Disposable coveralls for heavy contamination situations

Any food that was exposed to soot or smoke, even if it looks perfectly fine and was sealed in packaging, must be thrown out. Combustion particles carry harmful chemicals that contaminate food, and no amount of washing or wiping makes it safe to eat. This applies to pet food too.

Keep children and pets completely away from affected areas during cleaning. Dispose of heavily contaminated items in sealed bags rather than trying to save everything. Don’t track soot from contaminated rooms into clean areas of your house. Remove shoes and coveralls before moving between spaces. Recognize that extensive fire damage, widespread oily soot, or situations involving structural concerns require professional remediation both for safety and because insurance companies often require documented professional services for claims.

Immediate Ventilation Methods for Soot Odor Control

bSY5l7S0TvS7yUmk2v2aDQ

Ventilation is your critical first step, but understand that it won’t solve the problem by itself since soot particles stick to surfaces and won’t blow away completely.

Create cross ventilation by opening windows on opposite sides of your house so fresh air flows through rather than just circulating contaminated air. Open interior doors between rooms to allow airflow to reach all affected spaces. Prioritize the rooms with the heaviest soot exposure first. Get air moving there before worrying about lightly affected areas.

Position fans strategically using these steps:

  1. Place box fans in windows facing outward to exhaust contaminated air outside rather than recirculating it
  2. Position additional fans to direct airflow from clean areas toward contaminated zones, pushing dirty air toward the exhaust fans
  3. Run bathroom and kitchen exhaust fans at maximum settings to help pull air out of the house
  4. Avoid using ceiling fans, which just circulate particles around the room without removing them
  5. Maintain this ventilation setup for a minimum of 24 to 48 hours for light soot exposure, longer for heavier contamination

Replace your HVAC air filters immediately. Smoke particles clog filters fast and then get blown throughout your ductwork, spreading contamination to every room. Keep your heating and cooling system turned off during this initial ventilation phase to prevent circulating contaminated air through your ducts before you’ve had a chance to clean. If smoke entered your HVAC system at all, schedule a professional duct inspection because particles settle deep inside ductwork where you can’t reach them, and they’ll keep releasing odor every time your system runs.

Deep Cleaning Hard Surfaces to Eliminate Soot Residue

9OISOvGRRVKZt14qvxNTpQ

Always clean from top to bottom. Start with ceilings and work your way down to baseboards so you’re not contaminating already cleaned surfaces with soot that falls from above.

For dry soot, begin with a chemical dry sponge, also called a soot sponge, before using any water. These specialized sponges lift dry soot particles without smearing them. Work in overlapping strokes across the surface, and rotate or replace sections of the sponge as they become saturated with soot. If you keep using a dirty section, you’ll just smear soot around. After dry sponging, follow up with damp cleaning using either mild detergent mixed with water or a white vinegar solution made from one cup of vinegar per gallon of water.

Clean all these hard surfaces thoroughly:

  • Ceilings, working in small sections
  • Walls, starting at the top and working down
  • Baseboards and all trim work
  • Door frames and both sides of doors
  • Window frames, sills, and glass
  • Cabinet exteriors and interiors after removing contents
  • Countertops and backsplashes
  • Light switch plates and outlet covers

Oily soot won’t respond to simple detergent and requires TSP cleaner, trisodium phosphate, or a commercial degreaser formulated for smoke damage. Test any strong cleaning solution in an inconspicuous area first to make sure it won’t damage the finish. Oily soot that covers large areas or has penetrated porous surfaces may need professional cleaning equipment and solvents that aren’t available to consumers.

If visible staining remains after thorough cleaning, if odor keeps seeping from walls even after they’re clean, or if your existing paint finish was damaged during cleaning, you’ll need to apply an odor sealing primer before repainting. Use products specifically rated for smoke damage like Kilz or Zinsser BIN. Regular primer won’t block odor compounds from continuing to off gas through the new paint.

Carpet and Upholstery Soot Deodorizing Techniques

7tW6Y3RQQiq-J-cjExG3Sw

Carpets and upholstery present special challenges because their porous fibers trap soot particles deep inside where surface cleaning can’t reach. Standard vacuum cleaners with rotating brushes can push particles deeper instead of removing them, and using too much moisture or the wrong cleaning chemicals can permanently set stains.

Follow this treatment process for carpets and upholstered furniture:

  1. Vacuum thoroughly using a vacuum with a HEPA filter, making slow overlapping passes to capture as many particles as possible. For upholstery, use a handheld attachment without beater bars since rotating brushes force soot deeper into fabric.
  2. Sprinkle baking soda liberally over the entire surface, covering it completely
  3. Work the baking soda gently into the fibers using a soft brush, but don’t scrub aggressively
  4. Leave the baking soda in place for a minimum of 12 to 24 hours to absorb odor compounds
  5. Vacuum again thoroughly with your HEPA filtered vacuum, and repeat the entire process if odor persists after the first cycle

Test any cleaning solution on a hidden area before applying it to visible surfaces. Check an area under furniture or in a closet to make sure the cleaner won’t cause discoloration or damage. Avoid excessive moisture that can spread soot deeper into padding or cause mold growth, especially if you’re working with upholstery that dries slowly. Keep furniture pieces away from carpets during treatment to prevent cross contamination where furniture legs contact carpet fibers.

Professional carpet and furniture cleaning becomes necessary when odor remains after two complete DIY treatment cycles, when you see visible staining that home methods won’t remove, when you’re dealing with oily soot contamination that requires specialized extraction equipment, or when you’re treating high value furnishings where mistakes would be costly.

Cleaning Washable Fabrics Affected by Soot Odor

fs3OP1zlRNWqPuZU0oruCw

Washable items that need attention include all clothing that was in affected areas, bedding and pillows, towels and washcloths, removable curtains and drapes, washable furniture slipcovers, and table linens.

For items exposed to dry soot, sort everything by fabric type and color as you normally would, then use the hottest water temperature the fabric care label allows since heat helps release embedded smoke smell. Add one cup of white vinegar to the wash cycle along with your regular detergent. The vinegar neutralizes acidic odor compounds that detergent alone won’t remove. Include a commercial odor eliminator product if the smell is particularly strong, and run an extra rinse cycle to make sure all cleaning residue is removed.

Follow these best practices for smoke affected laundry:

  • Air dry items outdoors in sunlight whenever possible since UV exposure helps break down remaining odor compounds
  • Avoid putting items in the dryer until odor is completely gone because dryer heat can permanently set smoke smell into fibers
  • Inspect items carefully after washing and rewash anything that still smells before drying
  • Send delicate fabrics and anything labeled “dry clean only” to professional cleaners rather than risking damage
  • Never put items with oily soot residue in your washing machine because the oily compounds can clog your machine’s pump and spread contamination to other laundry

Professional dry cleaners have specialized solvents designed for smoke odor removal that work better than water based home washing for certain items. Send suits, wool garments, silk clothing and draperies, structured curtains with linings, and anything labeled “dry clean only” to cleaners who have experience with smoke damage. Tell them specifically about the soot exposure so they use appropriate treatments.

Addressing Hidden Areas Where Soot Smell Accumulates

cUM8eJc1T5m-o6Bnkh8akQ

Soot particles settle everywhere, including spaces you don’t see during daily life. These hidden locations keep emitting odor even after you’ve cleaned all visible surfaces.

Hidden Location Cleaning Method Priority Level
Closet interiors Wipe walls and shelves, remove all items first High
Dresser drawers Empty completely and wipe all interior surfaces Medium
Light fixtures Remove covers and shades, wash thoroughly Medium
Behind appliances Pull out refrigerator, stove, washer to vacuum and wipe High
Inside cabinets Empty and wipe all surfaces including tops High
Air ducts and vents Professional cleaning required High for fire events
Attic and crawl spaces Professional assessment recommended Medium

Your HVAC system deserves special attention because smoke particles circulate through ductwork every time the system runs, continuously recontaminating spaces you’ve already cleaned. Replace your filters immediately. This isn’t optional. Vacuum and wipe down all supply and return vents you can access. For any significant smoke event, professional duct cleaning is essential because particles settle deep inside ductwork where home cleaning methods can’t reach them.

Professional HVAC duct cleaning costs vary based on contamination severity and your system size. Routine duct cleaning for maintenance purposes typically runs $300 to $500, but smoke remediation cleaning that requires specialized equipment and multiple passes through the system ranges from $500 to $2,000. That investment stops your ventilation system from recontaminating your home every time it cycles on.

Natural Odor Absorbers for Soot Smell Neutralization

2vj0ekJ5TfaPo5H2T4bYug

Natural absorbers work continuously to capture airborne odor molecules and provide safe, affordable odor control that complements your mechanical cleaning efforts.

Use these methods throughout your home:

White vinegar bowls. Place uncovered bowls containing 1 to 2 cups of white vinegar in each affected room, replacing the vinegar every 24 hours. Alternatively, simmer a 50/50 vinegar water solution on your stovetop for 30 minutes to treat the whole house at once. The vinegar smell dissipates as it dries, taking smoke odor with it.

Activated charcoal bags. Position bags near odor sources, in closets, and in central room locations. These bags adsorb odor molecules from the air. Recharge them monthly by placing in direct sunlight for several hours.

Baking soda boxes. Open boxes of baking soda and place them in closets, drawers, and around rooms. Replace monthly as the baking soda becomes saturated with absorbed odors.

Coffee grounds. Use fresh, unused coffee grounds in breathable fabric bags or open containers for enclosed spaces like cabinets. The grounds absorb odors without adding coffee scent to your belongings.

Lemon water. After completing all cleaning work, simmer lemon slices in water on your stovetop to add fresh scent. This is a finishing touch, not a treatment method.

These natural absorbers work by capturing volatile organic compounds that cause odors, neutralizing acidic odor molecules through chemical interaction, and providing continuous odor control between your active cleaning sessions. They work by absorption, physically trapping odor molecules, and neutralization, chemically altering odor compounds so they no longer smell.

Natural absorbers supplement but don’t replace physical cleaning. They work best after you’ve removed soot residue from surfaces. Otherwise you’re trying to absorb odors that are still being generated by contaminated materials.

Air Purification Systems for Persistent Soot Odor

Y9O4t9e4RWiTb2_RBninkQ

Mechanical air purification removes airborne soot particles and odor molecules that cleaning alone cannot address. These microscopic particles remain suspended in your home’s air for extended periods, standard ventilation doesn’t capture them before they resettle on surfaces, and continuous filtration prevents the recontamination of areas you’ve already cleaned.

Effective air purification requires dual filtration technology working together. HEPA filters capture 99.97% of particles 0.3 microns and larger, including soot particles, ash, and solid combustion byproducts that cause visible residue. Activated carbon filters handle what HEPA can’t. They adsorb gaseous odor molecules and volatile organic compounds that pass right through HEPA material. You need both filter types because soot odor comes from both solid particles and gaseous compounds.

Run your air purifiers effectively by following these steps:

  1. Select a unit sized appropriately for your room’s square footage with a CADR, Clean Air Delivery Rate, rating specifically for smoke particles
  2. Position the purifier in a central location at least one foot away from walls so air can circulate freely around all sides
  3. Run continuously on the highest setting for the first 48 to 72 hours to remove the bulk of airborne contamination
  4. Replace filters according to the manufacturer’s schedule, or sooner if they appear visibly dirty when you check them
  5. Use multiple units for whole house treatment since most residential purifiers are designed to treat one room effectively

Professional air purification systems offer capabilities beyond consumer models for severe contamination situations. Commercial grade air scrubbers process much higher air volumes per hour, use medical grade HEPA filtration that captures even smaller particles, include multiple activated carbon stages for aggressive odor removal, and are available through restoration companies for temporary rental during intensive remediation projects. Light smoke exposure may clear in one to two days with ventilation and residential air purification. Heavy, ingrained smoke smells require deep cleaning, natural absorption methods, and continuous operation of HEPA air purifiers with activated carbon filtration.

Commercial Odor Neutralizers and Soot Smell Encapsulation

Commercial products that neutralize or encapsulate odors work differently than air fresheners and scented sprays, which only mask smells temporarily without addressing the underlying odor sources.

Enzymatic odor neutralizers contain biological enzymes that break down organic odor compounds at the molecular level, permanently eliminating them rather than covering them up. Apply these products after you’ve completed surface cleaning, allow the recommended dwell time of 6 to 24 hours for the enzymes to work, and expect best results on porous surfaces like unsealed wood and concrete where odor molecules have penetrated deeply.

Use these specialized products for different situations:

Enzymatic spray cleaners. Apply to fabrics, unsealed wood, and other porous surfaces after initial cleaning.

Hydroxyl generating devices. Professional equipment that treats entire rooms by producing hydroxyl radicals that break down odor compounds in air and on surfaces.

Odor blocking primers. Oil based or shellac based primers applied to walls and ceilings before repainting to seal in odors that cleaning couldn’t remove.

Commercial smoke sealants. Applied to permanently affected wood surfaces to encapsulate odor compounds.

Professional grade vapor barrier paints. Used for severe odor encapsulation when standard primers aren’t sufficient.

Odor sealing primers deserve special attention because they’re essential when porous drywall or plaster has absorbed smoke compounds too deeply for cleaning to remove. Apply primer only after cleaning and completely drying the surface. Primer can’t seal in surface contamination. Use products specifically rated for smoke damage like Kilz, Zinsser BIN, or similar primers that list smoke odor blocking in their specifications. These primers require proper ventilation during application because they contain strong solvents.

Surface sealing with primers and vapor barrier paints is a last resort solution for when cleaning, absorption methods, and air purification don’t eliminate odor from porous building materials. It works by creating an impermeable barrier that prevents trapped odor compounds from off gassing into your living space. Once sealed, those surfaces won’t release smell even though odor compounds remain trapped inside the material.

Professional Soot Odor Removal Services and Methods

Professional intervention becomes necessary when odor persists despite thorough DIY cleaning efforts, when you’re dealing with extensive fire damage affecting multiple rooms, when oily soot contamination requires specialized solvents and equipment you don’t have access to, when your HVAC system is contaminated and needs complete servicing, when structural damage raises safety concerns, or when insurance coverage requires documented professional services for your claim.

Professional fire damage restoration companies provide specialized services and equipment that go beyond consumer level solutions.

Ozone Treatment

Ozone generators produce O3 molecules that oxidize and chemically break down odor compounds at the molecular level, destroying them rather than masking or absorbing them. Treatment requires complete evacuation of all people, pets, and plants for the entire treatment period, typically 24 to 48 hours, followed by an extended ventilation period of several hours before the space is safe to reoccupy. Ozone treatment remains controversial. Some restoration professionals swear by it while others avoid it due to concerns about material damage and health risks if not performed correctly. This is not a DIY method because improper ozone exposure damages lungs and degrades certain materials.

Thermal Fogging

Thermal fogging heats a deodorizing solution until it vaporizes into a fog that penetrates fabrics, wall cavities, and hidden spaces following the same paths smoke originally traveled. The fog particles neutralize odors through direct chemical interaction with odor compounds. Only trained technicians with specialized heating equipment perform this service, and it’s typically combined with other cleaning methods rather than used as a standalone treatment for comprehensive odor elimination.

Professional HVAC and Duct Cleaning

Professional duct cleaning for smoke remediation includes inspection of your entire system to locate all contamination, mechanical agitation using specialized brushes and air whips to dislodge particles stuck to duct walls, powerful vacuum extraction to remove loosened soot, sanitization of system components with antimicrobial treatments, complete filter replacement throughout the system, and verification testing to confirm proper operation and air quality.

Full service restoration companies coordinate every aspect of recovery as an integrated service: initial damage assessment with documentation for insurance, emergency stabilization to prevent further damage, comprehensive cleaning of all affected materials, necessary repairs to damaged building components, and finish work to restore your home’s appearance. Working with one company that handles the complete sequence eliminates coordination headaches and ensures each phase is completed properly before the next begins.

Timeline Expectations for Soot Smell Removal Success

How long complete odor removal takes depends on how much soot exposure occurred, how quickly you start remediation after the incident, and which cleaning methods you use.

Contamination Level Typical Timeline Methods Required
Minor (candle soot, single room) 2 to 5 days Ventilation, surface wiping, natural absorbers
Moderate (fireplace backdraft, multiple rooms) 1 to 2 weeks Deep cleaning, laundering, air purification, odor neutralizers
Severe (furnace puffback, oily soot) 2 to 4 weeks Professional cleaning, HVAC service, possible primer/repainting, ongoing air treatment
Extensive (house fire) 4 to 12 weeks Full professional restoration, structural repairs, complete remediation

Some cases take longer than others for specific reasons. Oily soot requires specialized solvents and more aggressive treatment than dry soot, often needing multiple cleaning passes. Delayed response allows soot to penetrate deeper into porous materials where it becomes harder to remove. Quick action makes everything easier. High humidity environments slow drying and prolong odor because moisture keeps odor compounds active. Some materials eventually need replacement rather than cleaning when odor has penetrated too deeply or when the cost of cleaning exceeds replacement value.

You’ll know you’re finished when the odor is no longer detectable when you come inside from fresh air outdoors. Your nose adjusts to constant smells, so stepping outside and coming back in gives you a fresh perspective. When no visual soot residue remains on any surface, and when air quality testing shows acceptable particulate levels if you choose to verify scientifically.

Cost Considerations for Soot Odor Removal Projects

Costs vary widely based on how much contamination you’re dealing with, which cleaning methods you choose, and whether your homeowners insurance covers the damage.

Typical DIY costs include:

  • Cleaning supplies and chemical sponges: $30 to $60
  • White vinegar and baking soda in quantity: $15 to $30
  • Activated charcoal bags for multiple rooms: $25 to $50
  • HEPA vacuum purchase or short term rental: $50 to $150 purchase, $30 to $50 rental
  • Residential air purifier with HEPA and carbon filtration: $150 to $400
  • Replacement HVAC filters: $20 to $80 depending on system size
  • Enzymatic odor neutralizer products: $25 to $75
  • Odor sealing primer and paint for an average room: $75 to $200
Professional Service Typical Cost Range When Needed
Carpet and upholstery cleaning $150 to $500 Persistent odor after DIY attempts
HVAC duct cleaning $300 to $2,000 Smoke entered ventilation system
Ozone treatment $400 to $1,200 Severe odor in multiple rooms
Complete fire restoration $5,000 to $50,000+ Structural damage, extensive contamination
Thermal fogging $500 to $1,500 Odor penetrated walls and hidden spaces

Most homeowners insurance policies cover fire and smoke damage including professional remediation costs. Document everything with photos before you start cleaning, during the process, and after completion. Save all receipts for cleaning supplies and professional services. Obtain written estimates from professional restoration companies even if you plan to do some work yourself. Insurance adjusters use these estimates to determine claim values. Understand your policy’s deductible and coverage limits before starting work. Many restoration companies work directly with insurance adjusters and can bill insurance companies directly, which simplifies the claims process.

Attempting inadequate DIY methods can actually increase long term costs if odor persists and you eventually need professional help anyway, or if you damage materials through improper cleaning techniques and create additional repair expenses. Start with appropriate methods for your contamination level rather than hoping the cheapest approach will work.

Preventing Future Soot Smell Problems in Your Home

Prevention costs far less and causes far less disruption than remediation after soot damage has occurred.

Take these preventive steps regularly:

  1. Schedule annual furnace inspections and professional cleaning before each heating season starts
  2. Have your chimney professionally swept and inspected yearly if you use your fireplace regularly
  3. Replace HVAC filters every 1 to 3 months depending on system usage and manufacturer recommendations
  4. Use properly sized candles in stable holders positioned away from drafts and curtains
  5. Trim candle wicks to 1/4 inch before lighting each time to prevent excessive soot production
  6. Install smoke detectors in all required locations and test them monthly to catch problems early
  7. Use your kitchen exhaust fan during all cooking and clean the hood filters monthly
  8. Ensure proper fireplace draft before lighting fires by holding a lit match near the damper opening to verify upward airflow, and never close the damper while hot ashes remain
  9. Address any unusual odors from your HVAC or heating system immediately rather than waiting to see if they go away
  10. Establish and enforce outdoor only smoking rules with designated areas kept away from windows and air intake vents

Recognize warning signs before they become major problems: unusual burning or musty odors when your heating system starts up, visible soot accumulation around supply vents or above your fireplace opening, candles that produce black smoke instead of clean flame, or your furnace cycling on and off irregularly.

Professional maintenance contracts provide value beyond the immediate service. Annual HVAC service agreements typically cost $150 to $300 but catch developing problems before they cause damage, often including priority emergency service if problems do occur. Chimney sweep services run $125 to $250 but prevent dangerous creosote buildup that causes chimney fires and backdraft incidents that fill your home with smoke. Documentation of regular professional maintenance supports insurance claims if incidents occur despite your preventive efforts, showing you maintained your systems responsibly.

Final Words

Removing soot smell from house takes patience and the right approach for your situation.

Start with ventilation, work through cleaning systematically from top to bottom, and use natural absorbers or air purifiers to catch what surfaces release over time.

Light soot clears in days. Heavy contamination needs weeks and possibly professional help.

If you’ve cleaned thoroughly and the odor still won’t budge, that’s when specialized restoration makes sense. We handle the full process so you’re not juggling contractors or wondering what to do next.

Your home can smell clean again.

FAQ

How can you effectively get rid of soot smell in your house?

You can effectively get rid of soot smell in your house by ventilating the space thoroughly, deep cleaning all hard surfaces from ceiling to floor, treating carpets and fabrics with baking soda, washing all washable items with vinegar, and running HEPA air purifiers with activated carbon filters continuously until the odor clears.

What materials and methods absorb smoke odor most effectively?

Activated charcoal bags, baking soda, and white vinegar absorb smoke odor most effectively because they capture volatile organic compounds and neutralize acidic odor molecules rather than just masking the smell. Place these natural absorbers throughout affected rooms and replace them regularly for continuous odor control.

How long does soot smell typically last in a home?

Soot smell typically lasts 2-5 days for minor exposure with proper ventilation and cleaning, 1-2 weeks for moderate contamination requiring deep cleaning, or 2-4 weeks for severe cases involving oily soot or furnace puffback. Heavy house fire smoke damage may require 4-12 weeks of professional restoration to eliminate completely.

What products and techniques do professional restoration services use to remove smoke smell?

Professional restoration services use ozone generators that break down odor molecules, thermal fogging that penetrates deep into porous materials, HVAC duct cleaning to remove embedded particles, odor-sealing primers before repainting, and hydroxyl generators for whole-room treatment. These specialized methods reach areas and contamination levels that DIY cleaning cannot address effectively.

When should you call professionals instead of attempting DIY soot odor removal?

You should call professionals when odor persists after thorough DIY cleaning attempts, when dealing with oily soot from furnace malfunctions, when smoke has contaminated your HVAC system, after house fires affecting multiple rooms, or when structural damage assessment is needed. Professional services have specialized equipment and techniques for severe contamination.

Can natural methods like vinegar and baking soda completely eliminate soot odor?

Natural methods like vinegar and baking soda help reduce soot odor but work best as supplements to physical cleaning rather than standalone solutions. They absorb airborne odor molecules and neutralize acidic compounds effectively after you’ve removed soot residue from surfaces through proper cleaning.

How do you prevent soot buildup and smoke odors from recurring?

You prevent soot buildup and smoke odors from recurring by scheduling annual furnace inspections and chimney cleanings, replacing HVAC filters every 1-3 months, using kitchen exhaust fans during cooking, trimming candle wicks to prevent excess soot, and addressing unusual heating system odors immediately before they spread.

What safety equipment do you need before cleaning soot from your home?

You need N95 or P100 respirator masks, rubber or nitrile gloves, eye protection, long sleeves and pants, and closed-toe shoes before cleaning soot from your home. For heavy contamination, add hair coverage and disposable coveralls to prevent exposure to toxic combustion byproducts and acidic compounds.

How does HVAC system contamination affect soot odor removal success?

HVAC system contamination continuously recontaminates cleaned spaces by circulating smoke particles through ductwork back into your home. You must replace filters immediately, clean supply and return vents, and schedule professional duct cleaning after significant smoke events to prevent odor from returning.

What’s the difference between dry soot and oily soot for cleaning purposes?

Dry soot comes from wood, paper, or candles and cleans with chemical sponges and mild detergents, while oily soot from furnace malfunctions or petroleum products requires TSP cleaner, commercial degreasers, and often professional equipment. Oily soot penetrates deeper into porous materials and poses greater cleaning challenges.

Smoke Damage Odor Sealing Process That Actually Works

Think painting over smoke fixes the smell? Think again.
You can wipe soot off drywall and still get that musty smoke smell every time the heat or humidity changes.
Sealing odor is the step that stops those tiny smoke particles in wood, drywall, and concrete from releasing smell into your home.
But it only works when done after proper cleaning, HEPA vacuuming (captures fine soot), and moisture checks.
This post walks you through the exact sealing process, what products, what order, and what tests to lock odor in and get your home smelling normal again.

Core Process for Sealing Smoke Odor

ampZ_LQ6SEGzB8IKiE2xRg

Sealing smoke odor is required because smoke particles (many under 2.5 microns) penetrate deep into porous materials like drywall, wood framing, concrete, and insulation. After a fire, you can clean visible soot from surfaces. But odor molecules stay embedded in the structure. Without encapsulation, those particles keep releasing odor, especially when humidity or temperature shifts. Sealing traps those molecules behind an impermeable barrier so they can’t reach the air you breathe.

Sealing happens near the end of the fire restoration timeline. First the property gets stabilized and dried. Then debris and unsalvageable materials are removed, followed by thorough soot and residue cleaning. Deodorization treatments may be applied to neutralize airborne and embedded odors. Only after all cleaning and drying is complete does sealing begin. Applying primer over dirty or damp surfaces locks in contaminants and prevents the sealer from bonding. That causes odor to bleed through later.

Typical materials that get sealed include painted drywall, wood studs and joists, roof decking, baseboards, door and window trim, concrete foundations, and plaster. Porous materials like carpet padding, insulation, and heavily soaked ceiling tiles are usually removed and replaced rather than sealed because cleaning them doesn’t work.

  1. Remove and dispose of unsalvageable materials that are too contaminated to clean or seal.
  2. HEPA vacuum all surfaces to remove loose soot and particulate without spreading it into the air.
  3. Wash surfaces with appropriate cleaners to remove oily residue, tar, and remaining soot.
  4. Dry completely and verify with moisture readings before any primer is applied.
  5. Apply odor blocking primer in one or more coats, allowing full cure between coats.
  6. Finish with topcoat paint once the sealer has cured and odor tests confirm encapsulation.

Cleaning and Surface Preparation Before Sealing

uWvXzTJNS6SKTtGxa9LbwQ

Soot and tar residue must be fully removed before sealing. If you seal over heavy contamination, the oils and acids in the residue can bleed through the primer. Stains and odor reappear within days or weeks. Proper cleaning also ensures the primer can bond to the substrate. Start by HEPA vacuuming all surfaces from top to bottom. Non-HEPA vacuums just blow fine soot particles back into the air. After vacuuming, use a dry soot sponge on walls and ceilings to lift remaining dry particulate without smearing it.

Once dry soot is removed, wash surfaces with a degreaser or alkaline cleaner to break down oily smoke residue. For hard surfaces like tile, painted drywall, and countertops, spray the cleaner and wipe bottom to top on vertical surfaces to prevent streaking. Rinse with clean water and let the surface dry completely. Porous materials like unsealed wood or concrete may need 24 to 48 hours of drying time before sealing. Use moisture meters to confirm dryness, especially on structural lumber and subflooring.

  • HEPA vacuuming to capture fine particulate without re-aerosolizing it
  • Dry soot sponges for lifting surface soot on walls and ceilings
  • Degreaser or alkaline cleaner to dissolve oily smoke residue on non-porous surfaces
  • Rinsing with clean water to remove cleaner residue that can interfere with primer adhesion
  • Moisture measurement and drying to prevent trapping water under the sealer, which causes peeling and mold

Selecting the Right Odor Blocking Primers and Sealers

4VfCmM8PSrOnLGwA6CuGSw

Shellac based primers are the top choice for severe smoke odor. They form an extremely tight molecular barrier that blocks both odor and tannin stains from bleeding through. Shellac primers dry fast, often tack free in 15 to 60 minutes. That lets you apply multiple coats in a single day. Speed matters when you’re restoring occupied homes or commercial properties under time pressure. Shellac works especially well on structural wood like studs, joists, and roof decking, and on surfaces exposed to protein fires in kitchens.

Oil based primers offer strong penetration and are effective on moderately contaminated surfaces. They bond well to glossy or previously painted surfaces and provide good odor blocking for wood, drywall, and concrete. But oil based products require longer cure times, typically 8 to 24 hours between coats and up to seven days for full cure. They also release higher VOCs and require mineral spirits for cleanup. More ventilation and stricter disposal procedures.

Water based encapsulants are used on large surface areas when the odor contamination is moderate and the surface has already been thoroughly cleaned. These products are safer to use in occupied spaces, produce fewer fumes, and allow easy cleanup with soap and water. They’re vapor permeable, which prevents moisture from being trapped behind the seal and reduces the risk of mold. Water based sealers are often applied by spray for uniform coverage and serve as both primer and sealer before a finish coat of paint.

Primer Type Strengths Best Uses
Shellac based Extreme odor blocking; fast dry; tight molecular barrier Severe fires; structural framing; protein fires; roof decking
Oil based Deep penetration; bonds to glossy surfaces; good for moderate odor Concrete; brick; textured drywall; mixed fuel fires
Water based encapsulant Low VOC; vapor permeable; safe for occupied spaces; easy cleanup Large areas; moderate contamination; post cleaning sealing
Specialty odor sealers Formulated for heavy contamination; flexible application methods Heavy odor after cleaning; mixed surface types; contents restoration

Application Techniques for Effective Smoke Odor Sealing

jXbDOok-Qxa-Tf6NqqMwEQ

For small areas, trim, and detailed work, brush or roller application gives you control and ensures even coverage in corners and edges. For large surface areas (walls, ceilings, entire rooms), airless spray equipment provides the best results. Spraying creates a uniform film thickness and minimizes lap marks that can occur with roller application. It also forces primer into surface texture and pores more effectively than brushing. Plan for proper ventilation and mask off areas that shouldn’t be coated.

Most projects require two coats of primer, especially on porous substrates like unsealed wood or heavily textured drywall. Each coat must cure fully before the next is applied. Shellac based primers typically allow recoating in 45 to 60 minutes. Oil based primers need 8 to 24 hours between coats. After the final primer coat has cured (usually 24 to 48 hours), you can apply a standard latex or oil based finish coat. Follow the product label for exact recoat windows and cure times. Formulations vary.

  • Use airless spray for large areas to achieve uniform coverage and minimize application time
  • Apply two or more thin coats rather than one heavy coat to avoid runs and improve encapsulation
  • Allow full cure between coats per the product label to maximize cross linking and odor blocking
  • Verify coverage with a flashlight at an angle to spot thin areas or skips before the primer dries

Advanced Odor Removal Methods Used Before Sealing

yEYrLlNDQcqaIIDG-1m87A

Ozone treatment uses ozone gas to chemically break down odor molecules in the air and on surfaces. Ozone generators are run for 4 to 48 hours or longer depending on contamination severity. The property must be vacated during treatment because ozone is a respiratory irritant. Professionals measure ozone concentration in parts per million and monitor exposure time to ensure effectiveness. Ozone is especially useful for reaching odor molecules deep inside wall cavities, ductwork, and HVAC plenums where cleaning tools can’t reach. It’s typically applied after cleaning but before sealing, so that broken down odor molecules can be ventilated out rather than sealed in.

Thermal fogging replicates the way smoke traveled during the fire. A thermal fogger heats a petroleum based deodorant into a fine mist that penetrates cracks, voids, and porous materials the same way smoke did. The deodorant neutralizes smoke odor molecules on contact. Thermal fogging is especially effective on contents like upholstered furniture, drapes, and stored items in closets and cabinets. Most jobs require one to three applications. The process requires strict respiratory protection and is always performed by trained technicians.

Hydroxyl generators are a safer alternative to ozone and can be used in occupied or semi occupied spaces with proper precautions. Hydroxyl radicals neutralize odor molecules in the air and on soft surfaces without requiring evacuation. These units are often run continuously for several days. Hydroxyl treatment is commonly paired with sealing when the building needs to remain accessible during restoration. All three methods (ozone, thermal fogging, and hydroxyl) support long term odor control by addressing molecules that cleaning alone can’t eliminate. The choice depends on contamination level, occupancy needs, and the materials involved.

HVAC, Airflow, and Hidden Space Considerations

7AvzJmbFQiq-tQC3wBPJwA

Smoke doesn’t stop at walls and ceilings. During a fire, smoke and soot are pulled into HVAC return vents, forced through ductwork, and deposited on coils, blower wheels, and filter housings. When the system runs after the fire, it circulates odor and particulate back into the living space. Even if every visible surface has been sealed. That’s why HVAC cleaning is a mandatory part of smoke odor restoration. All filters must be replaced with HEPA rated filters if possible. Coils and drain pans should be cleaned, and ducts should be professionally cleaned if they contain visible soot or emit odor when the system runs.

Smoke also infiltrates attics, crawl spaces, wall cavities, and insulation. These hidden areas act as odor reservoirs. Sealing only the interior surfaces traps odor in voids that will continue to bleed through over time. Professionals use thermal imaging cameras to identify areas where smoke has penetrated behind drywall or into structural cavities. In severe cases, wall sections must be opened to remove insulation and seal the framing before closing the wall back up.

  • HVAC return vents and ductwork that pulled smoke during the fire and now circulate odor when the system runs
  • Attics and crawl spaces where smoke settled on insulation, roof decking, and floor joists
  • Wall and ceiling cavities where smoke entered through cracks, penetrations, or gaps around electrical boxes

DIY vs Professional Smoke Odor Sealing

bRhC3TrxQH2AknN76AO3Vg

Light smoke exposure in a single room (such as a small kitchen fire that was quickly extinguished) can often be handled with DIY methods. You can HEPA vacuum, wash surfaces with a degreaser, apply a consumer grade odor blocking primer, and finish with paint. The risk is that consumer primers don’t always provide the same molecular barrier as professional grade shellac or encapsulant products. If odor returns after the first coat, a second or third attempt may be needed. The total cost and labor can exceed the price of hiring a professional from the start.

Professional restoration brings commercial grade products, spray equipment for uniform application, and detection tools like thermal imaging cameras, moisture meters, and particle counters. Certified technicians follow IICRC protocols for assessment, cleaning, deodorization, and verification. They can integrate HVAC cleaning, contents treatment, and supplemental odor removal methods like ozone or thermal fogging into a single coordinated workflow. For fires that affected multiple rooms, produced heavy soot, or involved synthetic materials, professional work is almost always necessary to achieve permanent odor elimination.

DIY Professional
Consumer grade primers; limited odor blocking performance Commercial shellac, oil, and water based encapsulants tested for fire restoration
Brush and roller application; uneven coverage on large areas Airless spray equipment; uniform film thickness and deep penetration
No HVAC or hidden space access; odor may return from ducts or cavities Duct cleaning, attic access, thermal imaging to locate hidden contamination
Trial and error; multiple attempts if odor persists Verification testing with particle counters and sensory evaluation before closeout
Best for single room, light smoke events with quick extinguishment Required for multi room fires, heavy soot, synthetic materials, or persistent odor after cleaning

Final Words

Start with cleaning and prep—remove soot, degrease, and dry surfaces so sealers actually stick. No guesswork. Use moisture checks and inspect hidden cavities.

Choose the right primer (shellac, oil, or water-based) and apply thin, even coats. Use sprayers for better penetration and remember to address HVAC, attics, and ducts.

Small jobs can be DIY. For heavy smoke or persistent odor, call pros with the tools and testing.

Following the smoke damage odor sealing process ties the steps together, and with the right prep your home will feel fresh again.

FAQ

Q: How to seal in smoke smell?

A: Sealing in smoke smell is done by cleaning and deodorizing first, then applying an odor-blocking primer or sealer (shellac-based or oil-based) to encapsulate residue, including hidden cavities and ducts.

Q: How long does smoke damage smell last and how do you get rid of smoke damage smell?

A: Smoke damage smell can last weeks to years depending on soot depth and porous materials; remove it with thorough cleaning, professional deodorizing (thermal fogging or hydroxyl), sealing, and HVAC and hidden-space cleaning.

Q: What does Servpro use to remove smoke smell?

A: Servpro uses thermal fogging, hydroxyl generators, ozone when spaces are empty, HEPA vacuuming, specialized cleaners, and odor-blocking primers to break down, remove, and seal smoke odors.

Hardwood Floor Water Damage Repair That Actually Works

0

You think hardwood floor water damage is just a wet floor problem. It’s not. The real damage is happening underneath right now, in the subfloor and between the boards where you can’t see it. Every hour you wait, moisture pushes deeper into wood fibers, turning a manageable cleanup into a full replacement job. This guide walks you through the emergency steps that stop damage from spreading, the drying timeline that actually protects your subfloor, and the finish work that makes repairs disappear into your existing floor.

Immediate Emergency Response Steps for Water-Damaged Hardwood Flooring

f4DoGchXRxyBiFTavzyWvw

Every minute counts when water hits hardwood floors. The longer moisture sits, the deeper it goes into wood fibers and the subfloor underneath, turning what could’ve been a quick cleanup into a full floor replacement.

  1. Identify and stop the water source. Shut off your main water valve if a burst pipe is flooding things. Turn off the supply line to whatever appliance is leaking. Or just find where it’s coming from and stop it right now.

  2. Remove standing water with a wet vacuum or shop vac. Pull up pooled water from the floor surface. Work from the outside edges toward the center so you’re not spreading water to dry sections.

  3. Pull up area rugs and move furniture. Get everything off the wet floor within the first hour. That includes rugs trapping moisture underneath and furniture blocking air circulation or creating pressure points where water gathers.

  4. Soak up what’s left with towels or absorbent materials. After you vacuum, press clean towels or microfiber cloths hard against the floor. They’ll pull out what the vacuum missed. Replace them when they get soaked.

  5. Photograph damage for insurance documentation. Take clear photos showing how far the water spread, close ups of any warping or cupping you can see, the water source if you can identify it, and time stamped images of affected rooms from different angles.

  6. Contact your insurance company if applicable. Report what happened within 24 hours if the damage is bad or if it’s something your policy covers. Ask about emergency mitigation coverage that might apply before an adjuster shows up.

The source of water matters for safety and how you approach cleanup. Clean water from supply lines, burst pipes, or appliance connections has fewer contaminants and lower health risks during cleanup. Contaminated water from flooding, sewage backups, or standing water that’s been sitting over 48 hours needs professional handling with protective equipment and sanitization. Don’t walk through or try DIY cleanup on water that might contain sewage or chemicals.

Quick damage assessment tells you if you’re dealing with surface stuff or a structural emergency. Look for these visual indicators right away:

Cupping. Board edges curl upward higher than the center, creating a concave surface that catches your fingernail when you run it across.

Warping. Boards bend along their length, creating waves or dips.

Buckling. Boards lift completely away from the subfloor. You can feel raised sections when walking.

Crown. Opposite of cupping. Board centers rise higher than edges.

Water stains and discoloration. Dark spots, white cloudy patches, or gray streaking showing water got into the wood.

Gaps between boards. Visible separation as boards shrink or pull away from each other.

Soft or spongy spots. Areas that give slightly when you step on them, meaning subfloor damage beneath the hardwood.

Mold or mildew presence. Fuzzy growth, black spots, or musty smells in affected areas.

A moisture meter confirms what your eyes are telling you and gives you baseline readings that guide the whole restoration. Pin type meters measure moisture by sticking prongs into the wood. Pinless meters scan the surface without creating holes. Wood moisture above 12 to 15% means you’ve got active water that needs immediate attention. Readings between 6 and 9% show the floor is dry and stable. Minor damage affecting just the surface layer might self repair as the wood dries and contracts back. Major damage with moisture readings over 20%, visible buckling, or subfloor penetration needs professional treatment with industrial drying equipment to prevent permanent structural problems.

Drying Process Requirements and Timeline Expectations

YMgsxK1hQPa6ezzpdIeo3Q

The subfloor controls your timeline, not the visible surface. Even when the top of your hardwood looks and feels dry, trapped moisture in plywood underlayment or floor joists keeps damaging your floor system until it evaporates completely.

Professional grade equipment creates the controlled environment you need for thorough drying. Dehumidifiers pull moisture from the air, targeting 30 to 50% relative humidity to draw water vapor out of wood and stop it from reabsorbing. High velocity fans move air continuously across floor surfaces, speeding up evaporation at the wood to air boundary where drying actually happens. Open windows only when outdoor humidity is lower than indoors. Otherwise you’re just adding more moisture.

Position fans to blow across floor surface, not just into the room. Aim airflow horizontally along the floor at a 45 degree angle, creating wind patterns that sweep across the whole affected area.

Run dehumidifiers continuously for the first 72 hours minimum. Empty collection tanks or connect gravity drains so equipment runs without stopping during the critical initial drying period.

Monitor moisture readings daily with a moisture meter. Test the same spots at the same time each day, tracking progress in a simple log that shows moisture dropping consistently.

Maintain indoor temperature between 60 to 80°F. Warmer air holds more moisture, speeding evaporation, but too much heat can cause rapid drying that cracks wood.

Rotate equipment placement every 2 to 3 days. Move fans and dehumidifiers to different positions so air circulation reaches all sections evenly and doesn’t over dry concentrated areas.

Surface drying timelines depend on water volume and how long it sat. Minor spills you caught within an hour might dry completely in 3 to 7 days with fans and dehumidifiers running. Moderate saturation from a leak that ran several hours typically takes 2 to 4 weeks of controlled drying before moisture readings hit the safe zone. Severe flooding that covered floors with standing water for over 24 hours can take 4 to 8 weeks or longer, especially in humid climates or during summer when outdoor moisture slows things down.

Subfloor inspection reveals the hidden damage that determines whether you’re drying or replacing. Pull sample boards in the worst areas by drilling relief holes and carefully prying up 2 to 3 boards to see what’s underneath. Check for plywood delamination where layers separate into thin sheets. Press firmly on exposed subfloor looking for soft spots that show water saturation. Look for swelling where plywood thickness has expanded beyond original dimension. Inspect floor joists underneath for water staining, dark discoloration, or soft wood that compresses when you press a screwdriver tip against it.

Spongy feeling when walking on apparently dry hardwood. Means subfloor has lost structural integrity even though the surface looks recovered.

Visible sagging in floor sections. Shows joist or subfloor failure needing structural repair before hardwood can be reinstalled.

Mold growth on the underside of removed boards or subfloor surface. Confirms moisture stuck around long enough to create conditions for growth.

Swelling beyond original thickness in plywood underlayment. Plywood that measured 3/4 inch now reads 7/8 inch or more, showing permanent deformation.

Crumbling or deterioration when you press the subfloor. Material breaks apart or compresses easily, showing water destroyed the wood composite structure.

Persistent musty odors even after surface drying. Smell comes from beneath the floor, indicating ongoing moisture or mold issues in the subfloor layer.

Subfloor drying takes 2 to 3 times longer than the hardwood surface because moisture is trapped between layers with poor air circulation. Professional assessment using thermal imaging cameras and deep probe moisture meters maps exactly where water remains and predicts accurate drying timelines. Damaged plywood sections need to be cut out and replaced with new material matched to original thickness. Floor joists showing water damage need treatment with wood hardeners or replacement if structural integrity is compromised. Nothing gets reinstalled or refinished until moisture readings in both hardwood and subfloor confirm complete drying below 12% moisture content. Installing moisture barriers between new subfloor and hardwood prevents future water migration from below.

Mold Growth Risks and Prevention in Water-Damaged Hardwood Flooring

BFMlmN57TOy36CRbFscZOQ

Mold spores start colonizing damp wood within 24 to 48 hours when moisture and warmth create ideal growing conditions. Once established, mold spreads quickly across floor surfaces and into the subfloor beneath.

Risk factors speed up mold development in water damaged hardwood. Moisture exposure beyond 48 hours almost guarantees some mold growth. Poor ventilation in bathrooms, basements, or closed off rooms traps humid air against wet flooring. Humidity levels above 60% provide the constant moisture supply mold needs to thrive. Hardwood naturally contains cellulose and other organic materials feeding mold colonies. Contaminated water from flooding or sewage carries mold spores and bacteria that start growing immediately when they contact porous wood surfaces.

Detection starts with careful inspection of both visible surfaces and hidden areas. Examine the floor topside for fuzzy patches, dark spots, or white powdery deposits in damp sections. Check underneath by removing sample boards in affected zones, looking for mold growth on board undersides or subfloor surfaces. A strong musty odor that gets worse near the floor indicates active mold growth even when you can’t see visible colonies yet. Discoloration patterns like black streaks, green patches, or brown staining that appeared after water exposure often signal mold penetration into wood grain. Professional mold testing using air samples or surface swabs confirms the specific mold species and concentration levels when contamination is suspected or visible growth looks extensive.

All mold needs professional remediation before any repair or refinishing work starts. Antimicrobial treatment becomes necessary when mold has penetrated into wood fibers, when contaminated water was involved, or when testing confirms high spore concentrations that pose health risks. Containment barriers prevent mold spores from spreading to unaffected areas during removal.

Professional vs DIY Repair: Decision Framework for Water-Damaged Hardwood

KMujBkZqS3WwNETGDfTyDw

Small, contained damage you caught early fits within DIY capability. Water stains affecting just the finish layer, minor cupping in 2 to 3 boards that starts flattening as moisture evaporates, surface discoloration without structural changes, and isolated single board issues you can address with replacement techniques.

Call professionals when damage affects floor structure or spreads beyond isolated spots. Widespread buckling across multiple rooms, subfloor damage requiring plywood replacement, structural concerns with floor joists showing water staining or soft spots, extensive mold growth beyond surface cleaning, sewage contamination requiring specialized sanitization, and insurance claims needing certified documentation and estimates.

Damage Type Professional vs DIY
Surface stains only DIY
Cupping affecting multiple boards Professional
Isolated 1-3 board replacement DIY
Subfloor water penetration Professional
Minor discoloration DIY
Structural instability Professional
Engineered hardwood damage Professional
Widespread warping Professional

Professional restoration companies bring capabilities DIY approaches can’t match. Industrial drying equipment including truck mounted dehumidifiers and dozens of high velocity air movers creates controlled drying environments in large spaces. Moisture mapping technology using thermal imaging cameras and deep probe meters tracks hidden water in subfloors and wall cavities. Subfloor inspection and replacement expertise handles structural repairs requiring removal of large floor sections and rebuilding the foundation beneath. Engineered hardwood complexity demands professional handling because thin veneer layers need different techniques than solid hardwood and damage often means complete replacement rather than refinishing. Fire and Water Damage Restoration Services follow IICRC certified water damage restoration protocols that insurance companies recognize and that protect your home from secondary damage during the drying process.

Essential DIY tools and materials for appropriate minor repairs include a pin type or pinless moisture meter to verify drying progress and confirm safe moisture levels before refinishing. An orbital sander with variable speed control and dust collection handles surface preparation. Wood stain matching kits with multiple color options let you blend repaired sections. Water based polyurethane finish in satin or semi gloss sheen protects refinished areas. Box fans or rental dehumidifiers maintain air circulation during drying. Safety gear including dust masks, eye protection, and ventilation fans protects you during sanding and finishing work.

Select contractors with proper credentials when professional help is needed. IICRC certification in water damage restoration, state contractor licenses, liability insurance, and references from recent similar projects. Get written estimates detailing scope of work, timeline, and payment schedule. DIY repairs should only proceed after moisture meter readings confirm floors are completely dry, showing consistent readings below 12% moisture content across all affected areas for at least 72 consecutive hours.

Complete Refinishing Process for Water-Damaged Hardwood Floors

fd9w1iQCS-errGTI4SqlA

Moisture verification comes before any sanding or finishing work starts. Test with a calibrated moisture meter in at least 10 spots across the affected area, waiting until all readings stabilize below 12% for a minimum of three consecutive days.

Board replacement becomes necessary when severe warping persists after complete drying and doesn’t flatten, when structural compromise has weakened boards so they crack or split under normal foot traffic, when mold has penetrated deep into wood grain beyond surface treatment, and when boards have split lengthwise or show separation along joints.

  1. Identify damaged board boundaries. Mark the full length of boards requiring replacement, extending at least 6 inches beyond visible damage to ensure you remove all compromised wood.

  2. Drill relief holes at board ends. Use a 3/8 inch drill bit to create holes near each end of the damaged section, positioned 1 inch from the board edge and stopping just short of penetrating the subfloor.

  3. Use a circular saw set to board thickness. Adjust blade depth to exactly match your flooring thickness (usually 3/4 inch for solid hardwood), then cut carefully along the board’s length staying 1/2 inch away from adjacent boards.

  4. Chisel out the damaged section without harming adjacent boards. Work from the relief holes toward the center, prying up the cut section and removing the tongue and groove connections by splitting them lengthwise with a chisel.

  5. Inspect and repair subfloor if needed. Check exposed underlayment for soft spots, swelling, or mold, replacing damaged plywood sections before you continue.

  6. Cut replacement board to exact dimensions. Measure the gap precisely, then cut new flooring to length, removing the bottom lip of the groove side with a chisel so the board drops into place.

  7. Apply construction adhesive to subfloor contact points. Run a bead of wood flooring adhesive along the subfloor where the replacement board will sit, ensuring full contact for stability.

  8. Face nail or blind nail new board depending on location. Face nail boards near walls where baseboards will hide nail heads, or blind nail through the tongue at a 45 degree angle for mid floor repairs, setting nails below the surface and filling with wood putty.

Matching challenges complicate repairs. Finding the same wood species matters because oak, maple, hickory, and other species have distinct grain patterns and color tones that don’t blend when mixed. Match grain pattern direction so replacement boards run parallel to existing flooring. Account for age related color differences since new wood is lighter than flooring that’s darkened over years of UV exposure and finish oxidation. Source options include leftover flooring from your original installation if you saved extras, current manufacturer stock if your floor series is still produced, reclaimed wood dealers who specialize in matching vintage flooring, or close grain alternatives stained to match.

  1. Confirm final moisture reading below 12%. Test again right before sanding to verify no moisture returned during board replacement work.

  2. Sand with progressively finer grits starting at 36. Begin with coarse 36 grit to level cupped areas and remove old finish, then move to 60 grit to smooth rough sanding marks, follow with 80 grit to refine the surface, and finish with 100 grit for a smooth base that accepts stain evenly.

  3. Vacuum thoroughly between sanding stages. Use a shop vac with brush attachment to remove all dust between grit changes, preventing coarse particles from creating scratches during finer sanding passes.

  4. Inspect for remaining cupping or unevenness. Run your hand across sanded sections feeling for high spots or depressions needing additional sanding attention.

  5. Apply wood stain if color correction is needed. Brush or wipe stain onto bare wood in the direction of the grain, working in manageable sections and wiping excess before it dries to prevent blotching.

  6. Apply polyurethane finish in 2 to 3 coats. Use a lambswool applicator or high quality brush to apply thin, even coats, allowing each coat to dry completely (4 to 6 hours minimum) before lightly sanding with 220 grit and applying the next layer.

  7. Allow proper cure time of 72 hours minimum. Keep traffic off refinished floors for at least three full days, waiting a full week before replacing heavy furniture or area rugs.

Minor cupping less than 1/8 inch often flattens naturally during drying as wood fibers relax back to their original shape. Persistent cupping that remains after complete drying can usually be corrected through careful sanding that removes high edges and levels the surface. Professional assessment becomes necessary when cupping exceeds 1/4 inch or when boards show structural compromise beyond surface irregularities.

Blending replaced boards into existing flooring requires attention to transition details. Sand the edges where new wood meets old flooring at a slight angle, creating a gradual transition rather than an abrupt line. Stain the entire affected section rather than just replacement boards, feathering stain application 12 to 18 inches beyond repair boundaries so color gradually shifts rather than creating a visible patch. Feather polyurethane application at repair boundaries by thinning the finish slightly and brushing outward from the repair zone into existing floor finish. Match sheen level precisely since satin, semi gloss, and gloss finishes reflect light differently and mismatched sheen creates obvious patches even when color matches perfectly.

Acclimation prevents finish adhesion failures and moisture problems. Let replacement boards sit in the installation room for 3 to 5 days before installation so wood moisture content adjusts to ambient humidity. Wait until relative humidity stabilizes between 30 to 50% before applying finish coats. Rushing refinishing traps residual moisture beneath polyurethane, creating cloudiness, poor adhesion, and finish that peels within months.

Cost Estimates and Timeframes for Hardwood Floor Water Damage Repair

n_SyDr6kTMSNOfB6oXkKyQ

Damage extent and your location create wide cost ranges, with severe structural damage in high cost regions reaching the upper limits while minor surface repairs in affordable markets stay at the lower end.

Service Type Cost Range Timeline
Water extraction $150-$500 1 day
Professional drying/dehumidification $1,000-$3,000 1-4 weeks
Moisture testing $100-$300 Ongoing
Minor refinishing 100-200 sq ft $300-$800 3-5 days
Full refinishing 500+ sq ft $3-$8 per sq ft 4-7 days
Board replacement $8-$15 per sq ft 2-4 days
Subfloor replacement $25-$50 per sq ft 3-7 days
Complete professional restoration $4,000-$15,000+ 3-8 weeks

Cost factors create variation within each service category. Water damage extent determines equipment needs, labor hours, and material quantities, with widespread flooding requiring more dehumidifiers, fans, and personnel than a localized leak. Flooring type affects both material and labor costs since solid hardwood sands and refinishes multiple times while engineered hardwood’s thin veneer layer often requires complete replacement rather than repair. Regional labor rates vary significantly, with metro areas charging $75 to $125 per hour compared to rural markets at $45 to $75 per hour. Wood species rarity impacts board replacement costs when matching exotic or discontinued flooring requires specialty suppliers. Urgency drives pricing when emergency water extraction and same day drying setup command premium rates compared to scheduled work.

Drying requirements dominate the overall timeline regardless of repair scope. Even fast surface drying takes 1 to 2 weeks minimum, while subfloor moisture extends timelines to 4 to 8 weeks before refinishing can begin. Humidity conditions affect drying speed, with summer moisture slowing evaporation and winter heating speeding it up. Structural repairs extend timelines significantly since subfloor replacement requires removing hardwood, replacing underlayment, allowing new plywood to acclimate, then reinstalling flooring before refinishing starts.

Get at least three written estimates from licensed contractors, comparing not just price but scope details like equipment type, monitoring frequency, moisture testing locations, and warranty terms. Understand that lowest bids sometimes skip critical steps like subfloor inspection or adequate drying time.

Insurance Claims and Documentation for Water-Damaged Hardwood Floors

41vKtkSKSV-npzbt-CgN4Q

Homeowners insurance typically covers sudden and accidental water damage like burst pipes, appliance failures, and roof leaks, but excludes gradual damage from ongoing leaks or poor maintenance and flooding from external sources requiring separate flood insurance.

Document everything immediately to support your claim and preserve evidence. Photograph damage from multiple angles showing the full extent of water coverage, close ups of warping or cupping, the water source if identifiable, and affected rooms from corner to corner views. Record the exact date and time you discovered the damage, noting what you were doing when you found it. Document the water source and cause in writing with photos, whether it’s a burst washing machine hose, failed water heater, or roof leak during a storm. Create video walkthroughs that capture room layout, damage extent, and your verbal description of what happened. Save damaged materials as evidence by storing removed boards, cut out subfloor sections, and failed appliance parts in a garage or basement until the adjuster confirms you can dispose of them.

  1. Contact your insurance company within 24 hours. Call the claims line right after stopping the water source, providing your policy number and a brief description of what happened.

  2. Request immediate inspection if damage is severe. Ask for emergency adjuster dispatch when flooding affects multiple rooms, when structural damage is visible, or when mold risk is high.

  3. Obtain written damage assessment from the adjuster. Get the inspection report in writing showing what the insurance company agrees is covered damage versus pre existing conditions.

  4. Get repair estimates from licensed contractors. Provide detailed written quotes to your adjuster showing scope of work, materials, labor, timeline, and total cost broken down by repair phase.

  5. Review policy coverage limits and your deductible. Understand your coverage cap for water damage, whether contents and structure are covered separately, and what amount you’ll pay out of pocket.

  6. Understand depreciation versus replacement cost coverage. Know whether your policy pays actual cash value (depreciated) or full replacement cost, and what documentation you need to receive full replacement reimbursement.

  7. Maintain a communication log with your adjuster. Write down every phone conversation with date, time, adjuster name, and summary of what was discussed or decided.

Common coverage scenarios help predict claim outcomes. Burst pipes are usually covered as sudden and accidental events. Flooding from external sources like heavy rain, storm surge, or river overflow requires separate flood insurance through the National Flood Insurance Program. Gradual leaks from slow drips, worn seals, or aging plumbing are often excluded as maintenance issues. Sudden appliance failures like washing machine hose ruptures or water heater tank failures typically qualify as covered events.

Work with restoration companies experienced in insurance documentation who photograph every stage of work, provide detailed daily logs, itemize all equipment and materials, and submit proper claim formats that adjusters recognize. Keep copies of every repair invoice, material receipt, equipment rental agreement, and scope change authorization in a dedicated claim folder.

Prevention Strategies to Protect Hardwood Flooring from Future Water Damage

kBiEAKP2TQWBvlgJHfgyNQ

Prevention costs a fraction of repair expenses and eliminates the disruption, stress, and timeline of restoration projects.

Maintain indoor humidity between 30 to 50% year round. Use whole house humidifiers in winter when heating dries air, and dehumidifiers in summer when cooling creates condensation, monitoring levels with a digital hygrometer.

Install water leak detection systems near appliances. Place wireless leak sensors under washing machines, dishwashers, water heaters, and refrigerators with ice makers, choosing systems that send smartphone alerts when moisture is detected.

Inspect washing machine and dishwasher hoses annually. Check rubber supply hoses for cracks, bulges, or brittleness, feeling along the entire length and examining connection points where leaks typically start.

Apply water resistant sealant to high risk areas. Use polyurethane with moisture resistant additives in bathrooms, laundry rooms, and kitchens, reapplying every 3 to 5 years as the protective layer wears.

Ensure proper expansion gaps at walls and transitions. Maintain 1/2 to 3/4 inch spacing between hardwood edges and walls, doorways, or other flooring types, allowing seasonal expansion without buckling.

Use area rugs in pet and high traffic zones. Place washable rugs near pet water bowls, entry doors, and kitchen sinks where spills and tracked moisture concentrate, using rug pads that allow air circulation underneath.

Clean up spills immediately within 20 minutes. Wipe water, pet accidents, or tracked snow with absorbent cloths before moisture penetrates finish and reaches wood, drying the area completely afterward.

Install vapor barriers in basements and crawl spaces. Use 6 mil polyethylene sheeting over dirt crawl spaces and under basement subfloors, preventing ground moisture from migrating upward into flooring systems.

Schedule annual HVAC and plumbing inspections. Have licensed technicians check condensate drain lines, drain pans, supply lines, and connections where slow leaks develop unnoticed.

Apply protective coatings during refinishing. Choose water based polyurethane formulations with moisture barriers built in, applying at least three coats for maximum protection in vulnerable rooms.

Seasonal considerations affect hardwood moisture content throughout the year. Winter heating systems reduce indoor humidity to 15 to 25%, causing hardwood to contract and creating small gaps between boards. Add whole house humidifiers or portable units to raise humidity into the safe 30 to 40% range. Summer humidity climbs to 60 to 70% in many regions, causing hardwood to expand and sometimes creating slight cupping. Run dehumidifiers to maintain 40 to 50% relative humidity. Seasonal expansion and contraction of 1/16 to 1/8 inch is normal and doesn’t indicate damage, as long as boards return to their original shape when humidity stabilizes.

Appliance maintenance prevents the sudden failures that cause most hardwood water damage. Replace braided stainless steel washing machine hoses every 5 years even if they look fine, since internal deterioration isn’t visible from outside. Check refrigerator water lines annually where they connect to the wall valve and the back of the unit, replacing plastic tubing with braided stainless lines. Inspect toilet supply connections for corrosion or mineral buildup that weakens seals. Monitor water heaters for rust staining around the base or moisture on the floor nearby, indicating a developing leak needing immediate attention.

Expert Home Repair and Restoration professional floor inspections every 3 to 5 years catch early signs of moisture damage before they become expensive problems. Maintenance schedules that include finish renewal every 7 to 10 years keep protective coatings intact and prevent water from penetrating worn finish layers.

Final Words

Stop the water. Dry it right. Fix what’s damaged.

That’s the core of hardwood floor water damage repair.

Move fast in the first 24 hours. Pull the moisture out before it sinks deep. Let the subfloor dry completely before you sand or refinish anything.

Check for mold. Know when you can handle it yourself and when you need pros with the right equipment.

Document everything if insurance is involved. Get multiple quotes. Understand the timeline.

Then finish it clean so the repairs blend in and your floors look whole again.

With the right steps and realistic expectations, you’ll get your home back to solid ground.

FAQ

Can hardwood floors be repaired after water damage?

Hardwood floors can be repaired after water damage, depending on severity. Minor water exposure often dries naturally and self-repairs over time. Moderate damage may need professional drying, sanding, and refinishing. Severe damage involving buckling, subfloor deterioration, or widespread warping typically requires board replacement and structural repairs before refinishing.

Can mold grow under hardwood floors?

Mold can grow under hardwood floors when moisture penetrates beneath the surface. Mold development can begin within 24 to 48 hours in damp conditions. Prolonged moisture exposure, poor ventilation, humidity above 60%, and contaminated water sources increase mold risk. All mold must be remediated before repair work begins to protect home air quality and prevent further damage.

How much does it cost to repair a water damaged wood floor?

Water damaged wood floor repair costs vary from $300 to $15,000 or more depending on damage extent. Water extraction runs $150 to $500. Professional drying costs $1,000 to $3,000. Minor refinishing averages $300 to $800 for small areas. Board replacement costs $8 to $15 per square foot. Subfloor replacement runs $25 to $50 per square foot.

Will a wet wood floor go back to normal?

A wet wood floor will go back to normal if damage is minor and drying happens quickly. Minor cupping (edges higher than center) often flattens naturally during proper drying without professional intervention. Major water exposure requires immediate professional treatment with industrial fans to prevent permanent buckling. Complete drying typically takes several weeks to months, especially when subfloor is affected.

Property Damage Claim Fire Damage: What You Need Now

0

Think you can wait to call your insurer after a fire?
Waiting can cost you your claim and let hidden damage—smoke inside walls, soaked insulation, warped framing—get worse.
This post tells you exactly what to do now: the safety steps in the first hours, the paperwork and photos insurers expect, how to work with adjusters, and how claims are valued so you don’t get shorted.
Read on to act fast, stop more damage, and start the repair and rebuild the right way.

Immediate Actions After Fire Damage

k4LnE_KmQnGQxxQguG1bWQ

The first hours after fire damage set the pace for your entire recovery. Insurers expect you to report what happened and stop any additional damage as soon as it’s safe to go back. Wait too long and you risk claim denials or coverage gaps that cost you later.

Most homeowners’ policies give you 24 to 72 hours to notify the company after a fire. Some let you call it in. Others want both a phone report and something in writing. Don’t hold off until you’ve cleaned up or gotten repair quotes. Call right away, even if you can’t see the full extent of what’s damaged yet.

Don’t step back inside until fire officials or building inspectors tell you it’s safe. Collapsed walls, toxic soot, live wires, and smoldering debris can still be there days after the flames are out.

Once you’re cleared to return, knock out these six things immediately:

  1. Make sure everyone (family, pets, anyone living there) is safe and accounted for.
  2. Get a copy of the fire department incident report. You’ll need it for the claim.
  3. Call your insurance company’s claims line, report the loss, and grab a claim number plus the adjuster’s contact info.
  4. Start taking photos and video of everything that’s damaged, inside and outside, before you move or throw anything out.
  5. Stop further damage by boarding up windows, tarping holes in the roof, shutting off utilities if you’re told to, and keeping weather and trespassers out.
  6. Line up temporary housing if the home isn’t livable. Save every receipt for hotels, food, and anything else you spend because of the fire.

Required Documentation for a Fire Damage Claim

8GPgJA6fTNCCogWQ1xhqCQ

Insurers decide what to pay based on what you can prove. Missing or incomplete documentation is one of the biggest reasons claims get delayed, cut down, or denied outright. Your job is to show what you owned, what it was worth, and what got wrecked.

Start with a room by room inventory that lists every item hit by fire, smoke, heat, or the water they used to put it out. For each thing, write down the description, brand, model, when you bought it (roughly), what it cost if you remember, and what shape it was in before the fire. Attach photos, receipts, credit card statements, warranties, manuals, anything you’ve got. If you don’t have receipts, detailed descriptions and photos still matter.

Pull together these seven documents as fast as you can:

  • Photos and video of all damaged areas, walls, ceilings, floors, and everything you owned
  • The official fire department or fire marshal report
  • A written inventory of destroyed or damaged stuff, broken down by room
  • Purchase receipts, bank statements, or credit card records for expensive items and recent buys
  • Independent contractor estimates for repair or rebuild costs
  • Documentation of all emergency repairs and cleanup work, including invoices and photos
  • A copy of your complete insurance policy, the declarations page, and any endorsements

Step-by-Step Guide to Filing a Fire Insurance Claim

hzSZuXeKRAiXHdkJv1RUJw

Filing a fire claim isn’t one phone call. It’s a process with specific paperwork and deadlines that change depending on your insurer and where you live. Miss a step or a deadline and you can stall your payout or shrink what you get back.

Your insurer assigns a claim number and an adjuster shortly after you report the fire. The adjuster schedules an inspection, usually within a few days to two weeks depending on how big and messy the loss is. Before that visit, gather as much documentation as you can so you’re ready to walk the adjuster through the damage with proof in hand.

Most policies require you to submit a formal “proof of loss” document within 30 to 60 days of the fire. The proof of loss is a sworn statement listing all damaged property, estimated values, and what caused the loss. Your insurer provides the form. Fill it out carefully, attach your inventory and receipts, and keep copies of everything you send in.

After the inspection, the adjuster prepares an estimate and submits it for review. Depending on how your insurer works, you might get an initial advance payment and a final payment after repairs are documented. Big claims can take weeks or months to settle, especially if there are fights over what’s covered, how much things are worth, or what needs fixing.

Follow these eight steps to file your claim the right way:

  1. Report the fire to your insurer right away and get a claim number.
  2. Secure the property from more damage and document all cleanup work with photos and receipts.
  3. Request and save the fire department incident report as official proof of what happened.
  4. Take detailed photos and video of all damage before cleanup or repairs start.
  5. Prepare a written inventory of all damaged or destroyed property with descriptions, quantities, and estimated values.
  6. Collect supporting documents like receipts, credit statements, warranties, serial numbers, contractor estimates.
  7. Complete and submit the proof of loss form within the insurer’s deadline, usually 30 to 60 days.
  8. Cooperate with the adjuster’s inspection, hand over requested documents quickly, and follow up in writing to confirm next steps.

Working With the Insurance Adjuster

IP2P2E5_RQijXuxOxmZhdA

The insurance adjuster’s job is to inspect the damage, verify your losses, and estimate repair costs for the insurer. The adjuster doesn’t work for you. They work for the insurance company. Understanding that relationship helps you prepare and protect yourself during the inspection.

Adjusters look for proof that damage came from the fire and not from problems that were already there, neglect, or things your policy doesn’t cover. They check structural parts, take photos, measure affected areas, and ask questions about what happened. Stick to the facts and what you know. Don’t guess about causes or give opinions on coverage. Answer questions directly, point out all visible damage, and mention areas you think have hidden damage like smoke inside walls or water from firefighting.

Get your documentation ready before the adjuster shows up. Bring copies of your inventory, receipts, photos, contractor estimates, and the fire report. Walk through the property together and take notes during the visit. If the adjuster’s estimate seems low or incomplete, ask for clarification and request a line by line breakdown. You’re allowed to get independent contractor estimates and submit them for review. If there are big differences in valuation, ask the adjuster to explain their math and give you written justification. You can request a second inspection or a second opinion if needed.

How Fire Damage Claims Are Valued

iIlICkFhS9Kyqau8BVOCmA

Insurers calculate fire damage payouts two ways: Actual Cash Value and Replacement Cost Value. The difference changes how much money you get and when you get it.

Actual Cash Value means the insurer subtracts depreciation from the cost to repair or replace damaged property. A ten year old roof or appliance gets valued at what it was worth the day before the fire, not what it costs to buy new. Replacement Cost Value pays the full cost to rebuild or replace with new materials of similar kind and quality, without taking off anything for age or wear. Many policies pay an initial advance at ACV, then reimburse the depreciation amount after you finish repairs and submit invoices.

Most homeowners’ policies have separate limits for structure coverage and personal property coverage. The dwelling coverage limit applies to the house and attached structures. Personal property limits apply to contents. High value items like jewelry, art, collectibles, or electronics often have sub limits unless you bought additional scheduled coverage. Check your declarations page to confirm your limits and valuation method.

Category ACV Example Replacement Cost Example
Structure (roof) $8,000 replacement cost − $3,000 depreciation = $5,000 advance $8,000 paid after repairs completed and invoiced
Contents (sofa) $1,200 new cost − $600 depreciation = $600 advance $1,200 reimbursed with receipt for replacement sofa
Appliances (refrigerator) $900 new − $400 depreciation = $500 advance $900 paid after purchase receipt submitted
Personal items (laptop) $1,000 new − $500 depreciation = $500 advance $1,000 reimbursed with replacement receipt

Timelines and Expectations During the Claim Process

PKvFK4upR1qiAaF6aVKXwg

Most states require insurers to acknowledge your claim within 7 to 15 days of getting notice. The insurer must send claim forms and instructions within a similar window, often 15 to 30 days depending on state law.

After you submit your proof of loss and supporting documents, insurers typically have 30 to 60 days to review the claim, finish inspections, and issue a coverage decision or settlement offer. Complex claims involving structural assessments, engineering reports, or coverage fights can take longer. Regular contact is normal. If weeks go by without updates, follow up in writing and ask for a status summary.

Delays beyond reasonable timelines may mean there are disputes over valuation, coverage questions, or insurer tactics. Document every contact, save emails and letters, and write down dates and names of everyone you talk to. Unexplained delays can support bad faith complaints or legal action if the insurer fails to meet what the law requires.

Common Reasons Fire Damage Claims Get Denied

y5o6RHOTRvSvppUnbi73zg

Insurers deny fire claims for specific, documented reasons. Knowing these reasons helps you avoid mistakes that put your payout at risk.

The most common denial causes are not enough documentation, late reporting, failure to stop further damage, suspected arson or intentional fire, and policy exclusions like vacant home clauses or unpaid premiums. If the insurer thinks the fire was set on purpose by you or someone working with you, the claim will be delayed pending investigation and denied if intent is proven. Cooperate fully with investigations, give truthful answers, and save all communications.

Six common reasons fire damage claims get denied:

  • Not enough or missing documentation, like no inventory, no receipts, or incomplete proof of loss
  • Late reporting beyond the policy’s required notice period
  • Failure to prevent more damage after the fire, like leaving a tarped roof unsecured in a storm
  • Suspected arson or fraud based on investigation findings or inconsistencies in what you said
  • Policy exclusions, including fires caused by intentional acts, certain perils, or property left vacant beyond the policy’s vacancy clause
  • Lapsed coverage due to unpaid premiums or policy cancellation before the fire happened

Coverage for Temporary Living Expenses

tb9wIRdxT6WI2PlLjVIKvA

If fire damage makes your home unlivable, most homeowners’ policies include Additional Living Expenses coverage, often called ALE or Loss of Use. This pays for reasonable costs above your normal living expenses while the home is being repaired or rebuilt.

ALE typically covers hotel or temporary rental housing, meals that cost more than you’d normally spend at home, laundry and cleaning services, storage for salvaged belongings, and transportation if you’re displaced far from work or school. Coverage has dollar limits and time limits written into your policy. Some policies cap ALE at a percentage of your dwelling coverage limit. Others set a fixed dollar amount or a time period like 12 or 24 months.

Keep every receipt and write down the reason for each expense. Insurers will compare your temporary costs to your normal household budget and reimburse the difference. A daily log or spreadsheet showing dates, vendors, amounts, and categories helps smooth out ALE claims and avoids disputes.

Common ALE expenses that are usually covered:

  • Hotel, motel, or short term rental housing costs
  • Increased meal expenses beyond typical grocery spending
  • Laundry, dry cleaning, and related services if you can’t use your washer
  • Storage unit fees for furniture and belongings removed from the home

When to Hire a Public Adjuster or Attorney

val2Yx1wT-OR_0qexHp7g

Public adjusters and attorneys do different things, but both can help when your claim is complex, disputed, or denied. Knowing when to bring in help keeps you from accepting a low settlement or missing deadlines to challenge the insurer’s decision.

Public adjusters are licensed professionals who represent policyholders, not insurers. They prepare inventories, estimate losses, and negotiate with the insurance company on your behalf. Public adjusters typically charge a percentage of the final recovery, usually 5 to 15 percent. Consider hiring one for large or complicated claims, when the insurer’s offer seems way too low, or when you don’t have time or expertise to document and value losses yourself. Attorneys handle disputes, bad faith claims, and lawsuits. They can file suits, enforce policy terms, and go after damages beyond the policy limits if the insurer acts in bad faith. Legal fees vary. Some attorneys work on contingency, others charge by the hour.

Hire professional help in these five situations:

  • The insurer denies your claim or offers a settlement far below documented losses and independent estimates
  • You suspect bad faith, like unreasonable delays, failure to respond, or ignoring evidence you gave them
  • The claim involves big dollar amounts, complicated valuation issues, or fights over covered versus excluded damage
  • You’re overwhelmed by the documentation and negotiation process and can’t put in the time needed
  • The fire involved commercial property, business interruption, or potential third party liability such as utility caused fires

Final Words

First, shut off hazards, document the damage, and call your insurer, because quick action limits further loss and protects your claim.

We covered what to gather — photos, receipts, the fire department report, inventories, and contractor estimates — plus how to file the claim, work with the adjuster, and understand valuation and timelines.

Don’t let delays or missing paperwork sink a property damage claim fire damage. If it gets complicated, bring in a public adjuster or attorney. You’ll stabilize, document, and rebuild—and get back home sooner.

FAQ

Q: What is the average settlement for property damage?

A: The average settlement for property damage varies widely depending on damage size, policy limits, and location. Small claims often run from a few hundred to several thousand dollars; major structural losses can reach tens to hundreds of thousands.

Q: Can insurance deny a house fire claim?

A: Insurance can deny a house fire claim for reasons like suspected arson, late reporting, policy exclusions, insufficient evidence, or failure to mitigate further damage. Document everything and report quickly to lower denial risk.

Q: What are common examples of property damage?

A: Common examples of property damage include fire and smoke damage, water from burst pipes or storms, wind or roof damage, vandalism, broken windows, and ruined flooring, cabinets, or personal items from leaks.

Q: What does $25,000 property damage coverage mean?

A: A $25,000 property damage coverage means the insurer will pay up to $25,000 for covered repairs or replacements, minus your deductible. If repair costs exceed that limit, you’re responsible for the remainder.

Does Kilz Seal Smoke Odor for Good?

0

You just finished cleaning smoke stained walls and now you’re staring at that can of Kilz, wondering if it’ll actually stop the smell or just cover it up temporarily. Here’s the straight answer: Kilz seals smoke odor effectively, but only if you clean surfaces thoroughly first and choose the right formula for your situation. Oil based Kilz creates a stronger barrier against nicotine compounds than water based versions, but neither one works as a magic fix over dirty walls.

Kilz Product Recommendations and Purchasing Guide for Smoke Odor

GABzE_2qRc-UYuJOkdeDXA

For heavy cigarette smell and nicotine stains, buy Kilz Original oil based primer. For moderate smoke odor with lower fume tolerance, choose Kilz Original Low Odor. For light smoke with ventilation concerns, select Kilz Restoration water based.

Yes, Kilz odor blocking primers effectively seal smoke odor when surfaces are properly cleaned first. The oil based versions create a tougher barrier against the water soluble nicotine compounds that cause most cigarette smell problems.

These primers work by creating a barrier that prevents odor molecules from penetrating through fresh paint layers. The sealing mechanism encapsulates residual smoke particles that remain after cleaning, trapping them beneath a protective layer that stops them from reaching the air. Kilz Original has been trusted by professionals for over 40 years specifically because of these sealing properties.

Product Name Formula Type Best For Ventilation Needs Price Range
Kilz Original Oil-based Heavy cigarette smell, nicotine stains, severe odor High – cross-ventilation required $35-45 per gallon
Kilz Original Low Odor Oil-based Moderate smoke, solvent-sensitive spaces Medium – window ventilation sufficient $38-48 per gallon
Kilz Restoration Water-based Light smoke, occupied buildings, low VOC needs Low – standard room ventilation $25-35 per gallon

Set realistic expectations. Kilz works effectively for surface smoke from cigarette smell and light fire damage, but it’s not a complete fix for severe contamination or deep penetration into porous materials without professional cleaning first. Surfaces must be cleaned before priming or the primer will seal in odor producing residue, making the problem worse. For severe smoke damage cases where professional restoration may be needed beyond primer application, consider Fire and Smoke Damage Restoration.

Complete Surface Preparation and Cleaning Process for Smoke Odor

TM8kW2xyRZi39zxBpv22MQ

Priming alone won’t work without proper cleaning because nicotine and smoke particles must be removed first, not sealed in. Trying to trap dirty surfaces under primer traps the odor source itself.

  1. Remove all soft furnishings, carpets, and window treatments from affected rooms
  2. Wash walls and ceilings with TSP cleaner or degreasing agents using circular motions
  3. Pay special attention to corners, edges around baseboards, ceiling fans, and door frames where smoke concentrates
  4. Rinse surfaces thoroughly with clean water to remove all cleaner residue
  5. Allow complete drying, typically 24 to 48 hours depending on humidity levels
  6. Sand glossy surfaces lightly for adhesion
  7. Vacuum all dust and debris before priming
  8. Test one small area by priming and waiting 72 hours to verify odor is eliminated before proceeding with entire room

The most critical errors happen during preparation. Skipping the cleaning step entirely and priming over nicotine residue prevents proper adhesion and traps odor producing particles beneath the primer layer. Rushing the drying process causes primer adhesion failure and eventual peeling. Missing edges and concentrated smoke areas allows those spots to later reactivate odor that spreads through the room. Using water based cleaners without thorough rinsing interferes with oil based primer bonding, creating weak spots where smell breaks through.

Thorough cleaning dramatically improves success rate because nicotine is water soluble. Proper washing removes the bulk of odor sources while oil based primer encapsulates what remains in porous materials like drywall paper and wood grain.

Application Techniques and Complete Coverage Best Practices

EfhGcRbbSTas9tLn2IUitA

Proper application technique is as important as product selection for smoke odor sealing.

Choose the right application method based on your surfaces. Use a brush for edges and detail work around trim and fixtures where smoke residue concentrates. Use a roller for walls and ceilings to provide even coverage across large flat areas. Use spray equipment for large areas and textured surfaces, which offers the fastest coverage but requires more ventilation and masking to protect adjacent surfaces.

Plan your materials correctly. Coverage typically runs 300 to 400 square feet per gallon depending on surface porosity and texture. Plan for two gallons per average room when accounting for two coats on walls and ceiling. Porous surfaces like bare drywall or textured ceilings absorb more primer and reduce coverage per gallon.

Apply primer only in temperatures between 50°F and 90°F for proper film formation and sealing properties. Apply first coat in thin, even layers to avoid drips and ensure proper adhesion to cleaned surfaces. Allow oil based Kilz to dry 1 hour before assessing coverage. Water based Kilz Restoration dries in 30 minutes.

Apply second coat to all areas showing stain bleed through or where primer appears thin. Don’t skip this step even if surface looks covered. Pay special attention to corners, edges around baseboards and ceiling fans, and ceiling to wall transitions where smoke residue concentrates.

Check coverage under different lighting conditions, both natural daylight and artificial light, to identify missed spots before topcoating. Maintain proper recoating intervals of 1 to 2 hours for oil based Kilz between primer coats, ensuring first coat is dry to touch. Apply quality latex paint topcoat within manufacturer’s recoating window to seal the primer layer and complete the odor barrier system.

Complete coverage without gaps is important because even small unsealed areas can reactivate smoke odor over time, negating the entire remediation effort. One missed corner can smell up a whole room.

Kilz Primer Effectiveness for Different Types of Smoke Damage

LyIdmyfWTy6CD2H875lvaA

Smoke damage exists on a spectrum from light cigarette smell to severe fire damage.

Kilz handles light to moderate cigarette smell on walls and ceilings quite well. After proper cleaning with 2 coats of oil based formula, it eliminates surface odors in about 90% of residential cases. These are situations where someone smoked indoors for a few years but didn’t create thick yellow staining or where smoke exposure was intermittent rather than constant.

Heavy tobacco residue or fire damage exceeds Kilz’s capabilities in many cases. Porous materials like wood and drywall may hold smoke particles too deep for surface primer to fully encapsulate. This happens especially in extreme cases where smoke has penetrated for years or where heat from fire drove particles deep into material structure. The primer can only seal what’s at or near the surface.

If smoke odor returns within days after priming or if surfaces show heavy char or yellowing that bleeds through two primer coats, you’re looking at a deeper problem. Professional fire damage restoration with specialized odor encapsulation or material replacement may be necessary.

Safety Measures and Ventilation Requirements During Application

8NpBXKSIRz-xYKpmcikyMg

Oil based Kilz primers release strong fumes from solvents during application and drying, with VOC levels requiring proper safety protocols. These aren’t just unpleasant smells. They’re chemical vapors that can cause headaches, dizziness, and respiratory irritation.

Proper ventilation and protective equipment are necessary for health and safety, especially in enclosed spaces where fume concentration builds quickly.

Wear N95 or organic vapor respirator mask during application and while primer dries for first 4 to 6 hours. Open all windows and doors to create cross ventilation throughout work area before opening primer can. Use box fans in windows to actively exhaust fumes outside rather than relying on passive air circulation.

Remove pets and children from home during application and for 24 to 48 hours while oil based formula cures. Wear safety glasses and nitrile gloves to prevent skin and eye contact with primer. Take frequent breaks, every 20 to 30 minutes, in fresh air when working with oil based formulas.

Dispose of rags and brushes according to local hazardous waste guidelines to prevent spontaneous combustion from oil soaked materials. Plan occupancy timing. Allow minimum 72 hours before returning sensitive individuals like infants, elderly, or people with respiratory conditions to freshly primed spaces.

Water based Kilz Restoration offers a lower odor alternative with fewer VOC health concerns and reduced ventilation requirements. Standard room ventilation is sufficient, making it suitable for occupied buildings or when vacating premises isn’t feasible. The tradeoff is that it may require additional coats for heavy nicotine encapsulation compared to oil based formulas. You’re choosing between stronger sealing power with more safety precautions versus milder product with less hassle.

Kilz Primer Alternatives for Severe Smoke Odor Problems

PgrMqILATuer5bbffkK4ow

Some smoke odor situations require stronger or different approaches than standard Kilz primer.

Shellac based primers like Zinsser BIN provide superior stain and odor blocking for severe nicotine stains and heavy smoke. The shellac formula penetrates deeper and creates a tougher seal than standard oil based primers. The downside is very strong fumes during application and a longer curing process than Kilz oil based options. You’re trading convenience for sealing power.

Complementary methods like ozone treatment can eliminate smoke odor from porous materials before priming. Ozone generators break down odor molecules at the molecular level, reaching into carpet padding, upholstery, and wood that cleaning and primer can’t fully address. This requires professional equipment and poses health risks if not done correctly with proper ventilation and occupancy timing. The space must be completely unoccupied during treatment.

Professional smoke remediation services become necessary when smoke has penetrated HVAC systems, insulation, or structural materials. Contractors may need to combine duct cleaning, filter replacement, material removal, specialized sealers, and Kilz primer as part of a whole house approach. They can access crawl spaces, attics, and wall cavities where smoke lodges for years beyond the reach of surface treatments.

Cost Considerations and When to Hire Professionals for Smoke Odor

xPhKOu8iSFqXS5PMUydo0A

DIY Kilz application costs $25 to $45 per gallon, covering approximately 300 to 400 square feet per gallon. This makes whole room treatment feasible for $100 to $300 in materials plus application tools for light to moderate cigarette smell. Add brushes, rollers, drop cloths, and safety equipment for another $50 to $100 if you’re starting from scratch. For a typical three bedroom home with smoke affected walls and ceilings, budget $500 to $800 in materials.

DIY makes sense for surface smoke on painted walls and ceilings in homes where occupants can vacate during application and curing. If you’re dealing with one or two rooms, have basic painting skills, and can handle the ventilation requirements, tackling it yourself saves contractor labor.

Professional assessment provides value beyond DIY capability. Contractors can test odor penetration depth using moisture meters and inspection cameras to see inside wall cavities. They evaluate HVAC contamination by checking ductwork and air handlers. They identify hidden smoke damage in crawl spaces or attics that you can’t easily access. They provide documentation for insurance claims or resale preparation that buyers and adjusters accept. For situations where homeowners should consider professional contractor services for comprehensive smoke remediation beyond DIY priming, explore Professional Home Repair and Restoration.

Rental property restoration and disclosure requirements change the calculation for landlords and sellers. You often need professional smoke remediation with documented results to meet buyer concerns and legal obligations. Many states require sellers to disclose known smoke damage, and professional remediation reports protect you from future liability. This makes contractor services worthwhile despite higher upfront costs of $2,000 to $8,000 for whole house treatment.

Long Term Maintenance for Sustained Smoke Odor Control

JV1s7k8WRzWF6vcVVmSzNg

Proper topcoating and system maintenance extend Kilz primer effectiveness and move toward a permanent solution.

Apply quality latex paint within manufacturer’s recoating intervals, typically 1 to 2 hours for oil based Kilz, to seal the primer layer and prevent any residual odor molecules from escaping during the curing process. Two coats of topcoat paint are recommended for maximum barrier integrity. The paint acts as a second barrier layer over the primer, creating a double sealed system that’s harder for odor molecules to penetrate.

Replace HVAC filters immediately after priming and monthly for three months to prevent smoke particles from recirculating through ventilation system. Schedule professional duct cleaning if smoke odor circulated through ventilation system before remediation.

Use air purification with HEPA and activated carbon filters in treated rooms for 30 to 60 days post application to capture any residual particles. Monitor humidity levels below 50% to prevent primer barrier breakdown and odor reactivation from moisture.

Address any water leaks immediately as moisture can compromise sealing properties of both primer and topcoat. Inspect previously smoke affected rooms annually for any yellowing or odor return as early indicator of barrier failure. Repaint with fresh topcoats every 5 to 7 years in previously smoke affected rooms to maintain barrier integrity.

Following these practices maximizes the permanent solution potential of Kilz primer treatment and prevents the need for re remediation. The primer barrier doesn’t last forever without maintenance, but proper care extends its effectiveness for years.

Final Words

Yes, Kilz does seal smoke odor when you apply it correctly after thorough surface cleaning.

The oil-based formulas create a barrier that encapsulates residual smoke particles and nicotine stains, preventing odors from bleeding through your fresh paint.

But the primer only works if you clean first. Skipping the TSP wash and proper drying means you’re just sealing in the problem.

For light to moderate cigarette smell on walls and ceilings, Kilz Original handles the job in most cases. Heavy fire damage or deep smoke penetration into porous materials needs professional help.

With proper prep, complete coverage, and good ventilation during application, you can eliminate surface smoke odor and get your home back to normal.

FAQ

What paint absorbs smoke smell?

Kilz oil-based primers absorb and seal smoke smell by creating a barrier that encapsulates odor molecules and nicotine residue left after cleaning. The primer doesn’t actually absorb odor—it traps residual smoke particles that remain in porous materials, preventing them from penetrating through fresh paint layers.

What neutralizes the smell of smoke?

The smell of smoke is neutralized by first washing surfaces with TSP cleaner or degreasing agents to remove nicotine and smoke particles, then sealing what remains with oil-based primer. Water-soluble nicotine must be cleaned off before priming, as the primer encapsulates only what stays in porous materials after thorough washing.

Can you paint over smoke smell?

You cannot paint over smoke smell with regular paint alone because odor molecules penetrate through standard latex paint layers. Proper smoke odor elimination requires cleaning surfaces first with degreasing agents, then applying oil-based Kilz primer to create a sealing barrier, followed by quality latex topcoat paint.

What is the best paint to cover smoke damage?

The best system to cover smoke damage combines Kilz Original oil-based primer for heavy nicotine stains or Kilz Restoration water-based primer for lighter smoke, followed by quality latex paint. The primer creates the odor-blocking barrier, while the topcoat seals the primer layer and provides the finished appearance.

How long does Kilz primer take to dry before painting?

Kilz oil-based primer dries to touch in 1 hour and requires 1-2 hours between coats, with topcoat application recommended within the manufacturer’s recoating window. Water-based Kilz Restoration dries faster at 30 minutes between coats, though both formulas benefit from complete curing before occupancy.

Do I need to clean walls before using Kilz for smoke odor?

You need to clean walls thoroughly before using Kilz because priming over nicotine residue and smoke particles prevents proper adhesion and traps odor-producing substances. Washing surfaces with TSP cleaner removes water-soluble nicotine while oil-based primer then encapsulates what remains in porous materials like drywall and wood.

Will Kilz work on severe fire damage smoke odor?

Kilz works on light to moderate smoke odor but may not eliminate severe fire damage where heat drove smoke particles deep into porous materials. If odor returns within days after two primer coats or heavy char bleeds through, professional fire damage restoration with specialized odor encapsulation or material replacement becomes necessary.

How many coats of Kilz primer for smoke odor?

Two coats of Kilz primer are typically needed for smoke odor, with the second coat applied to areas showing stain bleed-through or thin coverage. Complete coverage without gaps is essential because even small unsealed areas can reactivate smoke odor over time, negating the entire remediation effort.

Is oil-based or water-based Kilz better for smoke smell?

Oil-based Kilz Original is better for heavy cigarette smell and nicotine stains because it provides superior encapsulation of water-soluble nicotine residue. Water-based Kilz Restoration works for light smoke with lower fume concerns but may require additional coats compared to oil-based formulas for heavy tobacco contamination.

What safety equipment is needed when applying Kilz primer?

Safety equipment needed when applying Kilz oil-based primer includes N95 or organic vapor respirator mask, safety glasses, and nitrile gloves. Open all windows for cross-ventilation, use box fans to exhaust fumes outside, and remove pets and children for 24-48 hours during curing.

How do I know if Kilz primer sealed the smoke odor?

You know if Kilz primer sealed smoke odor by testing one small area, priming it, and waiting 72 hours to verify odor elimination before proceeding with the entire room. Check coverage under different lighting conditions and monitor previously smoke-affected rooms annually for yellowing or odor return.

Can I stay in my house while applying Kilz primer?

You can stay in your house while applying water-based Kilz Restoration with standard room ventilation, but oil-based Kilz requires vacating for 24-48 hours due to strong solvent fumes. Plan minimum 72 hours before returning sensitive individuals like infants, elderly, or people with respiratory conditions to freshly primed spaces.

Signs of Black Mold in House: What to Look For

0

Think that dark spot on your wall is just dirt?
It might be black mold, and the sooner you know, the less repair you’ll need.
This post walks you through the clear signs of black mold in house: what it looks like, the musty smells, common hiding spots, and health clues to watch for.
You’ll learn which tests help confirm it and the safety steps to take before you disturb anything.
Read on so you can spot trouble fast, stop more damage, and plan the right repairs.

Key Visual and Sensory Indicators to Identify Black Mold Indoors

x3fE0xqMSOSUa23Q9rD4GQ

Black mold typically appears as dark green to black patches that look fuzzy when they’re dry or slimy when moisture’s present. The colonies spread in irregular shapes or circular patterns, and you’ll often see the surface underneath starting to suffer. Drywall stains, ceiling tiles peel, wood trim warps. Pull back wallpaper or lift a corner of wet carpet and you might find dark discoloration with a soft, almost velvety texture. That’s a strong visual sign.

You’ll usually spot these patches in rooms where moisture sticks around. Bathrooms, basements, crawl spaces, areas near leaky pipes. Black mold needs steady dampness to grow, so any place that stays wet for more than a day or two can become a breeding ground. Check around shower surrounds, under sinks, behind washing machines, along basement walls where condensation pools.

The smell often hits you first, before you even see anything. Black mold releases a strong, musty odor that people describe as earthy, damp, or like rotting wood. That smell comes from microbial volatile organic compounds, and it gets worse in humid or poorly ventilated rooms. Walk into a space and immediately notice that smell? Start looking for moisture and discoloration.

Specific indicators to watch for:

Dark green, black, or deep brown patches that may appear fuzzy, slimy, or powdery depending on moisture level. Circular or irregular growth patterns spreading outward from a wet spot or leak. Staining, bubbling, or peeling paint and wallpaper near the colony. Warped or soft drywall, baseboards, or ceiling tiles in the same area. Persistent condensation on windows, pipes, or walls close to the growth. Water stains, rust marks, or discolored grout that signal ongoing moisture problems.

Common Household Areas Where Black Mold Thrives

XbZzV2VUSyOgO3PYQ12kMw

Bathrooms see constant humidity from showers and baths, so mold often takes hold around tubs, behind tiles, along caulk lines, inside poorly ventilated exhaust vents. If your bathroom doesn’t have a working fan or a window you can open, moisture just sits in the air and soaks into grout, drywall, and wood. Check around the toilet base and under the sink cabinet, especially if there’s been a slow leak.

Basements and crawl spaces are natural targets. They’re cooler, damper, and often have poor air circulation. Water can seep through foundation cracks, collect from high groundwater, or drip from overhead pipes. Mold grows on exposed wood joists, insulation, cardboard boxes, any porous material that stays damp. Attics can develop the same problem if roof leaks or condensation from temperature swings create wet spots on rafters and sheathing.

Highest risk household zones:

Bathrooms with limited ventilation or recurring steam and splash zones. Basements, especially unfinished spaces with concrete walls and minimal airflow. Crawl spaces with dirt floors, standing water, or inadequate vapor barriers. Kitchens near sinks, dishwashers, and refrigerator water lines. Around windows and exterior walls where condensation forms during temperature shifts.

Health Symptoms That Suggest Possible Exposure

WyLU_oRPRDGaVXxeGdjUIg

Respiratory symptoms are the most common reaction. You might notice persistent coughing, sneezing, a runny or stuffy nose, wheezing, or throat irritation that doesn’t go away even when you’re not sick. Some people feel tightness in the chest or have trouble catching their breath, especially if they already deal with asthma. These symptoms often get worse when you’re home and improve when you’re away for a few hours or overnight.

Chronic or recurring issues can include sinus infections that keep coming back, headaches that feel worse in certain rooms, ongoing fatigue, itchy or watery eyes. You might also see skin rashes or irritation in areas exposed to spores. If you clean a moldy spot without proper protection and then feel suddenly worse (more congestion, sharper headache, nausea), that’s a sign you disturbed the colony and released spores into the air.

Children, elderly individuals, pregnant people, and anyone with a weakened immune system or existing respiratory condition face higher risk. Infants and young kids are closer to the floor where spores settle, and their lungs are still developing. Older adults and people with asthma, allergies, or chronic obstructive pulmonary disease may experience severe reactions even from low level exposure. If someone in your household has these symptoms and you can’t find another cause, check for hidden mold near their bedroom or common areas.

Distinguishing Black Mold From Other Types of Mold

vRr8rLfRZCIu9_UO0_UFg

Many household molds share dark colors, so you can’t rely on appearance alone to confirm you’re dealing with toxic black mold. Cladosporium often looks dark green or black and grows on damp windowsills, bathroom tile, and fabrics. Alternaria can appear black or dark brown and tends to show up in showers, around leaks, on water damaged materials. Both are common, and both can cause allergic reactions, but they don’t produce the same mycotoxins as Stachybotrys chartarum.

Texture and growth pattern help narrow it down. Black mold usually feels slimy when wet and develops a more velvety or powdery surface when it dries out. It spreads in irregular patches or concentric rings and often leaves a greenish black stain on the surface underneath. Cladosporium tends to grow in smaller, more defined spots with a suede like texture. Alternaria can look fuzzy or hair like and spreads more evenly across damp surfaces.

Environmental behavior is another clue. Black mold needs continuous moisture and cellulose rich materials like drywall, wood, or ceiling tile. If the mold keeps coming back even after you dry the area or scrub it down, and it’s growing on paper backed drywall or inside a wall cavity near a leak, that increases the chance it’s Stachybotrys. Other molds may tolerate slightly less moisture or grow on different materials like concrete or plastic.

Mold Type Typical Color Growth Traits
Stachybotrys chartarum (black mold) Dark green to black, may appear slimy or velvety Requires continuous moisture; grows on cellulose materials; produces mycotoxins
Cladosporium Dark green, brown, or black; suede like texture Tolerates cooler temperatures; common on fabrics, wood, tile
Alternaria Dark brown to black; fuzzy or hair like appearance Grows quickly in damp areas; common in showers and on water damaged materials

Testing Methods to Confirm Black Mold

2_yq9LMmQCeL5m0QbR-7_w

If you see mold and you know you have a moisture problem, testing usually won’t change what you need to do. Remove the mold and fix the leak. But if you smell that musty odor and can’t find the source, or if someone in the house is having unexplained health symptoms, testing can confirm hidden growth and tell you how widespread the problem is.

Professional Mold Inspection

A certified inspector will do a visual walk through and use moisture meters to check walls, floors, and ceilings for hidden dampness. They’ll take air samples to measure airborne spore counts and surface samples from suspected colonies. The samples go to a lab for species identification, and you get a report showing what types of mold are present and at what concentration. This option works best when you suspect mold inside walls, in ductwork, or in spaces you can’t easily access. Inspections typically run $300 to $800 depending on your area and the size of your home.

Laboratory Surface Sampling

If you can see the mold, you can collect a sample yourself using clear tape or a sterile swab, then send it to a lab for analysis. The lab will identify the species and sometimes provide spore counts. Turnaround is usually a few days to a week. Each sample typically costs $75 to $200 to process. Surface sampling is useful when you want to confirm the exact type of mold before deciding on remediation, especially if you’re dealing with insurance or need documentation for a landlord.

DIY Mold Test Kits

Home test kits include a petri dish or swab that you expose to the air or press against a surface, then mail to a lab or read yourself using an included guide. They’re inexpensive, usually $10 to $50, and can give you peace of mind if you’re worried about air quality. The downside is accuracy. Some kits detect any mold spores in the air, which every house has to some degree, and they don’t tell you if what you found is actually a problem or just normal background levels. If the kit shows positive, you’ll still need professional confirmation to know the species and concentration.

Safety Precautions Before Inspecting or Disturbing Mold

BA-hwX35T3-OjL8ktS_4ZQ

Touching or scraping mold can release thousands of spores into the air, and those spores can travel through your HVAC system or settle on furniture, clothing, and other surfaces. Once airborne, they’re easy to inhale, and that’s when respiratory symptoms and allergic reactions start. Even if you’re just pulling back a piece of trim or lifting a corner of carpet to check for growth, you’re disturbing the colony.

Before you start poking around, put on basic protective gear. An N95 respirator will filter out most mold spores. Nitrile or rubber gloves keep spores off your skin, and safety goggles protect your eyes from irritation. Wear long sleeves and pants you can wash or throw away afterward. If you’re cutting into drywall or pulling up flooring, consider sealing off the room with plastic sheeting and running a fan to vent air outside through a window. Don’t run your central air or heat while you’re working. You’ll just spread spores to other rooms.

Essential protective gear:

N95 respirator or P100 mask for filtering airborne mold spores. Nitrile or heavy rubber gloves to avoid direct skin contact. Safety goggles or a face shield to protect eyes from spore release. Long sleeve shirt, long pants, and closed toe shoes; discard or launder immediately after inspection.

When to Contact a Professional Remediation Service

btg2rjZLT7GFxvFO42Pc_g

If the moldy area is larger than about 10 square feet (roughly a 3 by 3 foot patch), you’re usually better off calling a professional. At that size, the colony is well established, and trying to scrub it yourself can release a lot of spores and make the contamination worse. Professionals use containment barriers, negative air pressure, and HEPA filtration to keep spores from spreading while they remove damaged materials and treat surfaces.

Structural issues require expert help. If mold is growing inside wall cavities, on ceiling joists, in your HVAC system, or anywhere you need to cut open drywall or pull up flooring to reach it, that’s beyond a DIY job. The same goes for mold that appeared after a major flood, sewage backup, or roof leak that soaked insulation and framing. These situations often involve hidden damage, and you need someone who can assess moisture levels behind surfaces and verify everything is dry before closing it back up.

Recurring mold is a strong signal that the moisture source isn’t fixed. You can clean visible growth, but if it comes back in the same spot a few weeks later, there’s an underlying leak, condensation problem, or ventilation issue that you haven’t solved. A remediation specialist will trace the moisture, recommend repairs, and confirm the area is dry and treated so the mold doesn’t return. That’s especially important if you’ve already tried cleaning it yourself and the problem persists.

Final Words

If you spot dark, green-black patches or smell a strong musty odor, act fast. Check bathrooms, basements, ceilings, and areas near leaks. Use protective gear and don’t disturb large patches.

This post covered visual cues, common hotspots, health signals, testing options, safety steps, and when to call a pro. Take photos and record moisture readings for documentation.

If you notice signs of black mold in house, get it checked or tested right away, because quick steps stop the spread and cut repair time. You’ll get this fixed and back to normal.

FAQ

Q: What are the 10 warning signs of mold toxicity?

A: The 10 warning signs of mold toxicity include coughing, sneezing, sinus congestion, watery eyes, headaches, fatigue, skin rashes, wheezing, brain fog, and a persistent musty odor.

Q: How do you know if mold is making you sick?

A: You know mold is making you sick if symptoms like cough, congestion, eye irritation, headaches, or fatigue start or worsen at home and improve when you leave, or if several household members share them.

Q: Is it okay to be in a house with black mold?

A: Being in a house with black mold is not safe for long exposures, especially for kids, elderly, or people with breathing issues. Avoid prolonged contact, stop the moisture, and clean or call pros for large growth.

Q: What kills 100% of black mold?

A: Nothing household or DIY reliably kills 100% of black mold; full removal, fixing the moisture source, and replacing affected porous materials or hiring pros is required. Bleach only cleans surface spores.

How to Maximize Property Damage Claim: Smart Steps to Get Full Compensation

0

Most homeowners leave thousands of dollars on the table after property damage, accepting the first settlement offer without understanding what they’re legally entitled to receive. Insurance companies count on that. They know most people don’t read their policies, don’t document thoroughly, and don’t push back on lowball offers. Here’s the reality: maximizing your claim isn’t about gaming the system. It’s about knowing your coverage, proving your losses completely, and holding your insurer to the contract you’ve been paying for all along.

Critical Factors That Maximize Your Property Damage Settlement

1RMIzUl9SMCZ3VdB2OeOjA

Maximizing your property damage claim depends on three critical leverage points: understanding policy valuation methods, strategic professional representation, and evidence based negotiation. Get these right, and you’ll position yourself for full compensation rather than accepting the insurer’s first offer.

The difference between replacement cost value (RCV) and actual cash value (ACV) dramatically affects your settlement. RCV policies pay the current cost to replace damaged property with new materials of similar quality. ACV policies deduct depreciation based on age and condition, often reducing payouts by 30 to 60%. A $15,000 roof replacement might generate only a $7,500 ACV payout for a 10 year old roof with 50% depreciation applied. Check your policy declarations page to confirm which valuation method applies to your dwelling and personal property. This single factor can mean tens of thousands of dollars in settlement differences.

Public adjusters increase settlements beyond their 5 to 15% fee in specific scenarios: complex claims exceeding $50,000, catastrophic multi damage situations involving fire, water, and smoke simultaneously, and cases where initial offers seem inadequate compared to actual damage. Public adjusters typically increase settlements by 20 to 40% through comprehensive damage assessment and aggressive negotiation with insurance companies. They know what adjusters overlook and how to document damage that homeowners miss.

Negotiation tactics counter lowball offers effectively. Never accept first settlements without evaluation against contractor estimates. Provide written estimates from licensed contractors that exceed adjuster assessments. Itemize disagreements with policy specific justification citing coverage language. File supplemental claims for newly discovered damage during repairs. Damage you couldn’t see until contractors opened walls or removed flooring.

Immediate actions after damage occurs:

  • Conduct safety assessment checking for structural instability, electrical hazards, and gas leaks before entering property
  • Document all damage with photos and video before cleanup, capturing wide shots for context and close ups for specific damage details
  • Review policy coverage and valuation method to understand limits, deductibles, and whether you have RCV or ACV
  • Report claim within 24 to 72 hours as most policies require prompt notification and delays jeopardize coverage
  • Prevent further damage through reasonable mitigation like tarping roof holes, extracting standing water, and boarding broken windows
  • Preserve damaged items as evidence without discarding anything until adjuster inspection and final settlement

These three strategies work together to position you for maximum recovery. Policy knowledge tells you what you’re entitled to receive. Professional representation ensures comprehensive damage assessment. Evidence based negotiation forces insurers to justify inadequate offers with specific policy language rather than relying on homeowner uncertainty to accept less than full compensation.

Comprehensive Documentation: Building Evidence That Maximizes Settlement Value

4eWXvLuETKaWAqn50XAIcQ

Thorough documentation is the foundation of successful claims. Insufficient evidence leads to underpayment or denial every time.

Insurers default to policy minimums when proof is inadequate. They’ll pay only what you can prove you lost. Every undocumented item, every missing receipt, every unclear photo becomes money left on the table. The average homeowner loses $8,000 to $15,000 in settlement value through inadequate documentation alone.

Damage documentation:

Photograph all damage from multiple angles. Take wide shots showing entire rooms or exterior areas for context. Take close ups showing specific damage details like cracks, water stains, fire charring, broken materials. Use your phone’s date stamp feature or hold a dated newspaper in frame. Record video walkthroughs with narration explaining damage extent and affected areas. “This is the living room ceiling where water came through from the upstairs bathroom. You can see the bubbling paint here, and the drywall is soft when I press on it.”

Document pre loss property condition through old photos or videos. Family photos showing rooms before damage establish comparison baseline. Real estate listing photos work if you bought recently. Even social media posts showing your home before the loss help prove what was damaged.

Photograph all affected rooms even if damage seems minor. Water travels through walls. Smoke permeates entire structures. Fire heat damages materials far from visible flames. Document everything now because damage that seems minor today might worsen as materials dry out or you discover hidden issues during repairs.

Property inventory documentation:

Create itemized lists of all damaged personal property with purchase dates and original costs. List every piece of furniture, every electronic device, every article of clothing damaged by water or smoke. Organization by room helps ensure nothing gets missed.

Gather receipts and proof of ownership for high value items through credit card statements or bank records when original receipts are unavailable. Bank statements showing $2,500 charged to a jewelry store establish that purchase occurred even without the paper receipt.

Obtain professional appraisals for items exceeding policy sublimits. Most policies cap jewelry at $1,500 to $2,500, electronics at $2,500, and collectibles at $200 to $500 per item. Appraisals justify higher values for items exceeding these caps.

Organize inventory by room with estimated replacement values. “Master bedroom: queen mattress set purchased 2019 for $1,800, dresser purchased 2018 for $650, nightstands purchased 2018 for $200 each, table lamps purchased 2020 for $75 each…”

Ongoing claim documentation:

Maintain communication logs recording every interaction with your insurer. Note claim number, adjuster names, dates, times, and conversation summaries. “Called 3/15/24 at 2:30pm, spoke with adjuster Mike Johnson, claim #12345678. Discussed roof damage estimate. He said he’d send supplement approval by 3/20/24.”

Save all written correspondence and emails in organized folders. Create a claim file with subfolders for emails, letters, estimates, receipts, and photos. You’ll need this information multiple times throughout the claim process.

Document all mitigation efforts with photos and receipts showing reasonable steps to prevent further damage. Photograph the roof before and after tarping. Save the receipt for emergency water extraction service. These mitigation costs are reimbursable, but only with documentation.

Keep receipts for all temporary repairs and emergency services. Board up services, emergency roof tarping, water extraction, temporary fence installation. All reimbursable with receipts.

Photograph the adjuster inspection process itself. Document which areas the adjuster examined and which areas weren’t inspected. If the adjuster spent five minutes looking at your roof from the ground, photos prove inadequate investigation.

Documentation mistakes that reduce claim value:

  • Failing to document hidden damage in walls or structural areas like attic spaces, crawlspaces, and wall cavities where moisture or smoke traveled
  • Discarding damaged items before adjuster inspection and final settlement, eliminating physical evidence insurers require for verification
  • Incomplete room by room inventories missing secondary damage in closets, garages, storage areas, and outdoor structures
  • Missing receipt documentation for valuable personal property over policy sublimits resulting in insurers applying minimum coverage amounts
  • Inadequate photograph quality due to poor lighting or unclear images that don’t show damage extent or specific problem areas
  • Poor organization making evidence difficult for adjusters to review, slowing claim processing and increasing likelihood of overlooked damage
  • Failing to document discovery dates for damage found during repairs, making it difficult to justify supplemental claims for issues not visible initially

Digital organization strategies ensure documentation accessibility throughout the claim process. Create cloud based backup systems using Google Drive, Dropbox, or iCloud so documentation survives if your home is destroyed. Organize files by damage category and date with clear naming conventions: “2024-03-15Living-RoomWater-DamagePhotos” or “2024-03-18Contractor-Estimate_ABC-Restoration.pdf.” Maintain both digital and physical copies of critical documents in case of technology failures. Keep a printed claim file with key documents in a safe location away from your property. Ensure documentation accessibility for contractors, adjusters, and attorneys throughout the claim process by sharing organized folders rather than sending scattered emails with random attachments.

Understanding Your Policy Coverage and Claim Limits

HtDltk3PT7S5C3oNMU1Bng

Policy comprehension is essential before filing claims. Insurers often overlook certain coverages during initial assessments, counting on homeowners not knowing what they’re entitled to receive.

Reading your policy reveals available coverage that increases claim value. The difference between knowing your coverage and assuming coverage means thousands of dollars in settlement differences.

Key policy components:

Dwelling coverage vs. personal property coverage apply to different loss categories. Dwelling coverage pays for structural damage to your house. Walls, roof, floors, built in fixtures. Personal property coverage pays for belongings inside the house. Furniture, clothing, electronics, appliances. A fire that damages both structure and contents triggers both coverage types, potentially doubling available claim funds compared to homeowners who only claim structural damage.

Contents coverage limits and sublimits cap specific item categories. Most policies cover personal property at 50 to 70% of dwelling coverage but apply sublimits for valuable categories. Jewelry typically maxes at $1,500 to $2,500 total. Electronics coverage typically caps at $2,500. Collectibles often have $200 to $500 per item limits. These sublimits dramatically reduce settlements for valuable items unless you purchased additional coverage through scheduled endorsements.

Additional living expenses or loss of use coverage pays temporary housing and increased costs during repairs, typically 20 to 30% of dwelling coverage. A $300,000 dwelling policy might include $60,000 to $90,000 for temporary housing if fire damage makes your home uninhabitable for eight months. This coverage adds substantial value to total claim settlement but requires proper documentation of expenses.

Ordinance coverage pays code upgrade requirements that increase legitimate repair costs. Building codes change over time. Repairs often trigger requirements to upgrade electrical, plumbing, or structural systems to current code even though original damage didn’t involve those systems. Ordinance coverage pays these mandated upgrades. Without this coverage, you’ll pay thousands out of pocket for code compliance.

Deductible structures reduce net settlement amounts. Most policies have $1,000 to $5,000 deductibles applied to each claim. A $25,000 settlement with a $2,500 deductible means you receive $22,500. Percentage deductibles (common in hurricane prone areas) calculate based on dwelling coverage. 2% of $300,000 dwelling coverage equals $6,000 deductible.

Coverage homeowners frequently miss:

Scheduled personal property endorsements provide higher limits for appraised valuable items. If you scheduled your $8,000 engagement ring, it’s covered for full appraised value rather than the standard $1,500 jewelry sublimit. Scheduled items typically have no deductible and cover more loss types including mysterious disappearance.

Equipment breakdown coverage covers mechanical systems like HVAC, water heaters, and appliances when they fail from mechanical or electrical issues. This coverage bridges the gap between standard property damage coverage and manufacturer warranties.

Water backup coverage is separate from standard water damage protection. Standard policies cover water damage from burst pipes but exclude water backup from sewers or drains. This endorsement adds coverage for the specific scenario of sewer line backup flooding your basement.

Identifying coverage gaps before losses occur lets you purchase additional coverage. Review your policy annually with your agent. Ask specifically about sublimits, exclusions, and whether additional endorsements would benefit your situation based on your property’s value and contents.

Understanding exclusions prevents incorrect expectations. Flood damage requires separate National Flood Insurance Program policies. Earthquake damage requires separate earthquake coverage. Maintenance related damage from gradual deterioration or homeowner neglect isn’t covered. Knowing what’s excluded focuses your claim on covered damage and prevents wasted time documenting excluded losses.

Strategic Contractor Estimates: Using Professional Quotes as Negotiation Leverage

L_YaRpo6RPugahzxEtezdw

Independent contractor estimates are critical evidence that directly challenges insufficient insurance estimates. They shift negotiation power to homeowners by providing objective third party damage assessments that insurers can’t easily dismiss.

Insurance adjusters work for insurance companies. Their estimates often minimize damage to reduce claim payouts. Contractor estimates provide independent verification of actual repair costs and scope of work required to properly restore your property.

Strategic estimate process:

Obtain at least three written estimates from licensed, insured contractors specializing in the specific damage type. Fire restoration specialists for fire damage understand smoke remediation, structural repairs, and odor elimination in ways general contractors don’t. Roofing contractors for roof damage provide detailed assessments of decking, underlayment, flashing, and ventilation that general handymen miss. Water damage restoration companies understand moisture mapping, structural drying, and mold prevention better than typical remodeling contractors.

Ensure estimates include detailed scope of work with itemized costs for materials and labor rather than lump sum quotes. “Repair water damage: $8,500” provides no negotiating leverage. “Remove and dispose of damaged drywall (240 sq ft at $2.50/sq ft = $600). Dry framing and insulation with industrial dehumidifiers (3 days at $150/day = $450). Install new drywall (240 sq ft at $1.80/sq ft materials = $432). Tape, mud, and finish drywall (240 sq ft at $1.50/sq ft labor = $360)…” gives you specific line items to compare against adjuster estimates.

Request estimates that match or exceed current building code requirements since upgrades may be mandated. Electrical panel replacement might require AFCI breakers throughout the house per current code even though your 1985 panel didn’t have them. Window replacement might trigger egress requirements for bedroom windows. These code requirements are legitimate costs that policies must cover.

Time estimates to occur before or immediately after adjuster inspection to enable direct comparison. Schedule contractor walk throughs within 48 hours of insurance adjuster inspection while damage is in identical condition. This timing prevents insurers from claiming damage changed between their inspection and contractor assessment.

Understanding how contractor availability and post disaster demand affect pricing helps justify increased costs that insurers must acknowledge. After hurricanes, roof repair costs double or triple due to contractor demand. Material costs spike when disasters affect multiple states simultaneously. These market driven increases are legitimate costs insurers must pay, not homeowner problems to absorb.

Comprehensive estimates should contain:

Complete line item breakdowns for every repair task. Demolition, disposal, framing repairs, drywall installation, painting, trim work, flooring, electrical, plumbing. Every task separately identified with quantities and costs.

Specific material specifications with brand names and quality grades. “Replace damaged flooring with comparable 12mm laminate flooring, AC4 rating, Armstrong or equivalent” establishes quality expectations rather than allowing lowest grade materials.

Labor hours allocated to each task. This breakdown helps justify costs when adjusters claim estimates are inflated. “Drywall installation labor: 16 hours at $65/hour = $1,040” shows actual time required for quality work.

Permit costs required by local jurisdictions. Electrical permits, plumbing permits, building permits. All legitimate costs that insurers must reimburse as part of proper repairs.

Disposal and dumpster fees. Damaged material removal isn’t free. Dumpster rental, disposal fees, and labor for demolition are all reimbursable costs.

Project timeline projections. “Estimated completion: 4 to 6 weeks from authorization” helps you plan temporary housing duration and supports additional living expense claims.

Contractor licensing information. License numbers, insurance certificates, and contractor credentials establish that estimates come from qualified professionals, not unlicensed handymen providing unreliable assessments.

Presenting estimates strategically:

Point out specific line item discrepancies between adjuster and contractor estimates during negotiation meetings. “Your estimate shows $2,400 for roof decking replacement. Three licensed roofers estimated $4,200 to $4,800 for the same work. Can you explain this $2,000 difference?”

Request written explanation for why the adjuster excluded items that contractors included. If contractors include attic insulation replacement due to water saturation but the adjuster’s estimate doesn’t, ask for written justification citing specific policy language that excludes this coverage.

Use estimate differences to justify supplemental claim requests. When contractors discover additional damage during repairs that wasn’t visible during initial inspection, contractor documentation of newly discovered issues supports supplemental claims for increased scope.

Maintain professional but firm tone while advocating for contractor assessment validity. “I understand your estimate differs from the contractor estimates. However, three independent licensed contractors identified the same damage and similar repair costs. I need specific policy language explaining why covered damage isn’t being paid.”

Estimate discrepancies actually benefit homeowners in several ways. Higher contractor estimates justify settlement increases when supported by multiple consistent assessments. Multiple consistent contractor estimates outweigh single adjuster opinion. Three professionals agreeing carries more weight than one adjuster’s assessment. Post disaster pricing surges create legitimate cost increases that policies must cover through actual cash value at time of loss, not pre disaster pricing that no longer reflects market reality.

For specialized damage scenarios like fire and smoke damage restoration services, restoration company assessments differ from general contractor quotes by including services general contractors don’t provide. Thermal fogging for smoke odor, ozone treatment for pervasive smells, specialized cleaning for smoke residue on non damaged surfaces. These specialized services add legitimate costs to fire claims that general contractor estimates might not include. Insurance adjusters often overlook these specialized needs, making restoration company estimates essential for complete fire damage claims.

Property Damage Types and Claim Specific Maximization Strategies

gJ9MBNARTpC_gU1nTTzc-A

Different damage types require specialized documentation and assessment approaches that address unique coverage issues and hidden damage patterns specific to each loss category. A fire claim requires different evidence than a water claim. Wind damage creates different documentation needs than hail damage.

Water and Flood Damage Claims

Immediate mitigation documentation shows reasonable steps to prevent further damage. Photograph standing water before extraction. Document emergency water removal efforts with photos showing equipment placement and work in progress. Save receipts for emergency services, equipment rental, and temporary repairs.

Distinguish between covered sudden water damage and excluded gradual seepage or flood damage. Burst pipes, appliance malfunctions, and sudden roof leaks are covered. Groundwater seepage through foundation cracks and river flooding are excluded unless you have separate flood insurance. Document the water source clearly. Photograph the burst pipe, the failed water heater, the roof hole where rain entered.

Photograph water lines and saturation patterns on walls and floors. Water leaves visible marks showing how high it rose and where it traveled. These marks prove damage extent and help quantify affected materials for replacement calculations.

Document all affected materials including hidden moisture in walls and subfloors through professional moisture meter readings. Water wicks into drywall, insulation, and wood framing. Moisture meters quantify saturation levels that photos can’t show. Professional water damage restoration companies provide detailed moisture mapping showing affected areas requiring removal and drying.

Obtain estimates for full structural drying and mold prevention that insurers often undervalue. Proper water damage remediation requires industrial dehumidifiers, air movers, and antimicrobial treatment to prevent mold growth. These services cost $2,000 to $8,000 depending on damage extent but are essential for proper restoration. Professional water damage restoration and repair services provide detailed scopes including extraction, drying, moisture monitoring, and mold prevention that exceed basic contractor cleanup estimates.

Fire and Smoke Damage Claims

Document both visible fire damage and pervasive smoke damage throughout entire structure including areas far from fire origin. Smoke travels through HVAC systems, wall cavities, and attic spaces. Rooms without visible fire damage often have smoke residue on walls, ceilings, and contents requiring cleaning or replacement.

Inventory all smoke affected contents even in non burned rooms since smoke residue damages items throughout home. Clothing absorbs smoke odor. Upholstered furniture traps smoke particles. Electronics corrode from smoke exposure. Document everything affected, not just items near visible flames.

Obtain professional cleaning estimates for salvageable items rather than accepting total loss designations. Specialized cleaning restores many smoke damaged items for less than replacement cost. Insurers prefer cleaning when possible, but homeowners deserve estimates for both cleaning and replacement to make informed decisions.

Address odor remediation costs through thermal fogging or ozone treatment. Smoke odor permeates porous materials. Standard cleaning doesn’t eliminate deep odors. Thermal fogging uses heated deodorizing chemicals that penetrate materials the way smoke did. Ozone treatment chemically neutralizes odor molecules. These processes cost $800 to $3,000 but are necessary for livable restoration.

Document structural concerns from heat exposure even where no visible fire damage occurred. Heat weakens wood framing, compromises electrical wiring, and damages plumbing. Structural engineers may need to assess damage that’s not visible but affects structural integrity and safety.

Storm, Wind, and Hail Damage Claims

Document wind direction and debris impact patterns to prove damage causation. Photograph debris location, direction of fallen trees, and impact damage showing which direction wind hit your property. This documentation proves damage occurred during the specific storm event and counters insurer claims that damage pre existed the loss.

Obtain professional roof inspections with detailed reports identifying all compromised areas since ground level inspection misses damage. Roof inspectors walk every section, checking shingles, flashing, vents, and decking for impact damage, wind uplift, and hail strikes. Their reports include photos, measurements, and specific damage locations that ground level observations miss.

Photograph matching issues when partial repairs are proposed since inconsistent repairs reduce property value. If hail damaged the south facing roof slope but the adjuster approves replacement of only that section, photograph how new shingles won’t match aged shingles on other slopes. Document how partial repairs create aesthetic inconsistency reducing property value and marketability.

Address code upgrade requirements that legitimately increase claim value when repairs trigger permit requirements. Roof replacement might require ice and water shield underlayment that wasn’t required when the roof was originally installed. Window replacement might trigger tempered glass requirements for windows near doors. These mandated upgrades are legitimate costs that policies should cover.

Document interior damage from water infiltration through storm compromised roof or walls. Roof damage lets water enter, causing interior ceiling damage, wall damage, and flooring damage. Don’t limit your claim to exterior damage when interior damage resulted from the same storm event.

Secondary and hidden damage that adjusters commonly overlook or minimize includes multiple categories. Mold growth develops within 48 to 72 hours following water events. If water infiltrated from storm damage and wasn’t immediately extracted and dried, mold remediation becomes necessary and should be included in the claim scope. Structural issues behind cosmetic damage include compromised framing or foundations that aren’t visible until demolition exposes hidden areas. Electrical systems compromised by water or fire exposure create safety hazards requiring replacement rather than surface cleaning. HVAC systems contaminated by smoke or water often require full replacement rather than cleaning since contaminants circulate through ductwork and mechanical components. Plumbing damage from freezing or impact isn’t visible until water pressure is restored and hidden leaks appear. All these hidden damage categories justify supplemental claims when discovered during repair work, but only if properly documented with photos, contractor assessments, and clear explanation of how initial damage caused secondary issues.

When and How to Hire a Public Adjuster for Maximum Claim Recovery

xzcfLYIyRPSlkTtZHVaRZA

Public adjusters are licensed professionals who represent policyholders, not insurers, during the claim process. They work exclusively for homeowners, assessing damage, preparing claims, and negotiating with insurance companies to maximize settlements. Their compensation structure aligns their interests with yours. They’re paid a percentage of settlement increase, typically 5 to 15%, and collect nothing unless claim value increases. The percentage decreases as claim size increases: 15% for claims under $50,000, 10% for claims of $50,000 to $150,000, and 5 to 7% for claims exceeding $150,000.

Public adjusters provide greatest value and typically increase settlements by 20 to 40% in specific scenarios. Complex claims exceeding $50,000 where comprehensive damage assessment requires specialized expertise benefit from public adjuster involvement. These professionals know what damage to look for, how to document it properly, and what coverage applies under specific policy language.

Catastrophic damage with multiple loss types (fire plus water plus smoke damage, or wind damage with subsequent water infiltration) requires coordination across specialties. Public adjusters manage complex multi damage scenarios more effectively than homeowners juggling multiple contractors and coverage questions simultaneously.

Claims where initial insurance settlement seems insufficient compared to actual damage and contractor estimates signal underpayment. When three contractors estimate $85,000 in repairs but your adjuster offers $52,000, that $33,000 gap justifies public adjuster involvement even after their fee.

Situations where homeowners lack time or expertise to manage extensive claim process and documentation requirements make public adjusters valuable. If you’re dealing with job demands, family obligations, or temporary housing logistics while trying to document damage, hire professionals who handle claims full time.

Cases involving coverage disputes or partial denials require policy interpretation expertise. Public adjusters understand coverage nuances and can argue policy language interpretation more effectively than homeowners reading policies for the first time.

Claims where insurance companies delay responses or fail to negotiate in good faith waste homeowner time and prolong displacement. Public adjusters escalate unresponsive insurers through regulatory channels and persistent professional follow up that gets results.

Evaluating public adjuster qualifications before hiring:

  • State licensing verification through regulatory agency websites confirming current license status, disciplinary history, and license type specific to property claims
  • Specific experience with your damage type demonstrated through case examples and references from fire claims, water claims, or storm claims matching your situation
  • References from recent clients with similar claim types and sizes providing honest feedback about communication, results, and settlement timeline
  • Transparent fee structure with written contract specifying percentage, what services are included, and whether percentage applies to initial settlement or increases only
  • Detailed written contract outlining scope of representation, what public adjuster will handle, communication expectations, and termination provisions if relationship isn’t working
  • No upfront fees or costs beyond contingency percentage protecting you from financial risk if public adjuster doesn’t increase settlement enough to justify their fee

The public adjuster process starts with comprehensive damage assessment using specialized tools and expertise. They document damage homeowners miss, photograph hidden issues, and quantify damage extent using industry standard estimating software that insurers recognize and respect. Detailed claim preparation with organized documentation exceeding typical homeowner capability follows. Public adjusters create thorough damage inventories, obtain expert reports when needed, and compile evidence packages that address potential insurer objections before they’re raised. Direct negotiation with insurance company using industry knowledge and leverage comes next. Public adjusters speak the same language as insurance adjusters and know policy coverage arguments that work. They negotiate from positions of knowledge and aren’t intimidated by adjuster pushback. Claim resolution through settlement or appraisal process concludes the engagement. If negotiation doesn’t produce fair settlement, public adjusters manage the appraisal process where independent appraisers determine damage value.

Public adjusters handle claim preparation and negotiation. Attorneys handle bad faith litigation and legal coverage disputes. If your claim involves clear coverage that insurers are underpaying, hire a public adjuster. If your claim involves disputed coverage where insurers deny claims based on policy exclusions or limitations, hire an attorney who can litigate coverage disputes. The cost benefit analysis shows that increased settlements typically exceed adjuster fees by 2 to 3 times. A public adjuster charging 10% who increases your settlement from $52,000 to $85,000 earns $3,300 while you gain an additional $29,700 net of their fee. Money you wouldn’t have received handling the claim yourself.

Effective Negotiation Strategies to Increase Insurance Settlement Offers

jjZnsul8RRiBk_6DEUFZGg

Initial offers are often negotiable starting points rather than final determinations. Insurance companies expect counteroffers supported by documentation.

Insurers make initial offers based on their adjuster’s assessment, which frequently minimizes damage to reduce claim costs. They know most homeowners will accept first offers without question. The difference between homeowners who negotiate and homeowners who accept first offers averages $8,000 to $15,000 in additional settlement value.

Successful negotiation requires professional communication combined with firm advocacy supported by evidence. Emotional arguments don’t work. Policy based arguments supported by contractor estimates and damage documentation do work.

Specific negotiation tactics:

Never accept first offers without thorough evaluation against actual repair costs and contractor estimates. Initial offers deserve careful review, not immediate acceptance. Compare the settlement line by line against contractor estimates to identify shortfalls.

Respond in writing with detailed justification for higher amount citing specific policy language and damage evidence. Written responses create documentation of insurer bad faith if they refuse reasonable negotiation. “I received your settlement offer of $47,500 on March 15, 2024. After reviewing the offer against three contractor estimates and my policy coverage, I respectfully dispute the offer as inadequate for the following specific reasons…”

Provide contractor estimates that exceed adjuster estimates with clear explanation of discrepancies including itemized differences. Attach contractor estimates showing higher costs. Explain differences: “Your estimate allocates $3,200 for kitchen cabinet replacement. Three contractors estimated $6,800 to $7,200 for comparable cabinets. The difference appears to be your estimate assumes builder grade cabinets while my damaged cabinets were semi custom with specific features…”

Break down disagreements item by item rather than disputing total settlement amount since specific objections are harder to dismiss. Don’t say “Your $47,500 offer is too low.” Say “I dispute the following 12 line items where your estimate undervalues actual repair costs: 1) Roof decking replacement, 2) Insulation replacement, 3) Drywall quantity…”

Request specific policy language citations that support coverage for disputed items and require written explanation when coverage is denied. “Please provide the specific policy exclusion that denies coverage for attic insulation replacement. Three contractors identified this damage as directly caused by the roof leak, which is a covered peril under my policy.”

Set reasonable deadlines (10 to 14 business days) for insurer responses to maintain claim momentum. “Please provide your written response to this counteroffer by April 1, 2024. If I don’t receive a response by this date, I will assume you are negotiating in bad faith and will proceed accordingly.”

Maintain professional but firm communication tone that documents insurer delays or bad faith practices. Stay calm and factual. Avoid threats or emotional language. Document everything: “This is my third request for clarification on the denied insulation coverage. I have not received the policy language citation I requested in my February 28 and March 8 letters.”

Structured negotiation approach:

  1. Acknowledge receipt of initial offer with thank you for prompt processing to establish professional tone and confirm you received the offer
  2. Identify specific inadequacies with supporting documentation showing actual costs exceed offer with contractor estimates, photos, and policy coverage analysis
  3. Present detailed counteroffer with item by item cost breakdown supported by contractor estimates and policy coverage analysis showing exactly what you believe settlement should be
  4. Request written explanation for any denied items citing specific policy exclusions or limitations forcing insurer to justify denials with policy language
  5. Establish clear timeline for resolution with escalation plan if insurer fails to respond within reasonable timeframe

File supplemental claims for damage discovered after initial settlement when repairs reveal issues not visible during initial inspection. Supplemental claims are separate claims for additional damage from the same loss event. They’re legitimate when damage couldn’t reasonably be discovered until demolition or repair work exposed hidden areas.

Document additional damage for supplemental claims with dates proving discovery occurred during repair process. Photograph newly discovered damage immediately when contractors find it. Get contractor statements explaining why damage wasn’t visible during initial inspection. Document the date contractors discovered the issue to prove it wasn’t unreasonable to file supplemental claim weeks or months after initial settlement.

Reopen claim discussions when new evidence emerges showing damage extent exceeded initial assessment. If engineering reports reveal structural damage not identified by insurance adjuster, or if mold testing shows contamination requiring remediation that initial inspection missed, new evidence justifies claim reopening even after initial settlement seemed complete.

Bad faith insurance practices include unreasonable delays where insurers miss response deadlines repeatedly without explanation, failure to investigate thoroughly by conducting inadequate inspections or ignoring damage areas, misrepresenting policy terms to deny coverage that policies actually provide, and refusing to negotiate despite valid evidence supporting higher settlement amounts. When negotiation should shift to legal action: if insurers ignore three written requests for explanation of denied coverage, if they refuse to respond to counteroffers within 30 days without explanation, if they misrepresent policy language to justify inadequate settlements, or if they deny claims without conducting adequate damage investigation. At that point, attorney involvement becomes necessary.

Critical Claim Deadlines and Time Limits That Affect Settlement Value

dJqyznxWSqaHYvx3qE5Rqg

Missed deadlines are among the most common reasons for claim denial or reduction. Timeframes vary by policy and state with significant consequences for late compliance.

Insurance policies are contracts with specific performance requirements. When you miss deadlines outlined in the policy, insurers can legitimately reduce or deny claims based on your breach of contract obligations. These aren’t arbitrary rules. They’re contractual requirements you agreed to when purchasing the policy.

Deadline Type Typical Timeframe Consequence of Missing
Initial Claim Report 24 to 72 hours from discovering damage, or “prompt” notice Complete claim denial for failure to provide timely notice, or reduced settlement if delay prejudiced insurer’s investigation
Proof of Loss Submission 60 days from loss date, with extensions available if requested before deadline Claim denial for failure to provide required documentation, though extensions are commonly granted for reasonable requests
Settlement Response 30 days to accept, reject, or counter settlement offer before it expires Offer withdrawal forcing new negotiation from beginning, or acceptance of lower revised offer
Lawsuit Filing (Statute of Limitations) 1 to 5 years from claim denial or inadequate settlement, varies by state Complete loss of legal right to sue insurer for bad faith or breach of contract, leaving inadequate settlement as final resolution

Most policies require “prompt” or “immediate” notice, typically interpreted as 24 to 72 hours of discovering damage. Discovering damage means when you knew or reasonably should have known about the damage, not when damage occurred. If you were on vacation when a pipe burst and returned home a week later to find water damage, the clock starts when you returned home and discovered the damage, not when the pipe actually burst.

Deadlines for submitting proof of loss documentation commonly fall 60 days from loss date. Proof of loss is a formal sworn statement documenting what was damaged and the claimed value. This deadline has extensions available if requested before the deadline expires. If you need more time to compile documentation, request an extension in writing before the 60 day deadline.

Timeframes for accepting or disputing settlement offers typically give 30 days to respond before offers expire. Settlement offers aren’t indefinite. If you don’t respond within the stated timeframe, insurers can withdraw the offer and issue revised (often lower) offers or require new negotiation from the beginning.

Statute of limitations for filing lawsuits against insurers varies by state, typically 1 to 5 years from claim denial or inadequate settlement. Florida allows 5 years. Texas allows 2 years. California allows 2 years. Check your state’s statute of limitations because missing this deadline eliminates your right to sue for bad faith or breach of contract, leaving you stuck with whatever inadequate settlement the insurer offered.

Deadlines for supplemental claims when additional damage is discovered fall within reasonable timeframe from discovery date, typically 60 to 90 days. You can’t discover hidden mold three months after initial settlement and wait another six months to file a supplemental claim. File supplemental claims promptly when contractors discover additional damage during repairs.

Documenting compliance with deadlines:

Send

Final Words

Start documenting damage now, not later. Get those photos, save those receipts, and talk to contractors who can give you real numbers.

The work you put into learning how to maximize property damage claim matters. Most homeowners leave money on the table because they don’t know what’s covered, don’t push back on low offers, or miss deadlines.

You don’t have to accept the first number they give you. Get organized, understand your policy, and don’t be afraid to bring in help when the claim gets complicated.

Your home matters. Fight for what it takes to fix it right.

FAQ

What is the 80% rule in property insurance?

The 80% rule in property insurance requires homeowners to insure their property for at least 80% of its replacement cost to receive full claim payment. If you carry less coverage, the insurer pays only a proportional amount of the loss, which means you face significant out-of-pocket expenses even on partial damage claims.

What is the average settlement for property damage?

The average settlement for property damage varies widely based on loss type and extent, ranging from $5,000 for minor water damage to over $75,000 for major fire or storm damage. Settlement amounts depend on coverage limits, deductibles, policy type (replacement cost versus actual cash value), and how thoroughly you document damage and negotiate with your insurer.

What should you not say to an insurance adjuster?

You should not tell an insurance adjuster that you’re unsure about damage extent, accept blame for the loss, provide inconsistent statements about what happened, or agree that initial damage assessments are complete. Avoid speculating about repair costs, admitting to delayed maintenance, or saying you’ll accept whatever they offer, as these statements reduce your settlement leverage.

What are the top 3 claim settlement ratios?

The top 3 claim settlement ratios vary by insurer and change annually based on company performance and claim volume. State insurance departments publish complaint ratios and settlement statistics for major insurers, which homeowners should review before purchasing coverage to identify companies with better claims handling reputations and higher approval rates.

How long does it take to settle a property damage claim?

Property damage claims typically take 24 days on average to settle for straightforward cases, though complex claims involving significant damage or coverage disputes can extend to several months. The timeline depends on damage extent, documentation completeness, contractor estimate availability, and insurer responsiveness throughout the negotiation process.

Can you negotiate a property damage settlement?

You can negotiate a property damage settlement by providing contractor estimates that exceed the adjuster’s assessment, documenting additional damage discovered during repairs, and submitting written counteroffers with specific justification. Initial insurance offers are typically starting points, not final amounts, and insurers expect homeowners to negotiate when evidence supports higher claim values.

When should you hire a public adjuster for a claim?

You should hire a public adjuster for claims exceeding $50,000, catastrophic multi-damage scenarios, or situations where initial settlement offers seem inadequate compared to actual repair costs. Public adjusters typically increase settlements by 20-40% through comprehensive damage assessment and aggressive negotiation, which exceeds their 5-15% contingency fee.

What is the difference between replacement cost and actual cash value?

Replacement cost coverage pays the current cost to replace or repair damaged property without depreciation deductions, while actual cash value subtracts depreciation based on age and condition, often reducing payouts by 30-60%. A $15,000 roof replacement might yield only a $7,500 actual cash value settlement for a 10-year-old roof with 50% depreciation.

How do you document property damage for insurance claims?

You document property damage for insurance claims by photographing all damage from multiple angles with date stamps, recording video walkthroughs with narration, creating itemized inventories with purchase dates and costs, and maintaining communication logs of all insurer interactions. Preserve damaged items until adjuster inspection and keep receipts for all mitigation efforts and temporary repairs.

What personal property has coverage limits in homeowners insurance?

Personal property with coverage limits in homeowners insurance includes jewelry (typically $1,500-$2,500), electronics ($2,500), collectibles ($200-$500 per item), firearms ($2,500), and business equipment ($2,500). These sublimits dramatically reduce settlements for valuable items unless you purchase scheduled personal property endorsements with higher agreed-upon values through professional appraisals.

Basement Egress Window Waterproofing: Stop Leaks Permanently

0

Think a fresh bead of caulk will stop basement egress window leaks for good?
Think again.
Caulk hides the symptom but not the soil pressure, clogged wells, or failing membranes that force water past the sill.
If you’re tired of damp trim, brown stains, or musty smells, this guide gives the real fix.
We’ll walk through the exterior-first steps that work—waterproof membrane up the wall, a 4-inch perforated drain in clean gravel, proper grading, sealed frame joints, and a tight well cover—so you can stop leaks permanently.

Key Waterproofing Solutions for Keeping Egress Windows Dry

RE_AqBIeSryav9UQAKGbZQ

Water gets into basement egress windows through failed seals where the frame meets foundation, clogged or missing window well drains, and bad waterproof membranes. Check for puddles or drips right under the window, mold on trim or drywall, brown or yellow wall stains, and paint that’s starting to fade near the sill. If paint’s bubbling or flaking where window meets wall, water’s already behind it.

Quick fixes mean clearing out contaminated gravel, re-caulking visible gaps with exterior grade polyurethane sealant, and putting up heavy duty covers to stop rain and debris. Long term prevention takes a 4 inch perforated drain pipe at the bottom of the well, sloped 1 to 2 percent toward daylight or a sump, backfill with clean three quarter inch crushed stone, waterproof membrane over the foundation wall at least 2 to 3 feet above grade, and regrading soil so it slopes away from the house.

Six critical waterproofing parts that work together:

Self adhesive or liquid applied waterproof membrane from below the sill to 2 to 3 feet above grade, covering foundation wall and lapping onto window flange (around 50 square feet per window).

Four inch perforated drain pipe running along the well base and tied to footing drain or sump pump, buried in gravel.

Three quarter inch clean crushed stone backfilled around drain pipe and behind well liner, 6 to 12 inches deep, so water drains freely and soil doesn’t clog things up.

Exterior grading sloped at least one quarter inch per foot for the first 4 to 6 feet from foundation to push surface water away from the well.

Polyurethane or hybrid polymer sealant at all joints between window frame and foundation opening to block direct water entry.

Heavy duty polycarbonate or steel well cover that seals to the well lip, blocks rain, snow, and leaves, and keeps debris from clogging the drain.

Building Science Forces That Lead to Egress Window Water Intrusion

ohmSiHMoRAytety40J2CIA

Water doesn’t just run downhill. It moves through soil under pressure, pushes sideways against foundation walls, and forces its way through tiny cracks in concrete and mortar. Understanding what drives these forces explains why surface fixes like caulking often fail and why real solutions require managing soil saturation and pressure, not just sealing visible gaps.

Hydrostatic pressure builds when soil gets saturated after heavy rain or snowmelt, creating a column of water that pushes against foundation wall with force proportional to how deep the saturation goes. Freeze thaw cycles make it worse. Water expands as it freezes, driving cracks wider each winter and creating new routes for water to get in. Soil expansion and structural shifting also open joints over time, especially around the rigid window frame where it meets the flexible foundation wall.

Five core mechanisms that push water into egress windows:

Hydrostatic pressure builds when saturated soil pushes against foundation wall. Water gets in through cracks, mortar joints, and the seam between window frame and rough opening when pressure beats the seal strength.

Soil saturation cycles mean repeated wetting and drying. Clay heavy soils expand and contract, shifting the foundation slightly and breaking adhesive bonds between sealants and whatever they’re stuck to.

Freeze thaw expansion happens when water trapped in concrete pores freezes, expands, and widens hairline cracks into pathways large enough for bulk water flow. Same cycle damages caulk and membrane adhesives.

Inadequate drainage velocity means when drain systems can’t remove water faster than it accumulates, standing water in the window well increases the effective hydrostatic head and drives infiltration at the lowest point, usually the sill joint or a crack near the frame corner.

Structural settlement and wall movement from normal foundation settling and lateral soil pressure create differential movement between rigid masonry and the window frame, shearing sealant beads and opening gaps that come back even after fresh caulking.

Exterior Waterproofing for Egress Windows: Drainage, Membranes, and Excavation

I2lqAsYiRrezHPW-dDQ19A

Exterior waterproofing is the only method that stops water from reaching the foundation wall in the first place. Interior fixes manage symptoms. Exterior membranes, flashing, and perimeter drains stop infiltration at the source by shedding water away from the window opening and removing it before pressure builds.

The basic exterior approach requires excavating soil around the window well, exposing foundation wall from 2 to 3 feet below the window sill down to the footing if possible, repairing cracks and voids in concrete, applying a continuous waterproof membrane, installing perforated drain pipe to carry water away, and backfilling with clean gravel that allows free drainage. Material quantities for a typical single egress window include a 50 square foot roll of membrane, 10 to 30 feet of 4 inch perforated drain pipe depending on distance to the tie in point, and one half to one cubic yard of three quarter inch crushed stone.

Excavation and substrate preparation

Excavate by hand or with a small machine to expose foundation wall at least 2 feet beyond the window well perimeter and down to footing level or at minimum 12 inches below the window sill. Remove all loose soil, old tar coatings, and debris from the concrete surface. Fill active cracks with hydraulic cement, which sets in minutes even when water’s seeping, or inject epoxy for structural cracks wider than one eighth inch. Let repairs cure, then wire brush the wall to create a clean, slightly rough surface for membrane adhesion.

Applying exterior membranes and flashing

Roll out a self adhesive rubberized asphalt or polymer modified bitumen membrane in a single continuous sheet that extends from below the window sill up the foundation wall to at least 2 to 3 feet above final grade. Overlap horizontal seams by 6 inches and vertical seams by 4 inches, pressing firmly to eliminate air pockets. Extend the membrane 6 inches onto the window frame or rough opening flange, sealing the transition with compatible flashing tape or liquid sealant. Membrane thickness should be 40 to 60 mils for typical residential applications. Heavier 60 to 120 mil membranes are used in high water table or commercial projects.

Installing 4″ drain pipe, gravel, and backfill

Lay 4 inch perforated PVC or corrugated HDPE drain pipe at the base of the excavation, sloped one eighth to one quarter inch per foot toward a daylight outlet, existing footing drain, or sump pump discharge line. Surround the pipe with 6 to 12 inches of three quarter inch clean crushed stone to create a free draining envelope. Backfill the remainder of the excavation with the same crushed stone up to within 6 inches of final grade, then cap with native soil sloped away from the foundation. Compact backfill in lifts to prevent settlement.

Material Typical Quantity Purpose
Self adhesive waterproof membrane (40–60 mil) 50 sq ft per window Seal foundation wall and window flange against infiltration
4″ perforated drain pipe (PVC or HDPE) 10–30 linear feet Collect and remove groundwater before pressure builds
3/4″ clean crushed stone 0.5–1 cubic yard Surround pipe and backfill well to promote drainage
Hydraulic cement or epoxy crack filler 1–5 lb Seal cracks and voids in foundation before membrane application

Window Well Design, Covers, Liners, and Drainage Around Egress Windows

A6PtDkY9Sj6F3-KJy8M4Ug

A properly designed window well does three jobs. It keeps soil away from window glass, provides a gravel packed drainage zone that intercepts groundwater before it reaches the frame, and supports a cover that blocks rain, snow, and debris. Code typically requires a minimum well area of 9 square feet with at least one dimension of 36 inches. Wells deeper than 44 inches must include a permanently attached ladder or steps.

The well liner (usually corrugated galvanized steel, heavy duty plastic, or masonry block) mounts against the foundation wall and extends several inches above grade to shed surface water away from the opening. At the bottom of the well, install 4 inches of three quarter inch gravel over the perforated drain pipe. Covers range from $60 to $250 for polycarbonate domes that let in light, to $120 to $400 for heavy duty powder coated steel or aluminum grates that bear snow loads and foot traffic. Sealed or gasketed covers prevent leaves and debris from clogging the drain, which is the most common failure mode in existing wells.

Key design features that prevent leaks and maintain code compliance:

Well area at least 9 square feet with minimum horizontal dimension of 36 inches to provide working clearance and drainage volume.

Four inch perforated drain pipe at the base of the well, sloped to an outlet, covered with 6 to 12 inches of clean gravel.

Well liner lip extends at least 3 inches above finished grade and slopes away from the window to shed surface runoff.

Heavy duty cover rated for local snow load, with air vents or sealed gasket to prevent debris entry while allowing ventilation.

Ladder or step system permanently fixed to the well wall when depth exceeds 44 inches, meeting egress window accessibility requirements.

Gravel kept clean and free draining. Remove and wash or replace gravel if it becomes contaminated with soil, leaves, or organic matter.

Interior Waterproofing Methods for Egress Windows

KQ0nbt0PRuKZmiZSgfPuEw

Interior waterproofing manages water after it’s already passed through the foundation wall. It doesn’t prevent infiltration. It redirects water to a controlled drainage system so it doesn’t pool around the window or damage finishes. Use interior methods when exterior excavation is impossible due to pavement, landscaping, or adjacent structures, or when persistent groundwater seepage continues despite exterior membrane repairs.

The core interior strategy is a perimeter French drain. Excavate the basement slab along the foundation wall to expose the footing, install 4 inch perforated drain pipe at footing level, cover it with gravel, and route it to a sump pump basin. The sump pump (typical cost $200 to $1,000 installed) lifts collected water and discharges it outside, away from the foundation. For active leaks at cracks or joints, inject epoxy or apply hydraulic cement from the inside to stop visible flow, then coat the wall with a 40 to 60 mil interior waterproofing membrane or elastomeric masonry coating to manage residual moisture. Interior fixes don’t address hydrostatic pressure, so they work best alongside exterior grading improvements and gutter maintenance.

Interior systems are necessary when:

Exterior access is blocked by permanent structures like driveways, decks, or adjacent buildings, making excavation impractical or prohibitively expensive.

Persistent groundwater seepage continues after exterior membrane and drain repairs, indicating a high water table or subsurface spring that requires active pumping to control.

The egress window was installed without proper flashing or exterior waterproofing, and the homeowner can’t afford full exterior excavation and membrane installation immediately. Interior drainage buys time and prevents ongoing damage while saving for a complete exterior fix.

Condensation has been ruled out and moisture readings confirm active water infiltration through the wall rather than interior humidity condensing on cold glass or frames. Dehumidifiers rated for 30 to 70 pints per day help manage interior humidity but don’t stop leaks.

Step by Step Waterproofing Process for a Basement Egress Window

EtMmsfDMT62q9Lkd0ss7Tw

A complete waterproofing job follows a logical sequence that addresses drainage first, then sealing, then protection from above. Skipping steps or reversing the order leaves weak points that allow water to bypass even high quality materials.

The full installation process from excavation to final backfill:

Inspect the window and well immediately after a heavy rainfall to identify active leak points. Look for dripping at the frame, pooling water in the well, and damp or stained drywall inside.

Excavate soil around the well to expose the foundation wall from 2 to 3 feet below the window sill, extending at least 18 inches beyond the well perimeter on all sides.

Clean the foundation wall with a wire brush, remove loose material, and let the surface dry completely. Apply concrete primer if recommended by the membrane manufacturer.

Fill all cracks wider than one sixteenth inch with hydraulic cement for active leaks or polyurethane crack sealant for stable cracks. Allow curing time per product instructions.

Apply the waterproof membrane in a continuous sheet from below the sill up the foundation wall to at least 2 to 3 feet above final grade, overlapping seams as specified, and extending 6 inches onto the window frame or flange.

Install a sill pan or sub sill flashing beneath the window if the rough opening allows access. This catches any water that bypasses the frame seal and directs it back outside.

Place 4 inch perforated drain pipe at the bottom of the excavation, sloped one eighth to one quarter inch per foot, and connect it to an existing footing drain, daylight outlet, or sump pump line.

Backfill around the pipe with 6 to 12 inches of three quarter inch clean crushed stone, then fill the remainder of the excavation with more stone up to within 6 inches of grade.

Cap the stone backfill with native soil, sloped away from the foundation at least one quarter inch per foot for the first 4 to 6 feet to direct surface water away from the well.

Install a heavy duty polycarbonate or steel window well cover, ensuring it seals tightly to the well lip or includes gaskets to block debris and rain while allowing ventilation.

Professional contractors typically complete a straightforward single window exterior waterproofing job in 1 to 3 days. DIY projects with simple fixes like cleaning gravel, re caulking joints, and installing a new cover take 1 to 2 days for homeowners comfortable with hand tools and basic drainage concepts.

Cost, Labor, and Timeline for Egress Window Waterproofing

MZs20Lx5QfiqAs9GvxJ7WA

Waterproofing costs vary with the scope of work, access difficulty, and whether you hire a contractor or do the labor yourself. Small repairs like re caulking joints and adding a well cover cost under $100 in materials and an afternoon of work. Full exterior excavation, membrane application, drain pipe tie in, and professional labor can exceed $10,000 when multiple windows or extensive foundation repairs are involved.

DIY projects using store bought sealants, membranes, and covers typically cost $50 to $800 in materials for a single window, assuming no major foundation damage. Hiring a contractor to replace a window well and cover runs $150 to $1,200. Installing an interior French drain tied to a sump pump costs $1,000 to $6,000 depending on the basement perimeter length and existing floor conditions. Exterior excavation with membrane, new drain tile, gravel backfill, and restoration of landscaping ranges from $3,000 to over $12,000 for comprehensive projects. Adding a new egress window with well during a waterproofing project costs $1,000 to $5,000 depending on wall type, window size, and finish details.

Scope Typical Cost Typical Time
DIY minor sealing, gravel cleaning, cover replacement $50–$800 1–2 days
Professional window well and cover install/repair $150–$1,200 1 day
Interior French drain tied to sump pump $1,000–$6,000 3–7 days
Exterior excavation, membrane, drain tile, backfill $3,000–$12,000+ 1–2 weeks
New egress window installation with well $1,000–$5,000 2–5 days

Building Code Requirements That Affect Waterproofing Around Egress Windows

G5jzn5noSq6YOQGir3EeWA

Egress windows must meet minimum size and accessibility standards to serve as emergency escape routes. These code requirements directly influence waterproofing design. Well depth determines whether a ladder is required, which affects cover design and drainage layout, and the minimum well area affects gravel volume and drain pipe placement.

Most jurisdictions adopt the International Residential Code or similar standards, which specify a net clear opening of at least 5.7 square feet (approximately 821 square inches), minimum opening height of 24 inches, minimum opening width of 20 inches, and maximum sill height of 44 inches above the finished basement floor. The window well must provide at least 9 square feet of horizontal area with a minimum dimension of 36 inches in any direction. Wells deeper than 44 inches require a permanently attached ladder or steps with treads at least 3 inches deep.

Measurements that must be met to satisfy typical egress and safety codes:

Net clear opening area minimum 5.7 square feet (verify local amendments for bedrooms vs. other habitable spaces).

Opening dimensions at least 24 inches tall and 20 inches wide when fully open.

Sill height maximum 44 inches above the basement floor (lower sills improve accessibility).

Window well area minimum 9 square feet with at least one dimension of 36 inches to allow occupant movement and ladder placement.

Moisture Control, Condensation Prevention, and Thermal Comfort Around Egress Windows

7kZsazO4TdS5iOOmNC1Niw

Not all moisture on basement windows is a leak. Condensation forms when warm, humid indoor air contacts cold glass or metal frames, leaving droplets or frost that can drip onto sills and stain trim. Surface water infiltration shows up as active dripping during or after rain, pooling in the well, or damp soil visible around the frame. Condensation appears as fogging between double pane glass or surface moisture with no corresponding soil wetness.

Reduce condensation by lowering indoor humidity with a dehumidifier rated for 30 to 70 pints per day depending on basement size, upgrading to insulated double or triple pane low emissivity glass, and installing window frames with thermal breaks that reduce heat transfer. Seal air leaks around the rough opening with spray foam or backer rod and sealant to prevent warm interior air from reaching cold surfaces. In cold climates, consider insulated well covers or removable storm panels during winter months to add an extra thermal buffer.

Improvement strategies that reduce both condensation and heat loss:

Install double or triple pane low E glass with insulated frames and thermal breaks to raise interior surface temperature and reduce condensation risk.

Run a basement dehumidifier continuously during humid months to keep indoor relative humidity below 50 percent, which minimizes condensation on all cold surfaces.

Seal gaps between the window frame and rough opening with closed cell spray foam or backer rod plus polyurethane sealant to eliminate air leakage and thermal bridging.

Add insulated, gasketed well covers in winter to create a dead air space that moderates temperature swings and reduces frost formation on glass.

Maintenance Practices That Protect Egress Window Waterproofing Long Term

45YJ540LRxiWpJSUThHhew

Waterproofing systems degrade slowly. Gravel clogs with sediment, covers crack under snow load, sealant joints shrink and lose adhesion, and drain pipes fill with roots or silt. Regular inspection and minor maintenance every few months prevent small problems from becoming expensive failures.

Inspect window wells, covers, and drains twice each year in spring and fall, and again after any storm that drops more than 2 inches of rain or heavy wet snow. Clear leaves, twigs, and debris from wells monthly during fall when trees drop material faster than covers can shed it. Test the sump pump annually by pouring water into the basin until the float activates, and clean the intake screen to prevent clogging. Re inspect and touch up sealant joints every 3 to 5 years, watching for cracks or gaps wider than one sixteenth inch. Plan to replace polycarbonate well covers every 5 to 10 years as UV exposure makes them brittle, and steel or aluminum covers every 10 to 15 years as coatings wear and rust begins.

Maintenance tasks that extend the life of egress window waterproofing:

Inspect wells and covers in spring and fall, and within 24 hours after heavy rain or snowmelt, looking for standing water, debris buildup, or new cracks in concrete.

Clear leaves, dirt, and organic matter from window wells monthly during fall, and remove snow accumulation from covers after winter storms to prevent overloading and melting into the well.

Test perforated drain pipes and sump pump operation annually by running water into the well and confirming it drains completely within minutes.

Re caulk joints between window frames and foundation every 3 to 5 years using polyurethane or hybrid polymer sealant rated for below grade exposure.

Replace well covers every 5 to 15 years depending on material. Polycarbonate degrades faster under UV, steel lasts longer but may rust.

Monitor interior humidity and dehumidifier performance, emptying catch buckets or checking drain lines weekly during humid months to prevent overflow and ensure condensation stays controlled.

Final Words

When water soaks the window well, act fast: clear debris, check the drain, and re-caulk visible gaps.

This post walked through how leaks start, the building forces that push water in, and practical fixes—from exterior membranes and 4″ perforated drain pipe installs to well covers, sill pans, and interior drains. Follow the step-by-step process, meet code, and keep a simple maintenance routine. Take photos and moisture readings so repairs and costs are clear.

With proper basement egress window waterproofing, you’ll stop the leak and get the space back to normal.

FAQ

Q: How to waterproof a basement egress window?

A: The way to waterproof a basement egress window is to stop water outside and seal the frame: install an exterior membrane, fit a 4″ perforated drain with 3/4″ crushed stone, re-caulk gaps, and add a well cover.

Q: Are egress windows waterproof? Should basement windows be waterproof?

A: Egress windows are not waterproof by default, and basement windows should be protected. Use frame sealing, exterior membranes, window-well drains, clean gravel, and covers to prevent leaks, mold, and rot.

Q: Why put rocks in window wells?

A: You put rocks in window wells to let water flow to the drain and keep soil from clogging it. Use 3/4″ crushed stone for a gravel-packed well so drains stay clear and work reliably.

PPE for Black Mold Removal: Safety Gear Checklist

0

Think your hardware store dust mask will protect you from black mold spores measuring 0.003 millimeters across. It won’t. Cloth masks, surgical masks, and basic dust filters let microscopic spores straight through to your lungs while you’re scrubbing contaminated surfaces and stirring them into the air you breathe. Black mold removal demands respiratory protection filtering down to 0.3 microns, sealed eye coverage blocking spores from every angle, chemical resistant gloves and coveralls creating full body barriers, and waterproof footwear. The right PPE checklist depends on how much contamination you’re facing, what materials are affected, and whether you’re dealing with surface growth or hidden mold behind walls.

Essential PPE Requirements: Complete Equipment Specifications for Black Mold Removal

wN8AAXLfRomBo12zoij0IA

Black mold removal needs four types of protection working together. Respiratory defense, full body skin barrier, eye and face shielding, and hand plus foot protection. Each piece blocks a different contamination path. Your lungs need filtered air. Your skin needs a sealed barrier. Your eyes need wraparound coverage. Your hands and feet need chemical resistance and waterproofing.

Equipment specs change based on how much mold you’re dealing with, what type it is, and how long you’ll be working. Small jobs under 30 square feet need minimum protection standards. Larger areas demand professional grade equipment with better filtration and sealed containment. The wrong gear doesn’t just make the job uncomfortable. It lets microscopic spores enter your body while you’re stirring them into the air.

Complete PPE Specifications for Black Mold Removal:

  • NIOSH approved N95 respirator filtering 95 percent of airborne particles down to 0.3 microns, works for areas under 30 square feet with proper fit testing and single use disposal after each work session, or upgrade to P100 respirator filtering 99.97 percent of particles with replaceable cartridges for jobs over one hour or multiple cleaning sessions

  • Full face respirator with P100 filters combining respiratory and complete eye protection for contamination approaching 30 square feet, heavy spore concentration shown by strong musty odors, or when working in confined spaces like closets and bathrooms where air circulation is limited

  • Powered Air Purifying Respirator (PAPR) with HEPA filters providing battery powered positive airflow for professional remediation over 30 square feet, eliminating breathing resistance during extended work periods and maintaining protection even with facial hair present

  • ANSI Z87.1 rated non vented or indirect vent safety goggles with anti fog coating wrapping fully around eye sockets to block airborne spores from every angle, featuring soft rubber gaskets that seal against facial contours without gaps at temples or nose bridge

  • Clear polycarbonate face shield worn over goggles deflecting liquid disinfectants, cleaning agents, and debris during scrubbing work. Face shields never replace goggles because they allow airborne spores to enter from sides and bottom gaps

  • Nitrile or neoprene chemical resistant gloves with extended mid forearm cuffs reaching at least six inches above wrist, minimum 6 mil thickness resisting punctures from rough surfaces and degradation from bleach solutions and antimicrobial cleaners, single use disposal protocol after each contaminated area

  • Disposable Tyvek or microporous film coveralls with integrated hood covering hair completely, elastic wrist and ankle closures preventing sleeves from riding up during overhead work, sealed seams resisting tearing around sharp edges, and attached boot covers eliminating the gap where spores collect at shoe tops

  • Knee high waterproof rubber or PVC boots with slip resistant soles gripping wet basement concrete and damp subfloors, or disposable polyethylene boot covers over regular work shoes for small jobs under 30 square feet lasting less than one hour

  • Two layer glove system pairing inner disposable nitrile liner gloves with outer heavy duty chemical resistant gloves for extended jobs requiring repeated tool handling, allowing outer glove changes when contaminated while maintaining inner barrier protection

  • All respiratory equipment must get proper seal with clean shaven face (no beards, stubble, or sideburns breaking contact), pass user seal check by covering exhaust valve and inhaling to verify mask pulls tight against face, and remain dry throughout work session. Damp masks lose filtration efficiency

Respirator Type Filtration Efficiency Best For Limitations Cost Range
N95 Disposable 95% of particles 0.3 microns Single room jobs under 30 sq ft, work under 1 hour Single use only, no facial hair allowed, discard when damp $2-5 each
P100 Half Face Reusable 99.97% of particles Multiple sessions, jobs lasting 1-3 hours, moderate contamination Requires cleaning after each use, cartridge replacement every 40 hours $30-80 plus $15-30 per cartridge pair
Full Face P100 99.97% plus complete eye protection Heavy contamination approaching 30 sq ft, confined spaces, extended work Higher cost, more cleaning required, can fog in humid conditions $150-400 plus cartridge replacements
PAPR with HEPA 99.97% with powered airflow Professional remediation over 30 sq ft, all day work, facial hair present Heavy, requires battery charging, high initial investment $800-2,000 plus filter replacements

Jobs under 30 square feet (approximately 5.5 feet by 5.5 feet, or three standard 2×4 foot ceiling tiles) are suitable for DIY work with minimum protection. N95 respirator, ANSI Z87.1 goggles, 6 mil nitrile gloves, and disposable Tyvek coveralls. Upgrade to P100 respirator and two layer glove system for multiple cleaning sessions, work over one hour, or when strong musty odors indicate heavy spore concentration in the air. Professional help becomes necessary for contamination over 30 square feet, within HVAC ductwork, behind walls, under flooring, or in structural cavities where hidden growth extends beyond what you can see.

Don’t substitute cloth masks, surgical masks, vented safety glasses, vinyl gloves, or regular work clothing for proper PPE. OSHA requires fit testing for all respirators in workplace settings. CDC recommends seal check procedures before each use even for homeowner projects. Replace disposable respirators when breathing becomes difficult, masks become damp from exhaled moisture, or after completing a single work session. Reusing disposable masks allows mold spores collected on the outer surface to work through the filter material. Disposable coveralls, gloves, and boot covers also get one use, then go straight into sealed plastic bags for disposal.

DIY Safety Thresholds: When Homeowner PPE Is Sufficient Versus Professional Intervention

TczEf76XTxC6eJJEUZn6Ag

The 30 square foot threshold (approximately 5.5 feet by 5.5 feet or three standard 2×4 foot ceiling tiles) marks the maximum safe DIY project size. Measure the entire contaminated area by length times width for continuous growth. For scattered patches, add up each separate spot. If the total exceeds 30 square feet, stop. That’s the line where homeowner equipment stops being enough and professional grade containment systems become necessary to prevent spreading spores throughout your home during cleanup.

Minimum DIY PPE includes NIOSH approved N95 respirator filtering 95 percent of airborne particles, ANSI Z87.1 non vented goggles sealing completely around eyes, 6 mil nitrile gloves with mid forearm cuffs extending at least six inches above wrists, and disposable Tyvek coveralls with integrated hood and boot covers. This combination works for small surface mold on hard materials like tile, glass, or sealed wood where you can see the entire affected area and reach it without opening walls or moving insulation. The job should take less than one hour of active scrubbing and wiping.

Upgrade to P100 respirator filtering 99.97 percent of particles if you’re working longer than one hour, planning multiple cleaning sessions over several days, or dealing with strong musty odors that show heavy spore concentration in the air. Strong odors mean high counts. High counts mean more protection. Add a two layer glove system and consider a full face respirator combining P100 filtration with eye protection when working overhead on ceilings where contaminated liquid can drip onto your face.

You need professional help when contamination appears in HVAC ductwork, behind walls, under flooring, in crawlspaces, or involves porous materials like drywall and insulation that absorb mold deep into their structure. Professional mold remediation handles hidden mold behind visible growth, water damage from sewage or flooding, and structural material involvement requiring moisture meters and air quality testing to verify complete removal. Health conditions including asthma, immune deficiencies, chronic respiratory sensitivities, or pregnancy require professional services regardless of contamination size. Your safety matters more than saving money on a small job.

Proper PPE Donning, Removal, and Decontamination Procedures

DrKil46oRduJ92Udyyi4TQ

Contamination happens during removal, not during the work. Most people get exposed when they peel off dirty coveralls, yank off gloves, or pull respirators over contaminated hair. Spores cling to every surface. They wait for you to make a mistake. Set up a decontamination zone before you start work. A clean area just outside the contaminated space where you can remove gear without tracking spores into the rest of your home.

Don’t remove PPE in clean areas of the home. Set up plastic sheeting on the floor. Keep a trash bag open and ready. Have clean water and detergent nearby for washing reusable items.

PPE Removal Sequence:

  1. Remove outer gloves first while still wearing all other gear, turning them inside out as you peel them off so contaminated surfaces fold inward, then drop directly into open trash bag without touching clean surfaces

  2. Peel coveralls forward and down from shoulders, rolling contaminated outer surface inward as you pull arms free, then step out of leg sections and boot covers while folding everything into itself, seal in trash bag

  3. Remove goggles by grasping the strap from behind your head, lifting forward and away from face without touching the front lenses where spores have settled, place directly in decontamination bucket or trash bag depending on whether they’re reusable or disposable

  4. Remove respirator last by releasing bottom strap first, then top strap, pulling forward from your face without touching the front filter surface, seal disposable masks in trash bag or set reusable respirators aside for immediate cleaning

  5. Wash hands thoroughly with soap and water for at least 20 seconds, scrubbing under nails and between fingers where spores hide

  6. Shower immediately if any skin contacted contaminated surfaces or if working longer than one hour in heavy contamination

Reusable Equipment Decontamination:

  • Take apart respirators, goggles, and face shields completely, removing filters and cartridges first, then wash all components in warm water with detergent using a soft brush to scrub crevices and seal surfaces

  • Rinse thoroughly under running water until no soap residue remains, then spray or wipe all surfaces with 70 percent isopropyl alcohol solution or EPA approved quaternary disinfectant, allowing complete contact time per product instructions

  • Air dry all components completely in a clean area away from contamination zones. Damp equipment grows mold itself and loses seal integrity, inspect seals and straps for cracks or degradation after drying

  • Scrub waterproof boots with detergent in a dedicated bucket, rinse clean, spray with 70 percent alcohol or disinfectant, then dry completely before storage or next use

  • Store all cleaned equipment in sealed plastic bags or closed containers in clean, dry locations away from temperature extremes and direct sunlight that degrades rubber seals and plastic components

Professional Grade PPE for Large Scale Mold Remediation

OFYTlqacSUixppfAaD9jFQ

Powered Air Purifying Respirator (PAPR) systems deliver battery powered airflow through HEPA filters, maintaining positive pressure inside the hood that prevents any outside air from entering even if the seal isn’t perfect. The constant airflow eliminates breathing resistance during heavy physical work like tearing out drywall or hauling contaminated materials. PAPR systems work with facial hair and provide cooling air circulation during extended remediation work in hot, humid conditions where regular respirators become uncomfortable within minutes.

Full face respirators combine P100 filtration blocking 99.97 percent of airborne particles with complete eye protection in one sealed unit. Professional crews use these for contained work areas where disinfectant misting, pressure washing, or aggressive scrubbing creates liquid droplets carrying spores. Mold remediation services deploy negative air pressure containment systems using specialized machines that pull contaminated air from work zones, pass it through HEPA filters capturing 99.97 percent of particles, then exhaust clean air outside the home. This prevents spores from migrating into unaffected rooms during demolition and removal work.

IICRC certification standards for mold remediation professionals require documented training in containment protocols, PPE selection, air monitoring, and structural drying techniques. Professional services handle contamination exceeding 30 square feet, mold within HVAC systems where spores circulate throughout the home, and hidden growth in wall cavities requiring moisture meters and thermal imaging to locate. Certified crews coordinate moisture elimination, contaminated material removal, antimicrobial treatment, and final air quality testing as one complete sequence. That’s the difference between clearing visible mold and actually solving the moisture problem that caused it.

Health Risks of Inadequate PPE During Mold Removal

ggAO7RuEQJSosvaYBf209w

Airborne spores enter lungs and eyes within minutes of disturbing mold growth, causing immediate throat irritation, coughing fits, and watery eyes that blur vision while you’re trying to work. Sensitive individuals develop asthma like attacks with chest tightness and wheezing that doesn’t stop when you leave the area. Skin contact causes rashes, itching, and redness that spreads beyond the initial touch point.

Exposure Duration Symptoms Protection Level Needed
First 5-10 minutes Throat tickle, mild cough, watery eyes, musty smell triggering nausea Minimum N95 respirator and goggles prevent immediate respiratory and eye irritation
30-60 minutes continuous exposure Persistent coughing, breathing difficulty, eye burn, headache from spore concentration P100 respirator with higher filtration and sealed coveralls block increasing spore loads
Repeated exposure over days Chronic sinus congestion, developing allergic sensitivity, skin rashes, worsening respiratory symptoms Full face respirator or PAPR system plus complete body coverage prevent sensitization
Long term chronic exposure Asthma development, chronic bronchitis, permanent respiratory damage, immune system impacts Professional remediation with containment systems and medical monitoring required

CDC studies document higher respiratory infection rates among workers who skip respirators in moldy environments. Your body fights the spore invasion. That immune response creates inflammation. Inflammation reduces your ability to fight actual infections. Spores cling to hair, clothing, and shoes, causing cross contamination that spreads microscopic particles to clean areas of your home where family members breathe them in hours after you finish working. Unprotected workers experience eye burn and breathing difficulty that forces them to stop working before the job is complete, leaving partially disturbed mold colonies that rebound within weeks.

Mycotoxins produced by black mold species including Stachybotrys chartarum create additional health concerns beyond allergic reactions. These chemical compounds irritate mucous membranes, disrupt normal cell function, and accumulate in the body with repeated exposure. Proper PPE blocks both spores and mycotoxins from entering your respiratory system, landing on your skin, or contaminating your clothing.

Where to Purchase and Rent Mold Removal PPE

8z5ZTvNHRBCCZn9B-EG5eA

Major home improvement stores carry N95 respirators in the paint department, disposable Tyvek coveralls in painting supplies, nitrile gloves in multiple sections, and basic safety goggles near power tools. Safety supply distributors stock higher grade equipment including P100 respirators, full face masks, and chemical resistant boots in wider size ranges with expert fitting assistance. Online marketplaces offer complete PPE kits bundling respirators, coveralls, gloves, goggles, and boot covers at package pricing, but verify NIOSH approval markings and check seller ratings before purchasing respiratory protection.

Cost ranges help you budget appropriately. N95 disposable respirators run $2 to $5 each, reusable half face respirators with P100 cartridges cost $30 to $80 plus $15 to $30 per replacement cartridge pair, full face respirators range $150 to $400, and PAPR systems start around $800 reaching $2,000 for professional grade units. Disposable Tyvek coveralls cost $8 to $15 per suit. Chemical resistant nitrile gloves run $1 to $3 per pair for 6 mil thickness. Non vented goggles meeting ANSI Z87.1 standards range $8 to $25. Complete PPE for one small DIY project under 30 square feet totals approximately $35 to $60 for disposable components plus $30 to $80 if purchasing a reusable respirator.

Rental options exist for one time projects through tool rental centers and safety equipment suppliers. PAPR systems rent for $75 to $150 per day or $200 to $400 per week. Full face respirators rent for $25 to $50 per day with cartridge purchases. Rental makes sense for large one time projects where purchasing professional equipment exceeds the cost of hiring professional remediation services. Most rental agreements require cleaning deposits and proof of training for PAPR systems.

Verification Checklist Before Purchase:

  • NIOSH approval marking printed directly on respirator facepiece or packaging, including TC approval number (example: TC 84A XXXX)

  • Expiration date for respirators and cartridges. Unused respirators degrade over time as elastic straps lose tension and filter materials break down

  • Proper sizing availability in small, medium, and large for respirators and coveralls, with measurement guides provided to ensure correct fit

  • Replacement filter and cartridge availability for reusable respirators. Discontinued models become unusable when cartridges run out

  • Return policies allowing unused, unopened respirators and unopened coverall packages to be returned if sizing doesn’t fit properly after trying on at home

  • ANSI Z87.1 marking on goggle frames or packaging confirming impact and splash protection standards compliance

OSHA and EPA Standards for Mold Remediation PPE

EpZ334mvRUOLz98ISKDTDA

OSHA respiratory protection standard 29 CFR 1910.134 requires fit testing for all respirators used in workplace settings to ensure proper seal and filtration effectiveness. Fit testing uses specialized equipment measuring air leakage around mask edges while the wearer performs bending, talking, and head turning exercises that simulate real work movements. Homeowners performing DIY cleanup aren’t legally required to complete formal fit testing, but the same physics apply. Gaps around your mask let unfiltered air enter with every breath. Perform a user seal check before each use by covering the exhaust valve with your hand and inhaling to verify the mask pulls tight against your face with no air leaking around edges.

ANSI Z87.1 establishes impact and splash protection standards for eye wear used during construction, demolition, and chemical handling work. Non vented safety goggles meeting this standard feature wraparound coverage, indirect ventilation preventing liquid entry, and polycarbonate lenses resisting impacts from falling debris. The standard requires marking on the frame or lens, not just the packaging. Vented safety glasses don’t meet the standard for mold work because ventilation holes allow spores to enter from sides and bottom gaps.

EPA guidelines for mold remediation specify disposal procedures for contaminated materials and list approved antimicrobial products effective against fungal growth. All disposable PPE counts as contaminated material requiring sealed plastic bags for disposal. Most municipalities allow sealed bags to go in regular trash for residential projects under 30 square feet, but commercial remediation projects may require biohazard disposal following local regulations. EPA approved biocides include quaternary ammonium compounds, hydrogen peroxide solutions, and registered fungicides. Don’t mix different cleaning products as chemical reactions can create toxic fumes requiring emergency ventilation.

IICRC S520 standard provides detailed protocols for professional mold remediation including containment construction, negative air pressure requirements, HEPA filtration specifications, and personal protection equipment. The standard divides remediation into three conditions. Condition 1 (normal fungal ecology), Condition 2 (settled spores or actual growth), and Condition 3 (actual growth plus significant amplification). Each condition specifies minimum PPE requirements. Homeowners working under the 30 square foot threshold fall into Condition 2 protocols requiring N95 minimum respiratory protection, eye protection, gloves, and disposable coveralls. Condition 3 work demands professional intervention with full face respirators or PAPR systems.

Maintaining and Storing Reusable Mold Removal Equipment

EUwgQQLYRH-u8zmN-7znzA

Clean elastomeric respirators, full face masks, and goggles immediately after each use while contamination is still damp and easier to remove. Take apart respirators completely by removing filters and cartridges first. Never submerge cartridges in water as moisture destroys filter media. Wash facepiece, straps, and seals in warm water with mild detergent using a soft brush to scrub crevices where spores collect around exhalation valves and nose cups. Rinse thoroughly under running water until no soap residue remains because residue irritates skin during next use and degrades rubber seals over time.

After washing and rinsing, spray or wipe all surfaces with 70 percent isopropyl alcohol solution or EPA approved quaternary disinfectant, following product contact time instructions (typically 10 minutes for alcohol, 5 minutes for quaternary compounds). This step kills any remaining spores that survived detergent washing. Air dry all components completely in a clean area away from contamination zones. Damp equipment grows mold itself, and moisture trapped in crevices prevents proper seal formation during next use.

Complete air drying takes 4 to 6 hours for respirators and goggles, longer for boots with thick insulation. Hang items where air circulates freely. Don’t store in sealed bags while damp. Store cleaned and dried equipment in sealed plastic bags or closed containers protecting from dust, dirt, and temperature extremes. Direct sunlight and heat above 120°F degrade rubber seals and plastic components. Freezing temperatures make rubber seals stiff and prone to cracking.

Reusable Equipment Maintenance Schedule:

  • Inspect seals, straps, and lenses before each use checking for cracks, tears, stiffness, or cloudiness indicating degradation requiring replacement

  • Replace respirator cartridges every 40 hours of use, sooner if breathing becomes difficult or chemical odors break through indicating filter saturation

  • Replace head straps when elastic no longer holds mask tight against face or when buckles crack and slip during adjustments

  • Test respirator seal monthly by performing positive and negative pressure seal checks even if the mask hasn’t been used recently

  • Replace goggle lenses when scratches or cloudiness impair clear vision. Damaged lenses create hazards while working on ladders or in tight spaces

  • Monitor expiration dates on respirator cartridges and complete respirator assemblies. Manufacturers guarantee filtration performance only until the printed date

  • Launder removable boot liners separately from other clothing in hot water with detergent and one cup white vinegar to kill spores and eliminate odors

Final Words

Proper PPE for black mold removal isn’t optional. It’s the difference between safe cleanup and serious health complications.

The 30 square foot threshold gives you a clear decision point. Below that, minimum N95 protection, nitrile gloves, sealed coveralls, and non-vented goggles let you handle it yourself.

Above that, or when mold hides in walls, HVAC systems, or structural cavities, it’s time to call in professional help with full containment systems and PAPR respirators.

Follow the removal sequence exactly. Contamination happens when you’re taking gear off, not putting it on.

Your respiratory health matters more than finishing the job fast.

FAQ

Will an N95 mask protect against black mold?

An N95 mask will protect against black mold for small jobs under 30 square feet when properly fitted and used with other PPE like goggles, nitrile gloves, and disposable coveralls. N95 respirators filter 95 percent of airborne particles down to 0.3 microns, which includes mold spores. The mask must achieve a tight seal against your face with no gaps and requires a user seal-check before each work session. For jobs lasting longer than one hour, multiple cleaning sessions, or areas approaching 30 square feet, upgrade to a P100 respirator that filters 99.97 percent of airborne particles. Never use cloth masks or surgical masks as substitutes. Facial hair prevents proper seal, which makes the respirator ineffective.

What respirator is best for black mold removal?

The best respirator for black mold removal depends on contamination size and exposure duration, ranging from N95 disposables for small jobs to powered air-purifying respirators (PAPR) for professional work. For areas under 30 square feet with work sessions under one hour, a NIOSH-approved N95 disposable respirator provides adequate protection at 95 percent filtration efficiency. P100 half-face respirators with replaceable cartridges are better for jobs exceeding one hour or multiple cleaning sessions, filtering 99.97 percent of airborne particles. Full-face respirators with P100 filters combine respiratory and eye protection for contamination approaching 30 square feet. Professional remediation over 30 square feet requires PAPR systems with HEPA filters and battery-powered airflow for maximum protection.

What should you wear when cleaning black mold?

When cleaning black mold, you should wear four integrated protection categories: NIOSH-approved respirator, full-body disposable coveralls, non-vented safety goggles, and chemical-resistant nitrile gloves with extended cuffs. For areas under 30 square feet, minimum PPE includes an N95 respirator, ANSI Z87.1-rated non-vented goggles, disposable Tyvek coveralls with integrated hood and boot covers, and 6-mil nitrile gloves reaching mid-forearm. Upgrade to a P100 respirator for work exceeding one hour or multiple sessions. Never use regular work clothing, cloth masks, vented safety glasses, or vinyl gloves as substitutes. All equipment must work together to prevent spores from entering your respiratory system, eyes, or contacting skin.

Is P100 or N95 better for mold?

P100 respirators are better for mold removal than N95 masks because they filter 99.97 percent of airborne particles compared to N95’s 95 percent filtration efficiency. P100 respirators with replaceable cartridges are recommended for jobs lasting longer than one hour, multiple cleaning sessions, or areas approaching the 30 square foot professional threshold. N95 disposable respirators are sufficient for small jobs under 30 square feet with work sessions under one hour when properly fitted. Both respirator types must achieve a tight seal against your face with no facial hair interference and require a user seal-check before each use. For professional remediation over 30 square feet, P100 filtration in a full-face respirator or PAPR system is mandatory.

Basement Drain Tile Installation: Steps, Costs and DIY Tips

0

Most foundation drainage advice skips the real question: can you actually handle breaking up your basement floor, hauling out literal tons of concrete and soil, and working around a sump pump hole for weeks? Basement drain tile installation stops hydrostatic pressure from pushing groundwater through your foundation, but the process is loud, dusty, and physically brutal. This guide covers what actually happens during interior and exterior installation, realistic cost breakdowns, and whether tackling this yourself makes sense or sets you up for an expensive do-over.

Interior and Exterior Drain Tile Systems: Choosing the Right Approach

i350w5viSdaaHYM_Wk0piA

98% of basements in the United States will deal with some kind of water damage during their lifetime. The thing causing most basement flooding isn’t dramatic pipe bursts or sewage backups. It’s hydrostatic pressure. When groundwater piles up around your foundation, it creates pressure that pushes water through tiny cracks in floor joints, wall seams, and concrete pores. Over time, this constant pressure widens openings and turns minor seepage into standing water. The problem gets worse during spring thaw and heavy rainfall when saturated soil can’t absorb more moisture.

Basement drain tile installation solves this by capturing water before it enters your living space and redirecting it away from the foundation. These perimeter drainage systems (also called French drains or weeping tile) intercept groundwater at the foundation level and channel it to a controlled discharge point. Two primary installation approaches exist: interior systems installed beneath your basement floor and exterior systems placed outside the foundation wall. The method you choose depends on your home’s age, your budget, and whether you’re dealing with an existing problem or planning ahead.

Method Installation Timing Access Required Cost Range Best For Key Advantage
Interior Any time, including winter Inside basement only $4,000–$8,000 Existing homes with finished basements No landscape disruption
Exterior Construction phase or major renovation Full perimeter excavation $8,000–$15,000+ New construction or foundation work Stops water before foundation contact

Interior drain tile systems sit underneath basement floors next to foundation footings, relieving hydrostatic pressure at its source. Installation involves breaking a perimeter strip of concrete, excavating a trench, and installing perforated pipe that collects water and directs it to a sump pump. The pump then discharges water away from your home. This approach works year round regardless of weather, doesn’t require excavating your landscaping, and lets you keep finished basement spaces mostly intact during installation. Interior systems connect directly to sump pumps, giving you the added benefit of a backup system if surface water ever enters through other means.

Exterior drain tile systems prevent water from reaching your foundation walls in the first place. Installed during new construction or when major foundation work is already planned, these systems sit at footing level on the outside of the foundation. They’re often combined with external waterproofing membranes that create a two layer defense against moisture. Water intercepted by exterior tile drains to a daylight discharge point or dry well located well away from the house. This method works best when excavation equipment already has access to the foundation perimeter. Adding it during a landscaping overhaul or foundation repair makes financial sense.

The decision framework comes down to timing and circumstances. Choose interior installation for retrofit situations where you have mature landscaping, buried utilities, or finished basement spaces you want to preserve. Interior systems also make sense when budget matters most or when winter weather prevents exterior excavation. Choose exterior installation during new home construction, when planning foundation repairs that already require excavation, or when you want to combine drainage with foundation waterproofing. Consider your long term maintenance preferences too. Interior systems give you easy access to cleanouts and the sump pump, while exterior systems require less frequent attention once properly installed.

Required Tools and Materials for Drain Tile Projects

QbUElrdbR6-yI0tm0b9i9A

Proper materials directly impact how long your drainage system works without problems. Cheap pipe, inadequate gravel, or skipped filter fabric leads to clogs, settling, and eventual system failure that requires tearing everything out and starting over. The difference in material cost between adequate and excellent components typically runs a few hundred dollars. Minor compared to reinstallation labor if something fails.

Choosing between corrugated and rigid pipe affects both durability and flow rates. Corrugated pipe costs less and flexes around obstacles, but the ribbed interior collects sediment over time. Rigid PVC pipe with smooth interior walls maintains better flow and resists clogging, making it worth the additional expense for most applications.

Materials List:

Perforated drainage pipe (4 inch diameter rigid PVC or corrugated with sock, 100+ linear feet depending on basement perimeter). Drainage fabric or filter sock (if pipe doesn’t come pre wrapped, enough to cover all pipe with 6 inch overlap). Crushed stone or drainage gravel for bottom layer (typically 2 to 3 inches deep, calculate based on trench dimensions). Crushed stone for top layer (covering pipe to just below floor level). Sump basin and pump (18 to 24 inch diameter basin, 1/3 to 1/2 HP pump rated for your vertical lift). PVC discharge piping (1.5 or 2 inch diameter, routed from pump to exterior discharge point). Check valve (prevents water from flowing back into basin when pump stops). Cleanout access fittings (install at direction changes and every 40 to 50 feet of straight run). Pipe connectors and fittings (couplings, elbows, adapters for all connections). Concrete patching materials (premixed concrete or mortar for floor restoration, typically several bags).

Tools List:

Concrete saw or jackhammer (rental equipment for cutting and breaking floor sections). Trenching shovel and pointed spade (digging and shaping trench to proper depth and slope). Wheelbarrow or contractors’ buckets (removing hundreds of pounds of concrete and soil from basement). Level and measuring tools (ensuring proper slope throughout pipe run, checking depth). Safety equipment (eye protection, dust masks, hearing protection, work gloves, steel toe boots). Compaction tools (hand tamper or plate compactor for gravel layers). Mixing equipment for concrete (drill with paddle mixer or wheelbarrow and hoe for small batches). Utility marking supplies (chalk line, spray paint, measuring tape for layout before cutting).

Professional grade materials typically offer better warranties and longer service life than big box store economy options. Source drainage fabric and filter wrapped pipe from suppliers that specialize in foundation waterproofing rather than general landscaping products. The fabric weave and pipe perforation size matter. Ask for products designed specifically for foundation drainage applications. Quality sump pumps with cast iron housings and sealed bearings cost more upfront but run reliably for 10+ years instead of requiring replacement every few seasons.

Step by Step Interior Drain Tile Installation Process

9pFdMRfxQCGbAv9zikr9TA

Interior installation requires precise execution and significant physical labor. You’ll remove hundreds of pounds of concrete, excavate tons of soil, and work in tight quarters with heavy equipment. The systematic approach below breaks the project into manageable phases, but understand that dust, noise, and disruption will be substantial throughout.

Installation Steps:

  1. Mark perimeter cutting lines 12 to 18 inches from foundation wall. Use chalk line to create straight, parallel guide lines around entire basement perimeter where floor meets wall, measuring carefully to maintain consistent distance from foundation.

  2. Cut concrete floor using concrete saw or jackhammer. Score cutting lines with concrete saw to 3 to 4 inch depth, then break out sections with jackhammer, working in manageable 3 to 4 foot segments to keep debris removal practical.

  3. Remove concrete sections and expose soil beneath. Break cut sections into pieces small enough to carry up basement stairs (typically 12×12 inches or smaller), clearing work area completely before proceeding to excavation.

  4. Excavate trench to proper depth, typically 12 to 18 inches below floor level, reaching foundation footing level. Dig trench along entire perimeter, maintaining consistent depth and removing all soil to create clean working space, pile excavated dirt in central basement area for later removal.

  5. Grade trench bottom with slight slope toward sump pit location. Create minimum 1/8 inch per foot slope directing water toward planned sump basin location, check slope accuracy with long level, adjust grade as needed before adding materials.

  6. Install gravel base layer 2 to 3 inches deep for stable foundation. Pour and spread crushed stone evenly across trench bottom, compact lightly with hand tamper to create firm base that won’t shift when pipe is placed.

  7. Lay perforated pipe with holes facing downward, wrapped in filter fabric. Position pipe on gravel bed with perforations pointing down (allowing water to enter from below), ensure fabric covers all pipe surfaces with overlapping seams, maintain consistent slope throughout run.

  8. Connect pipe sections and route toward sump basin. Join pipe segments using appropriate connectors, ensure tight seals at all joints, install cleanout fittings at corners and long straight runs for future maintenance access.

  9. Cover pipe with additional gravel layer full to just below floor level. Bury pipe completely with clean crushed stone, filling trench to within 2 to 3 inches of floor surface, compact gravel lightly to prevent future settling while maintaining drainage capacity.

  10. Replace concrete and finish floor surface to match existing. Pour concrete mix into trench, screeding level with existing floor, trowel smooth, allow adequate curing time before returning stored items to basement (minimum 72 hours for foot traffic, longer for heavy loads).

Concrete patching techniques determine whether your floor looks like a professional job or permanent repair scars. Mix concrete to proper consistency. Too wet and it will crack, too dry and it won’t bond properly. Use bonding agent on cut edges where new concrete meets old to prevent separation cracks. Trowel the surface to match your existing floor texture, and consider applying epoxy floor coating across the entire basement to blend old and new sections into a uniform appearance. Proper curing requires keeping new concrete damp for several days in dry conditions. Cover patched areas with plastic sheeting and mist occasionally if your basement humidity is low.

Exterior Drain Tile Installation Around Foundation Perimeter

rlZVPdjAS7WWCMg1oosiZA

Exterior installation requires excavation along the foundation perimeter, typically done during new construction or when landscape removal is already planned for other foundation work. The advantage of stopping water before it reaches your foundation walls makes this method ideal when timing and access align. You’ll need excavation equipment capable of digging 8 to 10 feet deep, room to pile excavated soil away from the work area, and cooperation from weather since rain turns open trenches into muddy disasters.

Excavation depth requirements depend on your foundation depth and local frost line. Most foundations extend 8 to 10 feet below grade, and your drain tile must sit at footing level to intercept water before it creates hydrostatic pressure. In cold climates, discharge lines must run below the frost line (typically 3 to 4 feet deep) to prevent freeze damage. Expect to move 10 to 15 cubic yards of soil per 100 linear feet of foundation perimeter. Excavated material needs temporary storage away from the work zone where it won’t slide back into open trenches.

Pipe installation at footing level follows the same principles as interior systems but with exterior specific considerations. Place perforated pipe on a 2 to 3 inch gravel bed at the base of the foundation footing. Ensure proper slope away from the structure. Minimum 1/8 inch per foot toward the discharge point. Wrap pipe in filter fabric before placement, overlapping fabric seams by at least 6 inches to prevent soil infiltration. The pipe should sit level with or slightly below the footing bottom, positioned 6 to 12 inches away from the foundation wall to avoid undermining support.

The backfill process happens in stages to prevent settling and maintain drainage capacity. Start by covering the pipe with clean crushed stone, filling 12 to 18 inches above the pipe. This gravel envelope allows water to move freely toward the pipe from any direction. Add a layer of filter fabric over the top of the gravel to separate it from backfill soil and prevent silt from washing down and clogging the stone. Then backfill with excavated soil in 6 to 8 inch lifts, compacting each layer before adding the next. Proper compaction prevents future settling that creates low spots where water pools against your foundation.

Discharge routing determines whether your system actually moves water away from the problem area. Connect the drain tile to a solid pipe that carries collected water to a daylight discharge point, a location downhill from your foundation where water can exit above ground and continue flowing away. If your property doesn’t have natural downhill slope, route to a dry well or subsurface drainage field located at least 10 feet from the foundation. In cold climates, the discharge line must be buried below frost depth or insulated and heat traced where it rises to surface level. Never discharge into sanitary sewer systems. Most jurisdictions prohibit this and you’ll face fines if discovered during inspection.

System Design Requirements: Slope, Discharge, and Code Compliance

6ejQZD1ASyq-U4GGrYiu_w

Proper system design following code requirements ensures both legal compliance and functional performance. Cut corners on specifications and you’ll have a system that looks complete but doesn’t drain reliably when you need it most.

Slope and Grade Requirements

Minimum slope specifications for drain tile systems typically require 1/8 inch per foot (1% grade) toward the sump pit or discharge outlet. This seemingly modest slope makes a dramatic difference in water movement. Without adequate slope, water pools in low spots instead of draining, creating stagnant sections where sediment settles and eventually clogs the pipe. Maintaining consistent grade throughout the pipe run requires careful measurement during installation. Check slope every 10 feet using a long level and adjust the trench bottom before placing pipe. Consequences of inadequate slope include standing water that breeds mosquitoes in exterior systems, slow drainage that allows water to seep through floor cracks before the system can handle it, and sediment accumulation that reduces pipe capacity over time until the system effectively stops working.

Discharge Location and Routing Standards

Discharge distance requirements in most jurisdictions mandate minimum 10 feet from the foundation, though 20 feet is better if your property allows. Water discharged too close seeps back through soil and reloads the system in an endless cycle. Property line considerations matter too. You can’t discharge onto your neighbor’s yard without permission, and directing concentrated water flow toward adjacent properties creates liability issues. Connection prohibitions prevent adding foundation drainage to sanitary sewer lines in most areas because the volume overwhelms treatment capacity during storms. Daylight discharge works when you have downhill slope, while dry wells or subsurface infiltration beds handle discharge when surface options aren’t available. Freeze protection depth requirements in cold climates mean burying discharge lines below the frost line or using insulated pipe sections where burial depth isn’t possible. Add splash blocks or pipe extensions at the discharge point to prevent erosion from concentrated water flow.

Permits, Inspections, and Code Compliance

Permits are typically required when interior installation involves structural floor alterations or when exterior work affects foundation support, though specific requirements vary by jurisdiction. Call your local building department before starting to verify whether your project needs approval. Common inspection timing requires scheduling before you backfill trenches or replace concrete. Inspectors need to see the installation details before they’re buried. Plan installation phases around inspection availability to avoid delays where open trenches sit exposed to weather. Maintain cleanout access points per code. Most jurisdictions require accessible fittings at direction changes and every 40 to 50 feet of straight run so future maintenance doesn’t require excavation. Keep documentation including permits, inspection certificates, material specifications, and contractor warranties for future property sales.

Code compliance provides benefits beyond avoiding fines. Minimum performance standards ensure your system actually works rather than just looking complete. Documentation protects resale value when buyers see proof of permitted work. Insurance validity depends on code compliant installations in many policies. Coverage for water damage may be denied if you installed unpermitted systems that failed. Most importantly, avoiding costly reinstallation due to code violations discovered during home inspections or insurance claims makes the permit process worthwhile despite the hassle and fees.

Connecting Drain Tile to Sump Pump Systems

lwAIAP6zTQSj5h9m2w2pYA

Interior systems connect to a sump pump that activates when water reaches a certain level. The sump pit becomes the low point where all drain tile flows converge, and the pump provides the mechanical force to lift water up and out of your basement. Proper integration of these components determines whether your system handles water reliably or fails during the storms when you need it most.

Optimal sump basin placement requires finding the lowest point in your drainage system, typically in a corner or against a wall where drain tile from multiple directions can converge. The basin should sit slightly lower than the drain pipe invert to ensure complete drainage between pump cycles. Avoid placing the pit near finished walls if possible. Sump pump noise and occasional overflow risks make mechanical room locations preferable to finished living areas. Consider access for maintenance when choosing location. You’ll need to reach the pump for testing and eventually replacement.

Basin installation requires proper sizing and preparation. Most residential applications use 18 to 24 inch diameter basins that are 24 to 30 inches deep, providing adequate capacity to prevent rapid pump cycling while accommodating pump dimensions and float switch operation. Dig the pit deep enough that the basin sits on a 4 to 6 inch gravel base for drainage even if the pump fails. The pit should be deeper than the drain tile level to create a collection point where water gathers before the pump activates. Install a secure lid that prevents debris from falling into the basin while allowing access for maintenance. Children and pets can fall into open pits, and the lid also reduces humidity and radon infiltration.

Pump selection depends on your vertical lift requirements and expected water volume. Measure from the pump location to your discharge point elevation. This vertical distance determines the horsepower needed. For typical basement installations with 8 to 10 feet of vertical lift, a 1/3 HP pump handles most situations. Increase to 1/2 HP for lifts above 10 feet or installations that expect high water volume. The pump must activate when water reaches a predetermined level via a float switch, then run until water drops back below the shutoff point. Specify cast iron housing and sealed bearings for reliability. Plastic pumps cost less but fail more frequently.

Key sump pump system components:

Primary pump specifications matched to vertical lift and expected flow volume requirements. Backup pump installation with separate discharge line and independent power source. Battery backup systems for power outages that often coincide with heavy storms. Check valve placement 3 to 4 feet above pump discharge to prevent backflow when pump stops. Discharge line routing with proper slope, freeze protection, and distance from foundation. Alarm systems providing audible notification of pump failure, power loss, or water level.

Discharge line best practices determine whether pumped water actually leaves the problem area. Slope discharge piping at minimum 1/4 inch per foot away from the house to prevent water from running backward when the pump stops. Route the line at least 10 feet from the foundation before allowing water to discharge. Closer discharge points allow water to seep back through soil and reload the sump basin. In cold climates, bury discharge lines below frost depth or use heat tape on above ground sections to prevent ice blockages that cause pump burnout and basement flooding. Never discharge into sanitary sewer lines. This violates code in most areas and overwhelms treatment systems during storms. Never discharge onto neighboring properties without permission or toward foundation walls.

Cost Factors and Budget Planning for Drain Tile Installation

LoD_KEBaReCLPbuOmvcDPw

Drain tile installation represents a significant investment with costs varying based on method, basement size, and site conditions. Understanding the breakdown helps you budget accurately and spot quotes that are unrealistically low or padded with unnecessary expenses. Interior systems typically run less expensive than exterior because they require less excavation and no landscape restoration.

Professional crews of five to six technicians typically require two days to complete interior installation. The first day focuses on concrete cutting, removal, and excavation. The second handles pipe installation, backfill, and concrete replacement. Exterior projects take longer due to excavation depth and volume. Expect 3 to 5 days depending on foundation perimeter length and access difficulties.

Cost Component Interior System Range Exterior System Range
Materials (pipe, gravel, fabric, fittings) $800–$1,500 $1,200–$2,500
Labor (crew and time) $2,000–$4,000 $4,000–$8,000
Equipment/Tools (rental or owned) $300–$600 $800–$2,000
Sump Pump System (basin, pump, discharge) $500–$1,200 Not typically included
Concrete Restoration or Backfill $400–$800 $1,000–$2,500
Total Typical Range $4,000–$8,000 $8,000–$15,000+

Variables increase costs beyond base estimates. Difficult soil conditions like heavy clay or rocky subsoil slow excavation and increase labor hours. Deep foundations require removing more material and installing longer pipe runs. Extensive concrete removal in finished basements adds costs when you’re working around utilities and trying to preserve floor finishes in adjacent areas. Finished basement complications include protecting walls, relocating utilities temporarily, and containing dust from concrete cutting. Accessibility challenges occur when narrow basement stairs prevent equipment access or when finished ceiling height limits headroom for jackhammer operation. Unexpected utilities discovered during excavation require rerouting or protection measures. High water tables demand more robust pumping during installation and may require upgraded sump systems.

Long term value justifies the initial expense when you consider what drain tile prevents. Foundation and structural repairs from chronic water infiltration cost $10,000 to $30,000 once damage reaches the point of requiring excavation and rebuilding. Water damaged basements lose property value when buyers see evidence of moisture problems or smell musty odors during showings. Reduced insurance claims mean lower premiums and continued coverage. Carriers often non renew policies after repeated water damage claims. Most importantly, improved basement usability transforms unusable storage space into livable area, adding functional square footage without the cost of an addition. For more information on related restoration work, see understanding home restoration timelines.

DIY Installation Feasibility and Professional Recommendations

MEkbuQawR9K4qDIbmtF2sA

Some homeowners consider DIY installation to reduce costs, and the potential savings of $2,000 to $4,000 in labor expenses seems attractive at first. The reality involves significant physical labor and specialized knowledge that most people underestimate until they’re standing in a basement full of broken concrete wondering what they’ve started.

The challenges start with concrete cutting using heavy equipment you’ve likely never operated. Concrete saws and jackhammers rent for $100 to $200 per day, but knowing how to control them safely requires practice you don’t want to get on your basement floor. You’ll remove hundreds of pounds of concrete chunks and several tons of soil. Carrying this up basement stairs in buckets tests physical endurance and patience. Proper slope calculation requires precision measurement and understanding of drainage hydraulics. A spirit level and eyeballing don’t cut it when 1/8 inch per foot over 50 feet means hitting your target within half an inch. Working in confined basement spaces with limited headroom and artificial lighting adds difficulty to every step.

Hidden complexity separates functioning systems from expensive failures. Achieving proper drainage pitch throughout the entire pipe run demands constant vigilance and multiple checks during installation. One low spot creates a permanent trap where water pools and sediment accumulates. Avoiding utility conflicts requires identifying electrical, plumbing, gas, and telecommunications lines before cutting. Hit a water line and you’re dealing with flooding before your drainage system even exists. Ensuring adequate sump pump sizing involves calculating basement square footage, local rainfall intensity, and soil drainage characteristics to specify pump capacity. Creating durable connections between pipe sections matters because leaks defeat the entire system purpose but only reveal themselves after burial when fixing them requires excavation.

Mistakes in DIY installations may not be discovered until after burial under soil and concrete, requiring professional drain tile repair at higher cost than proper initial installation. Systems that drain slowly due to inadequate slope seem fine during light rain but fail during the spring thaw when you actually need them. Undersized sump pumps keep up with normal seepage but can’t handle peak flows, allowing water to back up through floor drains. Improper discharge routing moves water 6 feet from the foundation where it seeps back through soil and reloads the system. Forgotten cleanout access points mean future clogs require demolition to clear.

Professional installation makes sense for interior systems where concrete cutting and proper slope are critical, complex layouts involving multiple direction changes or obstacles, finished basements where dust containment and minimizing disruption matter, homes with high water tables demanding precise installation and reliable components, situations requiring permits and inspections that involve code compliance verification, and whenever long term warranties matter for property value and peace of mind. For guidance on selecting qualified contractors, reference hiring the right contractor for water damage restoration.

Pre Installation Site Assessment and Soil Evaluation

ixrbVZ4ISJ6iSsKuE-9gyg

Proper assessment before installation prevents costly design errors and ensures system effectiveness. You’re gathering information that determines pipe sizing, slope requirements, discharge location, and whether your drainage plan will actually work for your specific property conditions.

Site Assessment Checklist:

Current water entry points and patterns (where water appears first, frequency, volume). Soil composition and drainage characteristics (clay, sand, loam, mixed composition). Water table depth and seasonal fluctuations (stable year round or rising during spring and fall). Existing grade and slope around foundation (water flows toward or away from house). Utility line locations (buried electrical, gas, water, sewer, telecommunications). Basement floor elevation relative to exterior grade (how far below ground your floor sits). Extent of existing water damage (efflorescence, previous flooding height, structural damage). Frequency and timing of water intrusion events (every rain, only heavy storms, seasonal).

Clay soil creates special challenges that standard installation approaches don’t handle well. Clay doesn’t drain. Water sits on top rather than percolating through like sandy or loamy soils do. When you excavate clay and then backfill around your drain tile, you’ve created a bathtub that holds water against your foundation unless you amend the backfill. Address clay by increasing gravel volume around the pipe to create a larger drainage envelope, amending backfill soil with sand or gravel to improve permeability, and ensuring surface grading directs water away rather than pooling near the foundation. Interior systems work better in heavy clay conditions because they intercept water that has already penetrated rather than trying to manage it in non draining soil outside.

Water table considerations determine whether a basic system handles your conditions or whether you need upgraded capacity. High water tables mean your drain tile sits below the natural groundwater level and fights constant pressure. This requires more robust sump pump systems with higher capacity, possibly dual pumps or pumps with greater horsepower. Exterior systems sometimes work better in high water table situations because they’re positioned at footing level before water reaches maximum pressure. However, extreme water table issues may require both interior and exterior systems working together, along with foundation waterproofing and possible subsurface drainage improvements beyond the immediate foundation perimeter.

Seasonal patterns reveal whether you’re dealing with temporary water intrusion or chronic problems. Spring thaw creates peak loads when snow melt saturates frozen ground that can’t absorb water. Systems must handle maximum flow rates during these weeks even if they sit relatively dry the rest of the year. Heavy rainfall events show whether your problem is surface runoff from inadequate gutters and grading or groundwater intrusion that requires subsurface drainage. Size system capacity for peak conditions, not average annual flow. A system that handles normal spring rain but fails during 100 year storm events isn’t adequate protection for your foundation and basement contents.

Preparing Your Basement Before Installation Begins

MwXsqyDYRtOdiP-dseNBog

Proper preparation reduces installation time and protects belongings from dust and debris generated during concrete cutting and soil excavation. The work creates conditions similar to a demolition site. Concrete dust coats everything within 20 feet of cutting, and tracked soil spreads across basement floors despite containment efforts.

Concrete cutting and soil removal create significant dust even with water suppression systems on saws. Jackhammering vibrates the entire basement and sends concrete chips flying. Plan for noise levels around 100 decibels, similar to chainsaw or jackhammer operation, that make the basement unusable during active work and disrupt main floor activities.

Preparation Steps:

  1. Clear all furniture, stored items, and belongings from basement perimeter, moving everything at least 3 to 4 feet from walls to provide worker access and protect from dust and damage.

  2. Identify and mark all utility lines including electrical conduit, plumbing supply and drain lines, gas lines, and HVAC ductwork running through floors or walls in work areas, use colored tape or paint to highlight locations.

  3. Shut off power to basement electrical circuits if working near outlets or wiring, especially important when cutting concrete that may contain hidden conduit, prevents shock hazards from damaged wiring.

  4. Remove or protect HVAC ductwork in work areas, seal supply and return vents with plastic and tape to prevent dust infiltration throughout house ventilation system.

  5. Create dust barriers using 6 mil plastic sheeting to isolate work zone from finished areas, seal plastic to ceiling and walls with tape, create zippered access door, contain dust to minimize whole house cleanup.

  6. Establish debris removal path protecting stairways from damage, lay plywood or cardboard runners on stairs and floors between basement and exterior disposal area, removes hundreds of trips carrying concrete and soil.

  7. Arrange temporary dehumidification if needed during installation, open trenches can raise basement humidity dramatically, run dehumidifier continuously if installing during humid season.

  8. Verify contractor access to water source for concrete cutting dust suppression and mixing, confirm electrical power availability for tools, identify where debris containers will be positioned outside.

Consider temporary living arrangements if dust or noise will be disruptive to daily routines. Installation typically takes two full days of continuous noise and activity. Jackhammering starts early and runs most of the first day. Working from home becomes impossible, and sensitive electronics should be covered or relocated. Elderly occupants, infants, or anyone with respiratory conditions should stay elsewhere during active concrete work despite dust containment efforts. The second day involves less disruptive pipe installation and concrete finishing but still requires contractor access and creates minor dust when mixing replacement concrete.

Integrating Drain Tile with Other Waterproofing Methods

Drain tile addresses hydrostatic pressure and water that reaches foundation level, but complete protection requires multiple integrated approaches working together. Water infiltration happens through several mechanisms simultaneously. Think of it as addressing both the source and the symptoms rather than choosing one or the other.

Exterior waterproofing membrane application during exterior drain tile installation creates dual protection. After excavating to install drain tile, apply waterproof coating or membrane to the foundation wall before backfilling. This blocks water that makes it through the soil from penetrating wall surfaces even if some seepage bypasses the drain tile. The combination prevents both hydrostatic pressure buildup and direct wall penetration. Materials range from rubberized asphalt coatings brushed or sprayed onto walls to dimpled drainage board systems that create an air gap between soil and foundation. The exterior drain tile then captures any water that penetrates this first line of defense.

Interior vapor barriers and wall floor joint sealing prevent moisture transmission through concrete even after the drainage system removes bulk water. Concrete is porous. Water vapor moves through tiny pores even when liquid water is controlled. This causes humidity problems, efflorescence (white mineral deposits), and that characteristic musty basement smell. Applying waterproof coatings to interior foundation walls blocks vapor transmission. Seal wall floor joints with hydraulic cement or specialized caulks designed for below grade moisture exposure. These measures work alongside drain tile by controlling humidity and preventing mineral staining even when trace moisture exists in foundation materials.

Radon mitigation compatibility matters because interior drain tile systems affect sub slab air pressure. Many homes require radon systems that create negative pressure beneath basement floors, pulling radon contaminated air from soil and venting it outside. Interior drain tile provides ready made pathways for air movement beneath floors if not properly integrated. Design drain tile systems to work with sub slab depressurization by sealing the sump basin lid airtight, installing special radon rated lids with pass through fittings for radon collection pipes, and ensuring floor restoration creates an air barrier. Poor integration allows radon to enter through the drainage system rather than being captured and vented.

Capillary break materials prevent water from wicking up through concrete pores even when bulk water is controlled. Place plastic sheeting or specialized capillary break products between gravel layers and concrete when restoring floors after drain tile installation. This thin barrier stops water from moving upward through concrete via capillary action, the same mechanism that draws water up a paper towel. Without this barrier, moisture can migrate from the gravel drainage layer into your finished floor even though the drain tile successfully removes standing water.

Common Installation Mistakes and How to Avoid Them

Many drain tile failures result from preventable installation errors that aren’t discovered until the system faces real water during heavy storms or spring thaw. By then, the mistakes are buried under concrete or soil, making corrections expensive and disruptive.

Common Installation Mistakes and Corrections:

Installing pipe with perforations facing upward instead of downward. Perforations must face down allowing water to enter from below through gravel bed, upward holes collect falling sediment that rapidly clogs the pipe.

Inadequate slope causing water pooling and slow drainage. Maintain minimum 1/8 inch per foot throughout entire run, check grade every 10 feet during installation before covering pipe.

Using insufficient gravel creating poor drainage and pipe settlement. Provide minimum 2 to 3 inches below pipe and 6 to 8 inches above, skimping on gravel to save money guarantees long term problems.

Omitting filter fabric allowing soil infiltration and clogs. Wrap all pipe in non woven geotextile fabric with overlapping seams, acts as filter preventing soil particles from entering drainage system.

Undersized sump basin unable to handle peak water volume. Install 18 to 24 inch diameter basins deep enough for adequate capacity and float switch operation, small basins cause rapid pump cycling and premature failure.

Improper discharge location too close to foundation. Route discharge minimum 10 feet away, closer discharge allows water to seep back through soil and reload the system.

Failed connections between pipe sections causing leaks. Use proper connectors with secure fits, tape joints if necessary, test connections before burial by running water through system.

Inadequate cleanout access points preventing future maintenance. Install cleanouts at every corner and every 40 to 50 feet of straight run, future clogs will require these access points.

Slope requirements deserve special attention because they’re invisible once the system is buried but determine whether water drains effectively.

Final Words

Basement drain tile installation solves hydrostatic pressure problems that affect nearly every home eventually.

Whether you choose interior or exterior systems depends on your timing, budget, and site conditions. Both approaches work when designed correctly and installed with attention to slope, discharge routing, and proper materials.

Start with a thorough site assessment. Plan for permits and inspections. Use qualified contractors who understand foundation water management.

A well-installed drain tile system protects your home’s structure, keeps your basement dry and usable, and gives you confidence during heavy rain seasons.

FAQ

How much does it cost to install drain tile in a basement?

Basement drain tile installation typically costs between $3,000 and $8,000 for interior systems and $8,000 to $15,000 for exterior systems. The total price depends on basement size, soil conditions, concrete removal extent, and sump pump system requirements.

How should drain tile be installed?

Drain tile should be installed by excavating a trench along the foundation perimeter, laying a gravel base, placing perforated pipe with holes facing downward wrapped in filter fabric, covering with additional gravel, and connecting to a sump pump or exterior discharge point.

Do you put gravel under drain tile?

Yes, gravel goes under drain tile to create a stable base and allow smooth water flow. A 2-3 inch layer of crushed stone sits beneath the pipe, and another gravel layer covers the pipe to help with filtration and prevent clogs.

How deep should drain tile be buried?

Drain tile should be buried 12-18 inches below the basement floor level for interior systems, reaching down to the foundation footing. Exterior systems are typically installed 8-10 feet deep, depending on foundation depth and local frost line requirements.

Can I install drain tile myself or should I hire a professional?

DIY drain tile installation is possible but requires heavy equipment, concrete cutting skills, proper slope calculation, and significant physical labor. Professional installation is recommended because mistakes often aren’t discovered until buried, requiring costly reinstallation and potentially allowing continued water damage.

How long does drain tile installation take?

Interior drain tile installation typically takes two days with a professional crew of five to six technicians. The timeline can extend if soil conditions are difficult, concrete is exceptionally thick, or the basement layout is complex with multiple obstacles.

What is the difference between interior and exterior drain tile systems?

Interior drain tile systems sit beneath basement floors next to foundation footings and connect to sump pumps, while exterior systems are placed outside the foundation during construction or renovations to prevent water from reaching foundation walls. Interior works for existing homes, exterior prevents water before foundation contact.

How often does drain tile need maintenance?

Drain tile systems need sump pump testing monthly, visual discharge inspection quarterly, clean-out flushing annually, and professional inspection every 3-5 years. Systems typically last 20-30+ years with proper maintenance including sediment checks and timely pump replacement.

Will drain tile solve all basement water problems?

Drain tile addresses hydrostatic pressure and water reaching foundation level but works best as part of comprehensive waterproofing. Complete protection requires proper exterior grading, functional gutters, foundation wall waterproofing, and vapor barriers to control moisture from multiple sources.

Do I need a permit to install drain tile?

Permits are typically required for drain tile installation involving structural floor alterations and foundation work, though requirements vary by jurisdiction. Proper permitting ensures code compliance, protects resale value, maintains insurance validity, and avoids costly reinstallation due to violations.

What are the most common drain tile installation mistakes?

Common drain tile installation mistakes include positioning pipe perforations upward instead of downward, inadequate slope causing water pooling, insufficient gravel creating poor drainage, omitting filter fabric allowing clogs, and improper discharge location too close to the foundation.

How does drain tile work with a sump pump?

Drain tile works with a sump pump by collecting water through perforated pipes and directing it to a sump basin at the system’s lowest point. When water reaches a certain level, the pump activates and discharges water away from the house through PVC piping.

Does drain tile increase home value?

Drain tile increases home value by preventing foundation deterioration worth thousands in repairs, maintaining basement usability, and providing documented water management systems that give buyers confidence. Professional installation with warranties adds credibility during real estate transactions.

Interior Trim Replacement After Fire: Restoration Steps That Work

Painting over smoke-stained trim is tempting, but it rarely fixes the problem.
Smoke soaks into wood, and the smell can stick even after a fresh coat.
If trim is charred, warped, or soaked by firefighting water, it often needs removal so hidden damage doesn’t spread.
This post lays out the restoration steps that actually work:
how to assess what’s ruined, remove trim safely, clean and dry surfaces, choose materials that hold up, reinstall properly, and document everything for your claim.
Fast action prevents mold and lingering odors.

Assessing Fire‑Damaged Interior Trim

FimtVDz7R76EFOw7BlixYQ

Start by looking at the trim itself. Check baseboards, door casings, and window trim for visible charring, warping, or bubbling in the finish. Smoke can soak into wood fibers even when the surface looks okay, and that smell won’t go away with paint alone. Press gently on any charred sections with a screwdriver or your fingernail. If the wood feels soft, crumbly, or leaves a black residue on your hand, the damage goes deeper than the surface.

Next, confirm the wall structure behind the trim is safe. If studs or drywall show warping, sagging, or water staining from firefighting efforts, you’ll need to address those issues before you worry about trim. Never reattach trim to a wall that isn’t solid. Tap along the wall with your knuckles. A hollow or spongy sound can mean hidden damage or moisture trapped inside.

Some signs mean the trim must come out. No negotiation. Deep charring that goes more than a quarter inch into the wood removes structural integrity and holds smoke residues you can’t clean. Warping that pulls the trim away from the wall won’t flatten out. Persistent smoke odor after thorough cleaning means contaminants have penetrated the material. If trim was soaked by fire hoses and now feels damp or shows dark spots, mold may already be forming inside the wood.

Initial actions to take within 24 to 48 hours:

  • Ventilate the space by opening windows and using fans to pull smoky air outside, but don’t disturb loose soot.
  • Document all visible damage with photos and short videos from multiple angles before you touch anything.
  • Wear an N95 mask, safety glasses, and gloves if you need to enter the room to assess damage.
  • Don’t pull on loose or charred trim until you’ve confirmed the wall behind it is stable and dry.
  • Contact your insurance company and ask whether they require a professional inspection before you remove damaged materials.

Removing Fire‑Damaged Trim Safely

PhVS8hZpRCCb1suCkBXgRA

Wear a respirator rated N95 or higher. Not just a dust mask. Soot contains fine particles and chemical residues from burned materials, and disturbing it sends that into the air. Add safety glasses to keep debris out of your eyes, and use nitrile gloves that won’t tear when you handle splintered wood. Lay plastic sheeting on the floor and tape it to the baseboards you’re keeping. That containment keeps soot from spreading to clean areas.

Turn off power to the room at the breaker if you’ll be working near outlets or light switches. Fire can damage wiring hidden behind trim, and a nail through compromised electrical lines is a real risk. Set up a box fan in a window, facing outward, to pull dust and odor outside while you work.

Step by step trim removal:

  1. Score the caulk line between the trim and the wall with a utility knife to break the seal without tearing drywall paper.
  2. Slide a thin pry bar behind the trim near a nail, starting at one end, and gently lift to create a small gap.
  3. Move the pry bar a few inches down and repeat, working slowly to avoid snapping brittle, fire damaged wood.
  4. Once the piece is loose, pull it away from the wall and check for nails left behind in the studs. Remove those with pliers or a nail puller.
  5. Inspect the wall surface and framing for charring, soft spots, or moisture. Mark any problem areas with painter’s tape for repair.
  6. Place removed trim directly into heavy duty trash bags, seal them, and dispose of the material to prevent soot from settling elsewhere in the home.

Preparing Walls and Surfaces for New Trim

e4U43p_DQI29fhcEExTu6g

Soot clings to everything. It will bleed through fresh paint if you don’t clean it first. Start with a HEPA vacuum to pull loose particles off the wall without smearing them. Then wipe the surface with a dry chemical sponge, which lifts soot without water. After that, use a damp cloth with a mild detergent solution or a cleaner designed for smoke residue. Work in small sections, rinse the cloth often, and let the wall dry completely. If the smell persists or the wall still looks stained, apply a stain blocking primer like BIN or Kilz before you paint or install new trim.

Check the drywall for damage. Firefighting water can soak into the paper and gypsum core, leaving the surface soft or discolored. Press on the wall near where trim was attached. If it feels spongy or your finger leaves an indent, cut out the damaged section and patch it with new drywall. Use a moisture meter if you have one. Readings above 16 to 20 percent mean the wall is still too wet for new materials. Run a dehumidifier and air movers until the levels drop. Seal any patched or stained areas with odor blocking primer so smells don’t migrate into the new trim.

Choosing Materials for Interior Trim Replacement

ZYFrmqHQNSy4cYoxcIMug

MDF is affordable and cuts cleanly, but it swells when wet and scorches easily in a fire. If your house took water damage from fire hoses, MDF won’t hold up. Softwood like pine is common for painted trim and costs less than hardwood, but it chars quickly under heat and can retain smoke odor if the grain absorbs residue. Hardwood species such as oak or maple resist fire better and last longer, but they cost more and require staining or clear finishes that show every imperfection. PVC and composite trim won’t rot or swell from water, and they handle heat better than wood, though they can melt or release fumes in direct flame.

Match the profile and height of your existing trim when possible. Take a sample piece or a photo to the lumberyard so you can compare it to stock profiles. If you’re replacing trim in only one room, mismatched baseboards will stand out. If the fire damaged trim throughout the house, switching to a different style is easier because everything gets replaced at once.

Fire resistant materials don’t eliminate risk, but they slow the spread of flames and reduce smoke absorption. Intumescent coated wood trim is available in some markets and expands when exposed to heat, forming a protective char layer. That’s overkill for most residential applications, but it’s an option if building codes or your insurance company require upgraded materials.

Material Durability Fire Performance Typical Cost
MDF Low; swells with moisture Poor; chars and crumbles quickly $2–$4 per linear foot
Softwood (pine) Moderate; dents easily Fair; burns faster than hardwood $3–$6 per linear foot
Hardwood (oak, maple) High; resists dents and wear Good; slower ignition, denser char $5–$12+ per linear foot
PVC / Composite Very high; waterproof, no rot Good; melts rather than burns, less smoke $4–$10 per linear foot

Installing New Interior Trim After Fire Damage

3thHnvlMTT-0fdeo5Dnk7w

Measure each wall section and window or door opening separately. Walls that look straight can shift after fire damage, so don’t assume all pieces will be the same length. Use a miter saw for clean 45 degree cuts on outside corners and cope inside corners for baseboards so joints fit tight even if walls aren’t perfectly square. A coping saw or oscillating multi tool makes that cut easier.

If smoke odor lingers in the room even after cleaning, paint or prime the back of the trim before you install it. That extra seal keeps residual smells from creeping out through the wood grain later. Once the trim is cut, hold it in place and mark nail locations at studs, which are typically 16 inches apart. Use a finish nailer with 15 or 16 gauge nails long enough to bite into the stud, not just the drywall. Nails that hit only drywall will pull loose over time.

Common mistakes include forcing warped trim flat against the wall, which creates gaps that open up later, and skipping caulk along the top edge where the trim meets the wall. Caulk hides minor irregularities and creates a clean paint line. Don’t caulk the bottom edge of baseboards on hardwood or tile floors. Leave a small gap for expansion. Another mistake is using too much force with the nailer, which dents the trim face. Set the compressor pressure low and test on a scrap piece first.

Simplified installation steps:

  1. Cut the first piece to length with a 90 degree cut on one end if it meets a wall, or a 45 degree miter if it meets another piece at a corner.
  2. Hold the trim against the wall and check for gaps. Shim behind it if needed to keep it straight and level.
  3. Nail the trim at each stud location, angling nails slightly downward to lock the piece in place.
  4. Fill nail holes with wood filler or caulk that matches the trim finish, then sand smooth once dry.
  5. Apply a final coat of paint or stain to seal the trim and blend repairs, making sure all seams and edges are covered.

Understanding Costs and Insurance Coverage

g6XqNwP6TFGewp7wOimczw

Replacing interior trim in a single room typically costs $300 to $800 when you include materials, fasteners, caulk, primer, and paint. If you’re matching custom profiles or using hardwood, expect $1,000 to $2,000 per room. Whole house replacement after a fire can run $3,000 to $10,000 or more depending on square footage, ceiling height, and the number of doors and windows. Professional installation labor adds $4 to $12 per linear foot, so a 1,500 square foot house with 400 linear feet of baseboard could cost $1,600 to $4,800 in labor alone.

Homeowners insurance usually covers trim replacement when fire is the cause of damage, but you’ll need documentation. Take photos of every damaged piece before you remove it, and keep receipts for all materials and contractor work. Your adjuster may require a written estimate or invoice from a licensed contractor even if you plan to do some of the work yourself. Policies vary between replacement cost coverage, which pays for new materials at current prices, and actual cash value, which subtracts depreciation. Ask your agent which type you have before you start buying materials.

Documents to gather for your insurance claim:

  • Photos and videos showing the extent of trim damage and any charring or smoke staining on walls.
  • Contractor estimates or invoices that list labor, materials, and scope of work in detail.
  • Receipts for materials you purchased, including trim, primer, paint, fasteners, and tools if they’re one time purchases related to the fire.
  • A copy of your fire department report, which confirms the date, cause, and areas affected by the fire.

DIY vs Professional Trim Replacement After a Fire

YJ4ai1cFSTu1f1P8wb851g

DIY is reasonable if the fire was small, the trim damage is limited to one or two rooms, and you’ve already cleaned all smoke residue and confirmed the walls are dry and structurally sound. Removing and replacing baseboards and door casings is straightforward if you have basic carpentry skills, a miter saw, and a finish nailer. Painting or staining the new trim yourself saves labor costs, and the work goes faster when you’re not coordinating schedules with a contractor.

Call a professional restoration company when smoke odor persists after cleaning, when you see water stains or soft spots in the drywall, or when trim was attached to load bearing walls that show charring or warping. Professionals use moisture meters, thermal imaging, and HEPA filtration systems to find hidden damage and prevent mold. They also document the work for insurance in a way that meets adjuster requirements and building code standards. If your trim replacement is part of a larger fire restoration project that includes drywall, electrical, or structural repairs, a licensed contractor ensures all the work is done in the right sequence and inspected properly. Skipping that step can leave you with recurring odors, failed inspections, or claim denials.

Final Words

In the action: first, check the trim for charring, smoke soak, and stability. Confirm the wall behind is safe before you touch anything.

Next, remove unstable pieces with protective gear (gloves, mask), document everything, and clean soot before sealing and repairs. Test for moisture. Dry fully before new trim goes in.

When you’re ready to reinstall, pick materials that resist heat and seal surfaces to stop lingering odors. Keep good records for claims. With steady steps and proper interior trim replacement after fire, your home will feel whole again.

FAQ

Q: How long do toxic fumes last after a fire?

A: Toxic fumes after a fire can linger from hours to weeks, depending on fire size, materials burned, and ventilation. Open windows if safe, use air scrubbers, and get professional testing to confirm air quality.

Q: Does homeowners insurance cover housing after a fire?

A: Homeowners insurance usually covers temporary housing (loss of use) when a fire makes your home unlivable, subject to policy limits and adjuster approval. Save receipts, document damage, and notify your insurer right away.

Q: What needs to be replaced after a fire?

A: What needs replacing after a fire depends on damage: visibly charred trim, wet or collapsed drywall, warped flooring, insulation, cabinets, and HVAC components often require replacement after a professional inspection.

Q: What is salvageable after a house fire?

A: What’s salvageable after a house fire depends on heat, soot, and water exposure: nonporous items like metal tools, some glass, and sealed electronics can often be cleaned; porous fabrics, paper, and some furniture usually need disposal.