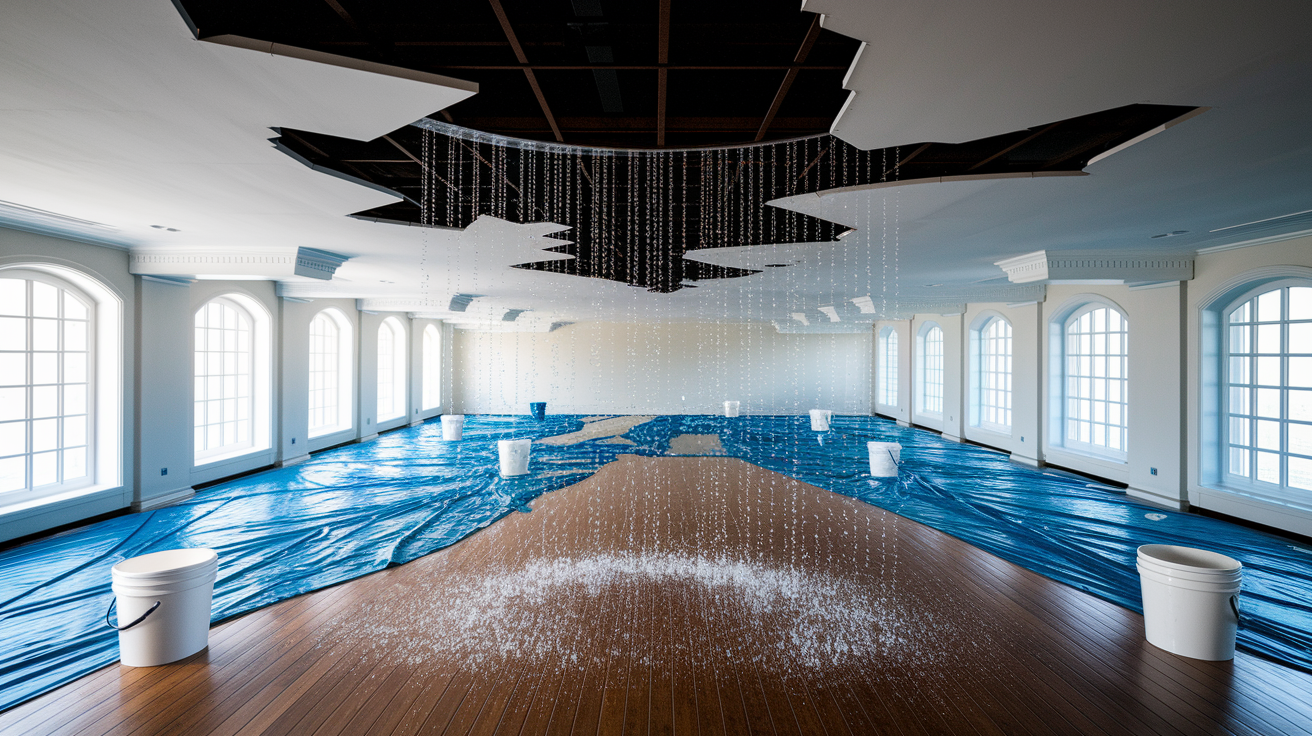
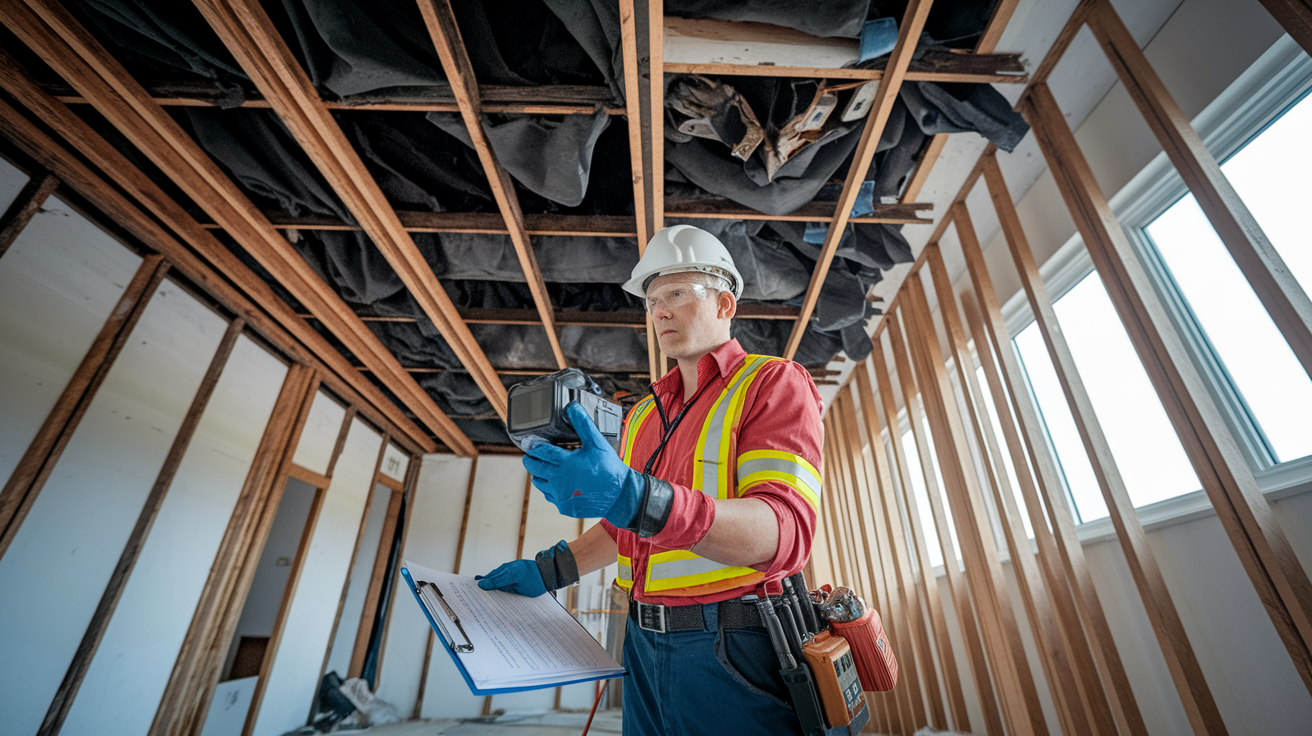
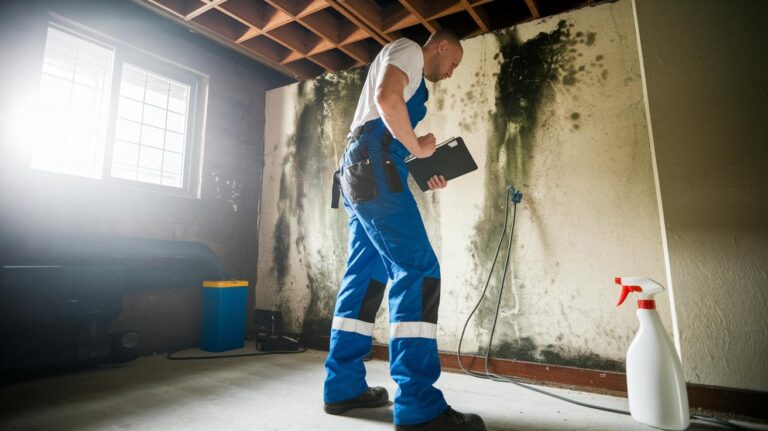
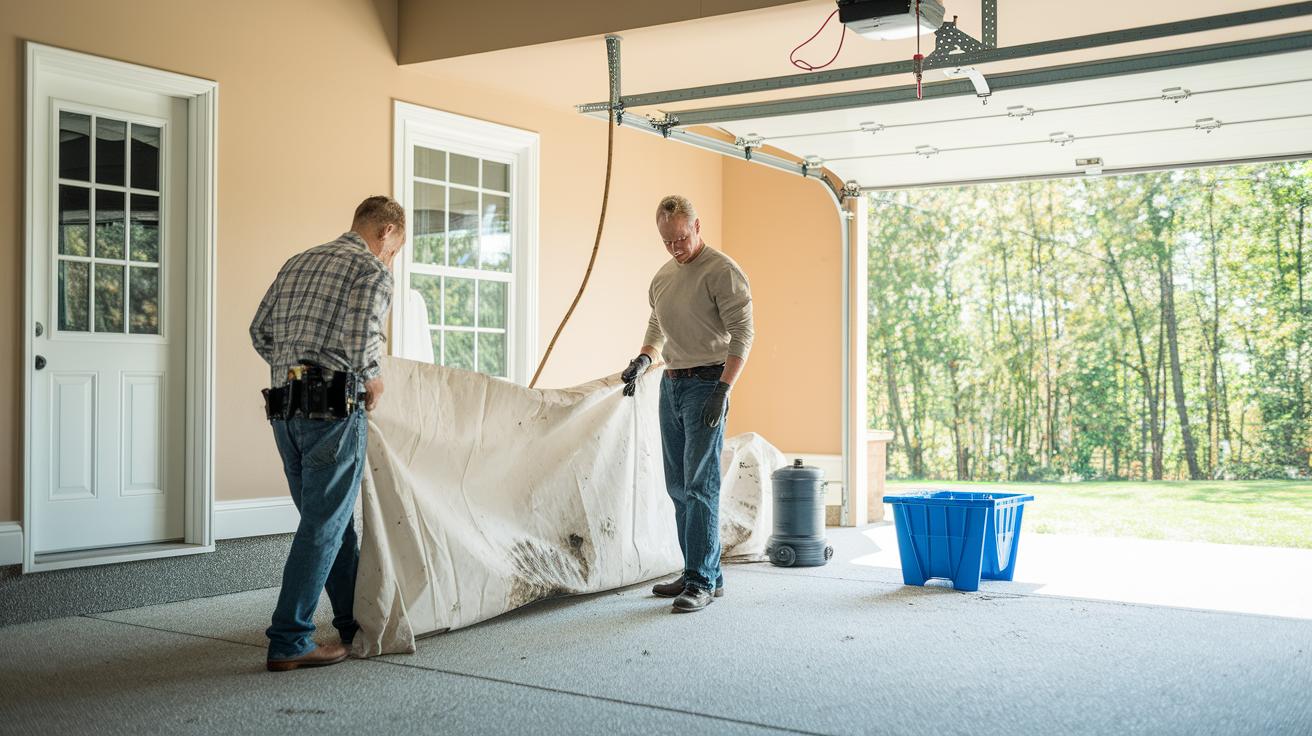
Home Blog Page 5

Hydrostatic Pressure Basement Leaks: What Causes Them and How to Fix

0

Controversial. Sealing a few visible cracks won’t stop most basement leaks.
Hydrostatic pressure, groundwater and saturated soil pushing against your foundation, does the real work.
It forces water through concrete pores, mortar joints, and the cove where floor meets wall.
If you keep seeing water after heavy rain, that’s the likely cause.
This post explains what creates hydrostatic pressure, the signs to watch for, and clear repairs that actually work, from surface drainage and interior perimeter drains with a sump to full exterior waterproofing and wall stabilization.
Read on to learn the next steps and what to expect.

What Is Hydrostatic Pressure and How It Causes Basement Leaks

yUDzwuLQRz2xKU1eAWAZ2A

Hydrostatic pressure is the force groundwater and saturated soil push against your basement walls and floor. Water weighs about 62.4 pounds per cubic foot. For every foot of water height above a surface, the pressure jumps roughly 0.433 pounds per square inch. When soil around your foundation gets soaked after heavy rain, snowmelt, or a rising water table, that water pushes sideways against basement walls and upward against floor slabs. Ten feet of saturated soil against your wall? That’s more than 4 psi trying to force water through concrete.

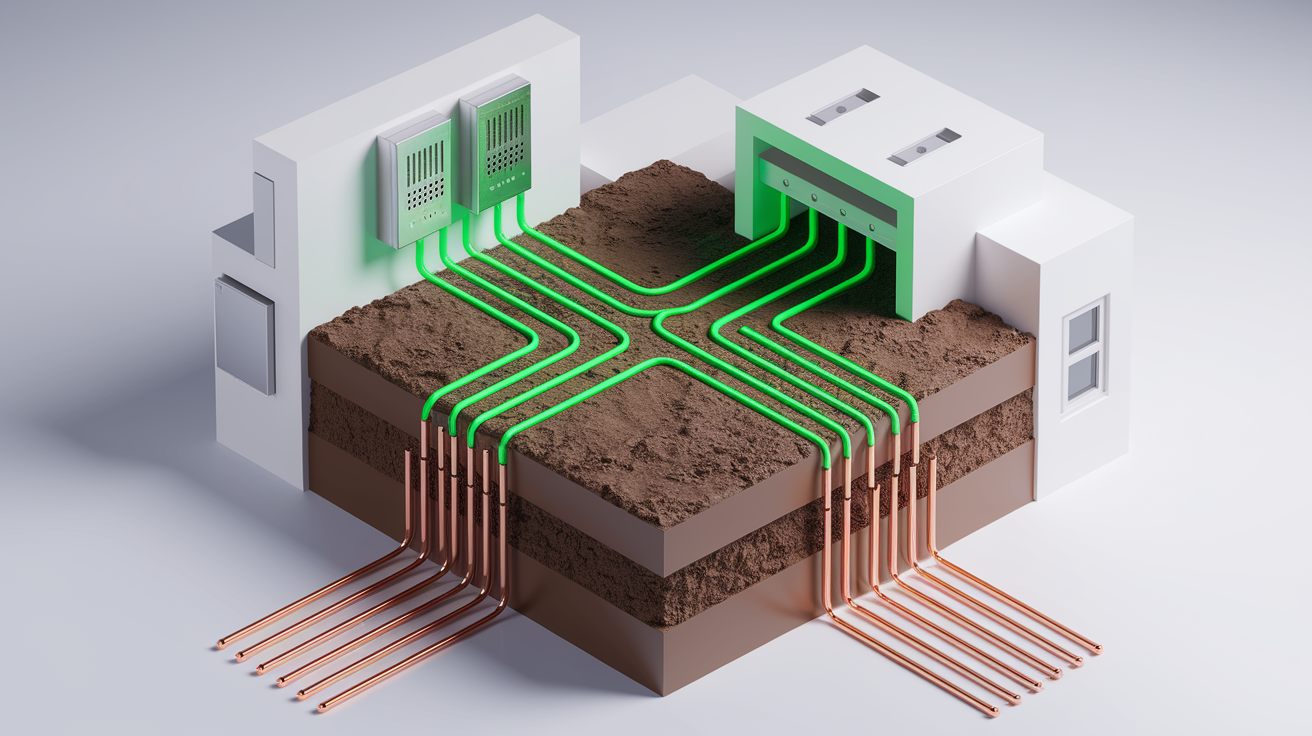
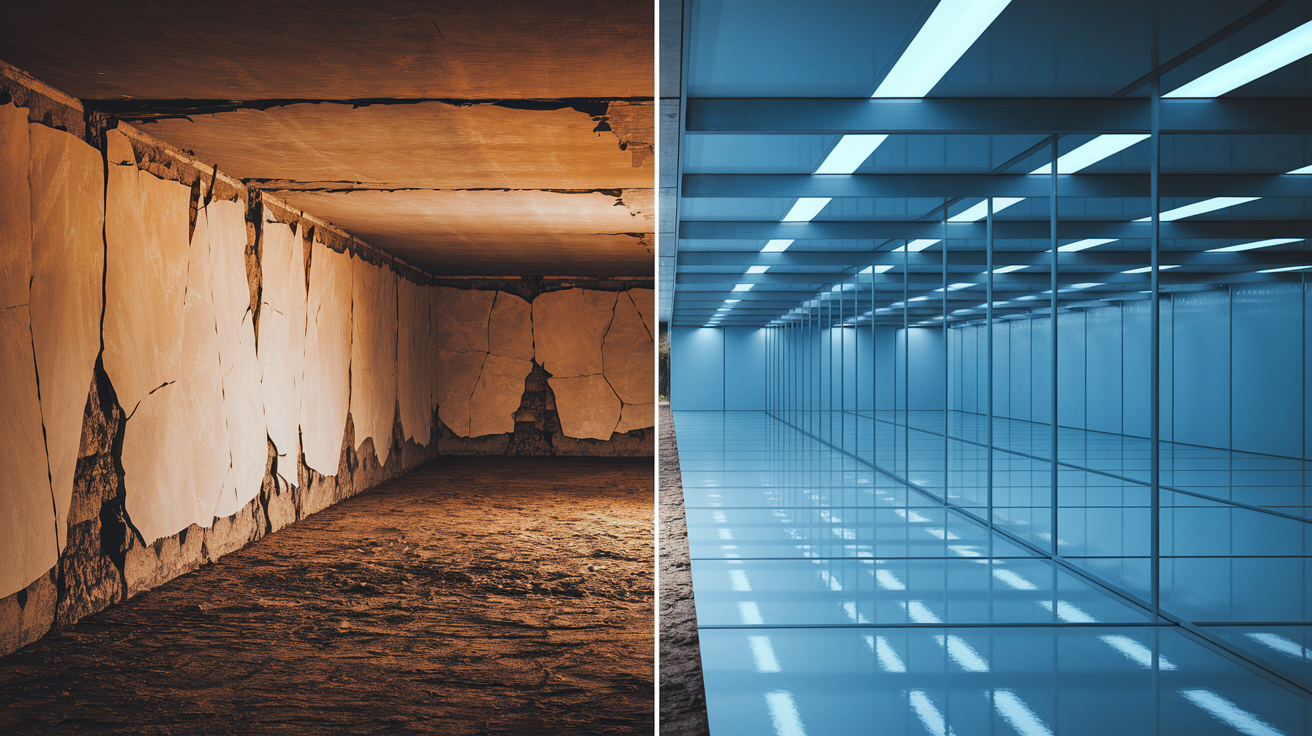
Concrete handles compression well, but it’s porous. Block walls have mortar joints. Poured walls have construction joints and small shrinkage cracks. Hydrostatic pressure drives water through those weak points, through the tiny pores in the concrete itself, and along the cove joint where floor meets wall. Lateral pressure against walls forces water inward through cracks and seams. Upward pressure beneath slabs lifts water through floor cracks, along footing interfaces, and up into the basement. Both forces work together when soil is saturated.

The result? Basement water pressure that doesn’t stop until the water finds a path inside or the external pressure gets relieved by drainage. You can’t stop the physics. The water will move. The only choice is whether it moves into your basement or into a drain system designed to carry it away. That’s why hydrostatic pressure basement leaks are persistent, predictable, and tied directly to groundwater levels outside your foundation.

Common Signs of Hydrostatic Pressure Problems

WE0qJZbXRM-Y-PXMksCgSw

Hydrostatic pressure leaves specific clues. If you’re seeing water after every heavy rain, if the same spots stay damp, or if you notice staining and odors that won’t go away, hydrostatic pressure is likely the cause. These aren’t random leaks. They follow patterns tied to soil saturation and groundwater movement.

The warning signs show up on walls, floors, and in the air. You may see some or many of these at once:

Cove joint seepage. Water appears where the basement floor meets the wall, especially during or after storms.

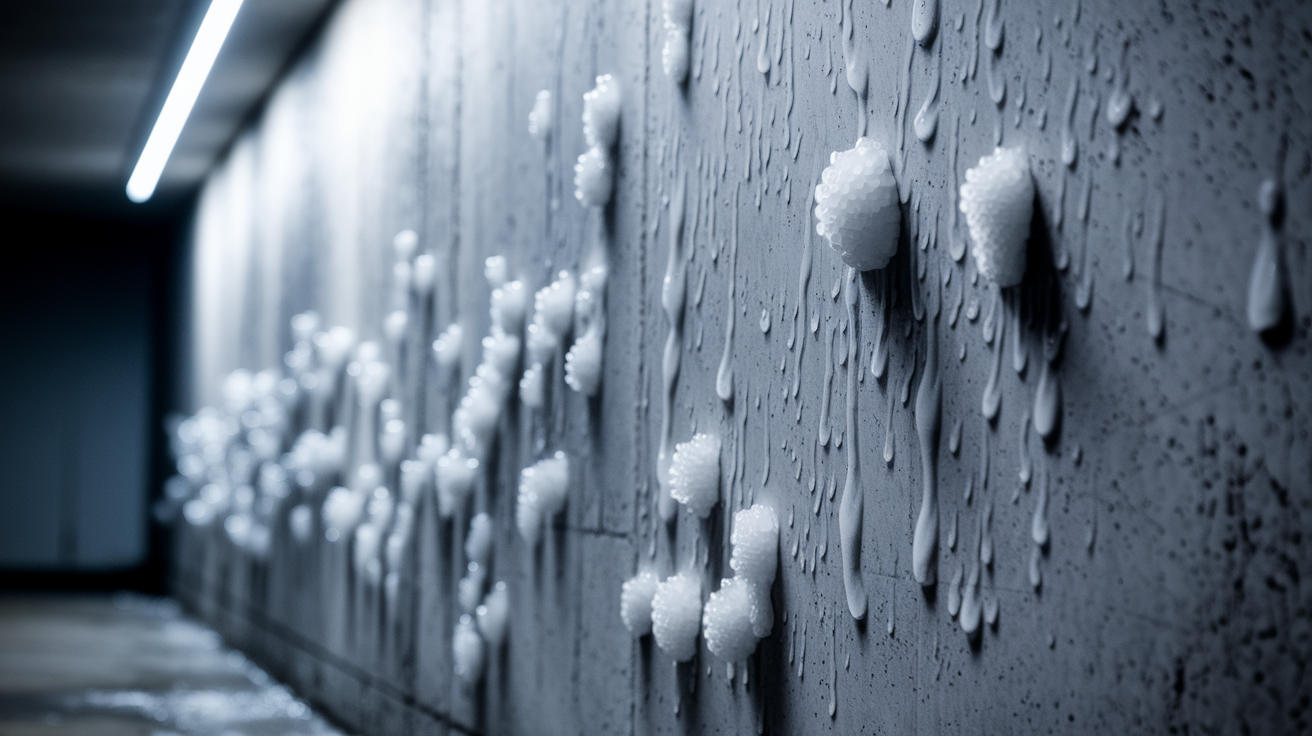
Efflorescence. White, chalky mineral deposits on concrete surfaces where water has evaporated and left minerals behind.

Damp or discolored walls. Persistent moisture, dark staining, or cold, wet spots on foundation walls.

Musty or moldy smell. Damp air and organic odors that come back even after cleaning.

Bowing or horizontal cracks in walls. Outward wall movement or horizontal cracking caused by sustained lateral pressure.

Pooling water on the floor. Wet patches, puddles, or standing water that reappear each time it rains hard.

If you see these signs during heavy rain or spring thaw, the pattern points to hydrostatic pressure. The water is being pushed in from outside, not dripping from above or condensing inside.

Causes of Hydrostatic Pressure Around Basements

XxUjG8FtRYusMmwXawwsTA

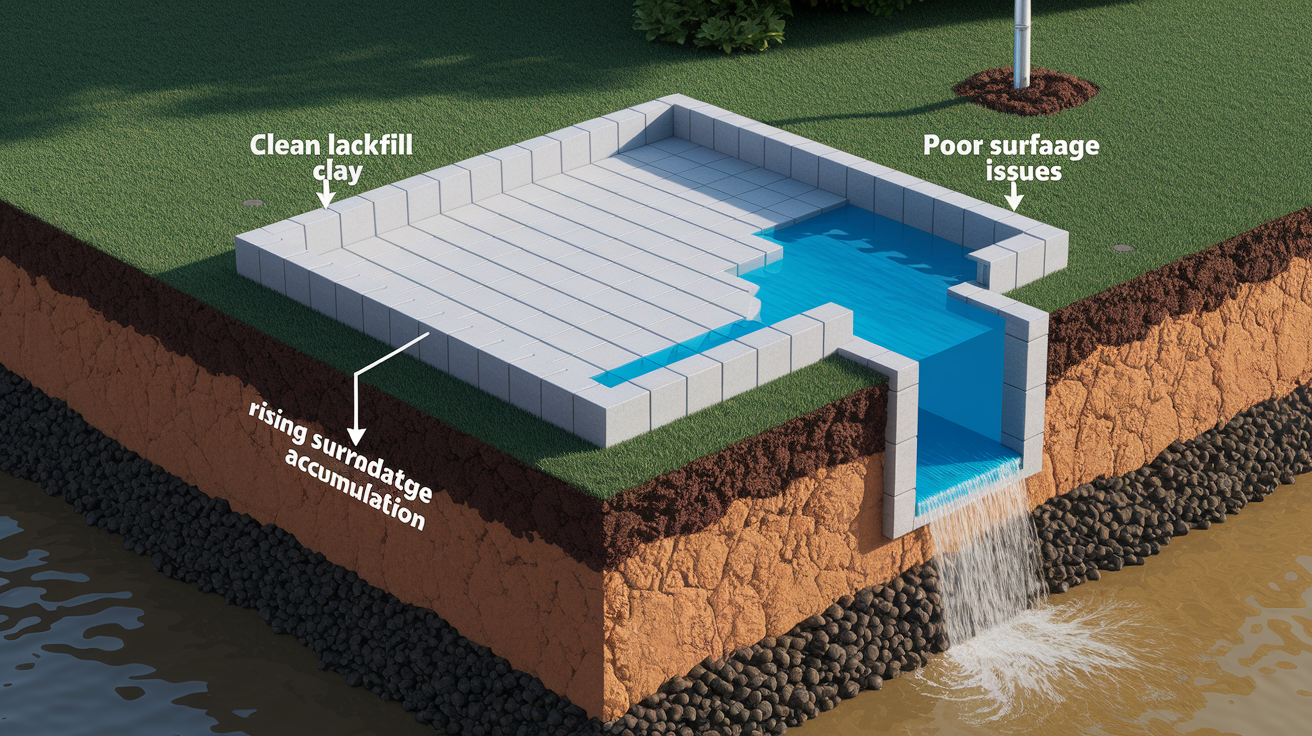
Hydrostatic pressure builds when water accumulates in the soil around your foundation and has nowhere to go. The most common cause is poor surface drainage. If your yard slopes toward the house, or if the soil has settled and created low spots next to the foundation, rainwater and snowmelt flow straight into the ground at the base of your walls. That water saturates the soil, raises the local water table, and increases pressure.

Soil type matters. Clay soils hold water like a sponge and drain slowly. When saturated, clay creates high hydrostatic pressure because the water stays trapped against the foundation. Sandy or gravelly soils drain faster and generate less sustained pressure. If your home was built with clay backfill around the foundation, you’re more likely to have hydrostatic issues. Clogged gutters and short downspouts make it worse. When roof water dumps right next to the foundation instead of being carried away, you’re recharging the soil with thousands of gallons every storm.

Heavy seasonal rainfall, rapid snowmelt, and high groundwater tables all contribute. In areas with shallow bedrock or high water tables, basements sit in saturated zones for part of the year. Frozen ground in winter can block normal drainage paths, forcing water to build up against walls. Missing or failed footing drains compound the problem because there’s no controlled outlet for groundwater, so pressure continues to rise until water finds a way in.

Prevention Methods to Reduce Hydrostatic Pressure

WNHvymmCQuq-k5Uego1u9A

The goal is to lower the water table around your foundation and give groundwater a controlled path away from the house. Surface drainage is the first line of defense. If you can keep water from soaking into the soil near your walls, you reduce the source of the pressure before it starts.

Yard grading should slope away from the foundation at least 6 inches over the first 10 feet. Check the grade annually and add soil if settling has created low spots. Extend downspouts at least 6 to 10 feet from the foundation using rigid or flexible extensions or underground discharge lines. Clean gutters twice a year so roof water doesn’t overflow and saturate the soil below. If you have clay soil or poor natural drainage, consider amending the backfill zone with free draining topsoil or installing shallow swales to redirect surface runoff.

Here are the core prevention measures:

  1. Grade soil to slope away from the foundation. Maintain at least 6 inches of drop in the first 10 feet.
  2. Extend downspouts and keep gutters clear. Discharge roof water at least 6 to 10 feet away, inspect gutters spring and fall.
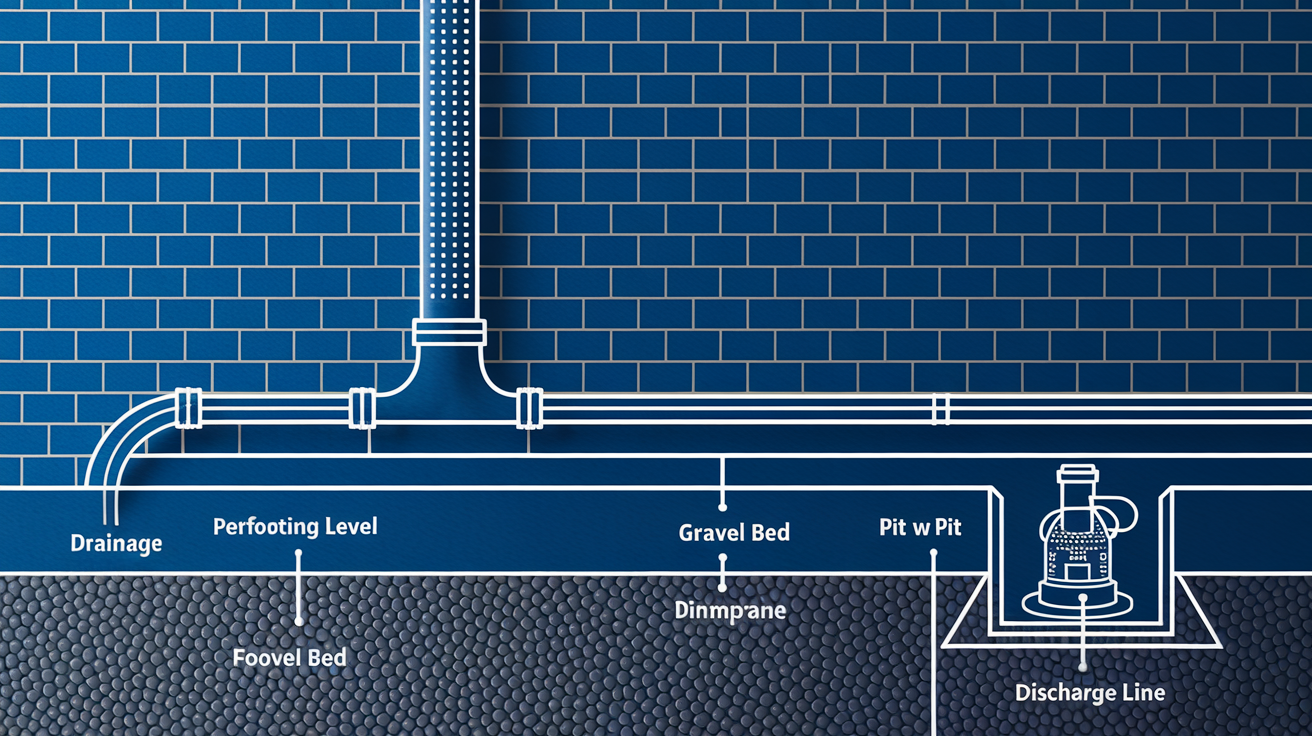
  3. Install or verify exterior footing drains. 4 inch perforated pipe at footing level, surrounded by gravel, draining to daylight or sump.
  4. Apply exterior waterproofing membrane. Protects walls and reduces water infiltration when excavation is feasible.
  5. Add an interior perimeter drain and sump pump. Collects groundwater that enters beneath the slab and pumps it out before it can pool.

Each measure reduces hydrostatic pressure by either preventing water accumulation or providing a relief path. Combined, they create a layered defense that keeps basements dry even during heavy rain.

Repair Options for Hydrostatic Pressure Basement Leaks

H6G-nZvEShOhwdrNR2R_9g

When prevention isn’t enough or when you’re dealing with an existing leak, you need a repair solution that either stops water before it reaches the foundation or manages it after entry. The choice depends on access, budget, the severity of the problem, and whether structural damage has occurred.

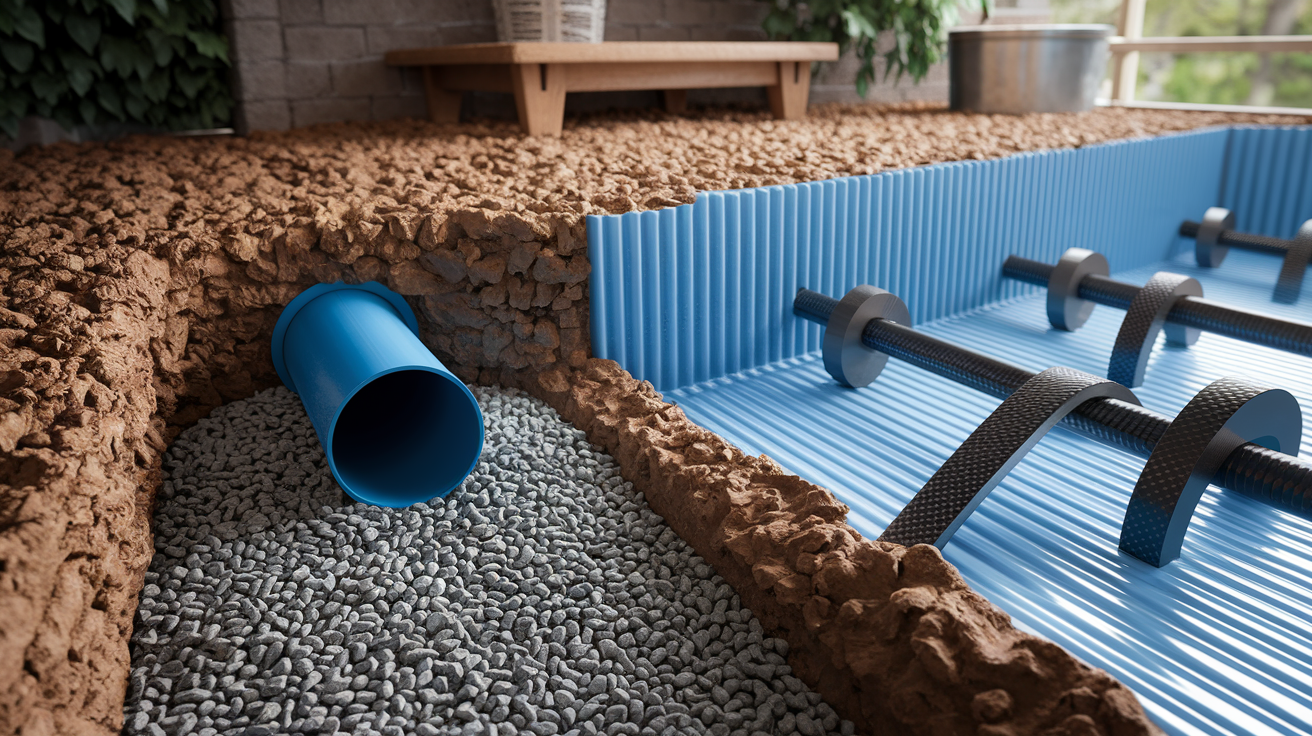
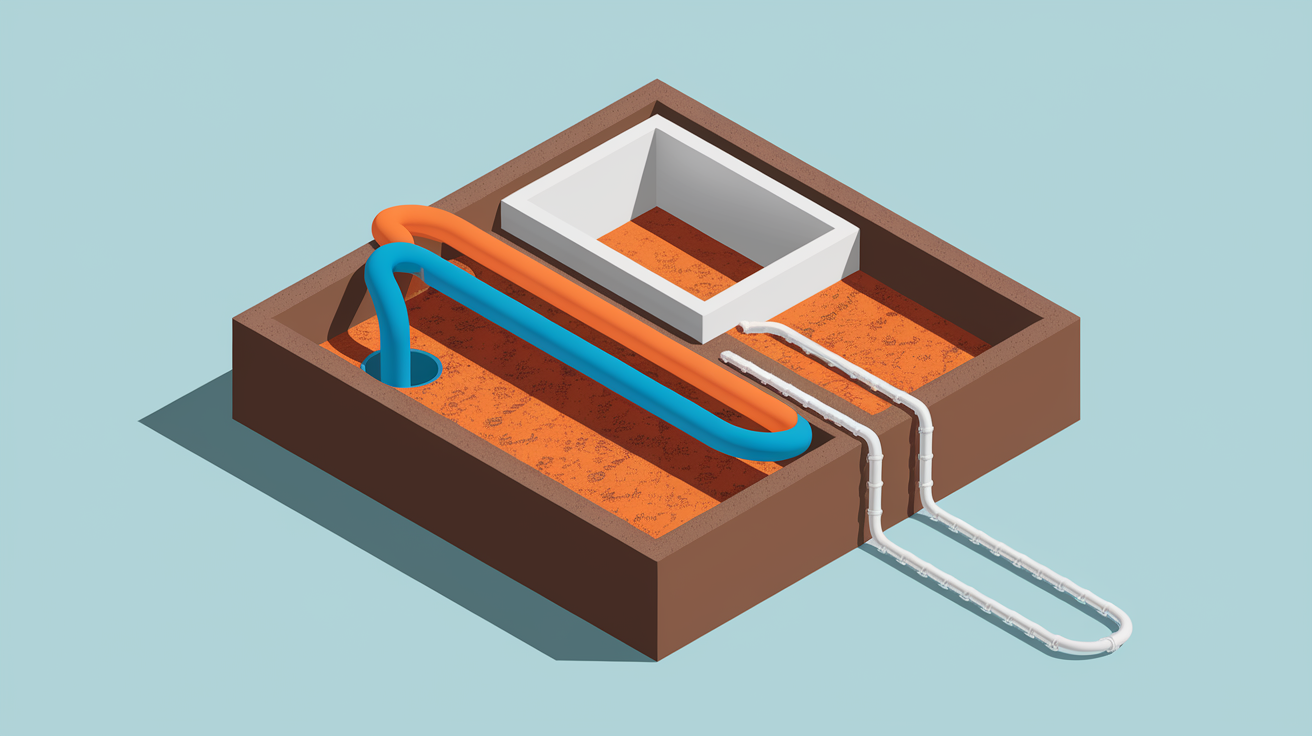
Interior perimeter drain systems are the most common repair for hydrostatic pressure basement leaks. A trench is cut along the inside edge of the basement floor, a 4 inch perforated drain pipe is installed in gravel, and the pipe slopes to a sump pit. Groundwater that seeps under the slab or through the cove joint flows into the drain and is pumped out by a sump pump. This method doesn’t stop water from contacting the exterior wall, but it intercepts and removes it before it can flood the basement. It’s less disruptive than exterior work and can be completed in a few days.

Exterior excavation and waterproofing is the most permanent solution. The soil is dug away from the foundation down to the footing, the wall is cleaned, a waterproof membrane or coating is applied, and a new footing drain is installed or repaired. This approach stops water before it contacts the foundation and relieves hydrostatic pressure at the source. It’s more expensive and disruptive but protects the structure long term and is often necessary when walls show structural stress or when interior solutions have failed.

Method What It Fixes Typical Application
Interior perimeter drain + sump pump Manages water after it enters beneath slab, prevents basement flooding Recurring seepage at cove joint, wet floors, minor to moderate hydrostatic intrusion
Exterior excavation + membrane + footing drain Stops water before it contacts foundation, relieves pressure at source Structural wall issues, high water table, persistent leaks, new construction waterproofing
Crack injection (epoxy or polyurethane) Seals individual cracks to stop active leaks Isolated cracks with visible water entry, does not address underlying pressure
Wall reinforcement (carbon fiber, anchors, tie backs) Stabilizes bowed or cracked walls caused by lateral pressure Horizontal cracks, inward bowing, structural movement from sustained hydrostatic force

Crack injection is effective for stopping leaks through individual cracks but does not lower hydrostatic pressure. Polyurethane foam is flexible and works well for active leaks. Epoxy is rigid and used for structural repairs. Wall reinforcement is required when hydrostatic pressure has caused bowing, horizontal cracking, or movement. Carbon fiber straps, helical anchors, or steel tie backs stabilize the wall, but pressure relief through drainage is still necessary to prevent future damage.

Cost Expectations for Hydrostatic Pressure Repairs

nqMLG4MWTPWjl6HcvzL_lw

Repair costs vary widely based on the method, the size of your basement, soil conditions, and how much structural work is needed. Interior perimeter drain systems with a sump pump typically run between $2,000 and $7,000 for an average basement. That includes trenching, pipe, gravel, sump pit, pump installation, and concrete patching. Costs rise if you need battery backup for the sump, if access is difficult, or if the basement is large with a long perimeter.

Exterior excavation and waterproofing is more expensive because it involves digging, disposal of soil, membrane application, footing drain installation, and backfill. Expect $8,000 to $20,000 or more depending on how deep the footing is, how long the perimeter run is, and whether landscaping, driveways, or utilities complicate access. Crack injection runs $300 to $800 per crack for polyurethane foam, more for epoxy or long cracks. Sump pump installations alone, including pit and discharge line, range from $1,200 to $3,000. Wall reinforcement with carbon fiber or anchors can add $3,000 to $10,000 depending on the length of wall and severity of movement.

Cost drivers include soil type (clay and rock are harder to excavate), depth of the foundation, accessibility (tight spaces or finished landscaping add labor), and whether structural repairs are required. Homes with high water tables or repeated flooding often need more robust systems, which push costs higher. Always get two to three quotes and ask contractors to specify what is included, what equipment they’ll use, and what warranty or guarantee they offer on the work.

When to Call a Professional

PmsXd8tPRPO-LkrwAkTObQ

Call a professional when you see recurring leaks, structural cracks, wall movement, or when your own efforts to control water haven’t worked. If water appears every time it rains, if you’ve regraded and extended downspouts but still have seepage, or if you see horizontal cracks or bowing in foundation walls, the problem is beyond simple fixes. Hydrostatic pressure that’s strong enough to move walls or flood basements repeatedly needs professional assessment and engineered solutions.

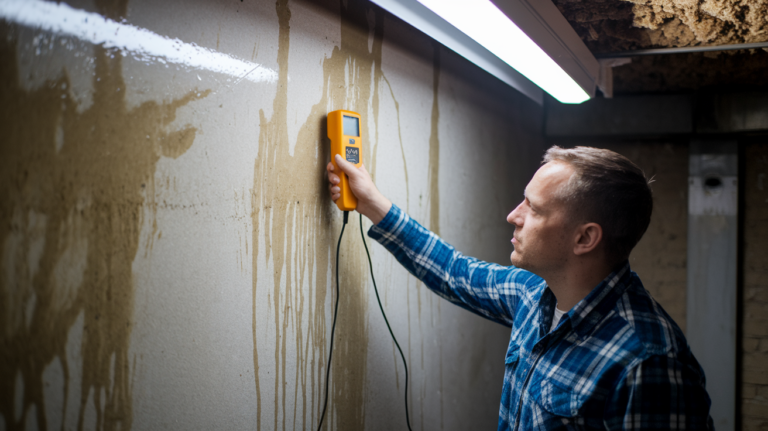
Professionals use moisture meters, thermal imaging, and visual inspections to trace water entry points and measure wall movement. They can determine whether you need drainage work, structural reinforcement, or both. If your sump pump runs constantly during storms or if you’re seeing efflorescence and mold growth that won’t stop, a waterproofing contractor or structural engineer can diagnose the root cause and design a repair that addresses hydrostatic pressure at the source. Don’t wait if walls are bowing, if cracks are widening, or if flooding is affecting mechanical systems or finished spaces. Early intervention prevents expensive structural damage and protects your home’s foundation long term.

Final Words

Water in the soil is pushing on your foundation right now, finding any weak spot. That force, hydrostatic pressure, forces water through walls, cove joints, and floor cracks.

This post explained what that pressure is, the common signs to watch for, why it builds up, practical prevention steps, repair options, cost expectations, and when to call a professional.

If you spot damp walls or pooling after rain, act fast: make simple temporary stops and get a pro to test and repair. Quick action makes hydrostatic pressure basement leaks manageable and gets your home back to normal.

FAQ

Q: Does homeowners insurance cover hydrostatic pressure or water seeping into the basement?

A: Homeowners insurance usually doesn’t cover hydrostatic pressure or slow water seepage into basements. Policies often exclude groundwater; you might get coverage only for sudden accidental discharge—document damage and check your policy with your insurer.

Q: How much does it cost to fix hydrostatic pressure?

A: Fixing hydrostatic pressure ranges widely: crack injections $300–$800, sump pumps $1,200–$3,000, interior drains $2,000–$7,000, exterior waterproofing $8,000–$20,000. Final cost depends on soil, access, and severity.

Q: What is the #1 cause of basement flooding?

A: The #1 cause of basement flooding is groundwater buildup and hydrostatic pressure from saturated soil, often worsened by poor grading, clogged gutters, or heavy rain pushing water through walls, cove joints, and floor cracks.

Black Mold in Bathroom Removal: Safe DIY Steps

0

You’ve probably seen those dark patches spreading across your bathroom tiles and wondered if you really need to call someone, or if it’s something you can fix yourself. Here’s the reality: you can handle black mold safely on your own when it’s covering less than 10 square feet. That’s roughly a 3 by 3 foot area. Bigger than that, or if it’s growing behind walls, you’re looking at a professional job. This guide walks you through safe DIY removal steps, the right protective equipment to use, and when to stop and call for help.

Complete Guide to Safe Black Mold Removal in Your Bathroom

q7l6VUuuRHWvyxvpdTiBkA

You can tackle bathroom black mold yourself when it’s covering less than 10 square feet. That’s roughly a 3 by 3 foot area. Bigger than that? You’re looking at a job for professionals.

Call an expert if the mold exceeds that size, if it’s growing behind walls or inside your HVAC system, or if you’ve got asthma, allergies, or other respiratory conditions. DIY removal works fine for surface mold on tiles and tubs. But mold that’s spread into structural materials needs different tools and training.

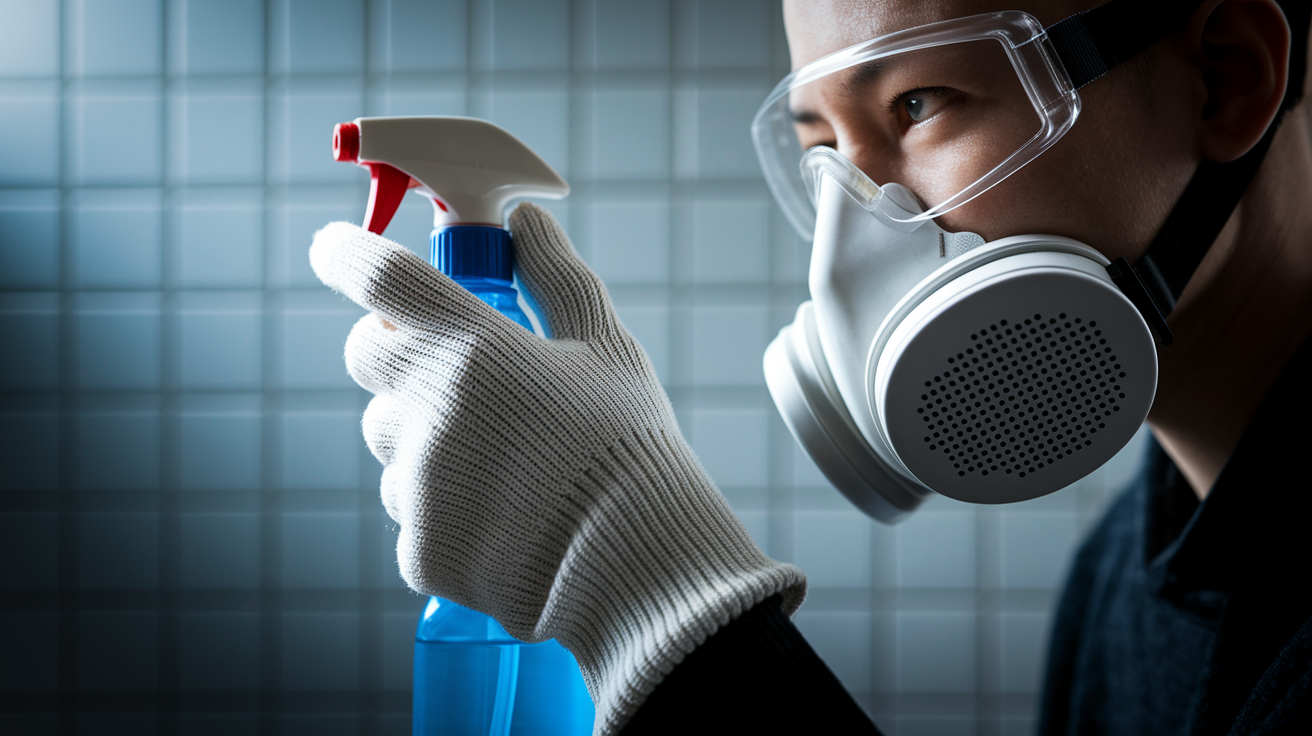
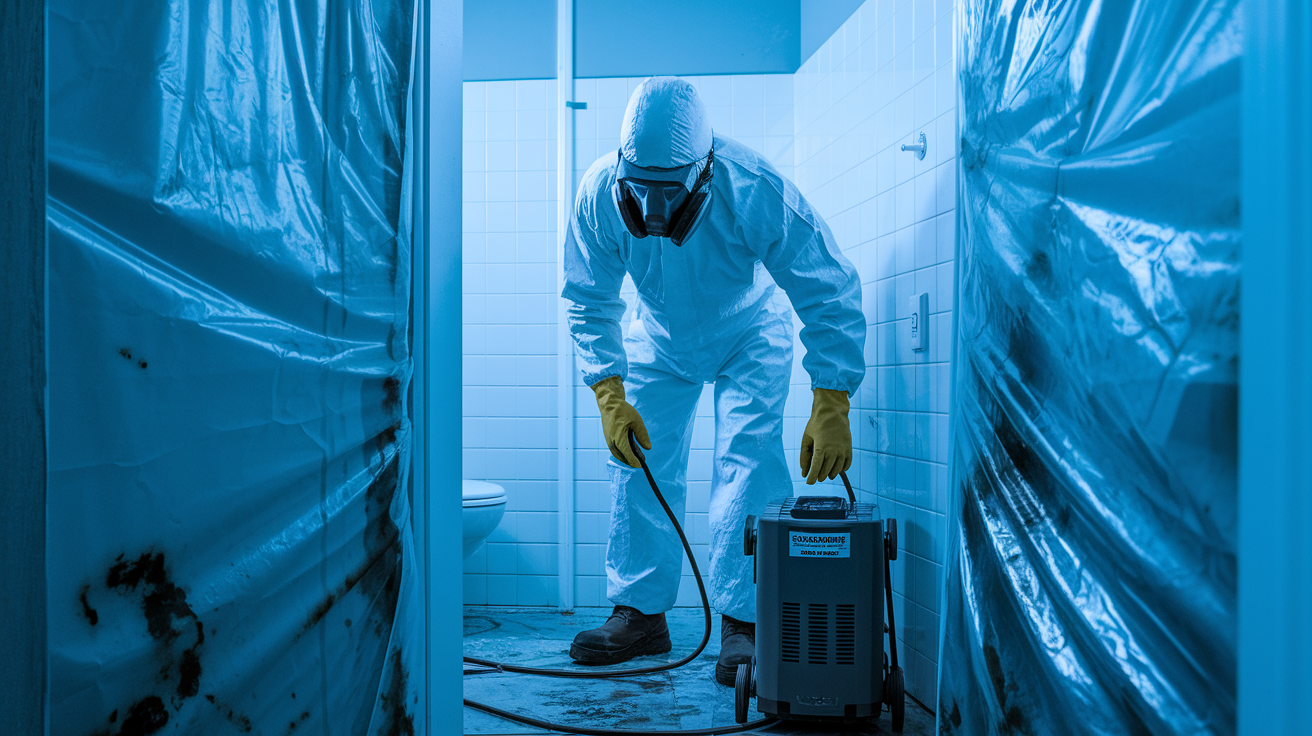
Before you touch anything moldy, gear up properly. You need an N95 or N100 respirator mask. Not just a basic dust mask. Regular masks don’t filter out the tiny mold spores that go airborne when you start scrubbing. Add rubber or chemical resistant gloves, safety goggles to protect your eyes, and long sleeves with long pants to keep spores off your skin. Set up ventilation before you start: open the bathroom window, turn on the exhaust fan, and let it run for at least 30 minutes before you begin. If your bathroom doesn’t have a window, open the door and crack a window in an adjacent room. Good airflow pushes spores outside instead of letting them settle elsewhere in your home. This step matters because disturbing mold sends thousands of spores into the air, and breathing them causes the respiratory issues, headaches, and fatigue that make black mold dangerous.

Your cleaning solution determines how well the mold comes off and whether it grows back. Distilled white vinegar works well undiluted. It’s non-toxic and safe for most surfaces. Pour it straight into a spray bottle. Hydrogen peroxide at 3 percent concentration (the standard drugstore bottle) has stronger antimicrobial properties than vinegar and also goes in the bottle undiluted. For stubborn mold on hard surfaces, mix 10 percent ammonia to 90 percent water. That’s roughly 1 cup of ammonia to 9 cups of water. Commercial antifungal cleaners work too, just follow the directions on the label. Here’s the critical part: never use bleach on porous surfaces like grout or drywall. The water in bleach soaks into the material and adds moisture, which can make the mold problem worse instead of better. Bleach might lighten the dark color temporarily, but it doesn’t kill mold that’s penetrated into porous materials. Test your chosen cleaner on a small hidden spot first to make sure it doesn’t damage the finish.

Removing Mold From Non-Porous Surfaces

Non-porous surfaces include ceramic tiles, porcelain bathtubs and sinks, glass shower doors, and sealed countertops. Water can’t penetrate these materials, which makes them easier to clean.

Put on all protective equipment and turn on ventilation before you start working. Fill a spray bottle with your chosen cleaning solution. Spray the affected area generously until the surface is completely covered. Let the solution sit for 10 to 15 minutes so it can penetrate the mold. Wipe the surface with a clean cloth or sponge. Scrub any stubborn spots with a stiff brush using circular motions. Dry the area thoroughly with a clean towel, making sure no moisture remains.

If mold shows up again after the first treatment, switch to the ammonia solution and repeat the process. Sometimes it takes two rounds to get rid of established growth.

Removing Mold From Porous Surfaces

Porous surfaces absorb water and let mold roots dig in deeper. This includes grout lines, drywall, ceiling tiles, unsealed wood, and caulking. You need a lighter touch here.

Put on protective equipment and make sure ventilation is running strong. Fill a spray bottle with white vinegar or commercial mold cleaner. Spray the affected area lightly. Avoid oversaturating the surface. Let the solution sit for 10 to 15 minutes. For grout lines, dip an old toothbrush in cleaning solution and scrub lightly using circular motions. For walls and ceilings, wipe with a wrung out cloth or sponge that’s damp but not dripping. Wipe again with a barely damp cloth to remove residue. Let the surface air dry completely for 24 hours before you check the results.

Never soak porous surfaces with water. The material absorbs moisture, and that moisture creates the exact environment mold needs to come back stronger. If you see extensive mold that’s darkened large wall sections, soaked into ceiling tiles, or penetrated deep into drywall, you need to replace those materials rather than try to clean them. Cleaning won’t reach mold that’s grown into the material itself. This type of deep penetration often indicates water damage that needs professional repair.

Put contaminated materials in sealed plastic bags immediately. That includes any caulking you’ve removed, ceiling tiles you’ve pulled down, and heavily soiled rags. Dispose of them with your regular trash unless your local regulations say otherwise. Single use cleaning tools like sponges and brushes go in sealed bags too. Wash reusable PPE like goggles and gloves thoroughly, or throw away disposable masks and gloves properly.

Understanding Bathroom Moisture Problems That Cause Black Mold

N_Pirc9eTmui230TXcvlrw

Black mold needs three things to grow: spores, a surface to attach to, and moisture. Spores are always floating in the air. You can’t eliminate them completely. Most surfaces in a bathroom work fine for mold to grab onto. That leaves moisture as the one factor you can actually control. When humidity stays above 55 percent for extended periods, mold starts growing. Most bathrooms hit that threshold easily.

Bathrooms make perfect mold habitats because they combine warm temperatures with frequent moisture and plenty of organic materials like grout, wood trim, and drywall. Every shower or bath adds gallons of water vapor to the air. That moisture has to go somewhere, and if your ventilation can’t move it outside fast enough, it settles on cool surfaces and soaks into porous materials.

Visible moisture sources are the ones you can see: steam from hot showers, condensation on mirrors and walls, wet towels hanging on hooks, water splashing outside the tub or shower onto the floor. These create surface moisture that feeds mold growth on tiles, grout, and ceiling corners. Regular wiping helps, but it doesn’t address the humidity that’s already in the air.

Hidden moisture problems cause more damage because you don’t notice them until mold appears. Leaking pipes behind walls let water pool where you can’t see it. A slow drain leak under the sink drips onto wood cabinets and subfloors. Cracked grout or deteriorated caulk allows shower water to seep through gaps into the wall cavity behind the tile. An improperly sloped shower pan creates standing water that doesn’t drain completely, leaving constant dampness. These problems keep feeding mold even after you’ve cleaned visible growth.

Condensation issues happen when conditions inside the bathroom clash with conditions in the walls or pipes. Cold water pipes “sweat” in humid bathrooms, dripping moisture onto nearby surfaces. Inadequate insulation on exterior walls creates cold spots where humid air condenses. Poor ventilation allows humidity to accumulate instead of exhausting it outside. And if your exhaust fan vents into the attic instead of outdoors, you’re just moving the moisture problem to a different location. Watch for signs of hidden leaks: water stains on ceilings or walls, soft or discolored drywall, a musty smell that won’t go away after cleaning, or warped flooring near the tub or toilet. Addressing the moisture source matters more than just cleaning the visible mold. If water keeps entering the same spot, mold will keep coming back.

Identifying Black Mold in Your Bathroom

fy1lDwg6RXqZC9lQEZkr4Q

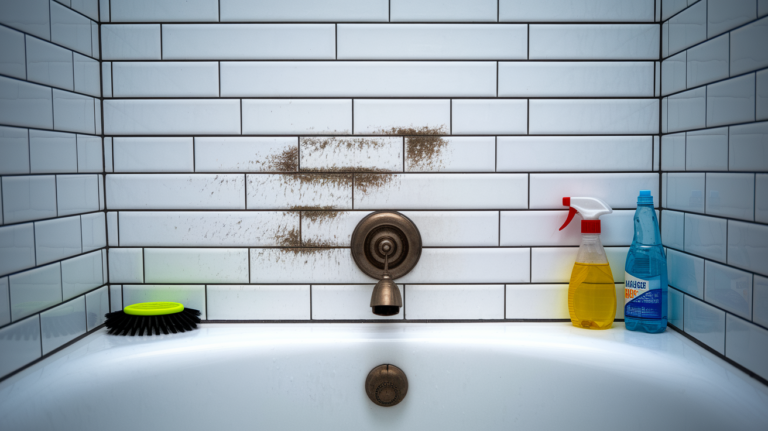
Black mold (scientifically called Stachybotrys chartarum) shows up as dark greenish-black patches that usually form in circular or irregular clusters. The patches look wet or slimy even when they’re not actively getting moisture. You’ll smell it before you see it sometimes: a distinct musty, earthy odor that doesn’t go away after normal cleaning. That smell means mold is actively growing somewhere, even if you haven’t spotted the visible growth yet.

Look in the usual spots: grout lines between shower tiles, ceiling corners where steam collects, the wall behind the toilet where air doesn’t circulate well, window sills that get condensation, and the area around the sink. Black mold prefers darker, damper locations with less airflow. It’s different from the light pink or orange mildew that shows up on shower curtains. That’s a different organism entirely and much less concerning. Black mold also differs from the grayish-green fuzzy mold that might appear on a wet bath mat. Stachybotrys has that characteristic dark greenish-black color and slimy texture.

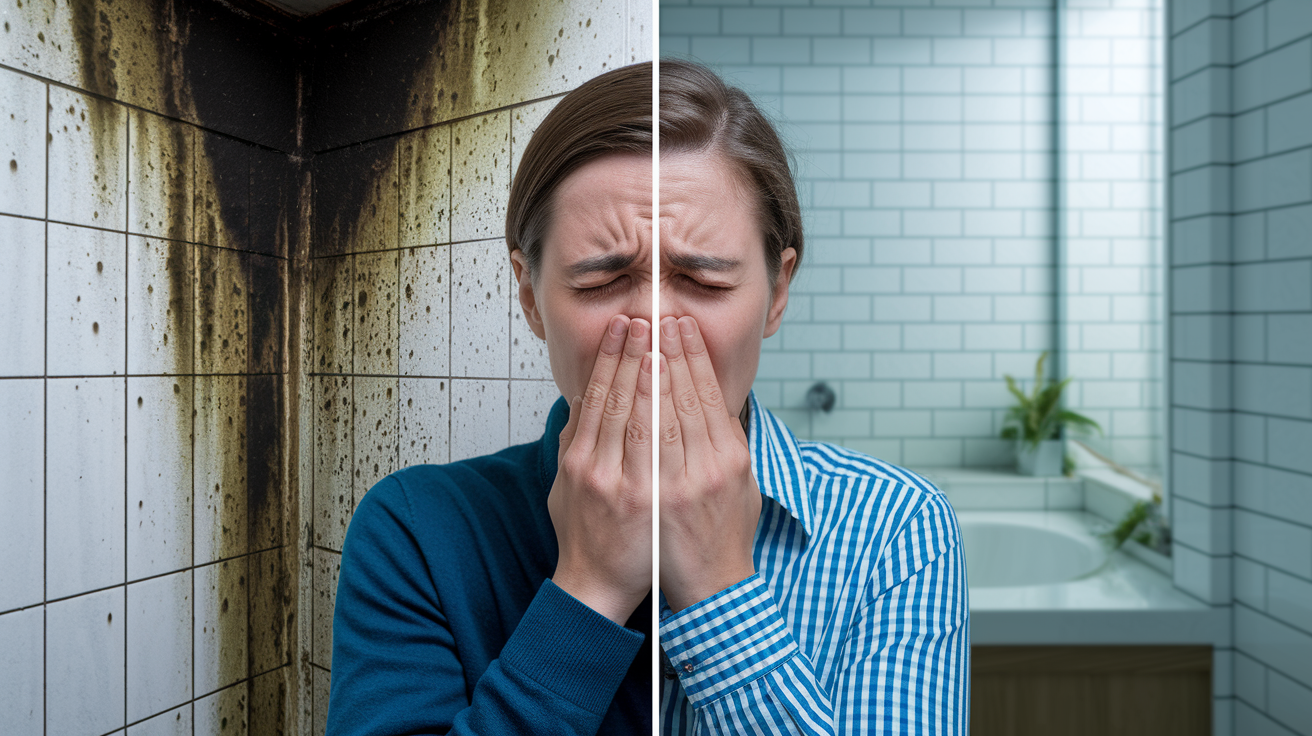
If you’re experiencing respiratory issues, headaches, persistent fatigue, nausea, or allergic reactions that get worse when you’re in the bathroom, black mold might be the cause. It produces mycotoxins that affect your respiratory system and overall health. People with asthma or existing allergies notice symptoms faster and more severely. When you’re not sure whether the dark growth is actually Stachybotrys or another mold type, you can buy a home testing kit or hire a professional for lab analysis. Testing makes sense if you’re planning extensive remediation work or if someone in the house has serious health reactions. Most of the time, though, you can identify black mold by its appearance, location, and smell.

When to Call Professionals for Bathroom Mold Remediation

0DCtAAbZR-OItuvzGQaMCw

The 10 square foot threshold is your decision point. Roughly a 3 by 3 foot area. Smaller than that, and you can handle it with the DIY methods above. Larger than that, and you need professional equipment, containment procedures, and expertise.

Some situations always require professionals, regardless of the mold’s size. Mold coverage exceeds 10 square feet. Mold appears behind walls or under flooring. Mold is growing in the HVAC system or ductwork. Mold has affected structural elements like studs or joists. You have asthma, allergies, or respiratory conditions. Mold returns repeatedly after you’ve cleaned it. The water damage involves sewage or contaminated water.

Mold inspection typically costs around $656, though some companies waive the inspection fee if you hire them for the remediation work. They’ll test the mold type, measure the extent of growth including hidden areas, identify moisture sources, and give you a detailed scope of what needs to happen. Black mold removal costs start at $1,223 and average $2,300, though the price varies significantly based on how much material needs removal, whether structural damage exists behind the mold growth, and how accessible the affected areas are. A small patch on an exterior wall might cost less. Mold throughout a bathroom with damaged drywall, compromised framing, and a leaking shower pan will cost more.

Preventing Black Mold Growth in Your Bathroom

4f4AAxOvTsquH9TcZRZazw

Preventing mold takes less time and costs less money than removing it. The difference between a bathroom that grows mold and one that doesn’t usually comes down to consistent habits, not expensive equipment.

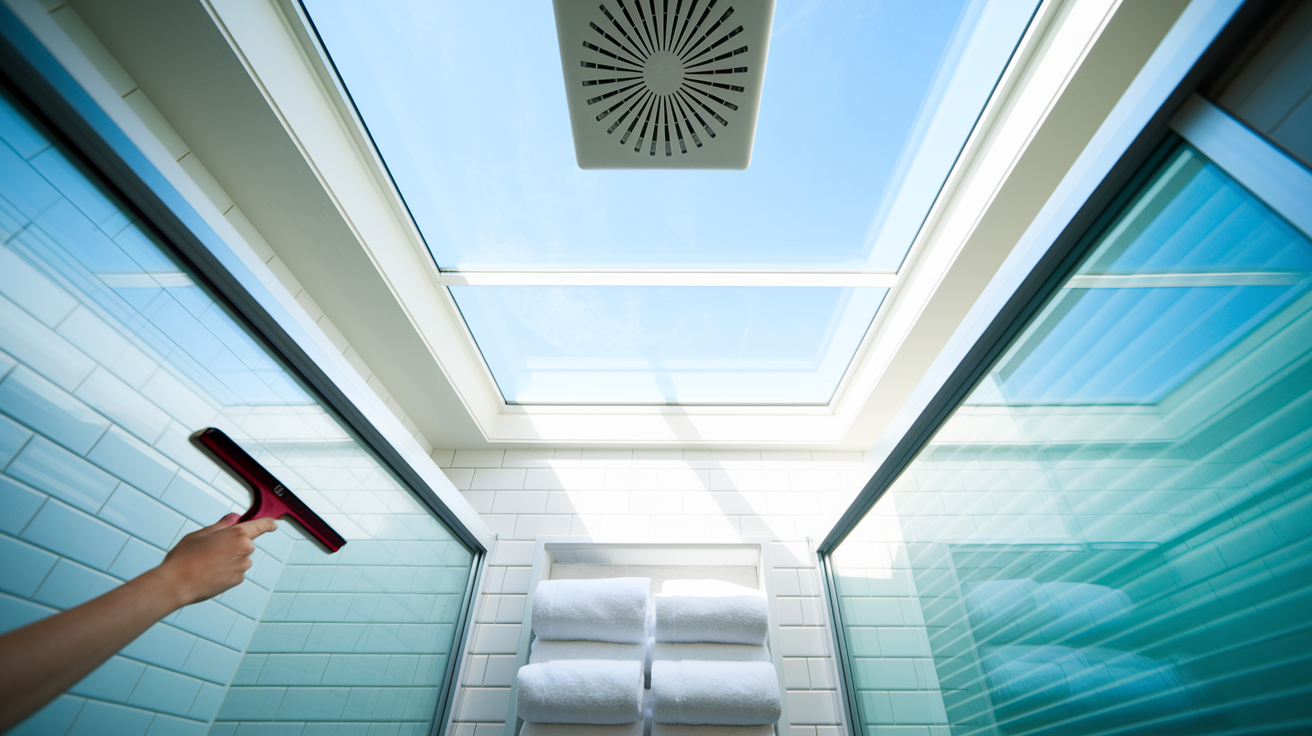
Daily and weekly prevention steps work better than any product you can buy. Run the exhaust fan during your shower and for at least 30 minutes after. Make sure it vents outside the house, not into the attic. Use a squeegee on shower walls and glass doors after every use to remove standing water. Keep a spray bottle of vinegar in the bathroom, spray surfaces after bathing, and let it air dry. Wipe down wet surfaces with a towel after showers, especially around the tub and sink. Clean the bathroom weekly with regular cleaner and rotate in antifungal cleaner at least once monthly.

Fix leaking pipes the same day you notice them. Water pooling or seeping into walls creates hidden mold. Keep bathroom humidity below 50 percent using a dehumidifier if your exhaust fan isn’t enough. Leave the bathroom door open or crack a window for airflow between uses so moisture doesn’t sit in the air. Inspect caulking around the tub, shower, and sink regularly and replace it when you see cracks or gaps. Check grout lines for deterioration and reseal them when they start looking worn or absorbing water.

Early detection during your regular cleaning routine lets you address small spots before they spread. The key is stopping moisture at the source: if water doesn’t sit on surfaces or stay in the air, mold can’t establish itself even though spores are always present.

Mold-Resistant Materials and Bathroom Upgrades

8nsSWwcXSU6DLm0dScBmCw

The materials you choose affect how easily mold can take hold. Some surfaces resist moisture penetration and don’t provide the organic food source mold needs. When you’re repairing mold damage or renovating a bathroom, upgrading to mold-resistant materials adds a layer of protection that makes future problems less likely.

Paperless drywall uses fiberglass facing or cement board instead of paper. Mold feeds on paper, so removing it removes the food source. Mold-resistant paint contains antimicrobial additives that discourage growth on painted surfaces. Silicone-based caulking resists water penetration better than acrylic caulk and lasts longer in wet environments. Epoxy grout is non-porous, unlike cement grout, so water and mold can’t penetrate into the grout lines. Vapor barriers installed behind shower walls block moisture from reaching the wall cavity. Waterproof membrane systems create a completely sealed shower enclosure that prevents any water from reaching the framing.

These materials cost more upfront than standard options. Paperless drywall runs about 20 percent more than regular drywall. Epoxy grout costs roughly double what cement grout costs. Waterproof membrane systems add several hundred dollars to a shower installation. The tradeoff is reduced maintenance, fewer mold problems, and less chance you’ll need to tear out and replace materials later. Proper installation matters as much as the materials themselves. Even the best mold-resistant drywall will fail if it’s installed without adequate ventilation or if leaks soak it repeatedly.

Proper Disposal and Cleanup After Bathroom Mold Removal

Y2BQMigjQsiR1Bl4odNxTQ

Mold spores scatter into the air when you disturb them during cleaning, and your goal during disposal is to keep them contained so they don’t settle elsewhere in your home and start new colonies.

Seal contaminated materials immediately in heavy-duty plastic bags. Double-bag if the materials are wet or if you’ve removed a lot of moldy material. Twist the bag closed and secure it with duct tape before you carry it through the house. Dispose of sealed bags with your regular household trash unless your local waste management department specifies different procedures for mold contaminated materials. Some areas require special handling, so check local regulations if you’re unsure. Disposable cleaning tools like sponges, scrub brushes, and cheap spray bottles should go in sealed bags too. Trying to clean and reuse them just spreads spores.

After you’ve removed the mold and bagged the contaminated materials, clean the entire work area. Wipe down all surfaces in and around the bathroom with a damp cloth to capture any spores that settled during the work. If you have a vacuum with a HEPA filter, vacuum the floor and nearby areas. Regular vacuums blow small particles back into the air, but HEPA filters trap them. Wash reusable PPE like rubber gloves and safety goggles thoroughly with soap and water, then let them air dry completely. Throw away disposable masks, gloves, and protective clothing in a sealed bag.

Let treated areas dry completely before you evaluate whether the mold is gone. Porous surfaces need 24 hours of drying time before you can tell if cleaning worked. Running an air purifier with a HEPA filter in the bathroom for a few days after cleaning helps capture airborne spores and improves air quality. Open windows and run the exhaust fan to keep air moving and speed up drying.

Health Considerations and Testing for Black Mold Exposure

y_aiB3h5Ro2hm_LiTROrNw

Black mold produces mycotoxins. Toxic compounds that cause health problems when you breathe them or when they contact your skin. The severity depends on how much mold is present, how long you’re exposed, and your individual sensitivity. Respiratory issues are the most common effect: coughing, wheezing, throat irritation, and nasal congestion. Headaches and persistent fatigue follow close behind. Some people experience nausea, skin rashes, or eye irritation.

Children, elderly adults, and people with compromised immune systems react more severely to mold exposure than healthy adults. Anyone with existing asthma or allergies will notice their symptoms get worse around black mold. And those individuals should not attempt DIY removal at all. Even healthy people can develop sensitivities after prolonged exposure, especially if the mold covers a large area or if they’re exposed daily.

Testing makes sense in specific situations: when you’re experiencing persistent health symptoms but can’t locate visible mold, when you’re uncertain about the extent of hidden mold, or before you purchase a home that shows signs of moisture problems. Professional testing involves air samples, surface samples, or bulk samples sent to a lab for analysis. Results identify the mold species and concentration levels. Home test kits cost less but provide less reliable results. They can tell you mold is present but often can’t identify the specific type or give accurate concentration measurements.

Watch for these symptoms that warrant medical attention. Persistent respiratory problems or worsening asthma attacks. Chronic headaches or unexplained fatigue that doesn’t improve. Skin rashes or persistent eye irritation. Neurological symptoms like memory problems or difficulty concentrating. Persistent coughing or wheezing that continues even when you leave the house.

Health symptoms may continue for days or weeks after mold exposure ends, especially if the exposure was prolonged or the concentration was high. Inform your doctor about the mold exposure so they can provide appropriate treatment and monitor for longer-term effects. Most people recover fully once the mold is removed and they’re no longer breathing contaminated air, but documented exposure helps your doctor understand the context if symptoms persist or worsen.

Final Words

Black mold in bathroom removal starts with knowing your limits and protecting yourself properly.

Small patches on shower tiles or grout can be handled safely with the right gear and cleaning solutions. Larger areas, hidden growth, or mold on drywall and structural surfaces need professional help.

Prevention is your best tool. Run the exhaust fan, wipe down wet surfaces, fix leaks fast, and keep humidity in check.

Address the moisture source, not just the visible mold. That’s what stops it from coming back.

If you’re dealing with widespread growth, damaged walls, or persistent problems after cleaning, we’ll assess the scope, stabilize the area, and handle the repairs from start to finish.

FAQ

How do I get rid of black mold in my bathroom permanently?

You get rid of black mold in your bathroom permanently by removing the mold from affected surfaces and fixing the moisture problem causing the growth. Clean patches under 10 square feet using distilled white vinegar or hydrogen peroxide, then address leaks, improve ventilation, and control humidity below 50 percent. Without fixing the moisture source, mold will return even after thorough cleaning.

Is black mold in the bathroom toxic?

Black mold in the bathroom is toxic because it produces mycotoxins that cause respiratory issues, headaches, fatigue, and nausea in exposed individuals. Stachybotrys chartarum, the scientific name for black mold, ranks among the world’s 10 most hazardous fungi. People with asthma, allergies, or respiratory conditions face higher risks and should avoid DIY removal attempts.

What are the 10 warning signs of mold toxicity?

The 10 warning signs of mold toxicity include persistent respiratory problems or worsening asthma, chronic headaches, ongoing fatigue, skin rashes, eye irritation, neurological symptoms like memory issues or difficulty concentrating, persistent coughing, wheezing, nausea, and a musty odor that won’t go away after cleaning. If you experience these symptoms after mold exposure, inform your doctor about the situation.

What kills black mold instantly?

Undiluted distilled white vinegar and 3 percent hydrogen peroxide kill black mold on hard surfaces when sprayed directly and allowed to sit for 10 to 15 minutes before wiping. For stubborn mold on non-porous surfaces, a 10 percent ammonia to 90 percent water solution works after other methods fail. Never use bleach on porous surfaces like grout or drywall, as the water in bleach adds moisture and potentially worsens the problem.

When should I call professionals for bathroom mold removal?

You should call professionals for bathroom mold removal when the affected area exceeds 10 square feet, mold appears behind walls or under flooring, you have asthma or respiratory conditions, or mold returns repeatedly after cleaning. Professional remediation is necessary when mold affects structural elements or involves water damage from sewage or contaminated water.

How do I prevent black mold from coming back in my bathroom?

You prevent black mold from coming back in your bathroom by running the exhaust fan for 30 minutes after showers, using a squeegee on wet surfaces after every use, keeping humidity below 50 percent, and fixing leaking pipes immediately. Store a spray bottle of vinegar in the bathroom and spray surfaces after bathing, letting it air-dry. Check and replace cracked caulking around the tub, shower, and sink regularly.

What surfaces can I clean myself versus needing replacement?

You can clean non-porous surfaces like ceramic tiles, porcelain bathtubs, and glass shower doors yourself using vinegar or hydrogen peroxide. Porous surfaces like grout, drywall, ceiling tiles, and unsealed wood require careful cleaning with minimal moisture, but extensive mold penetration on these materials requires replacement rather than cleaning. If large wall sections or ceiling tiles show deep mold growth, replacement is necessary.

What protective equipment do I need for bathroom mold removal?

You need an N95 or N100 respirator mask, rubber or chemical-resistant gloves, eye protection or safety goggles, and long sleeves with pants for bathroom mold removal. Set up proper ventilation by opening windows and running the exhaust fan for at least 30 minutes before starting. This equipment is critical because mold spores become airborne during cleaning and cause respiratory issues.

How long does it take for treated surfaces to dry after mold removal?

Treated surfaces take 24 hours to dry completely after mold removal, especially porous materials like grout and drywall. During this time, avoid using the bathroom heavily and keep ventilation running. After 24 hours, evaluate whether the treatment worked or if additional cleaning is needed.

What mold-resistant materials should I use during bathroom repairs?

You should use paperless drywall like fiberglass-faced or cement board, mold-resistant paint with antimicrobial additives, silicone-based caulking, epoxy grout, vapor barriers behind shower walls, and waterproof membrane systems during bathroom repairs. These materials resist moisture penetration better than standard options, but proper installation matters as much as material choice for long-term mold prevention.

Interior Buildback Timeline: What to Expect During Reconstruction

Think a rebuilding project will be done in a weekend? Not even close.
A complete interior buildback usually runs 13 to 23 weeks—about 3 to 6 months—from your first meeting to walking into a finished room.
Delays often come from demo surprises, permit waits, and long lead times for cabinets or countertops.
This post walks you through each phase—what happens, typical durations, key milestones that keep work moving, and where you should expect hold-ups—so you can plan, avoid surprises, and get your home back on schedule.

Core Interior Buildback Timeline Overview and Phase Durations

VnellmHMSxiI98etyBMHYA

A complete interior buildback usually takes 13 to 23 weeks, about 3 to 6 months from your first meeting to walking back into a finished space. Add a follow-up review period and you’re looking at 25 weeks total. The timeline splits into separate phases, each with clear deliverables that tell you when it’s safe to move forward.

The initial consultation lasts 1 to 2 weeks. You’ll meet designers and contractors, lock in measurements, and approve a design brief. Concept development comes next, running 2 to 4 weeks. This is where you see mood boards, floor plans, and maybe some 3D views. Then design finalization and procurement takes 4 to 6 weeks. Final drawings get issued, furniture and lighting orders go out, and contractor calendars get confirmed. The construction and installation phase is the big variable, anywhere from 4 to 8 weeks depending on how much demo you need, what structural fixes show up, and how many finish trades are involved. Once construction wraps, styling and final touches need 1 to 2 weeks for furniture placement, art hanging, and lighting tweaks. Final inspection and handover is usually 1 week for your walkthrough, punch list fixes, and warranty paperwork. An optional post-project review can add 1 to 2 weeks if you want follow-up visits or maintenance checks.

Milestone markers control everything. Key checkpoints: design brief signed, concept boards approved, final drawings issued, construction start confirmed, rough inspections passed, drywall and paint done, major items delivered and installed, final walkthrough scheduled. Miss one and everything downstream stalls. Tracking them weekly keeps the project on track and gives you concrete points to measure against your target date.

The seven stages in order:

  1. Initial Consultation & Design Brief – 1 to 2 weeks
  2. Concept Development – 2 to 4 weeks
  3. Design Finalization & Procurement – 4 to 6 weeks
  4. Construction, Renovation & Installation – 4 to 8 weeks
  5. Styling & Final Touches – 1 to 2 weeks
  6. Final Inspection & Handover – 1 week
  7. Post-Project Review & Feedback – optional 1 to 2 weeks after completion

Demolition and Structural Preparation in the Interior Buildback Timeline

3q5EjvIrTCu4DPEabJ41XQ

Demo is the first physical work once designs are final and permits are ready. A single room might only take a few days. Multi-room or whole floor projects stretch that to 1 or 2 weeks. Schedule depends on debris volume, containment needs, and whether you’re protecting nearby spaces from dust and noise. If structural problems show up (sagging joists, hidden water damage, old wiring buried in walls), the timeline extends. Structural fixes add 1 to 3 weeks depending on severity and whether you need engineering reviews or extra permits.

Demo sets up everything that follows. Delays here ripple through the entire job. An inspector flags code violations or discovers asbestos, mold, or termite damage? Work stops until remediation clears and you get sign-off. That can mean days or weeks you didn’t account for.

Key demo and early structural prep tasks with typical durations:

  • Site prep and containment setup – 1 to 2 days
  • Demo of finishes, fixtures, and non-structural elements – 2 days to 1 week
  • Debris removal and disposal – 1 to 3 days
  • Structural repairs or framing corrections – 1 to 3 weeks if needed
  • Hidden damage discovery and remediation – variable, often adds 1 to 2 weeks plus inspection time

Rough-In Phase Timing: Electrical, Plumbing, and HVAC in an Interior Buildback Timeline

ZHBE2JgoRvSGyBUc0bgVHA

Once demo and structural repairs are done, rough-in work starts. Electricians, plumbers, and HVAC techs run new wiring, pipes, and ducts inside open walls and ceilings. This phase generally takes 1 to 3 weeks depending on room count, system complexity, and whether you’re upgrading panel capacity, moving fixtures, or adding zones. Trade sequencing matters. Electricians and plumbers often work at the same time, but HVAC duct installation can clash with framing or electrical conduit paths. Coordination failures mean rework—pulling wire twice or relocating a drain because it blocks a duct run.

After rough-in wraps, inspections must happen before you close walls. Inspections can take a few days to up to 2 weeks depending on how busy your local building department is and whether corrections are needed. Permit approvals just to start rough-in work can take around 1 month in many areas, so plan that lead time early. Missing an inspection or failing a code check stops everything until the issue gets fixed and a follow-up inspection is scheduled.

Scheduling conflicts between trades slow things down too. If the electrician runs late and the plumber’s already booked on another job, you lose days waiting for the right sequence to resume. Weather delays HVAC equipment deliveries. Supply shortages push back rough-in start dates by weeks. Clear communication, locked schedules, and buffer time between phases reduce risk, but rough-in remains one of the most common bottleneck stages.

Drywall, Insulation, and Interior Surface Milestones Within the Buildback Timeline

pkQJcVdMQvu8FFa0jWghLw

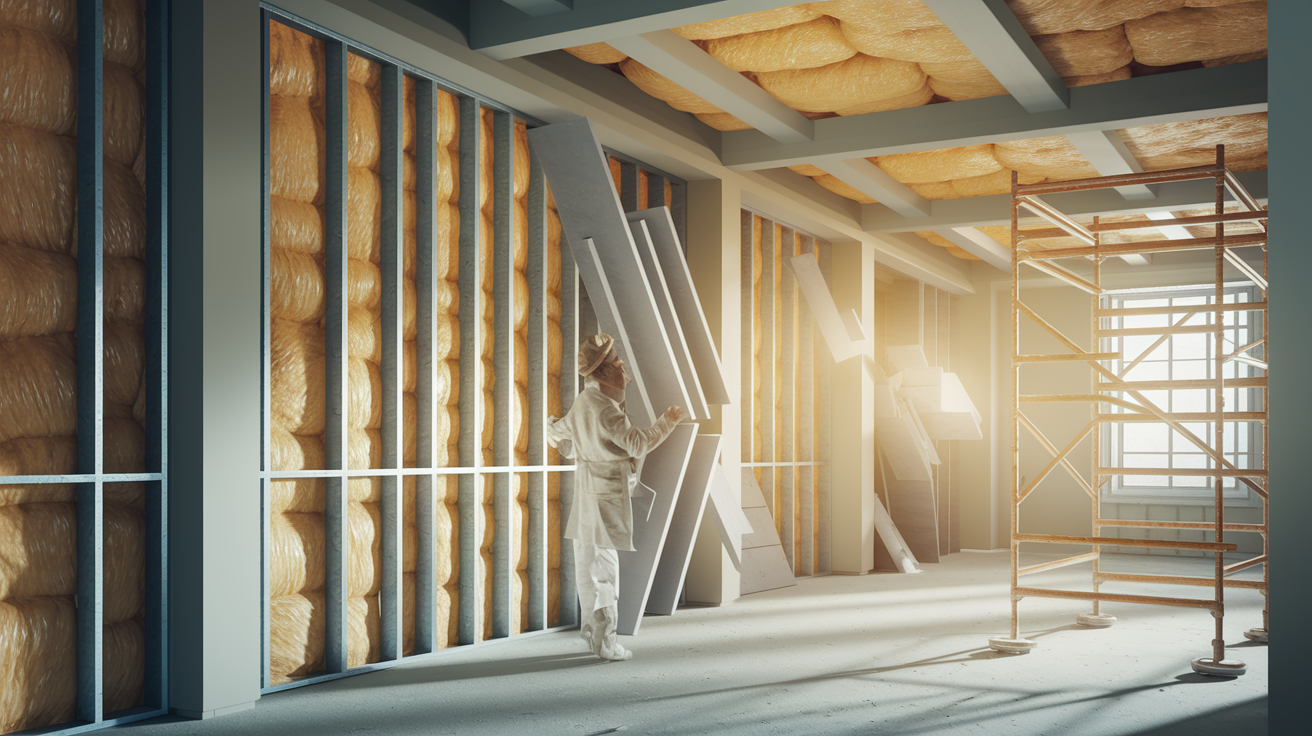
Insulation and drywall installation mark the shift from rough construction to finish-ready surfaces. This phase typically takes 1 to 3 weeks. Insulation goes in first, then drywall gets hung, taped, and finished with multiple coats of joint compound. Each coat has to dry before the next, and humid weather or poor ventilation stretches drying time by days. Rough-in inspections must be complete and signed before drywall starts. If an inspector catches a missed outlet box or improperly supported plumbing, the drywall crew waits while corrections get made and reinspected.

Timing also depends on area size and finish level. A simple single room with Level 4 finish (standard for painted walls) moves faster than a whole floor remodel needing Level 5 finish for critical lighting. Texture application, priming, and paint add more time after drywall finishing wraps.

Key milestone benchmarks for this phase:

  • Insulation installed and inspected – confirms thermal and sound control is in place
  • Drywall hung on all walls and ceilings – framing and rough-in are now hidden
  • Taping and joint compound coats complete – surface is smooth and ready for primer
  • Primed and ready for paint – signals readiness for finish coats and trim carpentry

Finish Work Timing: Flooring, Cabinets, Countertops, and Trim in the Interior Buildback Timeline

C7hDvnFdRduJT2NUM4EBkw

The finish phase is where the space actually starts looking like a completed interior again. This stage spans 2 to 12+ weeks depending on material availability, custom orders, and installation complexity. Specialty countertops and custom cabinetry often carry lead times of 12 to 16 weeks or more, so ordering early matters. Installation sequencing matters too. In most cases, flooring goes in before cabinetry to allow a clean subfloor and avoid gaps. Cabinets get installed next, followed by countertops once base cabinets are secured and leveled. Plumbing fixtures, lighting, and trim carpentry come after painting to avoid damage to finished surfaces.

Each finish component has its own schedule, and delays in one push everything behind it. Custom cabinets arrive late? Countertop templating can’t happen. Countertops delayed? Plumbing hookups wait. Flooring damaged during cabinet delivery? Repairs add days. Coordinating delivery windows with installer availability cuts idle time, but long lead times and supply chain disruptions remain common causes of slippage.

Material availability fluctuates. Stock flooring and cabinets may arrive in 2 to 4 weeks. Custom millwork, stone counters, specialty tile, and imported fixtures frequently take 8 to 16 weeks. Always confirm lead times in writing before finalizing selections, and add buffer time for shipping delays, damaged shipments, or manufacturing errors that require reorders.

Standard installation order for finish components:

  • Flooring installed first (in most layouts)
  • Base cabinets set and leveled
  • Countertops templated, fabricated, and installed
  • Backsplash tile and trim work completed
  • Plumbing fixtures and appliances connected
  • Light fixtures, switch plates, and final hardware installed
Finish Component Typical Duration Range
Flooring (hardwood, tile, LVP) 3 to 7 days installation; 2 to 8 weeks lead time
Custom cabinetry 1 to 3 days installation; 8 to 16 weeks lead time
Countertops (quartz, granite, solid surface) 1 day installation; 4 to 12 weeks lead time

Material Procurement, Delivery Windows, and Supply Chain Impacts on the Interior Buildback Timeline

hmaPp-XTTyysS7DqOWWMgA

Material lead times control the pace of every buildback project. Stock items from local suppliers may arrive in 2 to 4 weeks. Made to order materials (custom cabinets, stone slabs, imported tile, specialty lighting) can take 12 to 16 weeks or more. If you wait until construction starts to order, you’re adding months of idle time waiting for deliveries. Ordering long lead items as soon as design selections are finalized keeps the project moving.

Delivery timing has to align with construction progress. Coordinating major deliveries during demo or early framing lets materials arrive on site when needed, not weeks before or after. Early deliveries create storage problems and damage risk. Late deliveries halt work and push labor to other jobs, creating scheduling conflicts when materials finally show up. Always build buffers of at least 2 months into the schedule for emergencies, damaged components, or unexpected vendor delays. Supply chain disruptions, shipping backups, and manufacturing quality issues are common and unpredictable.

Some tasks can overlap. Locally stocked flooring or paint can be delivered during demo without disrupting the schedule. But finish trades are mostly sequential. You can’t install countertops before cabinets. You can’t hang cabinets before drywall. You can’t tile a floor before rough plumbing gets inspected. Understanding which tasks must happen in order and which can run concurrently helps you identify the critical path—the sequence of dependent tasks that determines minimum project duration. Any delay on the critical path delays the entire completion date.

Major long lead items to order early:

  • Custom cabinetry and built-in millwork
  • Stone or quartz countertops requiring templating and fabrication
  • Specialty tile, especially imported or discontinued patterns
  • High-end light fixtures and appliances with extended manufacturing times
  • Custom window treatments and hardware

Contractor Scheduling, Labor Coordination, and Inspection Bottlenecks in the Interior Buildback Timeline

KNX2FBV3SBC5ZVQhtoBlMg

Coordinating multiple subcontractors and inspection appointments is one of the most common delay sources. Rough-in, drywall, and final inspections are critical bottlenecks. Each inspection can take anywhere from a few days to 2 weeks depending on inspector availability and whether corrections are needed. If an inspection fails, work stops until the issue gets fixed and a follow-up inspection is scheduled. That can add a week or more.

Contractor scheduling conflicts slow progress when one trade is delayed and the next trade is already booked on another project. If the electrician runs late and the drywall crew is scheduled to start Monday, the drywall crew either sits idle or moves to another job. When they finally return, it may be days or weeks later. Design revisions during construction are another frequent delay cause, adding 1 to 4+ weeks depending on scope. A simple outlet relocation may cost a day. Changing cabinet layouts or plumbing fixture locations can require new permits, revised drawings, and rescheduled inspections.

Peak construction seasons (spring and early summer) and holiday periods from late November through December make scheduling harder. Trades are busier, inspectors are backed up, and lead times stretch. Starting a project in the off-season gives you more flexibility and faster responses from contractors and inspectors.

Common scheduling conflicts and delay causes:

  • Inspector availability and appointment lead times
  • Failed inspections requiring corrections and follow-up visits
  • Trade scheduling conflicts when one contractor is delayed and the next is already booked elsewhere
  • Design changes or scope revisions requiring revised permits, drawings, or material reorders

Insurance, Permits, and Documentation Timelines That Influence Interior Buildback Progress

R1XSEKUYRWCxia0KmcmHbQ

Permit inquiry and approval processes add lead time before construction can legally begin. Initial permit inquiries often take around 1 month to start, and approval times vary widely by jurisdiction and project complexity. Simple interior remodels may clear permits in a few weeks. Projects requiring structural changes, electrical panel upgrades, or plumbing reroutes can take months. Always factor permit lead time into your project start date.

Insurance supported repairs require documented damage assessments, detailed scopes of work, and coordinated estimates before work can begin. Adjusters must inspect, approve the scope, and issue funding. That process can add weeks to the front end. If hidden damage shows up during demo, you need supplemental documentation, revised scopes, and adjuster re-inspection before moving forward. Each round of revisions delays the start of the next construction phase.

Design and architectural plan approvals also influence the schedule. If plans require revisions to meet code, or if you request changes after initial approval, the timeline extends. Coordinating between designers, contractors, and permitting authorities takes time, and miscommunication or incomplete submittals cause rejections and resubmissions.

Common documentation requirements and their timing impact:

  • Initial damage assessment and photo documentation – 1 to 2 weeks
  • Insurance adjuster inspection and scope approval – 1 to 4 weeks
  • Permit application preparation and submittal – 1 to 2 weeks
  • Permit approval and issuance – 2 weeks to 3+ months depending on jurisdiction
  • Supplemental claims for hidden damage discovered during demo – adds 1 to 3 weeks per revision cycle

Example Interior Buildback Timeline Scenarios for Different Project Sizes

IvRaQWCsSqKdOqKxzRFaRQ

Real world project durations vary by scope, but consistent patterns emerge across different interior buildback types. A small bathroom renovation typically runs about 3 months from initial design research to final construction completion. A standard kitchen remodel (roughly 160 square feet) is often planned at around 6 months, though well coordinated projects can finish in 5 months. Single room remodels with moderate scope usually require about 1 month of active construction once demo begins, with additional time for design, permits, and procurement beforehand. Whole home renovations commonly span 6 months or more depending on the extent of demo, structural work, and finish complexity.

For fire, water, or mold recovery projects, the timeline follows similar phase durations but adds time for remediation, drying, and environmental clearances before reconstruction starts. Water damage buildbacks often require 1 to 2 weeks of drying and moisture monitoring after extraction. Fire restoration adds time for soot removal, odor treatment, and HVAC cleaning before drywall and finishes can begin. Mold remediation requires containment, HEPA air scrubbing, and post-remediation verification, which can add 1 to 3 weeks depending on contamination extent.

Standard interior design driven projects without major structural issues typically cycle through in 13 to 23 weeks. Projects with heavy demo, permitting delays, or long lead custom finishes push timelines toward the upper end or beyond. Small scope projects that skip major construction phases can compress to 9 to 15 weeks if all materials are in stock and no structural surprises appear.

Project Type Active Construction Duration Total Timeline
Small bathroom renovation 3 to 5 weeks ~3 months (includes design, permits, procurement)
Standard kitchen remodel (~160 sq ft) 4 to 8 weeks 5 to 6 months (includes design, procurement, inspections)
Single-room interior rebuild (moderate scope) 3 to 4 weeks 2 to 3 months (with design and permits)
Whole-home renovation or multi-room buildback 3 to 6+ months 6 to 12+ months (includes full design cycle and permitting)

Staying on Schedule: Managing Risks and Maintaining Progress Throughout the Interior Buildback Timeline

1i0TcKPbTJ2pAchzP9cqHw

Keeping an interior buildback on schedule requires active management, regular communication, and built-in buffers for the unexpected. Weekly progress meetings with your contractor and designer keep everyone aligned on upcoming tasks, material deliveries, and inspection schedules. Tracking milestone dates (permit submission, rough-in sign-off, cabinet delivery, final walkthrough) lets you spot delays early and adjust the calendar before small problems cascade. Always maintain a contingency fund for budget overruns and schedule slippage. Unexpected structural repairs, damaged materials, or design changes will happen. Planning for them reduces stress and keeps the project moving.

Ordering long lead items early is one of the most effective schedule control strategies. Custom cabinets, stone countertops, specialty tile, and high-end fixtures often take 12 to 16 weeks or more. Placing orders as soon as selections are finalized prevents months of idle time waiting for deliveries. Coordinating delivery dates with contractor schedules before ordering ensures materials arrive when trades are ready to install, not weeks too early or too late.

The punch list and final walkthrough typically require 1 to 2 weeks at the end of the project. Small touch-ups, fixture adjustments, paint corrections, and final cleaning happen during this window. Quality checks confirm that all finishes meet design intent and technical standards. Documentation (warranties, care instructions, and final project reports) gets delivered during handover. If optional post-project reviews are scheduled, they add another 1 to 2 weeks for feedback collection and any last adjustments.

Key schedule control tips:

  • Hold weekly progress meetings with contractors and designers to review upcoming tasks and deadlines
  • Order long lead materials (cabinets, countertops, specialty finishes) as soon as selections are finalized
  • Build buffers of at least 2 months into the overall schedule for emergencies and vendor delays
  • Track milestone dates and adjust the calendar proactively when changes occur
  • Plan to finish at least 2 months before any hard deadline (move-in date, event, sale closing)
  • Use project management tools (Trello, Asana, Monday.com) to track tasks, communications, and delivery schedules

Final Words

You’re lining up trades, scheduling inspections, and checking that materials arrive on time. Fast moves matter because they stop more damage and keep costs down.

This post walked through the main phases, demolition and prep, rough-in (electrical, plumbing, HVAC), drywall and insulation, finish work, procurement, contractor coordination, and insurance steps. We flagged milestone markers: design sign-off, permit approval, rough-in completion, drywall/paint, and final inspection.

Use the interior buildback timeline to set realistic expectations, order long-lead items early, and document everything for claims. Stay steady, ask questions, and the job gets finished right.

FAQ

Q: What is the 3-5-7 rule in interior design and what is the 3 4 5 rule in interior design?

A: The 3-5-7 rule in interior design means grouping décor in odd numbers (three, five, or seven) to create balance and visual rhythm. The 3‑4‑5 rule is less common and used as a simple proportion guide for spacing and scale.

Q: What is the 70/30 rule in interior design and what is the 30% rule in remodeling?

A: The 70/30 rule means one color or material covers about 70% of a room and accents make up 30% for balance. The 30% rule in remodeling varies—often a budget contingency or a scope limit, so confirm for your project.

Preventive Home Upgrades To Reduce Fire And Water Damage Risk: Safe!

Have you ever thought about how a few simple updates could protect your home? Every year in the United States, more than 368,500 home fires occur. A small mistake can lead to expensive repairs and hidden health risks. Updating your smoke detectors (devices that alert you early in case of fire) and adding water leak sensors (gadgets that spot water damage) can stop minor problems from becoming major ones. These upgrades act like a shield, lowering the risk of fire and water damage for your home and family. Taking action now means you’re investing in a safer tomorrow.

Key Preventive Home Upgrades to Minimize Fire and Water Damage Risk

Every year, more than 368,500 home fires occur in the United States. Even a small fire can weaken wood supports and cause hidden damage. Smoke finds its way into every crack, which can lead to long-term health risks even when things seem fine at first. We know how important it is for you to act quickly and update your home to keep it safe.

When problems go unnoticed, the damage can become much worse. Simple, proactive upgrades now can help stop a small issue from turning into an expensive repair later. These updates not only protect your property but also help lower future repair costs by stopping further damage. Taking action today is a smart way to protect your home and avoid bigger problems down the road.

We recommend focusing on three key areas for home upgrades:

  • Detection systems: Install smart sensors and alarms that alert you right away if smoke or water is detected.
  • Structural barriers: Strengthen your home with fire-resistant materials and treatments that block heat and water.
  • Water control: Improve drainage and set up water leak detectors to manage moisture and prevent it from seeping into your foundation.

These steps lower your overall risk by catching issues early and reinforcing your home against fire and water damage. By upgrading today, you help protect your family’s safety and keep restoration costs to a minimum, ensuring your home stays secure and valuable.

Upgrading Smoke Detectors and Fire Alarm Systems for Enhanced Protection

img-1.jpg

A complete alarm system keeps your home safe from fire risks. By placing smoke detectors on every level, especially in bedrooms, you make sure everyone gets warned quickly if a fire starts. Checking your alarms regularly helps you know they work when it matters most.

  • Put one smoke detector in each bedroom.
  • Mount extra detectors in hallways and living areas.
  • Press the test button every 30 days to ensure they work.
  • Replace batteries every six months.
  • Upgrade the unit after 10 years for best sensitivity.

Smart detectors can send alerts straight to your phone, even showing you the exact room where smoke or fire is found. They connect with home automation systems (technology that controls devices automatically) so you can keep an eye on your home 24/7. Regular maintenance makes the alarms last longer and work better. This lowers the risk of fire damage and costly repairs while keeping your family safe.

Equipping Fire Extinguishers and Home Fire Suppression Tools

Fire extinguishers come in various types. For example, ABC-rated extinguishers handle common household fires, while CO₂ models (using carbon dioxide gas to put out flames) work well on electrical fires. These tools help stop small fires fast and meet safety rules.

Place an extinguisher where fires are most likely, like in the kitchen. Also, keep at least one on every floor of your home. Make sure they are easy to see and reach in an emergency. Keep the area clear and check that labels and instructions are easy to read.

It’s important to inspect your fire tools regularly. Check the pressure gauge (a measure of the unit’s charge) every month. Service or replace them every 12 years or earlier as recommended by the maker. This routine helps lower fire risk and keeps your home safe.

Implementing Water Leak Detection and Automatic Shutoff Mechanisms

img-2.jpg

Water damage can come in three types based on its source and speed. A burst pipe, a leaking roof, or water seeping through the foundation can all harm your home if not stopped quickly. Finding moisture early helps you avoid pools of water, which means less damage and lower repair costs.

We use simple water leak sensors that work on their own by sounding an alarm when they sense moisture. You might also use a smart hub. This device connects several sensors to one system that can alert you on your phone. This way, you see the whole picture of your home’s water situation and can act fast if something is wrong.

You can also install an automatic water shutoff valve. This valve sits on your main water line and cuts off the flow within seconds when sensors detect water. It is important to test these valves and sensors every few months by simulating a leak. This proactive step limits damage and helps keep repair costs low.

Enhancing Structural Waterproofing and Drainage for Water Damage Prevention

After a heavy rainfall, it's important to check your roof for leaks and clean your gutters. Clean gutters guide water away from your home's foundation, reduce overflow that might flood your basement, and help your gutter system last longer. A well-maintained roof stops water from trickling into weak spots, protecting your property from long-term damage.

We can add an extra layer of defense by using interior sealants and exterior membrane systems. Sealants (water-blocking materials) applied on walls and floors help stop water from seeping through small cracks. Membranes (protective layers) on the outer walls or roof serve as another barrier. Together, these methods control water flow and reduce the risk of flood damage.

Prevention Method Benefits
Gutter Cleaning Keeps water flowing away and protects the foundation
Roof Leak Inspection Finds damage early after storms
Foundation Sealant Stops water from seeping up through small cracks

Regular inspections keep your home safe. Check your roof and gutters often, and use a home safety checklist after a flood to make sure nothing is missed. If you notice leaks or water seeping in, call a professional right away to strengthen your flood defense and keep water out.

Selecting Fire-Resistant Building Materials and Insulation Options

img-3.jpg

Using materials that slow fire spread keeps your home safe and meets building codes. Many insurance companies even offer discounts when you upgrade to products that help stop fire and protect the structure of your home.

For walls, gypsum board is a smart choice because it blocks fire well. For roofs, treated lumber adds an extra layer of defense against extreme heat. These options work together to shield your home from fire damage while keeping it attractive.

Mineral wool insulation is a top pick. It has a higher R-value (a measure of how well it resists heat) and better fire ratings than regular fiberglass insulation. Checking these details helps you choose insulation that is safe and energy efficient.

These fireproof materials and insulation might cost more upfront, but they lower the risk of major fire damage and can reduce your insurance costs. This smart investment gives you lasting protection, peace of mind, and a strong, safe home for years to come.

Integrating Smart Sensors and Emergency Preparedness Upgrades

Plan clear escape routes from every room. Each room should offer two ways out so everyone can leave quickly in an emergency. Choose a safe meeting spot outside and run a drill every month so every family member knows what to do when alarms sound.

Add smart sensors to your home system to keep watch for fire and water problems. These sensors (devices that detect danger) notice smoke, heat, or water leaks and send instant alerts to your phone. When they connect to one central hub, you can see all alerts in one place, which makes it easier to respond quickly.

Keep your sensor system reliable with regular updates and cleaning. Set a monthly reminder to check that the sensors are current, and follow the setup instructions for cleaning and recalibrating them. A well-maintained system works better when every second counts.

Smart alerts help cut down response time. When a sensor sounds an alarm, you get a real-time message that lets you act fast, whether you need to evacuate or turn off the water. This quick action helps reduce damage and gives you more control during unexpected events.

Final Words

In the action, we covered key upgrades to protect your home from fire and water damage. We explored reliable detection systems, effective suppression tools, smart leak sensors, improved drainage, durable materials, and smart sensors to boost emergency preparedness. Each step is designed to lower risk, keep costs down, and restore safety quickly. Through practical preventive home upgrades to reduce fire and water damage risk, you can secure your property while simplifying the restoration process. Moving forward, these measures bring lasting peace and protection.

FAQ

What is fire mitigation for homeowners?

The fire mitigation for homeowners means reducing the risk of fire damage. Homeowners use upgrades and maintenance to lower hazards and protect their homes.

What is a fire mitigation plan?

The fire mitigation plan outlines specific steps like improving detection systems and structural barriers. This plan helps reduce fire risks and guides recovery efforts if a fire occurs.

How do you fireproof your home from wildfires, including in California?

The method to fireproof your home from wildfires involves using fire-resistant materials, creating defensible space, and considering sprinkler systems to help slow the spread of flames and embers.

What are some fire mitigation examples?

The fire mitigation examples include installing advanced smoke detectors, upgrading building materials, setting up sprinkler systems, and maintaining clear surroundings to reduce fire spread.

What is a wildfire home protection sprinkler system?

The wildfire home protection sprinkler system works by automatically spraying water on surfaces during a fire. This cooling system helps control flames and limit damage during wildfire conditions.

What are five ways to prevent fire at home?

The five ways to prevent fire at home include installing and testing smoke detectors, maintaining fire extinguishers, safely storing flammable items, upgrading to fire-resistant materials, and having a clear emergency plan.

Flood Water Extraction Methods That Actually Work

0

Think a shop vac will save a flooded basement? Think again.
Flood water extraction isn’t one trick or tool. It’s a timed sequence of safety checks, the right pump or vacuum, and drying gear that pulls water from materials, not just the surface.
In this post we’ll walk you through proven methods for deep pumps, trash pumps, portable extractors, air movers, and dehumidifiers, and explain when each one is the right choice.
You’ll learn what to do first, how fast action prevents mold and warped floors, and how pros confirm areas are truly dry before repairs start.

High-Level Overview of the Flood Water Extraction Process

Nt2FbObjSFejiDifBGeIhQ

Flood water extraction isn’t just one decision or one tool. It’s a chain of urgent steps that starts the second you spot water on your floor. Safety comes first. Cut the power if you can do it safely, check for structural damage, and don’t walk into water that’s touching outlets or submerged wiring. Once the area’s safe to enter, professionals figure out how deep the water is, what type of contamination they’re dealing with, and how far it’s spread. That assessment drives which extraction tools get used, how quickly the water needs to come out, and what drying equipment follows.

Getting rid of standing water is just the beginning. Water soaks into drywall, wood framing, subfloors, insulation. Drying equipment pulls moisture out of the air and the materials themselves. Moisture meters tell you when the structure is dry enough to close up. How long it takes depends on how deep the water was, how long it sat there, and what got wet. Small floods might clear in a few hours. Large scale flooding can take days to extract and another week to dry completely.

The overall sequence looks like this:

  • Safety check to make sure the space is safe to enter and work in
  • Category assessment to figure out if water is clean, gray, or contaminated
  • Extraction method selection based on depth, volume, and access
  • Standing water removal using pumps or vacuums until floors are clear
  • Controlled drying with air movers and dehumidifiers to pull moisture from materials
  • Verification using moisture meters to confirm dryness before repairs start

Mechanical Flood Water Extraction Tools and Pump-Based Removal Options

G5Q8TC9JTcKJPBOmSl2qlw

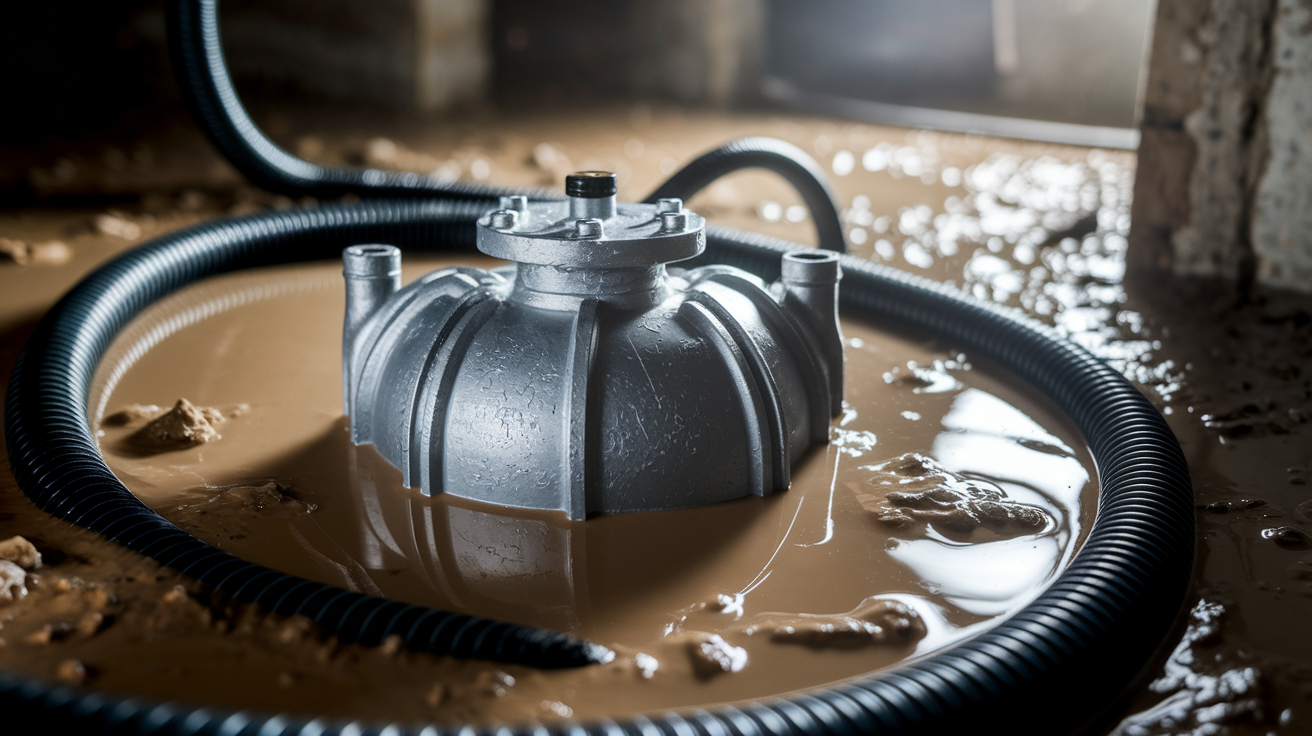
Mechanical pumps are what you need when there’s too much water for portable vacuums to handle. Submersible pumps sit right in the water and push it out through a discharge hose. They’re built for deep basements, flooded crawl spaces, garage floods where water’s pooled several inches or more. Choosing the right one comes down to two numbers: flow rate (gallons per minute) and head height (how high the pump can push water upward to reach a drain or exit point). Residential submersible pumps typically move 1,500 to 3,000 gallons per hour. Heavy duty construction models push way more.

Trash pumps and diaphragm pumps handle debris laden water. If the flood brought mud, leaves, gravel, or sewage solids, a standard pump’s going to clog. Trash pumps use larger impellers and wider inlets so debris passes through without jamming the system. Centrifugal pumps work well when the water’s relatively clean and you need to move high volumes fast. They’re common in storm response and irrigation emergencies.

Truck mounted extraction units bring together pump power and portability. The equipment stays in the vehicle, hoses extend into the building. Suction’s stronger than handheld units, extraction’s faster, and the tank capacity is big enough to handle full basements without constant emptying. Heating elements in some truck mounted systems warm the extracted water, which speeds evaporation when you pair it with air movers. These units are standard for commercial jobs and large residential floods where speed prevents more damage from happening.

Pump Type Best Use Case Advantages Limitations
Submersible Pump Deep standing water in basements or confined spaces High flow rate, works underwater, reliable for large volumes Requires discharge point; clogs easily if debris is present
Trash / Diaphragm Pump Water mixed with mud, leaves, or sewage solids Handles debris without clogging; designed for dirty water Slower flow rate than centrifugal pumps
Centrifugal Pump High volume clean or lightly contaminated water Very fast extraction; efficient for large areas Cannot handle solids or heavy debris
Truck Mounted Extractor Commercial properties and large residential floods Strongest suction, large tank capacity, minimal interruption Requires vehicle access; higher service cost

Portable Flood Water Extraction Methods for Homes and Small Businesses

f1ZKYlXEQPCflgap_Cjwng

Portable extractors and wet/dry vacuums are what you reach for on smaller floods, tight spaces, and residential jobs where a truck can’t get close enough. Portable extractors combine suction with adjustable pump rates, compact design, and filtration that traps fine particles. Most units weigh under 50 pounds and fit through doorways, down basement stairs, into closets. They pull water from carpet, tile, hard floors without leaving heavy equipment in the middle of the room. Filters are often HEPA rated to reduce airborne dust and contaminants during extraction.

Wet/dry vacuums vary widely in tank capacity and motor power. Small shop vacs handle minor spills and surface water in bathrooms or laundry rooms. Industrial wet/dry units hold 15 to 20 gallons and deliver stronger suction for larger areas. Battery powered models work in spaces where electrical outlets aren’t safe or available. After each use, empty the tank, rinse it out, and inspect the filter. Mold and bacteria grow fast in damp tanks left sealed between jobs.

Getting good results comes down to technique and monitoring:

  • Place the unit as close to the water source as possible to reduce suction loss through long hoses
  • Use overlapping extraction strokes on carpet and upholstery to pull water from padding and fibers
  • Check the tank level frequently and empty before it reaches capacity to keep suction strong
  • Inspect hoses for kinks or clogs that reduce flow and slow extraction
  • Clean the tank and filter right after finishing to prevent odors and microbial growth

Drying and Dehumidification Techniques After Flood Water Extraction

rb4Rl4M_S1ar7SZMVzWCfg

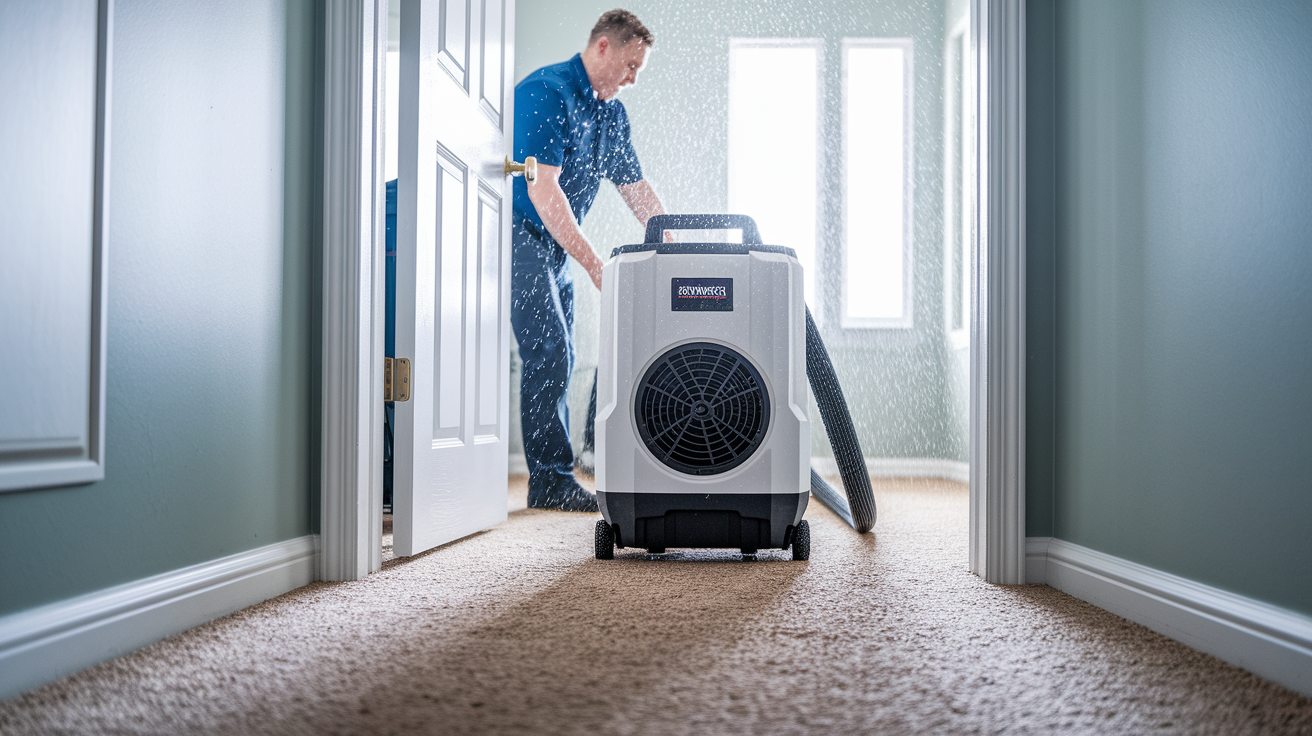
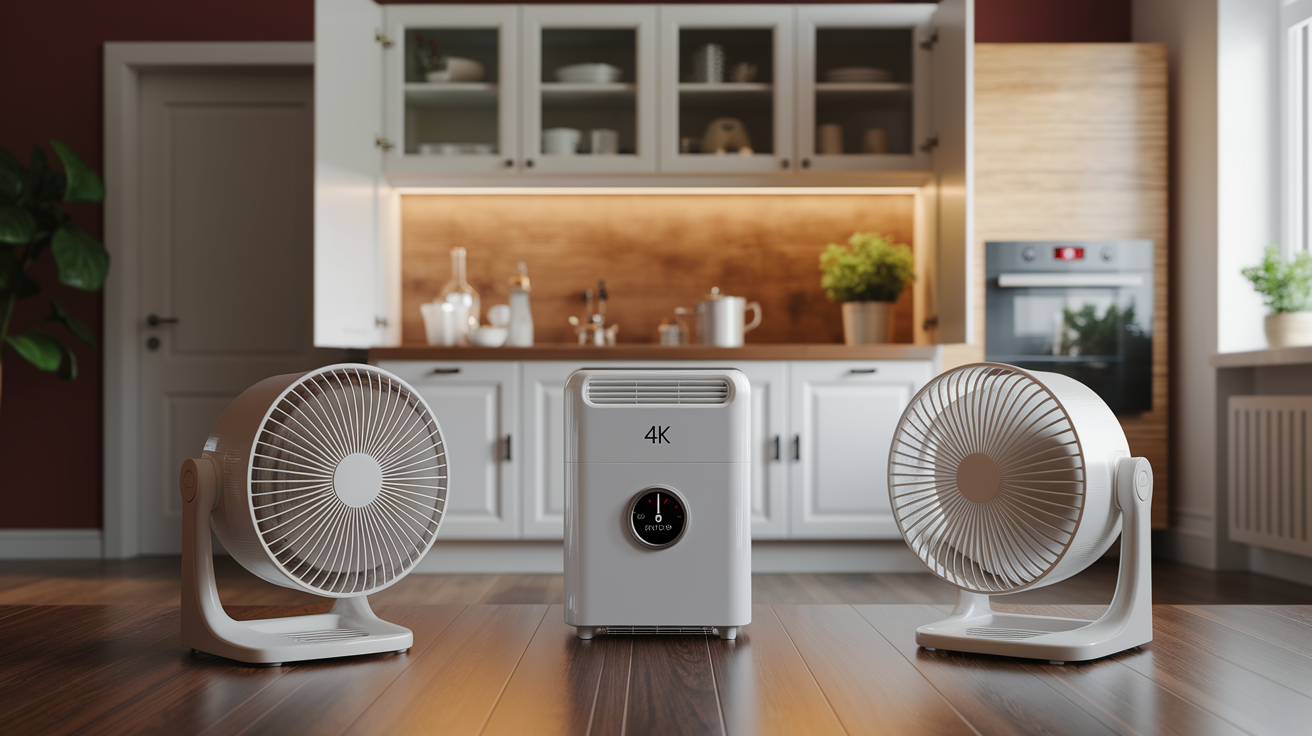
Getting rid of standing water is step one. Drying the materials that absorbed it is step two. Air movers create directed airflow across wet surfaces to speed evaporation. Think of them as industrial fans, but designed to push air in focused streams rather than scatter it everywhere. Placement matters a lot. Set them to blow along walls, under cabinets, across wet floors in overlapping patterns. Cross ventilation, where air movers face each other from opposite corners, pulls moisture out faster than a single unit blowing into dead air.

Dehumidifiers pull moisture from the air so materials can keep releasing water instead of reabsorbing humidity. Without dehumidifiers, evaporation slows and the air becomes saturated. Two types dominate the restoration industry: refrigerant units and desiccant units. Refrigerant dehumidifiers work like air conditioners. They cool air to condense moisture, then reheat and recirculate it. They perform best in warm environments above 60°F. Desiccant dehumidifiers use moisture absorbing materials to pull water from the air chemically. They work great in colder spaces, unheated basements, and during winter months when refrigerant units lose efficiency.

Drying times depend on the materials, the volume of water, and ambient temperature. Drywall may take three to five days. Hardwood floors can take a week or more if water reached the subfloor. Professionals monitor progress daily with moisture meters and adjust equipment as readings drop. If drying stalls, mold can begin forming within 24 to 48 hours, even if surfaces look dry.

Comparing Dehumidifier Types

Refrigerant dehumidifiers are the workhorse for most residential floods. They remove water efficiently when the temperature’s stable and moderate. Desiccant units shine in cold, damp environments where refrigerant coils would freeze. They also handle very low humidity targets, which is why they’re common in commercial drying and climate controlled restoration projects. Refrigerant units cost less to rent and run. Desiccant units cost more but deliver results when temperature or target moisture level makes refrigerant models impractical.

Moisture Detection and Monitoring Techniques for Flood Damaged Structures

Y-mZR8CARRSM7SoCujGv-Q

Dry to the touch doesn’t mean dry enough to close the wall. Moisture meters measure water content inside materials, not just on the surface. Pin type meters insert two metal probes into drywall, wood, or insulation and measure electrical resistance. The wetter the material, the lower the resistance. Pinless meters use radio frequency sensors to scan a surface without puncturing it. They’re faster for sweeps of large areas but less precise for specific readings.

Thermal imaging cameras detect temperature differences caused by evaporation and moisture. Wet areas appear cooler on the screen because water evaporates and cools the surface. Infrared scanning reveals hidden saturation behind walls, under flooring, in ceiling cavities where visual inspection and standard meters can’t reach. Moisture mapping combines meter readings and thermal images into a floor plan that tracks wet zones over time. It confirms where drying’s complete and where equipment needs to stay longer.

Tool Type What It Detects Best Use Case
Pin Type Moisture Meter Moisture content inside drywall, wood, insulation via electrical resistance Spot checking specific materials; confirming dryness before reconstruction
Pinless Moisture Meter Subsurface moisture via radio frequency scan Fast surveys of large wall or floor areas without damaging surfaces
Thermal Imaging Camera Temperature differences caused by evaporation and trapped moisture Locating hidden moisture behind walls, ceilings, and under flooring

Safety Procedures and Contaminated Water Handling During Flood Extraction

XBfV1B6fTJefCpwmcmkzOA

Water and electricity are a dangerous combination. Before entering a flooded space, shut off power at the breaker panel if you can reach it safely. If the panel’s underwater or you’re unsure, call an electrician or your utility company. Look for exposed wiring, damaged outlets, submerged appliances. Use insulated tools and wear rubber soled waterproof boots to reduce shock risk.

Not all floodwater is the same. Clean water from a broken supply line is category 1. Gray water from washing machines, dishwashers, or sump pump backups is category 2. It contains contaminants but not raw sewage. Black water from toilets, sewers, or outdoor flooding is category 3 and carries bacteria, viruses, chemicals. Black water requires full PPE: waterproof gloves, face masks or respirators, eye protection, coveralls. Never use standard household gloves or cloth masks for sewage cleanup.

Structural damage is common after severe flooding. Check for sagging ceilings, cracked foundation walls, soft or spongy floors before walking through the space. If the floor feels unstable or you see visible bowing in walls, stay out and call a structural engineer. Mold spores spread fast in damp air. If you smell musty odors or see discoloration on walls, assume mold’s present and use a respirator rated for mold exposure.

Essential safety steps during extraction:

  • Turn off electrical power and avoid standing water near outlets or appliances
  • Wear waterproof boots, heavy duty gloves, and eye protection at minimum
  • Use N95 or P100 respirators when working in moldy or contaminated environments
  • Ventilate the space with open windows and exhaust fans to reduce airborne contaminants
  • Keep a first aid kit, flashlight, and phone nearby in case conditions worsen
  • Don’t enter spaces with visible structural damage until a professional assesses stability

Insurance Documentation and Reporting Techniques for Flood Water Extraction Projects

j6PjYvgpSEyGHHxftVcouw

Insurance adjusters need proof. Take photos of the water level, damaged materials, affected rooms before you start extraction. Photograph wet carpet, soaked drywall, standing water in the basement, any visible mold or staining. Date stamp the images if your phone allows it. Wide shots show the scope. Close ups show detail. Both matter.

Moisture meter readings become part of the claim file. Record initial readings when water’s still present, daily readings during drying, final readings when equipment’s removed. Print or screenshot the data. If hidden damage appears, like wet insulation inside a wall or soaked subfloor under tile, document it immediately and notify your adjuster. Supplements to the original estimate are common, but they require proof that the damage wasn’t visible during the first inspection.

Professional restoration companies generate detailed reports that include extraction methods, equipment used, drying logs, before and after moisture readings. These reports support your claim and speed approval. If you’re handling extraction yourself, keep a simple log: date, time, equipment used, areas worked, observations. It doesn’t need to be formal. It needs to be accurate.

Steps for good insurance documentation:

  1. Photograph all water damage before starting extraction or cleanup
  2. Record moisture meter readings at the start, during drying, and at completion
  3. Save receipts for rental equipment, cleaning supplies, disposal fees
  4. Notify your insurance company immediately and follow their documentation requirements

Mold Prevention Strategies After Using Flood Water Extraction Methods

qQc3XlrAQtmQCXwfGeQUQA

Mold doesn’t wait. Spores are already in the air. When materials stay wet for 24 to 48 hours, those spores land, take hold, begin growing. The goal is to dry everything before that window closes. Air movers and dehumidifiers aren’t optional. They’re the primary defense. Keep them running until moisture readings drop to safe levels, even if surfaces feel dry.

Ventilation pushes humid air out and brings drier air in. Open windows when outdoor humidity’s lower than indoor humidity. Use exhaust fans in bathrooms and kitchens. If the air outside is saturated, common after storms, rely on dehumidifiers instead. HEPA air scrubbers filter mold spores, dust, bacteria from the air during drying. They’re especially important when working with contaminated water or when mold’s already visible.

Odor is a warning sign. Musty smells mean microbial growth is happening, even if you don’t see it yet. Don’t mask odors with air fresheners. Find the source, confirm moisture with a meter, increase drying in that area. Some jobs require antimicrobial treatments or odor neutralizers after extraction, particularly if sewage or long standing water was involved. Verify dryness with meters before you seal walls, replace flooring, or reinstall baseboards. Closing up a space that’s still damp traps moisture and guarantees mold.

Steps for mold prevention after flood water extraction:

  • Run air movers and dehumidifiers continuously until all materials reach target moisture content
  • Use HEPA air filtration to capture airborne mold spores during and after drying
  • Ventilate the space with exhaust fans or open windows when outdoor conditions allow
  • Monitor humidity levels and keep indoor relative humidity below 60 percent
  • Verify dryness with moisture meters before closing walls or installing new materials

Final Words

We started by stopping hazards and removing standing water, then chose the right equipment and pumps based on depth and contamination.

Extraction moves to drying with air movers and dehumidifiers, then moisture mapping confirms it’s safe. We documented every step for insurance and followed PPE and contaminated-water procedures to protect you. These flood water extraction methods are about stopping damage fast and rebuilding properly. You’re on the right path. Fast action, clear checks, and steady repair will get your home back to normal.

FAQ

Q: How do they remove water from floods? What are the methods of extracting water? What is the best way to get water out of a flooded basement?

A: Water from floods and flooded basements is removed by a fast sequence: stop the source, pump or vacuum out standing water, then controlled drying and moisture checks. Choice depends on depth, contamination, and access.

Q: How quickly does mold grow after a flood?

A: Mold can begin growing 24 to 48 hours after a flood. Rapid drying, dehumidifiers, air movers, removing soaked materials, and moisture readings stop growth and limit odors and damage.

Basement Moisture Control Solutions That Actually Work

0

Most basement moisture problems start because someone tried one fix when they actually needed three. You patch a crack, but condensation keeps forming. You buy a dehumidifier, but water still seeps through the floor after heavy rain. Basement moisture control works when you stop water at every stage: before it reaches your foundation, when it tries to push through walls and floors, and after it turns into humidity inside. This guide walks you through diagnosing what’s actually causing dampness in your basement, then matching the right combination of drainage, waterproofing, and humidity control to fix it for good.

Diagnosing Your Basement Moisture Problem

GJbmOz2mR6-j0JmyeZhJBg

Before you start patching walls or buying equipment, you need to know what you’re dealing with. Guessing wastes time and money. Accurate diagnosis tells you which solutions will actually work.

Start by walking your basement slowly during different weather conditions. Look for water stains on walls or floors, especially near the foundation perimeter. Check for efflorescence, those white powdery deposits that appear when water evaporates from concrete and leaves mineral salts behind. Inspect paint and wall coatings for peeling or bubbling, which signals moisture trapped behind the surface. Run your hand along walls near the floor, feeling for damp spots or temperature changes. A musty smell means moisture is present even if you can’t see it yet.

Next, measure what you’re seeing. A hygrometer shows the percentage of water vapor in the air as relative humidity. Place one in your basement and check readings over several days. Ideal basement humidity should stay between 30 to 50 percent to prevent mold growth and protect your belongings. Readings above 50 percent mean you need active moisture control. A moisture meter pressed against walls and floors detects dampness inside concrete and drywall that isn’t visible on the surface. For stubborn problems, thermal imaging cameras reveal hidden moisture patterns, temperature differences, and wet insulation behind finished walls, though these typically require professional equipment.

Call a professional when you see persistent mold growth that returns after cleaning, structural damage like bowing walls or large cracks, or regular pooling after minor rains. DIY assessment works fine for simple humidity issues, minor dampness, or small cracks you can see and reach.

Core Methods to Control Basement Moisture

iAADJELZT0y0C-Y9F077iA

Basement moisture control isn’t a single fix. It’s a coordinated plan that addresses water at every stage, from keeping it away from your foundation to removing it from the air.

The most effective approach uses three layers working together. First, exterior water diversion prevents rainwater and groundwater from reaching your foundation walls in the first place. Proper grading, functional gutters, and drainage systems move water away before it becomes your problem. Second, interior waterproofing barriers block water that does reach your walls and floor. Sealants, vapor barriers, drainage channels, and sump pumps manage what gets through. Third, humidity regulation tackles condensation and indoor moisture through dehumidifiers, ventilation improvements, and insulation that prevents warm moist air from condensing on cold basement surfaces.

Multiple factors contribute to damp basements. Improper grading. Poor gutter and downspout systems. Groundwater seepage from saturated soil. Condensation from high humidity levels. Trying to solve all of these with just a dehumidifier or just crack sealer rarely works long term. A multi step plan combining exterior and interior moisture control measures produces the longest lasting results, with specific solutions matched to your basement’s particular combination of problems.

Exterior Drainage Systems for Moisture Prevention

WhUBYF8TJq1ZmMjYtl-ig

Exterior drainage is your first line of defense. Stop water before it reaches your foundation, and you’ve eliminated most of your moisture problem at the source.

Start with your gutters and downspouts because they handle thousands of gallons during heavy rain. Clean gutters twice yearly, removing leaves and debris that cause overflow near your foundation. Extend downspouts at least five to six feet away from the foundation to direct roof water away from the home. Use rigid extensions or flexible drainage pipe, not just splash blocks that let water pool after a few seasons. Gutter guards or seamless gutter systems block leaves and prevent clogs. Most homeowners can handle gutter cleaning and downspout extension themselves. Professional installation makes sense for seamless gutters or complex rooflines with multiple valleys.

Ground around your home should slope away from the foundation to prevent water from pooling near basement walls. Proper grading means the soil drops at least six inches over the first ten feet moving away from the house. Walk your foundation perimeter after heavy rain and watch where water flows. If it’s moving toward the house or pooling against walls, you need regrading. For minor low spots, you can add soil and regrade yourself using a rake and wheelbarrow. Significant grade corrections across large areas usually require professional landscaping with equipment to move soil efficiently and ensure proper compaction.

French drains are underground drainage systems that redirect water away from the foundation. They work by placing perforated pipe in a gravel filled trench around your basement perimeter, typically three to four feet deep at the footing level. Water seeps into the pipe and flows to a lower discharge point away from the house. French drain installation requires excavation equipment, proper slope calculation, and connection to a safe drainage outlet, making this a professional job in most cases. They’re especially effective in areas with high water tables or clay soil that doesn’t drain naturally.

Additional surface water management options include dry wells that collect runoff in underground gravel chambers where it gradually absorbs into soil, and swales, which are shallow planted ditches that channel water around your property following natural contours.

Interior Waterproofing Systems and Drainage Solutions

6t-pp78CRYCYscqKWrlwgA

When exterior drainage isn’t enough, interior systems collect and remove water that reaches your basement. They’re your second line of defense, especially in areas with high water tables or ongoing seepage despite exterior improvements.

Interior drainage becomes necessary when groundwater pressure pushes moisture through foundation walls, when the water table rises above your basement floor level during wet seasons, or when exterior waterproofing isn’t possible because of landscaping, adjacent structures, or property lines. These systems typically require professional installation because they involve breaking concrete, installing drainage components at precise slopes, and connecting to pumping equipment.

Interior drainage tile systems are installed at the footing level along the basement perimeter. Contractors break out a section of floor along the walls, dig down to expose the footing, install perforated drainage pipe in gravel, and cover it with new concrete. Water that seeps through the wall floor joint or through porous concrete flows into the drainage tile and channels to a collection point. The system captures water before it surfaces on your floor. Some installations include dimpled plastic membrane on walls that directs moisture down into the drain channel.

Sump pump systems collect water from interior drains and discharge it outside and away from the house. Choose between pedestal pumps with motors mounted above the pit, which are easier to service but louder, and submersible pumps that sit in the pit, which are quieter and more expensive. Size the pump to handle your basement’s water volume, typically measured in gallons per hour at a specific lift height. Essential features include battery backup systems that run during power outages when you need them most, automatic float switches that activate the pump without manual intervention, and check valves that prevent backflow. Most homeowners can replace an existing sump pump themselves. New installations in basements without existing pits require cutting concrete and professional setup. Test your sump pump every few months by pouring water into the sump pit until the float activates and the pump cycles water out.

Installation at cove joints where the floor meets the wall and at floor joints where concrete sections connect targets the exact locations where hydrostatic pressure pushes water into basements. Sealing these joints from inside creates a pathway for water to reach interior drains rather than surfacing randomly across your floor.

Regular maintenance keeps interior systems working when you need them. Test the pump quarterly, clean debris from the pit twice yearly, and verify the discharge line hasn’t frozen or become blocked.

Wall and Floor Waterproofing Methods

AakemnrEQcyq2bvGVync7Q

Sealing and waterproofing create barriers against moisture moving through concrete, whether it’s liquid water or water vapor.

First, understand the difference between three approaches. Crack repair fixes openings where water actively enters. Vapor barriers block moisture vapor that passes through porous concrete but don’t stop liquid water under pressure. Waterproof coatings create a film that stops both vapor and water. Minor crack sealing and vapor barrier installation are typically DIY friendly. Structural crack repair and professional grade coating systems usually require contractor expertise.

For crack repair, start by cleaning cracks with a wire brush to remove loose concrete, dirt, and old coating. Hydraulic cement is a quick setting material that plugs active leaks in concrete or masonry walls. Mix it to a putty consistency, pack it tightly into the crack, and hold it in place for several minutes while it sets. It works even when water is flowing. Epoxy injection repairs structural cracks by filling the entire crack depth with resin pumped under pressure, bonding the concrete back together. This requires professional equipment and is necessary when cracks indicate foundation settlement or movement. Concrete sealers penetrate porous walls and reduce moisture transmission for small hairline cracks and general dampness. Clean the surface first, apply sealer with a brush or roller, and allow proper cure time before testing.

Vapor barrier installation uses polyethylene sheeting or dimpled membrane systems to block ground moisture from moving through floors and walls. For floors, roll out 6 mil plastic sheeting across the entire surface, overlapping seams by at least 12 inches, and tape seams with waterproof tape. Run the edges up the wall several inches. This works under new flooring installations or subfloor systems. For walls, dimpled plastic membranes create an air gap between the foundation and the barrier, allowing any moisture that penetrates the wall to drain downward to interior drainage systems instead of entering the basement. Attach membranes to walls with mechanical fasteners, ensuring the dimples face the wall to create the air space.

Coating types serve different purposes depending on water pressure and application location. Cementitious coatings are cement based mixtures applied like thick paint to interior walls, creating a hard waterproof surface. They work well for blocking moisture vapor and minor dampness. Crystalline waterproofing penetrates into concrete and forms crystals that fill pores and micro cracks throughout the concrete depth, self sealing future cracks as they develop. It’s applied as a slurry coating but works within the concrete, not just on the surface. Waterproof paints are the simplest option for controlling minor moisture and improving appearance, but they don’t hold up under hydrostatic pressure or active water infiltration.

Method Application DIY or Professional
Hydraulic cement Active leaks and wet cracks DIY
Epoxy injection Structural cracks requiring bonding Professional
Concrete sealer Porous walls and minor dampness DIY
Polyethylene barriers Floor vapor control under flooring DIY
Dimpled membranes Wall drainage and vapor control DIY to Professional
Crystalline coatings Deep penetration waterproofing Professional

Positive side waterproofing is applied on the side where water pressure occurs, typically on exterior foundation walls. It’s more effective because it stops water before it enters concrete. Negative side waterproofing is applied on the interior, the opposite side from where water pressure occurs. It’s less effective under high pressure and can eventually fail if water is trapped in the concrete, but it’s the only option when exterior access is impossible. Coatings alone have limitations. They can’t fix drainage problems. They won’t handle significant hydrostatic pressure indefinitely. And they must be reapplied over time as they wear.

Dehumidification Strategies to Reduce Basement Humidity

rxAHcFOIRIO-bh2Gzow26Q

Even after you’ve stopped water from entering your basement, you still need to manage humidity. Dehumidifiers control condensation problems and keep relative humidity in the range where mold can’t grow.

Dehumidifiers work by pulling moisture out of the air, which is especially important in basements that stay cooler than upper floors. When warm humid air from outside or from upper levels enters a cool basement, moisture condenses on cold surfaces like foundation walls, concrete floors, and uninsulated pipes. Running a dehumidifier removes that moisture before it condenses.

Size your dehumidifier based on both square footage and existing humidity level. For moderately damp basements with 50 to 60 percent humidity, calculate about 10 pints of capacity per 500 square feet. For very damp basements at 60 to 70 percent humidity, increase to 12 pints per 500 square feet. For wet basements with visible moisture and 70 percent plus, use 14 pints per 500 square feet. Residential dehumidifiers can remove up to 50 pints of moisture daily, while built in whole house systems can handle 100 pints or more. Basement square footage matters. A 1,000 square foot basement that’s very damp needs at least a 50 pint unit.

Two main dehumidifier types work differently. Refrigerant models, which are more common and affordable, cool air to condense moisture onto cold coils, then reheat the air before releasing it back into the room. They work efficiently in temperatures above 65 degrees. Desiccant models absorb moisture chemically using silica gel or similar materials, then heat the desiccant to release collected water. They work better in cold basements below 60 degrees and extremely humid environments, but cost more to operate.

Essential features to look for when purchasing include an adjustable humidistat that lets you set target humidity (aim for 30 to 50 percent) and automatically cycles the unit to maintain it, continuous drain option that connects a hose to drain collected water without emptying a bucket, built in pump that can push water upward into elevated disposal points up to 16 feet away like a utility sink or exterior drain, automatic shut off that stops the unit when the water collection tank fills preventing overflow, and accessible filter that you can remove, clean, and replace easily during maintenance.

Place your dehumidifier in a central location with at least 12 inches of space around all sides for proper airflow. Avoid corners or tight spaces against walls. Position it near the most humid area if your basement has zones with different moisture levels. For continuous drainage, run a hose from the unit’s drain port to a floor drain or sump pit. Elevate the dehumidifier slightly if draining by gravity to maintain downward slope.

Maintenance keeps units running efficiently. Empty collection tanks when full if you’re not using continuous drainage. Clean or replace filters monthly during heavy use. Wipe down coils every few months to remove dust and maintain efficiency. Check drain hoses periodically to ensure they’re not kinked or clogged.

Ventilation and Air Circulation Improvements

OVG62OabS3qhp0u1U7pCCg

Basements become humid because they are underground, surrounded by dirt that holds moisture, cooler than upper floors causing condensation when warm moist air enters, and typically have poor ventilation with few windows or doors. Improving air circulation prevents stagnant humid air from settling and creating ideal conditions for mold.

Mechanical ventilation moves air actively using fans and powered equipment. Install exhaust fans in basement bathrooms and laundry rooms to remove humidity at the source when showers run or clothes dry. Simple bathroom exhaust fans are DIY installations that mount in the ceiling and vent through ductwork to the exterior. For laundry areas, vent your dryer properly to the outside using rigid metal duct, not flexible plastic that traps lint and restricts airflow. Air exchangers and heat recovery ventilator systems bring fresh outdoor air in while exhausting stale basement air out, exchanging heat between the two streams to maintain efficiency. These are beneficial in tightly sealed basements where natural air exchange is minimal. Professional installation handles ductwork, electrical connections, and balancing airflow for HRV systems.

Natural ventilation uses windows and passive airflow when conditions are right. Opening windows when outside air is drier than inside helps reduce trapped moisture in the basement. Check outdoor humidity with a hygrometer or weather app before opening windows. Open windows on opposite sides of the basement to create cross ventilation that moves air through the space rather than just in and out of one opening. During summer, outdoor humidity is often higher than basement humidity, so keep windows closed and rely on dehumidifiers. Spring and fall offer the best natural ventilation opportunities when outdoor air is cool and dry.

Condensation forms on cold surfaces when humid air contacts them. Insulate cold water pipes to prevent sweating and condensation, especially pipes running across ceilings or along exterior walls. Use foam pipe insulation sleeves sized to fit your pipe diameter. Slide them over pipes and seal seams with tape. This is a simple DIY project that prevents dripping condensation from adding moisture to your basement air. Address thermal bridging at rim joists where your foundation meets the wooden floor framing above. This area stays cold, conducts heat poorly, and becomes a condensation zone. Spray foam insulation seals and insulates rim joists effectively but typically requires professional application. Rigid foam board cut to fit between joists is a DIY alternative, though not as airtight.

Proper ventilation connects directly to mold prevention by eliminating the stagnant moist air where mold spores settle and grow. It improves overall air quality, reduces musty odors, and makes basements more comfortable for storage or living space use.

Identifying and Fixing Plumbing Related Moisture Sources

dulGjyuaR-mvNSZ3AGHvng

Not all basement moisture comes from groundwater. Sometimes the problem is your pipes, appliances, or plumbing connections adding water exactly where you don’t want it.

Plumbing moisture shows up differently than groundwater seepage. It’s often localized near specific fixtures, appears suddenly after water use, or creates drips and wet spots that don’t match rain patterns. Groundwater moisture tends to spread along foundation perimeters, worsen during wet weather, and show up as general dampness across larger areas.

Common plumbing problems that cause basement moisture include supply line leaks from aging pipes, loose connections, or failed fittings. Check under sinks, behind washing machines, near water heaters, and along exposed pipes for drips, corrosion, or water stains. Drain pipe condensation happens when cold water runs through pipes in humid air, creating dripping condensation similar to a cold glass sweating. Water heater issues include leaking tanks, failed pressure relief valves, and dripping drain valves. Washing machine connections, especially older rubber supply hoses, can fail suddenly and flood significant water before you catch it. Replace rubber hoses with braided stainless steel supply lines for more reliable long term performance. Simple connection tightening and supply line replacement are DIY projects. Leaking pipes inside walls, main supply line repairs, or water heater replacement require professional plumbers.

Cold water lines sweat in humid conditions, creating constant dripping that adds moisture to basement air and can damage surrounding materials. Pipe insulation prevents this condensation through simple foam sleeves that slip over pipes. Measure your pipe diameter, usually half inch, three quarter inch, or one inch for residential water lines. Buy foam insulation tubes sized to match, slice them lengthwise if they’re not pre slit, slide them over pipes, and seal seams with tape or adhesive. Cover all cold water pipes you can reach, especially in humid areas. This DIY project costs little and eliminates a steady moisture source.

Washing machines, dryers, and utility sinks in basements add humidity through steam and evaporation during use. Vent dryers to the outside using the shortest possible duct run with smooth rigid metal duct. Avoid long flexible ducts that trap moisture and lint. If your dryer currently vents into the basement, rerouting it outside is essential. Simple vent installations through rim joists or basement windows are DIY friendly with a vent kit. Complex runs through multiple floors or exterior walls need professional installation. Run exhaust fans during laundry use to remove humid air, and keep basement doors open to upper floors so moist air doesn’t get trapped.

Regular plumbing inspections catch small leaks before they become moisture problems. Check visible pipes quarterly for corrosion, drips, and loose connections. Replace washing machine hoses every five years even if they look fine. Test your water heater pressure relief valve annually. Call professionals for repairs when you find active leaks, see unexplained water damage, or notice water pressure changes that suggest hidden pipe problems.

Understanding Hydrostatic Pressure and Water Table Issues

GXyQihuVTzSW6nqvRuUCsw

Hydrostatic pressure is the force of water in saturated soil pushing against your foundation walls and floor. Understanding it helps you see why certain moisture problems need specific solutions, not just surface fixes.

When soil around your basement fills with water from rain, snowmelt, or a high water table, that water exerts pressure against every surface it contacts. The deeper the basement, the more pressure at the bottom. Imagine water stacked eight feet high against your foundation. That column of water pushes hard, finding any weakness in concrete, any crack or porous section, and forcing moisture through. Hydrostatic pressure doesn’t stop until the water level drops or finds a release path.

Seasonal water table fluctuations mean your basement faces different moisture challenges throughout the year. Spring thaw and heavy rain periods raise the water table, sometimes to levels above your basement floor. Water seeks to equalize, pushing upward through floor cracks and inward through walls. Summer typically lowers the water table as plants draw moisture from soil and evaporation increases. Fall rains raise it again. Winter freezing can trap water in soil, increasing pressure as ice expands. These cycles explain why basements stay dry for months then suddenly develop moisture problems during wet seasons.

Water travels through porous concrete even without visible cracks through a process called capillary action. Concrete contains microscopic pores and channels. Water molecules are attracted to concrete, and they pull neighboring water molecules along, moving moisture from the wet soil side to the dry basement side. You don’t see water flowing, but dampness appears on interior walls as moisture migrates through. Older concrete is more porous. Concrete mixed without modern waterproofing additives allows more capillary movement. This is why vapor barriers and penetrating sealers help even when you can’t find cracks to patch.

Over time, continuous hydrostatic pressure causes structural damage beyond just dampness. Foundation walls can bow inward as soil pressure exceeds the wall’s resistance. Floor slabs can heave upward when water pressure builds beneath them, cracking concrete and pushing sections out of level. Progressive cracking starts small but widens with repeated pressure cycles, eventually allowing significant water entry. Once structural damage starts, it accelerates because compromised concrete offers less resistance to pressure.

In high water table areas or locations with poor soil drainage, comprehensive solutions combining exterior drainage and interior systems are necessary because you’re fighting constant pressure that single method fixes can’t handle alone. Exterior drainage reduces the water reaching your foundation, lowering the pressure source. Interior systems provide a release path for water that does penetrate, preventing pressure buildup that causes structural damage.

Professional Waterproofing Methods and When to Use Them

7pgPv0ufSX6EHk2dsPehUA

Some moisture problems exceed DIY capability, either because of the severity, the required equipment, or the structural expertise needed to fix them right.

Call a professional when persistent mold growth returns after you’ve cleaned it and tried humidity control, when you see structural damage including bowing walls, large foundation cracks wider than a quarter inch, or beams showing rot or deflection, or when regular pooling or flooding happens after minor rains despite your drainage improvements. These situations signal problems that need expert diagnosis and solutions beyond typical homeowner scope.

Exterior excavation waterproofing involves digging down to your foundation footing level, cleaning and preparing the foundation wall, then applying waterproofing systems that stop water before it contacts the concrete. Contractors excavate around your foundation perimeter, exposing walls from grade level down to the footing, typically six to eight feet deep. They pressure wash walls, repair cracks, then apply rubberized waterproofing membrane or spray on coatings that create a barrier without seams. Bentonite clay panels are sometimes installed against the wall. When water contacts bentonite, it swells to form a tight waterproof seal. Drainage board systems attach over the waterproofing, creating an air gap and drainage path for any water that reaches the wall, directing it down to footing drains rather than sitting against the waterproofing. This is the most thorough exterior approach but requires heavy equipment, proper backfill, and landscape restoration after completion.

Crawl space encapsulation seals dirt floor crawl spaces under homes with partial basements or homes built partially on crawl space and partially on basement. The process covers the ground with heavy vapor barrier plastic, seals it to walls and posts, and often includes insulation on walls and a dehumidification system. Encapsulation transforms a damp crawl space into a controlled dry environment that stops moisture from rising into the home above. It’s comprehensive, addressing ground moisture, humidity, and air quality in one project, typically requiring professional installation for proper sealing and system integration.

Professional assessment starts with inspection of the foundation, drainage, soil conditions, and existing moisture patterns. Contractors scope the work needed, explaining which methods apply to your specific situation and why. Timeline estimates depend on project size. Exterior excavation waterproofing can take one to two weeks depending on foundation perimeter length and site conditions. Interior drainage and sump systems often complete in two to five days. Crawl space encapsulation varies by size and complexity. Warranty coverage typically includes materials and workmanship. Membrane and coating products often carry manufacturer warranties of 10 to 20 years. Drainage systems and sump pumps include shorter warranties on mechanical components, often one to five years with options to extend.

Professional waterproofing costs thousands to tens of thousands depending on scope, but view it as a long term investment. It protects your foundation from progressive structural damage that becomes exponentially more expensive to repair. It prevents mold and air quality issues that affect your family’s health. It maintains and often increases property value by eliminating a major defect that scares away buyers or reduces sale prices.

Preventive Maintenance to Keep Basements Dry Long Term

Once you’ve implemented moisture control solutions, ongoing maintenance protects that investment and catches new problems early when they’re still simple fixes.

Maintenance isn’t optional if you want solutions to keep working. Systems that aren’t monitored fail when you need them most. Gutters clog, sump pumps seize, humidity creeps up unnoticed until you’ve got mold again.

Spring tasks include testing your sump pump by pouring several gallons of water into the pit until the float activates and the pump discharges water outside. Check that the discharge line hasn’t frozen or become blocked over winter. Walk your foundation perimeter and inspect grading. Freeze thaw cycles and spring thaw can create new low spots or settling near the foundation. Add soil and regrade as needed before heavy spring rains.

Summer tasks include monitoring basement humidity with a hygrometer. Readings should stay between 30 and 50 percent. If humidity rises above 50 percent during humid weather, verify your dehumidifier is running efficiently and consider adding ventilation. Inspect visible plumbing, water heaters, and washing machine connections for any signs of leaks, corrosion, or drips.

Fall tasks include cleaning gutters thoroughly before fall rains and winter, removing all leaves and debris. Flush downspouts with a hose to verify they’re clear. Check that downspout extensions are still in place and directing water at least five feet from the foundation. Verify that ground slopes still direct water away from the house and hasn’t settled.

Winter tasks include watching for ice dams on the roof that can cause water to back up and seep into walls. Monitor basement humidity, which can rise if you’re running humidifiers upstairs for comfort. Cold basements sometimes develop condensation on pipes and walls when humidity levels increase, so balance whole house humidity carefully.

Monthly tasks include checking hygrometer readings to verify humidity stays in the 30 to 50 percent range, walking your basement to visually inspect for new moisture signs like stains, efflorescence, dampness, or musty odors, and maintaining your dehumidifier by emptying collection tanks if not using continuous drainage, cleaning filters, and ensuring the unit is running when humidity rises.

Annual professional checkups provide expert eyes on critical systems. Have sump pumps inspected, tested under load, and cleaned by a professional annually. Pumps work in harsh conditions and wear over time. Battery backup systems need testing to verify they’ll run during power outages. Foundation inspections by a professional every few years catch developing cracks, settlement, or drainage issues before they become serious. For homes with drainage systems, verify that footing drains, French drains, and discharge points are flowing properly and haven’t become clogged with silt or root intrusion.

Maintenance connects directly to preventing health hazards from mold growth and structural damage, and to protecting property value by keeping your basement dry and functional rather than becoming a problem that reduces buyer interest.

Cost Considerations for Basement Moisture Control Projects

Moisture control costs vary widely based on problem severity, basement size, and which solutions you need. Understanding cost ranges helps you budget and prioritize spending.

Simple problems with minor moisture and DIY solutions cost hundreds. Comprehensive professional waterproofing with excavation and interior systems costs thousands to tens of thousands. Most homeowners spend somewhere in between, combining DIY improvements with targeted professional work.

Solution Type Typical Cost Range DIY or Professional
Dehumidifier (residential unit) $200 to $500 DIY
Crack sealing (materials and minor repair) $50 to $300 DIY
Interior drainage system (per linear foot) $50 to $100 per foot Professional
Sump pump installation (new system) $800 to $2,500 Professional
Exterior excavation waterproofing (per linear foot) $80 to $150 per foot Professional
French drain installation (exterior perimeter) $3,000 to $10,000 Professional
Vapor barrier installation (floor and walls) $300 to $1,500 DIY to Professional
Crawl space encapsulation (complete system) $5,000 to $15,000 Professional

Prioritize spending by addressing the most critical problems first. If you have active water entry, fix that before worrying about humidity. Stop water flowing through foundation cracks or coming up through the floor before investing in dehumidifiers. Once water entry is controlled, add humidity management through dehumidification and ventilation. Finally, make preventive improvements like enhanced drainage, better grading, and long term waterproofing that reduce future risk. This staged approach spreads costs over time and ensures you’re solving problems in order of urgency.

When evaluating contractor quotes, get at least three estimates for major work. Verify that each quote includes the same scope so you’re comparing equivalent solutions. Ask what’s included like materials, labor, site cleanup, restoration of landscaping or concrete. Understand warranty coverage on both materials and workmanship, and get it in writing. Verify proper licensing for your state and that contractors carry liability insurance and workers’ compensation coverage. Ask for references from recent similar projects and actually call them.

Frame moisture control as an investment that protects against much larger costs. Uncontrolled moisture causes structural damage to foundations, beams, and flooring that can cost tens of thousands to repair once it progresses. It creates health hazards from mold exposure that affect your family. It reduces home resale value significantly. Buyers fear damp basements and either walk away or demand major price reductions and repair credits. The cost of proper moisture control, even comprehensive professional solutions, is less than the cost of structural repairs, health issues, and lost property value over time.

Health and Safety Considerations in Damp Basements

Basement moisture isn’t just a property maintenance issue. It’s a health priority that affects everyone living in your home.

Excess moisture creates ideal conditions for mold growth, and mold releases spores that circulate through your home’s air. Those spores trigger respiratory problems, allergic reactions, and worsen asthma. Mold grows when humidity stays above 50 percent for extended periods. Keep humidity between 30 and 50 percent to prevent mold from establishing colonies.

Health hazards from damp basements include direct mold spore exposure, which causes coughing, wheezing, throat irritation, and nasal congestion, especially in children and people with existing respiratory conditions. Dust mites thrive in humid environments, and humidity at 50 percent or higher allows indoor allergens to survive and thrive, multiplying allergen levels throughout your home. Poor indoor air quality affects the entire house because basement air rises into upper floors, carrying musty odors, mold spores, and elevated humidity. Even if you don’t use your basement as living space, the air down there impacts what you breathe upstairs.

Safety concerns beyond health include electrical hazards in wet basements where water near outlets, electrical panels, or appliances creates shock and fire risks. Never touch electrical equipment or outlets if you’re standing in water or touching wet surfaces. Shut off power to basement circuits at the main panel if you have significant water intrusion. Structural integrity risks develop when long term moisture weakens wood beams, rots sill plates, and compromises floor joists that support your home above. What looks like a minor moisture problem can be quietly destroying structural components you can’t see.

Conditions sometimes require temporary relocation during remediation if mold contamination is extensive, if water damage has compromised structural safety, or if professional remediation involves chemicals or containment procedures that make the home temporarily unsafe. Take moisture problems seriously before they reach this point.

Building code requirements for habitable basement spaces specify maximum humidity levels, ventilation standards, and waterproofing requirements. Codes vary by jurisdiction, but most require that basement living spaces maintain humidity below 60 percent, have mechanical ventilation providing adequate air changes per hour, include proper emergency egress windows for bedrooms, and show no evidence of active water intrusion or structural damage. Finished basements must meet these requirements to pass inspection and be legally considered living space. If you’re finishing your basement or using it as living area, proper moisture control isn’t optional. It’s required for safety and code compliance.

Moisture control protects your family’s health and safety, not just your property. Address moisture issues promptly, maintain proper humidity levels, and don’t ignore warning signs like mold growth, structural damage, or persistent dampness.

Final Words

Effective basement moisture control solutions require addressing both water entry and humidity management together.

Start with exterior drainage to keep water away from your foundation. Add interior systems and dehumidification where needed. Seal cracks and barriers properly. Keep up with maintenance.

Most successful moisture control combines several methods rather than relying on one fix. When you’re dealing with repeated flooding, visible structural damage, or solutions that haven’t worked, bring in professionals for assessment.

A dry basement protects your home’s structure, keeps your family healthier, and maintains your property value over time.

FAQ

What is the best way to get rid of moisture in a basement?

The best way to get rid of moisture in a basement combines exterior drainage improvements with interior humidity control. Start by extending downspouts at least five feet from your foundation, fixing gutter problems, and checking that ground slopes away from your house. Inside, run a properly sized dehumidifier and seal any foundation cracks or gaps. Most successful moisture control uses multiple methods together rather than relying on one fix alone.

How much does it cost to waterproof a 1200 sq ft basement?

Waterproofing a 1200 sq ft basement typically costs between $3,000 and $15,000 depending on the severity of moisture problems and solutions required. Basic interior crack sealing and dehumidification runs on the lower end, while comprehensive systems including interior drainage, sump pump installation, and exterior waterproofing membrane application cost more. Professional assessment helps determine what your specific situation requires and provides accurate pricing for needed work.

How am I getting water in my basement when my cement walks aren’t cracked?

Water enters basements through several paths beyond visible cracks in concrete walks. Groundwater seeps through porous concrete itself through capillary action, hydrostatic pressure forces water through foundation walls from saturated soil, and water can travel along the footing where walls meet floors at cove joints. Poor grading, clogged gutters directing water toward your foundation, and high water table levels also push moisture into basements without requiring visible surface cracks.

Does DampRid work in a basement?

DampRid works for very small, enclosed spaces but is not effective for whole basement moisture control. These passive moisture absorbers collect limited water and require frequent replacement, making them impractical and expensive for basement-sized areas. A properly sized electric dehumidifier removes 30 to 100 pints of moisture daily and provides adjustable humidity control, making it the right choice for managing basement humidity levels effectively.

When should I call a professional for basement moisture problems?

Call a professional when you see persistent mold growth after DIY attempts, structural damage to foundation walls or beams, or regular pooling and flooding after minor rains. Professional inspection also makes sense when you’re unsure what’s causing moisture, when multiple DIY solutions haven’t worked, or when you need interior drainage systems and sump pump installation that require excavation and specialized equipment.

How do I know if my basement moisture is from groundwater or plumbing leaks?

Basement moisture from groundwater typically appears after heavy rain or spring thaw, shows up along walls near the floor, and affects larger areas with dampness or efflorescence. Plumbing-related moisture stays consistent regardless of weather, appears near supply lines or drains, and creates localized wet spots on walls or floors. A moisture meter and visual inspection of pipe connections help identify the source before selecting the right fix.

What humidity level should I maintain in my basement?

Maintain basement humidity between 30 to 50 percent relative humidity to prevent mold growth and protect belongings from moisture damage. Use a hygrometer to monitor humidity levels regularly, adjusting your dehumidifier settings as needed. Humidity above 50 percent allows mold spores, dust mites, and allergens to thrive, while levels below 30 percent can feel uncomfortable and may affect wood furnishings.

Can I finish my basement if I have moisture problems?

Never finish a basement until you’ve fully resolved moisture problems and maintained dry conditions for at least one full seasonal cycle. Finishing over existing moisture traps water behind walls, accelerates mold growth, ruins materials, and creates health hazards. Fix exterior drainage, install necessary waterproofing systems, control humidity, and verify everything stays dry through spring thaw and heavy rain periods before investing in finish work.

2 What Photos To Take For Insurance Claims After A Disaster!

0

Have you ever wondered if a clear photo could save you from future claim hassles? When trouble hits, every moment and every picture matters. Photos capture the damage and show what your home looked like before repairs. In this post, we share simple steps to help you take the best images for your insurance claim. We explain how to get everything from wide shots to close-ups so you can protect your home and support your claim with confidence.

Essential Photo Checklist for Insurance Claims After a Disaster

Before you start cleaning up, take clear photos of the damage. These pictures show the condition of your home before any debris is removed. A good set of photos helps keep important evidence safe. Use your phone or camera and make sure the images are focused and easy to see.

Follow these simple steps to build your visual checklist:

  1. Take a wide shot of the entire damaged area. For example, capture an image of your front yard and house to show the overall extent of damage.
  2. Snap close-up photos of specific details. Look for signs like burn marks on a doorframe from a fire, water stains from a leak or burst pipe, or dents from hail or fallen branches.
  3. Capture several angles of each area. Move around the spot and take side and top-down photos so nothing is missed.
  4. Separate your shots of the inside and outside. Photograph outside damage like broken windows and siding, and focus on indoor areas like floors, walls, and fixtures that show water or fire damage.
  5. Save your photos safely. Upload your pictures to a cloud backup from your phone to make sure they won't be lost.

Only enter your home when experts say it's safe. And always wear protective gear like gloves, masks, and boots.

For more tips, check out the resource: Insurance claim documentation checklist for homeowners.

Exterior Damage Photo Techniques for Claims After a Disaster

img-1.jpg

Start with a wide shot of your property to show the overall damage. Focus on the roof to capture missing shingles, holes, or water pooling. For example, take a photo from an angle that clearly shows water collecting near a gap.

Next, take photos of the siding and walls. Look for dents, cracks, or burn marks from the event. Snap shots from different angles, one straight-on and another from the side, to show the depth of any cracks.

Now direct your attention to windows and doors. Get close-up images of broken glass or warped frames to clearly show the damage. Slowly pan from one side to the other to capture every detail.

Don’t forget the surroundings. Photograph any damaged landscaping, fences, or gardens. Also, take ground-level photos to show waterlines or erosion around the foundation.

Finally, capture any harm to outdoor utility equipment like HVAC units and meters. Use natural light and shoot from several angles. This helps build a strong photo record that supports your claim.

Interior Impairment Capture Advice: Photographing Inside Damage

Start by taking clear photos of every affected area inside your home. These pictures help show the full extent of the damage. For example, capture images of warped flooring, peeling paint, or burned surfaces. Try using natural light and keep your camera or phone steady, so the details come through.

Interior Area Damage Detail
Flooring Warped wood, stains, and buckled sections from water
Walls and Ceilings Peeling paint, soot build-up, and mold spots
Electrical Fixtures Burn marks and water damage near outlets
HVAC & Appliances Moisture or fire residue on vents and ductwork
Personal Contents Visible damage to furniture and electronics (including visible serial numbers)

Take close-up photos from different angles. Use good, clear lighting and, if you can, record the date and time on each image. If you notice water stains on a hardwood floor, snap both a wide shot for context and a close-up to show detailed damage.

Specialized Photography for Fire, Flood, and Storm Damage Evidence

img-2.jpg

Fire Damage Photo Tips

When you take photos of fire damage, focus on the details that show how the fire changed your property. Snap close-ups that highlight the burn marks and the texture changes on wood or other surfaces. Capture the deep char on beams or doorframes and any soot sticking to walls or fixtures. Mix wide shots that show the entire scene with detailed images that capture melted fixtures or warped structure. This variety helps prove both the overall extent and the specific points of damage.

Flood Impact Photo Tips

For flood damage, clearly document the effects of water on your home. Photograph high water marks on walls and areas where water pooled, causing wood or drywall to swell. Look for signs like moisture trails or early mold growth from long exposure to damp conditions. Capture shots from floor to ceiling to clearly record the damage line. These images will help show the ongoing changes caused by water exposure.

Storm Ruin Photo Tips

When you document storm damage, focus on what the wind and debris did to your property. Take photos of hail dents on metal surfaces and damage from falling trees or debris. Capture roof tears from different angles, one close to the roof edge and another from a safe distance to show the full roof condition. Also, record any broken siding or shattered windows. These images give a complete view of how the storm affected your property.

Angles, Lighting, and Technical Settings for Clear Damage Photos

When you document damage, using the right camera settings is key. Hold your camera so the lens is parallel to the walls or floors (this is called orthogonal framing). This method keeps the image straight and shows every crack and dent in clear detail. Shoot in early mornings or late afternoons when the natural light is soft to reduce glare.

Set your focus manually or tap your smartphone to focus. This helps capture sharp edges and the true texture of surfaces. Adjust your ISO (the camera sensor's sensitivity to light) based on your setting. In bright areas, use an ISO of 100 to 200 to keep photos clear and free from grain. In dimmer areas, bump the ISO to 400 to 800 so you capture more detail.

These steps give you clear, high-quality images that show the full extent of the damage. With clear photos, claims personnel can quickly see and evaluate the loss. Taking the extra time to set your camera right makes your evidence stronger and more reliable.

Chronological Visual Records Post-Disaster: Logging and Storage Strategies

img-3.jpg

After a disaster, every photo you capture helps tell your property's story. First, add a timestamp to each picture. You can use your phone's date and time or note it manually in a spreadsheet or file name. Also, record where each damage occurred to build a strong visual record for your claim.

Next, sort your photos by damage type, such as exterior, interior, or belongings. This helps you create an easy-to-follow timeline of what happened. Place your images in dedicated folders so you can track any changes as repairs begin.

Be sure to back up your photos in at least two secure spots. For example, save them in a cloud service and on an external hard drive. If you spot new damage during clean-up or repairs, update your files right away with fresh photos and note any details in your log.

This careful record builds a clear digital timeline that simplifies the claims process and supports your case with simple, dated evidence. Keep your records updated until your claim is settled to capture every important detail.

Integrating Photos into an Organized Claim Submission Package

A clear photo record makes your insurance claim easier to review. It helps everyone quickly see what needs repair. When you take photos of the damage, labeling each one clearly makes a big difference.

Each picture should have a clear category and be saved in a common file format like JPEG (a standard image file). Write a short caption that explains what you see and describes the damage. For example, a photo labeled "Roof Damage – Water Pooling" with a note about the number of pictures shows the exact problem more clearly than a general image.

Group your photos by type of damage. You can use groups like exterior, interior, and personal property. This organized way makes your claim easy to follow and helps your evidence stay clear throughout the restoration process.

Below is an example of how to organize your images:

Category File Format Caption Photo Count
Exterior JPEG Damage overview and specific close-ups Multiple
Interior JPEG Room-by-room damage details Multiple
Contents JPEG Damaged personal items with serial information Multiple

Final Words

In the action, we covered a clear guide for capturing essential damage photos. We detailed ways to document exterior, interior, and event-specific issues like fire, flood, and storm damage. We touched on angles, lighting, and technical tips to ensure every shot is reliable. This guide shows what photos to take for insurance claims after a disaster, making it easier to build a solid case. With a straightforward checklist in hand, you can move ahead with confidence and get your property safe and ready again.

FAQ

Q: What pictures do insurance companies need?

A: The pictures insurance companies need include clear images of all damaged areas. Capture both wide shots and close-ups of interior and exterior damage, such as water stains, burn marks, or structural issues, before any cleanup begins.

Q: How to take photos for insurance claim?

A: Taking photos for an insurance claim means using clear angles with ample natural light. Capture the damage from multiple perspectives, include wide shots and close-ups, and document details before debris removal starts.

Q: What’s the biggest mistake people often make when dealing with an insurance claim?

A: The biggest mistake is not fully documenting all damage before cleanup. Missing clear, detailed photos of affected areas can delay the claim process and reduce the recovery of proper funds.

Q: Should I upload photos to an insurance claim?

A: Uploading photos to your insurance claim is recommended. Digital images stored securely with timestamps support your claim by clearly showing the damage and speeding up the review process.

Rebuilding Interior Walls After Fire: Complete Recovery Steps

A fire doesn’t just char your walls. It weakens the framing behind them, bakes smoke deep into every porous surface, and creates structural risks you can’t see from the doorway. Rebuilding interior walls after fire means more than hanging new drywall. You’ve got to assess hidden damage, remove contaminated materials completely, repair or replace compromised framing, and seal everything properly so smoke odor doesn’t return six months later. This guide walks you through the full recovery process, from safety inspection to final paint, so you understand what actually needs to happen and why each step matters.

Safety Assessment and Structural Inspection Before Wall Repairs

6MHt43cQTqnsNzPKHxm5w

You need a professional structural inspection before any demolition or rebuilding starts. Here’s the thing: hidden damage to load-bearing walls, studs, and joists doesn’t always show up on the surface. Fire weakens structural members in ways that aren’t obvious, and a qualified inspector looks at your entire structural system, not just the charred spots you can see. Heat damage travels through connected framing and can weaken supports that are nowhere near the actual flames.

Critical structural risks you’ve got to evaluate before wall rebuilding:

  • Support beams that look fine but lost their load capacity from heat exposure
  • Damaged electrical systems in wall cavities creating fire and shock hazards
  • Weakened foundations with cracks, settling, or damaged footings affecting wall stability
  • Unstable roofing materials that could come down during wall reconstruction
  • Sagging rooflines showing the support system failed
  • Compromised wall framing with charred studs, weakened connections, or damaged plates

Engineering reports become necessary when damage hits multiple load-bearing walls, when insurance needs detailed documentation for coverage approval, or when the building inspector spots concerns beyond standard assessment scope. Minor single room damage usually just needs standard building inspection. Extensive fire damage requires professional engineering evaluation with load calculations and repair specifications. Some insurance companies won’t even process claims without an engineering report documenting the full scope of structural damage.

You need proper safety equipment during assessment: N95 or N100 respirators to filter smoke particles, protective clothing covering all skin, hard hats in areas with overhead hazards, and safety glasses. Don’t go into fire damaged areas without protection.

Insurance Claims and Documentation for Interior Wall Damage

6ox3d_xHTJ6yQdJXdWtWbQ

Contact your insurance company within 24 to 48 hours of the fire to maintain coverage eligibility and start the claims process.

Essential documentation for insurance claims:

  • Photos from multiple angles showing damage extent, structural concerns, and affected areas
  • Video walkthrough documenting each damaged room and explaining what you’re seeing
  • Damaged property list with estimated values for contents affected by fire and smoke
  • Receipts for emergency repairs like board up services, temporary utilities, and stabilization work
  • Contractor estimates with detailed scope breakdowns for demolition, repair, and finishing phases
  • Structural assessment reports from licensed inspectors or engineers
  • Itemized scope of work separating demolition costs, structural repair expenses, and finishing materials

Creating an effective scope of work means breaking the project into clear phases that insurance adjusters understand. Start with emergency stabilization and assessment, then list demolition and debris removal, followed by structural framing repairs, systems work (electrical, plumbing, HVAC), insulation and drywall, and finally finishing work including paint and trim. Separate labor costs from materials. Include line items for required permits and inspections. Adjusters approve claims faster when they can see exactly what work is necessary and why each phase matters.

Emergency board up services typically cost $200 to $800 depending on the size of openings that need securing. That’s minimal compared to the thousands in additional damage from weather exposure, vandalism, or theft if you leave the structure open. Most insurance policies cover board up costs, and getting the work done immediately prevents disputes about whether subsequent damage was fire related or occurred afterward.

Smoke and Soot Removal from Fire-Damaged Walls

gP2nyJCtQF6Qwnc-f-B1rg

The EPA warns that fine particles from smoke can get deep into your lungs, causing respiratory issues, especially for children, elderly family members, and anyone with pre-existing conditions like asthma or heart disease. Proper smoke remediation protects everyone who’ll live in the home after rebuilding, and it’s got to happen before reconstruction work begins.

Cleaning Method Application Equipment Needed
HEPA Air Scrubbers Continuous air filtration during and after cleaning to capture airborne smoke particles Commercial HEPA units rated for fire restoration, minimum 500 CFM capacity
Thermal Fogging Neutralizes smoke odor molecules in porous surfaces like wood studs and concrete Thermal fogger machine, deodorizing solution, sealed work area
Ozone Treatment Breaks down stubborn odor molecules in empty spaces (no occupants or pets during treatment) Ozone generator, air monitoring equipment, proper ventilation system
Dry Cleaning Sponges Surface soot removal from walls, ceilings, and exposed framing before wet cleaning Chemical dry sponges, ladder, vacuum with HEPA filter
Chemical Neutralizers Applied to surfaces after dry cleaning to neutralize acidic soot residue Spray bottles, neutralizing solution, microfiber cloths, protective gloves

Porous surfaces like drywall, wood studs, and concrete trap smoke deeper than smooth surfaces, which means they need multiple cleaning cycles and primer sealer treatment to prevent odors from coming back. Drywall that looks clean might still release smoke smell months later if you don’t seal it properly. Wood framing that’s structurally sound but smoke stained requires thermal fogging, chemical neutralization, and shellac based sealer before you close the walls. Skip these steps and the odor comes back even after you’ve completely rebuilt the walls with new drywall and fresh paint.

Air quality testing confirms safe conditions before workers proceed with rebuilding. Testing measures particulate levels, VOCs (volatile organic compounds), and confirms that smoke remediation brought air quality back to acceptable standards.

Demolition and Removal of Fire-Damaged Wall Materials

WtvoVNvdSFaGNiTxn6VwJA

Demolition permits are required when you’re removing structural walls, making changes that affect load bearing members, or when damage affects more than one room in most jurisdictions.

Homes built before 1980 require asbestos and lead paint testing before any demolition work begins. Asbestos was commonly used in joint compound, insulation, and textured ceiling finishes. Lead paint remains under newer paint layers on trim, doors, and walls. Testing costs $200 to $500 but prevents health hazards and legal liability. If testing confirms asbestos or lead, specialized abatement contractors must handle removal following EPA protocols, which adds cost and time but keeps everyone safe.

Proper disposal procedures for fire damaged wall materials:

  • Separate hazardous materials (asbestos, lead paint debris) for specialized disposal at certified facilities
  • Identify salvageable materials like solid wood trim, doors, and hardware that can be cleaned and reused
  • Confirm contractor disposal requirements including dumpster permits and landfill receipts for insurance documentation
  • Follow municipal codes for debris removal timelines, typically requiring removal within 30 days of demolition
  • Clear debris systematically room by room to maintain safe access for workers and inspectors

Charred drywall and insulation require complete removal down to the studs because smoke and water contamination penetrate these porous materials beyond what cleaning can address. The damaged material continues releasing odors and creates potential mold growth if you try to save it. Wall framing may be salvageable if studs remain structurally sound, meaning they’re not charred through, cracked, or weakened. An inspector or engineer makes that determination based on the depth of charring and remaining wood thickness that can still carry loads.

Wall Framing Repair and Structural Reinforcement After Fire

bRm60gyQQH6LVfFnEU68Ag

Assessing which wall studs and framing members require replacement versus reinforcement starts with measuring the char depth. Surface charring less than 1/4 inch deep on non load bearing studs might be acceptable after cleaning and sealing. Charring deeper than 1/4 inch, any charring on load bearing walls, or studs with cracks and checks require complete replacement. You’re not saving money by keeping questionable framing because structural failure costs far more than new lumber.

Sequential steps for proper wall framing repair after fire damage:

  1. Remove damaged studs by cutting above and below the damaged section, or removing full height studs if damage is extensive
  2. Check plate connections (top plates and bottom plates) for char damage, cracks, or separation from adjacent framing
  3. Install new framing lumber meeting current code (typically 2×4 or 2×6 depending on wall function) with proper nailing patterns
  4. Reinforce load bearing connections with structural screws or hurricane ties where required by updated code
  5. Install headers above door and window openings using engineered lumber or built up dimensional lumber per span tables
  6. Schedule framing inspection before proceeding to insulation, ensuring all structural work is approved and documented

Foundation repairs may be necessary when fire damage affects the structure’s base. Cracked concrete from intense heat exposure, settling issues from weakened soil under the foundation, damaged footings that no longer provide stable support, and soil stability testing around the foundation perimeter all require professional assessment. Foundation work must be completed before wall framing proceeds because unstable foundations lead to recurring wall cracks and structural movement.

Getting framing inspected before concealing work with insulation and drywall is required by code and protects you from costly rework if the inspector identifies issues after walls are closed up.

Electrical Wiring and Plumbing Inspection in Fire-Damaged Walls

mdad4Vf3TkeaREuQ7pZWqg

All electrical wiring exposed to heat or smoke requires inspection even if there’s no visible damage. Wire insulation degrades from heat exposure before you see melting or discoloration, and compromised insulation creates shock and fire hazards. A licensed electrician tests wire integrity, measures insulation resistance, and determines what must be replaced.

Electrical inspection requirements for fire damaged walls:

  • Wire insulation integrity testing using megohmmeter to measure resistance and identify degraded insulation
  • Junction box condition assessment for melted boxes, damaged connections, or boxes pulled loose from framing
  • Circuit breaker function testing to ensure breakers weren’t damaged by electrical surges during the fire
  • Ground fault protection verification in bathrooms, kitchens, and outdoor circuits meeting current code requirements
  • Outlet and switch replacement in fire affected areas because internal components degrade from heat even when exterior looks intact

All electrical work must be inspected and approved before drywall installation conceals wiring and boxes. The inspector verifies proper wire sizing, correct circuit loading, secure connections, appropriate box fill, and code compliant installation methods. You can’t call them back after the walls are closed.

Plumbing inspection covers pipes running through fire damaged walls because plastic supply lines (PEX, CPVC) and drain pipes (PVC, ABS) weaken from heat exposure without visible melting. A plumber pressure tests supply lines and inspects drain connections for integrity. Metal pipes handle heat better but still require inspection for damaged joints and hangers.

HVAC ductwork running through fire damaged wall cavities traps smoke particles and distributes contamination throughout the home if you don’t address it. Sheet metal ducts can be professionally cleaned using HEPA vacuums and antimicrobial treatments. Flexible duct and duct board insulation must be replaced because cleaning doesn’t remove smoke that penetrated the porous materials. Contaminated ducts compromise air quality every time the system runs.

Fire-Rated Materials Selection for Enhanced Wall Protection

7-Yz9VbeTYiDHbIkxuWIUg

Rebuilding after fire damage offers a cost effective opportunity to upgrade fire resistance beyond your home’s original construction. Fire rated materials add 15 to 30 percent to material costs during reconstruction, but they provide significant long term protection and many insurance companies offer premium discounts for verified upgrades.

Material Category Standard Option Fire-Rated Option Fire Rating Cost Difference
Drywall 1/2″ standard gypsum board 5/8″ Type X fire-rated drywall 1-hour fire resistance +$8-12 per sheet
Insulation Foam board or spray foam Rock wool or fiberglass batts Non-combustible, won’t fuel fire +$0.15-0.30 per sq ft
Interior Paint Standard latex paint Intumescent fire-retardant coating Delays flame spread, reduces smoke +$15-25 per gallon
Interior Doors Hollow-core wood doors 20-minute fire-rated solid core doors 20-minute fire resistance +$75-150 per door
Framing Treatment Untreated dimensional lumber Fire-retardant treated lumber or spray-applied coating Class A flame spread rating +20-35% lumber cost

Class A fire resistance ratings represent the highest level of fire protection for building materials. The rating measures flame spread and smoke development, with Class A materials having a flame spread index of 0 to 25 (concrete and brick score 0, untreated wood scores around 100 to 200). Materials are tested according to ASTM E84 standards. When you see “Class A” on product specifications, it means the material resists ignition, limits flame spread, and produces less smoke than lower rated alternatives.

Insurance companies often provide 5 to 15 percent premium discounts for verified fire resistant upgrades including Type X drywall throughout the home, fire rated doors between living spaces and garage, non combustible insulation, and fire resistant roofing materials. You’ll need documentation showing what materials were installed and proof of final inspection approval. Ask your insurance agent which specific upgrades qualify for discounts before purchasing materials.

Some jurisdictions now require fire rated materials in specific wall applications, particularly in attached garages, walls near property lines, and homes in wildfire prone areas. Check local code requirements before selecting materials.

Insulation Replacement and Moisture Barriers in Rebuilt Walls

HjR5CUxpQJu4eGsUjUZAMQ

All fire exposed insulation requires replacement regardless of visible damage. Smoke contamination, water from firefighting efforts, and heat exposure compromise insulation performance and create ongoing odor and air quality problems if you leave it in place.

Vapor barrier requirements depend on your climate zone and wall assembly. Cold climates typically need vapor barriers on the warm (interior) side of insulation to prevent condensation inside wall cavities. Warm humid climates may not need interior vapor barriers or may require them on the exterior side. Before installing new insulation, use a moisture meter to verify wall cavities are dry (moisture content below 16 percent for wood framing). Wet framing from firefighting water must dry completely or you’re trapping moisture that leads to mold growth.

Mold remediation becomes necessary if water used during firefighting sat in wall cavities for more than 48 hours. Visible mold growth on framing requires professional remediation following IICRC S520 standards. The remediation contractor removes contaminated materials, treats affected surfaces with antimicrobial solutions, and verifies clearance through air quality testing before you proceed with insulation.

Sequential steps for proper insulation installation in fire damaged walls:

  • Conduct moisture testing of all wall cavity framing using pin type or pinless moisture meter to verify readings below 16 percent
  • Install vapor barrier if required by climate zone and building code, with proper overlap and sealing at seams
  • Place insulation material to achieve proper R value for your climate without compression or gaps
  • Verify R value meets or exceeds current energy code requirements (often higher than original construction)
  • Schedule insulation inspection before drywall installation to document proper installation and R value compliance

Insulation installation timing must occur after all electrical wiring, plumbing pipes, and HVAC ducts are installed, tested, and inspected. You can’t properly insulate around systems that aren’t finished, and you can’t access systems for inspection or repairs after insulation goes in.

Drywall Installation and Interior Wall Finishing After Fire

tTzqPBTCT5yjzSLvCdXwpg

Ensure all required inspections are complete before drywall installation begins. You can’t proceed until framing, electrical, plumbing, and insulation have been inspected and approved.

Sequential steps for professional quality drywall installation and finishing:

  1. Measure and cut drywall panels to minimize seams and reduce joint compound work
  2. Hang drywall with screws spaced every 12 inches on studs and every 8 inches on ceiling joists for proper attachment
  3. Install corner bead on all outside corners using metal or vinyl bead secured with adhesive or screws
  4. Apply first coat of joint compound (taping coat) over seams with paper or fiberglass mesh tape embedded
  5. Apply second coat (fill coat) to build up joints and smooth over fastener dimples
  6. Sand between coats using fine grit sandpaper or sanding screen after compound is completely dry
  7. Match existing wall texture in undamaged areas using spray texture, hand trowel, or other application methods

Proper screw spacing every 12 inches on wall studs and every 8 inches on ceiling joists prevents screws from popping through the drywall surface months after installation. Screws driven too deep break the paper face and lose holding power. Screws not driven deep enough create bumps that show through paint. Set screws just below the surface, creating a slight dimple without tearing the paper.

Matching existing wall texture in undamaged areas creates repairs that blend the rebuilt section with original walls. Orange peel texture (light spray texture common in modern homes) requires a hopper gun with specific tip size and air pressure settings. Knockdown texture involves spraying heavily then lightly flattening high spots with a trowel. Hand troweled textures like skip trowel or Santa Fe require skill to match the pattern, depth, and direction. Complex textures often need professional help because matching by hand takes practice.

Complete drywall finishing typically requires 5 to 7 days including drying time between joint compound coats. First coat needs 24 hours to dry, second coat needs another 24 hours, and texture application needs 24 hours before priming. Humidity and temperature affect drying time, with cold or humid conditions extending the schedule.

Primer Application and Odor-Sealing Paint for Fire-Damaged Walls

2v4ZkMdATfSe5k-fffv3sA

Standard primer fails on fire damaged surfaces because it doesn’t seal smoke odor and stains bleed through within weeks. You need shellac based or specialty smoke sealing primers that encapsulate odor molecules and block stains from reaching the topcoat.

Primer types and their specific applications for fire damaged wall surfaces:

  • Shellac based sealers (BIN, Cover Stain) provide superior odor blocking and stain coverage, ideal for heavily smoke damaged drywall and trim
  • Oil based stain blockers offer excellent adhesion and sealing on surfaces with moderate smoke exposure
  • Synthetic shellac primers combine shellac like blocking with easier cleanup and lower odor during application
  • Specialty smoke sealing products (Kilz Max, Zinsser Odor Killing Primer) formulated specifically for fire restoration work
  • Application techniques include brush and roll for walls, spray application for large areas and texture matching

Shellac based primers provide superior odor blocking compared to standard latex primers because shellac creates an impermeable barrier that traps odor molecules. Latex primers are porous and allow smoke smell to migrate through over time. Apply shellac primer in thin coats with good ventilation because the alcohol based formula has strong fumes until dry. One coat usually seals light smoke damage. Two coats may be necessary on heavily stained surfaces.

Quality topcoat paint selection matters for durability after proper priming. Use premium grade interior latex paint with stain resistance, scrubbability, and moisture resistance for kitchens and bathrooms. Flat paint hides surface imperfections best but shows scuffs. Eggshell or satin finishes balance hiding power with washability. Semi gloss works well in high moisture areas and on trim.

Proper ventilation during painting prevents VOC buildup from primers and paints, ensures proper drying, and protects air quality. Open windows, use fans to create cross ventilation, and avoid occupying spaces until paint is fully cured (typically 7 to 30 days depending on product).

Baseboards, Trim, and Door Frame Restoration in Fire-Damaged Rooms

Assess which trim elements can be cleaned and reused versus replacement by examining the char depth, structural integrity, and whether profiles match available stock. Solid wood trim with surface smoke staining often cleans up well with TSP (trisodium phosphate) solution and light sanding. Trim with charring, cracks, or deep heat damage requires replacement.

Steps for professional trim and baseboard installation in rebuilt rooms:

  1. Remove and catalog salvageable trim pieces, labeling location and room for reinstallation
  2. Match profiles for replacement pieces by bringing samples to millwork suppliers or custom milling for historic profiles
  3. Prime all trim pieces before installation using stain blocking primer on both sides to prevent moisture absorption and warping
  4. Install baseboards with proper reveals (gap between baseboard and floor) allowing for flooring installation or carpet thickness
  5. Case doors and windows with mitered or butted corners depending on trim style, ensuring tight joints
  6. Caulk gaps between trim and walls using paintable acrylic caulk for clean finished appearance

Matching stain or paint finishes to existing trim in undamaged areas requires identifying the original finish type (stain and clear coat versus painted) and color. For stained wood, bring a sample piece to a paint store for color matching, then test on scrap wood before applying to installed trim. For painted trim, most paint retailers can color match from a sample chip. Apply the same number of coats as the original finish for consistent appearance.

Door and window frames exposed to intense heat may require complete replacement even if they look cosmetically intact. Heat weakens the wood fibers and joint connections, causing frames to sag or bind over time. Check for loose joints, warping, and whether doors close properly with consistent reveals all around. Frames that don’t sit plumb and square need replacement because they’ll cause ongoing door operation problems.

Proper caulking between trim and walls fills small gaps created by wall texture variations or settling, creates clean shadow lines, and prevents gaps from appearing as materials expand and contract with humidity changes.

Building Code Compliance and Permit Requirements for Wall Rebuilding

Fire damage repairs must meet current building codes, not just match how your home was originally built. Code requirements change over time, adding safety measures, energy efficiency standards, and structural requirements that didn’t exist when your home was constructed. When you’re rebuilding walls, you’re bringing those sections up to current code.

Inspection Type Timing What’s Checked Required For
Framing Inspection After wall framing complete, before insulation Stud spacing, header sizing, plate connections, structural integrity, proper fastening All wall framing repairs, especially load-bearing walls
Electrical Inspection After wiring complete, before insulation and drywall Wire sizing, circuit loading, box fill, GFCI protection, grounding, proper connections Any electrical work in fire-damaged walls
Plumbing Inspection After rough-in complete, before insulation and drywall Pipe sizing, slope on drains, vent connections, supply pressure test, proper support Walls containing water supply or drain pipes
Insulation Inspection After insulation installed, before drywall R-value compliance, vapor barrier placement, proper installation without gaps or compression All insulated wall assemblies in conditioned space
Final Occupancy Inspection After all work complete including finish paint and trim Overall code compliance, proper completion, smoke detectors, egress requirements, safe occupancy All fire damage rebuilding before re-occupancy

Progressive inspections occur at specific construction milestones when systems and structural work can still be accessed and corrected if needed. Inspectors won’t approve concealed work after the fact. Missing an inspection means tearing out finished work to expose what they need to see.

Wildfire prone areas may have enhanced fire resistance requirements for rebuilding approval including mandatory fire rated roofing materials, defensible space clearances around structures, ignition resistant vents, and ember resistant construction details. Some jurisdictions require certification that rebuilt structures meet insurability standards before issuing occupancy permits. If insurance companies won’t cover a rebuilt home due to location or construction methods, you may not get approval to rebuild.

The final occupancy certificate legally authorizes you to move back into repaired spaces. Building departments won’t issue occupancy approval until all inspections pass, utilities are safe and functional, smoke detectors are installed, and egress requirements are met.

Cost Estimation and Budget Planning for Interior Wall Rebuilding

Single room wall rebuilding typically ranges from $3,000 to $8,000 depending on the extent of structural damage, systems work required, and finish quality selected.

Major cost categories in wall rebuilding projects with typical percentage of total budget:

  • Demolition and disposal (10 to 15%) including labor, dumpster rental, hazardous material handling, and permit fees
  • Structural framing repairs (15 to 25%) covering lumber, engineered headers, structural fasteners, and labor for framing installation
  • Electrical system work (10 to 20%) including wire replacement, new boxes and devices, circuit upgrades, and electrician labor
  • Plumbing repairs (5 to 10%) for supply and drain pipe replacement, fixture connections, and pressure testing
  • Insulation replacement (8 to 12%) including material cost and proper installation meeting R value requirements
  • Drywall and finishing (20 to 25%) covering material, hanging labor, taping and mudding, texture application, and sanding
  • Painting (10 to 15%) including primer, finish coats, and application labor for walls, ceilings, and trim
  • Trim and baseboard installation (8 to 12%) for material, custom milling if needed, installation labor, and finish work

Emergency board up costs of $200 to $800 prevent weather damage, unauthorized entry, and additional insurance claims that cost thousands more than the protection service. Securing the structure immediately after fire stops rain, snow, animals, and vandalism from causing secondary damage while you’re planning the rebuilding process.

Get at least three detailed written estimates with identical scopes of work for valid comparison. Estimates should break down labor and material costs separately, list specific products and brands, include permit and inspection fees, and provide timeline expectations. If estimates vary significantly, it often indicates different scope assumptions, not just pricing differences. Ask what’s included in each bid.

Standard payment schedules tie payments to completion milestones rather than requiring large upfront deposits. Typical payment structure: 10 percent at contract signing, 25 percent at demolition complete, 35 percent at rough in work complete (framing, electrical, plumbing), 25 percent at drywall and finishing complete, and final 5 percent at final inspection approval. Contractors requesting 50 percent or more upfront create risk that you’re funding their operating expenses rather than your project materials.

Choosing Qualified Restoration Contractors for Fire-Damaged Walls

IICRC (Institute of Inspection, Cleaning and Restoration Certification) fire damage restoration certification demonstrates that contractors have completed specialized training in fire damage assessment, smoke remediation, structural cleaning, and reconstruction methods specific to fire affected properties. General contractors without fire restoration training miss critical smoke remediation steps and health hazards.

Essential criteria for evaluating and selecting fire damage restoration contractors:

  • Proper licensing and insurance including general liability coverage, workers’ compensation, and contractor license verification through state boards
  • Fire restoration certifications (IICRC Fire and Smoke Restoration Technician) showing specialized training beyond general construction
  • References from recent fire damage projects within the last 12 months that you can contact and visit if possible
  • Detailed written estimates breaking down scope, timeline, materials, labor, and permit costs without vague “allowances”
  • Clear communication practices including assigned project manager, regular update schedule, and documented decisions
  • Warranty offerings on workmanship (typically 1 to 2 years) and explanation of what’s covered versus manufacturer warranties
  • Insurance company relationships and willingness to work with adjusters, provide required documentation, and coordinate inspections

Warning signs of unqualified contractors include pressure for immediate decisions without time to review contracts or get competing bids, requests for full payment or large deposits (over 20 percent) before work begins, reluctance to provide references or license verification, verbal estimates without written documentation, and unwillingness to discuss specific products or methods.

Written warranties protect you if restoration work fails within specified periods. Keep warranty documents with your home records and understand what’s covered: workmanship warranties cover installation failures, material warranties come from manufacturers for product defects, and some contractors offer satisfaction guarantees on specific aspects like odor removal. Get warranty terms in writing before signing contracts.

Timeline Expectations from Fire Damage to Completed Wall Restoration

Minor single room fire damage typically requires 6 to 8 weeks from initial assessment through final inspection and occupancy approval. Extensive multi room damage affecting structural systems, requiring foundation work, or involving hazardous material abatement can extend timelines to 4 to 6 months or longer.

Phase Timeline Key Milestones Inspection Requirements
Emergency Response Week 1 Property secured with board-up, initial damage assessment completed, debris removal started, temporary utilities connected if needed Fire marshal clearance, utility company approvals
Remediation Weeks 2-4 Smoke and soot removal completed, air quality testing passed, structural cleaning finished, damaged materials removed and disposed Air quality clearance, hazardous material abatement verification if applicable
Reconstruction Months 2-3 Framing and structural repairs complete, electrical and plumbing rough-in finished, insulation installed, drywall hung and finished Framing inspection, electrical rough-in, plumbing rough-in, insulation verification
Finishing Months 3-4 Painting and trim work complete, fixtures and hardware installed, final cleaning, punch list items addressed Final building inspection, electrical final, plumbing final, occupancy approval

Common delay factors include permit approval waiting periods (1 to 4 weeks depending on jurisdiction workload), material availability for specialty items like custom trim or fire rated products, inspection scheduling during busy seasons when inspectors are booked weeks out, and insurance authorization for work scope changes or upgrades discovered during demolition.

Temporary housing may be necessary during structural framing and systems work phases when the home isn’t safe or habitable. Most homeowner policies include “loss of use” or “additional living expense” coverage that pays for hotel or rental housing, meals above normal costs, and storage for belongings during the repair period. Keep all receipts and submit monthly to your insurance adjuster.

DIY Versus Professional Help for Fire-Damaged Wall Rebuilding

The EPA warns that fine particles from smoke can get deep into your lungs, causing respiratory issues, especially for children, elderly family members, and people with pre-existing conditions. Smoke remediation requires specialized equipment including HEPA filtration, negative air pressure systems, and personal protective equipment that homeowners don’t typically own. The health risks make this professional work, not a DIY project.

Tasks that require professional contractors, not DIY approaches:

  • Structural assessment of load bearing walls, framing integrity, and foundation damage requires engineering expertise to identify hidden failures
  • Electrical wiring inspection and repair in fire damaged areas must be performed by licensed electricians who can identify heat damaged insulation
  • Smoke remediation including HEPA air scrubbing, thermal fogging, and ozone treatment requires specialized equipment and training
  • Load bearing wall framing repairs affect your home’s structural stability and must meet code requirements verified by inspection
  • Insulation installation in fire damaged areas must achieve proper R value, vapor barrier placement, and clearance before wall closure
  • Code compliance verification throughout the process ensures work meets current standards and passes required inspections

Painting and trim installation may be DIY appropriate for experienced homeowners after professionals complete structural repairs, systems work, smoke remediation, and drywall finishing. You can save labor costs on finish work if you have the skills, time, and tools. Wait until all inspections pass and you have written clearance before starting DIY finish work.

DIY electrical work in fire damaged areas creates serious safety risks including shock hazards, fire risks from improper connections, and code violations that affect insurance coverage and home sale. Even if you have electrical experience, heat damaged wiring behaves differently than new installation, and inspectors won’t approve DIY work without proper licensing.

Preventing Future Fire Damage and Upgrading Home Safety Systems

Rebuilding offers a cost effective opportunity

Final Words

Rebuilding interior walls after fire requires coordinated phases: safety assessment, smoke remediation, structural framing, systems inspection, fire-rated materials, insulation, drywall, and finish work.

Each phase builds on the one before. Skip proper smoke sealing, and odors return. Rush framing inspection, and you’ll fail code review later.

Work with qualified contractors who understand fire damage restoration, not just general remodeling. Get permits, follow inspection schedules, and use this as a chance to upgrade fire resistance.

Your home will be safe, structurally sound, and finished right.

FAQ

Does insurance rebuild a house after a fire?

Insurance typically covers fire damage repairs including wall rebuilding, but coverage depends on your policy terms, damage extent, and deductible amounts. Most policies pay for structural repairs, smoke remediation, and restoration to pre-loss condition after you meet your deductible. Your insurance will send an adjuster to assess damage, create a repair scope, and authorize work based on your coverage limits.

What is the 30/30/30 rule for fire?

The 30/30/30 rule for fire safety recommends maintaining 30 feet of defensible space around structures, using 30-minute fire-rated building materials, and ensuring 30-minute emergency response capability. This guideline helps protect homes in wildfire-prone areas by creating fuel breaks, slowing fire spread through resistant materials, and allowing time for evacuation or firefighter response.

What is salvageable from a house fire?

Salvageable items from house fires include undamaged solid wood trim, uncharred structural framing members, intact electrical fixtures in unaffected areas, and non-porous materials cleaned of smoke residue. Fire-exposed drywall, insulation, charred wood framing, smoke-contaminated porous materials, and heat-damaged wiring typically require complete replacement regardless of appearance.

What neutralizes smoke smell after a fire?

Shellac-based primer sealers neutralize smoke smell after fire by creating an impermeable barrier that traps odor molecules in porous surfaces like drywall and wood. Professional smoke remediation uses HEPA air scrubbers, thermal fogging, ozone treatments, and chemical neutralizers before applying odor-sealing primers. Multiple cleaning cycles and primer coats prevent trapped smoke odors from returning through new paint.

Electrical Fire Hazards in Older Homes: Critical Warning Signs

0

Think an older house is harmless just because the lights still come on?
Outdated wiring, loose connections, and undersized panels can overheat over years until they spark, sometimes first as a faint burning smell, a warm outlet, or breakers that trip more often.
If you live in a home built decades ago, these quiet failures are the most common electrical fire hazards.
This post lays out the critical warning signs, what each sign likely means, and the practical steps to stop further damage and get the right repairs.

Identifying the Most Common Electrical Fire Risks in Aging Homes

5cXZIV1FRx-OcczNUqJkcA

The average U.S. home is over 37 years old. That means the electrical system inside was designed decades before smart TVs, laptops, phone chargers, microwaves, and air fryers became everyday loads. Aging electrical systems were never built to handle what we ask of them today. As components age, insulation breaks down, connections loosen, metal corrodes. These changes happen slowly, out of sight, until something fails. When that happens, you’re looking at heat, smoke, or fire.

Electrical fire hazards in older homes fall into a few broad categories. Outdated wiring types lack the grounding and insulation modern codes require. Circuits designed for light bulbs and radios now power coffee makers, hair dryers, and home offices. Panels and fuse boxes deteriorate from heat and humidity. Outlets installed before grounding was standard leave appliances and people vulnerable. Overloaded circuits try to carry more current than they were rated for, and the wiring inside walls gets hot enough to ignite surrounding materials.

These hazards don’t always announce themselves. Sometimes the first sign is a faint burning smell near an outlet. Other times it’s an outlet that feels warm when you unplug something. Breakers that trip more often than they used to. Lights that flicker when the refrigerator kicks on. These aren’t small inconveniences. They’re the electrical system trying to tell you it can’t keep up and something inside is starting to fail.

Understanding Hidden Wiring Defects and Fire Triggers in Older Electrical Systems

BcAwB_L0Rri-9HvO_zHLBw

The most dangerous electrical fire hazards in older homes are the ones you can’t see. Knob and tube wiring dangers start behind plaster walls and above ceilings, where cloth or rubber insulation has turned brittle over decades. Aluminum branch circuit wiring risk hides inside junction boxes and behind switch plates, where connections have expanded and contracted thousands of times until they no longer make solid contact. Deteriorating insulation problems worsen when old wiring gets buried under new attic insulation, trapping heat that accelerates breakdown. These defects don’t show up during a walk through. They wait.

Common hidden wiring defects include:

  • Loose or corroded wire splices inside concealed junction boxes
  • Brittle insulation that cracks and exposes bare copper conductors
  • Ungrounded wiring runs that lack a safe path for fault current
  • Junction boxes buried under insulation or drywall, making future inspection impossible
  • Live wires in contact with wood framing or combustible insulation
  • Corroded aluminum conductors at switch and outlet terminals

Attic wiring risks and crawlspace electrical hazards are especially serious because those areas see temperature extremes, moisture from roof leaks or ground vapor, and rodent activity. Squirrels chew through insulation. Mice nest on top of junction boxes. Humidity corrodes terminals. Heat from poorly ventilated attics bakes old insulation until it crumbles. If a previous homeowner ran an extension cord through the attic and stapled it to a rafter, that’s a fire waiting for the right conditions. If someone spliced in an extra circuit twenty years ago without a proper box, the connection is probably loose by now, arcing every time the circuit energizes.

Overloaded Circuits and Unsafe Power Distribution in Older Houses

sNUfEA9VQoed-bGSvB87Kg

Older homes were wired with the assumption that each room might have a lamp, a clock, maybe a radio. Circuits were sized for that. Now the same bedroom has a TV, a laptop charger, a phone charger, a fan, and a space heater all plugged in at once. When the total load exceeds what the circuit can safely carry, the wire heats up. Overloaded circuits causes include adding high draw appliances to shared circuits, running too many devices from a single outlet, and using power strips as permanent solutions instead of temporary ones.

Common mistakes make the problem worse. Extension cord misuse hazards appear when people run a heavy duty appliance like a window AC unit or a portable heater on a lightweight cord meant for a lamp. The cord gets warm, then hot, and eventually the insulation starts to melt. Overloaded power strips happen when one six outlet strip feeds another, then another, until ten devices share a single 15 amp circuit. Appliance load assessment almost never happens, so nobody realizes the microwave, toaster, and coffee maker on the same counter are all on the same circuit.

Warning Sign Possible Cause
Breaker trips when you plug in a space heater Circuit is already near capacity; heater pushes it over the limit
Lights dim when the microwave runs Shared circuit is overloaded; voltage drop occurs under heavy load
Outlet feels warm after use Loose connection or sustained overcurrent heating the receptacle
Power strip or extension cord is hot to the touch Too much current flowing through undersized conductors
Burning smell near an outlet or appliance Overheating wire insulation or melting plastic inside the outlet box

Outdated Panels, Fuse Boxes, and Improper Circuit Protection

nfaleewsQEqgWW-cRAE7gA

Outdated fuse boxes were standard in homes built before the 1960s. A fuse is a one time device. When it blows, you unscrew it and replace it. The problem is that fuses are easy to bypass. Homeowners who got tired of replacing blown fuses sometimes installed a higher rated fuse to stop the trips. That eliminates the safety margin. If a 15 amp circuit is protected by a 30 amp fuse, the wiring can overheat long before the fuse blows. The wire becomes the weak point, and when it gets hot enough, it ignites whatever is nearby.

Antiquated circuit breakers in aging panels suffer from corrosion, loose bus connections, and worn contact points. Electrical panel replacement becomes necessary when breakers no longer trip reliably, when the panel buzzes under load, or when rust and heat discoloration appear on the interior. A panel that was adequate in 1975 is often undersized today. Adding circuits for modern appliances isn’t possible if the panel is already full, and attempting to double tap breakers, connecting two wires to one breaker terminal, creates a fire hazard.

Signs need for panel upgrade include breakers that trip frequently even after redistributing loads, a panel that feels warm to the touch, intermittent power losses in parts of the house, and a burning smell near the panel. If the panel still uses screw in fuses, replacement is overdue. If breakers won’t reset or won’t stay in the on position, internal components have failed. Breaker type identification matters because some older panels used breakers that are no longer manufactured, and replacement parts may not meet current safety standards. Homes with Federal Pacific or Zinsco panels have documented failure rates high enough that full panel replacement is recommended even if the panel appears to function.

Missing Grounding, GFCI, and AFCI Protection in Aging Homes

yT3YZkfBRtudcxt83DnIzw

Lack of ground fault protection and absence of arc fault devices are common in homes built before the 1980s. Ungrounded outlets, those with only two slots instead of three, offer no path for fault current to safely return to the panel. If a hot wire touches a metal appliance case, the case becomes energized. Without grounding, the breaker won’t trip, and anyone who touches the appliance gets shocked. GFCI retrofit solutions and AFCI retrofit solutions are available for older homes, but many homeowners don’t realize these devices exist or why they matter.

Grounding provides a low resistance path that helps breakers trip during a fault. GFCIs detect tiny imbalances in current. When more current flows out on the hot wire than returns on the neutral, they shut off power in milliseconds to prevent electrocution. AFCIs monitor the circuit for the distinct electrical signature of arcing, which happens when a wire is damaged or a connection is loose, and they cut power before the arc ignites surrounding material.

High risk areas that often lack proper protection include:

  • Kitchens, especially countertop outlets near sinks and wet surfaces
  • Bathrooms, where water and electricity are in close proximity
  • Basements and crawlspaces with exposed wiring and moisture
  • Bedrooms and living areas that need AFCI protection to detect hidden arcing faults

Retrofitting grounding, GFCIs, and AFCIs significantly reduces electrical fire risk and shock hazards. Adding a GFCI outlet to an ungrounded circuit still provides ground fault protection even without a grounding conductor. Installing AFCI breakers in the panel protects entire circuits from arc faults. Both upgrades are code required in new construction for good reason. They stop the majority of electrical injuries and fires before they happen.

Recognizing Warning Signs of Imminent Electrical Failure

vqIcr1DaTt6ZtCR5ZzaUfQ

Most electrical failures give warning before they escalate to fire or serious shock. Hot outlets diagnosis starts with touch. If an outlet faceplate is warm or hot when nothing is plugged in, or if it heats up quickly when you plug something in, a loose connection or overloaded circuit is generating heat inside the box. Flickering lights causes range from loose bulbs to failing fixtures, but when flickering happens across multiple rooms or worsens when appliances cycle on, the problem is upstream. At the panel, at a junction, or in the service connection.

The most dangerous symptoms that demand immediate attention include:

  • Outlets or switches that feel warm or hot to the touch, even when not in use
  • Discoloration, melting, or charred areas on outlet covers or switch plates
  • Burning odor electrical, sometimes described as a hot plastic smell or an ozone like sharpness, near outlets, switches, or the panel
  • Visible arcing symptoms such as sparks, flashes, or popping sounds when plugging in or unplugging devices
  • Frequent breaker trips that happen without an obvious cause or that reset and trip again immediately
  • Buzzing, humming, or sizzling sounds from outlets, switches, the electrical panel, or inside walls
  • Tingling sensation when touching an appliance, faucet, or metal fixture

If you see charred receptacle signs like blackening around the slots, melted plastic, or scorch marks on the wall, that outlet has already overheated. It may have stopped working, or it may still function while remaining a fire hazard. Burning odor electrical should never be ignored. That smell means insulation is degrading or plastic components are melting. The faster you shut off power to that circuit and call a licensed electrician, the better your chances of stopping a fire before it starts.

When to Call a Licensed Electrician for Older Home Electrical Hazards

PHU2Cvt3SZaV5eWfp-dVog

A licensed electrician should be your first call whenever you discover knob and tube wiring, aluminum branch circuit wiring, warm outlets, burning smells, persistent breaker trips, or any evidence of amateur wiring from past DIY projects. Licensed electrician hire tips include verifying the contractor holds an active state license, carries liability insurance, and can provide references from similar older home projects. Rewiring older houses is specialized work. Experience with historic wiring types, concealed junction access, and code compliant retrofits matters.

Before hiring, ask these five questions:

  1. Are you licensed and insured to perform residential electrical work in this city?
  2. Have you worked on homes with knob and tube or aluminum wiring before, and what was your approach?
  3. Can you provide a written estimate that breaks down labor, materials, and permit costs?
  4. Will you pull permits and schedule inspections, or is that my responsibility?
  5. What is your timeline for completing the work, and how will you minimize disruption?

Periodic professional inspections are recommended every three to five years for older homes, especially if you’ve noticed any warning signs or if the home has changed ownership. An electrician estimate questions session should cover not just the immediate repair but also a broader assessment of panel capacity, grounding status, GFCI and AFCI coverage, and overall system condition. Many serious hazards like concealed junction boxes, deteriorating attic wiring, or loose panel connections only show up during a thorough inspection. Catching them early means you can plan and budget for staged upgrades instead of facing an emergency service call when something fails at the worst possible time.

Practical Upgrade Options to Reduce Electrical Fire Hazards

VgN7vOFxS7ihIe3tU_0Oxg

Electrical panel replacement is often the first major upgrade because a modern panel with adequate amperage and working breakers is the foundation for everything else. Rewiring older houses with modern copper conductors eliminates knob and tube wiring dangers and aluminum branch circuit wiring risk at the source. Pigtailing aluminum wiring, connecting short copper jumpers to aluminum conductors using approved connectors and anti oxidant paste, can be a lower cost alternative to full rewiring when the aluminum wire itself is in good condition. Staged electrical upgrades let homeowners prioritize the most dangerous areas first, then tackle additional circuits and rooms over time as budget allows.

Upgrade Type Primary Safety Benefit
Replace knob and tube or aluminum wiring with copper Eliminates deteriorated insulation, adds grounding, supports modern loads
Install GFCI outlets in kitchens, bathrooms, basements Prevents electrocution from ground faults in wet locations
Add AFCI breakers to bedroom and living area circuits Detects and stops dangerous arcing before it ignites a fire
Upgrade electrical panel to modern breaker box with higher amperage Provides reliable overcurrent protection and capacity for new circuits
Add grounded three prong outlets throughout the home Protects people and equipment from shock and surge damage
Install dedicated circuits for high draw appliances Prevents overloaded circuits and reduces risk of overheating

Low cost safety improvements include replacing any two prong outlets in wet areas with GFCI outlets, even if the circuit remains ungrounded, because GFCI protection still prevents shock. Adding a few additional outlets in rooms that rely heavily on extension cords reduces the temptation to overload a single receptacle. Hiring an electrician to inspect and tighten connections at the panel and at high use outlets can eliminate loose connections before they overheat. Not every older home needs a complete rewire immediately, but every older home benefits from a clear priority list that addresses the highest risk hazards first and builds toward full code compliance over time.

Final Words

If you smell burning or notice a hot outlet, this post walked you through why aging wiring, hidden defects, overloaded circuits, and outdated panels raise fire risk. We covered the common warning signs, hidden wiring problems, when to call a licensed electrician, and practical upgrades like GFCI/AFCI, panel replacement, and staged rewiring.

Take action early: document issues, get an inspection, and make targeted upgrades to reduce electrical fire hazards in older homes. Small steps now make repairs simpler and your home safer.

FAQ

Q: What makes older homes more prone to electrical fires?

A: Older homes are more prone to electrical fires because wiring ages, insulation breaks down, and panels or two‑prong outlets often lack modern grounding and capacity, increasing overheating and failure risk.

Q: What are the most common electrical hazards in aging homes?

A: The most common electrical hazards in aging homes are outdated wiring and panels, degraded insulation, overloaded circuits, inadequate grounding, and improper DIY splices that raise heat and fire risk.

Q: What hidden wiring defects should I look for in older homes?

A: Hidden wiring defects to watch for include loose splices, corroded conductors, brittle insulation, ungrounded runs, inaccessible junction boxes, and wires buried under insulation in attics or walls.

Q: What warning signs mean imminent electrical failure?

A: Warning signs of imminent electrical failure include warm or hot outlets, burning or ozone smells, flickering lights, visible sparking, charred receptacles, buzzing panels, and frequent breaker trips.

Q: What should I do right away if I smell burning or find a hot outlet?

A: If you smell burning or find a hot outlet, shut off the affected circuit if safe, stop using it, unplug devices, keep people away, and call a licensed electrician immediately.

Q: When should I call a licensed electrician for older‑home electrical hazards?

A: Call a licensed electrician whenever you find outdated wiring, hot outlets, burning odors, persistent breaker trips, evidence of DIY wiring, or before moving in or renovating an older home.

Q: How often should older homes get electrical inspections?

A: Homes older than about 30 years should get inspections every 3–5 years, and you should schedule one before buying, after major storms, or when any warning signs appear.

Q: What upgrades reduce electrical fire risk in older houses?

A: Effective upgrades include staged or full rewiring, panel replacement, adding grounded outlets, and installing GFCI and AFCI protection to prevent shocks and arc‑related fires.

Q: Are DIY electrical fixes safe in older homes?

A: DIY electrical fixes in older homes are usually not safe; hidden defects, aluminum or knob‑and‑tube wiring, and poor splices need a trained, licensed electrician to diagnose and repair.

Q: How do overloaded circuits cause fires and how can I spot misuse?

A: Overloaded circuits cause overheating and possible fires when modern appliances exceed old circuit ratings; spot misuse by flickering lights, frequent trips, hot outlets, and heavy reliance on power strips or extension cords.

Q: When does a fuse box or breaker panel need replacement?

A: A fuse box or breaker panel needs replacement when you see rust, buzzing, repeated trips, blown fuses replaced with higher ratings, or the panel can’t handle modern electrical loads.

Q: What is the benefit of adding GFCI and AFCI protection?

A: Adding GFCIs and AFCIs reduces electrical risk: GFCIs shut off during ground faults in wet areas, and AFCIs detect dangerous arcing and cut power before an arc can start a fire.

Diy Guide For Cleaning Smoke Damaged Contents: Revive

0

Ever wondered if you could salvage your belongings after a fire on your own? I'm sorry this happened, and we know it can be overwhelming. In this guide, we show you clear, step-by-step actions to help you revive smoke-damaged items at home.

Here’s how to get started:

  1. Check each room thoroughly. Look for visible damage, soot, and residue.
  2. Sort your items. Set aside things that need extra care from those that can be cleaned easily.
  3. Take clear photos. Snap before-and-after pictures to track your progress and help with insurance claims.
  4. Protect yourself. Use a mask and ensure good airflow (open windows or use a fan) to keep the air clean while you work.

With these simple steps, you can take charge of cleanup and start bringing your treasured items back to life. We’re here to help you get back to a safe, livable home.

Step 1 – Assessing Smoke Damage on Belongings

Start by carefully looking over every part of the affected area. Walk through each room and check sofas, chairs, walls, and air vents for any black residue. Use a flashlight to peek into corners and other dark spots where soot might hide. Spotting small traces now can help avoid bigger problems later.

Next, sort items into two groups: those that soak up smoke and odors (like fabrics and carpets) and those that only show a surface stain (like wood and metal). Write down each item's material and condition. This helps you decide if an item needs a deep clean or professional help.

Finally, take clear photos of all the damage. Capture each room and every item with visible soot. Add labels with the location and a short note about what you see. These pictures will help track the cleanup and can be useful when you file an insurance claim.

Step 2 – Protective Equipment and Ventilation Essentials for Smoke Cleanup

img-1.jpg

Start your cleanup by putting on the right safety gear. Wear an N95 or P100 mask (a face covering that traps tiny, harmful soot particles), nitrile gloves (protective gloves that keep harmful substances off your skin), and safety goggles (to shield your eyes from falling debris). This gear acts like a barrier against unseen dangers in the smoke.

Next, open all your windows and doors to let fresh air in. Use fans to push contaminated air outside. This helps clear the air faster and reduces the chance of inhaling any lingering soot.

Before you turn your HVAC system back on, clean or replace your furnace and A/C filters. These filters trap soot, and cleaning them stops particles from recirculating through your home. Taking this simple step keeps your indoor air safer and fresher as you continue cleaning.

Step 3 – Removing Loose Soot and Ash from Surfaces

Begin by using dry removal methods. Use a dry chemical sponge or a HEPA-filter vacuum (an air-moving tool that traps tiny soot particles) to lift the loose soot without spreading it. Work from the top down, start with high areas like walls and cabinets so that the soot doesn't fall onto surfaces you have already cleaned.

A homeowner shared, "I used a dry sponge first, gently dabbing the soot off the top shelf to keep it from running down." This method clears away ash and soot particles, setting the scene for a deeper clean.

Next, move to the wet cleaning step. Mix warm water with a small amount of mild detergent. Use a microfiber cloth (a cloth made from tiny fibers designed to pick up particles) to wipe down hard surfaces gently. Be careful not to soak porous materials such as wood or fabric, as too much liquid can cause staining or warping. One homeowner tip was to dampen the cloth just enough to remove the stubborn soot without saturating the surface. This careful approach helps protect your materials while getting rid of any remaining soot.

Step 4 – Cleaning Techniques for Different Materials

img-2.jpg

Hard Surfaces

For hard surfaces such as tile, glass, and countertops, start by using a dry cleaning sponge to lift loose soot gently. Next, wipe the area with a damp cloth soaked in warm water mixed with a little mild detergent. Always test a small, hidden spot first to ensure nothing gets damaged. One homeowner noted that testing helped prevent any discoloration.

Fabrics and Upholstery

Begin by vacuuming your fabrics and upholstery with a HEPA filter vacuum (a type of vacuum that traps tiny particles) to remove as much dust and soot as possible. Then, try an upholstery shampoo or sprinkle a bit of baking soda on a small area as a test. Gently dab the spot to lift the embedded particles while keeping the fabric safe from too much moisture.

Electronics

Before cleaning electronics, make sure the device is completely turned off to prevent any risk of short circuits. Use a dry cleaning sponge to carefully remove surface soot, and then use compressed air (a tool that blows air forcefully) to clear out any remaining particles. Never use liquids on electronics, as they can damage the sensitive circuits. One device owner shared, "I kept my smartphone dry and simply used a sponge and a bit of air."

Paper-Based Items

For paper items like documents and photographs, use a soft, archival-grade brush to gently remove light soot. Brush lightly so you don't smear the surface. Handle these items carefully to maintain their quality while removing any soot present.

Step 5 – Odor Elimination Strategies for Smoke-Damaged Contents

If your home has smoke damage, you can use simple steps to clear unwanted odors. A popular trick is to sprinkle baking soda on fabrics and leave it overnight. Baking soda (a natural odor absorber) helps pull out stubborn smoke smells without harsh chemicals. You can also spray white vinegar (a natural cleaner) around the room. This helps break down burnt scents and freshen the space. Many homeowners use these methods for quick, temporary relief from smoke odors.

These home solutions work well, but you might need extra measures for a full clean-up. Using an air purifier with a carbon or HEPA filter (machine that catches tiny particles) can improve your indoor air. In tougher cases where odors stick around, professional treatment could be needed.

Here are some steps and tools you might use:

  • Baking soda on fabrics left overnight to absorb odors.
  • Activated charcoal in open containers to catch airborne particles.
  • White vinegar sprayed in rooms to break down smoke smells.
  • Portable air purifiers with carbon or HEPA filters for cleaner air.
  • Professional thermal fogging or chlorine dioxide gas treatments for deep removal of smoke residues.

Step 6 – Tackling Stubborn Smoke Stains and Residue Buildup

img-3.jpg

First, check what kind of soot you have. Sometimes, the soot is oil-based and leaves behind a sticky, tar-like film on walls or other surfaces. Knowing if the soot is oil-based, dry, or a mix helps us decide the best cleaning approach. One homeowner shared that noticing the oily feel changed their cleaning method completely.

Next, pick the right cleaner for each type of residue. For oil-based soot, use a degreaser (a cleaner that breaks down grease) sparingly. Always follow the instructions on the container and test a small hidden spot first. One tip we heard was, "Start with a tiny bit to see how the surface reacts."

Then, scrub safely based on the surface you are cleaning. Use a dry-cleaning sponge to lift tar-like marks off walls. On smooth surfaces like metal or ceramic, a mild abrasive pad works well to scrub off hardened residue. After you clean, grab a clean cloth to wipe away any remaining chemicals. Always test your method on a small area first to ensure it is safe before cleaning larger spots.

Step 7 – Restoring Furniture and Valuables After Smoke Exposure

Start with your wood furniture. Take apart pieces if you can so you expose joints and hidden areas where soot might hide. Wipe down all surfaces using a grease-cutting cleaner (a cleaner that breaks down oils and residues). Next, apply a seal-primer before you refinish. One homeowner shared that taking apart their dining table helped reveal spots that were missed before. This process not only removes the soot but also stops it from breaking down the wood fibers.

For fabric items like upholstered chairs, begin with a thorough vacuum using a HEPA filter (an air filter that traps tiny particles like mold and soot). Then, clean the fabric with a gentle steam treatment or fabric shampoo to lift out embedded particles. Remember, too much moisture can harm some materials.

For precious items such as jewelry, porcelain, or metal heirlooms, using a professional ultrasonic bath can be the safest approach. This machine uses sound waves in water to gently remove soot without causing damage. Review each piece carefully based on its material and value before cleaning it yourself. Take your time with every item to avoid causing further harm.

  • After cleaning, treat wood items by applying a polish or sealant recommended for smoky residues.
  • For upholstered pieces, use a fabric refresher to neutralize any lingering odors.
  • Dry delicate items in a well-ventilated area to prevent moisture buildup.

Step 8 – When to Call Professionals and Avoid DIY Pitfalls

img-4.jpg

Sometimes homeowners try to clean up serious smoke damage by themselves. However, DIY fixes can end up making the damage worse. For example, using too much water on items that soak up liquids or skipping essential safety gear like masks and gloves can spread harmful soot and chemicals instead of containing them. Even if small soot spots seem manageable, hidden deposits in vents or on walls may be missed. This can leave behind stubborn smells or cause further damage.

When smoke damage covers large areas or the smell persists after a few cleaning attempts, it’s time to call in professionals. If you see signs of contamination on structural elements or soot deeply embedded in walls and ducts, expert help is needed. Skilled technicians use special foggers (machines that disperse cleaning solution as a fine mist) and sealed cleaning methods that reach areas regular tools cannot. Relying on professionals makes sure the cleanup is complete, protecting your health and preserving your home.

Final Words

In the action, we worked through assessing smoke damage, using protective equipment, removing soot and ash, and handling specific materials with care. We shared clear techniques to rid your property of lingering odors and stubborn residues. We also explained when it’s best to call in professionals to protect your belongings and health.

Keep this DIY guide for cleaning smoke damaged contents handy for future challenges. Stay safe, and remember that every step counts in getting your home back to a livable space.

FAQ

How can I clean smoke damaged contents using a DIY approach?

Cleaning smoke damage yourself is doable. Start by assessing each item’s condition, use proper protective gear like N95 masks and gloves, and gently remove soot with dry sponges or HEPA vacuums and approved cleaning solutions.

How do you clean smoke damage on walls and ceilings?

Cleaning smoke damage on walls and ceilings starts with dry removal using chemical sponges or HEPA vacuums to lift loose soot. Follow with a mild detergent solution and avoid over-wetting porous surfaces.

What smoke damage cleaning products can I use, including options from Home Depot?

Home improvement stores offer cleaning products such as chemical sponges, HEPA vacuums, and mild detergent solutions. These items help lift soot, neutralize odors, and are designed for safe, effective smoke damage cleanup.

What should be thrown away after smoke damage?

Items that are deeply saturated with soot or emit strong smoke odors should be discarded. This often includes certain fabrics, paper goods, and electronics that may retain harmful residues and persistent odors.

How do I clean after fire smoke damage effectively?

After fire smoke damage, begin with a thorough inspection, then carefully remove loose soot using appropriate tools. Next, clean surfaces with a mild detergent and address lingering odors using household remedies like baking soda or vinegar mist.

How much does smoke damage cleaning cost?

The cost of cleaning smoke damage varies greatly. DIY methods are usually less expensive, while professional services cost more depending on the extent of damage, area size, and required specialized treatments.

What is the best product to clean smoke damage?

The best approach uses a combination of protective gear, a chemical or dry-cleaning sponge for soot removal, and a mild detergent solution to clean surfaces without spreading residues further.

What does Servpro use to remove smoke smell?

Servpro uses specialized cleaning agents and techniques such as thermal fogging. These methods deeply penetrate materials to neutralize embedded odors and remove smoke smells from affected areas.

Can smoke damaged furniture be saved?

Smoke damaged furniture can often be restored. Using HEPA-filter vacuuming, steam cleaning, or professional upholstery treatments may save your furniture if the damage is not too severe.

Flood Damage Restoration Process: Steps to Recovery

When floodwater invades your home, you’ve got about 24 to 48 hours before minor damage turns into a structural nightmare. Every hour counts because water doesn’t just sit there. It migrates through walls, soaks into subflooring, and creates conditions for mold growth that starts faster than most homeowners realize. Flood damage restoration isn’t a single task you check off a list. It’s a carefully sequenced process where professionals extract standing water, dry hidden moisture, disinfect contaminated surfaces, and rebuild damaged areas in the right order so your home is actually safe and dry, not just surface-level presentable.

What Happens During Flood Damage Restoration: Step-by-Step Overview

pPQmeKEcSRWwWiYop0PGvA

Flood damage restoration isn’t just mopping up and hoping for the best. It’s a coordinated process where each phase builds toward getting your property back to normal. You can’t skip steps or rush through them without risking problems down the road. Here’s what actually happens when professionals tackle water that shouldn’t be in your house.

Certified techs show up and figure out what they’re dealing with using moisture meters and infrared cameras that see what you can’t. Then they pull out standing water with industrial pumps and vacuums that handle way more volume than anything you’d rent at a hardware store. After extraction comes the drying phase, where air movers and commercial dehumidifiers work around the clock to pull moisture from walls, floors, and ceiling cavities. Once things are dry, pros sanitize and disinfect everything because floodwater carries contamination you don’t want sticking around. Then comes the repair work, replacing damaged drywall, insulation, flooring, and anything else that didn’t survive. Finally, technicians verify complete drying with another round of measurements to confirm it’s actually safe.

Timeline depends on how bad things got. Minor flooding might wrap up in a few days. Extensive water intrusion can stretch into several weeks. The longer water sits, the worse it gets for your subflooring, wall cavities, and structural supports. Fast professional response stops that progression and shuts down mold before it even starts.

Emergency Response and Initial Contact Steps

1-oLR1LMTZuERWqb2GJORg

When flooding happens, you’ve got a short window to prevent disaster from getting worse.

First, make sure it’s safe. Evacuate if you need to and stay clear of electrical hazards. Don’t walk through standing water if outlets or appliances are underwater. If a burst pipe caused this mess and you can safely reach the main water valve, shut it off. Contact an emergency restoration company right away because the first 24 hours determine what can be saved versus what you’re replacing. Document everything with photos and video before anything moves. Insurance needs proof of water levels, affected rooms, and damaged belongings. If it’s safe, move valuables out of harm’s way. Lift furniture onto blocks, get electronics and documents to dry spots. But don’t start major cleanup before professionals assess the situation. Hidden moisture and contamination need specialized detection and treatment.

Emergency restoration companies answer calls 24/7 and typically show up within hours. Speed matters because water doesn’t wait. It migrates through porous materials fast, spreading damage to areas that seemed fine at first. The sooner pros get eyes on your situation, the more they can salvage.

Emergency work starts the moment crews arrive. They’ll handle temporary repairs like boarding up broken windows or damaged walls. If your roof took a hit, they’ll install tarps to stop additional water from getting in while restoration happens. When flooding is severe or sewage got involved, teams provide content pack out services, safely removing and storing your stuff in a controlled environment until your home is ready. These stabilization steps halt further damage while the complete repair plan gets rolling, especially critical when flooding came from severe weather that compromised your home’s exterior.

Emergency Assessment and Damage Inspection Phase

VZasrsIWRXqflRGte-L8aA

Certified technicians arrive quickly to evaluate what you’re dealing with, starting with visible flooding and then investigating spots you can’t easily check. They examine wall cavities, subflooring beneath carpets, insulation inside walls, and the underside of cabinetry. This thorough look identifies all affected areas, including moisture that’s already traveled away from where the flood started.

The inspection goes way beyond what you can see. Professionals use advanced detection tools because moisture hides in places that look and feel dry on the surface. Walls might appear fine while the interior cavity holds trapped water. Flooring could seem solid while the subfloor underneath has absorbed enough moisture to support mold growth within days.

Assessment relies on moisture meters that measure saturation in building materials like drywall, wood framing, and concrete. Infrared cameras detect hidden water pockets behind walls and under flooring. Thermal imaging reveals moisture related temperature variations that indicate active water intrusion. Visual inspection catches structural damage to walls, floors, ceilings, and load bearing components. Documentation photography supports insurance claims, showing moisture readings and affected areas.

Water categorization determines the entire restoration approach. Clean water comes from supply lines or rainwater and poses minimal contamination risk. Gray water contains some contaminants from sources like washing machines, dishwashers, or toilet overflow without feces. Black water is heavily contaminated from sewage backup, groundwater intrusion, or floodwater that contacted soil and debris. Each category requires different safety precautions, protective equipment, and disposal methods for affected materials.

Standing Water Removal and Extraction Methods

grGNg60aTaS_wF-1fnXP4Q

Restoration companies deploy industrial pumps for large water volumes in flooded basements and ground floor areas where water depth exceeds an inch. These high powered pumps move hundreds of gallons per minute, dramatically reducing standing water within the first few hours. For smaller volumes or areas where large pumps can’t reach, technicians use truck mounted and portable wet vacuums that extract water from corners, closets, and between furniture.

After removing visible standing water, weighted extractors and sub surface extraction tools pull moisture from deep within carpets, padding, and upholstered furniture. These specialized tools apply pressure while vacuuming, forcing water up from materials that would otherwise stay saturated for days. Carpet padding typically can’t be saved after flooding because it acts like a sponge, holding contaminated water against your subflooring where it causes damage and supports microbial growth.

Rapid water removal prevents electrical hazards, reduces structural damage, and stops mold growth before it begins. Every hour that standing water remains increases the severity of damage. Drywall wicks water upward, wood framing absorbs moisture and begins to swell, and subflooring starts to come apart. The longer water sits, the more materials get removed and replaced rather than dried and saved. Extraction continues until moisture meters confirm no standing water remains and saturation levels have dropped to where structural drying equipment can complete the job. This thoroughness makes the difference between successful restoration and a property with hidden moisture that causes problems months later.

Structural Drying and Dehumidification Techniques

zdTozfkGTUeZ1BQWm0o_4A

Industrial dehumidifiers extract moisture from the air while high velocity air movers create circulation patterns that speed up evaporation from building materials. This combination pulls water from deep within walls, floors, and ceilings where it’s migrated beyond the surface. Air movers get positioned strategically to target affected structural layers, creating controlled airflow that moves warm, dry air across wet surfaces while pulling humid air away.

Wall cavity drying requires specialized techniques. Technicians may drill small inspection holes to introduce air movement inside walls, making sure moisture doesn’t remain trapped between studs where it would eventually cause mold growth and wood rot. Floor drying systems direct airflow under hardwood or tile to dry the subfloor without removing the finished surface, when possible.

Drying equipment includes industrial dehumidifiers for extracting airborne moisture and maintaining low humidity levels. High velocity air movers increase air circulation and create evaporation at material surfaces. Specialized meters monitor moisture and humidity levels in real time throughout the space. Infrared cameras verify complete drying in hidden areas like wall cavities and under flooring.

Technicians continuously monitor humidity and moisture levels with specialized meters, checking readings multiple times daily during active drying. They adjust equipment placement and intensity based on these measurements, moving air movers to target areas that aren’t drying as quickly or adding dehumidifiers if humidity levels remain too high. The goal is humidity below 60% and moisture content in building materials returning to normal levels, typically 12 to 15% for wood products.

Complete drying usually takes three to five days for moderate flooding, longer for extensive water intrusion or humid weather conditions that slow evaporation. Even minor moisture left behind can lead to long term structural damage or mold growth posing serious health and safety risks. Professionals verify complete drying with moisture meters before proceeding to repairs, making sure every affected material has returned to acceptable moisture levels. This verification step prevents the common DIY mistake of covering up damp materials with new drywall or flooring, which traps moisture and guarantees future problems.

Cleaning, Sanitization, and Disinfection Procedures

dM42cIgBT6ivBI3M_8ph2g

Floodwater contains dangerous contaminants requiring professional disinfection. Even water that looks relatively clean has contacted soil, building materials, and surfaces that harbor bacteria.

Contaminant Type Health Risk Treatment Method
Bacteria Gastrointestinal illness, infections, skin reactions EPA-registered disinfectants, antimicrobial treatments
Viruses Hepatitis, respiratory illness, gastroenteritis Broad-spectrum sanitizers, surface sterilization
Sewage/waste E. coli, parasites, serious infection Category 3 protocols, complete material removal
Chemicals/toxins Skin irritation, respiratory damage, long-term exposure effects Specialized cleaning agents, protective neutralization

Professionals assess which materials can be cleaned versus what must be removed and disposed of safely. Porous materials like drywall, insulation, and carpet padding that contacted category 2 or 3 water typically can’t be adequately disinfected and require removal. Non porous surfaces like tile, sealed concrete, and most hard furniture can be thoroughly cleaned and sanitized. This assessment prevents the false economy of trying to save materials that will continue harboring contaminants and causing health problems.

Antimicrobial treatments get applied to all affected surfaces, walls, and floors to prevent mold growth during and after the drying process. These treatments create an environment where mold spores can’t establish colonies even if minor moisture remains during the drying phase. Content cleaning addresses furniture, carpets, and upholstery that can be salvaged through deep cleaning and deodorization. Specialized techniques remove embedded dirt, contamination, and odors from salvageable belongings, often using controlled environments and professional cleaning equipment that produces better results than field cleaning.

Restoration, Repair, and Reconstruction Work

1huDuPZkQHa8-rI3JV7POw

Restoration scope varies from minor repairs to major reconstruction depending on damage extent and how long water remained in contact with building materials. A basement that flooded for a few hours requires different intervention than one that sat in standing water for days. Water category also determines what can be saved versus what must be removed for safety.

Common material replacements include drywall sections or entire walls when water wicked more than two feet up from the floor. Damaged insulation inside walls gets removed because it loses effectiveness when wet and can harbor mold growth. Baseboards and trim typically require replacement after flooding since they’re made from materials that swell, warp, and don’t return to their original shape even after drying. Compromised subflooring gets replaced when moisture meters show it hasn’t dried adequately or when visible warping and coming apart have occurred.

Flooring restoration varies by material type. Carpet and padding in flooded areas almost always require replacement, especially if contaminated water was involved. Hardwood floors can sometimes be saved if dried quickly and thoroughly, though cupping and crowning may develop, requiring sanding and refinishing. Tile and vinyl flooring may survive if the subfloor beneath them dried completely, but often the adhesive fails and the flooring must be removed to address subfloor damage anyway.

Finishing work makes sure repaired areas blend with existing surfaces. Technicians repaint walls and ceilings, matching existing colors and textures as closely as possible. They install new trim and baseboards, often using profiles that match what’s elsewhere in your home. Attention to detail during this phase makes the difference between repairs that stand out and restoration that fits right in with undamaged areas. Content restoration handles salvageable furniture, electronics, and belongings through specialized cleaning, repair, and when necessary, replacement. Professional restoration companies coordinate all these repairs under one plan rather than leaving you to manage separate contractors for different work.

Mold Prevention and Remediation Strategies

pfEPfY0ZRHuyliC8krnIow

Mold begins growing within 24 to 48 hours of water exposure, making speed critical throughout every phase of flood damage restoration.

Mold prevention during restoration starts with rapid water extraction within the first 24 hours. Removing standing water before mold spores activate stops growth before it starts. Immediate dehumidification to lower humidity below 60% matters because mold needs humid conditions and won’t establish colonies in properly dried environments. Continuous air circulation with air movers prevents moisture from settling on surfaces and creating mold friendly conditions. Antimicrobial treatments get applied to all affected surfaces during the cleaning phase to stop mold growth on treated materials. Ongoing moisture monitoring confirms complete drying, verifying moisture levels return to normal so mold won’t develop after equipment removal.

When mold growth is discovered during assessment or develops despite prevention efforts, mold remediation procedures begin immediately. Technicians establish containment using plastic sheeting and negative air pressure to prevent mold spores from spreading to unaffected areas. They remove affected materials that can’t be adequately cleaned, which often includes drywall, insulation, carpet, and porous building materials where mold has penetrated beyond surface level. HEPA filtration runs continuously during remediation to capture airborne spores, and after visible mold removal, verification testing confirms spore counts have returned to normal levels. This systematic approach addresses active growth while preventing cross contamination that would spread the problem throughout your property.

Restoration Timeline and What to Expect

RfS9g1cDRSeMrcOU8ySU4A

Restoration timelines vary significantly based on damage severity, property size, and the extent of structural repairs required.

Restoration Phase Typical Duration
Assessment 2 to 4 hours on initial visit
Water extraction 1 to 3 days depending on water volume
Drying/dehumidification 3 to 7 days for most properties, longer for severe flooding
Cleaning/sanitization 2 to 3 days, may overlap with drying phase
Repairs/reconstruction 1 to 4 weeks depending on extent of damage
Final inspection 1 to 2 hours for walkthrough and verification

Several factors affect timeline and explain why some restorations finish quickly while others take weeks. Extent of water damage drives duration more than any other factor. A flooded basement takes longer than a single room event. Category of water matters because contaminated water requires more extensive cleaning and material removal. Size of the affected area impacts timeline since larger spaces need more equipment and more time for thorough drying. Materials involved influence duration because some dry faster than others. Concrete and masonry hold moisture longer than wood framing. Weather conditions affect drying time since high humidity slows evaporation even with professional equipment running.

You should expect daily progress updates from the project manager or lead technician assigned to the restoration. Monitoring visits occur regularly to check moisture readings and adjust equipment placement for optimal drying. Equipment adjustments happen as conditions change, with air movers getting repositioned and dehumidifiers getting moved to target areas that need more attention. Coordination with contractors follows for any repairs requiring specialized trades like electrical work, plumbing repairs, or HVAC modifications. Completion verification happens through a final walkthrough where you see the finished restoration and receive a certificate of completion documenting the work performed and confirming your property meets industry standards for moisture levels and safety.

Cost Factors and Budget Considerations

C1SiSbAKSUiWbNoS3L5uIQ

Flood damage restoration costs vary widely based on multiple factors that interact with each other. A small area with severe contamination may cost more than a large area with clean water that got extracted quickly. Professional restoration prevents more expensive long term damage like structural failure, ongoing mold problems, and health issues that develop when contamination isn’t properly addressed. The investment in complete restoration protects your property value and keeps your family safe.

Cost Factor Impact on Total Cost
Water category/contamination level Category 3 (black water) costs significantly more due to safety protocols and disposal requirements
Square footage affected Larger areas require more equipment, labor hours, and materials
Materials requiring replacement Hardwood floors and custom finishes cost more than basic carpet and standard drywall
Extent of structural damage Load bearing wall repairs or foundation work add substantial costs
Mold remediation needs Active mold growth requires containment, removal, and verification testing
Contents restoration requirements Cleaning and restoring personal belongings adds to total project cost

Restoration companies work directly with insurance carriers, submitting detailed estimates and documentation that support your claim. Many offer payment plans for amounts not covered by insurance or for homeowners managing deductibles. The detailed estimates provided during initial assessment break down costs by phase, showing what’s needed for extraction, drying, cleaning, and repairs. This transparency helps you understand where money gets allocated and why certain steps matter. Choosing licensed, insured companies that offer warranty service protects your investment. Reputable restoration companies stand behind their work with guarantees covering both labor and materials for a specified period after completion.

When to Call Professionals vs. DIY Limitations

While minor spills may be manageable with household equipment and quick action, flood damage almost always requires professional restoration due to hidden moisture, contamination risks, and the speed at which secondary damage develops.

Call professionals immediately when water covers more than one room or exceeds 1 inch depth anywhere in your property. If the water source is contaminated, meaning sewage backup, storm water carrying debris, or groundwater intrusion, you need pros. When water has contacted electrical systems, outlets, appliances, or the main electrical panel, don’t mess around. If structural damage is visible or suspected, including sagging ceilings, warped floors, or cracking walls, get help. And when mold growth is present or likely due to water sitting for more than 24 to 48 hours, it’s beyond DIY territory.

You might handle small, clean water spills caught immediately and confined to hard, non porous surfaces. Surface level moisture with no material saturation can sometimes be managed if you act fast. Single item cleanup like a small appliance overflow that affected only the immediate area might not need a pro.

But professional restoration companies offer emergency availability with technicians on call 24/7, certified expertise in water damage restoration and structural drying, and complete restoration services that prevent costly long term damage from incomplete DIY attempts. The specialized equipment used by professionals includes truck mounted extractors, industrial dehumidifiers, thermal imaging cameras, and commercial air movers that produce results impossible to achieve with household wet dry vacuums and box fans. For extensive flooding or any contaminated water situation, professionals provide the expertise and equipment necessary to fully restore your property and prevent ongoing problems that develop when hidden moisture and contamination remain after amateur cleanup attempts.

Insurance Claims and Documentation Requirements

Most homeowner policies cover certain flood damage restoration, but coverage varies by cause and policy type. Water damage from burst pipes, appliance malfunctions, and sudden internal flooding typically falls under standard homeowner policies. Flooding from external sources like rising rivers, storm surge, or groundwater intrusion usually requires separate flood insurance. Understanding your coverage before disaster strikes helps you know what to expect when filing claims.

Professional restoration companies assist with claims by providing detailed documentation, comprehensive damage assessments, and restoration plans that show what work is necessary and why. They communicate directly with insurance adjusters, often walking them through the property to explain findings and restoration scope. This expertise helps move claims forward because adjusters understand that documentation from certified professionals carries more weight than homeowner descriptions alone. Immediate contact with both your insurance company and an emergency response provider matters. Most policies require prompt notification and have specific timeframes for beginning work to prevent further damage.

Required documentation for insurance claims includes detailed damage assessment reports showing affected areas, moisture readings, and water category. Comprehensive photography and video documentation shows damage extent before, during, and after restoration. Moisture readings and damage measurements get recorded at multiple points throughout the restoration process. Itemized inventory of damaged belongings includes descriptions, conditions, and replacement values. Restoration scope of work and cost estimates break down by phase and material. Certificate of completion after restoration confirms work performed and final moisture verification.

Working with licensed, insured restoration companies helps make sure insurance claims processing goes smoothly. These companies understand policy requirements, provide documentation in formats adjusters expect, and maintain the professional standards insurance companies rely on when approving claims and issuing payment.

Safety Precautions and Health Considerations

Water extraction reduces electrical hazards that make standing water dangerous. Never enter flooded areas without first shutting off electrical power to those spaces at your circuit breaker or main panel. Outlets, switches, and appliances submerged or contacted by water can cause electrocution. Structural instability develops quickly when framing members absorb water. Ceiling materials sag, floors become spongy, and walls may lean. Watch for these warning signs and evacuate any area showing structural movement or unusual settling.

Contamination risks from category 2 gray water and category 3 black water create serious health hazards. Gray water from washing machines, dishwashers, or toilet overflow without feces contains detergents, food particles, and bacteria that cause gastrointestinal illness and skin infections. Black water from sewage backup, rising floodwater that contacted soil, or toilet overflow with feces carries E. coli, parasites, viruses, and pathogens causing severe illness. Never attempt cleanup of contaminated water without proper training and equipment. What looks like minor contact can lead to infection, especially if you have any cuts or compromised immune function.

Protective equipment professionals use includes full personal protective equipment such as waterproof suits, rubber boots, and heavy duty gloves when working with contaminated water. Respirators with appropriate filters get used during mold remediation or when airborne contaminants are present. Proper ventilation during cleaning prevents concentrated chemical exposure and maintains air quality throughout the restoration process. Air quality testing may be recommended before reoccupying spaces that experienced sewage contamination or extensive mold growth. HVAC system inspection makes sure contaminated air hasn’t circulated through ductwork, spreading mold spores or bacteria throughout the property. These safety measures protect both restoration workers and your family from health risks that stick around even after visible water disappears.

Final Words

The flood damage restoration process moves through clear phases, from emergency response and water extraction to complete structural drying and final repairs.

Each step builds on the last. Swift water removal stops immediate damage. Thorough drying prevents mold. Professional cleaning eliminates health risks. Careful reconstruction brings your home back.

Speed matters, but so does doing it right. Missing hidden moisture or skipping antimicrobial treatments creates problems that show up weeks later.

When flood damage hits, you need a team that handles the whole sequence. One call, one plan, start to finish.

FAQ

What are the steps of water damage restoration?

The steps of water damage restoration follow a systematic sequence: emergency response and assessment, standing water removal, structural drying and dehumidification, cleaning and sanitization, repairs and reconstruction, and final inspection. Each phase builds on the previous one to return your property to pre-damage condition safely.

What’s the difference between remediation and restoration?

Remediation and restoration differ in scope and timing. Water mitigation stops active damage and prevents it from spreading (emergency water removal, temporary repairs, board-up). Restoration comes after, repairing and rebuilding damaged materials to return your home to normal condition.

What does a restoration company do after a flood?

A restoration company after a flood removes standing water, dries structural materials completely, cleans and disinfects contaminated surfaces, removes unsalvageable materials, rebuilds damaged walls and floors, and verifies safe humidity levels. They coordinate the entire process from emergency response through final walkthrough.

How long does water damage restoration take?

Water damage restoration takes anywhere from a few days for minor damage to several weeks for extensive flooding. Timeline depends on water category, square footage affected, structural damage extent, and how long water remained before extraction. Professionals provide specific estimates after initial assessment.

Can I stay in my home during flood restoration?

Staying in your home during flood restoration depends on damage extent and contamination level. Minor restoration may allow occupancy in unaffected areas. Extensive flooding, contaminated water, or necessary structural repairs typically require temporary relocation until air quality and safety are verified.

What equipment do professionals use for flood drying?

Professionals use industrial-grade dehumidifiers to extract airborne moisture, high-velocity air movers for circulation, moisture meters to measure saturation levels, infrared cameras to detect hidden water, and specialized sub-surface extractors for carpets and padding. This equipment accelerates drying beyond household fans or shop vacuums.

Does homeowner insurance cover flood damage restoration?

Homeowner insurance coverage for flood damage restoration varies by policy and water source. Most policies cover sudden pipe bursts or appliance failures. Natural flooding typically requires separate flood insurance. Contact your insurance company immediately and work with licensed restoration companies who document everything properly.

When should I call a professional restoration company?

Call a professional restoration company immediately when water covers more than one room, exceeds one inch depth, comes from contaminated sources like sewage or groundwater, contacts electrical systems, or causes visible structural damage. Professionals prevent secondary damage that DIY cleanup misses.

How do restoration companies prevent mold growth?

Restoration companies prevent mold growth by extracting water within 24 hours, running dehumidifiers to lower humidity below 60 percent, creating continuous air circulation, applying antimicrobial treatments to all affected surfaces, and monitoring moisture levels until materials reach acceptable dryness. Speed matters since mold starts growing within 48 hours.

What flood-damaged materials can be saved?

Flood-damaged materials that can often be saved include hardwood floors (if dried quickly), some furniture pieces, tile flooring, metal fixtures, and solid wood trim. Materials requiring removal include saturated drywall, compromised insulation, soaked carpet and padding, and anything contacted by sewage or contaminated water. Professionals assess salvageability during inspection.

Is It Safe To Stay In A House After A Fire: Truly Secure

Is it really safe to go back inside after a fire? You might think that if one room burned, the damage is limited. But hidden dangers can still be there. Soot (black residue from fire) and weakened beams can put you at risk. Even if you only smell smoke, toxic particles may be lingering in the air and on surfaces.

We understand how stressful this can be. That is why we recommend a full inspection by trained experts before you return home. They check for hidden damage to ensure your house is truly safe again. If you have any questions or need help, please contact us right away.

Assessing Safe Re-Entry After Fire Damage

It is not safe to go back into your home after a fire until experts check it out. Harmful particles like tar (sticky substance from burned materials), carbon (soot that you see from fires), and heavy metals (toxic metals) can hide in vents and walls. These hidden toxins can block oxygen, which may hurt your health even if the fire damage looks small.

Smoke and soot travel easily through vents and can settle on your furniture, belongings, and surfaces. If you still smell smoke, it might mean toxic chemicals are lingering. Even when only one room is burned, these hidden particles can give you breathing problems or irritate your skin.

Experts say you should not sleep or stay in a home affected by fire until a professional has done a full check. They inspect every hidden area, from walls to ducts, to make sure all dangerous toxins have been removed.

Trust certified professionals to do this important inspection. They have the right tools and skills to find any remaining toxins and hidden hazards. Once they give the all-clear, you can safely return to your home.

Evaluating Structural Integrity Post-Blaze

img-1.jpg

After a fire, even if the flames seem contained, unseen damage may put your home at risk. High heat can weaken key support beams (the strong parts that hold your home up) and can affect the metal fasteners that keep the structure together. Extreme temperatures might warp or melt building materials, leaving your home vulnerable even if the damage isn’t obvious.

Smoke can nestle in walls and cause hidden issues like burnt framing and damaged drywall. This damage may not be visible at first but could lead to long-term instability. Soot and smoke can also taint electrical outlets and wiring, which might lead to faults or malfunctions. Only certified contractors have the proper tools to uncover these hidden problems.

We recommend having a certified structural inspector check your home. Their expert evaluation will find subtle, dangerous issues before they turn into bigger, more expensive problems.

Key Structural Components to Inspect

  • Foundation: Look for cracks or shifts that show settling.
  • Framing: Check beams and joists for signs of heat or residue damage.
  • Roof: Inspect for warped, burnt, or weakened materials.
  • Electrical Systems: Examine wiring and outlets for any soot contamination.

Addressing Air Quality and Toxic Residue Concerns

When a fire occurs, smoke leaves behind dangerous substances like heavy metals, tar, and carbon compounds. These toxins seep into your HVAC ducts and wall cavities. They stick to surfaces and build up over time. Imagine cleaning a room only to find hidden deposits that continue to pollute the air.

Air purifiers can clear visible smoke but they do not remove the chemicals that settle deep in ducts and walls. We use special tests with tools such as particle counters (devices that count tiny particles) to measure these harmful chemicals. For example, a technician might use a particle counter to detect particles trapped in hard-to-reach spaces.

Our experts use advanced cleaning methods to treat the areas behind walls, in tight corners, and inside your HVAC system. They inspect these spots carefully and target the cleaning where regular air purifiers cannot reach.

Essential Post-Inspection Checklists for Safe Occupancy

img-2.jpg

After a fire, it’s smart to use a checklist before moving back in. We want to make sure no hidden risks remain. A detailed review helps us check areas touched by heat, soot, and smoke. This way, we lower long-term health risks.

  • Structural check: Have experts look for cracks, warped wood, or crumbling supports that could weaken your home.
  • Electrical test: Ensure heat-affected wiring and outlets are examined to prevent short circuits or fires.
  • HVAC and duct inspection: Check your heating, ventilation, and air conditioning system along with the ductwork and filters (parts that channel air) for soot buildup. Proper cleaning stops harmful particles from spreading.
  • Carbon monoxide and gas check: Run tests to confirm no dangerous fumes remain from damaged appliances.
  • Moisture and mold look-over: Inspect for hidden water damage and mold growth, which can harm your home’s structure and your health.

Each step helps protect you from unseen dangers. For instance, spotting a small crack can stop a bigger problem later. Following this checklist keeps you safe and confirms your home is ready for you to live in again.

is it safe to stay in a house after a fire: Truly secure

After a fire, it is vital to use professional cleaning recommended by the manufacturer. We use special cleaning methods (remediation services) to remove soot and harmful residues from surfaces and hidden spots before they cause more damage. Materials affected by smoke must be handled carefully because poor cleaning can spread contaminants or harm the underlying material. Our team uses cleaning agents that break down tar and carbon buildup while keeping your home’s structure safe.

Our crew wears protective gear like gloves, masks, and full-body suits (personal protective equipment or PPE) during the cleanup. We also set up controlled ventilation (using fans and open windows) to keep smoke and residue from settling in clean areas. These steps help stop extra problems, like wiring corrosion or damage to metal fixtures, from untreated smoke residue.

We follow clear steps to clean your home. First, our experts inspect the area to find any remaining harmful particles. Next, we apply cleaning solutions to break up and capture soot. Then, we remove any damaged materials that might hold toxic substances. Lastly, we inspect and decontaminate electrical systems and metal fixtures to prevent future hazards.

You can only move back in after rigorous tests confirm that no dangerous residues remain. For more details on our cleanup process, please check our guide on fire damage cleanup. Every step is designed to protect your health and keep your home safe and secure before you return.

Insurance Considerations and Documentation Steps

img-3.jpg

After a fire, it is important to document every detail. Begin by taking photos that show the date and time. For example, snap pictures of burned walls and ruined belongings and note with a timestamp like, "Photo taken on 02/10/2026 shows heavy damage in the kitchen and living room." Getting a report from a certified expert (a professional who checks for hidden damage) can also help support your claim.

Keep a detailed record of every repair and cleanup cost. Write down each expense and what work was done. This organized log is like keeping receipts after a big purchase and can protect you if questions arise later.

Our experts suggest scheduling a re-inspection on or after February 11, 2026, when the conditions are stable enough for review by insurers. This updated report can catch any issues that may have developed after the initial damage. Always consult with your insurance agent or lawyer before signing any forms. Their advice can help you avoid future problems and make sure your claim gets approved.

For more guidance on documenting fire damage for your insurance claim, check out this guide.

Safe Recovery Timeline and Temporary Housing

After a fire, your home might not be safe for weeks. We suggest waiting at least 72 hours while professionals check your place. Certified experts will test the air (to spot harmful smoke particles) and inspect your structure, as hidden damage can make a house unsafe. Rushing back could expose you to toxic fumes and might even void your insurance.

While experts work on your home, arrange for temporary housing. This pause lets them clear away residue, fix unseen issues, and remove contaminants. Follow these steps for a safe recovery:

  • Wait at least 72 hours before considering re-entry.
  • Let certified experts complete air quality tests and structural inspections.
  • Stay in temporary lodging until your home is officially safe.

Taking the time to check your home properly protects your health and keeps your insurance intact.

is it safe to stay in a house after a fire: Truly secure

img-4.jpg

After a fire, you need to decide if your home is safe to live in. First, have experts check the building’s structure and give you a cost estimate. Hidden damage may make simple repairs risky. Sometimes a full rebuild is the safer option.

Rebuilding lets you add new safety features like better ventilation (a system that moves air to lower heat) and fire-resistant materials. It also makes sure your home meets the latest building codes, which lowers future hazards.

We treat post-fire safety as a major home improvement project. By taking careful steps now, you can reduce risks and even lower repair and insurance costs. Experts can help you create a clear recovery plan so you know exactly what to do next.

Final Words

In the action, we covered fire damage hazards and key steps to protect your home.
We explained why unseen soot, compromised structures, and lingering toxins make re-entry risky.
Our guide stressed the need for professional checks and clear post-inspection checklists.
By asking, "is it safe to stay in a house after a fire?" you can make smart decisions with expert help.
With careful evaluation and proper remediation, you can rebuild a safe, livable home and look forward to a secure future.

FAQ

Is it safe to sleep in a house after smoke?

Sleeping in a smoke-affected house is unsafe because harmful particles and toxins, like carbon monoxide, can linger. You should get a professional safety evaluation before re-entering.

What can you keep after a fire?

Salvage only belongings that show no signs of contamination from soot or water damage. Consult professionals to determine which items can be safely saved.

House filled with smoke but no fire?

A house filled with smoke without visible flames still contains dangerous residues and chemicals. A professional inspection is necessary before re-entry to avoid health risks.

What to do after a house fire with no insurance?

After a fire with no insurance, prioritize your safety by evacuating, document all damage, and contact fire restoration experts who can advise you on financial support or cleanup options.

When is it safe to enter a building after a fire?

Building entry is safe only after professionals confirm via inspections that no structural damage, toxic residue, or electrical hazards remain, ensuring the area is secure.

Health risks after house fire?

Health risks from a house fire include respiratory issues, irritation, and long-term lung problems due to toxic smoke particles. Professional cleanup and air testing are vital to reduce these hazards.

What to do after a fire at home?

Immediately evacuate, call emergency services, and avoid re-entering until experts assess the damage. Document what you can for restoration and insurance while ensuring personal safety.

What to do after a house fire checklist?

A post-fire checklist requires professional inspections of the structure, electrical systems, HVAC ducts, and carbon monoxide levels, along with checking for moisture and mold before repairs.

What is the 30/30/30 rule for fire?

The 30/30/30 rule means evacuate within 30 seconds, move to a spot 30 feet away, and call for help in 30 seconds. This rule helps promote quick, safe actions during a fire.

Is the smell of smoke after a fire harmful?

The lingering smell of smoke indicates residual toxins and soot, which can be harmful if inhaled. Professional cleaning is recommended to remove these contaminants and odors from the home.

How long will air quality be bad after fire?

Air quality may remain compromised for days to weeks after a fire. Professional air purification and thorough testing are needed to determine when it is safe to breathe again.

Is a house toxic after a fire?

A house can be toxic after a fire due to lingering soot, chemicals, and smoke particles. Expert evaluations and proper cleanup are essential to make the home safe to live in.

Emergency Roof Protection After Damage: Critical Steps to Take

0

Did you know the first five minutes after roof damage decide whether you’re looking at a quick fix or thousands in secondary water damage?
If water’s getting in, your first moves are simple: protect people, stop water from soaking insulation and ceilings, and start documenting what you see.
This post shows safe immediate steps: what to do inside, how to tarp once it’s safe, which tools to grab, and how to document damage for adjusters.
Do these steps now to limit hidden damage, speed drying and repairs, and make the rebuild clearer.

Immediate Emergency Actions to Protect a Damaged Roof

N_ctYaA6RCGit0YhCwIXKg

The first five minutes after you spot roof damage decide whether you’re looking at a quick fix or thousands in secondary water destruction. Your goal is simple: stop water from hitting insulation, ceilings, and walls while keeping yourself safe.

If water’s actively pouring in, you’re racing against absorption. Drywall, insulation, and flooring soak up moisture fast. Once they’re saturated, drying becomes a multi-day ordeal with equipment. Act now to limit how much material gets wet.

Every minute you wait, water spreads. It runs along rafters, seeps into wall cavities, drips onto belongings. Here’s what to do right away:

  1. Turn off electricity to affected rooms at the breaker box if water’s dripping near light fixtures, outlets, or appliances. Don’t touch switches or electronics with wet hands.

  2. Place buckets, trash cans, or large containers under active leaks to catch water before it soaks into floors or carpets. Empty them frequently.

  3. Lay down towels, tarps, or plastic sheeting on floors and furniture directly below the damage to absorb drips and protect belongings.

  4. Move valuables, electronics, and furniture out of rooms where water’s entering. If items are too heavy to move, cover them tightly with plastic and elevate them on blocks if possible.

  5. Look up at the ceiling from inside and note where water’s entering. If you see bulging, sagging, or discolored drywall, place a bucket directly underneath and don’t stand below it.

  6. Grab a flashlight, your phone, and basic tools like a hammer, nails, duct tape, and any tarps or plastic sheeting you’ve got on hand. You’ll need these in the next steps.

If the roof damage happened during an active storm, don’t go outside or climb onto the roof until conditions are safe. Wind, rain, lightning, and darkness make roof access extremely dangerous. Your first job is stopping damage from inside the house, not fixing the roof itself. Once the immediate interior is protected and the weather clears, you can assess the roof and begin temporary exterior coverage.

How to Safely Tarp a Roof After Storm Damage

OH6OfW2CT6CsSih4F2xnIg

Tarping a roof is a temporary fix to keep rain, snow, and debris out until a contractor can complete permanent repairs. It’s appropriate when you’ve got a visible hole, missing shingles, or torn sections and weather is expected within hours or days. Tarping doesn’t repair the roof. It buys you time and prevents further water intrusion.

Step by Step Tarping Instructions

  1. Wait for safe conditions. Don’t climb onto a roof during rain, high winds, ice, or darkness. If the roof’s steep (more than a 6/12 pitch) or you’re uncomfortable with heights, call a professional instead.

  2. Set up a sturdy extension ladder at a 4:1 angle (for every 4 feet of height, the base should be 1 foot from the wall). Have a second person hold the ladder steady while you work.

  3. Clear loose debris from the damaged area by hand or with a rake. Remove broken shingles, branches, and nails that could puncture the tarp or create uneven surfaces.

  4. Unfold a heavy-duty poly tarp (10 to 12 mil thickness) that extends at least 2 feet past the damaged area in all directions. If the damage crosses the roof ridge, drape the tarp over the peak so water sheds evenly down both sides.

  5. Secure one edge of the tarp first using a 2×4 board laid across the tarp, then fasten the board to the roof with 3 inch exterior screws driven through the board into roof decking every 12 to 16 inches. This is called the batten method and prevents the tarp from tearing at fastener points.

  6. Pull the tarp tight and flat to eliminate sagging or pooling areas where water can collect. Loose tarps flap in wind and wear out quickly.

  7. Fasten the remaining edges with more 2×4 battens, sandbags, or bricks placed along the lower edge. Avoid driving nails or screws directly through the tarp into undamaged roof areas. Each new hole is a future leak.

  8. Inspect all edges and seams to ensure water can’t flow underneath. Pay special attention to roof valleys and areas where two roof planes meet.

Common mistakes include using tarps that are too small, which leave gaps for water to enter, and failing to anchor properly, allowing wind to rip the tarp loose within hours. Never walk on a tarp that’s already in place. It’s slippery and hides uneven surfaces underneath. And don’t use duct tape or staples as primary fasteners. They fail quickly in wet or windy conditions. If your tarp starts flapping or pooling water, re-secure it immediately before it tears or causes new damage.

Essential Materials for Temporary Roof Protection

7e5M3RZpRIy7UWJVXixKnA

Having the right materials on hand makes emergency roof protection faster and safer. Most of these items can be purchased at hardware stores or home centers. Keeping a basic kit in your garage or shed means you’re ready when damage happens.

Materials and Quantities:

  • Heavy-duty poly tarp, 10 to 12 mil thickness — at least one 12 x 20 ft tarp for moderate damage; add a second smaller tarp (10 x 12 ft) for backup or multiple holes
  • 2×4 lumber boards, 8 ft length — three boards minimum for battens and anchoring
  • Exterior grade plywood, 1/2″ or 3/4″ thick, 4 x 8 ft sheets — one to three sheets for boarding large openings
  • Galvanized roofing nails, 8d size — box of 100 for securing boards and edges
  • Exterior screws, 3 inch length — box of 50 for fastening battens through tarp into decking
  • Sandbags or bricks — four to six for weighting tarp edges without puncturing
  • Plastic sheeting, 6 mil, in rolls — for interior ceiling protection and covering furniture
  • Roofing cement or fibered mastic, 1 gallon pail — for sealing small punctures or torn shingles
  • Work gloves, safety glasses, and non-slip footwear — basic PPE for climbing and handling materials
  • Cordless drill, hammer, utility knife, and tape measure — essential tools for cutting, fastening, and measuring

If you can’t find heavy duty tarps immediately after a storm, use what’s available. Painter’s drop cloths, canvas tarps, or multiple layers of plastic sheeting. They’re less durable but better than nothing. When plywood is sold out, you can substitute OSB (oriented strand board) or even metal roofing panels in a pinch. The goal is to create a weather tight barrier until permanent materials and contractors are available.

Safety Precautions When Protecting a Damaged Roof

VYLgOGosQwylNP07GEA8ew

Roof work is one of the most dangerous home maintenance tasks, and emergency conditions make it riskier. Wet shingles, unstable decking, and unexpected weather changes can turn a simple tarp job into a fall or electrical hazard. Before you climb, evaluate whether the risk is worth it or whether waiting for a professional is the smarter choice.

Slippery surfaces are the top cause of falls. Asphalt shingles become slick when wet, and algae or moss growth makes them even worse. Metal roofs are nearly impossible to walk on safely during or after rain. If the roof pitch is steeper than 6/12 (6 inches of rise for every 12 inches of horizontal run), you shouldn’t attempt to walk on it without fall protection equipment like a full body harness and anchor rated for 3,000 pounds or more. Most homeowners don’t own this gear, and that’s a clear sign to call a roofer instead.

Electrical hazards are just as serious. If water’s leaking near light fixtures, outlets, ceiling fans, or any visible wiring, don’t touch those areas and don’t walk on the roof directly above them until you’ve shut off power to those circuits at the breaker box. Downed power lines near the home or touching the roof mean you shouldn’t approach the building at all. Call the utility company and emergency services immediately. Unstable roof decking is another critical warning sign. If you see sagging areas, soft spots when you press on shingles, or visible cracks in the roof surface from the ground or attic, the structure may not support your weight. Don’t climb onto a roof that looks compromised. Wait for an inspection by a contractor who can assess the framing and decking safely.

How to Assess Roof Damage After a Storm

8m0DK1uHSDWrYNK40ceurQ

Knowing what to look for helps you describe the problem accurately to contractors and insurers, and it tells you whether temporary protection is enough or if you need emergency structural work.

Start your assessment from the ground and from inside the attic if you can access it safely. Use binoculars to inspect the roof from the yard, looking for obvious gaps, missing shingles, or debris like tree branches. Walk around the entire perimeter of the house and check all roof planes, not just the side facing the storm. Wind and hail can damage multiple areas.

Key damage signs to document:

  • Missing or displaced shingles — look for bare spots where shingles have blown off or lifted edges that expose underlayment
  • Punctures or holes — caused by fallen branches, flying debris, or hail impact; measure the size with a tape measure if accessible
  • Torn or lifted flashing — metal strips around chimneys, vents, and roof edges that have peeled away or bent
  • Sagging or dips in the roofline — indicates possible structural damage to rafters, trusses, or decking
  • Granule loss on asphalt shingles — shingles that look shiny, smooth, or have bald patches where the protective granules have worn away
  • Interior water stains or drips — discolored ceiling patches, wet insulation, or active leaks inside the home
  • Debris accumulation — branches, shingles, or roofing materials lying in gutters, on the roof, or around the house

If you can safely enter the attic, look for daylight coming through the roof, wet insulation, water stains on rafters, or sagging roof sheathing. These are signs of active or recent leaks. Don’t walk on wet insulation or attic floors without confirmed structural support. If any of these conditions are present and severe (such as large holes, visible sagging, or multiple leak points), don’t attempt DIY tarping and call a roofing contractor for same day emergency service.

Temporary Waterproofing Options Beyond Tarping

4zhfdXmfSKa7k8YCXehdkA

When tarps aren’t practical or available, other temporary methods can slow water intrusion until permanent repairs are completed. These solutions work best for small leaks, isolated damage, or situations where roof access is limited.

Alternative waterproofing methods:

  • Roofing cement or mastic — apply directly to small punctures, torn shingles, or gaps around flashing; one tube covers 10 to 20 small patches and costs $10 to $30
  • Self-adhering flashing tape — peel and stick rolls (3 to 4 inches wide, 33 feet long) that seal around vents, skylights, and small seams; works in dry conditions only
  • Plastic sheeting stapled or taped to interior ceilings — catches drips and protects contents when exterior access is unsafe; use heavy duty painter’s plastic and duct tape or staples
  • Emergency roof patch kits — pre-cut adhesive patches sold at hardware stores for quick shingle repair; follow manufacturer’s instructions for surface prep and application
  • Plywood boards sealed with roofing cement — cut to fit over large holes, seal edges with mastic, and fasten with exterior screws every 8 to 12 inches

These methods are short term fixes, not replacements for professional repair. Roofing cement hardens and cracks over time, tape loses adhesion in temperature swings, and plastic sheeting indoors does nothing to prevent exterior damage or mold growth inside wall cavities. Use them to buy hours or days, then schedule a contractor to assess and repair the roof properly. If you’re dealing with ongoing leaks and none of these options stop the water, that’s a sign the damage is too extensive for temporary measures.

Documenting Roof Damage for Insurance Claims

ZSoTRKFkS1iwUXTeu0QjNw

Insurance companies require proof of damage, the timeline of events, and evidence that you took reasonable steps to prevent further loss. Good documentation speeds up claims and reduces disputes over coverage.

Take photos and videos as soon as it’s safe to do so, ideally before you make any temporary repairs. If that’s not possible, photograph the damage before and after you tarp or patch, and explain in writing what you did and when.

Steps for thorough documentation:

  1. Capture wide angle exterior shots showing the whole house, roof, and surrounding context like fallen trees, storm debris, or weather conditions.

  2. Take close-ups of each damaged area with a tape measure or ruler visible for scale; photograph missing shingles, punctures, torn flashing, and any debris on the roof.

  3. Document interior damage including water stains on ceilings, wet walls, soaked insulation, and any belongings affected by leaks.

  4. Record date and time stamps on all photos and videos; most smartphones do this automatically, but note it separately in a written log as well.

  5. Keep receipts for all emergency purchases such as tarps, lumber, roofing cement, tools, and contractor fees for temporary work; insurers typically reimburse reasonable emergency expenses.

  6. Don’t discard damaged materials like broken shingles, torn flashing, or punctured decking until your adjuster has inspected and photographed them; store debris in a safe, dry location if possible.

Most policies require you to notify your insurer within 24 to 72 hours of discovering damage, so call your agent or claims line as soon as the emergency is under control. Provide your documentation, explain what happened, and ask about next steps for inspection and temporary repair reimbursement. Avoid making permanent structural repairs until the adjuster has seen the damage, but do make temporary fixes to stop further water intrusion. That’s expected and covered under your duty to mitigate loss.

DIY vs. Professional Emergency Roof Repairs

FnXzt5nmTHmqqMQxk9zhNw

Small, accessible damage on a low slope roof in good weather can sometimes be handled by a confident homeowner with the right tools and materials. But many emergency situations are too dangerous, too complex, or too urgent for DIY work.

DIY is appropriate when the damaged area is small (less than 4 square feet), the roof pitch is gentle (6/12 slope or less), there’s no structural sagging or instability, and you’re comfortable working on a ladder with basic carpentry tools. Examples include replacing a few missing shingles, sealing a small puncture with roofing cement, or laying a tarp over a minor leak during dry weather.

Professional help is required immediately when damage exceeds 100 square feet, when rafters or trusses are broken or sagging, when a tree has fallen through the roof, or when there are electrical or gas hazards present. Steep roofs (greater than 6/12 pitch), multi-story homes, and situations involving asbestos or other hazardous materials also demand trained contractors with safety equipment and insurance. If your roof is more than 15 years old and experiencing multiple leaks across different areas, a professional inspection is essential to determine whether temporary patches will hold or if larger failure is imminent.

Option When Appropriate Risks
DIY Tarp or Patch Small damage <4 sq ft; low pitch ≤6/12; dry weather; homeowner experienced with ladders Falls, inadequate coverage, missed hidden damage, voided warranties
Emergency Roofer (Temporary) Moderate damage 4 to 100 sq ft; uncertain stability; steep pitch; active weather Higher cost; availability delays during major storms
Emergency Roofer (Full Repair) Large damage >100 sq ft; structural issues; tree impact; electrical/gas hazards Significant cost; requires insurance coordination; multi-day timeline
Do Nothing / Wait Never appropriate if damage allows water intrusion Exponential interior damage; mold growth; insurance claim denial for failure to mitigate

When hiring a contractor, verify they’re licensed, insured, and can provide a certificate of insurance with liability coverage. Ask for a written estimate that itemizes labor, materials, permits, and timeline. Avoid contractors who demand full payment upfront or only accept cash. Reputable companies work on deposits (10 to 30%) with the balance due on completion. Get at least two estimates when time allows, but in true emergencies where water’s actively entering, prioritize speed and availability over price shopping.

Expected Costs for Emergency Roof Protection and Repairs

sn_Gcv1eR7CwMn10XLP_zg

Emergency roof services cost more than scheduled work because of after hours dispatch, urgency, and unpredictable conditions. Knowing typical price ranges helps you budget and recognize fair pricing versus price gouging during storms.

A contractor installed emergency tarp typically runs $150 to $600 depending on roof size, accessibility, and how many tarps are needed. Single tarp jobs on ranch style homes with easy access commonly fall in the $200 to $450 range. Plywood boarding over large holes or blown off sections costs $200 to $800, with pricing influenced by the number of sheets required and roof pitch. After hours or weekend emergency service often adds a $100 to $300 dispatch fee to the total invoice.

Common emergency cost ranges:

  • Emergency tarp installation by contractor: $150 to $600 per job
  • Plywood boarding (large openings): $200 to $800 depending on materials and labor
  • Small localized shingle replacement (up to 5 shingles): $200 to $1,000 including labor and materials
  • Temporary patch or flashing repair: $200 to $900 for minor leaks sealed with roofing cement and new flashing
  • After hours or same day emergency dispatch fee: $100 to $300 added to invoice

Permanent repairs vary widely. Replacing missing shingles and resealing flashing on a small area (20 to 100 square feet) typically costs $800 to $3,500. Larger repairs or partial re-roofing (100 to 300 square feet) run $3,000 to $10,000. Full roof replacement for a typical single family home ranges from $5,000 to $30,000 depending on materials, with asphalt shingle jobs averaging $8,000 to $15,000. If tree removal is required before repairs can begin, add $500 to $5,000 depending on tree size and cleanup complexity. Factors that increase cost include steep pitch, multi-story height, complex roof geometry with valleys and dormers, premium materials like metal or tile, and local permit or code requirements.

Final Words

in the action you learned the immediate steps: stop active leaks, check for hazards, move valuables, and cover exposed areas quickly.

We walked through safe tarping steps, the materials to have on hand, how to document damage for your claim, and when to call a pro.

Act quickly to limit water and structural harm. Use clear photos and receipts, and don’t climb onto unsafe sections. If you’d rather not DIY, get help right away. emergency roof protection after damage prevents more loss and helps you move toward repair with confidence.

FAQ

Q: What is the 25% rule in roofing?

A: The 25% rule in roofing means if over 25% of a single roof plane is damaged, many building codes or insurers push for a full replacement instead of spot repairs to keep the roof safe and consistent.

Q: Can I spray Roof Maxx myself?

A: You can spray Roof Maxx yourself, but the company often uses trained applicators; DIY risks include uneven coverage, wasted product, and ladder hazards—hiring a certified tech gives steadier results and safety.

Q: What constitutes a roofing emergency?

A: A roofing emergency is active water coming in, visible sagging or collapse, large open holes, exposed live wiring, or fast interior damage that threatens safety or valuables and needs immediate action.

Q: What not to say to a roof insurance adjuster?

A: You should avoid saying you caused the damage, that you already repaired things without receipts, or accepting verbal offers; stick to clear facts, document losses, and let the adjuster inspect first.

Hazard Electrical Safety: Protection Methods and Best Practices

0

Ever notice how electrical hazards rarely announce themselves before they strike? Damaged wiring doesn’t flash warning signs, and overloaded circuits don’t send calendar reminders before they fail. Electricity moves faster than reaction time, which means protection starts with recognition, not response. Whether you’re managing a worksite or maintaining a home, knowing what creates shock risks, arc flash dangers, and fire hazards lets you control them before someone gets hurt. This guide covers the electrical hazards that cause most injuries and deaths, the grounding systems that protect against faults, and the practical steps that keep people safe around power.

Identifying Common Electrical Hazards in Workplaces and Homes

aa8pJJqPS5Sccq3SZS4r8g-1

Electrical hazards create risks of burns, electrocution, arc flash, electric shock, fires, and explosions. Contact with electricity is one of the leading causes of workplace fatalities. Five sources account for 92 percent of electrical deaths: overhead power lines, ground faults, damaged wiring, energized parts, and unexpected contact. Common causes include insufficient insulation, circuit breaker failure, damaged appliances, improper extension cord use, and inadequate maintenance.

Recognition is the first step. Before work begins, identifying electrical hazards lets you implement controls and prevent incidents. Construction sites damage electrical wiring and increase shock hazards, but homes carry similar risks when systems age or when someone attempts repairs without proper knowledge.

Overhead Power Lines

Overhead power lines carry high voltages and account for 46 percent of all electrical fatalities. These lines are dangerous to both electrical and non-electrical workers. In fact, 57 percent of overhead power line fatalities happen in non-electrical occupations. Always maintain at least 10 feet distance from overhead power lines with yourself and any equipment you’re operating or carrying. This applies to equipment booms, ladders, scaffolding, and hand-carried tools or materials.

Safety barriers and warning signs must be installed where overhead power line exposure exists. Carry equipment including ladders horizontally to avoid contact. Never touch anything that’s in contact with overhead power lines. Always assume all power lines are live and dangerous. Downed power lines require even more caution. Stay at least 35 feet away.

Exposed Wiring and Energized Electrical Parts

Contact with energized conductors or parts accounts for 45 percent of all electrical fatalities, with 74 percent of these deaths occurring in electrical occupations. Exposed wiring creates immediate shock and electrocution risks when protective covers are missing or damaged. Open electrical panels, missing covers on junction boxes, and exposed terminal connections all present contact hazards.

Energized parts become hazardous during maintenance, inspection, or when protective barriers fail. Workers performing tasks near energized equipment face arc flash risks on top of direct contact dangers. All electrical panels must stay closed except during authorized work by qualified personnel. Never bypass interlocks or remove guards that prevent access to energized parts.

Damaged Insulation and Frayed Cords

Insulation deterioration exposes conductors and creates shock hazards. Don’t try to cover damaged insulation with electrical tape as a permanent repair. This temporary fix doesn’t provide adequate protection and creates a false sense of security. Turn off all power sources before replacing damaged insulation, and replace the entire damaged section or component.

Conduct regular inspections for cracks, cuts, or abrasions on cables, wires, and cords. Look for signs of thermal damage, mechanical stress, or environmental deterioration. Check power cords, plugs, and outlets regularly for damage like fraying, exposed wires, or loose connections. Damaged cords and plugs should be replaced immediately. Inspection protocols should include visual examination before each use for portable equipment and periodic scheduled inspections for fixed wiring.

Overloaded Circuits and Inadequate Wiring

Circuit capacity issues lead to overheating, insulation breakdown, and fire risks. Circuit breaker failure or frequently tripping breakers signal overloading problems that need immediate attention. Warm outlets, discolored cover plates, burning smells, or flickering lights all indicate dangerous overload conditions.

Inadequate wiring for the electrical load creates sustained stress on conductors and connections. Adding high-draw appliances to circuits sized for lighter loads exceeds safe ampacity ratings. Never increase breaker or fuse sizes without verifying wire gauge can handle the increased current. This creates fire hazards since the protection device no longer matches conductor capacity.

Wet Conditions and Water Contact

Water conducts electricity, making wet conditions particularly dangerous. The combination of electricity and water dramatically increases electrocution risk by reducing body resistance and providing conductive paths to ground. Never operate electrical equipment in wet conditions or with wet hands.

Moisture on floors, walls, or equipment surfaces creates shock paths that wouldn’t exist in dry conditions. Rain, humidity, plumbing leaks, and standing water all heighten electrical dangers. Ground fault circuit interrupters provide critical protection where electricity and water may come in contact, but preventing wet condition exposure remains the priority.

Damaged Tools and Equipment

Construction sites involve rough environments where tools and equipment sustain impacts, compression, and abrasion that compromise electrical safety. Damaged tool housings expose internal wiring. Cracked or broken insulation on power tools creates contact hazards. Loose or damaged plugs fail to maintain proper grounding connection.

Inspect all electrical equipment before use, checking for physical damage, missing parts, or signs of overheating. Remove damaged equipment from service immediately. Don’t attempt field repairs on damaged tools unless you’re qualified and following manufacturer procedures. Assessment of appliance condition should verify proper grounding, intact insulation, and functioning safety features.

Improper Extension Cord Use and Temporary Wiring

Extension cords routed across walkways create tripping hazards and sustain damage from foot traffic and equipment. Running cords under carpets traps heat, accelerates insulation breakdown, and hides damage from inspection. Use cable management solutions like cord covers or cable trays to keep cords organized and prevent tripping hazards while protecting conductors.

Temporary power systems on construction sites present risks from faulty connections, damaged cables, or inadequate grounding. These systems lack the permanent installation quality of fixed wiring and need frequent inspection. Never use extension cords as permanent wiring. Size cords appropriately for the load and length of run to prevent voltage drop and overheating.

Unexpected Contact with Electricity

Construction activities like drilling, digging, or demolition may result in unplanned electrical contact when workers strike buried cables or penetrate walls containing energized wiring. Electric shock occurs when the human body completes a circuit during these activities. Call 811 before excavation to locate underground utilities. Verify wall cavity contents before drilling or cutting.

Demolition work requires electrical hazard assessment and de-energization before structural members are removed. Assume wiring remains energized unless you’ve verified isolation and tested for voltage. Metal tools and equipment become energized when they contact live conductors, creating shock hazards for anyone touching the tool.

Systematic inspection before work begins identifies electrical hazards and allows implementation of controls. This proactive assessment prevents the majority of electrical incidents. The fact that 69 percent of all electrical fatalities involved non-electrical occupations emphasizes that universal awareness across all workers is essential, not just among electricians. Every person on a worksite or in a home must recognize basic electrical hazards and understand when to stop and call for qualified help.

Understanding Grounding Systems and GFCI Protection
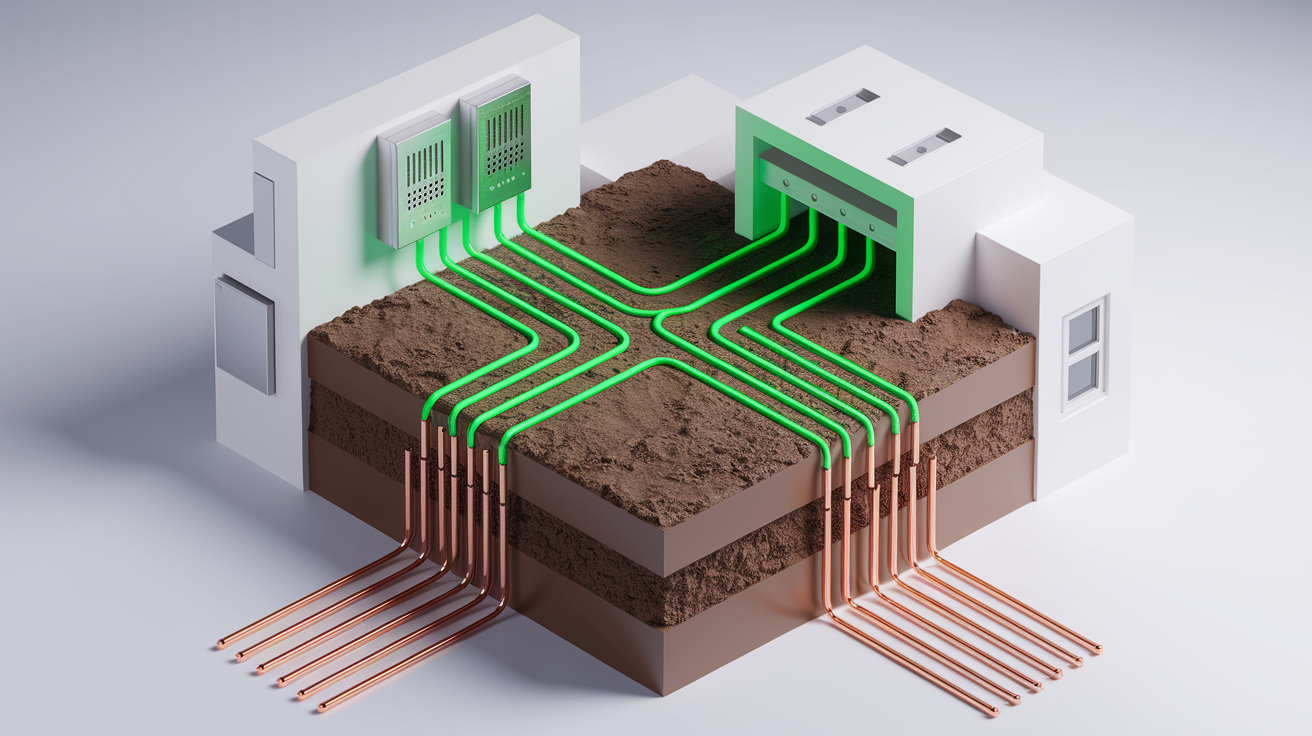
iXbzqBFSIaC3EiKM_S-zA-1

Grounding and ground fault circuit interrupter protection serve as critical safeguards that prevent shock by providing alternative paths for fault current, protecting people when insulation fails or equipment malfunctions.

Grounding System Function and Requirements

Grounding systems work by returning fault current to earth through a dedicated low-resistance path, preventing voltage buildup on equipment frames and enclosures that people might touch. When insulation fails and energized conductors contact metal equipment parts, the grounding system carries fault current back to the source, tripping the overcurrent protection device and de-energizing the circuit. Without proper grounding, equipment frames remain energized at line voltage, creating deadly shock hazards.

Equipment grounding conductor sizing must match circuit capacity following National Electrical Code requirements. The conductor must maintain continuity from equipment through the entire branch circuit back to the service grounding electrode system. Any break in this path leaves equipment ungrounded. Bonding systems connect all metal parts that aren’t meant to carry current, ensuring they remain at the same electrical potential and preventing voltage differences between touchable surfaces.

Improper grounding is the most frequent OSHA electrical violation. Missing grounding connections, undersized grounding conductors, corroded connections, and removed ground pins all appear repeatedly in citations. This violation frequency reflects both the critical importance of grounding and the common tendency to bypass or neglect grounding requirements.

Ground Fault Circuit Interrupter Protection

GFCIs monitor current flow between hot and neutral conductors, detecting any imbalance that indicates current leaking to ground through an unintended path like through a person’s body. When the GFCI senses a difference as small as 4 to 6 milliamps between outgoing and returning current, it trips within 25 milliseconds, fast enough to prevent most serious shocks. This trip threshold sits well below the 10 to 20 milliamp level where muscle contractions prevent releasing the energized object.

Required installation locations include any area where electricity and water may come in contact: bathrooms, kitchens, outdoor outlets, crawl spaces, unfinished basements, garages, and temporary construction power. Install GFCI protection either at the outlet (receptacle type) or protecting the entire circuit (breaker type). Portable GFCI devices provide protection for extension cords and temporary equipment.

The three-prong plug includes the round grounding pin below the two flat current-carrying blades. Never remove the metallic ground pin as it plays a vital role in safely returning unwanted voltage to ground. The ground pin connects equipment frames to the grounding system, preventing shock if internal insulation fails. Adapters that allow three-prong plugs in two-prong outlets defeat the grounding protection unless the adapter tab connects to a grounded outlet cover screw, which rarely provides reliable grounding.

Testing procedures for ground continuity verification use specialized continuity testers or multimeters to confirm low-resistance paths from equipment grounding points back to the service ground. Resistance above 1 ohm indicates problems requiring correction. GFCI monthly testing requirements involve pushing the test button to verify trip function. The device should immediately shut off power. Press the reset button to restore power. Mark any GFCI that fails to trip during testing, remove it from service, and replace it.

Recognition of grounding deficiencies during inspections includes looking for two-prong outlets in areas requiring GFCI protection, missing or damaged ground pins on plugs, painted-over outlet ground contacts, and equipment with no visible grounding connection. Receptacle testers plug into outlets and indicate proper grounding, open grounds, and reverse polarity conditions through indicator light patterns.

Protection Device Trip Threshold Application
GFCI 4-6 milliamps imbalance Personnel protection in wet locations, outlets within 6 feet of water sources, outdoor circuits, construction sites
AFCI (Arc Fault Circuit Interrupter) Detects arcing patterns Fire prevention in residential bedrooms, living areas, required for most dwelling unit circuits per current NEC
Circuit Breaker 125% of continuous load rating Overcurrent protection for branch circuits, prevents conductor overheating and fire from excessive current
Fuse Rated amperage Overcurrent protection, one-time use device that must be replaced after operation, common in older systems and equipment

Risk Assessment Methods and Hierarchy of Controls

XHZkWDt3RSGo8Qf4piiAtw-1

Performing a site and risk assessment before conducting any electrical work identifies hazards and determines appropriate control measures. This assessment examines the work environment, equipment condition, voltage levels, and potential for contact with energized parts. Documentation of findings guides control selection and safe work planning.

Arc flash hazards release intense thermal energy when electrical faults create plasma between conductors or from conductor to ground. The explosion produces temperatures exceeding 35,000°F, pressure waves, molten metal droplets, and intense light. Arc flash events cause severe burns, hearing damage, and blast injuries. The fact that 45 percent of all electrical fatalities resulted from working on or near energized conductors highlights the severity of energized work hazards. Among electrical occupations specifically, 74 percent of energized equipment fatalities demonstrate the concentrated risk faced by workers performing electrical tasks.

The hierarchy of controls provides a systematic approach to hazard mitigation based on risk assessment findings. This framework ranks control methods by effectiveness, with higher level controls providing more reliable protection because they don’t depend on human behavior or require constant maintenance. Preference always goes to higher level controls that eliminate hazards or engineer them out of the system rather than relying on procedures or personal protective equipment.

Elimination (Most Effective)

Elimination removes electrical hazards entirely by de-energizing equipment and systems before work begins. Turning off power when possible before conducting work eliminates shock, arc flash, and burn hazards. Design approaches that eliminate electrical exposure include locating equipment away from work areas, using non-electrical alternatives for tasks, and designing out the need to work on energized systems.

Complete de-energization and verification through lockout/tagout procedures provides the most effective hazard control. Work on de-energized systems eliminates the majority of electrical incident risks. Schedule electrical work during shutdowns when systems can be fully isolated. When you can’t work de-energized, document the justification and implement multiple additional controls.

Substitution

Substitution replaces high hazard electrical systems with lower hazard alternatives. Using lower voltage systems reduces shock severity and arc flash energy. For example, specifying 120-volt systems instead of 480-volt where adequate for the application decreases incident energy. Intrinsically safe equipment limits available energy to levels incapable of causing ignition in hazardous atmospheres.

Battery-powered tools eliminate shock hazards from corded equipment in many applications. Pneumatic tools substitute air power for electrical power in wet environments or areas with explosion risks. Reduced voltage systems for temporary construction lighting and portable equipment limit exposure compared to full-line voltage.

Engineering Controls

Engineering controls use physical design features and equipment to separate people from electrical hazards. Insulation covers conductors to prevent contact. Guarding places barriers around energized parts. GFCI installation provides automatic disconnection during ground faults. Grounding systems create low-resistance fault current paths. These controls work continuously without requiring human intervention.

Safety barriers and warning signs for overhead power lines keep non-electrical workers away from high-voltage exposure. Physical separation from energized parts through enclosed equipment, locked rooms, and adequate spacing prevents contact. Double insulation on power tools provides two independent layers of protection. Interlocks shut off power when enclosure doors open.

Administrative Controls

Administrative controls use procedures, training, and work practices to reduce electrical hazards. Safe work practices define how to perform tasks safely. Lockout/tagout procedures prevent unexpected energization. Training programs build knowledge and skills. Job hazard analysis identifies task-specific risks before work starts.

Voltage testing requirements mandate testing both equipment and the surrounding area before work to verify de-energization. Test equipment itself before and after use to confirm proper function. Permit systems control access to electrical hazards and verify proper planning and precautions. Work scheduling and coordination prevent multiple crews from creating hazards for each other. Inspection programs find and correct hazards before incidents occur.

Personal Protective Equipment (Least Effective)

Personal protective equipment serves as the last line of defense when higher level controls don’t eliminate all hazards. Arc flash analysis determines required PPE based on incident energy calculations at specific working distances. Calculation methods determine arc flash boundaries and incident energy levels measured in calories per square centimeter. This analysis specifies voltage-rated gloves, flame-resistant clothing, face shields, and other PPE needed for the specific hazards present.

PPE reliability depends entirely on proper selection, correct use, and maintenance in good condition. It provides no protection if not worn or if damaged. It addresses consequences rather than eliminating hazards. Use PPE as a supplement to higher level controls, never as the primary protection method.

Every job is different requiring fresh assessment to avoid complacency. The work environment changes, equipment conditions vary, and voltage levels differ by location. Treat each task as unique and verify conditions rather than assuming they match previous similar work. Connect risk assessment directly to control selection, implementing the highest level controls feasible for the identified hazards. This systematic approach prevents the incidents that occur when workers assume conditions are safe or take shortcuts.

Lockout Tagout Procedures for Electrical Safety

2_x7_vXZRV6eqCgB9Itepg-1

Lockout tagout serves as the primary method for preventing unexpected energization during electrical maintenance, implementing administrative controls that enable safe work on electrical systems that can’t be eliminated or substituted.

The six-step LOTO procedure for electrical systems:

  1. Preparation and notification. Identify all energy sources for the equipment, review equipment-specific LOTO procedures, and notify affected personnel that shutdown will occur. Document all circuits and disconnects controlling the equipment.

  2. Shutdown of equipment. Use normal stopping procedures to shut down equipment in a controlled manner. Operate switches, controls, and valves according to shutdown sequence. Verify equipment reaches zero-energy state.

  3. Isolation of energy sources. Operate disconnecting means to isolate each energy source. Move circuit breakers to off position, remove fuses, open disconnects, and operate control switches. Physically verify each disconnecting device reaches the isolated position.

  4. Application of lockout/tagout devices. Place locks and tags on all energy-isolating devices in positions that prevent operation. Each worker applies their individual lock. Tags must identify the worker and warn against operating the device. Locks must withstand the environment and can’t be removed without tools or key.

  5. Release of stored energy. Discharge capacitors, relieve hydraulic and pneumatic pressure, and block mechanical motion. Stored electrical energy in capacitors and charged cables can remain at lethal levels after power isolation. Short and ground conductors after verifying de-energization.

  6. Verification of isolation. Test for voltage before performing work and test the area around the equipment. Use the appropriate voltage testing equipment at all conductor locations. Test the voltage tester itself before and after use on a known live source. Return to test for voltage if work is interrupted or if any doubt about system state exists.

Qualified workers and authorized personnel designations follow OSHA requirements. Qualified workers have training and demonstrated knowledge of electrical systems and safety practices. Authorized employees receive specific training to apply and remove LOTO devices. Affected employees work in areas where LOTO procedures are used but don’t perform the procedures themselves. Each category receives training appropriate to their role.

Testing requirements before and after LOTO application verify the system state. Always test for voltage before performing work even after following LOTO steps. Circuits can be energized from backfeeds, induction, or incorrect identification. Use approved electrical power testing equipment rated for expected voltages to accurately assess the level of risk associated with particular operations. Test all phases and test phase-to-phase as well as phase-to-ground.

Permit requirements and documentation procedures track LOTO applications for complex equipment or when multiple crews work on interconnected systems. The energy control permit lists all isolation points, required tests, special precautions, and authorized workers. Documentation creates accountability and provides a verification checklist. Keep permits until work completes and equipment returns to service.

Group lockout procedures when multiple workers are involved ensure each person applies their individual lock. Group lockout boxes or hasps accommodate multiple locks on a single isolation point. The rule is simple: you lock it out, you verify it’s de-energized, you do the work, you remove only your lock. Never remove another worker’s lock.

LOTO Step Key Requirements Verification Method
Preparation Identify all energy sources, review procedures, notify affected personnel, gather LOTO devices and testing equipment Review equipment-specific LOTO procedure checklist, verify all energy sources documented on energy control permit
Shutdown Use normal stopping procedures, operate controls in proper sequence, verify equipment reaches zero-energy state Visual confirmation equipment has stopped, check control panel indicators, verify mechanical motion ceased
Isolation Operate all disconnecting means, move breakers to off, remove fuses, open disconnects, physically verify position Visual confirmation of disconnect position, attempt operation of disconnects to confirm mechanical engagement in off position
Lockout Device Application Place locks preventing operation, each worker applies individual lock, attach tags identifying worker and warning against operation Attempt operation of energy-isolating device to confirm lock prevents movement, verify tag attachment and legibility
Stored Energy Release Discharge capacitors, short and ground conductors, relieve pressure, block mechanical motion, allow systems to cool Test voltage before installing grounds, measure zero pressure on gauges, verify blocking prevents motion
Verification Test for voltage at all conductor locations, test equipment before and after on known live source, test area around equipment Zero voltage reading on properly functioning tester, document test results on energy control permit

Personal Protective Equipment for Electrical Work

G8qm4lXdS-60KCP6pUtcAA-1

Risk assessment and arc flash analysis determine PPE selection based on hazard levels and voltage exposure. The hierarchy of controls positions PPE as the last line of defense after elimination, substitution, engineering controls, and administrative controls have been implemented. PPE selection must match calculated incident energy levels, fault current available, and clearing time of protective devices.

Inadequate personal protective equipment is a recognized electrical hazard contributing to injuries and fatalities. PPE provides protection only when properly selected for the specific hazards, correctly worn, and maintained in serviceable condition. Damaged, contaminated, or improperly rated PPE fails to protect and creates false confidence. Remove any questionable PPE from service immediately.

Voltage-rated glove classifications range from Class 00 through Class 4, protecting against progressively higher voltages. Class 00 protects to 500 volts AC, Class 0 to 1,000 volts, Class 1 to 7,500 volts, Class 2 to 17,000 volts, Class 3 to 26,500 volts, and Class 4 to 36,000 volts. Each glove class must be tested every six months by certified testing laboratories using high-voltage testing equipment that checks for pinholes and deterioration. Manufacturers stamp test dates on gloves. Perform visual inspection and air tests before each use, looking for cuts, punctures, embedded objects, and ozone damage (indicated by cracking or checking on the surface).

Essential PPE categories with voltage ratings and application contexts:

Insulated gloves with voltage class ratings. Primary protection for hands working on or near energized parts. Wear leather protectors over rubber insulating gloves to prevent physical damage. Size gloves properly to maintain dexterity while providing protection.

Dielectric footwear specifications. Provides insulation from ground, reducing shock current through the body. ASTM F2413 protective footwear or ASTM F2412 dielectric overshoes rated for voltage exposure. Contamination by moisture, dirt, or conductive materials compromises protection.

Flame-resistant clothing and arc ratings (calories/cm²). Protects against arc flash thermal energy. Arc rating indicates the incident energy level the fabric withstands before causing second-degree burn (onset of blistering). Select arc rating equal to or greater than calculated incident energy. Multi-layer systems increase protection level. Clothing must cover all skin from neck to wrists to ankles. Never wear flammable synthetic materials under arc-rated clothing.

Face shields and safety glasses with appropriate ratings. Face shields protect against arc flash thermal energy and molten metal droplets. Always wear safety glasses under face shields for impact protection if the shield is damaged. Arc-rated face shields with ratings matching the hazard level. Flip-up shields allow normal vision between energized work tasks.

Insulated tools and equipment. Hand tools rated for voltage exposure prevent shock when tools contact energized conductors. Look for 1000V rating marks for general electrical work. Insulated tool integrity requires regular inspection for cracks, chips, or gaps in the insulation coating.

Hearing protection for arc flash events. Arc blast pressure waves cause hearing damage. Use hearing protection rated for impulse noise (NRR 25-33 dB) when arc flash risk exists. The arc creates sound pressure levels exceeding 140 dB at typical working distances.

Hard hats with electrical ratings (Class E). Class E (Electrical) hard hats protect against electric shock up to 20,000 volts. Class G (General) protects to 2,200 volts. Class C (Conductive) hard hats provide no electrical protection and must never be used for electrical work. Check for the class rating inside the hard hat.

Voltage detectors and approved electrical power testing equipment. Use approved electrical power testing equipment to accurately assess the level of risk associated with particular operations. Non-contact voltage detectors provide initial indication but require confirmation with contact-type testers. Test the tester before and after each use on a known energized source.

Inspection, maintenance, and replacement schedules for electrical PPE follow manufacturer requirements and OSHA standards. Inspect rubber insulating gloves before each use through visual examination and air tests, with formal electrical testing every six months. Inspect arc-rated clothing before each use for damage, contamination, and manufacturers’ labels. Launder FR clothing according to manufacturers’ instructions. Contamination by flammable materials or degradation of arc rating requires removal from service. Replace hard hats showing cracks, dents, or ultraviolet degradation (indicated by fading and chalky surface). Replace voltage testers that fail functionality checks or show physical damage. Maintain records of PPE inspections and testing to demonstrate compliance. Damaged PPE must be removed from service immediately and replaced before returning to electrical work.

Safe Work Practices for Preventing Electrical Incidents

Cx6-eL3yTCSDaOFLMxVTRA-1

Safe work practices function as administrative controls in the hierarchy of controls, creating procedural barriers between workers and electrical hazards. These practices complement engineering controls like insulation and grounding while establishing behavioral expectations that reduce risk. Practices provide protection through consistent application of proven methods rather than relying on engineering modifications alone.

Combined layers of protection work together. Engineering controls establish physical barriers, administrative safe work practices define how to work near those barriers, and personal protective equipment provides final defense when contact occurs. No single control provides complete protection. Layered controls create redundancy so that if one control fails, others prevent incidents.

Specific safe work practices immediately applicable:

Always maintain at least 10 feet distance from overhead power lines with yourself and equipment. This minimum clearance accounts for tool length, equipment reach, and unexpected movement. For higher voltages, increase clearance: add 4 inches for every 10,000 volts above 50,000 volts. The 10-foot rule applies to yourself, ladders, scaffolds, equipment booms, antennas, building materials, and any object you’re carrying, lifting, or moving.

Stay at least 35 feet away from downed power lines. Downed lines remain energized and energize the ground around them in concentric voltage gradients. Current flows through the earth, creating step potential that shocks anyone walking near the line. The 35-foot clearance keeps you outside the typical energized ground zone. Call the utility immediately when you encounter downed lines.

Always assume all power lines are live and dangerous. You can’t determine voltage by appearance. Distribution lines carry 7,200 to 34,500 volts. Transmission lines carry 69,000 to 765,000 volts. Insulated lines aren’t insulated for worker protection, only for weather resistance. Don’t rely on circuit breakers or reclosers to prevent re-energization. Automatic reclosing devices attempt to restore power multiple times after faults.

Carry ladders and long equipment horizontally to avoid overhead line contact. Vertical carrying raises the ladder or material into the overhead power line zone. Lower long objects to horizontal position before moving. Plan carrying routes that avoid passing under power lines. Use non-conductive fiberglass ladders near overhead lines, never aluminum or wet wood ladders.

Never touch anything in contact with overhead power lines. Objects touching power lines become energized at line voltage. Trees, buildings, fences, vehicles, equipment, and other objects conduct electricity from line contact points. Don’t attempt to remove branches or objects touching lines. Call the utility.

Never operate equipment in wet conditions or with wet hands. Water on hands, floors, or equipment reduces electrical resistance and increases shock severity. Water provides conductive paths to ground. Wait for conditions to dry before operating electrical equipment. If you must work in damp locations, use GFCI protection and insulated equipment. Moisture from rain, snow, humidity, or standing water all increase risk.

Avoid running electrical cords across walkways or under carpets. Cords in walkways create tripping hazards and sustain damage from foot traffic. Damage to cord insulation exposes conductors. Running cords under carpets traps heat from conductor resistance, accelerates insulation deterioration, and hides damage from visual inspection. Route cords against walls or use overhead suspension. Where crossing walkways is unavoidable, use cord covers that protect the cord and provide trip-resistant surfaces.

Unplug devices when not in use. Reduces risk of electrical malfunctions during unattended periods and prevents energy wastage. Unplugging eliminates standby power consumption and removes voltage from damaged appliances that might fail when unattended. Make unplugging part of end-of-day shutdown procedures.

Avoid conductive materials and metal objects near energized equipment. Metal tools, jewelry, watches, key chains, and belt buckles conduct electricity. Remove rings, watches, and metallic jewelry before electrical work. Don’t carry metal tools in pockets where they might contact energized parts. Aluminum ladders and scaffolds near power lines create electrocution risk.

Properly route cords to prevent damage. Keep cords away from sharp edges, hot surfaces, chemicals, and mechanical equipment. Support cords to prevent strain on connections. Coil extra cord length loosely, never tightly wrap or bend at sharp angles. Inspect cord routing regularly and adjust to prevent abrasion or compression.

Use appropriate wattage ratings per manufacturer recommendations. Light bulbs and electrical appliances must use correct wattage as recommended by manufacturer to prevent overheating and electrical fires. Exceeding ratings causes overheating that breaks down insulation and creates ignition sources. Check fixture labels for maximum wattage. For appliances, verify power requirements match circuit capacity.

Never bypass safety devices or remove ground pins. Safety interlocks, GFCI protection, circuit breakers, and grounding pins protect against specific hazards. Removing or bypassing these devices eliminates designed-in protection. Never remove the metallic ground pin as it plays a vital role in safely returning unwanted voltage to ground. The ground pin carries fault current and trips protective devices when insulation fails.

Avoiding complacency requires treating each job uniquely with fresh assessment. Familiarity with equipment and locations creates dangerous assumptions that conditions match previous experience. Verify every time: test for voltage, inspect for damage, check environmental conditions, and assess the work approach. “I’ve done this a hundred times” thinking contributes to incidents when the 101st time involves changed conditions.

Water and electricity dangers extend beyond direct water contact. High humidity affects insulation resistance. Damp concrete floors conduct electricity. Plumbing and ductwork provide ground paths. During flooding events, shut down electrical systems at the main breaker before water reaches electrical equipment. If water has already contacted electrical systems, don’t attempt restoration yourself. Flood damage repair requires systematic assessment and safe drying approaches that address electrical hazards before re-energization.

Workers should speak up if they feel unsafe performing a job. Stop work authority means any worker can halt work when unsafe conditions exist, without fear of retaliation. Stopping work prevents incidents. Continuing despite concerns causes injuries. Company safety culture must support and expect workers to refuse unsafe work assignments and voice safety concerns about electrical hazards and work methods.

OSHA Standards and National Electrical Code Compliance

0MtyG2sdSuedcMRcIBuz4w-1

OSHA electrical standards establish enforceable safety requirements for workplaces. For general industry, 29 CFR 1910 Subpart S covers electrical safety-related work practices, while 29 CFR 1926 Subpart K applies to construction industry electrical requirements. These standards address installation safety, safe work practices, maintenance requirements, and worker training. Construction electrical standards recognize the temporary nature and rough conditions that require enhanced safety measures.

The National Electrical Code (NFPA 70) serves as the foundation for electrical installation standards throughout the United States. The NEC establishes requirements for electrical system design, wiring methods, equipment installation, grounding, and protection against hazards. OSHA references the NEC in its regulations, making NEC compliance an OSHA enforcement matter. States and local jurisdictions adopt specific NEC editions as legal requirements, creating enforceable installation standards. Authorities having jurisdiction inspect new installations against adopted NEC editions for code compliance.

The construction industry accounts for 52 percent of all electrical fatalities in US workplaces, creating regulatory focus on construction site electrical safety. OSHA construction standards address temporary power, grounding requirements, assured equipment grounding conductor program or GFCI protection, overhead power line clearances, and qualified worker requirements. The elevated fatality rate in construction results from temporary systems, rough conditions, overhead line proximity, and varying site conditions.

Competent person designation requirements mandate identifying qualified individuals with authority to recognize hazards and take corrective action. A competent person for electrical work must have training and experience in electrical systems, understand applicable standards, and possess authority to stop unsafe work. Competent person responsibilities on worksites include daily inspections of electrical equipment, verification that assured equipment grounding conductor programs function properly, hazard identification, and corrective action authority. The employer must designate competent persons in writing and document their qualifications.

Permit requirements for electrical work in hazardous locations and on energized equipment control access and verify proper planning. Hot work permits document arc flash analysis, justified reasons for energized work, implementation of necessary controls, required PPE, qualified worker verification, and authorized supervision. Permits aren’t needed for work on de-energized systems following lockout/tagout procedures.

Inspection and testing frequency requirements under OSHA regulations mandate daily visual inspections of portable electrical equipment on construction sites before each use. Assured equipment grounding conductor programs require three-month continuity testing intervals for cord sets, receptacles, and equipment. Annual inspections verify that electrical installations remain code-compliant and safe. Ground fault circuit interrupter protection requires monthly functionality testing.

Improper grounding remains the most common OSHA electrical violation, appearing repeatedly across all industries. Citations involve missing equipment grounding conductors, removed ground pins, undersized grounding conductors, and corroded connections.

Final Words

Electrical hazards create real risks in both workplaces and homes. From overhead power lines to damaged cords, wet conditions to overloaded circuits, hazard electrical safety starts with recognizing what puts you at risk.

Inspection, proper grounding, GFCI protection, and clear safe work practices protect against shock, burns, and fires. Every job is different. Follow lockout tagout procedures, maintain clearances, test for voltage, and use the right PPE.

When conditions feel unsafe, stop and reassess. Prevention works.

FAQ

Q: What are the electrical safety hazards?

A: Electrical safety hazards are conditions that create risk of burns, electrocution, arc flash, electric shock, fires, and explosions. These hazards come from five main sources that account for 92 percent of all electrical fatalities: overhead power lines, ground faults, damaged wiring, energized parts, and unexpected contact with electricity.

Q: What are the 8 examples of electrical hazards?

A: The eight examples of electrical hazards are overhead power lines, exposed wiring and energized electrical parts, damaged insulation and frayed cords, overloaded circuits and inadequate wiring, wet conditions and water contact, damaged tools and equipment, improper extension cord use and temporary wiring, and unexpected contact with electricity during construction activities.

Q: What are the 4 main hazards?

A: The four main electrical hazards are contact with overhead power lines (responsible for 46 percent of electrical fatalities), ground faults, damaged wiring and insulation, and energized equipment or parts. Together with unexpected contact, these five sources account for 92 percent of all electrical fatalities.

Q: What are 10 electrical safety rules?

A: The ten electrical safety rules are: maintain at least 10 feet distance from overhead power lines, stay 35 feet away from downed power lines, never operate equipment in wet conditions or with wet hands, turn off power before conducting work, follow lockout tagout procedures, test for voltage before performing work, never remove the metallic ground pin, avoid running cords across walkways or under carpets, unplug devices when not in use, and always assume all power lines are live and dangerous.

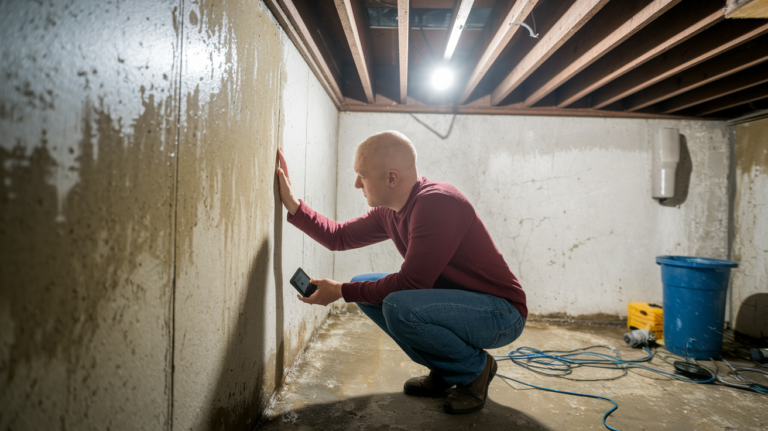
Hazard Electrical Safety: Protection Methods and Best Practices

0

Ever notice how electrical hazards rarely announce themselves before they strike? Damaged wiring doesn’t flash warning signs, and overloaded circuits don’t send calendar reminders before they fail. Electricity moves faster than reaction time, which means protection starts with recognition, not response. Whether you’re managing a worksite or maintaining a home, knowing what creates shock risks, arc flash dangers, and fire hazards lets you control them before someone gets hurt. This guide covers the electrical hazards that cause most injuries and deaths, the grounding systems that protect against faults, and the practical steps that keep people safe around power.

Identifying Common Electrical Hazards in Workplaces and Homes

aa8pJJqPS5Sccq3SZS4r8g

Electrical hazards create risks of burns, electrocution, arc flash, electric shock, fires, and explosions. Contact with electricity is one of the leading causes of workplace fatalities. Five sources account for 92 percent of electrical deaths: overhead power lines, ground faults, damaged wiring, energized parts, and unexpected contact. Common causes include insufficient insulation, circuit breaker failure, damaged appliances, improper extension cord use, and inadequate maintenance.

Recognition is the first step. Before work begins, identifying electrical hazards lets you implement controls and prevent incidents. Construction sites damage electrical wiring and increase shock hazards, but homes carry similar risks when systems age or when someone attempts repairs without proper knowledge.

Overhead Power Lines

Overhead power lines carry high voltages and account for 46 percent of all electrical fatalities. These lines are dangerous to both electrical and non-electrical workers. In fact, 57 percent of overhead power line fatalities happen in non-electrical occupations. Always maintain at least 10 feet distance from overhead power lines with yourself and any equipment you’re operating or carrying. This applies to equipment booms, ladders, scaffolding, and hand-carried tools or materials.

Safety barriers and warning signs must be installed where overhead power line exposure exists. Carry equipment including ladders horizontally to avoid contact. Never touch anything that’s in contact with overhead power lines. Always assume all power lines are live and dangerous. Downed power lines require even more caution. Stay at least 35 feet away.

Exposed Wiring and Energized Electrical Parts

Contact with energized conductors or parts accounts for 45 percent of all electrical fatalities, with 74 percent of these deaths occurring in electrical occupations. Exposed wiring creates immediate shock and electrocution risks when protective covers are missing or damaged. Open electrical panels, missing covers on junction boxes, and exposed terminal connections all present contact hazards.

Energized parts become hazardous during maintenance, inspection, or when protective barriers fail. Workers performing tasks near energized equipment face arc flash risks on top of direct contact dangers. All electrical panels must stay closed except during authorized work by qualified personnel. Never bypass interlocks or remove guards that prevent access to energized parts.

Damaged Insulation and Frayed Cords

Insulation deterioration exposes conductors and creates shock hazards. Don’t try to cover damaged insulation with electrical tape as a permanent repair. This temporary fix doesn’t provide adequate protection and creates a false sense of security. Turn off all power sources before replacing damaged insulation, and replace the entire damaged section or component.

Conduct regular inspections for cracks, cuts, or abrasions on cables, wires, and cords. Look for signs of thermal damage, mechanical stress, or environmental deterioration. Check power cords, plugs, and outlets regularly for damage like fraying, exposed wires, or loose connections. Damaged cords and plugs should be replaced immediately. Inspection protocols should include visual examination before each use for portable equipment and periodic scheduled inspections for fixed wiring.

Overloaded Circuits and Inadequate Wiring

Circuit capacity issues lead to overheating, insulation breakdown, and fire risks. Circuit breaker failure or frequently tripping breakers signal overloading problems that need immediate attention. Warm outlets, discolored cover plates, burning smells, or flickering lights all indicate dangerous overload conditions.

Inadequate wiring for the electrical load creates sustained stress on conductors and connections. Adding high-draw appliances to circuits sized for lighter loads exceeds safe ampacity ratings. Never increase breaker or fuse sizes without verifying wire gauge can handle the increased current. This creates fire hazards since the protection device no longer matches conductor capacity.

Wet Conditions and Water Contact

Water conducts electricity, making wet conditions particularly dangerous. The combination of electricity and water dramatically increases electrocution risk by reducing body resistance and providing conductive paths to ground. Never operate electrical equipment in wet conditions or with wet hands.

Moisture on floors, walls, or equipment surfaces creates shock paths that wouldn’t exist in dry conditions. Rain, humidity, plumbing leaks, and standing water all heighten electrical dangers. Ground fault circuit interrupters provide critical protection where electricity and water may come in contact, but preventing wet condition exposure remains the priority.

Damaged Tools and Equipment

Construction sites involve rough environments where tools and equipment sustain impacts, compression, and abrasion that compromise electrical safety. Damaged tool housings expose internal wiring. Cracked or broken insulation on power tools creates contact hazards. Loose or damaged plugs fail to maintain proper grounding connection.

Inspect all electrical equipment before use, checking for physical damage, missing parts, or signs of overheating. Remove damaged equipment from service immediately. Don’t attempt field repairs on damaged tools unless you’re qualified and following manufacturer procedures. Assessment of appliance condition should verify proper grounding, intact insulation, and functioning safety features.

Improper Extension Cord Use and Temporary Wiring

Extension cords routed across walkways create tripping hazards and sustain damage from foot traffic and equipment. Running cords under carpets traps heat, accelerates insulation breakdown, and hides damage from inspection. Use cable management solutions like cord covers or cable trays to keep cords organized and prevent tripping hazards while protecting conductors.

Temporary power systems on construction sites present risks from faulty connections, damaged cables, or inadequate grounding. These systems lack the permanent installation quality of fixed wiring and need frequent inspection. Never use extension cords as permanent wiring. Size cords appropriately for the load and length of run to prevent voltage drop and overheating.

Unexpected Contact with Electricity

Construction activities like drilling, digging, or demolition may result in unplanned electrical contact when workers strike buried cables or penetrate walls containing energized wiring. Electric shock occurs when the human body completes a circuit during these activities. Call 811 before excavation to locate underground utilities. Verify wall cavity contents before drilling or cutting.

Demolition work requires electrical hazard assessment and de-energization before structural members are removed. Assume wiring remains energized unless you’ve verified isolation and tested for voltage. Metal tools and equipment become energized when they contact live conductors, creating shock hazards for anyone touching the tool.

Systematic inspection before work begins identifies electrical hazards and allows implementation of controls. This proactive assessment prevents the majority of electrical incidents. The fact that 69 percent of all electrical fatalities involved non-electrical occupations emphasizes that universal awareness across all workers is essential, not just among electricians. Every person on a worksite or in a home must recognize basic electrical hazards and understand when to stop and call for qualified help.

Understanding Grounding Systems and GFCI Protection

iXbzqBFSIaC3EiKM_S-zA

Grounding and ground fault circuit interrupter protection serve as critical safeguards that prevent shock by providing alternative paths for fault current, protecting people when insulation fails or equipment malfunctions.

Grounding System Function and Requirements

Grounding systems work by returning fault current to earth through a dedicated low-resistance path, preventing voltage buildup on equipment frames and enclosures that people might touch. When insulation fails and energized conductors contact metal equipment parts, the grounding system carries fault current back to the source, tripping the overcurrent protection device and de-energizing the circuit. Without proper grounding, equipment frames remain energized at line voltage, creating deadly shock hazards.

Equipment grounding conductor sizing must match circuit capacity following National Electrical Code requirements. The conductor must maintain continuity from equipment through the entire branch circuit back to the service grounding electrode system. Any break in this path leaves equipment ungrounded. Bonding systems connect all metal parts that aren’t meant to carry current, ensuring they remain at the same electrical potential and preventing voltage differences between touchable surfaces.

Improper grounding is the most frequent OSHA electrical violation. Missing grounding connections, undersized grounding conductors, corroded connections, and removed ground pins all appear repeatedly in citations. This violation frequency reflects both the critical importance of grounding and the common tendency to bypass or neglect grounding requirements.

Ground Fault Circuit Interrupter Protection

GFCIs monitor current flow between hot and neutral conductors, detecting any imbalance that indicates current leaking to ground through an unintended path like through a person’s body. When the GFCI senses a difference as small as 4 to 6 milliamps between outgoing and returning current, it trips within 25 milliseconds, fast enough to prevent most serious shocks. This trip threshold sits well below the 10 to 20 milliamp level where muscle contractions prevent releasing the energized object.

Required installation locations include any area where electricity and water may come in contact: bathrooms, kitchens, outdoor outlets, crawl spaces, unfinished basements, garages, and temporary construction power. Install GFCI protection either at the outlet (receptacle type) or protecting the entire circuit (breaker type). Portable GFCI devices provide protection for extension cords and temporary equipment.

The three-prong plug includes the round grounding pin below the two flat current-carrying blades. Never remove the metallic ground pin as it plays a vital role in safely returning unwanted voltage to ground. The ground pin connects equipment frames to the grounding system, preventing shock if internal insulation fails. Adapters that allow three-prong plugs in two-prong outlets defeat the grounding protection unless the adapter tab connects to a grounded outlet cover screw, which rarely provides reliable grounding.

Testing procedures for ground continuity verification use specialized continuity testers or multimeters to confirm low-resistance paths from equipment grounding points back to the service ground. Resistance above 1 ohm indicates problems requiring correction. GFCI monthly testing requirements involve pushing the test button to verify trip function. The device should immediately shut off power. Press the reset button to restore power. Mark any GFCI that fails to trip during testing, remove it from service, and replace it.

Recognition of grounding deficiencies during inspections includes looking for two-prong outlets in areas requiring GFCI protection, missing or damaged ground pins on plugs, painted-over outlet ground contacts, and equipment with no visible grounding connection. Receptacle testers plug into outlets and indicate proper grounding, open grounds, and reverse polarity conditions through indicator light patterns.

Protection Device Trip Threshold Application
GFCI 4-6 milliamps imbalance Personnel protection in wet locations, outlets within 6 feet of water sources, outdoor circuits, construction sites
AFCI (Arc Fault Circuit Interrupter) Detects arcing patterns Fire prevention in residential bedrooms, living areas, required for most dwelling unit circuits per current NEC
Circuit Breaker 125% of continuous load rating Overcurrent protection for branch circuits, prevents conductor overheating and fire from excessive current
Fuse Rated amperage Overcurrent protection, one-time use device that must be replaced after operation, common in older systems and equipment

Risk Assessment Methods and Hierarchy of Controls

XHZkWDt3RSGo8Qf4piiAtw

Performing a site and risk assessment before conducting any electrical work identifies hazards and determines appropriate control measures. This assessment examines the work environment, equipment condition, voltage levels, and potential for contact with energized parts. Documentation of findings guides control selection and safe work planning.

Arc flash hazards release intense thermal energy when electrical faults create plasma between conductors or from conductor to ground. The explosion produces temperatures exceeding 35,000°F, pressure waves, molten metal droplets, and intense light. Arc flash events cause severe burns, hearing damage, and blast injuries. The fact that 45 percent of all electrical fatalities resulted from working on or near energized conductors highlights the severity of energized work hazards. Among electrical occupations specifically, 74 percent of energized equipment fatalities demonstrate the concentrated risk faced by workers performing electrical tasks.

The hierarchy of controls provides a systematic approach to hazard mitigation based on risk assessment findings. This framework ranks control methods by effectiveness, with higher level controls providing more reliable protection because they don’t depend on human behavior or require constant maintenance. Preference always goes to higher level controls that eliminate hazards or engineer them out of the system rather than relying on procedures or personal protective equipment.

Elimination (Most Effective)

Elimination removes electrical hazards entirely by de-energizing equipment and systems before work begins. Turning off power when possible before conducting work eliminates shock, arc flash, and burn hazards. Design approaches that eliminate electrical exposure include locating equipment away from work areas, using non-electrical alternatives for tasks, and designing out the need to work on energized systems.

Complete de-energization and verification through lockout/tagout procedures provides the most effective hazard control. Work on de-energized systems eliminates the majority of electrical incident risks. Schedule electrical work during shutdowns when systems can be fully isolated. When you can’t work de-energized, document the justification and implement multiple additional controls.

Substitution

Substitution replaces high hazard electrical systems with lower hazard alternatives. Using lower voltage systems reduces shock severity and arc flash energy. For example, specifying 120-volt systems instead of 480-volt where adequate for the application decreases incident energy. Intrinsically safe equipment limits available energy to levels incapable of causing ignition in hazardous atmospheres.

Battery-powered tools eliminate shock hazards from corded equipment in many applications. Pneumatic tools substitute air power for electrical power in wet environments or areas with explosion risks. Reduced voltage systems for temporary construction lighting and portable equipment limit exposure compared to full-line voltage.

Engineering Controls

Engineering controls use physical design features and equipment to separate people from electrical hazards. Insulation covers conductors to prevent contact. Guarding places barriers around energized parts. GFCI installation provides automatic disconnection during ground faults. Grounding systems create low-resistance fault current paths. These controls work continuously without requiring human intervention.

Safety barriers and warning signs for overhead power lines keep non-electrical workers away from high-voltage exposure. Physical separation from energized parts through enclosed equipment, locked rooms, and adequate spacing prevents contact. Double insulation on power tools provides two independent layers of protection. Interlocks shut off power when enclosure doors open.

Administrative Controls

Administrative controls use procedures, training, and work practices to reduce electrical hazards. Safe work practices define how to perform tasks safely. Lockout/tagout procedures prevent unexpected energization. Training programs build knowledge and skills. Job hazard analysis identifies task-specific risks before work starts.

Voltage testing requirements mandate testing both equipment and the surrounding area before work to verify de-energization. Test equipment itself before and after use to confirm proper function. Permit systems control access to electrical hazards and verify proper planning and precautions. Work scheduling and coordination prevent multiple crews from creating hazards for each other. Inspection programs find and correct hazards before incidents occur.

Personal Protective Equipment (Least Effective)

Personal protective equipment serves as the last line of defense when higher level controls don’t eliminate all hazards. Arc flash analysis determines required PPE based on incident energy calculations at specific working distances. Calculation methods determine arc flash boundaries and incident energy levels measured in calories per square centimeter. This analysis specifies voltage-rated gloves, flame-resistant clothing, face shields, and other PPE needed for the specific hazards present.

PPE reliability depends entirely on proper selection, correct use, and maintenance in good condition. It provides no protection if not worn or if damaged. It addresses consequences rather than eliminating hazards. Use PPE as a supplement to higher level controls, never as the primary protection method.

Every job is different requiring fresh assessment to avoid complacency. The work environment changes, equipment conditions vary, and voltage levels differ by location. Treat each task as unique and verify conditions rather than assuming they match previous similar work. Connect risk assessment directly to control selection, implementing the highest level controls feasible for the identified hazards. This systematic approach prevents the incidents that occur when workers assume conditions are safe or take shortcuts.

Lockout Tagout Procedures for Electrical Safety

2_x7_vXZRV6eqCgB9Itepg

Lockout tagout serves as the primary method for preventing unexpected energization during electrical maintenance, implementing administrative controls that enable safe work on electrical systems that can’t be eliminated or substituted.

The six-step LOTO procedure for electrical systems:

  1. Preparation and notification. Identify all energy sources for the equipment, review equipment-specific LOTO procedures, and notify affected personnel that shutdown will occur. Document all circuits and disconnects controlling the equipment.

  2. Shutdown of equipment. Use normal stopping procedures to shut down equipment in a controlled manner. Operate switches, controls, and valves according to shutdown sequence. Verify equipment reaches zero-energy state.

  3. Isolation of energy sources. Operate disconnecting means to isolate each energy source. Move circuit breakers to off position, remove fuses, open disconnects, and operate control switches. Physically verify each disconnecting device reaches the isolated position.

  4. Application of lockout/tagout devices. Place locks and tags on all energy-isolating devices in positions that prevent operation. Each worker applies their individual lock. Tags must identify the worker and warn against operating the device. Locks must withstand the environment and can’t be removed without tools or key.

  5. Release of stored energy. Discharge capacitors, relieve hydraulic and pneumatic pressure, and block mechanical motion. Stored electrical energy in capacitors and charged cables can remain at lethal levels after power isolation. Short and ground conductors after verifying de-energization.

  6. Verification of isolation. Test for voltage before performing work and test the area around the equipment. Use the appropriate voltage testing equipment at all conductor locations. Test the voltage tester itself before and after use on a known live source. Return to test for voltage if work is interrupted or if any doubt about system state exists.

Qualified workers and authorized personnel designations follow OSHA requirements. Qualified workers have training and demonstrated knowledge of electrical systems and safety practices. Authorized employees receive specific training to apply and remove LOTO devices. Affected employees work in areas where LOTO procedures are used but don’t perform the procedures themselves. Each category receives training appropriate to their role.

Testing requirements before and after LOTO application verify the system state. Always test for voltage before performing work even after following LOTO steps. Circuits can be energized from backfeeds, induction, or incorrect identification. Use approved electrical power testing equipment rated for expected voltages to accurately assess the level of risk associated with particular operations. Test all phases and test phase-to-phase as well as phase-to-ground.

Permit requirements and documentation procedures track LOTO applications for complex equipment or when multiple crews work on interconnected systems. The energy control permit lists all isolation points, required tests, special precautions, and authorized workers. Documentation creates accountability and provides a verification checklist. Keep permits until work completes and equipment returns to service.

Group lockout procedures when multiple workers are involved ensure each person applies their individual lock. Group lockout boxes or hasps accommodate multiple locks on a single isolation point. The rule is simple: you lock it out, you verify it’s de-energized, you do the work, you remove only your lock. Never remove another worker’s lock.

LOTO Step Key Requirements Verification Method
Preparation Identify all energy sources, review procedures, notify affected personnel, gather LOTO devices and testing equipment Review equipment-specific LOTO procedure checklist, verify all energy sources documented on energy control permit
Shutdown Use normal stopping procedures, operate controls in proper sequence, verify equipment reaches zero-energy state Visual confirmation equipment has stopped, check control panel indicators, verify mechanical motion ceased
Isolation Operate all disconnecting means, move breakers to off, remove fuses, open disconnects, physically verify position Visual confirmation of disconnect position, attempt operation of disconnects to confirm mechanical engagement in off position
Lockout Device Application Place locks preventing operation, each worker applies individual lock, attach tags identifying worker and warning against operation Attempt operation of energy-isolating device to confirm lock prevents movement, verify tag attachment and legibility
Stored Energy Release Discharge capacitors, short and ground conductors, relieve pressure, block mechanical motion, allow systems to cool Test voltage before installing grounds, measure zero pressure on gauges, verify blocking prevents motion
Verification Test for voltage at all conductor locations, test equipment before and after on known live source, test area around equipment Zero voltage reading on properly functioning tester, document test results on energy control permit

Personal Protective Equipment for Electrical Work

G8qm4lXdS-60KCP6pUtcAA

Risk assessment and arc flash analysis determine PPE selection based on hazard levels and voltage exposure. The hierarchy of controls positions PPE as the last line of defense after elimination, substitution, engineering controls, and administrative controls have been implemented. PPE selection must match calculated incident energy levels, fault current available, and clearing time of protective devices.

Inadequate personal protective equipment is a recognized electrical hazard contributing to injuries and fatalities. PPE provides protection only when properly selected for the specific hazards, correctly worn, and maintained in serviceable condition. Damaged, contaminated, or improperly rated PPE fails to protect and creates false confidence. Remove any questionable PPE from service immediately.

Voltage-rated glove classifications range from Class 00 through Class 4, protecting against progressively higher voltages. Class 00 protects to 500 volts AC, Class 0 to 1,000 volts, Class 1 to 7,500 volts, Class 2 to 17,000 volts, Class 3 to 26,500 volts, and Class 4 to 36,000 volts. Each glove class must be tested every six months by certified testing laboratories using high-voltage testing equipment that checks for pinholes and deterioration. Manufacturers stamp test dates on gloves. Perform visual inspection and air tests before each use, looking for cuts, punctures, embedded objects, and ozone damage (indicated by cracking or checking on the surface).

Essential PPE categories with voltage ratings and application contexts:

Insulated gloves with voltage class ratings. Primary protection for hands working on or near energized parts. Wear leather protectors over rubber insulating gloves to prevent physical damage. Size gloves properly to maintain dexterity while providing protection.

Dielectric footwear specifications. Provides insulation from ground, reducing shock current through the body. ASTM F2413 protective footwear or ASTM F2412 dielectric overshoes rated for voltage exposure. Contamination by moisture, dirt, or conductive materials compromises protection.

Flame-resistant clothing and arc ratings (calories/cm²). Protects against arc flash thermal energy. Arc rating indicates the incident energy level the fabric withstands before causing second-degree burn (onset of blistering). Select arc rating equal to or greater than calculated incident energy. Multi-layer systems increase protection level. Clothing must cover all skin from neck to wrists to ankles. Never wear flammable synthetic materials under arc-rated clothing.

Face shields and safety glasses with appropriate ratings. Face shields protect against arc flash thermal energy and molten metal droplets. Always wear safety glasses under face shields for impact protection if the shield is damaged. Arc-rated face shields with ratings matching the hazard level. Flip-up shields allow normal vision between energized work tasks.

Insulated tools and equipment. Hand tools rated for voltage exposure prevent shock when tools contact energized conductors. Look for 1000V rating marks for general electrical work. Insulated tool integrity requires regular inspection for cracks, chips, or gaps in the insulation coating.

Hearing protection for arc flash events. Arc blast pressure waves cause hearing damage. Use hearing protection rated for impulse noise (NRR 25-33 dB) when arc flash risk exists. The arc creates sound pressure levels exceeding 140 dB at typical working distances.

Hard hats with electrical ratings (Class E). Class E (Electrical) hard hats protect against electric shock up to 20,000 volts. Class G (General) protects to 2,200 volts. Class C (Conductive) hard hats provide no electrical protection and must never be used for electrical work. Check for the class rating inside the hard hat.

Voltage detectors and approved electrical power testing equipment. Use approved electrical power testing equipment to accurately assess the level of risk associated with particular operations. Non-contact voltage detectors provide initial indication but require confirmation with contact-type testers. Test the tester before and after each use on a known energized source.

Inspection, maintenance, and replacement schedules for electrical PPE follow manufacturer requirements and OSHA standards. Inspect rubber insulating gloves before each use through visual examination and air tests, with formal electrical testing every six months. Inspect arc-rated clothing before each use for damage, contamination, and manufacturers’ labels. Launder FR clothing according to manufacturers’ instructions. Contamination by flammable materials or degradation of arc rating requires removal from service. Replace hard hats showing cracks, dents, or ultraviolet degradation (indicated by fading and chalky surface). Replace voltage testers that fail functionality checks or show physical damage. Maintain records of PPE inspections and testing to demonstrate compliance. Damaged PPE must be removed from service immediately and replaced before returning to electrical work.

Safe Work Practices for Preventing Electrical Incidents

Cx6-eL3yTCSDaOFLMxVTRA

Safe work practices function as administrative controls in the hierarchy of controls, creating procedural barriers between workers and electrical hazards. These practices complement engineering controls like insulation and grounding while establishing behavioral expectations that reduce risk. Practices provide protection through consistent application of proven methods rather than relying on engineering modifications alone.

Combined layers of protection work together. Engineering controls establish physical barriers, administrative safe work practices define how to work near those barriers, and personal protective equipment provides final defense when contact occurs. No single control provides complete protection. Layered controls create redundancy so that if one control fails, others prevent incidents.

Specific safe work practices immediately applicable:

Always maintain at least 10 feet distance from overhead power lines with yourself and equipment. This minimum clearance accounts for tool length, equipment reach, and unexpected movement. For higher voltages, increase clearance: add 4 inches for every 10,000 volts above 50,000 volts. The 10-foot rule applies to yourself, ladders, scaffolds, equipment booms, antennas, building materials, and any object you’re carrying, lifting, or moving.

Stay at least 35 feet away from downed power lines. Downed lines remain energized and energize the ground around them in concentric voltage gradients. Current flows through the earth, creating step potential that shocks anyone walking near the line. The 35-foot clearance keeps you outside the typical energized ground zone. Call the utility immediately when you encounter downed lines.

Always assume all power lines are live and dangerous. You can’t determine voltage by appearance. Distribution lines carry 7,200 to 34,500 volts. Transmission lines carry 69,000 to 765,000 volts. Insulated lines aren’t insulated for worker protection, only for weather resistance. Don’t rely on circuit breakers or reclosers to prevent re-energization. Automatic reclosing devices attempt to restore power multiple times after faults.

Carry ladders and long equipment horizontally to avoid overhead line contact. Vertical carrying raises the ladder or material into the overhead power line zone. Lower long objects to horizontal position before moving. Plan carrying routes that avoid passing under power lines. Use non-conductive fiberglass ladders near overhead lines, never aluminum or wet wood ladders.

Never touch anything in contact with overhead power lines. Objects touching power lines become energized at line voltage. Trees, buildings, fences, vehicles, equipment, and other objects conduct electricity from line contact points. Don’t attempt to remove branches or objects touching lines. Call the utility.

Never operate equipment in wet conditions or with wet hands. Water on hands, floors, or equipment reduces electrical resistance and increases shock severity. Water provides conductive paths to ground. Wait for conditions to dry before operating electrical equipment. If you must work in damp locations, use GFCI protection and insulated equipment. Moisture from rain, snow, humidity, or standing water all increase risk.

Avoid running electrical cords across walkways or under carpets. Cords in walkways create tripping hazards and sustain damage from foot traffic. Damage to cord insulation exposes conductors. Running cords under carpets traps heat from conductor resistance, accelerates insulation deterioration, and hides damage from visual inspection. Route cords against walls or use overhead suspension. Where crossing walkways is unavoidable, use cord covers that protect the cord and provide trip-resistant surfaces.

Unplug devices when not in use. Reduces risk of electrical malfunctions during unattended periods and prevents energy wastage. Unplugging eliminates standby power consumption and removes voltage from damaged appliances that might fail when unattended. Make unplugging part of end-of-day shutdown procedures.

Avoid conductive materials and metal objects near energized equipment. Metal tools, jewelry, watches, key chains, and belt buckles conduct electricity. Remove rings, watches, and metallic jewelry before electrical work. Don’t carry metal tools in pockets where they might contact energized parts. Aluminum ladders and scaffolds near power lines create electrocution risk.

Properly route cords to prevent damage. Keep cords away from sharp edges, hot surfaces, chemicals, and mechanical equipment. Support cords to prevent strain on connections. Coil extra cord length loosely, never tightly wrap or bend at sharp angles. Inspect cord routing regularly and adjust to prevent abrasion or compression.

Use appropriate wattage ratings per manufacturer recommendations. Light bulbs and electrical appliances must use correct wattage as recommended by manufacturer to prevent overheating and electrical fires. Exceeding ratings causes overheating that breaks down insulation and creates ignition sources. Check fixture labels for maximum wattage. For appliances, verify power requirements match circuit capacity.

Never bypass safety devices or remove ground pins. Safety interlocks, GFCI protection, circuit breakers, and grounding pins protect against specific hazards. Removing or bypassing these devices eliminates designed-in protection. Never remove the metallic ground pin as it plays a vital role in safely returning unwanted voltage to ground. The ground pin carries fault current and trips protective devices when insulation fails.

Avoiding complacency requires treating each job uniquely with fresh assessment. Familiarity with equipment and locations creates dangerous assumptions that conditions match previous experience. Verify every time: test for voltage, inspect for damage, check environmental conditions, and assess the work approach. “I’ve done this a hundred times” thinking contributes to incidents when the 101st time involves changed conditions.

Water and electricity dangers extend beyond direct water contact. High humidity affects insulation resistance. Damp concrete floors conduct electricity. Plumbing and ductwork provide ground paths. During flooding events, shut down electrical systems at the main breaker before water reaches electrical equipment. If water has already contacted electrical systems, don’t attempt restoration yourself. Flood damage repair requires systematic assessment and safe drying approaches that address electrical hazards before re-energization.

Workers should speak up if they feel unsafe performing a job. Stop work authority means any worker can halt work when unsafe conditions exist, without fear of retaliation. Stopping work prevents incidents. Continuing despite concerns causes injuries. Company safety culture must support and expect workers to refuse unsafe work assignments and voice safety concerns about electrical hazards and work methods.

OSHA Standards and National Electrical Code Compliance

0MtyG2sdSuedcMRcIBuz4w

OSHA electrical standards establish enforceable safety requirements for workplaces. For general industry, 29 CFR 1910 Subpart S covers electrical safety-related work practices, while 29 CFR 1926 Subpart K applies to construction industry electrical requirements. These standards address installation safety, safe work practices, maintenance requirements, and worker training. Construction electrical standards recognize the temporary nature and rough conditions that require enhanced safety measures.

The National Electrical Code (NFPA 70) serves as the foundation for electrical installation standards throughout the United States. The NEC establishes requirements for electrical system design, wiring methods, equipment installation, grounding, and protection against hazards. OSHA references the NEC in its regulations, making NEC compliance an OSHA enforcement matter. States and local jurisdictions adopt specific NEC editions as legal requirements, creating enforceable installation standards. Authorities having jurisdiction inspect new installations against adopted NEC editions for code compliance.

The construction industry accounts for 52 percent of all electrical fatalities in US workplaces, creating regulatory focus on construction site electrical safety. OSHA construction standards address temporary power, grounding requirements, assured equipment grounding conductor program or GFCI protection, overhead power line clearances, and qualified worker requirements. The elevated fatality rate in construction results from temporary systems, rough conditions, overhead line proximity, and varying site conditions.

Competent person designation requirements mandate identifying qualified individuals with authority to recognize hazards and take corrective action. A competent person for electrical work must have training and experience in electrical systems, understand applicable standards, and possess authority to stop unsafe work. Competent person responsibilities on worksites include daily inspections of electrical equipment, verification that assured equipment grounding conductor programs function properly, hazard identification, and corrective action authority. The employer must designate competent persons in writing and document their qualifications.

Permit requirements for electrical work in hazardous locations and on energized equipment control access and verify proper planning. Hot work permits document arc flash analysis, justified reasons for energized work, implementation of necessary controls, required PPE, qualified worker verification, and authorized supervision. Permits aren’t needed for work on de-energized systems following lockout/tagout procedures.

Inspection and testing frequency requirements under OSHA regulations mandate daily visual inspections of portable electrical equipment on construction sites before each use. Assured equipment grounding conductor programs require three-month continuity testing intervals for cord sets, receptacles, and equipment. Annual inspections verify that electrical installations remain code-compliant and safe. Ground fault circuit interrupter protection requires monthly functionality testing.

Improper grounding remains the most common OSHA electrical violation, appearing repeatedly across all industries. Citations involve missing equipment grounding conductors, removed ground pins, undersized grounding conductors, and corroded connections.

Final Words

Electrical hazards create real risks in both workplaces and homes. From overhead power lines to damaged cords, wet conditions to overloaded circuits, hazard electrical safety starts with recognizing what puts you at risk.

Inspection, proper grounding, GFCI protection, and clear safe work practices protect against shock, burns, and fires. Every job is different. Follow lockout tagout procedures, maintain clearances, test for voltage, and use the right PPE.

When conditions feel unsafe, stop and reassess. Prevention works.

FAQ

Q: What are the electrical safety hazards?

A: Electrical safety hazards are conditions that create risk of burns, electrocution, arc flash, electric shock, fires, and explosions. These hazards come from five main sources that account for 92 percent of all electrical fatalities: overhead power lines, ground faults, damaged wiring, energized parts, and unexpected contact with electricity.

Q: What are the 8 examples of electrical hazards?

A: The eight examples of electrical hazards are overhead power lines, exposed wiring and energized electrical parts, damaged insulation and frayed cords, overloaded circuits and inadequate wiring, wet conditions and water contact, damaged tools and equipment, improper extension cord use and temporary wiring, and unexpected contact with electricity during construction activities.

Q: What are the 4 main hazards?

A: The four main electrical hazards are contact with overhead power lines (responsible for 46 percent of electrical fatalities), ground faults, damaged wiring and insulation, and energized equipment or parts. Together with unexpected contact, these five sources account for 92 percent of all electrical fatalities.

Q: What are 10 electrical safety rules?

A: The ten electrical safety rules are: maintain at least 10 feet distance from overhead power lines, stay 35 feet away from downed power lines, never operate equipment in wet conditions or with wet hands, turn off power before conducting work, follow lockout tagout procedures, test for voltage before performing work, never remove the metallic ground pin, avoid running cords across walkways or under carpets, unplug devices when not in use, and always assume all power lines are live and dangerous.

Standing Water in Crawl Space Solutions That Actually Work

0

Think you can leave standing water under your house and it will dry itself?
Not true.
Every hour that water sits in a crawl space risks warped joists, mold that can start in 48 to 72 hours, and musty air that spreads through the home.
The first job is simple: get the water out and stop more from coming in.
This post lays out fast, safe emergency steps: pump, dry, and protect, plus proven long-term fixes like perimeter drains, sump pumps, and full encapsulation that actually stop the problem.

Immediate Standing Water Solutions for Crawl Spaces

zdHwOIenQtaZE6_eWDIr9Q

Standing water in a crawl space needs to come out fast. Every hour it sits under your home, you’re risking structural damage, mold growth, and air quality problems that can affect everyone inside. Mold can start within 48 to 72 hours after water shows up, so speed matters.

The usual suspects? Groundwater pushing in after heavy rain, poor yard grading that sends water straight toward your foundation, clogged or missing gutters, broken plumbing, and slow draining clay soil that holds moisture right next to your home. Whatever caused it, your first job is getting the water out and starting the drying process.

Once the water’s gone, you need to drop the humidity below 50% and keep it there. A crawl space rated dehumidifier and good air movement will stop mold before it takes hold and buy you time to plan permanent fixes.

Here’s the emergency removal process:

  1. Shut off power to the crawl space if it’s safe to do so. Never enter standing water with live electrical connections nearby.

  2. Wear gloves, eye protection, and a respirator. Crawl space water often contains dirt, debris, and bacteria.

  3. Use a submersible pump or wet/dry shop vac. Portable pumps can move hundreds to thousands of gallons per hour depending on the model. Wet vacs work for smaller amounts or tight corners.

  4. Remove wet insulation and debris. Saturated fiberglass batts and soaked materials won’t dry and can harbor mold.

  5. Set up fans and a dehumidifier. Target relative humidity below 50%. Crawl space rated units range from 30 to 70 pints per day depending on space size.

  6. Monitor for visible mold. If you see heavy contamination or the HVAC system connects to the crawl space, call a professional remediation company.

Causes of Crawl Space Water Accumulation and How They Relate to Long-Term Solutions

BbiN9DSSRQigpH50KJW1ew

You can pump out standing water, but it’ll come back unless you fix what caused it. Most crawl space flooding happens because water gets directed toward your home instead of away from it, or because groundwater has nowhere to go once it reaches your foundation.

Poor yard grading is the most common culprit. The soil around your foundation should slope down at least 6 inches over the first 10 feet, so rainwater and snowmelt naturally flow away. When the grade is flat or slopes back toward the house, every storm adds water to your crawl space. Gutters and downspouts also play a big role. If your gutters are clogged or missing extensions, thousands of gallons of roof runoff dump straight down next to your foundation.

Soil type matters too. Clay soil drains slowly and holds water near the foundation for days after a storm. Sandy soil drains faster but can still allow groundwater to rise during heavy rain or snowmelt. A high water table means the soil under your home is already saturated, so any additional rain has nowhere to go except up into your crawl space. Leaking pipes or appliances inside the crawl space add localized water that doesn’t go away on its own.

The most common causes of standing water under your home:

  • Poor yard grading. Soil slopes toward foundation instead of away. Needs regrading to achieve 6 inch drop over first 10 feet.
  • Inadequate drainage. Clogged gutters, missing downspout extensions, no yard drains to move surface water away from home.
  • High water table or prolonged snowmelt. Saturates soil under foundation. Requires interior or exterior drainage system with sump pump.
  • Slow draining clay soil. Holds water near foundation longer than sandy soil. Often requires French drain or perimeter drain.
  • Leaking plumbing or appliances. Localized water source inside crawl space. Fix leaks first, then dry and prevent return moisture.

Drainage System Solutions for Standing Water Problems

GPrnNbFFS42ZuZ8Og8xN8g

Permanent drainage systems stop groundwater before it becomes standing water. Exterior solutions intercept water outside your foundation and redirect it away. Interior systems collect water that reaches the crawl space and eject it using a sump pump. Both approaches work, and many homes need a combination of the two.

Exterior grading is the first line of defense. The target is a 6 inch drop over the first 10 feet from your foundation. If your yard is flat or slopes the wrong way, regrading costs typically range from $500 to $5,000 depending on how much soil needs to be moved and whether you need retaining walls or drainage swales. For homes where regrading isn’t enough or the water table is high, a French drain intercepts subsurface water before it reaches the foundation. A French drain uses a 4 inch perforated pipe surrounded by 3/4 inch clean gravel, installed in a trench 18 to 24 inches deep with a slope of about 1 percent, roughly 1/8 inch per foot. The pipe collects groundwater and carries it to daylight or a dry well away from the house. Typical costs run $2,000 to $10,000 depending on linear feet and site access.

Comparing French Drain vs Perimeter Drain

French drains work outside the foundation to intercept water before it reaches the crawl space. Perimeter drains work inside the crawl space, collecting water that’s already entered and routing it to a sump pit. Exterior systems prevent water intrusion. Interior systems manage water that gets through. If your water table is high or you’ve got persistent seepage, an interior perimeter drain paired with a sump pump is often the most reliable long term fix.

Drain Type Primary Function
Exterior French Drain Intercepts groundwater outside foundation. Diverts water before it reaches crawl space.
Interior Perimeter Drain Collects water inside crawl space perimeter. Channels to sump pit for ejection.
Sump Pump System Automatically activates when water fills pit. Pumps water away from foundation via discharge line.
Downspout Extensions Moves roof runoff 4 to 6 feet minimum from foundation. Prevents surface water pooling near walls.

Sump Pump Solutions for Crawl Spaces with Standing Water

FnNu-QJhQOaKzsz4vqOgCg

A sump pump is the core of any interior drainage system. The pump sits in a pit, typically 18 to 24 inches in diameter, where perimeter drains or groundwater naturally collect. When water fills the pit to a set level, a float switch activates the pump and ejects the water through a discharge line that runs away from your foundation. A check valve on the discharge line prevents water from flowing back into the pit after the pump shuts off.

For most crawl spaces, a 1/3 to 1/2 horsepower submersible pump is sufficient. Solids handling pumps are recommended because crawl space water often contains dirt and small debris. Sump pumps typically last 5 to 10 years, so plan for replacement or annual testing. Battery backup systems are worth the extra cost in areas prone to power outages during storms. The backup pump kicks in when the main pump loses power, preventing flooding when you need protection most. Sump pump and pit installation costs typically range from $1,500 to $5,000 depending on whether you’re adding perimeter drainage or just installing the pit and pump.

The discharge line must extend at least 10 feet from the foundation and slope downward so water drains away even when the pump is off. In cold climates, a buried discharge line with a freeze resistant termination prevents winter ice blockages.

Sump pump maintenance checklist:

  • Test the float switch twice a year. Pour water into the pit to confirm the pump activates and shuts off correctly.
  • Clean the pit annually. Remove debris, dirt, and silt that can clog the pump intake or bind the float.
  • Check the discharge line for blockages. Clear any leaves, ice, or debris at the termination point.
  • Inspect the check valve. Make sure it opens and closes fully to prevent backflow into the pit.
  • Test the battery backup. If installed, confirm the backup pump activates when you disconnect power to the primary pump.

Vapor Barriers and Moisture Control as Core Crawl Space Water Solutions

m-VDSvxgRzuNKaeLxLeSfg

A vapor barrier is a heavy plastic sheet installed over the crawl space floor and sometimes up the walls to block moisture vapor rising from the soil. Even after you remove standing water and install drainage, soil moisture will continue evaporating into your crawl space unless you seal it off. That moisture raises humidity, encourages mold, and degrades insulation and wood framing over time.

Vapor barriers are rated by thickness in mils. 12 to 20 mil polyethylene is standard for crawl spaces. Seams must overlap and be sealed with 4 inch vapor barrier tape to prevent moisture from migrating through gaps. The barrier should cover the entire floor and extend up foundation walls and piers to create a continuous seal. Material costs run about $0.50 to $2.00 per square foot, but professional installation that includes wall coverage, pier wrapping, and proper sealing typically adds labor costs that bring total vapor barrier projects to $1,000 to $5,000 depending on crawl space size and condition.

A properly installed vapor barrier reduces long term moisture intrusion, lowers humidity, and stops soil odors from entering your home. It’s the foundation of any crawl space moisture control strategy, but it works best when paired with drainage, air sealing, and dehumidification to create a complete system.

Full Encapsulation Solutions for Persistent Crawl Space Moisture

XxLOi2kBQMKPUvRUE6NpCA

Crawl space encapsulation is the most comprehensive moisture control solution. Instead of just installing a floor vapor barrier, encapsulation seals the entire crawl space (floor, walls, piers, and vents), turning it into a conditioned, dry environment that’s isolated from outside air and soil moisture. Encapsulation is recommended for homes with recurring moisture problems, high humidity, or persistent odors that simpler fixes haven’t solved.

The process starts with a heavy duty vapor barrier, typically 20 mil thickness, that covers the crawl space floor and extends up the foundation walls. All seams are overlapped and taped, and the barrier is mechanically fastened to walls and sealed around piers and posts. Next, all foundation vents are sealed from the inside to stop humid outside air from entering. Closed cell spray foam is applied to the rim joist (the wood framing where the foundation meets the floor structure) and to the interior of foundation walls. This two part spray foam insulates and air seals at the same time, stopping drafts and heat loss while preventing condensation on cold surfaces.

Finally, a crawl space rated dehumidifier is installed to control humidity. The target is 50 to 55 percent relative humidity year round. Units like the Aprilaire E070 are designed to run continuously in sealed crawl spaces and drain automatically into a sump pit or condensate pump. Professional encapsulation projects typically cost $3,000 to $12,000 depending on crawl space size, access difficulty, and whether drainage or sump pump installation is included.

Encapsulation provides long term moisture control, improves indoor air quality by stopping mold and odors, stabilizes indoor temperatures, and reduces energy costs by sealing air leaks and insulating the foundation. It’s the most durable solution for standing water problems that keep coming back.

Encapsulation Components and Their Role in Water Prevention

The vapor barrier isolates your home from soil moisture and prevents water vapor from evaporating into the crawl space. Spray foam insulation on the rim joist and foundation walls stops air infiltration and prevents condensation when warm, humid air contacts cold surfaces. Sealing the vents eliminates the pathway for humid outside air to enter. In summer, that humid air condenses on cool crawl space surfaces and adds moisture instead of removing it. The dehumidifier controls the air inside the sealed crawl space, pulling moisture out of the air and materials so humidity stays in the safe zone where mold and wood rot can’t develop.

Crawl Space Dehumidification as a Long-Term Moisture Solution

S1cX71rGSV6OwgIAM7KdpQ

A dehumidifier is necessary after encapsulation or in any crawl space where humidity stays above 50 percent even after drainage and vapor barriers are in place. Humid air supports mold growth, wood rot, and pest activity, and it allows moisture to condense on cool surfaces like metal ductwork and cold water pipes. A crawl space rated dehumidifier pulls moisture from the air continuously and drains automatically so you don’t have to empty a reservoir.

Dehumidifiers are sized by how many pints of water they can remove per day. Units range from 30 to 70 pints per day depending on crawl space square footage, regional humidity, and whether the space is sealed or vented. Sealed, encapsulated crawl spaces typically need smaller units because outside air isn’t constantly adding new moisture. Vented crawl spaces in humid climates may need larger units and will cost more to operate because they’re fighting a constant influx of humid air.

Choosing the right dehumidifier:

  1. Measure your crawl space square footage. Multiply length by width to get total area. Most manufacturers recommend 1 pint per day per 50 to 100 square feet depending on humidity level.

  2. Check whether the unit is crawl space rated. Standard basement dehumidifiers may not operate reliably in the cooler, dirtier conditions of a crawl space.

  3. Confirm automatic drainage. The unit should pump or gravity drain condensate into a sump pit, floor drain, or condensate line so you never have to empty a bucket.

  4. Set the target humidity between 50 and 55 percent. This range prevents mold and wood rot while avoiding over drying that can crack wood or increase operating cost.

Structural Damage and Mold Risks from Standing Crawl Space Water

mg_pP8MxQBifzo1mSP5_tA

Standing water doesn’t just smell bad or raise humidity. It directly attacks the structure of your home and creates health risks for everyone living inside. Mold begins growing on wet wood, insulation, and debris within 48 to 72 hours. Once mold colonizes, it releases spores into the air that circulate through your HVAC system and into living spaces, triggering allergies, asthma, and respiratory irritation.

Water also degrades wood. Floor joists, beams, and subfloors that stay wet will develop wood rot, lose structural strength, and eventually sag or fail. Foundation walls can crack and settle when the soil around them stays saturated, and prolonged moisture accelerates rusting of metal supports and fasteners. Wet or damp insulation loses its insulating value and becomes a breeding ground for mold and pests. Termites and rodents are attracted to damp crawl spaces because the moisture provides the environment they need to survive.

The cost of ignoring standing water escalates quickly. Minor mold remediation runs $500 to $3,000. Major contamination, structural joist replacement, or foundation repairs can reach $5,000 to $25,000 or more depending on the extent of damage. The longer water sits, the more expensive the repair becomes.

Damage and health effects of prolonged crawl space moisture:

  • Mold colonization within 48 to 72 hours. Releases airborne spores that degrade indoor air quality and trigger respiratory symptoms.
  • Wood rot and joist deterioration. Wet framing loses strength. Sagging floors, bouncy subfloors, and structural failure require costly beam and joist replacement.
  • Foundation cracks and settlement. Saturated soil shifts and settles unevenly, causing foundation walls to crack or tilt.
  • Degraded insulation. Fiberglass batts absorb water and lose R value. Become heavy, sag, and harbor mold.
  • Pest attraction. Termites, carpenter ants, and rodents are drawn to damp wood and humid environments.
  • Higher energy bills. Wet insulation and air leaks caused by moisture damage increase heating and cooling costs year round.

Exterior Water Management Solutions to Prevent Future Standing Water

lrNTnN6URbGy1-8J9a3cZQ

Stopping water before it reaches your crawl space is the most effective long term strategy. Exterior water management focuses on grading, gutters, and drainage systems that keep surface water and groundwater away from your foundation. Even if you install interior drains and a sump pump, fixing exterior problems reduces how much water the interior system has to handle and lowers the risk of future flooding.

Regrading your yard to create a 6 inch drop over the first 10 feet from your foundation ensures that rainwater and snowmelt flow away instead of pooling next to your walls. This often requires adding soil near the foundation and sloping it gradually outward. Avoid piling mulch or soil against siding or brick. The top of the grade should stay below the siding to prevent rot. Clay soils that drain slowly may also need shallow drainage swales or catch basins to move surface water away faster.

Gutters and downspouts must be clean and intact. A 1,000 square foot roof sheds over 600 gallons of water during a 1 inch rainstorm. If that water dumps next to your foundation, it’ll find its way into your crawl space. Extend downspouts at least 4 to 6 feet from the house using flexible extensions, rigid elbows, or underground drain lines that discharge into a swale or storm drain.

Five steps to prevent standing water with exterior fixes:

  1. Inspect yard grading twice a year. Check after heavy storms to see where water pools. Add soil and regrade as needed to maintain 6 inch drop over 10 feet.

  2. Clean gutters and install gutter guards. Clear debris before spring and fall heavy rain seasons. Guards reduce clogging and maintenance frequency.

  3. Extend all downspouts 4 to 6 feet minimum. Use splash blocks, flexible extensions, or buried drain lines. Confirm water discharges away from foundation.

  4. Add drainage swales or catch basins in low spots. Shallow graded channels or grated inlets move surface water to street or storm drain before it reaches foundation.

  5. Repair foundation cracks and gaps. Seal visible cracks in foundation walls and gaps around utility penetrations to reduce water entry points.

DIY vs Professional Standing Water Solutions: When to Call Experts

w7SDF_8GTIm6UlAZAa132w

Some crawl space water fixes are reasonable DIY projects. Others require specialized tools, safety equipment, or structural knowledge that makes professional help the smarter and safer choice. Knowing the difference protects your home and keeps you from taking on jobs that are beyond typical homeowner skills or equipment.

DIY tasks include cleaning gutters, installing downspout extensions, adding temporary grading with bagged soil, and using a portable pump or wet vac to remove standing water after a storm. You can also handle small crawl space inspections, visual mold checks, and setting up fans and a consumer grade dehumidifier. These jobs require basic tools, minimal risk, and can be completed in a few hours to a day without special training.

Professional help is necessary for digging and installing French drains, excavating for exterior perimeter drains, trenching inside the crawl space for interior drainage systems, installing sump pits and pumps with discharge lines, and performing full crawl space encapsulation with spray foam and mechanical fastening. Structural repairs like replacing rotted joists or beams, foundation crack injection or stabilization, and significant mold remediation also require licensed, insured contractors. Professionals bring the equipment, experience, and liability coverage needed to do these jobs safely and correctly, and most offer warranties on labor and materials that DIY work doesn’t include.

Final Words

If water’s standing, shut off power if it’s safe, stop the source, pump or wet-vac immediately, and start drying with fans and a crawl-space dehumidifier set under 50% RH. Take photos and moisture readings.

This post covered fast removal steps, common causes, drainage and sump-pump fixes, vapor barriers and full encapsulation, dehumidification targets, structural and mold risks, exterior grading, and when to call a pro.

Use these standing water in crawl space solutions to stop more damage and get your space back to normal. Act fast. You’ll be ahead of mold and bigger repairs.

FAQ

Q: How to get standing water out of a crawlspace?

A: Getting standing water out of a crawl space starts by shutting power and wearing PPE, then pump or wet-vac the water, run air movers and a dehumidifier to below 50% RH, and check for leaks; call a pro if heavy water.

Q: Is it normal to have standing water in a crawl space?

A: It is not normal to have standing water in a crawl space; it usually means poor grading, clogged gutters, high groundwater, or leaks and can cause mold in 48–72 hours and structural damage if not fixed.

Q: How much does it cost to fix water in a crawl space?

A: Fixing water in a crawl space can range from a few hundred dollars for pump-out and drying to several thousand for sump, French drain, or repairs; full encapsulation often runs $3,000–$12,000, more with mold or structural work.

Q: Will homeowners insurance cover water in a crawl space?

A: Homeowners insurance may cover sudden, accidental water like a burst pipe, but usually excludes gradual leaks or poor maintenance; document damage with photos, keep receipts, and report promptly to your insurer.

2 Carpet Water Extraction: Fast, Fresh Results

0

Is your wet carpet hiding a bigger issue? When water soaks into your carpet, it can cause mold (a type of fungus) and lasting damage if not fixed quickly. We use powerful suction tools and heat (techniques that pull water out) to get water out of your carpet and padding. We’ll walk you through simple, fast steps to keep your home safe and bring back that fresh feel. We’re here to help every step of the way so you can act quickly and confidently.

Carpet Water Extraction: Complete Removal Process

When your carpet gets wet, quick action stops damage and prevents mold. We understand how stressful water damage can be. Here’s a clear, simple guide we follow to restore your carpet.

  1. Check the water type: First, see if the water is clean, gray (from everyday household use), or black (very contaminated). This helps us know the right steps and keeps your family safe.
  2. Remove standing water: Use a wet/dry vacuum (a machine that sucks up water) to take out as much water as possible. This step helps cut down on further damage.
  3. Use moisture absorbers: Sprinkle baking soda or a commercial product on the carpet. These materials soak up leftover moisture and help with any smells. Let it sit for a few hours and then vacuum it up well.
  4. Improve air circulation: Open windows and set up fans or dehumidifiers (machines that pull moisture out of the air). This speeds up evaporation and lowers humidity.
  5. Check for complete dryness: Use a moisture meter (a tool that checks how wet a surface is) to make sure the carpet and its padding are dry before putting them back in place.

Our professional hot water extraction method goes deeper. We use a heated cleaning solution and high-pressure suction to lift deeply embedded dirt. This process prevents shrinkage and long-term damage by removing hidden contaminants. Quick, follow-up action with these steps helps ensure your carpet stays in great shape and your home is safe from mold and further water damage.

Carpet Water Extraction Equipment: Machinery Overview

img-1.jpg

Industrial-grade extraction equipment makes a big difference when water hits your carpet. We use strong suction devices that pull water from deep in the fibers, not just a simple wet vac. Our machines combine heat and suction to lift water and contaminants quickly, which speeds up drying time.

Air movers boost airflow to help water evaporate from under the carpet pad. Commercial dehumidifiers then lower humidity to below 40% to prevent mold growth. Together, these systems work fast to dry your carpet. Our portable equipment reaches every corner of your room, even in tight spaces, so no moisture is left behind.

Machine Type Function Ideal Use
Wet/Dry Vacuum Initial water extraction Light water removal
Carpet Extractor Deep cleaning with heated solution Comprehensive water damage recovery
Air Mover Accelerates evaporation Drying under padding
Commercial Dehumidifier Maintains low humidity Mold prevention and full drying

DIY vs Professional Carpet Water Extraction

You might try a DIY approach if the water damage is light. Using a home wet vacuum to pull out water, sprinkling baking soda to soak up moisture and freshen the air, and opening windows with fans to boost airflow can work quickly when the damage is small.

However, these basic methods have limits. Consumer tools like wet vacuums and household fans often struggle to remove moisture from thick carpet padding or hidden areas. Leftover water can lead to shrinkage and mold growth, making it tougher to restore your carpet completely.

For more serious water damage, professional teams use heavy-duty equipment. We use industrial extractors, special cleaning solutions, and powerful dehumidifiers (machines that pull moisture from the air) to remove deep, trapped water. This means that in cases of severe flooding, professional help provides more reliable results and helps your home stay safe. Our team is ready to respond with expert tools when you need emergency water extraction.

As a middle step, renting advanced recovery equipment might be a good choice. Leasing these high-power machines can offer stronger extraction than typical DIY tools and helps with thorough cleaning and quicker drying, all without the full cost of professional services.

Hot Water Extraction and Advanced Cleaning Techniques

img-2.jpg

Hot water extraction uses a high-pressure spray of warm cleaning solution to reach deep into your carpet fibers. It is different from steam cleaning, which only uses hot water vapor without strong suction. We send water and detergent deep into your carpet and then vacuum it away right away.

The warm solution loosens dirt and grime just like soaking a dirty sponge until the dirt comes free. Then, our strong suction removes the loosened dirt completely. This method cleans your carpet thoroughly and speeds up drying time by nearly half.

As we remove the dirt, we also sanitize the fibers. This helps prevent carpet shrinkage and mold growth, keeping your carpet cleaner and protected over time.

Drying Technologies for Efficient Moisture Elimination

We use powerful tools to remove water from your carpets fast. Our high-velocity air movers (fans that blow air very fast) move up to 3,000 cubic feet per minute. That strong airflow can cut carpet moisture by 90% in just 12 hours. These machines work with industrial dehumidifiers (devices that pull water out of the air) that remove 20 to 30 pints of water each day. Together, their strong suction and airflow pull water from deep within your carpet, speeding up the drying process.

Our methods are also eco-friendly. We use refrigerant-based dehumidifiers that work cleanly without harming the ozone layer. They dry your home using less energy while keeping your indoor air fresh. This sustainable approach helps prevent mold by reducing long-term moisture.

Our drying systems are designed to work quickly. They lower humidity to safe levels within 24 to 48 hours. We use moisture meters (tools that measure water content) during regular checks to be sure your home is dry. These advanced systems deliver fast, effective results to protect your home and prevent water damage.

Cost Considerations and Leasing Options for Extraction Units

img-3.jpg

If water damage occurs, renting quality equipment may be a smarter and more affordable choice than hiring a full restoration team. You can rent a mid-size wet/dry vacuum (a machine that pulls water out) for about $40 to $60 per day. This works well for initial water extraction and minor damage. For tougher jobs, industrial extractors are available for $150 to $250 a day. These machines have strong suction and special features to remove water from deep in your carpet fibers.

Dehumidifiers (machines that pull moisture from the air) are key to lowering humidity and helping your home dry faster. They usually cost between $50 and $100 daily. The right dehumidifier depends on how much moisture it can take out, which is important when comparing costs. Professional teams might charge between $0.50 and $1.50 per square foot. These prices can change based on the level of contamination and the size of the carpet.

Renting extraction equipment lets you choose tools that fit the severity of your water damage. Before you decide, compare the daily rental rates and any service fees. Think about whether renting the equipment yourself meets your needs or if hiring a full-service team is the better choice for a complete recovery. Always consider the machine’s performance, capacity, and your overall budget when selecting a pricing package.

Safety Measures and Mold Prevention in Carpet Water Extraction

Before starting any water extraction, turn off the power in the affected area. This stops water from meeting live outlets and causing an electric shock. For example, when using a wet/dry vacuum in a water-soaked room, we turn off the nearby electrical panel. Doing this protects everyone on site.

Always wear your personal protective equipment like gloves, goggles, and a respirator (a mask that filters out harmful particles). This gear shields you from chemicals and bacteria that might be in gray or black water. It works like a raincoat protects you from getting soaked.

After drying the carpet and getting the moisture level below 40%, use a moisture meter (a tool that checks for wetness) to confirm the area is completely dry. Once you know the carpet and padding are dry, apply mold inhibitors to stop mold from growing. This step helps keep your carpet fibers strong and your home safe.

Final Words

In the action, we quickly assess water source, extract standing water, apply absorbers, boost airflow, and verify dryness with a moisture meter. When you need effective carpet water extraction, we cover:

  1. Assess water source and contamination
  2. Extract standing water with a wet/dry vacuum
  3. Apply moisture absorbers
  4. Promote air circulation
  5. Verify dryness before replacing padding

These steps combine DIY ideas with professional standards for fast recovery. We work diligently to restore your home safely and help you move forward with confidence.

FAQ

Q: What is a carpet water extraction machine?

A: A carpet water extraction machine is a powerful device that removes moisture deep from carpet fibers using suction and sometimes heat. It helps speed drying and reduce the risk of mold.

Q: Where can I find carpet water extraction near me or rent a carpet extractor?

A: You can find carpet water extraction near you at rental centers, home improvement stores like Home Depot, or through professional services offering extractor rentals.

Q: How do you extract water from carpet?

A: Extracting water from carpet involves removing standing water with a wet/dry vacuum, applying absorbents, boosting air flow with fans and dehumidifiers, and checking dryness using a moisture meter.

Q: How much does it cost to remove wet carpet?

A: Removing wet carpet may cost $40–$60 per day for rental machines or $0.50–$1.50 per square foot for professional services, based on the level of water contamination and carpet size.

Q: What draws urine out of carpet?

A: Urine is drawn out by combining cleaning agents with strong suction equipment, which lifts contaminants from deep within the fibers, helping remove both the stain and odor.

Q: What is the difference between a carpet cleaner and a carpet extractor?

A: A carpet cleaner generally applies water and detergent for surface cleaning, while a carpet extractor uses pressure and suction to deeply remove moisture and embedded contaminants from carpet fibers.

Q: What are the benefits of using an industrial carpet extractor?

A: An industrial carpet extractor offers powerful suction and high-performance cleaning, rapidly removing water and contaminants to reduce drying time and minimize the risk of mold growth.

Q: What is a commercial portable carpet extractor?

A: A commercial portable carpet extractor is a high-performance, mobile machine used by professionals to quickly remove moisture in large areas, making it ideal for offices or multi-room spaces.

Signs of Ceiling Leak Damage You Shouldn’t Ignore

Think that small brown spot on your ceiling is just an eyesore?
It often means water is working behind the surface, and acting fast can stop mold, warped drywall, or a sudden collapse.
This post shows the visual clues, sounds, and smells that signal a real leak, not a cosmetic stain, and what to check right away.
You’ll learn when a leak is an emergency, how pros find hidden moisture with meters and cameras, and the steps to document and repair the damage so it doesn’t come back.

Key Visual Signs Of Early And Mid‑Stage Ceiling Leak Damage

QpB5OShgTHaubPr8YeDaww

You’ll usually spot the first signs of ceiling leak damage during the day when natural light hits at just the right angle. A faint brown spot about the size of a dinner plate might show up under a bathroom, laundry room, or near a roof valley. Looks harmless, right? But if it gets darker after heavy rain or slowly spreads over the next few weeks, that leak’s still active and moisture is working deeper into your drywall.

Paint changes tell their own story. When water gets trapped behind paint, the surface starts to blister or bubble. You’ll see small raised pockets that feel soft when you press them. Peeling paint comes next, often curling at the edges of the stain. These paint failures mean moisture is breaking the bond between paint and drywall. Simply repainting without fixing the leak? The damage comes right back.

Biological and sensory clues appear as leaks continue. Mold spots show up as small black, green, or gray speckles, usually clustered near stain edges or along seams where moisture collects. A stale, musty odor often develops in the room or attic above, even before you see mold. If you hear dripping sounds from inside the ceiling, notice water pooling on light fixtures or vents, or see active drops forming, that’s an emergency. The ceiling’s saturated enough to release water.

Common early and mid‑stage visual and sensory signs include:

Small brown or yellow water stains that appear under plumbing fixtures, bathrooms, or roof penetrations and may darken or expand after storms.

Ring‑shaped discoloration with a darker center where water drips most heavily and lighter outer edges where moisture spreads horizontally.

Bubbling or blistering paint indicating trapped moisture between the paint layer and drywall surface.

Peeling or cracking paint that curls away from the ceiling, often around stain edges or near seams.

Small dark speckles or fuzzy patches of mold growth appearing black, green, or gray, especially in corners or along joints.

Persistent musty, stale, or earthy odor in the room or attic, sometimes noticeable before visible damage appears.

Dripping sounds, active drops, or water pooling from ceiling vents, light fixtures, or seams, signaling heavy saturation and an active leak.

Ceiling Leak Damage Patterns And What They Mean

8cDPAvlJRRuxKKzbK_ZO2g

The shape, color, and behavior of a ceiling stain tell you where the water’s coming from and how fast it’s spreading. A small, round brown spot with a darker center usually means water’s dripping from a single point. Could be a nail hole in the roof or a pinhole leak in a pipe. The center’s darker because that’s where water repeatedly hits the same area. If the stain stays the same size for weeks, the leak may be slow or intermittent, showing up only during heavy rain or when someone uses a fixture above.

Stains that spread in irregular shapes, streaks, or elongated ovals often follow the path of a joist or rafter. Water runs along framing before dripping through drywall, so the stain shows the trail. If a stain reappears in the exact same spot after you repaint, the source is still wet and moisture’s wicking back through the new paint. A stain that comes back in the same spot three weeks after repainting tells you the leak was never actually fixed. Recurring stains after repainting are a clear sign the repair was cosmetic only.

Stain patterns and their typical causes:

Circular stain with dark center: pinpoint leak from above, such as a roof nail, small pipe crack, or fixture drip.

Ring‑shaped or halo pattern: slower leak where water spreads outward as it soaks into drywall before evaporating at the edges.

Streaked or elongated stain: water running along framing members (joists, rafters) before soaking through drywall.

Recurring stain after repainting: source not repaired. Moisture remains inside drywall or insulation and wicks back to the surface.

Structural Warning Signs Of Serious Ceiling Leak Damage

AmONl96MR3aoJxYvgYNVmw

When drywall absorbs enough water, it starts to lose structural integrity and the ceiling changes shape. Sagging, drooping, or bowed sections mean the drywall’s soaked and the weight of trapped water is pulling it down. You may notice the ceiling looks lower in one area, seams between panels start to separate, or a visible bulge forms. These aren’t cosmetic issues. They mean the material’s saturated and getting heavier. The ceiling could collapse if the weight exceeds what the fasteners and framing can hold.

Soft or spongy textures when you gently press upward on a ceiling (if safe to reach) indicate the drywall’s absorbed water and lost its rigidity. The surface may feel firm but give slightly under pressure, or it may feel wet and cold. Cracks can also appear as panels shift. Straight cracks running parallel to framing often result from drywall expanding as it gets wet, while webbed or branching cracks appear when panels bow or buckle. If you see cracks combined with discoloration or sagging, the damage has gone beyond surface level.

Large stains exceeding two feet in diameter, rapid drooping over hours or days, visible deformation of the ceiling plane, or any section that looks like it’s about to separate from the framing all point to collapse risk. Water saturated drywall can weigh several times more than dry material. When fasteners pull loose or the paper backing tears, sections can fall suddenly. Don’t stand beneath these areas. Treat them as urgent.

Five structural signs that need immediate professional attention:

  1. Sagging, drooping, or bowed ceiling sections where the plane is visibly lower or uneven, indicating heavy water saturation and weight overload.

  2. Soft, spongy, or pliable texture when gently pressing on the ceiling surface, showing the drywall’s absorbed moisture and lost structural strength.

  3. Visible seam separation where drywall panels pull apart at joints, often caused by panel movement, swelling, or fastener failure.

  4. Straight or webbed cracks appearing across the ceiling surface, especially near stains, caused by expansion, bowing, or stress from shifting saturated panels.

  5. Large stains exceeding 24 inches in diameter, rapid growth over hours, or sections showing visible deformation and imminent separation from framing.

Hidden Signs Of Ceiling Leak Damage Above The Surface

zSI9rH66QNGD2mFqB6Ljbw

Not all ceiling leaks show obvious stains or dripping. Moisture can sit inside insulation, soak into framing, or pool on top of drywall for weeks before a stain appears on the surface below. Slow leaks from condensation on cold pipes, minor HVAC drain pan overflows, or small roof penetrations may only leave faint, barely visible marks or a slight texture change that doesn’t look alarming. The ceiling may look fine while moisture’s spreading behind it.

Professional detection tools find these hidden leaks before they cause major damage. Moisture meters measure the water content inside drywall and framing without cutting holes. Thermal imaging cameras detect temperature differences caused by wet insulation or evaporating water, showing cool spots where moisture is present even if the surface looks dry. Sounds can also point to hidden leaks. Faint dripping inside a wall cavity, the hiss of a slow spray leak, or the occasional splatter of water hitting insulation are clues you might hear before you see damage. A persistent musty smell in a room or closet often means moisture’s present somewhere above, even if the ceiling looks normal.

Tool What It Detects When It’s Useful
Moisture Meter Water content inside drywall, insulation, and framing Suspected hidden leaks, verifying dryness after repairs, checking areas near faint stains
Thermal Imaging Camera Temperature differences caused by wet materials or evaporation Locating leaks behind walls/ceilings, finding wet insulation, mapping moisture spread
Visual Inspection (Attic/Crawl) Wet insulation, stains on framing, active drips, condensation Confirming source after detecting ceiling damage, checking roof/plumbing above affected area

Common Causes Leading To Ceiling Leak Damage

w7NgiytLROy6ZWN7-7uQdQ

Roof leaks are one of the most frequent culprits. Missing or damaged shingles, worn flashing around chimneys and vents, or cracked sealant on roof penetrations let rainwater in. In cold climates like Minnesota, ice dams form when snow melts on warm roof sections and refreezes at the eaves, forcing water under shingles and into the attic. Ice dam leaks often show up along exterior walls or near soffits after a heavy snow followed by a thaw. Skylights and roof valleys are also common weak points where water can find a way through compromised seals.

Plumbing leaks inside ceilings cause another large share of damage. Supply lines to upstairs bathrooms, laundry rooms, or water heaters can develop pinhole leaks or burst if they freeze. Overflowing bathtubs, clogged shower drains, or a toilet supply line that fails while you’re away can send gallons of water into the floor and down through the ceiling below. Drain leaks are slower but persistent, often appearing as recurring stains that grow each time the fixture is used.

HVAC systems and condensation issues round out the most common causes. Air handler drain pans can overflow if the condensate line clogs, dripping onto drywall or insulation. Poor attic ventilation traps humid air, which condenses on cold surfaces during winter or summer and soaks into insulation and framing. Bathroom exhaust fans that vent into the attic instead of outside dump moist air directly onto ceiling materials. Appliance failures, like a washing machine hose that splits or a water heater relief valve that drips, can also send water upward if located on an upper floor or in an attic utility closet.

Common causes and how they typically show on a ceiling:

Roof flashing failure or missing shingles: stains near chimneys, vents, valleys, or along exterior walls. Often worse after heavy rain or snowmelt.

Ice dams forcing water under shingles: stains along eaves and exterior walls in winter. May appear after freeze thaw cycles.

Burst or leaking supply pipes: sudden large stains, active dripping, and saturation. Often near bathrooms, laundry rooms, or water heaters.

Overflowing fixtures or clogged drains: recurring stains under tubs, showers, or sinks. Stain grows each time fixture is used.

HVAC condensate overflow: small, slow growing stains near air handlers or ductwork. Often accompanied by musty odor.

Poor attic ventilation and condensation: diffuse moisture or frost on sheathing and framing. Insulation may feel damp. Can cause widespread faint staining on ceilings below.

Mold, Odor And Air Quality Indicators Of Ceiling Leak Damage

12gjxrF3Sh6TpDHByA7vMA

Mold starts growing within 24 to 48 hours after materials get wet. It appears as dark speckles, fuzzy patches, or streaks in black, green, or gray. Mold loves drywall paper, insulation, and wood framing because they hold moisture. You’ll often see it clustered around the edges of a water stain, along ceiling seams, or in corners where airflow is poor and dampness lingers. If you spot mold on the ceiling surface, there’s usually more growing inside the drywall, on the back side of the panel, and in the insulation above.

A musty, stale, or earthy odor is often the first clue of hidden mold before you see visible growth. The smell comes from microbial volatile organic compounds (MVOCs) that mold releases as it grows. If a room or attic smells off and you can’t find an obvious source, check for ceiling stains, soft spots, or any signs of past moisture. That smell doesn’t go away with air fresheners. It stays until the mold is removed and the source of moisture is fixed. Ignoring mold lets it spread to larger areas, which increases remediation cost and health risk.

Five biological and air quality indicators:

  1. Visible mold spots or fuzzy patches appearing black, green, or gray on ceiling surfaces, seams, or around stains.

  2. Persistent musty, earthy, or stale odor in a room, closet, or attic that doesn’t fade and often worsens in humid weather.

  3. Dark streaks or discoloration along seams and corners where moisture collects and mold colonizes drywall paper.

  4. Increased allergy symptoms or respiratory irritation when spending time in the affected room, especially for sensitive individuals.

  5. Mold growth on insulation, framing, or stored items in the attic or crawl space above the ceiling, visible during inspection.

Safety Risks Linked To Ceiling Leak Damage

Aja8lgkSQiu1WMixTMA-LQ

Water and electricity don’t mix. When a ceiling leak spreads near light fixtures, ceiling fans, or electrical junction boxes, the risk of shock or fire increases. Water can travel along wiring, corrode connections, and cause shorts. If you see water dripping from a light fixture or pooled around an electrical box, turn off power to that circuit at the breaker panel and call a professional. Don’t touch wet fixtures or attempt repairs while power is on.

Sagging or bulging ceilings are collapse hazards. Water saturated drywall can weigh several times its dry weight, and fasteners can pull out of framing or the drywall paper can tear. Collapse can happen suddenly, especially if someone bumps the area or if additional water enters during another storm. Avoid standing, sitting, or placing furniture directly beneath sagging sections. Move valuables and people out of the area until the ceiling is inspected and stabilized.

Four safety steps to follow when you notice ceiling leak damage:

Turn off power to any circuits near the leak if water’s dripping from or pooling around electrical fixtures. Do not touch wet switches, outlets, or fixtures.

Evacuate the area beneath sagging, bulging, or bowed ceiling sections and keep people and pets away until a professional evaluates collapse risk.

Ventilate the space by opening windows and using fans to reduce humidity, but avoid disturbing visible mold or creating airflow that spreads spores.

Do not attempt to support or prop up a sagging ceiling yourself. Heavy saturated drywall can fall unexpectedly and cause injury.

Professional Inspection And Repair Process For Ceiling Leak Damage

7_LGsqdJSjeKjbl8zCALZQ

The first step in professional ceiling leak restoration is inspection and leak detection. A technician arrives, often within an hour in metro areas for emergency calls, and uses moisture meters to measure water content inside drywall, framing, and insulation. Thermal imaging cameras map temperature differences that reveal wet areas hidden behind surfaces. The priority is stopping the source. If it’s a plumbing leak, the water supply is shut off. If it’s a roof leak, temporary tarping or sealing prevents additional water from entering. The team confirms the leak is stopped before moving to drying and removal.

Next comes drying and water removal. Commercial dehumidifiers and air movers are positioned to pull moisture from materials and push air across wet surfaces to speed evaporation. If drywall or insulation is heavily soaked, it’s often removed instead of dried in place because saturated materials take too long to dry and may harbor mold. Standing water is extracted, and any wet belongings are moved out of the area. This phase can take several days depending on how much water is present and how deep it has soaked.

Mold remediation and prevention follow drying. Any materials showing mold growth, discoloration, or musty odors are removed and disposed of. HEPA filtration and antimicrobial treatments are applied to surfaces to prevent regrowth. Containment barriers keep mold spores from spreading to clean areas during removal. The space is tested to confirm it’s safe before reconstruction begins.

Reconstruction replaces the removed materials. New drywall, insulation, ceiling texture, and paint are installed to match the rest of the room. If framing was damaged, it’s reinforced or replaced. The work is coordinated with insurance allowances or your budget, and the team explains options for upgrades or changes during the rebuild.

The final step is a walkthrough and moisture recheck. The team uses meters to confirm all materials are dry and safe to seal. You walk through the finished work to verify it looks right and the smell is gone. The job isn’t closed until moisture readings are normal and you’re satisfied with the repair.

Five step professional restoration process:

  1. Inspection and leak detection using moisture meters and thermal imaging to locate the source and measure saturation. Stopping the leak is the first priority.

  2. Drying and water removal with commercial dehumidifiers and air movers. Removal of soaked drywall and insulation that can’t be salvaged or dried quickly.

  3. Mold remediation and prevention including removal of contaminated materials, HEPA air scrubbing, and antimicrobial treatments to stop regrowth.

  4. Reconstruction and material replacement to reinstall drywall, insulation, texture, and finishes. Coordinate with insurance scope and homeowner preferences.

  5. Final moisture check and walkthrough to verify complete dryness, confirm repairs meet quality standards, and ensure the homeowner is satisfied before closing the job.

Insurance And Documentation Tips For Ceiling Leak Damage

PTVfv9FOSYOPHMWHdGH6Ng

Homeowner insurance policies typically cover ceiling leak damage when the cause is sudden and accidental. A burst pipe, a tree branch punching through the roof during a storm, or a washing machine supply line that fails are usually covered events. Long term leaks from deferred maintenance, like a roof that’s been leaking slowly for years or a dripping faucet you ignored, are often excluded. Insurers want to see that the damage happened quickly and wasn’t preventable through normal upkeep.

Documentation speeds your claim and reduces disputes. Take time stamped photos as soon as you notice damage. Capture wide shots showing the room layout and where the stain is located, close ups of the stain center and edges, any sagging or bulging, visible mold, peeling paint, and warped materials. If water’s actively dripping, photograph or video that. Professional restoration companies document moisture readings and take their own photos, which become part of the claim file and help justify the scope of work when hidden damage is uncovered during repairs.

Four documentation steps to take before calling your insurance company:

Photograph all visible damage including wide context shots of the room, close ups of stains, sagging areas, mold growth, peeling paint, and any active dripping.

Record moisture meter readings if a professional provides them during inspection. These readings verify saturation and support the repair scope.

Save receipts and invoices for any emergency mitigation work, temporary repairs, or materials purchased to stop further damage.

Document the timeline with notes on when you first noticed the leak, when it worsened, and any weather events or plumbing use that correlates with the damage.

Final Words

Right now, if you see brown rings, bubbling paint, or dark spots after rain, you’re seeing early signs. Don’t ignore a musty attic smell or a slow drip.

This guide covered what those marks mean, how patterns change, hidden clues found with tools, and when to call for repair. We also touched on mold, safety, and insurance notes.

If you notice these signs of ceiling leak damage, stop the water if safe, take photos, and call a pro to confirm moisture and start repairs. You’ll limit damage and get back to normal.

FAQ

Q: How do you know if a ceiling leak is serious and how do you tell if a ceiling is water damaged?

A: A ceiling leak is serious when you see persistent wet stains, active dripping, darkening after rain, or mold growth, which means water is ongoing and you should stop the source and call a pro.

Q: What does the beginning of a water damage ceiling look like?

A: The beginning of water damage on a ceiling looks like faint pale discoloration, small brown spots, tiny paint bubbles, or a musty attic smell — early signs to monitor and photograph.

Q: Will homeowners insurance cover a ceiling leak?

A: Homeowners insurance will cover a ceiling leak only when the loss is sudden and accidental, while long-term leaks or maintenance issues are usually excluded. Document photos and moisture readings, then contact your insurer promptly.

Blue Tarp on Roof Meaning: Storm Damage and Temporary Protection Explained

0

You just spotted a blue tarp on your neighbor’s roof, and maybe you’re wondering what happened or if you should worry about your own home. That bright blue covering means one thing: storm damage that needs quick protection before the next rain makes everything worse. When you see tarps going up, it’s a sign that roofs took a hit and homeowners are racing to stop water from getting inside and causing bigger problems. Understanding what that tarp really means, and when you might need one, helps you protect your home when damage strikes.

What Blue Tarps on Roofs Signal to the Community

38MV2791SxqIWkB-3Y2uXw

A blue tarp on a roof means the home has taken damage that needs immediate weather protection.

The practical reality is simple. The roof got damaged from storms, fallen debris, wear and tear, or other causes, and the tarp acts as an emergency barrier stopping water from getting in and making things worse. The tarp keeps rain out of damaged areas, protecting interior spaces from water damage, ceiling stains, soaked insulation, and mold while the homeowner figures out permanent repairs.

When blue tarps start showing up across multiple houses, it signals widespread storm damage hitting an entire area. The community’s in recovery mode after a serious weather event. After Hurricane Ian, thousands of Florida homes had blue tarps at the same time, creating a visual reminder of just how bad things got. This concentration of tarped roofs helps disaster assessment teams understand damage extent and coordinate emergency response across affected regions.

Blue became the industry standard for emergency tarping because it’s highly visible for aerial surveys, disaster assessment teams, and insurance adjusters doing damage assessments from vehicles or aircraft. Blue polyethylene tarps get mass produced, they’re cheap, and you can find them at any hardware store or through roofing contractors. That makes them the practical choice for emergency roof protection. The bright color also helps insurance companies and government agencies spot homes needing assistance during post disaster recovery.

Blue tarps show proactive damage mitigation to protect the property. They demonstrate the homeowner’s waiting for permanent repairs, dealing with insurance claims, or waiting for contractor availability when demand’s high.

Common Roof Damage Scenarios Requiring Emergency Tarping

I4S2U6CTSzmip5AaGmh7tQ

Multiple types of damage make emergency tarping necessary to protect homes from continued exposure.

Getting damage covered quickly with tarps matters. It prevents minor roof problems from turning into major structural issues requiring expensive interior repairs.

Common scenarios needing emergency tarping include:

Hurricane and tropical storm damage with wind blown shingles, lifted roofing materials, and compromised roof decking

Tornado damage causing partial roof collapse, missing sections, and exposed structural elements

Fallen tree limbs and branches puncturing roof surfaces and damaging underlying decking

Lightning strikes creating holes, splits, and thermal damage to roofing materials

Missing or blown off shingles leaving underlayment or decking exposed to weather

Hail damage causing widespread impacts that compromise shingle integrity and create leak points

Wind damage lifting flashing, tearing membrane materials, and separating roof components

Animal intrusion from raccoons, squirrels, or birds creating entry points and damaging roof materials

Tarps create a waterproof barrier stopping rain, snow, and moisture from entering damaged roof areas. This prevents interior damage including ceiling stains, insulation saturation, structural wood rot, and mold growth. The temporary covering maintains a dry interior environment while contractors schedule inspections, insurance adjusters assess claims, and homeowners arrange financing for permanent repairs. Without this protective barrier, even small damaged areas allow continuous moisture intrusion that quickly escalates repair costs.

Tarps protect against debris intrusion and further weather related deterioration while permanent repairs get arranged. The covering shields damaged roof decking from additional rain events, protects exposed insulation from moisture saturation, and keeps wind from lifting additional shingles around damaged areas. This protective layer buys time for proper repair planning without letting damage worsen with each passing storm.

FEMA’s Operation Blue Roof Program Explained

OtjYk691RoyfRQJLd08JXg

Operation Blue Roof is FEMA’s disaster response program providing emergency roof protection after major disasters.

The program gives free temporary roof covering after presidentially declared disasters in areas experiencing widespread roof damage from hurricanes, tornadoes, and severe storms. FEMA contracts with roofing companies to install blue tarps on damaged roofs at no cost to eligible homeowners, helping communities stabilize property damage during the critical weeks following disasters. After Hurricane Ian, thousands of Florida homeowners got free tarp installation through Operation Blue Roof, protecting homes while contractors worked through the massive backlog of permanent repair requests.

The program typically activates within days of a major disaster declaration and continues operating for several weeks until homeowners can arrange permanent repairs.

Program details include:

Eligibility requires homeowners with primary residences in declared disaster areas with visible roof damage from the qualifying storm event

Application process involves registering with FEMA disaster assistance and requesting Operation Blue Roof services through the agency’s helpline or website

Installation timeline varies based on damage volume, with crews prioritizing severely damaged homes and working through registered addresses systematically

Coverage limitations specify that tarps address emergency protection only, not permanent repairs, and homeowners remain responsible for arranging permanent roof restoration

Program availability depends on disaster declaration status and typically ends 30 to 60 days after activation, requiring homeowners to transition to permanent solutions or private tarping services

Insurance Claims and Blue Tarp Coverage

AURRegvgRQWVKFj69T4fxg

Most homeowners insurance policies cover emergency tarping costs as part of damage mitigation requirements.

Tarps demonstrate the homeowner’s duty to prevent further damage, which insurers require as a condition of coverage. Insurance policies typically include language requiring policyholders to take reasonable steps to protect property from additional damage after a covered loss, and emergency tarping qualifies as a necessary protective measure. Homeowners who don’t tarp damaged roofs may face claim denials for secondary water damage that happens after the initial storm event, making prompt tarping both a practical necessity and an insurance obligation.

Tarps protect property during the claims assessment period while adjusters inspect and process claims.

Typical coverage includes installation costs ranging from $200 to $1,000, materials including the tarp and securing components, and the importance of documentation with photos and receipts proving the expense. Most insurance companies reimburse emergency tarping costs as part of the dwelling coverage without counting against policy limits, recognizing these expenses as damage mitigation rather than repairs. Keep all receipts from professional tarp installation and photograph the damaged areas before and after tarp placement to support your claim documentation. Insurance adjusters often need several days or weeks to inspect damage before authorizing payment, making tarps necessary temporary coverage during claims processing. For comprehensive support during water intrusion events, water damage home repair services coordinate emergency stabilization with insurance documentation requirements.

Proper Blue Tarp Installation on Damaged Roofs

u7LCKykGREe_NtT8WVAs0w

Professional installation follows a systematic process ensuring effective weather protection and secure attachment.

Assess the Roof Damage

Damage inspection and measurement require climbing onto the roof to identify all compromised areas, missing shingles, exposed decking, and potential leak points. Measure the damaged area and add several extra feet on all sides to ensure adequate coverage that extends well beyond the compromised section.

Select the Appropriate Tarp Size and Type

Choose heavy duty polyethylene tarps with reinforced edges sized to exceed the damaged area by at least three to four feet in all directions, ensuring the tarp reaches intact roof surfaces for proper securing.

Clear Debris from the Roof Surface

Remove loose shingles, broken materials, tree branches, and any debris from the damaged area before tarp placement to create a smooth surface that allows the tarp to lay flat without puncture risks from sharp objects underneath.

Position the Tarp Correctly

Lay the tarp over the damaged area with proper overlap extending beyond damage boundaries, ensuring the tarp reaches from ridge to eave when possible and covers enough surface area for secure attachment to solid roof structure.

Secure the Tarp Using Proper Methods

Wrap 2×4 anchor boards in tarp edges rather than nailing directly through the material, which tears easily under wind stress. Sandwich the tarp edge between two boards and nail or screw the boards into solid roof decking, creating a secure attachment that distributes stress across the board length rather than at individual nail points. Use weights like sandbags or lumber pieces for temporary securing when immediate repairs are anticipated and permanent attachment isn’t necessary.

Professional roofing contractors should handle installation for safety and effectiveness. Working on damaged roofs involves serious fall risks, requires proper safety equipment including harnesses and stable ladder placement, and demands experience judging structural stability of compromised roof sections. Contractors carry liability insurance protecting homeowners from injury claims and ensure proper installation that withstands wind without causing additional damage to surrounding roof areas.

Roof Inspection and Damage Assessment Before Tarping

xhpUAUURThCQIRdGyM6Tlg

Proper damage assessment matters before tarping to understand the full scope of roof compromise.

Inspections identify the extent of damage, affected areas, and necessary tarp coverage while documenting the condition for insurance purposes. Professional contractors examine the roof surface, check for hidden damage not visible from ground level, and determine whether the roof structure remains stable enough to support workers during tarp installation. This assessment prevents tarping over damaged decking that might collapse under worker weight and identifies secondary damage that might not be immediately obvious from exterior observation. For immediate professional assessment after discovering damage, emergency home repair services respond quickly to evaluate conditions and implement protective measures.

Documentation through photos is crucial for insurance claim support, showing the damage condition immediately after the storm and proving the need for emergency tarping expenses.

Complete inspection areas include:

Missing shingles showing how many are gone and whether the underlying felt or decking is exposed

Exposed decking indicating whether wood sheathing has water staining, soft spots, or structural compromise

Flashing damage around chimneys, vents, valleys, and roof edges where metal components may be bent, torn, or separated

Underlayment condition checking whether felt paper or synthetic underlayment remains intact or has torn away

Attic moisture inspecting for water stains, wet insulation, or active leaking that indicates damage location and severity

Interior ceiling stains documenting water damage inside the home that correlates with roof damage locations

Structural integrity evaluating whether rafters, trusses, or decking show signs of damage requiring immediate attention beyond tarping

Tarp Durability and Maintenance Requirements

lJNuFGESKiLmz0kdl3vFg

Heavy duty blue tarps typically last 30 to 90 days depending on weather conditions and installation quality.

Tarps are explicitly temporary solutions requiring eventual replacement with permanent roofing because the material degrades under sun exposure, tears under wind stress, and loses waterproof integrity over time. No tarp provides a permanent fix regardless of quality or installation method. You need to understand that tarping is emergency stabilization, not roof repair, and permanent solutions must follow within the tarp’s effective lifespan to prevent renewed damage when the tarp fails.

Regular professional inspection for tarp integrity, proper securing, and potential need for tarp replacement before permanent repairs ensures continued protection during the waiting period. Schedule inspection every two to three weeks during the tarped period, checking for tears, lifted edges, loosened securing points, and water pooling that might indicate improper drainage or tarp positioning.

Factors affecting tarp lifespan and maintenance considerations:

UV exposure breaks down polyethylene material, causing brittleness and tearing within 60 to 90 days of direct sun exposure

Wind conditions place stress on secured edges, potentially lifting tarps or tearing material at attachment points during storms

Installation quality determines whether securing methods withstand weather stress or fail prematurely due to improper technique

Tarp material grade affects durability, with heavy duty options lasting longer than light duty tarps not designed for roofing applications

Weather severity during the tarped period impacts lifespan, with multiple rain events and high winds accelerating deterioration

Securing method effectiveness influences how well the tarp remains in place, with proper anchor board techniques outperforming direct nailing

Inspection frequency requirements depend on weather activity, with post storm checks necessary after each significant wind or rain event

Repair Versus Replacement Decisions for Tarped Roofs

muYK9tMlReGEmQHBFrDsQA

Extensive tarp coverage often indicates damage too severe for simple repairs, particularly when the tarped area exceeds 30% of the total roof surface or when damage affects multiple roof planes. Roof age combined with damage severity influences replacement decisions. Older roofs near the end of their typical lifespan (15 to 25 years depending on material) make poor candidates for partial repairs that only extend function temporarily. When a 20 year old roof experiences significant storm damage, full replacement provides better long term value than patching the damaged section only to face additional repairs as the aging undamaged sections fail over the next few years.

Typical tarp installation costs as temporary emergency measures usually range from $200 to $1,000 depending on damage size and roof access difficulty, while partial roof repairs cost $1,500 to $5,000, and full roof replacement ranges from $8,000 to $25,000 based on home size and material selection.

Solution Typical Cost Range Duration Insurance Coverage
Emergency Tarping $200 – $1,000 30-90 days Usually covered under mitigation
Partial Roof Repair $1,500 – $5,000 5-10 years Covered if storm-related with deductible
Full Roof Replacement $8,000 – $25,000 15-30 years Covered if storm-related with deductible

Permanent replacement makes more sense financially than repeated repairs when damage is extensive, the roof is older than 15 years, or when insurance coverage will pay for replacement after the deductible. Insurance coverage factors include whether the policy provides replacement cost value or actual cash value, the deductible amount (typically $1,000 to $2,500), and whether the damage qualifies as a covered peril. Some policies include clauses limiting coverage on older roofs or requiring depreciation calculations that reduce payout amounts, making it important to review policy specifics before deciding between repair and replacement.

Older roofs near end of life may use tarps while homeowners arrange financing for full replacement. Spending money on repairs doesn’t make financial sense when the entire roof needs replacement within a few years anyway. Budgeting for permanent solutions involves working with insurance to understand coverage and out of pocket costs, obtaining multiple contractor estimates, considering payment plans or contractor financing options, and potentially accessing home equity or emergency fund savings for deductible payment and any coverage shortfalls.

Safety Concerns and Risks of DIY Blue Tarp Installation

Yeg8tDSJTEuUZLR_CxQOLg

Tarping damaged roofs involves serious safety hazards that homeowners without proper training and equipment can’t safely manage.

Specific safety risks of DIY tarping include:

Working at height on residential roofs typically 10 to 30 feet above ground creates fall risks that cause serious injuries or death

Unstable damaged roof surfaces may have compromised decking that can’t support weight safely, creating collapse risks

Weather conditions during emergency situations often include wind, rain, or recently wet surfaces that increase slip and fall hazards

Improper equipment such as inadequate ladders, missing fall protection, or incorrect securing tools increases accident risk

Inadequate securing causing further damage when DIY methods fail to hold tarps properly, allowing wind to lift them and tear additional shingles

Potential for injury requiring emergency room treatment, resulting in medical bills that exceed professional installation costs

Professional contractors have proper safety equipment including OSHA compliant fall protection harnesses, stable commercial grade ladders and roof jacks, and liability insurance covering any injuries that occur during installation.

Emergency situations require professional response for safety and effectiveness. Trained crews complete installations quickly and correctly without exposing homeowners to unnecessary injury risks.

Legal and Code Requirements for Temporary Roof Tarps

hPy5p_KSQyOBhvkdkmh0Rg

You have a legal duty to mitigate damage under most insurance contracts, meaning you must take reasonable steps to prevent additional damage after a covered loss.

Failure to tarp and prevent further damage may result in denied insurance claims for secondary damage including water damage to interior spaces, mold growth, and structural deterioration that occurs after the initial storm event but before permanent repairs. Insurance companies can legally refuse payment for damage that results from your failure to act, making prompt tarping both a practical necessity and a legal obligation under the insurance agreement’s mitigation clause.

Local permitting and code considerations for temporary structures exist in some jurisdictions, though most areas exempt emergency tarps from permit requirements as temporary protective measures. Check with local building departments if tarps will remain in place longer than 90 days, as extended temporary structures may trigger permit or inspection requirements.

HOA regulations may have specific requirements or restrictions regarding tarp appearance and duration, with some communities limiting how long tarps can remain visible or requiring specific colors or installation methods. Review HOA covenants and notify the association about storm damage and temporary tarping to avoid potential fines or violations during the repair period.

Next Steps After Blue Tarp Installation on Your Roof

Tarping is just the first step in roof damage recovery, with several critical actions required to complete the claim process and arrange permanent repairs.

Follow these steps after tarp installation:

Document damage with photos showing the damaged areas before tarping, the tarped roof from multiple angles, and any interior water damage for insurance claim support

Contact insurance company immediately to report the damage and begin the claim process, providing policy number and brief damage description

File claim promptly within the timeframe specified in your policy, typically within a few days to several weeks of discovering damage

Schedule adjuster inspection as soon as possible to have the insurance company assess damage, document losses, and determine covered repair costs

Obtain multiple contractor estimates from licensed roofing companies for permanent repair work, ensuring estimates are detailed and include all necessary work

Review coverage and out of pocket costs including your deductible amount, any policy limitations, and the timeline for insurance payment

Schedule permanent repairs with a qualified contractor once insurance coverage is confirmed and financing is arranged

Maintain tarp integrity until repairs complete by inspecting the tarp regularly and contacting the installer if securing fails or tears develop

Timeline expectations vary based on contractor availability, insurance processing speed, and the extent of community damage affecting repair scheduling, with permanent repairs typically occurring 2 to 12 weeks after tarping depending on storm severity and regional contractor capacity. Stay proactive throughout the repair process by following up with insurance adjusters weekly, maintaining communication with contractors, and checking tarp condition after weather events. For coordinated permanent repair work after emergency stabilization, home repair services manage the complete restoration process from initial damage through final finishes.

Final Words

A blue tarp on a roof means immediate action was taken to protect a home from further damage. It signals that the homeowner is working through the repair process, whether that involves insurance claims, contractor scheduling, or arranging financing for permanent fixes.

Tarps are temporary solutions, not endpoints. They buy time while you coordinate the right permanent repairs with qualified professionals.

If you see a blue tarp on your roof or your neighbor’s, it means someone is actively managing damage and preventing it from getting worse. That’s exactly what responsible property protection looks like after unexpected damage strikes.

FAQ

Why do people put blue tarps on their roof?

People put blue tarps on their roofs to create emergency temporary protection after storm damage, wind damage, fallen debris, or other roof failures that expose the interior to weather and moisture intrusion.

What does a blue tarp on a house mean?

A blue tarp on a house means the roof has sustained damage requiring immediate waterproof coverage to prevent further water damage, mold growth, and interior deterioration while the homeowner arranges permanent repairs.

Who puts blue tarps on roofs?

Professional roofing contractors typically put blue tarps on roofs because installation involves safety risks from working at height on damaged surfaces, though FEMA’s Operation Blue Roof program installs tarps free after presidentially declared disasters.

What do blue tarps mean?

Blue tarps mean active damage mitigation efforts are underway to protect property from water intrusion and signal the homeowner is working through insurance claims, contractor scheduling, or waiting for repair materials and permanent roof restoration.

How long can a blue tarp stay on a roof?

A blue tarp can stay on a roof for 30 to 90 days typically, depending on weather conditions, UV exposure, installation quality, and tarp material grade before requiring replacement or permanent roofing repairs.

Does homeowners insurance cover blue tarp installation?

Homeowners insurance covers blue tarp installation costs as part of required damage mitigation when storm damage is documented, including materials and professional installation expenses, which homeowners should document with photos and receipts.

Should I install a roof tarp myself?

You should not install a roof tarp yourself due to serious safety hazards including working at height, unstable damaged surfaces, weather exposure risks, and potential for improper securing causing additional damage or injury.

When does a tarped roof need full replacement instead of repair?

A tarped roof needs full replacement instead of repair when damage covers extensive areas, the roof age is near end-of-life, or repeated storm damage makes replacement more cost-effective than ongoing repair expenses.

What happens if I don’t tarp my damaged roof?

If you don’t tarp your damaged roof, water intrusion causes secondary damage including ceiling stains, insulation saturation, structural wood rot, and mold growth, which insurance may not cover due to failure to mitigate.

How do I apply for FEMA’s Operation Blue Roof program?

You apply for FEMA’s Operation Blue Roof program after a presidentially declared disaster by contacting FEMA directly, providing proof of storm damage, and meeting eligibility requirements for free temporary roof protection installation.

Smoke Damage Cleaning: Revive Your Home

0

Ever notice how a small flame can leave a hidden risk in your home? Smoke carries harmful gases and tiny particles that can hurt your space and your health. Quick cleaning removes rough soot and strong odors, paving the way for a safer, cozier home.

In this post, we share clear, step-by-step methods to tackle smoke damage. We understand how stressful this can be, so we keep it simple. Follow along and learn how a few smart actions today can prevent big repairs tomorrow.

Achieving Effective Smoke Damage Cleaning: Essential Steps for Restoration

Smoke from burning materials carries toxic gases and tiny particles that soon settle on surfaces. Acting within 24 to 48 hours can help remove soot and odor, which is key for quick smoke damage cleaning. Fast action stops more residue from building up and lowers the risk of long-term harm to your home.

Different types of smoke leave behind different messes. You might see dry, loose soot or wet, sticky deposits. If these aren’t cleaned up right away, they can stick to walls and your belongings, making later clean-up much tougher. Taking the proper steps right away sets you up for success in removing both odor and soot.

  1. Safety check – Make sure the area is safe to enter and look out for any risks.
  2. Ventilation – Open windows and doors to bring in fresh air.
  3. Dry sponges – Use special sponges to pick up loose soot from walls.
  4. HEPA vacuum – Use a high-efficiency particulate air (HEPA) vacuum to suck up the remaining particles.
  5. Wet cleaning – Wipe down surfaces with pH-balanced detergents (cleaners that work well without harming surfaces) without over-wetting them.
  6. Odor neutralizer – Use approved treatments to get rid of lingering smoke smells.

Following these steps improves how your home looks and smells. If the soot and odor seem too stubborn or cover a large area, consider calling a professional for extra help.

Understanding Smoke Residue Types for Effective Smoke Damage Cleaning

img-1.jpg

Smoke leaves behind different kinds of residue. Each type acts differently and needs its own cleaning method. First, you need to tell if the residue is light, powdery dry soot, oily wet soot, or sticky protein-based residue (from cooking fires). Getting this right is key. Using the wrong method can cause more damage, like metal corrosion or glass etching.

Residue Type Composition Recommended Cleaning Method
Dry Soot Light, powdery particles Dry cleaning with special sponges and HEPA vacuuming (machine that traps tiny particles)
Wet Soot Oily, smearable deposits Controlled wet cleaning with pH-balanced cleaners
Protein-Based Residues Sticky build-up from cooking fires Cleaning agents that break down protein compounds

Once you know which residue you’re dealing with, you can choose the best cleaning approach. This careful choice not only cleans the residue well but also stops further damage. Using the right method helps lower pollutants and restores surfaces safely so you can move ahead with your cleanup plan.

Safety Protocols in Smoke Damage Cleaning

Smoke leaves behind harmful chemicals and tiny particles. These can irritate your eyes, throat, and skin and make breathing uncomfortable. They can also build up on metal surfaces and cause rust.

When cleaning up smoke damage, your safety comes first. Wear a respirator (a mask that filters harmful particles), gloves, and goggles to protect yourself. Open windows and doors to let in fresh air and use air scrubbers (machines that remove harmful substances from the air) to clear out leftover toxins. This not only keeps you safe but also helps improve the indoor air quality.

If you notice widespread contamination or stubborn residue, it’s best to call a professional. Experts have the right tools and training to handle dangerous materials and use advanced air purifiers. Their help ensures your health and home are protected from harmful smoke.

Smoke Damage Cleaning: Revive Your Home

img-2.jpg

Dry Sponging and HEPA Vacuuming

We start by gently lifting loose soot from flat surfaces like walls and ceilings using a soft rubber sponge. This sponge helps remove extra soot without damaging your surfaces. Next, we run a HEPA vacuum (an air filter that traps tiny mold and soot particles) over the area to pick up any fine debris left behind. Picture blotting a damp sponge on your wall, then using a precise vacuum to finish the job.

Wet Cleaning Solutions

We then light spray surfaces with a pH-balanced detergent (a gentle cleaner with a balanced acidity) to break down stubborn oily soot. We gently wipe in a steady motion without soaking the area. Think of it like a light mist followed by a gentle wipe that dissolves and removes stubborn deposits.

Advanced Oxidation Treatments

For persistent smoke odors, we use ozone or hydroxyl generators (machines that neutralize smells at a very small level) to clear the air. We make sure the space is empty and well-ventilated during this process to keep it safe. Imagine a high-tech air refresher that removes odors completely when the room is unoccupied.

Hiring Certified Smoke Damage Cleaning Professionals

When you hire certified experts, you get skilled technicians who know how to quickly restore your home. They use powerful tools like thermal foggers (machines that spray a special mist to neutralize smoke damage) and air scrubbers (devices that clean the air) to remove contaminants from your space. This fast, focused work helps protect your property from further harm.

Trying to fix smoke damage on your own can be slow and risky. DIY methods often miss hidden smoke residue and can expose you to harmful chemicals. Certified professionals know exactly where to look and set up controlled spaces to keep you safe while they clear out all the contaminants.

Handling smoke damage without professional help may lead to incomplete cleaning. Experts follow trusted industry standards to restore everything from delicate surfaces to structural elements. In contrast, a DIY approach might leave behind lingering odors and cause long-term issues. Our team works fast to get your house back to a safe, livable state.

Before choosing a service, remember to check their credentials, insurance, and customer reviews. This easy extra step makes sure you choose a reliable company for complete, worry-free restoration.

Smoke Damage Cleaning: Revive Your Home

img-3.jpg

Keeping your home's air clean after smoke cleaning is key for your family's health. We know this process can be stressful, so we keep the steps clear and simple.

Check your home often for any remaining smoke odors or particles. For example, look at your HVAC system to make sure it is working right. Replace its filters every three months to stop dust and soot from building up. Adding a HEPA air purifier (a device that traps very small particles) helps clear the air even more. Using a dehumidifier (a machine that removes extra moisture) keeps surfaces dry and prevents rust.

It is also wise to schedule regular inspections by a professional. A trusted expert will look for hidden issues and help prevent future problems. Using odor-control products can keep your home smelling fresh and protect surfaces over time.

Following these steps will help you enjoy a healthier and safer home after smoke damage cleaning.

Final Words

In the action, we covered essential safety checks, step-by-step cleaning methods, and guidelines on when to call certified experts. We shared proven techniques, from dry sponging to HEPA vacuuming, and even tips to maintain indoor air quality after your repair. Our clear guide on smoke damage cleaning helps you start recovery fast, protect your belongings, and get your home back to a safe, livable state. Move forward with confidence and keep your space secure.

FAQ

What are effective smoke damage cleaning products and can I find them at Home Depot?

Effective cleaning products include dry sponges, HEPA vacuums (vacuum cleaners that trap fine particles), and pH-balanced detergents. Many of these items are available at Home Depot.

What is the cost of smoke damage cleaning?

Smoke damage cleaning cost depends on the extent of damage, methods used, and area size. A professional evaluation will provide an accurate estimate.

How can I find a reliable smoke damage cleaning service near me?

You discover reliable services by checking local listings and customer reviews, verifying credentials, and ensuring they specialize in fire smoke damage cleanup for comprehensive service.

What items should be thrown away after smoke damage?

Items to discard include porous materials like certain paper goods, fabrics, and objects heavily affected by soot that cannot be effectively cleaned or restored.

How should smoke-damaged clothes be cleaned?

Smoke-damaged clothes should be aired out, washed with odor-neutralizing detergent, and if odor lingers, taken to a professional cleaner for further treatment.

How do I clean smoke damage on walls and ceilings?

Start by ventilating the room, then use dry sponges to lift loose soot. Follow up with a water-based cleaning solution and mild detergent to safely remove remaining residue.

What are the health risks associated with smoke damage?

Health risks include exposure to toxic gases and fine particles that can cause respiratory irritation and skin issues. It is important to wear protective gear during cleaning.

Can I clean smoke damage myself or should I hire professionals?

While DIY cleaning may work for minor damage using proper products and equipment, severe smoke damage is best handled by professionals to ensure complete and safe residue removal.

Is it safe to stay in a house with smoke damage?

It is unsafe to remain in a smoke-damaged house due to lingering toxins and irritants. Temporary relocation is advised until thorough cleaning and air purification are completed.

What Removes Soot From Walls: Effective Cleaning Methods

0

Think grabbing a damp rag will clean soot?
It usually makes it worse.

Soot is tiny, oily carbon that smears into paint when it gets wet, so the fastest, safest move is dry first.
Start with a dry cleaning sponge (chemical sponge) and a HEPA vacuum, then use gentle wet cleaners like dish soap, vinegar, or baking soda.
If stains stay, step up to TSP or a commercial cleaner, then seal with a stain‑blocking primer before you repaint.
This post walks you step‑by‑step through what removes soot from walls, safety, and when to call a pro.

Immediate Methods That Remove Soot From Walls (Fastest Working Options)

QSvDzq7zT6WgR1V3cT2doA

The fastest way to remove soot from walls is to start dry, not wet. Soot’s made of fine, oily carbon particles that’ll smear and stain deeper into paint if you wipe it with water too early. Your first step is always to lift the loose soot off the surface using a dry cleaning sponge (also called a chemical sponge) and a HEPA vacuum with a soft brush attachment. Once the loose layer’s gone, you can move to mild wet cleaning with dish soap, vinegar, or baking soda. If stains remain after two cleaning cycles, switch to stronger commercial cleaners or TSP, then seal with a stain blocking primer before repainting.

A dry cleaning sponge costs about $5 to $15 each, and you’ll typically use one sponge per room depending on how much soot’s present. These sponges work by pressing against the soot and lifting it without rubbing or spreading. After dry cleaning, wet methods can be applied safely. The mildest option is dish soap. Mix 1 tablespoon of liquid dish soap per gallon of warm water. For light soot, add 1 cup of distilled white vinegar per gallon to cut through grease. For stubborn localized marks, make a paste with 3 parts baking soda and 1 part water.

Here’s the priority sequence for removing soot from walls:

  1. Put on PPE: wear an N95 or better respirator, nitrile gloves, and safety goggles. Open windows and run fans for cross ventilation.

  2. Vacuum loose soot first: use a HEPA vacuum with a soft brush attachment, holding the nozzle slightly off the wall to avoid grinding particles into the paint.

  3. Use a dry cleaning sponge: press the sponge flat against the wall and lift in one direction. Don’t rub back and forth. When the sponge surface gets loaded with soot, slice or sand off the dirty layer to expose a clean side.

  4. Test a small hidden area: before wet cleaning, test your chosen cleaner on a 2 to 4 square inch patch in a closet or behind furniture to confirm the paint won’t soften or discolor.

  5. Apply mild dish soap solution: dampen a microfiber cloth with the soap water mix (wring it out so it’s damp, not dripping), wipe from top to bottom in vertical strokes, rinse the cloth frequently in clean water, and change the cleaning solution when it turns gray.

  6. If stains remain, use vinegar or baking soda: apply a 1 cup per gallon vinegar solution or a baking soda paste to stubborn spots, let sit 5 to 10 minutes, then wipe and rinse thoroughly.

  7. Escalate to TSP or commercial cleaners only if needed: mix ¼ cup TSP per gallon of warm water (follow the product label), apply with a sponge, rinse twice, and allow full drying. Expect 30 to 90 minutes total for wet cleaning one wall, plus drying time.

Dry sponge cleaning usually takes 10 to 30 minutes per wall and should always happen before any liquid touches the surface.

Safety Gear & Preparation for Cleaning Soot From Walls

czm_EDc2Q8SUa68rfNcABw

Soot particles are smaller than 1 micrometer and can stay airborne for hours, which means you’ll inhale them if you don’t wear respiratory protection. Soot also contains carbon compounds, tar, acids, and sometimes heavy metals, all of which can irritate skin, eyes, and lungs. Before you start cleaning, put on an N95 respirator (about $1 to $3 each in multi packs) or a reusable P100 half mask if you have heavy soot. Wear nitrile gloves (a box of 100 costs $8 to $20) and safety goggles ($5 to $15). Open windows and place a box fan in one window blowing out to create cross ventilation. This pulls soot laden air outside instead of circulating it through the house.

Lay plastic drop cloths on the floor under the wall you’re cleaning to catch falling soot and prevent it from grinding into carpet or hardwood. Move furniture away from the wall or cover it with plastic sheeting. Don’t skip the HEPA vacuum step. Vacuuming loose soot before you apply any cleaner prevents you from rubbing oily particles deeper into the paint and spreading stains across a larger area.

PPE and preparation checklist:

  • N95 or P100 respirator
  • Nitrile gloves and safety goggles
  • Cross ventilation: open windows, use fans
  • Plastic drop cloths to protect floors
  • HEPA vacuum with soft brush attachment
  • Test patch on a hidden 2 to 4 square inch area before full cleaning

Tools, Cleaners & Materials That Remove Soot From Walls

hC1v0w0NSVyil5agr__Zmw

You’ll need a mix of dry tools and household cleaners to handle soot at different levels of severity. Start with items you probably already have, then add a few specialty products if needed.

Materials and approximate costs:

  • Chemical or dry cleaning sponge (1 to 2 per room): $5 to $15 each. Designed to lift soot without water.
  • HEPA vacuum with soft brush attachment: consumer models start around $100. If you don’t own one, consider renting or hiring a pro for extensive jobs.
  • Microfiber cloths (set of 6 to 12): $8 to $25. Lint free and reusable.
  • Warm water (1 to 2 gallons): tap water’s fine.
  • Liquid dish soap (such as Dawn, 24 to 28 oz bottle): $3 to $6. Mix 1 tablespoon per gallon of water.
  • Distilled white vinegar (1 gallon): $3 to $6. Mix 1 cup per gallon of water for light to moderate soot.
  • Baking soda (1 lb box): $1 to $3. Use ½ cup per gallon of water, or make a paste with 3 parts baking soda to 1 part water for spot treatment.
  • TSP (trisodium phosphate) or TSP substitute (1 to 4 lb box): $10 to $20. Mix about ¼ cup per gallon of warm water for heavy, oily residue. Follow product label directions.
  • Commercial heavy duty cleaners (Krud Kutter, Simple Green, Zep): $6 to $15 per quart. Use for persistent, resinous soot.
  • Stain blocking primer (Zinsser BIN shellac primer or Kilz Original oil based): $15 to $40 per quart. 1 quart covers about 100 to 125 square feet, 1 gallon covers 350 to 400 square feet.
  • Paint for finish coats: $25 to $60 per gallon depending on brand.
  • Plastic drop cloths: $5 to $15 for a roll. Protects floors and furniture.

Always start with the least invasive method. Dry cleaning sponge and mild dish soap. Then escalate only if stains remain. TSP and commercial degreasers are last resort options because they can dull or damage flat paint if overused. If you reach the point where cleaning fails, seal the stain with a shellac or oil based primer and repaint rather than scrubbing harder.

Dry Cleaning Methods That Remove Soot From Walls Without Smearing

7fCYs-wWRrCxMDsDF4X9jg

Dry methods are your first line of defense because they remove soot without pushing oily carbon deeper into porous paint. A dry cleaning sponge (sometimes called a chemical sponge even though it contains no chemicals) is made of vulcanized rubber and works like an eraser for soot. Press the flat surface of the sponge against the wall and lift in one direction. Don’t rub side to side or scrub in circles, because that spreads the residue. When the sponge surface gets saturated with black particles, slice off the dirty layer with a utility knife or sand it lightly with fine sandpaper to expose a clean surface underneath.

After sponging, use a HEPA vacuum with a soft brush attachment to pick up any loose soot left behind. Hold the nozzle about a quarter inch off the wall or let the soft bristles barely touch the surface. This prevents grinding particles into the paint. Work from top to bottom so falling soot doesn’t re contaminate areas you’ve already cleaned. Expect to spend 10 to 30 minutes per wall depending on coverage. Textured or knockdown plaster takes longer because soot settles into the peaks and valleys. Use the sponge gently and let the vacuum’s suction do most of the work instead of pressing hard.

Step by step dry cleaning process:

  1. Put on your N95 respirator, gloves, and goggles. Open windows and start ventilation.
  2. Lay plastic drop cloths on the floor beneath the wall.
  3. Starting at the top corner, press the dry cleaning sponge flat against the wall and lift in a single downward or sideways stroke.
  4. Rotate or flip the sponge to use a clean side after every few strokes.
  5. When the entire surface is loaded with soot, slice off the dirty layer or lightly sand the sponge to expose fresh rubber.
  6. After sponging the full wall, vacuum with the HEPA equipped soft brush, working top to bottom.
  7. Inspect the wall under good lighting. If a faint gray film remains, you can proceed to wet cleaning. If heavy black marks persist, repeat the dry sponge step before adding any water.

For smooth painted drywall, the sponge glides easily and lifts soot cleanly. On textured walls, use lighter pressure and make multiple passes rather than one heavy scrub. On semi gloss or satin finishes, the sponge works the same way but you may see fewer embedded stains because the paint’s less porous.

Wet Cleaning Solutions That Remove Soot From Walls Safely

VTPrRRfDQlGV_18TXJpZDg

Once loose soot’s gone, you can use water based cleaners to dissolve the oily film left behind. Always start with the mildest option. Dish soap. Stronger cleaners can strip paint or leave residue that bleeds through new coats. Mix 1 tablespoon of liquid dish soap (such as Dawn) per gallon of warm water in a bucket. Dampen a microfiber cloth in the solution, wring it out until it’s just damp (not dripping), and wipe the wall from top to bottom in vertical strokes. Rinse the cloth in a second bucket of clean water every few passes, and change the soapy solution when it turns gray. Dry the wall with a clean towel as you go to prevent water from soaking into the drywall.
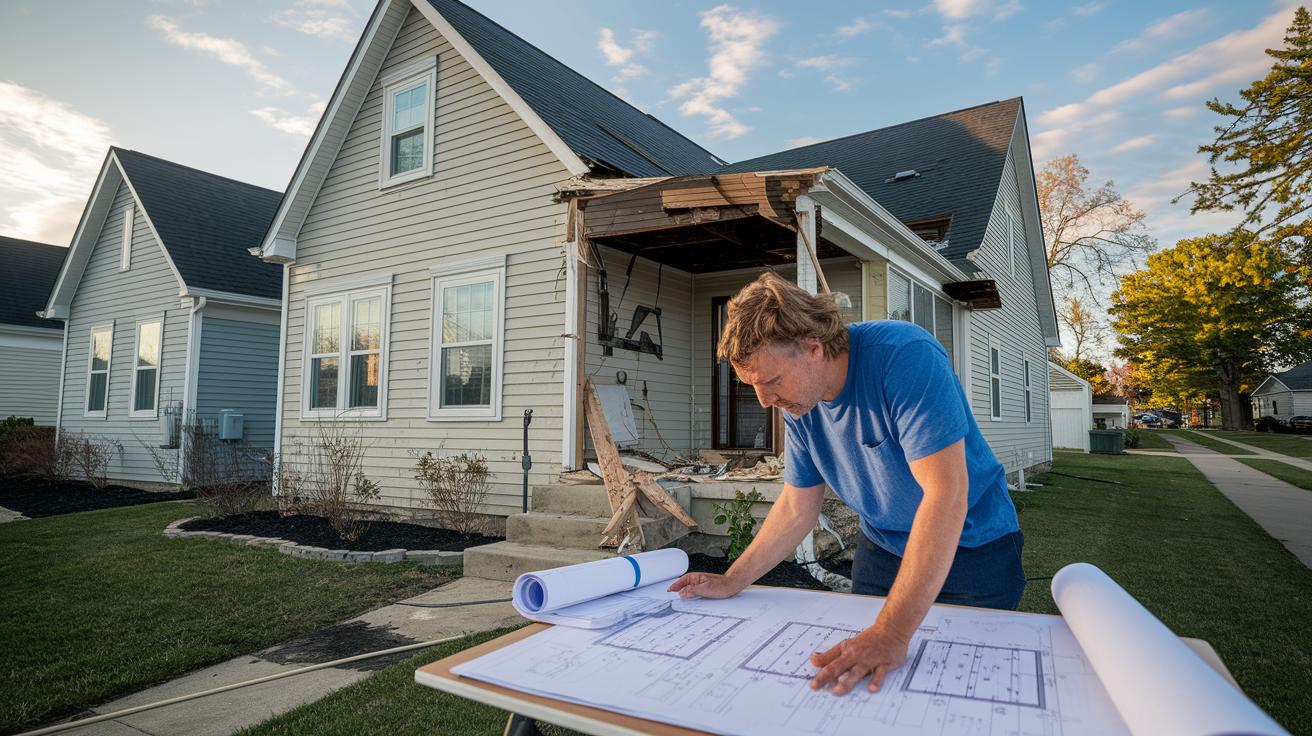
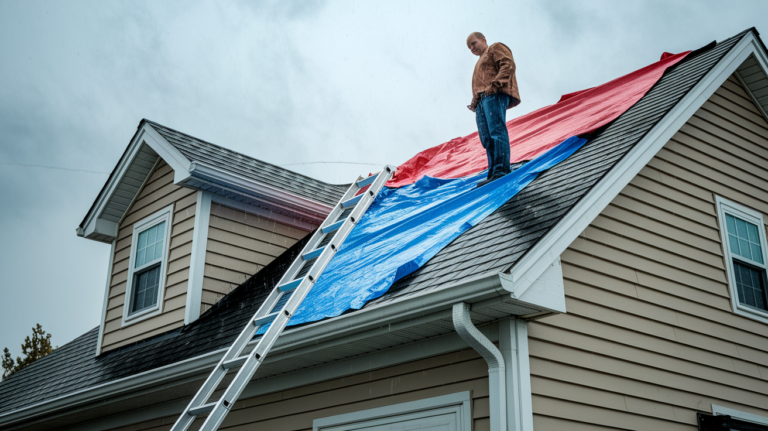
If dish soap alone doesn’t remove all the discoloration, add 1 cup of distilled white vinegar per gallon of warm water. Vinegar cuts through grease and neutralizes some of the acidic compounds in soot. Apply the same way. Damp cloth, top to bottom, frequent rinsing, thorough drying. For small, stubborn spots, make a paste with 3 parts baking soda and 1 part water. Spread a thin layer on the stain, let it sit for 5 to 10 minutes, then gently rub with a damp cloth and rinse. Baking soda’s mildly abrasive, so use it sparingly on flat or matte paint to avoid dulling the finish.

Expect wet cleaning to take 30 to 90 minutes per wall, including drying time. Work in sections about 3 feet wide so you can rinse and dry before the solution evaporates and leaves streaks. If you’re cleaning a whole room, start with the ceiling (if affected), then walls, then trim and baseboards. Change your cleaning solution at least once per wall to avoid redepositing soot.

Cleaner Mix Ratio Best Use Case
Dish soap 1 tbsp per gallon warm water Light to moderate soot on washable paint
White vinegar 1 cup per gallon warm water Oily residue or light smoke film
Baking soda paste 3 parts baking soda : 1 part water Localized stubborn marks on durable finishes

Always test your chosen cleaner on a hidden 2 to 4 square inch area first. Inside a closet, behind a door, or under a light switch plate. Wait 10 minutes and check for paint softening, color change, or surface damage before cleaning the visible wall.

Stronger Cleaners for Stubborn Soot Stains on Walls

yOgUPdSGTdex02s9oigVww

When dish soap, vinegar, and baking soda don’t fully remove the stain, escalate to a phosphate based cleaner like TSP (trisodium phosphate) or a commercial degreaser designed for smoke and soot. TSP’s a powerful alkaline cleaner that cuts through oily carbon residue, but it’ll dull flat paint and can etch some surfaces if left on too long. Mix about ¼ cup of TSP per gallon of warm water, following the product label for exact ratios and safety warnings. Always wear nitrile gloves, safety goggles, and a respirator when using TSP, and ensure good ventilation. Apply the solution with a sponge, let it sit for 2 to 5 minutes, then wipe and rinse twice with clean water to remove all residue. If TSP’s unavailable or you prefer a less caustic option, look for a TSP substitute at the hardware store. These products use different surfactants but work similarly.

Commercial smoke and soot cleaners like Krud Kutter, Simple Green Heavy Duty, or Zep Heavy Duty are formulated to dissolve tar and carbon without the harshness of TSP. Most dilute at a 1:10 or 1:20 ratio (follow the label). Spray or wipe the cleaner on, let it dwell for the recommended time, then scrub gently with a microfiber cloth and rinse thoroughly. These products often contain degreasers, surfactants, and mild solvents that break down soot more effectively than household cleaners. For resinous soot from candles or creosote from wood smoke, specialty soot removers sold at fireplace or restoration supply stores may work better than general purpose degreasers.

When and how to use stronger cleaners:

  • Use TSP or commercial degreasers only after milder methods fail.
  • Mix TSP at ¼ cup per gallon warm water (check product label for adjustments).
  • Apply with a sponge, not a spray bottle, to control coverage and prevent over wetting.
  • Let the solution sit 2 to 5 minutes, then wipe and rinse twice with clean water.
  • Dry the wall immediately with towels to prevent water damage or paint peeling.
  • Don’t use TSP on wallpaper, unsealed wood, or delicate plaster. Test first.
  • If the paint surface dulls or shows wear after one TSP application, stop and prime the wall before repainting instead of scrubbing further.
  • For enzyme cleaners or oxygen based formulas, follow product specific instructions. Some require longer dwell times.

If stains still show after a second TSP cleaning, the soot’s penetrated the paint layer. At that point, cleaning won’t help. You’ll need to seal the stain with a primer before repainting.

How to Remove Soot From Different Wall Surfaces

nrLMQIhvTGqhrGmUPPb8fw

Painted Drywall

Flat or matte latex paint is the most porous finish and traps soot particles easily. Start with a dry cleaning sponge and HEPA vacuum, then test a small area with dish soap and water. If the paint softens, stops absorbing water, or shows shiny spots, stop wet cleaning immediately and move to primer and repainting. Eggshell, satin, and semi gloss paints are more washable and tolerate dish soap, vinegar, and even TSP better than flat finishes. Work in small sections, rinse frequently, and dry thoroughly to avoid water stains or bubbling. If the soot’s been on the wall for weeks or longer, the oily residue may have bonded to the latex and won’t come off without removing the paint. Seal it with a shellac primer and repaint.

Textured or Plaster Walls

Knockdown, popcorn, and other textured finishes hold soot in their peaks and valleys, making cleaning slower and less complete. Use a dry cleaning sponge first, pressing gently so you don’t tear or flatten the texture. Follow with a HEPA vacuum using the soft brush attachment held slightly off the surface. For wet cleaning, use a spray bottle to mist the dish soap or vinegar solution lightly onto the wall, then blot with a microfiber cloth instead of rubbing. Heavy scrubbing can remove texture or leave shiny spots. If stains remain after two cleaning passes, prime and repaint. Trying to scrub textured walls harder usually damages the finish without removing the soot.

Wallpaper

Vinyl coated or vinyl wallpaper can tolerate light damp cleaning, but paper backed wallpaper will absorb water, swell, and delaminate. Always test a hidden area first. For washable vinyl wallpaper, use a barely damp cloth with mild dish soap, wipe gently, and dry immediately. Don’t press hard or rub back and forth. For non washable paper wallpaper, stick to the dry cleaning sponge only. Don’t use any water. If soot stains remain, you may need to remove and replace the wallpaper rather than clean it. Textured or embossed wallpaper follows the same rules as textured walls. Blot instead of scrub, and stop if the paper starts to soften or peel.

Wood Trim and Baseboards

Wood and painted trim are often semi gloss or gloss, which makes them easier to clean than flat wall paint. Start with the dry cleaning sponge, then use dish soap and water with a damp cloth. Avoid soaking the wood or letting water sit on the surface, because prolonged moisture can cause swelling, warping, or finish damage. For oily soot on natural wood or stained trim, use a wood cleaner or a vinegar solution, wipe quickly, and dry immediately. If the wood’s unsealed or the finish is worn, cleaning may raise the grain or leave water marks. Test first, and consider refinishing if the damage is extensive.

When Cleaning Fails: Primers, Sealing & Repainting Over Soot Stains

3SjitRk0QGOKI_S3M6EvNg

If you’ve cleaned the wall twice with progressively stronger methods and gray or yellow stains still show through, the soot’s penetrated the paint. Scrubbing harder will only damage the surface. At this point, seal the stain with a stain blocking primer designed for smoke and soot. Shellac based primers like Zinsser BIN or oil based primers like Kilz Original are the most effective because they create a waterproof barrier that prevents tannins, oils, and carbon from bleeding through the new paint. Water based stain blockers are cheaper but less reliable for heavy smoke stains. They may allow discoloration to reappear after a few months.

One quart of shellac or oil based primer covers about 100 to 125 square feet, which is roughly one wall in a standard bedroom. One gallon covers 350 to 400 square feet. Expect to pay $15 to $40 per quart depending on the brand. Apply the primer with a brush or roller in one even coat, let it dry per the product instructions (usually 1 to 3 hours for shellac primers), then check the wall under good lighting. If the stain’s still visible, apply a second primer coat. Once the primer’s fully dry and no stain shows through, repaint with one or two finish coats of latex or acrylic paint in your chosen sheen.

Steps for priming and repainting over persistent soot stains:

  1. Clean the wall as thoroughly as possible to remove loose soot and oil, then let the wall dry completely for at least 24 hours.
  2. Lightly sand the surface with 220 grit sandpaper to help the primer adhere, then wipe away dust with a tack cloth.
  3. Apply one coat of shellac based stain blocking primer (such as Zinsser BIN) or oil based primer (such as Kilz Original) using a roller for large areas and a brush for edges and trim.
  4. Allow the primer to dry per the manufacturer’s instructions. Shellac primers typically dry in 1 to 3 hours.
  5. If the stain still shows through after the first coat, apply a second primer coat and let it dry. Once no discoloration is visible, proceed to finish painting.

If more than 10 to 20 percent of a room is affected, repainting the entire wall or room usually gives the best color match and avoids visible patches. Total material cost for primer and paint typically runs $40 to $150 per room depending on brand and quality.

Removing Smoke Odor Remaining After Soot Is Off the Walls

Flw2gJ-lQ5ayhatxMeNw1A

Cleaning soot off the walls removes the visible residue, but smoke odor can linger in drywall, insulation, HVAC ducts, carpet, and furniture. Start by improving ventilation. Open all windows, run exhaust fans, and use box fans to push stale air outside. Place bowls of baking soda or activated charcoal in the room to absorb odors naturally. Change HVAC filters immediately after smoke exposure and consider having the ducts professionally cleaned, because soot particles circulate through the system and redeposit on surfaces. If the smell persists after a week of ventilation and natural deodorization, you may need professional help.

Ozone generators and thermal fogging machines are effective for deep smoke odor removal, but they must be used by trained technicians. Ozone’s a toxic gas that can damage lungs and materials if misused, and thermal fogging requires sealing the space and using specialized equipment to disperse deodorizing chemicals. These methods aren’t DIY safe. Professional fire and smoke restoration companies offer ozone treatment, thermal fogging, and hydroxyl generator services as part of comprehensive remediation. If walls, carpet, and furniture still smell after cleaning, the odor may be embedded in porous materials that need to be sealed or replaced.

Odor removal options after soot cleaning:

  • Open windows and use fans for continuous cross ventilation for at least 3 to 7 days.
  • Place bowls of baking soda or activated charcoal bags in affected rooms to absorb odors naturally.
  • Replace HVAC filters and consider professional duct cleaning to remove soot from the air system.
  • Use HEPA air purifiers with activated carbon filters to capture particles and neutralize odors.
  • For persistent smells, hire professionals for ozone treatment, thermal fogging, or hydroxyl generator deodorization.

If the smoke smell remains strong after two weeks of DIY efforts, call a fire restoration company. Odor that won’t dissipate usually means soot’s trapped inside wall cavities, insulation, or HVAC components. Areas that cleaning can’t reach.

Preventing Soot From Returning to Walls

42deo8boRTq1eUsGwhSUlA

The best way to deal with soot is to stop it from forming in the first place. Most household soot comes from candles, fireplaces, wood stoves, and poorly maintained heating appliances. If you burn candles regularly, choose beeswax or soy candles instead of paraffin, because paraffin releases more soot. Trim candle wicks to a quarter inch before each use. Long wicks produce taller, sootier flames. Place candles on stable trays or in glass holders, and keep them away from walls, curtains, and air vents where drafts can cause uneven burning and excess smoke.

For fireplaces and wood stoves, burn only seasoned, dry hardwood with a moisture content below 20 percent. Wet or green wood produces more smoke, creosote, and soot. Have your chimney inspected and cleaned at least once a year, or every one to three years depending on how often you use the fireplace. Install glass doors or mesh screens to contain sparks and reduce draft turbulence that can push soot into the room. Improve overall ventilation by using range hoods when cooking, opening windows periodically, and changing HVAC filters every one to three months to capture airborne particles before they settle on walls.

Soot prevention checklist:

  • Trim candle wicks to ¼ inch before lighting.
  • Use beeswax or soy candles instead of paraffin.
  • Place candles in glass or metal holders on stable surfaces away from walls and vents.
  • Burn only seasoned, dry wood in fireplaces and wood stoves.
  • Schedule annual chimney inspections and cleanings (or every 1 to 3 years depending on use).
  • Install glass doors or screens on fireplaces to reduce soot escape.
  • Change HVAC filters every 1 to 3 months to capture airborne particles.

If you notice new soot deposits forming quickly after cleaning, check for draft problems, incomplete combustion in heating appliances, or candles burning in high traffic areas. Addressing the source stops the cycle of cleaning and re sooting.

When to Call Professional Soot Removal or Fire Restoration Services

DIY cleaning works for light to moderate soot from candles, small cooking incidents, or single room fireplace use. But when soot covers multiple rooms, smells persist after cleaning, or you suspect hidden contamination in HVAC ducts or wall cavities, professional fire and smoke restoration is the safer and more effective choice. Restoration technicians use commercial grade HEPA vacuums, thermal foggers, ozone generators, and specialty cleaning agents that aren’t available to consumers. They also inspect for structural damage, test air quality, and document the work for insurance claims.

Professional soot cleanup for a small room typically costs $200 to $600, depending on the extent of damage and the region. Whole house smoke remediation after a fire commonly ranges from $1,000 to $5,000 or more, with costs rising if HVAC cleaning, insulation replacement, or reconstruction is needed. Most restoration companies offer free inspections and written estimates, so you can compare options before committing. If your insurance covers the damage, the restoration company will often work directly with your adjuster and provide detailed photo documentation, moisture readings, and itemized scopes to support your claim.

Signs you should call a professional instead of cleaning yourself:

  1. Soot covers more than one room or has spread through HVAC ducts to multiple areas of the house.
  2. Smoke odor remains strong after a week of ventilation, cleaning, and natural deodorization.
  3. Walls, ceilings, or insulation show charring, water damage, or structural instability from fire or firefighting efforts.
  4. You experience respiratory irritation, headaches, or allergic reactions while cleaning, indicating high soot or chemical exposure.
  5. Hidden soot is suspected behind walls, in attic spaces, or inside ductwork. Areas you can’t safely access or clean without specialized equipment.
  6. Your insurance requires professional documentation, testing, or certified remediation for the claim to be approved.

Fire and smoke restoration companies operate 24/7 and can often respond within hours to prevent further damage. If you’re unsure whether to hire a pro, most companies will inspect the property for free and give you an honest assessment of whether DIY cleaning is feasible or professional remediation is necessary.

Final Words

Start by grabbing a chemical sponge and a HEPA vacuum to stop soot from spreading. Do this before any wet cleaning so stains don’t smear.

Test a 2–4 in² patch, then work top to bottom: dish soap mix, vinegar or baking soda for spots, and TSP or a stain-blocking primer only if cleaning fails. Wear an N95, gloves, goggles, and ventilate the space.

If you’re asking what removes soot from walls, dry-clean first, then move to mild wet methods and stronger cleaners as needed. You’ll get this fixed, step by step.

FAQ

Q: How do you get soot off painted walls?

A: Getting soot off painted walls requires dry-cleaning first — use a chemical sponge (don’t rub) and HEPA vacuum. Then wash top-to-bottom with a dish soap solution, spot-treat, and rinse.

Q: What is the best cleaner for black soot on walls? / What will dissolve soot?

A: The best cleaners for black soot on walls are mild dish soap (1 tbsp per gallon), white vinegar (1 cup per gallon), baking soda paste (3:1), and TSP (1/4 cup per gallon) for stubborn stains.

Q: Can soot damage walls if left uncleaned?

A: Soot can damage walls if left uncleaned by staining paint, leaving corrosive residue that etches finishes, causing persistent odor and trapping moisture that leads to hidden damage. Clean and document quickly to limit repairs.

Crawlspace Dehumidifier Sizing for Your Home’s Humidity Needs

0

Most homeowners buy crawlspace dehumidifiers based on square footage alone, then wonder why humidity stays high or energy bills spike. That’s because accurate sizing depends on four factors working together: your space’s square footage, how well it’s sealed, current humidity level, and your climate zone. Get the calculation right and you’ll control moisture efficiently without wasting energy. Get it wrong and you’re either running a unit that can’t keep up or burning through electricity on an oversized machine that cycles on and off until it breaks.

Determining Required Dehumidifier Capacity: A Complete Calculation Method

vc4sglHQRdiEo9Efj62tNw

Getting the size right matters because undersized dehumidifiers can’t pull enough moisture to hit your target humidity. They just run nonstop without controlling anything. Oversized units waste energy and flip on and off too much, which burns out parts faster and costs more to run. Accurate crawl space dehumidifier sizing means looking at four things at once: square footage, how sealed your space is, current humidity level, and your climate zone. This way you get the complete answer upfront instead of guessing or trusting manufacturer claims that don’t match real conditions.

Here’s the formula that ties everything together. Start by calculating crawl space area in square feet (length times width). For weird layouts, measure each section separately and add them up. Next, figure out your sealing classification multiplier based on how it’s built: Loosely Sealed spaces (older homes with minimal air sealing and foundation cracks) get 1.4x, Moderately Sealed spaces (newer construction with some air sealing and intact foundations) use 1.0x, and Tightly Sealed or Encapsulated spaces (new builds meeting Energy Star standards or confirmed air leakage of 3 ACH50 or less) use 0.7x. Then measure your current relative humidity with a hygrometer. Don’t guess. Apply the humidity adjustment: 50 to 60% RH uses 1.0x, 60 to 70% RH uses 1.3x, and above 70% RH uses 1.5x. Finally, apply your climate zone factor: hot, humid regions like the Southeast and Gulf Coast get 1.2x, moderate climates get 1.0x, and arid regions get 0.8x. Put it together: Required Capacity (pints/day) = [Base Square Footage ÷ 50] × Sealing Multiplier × Humidity Multiplier × Climate Multiplier.

Let’s walk through a real example. Say you’ve got a 1,500 square foot crawl space in coastal Georgia. It’s loosely sealed (built in 1985, no encapsulation, visible foundation cracks), current RH reads 68% on your hygrometer, and you’re in a hot, humid climate. Here’s the math: [1,500 ÷ 50] × 1.4 × 1.3 × 1.2 = 30 × 1.4 × 1.3 × 1.2 = 65.5 pints per day. Round up to the next available capacity, which means you need a 70 pint dehumidifier. Dehumidifier performance is measured in pints per day at standard AHAM conditions (80°F and 60% RH), so manufacturers rate units under controlled test conditions. Your actual space will vary. The formula accounts for those variations.

Square Footage Loosely Sealed / High Humidity (pints/day) Moderately Sealed / Moderate Humidity (pints/day) Tightly Sealed / Low Humidity (pints/day)
Under 500 35-45 25-35 20-28
500-1000 45-60 35-50 28-38
1000-1500 60-80 50-65 38-50
1500-2000 80-100 65-80 50-65
2000-2500 100-120 80-95 65-80
Over 2500 120+ 95+ 80+

This calculation gives you the complete sizing answer by accounting for all variables upfront. The sections that follow cover refinements like low temperature operation, drainage options, and placement strategies, but this formula gives you the core capacity number you need to start shopping confidently.

How Crawl Space Sealing and Encapsulation Status Affects Capacity Requirements

ce0cUZ51RxOBta3-KGILrA

Construction quality and sealing status create vastly different moisture loads even when square footage is identical. A 1,200 square foot tightly encapsulated crawl space in a new home needs roughly half the dehumidifier capacity of a 1,200 square foot vented dirt floor crawl space in an older house. Understanding these three classifications helps you apply the right multiplier and avoid buying a unit that’s either too weak or unnecessarily powerful.

Loosely Sealed Crawl Spaces

Loosely sealed crawl spaces are typical in older structures built before modern air sealing practices became standard. You’ll find minimal or no vapor barriers, foundation walls with visible cracks or gaps, penetrations around pipes and utilities that were never sealed, and vented openings that allow exterior air to flow freely. These spaces experience constant moisture intrusion from two sources: humid outdoor air infiltrating through vents and gaps, and ground moisture migrating up through exposed soil. The dehumidifier is fighting a continuous battle against new moisture entering the space every hour. That’s why these require 40% higher capacity per square foot (the 1.4x multiplier). If your crawl space has dirt floors, open vents, and you can see daylight through foundation cracks, you’re looking at a loosely sealed space.

Moderately Sealed Crawl Spaces

Moderately sealed crawl spaces represent newer construction or older homes that have been partially upgraded. You’ll typically find some form of vapor barrier covering at least the ground, foundations in good condition without major cracks, vents that have been sealed or reduced, and some air sealing around major penetrations. These spaces have balanced moisture loads. Not fighting constant heavy infiltration, but not completely eliminating moisture sources either. They use the standard baseline capacity calculation (1.0x multiplier) because they represent typical middle ground conditions. Most crawl spaces built in the last 20 years that haven’t been fully encapsulated fall into this category.

Tightly Sealed and Encapsulated Crawl Spaces

Tightly sealed and encapsulated crawl spaces are found in new construction meeting LEED, Energy Star, or Passive House standards, or in older homes that have been professionally encapsulated. These spaces have complete vapor barriers covering both the ground and crawl space walls, sealed foundation penetrations, closed and sealed vents, and confirmed air leakage testing showing 3 ACH50 (air changes per hour at 50 pascals pressure) or less. Encapsulation provides better air circulation for more consistent humidity distribution and allows 30% lower capacity per square foot (the 0.7x multiplier) because the primary moisture sources (ground evaporation and outside air infiltration) have been largely eliminated. The dehumidifier’s role shifts from fighting constant new moisture to maintaining stable conditions in a controlled environment.

Encapsulation versus ventilated status fundamentally changes what you’re asking the dehumidifier to do. In a vented crawl space, the unit constantly battles humid summer air pouring through foundation vents, which can reach 75% relative humidity in hot, humid climates. In an encapsulated space, the dehumidifier maintains a sealed environment where moisture sources are controlled, making the job easier and allowing smaller capacity units to cover larger areas effectively.

Temperature Range Considerations for Crawl Space Dehumidifier Performance

vkPXlqO0T0CgaKNUS8YbNg

Crawl space dehumidifiers work most efficiently when operating temperatures stay between 65 and 80 degrees Fahrenheit. When temperatures drop below this range, efficiency decreases because moisture in the air starts freezing on the cooling coils instead of condensing into water that drains away. Ice buildup blocks airflow and stops moisture removal until the unit cycles into defrost mode to melt the ice. In unheated crawl spaces, especially in northern climates or during winter months, temperatures often drop well below 65°F. Standard room dehumidifiers designed for living spaces won’t work.

That’s why crawl space dehumidifiers are built differently. Units specifically designed for crawl spaces can operate at temperatures as low as 33.8°F (1°C), using low temperature compressor technology and automatic defrost cycles to handle cold conditions. If your crawl space regularly sees temperatures below 60°F during any season, you need a unit rated for low temperature operation. Not a higher capacity regular dehumidifier. Seasonal temperature fluctuations also matter. A crawl space might hit 75°F in July but drop to 45°F in January, so year round moisture control requires a dehumidifier with defrost mode that automatically pauses moisture removal, melts accumulated ice, and resumes operation without manual intervention.

Check manufacturer specifications for minimum operating temperature before finalizing your selection. If you live in cold climates where crawl space temperatures drop below 50°F regularly, low temperature operation capability is non negotiable regardless of your calculated pint per day capacity.

CFM Rating and Airflow Requirements for Crawl Space Coverage

QYhZ-i5wQqOzYMxGTEt1aA

CFM (cubic feet per minute) measures how much air the dehumidifier moves through its system every minute. This matters because the unit can only remove moisture from air that actually passes through it. A dehumidifier with adequate pint per day capacity but insufficient CFM won’t circulate air effectively in larger crawl spaces, leaving pockets of high humidity in corners and far ends while the area near the unit stays dry. Manufacturers state coverage area in square feet, but that coverage assumes the unit’s CFM rating can actually move enough air to reach all parts of the space.

To calculate required CFM, start with your crawl space volume in cubic feet (length × width × height). For effective moisture control, you want the dehumidifier to exchange the total air volume roughly once every hour. A 2,000 square foot crawl space with 3 foot height has 6,000 cubic feet of air. Dividing by 60 minutes means you need at least 100 CFM to turn over the air hourly. Most crawl space dehumidifiers in the 70 pint range move 180 to 220 CFM, which provides adequate circulation for spaces up to 2,500 square feet with typical layouts. Complex layouts with pillars, HVAC ductwork, or multiple rooms may need higher CFM or strategic placement to ensure air reaches all areas.

Several factors affect whether stated CFM will deliver effective coverage. Crawl space layout complexity matters. Open rectangular spaces need less CFM than L shaped or divided areas. Obstacle placement counts too. Dense ductwork, support posts, and stored items block airflow and require higher CFM. Vapor barrier presence makes a difference. Smooth plastic barriers allow better air movement than dirt floors. Duct work options help. Some units allow flexible duct attachment to distribute air to remote corners. And central versus distributed placement changes things. Centrally located units need less CFM than corner installations.

Units with duct attachment capability let you actively distribute conditioned air to crawl space corners that wouldn’t receive adequate airflow from the unit’s natural circulation pattern. If your crawl space extends more than 30 feet in any direction from where you plan to place the dehumidifier, look for models that accept duct attachments or plan to install two smaller units instead of one large centrally located unit.

Regional Climate and Current Humidity Assessment

A3zQOncITf2ZmkmixkVCyg

Regional climate conditions create baseline differences in moisture load that identical crawl spaces in different locations must handle. A 1,500 square foot crawl space in coastal South Carolina fights constant 75% summer humidity from hot Gulf air, ground moisture from high water tables, and year round warmth that accelerates evaporation. That same 1,500 square foot crawl space in Phoenix deals with 20% ambient humidity, minimal ground moisture, and dry heat that actually helps keep things dry. Sizing for coastal South Carolina requires higher capacity (the 1.2x climate multiplier) while Phoenix might use a reduced multiplier because the environment naturally suppresses moisture accumulation. Humid continental climates in the Midwest and Northeast, Pacific Northwest coastal regions, and anywhere with sustained rainy seasons all justify upward capacity adjustments.

Measuring your current relative humidity with a hygrometer is essential because perception is unreliable and RH fluctuates throughout the day and night. Your crawl space might read 55% RH at noon but climb to 72% RH at 3 AM when temperatures drop and moisture condenses. Grab a basic digital hygrometer from any hardware store for $15 to 30, and measure actual conditions instead of guessing. Place the hygrometer in your crawl space and check readings at different times over several days to understand your baseline and peak conditions.

Here’s how to properly assess your humidity levels. Measure during the highest humidity season for your region (summer in most areas, rainy season in others) to capture worst case conditions. Test at multiple locations including corners, the center, and near foundation walls since RH can vary significantly across the space. Record readings both morning and evening for 3 to 5 days to capture daily fluctuation patterns. Calculate the average and compare it to the 55% target to determine which adjustment multiplier applies to your sizing calculation.

Target relative humidity for crawl spaces is 30 to 60 percent, with 55 percent being the optimal point to prevent wood rot, mold and mildew growth, and insulation damage from moisture absorption. If your current RH averages 50 to 60%, you’re dealing with moderate conditions that use the standard 1.0x humidity multiplier. If readings consistently show 60 to 70%, apply the 1.3x multiplier because you’re starting from elevated baseline moisture. Above 70% RH requires the full 1.5x multiplier because you’re fighting high moisture loads that allow mold to establish quickly and wood to begin rotting.

Summer humidity in subterranean spaces can reach 75% RH during hot humid months even if outdoor ambient humidity is lower. Crawl spaces stay cooler than outdoor air, which causes moisture to condense as warm humid air enters and cools down. Add soil moisture from saturated ground after heavy rain or from high water tables, and you’re dealing with moisture entering from below while humid air enters from vents or gaps. This combination justifies the higher capacity requirements in humid climates and explains why the same square footage needs different dehumidifier capacity in different parts of the country.

Drainage System Options and Their Role in Dehumidifier Selection

iAH3U0KeQZ6rGgqMGsVTcw

Drainage matters because crawl space dehumidifiers remove water continuously, and that water has to go somewhere. Units with inadequate drainage plans either overflow, shut down when tanks fill, or require constant trips to empty collection buckets. None of which work for crawl spaces you visit maybe twice a year.

Manual Tank Collection

Manual tanks collect condensate water in a removable bucket that you empty by hand. Tank capacities typically range from 1 to 2 gallons, which fills quickly when a 70 pint dehumidifier is removing moisture aggressively. A 70 pint unit running in high humidity can fill a 2 gallon tank in less than a day, meaning you’d need to crawl into the space daily to empty it. This is rarely practical for crawl space applications where access is difficult and visits are infrequent. Manual tanks work for basements where you can check them easily, but crawl spaces need automatic continuous drainage.

Gravity Drain Systems

Gravity drains route condensate water through a hose to a floor drain, daylight drain leading outside, or other drainage point that sits lower than the dehumidifier outlet. Gravity flow requires no pump and no additional power consumption, making it simple and reliable as long as your crawl space has an appropriate drain point below the unit’s drain outlet. Many crawl spaces don’t have floor drains, and exterior drainage only works if your crawl space elevation allows water to flow downhill to the exit point. If you have a floor drain installed or can route a hose to daylight through a foundation penetration with proper downward slope, gravity drain systems work well.

Built In Condensate Pump Options

Built in pumps let you drain water upward and outward to sinks, exterior locations, sump pump basins, or anywhere else regardless of elevation. Pumps typically lift water 15 to 20 feet vertically, which means you can route condensate out through rim joist penetrations, into basement utility sinks, or directly outside even when the crawl space floor sits below the drainage destination. This eliminates the elevation limitations of gravity drains and is the most common solution for crawl space installations. Some systems coordinate with existing sump pumps by routing dehumidifier condensate into the sump basin so one pump handles both water sources.

Plan your drainage solution before finalizing dehumidifier selection to ensure the unit you choose has compatible drainage features. Most crawl space dehumidifiers offer gravity drain connections as standard with optional built in pump upgrades, giving you flexibility to match your space’s infrastructure.

Energy Efficiency and Operating Cost Factors in Sizing

QvUTQC2_TiG6HwiYYgDZMQ

Dehumidifier capacity and power consumption are directly related, but larger units don’t always cost more to operate. A properly sized 70 pint dehumidifier that reaches target humidity and cycles off uses less total electricity than an undersized 50 pint unit that runs continuously without ever controlling the moisture. Dehumidifiers draw anywhere from 4 to 8 amps depending on capacity and compressor size. A 70 pint unit typically uses 5.5 to 6.5 amps at 115 volts, consuming roughly 650 to 750 watts during active operation. Multiply watts by estimated runtime hours to calculate daily and annual energy consumption.

ENERGY STAR certification indicates the unit meets U.S. Environmental Protection Agency efficiency standards, which means it removes more moisture per watt of electricity consumed compared to non certified models. ENERGY STAR labeled dehumidifiers provide significant long term cost savings over the typical 5 to 10 year lifespan. The certification focuses on energy factor ratings that measure pints removed per kilowatt hour, so higher energy factor numbers mean better efficiency. When comparing two dehumidifiers with similar capacity, the ENERGY STAR model might cost $50 to 100 more upfront but save $200 to 400 in electricity over its operational life.

Here are the six key operating cost factors to evaluate. Initial purchase price ranges from $200 for basic 50 pint units to $1,500+ for commercial 110+ pint models with advanced features. Watts per pint removed is an efficiency rating that determines how much electricity is needed to remove moisture. Duty cycle percentage measures how many hours per day the unit actually runs based on moisture load and capacity match. Local electricity rates vary from $0.08 to $0.25 per kWh across different regions, directly affecting annual costs. Maintenance costs include filter replacements, occasional coil cleaning, and potential repairs over lifespan. Expected lifespan matters. Well maintained crawl space dehumidifiers last 5 to 10 years, spreading initial cost across years of service.

Electrical capacity in your crawl space also matters. Most crawl space dehumidifiers run on standard 115 volt household circuits, but you need to verify the circuit can handle the amperage draw. A 70 pint unit drawing 6 amps on a 15 amp circuit leaves adequate headroom, but if you’re adding a dehumidifier to a circuit that already serves crawl space lighting or receptacles, calculate total load to avoid tripping breakers.

Avoiding Critical Sizing Errors

9f_mA0IBRH-pnkUYbhBu8w

Following the sizing formula helps, but specific mistakes still lead homeowners to select incorrect capacity despite doing the math. Recognizing these errors before you buy saves the cost and hassle of returning an ineffective unit.

Here are the four most common sizing mistakes. First, selecting based on price rather than calculated capacity requirements. Buying a 50 pint unit because it’s $150 cheaper than the 70 pint model your calculation shows you need means you’ll end up with a dehumidifier that runs constantly without reaching target humidity, wasting more money on electricity than you saved upfront. Second, failing to account for moisture sources beyond ambient humidity. The sizing formula assumes normal conditions, but if you have active plumbing leaks, surface water entering during rain, or groundwater seepage through foundation walls, you need to address those water intrusion sources first or significantly increase dehumidifier capacity to compensate. Third, using manufacturer’s maximum coverage area without applying sealing, humidity, and climate adjustments. A dehumidifier rated for “up to 2,600 square feet” achieves that coverage only in tightly sealed spaces with moderate humidity in average climates. If your crawl space is loosely sealed with 70% RH in coastal Florida, that same unit might effectively cover only 1,200 square feet. Fourth, ignoring low temperature operation requirements in cold climates. Buying a standard dehumidifier with adequate pint capacity but no low temperature capability means it stops working during cold months when your crawl space drops below 60°F, leaving you with zero moisture control for half the year.

Signs that sizing was incorrect show up within the first few weeks after installation. If the unit runs continuously 24/7 without reaching your target RH, it’s undersized for the actual moisture load. If it cycles on for 5 to 10 minutes, shuts off for 10 to 15 minutes, and repeats constantly, it’s likely oversized and short cycling, which wears the compressor prematurely. Accelerated wear shows up as louder operation, reduced moisture removal despite continuous runtime, or frost buildup on coils even in moderate temperatures.

Reassess your sizing calculation if the installed dehumidifier doesn’t achieve target humidity levels within 2 to 3 weeks of continuous operation. Either your initial measurements underestimated actual conditions, or there’s an unaccounted moisture source adding load beyond what the formula predicted.

Installation Location and Placement for Optimal Dehumidifier Performance

Z3orXHYQ9Sn_RDC-JfB1g

Where you put the dehumidifier determines whether it can actually deliver the coverage area your sizing calculation expects. A properly sized 70 pint unit stuck in a crawl space corner blocked by ductwork won’t circulate air effectively, leaving the far end of the space humid while the area near the unit stays dry.

Central placement versus corner placement makes a measurable difference. Locate the unit as close to the geometric center of your crawl space as practical, which allows air to circulate evenly in all directions. If your crawl space is long and narrow, place the unit somewhere along the centerline rather than at one end. This positioning reduces the maximum distance air must travel to reach any part of the space.

Five placement considerations that affect performance. Central location for even distribution minimizes distance to farthest corners and promotes balanced humidity control across entire space. Clearance from walls matters. Maintain at least 12 inches on all sides for unrestricted air intake and discharge. Access for maintenance is important. Position where you can reach the unit for filter changes without crawling over obstacles or squeezing through tight gaps. Proximity to drainage helps. Locate near floor drains or exterior walls where drainage hoses can route efficiently. And avoid direct contact with vapor barrier. Elevate unit on plastic blocks or concrete pavers to prevent weight from tearing encapsulation material.

Unobstructed air intake and discharge keep the dehumidifier running at maximum efficiency. Don’t push the unit tight against foundation walls, stack items around it, or let insulation drape over vents. Air needs to flow freely into the intake grille, through the cooling coils, and out the discharge without fighting obstacles. Placing the unit where HVAC ductwork or support posts don’t block airflow paths helps circulation reach all areas.

Access requirements matter more than you’d think for equipment that lasts 5 to 10 years. You’ll need to reach the unit at least quarterly to check filters, verify operation, and confirm drainage is working. If you place it in the most remote corner where you can barely reach it now, you won’t maintain it properly, and performance will degrade as filters clog and efficiency drops.

Product Capacity Ranges and Price Considerations by Application

6m3cGICaTDyMLeCP_A4Mmw

Crawl space dehumidifiers for residential applications typically range from 30 to 110 pints per day capacity, which covers spaces from small 400 square foot areas up to large 3,000+ square foot crawl spaces. Commercial grade units start at 110 pints and extend to 300 pints per day for large buildings, warehouses, or multi unit applications, but most single family homes don’t need commercial capacity.

Residential grade and commercial grade dehumidifiers differ in construction and expected duty cycle. Residential units use lighter cabinets, standard compressors designed for intermittent operation, and basic controls suited for homeowner use. Commercial units feature reinforced steel cabinets, heavy duty compressors built for continuous 24/7 operation, higher CFM ratings for moving air through larger spaces, and often include remote monitoring and control capabilities. These construction differences justify the significant price gap between a residential 70 pint unit at $800 and a commercial 135 pint unit at $2,200.

Five capacity tiers with approximate price ranges and applications. 30 to 50 pints costs $250 to 450 for small crawl spaces under 1,000 sq ft with moderate sealing and average humidity. 50 to 70 pints costs $500 to 900, the most common residential range for 1,000 to 2,000 sq ft crawl spaces with typical moisture loads. 70 to 95 pints costs $800 to 1,200 for larger crawl spaces 2,000 to 2,800 sq ft or smaller spaces with high humidity and loose sealing. 95 to 135 pints costs $1,400 to 2,000 for large residential crawl spaces over 2,800 sq ft or transition to light commercial applications. And 135+ pints commercial costs $2,000 to 5,000+ for multi unit buildings, commercial structures, or extreme moisture conditions requiring industrial capacity.

Warranty coverage expectations correlate with price and build quality. Budget residential units typically offer 1 year limited warranties covering defects but not wear items like compressors. Mid range residential dehumidifiers include 2 to 3 year warranties with 5 year compressor coverage. Premium residential and commercial units often provide 5 year full warranties recognizing that continuous duty construction should deliver reliable performance throughout the expected 5 to 10 year lifespan. Extended warranty coverage signals manufacturer confidence in durability, which matters when you’re installing equipment in a crawl space you won’t check frequently.

Price correlates with capacity, build quality, and expected lifespan, but cheapest isn’t always most expensive in the long run. A $300 unit that fails after 3 years costs more over 10 years than a $900 unit that runs reliably for the full decade.

When to Seek Professional Assessment for Crawl Space Sizing

DIY sizing calculations work well for straightforward situations: dry crawl space that needs humidity maintenance, typical construction, no visible moisture damage, and no complications beyond selecting appropriate capacity. Complex scenarios benefit from professional evaluation before you spend money on equipment.

Six situations that indicate professional assessment is recommended. Active flooding or standing water indicates drainage problems or groundwater intrusion requiring remediation before dehumidification. Visible mold growth covering more than 10 square feet suggests moisture problems severe enough to need remediation, not just dehumidification. Structural damage including rotted floor joists, sagging subfloors, or crumbling foundations shows moisture has caused damage requiring repair, not just control. Failed previous attempts where installed dehumidifiers couldn’t control humidity points to moisture sources or conditions exceeding equipment capacity. Building code requirements for new construction or major remodeling may mandate specific moisture control strategies, ventilation rates, or equipment certifications. And insurance claims for water damage requiring documentation needs professional assessment, moisture mapping, and scope of work for remediation.

Professional assessment includes tools and expertise beyond basic square footage calculation. Moisture meter readings measure actual moisture content in wood framing, subfloors, and foundation walls to identify problem areas and track progress. Thermal imaging cameras reveal hidden moisture intrusion, air leaks, and insulation defects that affect sizing requirements. Blower door testing measures actual air leakage rates (ACH50) to determine if your crawl space truly qualifies as tightly sealed or if it’s leakier than construction age suggests. Comprehensive moisture source identification distinguishes between ground moisture, air infiltration, plumbing leaks, and condensation so solutions address root causes.

Professionals identify moisture sources you might miss. Condensation on cold water pipes, small plumbing leaks behind vapor barriers, or groundwater wicking through foundation walls. Buying a dehumidifier without addressing active water intrusion wastes money on equipment that fights an unwinnable battle. Professional sizing prevents costly mistakes and ensures building code compliance when required, giving you confidence the solution will actually work.

Maintenance Requirements and Performance Monitoring After Installation

Routine maintenance keeps your crawl space dehumidifier removing moisture effectively throughout its 5 to 10 year lifespan. Filter cleaning or replacement is the most frequent task. Plan on checking filters monthly and cleaning or replacing them every 2 to 3 months depending on crawl space dust levels. Dirty filters restrict airflow, reduce moisture removal efficiency, and force the compressor to work harder, wasting energy and shortening equipment life. Most crawl space dehumidifiers use washable filters you can rinse and reuse, while others need replacement filters available from the manufacturer.

Performance monitoring verifies the sized unit is actually maintaining target relative humidity. Use the dehumidifier’s built in humidistat if it has one, or place a separate hygrometer in the crawl space to track RH independently. Target range is 30 to 60 percent, with 55 percent being optimal for preventing wood rot, mold, and insulation damage. Check readings weekly for the first month after installation to confirm the unit is reaching target levels, then shift to monthly checks once performance stabilizes.

Five performance check steps for quarterly verification. Verify RH levels stay consistently within 30 to 60% range using hygrometer readings at multiple locations. Check drainage operation by confirming water flows freely through hose or pump operates when unit runs. Inspect filters for dust buildup and clean or replace if airflow seems reduced. Monitor runtime cycles to ensure unit reaches setpoint and shuts off rather than running continuously. Review energy consumption by comparing monthly electricity usage to baseline to spot efficiency problems.

Expected lifespan of 5 to 10 years with proper maintenance means the unit should run reliably for most of a decade if you keep up with basic care. Signs that sizing was incorrect or the unit is failing include inability to reach target RH despite continuous operation (undersized or failing compressor), extremely short on/off cycles every 5 to 10 minutes (oversized), and steadily increasing energy consumption over time (dirty coils or refrigerant leak reducing efficiency).

If RH readings stay above 60% despite the dehumidifier running constantly, either your sizing calculation underestimated actual moisture load or an unaddressed moisture source is adding water faster than the unit can remove it. Reassess conditions and consider whether you need higher capacity or must fix water intrusion problems first.

Final Words

Crawlspace dehumidifier sizing relies on accurate square footage calculation combined with your space’s sealing status, current humidity measurement, and climate zone reality.

The four-factor formula walks you through base capacity, then adjusts for what actually affects moisture load in your specific situation.

Measure your dimensions. Check your RH with a hygrometer. Apply the multipliers. Match the result to a unit that fits your drainage setup and electrical capacity.

When you get the sizing right the first time, you avoid undersized units that can’t keep up and oversized units that waste energy short cycling. Your crawl space stays at that stable 55% RH that protects your structure.

FAQ

What size dehumidifier for a 2000 sq ft house?

A 2000 square foot house typically requires a dehumidifier with 65 to 100 pints per day capacity, depending on sealing quality, current humidity levels, and climate zone. Loosely sealed spaces with high humidity need larger units, while tightly sealed encapsulated crawl spaces can use smaller capacities.

How do I calculate what size dehumidifier I need?

To calculate what size dehumidifier you need, multiply your square footage divided by 50, then adjust using multipliers for sealing type, current relative humidity, and climate zone. For example, a 1,500 square foot loosely sealed crawl space with 68% RH in a hot-humid climate requires approximately 65 pints per day capacity.

Is it worth putting a dehumidifier in a crawl space?

Putting a dehumidifier in a crawl space is worth it because it prevents wood rot, mold growth, insulation damage, and structural moisture problems by maintaining optimal relative humidity between 30 and 60 percent. Crawl spaces without dehumidification can reach 75% humidity during hot humid summer months, causing serious damage.

What’s the best setting for a dehumidifier in a crawl space?

The best setting for a dehumidifier in a crawl space is 55% relative humidity, which prevents wood rot, mold and mildew growth, and insulation damage while avoiding over-drying. Use a hygrometer to verify actual humidity levels rather than relying on perception, as RH fluctuates throughout day and night.

What happens if I choose an undersized dehumidifier?

An undersized dehumidifier fails to remove sufficient moisture from your crawl space, runs continuously without reaching target humidity levels, and cannot prevent mold growth or structural damage. Units must match calculated capacity requirements based on square footage, sealing quality, current humidity, and climate conditions.

What happens if I choose an oversized dehumidifier?

An oversized dehumidifier wastes energy, cycles on and off too frequently causing excessive wear, and may fail to run long enough for proper air circulation. Proper sizing using square footage and condition multipliers prevents both energy waste and premature equipment failure.

How do I measure my crawl space square footage for sizing?

To measure your crawl space square footage for sizing, multiply length times width for rectangular spaces, or calculate each section separately and add totals for irregular layouts. Multiply length, width, and height together to determine total cubic feet if CFM ratings matter for your application.

Do encapsulated crawl spaces need smaller dehumidifiers?

Encapsulated crawl spaces need 30% smaller dehumidifiers (0.7x multiplier) because complete vapor barriers, sealed penetrations, and controlled air leakage eliminate most moisture sources. Encapsulation provides better air circulation for consistent humidity levels compared to loosely sealed spaces requiring 40% higher capacity.

How does climate zone affect dehumidifier sizing?

Climate zone affects dehumidifier sizing through moisture load multipliers: hot-humid regions require 1.2x capacity, moderate climates use 1.0x standard sizing, and arid regions need only 0.8x capacity. Coastal and humid continental climates create higher baseline moisture loads than mountain or desert regions.

What relative humidity level indicates I need a larger dehumidifier?

Relative humidity levels above 60% indicate you need a larger dehumidifier with capacity adjusted upward by 1.3x for 60-70% RH or 1.5x for RH above 70%. Measure current RH with a hygrometer at multiple locations and times rather than relying on perception.

Can I use gravity drain with my crawl space dehumidifier?

You can use gravity drain with your crawl space dehumidifier only if floor drains or exterior drainage points exist at lower elevation than the unit. Built-in condensate pumps enable drainage to any location including up and out, making them more practical for most crawl space installations.

How does crawl space temperature affect dehumidifier performance?

Crawl space temperature affects dehumidifier performance because efficiency decreases below the optimal 65 to 80 degree Fahrenheit range as moisture freezes on coils. Units designed for crawl spaces can operate as low as 33.8 degrees Fahrenheit using automatic defrost modes for year-round operation.

What CFM rating do I need for my crawl space?

CFM rating needed for your crawl space depends on cubic footage and desired air exchanges per hour, with proper air circulation ensuring moisture removal reaches corners and distant areas. Central placement with unobstructed airflow provides better coverage than perimeter placement in complex layouts.

How do I know if my dehumidifier is correctly sized after installation?

You know your dehumidifier is correctly sized after installation if it maintains target relative humidity of 55% within 2-3 weeks, cycles normally rather than running continuously, and achieves consistent readings throughout the space. Inability to reach target RH or excessive short cycling indicates incorrect sizing.

Should I choose ENERGY STAR rated crawl space dehumidifiers?

You should choose ENERGY STAR rated crawl space dehumidifiers because they meet EPA energy efficiency standards and provide significant long-term cost savings over typical 5-10 year equipment lifespan. Efficient models reduce operating costs while maintaining effective moisture removal for continuous crawl space operation.

Ceiling Water Leak Repair: Fast Fixes and When to Call a Pro

0

You’re staring at a wet ceiling stain that wasn’t there yesterday, and now you’re wondering if this is a quick fix or a major problem. The truth is, ceiling water leaks range from simple DIY repairs to situations that need professional intervention fast. Knowing the difference keeps you safe, saves money, and prevents small leaks from turning into collapsed ceilings. This guide walks you through emergency response, leak detection, drying procedures, and when to stop and call someone who does this every day.

Immediate Emergency Response and Temporary Stabilization

cuus4sPdR4Sa7Qdcs1MXVQ

When water starts leaking through your ceiling, the first 15 minutes determine how much damage spreads. Quick action stops water from soaking insulation, weakening drywall, traveling into walls, and creating conditions for microbial growth. Every minute you wait increases repair costs and safety risks.

Watch for these warning signs: a ceiling that sags or feels soft when touched, brown or yellow stains spreading across the surface, paint that bubbles or peels away, and the steady sound of dripping water above you. You might also notice a musty smell or see actual water droplets forming.

Here’s what to do immediately:

  1. Turn off the water supply if the leak comes from plumbing (shut the main valve or the fixture supply line)
  2. Shut off electricity to the affected room at your breaker panel to eliminate shock risks
  3. Move furniture and valuables out of the area or cover them with plastic sheeting
  4. Place buckets directly under active drips to catch water
  5. Protect floors with tarps, old towels, or plastic sheeting to catch dripping water and falling debris
  6. Create a controlled drainage point by poking a small hole at the leak’s center with an awl or screwdriver, directing water into a bucket rather than letting it spread through the drywall

Never touch electrical fixtures, outlets, or switches near a wet ceiling. Water conducts electricity, and even a small amount of moisture around wiring creates serious shock hazards. If the ceiling bulges significantly or you hear cracking sounds, evacuate the room immediately. A saturated ceiling can collapse without warning. Always wear safety glasses when working overhead and put on work gloves when handling tools or damaged materials.

These temporary measures buy you time to arrange permanent repairs, but they’re not solutions that last. Most temporary fixes hold for 24 to 72 hours, giving you a window to assess damage, contact professionals if needed, and plan your next steps.

Quick temporary repairs include:

  • Controlled drainage holes to relieve water pressure and direct flow into containers
  • Waterproof tarps spread over the affected ceiling area and secured with painter’s tape
  • Strategic bucket positioning with towels underneath to catch overflow
  • Temporary patching compounds applied to small holes after drying (holding 24 to 48 hours)
  • Emergency sealants for hairline cracks that aren’t actively leaking

Gather these basic tools and materials for emergency response: a sturdy stepladder, multiple buckets in different sizes, heavy plastic tarps, an awl or screwdriver for creating drainage holes, a utility knife, box fans for air circulation, and a keyhole saw if you need to open the ceiling for inspection. Safety equipment matters just as much. Wear protective eyewear to keep debris out of your eyes, a dust mask if you’re cutting into drywall, and work gloves to protect your hands from sharp edges. These tools and materials provide 24 to 72 hours of protection while you arrange professional help or prepare for permanent DIY repairs.

Finding the Source of Your Ceiling Leak

SZ1WzRjbS_KJRxmD0ZJMeg

The ceiling stain shows you where water exits, but the actual leak source might be several feet away. Water travels along joists, pipes, and roof decking before finding a weak spot to drip through. That’s why a bathroom directly above doesn’t automatically mean the toilet caused your ceiling leak.

Plumbing Related Leak Sources

Bathroom fixtures cause most indoor ceiling leaks. A toilet’s wax ring can fail, letting water seep through the floor with every flush. Bathtub and shower drains loosen over time, and missing caulk around the tub edge sends water straight into the subfloor. Supply lines feeding toilets and sinks develop pinhole leaks or fail at connection points. All of this water finds ceiling cavities below.

Other plumbing culprits hide in unexpected places. Washing machine supply hoses crack and burst, flooding floors above. Dishwasher connections loosen during normal vibration. Water heaters leak from the bottom or at pipe connections, and second floor units create ceiling problems on the first floor. Hot water lines develop condensation in cold weather, dripping moisture that looks exactly like an active leak.

Roof and Exterior Leak Sources

Roof damage sends water on long journeys before it reaches your ceiling. A missing shingle allows water under the roof deck, where it travels down until finding a gap in the vapor barrier. Flashing around chimneys, skylights, and vent pipes deteriorates, creating entry points. Ice dams form along roof edges in cold climates, forcing water backward under shingles.

Clogged gutters overflow and dump water directly onto fascia boards and roof edges, where it soaks through. Flat roofs develop low spots that pool water after rain. HVAC systems mounted in attics produce condensation that drips onto insulation and eventually saturates drywall below. Even dryer vents venting into attics create moisture that condenses on cold surfaces.

Finding the exact source sometimes requires cutting a small inspection hole in the ceiling. Start at the stain’s edge and work toward the suspected source location. Lay sheets of toilet paper along pipes, ceiling joists, and around fixtures in the room above. Check back in a few hours. The toilet paper shows exactly where moisture travels by becoming visibly wet or disintegrating. When you can’t locate the source after reasonable inspection, or when water damage is extensive, professionals use thermal imaging cameras and moisture meters that detect water inside walls and ceilings without cutting large exploratory holes.

Drying and Removing Damaged Materials

ROaLS9RtRDGQzOwynZ246g

Everything must dry completely before you repair anything. Sealing moisture inside the ceiling creates perfect conditions for microbial growth, which starts developing within 24 to 48 hours of water exposure. Wet framing lumber weakens. Paint won’t stick to damp surfaces. Even small amounts of trapped moisture cause problems that show up weeks later as new stains, odors, or structural sagging.

Drying timelines depend on how much water soaked in. Minor surface dampness from a small leak might dry naturally in 24 to 48 hours with good air circulation. Moderate saturation from a steady leak over several hours needs 3 to 5 days with fans and dehumidifiers running constantly. Severe flooding from a burst pipe or major roof leak requires 5 to 7 days, and usually means opening the ceiling to expose the cavity. Set up box fans pointing directly at the affected area. Open windows if outdoor humidity is lower than indoor levels. Run a dehumidifier continuously, emptying it regularly. The goal is moving air constantly across all wet surfaces, including the hidden cavity above the drywall.

Leak Severity Drying Time Equipment Needed
Minor surface dampness 24 to 48 hours Box fan, open windows
Moderate saturation 3 to 5 days Multiple fans, dehumidifier
Severe flooding/burst pipe 5 to 7 days Ceiling opening, industrial fans, commercial dehumidifier

Sometimes drying means removing material. Drywall that stayed wet for more than 48 hours usually needs replacement. Paint that bubbles or peels won’t reattach even after drying. If you press the ceiling and it feels soft or spongy, that section is too damaged to save. Wear safety glasses and a dust mask before cutting into any ceiling. Falling debris and drywall dust irritate eyes and lungs.

Here’s the removal process:

  1. Mark cut lines at the nearest ceiling joists on both sides of the damage, creating a rectangular section that exposes solid framing for your patch backing
  2. Score along marked lines with a utility knife to prevent tearing drywall beyond your cuts
  3. Cut with a keyhole saw following your scored lines, working slowly to avoid hitting pipes or wiring above
  4. Remove wet insulation from the exposed cavity if present, handling it carefully and bagging it for disposal
  5. Clean and dry the cut edges with a cloth, making sure all debris is cleared from the joist surfaces where new drywall will attach

Cut back to dry material even if that means removing drywall that looks fine. If you see staining or feel any dampness, keep cutting until you reach completely dry sections. This usually means exposing the ceiling joists completely, which makes installing your patch much easier anyway. Bag and remove water damaged materials immediately. Wet drywall and insulation get heavy and messy quickly. If you see extensive sagging, large sections of soft ceiling, or damage spanning multiple rooms, stop and consult a structural professional before removing anything. Some ceiling damage indicates framing problems that need expert assessment. Small sections with peeling paint or surface bubbling might only need scraping with a putty knife rather than complete removal, saving repair time if the underlying drywall stayed solid and dry.

Complete Ceiling Repair: Drywall Replacement Through Finishing

4howCNYLSGu1BkU2z8uD0A

Cut your replacement drywall patch 2 inches wider and longer than the opening. This oversized approach lets you trim to exact fit without multiple trips to adjust size. Set the drywall piece against the opening and mark where it needs trimming, then score deeply along those marks with a utility knife. Snap the drywall along the score line and cut the back paper. Before installing, attach backing boards across the opening. Cut 1×3 or 1×4 boards about 6 inches longer than the opening width, slide them into the hole perpendicular to the joists, and screw them to the existing ceiling from below. These provide solid attachment points for your patch edges.

Position your cut drywall patch into the opening and secure it to the joists and backing boards with drywall screws. Drive screws every 12 inches along each joist and backing board, placing them about half an inch from the patch edges. Sink each screw head just below the drywall surface, creating a small dimple without breaking through the paper facing. Overdriving screws weakens the hold. Underdriving leaves bumps that show through the finished surface. The patch should sit perfectly flush with the surrounding ceiling. If it’s slightly high or low, remove it and adjust your backing boards.

Apply joint compound in thin layers rather than trying to fill everything at once. First coat covers the screw heads and fills the gaps along the seams. Spread compound with a 6 inch drywall knife, feathering the edges outward several inches beyond the repair. Let it dry completely overnight. Sand the dried compound with medium grit sandpaper, smoothing any ridges and bumps until the surface feels level with the existing ceiling. Wipe away dust with a damp cloth. Second coat goes on slightly wider, extending the feathered edge further into the existing ceiling. Sand again after drying. Third coat, if needed, should make the repair invisible by blending completely into the surrounding surface.

Patience produces professional results. Rushing through joint compound coats creates visible lumps and waves that show up clearly once painted. Each coat must dry thoroughly before sanding, and each sanding must finish completely smooth before the next coat. Most repairs need two to three coats depending on the damage size and your feathering skill. Humidity and temperature affect drying time, so don’t force the schedule.

Prime the repaired area before painting. Primer seals the joint compound, blocks any remaining water stains, and creates uniform paint adhesion across the patched and original ceiling surfaces. Open windows during primer application for ventilation and faster drying. Let primer cure for the time listed on the can before painting.

Match your ceiling texture before applying the final paint. Smooth ceilings just need careful paint application. Knockdown texture requires spraying texture compound and knocking down the peaks with a trowel after a few minutes. Popcorn texture uses specialized spray equipment most homeowners rent rather than buy. For paint color matching, take a sample chip from an inconspicuous area to the paint store for computer matching. When the repair is small (under 2 square feet), you can feather the new paint into the existing ceiling color. Larger repairs show less when you paint the entire ceiling, ensuring perfect color consistency and eliminating any visible repair edges. Keep windows open during final paint drying for ventilation and to prevent paint odor from concentrating in the room.

When to Call a Professional for Ceiling Leak Repairs

1kq8rqPSTLqn8Kk50jQMLw

Some ceiling leaks exceed DIY capabilities, no matter how handy you are. Attempting complex repairs yourself often costs more in the long run when initial mistakes require professional correction anyway. Safety risks increase when you’re working with structural damage, hidden electrical systems, or potential health hazards.

Call professionals for these situations:

  • Extensive structural damage showing sagging joists, cracked framing, or ceiling sections at risk of collapse
  • Hidden plumbing leaks requiring opening walls, rerouting pipes, or accessing crawl spaces and subfloors
  • Mold contamination covering more than 10 square feet or showing black, green, or fuzzy growth patterns
  • Electrical wiring running through or near the affected ceiling area, especially active junction boxes or fixtures
  • Roof repairs beyond simple shingle replacement, including flashing work, deck damage, or structural concerns
  • Recurring leaks from sources you can’t identify after reasonable inspection efforts
  • Insurance claim requirements needing detailed documentation, estimates, and licensed contractor invoices
  • HVAC system complications involving condensate lines, ductwork modifications, or equipment access

Different leak sources require specific expertise. A licensed plumber handles supply line leaks, drain failures, and fixture problems. Roofing contractors specialize in exterior leak sources, from shingle damage to flashing repairs. Water damage restoration companies manage extensive ceiling damage involving multiple trades, structural concerns, and coordinated drying, repair, and finishing work. For situations requiring immediate response, such as burst pipes or severe active leaks, emergency services provide rapid stabilization and damage control 24 hours a day.

Professionals bring specialized equipment you can’t easily rent or buy. Moisture meters detect hidden water in walls and ceilings without opening exploratory holes. Thermal imaging cameras show temperature differences that reveal water paths and saturation areas invisible to normal inspection. Industrial dehumidifiers and air movers dry structures faster and more thoroughly than consumer equipment. Professionals also know building codes, permit requirements, and proper repair sequences that prevent future problems. During assessment, expect professionals to inspect the damage area, trace the water source, test surrounding areas for hidden moisture, explain repair scope and timeline, and provide detailed written estimates before starting work. Most ceiling leak repairs take 3 to 7 days once started, depending on drying requirements and repair complexity.

Ceiling Water Leak Repair Costs and Budget Planning

9tSO9dCRQUe9WqLz-4RULg

Ceiling leak repair costs swing from under $100 for small DIY patches to several thousand dollars for extensive professional restoration. The damage extent drives costs more than any other factor. A fist sized stain with solid drywall underneath costs far less than a sagging 8 foot section requiring joist repairs. Accessibility matters too. First floor ceilings with open attics above cost less to fix than second story repairs requiring roof work. Regional labor rates vary significantly, and material choices affect the final bill.

DIY repairs save labor costs but require your time, tools, and skill. Professional services cost more upfront but include expertise, proper equipment, warranty coverage, and faster completion. For small cosmetic repairs, DIY makes financial sense. For anything involving structural work, plumbing, or electrical systems, professional help usually costs less than fixing DIY mistakes.

Repair Type DIY Cost Range Professional Cost Range Typical Timeline
Minor patch and paint $50 to 150 $200 to 400 1 to 2 days
Drywall section replacement $100 to 300 $400 to 800 2 to 4 days
Plumbing repair + ceiling fix $200 to 500 $800 to 2,000 3 to 5 days
Roof repair + ceiling restoration $300 to 800 $1,500 to 4,000 5 to 7 days
Full ceiling replacement $500 to 1,500 $2,000 to 6,000 5 to 10 days

Hidden costs appear during repairs. Microbial growth remediation adds $500 to $3,000 depending on contamination extent. Structural reinforcement for damaged joists runs $400 to $1,200 per joist. Some municipalities require permits for ceiling work, adding $50 to $300 in fees. When hiring contractors, get three written estimates detailing materials, labor, timeline, and warranty coverage. Verify licensing and insurance before signing contracts. Budget planning depends on whether you’re handling an emergency or planning repairs. Emergency repairs often cost 20 to 30 percent more due to urgent response needs and after hours labor rates. Planned repairs let you shop contractors, schedule during slower seasons, and negotiate better rates. Set aside 15 to 20 percent above the highest estimate for unexpected complications discovered once work begins.

k_GbSK2pSqOwlfVZzxjJHQ

Homeowner’s insurance typically covers sudden, accidental water damage but excludes gradual leaks and maintenance neglect. A burst pipe flooding your ceiling overnight gets covered. A slow drip from worn plumbing that stained the ceiling over six months doesn’t. Insurance companies distinguish between “sudden and accidental” events versus “maintenance issues.” Understanding this difference before filing prevents claim denials and frustration.

Document everything immediately when water damage occurs. Take photos showing the ceiling damage from multiple angles, capturing both close ups of the affected area and wide shots showing the room context. Record video walking through the space, narrating what you see and when you discovered the problem. Write detailed notes describing the leak source, when you first noticed it, and what emergency measures you took. Get professional assessments quickly. Contractors, plumbers, or restoration companies provide written evaluations documenting damage extent, probable cause, and repair estimates. This documentation becomes essential when the insurance adjuster visits.

Start your claim by calling your insurance company’s claims line within 24 hours of discovering major damage. Provide your policy number, explain what happened in simple terms, and ask about your next steps. The company assigns an adjuster who schedules an inspection visit, usually within 3 to 7 days. During the adjuster visit, show all damage areas, provide your documentation, and explain the timeline. The adjuster evaluates coverage, determines claim value, and explains what the policy will pay. After approval, you receive a repair authorization and initial payment, typically covering a portion of costs upfront with the remainder paid after completion. Keep all receipts, invoices, and photos throughout repairs. Insurance companies require final documentation before releasing remaining claim funds.

Claims get denied when homeowners can’t prove the damage happened suddenly, when evidence suggests neglect over time, when the policy specifically excludes the damage cause, or when documentation is insufficient. Avoid denials by maintaining home maintenance records showing regular inspections and upkeep. Report leaks immediately rather than waiting until damage worsens. Take thorough documentation at the first sign of problems. Read your policy carefully, understanding what’s covered and excluded. Most policies cover burst pipe damage but exclude roof leaks from poor maintenance, foundation seepage, sewer backups (without additional coverage), and damage from pests or vermin. When claim denial seems unfair, request a detailed written explanation citing specific policy language, then consider hiring a public adjuster who works for you rather than the insurance company.

Preventing Future Ceiling Water Leaks in Your Home

3V-9gKk0TCSAuQtk8nGWtA

Prevention stops ceiling leaks before they start, protecting your home’s structure, your belongings, and your repair budget. A proactive approach costs far less than emergency repairs and restoration work. Prevention isn’t a single task. It’s ongoing attention to the systems and structures that keep water where it belongs.

Schedule these regular maintenance tasks:

  • Annual roof inspections checking shingles, flashing, and roof penetrations for wear or damage
  • Gutter cleaning every 3 months, more often if trees overhang your roof, preventing overflow and ice dams
  • Plumbing fixture checks every 6 months, inspecting supply lines, drain connections, and toilet seals for leaks or corrosion
  • Caulk and grout inspection annually around tubs, showers, and sinks, recaulking when gaps appear
  • Appliance hose replacement every 5 years for washing machines and water heaters, even if hoses look fine
  • HVAC condensation line clearing annually before cooling season, preventing clogs that cause overflow

Build monitoring habits that catch problems early:

  • Monthly ceiling inspections walking through your home looking for new stains, soft spots, or paint changes
  • Listening for dripping sounds especially after using plumbing fixtures or during and after rain
  • Checking for musty odors that indicate hidden moisture accumulation
  • Monitoring water bills for unexplained increases suggesting hidden leaks
  • Attic checks within 24 hours after heavy rain, looking for wet insulation or roof deck staining

Create a home maintenance calendar noting when each task is due. Set phone reminders for seasonal work like gutter cleaning and roof inspections. Consider professional preventive inspections every 2 to 3 years. Plumbers can pressure test supply lines and inspect fixtures. Roofing contractors provide detailed assessments catching problems before they leak. HVAC technicians service condensation systems during annual tune ups. Smart home leak detection systems now monitor for water where it doesn’t belong. Small sensors placed under sinks, near water heaters, and around appliances alert your phone when they detect moisture. Whole house systems shut off main water supply automatically when flow patterns indicate possible leaks. These technologies cost $100 to $500 depending on coverage extent, catching problems that save thousands in ceiling repairs.

Final Words

Ceiling water leak repair starts with fast action to contain the damage, careful work to find the source, thorough drying to prevent mold, and patient rebuild steps that blend the fix into your ceiling.

The work matters because it protects your home from worse structural problems and keeps your space livable.

Some repairs you can handle with the right tools and time. Others need a professional who can trace hidden leaks, assess structural impact, or match textures cleanly.

Either way, you’re not stuck guessing. You know what to stabilize first, what to inspect, and when to call for backup.

FAQ

What do you do if your ceiling is leaking water?

If your ceiling is leaking water, immediately place buckets under active drips, move furniture and valuables away from the area, and shut off electricity to the affected room. Turn off the water supply if you suspect a plumbing source. Create a small controlled drainage hole at the leak center using an awl or screwdriver to direct water into a bucket rather than letting it spread through the drywall. Cover floors with tarps to catch dripping water and falling debris while you identify and stop the source.

How much does it cost to fix a ceiling leak?

Ceiling leak repair costs vary from $150 to $500 for minor DIY patch and paint work to $1,500 to $4,000 for professional drywall section replacement and finishing. If plumbing repairs are needed alongside ceiling fixes, expect $800 to $3,000 combined. Full ceiling replacement with underlying cause repair can range from $2,500 to $8,000 depending on damage extent, accessibility, and whether structural reinforcement is required.

Does home insurance cover ceiling leaks?

Home insurance typically covers ceiling leaks from sudden events like burst pipes or storm damage but excludes gradual leaks from poor maintenance or pre-existing conditions. Coverage depends on the documented cause, your specific policy terms, and whether you’ve maintained regular home upkeep records. Document damage immediately with photos and professional assessments to support your claim, and notify your insurer within 24 to 48 hours of discovery.

Can you repair a water damaged ceiling?

You can repair a water damaged ceiling after the source is stopped and all affected materials are completely dry. Minor damage may only need spackling and paint, while moderate damage requires cutting out wet drywall back to ceiling joists, drying the cavity with fans for 24 to 72 hours, then installing replacement drywall with joint compound and finishing. Severe structural damage or mold contamination beyond 10 square feet requires professional restoration to ensure safe, lasting repairs.

Mold Remediation Cost: Simple, Smart Pricing

Ever wonder why mold cleanup costs can be so different? When mold shows up in your home, it can be stressful. Knowing what to expect helps you plan ahead.

We break down all the expenses for you. This includes inspection fees (the cost to check your home for mold), labor (the work done by professionals), materials, and extra charges for hard-to-reach spots.

By understanding each cost, you can make smart choices without overspending. We’re here to help you stay in control and keep your home safe.

Understanding Mold Remediation Cost Components

Labor and materials are the main parts of mold cleanup costs. For an entire home, you can expect fees to range from $5,000 to $10,000. For example, when we inspected a waterlogged living room, quick repairs helped prevent even higher expenses later. We also consider the cost of using special tools and safely disposing of contaminated items.

Inspection fees run between $200 and $1,000. These checks include tests like air sampling (a method to spot tiny mold spores) and moisture level measurements. If mold is hiding in your attic or crawl space, the extra effort to access and contain it can add to the cost.

Cleaning HVAC and duct systems is another factor. Minor cleaning might start at about $1,000, but if the contamination is severe, costs can rise to $8,000. Identifying the extent of the problem early is key.

Repair work also affects the overall price. Replacing damaged drywall or fixing leaks can extend the cleanup from one day for small fixes to up to four weeks for serious cases. Certain types of mold, like black mold, require extra caution which can increase fees.

In short, mold remediation costs depend on labor, materials, inspections, testing, containment, repairs, and the type of mold present. Keep these factors in mind so you better understand your cost estimates.

Mold remediation cost: Simple, Smart Pricing

img-1.jpg

Understanding the pricing by area can help you plan your mold cleanup. Every space in your home comes with its own challenges and expenses. For an entire home, you might see costs range from $5,000 to $10,000. This price covers extensive work and quality materials. When the mold grows in spots that are hard to reach, costs can increase. For example, we handled an attic cleanup that cost nearly 30% more than normal because access was difficult.

Cleaning your HVAC system and ducts can also vary in price. For light mold contamination, prices usually start around $1,000. But if the mold is severe, costs can climb to $8,000. This difference reflects a simple cleaning versus a complete decontamination of the system.

A small basement with visible mold on walls or floors is usually more contained. Typically, these projects cost between $2,000 and $3,000, making them a simpler cleanup effort.

Attic areas often need extra care. Because of tricky access and higher risks, you may pay 20-30% above the basic rate. Crawl spaces also require special containment because of their tight work areas, usually running between $3,000 and $5,000.

When mold affects drywall, removal and replacement times can differ. Smaller jobs covering under 50 square feet might be wrapped up in one day. Larger jobs affecting more than 500 square feet could extend to around two weeks.

Area Type Typical Cost Range
Entire Home $5,000–$10,000
HVAC System $1,000–$8,000
Small Basement $2,000–$3,000
Attic Premiums of 20–30% above basic rates
Crawl Space $3,000–$5,000
Drywall Replacement One-day to two-week jobs

Regional Variations in Mold Remediation Cost

Mold cleanup costs can differ a lot depending on where you live. Local labor, weather, and state rules all affect the price. In California, for example, you might pay 15 to 25% more than the national average. This happens because teams there must use special gear and follow strict environmental rules.

In Florida, prices are usually 5 to 10% above average. The state's humid climate (warm, moist air that helps mold grow) makes mold more common and harder to remove completely. That often means extra steps are needed, which can raise the cost.

In places like Georgia and Texas, prices tend to match the national average. In some rural areas in these states, costs can be about 5% lower thanks to lower expenses and easier access to work sites.

Other factors that affect prices include state licensing rules, the number of certified experts (professionals who have passed special tests), and local market competition. Getting local cleaning quotes will help you compare bids and plan your budget, giving you a clearer picture of what to expect from mold cleanup services in your area.

DIY vs Professional Mold Remediation Cost Comparison

img-2.jpg

When mold damages your home, you may wonder whether to tackle it yourself or hire professionals. DIY kits and rental tools cost between $100 and $500. This option is cheaper at first, but it may not remove all the mold. Missed spots can cause health risks and lead to more damage later. Visit our DIY mold remediation page for details on kit costs and risks.

Professional help starts at about $5,000 and can exceed $10,000 for a single-family home. These services include full containment (securing the area to stop mold from spreading), HEPA vacuuming (using a filter that traps even tiny mold particles), and safe disposal of damaged materials. Our certified experts complete the work under warranty and follow insurance guidelines, reducing the chance of future mold problems. Check our professional mold remediation page for more on safe, certified work.

When you compare these options, the difference is clear. DIY may save money up front, but incomplete mold removal can lead to expensive fixes later. Professional services cost more initially but offer a complete cleanup that addresses every affected area. This approach protects your home and eases insurance claims. Consider cost, effectiveness, and long-term safety to choose the best path for your situation.

Tips for Budgeting Your Mold Remediation Cost

Start by checking online cost calculators. They give you a rough idea of what to expect before you reach out to contractors for quotes. This helps you plan your budget smartly.

Next, include extra charges in your budget. For example, add inspection fees (typically $200 to $1,000), air sampling for mold spores (a test to check for tiny mold particles), plumbing repairs, and roof-leak fixes. If a minor leak is found during an inspection, you’ll need extra funds for that repair.

You can also save money by planning the work during off-peak seasons like late fall or winter. When demand is lower, prices often drop. This seasonal strategy can help keep your costs down.

Then, gather three written bids from different contractors. Compare their quotes to find the best mix of price and quality. This step gives you confidence that you’re not overpaying.

Finally, review your homeowner’s insurance policy to see if mold damage is covered. Knowing your coverage can ease financial stress and help you plan your next steps.

Final Words

In the action, we broke down the key components of mold remediation cost. You learned about labor, materials, inspection fees, and more. We also compared costs by different areas of the home and highlighted regional price differences.

We weighed professional services against DIY options. You also got practical tips to budget and plan for safe and effective mold cleanup. Every step aims to help you reduce disruption and keep your home safe and livable. Stay positive, the right plan makes all the difference.

FAQ

How much is mold remediation cost per square foot?

The mold remediation cost per square foot depends on factors like infestation severity, affected surface area, and regional pricing, usually ranging from a few dollars per square foot for small jobs to higher rates for larger projects.

Who pays for mold remediation?

The responsibility for mold remediation typically falls to the homeowner, although insurance may cover costs when the mold results from a covered incident.

How does a mold remediation cost calculator work?

A mold remediation cost calculator estimates expenses by considering inspection, labor, and material fees, providing a preliminary figure to help you plan your budget.

How much does mold remediation cost in a basement?

Basement mold remediation generally costs between $2,000 and $3,000. Costs vary based on the extent of visible mold, the size of the area, and any additional repair work needed.

How much does mold remediation cost in a bathroom?

Bathroom mold remediation pricing is similar to other small spaces; the final cost depends on the area affected, severity of growth, and any extra repairs to address moisture issues.

How can I find mold remediation cost near me?

Local mold remediation pricing varies with region, labor rates, and job complexity. Contact local certified professionals for accurate estimates in your specific area.

What have people shared about mold remediation cost on Reddit?

Discussions on Reddit reveal a wide range of mold remediation costs, emphasizing that expenses vary greatly by job scope and location, so obtaining individual quotes is essential.

How does Servpro’s mold remediation cost compare?

Servpro’s mold remediation cost typically aligns with industry averages, with full-home treatments often ranging from $5,000 to $10,000 based on damage severity and repair needs.

What does mold remediation typically cost?

Mold remediation generally costs a few thousand dollars for small areas and can exceed $10,000 for full-home treatments, depending on factors such as severity, area size, and necessary repairs.

What should I do if I can’t afford mold remediation?

If costs are a concern, obtain multiple quotes, check with your insurance provider for potential coverage, and explore local assistance programs or payment plans to help manage expenses.

Is it safe to remediate mold myself?

DIY mold remediation is possible with available kits costing $100–$500, but it carries risks of incomplete removal and health hazards; professional help is recommended for safer, thorough treatment.

Can mold be completely removed from a house?

While professional remediation can eliminate active mold growth, it is challenging to remove all mold spores; experts focus on reducing risk and preventing future mold growth.

How to Restore Water Damaged Cabinets Successfully

0

Think water-damaged cabinets are ruined beyond help?
Not always. What you do in the first hours decides if you save them or replace them, and helps stop mold.
Stop the leak, pull everything out, and start drying right away with fans and a dehumidifier.
This guide walks you step by step through quick assessment, moisture checks, drying, fixes for warped doors and peeled veneer, and when to swap out particleboard that has broken down.

Immediate Steps to Begin Restoring Water‑Damaged Cabinets

r_ygR6ywQ-W84KLi21OumQ

First, stop the water source. Turn off the shut-off valve under the sink, disconnect the dishwasher line, or fix the leaking pipe before you do anything else. Water still running into cabinetry means more damage while you’re trying to dry. Next, look closely at the cabinets for urgent damage indicators. Bubbling or blistering on door faces shows water trapped under the finish. Doors that won’t close or feel sticky mean the wood’s swollen. Press on the cabinet bottom and sides. If the material feels soft or crumbly, that’s particleboard breaking down. Dark stains on the inside walls or a damp, musty smell mean water’s been sitting for a while and mold may already be growing.

Speed matters because mold can start forming within 24 hours of water exposure. Remove everything from inside the cabinets, take the doors and drawers off, and start drying immediately. Set up fans to push air across wet surfaces and run a dehumidifier to pull moisture from the air. Open cabinet backs if you can reach them, and remove toe kick trim so air can flow underneath.

Follow these five immediate steps to start the restoration:

  1. Remove all contents, including shelf liners, cleaners, and cookware.
  2. Take off cabinet doors and drawer fronts so air can reach all surfaces.
  3. Place 1–2 high capacity fans to blow directly into open cabinets and run a 30–70 pint dehumidifier in the room.
  4. Use a moisture meter to check cabinet box sides and bottoms. Write down the readings.
  5. Take photos of stains, warping, and soft spots for documentation and insurance.

Assessing Cabinet Damage Levels Before Repair

mqUlX3anRFCuckhdDn0a2Q

Use a moisture meter to measure the cabinet box, shelves, and door panels. Wood should read below 12% moisture before you sand or refinish. Readings above 20% mean the material’s still too wet to repair and may need more drying time or replacement. Look for three main damage types: surface stains with no structural change, warped or lifting veneer with some softness, and deep saturation where the cabinet box feels spongy or crumbly.

Check for mold by looking inside cabinet corners, under the sink area, and along the back panel. Small spots of surface mold on non-porous finishes can be cleaned. Mold covering more than 10 square feet, or mold that’s grown into porous particleboard, usually requires a professional with containment and HEPA equipment.

Damage Level Key Signs Repair or Replace Recommendation
Minor Surface water stains, slight bubbling on finish, no softening of wood, moisture reading <15% Repairable with drying, sanding, stain removal, and refinishing
Moderate Warped doors, delaminated veneer, localized mold spots, some edge swelling, moisture 15–20% Repairable with panel replacement, veneer regluing, mold cleaning, and refinishing
Severe Soft or crumbly cabinet box, widespread mold, structural collapse, moisture >20% Replace affected cabinets; repair may cost as much or more than new units

Drying Techniques for Moisture‑Damaged Cabinets

EzB3IBv8SJad1UR0QJ1KhA

Run fans and a dehumidifier continuously for at least 24 to 72 hours for surface moisture. If the cabinet’s made of thick plywood or particleboard, expect 7 to 14 days of controlled drying to get moisture levels below 12%. Position one fan to blow directly into the open cabinet box and a second fan to push air across the floor and toe kick area. Angle airflow so it moves through the cabinet, not just around it.

Pull out drawers and remove shelves if they lift out easily. Open all doors and drawers fully so air reaches every surface. If the cabinet back’s accessible, remove it or drill small access holes near the bottom to let wet air escape. Humidity in the room should drop below 50% and stay there. If the room feels damp or smells musty after three days, the dehumidifier may be undersized or the water damage extends into the wall cavity behind the cabinets.

Check moisture readings daily with a pin-type or pinless moisture meter. Write down the number for each spot you test so you can track drying progress. If readings stay above 15% after a week, you may need to remove panels or increase airflow with additional equipment.

Target moisture content: below 12% before sanding or refinishing, below 15% acceptable for structural assessment. Equipment: 1–2 axial or box fans, 1 portable dehumidifier rated 30–70 pints per day, moisture meter. Airflow tips: direct fans into the cabinet interior, not just at the door. Create cross-ventilation if possible. Remove base trim or drill weep holes for airflow under cabinets. Signs drying’s incomplete: condensation on cabinet walls in the morning, wood still feels cool or damp to touch, musty smell persists, moisture readings above 15%.

Repairing Swollen Wood, Warping, and Structural Cabinet Damage

RzZQwWAyQASNo_va5FUcCg

Minor swelling on door edges or face frames can often be reversed with controlled drying and light sanding. After the wood’s fully dry, sand swollen areas starting with 80-grit sandpaper to remove high spots, then move to 120-grit to smooth transitions, and finish with 220-grit before priming. If a door remains warped after drying, you can try clamping it flat between two straight boards with even pressure and leaving it clamped for 24 to 48 hours.

For cabinet bottoms or shelves made of particleboard that have swollen or softened, drying won’t restore the original strength. Remove the damaged panel by unscrewing or prying it out carefully. Measure the opening precisely and cut a replacement from 3/4-inch plywood or moisture resistant furniture board. Secure the new panel with screws or construction adhesive, then seal all edges with a water resistant primer or polyurethane.

Cracks, gaps, or small holes left after drying can be filled with interior grade wood filler or two-part epoxy wood filler. Apply filler slightly proud of the surface, let it cure fully (usually 2 to 4 hours), then sand it flush with 120-grit and finish with 220-grit. For larger gaps or separated joints, inject wood glue into the crack, clamp the pieces together, and wipe off any squeeze-out with a damp cloth.

When cabinet sides or face frames feel soft or crumbly, the structural integrity’s gone. Particleboard that’s absorbed water and broken down can’t be rebuilt. In this case, the only reliable repair is replacing the entire cabinet box or cutting out the damaged section and sistering in a new piece of plywood with screws and construction adhesive.

Techniques for Fixing Warped Doors

Slightly warped doors (less than 3 millimeters of bow) can sometimes be flattened by placing them face-down on a flat surface, weighing the high spots with books or weights, and allowing them to dry slowly over several days. Check daily and adjust weight if needed. Once flat and dry, seal both sides of the door with primer or finish to prevent future warping. Doors that remain twisted or bowed after this process should be replaced. Trying to force a warped door closed will damage hinges and the face frame over time.

Fixing Delaminated Veneer and Peeling Laminate on Water‑Damaged Cabinets

Ud59AdSQk6KFo-Rif883Q

When veneer lifts or bubbles, the bond between the thin wood face and the substrate has failed. Gently lift the loose veneer edge to see how far the separation extends. For small areas (less than a few inches), inject PVA wood glue under the veneer using a glue syringe or a small brush. Press the veneer down with a roller or your hand to spread the glue evenly, then clamp it flat using bar clamps and wooden cauls to distribute pressure. Leave it clamped for 24 hours, then remove the clamps and trim any glue squeeze-out with a sharp chisel or scraper.

Peeling laminate can be repaired the same way if the substrate underneath’s still solid. Remove any loose or damaged laminate sections, clean the substrate with a damp cloth, and let it dry. Apply contact cement to both the substrate and the back of the laminate, following the product instructions for open time (usually 10 to 20 minutes). Press the laminate firmly into place, starting from one edge and rolling out air bubbles with a J-roller or small hand roller. If the substrate’s swollen or softened, laminate won’t bond properly. Replace the entire door or drawer front instead.

When veneer delamination covers more than 30% of a door face, replacement’s usually faster and cleaner than repair. Small edge repairs are straightforward, but large areas are difficult to re-glue without visible lines or bubbles.

Use PVA wood glue for veneer on solid wood or plywood. Use contact cement or two-part epoxy for laminate on particleboard. Place clamps every 6 to 8 inches along the repair for even pressure. Protect the veneer surface with wax paper and a flat caul. Don’t force laminate down if the substrate feels soft. It’ll delaminate again within weeks. Trim veneer edges flush with a sharp utility knife or veneer edge trimmer after the glue’s fully cured.

Removing Water Stains, Discoloration, and Odors from Cabinets

iynViIsoR7CBJvVwllQ3yw

Dark water stains on wood are caused by tannins reacting with moisture. After the wood’s fully dry, try sanding the stain lightly with 220-grit sandpaper. If the stain remains, apply an oxalic acid based wood bleach following the product directions. Usually you mix powder with water, brush it on, let it sit for 20 minutes to an hour, then rinse thoroughly and let the wood dry before sanding. For lighter stains on finished surfaces, test a small amount of 3% hydrogen peroxide on an inconspicuous area. Apply it with a cloth, let it sit for a few minutes, then wipe clean.

Musty odors usually mean mold’s present, even if you can’t see it. Use a HEPA filter vacuum to remove loose dust and spores from the cabinet interior, then scrub all surfaces with a detergent and water solution. Rinse with clean water and dry thoroughly. If the smell persists after cleaning and drying, the mold may be inside porous particleboard or behind the back panel, and that material will need to be replaced.

Safe Use of Bleaching Agents

Always test bleaching solutions on a hidden spot first to check for color change or damage to the finish. Wear nitrile gloves, eye protection, and a respirator or N95 mask when working with oxalic acid or chlorine bleach. Work in a well-ventilated area and never mix bleach with ammonia or other cleaners. Toxic fumes can form instantly. After applying oxalic acid, neutralize the surface by wiping it with a solution of baking soda and water (1 tablespoon per cup), then rinse with clean water and dry completely.

Tannin stains (dark brown or black): use oxalic acid wood bleach, rinse and neutralize, sand lightly after drying. Surface discoloration (yellowish or grayish): try hydrogen peroxide or a mild bleach solution (1 part bleach to 10 parts water), test first, rinse thoroughly. Persistent odor with no visible stain: indicates mold inside porous material. Remove and replace affected panels.

Sanding, Priming, and Refinishing Restored Cabinets

a56DCn_nRUCdFy-_DxAPqg

Start sanding with 80-grit or 120-grit sandpaper to remove old finish, smooth repairs, and level filled areas. Move to 120-grit if you started coarser, then finish with 220-grit to prepare the surface for primer. Sand in the direction of the wood grain and use light, even pressure. After sanding, wipe all surfaces with a tack cloth or a damp microfiber cloth to remove dust.

Apply a stain blocking primer to any areas that had water stains, even if you bleached them. Primer prevents the stain from bleeding through the topcoat. Most primers dry in 2 to 4 hours, but check the label. Some oil based primers need up to 24 hours. Once the primer’s dry, lightly sand with 220-grit, wipe clean, and apply your finish coat.

For a painted finish, use cabinet grade paint (acrylic or alkyd enamel) and apply 1 to 3 thin coats, sanding lightly between coats. For a clear or stained finish, apply wood stain if desired, let it dry, then topcoat with 2 to 3 coats of polyurethane (oil based or water based) or conversion varnish. Allow each coat to dry fully and sand lightly with 220-grit before applying the next.

Step Materials Needed Typical Time Notes
Sanding 80, 120, 220-grit sandpaper; sanding block or orbital sander; tack cloth 1–3 hours per cabinet set Sand with the grain; remove all dust before priming
Priming Stain-blocking primer (1 quart covers ~100–150 sq ft); brush or foam roller 2–24 hours dry time Apply thin, even coat; sand lightly after dry
Painting or Staining Cabinet paint or stain + clear coat (1 quart–1 gallon); brush, roller, or sprayer 2–6 hours dry time per coat Apply 1–3 coats; sand lightly between coats
Sealing Polyurethane or conversion varnish (pint–quart); brush or foam applicator 4–24 hours cure time per coat Seal all surfaces including edges and insides for moisture protection

Hardware, Cabinet Doors, and Drawer Repairs After Water Damage

Tky6VvghSDCs_cO3-uiRWA

Remove hinges, pulls, and knobs before sanding and refinishing doors. Hinges that were submerged may have rust or corrosion. Replace them if screws are loose or the hinge no longer holds tight. If hinge screw holes have stripped out, fill them with wood glue and toothpicks or small dowels, let the glue dry, then drill new pilot holes and reinstall the hinge.

Drawer boxes made of particleboard often fail when water soaks the bottom or sides. If the drawer bottom’s soft or sagging, remove it and replace it with a 1/4-inch plywood panel cut to size. If drawer sides have swollen and the drawer no longer slides smoothly, sand the sides lightly or replace the drawer box entirely. Drawer slides that were underwater should be cleaned, dried, and tested. If they bind or feel gritty, replace them.

Remove all hardware before sanding. Label hinge locations and screw holes for easy reinstallation. Replace any hardware that shows rust, corrosion, or functional failure after cleaning. Repair stripped screw holes with glue and dowels, drill new pilot holes to prevent splitting. Test drawer operation after reinstalling slides. Adjust or shim if drawers bind or sit crooked. Refinish doors and drawer fronts separately from the cabinet box for cleaner results. Install doors after all finish coats have fully cured (usually 24 to 72 hours) to avoid sticking or smudging.

Cost, Timeline, and When to Replace vs Repair Water‑Damaged Cabinets

BJFCzDTDRjGjxc4JPDLb6g

Minor repairs like sanding, staining, and touch-up painting typically cost $20 to $300 in materials and take 1 to 3 days. Moderate repairs (replacing a few panels, regluing veneer, and full refinishing) usually run $300 to $1,200 and take 3 to 7 days. Major restoration or cabinet replacement can cost $1,500 to $15,000 depending on the extent of damage and the quality of new cabinets, with timelines stretching from a few days to several weeks.

Compare the cost of repairing damaged cabinets to the cost of replacement. If repairs approach 50% or more of what new cabinets would cost, replacement’s usually the better choice. For example, if refinishing and replacing panels on moderately damaged cabinets costs $2,500 but new stock cabinets for the same kitchen run $4,500, repair makes sense. If the repair estimate climbs to $3,000 or more due to extensive mold remediation, structural damage, or multiple failed components, replacement becomes more practical.

Professional help’s needed when moisture readings stay above 20% after a week of drying, when mold covers more than 10 square feet, when cabinet boxes have structural softness or collapse, or when water intrusion extends into the wall cavity. Licensed mold remediation, structural repairs, and coordination with insurance adjusters are outside the scope of most DIY projects.

DIY’s enough when damage is limited to surface stains, minor swelling, and isolated veneer lifting. Materials under $500, timeline under one week. Professional assessment’s needed when moisture readings remain high, mold’s widespread, or cabinet boxes feel soft. Costs range $500 to $6,000 depending on scope. Replacement’s most cost effective when repair costs exceed 50% of replacement cost, when cabinets are more than 20 years old and showing other wear, or when mold’s penetrated deep into porous materials.

Preventing Future Water Damage to Cabinets

jAn3M8KXTy2_sI9th-LRWw

Seal cabinet interiors, especially under sinks and near dishwashers, with a water resistant polyurethane or clear acrylic sealer. This adds a barrier that slows water absorption if a leak happens again. Apply two coats to all exposed wood surfaces, including the underside of shelves and the inside of doors. Maintain indoor humidity below 50% year-round. Use exhaust fans when cooking or running the dishwasher, and vent the range hood to the outside rather than recirculating air.

Fix plumbing leaks the same day you notice them. A slow drip under the sink can saturate a cabinet bottom in a matter of weeks. Install water sensors or leak detectors under sinks, behind dishwashers, and near ice maker lines. These battery powered alarms sound when they detect moisture, giving you time to stop the leak before damage spreads.

Seal all cabinet interiors with water resistant finish or polyurethane, reapply every 3–5 years. Keep indoor humidity below 50%. Use dehumidifiers in basements or kitchens with poor ventilation. Install drip pans or trays under sinks and appliances. Check quarterly for standing water or rust. Replace old or corroded supply lines with braided stainless steel hoses. Inspect connections annually and tighten if loose.

Final Words

Stop the leak, remove wet items, and start drying and documenting right away. Fast action limits mold, warping, and costly replacement.

Inspect with a moisture meter, sort repairs by severity, and follow the drying, repair, and refinishing steps we outlined: veneer fixes, structural repairs, stain and odor removal, then sanding and sealing.

If you need a simple plan for how to restore water damaged cabinets, follow these steps or call a pro. You’ll have your cabinets back functional and looking good.

FAQ

Q: Can water damaged cabinets be repaired?

A: Water-damaged cabinets can often be repaired if damage is minor to moderate; swollen doors, surface stains, or lifted veneer are usually fixable, but soft particleboard or widespread mold often means replacement.

Q: How to fix swollen wood from water?

A: To fix swollen wood from water, dry it slowly with fans and a dehumidifier, clamp flattened pieces, sand and fill as needed, and replace panels if swelling is severe or structural.

Q: How to dry cabinets after a water leak?

A: To dry cabinets after a water leak, stop the source, remove contents, open doors and drawers, run high-capacity fans and a dehumidifier, and monitor moisture until readings fall near 12% and humidity is under 50%.

Q: Can you sand back water damaged MDF?

A: You can sand back water-damaged MDF only for light surface stains; sanding won’t fix swollen or delaminated MDF—replace panels when edges are soft, swollen, or the board has lost integrity.